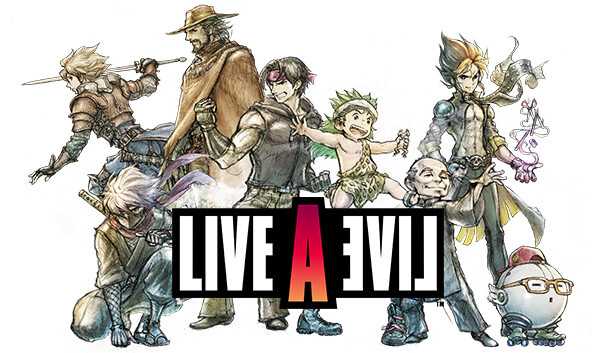
A simple Chapter by Chapter guide to every achievement in this version of the game.
While all chapters can be replayed and nothing is truly missable, achievements that can only be completed at a certain time during said chapter will be marked with an [M], with the exception of the Wild West due to how that chapter works.
There will be spoilers, obviously, so if you’re worried about that turn away now.
Prehistory

Head to the room to the right of where you begin the game, and talk to the Caveman there. Complete his minigame for the achievement. Do this early on, as you won’t be able to return to this room as the chapter progresses.
The earliest you can obtain this is after you gain control; head to the bottom left room in the main chamber, and talk to the shopkeeper. He’ll combine two items in your inventory to make a new one. You can also find caveman roaming as you progress through the chapter, who perform the same service. No matter who crafts your items, as long as they do it ten times, you’ll earn the achievement.
After you leave the cave, use your primary ability to hunt down an enemy.

Obtained upon completion of the Prehistory chapter,after defeating Odo.
Imperial China
Once you’ve fought each of your disciples properly in the dojo this appears.
Note that the first time you do this, you have to fight each disciple, but afterwards you can fight whichever of them you want. It’s recommended to show favoritism if you like one of them the most.

A disciple will learn the Shifu’s last technique, Heavenly Peaks Descent, and you’ll get this.
Obtained upon completion of the Imperial China chapter,after defeating Ou Di Wan Lee.
Twilight of Edo Japan

Simply use your primary ability at any time in the chapter.

Have Ryoma join the party. You can either recruit him by finding him in the dungeon after defeating Amakusa Shiro, or he’ll join automatically before the final boss.

First, make sure you pick up Koban and hold onto it as you travel across the castle. It can be found in many places, and freeing Goemon from the cells will replenish the chests that had them. You need at least 3, and ideally 4 Koban. Secondly, defeat Gennai, who can be found on the Castle Keep – Fourth Floor. He’ll drop a Mainspring, which you also need. Head north of the area you fought Gennai, and insert 3 Koban into a slot on the right side of the room. Afterwards, head south and inspect the puppet. Use the Mainspring on the puppet, and win the fight afterwards. Insert a coin into the slot again to turn the previous room back to normal and escape.
Koban can be found all over the place, including the Storeroom and the Castle Keep – Second Floor, but there are four in a chest at a secret room that opens up after you defeat Majin Ryunosuke, in the hallway north of the shifting corridor. This achievement is technically missable, if you somehow threw all your Koban into the pot in the shifting corridor.
Obtained upon completion of the Twilight of Edo Japan chapter, after defeating Ode Lou.
The Wild West
Once you gain control of Sundown kid, you can rummage through the town for supplies. Once you feel you have enough to set up traps, you can talk to the Sheriff, who will ask you to distribute the items to the townsfolk. Set up any one trap for the achievement.

During the set-up phase, send Annie (the blonde haired woman) out to set up a trap. While she is gone, go upstairs and enter the room in the center and grab the diary from her room. Once she returns, ask her to set up another trap and give her the diary.
There are a total of 10 different traps you can set up, all of which can be found by rummaging around town. You can find multiple copies of certain items (i.e. carrots), but only one counts for the achievement. A list of all items and their locations are as follows.
- Slingshot: Talk to Billy (The small child) in the center of the saloon, and he gives this to you. He’s the only one who can set up this trap.
- The Barkeep’s Beloved Poster: Found in the upper right room in the Saloon,
- Bottled Fire: Found by combining Oil and an Empty Bottle. These are found all around the town, but the closest locations are Oil in the bottom right room of the Saloon, whereas an Empty Bottle can be found in the Post Office next door to the right behind the counter.
- Dynamite: Can be found in the Sheriff’s office in a chest at the front.
- Shovel: Found in the Larder in a pile of hay.
- Frying Pan: Found in the back room of the Diner, hanging on the wall. Only Annie (The blonde woman) can set up this trap.
- Carrot: Found in the Diner, at the back.
- Bundle of Rope: Found in a semi-hidden room in Wayne’s Boarding House. At the back of the building there’s some barrels under a staircase that are obscuring a door. The Bundle of Rope is in a chest in that room.
- Pile of Horse Dung: Found in the Stables, under a pile of hay.
- Coal Tar: Found in the Storehouse, in a barrel.
The achievement is unlocked when every trap is set up and each person has returned. If you don’t have it before the final showdown, you missed an item. If you’re bored sitting around waiting, speaking to the Barkeep and choosing … will have him offer to pour you a drink, which speeds up time.
Obtained upon completion of the Wild West chapter, after defeating O. Dio and the fight(s) that come after.
Present Day
For this you have to learn an opponents technique – keep in mind that you have to see them perform the move, and only certain moves from each fight are learnable. These should be listed with their name on the select screen.
As a special tip, Jackie Iaukea has a third move. It’ll hit you really hard and will have a charged attack bar, and he only uses it if you can stop him from using his other moves with Armlock and Cross Heel Hold. Be sure to use Focus during this to survive the attack!

Go through all the fights on the select screen and properly clear them out for this one.

Obtained upon completion of the Present Day chapter, after defeating Odie O’Bright.
The Near Future

Use your primary ability when standing near an NPC.

Once you’re dropped off at the Orphanage, leave and head to the far west side of the map towards the park you started the game at. Go behind the counter where Lawless is standing to start selling taiyaki. Different customers have different prices they’re willing to pay: the old woman and the man in a blue suit will pay 10,000 yen. Be sure to do this early on, as Lawless leaves the stand after you visit the Steel Titan.
After you first visit the Steel Titan and do the associated rituals, Doc Tobei will be available to give items to. Give them a piece of equipment, and with a random chance they’ll either upgrade it do nothing. If they successfully upgrade it, the achievement is unlocked. To speed things up, the cutscene where he is attempting to upgrade items is skippable, with a reward being given at the end if he succeeds. Becomes missable after Lawless enters the Steel Titan for the second time.

Obtained upon completion of the Near Future chapter, after defeating the Great Inko.
The Distant Future

Once you’ve woken up the crew from cryo, head to the recreation room. Ask to read Huey’s book, and Kato will teach you how to make coffee shortly after.

Once you’ve woken up the crew from cryo, head over to the recreation room. The computer in the bottom left will allow you to play the arcade game, Captain Square. Simply booting up the game is all that’s required for the achievement. This is accessible pretty late into the chapter, but becomes unavailable right before the end. Specifically, accomplish this before you return to Darthe with the information from a bedridden Kato.
As you progress in the Distant Future chapter, you’ll automatically gain access to the Powered Prybar. Specific locked doors can be opened with it, and you’ll have to do so to progress through the chapter.

Obtained upon completion of the Distant Future chapter, after defeating the MUR-TH-UR Matrix.
The Middle Ages
Everything in this chapter and beyond can be considered heavy spoilers! You shouldn’t look at these until you’re in the chapter proper. All achievements are earned automatically during it, anyway. I also wouldn’t open any chests in this chapter, either. It will benefit you later.

Once you’ve gotten a full team of four party members, head to the top of Hero’s Rest. At the end of the cutscene, you’ll obtain Brion.
After obtaining Bryon, head to Archon’s Roost and make your way through the dungeon. At the end of the dungeon is a boss fight. Defeat him, and once you return to the King you’ll unlock the achievement.

Obtained upon completion of the Middle Ages chapter, after defeating Streibough.
The Dominion of Hate: Completion
There is one very large missable achievement in this chapter. You must defeat the final boss without recruiting every possible character, and once again after doing so. Make sure you keep a backup save before recruiting everyone. The chapter and achievements are different, depending on if you pick anyone from the first seven chapters, or the character from the Middle Ages.
No matter which character you pick, as soon as you start the chapter, this achievement unlocks.

Select Oersted when picking which character to play as in Dominion of Hate. During any one of his battles, if you get to low enough HP, the ‘Flee’ command becomes ‘Armageddon’. Use this skill.
Select Oersted when picking which character to play as in Dominion of Hate. Win all seven battles (without using Armageddon) to finish the chapter and unlock the achievement.
After you beat the Purity of Odeo, he’ll ask you to deliver to final blow. You can refuse at first, giving yourself a chance to save. I would recommend doing so before talking to him again and agreeing, as getting this achievement is an alternate ending that blocks out the other two.

Do not recruit all seven party members before fighting the final boss of the chapter. You can always decline someone joining your party, so make sure you leave at least one person in the dark. He’s extremely difficult early on, so if you don’t have some very powerful items from prior chapters (Cola Bottle, Lacquered Medicine Box) you should do some of the character’s bonus dungeons first. When you defeat the Purity of Odeo, do not grant the fallen hero’s final request and walk away. Defeat the bosses that come next, and you’ll earn the achievement along with one of the game’s endings.
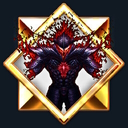
Recruit all seven party members before defeating the Purity of Odeo. Each character is found in a different location, and most require being defeated before they’ll join you. Of special note is you can only hold four characters at a time; one will have to leave, with whoever you chose at the start being unable to become switched out. Despite this, they still count as ‘befriended’ for the purpose of the achievement. To have them rejoin, simply return to where you first found them and talk to them again, with one exception.
- Pogo can be found in a clearing in the Lost Woods filled with Balmgrass, in the southmost section. The entrance is to the right of the wooden bridge. He’ll move about randomly throughout the clearing; keep talking to him and he’ll eventually fight you, unless your lead character is Liu, in which case he’ll offer to join right off the bat.
- The Shifu can be found at the top of the Last Hero’s Grave. Depending on which disciple became the Shifu, you’ll just need to talk to them, feed them a large amount of food items, or battle them for them to join.
- Oboromaru is hidden near the entrance to Archon’s Rest; if you read a signpost near the entrance to the dungeon, he’ll confront you and challenge you to a fight. Defeat him and he’ll join you.
- Sundown is somewhat tricky to recruit; you need to speak to him in five locations, in this order: the old cabin at The Last Hero’s Grave, at the upper east corner of the first section of Lost Hero’s Grave (near the entrance to Pogo’s personal dungeon), in front of a signpost on the way to Seat of the Betrayer, in the Throne Room at Seat of the Betrayer, and in the bedroom to the left of said throne room. After talking to him in all of these locations, he’ll confront you as you leave the castle, before offering to join. As a fair warning, if he leaves the party and you want him to rejoin, he’ll be in one of the five prior locations, randomly chosen.
- Masaru is relatively straight forward; he can be found in the dungeon at Seat of the Betrayer, working out. Approach him, and depending on your lead character, you might have to fight him before he’ll join.
- Akira can be found at the west side of Condemned Village, sleeping on a bench. He’ll read your mind, try and pick a fight, and offer to join afterwards.
- Cube‘s recruitment is twofold; first, you’ll need to find a glowing green item on the Last Hero’s Grave, halfway up the mountain around the center. After which, head to the Seat of the Betrayer and go onto the castle balcony. Cube will be tucked away in a corner, powered down. Give him the item and he’ll boot up and offer to join.
You’ll have to fight an extra boss if you’ve recruited each character, but it shouldn’t be a problem at this stage of the game. Be warned that you’ll have to use the characters that aren’t in your main team, so make sure they aren’t going in at level 2 with no equipment or anything. Complete the boss fights to unlock the ending and achievement..
The Dominion of Hate: Personal Dungeons

The Trial of Instinct is the Caveman’s personal dungeon and is located in the first section of the Lost Hero’s Grave, to the east. Start at the foot of the mountain and keep heading eastward and upward, and you’ll eventually reach the dungeon. If you remember where you found Sundown, the entrance to this dungeon is right next to where he was standing. Inspect a conspicuous rock wall surrounded by ice, and Pogo will open the dungeon entrance for you.
The dungeon is mostly navigating a bunch of doors, with loot off on side paths. If you see statues, you’re about halfway through the dungeon proper. You may find a cave with a giant fish shadow in it; the creature will ask for a Golden Topknot. This is a somewhat difficult boss, so be prepared before giving him the item. Shortly beyond the lake, you’ll find the Great Stone Axe.
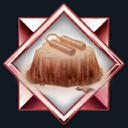
The Trial of Skill is the Shifu’s personal dungeon and is located near the foot of Lost Hero’s Grave, to the west. It requires destroying boulders with specific skills, while evading or fighting a miniboss known as The Bountiful Heart whom appears multiple times in several room as an overworld encounter. A bit of dialogue when inspecting each boulder will give a hint on which attack to use. At the end of this labyrinth, you’ll fight the Bountiful Heart one last time, which will despawn him from the entire dungeon and allow you to grab the Nunchaku of the Master.
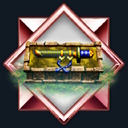
The Trial of Keys is Oboromaru’s personal dungeon and can be accessed from the four doors leading inside ‘houses’ at the town square of Seat of the Betrayer. Progress is made twofold; defeat the random encounter Shadow to earn Rusted Keys, which can be used to open doors further in the dungeon.
The dungeon has four special keys named after the Four Auspicious Beasts; Genmu, Suzaku, Seiryu, Byakko, which are scattered around the dungeon and unlock the path to the Murasame. Each entrance in the town square leads to a different area of the dungeon, so if you’ve fully explored one section, you should enter through a different entrance. After unlocking the four special gates within the dungeon, you can grab the Murasame.

The Trial of Time is Sundown’s personal dungeon and is hidden on a path along the south road in Lost Woods. On the way to Archon’s Roost, you’ll see a horse appear in the path before escaping south through the bushes. Follow him through the dungeon. The dungeon is relatively straightforward; there are no random encounters, and you have a limited amount of time to get as much treasure as you can and get out (depicted by eight bell chimes), before a boss approaches. Leaving the dungeon will reset the chimes, but not the treasure obtained. The .22 Magnum is found near the bottom, but if you’re strong enough, there are rewards for defeating the boss that approaches.
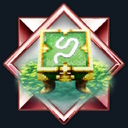
The Trial of Power is Masaru’s personal dungeon and can be accessed via a hidden passage right before the entrance to the Last Hero’s Grave; a small path to the east will lead to a nook with a large beast whom, upon being spoken to, will initiate combat. Defeat him to gain access to the dungeon.
This dungeon is extremely linear, has a large amount of chests that cannot be opened at first, and no random encounters at first. Reach the end to grab the item, which will enable chests to be opened and allow random encounters at an increased rate. Of special note: one of the chests contains a Golden Topknot, which can be used to access a hidden boss in the Trial of Instinct.

The Trial of Heart is Akira’s personal dungeon and has no overworld entrance; to find it, you’ll need to use Teleport with Akira several times, which each teleport having a random chance to teleport you to this dungeon. It also cannot be re-entered when you complete it, so keep that in mind as you explore.
The dungeon isn’t too complicated, but a unique feature is that the blue flames can be communicated with telepathically, allowing for bits of lore as you progress. Once your reach the end, you’ll obtain the Guts and Glory Glove and find one last entity to communicate with before the exit portal appears.

The Trial of Wisdom is Cube’s personal dungeon and can be accessed through either of the doors in Condemned Village. Unlike Oboromaru’s dungeon, the doors lead to the same place, so don’t worry about backtracking. The dungeon doesn’t have combat (with one notable exception), instead focusing on puzzles.
An NPC in a chair will explain what to expect from each puzzle as you move forward. The first section infinitely loops from left to right, and reverses your controls on the red floor. The second section has an NPC in a mirror whose directions you need to mimic: if he’s facing forward, move towards him, if he’s facing left, move left, etc. The second room has one mirror be incorrect, and the third room has all three being incorrect.
For the third section, follow the arrows on the floor. For the final section, touch the boulders going clockwise, beginning from the top right boulder. After you’ve hit four boulders this way, the 17nm Diode is in the room beyond. If you feel strong enough, re-enter the Trial of Wisdom again for an optional boss fight.
The Dominion of Hate: Hidden Bosses

Lucretius can be found in Pogo’s personal dungeon, the Trial of Instinct. Near the end of the dungeon, you can find a lake with a large shadow swimming in it. Approach the water’s edge and state you have business; they’ll demand a Golden Topknot, which can be found both in Archon’s Rest (if you didn’t loot it during the Middle Ages chapter) and Masaru’s personal dungeon, the Trial of Power.
Upon giving the topknot to the fish, they’ll rise and speak a bit. Agree with every choice and they’ll challenge you to a fight. If you fought Lord Iwama in the Chapter of Twilight Edo Japan, you know mostly what to expect, except Lucretius won’t flood the arena and heal themselves, and has more HP and deals more damage. They’ll give a Cosmic ring as a reward. He’ll also answer a few questions after the battle, if you ask.

The Jaggedy Jacks are a semi-hidden boss that appear in Sundown’s personal dungeon, the Trial of Time, if you allow all eight bell chimes to ring. The lights of the dungeon go out completely and four enemies spawn around you, with powerful attacks but relatively low HP at 347. They resist Wind and Light, and aren’t too complicated to take down, aside from you being positioned directly in the middle. Defeating them awards you with the achievement, a Cosmic glove, and removes the time limit from Sundown’s dungeon.

Once you’ve completed the Trial of Wisdom, re-enter the dungeon at any point and head to the first section with the red floors. Near the exit to that section, you’ll find a large machine patrolling back and forth. Approach the machine to begin a fight. The boss has high weakness to special attacks; the Shifu at level 16 makes quick work of them, as does anyone else with strong special attacks. He’ll drop a Cosmic helm for your troubles.

At the end of Archon’s Rest, at Virtue’s Reward, inspect the statue in the back, and attempt to leave. A voice will eventually call you back to the statue to speak more. Ignore the voice, and continue to backtrack from where you came. You’ll be teleported to a void not unlike where you started, and will eventually get assaulted by the Headhunter.
He is a surprisingly powerful foe; he resists everything, and has a very powerful melee attack that will likely oneshot most of your characters, though using the move debuffs him heavily. Stay at range, pick away at him, and he’ll eventually fall and drop the Cosmic boots, and allow you to exit the void.

A hidden boss can be found after fleeing 100 times in the Dominion of Hate chapter, named the Death Project. While this can take a while, the increased spawn rate inside the Trial of Power (provided you’ve completed it) can help speed this process along. To my knowledge there’s no real way to check how many times you’ve fled, though a voice will speak up taunting you when you’re at 95 battles fled.
Death Project is heavily resistant to special damage, though rather weak to physical damage. Sundown is pretty effective against this beast, practically able to solo them, but any strong character should be able to handle it provided you’ve done a bit of grinding beforehand. He drops a set of Cosmic mail.
Thanks to Jedo for his great guide, all credit to his effort. you can also read the original guide from Steam Community. enjoy the game.

