
Beating Lunacy 500 for the achievement (and to guarantee legendaries) is not easy. I’ve tried several different ship builds but kept struggling with survivability, until I discovered the powerful synergies possible with the Stinger subclass
Get a level 4 Stinger ship
Ideally you want to find a Stinger with these passives:
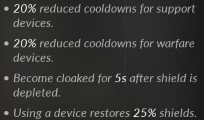
- Cloaking is great for getting a breather after losing your shield.
- We can maintain full shields very effectively.
- Increased cooldowns for devices let’s us use them more often
You may reroll passives once or revisit Kato’s Palace after 10 minutes until you find a Stinger with these passives.
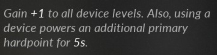 This additional hardpoint is a massive boon to damage output. By spamming devices frequently we can easily have constant uptime for the extra damage.
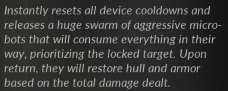 This is an emergency button if your shield is depleted, your devices are on cooldown and you are being overwhelmed. The swarm will keep your health up and getting all your devices reset will allow you to spam them to get your shield back.
Attribute points
- Expertise – to increase additional hardpoint uptime
- Precision – to increase crit chance to trigger Adam’s perk related abilities
- Firepower – for more damage
- Utility – for increased device cooldown rate
Adam’s Perk choices
 This is undisputedly the best perk to pick out of the 3 and allows you to use a shield variant with
higher capacity but greater recharge delay.

This is brilliant as we will be activating warfare devices fairly often and thus good for survivability.


Devices
The devices chosen allow you to use them frequently, to continuously trigger the Stinger’s passive 25% shield regeneration on device use as well as maintain upkeep of the additional hardpoint for increased survivability and damage output.
 Mercy Kill
After triggering corrosion injector on an enemy, if you manage to kill them within the 12s it is active, you get your use of this device refunded.
 Hard Reset
If sufficient targets were hit by the EMP, you can get your cooldown complete refunded. Great for when you’re swarmed by enemies.
 Scurry
You get a 25% chance to refund a charge upon use. This is your escape button to get away from enemies if you’re getting overwhelmed.
 Carefree Package
The mode will grant you healing to your hull, armor and shields. Life-saving in a pinch.
Gear
Legendary is the highest gear rarity, but you will only receive 2 for completing 2 side mission chains and the rest are locked behind the ancient rifts. You also may only equip 2 at a time.
The next best rarity gear you will want to have is Superior (pink). They have incrementally better stats and more passive attributes than blue/green/white gear.
Additionally you want to keep an eye out for Prototype and Starforged prefixes on gear. These will provide an additional increase in stats to your gear, Starforged being the best. These prefixes may not be obtained on gear that you craft, but only on gear looted from containers or enemies.
To summarise the best gear you want to be keeping an eye out for are Starforged Superior weapons & modules. Legendaries don’t drop with these prefixes so you can keep any you find
On the Stinger there are only 2 primary weapon slots. So to begin with you want to pick weapons you are comfortable with using. I enjoyed using a Pulse Laser and an Autocannon for a good balance between energy and armor damage.
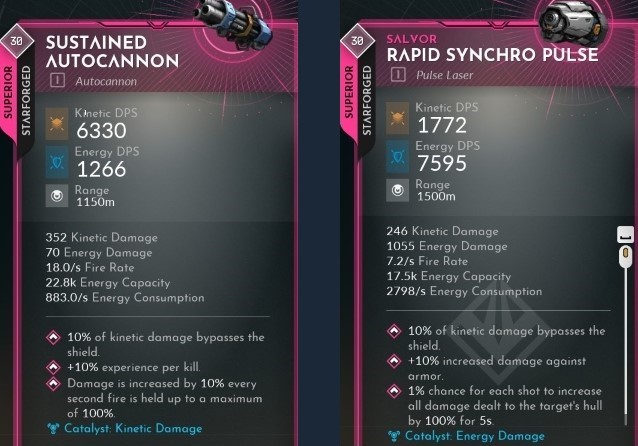
You should modify your weapons with a catalyst to increase their respective damages, as done here
But here’s the menace you want to keep an eye out for: An Eclipse Blaster and Eclipse Flak:
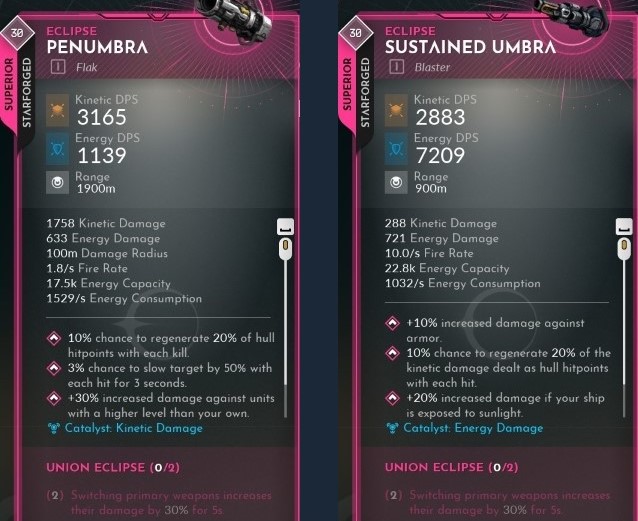
Equipping 2 of the required items in the Eclipse set activates their unique attribute giving you a massive damage boost when you cycle weapons
This damage increase is so easy to proc and trumps any other weapon combo. The Blaster shreds up close and the Flak is great for longer range attacks on multiple enemies.
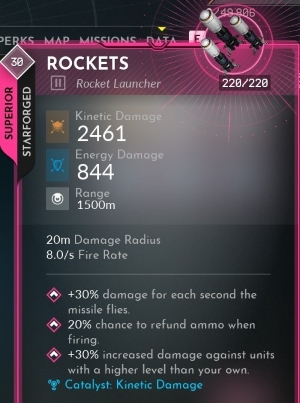
The Stinger has 2 secondary weapon slots. One slot should be used for simple dumbfire Rockets. These will be used exclusively for the boss at the end of the ancient rifts:
The other slot is a missile of your preference. Web missiles synergise perfectly with the Exploitation perk to increase crit chance on slowed enemies. But you can also use Armor/Shield breakers, or Destabilizers for extra debuffing. The reason I recommend using a missile is because I would recommend you to find one with this particular passive:
 Any time you crit you have a chance to fire off a free missile at your current target which is ideal with our limited capacity.
The key to choosing which gear to equip in each module slots mainly revolves around what attributes the gear is boosting, but that is at your own discretion. I prioritised according to the Attribute point distribution I listed above. There are however a couple exceptions you should keep in mind:
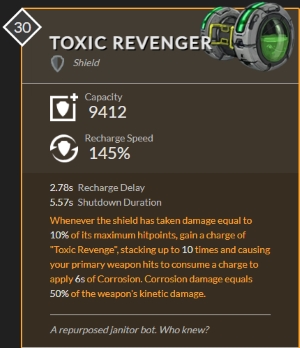
– Get a shield variant with high capacity and/or the EMP perk
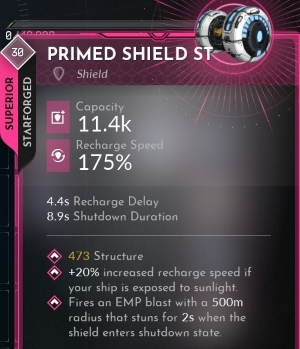
The long recharge delay doesn’t matter as we will be proccing recharge on kills thanks to the Defensive Massacre perk. Triggering an EMP on shield break is big help if you’re getting swarmed.
– Pick an energy core variant that prioritises weapon energy
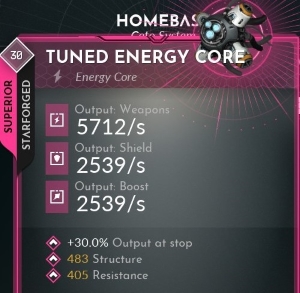
Shield & Boost energy don’t matter as much as pumping out as much damage for as long as you can.
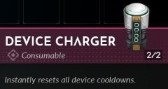 There is only really 1 consumable I found worth using and that is the Device Charger. It instantly resets all device cooldowns and is another great tool for when you’re in a pinch. You don’t need to worry about using them up in the ancient rifts as any consumables used are refunded after exiting the rift.
As you attempt the ancient rifts for the first time at lower lunacy levels, you do have a low chance of obtaining a legendary upon successful completion. Here are some I’d recommend that synergise really well with this Stinger build, in order of most synergising to least useful:
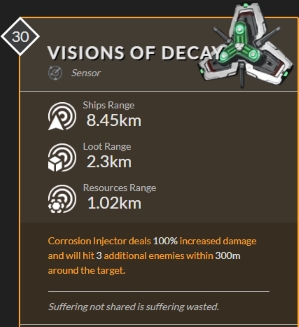
This ability is frankly disgusting and turns Corrosive Injector into an absolute powerhouse. This should get you through lunacy 500 easily
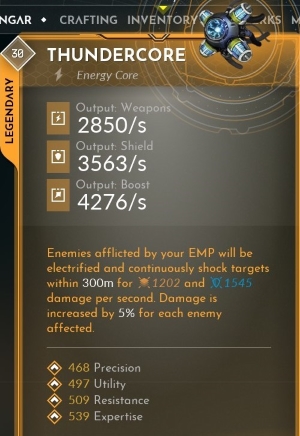
This is such a great augment to the EMP, turning it into a great damage dealer to large swarms of enemies
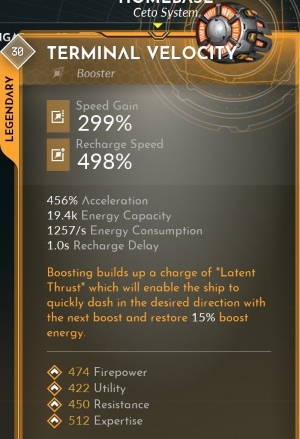
Latent Thrust is great for increased maneuverability for dodging enemies & missiles. I liked to use this, take off the Teleporter device and replace it with either the Missile Defense System or Front Shield Generator
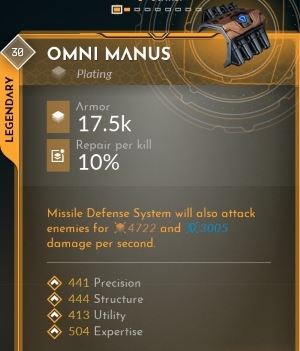
This is great for turning the Missile Defense System into another damage dealer. After I was comfortable not needing the Teleporter device for survivability, I used this instead for more damage.
Anything that lets you deal more damage is great.
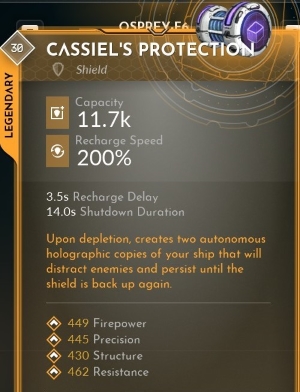
The clones are a great distraction whilst you regain your shield.
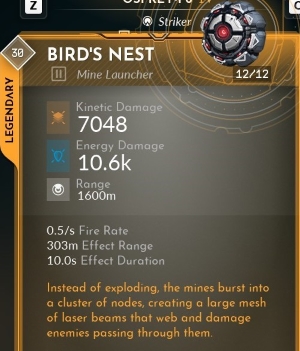
Good area damage dealer.
Progressing the Ancient Rifts
Definitely play on lower lunacy levels to get a feel for the rifts and have a chance at snagging prototype/starforged superiors or a legendary recommended above that could massively boost your build.
- Remember to cycle weapons every 5s to maintain the Eclipse 30% damage bonus
- Focus single targets, use Corrosive Injector, kill them quickly enough to refund the use and repeat
- EMP if you’re getting overwhelmed
- Spam teleport to get away and instantly get shields
- Nano Transmitter if you need healing fast
- Don’t forget to ULT or use device chargers in a pinch
- Using devices gets you 25% shields and temporary additional hardpoint
- Using EMP/Corrosive Injector gets you Reactive Armor
In an ancient rift, you must progress through 4 areas. After the first and second area, you are prompted with a choice of a high risk modifier to suffer for the remainder of your rift run. I will list them in order of easiest to most troublesome to give you an idea what modifiers to pick and avoid to make your run more doable:
- Overheated Systems – A random item is overheated for 10s
Virtually free, I hardly notice this - Repair on Kill – Every time an enemy is destroyed, all other enemies present are reapired by 20% of their maximum hitpoints
Not a big deal as you’re focusing single targets anyway - Enemy Regen – Enemies slowly repair their hull
Not a big deal as you can out DPS the healing easily if focusing single targetsAnnoying - Jarred Sensors – Enemy type names are hidden
Annoying but again not a super big deal as you can quickly learn enemy types from their shield/armor/hull composition and the weapons they use - Corrosive Death – Enemies leave behind corrosion fields when killed
Annoying but not persistent and visible so you can avoid it - Explosive Death – Enemies deal area damage upon death
Annoying but again not persistent - MInes on Death – Enemies drop mines when destroyed
Quite annoying as they’re persistent and small but should be able to clear them mostly just whilst shooting enemies - Hidden Health – Enemy hitpoint bars are hidden
Very annoying to me personally as I like to keep an eye on healthQuite disruptive - Evasive – Enemies have 50% increased movement speed
Tracking enemies as you shoot them becomes a lot harder - No EMP – Enemies are resistant to EMP
EMPs have been very clutch for me when I’m getting swarmed so rather not deal with thisRun killer - Strength in Death – Every time an enemy is destroyed, all other enemies gain +5% speed, shields, armor, and hull
With the sheer number of enemies, this bonus scales on others fast. Avoid at all costs
You may complete the 4th and final area in the ancient rifts by killing the boss. Always beeline for the boss at the end and unload with your rockets, weapons and corrosive injector. If any other enemies get too close use the EMP. You should be able to easily take out the boss before you get swarmed by other enemies.
Conclusion
Thanks to aByZMal for his great guide, all credit to his effort. you can also read the original guide from Steam Community. enjoy the game.
Related Posts:
- EVERSPACE 2: Beginners’ Guide
- EVERSPACE™ 2: Commodity Demand Guide
- EVERSPACE 2: How to Complete “Lost Cargo” Jobs
- EVERSPACE™ 2: Mission Vaultworthy (Level 09) at Prescott Starbase / Union