
This is a guide on how to set up your controls so you can use analog inputs for movement/driving and normal keyboard inputs for everything else.
Start
Setting up analog movement controls for both walking and driving is a little finicky in Cyberpunk but it is possible!
This is guide is assuming you arent using controller inputs for anything else but on-foot movement and driving. If you are using more then this might still be applicable to you but you will have to change some things around.
If you dont want to do all this here is a nexus mods link to my modified input file that you can download. [www.nexusmods.com]
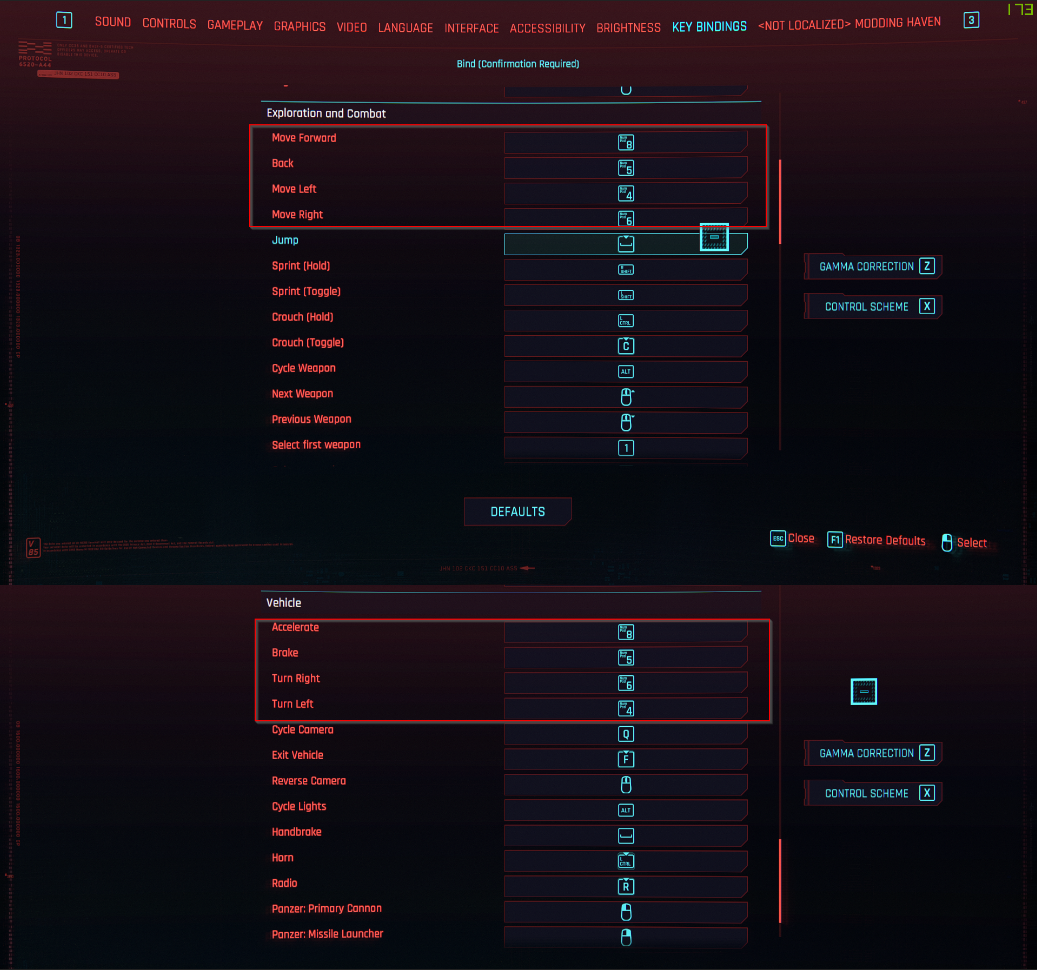
#1. Rebind your keyboard input driving and walking commands to keys you dont use (I used my numberpad keys).
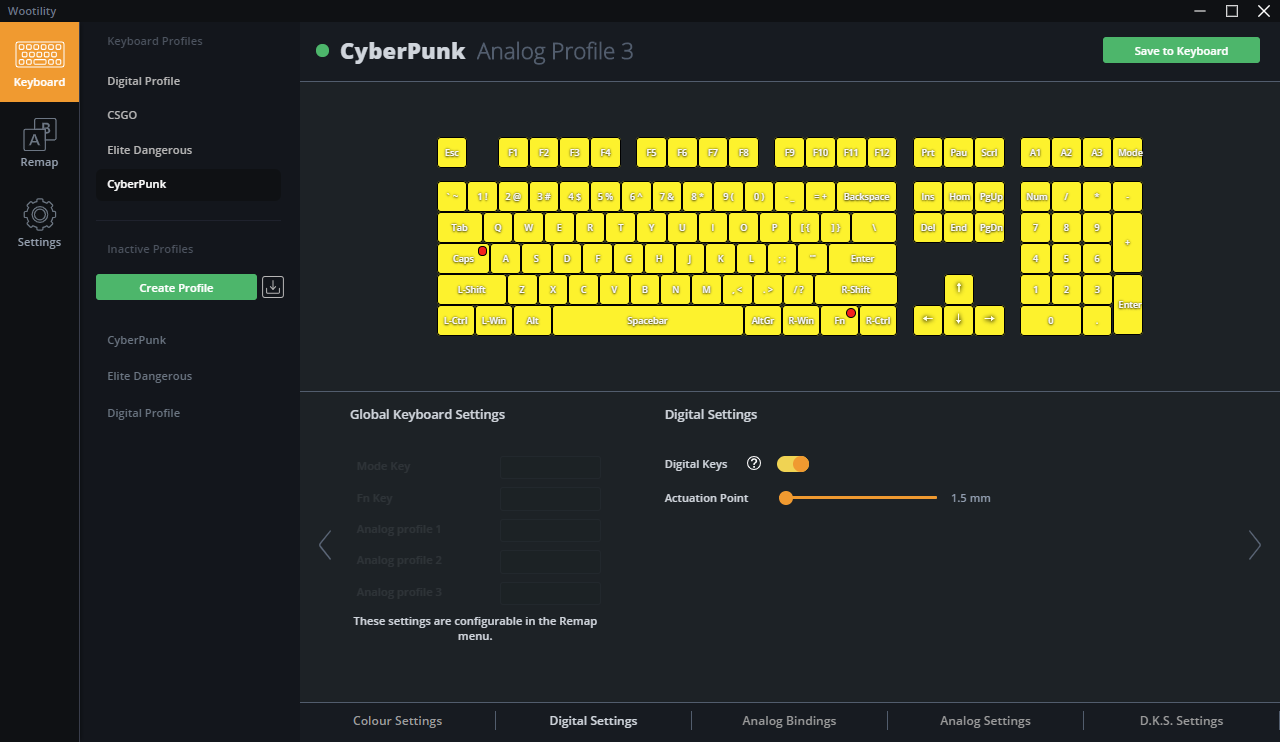
2. Set up your binds though the software you are using (I am using wootility with XInput).
- Leave your digital key functionality on
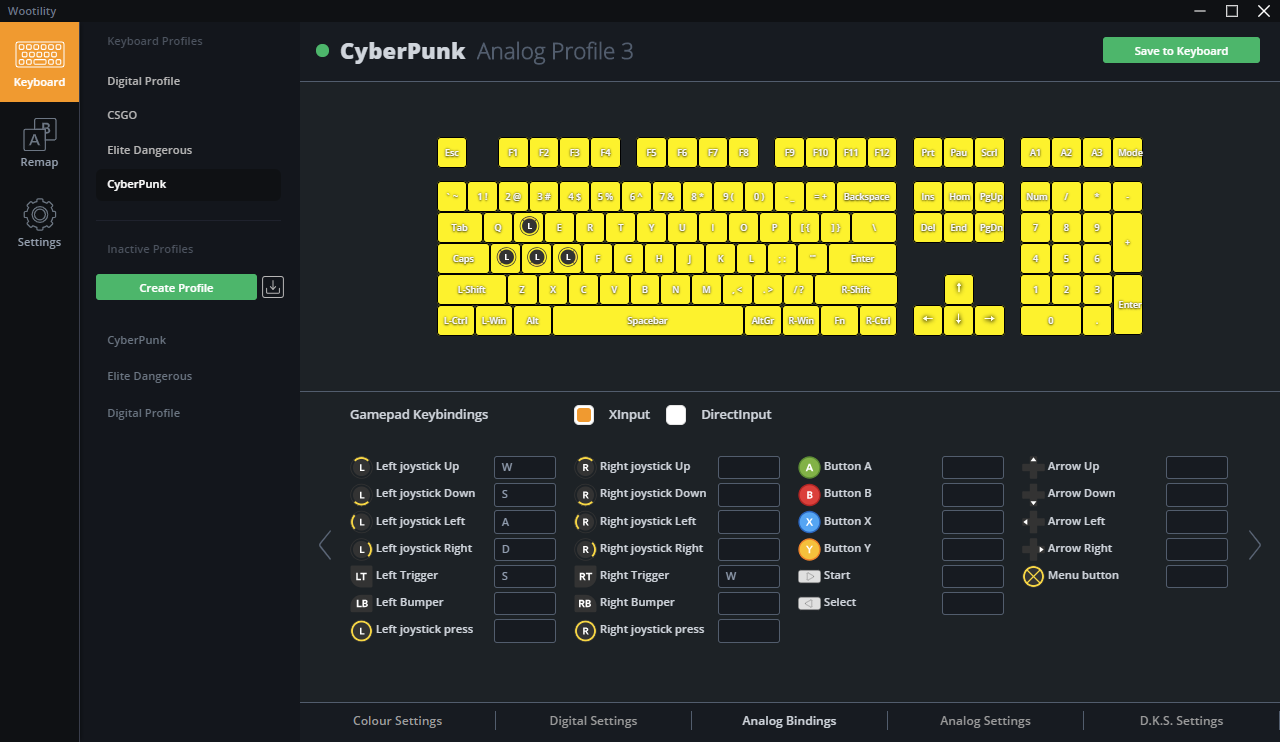
- Set your WASD keys to [Left Joystick] and also set your W key to [Right Trigger] and your S key to [Left Trigger]
- Here is an image of my analog curve if you want it
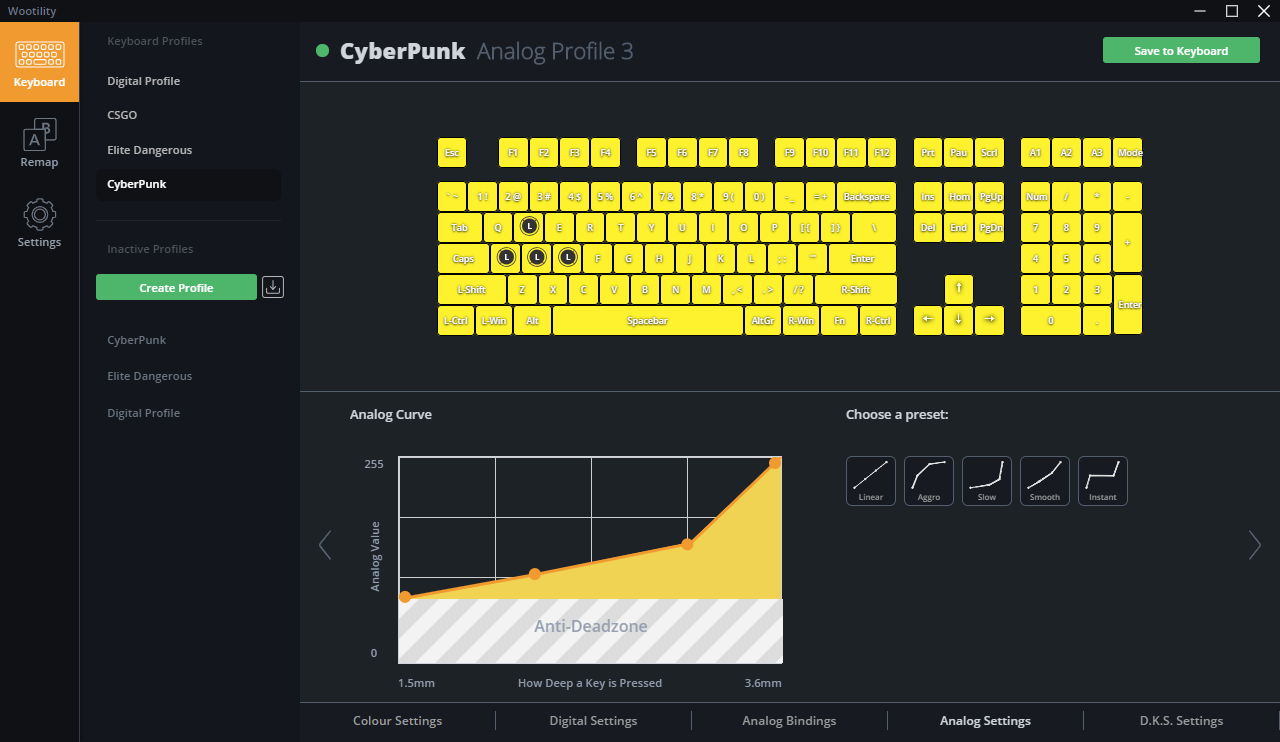
- Here is my wooting preset share code if you want it 42313eae-a4bf-4aa9-9106-7f79220fbff7
3. Navigate to your Cyberpunk installation folder.
- If you are on Steam right click your cyberpunk game and go to properties, this window should open
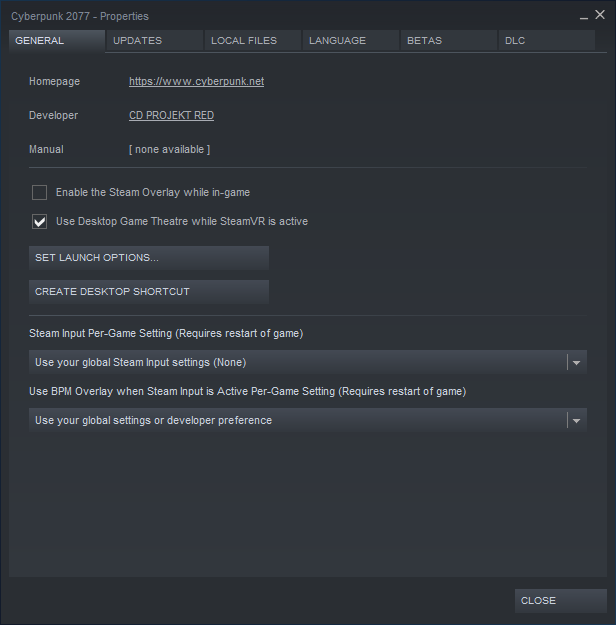
- Then go to the [Local Files] tab and click [Browse Local Files]
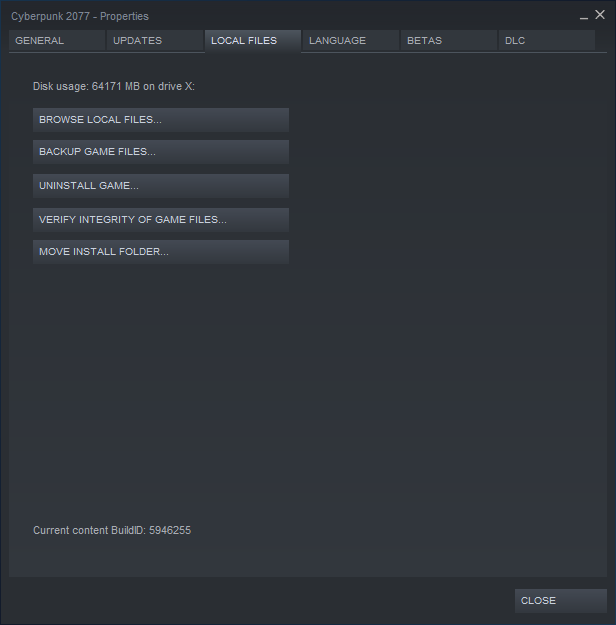
- A folder similar to this should open up

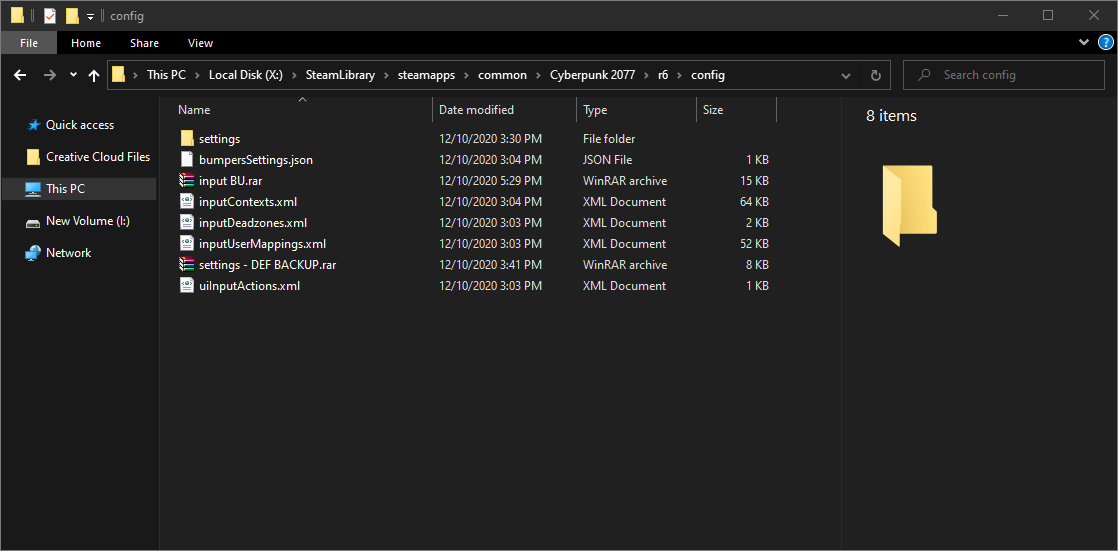
4. Navigate to the [r6] folder and then the [config] folder.
- Your folder should look like this without the .rar files (Those are my backups)
5. Backup your [inputUserMappings.xml] file just incase you want to revert anything (you can also just backup the whole config f
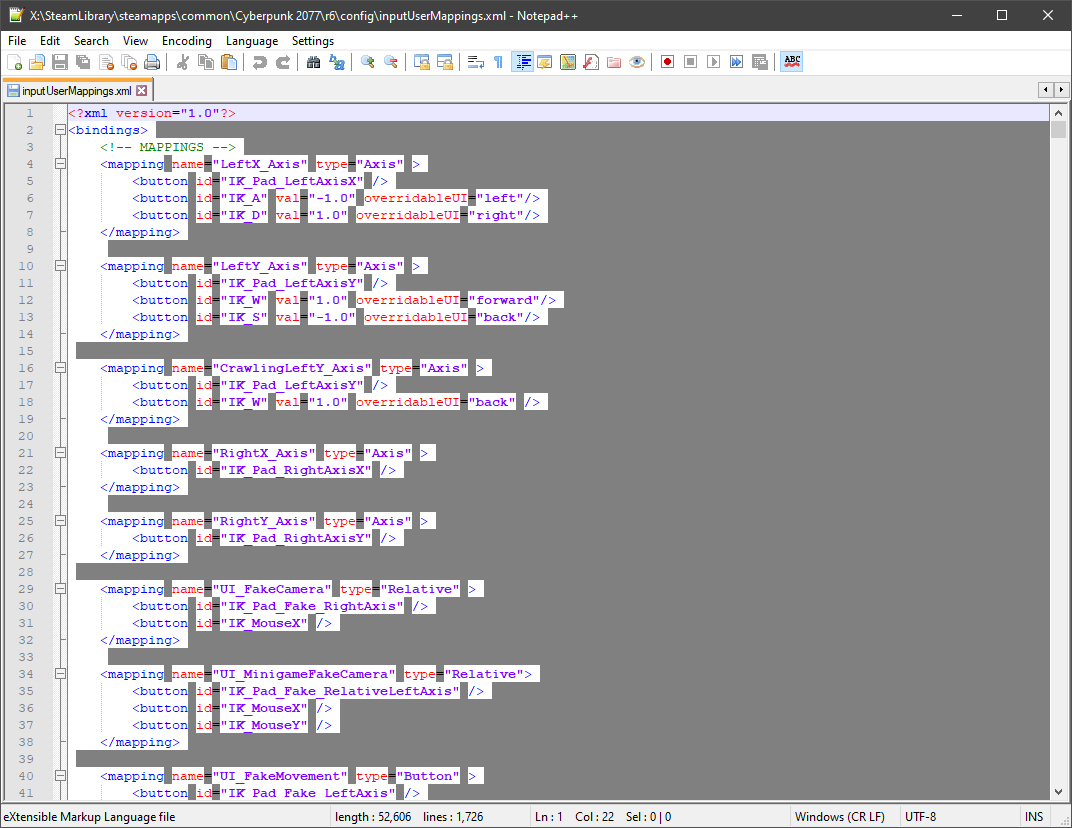
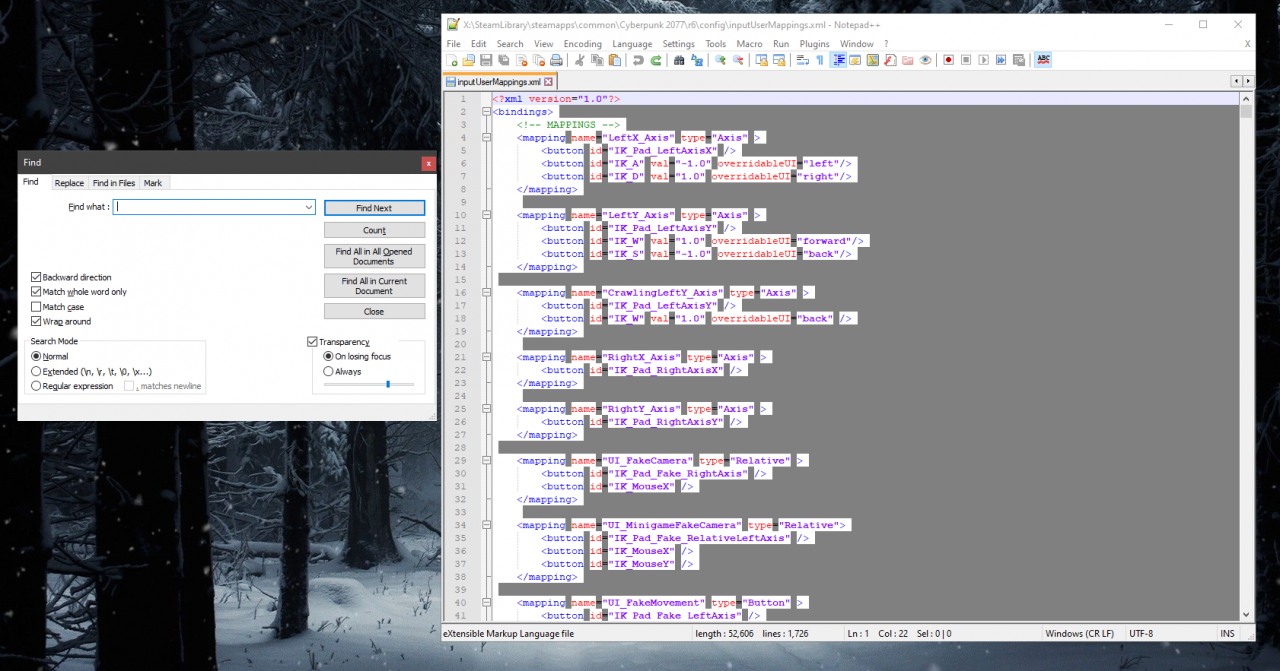
6. Open the inputUserMappings.xml file with your favorite text editor, I am using Notepad++ which makes things a little easier.
- It should look something like this
7. Now we want to start editing a few values to make this work.
- Note you will have to revert this to your backup if you want to play normally using a controller at any point.
- Hit the [Ctrl+F] keys on your keyboard at the same time whilst in the text editor to bring up the find menu.
8. Making another section with just the edits for ease of viewing.
time to delete all the binds that interfere with the Right Trigger as we just want to use it for the vehicle acceleration
- Search for PhotoMode_CraneUp_Axis and delete the line <button id=”IK_Pad_RightTrigger” />
- Search for world_map_menu_zoom_in and delete the line <button id=”IK_Pad_RightTrigger”/>
- Search for next_sub_menu and delete the line <button id=”IK_Pad_RightTrigger” thresholdPress=”0.5″ thresholdRelease=”0.55″ />
- Search for CameraMultSpeed and delete the line <button id=”IK_Pad_RightTrigger” thresholdPress=”0.5″ thresholdRelease=”0.55″ />
- Search for Debug_RightTrigger and delete the line <button id=”IK_Pad_RightTrigger” thresholdPress=”0.5″ thresholdRelease=”0.55″ />
- Search for Vehicle_Shoot_Primary and delete the line <button id=”IK_Pad_RightTrigger” thresholdPress=”0.5″ thresholdRelease=”0.55″ />
- Search for BraindancePlayForward_Button and delete the line <button id=”IK_Pad_RightTrigger” thresholdPress=”0.1″ thresholdRelease=”0.05″ />
- Search for MeleeAttack_Button and delete the line <button id=”IK_Pad_RightTrigger” thresholdPress=”0.2″ thresholdRelease=”0.55″ />
- Search for RangedAttack_Button and delete the line <button id=”IK_Pad_RightTrigger” thresholdPress=”0.5″ thresholdRelease=”0.55″ />
- Search for Hit_Button and delete the line <button id=”IK_Pad_RightTrigger” thresholdPress=”0.5″ thresholdRelease=”0.55″ />
- Search for PhotoMode_CraneUp_Axis and delete the line <button id=”IK_Pad_RightTrigger” />
time to delete all the binds that interfere with the Left Trigger as we just want to use it for the vehicle deceleration
- Search for PhotoMode_CraneDown_Axis and delete the line <button id=”IK_Pad_LeftTrigger” />
- Search for world_map_menu_zoom_out and delete the line <button id=”IK_Pad_LeftTrigger”/>
- Search for prior_sub_menu and delete the line <button id=”IK_Pad_LeftTrigger” thresholdPress=”0.5″ thresholdRelease=”0.55″ />
- Search for CameraReduceSpeed and delete the line <button id=”IK_Pad_LeftTrigger” thresholdPress=”0.5″ thresholdRelease=”0.55″ />
- Search for Debug_LeftTrigger and delete the line <button id=”IK_Pad_LeftTrigger” thresholdPress=”0.1″ thresholdRelease=”0.05″ />
- Search for Vehicle_Shoot_Secondary and delete the line <button id=”IK_Pad_LeftTrigger” thresholdPress=”0.5″ thresholdRelease=”0.55″ />
- Search for InspectionZoom and delete the line <button id=”IK_Pad_LeftTrigger” />
- Search for BraindancePlayBackward_Button and delete the line <button id=”IK_Pad_LeftTrigger” thresholdPress=”0.1″ thresholdRelease=”0.05″ />
- Search for RangedADS_Button and delete the line <button id=”IK_Pad_LeftTrigger” thresholdPress=”0.1″ thresholdRelease=”0.05″ />
- Search for MeleeBlock_Button and delete the line <button id=”IK_Pad_LeftTrigger” thresholdPress=”0.01″ thresholdRelease=”0.05″ />
- Search for Hit2_Button and delete the line <button id=”IK_Pad_LeftTrigger” thresholdPress=”0.1″ thresholdRelease=”0.05″ />
Time to delete all binds that still retain the base W and S move keys as we want to use the left stick for that (also some misc binds using the left stick that we dont want)
- Search for LeftY_Axis and delete the line <button id=”IK_W” val=”1.0″ overridableUI=”forward”/> and <button id=”IK_S” val=”-1.0″ overridableUI=”back”/>
- Search for CrawlingLeftY_Axis and delete the line <button id=”IK_W” val=”1.0″ overridableUI=”back” />
- Search for UI_LookY_Axis and delete the line <button id=”IK_Pad_LeftAxisY”/>
- Search for LeftY_Axis_Vehicle and delete the line <button id=”IK_Pad_LeftAxisY” />
- Search for Acceleration_Axis_Tank and delete the line <button id=”IK_W” val=”1.0″ overridableUI=”vehicleAccelerate”/> and <button id=”IK_S” val=”-1.0″ overridableUI=”vehicleDecelrate”/>
Time to delete all binds that still retain the base A and D move keys as we want to use the left stick for that (also some misc binds using the left stick that we dont want)
- Search for world_map_fake_move and delete the line <button id=”IK_Pad_LeftAxisX” />
- Search for UI_LookX_Axis and delete the line <button id=”IK_Pad_LeftAxisX” />
- Search for Debug_ModifyYAxis and delete the line <button id=”IK_Pad_LeftAxisX” />
- Search for LeftX_Axis_Vehicle and delete the line <button id=”IK_D” val=”1.0″ overridableUI=”vehicleSteerRight”/> and <button id=”IK_A” val=”-1.0″ overridableUI=”vehicleSteerLeft”/>
- Search for QuestLeft and delete the line <button id=”IK_Pad_LeftAxisX” />
- Search for LeftX_Axis and delete the line <button id=”IK_A” val=”-1.0″ overridableUI=”left”/> and <button id=”IK_D” val=”1.0″ overridableUI=”right”/>
Related Posts:
- Cyberpunk 2077: How to Keybind Dodge and Disable Double-tap
- Cyberpunk 2077: How To Turn Off Dodge & Evasion
- Cyberpunk 2077: AZERTY Binds for Update 2.0
- Cyberpunk 2077: How to Turn on Single Tap Dodge
- Cyberpunk 2077: How To Disable Autosave (Version 1.3.1 Compatible)