
This modding guide will describe how you can move cities and other types of settlements on the map, so that they are in a different spot at the start of the game.
Introduction
Vocabulary:
– Hub / Anchor / Anchor hub : Invisible in the game, this is the point that roads and other types of splines connect to. It is associated with settlements and in the map editor it has a purple sphere around it.
– Locator : An object which has visible graphics that look like a city, farm, mine, wood camp or port. In the map editor it has a yellow sphere around it (when the appropriate settings are enabled). It is normally placed near the hub.
– Splines / Strips : Roads and other things that connect hubs
But what exactly does that mean for the map?
Hubs and locators together help define what I called in the title settlements and in the thumbnail cities. Every state has four settlements, and coastal provinces have an extra. These are:
- city
- farm
- mine
- port
- wood
While the roads are frequently visible always, the settlements themselves will only be on the map if the state has a building associated with that settlement type, such as a naval base for a port, or a chemical plant for a city. If during the course of your testing you want to make sure that a settlement is in the right place, start a building for that settlement!
The Map Editor
- Open the console by pressing the key above Tab and to the left of 1 in the top left of your keyboard. It is possible that you will need to have debug mode enabled, which you can do in two ways: Either have it in your commandline by having the argument -debug_mode (and while you’re there, add -filewatcher, too!) – make sure you have the – at the front, OR in the launcher go to Gameplay Settings in the menu at the left and launch the game with the option Open game in Debug Mode. Once you’ve got that sorted, in the console type map_editor.
- Add a commandline argument that reads -map_editor. This will automatically launch the map editor after the game has been loaded, so you will need to remove it before you can properly play the game again.
The map editor is fairly resource-heavy, so if it crashes, it’s probably because you don’t have enough (free) computer resources. If this happens, try closing other programs while the editor is launching.
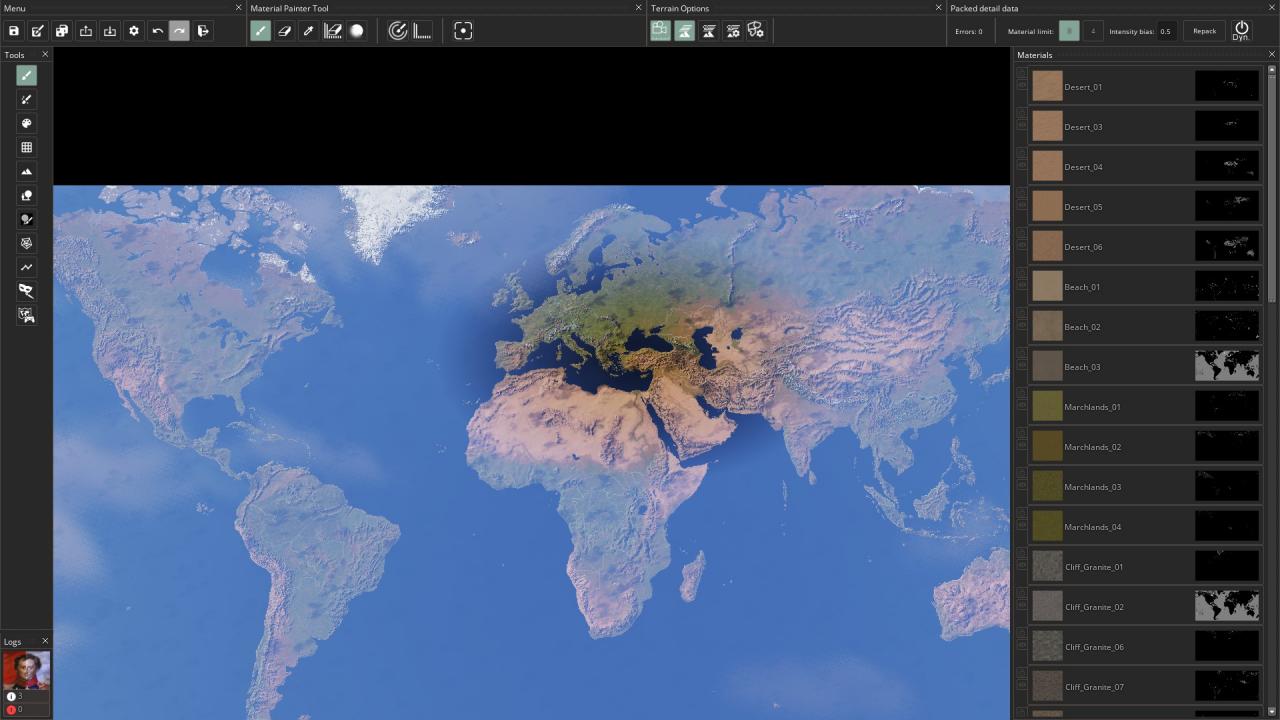
When it launches, and you get rid of the console if you had it open, you will see something like this:
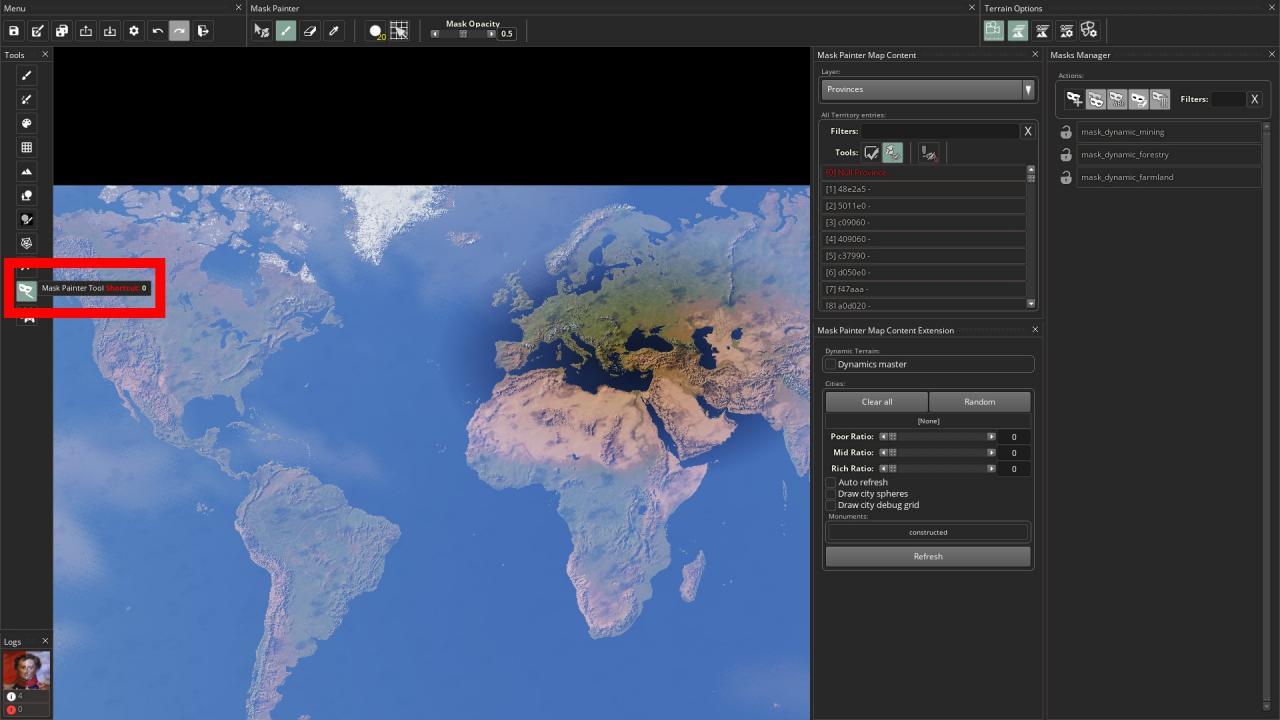
The first thing you’re going to want to do is click on the Mask Painter Tool in the left menu, the second one from the bottom.
Then in the menu that it opens on the right, look at the bottom-left window and tick the two boxes circled in red: Autorefresh and Draw City Spheres.
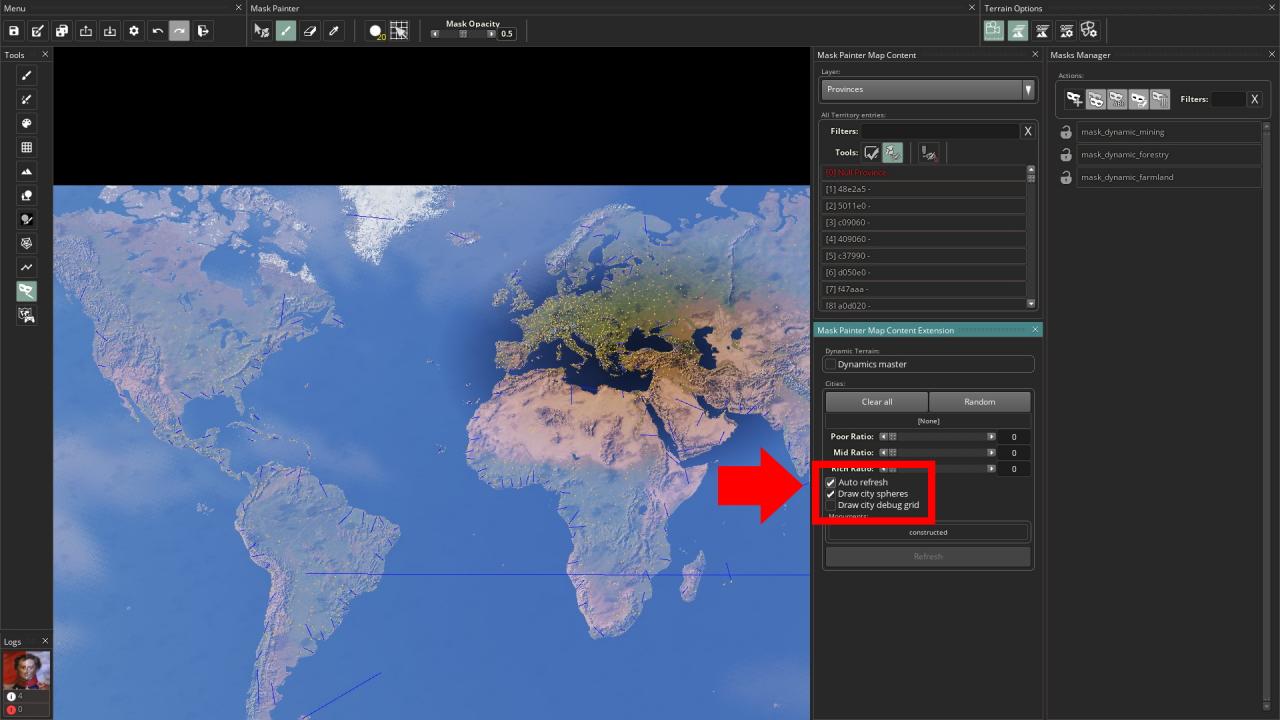 NOTE: Autorefresh requires a lot of resources, too. I have frequently crashed the editor by not giving it enough resources, so here it’s also important to make sure your computer has enough.
Moving the Settlement
We need to move both spheres – the pink/purple one that’s the hub, and the yellow one that’s the locator. It doesn’t matter which order you move them in, but if you want the locator to be right on top of the hub (which I normally do because I don’t like the look of the ends of the roads when they just stop abruptly), then I suggest starting with the hub. That’s what I’ll do. I’ll just move it a little bit to the southeast.
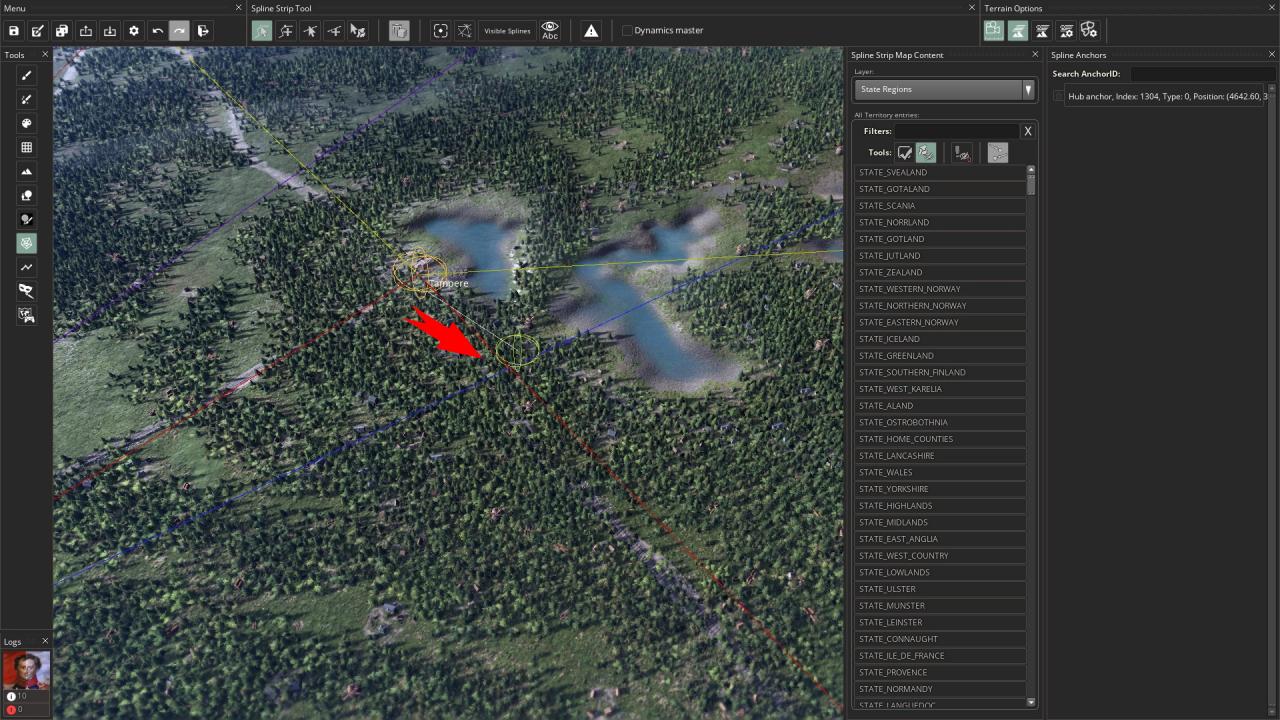
So I’m dragging the hub southeast, and once it’s in a good place I let go, and the game recalculates where the splines (roads) should go. I can adjust those with the Spline Network Adjustment Tool if I want, which is just below the currently-selected tool.
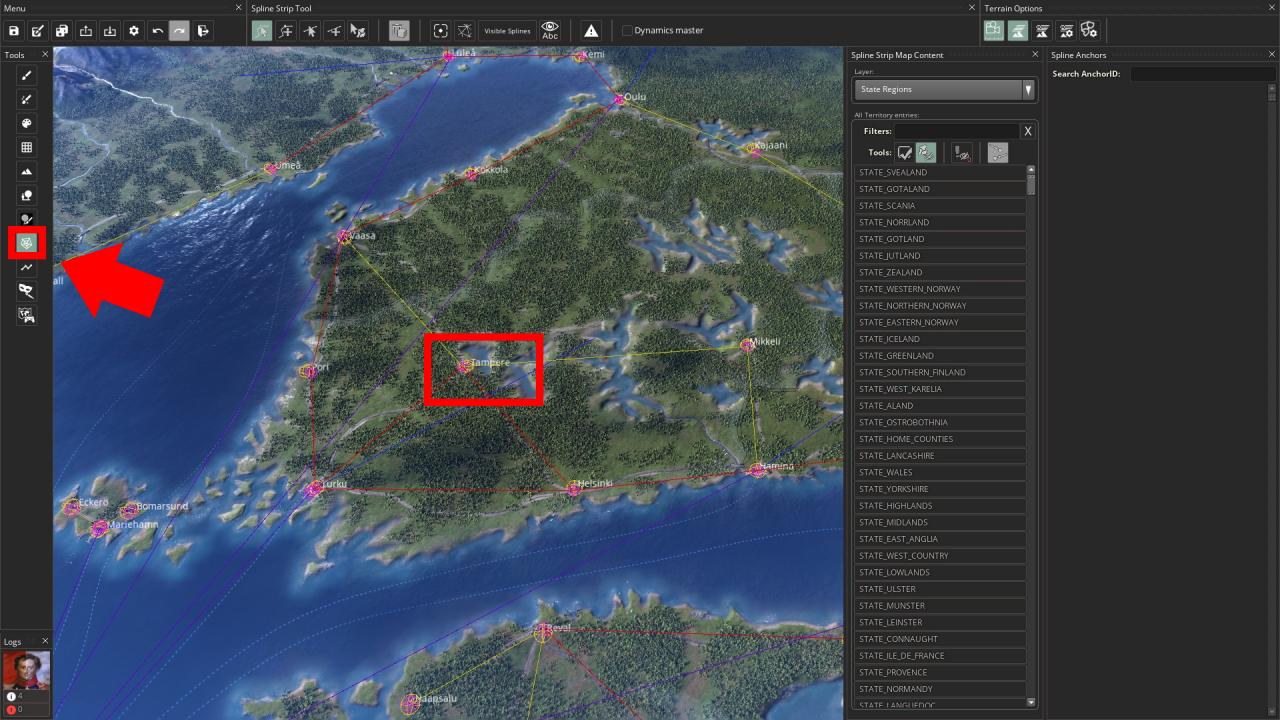
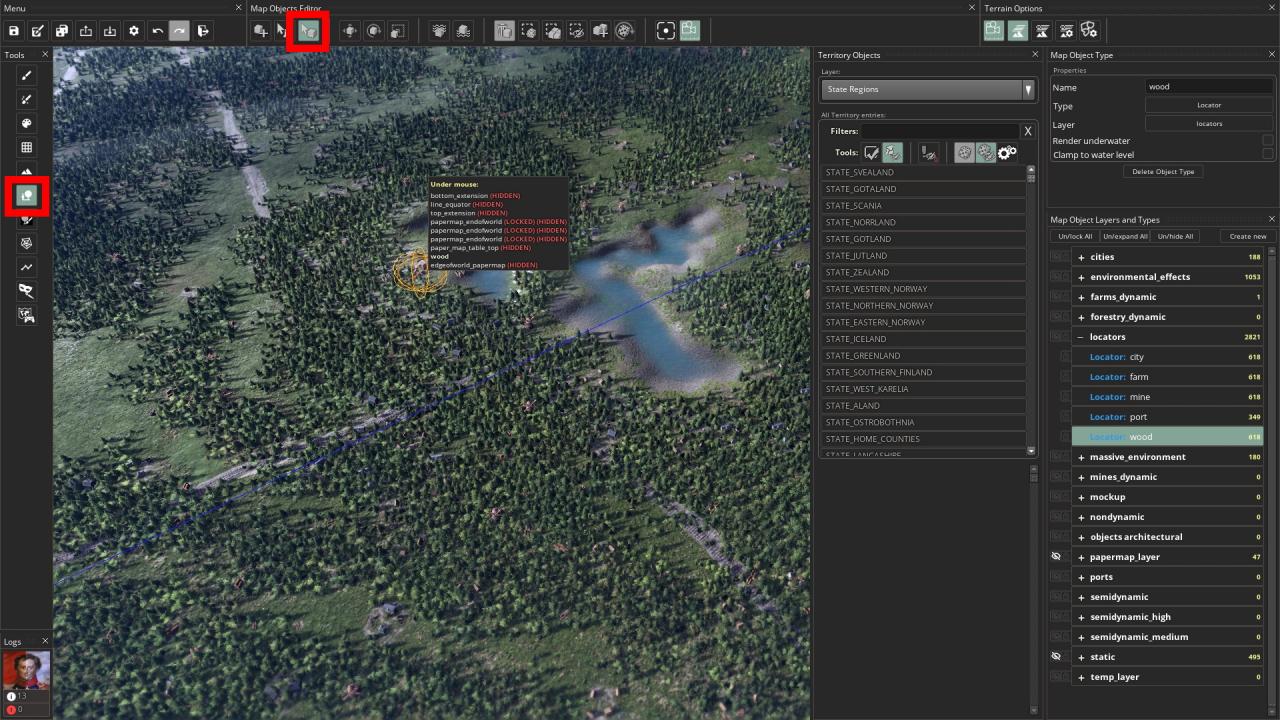
Now let’s move the locator. Choose the Map Objects Editor tool and click the Tampere sphere once.
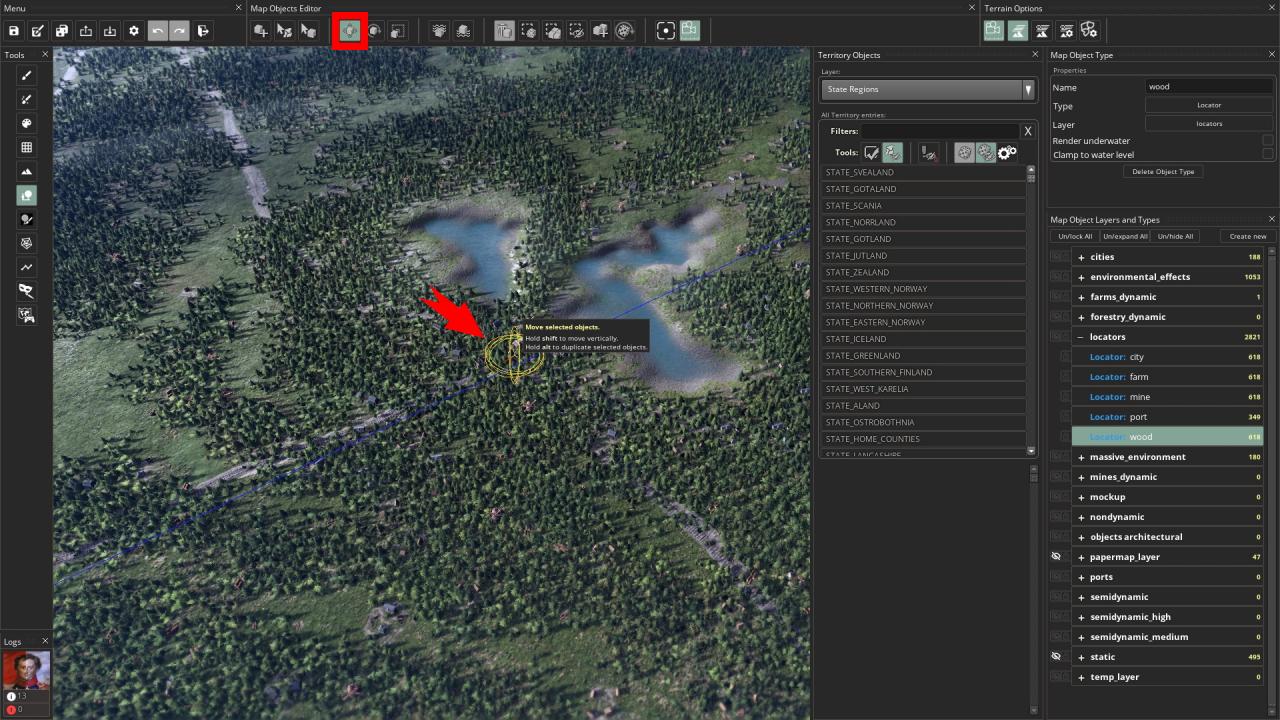
Then choose the Move tool from the top menu (shortcut key W) and drag the sphere to the desired location. If you’re doing more than just one, it’s good practice to switch back to the selection tool immediately by pressing Q and clicking away from the currently selected locator, that way you won’t accidentally drag locators around.
SAVE SAVE SAVE
Hit the Save As… button, and make sure that any files that have changed (that have their box ticked), are saving to your mod.
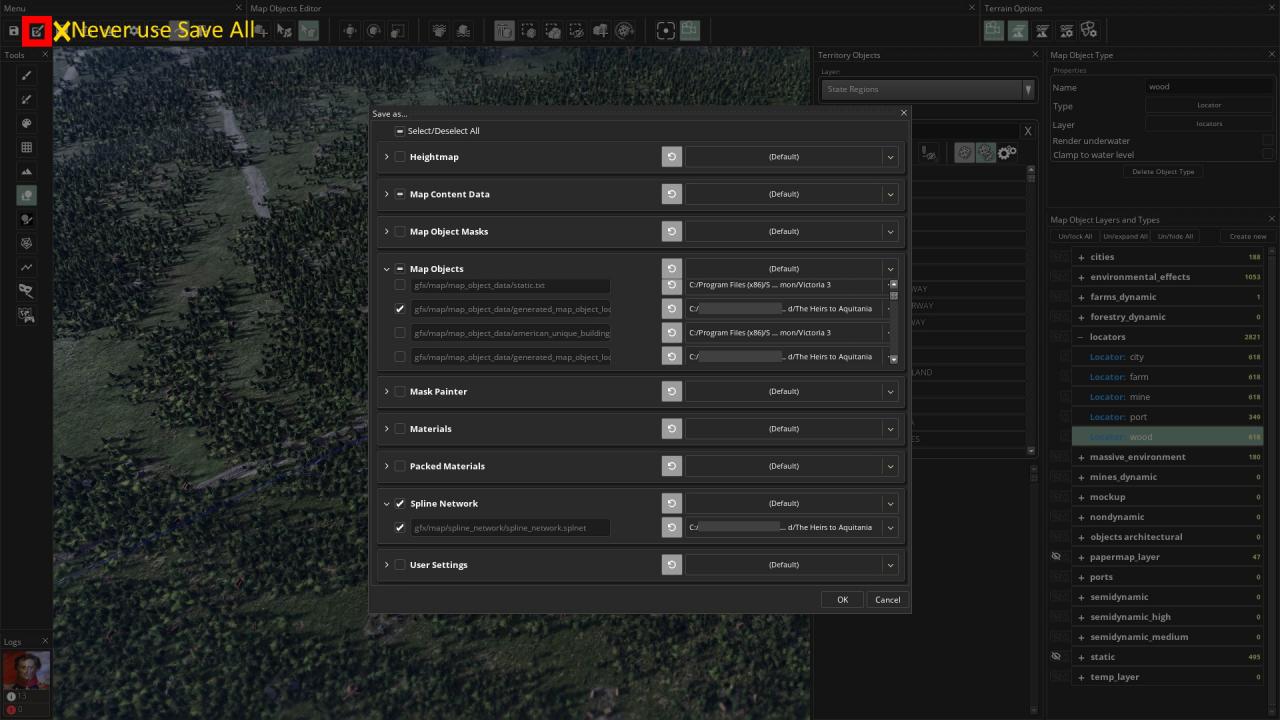
I strongly recommend against hitting the Save All button ever. Just reject it. I once hit it and it took a while to save and overwrote the base game files, so I needed to verify my game cache. It really put a dent in my modding vibe.
Save and save often.
Advanced: Hub IDs and types
Hubs have an ID associated to them, which when you select a hub you can see in the top right of the map editor. The ID is always of the format [State ID #][settlement type]. State IDs are perhaps most easily found in the map_data/state_regions folder. Settlement types are as follows:
- 00 – city
- 01 – farm
- 02 – mine
- 03 – port
- 04 – wood
Thus, the ID of the city for Lombardy (id 76) is 7600. The mine for Hedjaz (id 402) is 40202. The port for Guangdong (id 497) is 49703.
With ports you might notice that it in fact has TWO hubs! This second hub always has the ID [State ID#]00, and is different to the city because it’s a Type 1 hub (which tells the game that it’s a sea hub). Thus, although Guangdong’s sea-facing hub’s ID is 49700, because it’s Type 1 instead of the normal Type 0, the game doesn’t confuse it with the city in Guangdong (which is 49700 Type 0).
At the time of writing, I don’t know how to make new Type 1 hubs. If you figure it out, please let me know in the comments!
Other advanced info
After all, splines/strips cannot pass through a third state to connect hubs in different states. Sometimes a hub far from its locator may make it easier to connect disparate states.
Spline types:
- Roads are always present
- Railroads will only appear when you have researched the relevant technology
- Coastal naval routes connect ports to sea hubs
- Naval routes are the thick dashed line that connect sea hubs to other sea hubs
Each one has its own colour in the editor, which you can see when you play around with them a bit.
(I may write more here when it comes to mind)
Closing remarks
Thanks to Savs for his excellent guide, all credit to his effort. if this guide helps you, please support and rate it via Steam Community. enjoy the game.