
My guide for playing optimally. This can be used for all difficulties, but is more essential for Insane difficulty.
Survivor Choice
So why Nova? She’s the perfect final survivor. Liberated is so powerful if used correctly. There is no need to keep her happy. No need to schedule relaxation. You can starve her. She can be sleep deprived. She can sleep anywhere. You may not even need to give her a bed! Let her sleep on the ground! I send her on all my expeditions, even overnight. (Just don’t have expeditions arrive at the destination in the dark or injuries happen.) Your goal during the game is to get her construction skill boosted to a reasonable level so she can repair damage in the end-game. She also comes equipped with synthetic boots and pants.
Second, I choose Emelin. She cooks exquisite meals. That means +6 happiness which is equivalent to a one higher tier meal. So you can cook quick meals all game long and they will give +12 happiness instead of +6. You won’t need as many food resources either since quick meals only take 5 food per meal vs 10 or 15 for the higher tiers. No need for fats or oils for food. Emelin makes hay sausages usable!
Third, I choose a researcher/crafter. There are a couple options. Umayr because of his agoraphobia (+25 manipulation and happiness indoors) or Simon (interested in crafting and moves 25% faster). For pure indoor work, Umayr is probably better as he can crank out the research and crafting. Simon is pretty nice though because he levels up crafting quickly, and can scoot! He’s also very handy on the front line since he doesn’t bleed until he takes 6 or more bleeding damage.
Last, I choose a hardworker. Either Laara or Talas. Laara’s combat doesn’t start as high, but she can sure farm. Now you won’t be farming a ton if you use Emelin and only cook quick meals and only sew synthetic armor and t-shirts/shirts. Both get the 25% boost in manipulation, which means crafting, scavenging, and shooting faster. You really need at least one runner. They can move things around quickly and stay ahead of those pesky beetles during the first invasion on day 3!
With Emelin cooking and Umayr researching and crafting, they will likely fall in love, get married, and essentially be in euphoria the whole game between Emelin’s inherent happiness boost and Umayr’s indoor happiness boost plus the in-love boosts.
The main thing lacking in this group is construction. So I typically jump-start Nova’s construction by building burial spots. Each one gives 50-100 XP and requires zero resources. Just break them down and rebuild them. Nova becomes my primary builder, but Talas/Laara can also help.
Emelin is primarily cooking, and when not cooking, she can handle furnaces or maybe craft.
Umayr is researching or crafting. If you build a raised room with windows as a snipers nest, he can become quite proficient since he’s interested in combat and when indoors has the 25% boost to manipulation which makes him shoot faster.
So Nova, Emelin, Umayr, and Laara are currently my favorite survivor combo.
First Steps
Second, you need to get prepared for the first invasion. You must assume that you won’t find any weapons while scavenging, so I will tell you how to set up a defense for the first attack. You need fences with at least one gate. A few traps won’t hurt. Put them on both sides of the fence between the opening and the gate. The key is to not fully enclose your temporary base, and to put the gate(s) as far away from the fence opening as possible. You can group your survivors by the gate and the beetles will beeline to them. Once they get close, have your survivors step through the gate and they will turn around and run out of your base and around your fence towards your survivors on the “outside” of your base. I have my speedy survivor(s) run forward and team up on a beetle or two and then run back and have everyone go back through the gate at once. The beetles will again turn around and run back to the opening towards your survivors. If the traps are close enough to the gate, you can reset them while the beetles are running around the fence. Wash, rinse, repeat. It might take a while.
If you happen to find a gun while scavenging, just have Talas or Laara go out and kite the beetles before they attack. If preparation time runs out before they are all killed, Talas or Laara can run faster than the beetles and won’t get caught. Then use the gate and fence trick described above to make the beetles run around while shooting them.
Third, your goal should be to get flamethrowers ASAP. You should hopefully scavenge some fuel from your escape pod. You can use wood fences to funnel critters in front of a couple flamethrowers and easily kill everything in the first few waves. Keep adding flamethrowers with traps in front of them and you can handle everything up to shriekers. Just be sure to always leave an open path into your base.
Once you have a flamethrower deathtrap ready, you can relax a bit and start building and farming.
Research Priorities
You’ll want to get basic construction and defenses pretty early. The wood fortifications have much more durability and critters can’t see over them, which is very important once shriekers come around. You really only need the fortifications around your deathtrap. Wood fences are good everywhere else until you tire of their aesthetics.
Once you get basic construction, the Umayr will be able to spend all his time indoors and get that sweet 25% manipulation boost. It doesn’t help with research, but it sure helps with crafting and tailoring.
After you get the flamethrowers, you’re going to want to get your fuel supply cranking. The best fuel source is insect meat fermentation (fuel fermentation) if you got lucky and have that breakthrough. The second best source is turning fat or oil into fuel. You can either use clothblossoms and insect meat to make fat, or if you grow a ton of grain you can turn grain into oil. Both take a lot more labor than just fermenting insect meat directly into fuel. The third option is to tame at least four Ulfens and then build a two or three section animal shed surrounded by fortifications and gates with two feeders inside filled with hay or berries. Then you can convert their manure directly into fuel. The output is pretty consistent, and is only a single step process once you have the Ulfens, but it’s hard to get a big surplus. You’ll need to observe the Ulfens, observe berry bushes, and research animal taming, then observe the manure. Don’t use manure for fertilizing though. It takes too long and gives too little in return.
You’ll also want to scavenge everything nearby. So you will have a lot of scrap metal. Metal will be your most scarce material. So if you don’t already have smelting, get it now. And as long as you have enough bushes (sticks) nearby, there is no rush to move to electric furnaces. Speaking of electric, don’t even both with an electric cooking stove. The sticks only burn when the stove is being used, and the electric version doesn’t speed anything up. Electric furnaces DO speed up smelting though, so that’s a goal once you are comfortable behind your flamethrowers and turrets and have enough solar panels and batteries.
You’ll need tailoring and synthetic armor before winter. Forget fireplaces and heaters and air-conditioners. Those only help indoors and take a lot of research and fuel. Instead, spend that time and energy getting synthetic armor. That works inside and outside and requires zero fuel. Plus it gives your survivors better protection and wears out slower than regular clothes. If you don’t get the chitin synthetics breakthrough, then you’ll need to turn fuel into synthetic cloth. Good thing you’ve already got your fuel supply going!
You will want antibiotics before winter comes. Your survivors will eventually get pneumonia and that requires antibiotics (or first aid kits) to cure. You can also disassemble first aid kits to get a bandage and an antibiotic.
Once you’re set for winter, get the hot air balloon (long distance travel) and start sending Nova on as many expeditions as you can. Don’t let her arrive at night though because she’ll often get injured and waste the trip. But other than that, send her whenever you can. She will sleep in the balloon if needed and we don’t care if she’s unhappy! The sooner she starts exploring, the sooner you will get the orbital radio. Oh, one important thing. Assign Nova to mining and get her physical skill up to 7 before going on expeditions. Level 7 will get you 100 scrap metal per expedition when scavenging. Mining rocks is the fastest way to level the physical skill. Even if she has to travel far, send her out. You can even build a sleeping spot near the mining area and she can sleep outside. If there are berry bushes nearby, then she can eat those! Liberated FTW!
Depending on what your breakthroughs are, you can now focus on electrifying your base and getting turrets up. I start with a couple machine guns and a couple lasers, and then grow from there.
Unless you have the advanced weapon breakthroughs, you may not need to prioritize weapon research. You will usually find enough weapons to last you through the game if you don’t keep them equipped. Once the bugs appear, you will always have enough time to go equip the guns before they attack. I find the best gun is the pulse rifle because it will stun the critters running through your deathtrap. That will let them get shot and burnt to crisps. Even the bugs that avoid traps!
My favorite breakthroughs are:
Fuel Fermentation (likely the best breakthrough)
Battery Optimization (batteries are expensive)
Graphene Solar Cells (much more efficient power generation)
or Carbon Wind Turbines (if a shrieker nest is nearby)
Improved Pulse Rifles (longer range, better chance to stun)
Chitin Synthetics (only if no Fuel Fermentation)
Defense
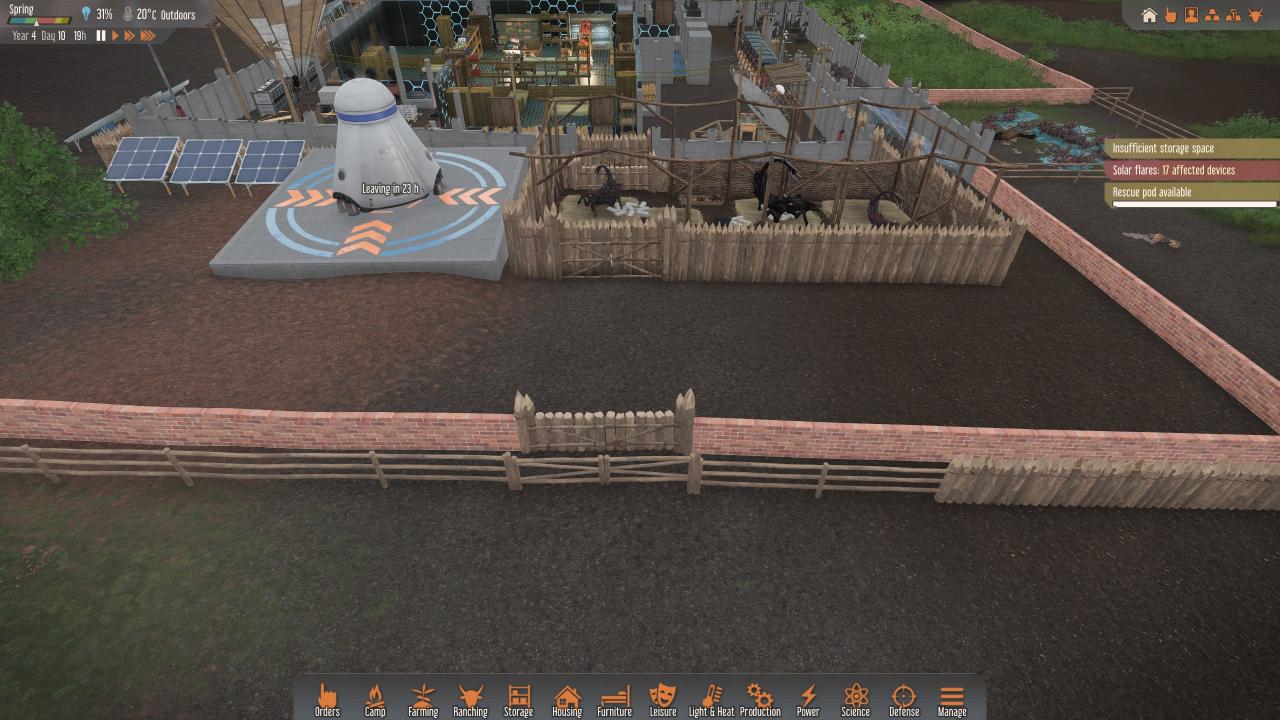
First, critters can and will appear anywhere around your base. You will need to “guide” them to your deathtrap. The easiest way is to leave an opening in your “wall” where you want them to go. It also helps to position your survivors at that opening.
Along the same lines, eventually other critters will try and destroy your orbital antenna. You must leave a 2-wide path from your wall opening to both antennas, otherwise those critters will try and break down your walls. Your goal is to avoid critters breaking your walls! Repairing walls is time consuming and can be expensive in resources! Better to just refuel your flamethrowers and reset traps.
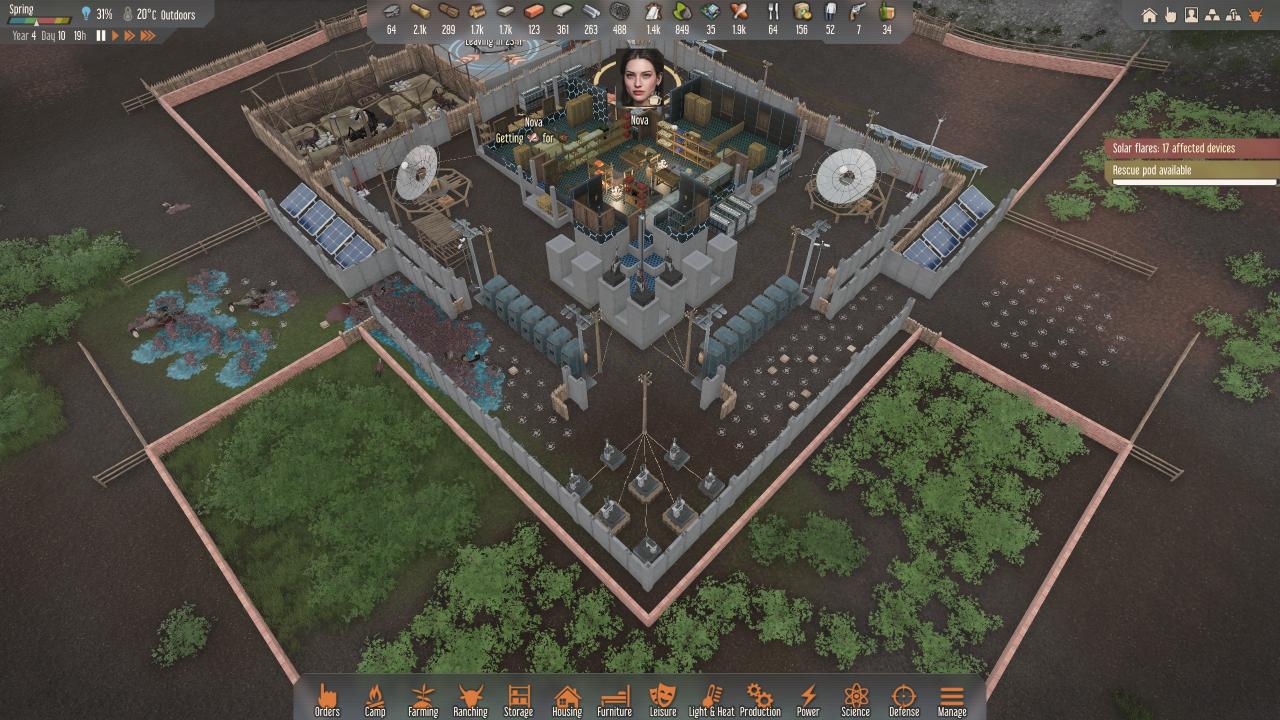
You can see in this screenshot there are two paths from the sides of my base (where the antenna are) that both lead to the opening in my wall at the bottom of the “diamond”. Each of these paths are my deathtraps, and either one can easily kill hundreds of critters.
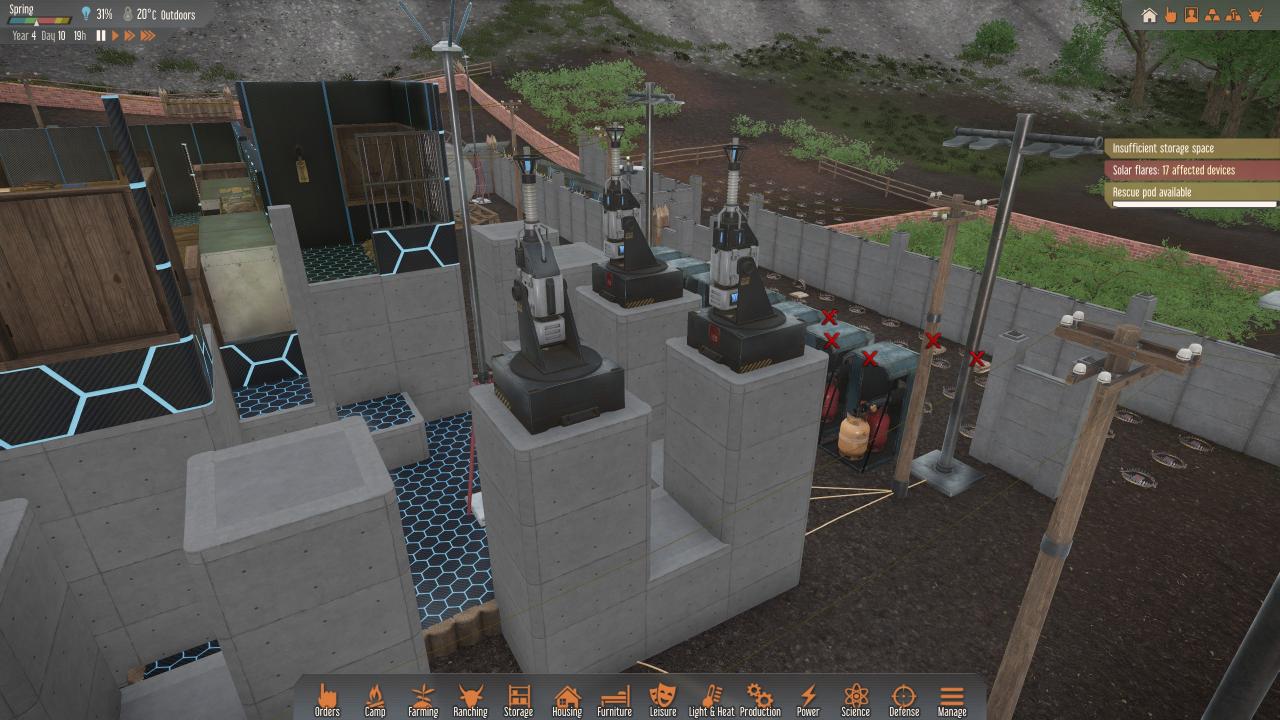
I stick three lasers up on the raised foundations just inside the opening. These will often be the first turrets to shoot and will thus attract the most attention and the critters will come running into the “flame hall”. I used to put turrets on the empty raised foundations near those three turrets, but I found that shrieker broodmothers could reach them from well outside the flame halls, so I removed them.
On the ground at the end of the flame halls I stick a bunch of turrets. They are on the ground and behind fortifications and are not visible from anywhere other than inside the flame halls. Shriekers can’t target them without entering the deathtrap.
If I have advanced pulse rifles with range of 18, I will put my survivors in amongst the turrets. With regular pulse rifles, I will have them stand further forward so they can open fire once a critter has turned the corner and is visible. The goal is to shoot and stun the flood of critters so that the flames and the ground turrets can wipe them out. This is why pulse rifles are the best at defense.
The reason I have the two circular trap patterns in the middle of the squares with openings at the corners at the beginning of each deathtrap is to blow up explosive beetles before they get close to my walls. I have a single missile launcher with the smallest target circle that I swap from one side to the other depending on where the majority of critters are coming. The traps keep the critters in place while the missiles fly. Otherwise the missiles will often miss.
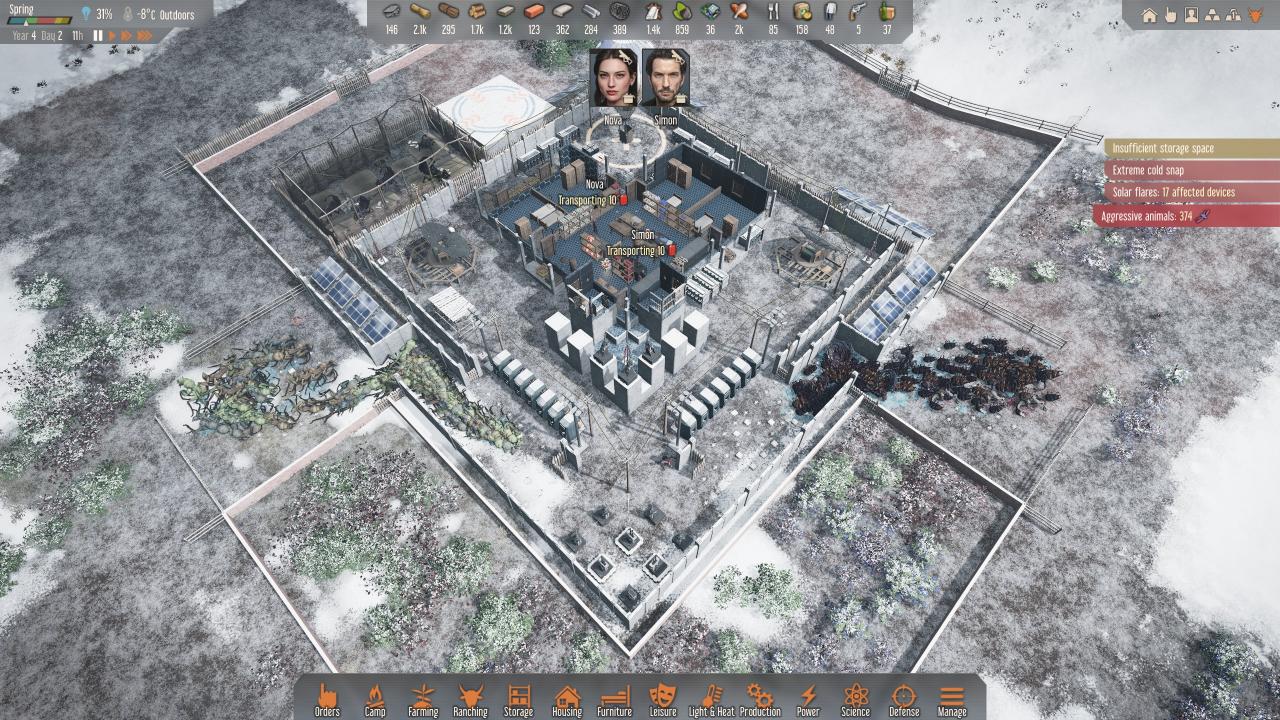
This setup easily handles everything but those pesky horrible hummingflies. I hate those guys! When those show up I will take my three turrets down from their raised foundations and place them in the cluster at the bottom. Then I play hide and seek with my survivors in my main building. I had to survive 374 hummingflies with only my last two survivors!
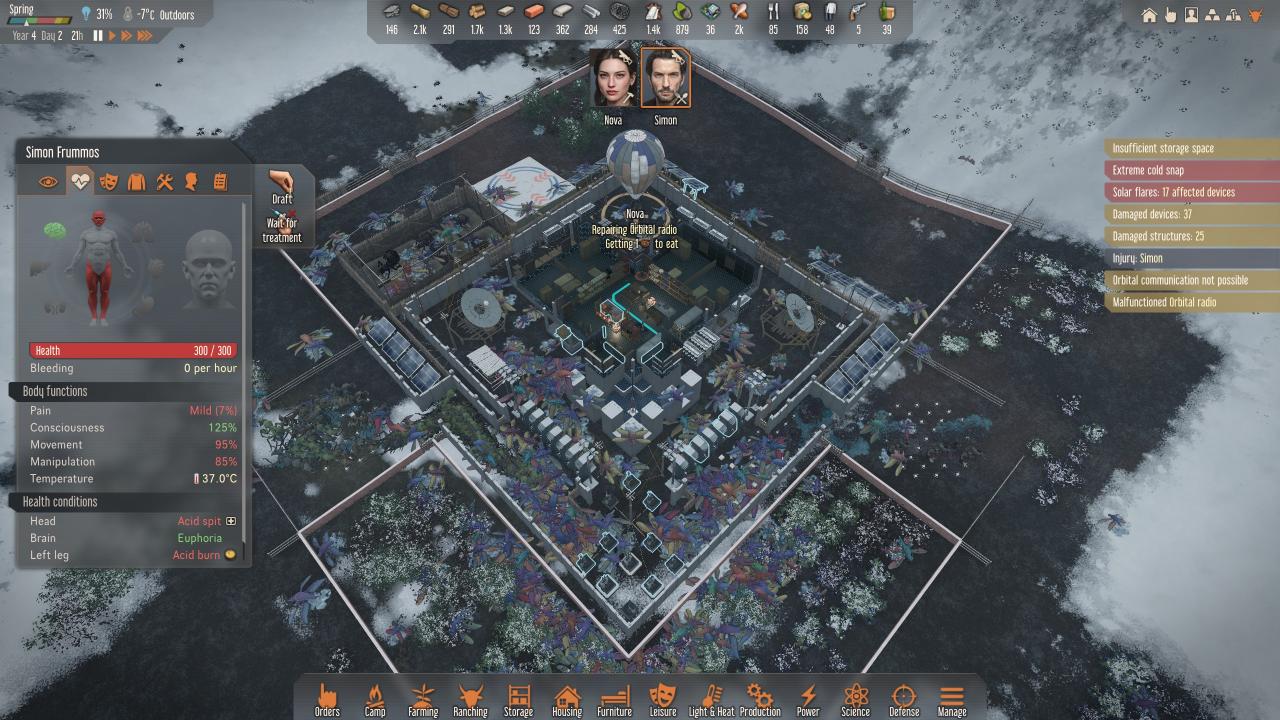
I have my survivors step outside a door, fire a shot, then run back inside for a bit. As you can see, Simon got hit a few times, but nothing too bad. Nova took a few hits too, but she’s already healed here. You can also see that I didn’t lose any turrets, but I had to spend almost 300 metal alloys to repair everything afterwards! My tamed shriekers got hit the hardest. The broodmother almost died. I’m pretty sure they took out a few flies too.
My original idea was to put survivors up in the raised sniper nests so they could use their pulse rifles on the flies attacking the turrets. But they got a lot more wounds, even standing back in the corners. However, those sniper nests are great for Umayr with a railgun against ground critters. You can put a sleeping spot in them too because survivors can walk over sleeping spots. I assign Nova to one. Also, no need for stairs. Survivors will place a ladder and climb up. You can’t have a wall or door where the climb-up space is, and it’s slow, but it’s super space-efficient.
So the keys to solid defense are:
1. Leave an opening into your base. Not an open gate, but an actual opening.
2. Leave a two-square-wide minimum path from outside your base, through your opening, and to both orbital antennas.
3. Place raised laser turrets near the opening that can shoot over your fortifications.
4. Place your deathtrap turrets and flamethrowers behind fortifications so Shriekers can’t attack them from outside your deathtrap.
5. Don’t put turrets in other parts of your base. Otherwise critters will try and break fences and fortifications to reach them.
6. Finally, keep turrets low and bunched up when fighting hummingflies.
Last note, you can plant fields in the two-square-wide path to the antenna. Plants don’t block movement. Shrooms work well, or grain, or clothblossoms. The space where the antenna will go can be planted too. I planted a 5×5 clothblossom field in each and had WAY more cloth than I needed. One harvest of a single 5×5 would have been plenty.
Building Smart and Efficiency
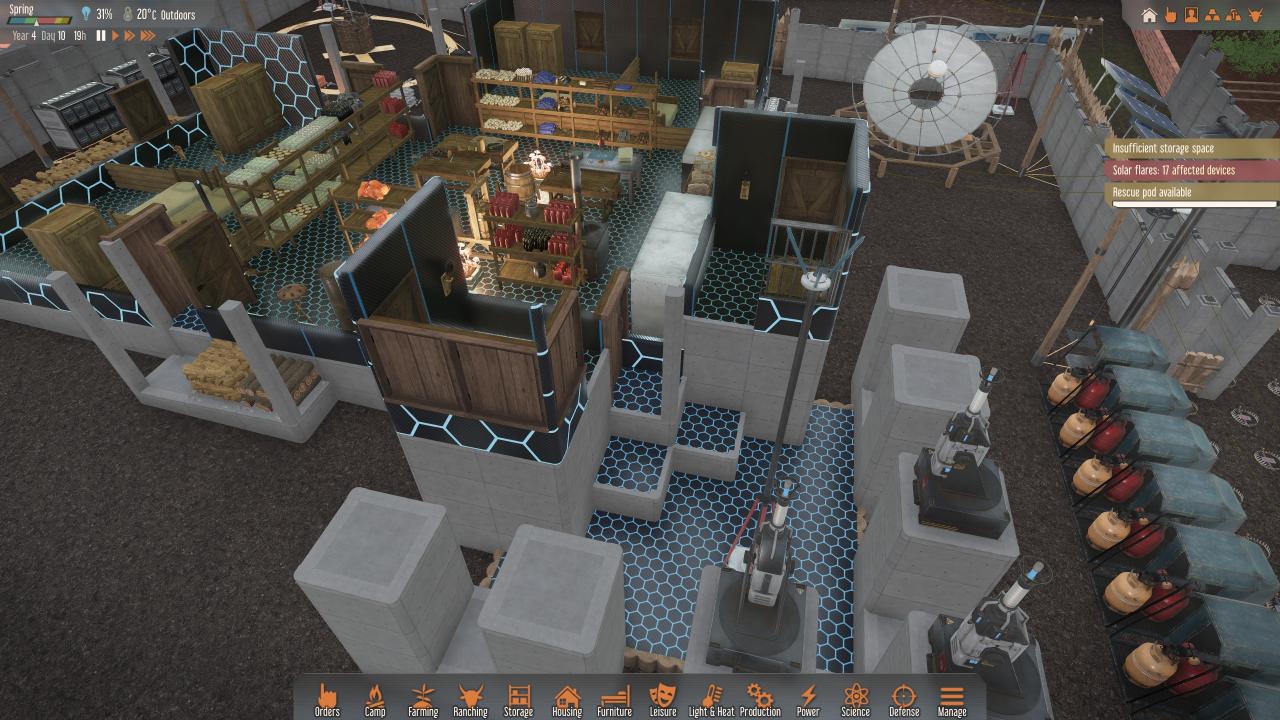
I’ve never had a need for more than a single freezer and fridge. Even with 8 survivors! Shrooms and emergency rations last forever just under a roof. Grain, insect meat, and a single stack of poultry go in the freezer. Sometimes other veggies if they are about to rot. Meals and berries and sometime dried meat go in the fridge. Always leave space for meals in the fridge.
Here you can see my 9×9 layout.
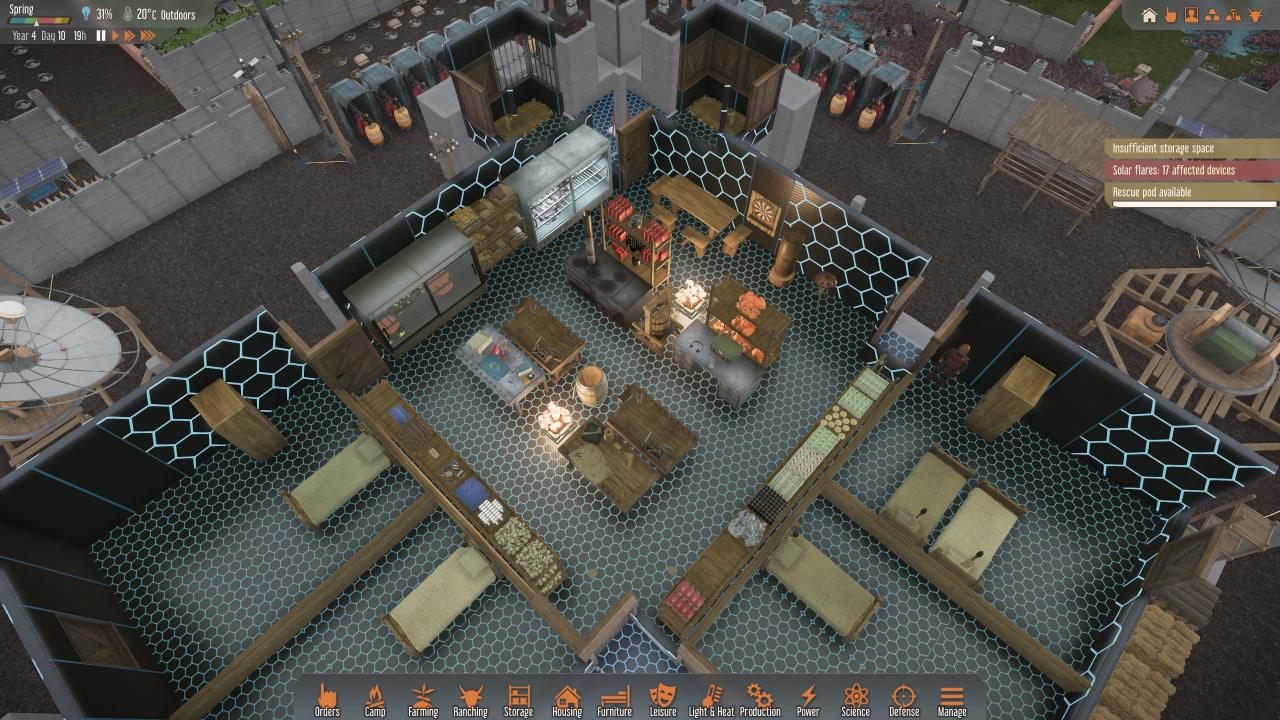
Before Hummingflies, I just leave the corners of the room open with no doors or walls. No need for heating and cooling because everyone wearing synthetic armor means we don’t need to keep the building temperature controlled. I could probably just use doorways for the bedrooms too.
Just the two shroomlights are enough to light all the workstations. No electric lights anywhere inside means less to repair. I put floodlights outside for the deathtraps though. Attacks often come at night.
The shelves around the perimeter are more than enough for a full playthrough. If you’re running out of room, you’re over-producing. I try and designate certain areas for materials near where they will be used.
You can see here that the orbital radio is in the middle and there are two workbenches. Originally I had the research station where the radio is currently. It’s good to have Umayr and Emelin working near each other for romance reasons. When I first got the radio, I put it under a small roof out in the “back”. It’s used only occasionally and for a short time, so the location isn’t critical. Once I stopped researching, I brought it inside.
If you end up cooking higher-tier meals, you can install two stoves so that your cook can start another meal while the first is cooking. However, if you stick to quick meals, you only need one stove because there is no extra cook time.
I recommend doubling up on fences. You can double a fence gate if they point in opposite directions. One opens in, the other opens out.
Don’t build stairs. Just build more foundations one step lower. I think doors have to have foundations at the same level on both sides of the door in order to be passable.
Survivors can reach a turret on a foundation that is 3 higher than the one they’re standing on. These are all reachable from the concrete foundations adjacent to the turret foundations, which are one step higher than the foundation behind them.
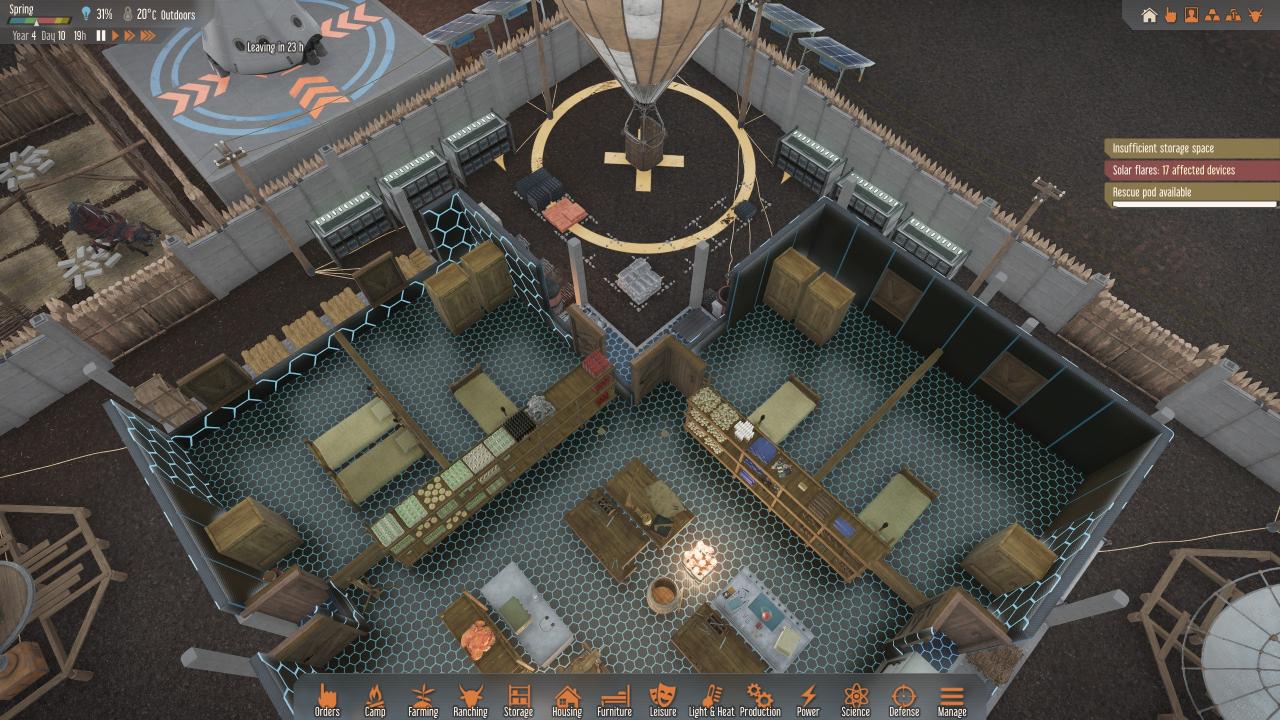
You can build things on the outer edges of the hot air balloon pad. Might as well use that space. The furnaces are also close to the metal stockpiles and the production benches.

The bedrooms must be 4×5 to get the full happiness bonus, but that’s a lot of wasted space. Might as well put wardrobes in there. Those are not used very often. When the wardrobe is just one space inside a room, often times a sleeping survivor won’t even get disturbed when another survivor uses the wardrobe. You can see that design on the left-most and right-most rooms. Those are my weapon wardrobes. I have also put fermentation barrels in the bedrooms when I am lucky enough to research Fuel Fermentation. Those could also go outside.
Note: Outdoor wardrobes are fine until Hummingflies come. They will destroy the wardrobes and everything in them.
General Advice and Tips
1. Don’t waste time on heating or air-conditioning. Just go straight for synthetic armor.
2. Don’t use stairs. Use foundations 1 step higher or lower instead.
3. Only butcher the bigger bugs. The smaller ones aren’t worth the effort.
4. Get creative when utilizing Nova. She’s just awesome!
5. The big evergreen tree is the only one worth planting. It grows quickly, even in the cold, and is space efficient.
6. Plant fields and then remove the fields. Any plants “killed” by the cold will come back in the spring. Plants not in a field won’t be damaged by toxic ash. The only benefit to keeping fields active is the automatic harvest designation. Not worth it.
7. Only observe the important plants and animals. Orange Mushrooms (non-rotting veggies and balm), Bright-Leafed Plants (cloth), Big Evergreen Trees (wood), Peculiar Plants (berries), Tall Leafy Plants (grain), Blade Grass (hay), and Pointy Red Plants (silicon). Big Horned Animals (meat, hides, and manure), and then the bodies of anything that attacks you. Shriekers are important because you can tame them and get unlimited stone or even carbon nanotubes.
8. Don’t overproduce, and stay focused on acquiring metal.
9. Get to level 7 physical skill before going on expeditions.
10. If you don’t get a decent starting location, try again with a different seed. Playing a full game with only clay soil is frustrating! If an important plant isn’t close, try again!
Thanks to TheRooster for his excellent guide, all credits belong to his effort. if this guide helps you, please support and rate it via Steam Community. enjoy the game.