
Intro
You can find a blueprint for the drone here.
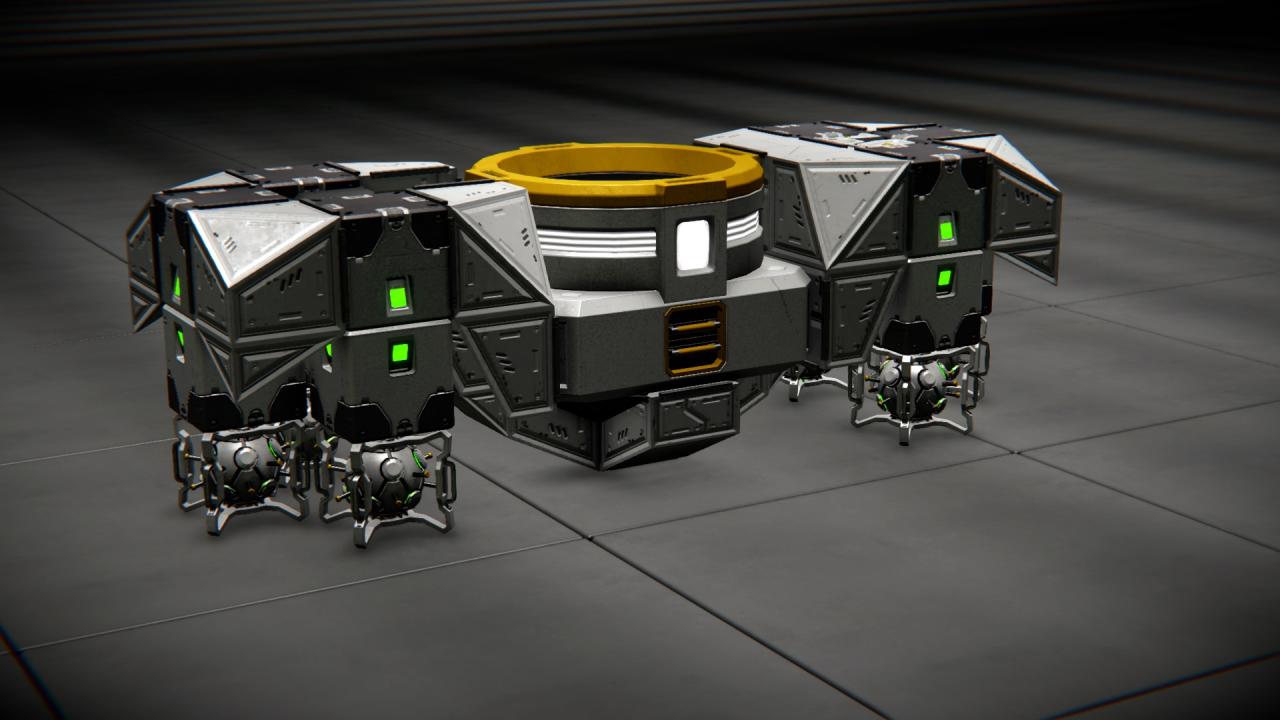
Getting Started
If you play in survival it is possible to print the drone on the provided 1x1x1 merge block, which is placed directly underneath the fuselage.
Missiles are attached by default on connectors and hinges so you will not be able to print them directly with the drone. Don’t worry though – we have our armament blueprint from the intro section.

1. Front Camera
2. PB LAMP – Seek For Target
3. PB LAMP – Fire (missile/guided bomb)
4. Control screens camera
5. Missile/bomb evasion switch
6. Aim point (offset/center of mass) switch
7. Topdown switch
To lock-on the target follow these steps:
- Switch to toolbar no. 1
- Press 1 to enter camera view
- Point your crosshair at the target like on the picture below (target needs to be within 5km range)
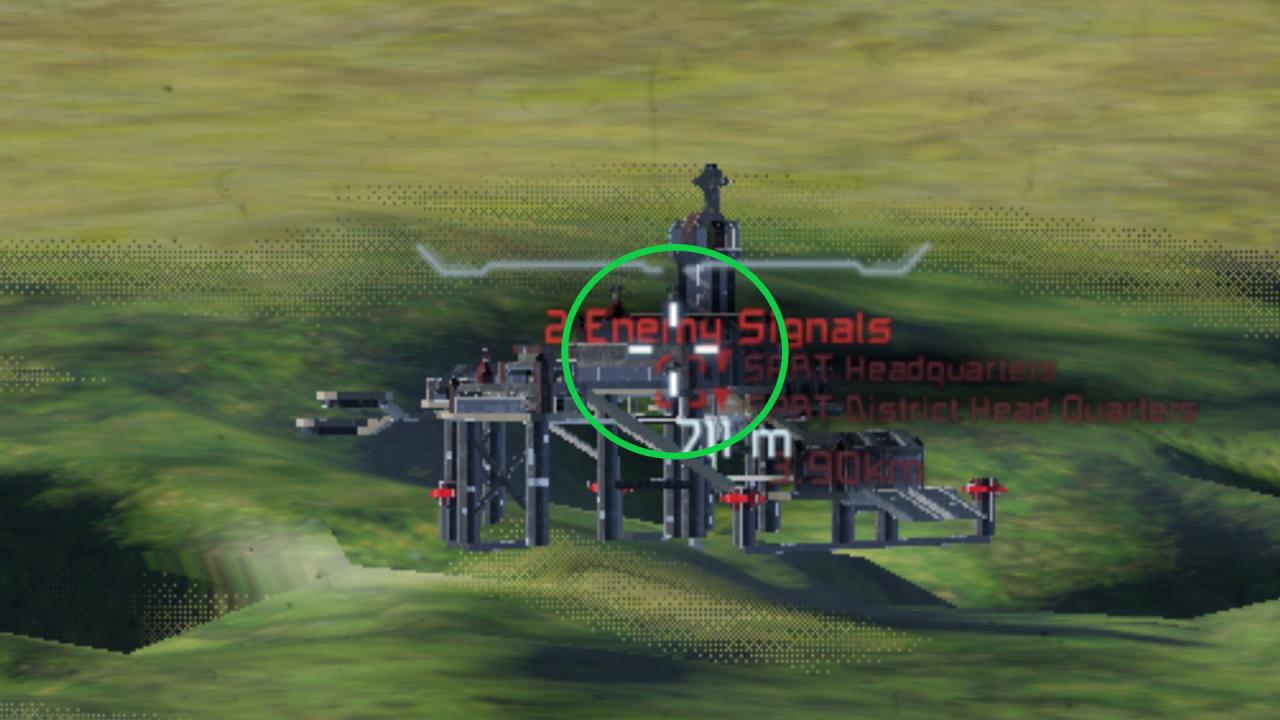
- Press 2 on toolbar to start to seek for target. You will start to hear beeping sound
- Once the sound changes – you have lock. You can also check that by pressing 4 to control screens. Middle panel should shine green and say “target locked”
- When you establish lock, you may use your R1, R3 and guided bombs in lock-on mode.
You can find more information about how to set up LAMP and WHAM scripts here
To set up drone position in the formation:
1. Find PB Block with tag “Wingman”
2. Run it with the argument: “Done1:setoffset;x;y;z” (No quote marks ” “)
For example:
Drone1:setoffset;0;30;0
You can have multiple drones following you at the same time
If you want to have more than 1 drone in your formation:
1. Find PB block with the tag “Wingman”
2. Change name of the second drone to unique name. For instance instead of “Drone1” rename it to “Drone2”.
For more information on how to use this script go to the official script page: Avaness Formation System
In the next section of this guide, we will prepare the missile to launch.
Modular Armament
- Gatling Gun Pod
- Rocket Launcher Pod
- Laser/Raycast Guided Bomb
- Freefall Bombs With Attached Bombsight
- Bait Pod
- R1 M Missile
- R3 Missile

After printing the Armament Blueprint, you need to cut off the red block on which the pod you want to use is attached.
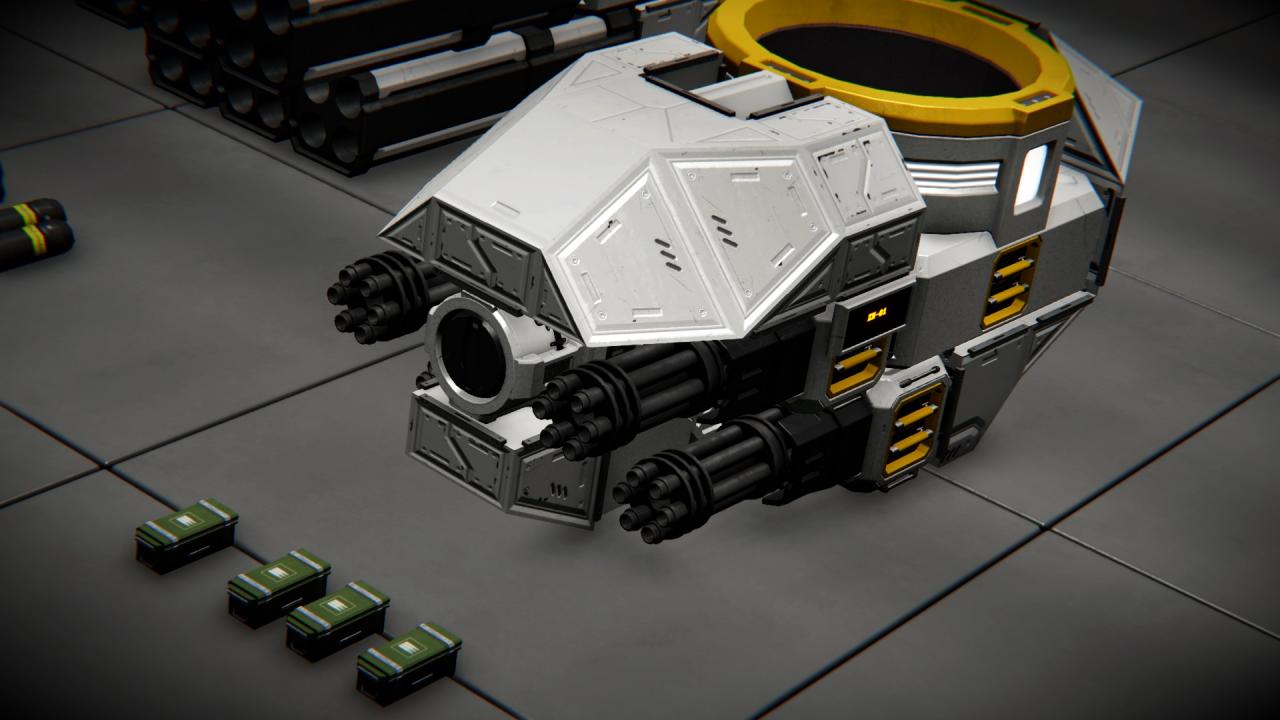 Gatling Gun Pod contains 4 gatling guns, sequenced with Whip’s salvo script.
To use it follow this steps:
- Cut the red block which is holding the pod
- Place the pod directly under one of the connectors, facing forward
- Once the connectors get yellow, it will mean that the blocks are ready to merge
- Press the adequate button under fuselage to lock connectors
- To fire, you must select gatling guns from the “K” menu and place them on your toolbar, then select them from toolbar
- You are ready to go!
Missile Launcher Pod
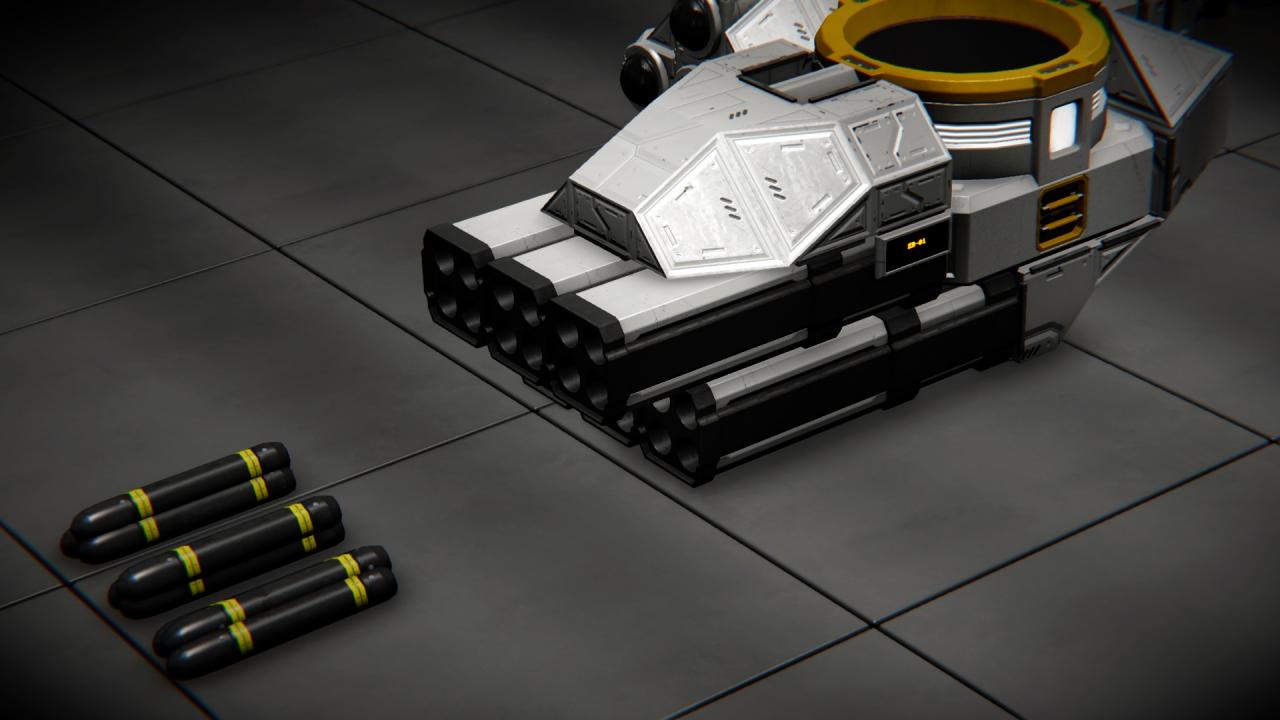
Missile Launcher Pod contains 6 missile launchers, sequenced with Whip’s salvo script.
To use it follow this steps:
- Cut the red block which is holding the pod
- Place the pod directly under one of the connectors, facing forward
- Once the connectors get yellow, it will mean that the blocks are ready to merge
- Press the adequate button under fuselage to lock connectors
- To fire, you must select missile launchers from the “K” menu and place them on your toolbar, then select them from toolbar
- You are ready to go!
Raycast Guided Bomb
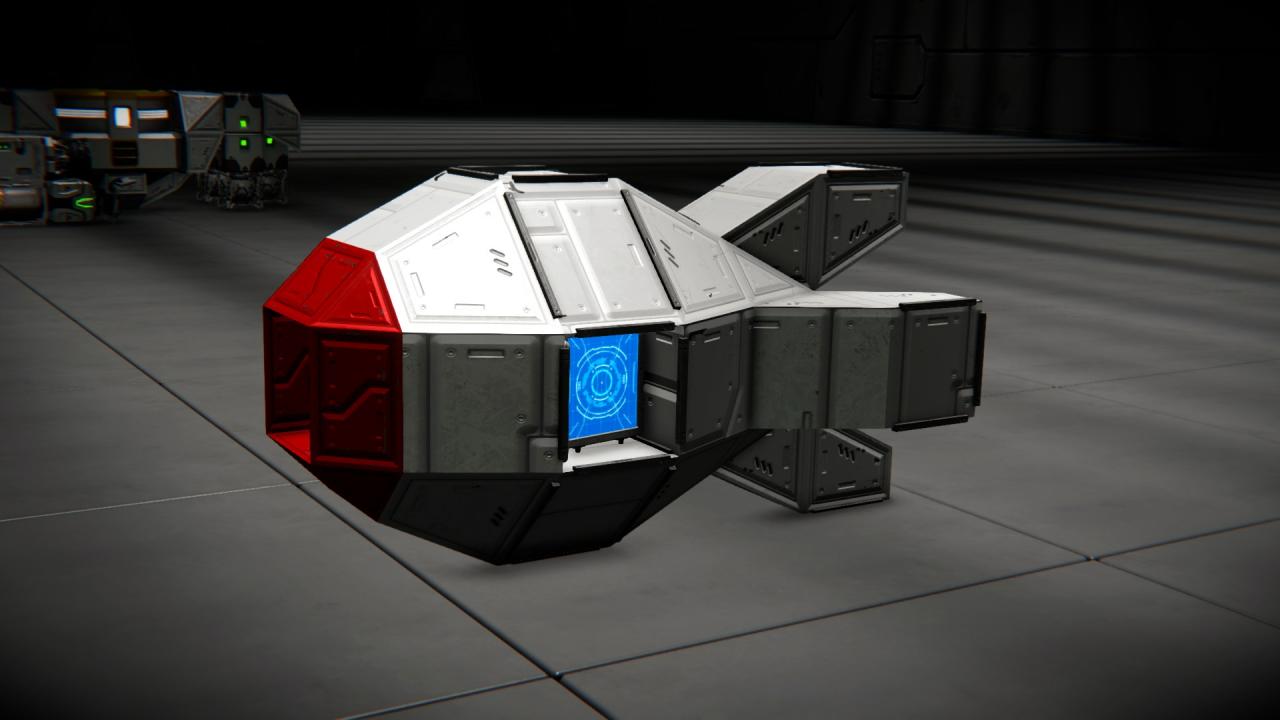
Raycast Guided Bomb is a small guided bomb, which requieres you to lock on a target before it is released.
The advantage of those bombs is that after lock-on the bomb navigates to the target by itself. It is also very cheap to produce comparing to other types of armament. It has small warhead installed inside.
Precision of the bomb is up to 6m for the static target. I do not recommend to use it against moving targets because it simply does not have enough thrust/power output to follow anything else than static targets.
To use it follow these steps:
- Cut the red block which is holding the bomb in the armament frame after printing it,
- Place the bomb directly under one of the drone’s under-wing hinges
- Lock the hinge on the missile and attach it to the drone
After the bomb is attached to the wing it’s basically ready to release. To do that follow these steps:
- [In Remote Control mode] Take control over the drones remote control “Remote Control”, lock-on the target with LAMP script and Run the argument “fire” (no ” “) when you are above the target.
- [In Loyal Wingman mode] You don’t need to worry about remote control, simply lock-on the target with LAMP script and Run the argument “fire remote” (no ” “) when your drone gets above the target
Recommended way of aiming for target
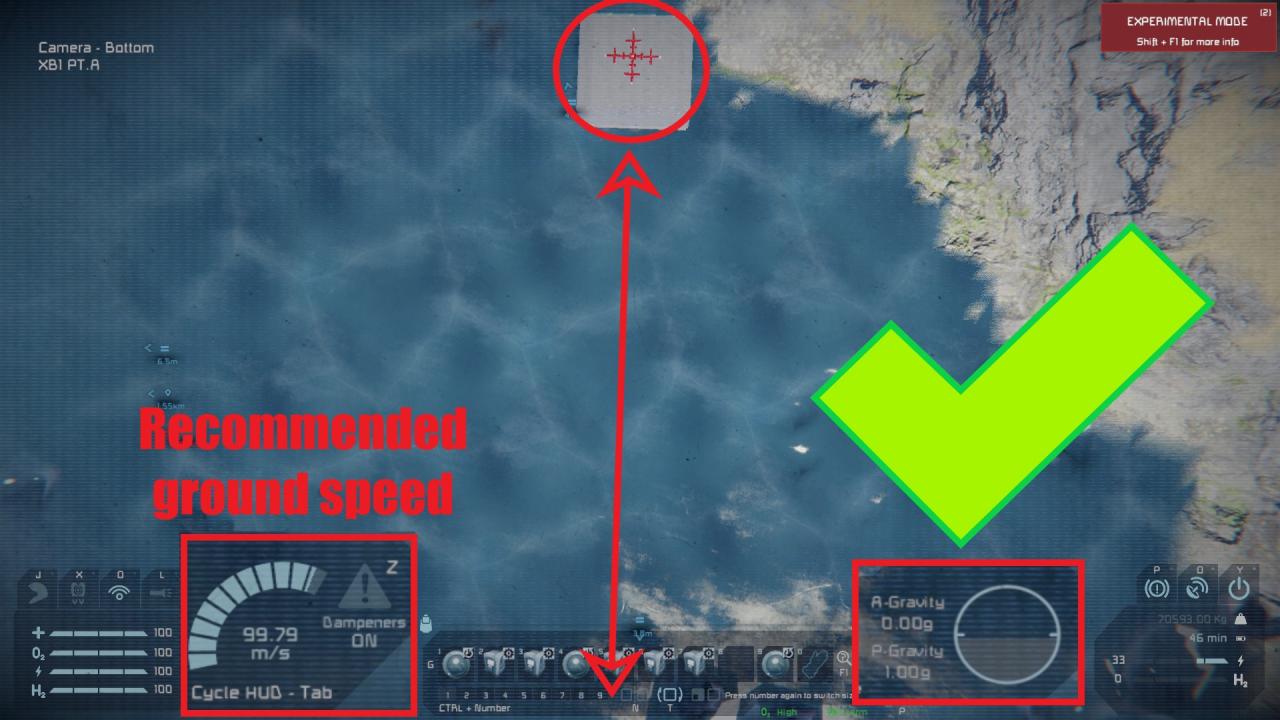
Aiming in a presented way is recommended because:
- Way the drone is going is (more or less) lined up with the target,
- The distance between drone and the target is long enough
- Drone has enough speed…
- …and is leveled
NOT recommended way of aiming
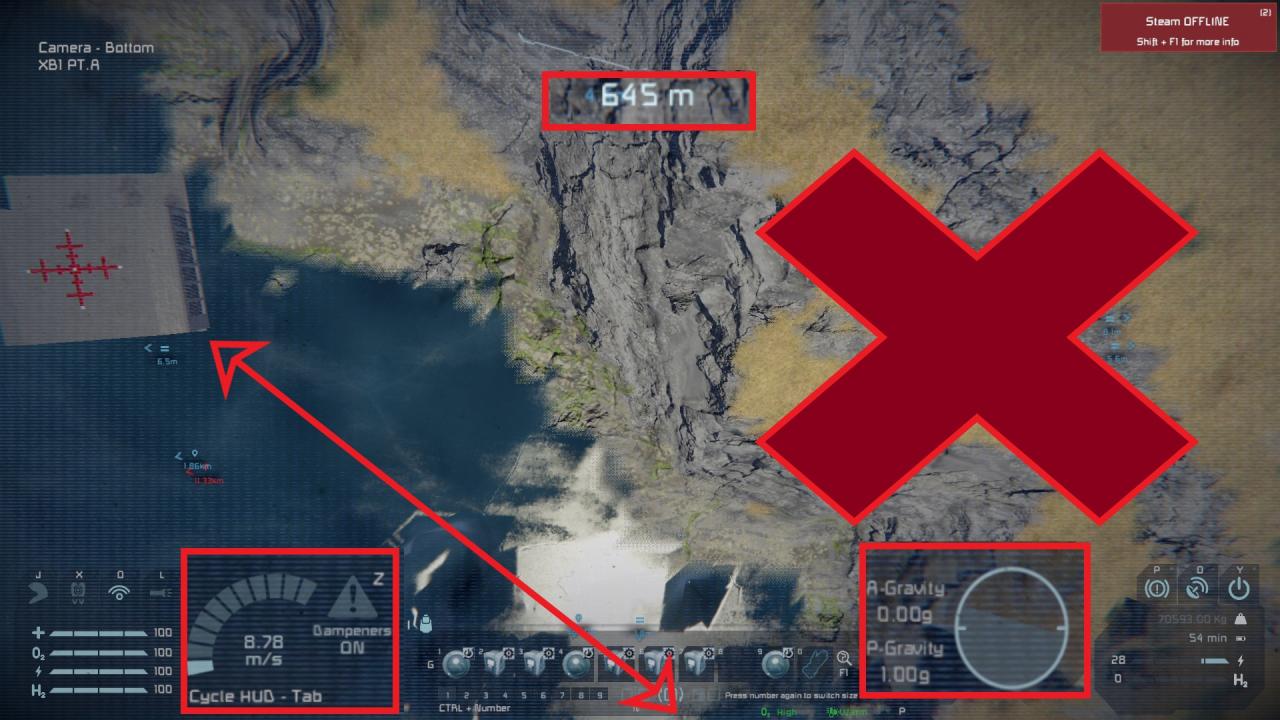
You probably should NOT aim in the presented way because:
- Path to the target is not lined up with the target
- Not enough dostance between drone and the target
- Drone is tilted sideways (you may damage yourself)
- Not enough speed
If you are lucky enough your bomb could still actually hit the target, however the chance is much lower than if you would aim as recommended.
Freefall Bombs
Bombsight
Bombsight works thanks to Whip’s custom freefall prediction script. It will show you a place where your bombs will land (with accuracy +/-20m per every 100m above the ground).
Make sure you attach your bomb pod with the bombsight with the correct orientation (Remote control facing forward). After you do that take control of the drone’s main remote control and place camera with the tag “bombsight” somewhere on your toolbar.
Now you are able to see where will your bombs drop.
Next step would be setting up the trigger for our bombs. While in drones main remote control, find PB block with the tag xxxxxxxxx in g-menu and run it with the argument “xxxxxxxxxx” (Without quotation marks).
To trigger the bomb drop, simply enter the bombsight camera view, and once the target is in the red circle, run PB block with the argument xxxxxxxxxx.
Your bomb run is ready to go!
Bait Pod
It contains 2 small beacons which have enough energy to work continiously for several minutes.
 To use them take control over drone’s main remote control and in g-menu find PB with the tag xxxxxxxxx. Run it with argument xxxxxxxxxx. First time you will run it, the first bait will be released. If you press it for the second time the next bait will be released.
Thanks to pro100tv for his great guide, all credit to his effort. you can also read the original guide from Steam Community. enjoy the game.
Related Posts:
- Space Engineers: Ore Finder Plus [OFP] Guide 2022
- Space Engineers: Planet Map 3D Guide
- Space Engineers: Visual Scripting Tool Guide
- Space Engineers: How to Setup my Executor Class Super Star Dreadnought
- Space Engineers: Playing it cool Achivment Save File