Walkthrough for first half of campaign (work in progress).
Intro & Tips
This guide might become out of date in the future when the campaign is shortened due to criticisms that the “curve” is oversmoothed, taking too long to unlock all the endgame stuff.
(This is not a speedrun guide.)
- Check out my ESDF Keybinds guide for smoother Raise/Lower controls.
- Railgrade Production Chart[docs.google.com] by /u/gollet. Ratios help with utilization.
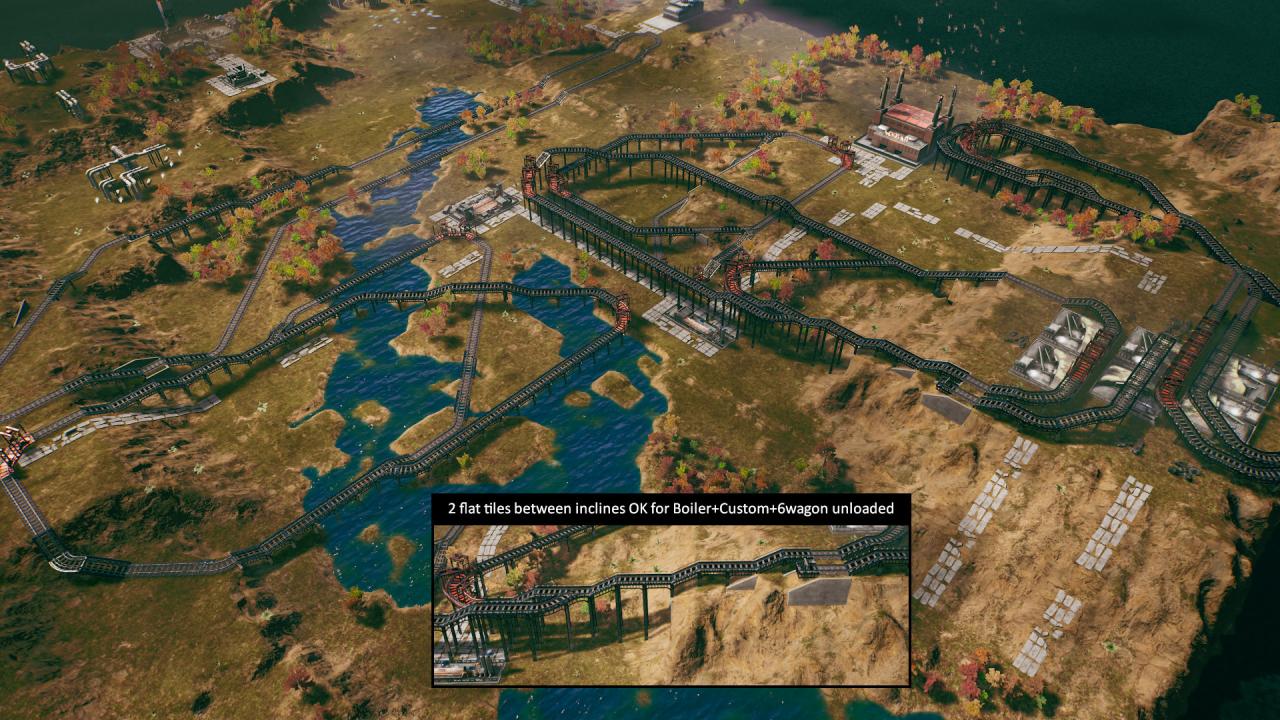
- Boilers are cheap. Workhorses were intended to be a balance between Boiler and Custom, but Boiler + Custom accidentally became meta for units of 6 wagons because of alignment with 6-tile stations, cheapness of boiler, and strength of Custom to power through small inclines.
- Space ramp tiles apart with Raise/Lower keys to reduce train slowdowns going uphill. Stations don’t need to be at ground level.
- Be sure to finish a chain and start delivering final products before the factory’s storage fills up; you want to be paid.
- The shortest shuttle is composed of 3 tiles: station-track-station used by an engine-2wagon. 2station-track-2station with engine-4wagon works better, and best when both buildings are within range of both stations. This is used as “direct insertion” since this game doesn’t have conveyor belts.
- A catalyst lasts 90s regardless of building level. This means a level 0 water pump can catalyze slightly over 5.5 buildings, less if a 2-way train travels too far to pick up all the water in time.
- Hold RMB to view names of all resources and buildings on map.
- Extractors e.g. mines and pumps do not care how many tiles of resources they’re sitting on.
- Clone Train also copies the train’s route so remember to fix the route if the new train belongs to a different station.
- As of writing, you do not need to pay attention to achievements, and S-Rank is not required. Just beat the campaign.
Personal opinion: Disable ghosting; this should be default.
Regions #T1–T3
Really?
- T1: Just connect it…
- T2: Click on the branches so the train reaches its destination…
- T3: You can press Raise to keep the tracks and stations level. Shuttles work perfectly fine here but in a real game with more than a level 0 building not immediately adjacent to another building, you definitely want RORO (roll-on/roll-off) stations for throughput.
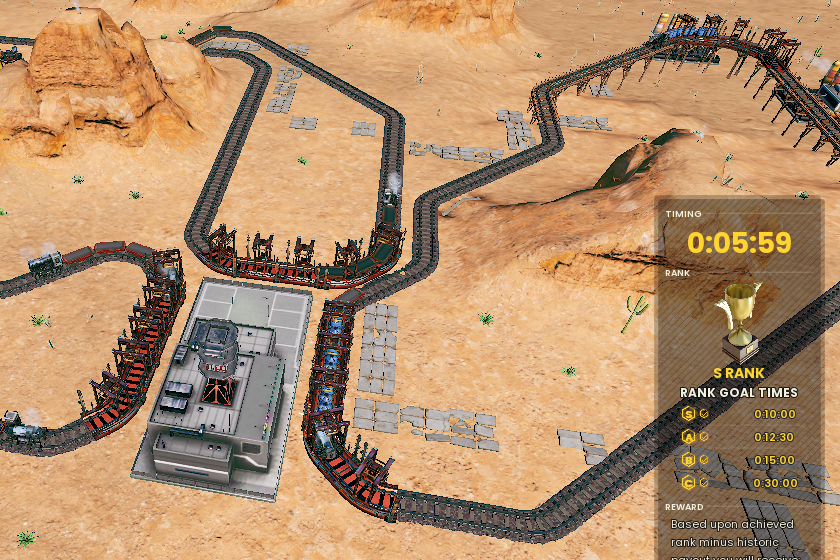
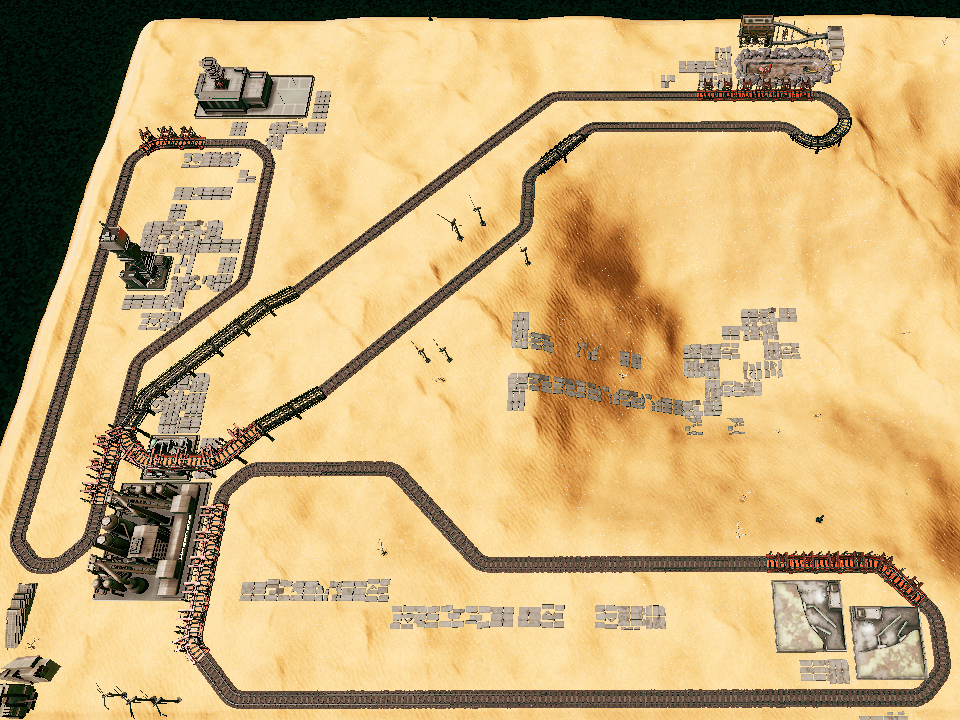
Region #S1: Validation Skip
(This rewards 5 vouchers itself but does not give vouchers for the levels skipped. You won’t need 100% of vouchers.)2023-11-02: I decided to replay this level since I know only one station tile needs to be within range of a building. This time I built 10 water pumps, 5 oil wells, 6 coal mines, and 4 iron mines. Space 4 tiles between ramp tiles for water since there’s less space, but 5 tiles between ramps for coal and iron. I realized that double length trains using boilers-only are prone to slowdown on uphill climbs since they will touch two ramps instead of one, so all my trains are Boiler+5wagon.
To clear the level quickly, do not pull a loan, and start with stations only on water and oil since they are closer. Use the “Clone Train” hotkey and build 5 trains on each water loop and 5 trains on oil. Deposit cash until you have ¥3k available then take your cash back to build stations and 7 trains on coal. Repeat the deposit and build process for the other pairs of iron mines but 6 trains on the shorter iron loop.
(You don’t have to do the deposit thing; that’s just what I did.)
Region #1: First Job
Region #2: Oil Overflow
The timer doesn’t start until you place a train, and you’re given plenty of cash to throw down a bunch of 6-tile stations and trains consisting of boiler + custom + 6 wagons (two trains per oil loop). You unlock Custom Engine immediately at the voucher shop.
An oil or coal powerplant is served by four oil wells or coal mines, respectively, at the same level. Alternating branch isn’t unlocked until Region #6, so I built two separate loops for delivery.
When it’s time to add a water pump, upgrade the oil wells as well by pulling a loan from the bank, and add a third train to the catalyzed oil wells.
Region #2 Bonus: Oil Overflow Omega
This time you start with less cash. Begin with 4-tile stations and four boiler+4wagon trains. Wait a minute then withdraw $1k and place 2-tile stations to deliver energy to zeppelin. Bring your left powerplant to 100% uptime with a third train.
Next, do what you want. Catalyze with water and/or add oil wells, and eventually upgrade the lone oil wells to increase storage and trains to boiler+custom+6 wagons and stations to 6-tiles.
If you choose to keep ghosting enabled, then you may possibly use multiple trains on a single shuttle track, but this offends the train bros.
Region #3: Mix Oil and Water
Region #S2: Giant Choice
(This rewards 5 vouchers itself but does not give vouchers for the levels skipped. You won’t need 100% of vouchers.)You are tasked with growing the city to level 2 and have some options to fulfill this like making wire and concrete. I chose to build catalyzed water pumps and oil powerplant. Yep, water and energy…
Boiler+Custom+6wagon trains work great.


Region #3 Bonus: Power Supply and Demand
Most players get C rank on first try, myself included. What we’ll do this time is to build a pair of optimized oil powerplant bad boys. Again, water and energy catalyze each other.
The key here is that you can still sell products when the city’s storage is full, but you’ll be paid half for each item over the cap. We are not worried about matching energy supply with water. Geothermal is quite convenient but is terrible here because you don’t get paid for precursor inputs like you do with oil powerplant, and most of our profit from energy is halved. A good chunk of our profit comes from delivering oil.
Region #4: Stretched Thin
TL;DR: Take the chill pill and ignore the powerplant. It’s practically a “tutorial” level and you will S rank just by exporting appliances and some steel/oil for income.
We start with few workers and have multiple factories that need more altogether. Luckily for us, an appliance plant only needs 1/4 steel mill and 1 wire coiler.
This time I will experiment with really stretching our starting budget and manpower by adding an oil powerplant, which is unnecessary; you may choose to simply sell catalyzed oil for cash. 1 worker on steel mill, 1 on coiler, and 2 on appliance plant will produce appliance at 70%. 2 workers on oil powerplant at 70% (actually 50% on our starting catalyzed oil well).
Most of my stations start at 2 tiles long aside from 1-tile for oil chain. This is starting to look like a bad idea (I don’t like the high starting interest). Withdraw $2k and within the next few minutes buy boiler+4wagon for everything except the oil chain. I had two 5wagon on water; mind the uphill incline spacing so boilers aren’t too slow.
Initially we will sell energy to the zeppelin. Eventually staff appliance plant to 100%, sell excess steel, and if you can, catalyze the appliance plant in an attempt to finish the simple mission a minute earlier. (Sir I thought you said this isn’t a speedrun guide.)
*I wrote most above before 1 minute into the timer. Post-game: Being as clumsy as I am, by the time I catalyzed the appliance plant with geothermal, I was already delivering the last batch of appliances. However, I suppose the energy was a good source of income and money started flowing in nicely after second oil well. The only Custom engines I had were on wire and appliance trains.

Region #4 Bonus A: Metalsome Production
The base production rate of a steel mill is 60/8*2 = 15 steel per minute. This steel mill is level 3 for 250% speed to produce 37.5 steel per minute. This means it does not need to be catalyzed to meet the level’s target of 36 steel per minute.
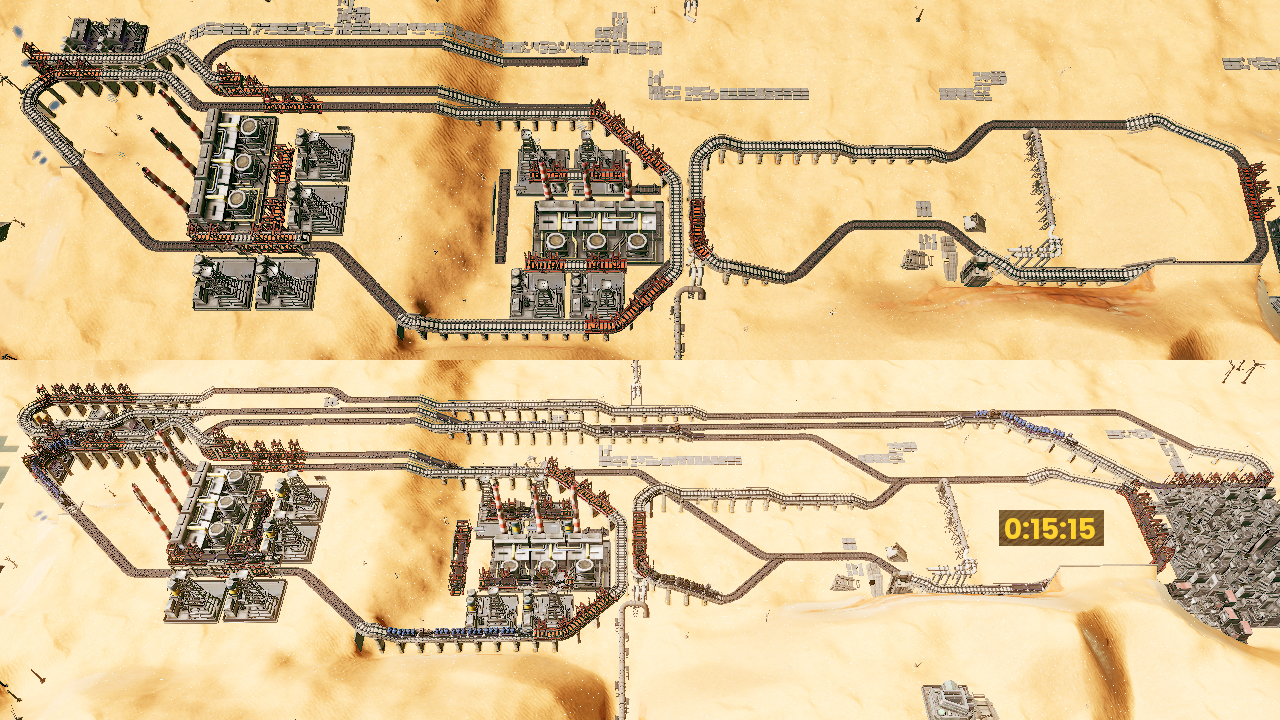
The coal powerplant is a red herring. Devote all your efforts to supply the steel mill and export steel. We will need the equivalent of 5 level 0 iron mines and 10 level 0 coal mines. We have an amazing budget to go almost all in from the start. Upgrade all mines to level 1 first. Before starting, we have cash to buy 7 long trains consisting of 2 Boilers, 2 Customs, and 12 wagons each. Then when you have the money, add trains and upgrade the mines to level 2.
Wow, didn’t even need level 2 mines! Short term anyway since mine storages start full, meaning the steel mill is well supplied from the start.
 *This note is false since we found out a building touching any one tile of a station has access to the load/unload throughput of the entire station. The above stations are effectively the same.
Region #4 Bonus B: Round About and Out
Similar to Region #3 Bonus, this is a map many of us struggle with at first. Originally I tried starting with 2 oil wells + oil refinery (unlocked later) + water catalysis, but this wasn’t enough for a get rich quick scheme.
The key is that even though you must pay to import steel, you get paid to deliver steel to appliance plants and then profit on appliance export, so do focus on producing appliances. Trains are Boiler+5wagon. Start with $1k loan and 3 trains for steel. Eventually upgrade trains by adding Custom+wagon and extend stations to 6 tiles (start at 3).
My timing was kinda bad so I beat the timer by only a minute, and I didn’t fully separate my steel and appliance loops. Withdraw cash to expand wire coilers. Separate your loops mid-game and remember to have enough cash to import steel so your trains aren’t running empty for entire trips, and you will finish faster than me.
Region #5: Fork in the Water

Region #6: Rooting out the Route
This level introduces the Alternating Branch Logic. Click on a train and click on a branch a few times to tell the train to alternate. Press “Cycle branch for all trains” hotkey on branch to apply to all trains that use that track.
You can’t build tracks on this level, so just play the game.
Region #6 Bonus: Glassed Over
We are given a steel mill and mines for 2 steel / 16s so I built an oil powerplant to match, 2 energy / 16s. After that, just cram as much glass as you can into the city since you have enough income.
Start with ¥2k withdrawal, mostly 3-tile stations, and Boiler+5wagon. Upgrade to 6-tile stations and +Custom+wagon, you know the drill. Double up on glass lanes to finish faster.

Region #7: Salt City
This level unlocks 6-high bridges.
The amount of salt you need to increase the population from 55 to 128 is approximately twice the concrete you need to export, so set up two salt refineries and one concrete yard. The last few minutes were lazy AFK.
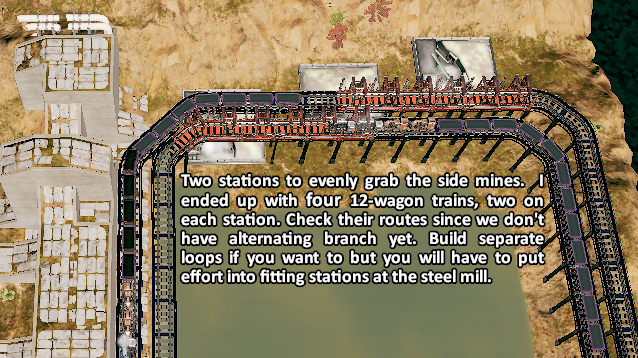
Region #8: Gorge of Greed
Supply the first city with three catalyzed salt refineries and a coal powerplant. You should pre-plan to reroute salt to second city. Thankfully you only need to grow this city to level 1. Afterward the second city asks to be grown to level 2; at this point you can set up the second coal plant and focus all deliveries to this city. Build a geothermal to ensure the salt refineries stay catalyzed. Build a little salt refinery next to second city to help out slightly.
I did not upgrade any building on this level. Clearing this level unlocks coal powerplant upgrade. Before then, you must use multiple 4wagon trains to deliver energy due to level 0 storage capacity.
Region #9: Uphill Both Ways
Region #9 Bonus A: Ancient Erosion
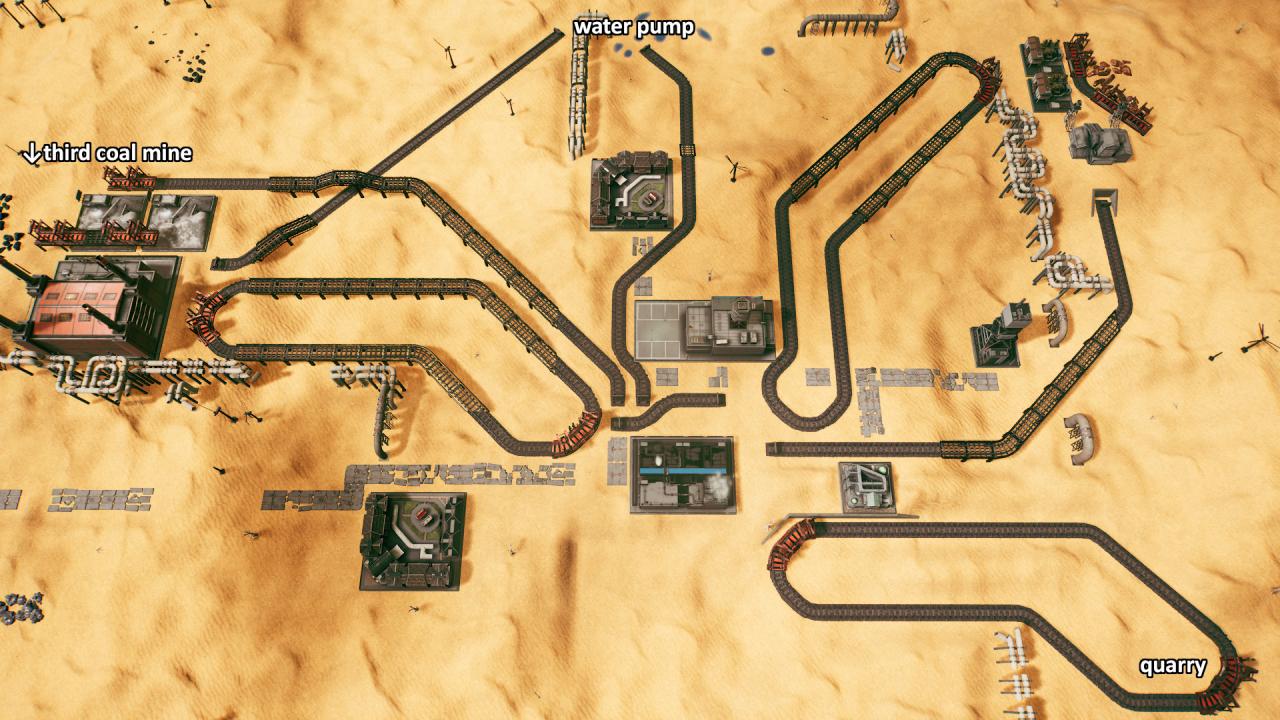
The goal is to export 28 crude oil per minute. Eight oil wells supports 30 per minute, allowing for a little bit of overhead.
- Withdraw ¥2k and fit 2×4 oil wells with tracks over it then remove the oil wells.
- We are given level 2 mines to supply a level 0 steel mill at 100%. We only have 6 workers, so two minutes in withdraw another ¥2k and upgrade the steel mill. I did not bother to add mines or to supply the city. (Funnily enough, level 0 steel storage can’t even hold a 12wagon delivery.)
- Start with a 2Boiler+Custom+12wagon on iron and coal each and Boiler+5wagon on steel. Eventually 2 trains on iron and coal each and 3 trains on steel. Later on you will notice a lot of empty wagons but realize two long trains with a Custom is cheaper than (though less top speed) three short trains with a Custom.
- Build the first cluster of oil wells. Buy a 2Boiler+Custom+12wagon and two more when there’s 12 oil to load. Withdraw/deposit cash at your discretion while you do this.
- Build the second cluster of oil wells, but instead of three more trains you only need two more. Don’t forget to set alternating branch for all trains. Upgrade the oil trains by adding a Custom, which will increase top speed.

Region #9 Bonus B: The Spire
The first map where you really should use Industrial engines. Here’s the strategy:
- Start with level 1 steel mill and 2Boiler+10wagon trains on coal and iron. Eventually have 6 coal mines and 3 iron mines, and two Industrial+Custom+10wagon trains delivering steel to the city.
- When city reaches level 1, sell a steel train and pause the other one. Export all steel to the dock while you set up a coal powerplant.
- Upgrade the coal powerplant and have 6 coal mines for it. Deliver energy to city with Industrial+8wagon. Unpause the steel-to-city train and reduce zeppelin export.
- Build two wire coilers and set up the appliance plant. Add geothermal to catalyze appliance plant. Deliver appliances to city with a pair of Industrial+4wagon trains (level 0 plant stores only 4 appliances).
 Not pictured: another pair of coal mines.

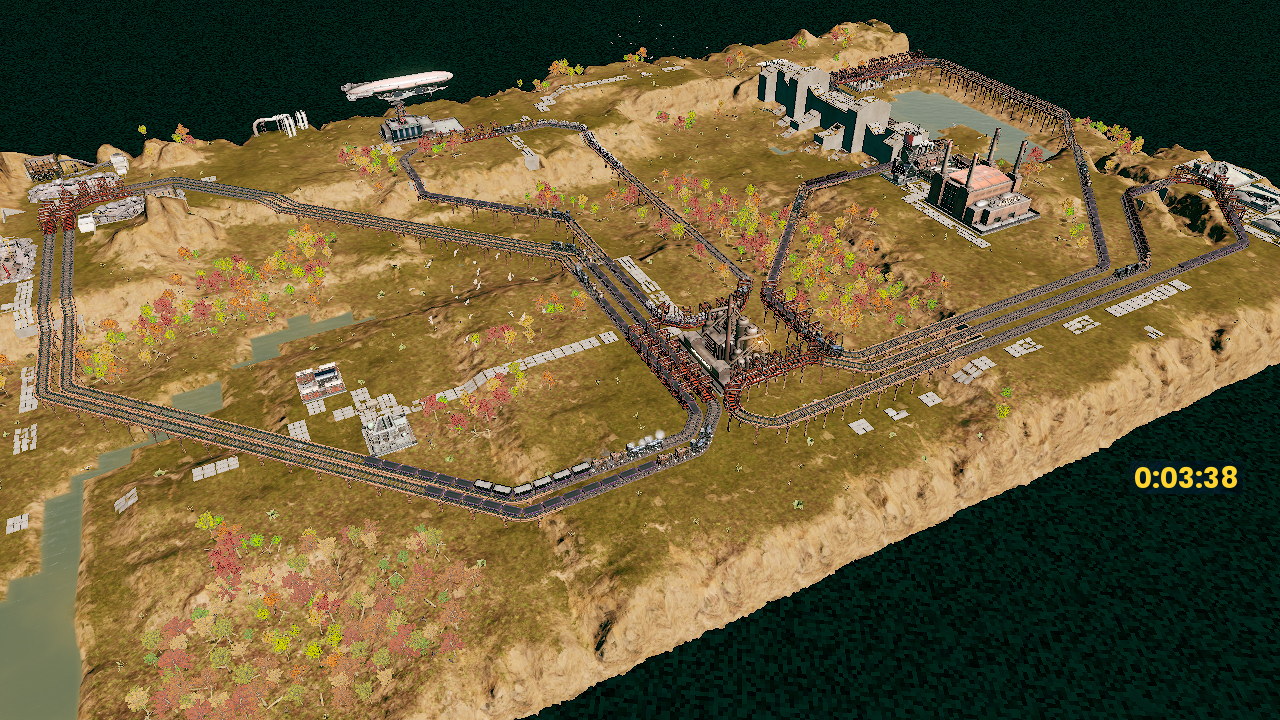
Region #10: Historic Restoration
My dGPU is now connected so my graphics are no longer poo. From now on I will put extra effort toward maintaining simple steps. I will not mention train composition unless it’s something other than Boiler/Custom engines.
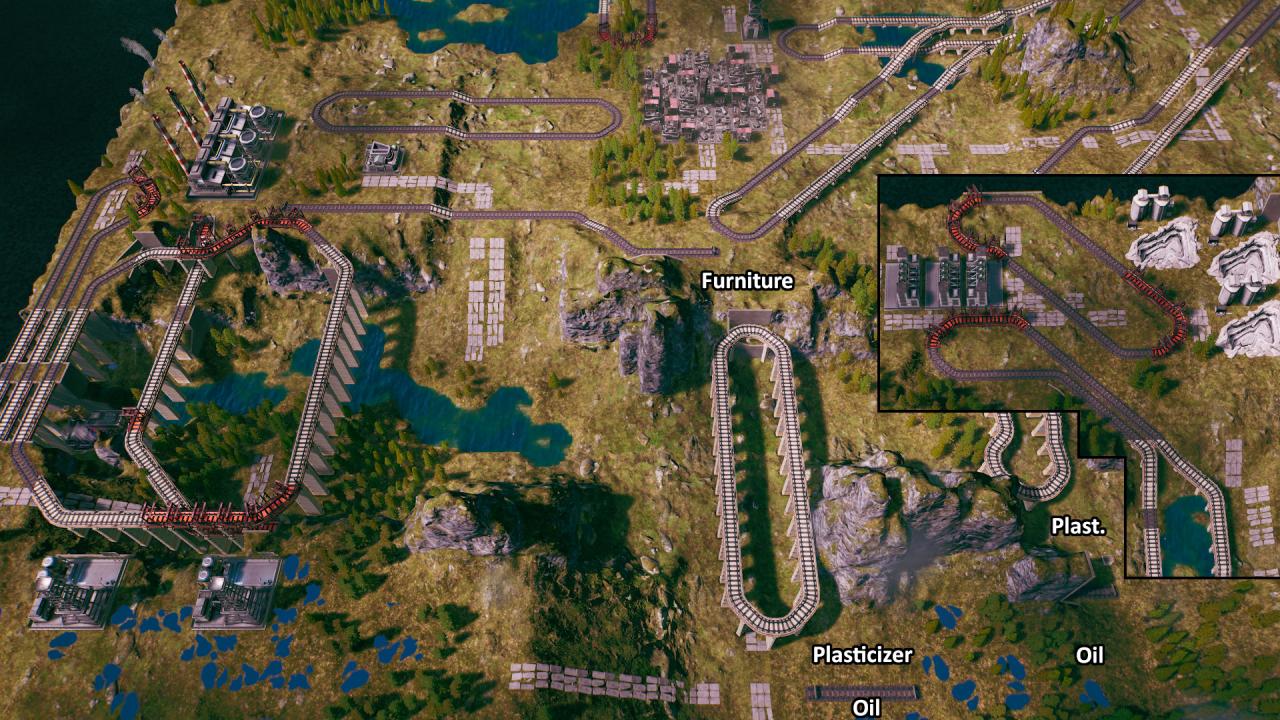
- Phase 1: Set up 4 salt / 16s. Don’t copy the screenshot exactly; plan to fit more quarries later on (see Phase 4).
- Phase 2: Set up 2 energy / 16s using water to catalyze two oil wells. Upgrade oil wells/powerplant (I don’t remember if I did this before or after making plastic).
- Phase 3: Catalyze another pair of oil wells to feed two plasticizers, which will feed two furniture assemblers. A pair of assemblers only makes 1 furniture / 16s so catalyze the assemblers with energy and build/upgrade oil wells / plasticizers.
- Phase 4: Panic. Notice how the demand for lower level demands grows exponentially as population increases. You want a lot more salt. Make more salt!
 Knowing that buildings only need 1 tile of station in range to use the whole station helps as you can slap down routes faster with less care for neatness.
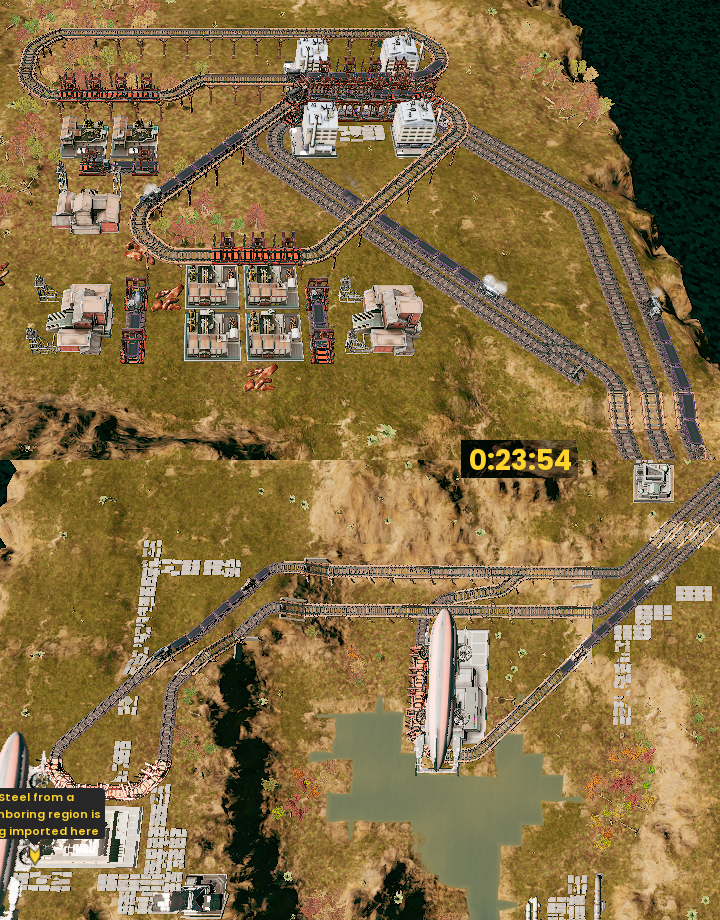
Region #11: Shifting Sands
You cannot build elevated tracks on this level, but you can still connect everything without any intersections. Sadly there is only two coal mines, supporting 2 steel / 16s, but this is perfect for running two level 0 appliance plants.
With all the tracks in place and ¥1k loan, you will be budget constrained from the start. Any more stations or loan then you will drown in debt. Ignore geothermal and second iron mine.
 *Exclude the steel export and second iron mine tracks. There is simply not enough time to significantly increase appliance production before you finish the mission.
Region #12 Branch A1: A Lighter Form of Oil
Clearing this level unlocks the following licenses: neon refinery and its upgrade, and oil refinery upgrade.
We are given a level 3 neon refinery which I will catalyze and supply at 300% out of 350% with 3 catalyzed oil refineries. These refineries will need the equivalent of 12 level 0 oil wells. Catalyze the three oil wells we’re given (“8”) and 2 more oil wells (“4”) to meet these “12”. Deliver oil from the three starting wells to the pair of refineries, and deliver oil from the newly built pair of wells to the third refinery. This is a total of 9 buildings we’re catalyzing. Reduce water supply to the city when it reaches level 1.
Amusingly we will only need to grow the city to 128 population for 16 workers to work the four factories. Ignore the powerplant and fourth refinery unless you’re unlazy enough to max out the neon refinery at 350%. I ended up AFK’ing the last 5 minutes after ensuring 100% uptime for oil refineries.
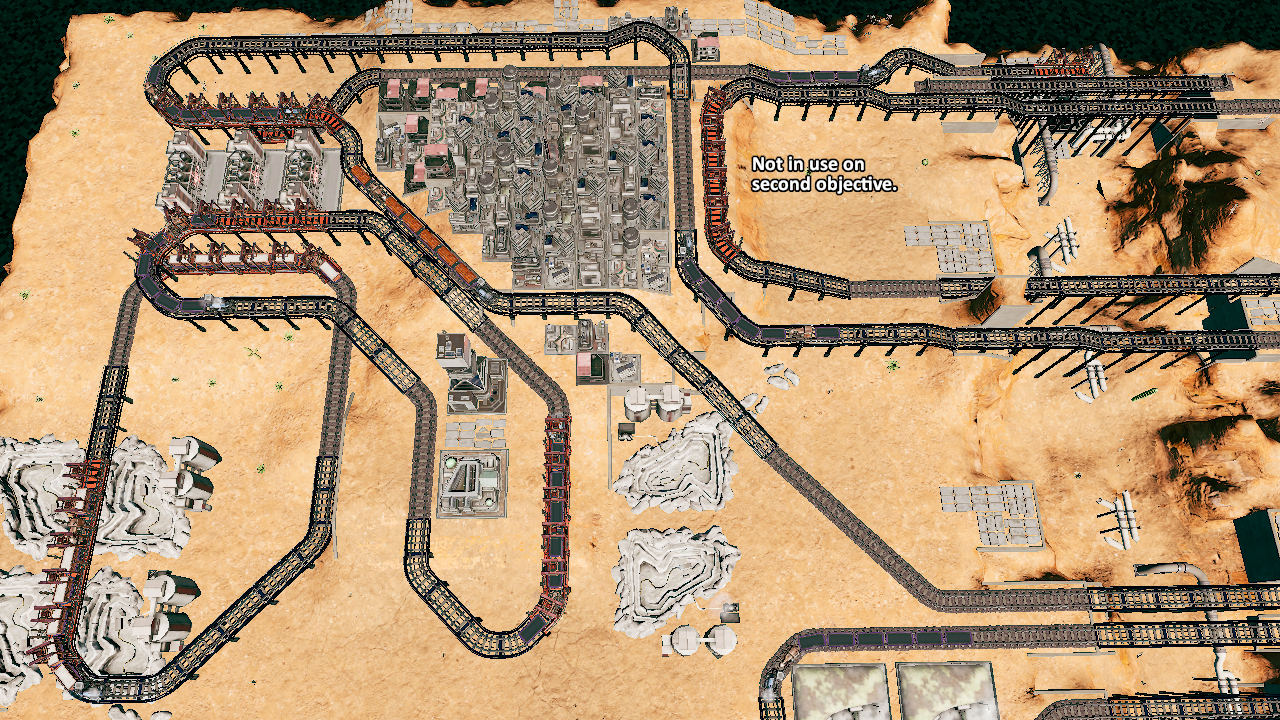
 *Upon further observation, a single station loop with Boiler+Custom+6wagon trains can support at least 6 item / 16s. The double station from oil refinery to neon refinery is unnecessary here.
Region #12 Branch A2: Good Buys Forever
Clearing this level unlocks the following licenses: appliance plant and hard mold and their upgrades, and electronics fab.
Let’s calm down and investigate what we need. One electronics fab and two appliance plants (we can’t build more of these) are supplied by 1/2 steel mill, 1/2 silica quarry, 1 energy / 16s, and 4 wire coilers. The fab produces 1 waste / 16s as byproduct and we can’t build an incinerator yet. We can get rid of all waste by using it to catalzye 5.625 mines (6 rounded up, <100% uptime). We will run a total of 29 workers (232 population).
- Phase 1: Grow the city to level 1 with wire. Have 1 worker on fab to start making waste to catalyze the copper mines; this way we can supply 5 wire coilers.
- Phase 2: While you grow the city to level 2, set up steel mill with 1 iron mine and 2 coal mines. Catalyze these mines and the two copper mines. Only catalyze silica quarry when excess waste has nowhere to go (but we will win before then). Pull a loan if necessary to build geothermal to supply energy to the city since it’s taking too long. 3 workers on steel mill can fully supply two appliance plants.
- Phase 3: With a full workforce (32+ workers), reroute geothermal to catalyze the appliance plants and send all steel there instead of exporting excess. Build the 6th wire coiler and quit supplying wire to the city since the appliance plants will need 4 coilers now. Never mind.
I finished the mission at exactly 232 population, so I didn’t get to produce appliances at 100% uptime. Would need another coal powerplant or geothermal to rush city level 2.


Region #12 Branch B: Downletting Upholsteries
Clearing this level after Branch A2 did not unlock any licenses. The dev stated you will eventually unlock everything regardless of which branches you take or skip. Looking at the overworld map there appears to be more branches late-game.
My plan is to produce furniture efficiently as I can with enough simplicity so we aren’t spaghettiing things mid-game. You don’t need to tryhard rush, just know that your job is to get the 6 buildings running fully.
Basic ratio: 2 coal mines to hardmold to 2 furniture assembler. With the hardmolds and assemblers catalyzed, this is 8 coal mines to 2 hardmolds to 4 assemblers. I will run a total of 18 workers (144 population) including 2 on coal powerplant (70%), which is enough to catalzye the 6 buildings.
- Phase 0: We have enough to cash to build everything starting with 3-tile stations; extend to 6-tile later. Assign 1 worker each on 2 hardmolds (ignore the other 2 nearby) and 2 furniture assemblers, and 2 workers on coal powerplant.
- Phase 1A: Use a mixed cargo shuttle between water pumps and powerplant (only 1 water wagon needed) to catalyze each other. Grow the city to level 1.
- Phase 1B: At city level 1 immediately send all energy to the city. We just need 2 more workers.
- Phase 2: Send energy to the hardmolds/assemblers for catalysis. Furniture prodution should now be fully staffed and catalzyed.
- Phase 3: Hm… I finished setting up 9 minutes in. AFK the rest or build/upgrade random stuff since you’re making so much money. You can upgrade the hardmolds if you did Region #12 Branch A2 first, or otherwise run the other hardmolds, your choice.


Region #12 Bonus: Back to Basics
Just basic stuff, man. 5 catalyzed water pumps + 5 water pumps = 15 water pumps at 100%. Because of fluctuation, the 64 water export per minute objective is fulfilled earlier and before my second pair of coal mines produced coal. The description says 16 pumps but long term wise you’d actually need about 17 pumps worth since 60/16*17=63.75.
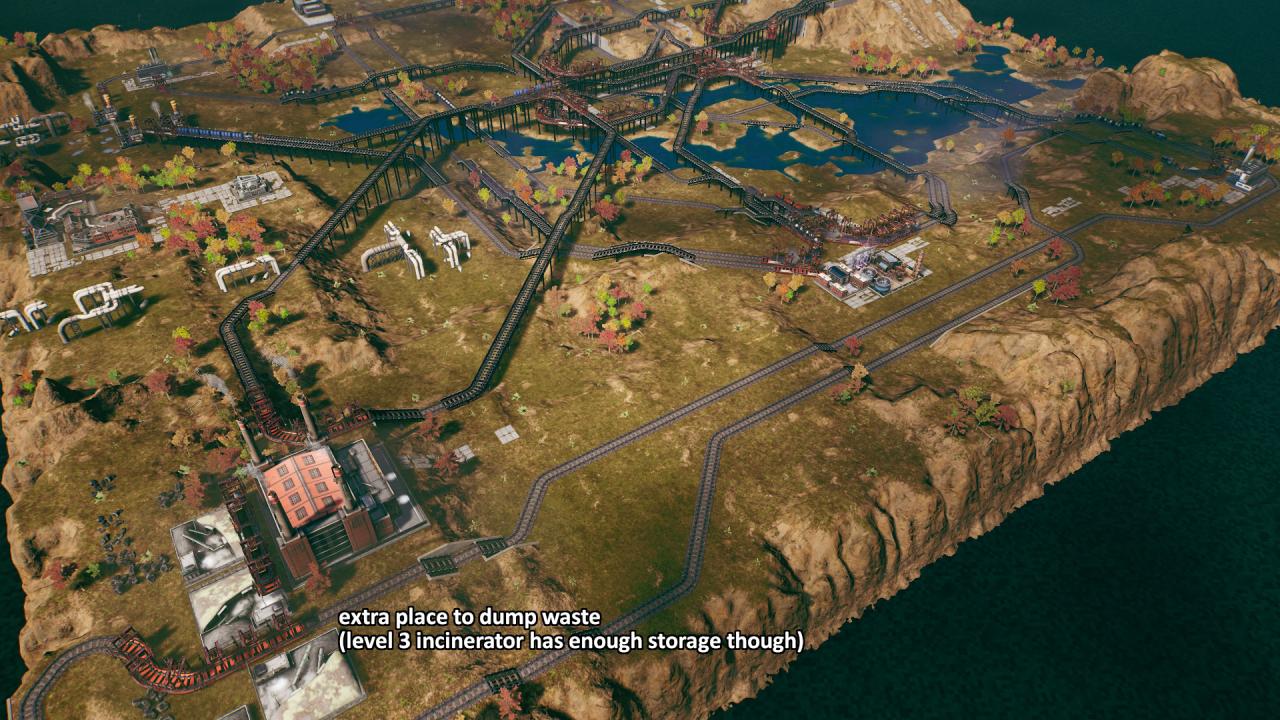
Region #13: Waste Not; Want More
Clearing this level unlocks the following licenses: incinerator and coal gassifier and their upgrades.
We are given three coal gassifiers of varying levels that we can’t upgrade or build more of, but this is okay. Uncatalyzed, together these consume 4.5 coal & energy and produce 4.5 reactive & waste per 16s, and our incinerators (unupgradeable) can handle 3.5 wastes per 16s. The level 3 neon refinery consumes 5 reactive and produces 2.5 neon gas per 16s, at which which rate would take 22.4 minutes to reach 168 neon gas if we do not increase production further. This seems “good enough” as S rank timer is 35 minutes.
4.5 energy + 4.5 coal needs 13.5 coal mines at 100%; we will catalyze 6 mines on top of the hill (the coal mines on the map are level 2). Coal powerplant will be upgraded once and catalyzed.
 You know what, that was a huge mess. Startup took longer than desired and for awhile my leftmost coal gassifier was out of reach from energy delivery station. I had to hurry up by catalyzing the pair of gassifiers and neon refinery and use the other pair of level 2 coal mines to produce energy for the pair of gassifiers. I beat the timer by only 23 seconds.
 If you retry this level with unlocked licenses, you can build coal gassifiers near this powerplant.
Region #13 Bonus A: Aggressive Zoning
- Supply city to level 1 with wire. Start energy production at 88 population. As soon as you can, catalyze the coal mines to increase energy production. Upgrade both coal mines.
- Supply city to level 2. Selling off the full storage of appliance that was waiting to be sold will net you ton of income. MAX out your loan and upgrade all copper mines and wire coilers.
- Reach 352 population.
 Shuttle spaghetti. Also, should’ve built another wire coiler near that copper mine.
Region #13 Bonus B: For the Greater Good
Electronics fab is one of the nicest factories in the game. It produces waste to catalyze the mines supplying it and itself can be catalyzed with water to produce 6 appliances / 16s at level 0. To supply a catalyzed fab at low cost, you need (catalyze everything except water pump) 1 silica quarry, 1 copper mine, 2 wire coilers, 3 coal mines, 1 coal powerplant, and 1 water pump for total of ¥16,384 including the fab and an incinerator (build later).
- Phase 1: Set up a self-catalyzed electronics fab. Catalyze 5 mines with waste (incinerate when full). One silica train can carry a waste wagon instead of making a shuttle. Water catalyzes powerplant and the extra energy will catalyze the wire coilers and do whatever later.
- Phase 2: You can choose to use your income to build another electronics fab or an appliance plant or two.
Started with a coal mine and water pump missing due to budget constraint.

Honestly with the cash you have, you can throw down three appliance plants and waste less time than I did. “Winning by fluctuation” isn’t always immediate.* As you can see in my screenshot I was scrambling to connect more wire coilers but cleared the objective before then. The “only x/min more” message bounces around afterward until you really have a stable minimum export rate.
*You can cheese this level (and similar levels) by upgrading electronics fab, filling up its storage, then exporting as much as you can within a minute.
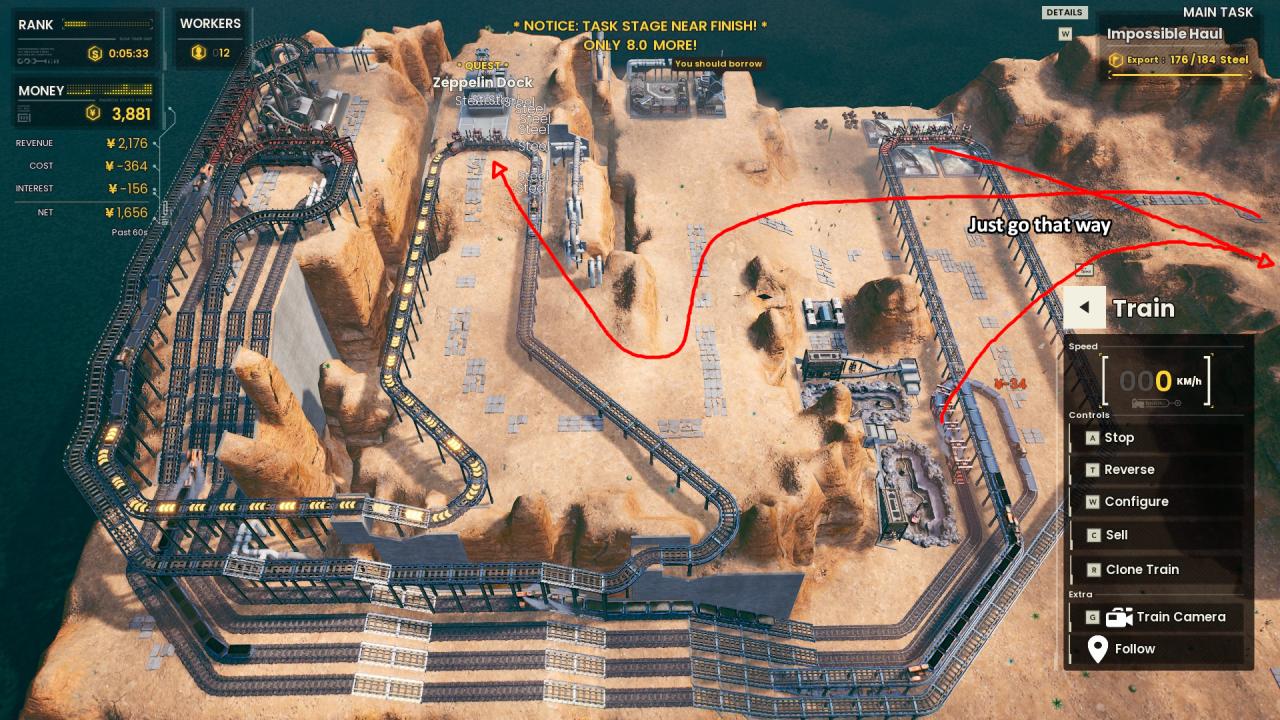
Region #14: Runaway Train
Or look up a guide anyway… Only six branch toggles are required.

![]() The minimum clear time is 3m 54s unless you can skip the intro.
The minimum clear time is 3m 54s unless you can skip the intro.
Region #15: SpacePark
A production of 4 steel / 16s (1 steel mill) and 2 widgets / 16s (4 tool dies) would take ~17 minutes to reach the 256 steel and 128 widgets needed for the rollercoaster park. It would take twice as long to reach 512 concrete at 4 concrete / 16s; the cost of setting up more concrete production is our bottleneck. The description suggests “starting by producing the simpler and higher volume production chains like concrete” first. However, since steel and widgets are worth more than concrete and we already have the factories, I choose to run these from the start.
- Phase 0: Set up half steel mill, 4 tool dies, an oil powerplant, and 2 catalyzed concrete yards, including catalyzed oil wells and water pumps.
- Phase 1: In the next several minutes, add 2 coal mines, 1 iron mine, and 2 silica quarries to bring our current factories to 100%.
- Phase 2: Add an oil well for powerplant to produce 2 energy / 16s. Add 2 concrete yards, 2 water pumps, and 4 silica quarries so we can produce 8 concrete / 16s.
- Phase 3: Catch up on concrete production by upgrading and quarries and concrete yards.

Should be faster if everything went right. Had a few hiccups like station only touching three tool dies and delaying construction of stations and fourth oil well.
Region #15 Bonus: Extra Tooling
- Phase 0: Withdraw ¥2k. Build 2 oil wells, 1 plasticizer, 2 tool dies, and 3 water pumps. Build an oil well for powerplant to start catalyzing the pumps.
- Phase 1: Supply water to the city. Build a water pump to catalyze the oil wells. Catalyze the tool dies with energy.
- Phase 2: After reaching city level 1, set up another set of tool dies and increase energy production to supply the city. You may quit catalyzing the water pumps to the city so the four tool dies + water pump to oil well can be catalyzed off 1 energy / 16s.
- Phase 3: AFK (“safe” if you have for sure have stable export of 4 widgets / 16s by 15 minutes in, 35m remaining on timer) or build another set of factories. The furniture assemblers have access to plastic so you can grab a few more workers by temporarily supplying city with furniture.

LOL this is slightly slower than my first run. I realized around 35 minutes in that one of my tool dies from the first set weren’t being catalyzed, and I didn’t make any furniture for the last few workers. Also my oil wells to the powerplant are poorly planned. I wanted to catalyze four wells but left it alone when I reached city level 2.
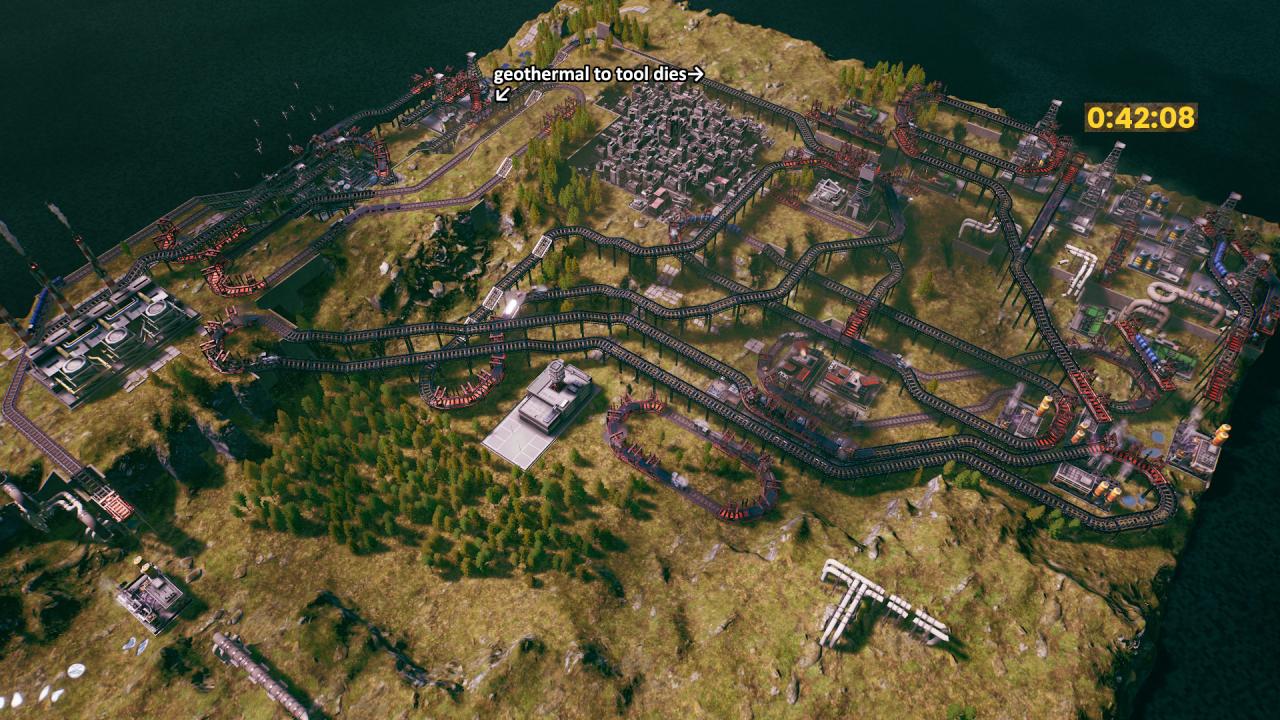
Region #16: CO2 WARNING
The mission is simple enough: Export all the energy.
Start with the central oil powerplant for close proximity and since oil wells and powerplants can be catalyzed with water while coal mines cannot. Then just produce as much energy as you can.


Region #16 Bonus A: CO2 WARNING REDUX
- Phase 1: Run a catalyzed coal powerplant in the corner adjacent to the export dock. Startup is much faster than immediately using the powerplant given to us. 2 water pumps are enough to grow the city to level 1.
- Phase 2: Set up two more powerplants nearest the dock. The one not adjacent to the dock (and the ones after this) should be upgraded for storage so you can use 6wagon trains for export.
- Phase 3: Set up the powerplant that we ignored. You will need two stations to reach all 8 coal mines. Temporarily supply energy to the city for 4 more workers (160 population); or don’t, and skip the city growth and final powerplant since you’re close to winning.
- Phase 4: Set up the final powerplant on the left side of the map. By now you have a ton of income rolling in to upgrade all powerplants and a bunch of coal mines at least once. Every 4 coal mine upgrades can run 1 powerplant upgrade.
There is not enough time to fiddle with coal gassifiers. You would use them if going for max production rate possible.
 Achievement get.


I’m still unsure of the exact throughput of a shuttle but I stacked the left powerplant export just in case since the buildings don’t reach both ends.

Region #16 Bonus B: No Distance Too Far
Initially waste is sent to the coal mines, then soon the left coal gassifier is connected with an incinerator until endgame when I start exporting coal.
Export signage and use the income to build many coal mines for the objective, which is to export 1,024 coal. The only upgrade needed besides coal mines (for export) is level 1 powerplant.


Region #17: Luxurious Vistas
Clearing this level unlocks luxury assembler and its upgrade, and RESCUE engine.
We’re starting to see big maps and more complex production chains than before. Two level 2 hullyards and luxury assemblers are way too much since the mission will finish shortly after city level 2. In fact, I’ll plan to use only 1 worker on each building running 140% hullyard and luxury assembler but supplying 100%.
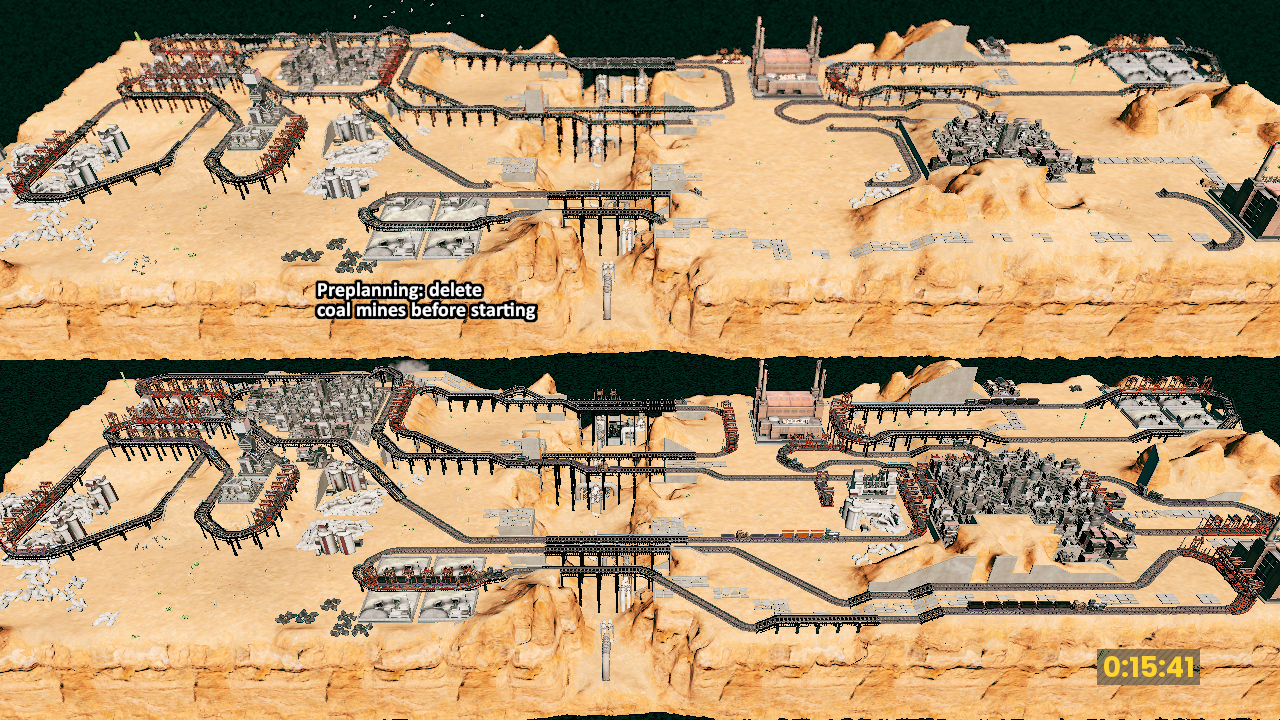
- Phase 0: Build 3 salt refineries and a catalzyed set of oil wells and level 1 powerplant. Before that, plan out the chains and delete the buildings while keeping the tracks so you may simply put the buildings back later on.
- Phase 1: Grow city to level 1 with salt while exporting energy.
- Phase 2: Grow city to level 2 with energy. Build everything needed for phase 3: 2 iron mines, 3 coal mines, steel mill (5 workers at 78% supplies 100% hullyard/luxury), 3 oil wells, 3 plasticizers (1 to hullyard, 2 to furniture), 2 catalyzed furniture assemblers, and 2 incinerators.
- Phase 3: Deliver 32 luxury rooms to city. I made a big mistake. Luxury room is a level 3 demand therefore you need to grow city to level 3 with furniture (level 2 demand). At around 380 population you need 4 salt : 2 energy : 1 furniture and it continues to go up so upscale your salt (or water/wire) production!
- Phase 4: Upon city level 3 (512 population), deliver 32 luxury rooms to city, slightly less if you were catalyzing city during phase 3.
That was slower than I’d like. Be sure to upscale level 0 demand, energy, and furniture production around the time you set up furniture. You’ll have 64 workers by city level 3.


Sorry, it’s taking me time to replay the levels and edit/write.
If you cooked up a strategy for a certain level, feel free to contribute.
Thanks to xBleacheDxSungasMx for his excellent guide; all credit belongs to his effort. If this guide helps you, please support and rate it via Steam Community. Enjoy the game.