
Quick guide to programming the Saitek X-52.
Saitek Software and Drivers
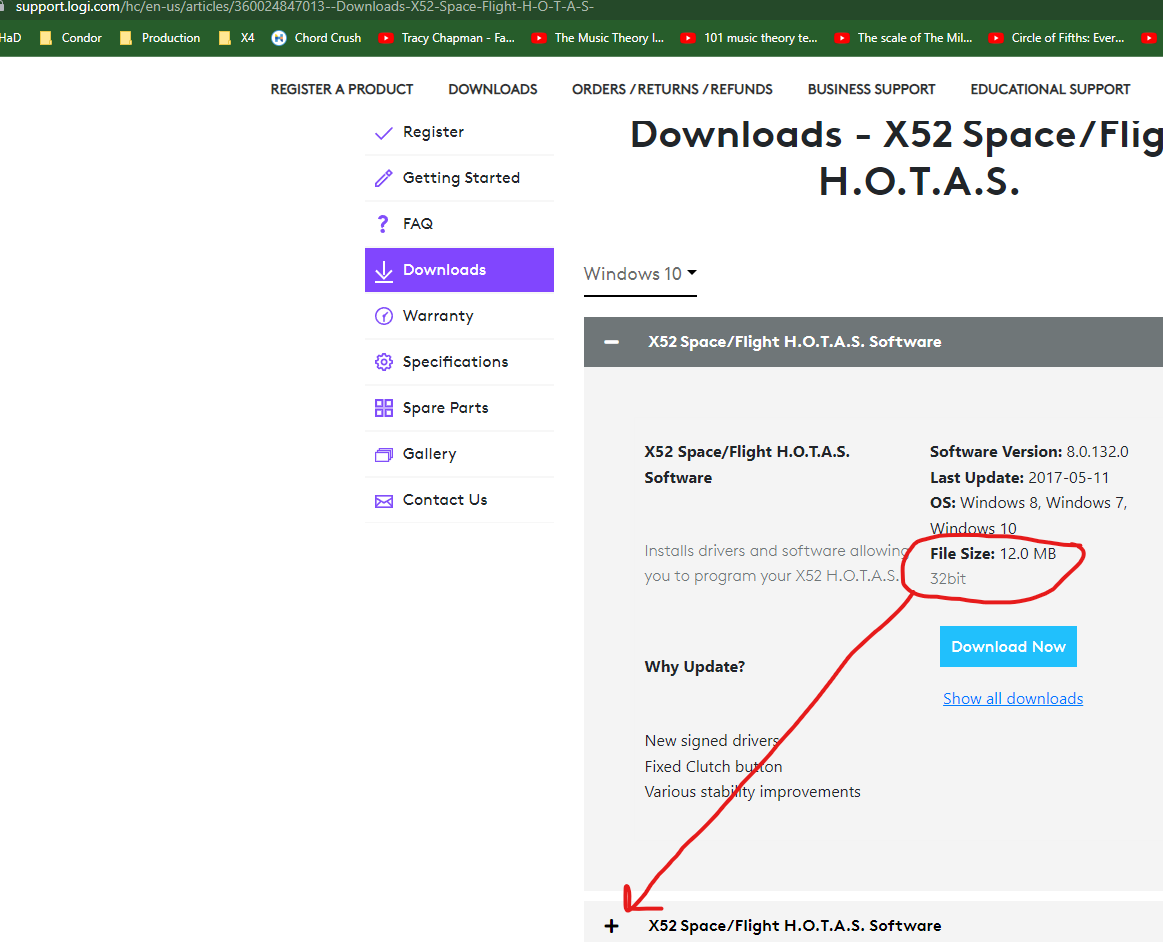
X-52 Software[support.logi.com]
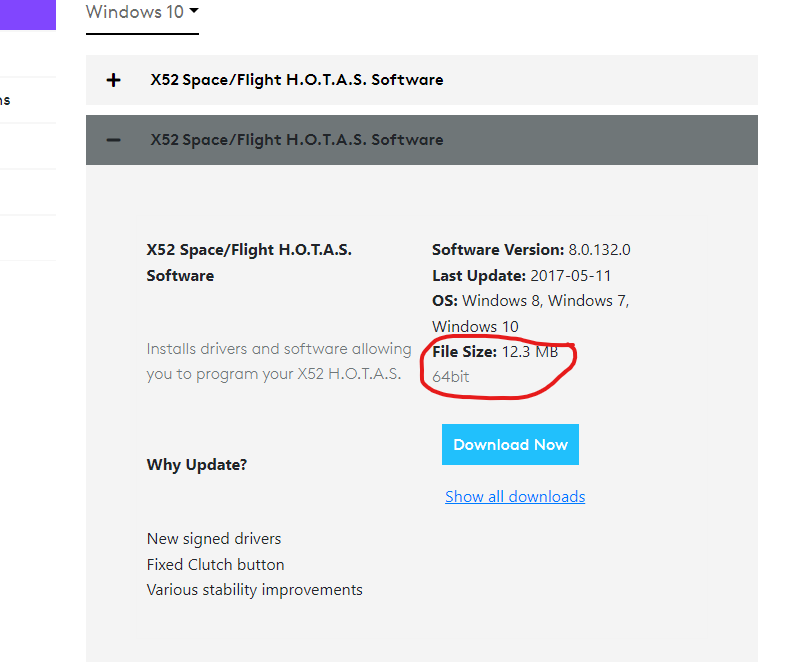
Please note the page defaults to showing the 32-bit software.
You probably want the 64-bit stuff below the default one…this should be the 64-bit software.
Once you have the right software page, click the Download Now button. Install the software and at some point it’ll ask you to plug in your hardware. Finish the setup and reboot if needed.
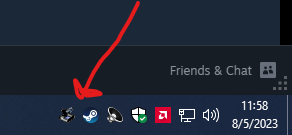
You should now have this handy little icon in your taskbar:
Right-Clicking this icon will allow a quick-profile to be loaded:
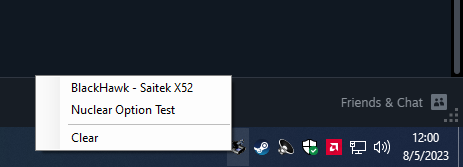
Profiles are stored at “C:\Users\Public\Documents\Logitech\X52\”
Of you left-click the same icon, you’ll launch the Logitech Profiler:

We will use this profiler later on. For now, let’s make sure Windows is seeing the hardware…
Windows USB Setup and Hardware Check
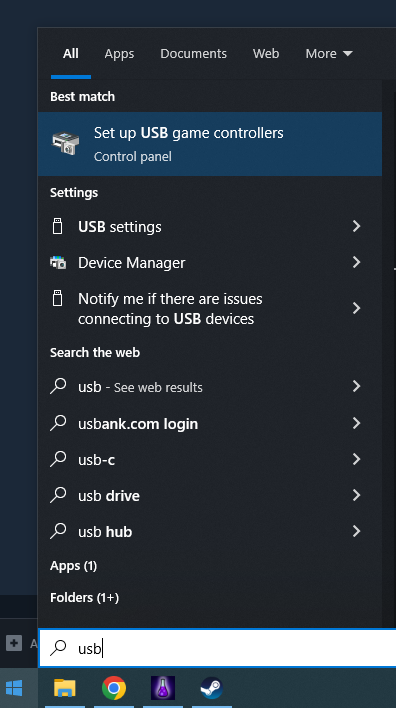
Clicking on “Set up USB…” will open the following setup screen:

Click on Advanced and make sure the X-52 is the preferred device.
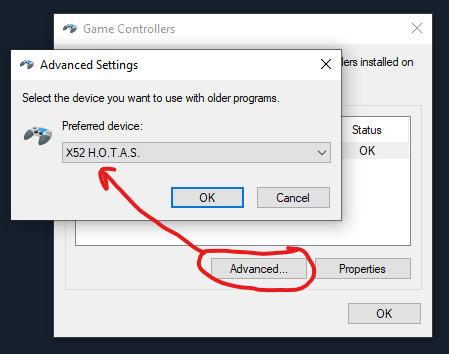
Go back to the main window and then select “Properties”. This will open you to the “Test” page. You can check things out here and make sure nothing looks off.

It’s best to tackle the tabs in reverse order. Click on the MFD page.

Set the brightness, the clocks, and make sure “Clutch Mode” is off.
On the LED page, set the brightness.
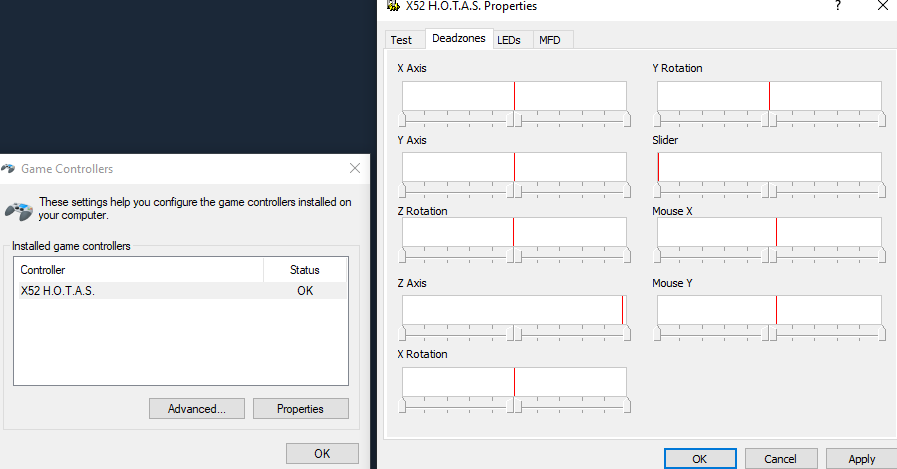
On the “Deadzones” page, check all your hardware.
Finally, head back to the “Test” page and make sure everything works as expected. The next steps will involve launching the game and configuring their setup page.
In-Game Setup
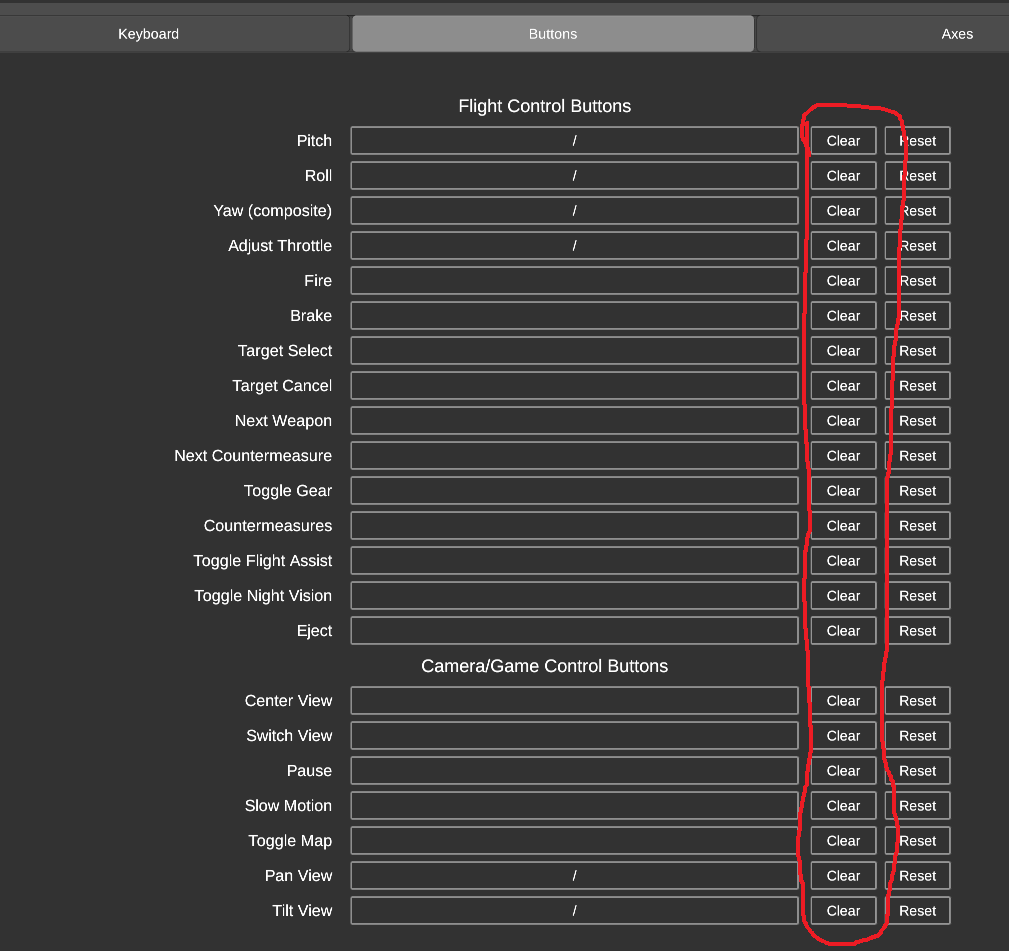
After you have done this, start “unbinding” things you don’t need.

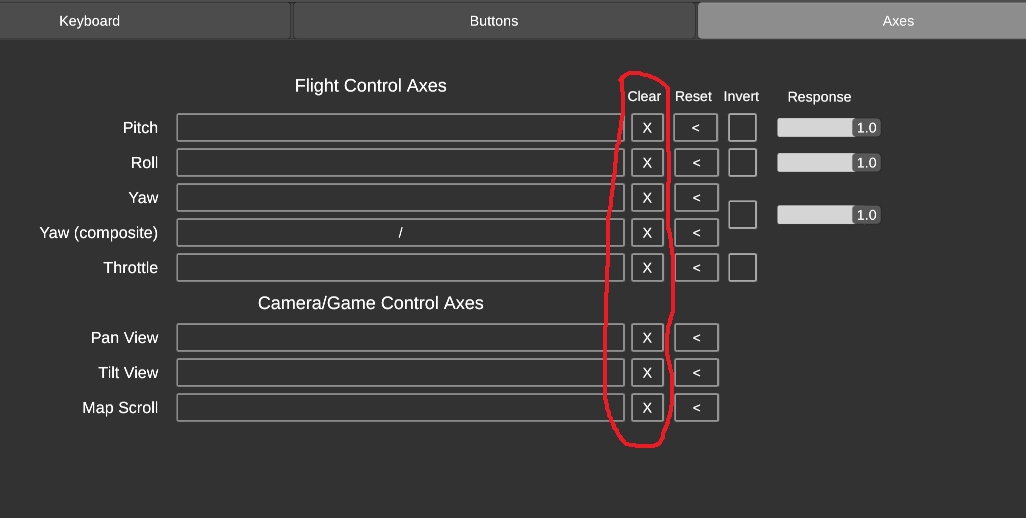
Now it’s time to bind your axes properly and set them to your liking.
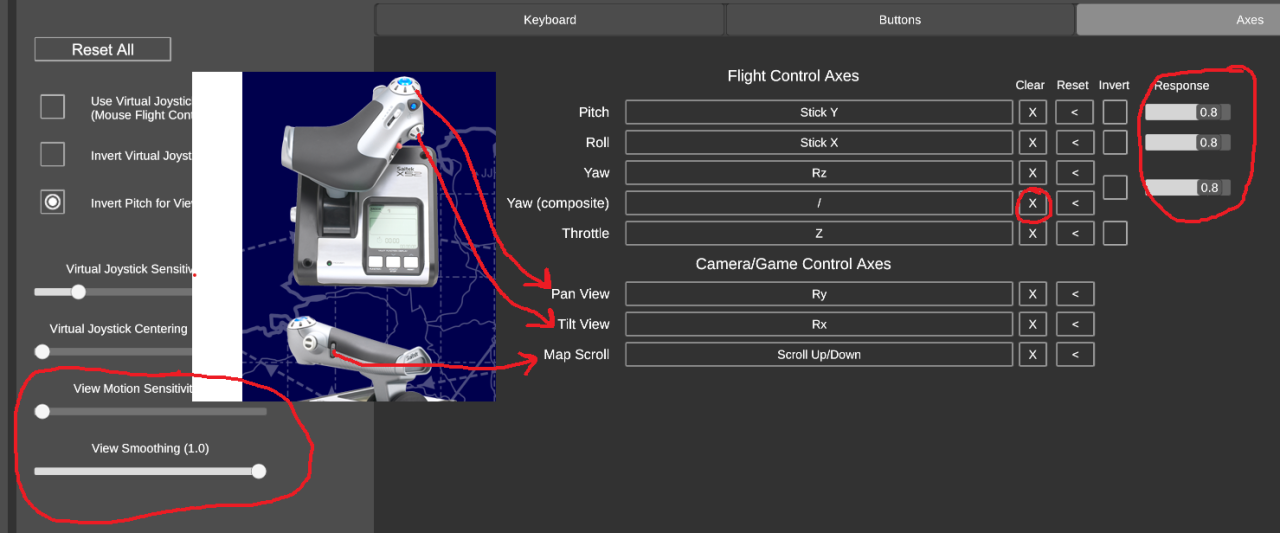
Use “Yaw” rather than “Yaw (Composite)”. Add in some “Response” to make the sticks a bit softer around center.
You can map the throttle rotaries to views here if you want. The pan wheel will work reversed if you can get used to that. I see no way to invert the rotary so you’ll just have to live with it for now.
The tilt rotary will work fine if you select “Invert Pitch for View Controls”.
While we are mapping the views here, we will actually control the view with the HAT via the Logitech Profile. Make sure to turn down “View Motion Sensitivity” and turn up “View Smoothing”.
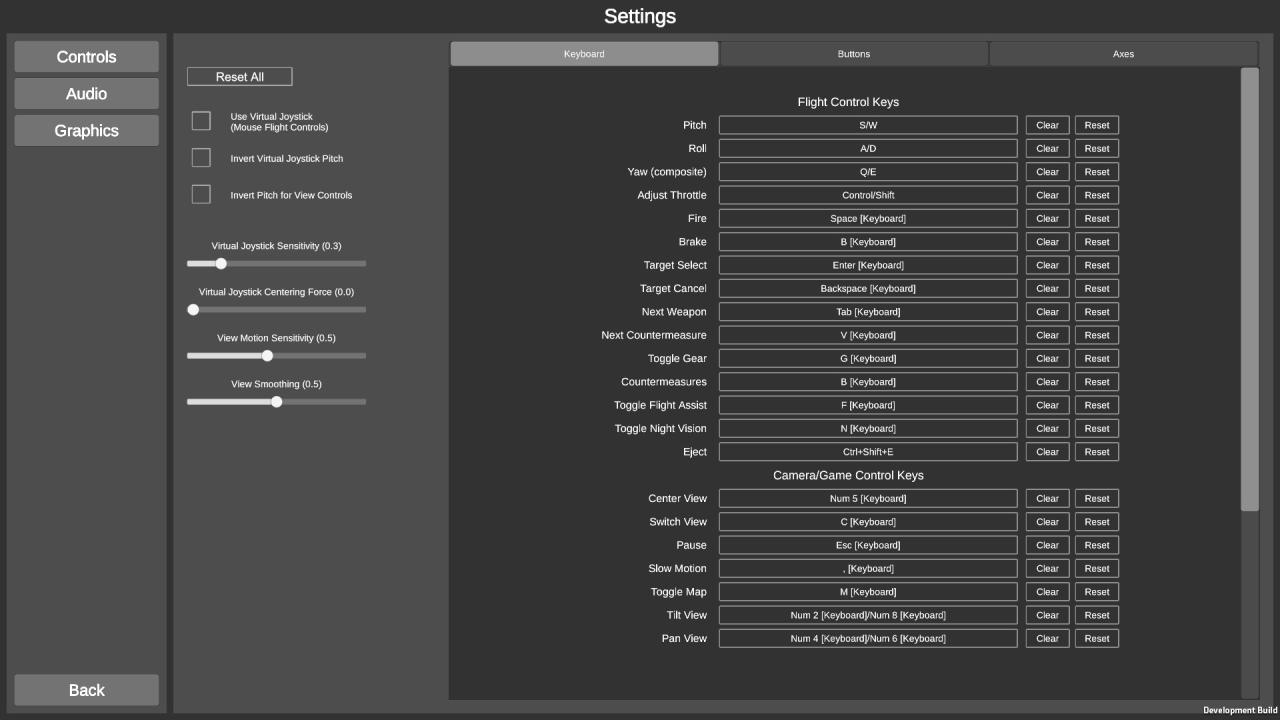
You should verify that “Buttons” tab is completely clear and make note of the “Keyboard” tab for the profile we will soon build. If you have followed up till now, it should be default with the flight axes controls cleared. Here’s how mine looks:
It’s time to take this keymap and set up the Logitech Profiler…
Building a Profile
Click on “Programming” and bring up the keymap. It may take a few tries to get used to how it works.
1. Hit desired key on HOTAS…it will jump to the key inside the profiler.
2. Click in the field just under the button.
3. Hit key on keyboard.
4. Click the little green checkmark on the upper-right side of the box. Don’t hit “enter” as this will add the “enter” keystroke to your string of commands.
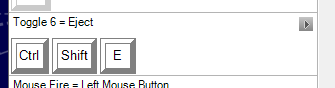
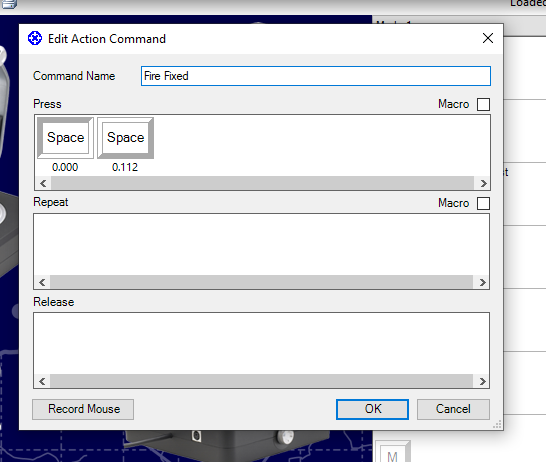
4a. Complex commands (like Eject) can be built as well…Try press and release of the CTRL key, then a press and release on Shift, and finally a press and release on “E”.
5. Name the command. Hit enter.
Map the controls in a way that makes sense to you. If you click on the upper-right area of the HAT field, you can change the HATs to buttons.
Map first trigger to brakes and second trigger to fire.

I find it most useful to put the views on the throttle HAT. This can reduce the right-hand workload during combat. If this game had trim options, I’d put trim on HAT1 and views on HAT3. Countermeasures are usually on HAT2. As it is, I’ll leave views on HAT1…remember down is up and up is down.

Set things up in a way that makes sense to you. Save, profile, and test often!

The “Test” option will save a lot of headaches.
You may find some buttons “repeat” function annoying. If so, switch to an “Advanced Command and set up a press-release for one time per press.
Just play around with it till it all comes together.
Thanks to xptical for his excellent guide; all credits belong to his effort. If this guide helps you, please support and rate it via Steam Community. Enjoy the game.