
Here is a guide on how to enhance your FPS in New World for both NVIDIA and AMD.
New World Settings
These settings will make your game look bad, however you will get more FPS and will be able to see things more clear. If you wish to make your game not look so bad, I recommend putting some settings on medium/high instead.I have highlighted the settings that are more significant than others, and you may pick and choose what you want to sacrifice for more FPS.
- Bandwidth Mode: High
Recommended high if you have fast internet, otherwise, put medium/low. - Enable Analytics Reporting: Off
- Window Mode: Fullscreen
- Resolution: Native resolution
Your monitor’s resolution. Choose a lower value for more FPS but your game will look blurry - Field of View (Vertical): 50
More FOV, less FPS however a lot of players are unable to play with low FOV - Video Quality: Custom
- Effects details: Low
- Lightning details: Medium
- Object details: Low
- Post processing details: Medium
- Shadows details: Low
- Terrain details: Low
- Texture details: Medium-High
Choose low if you have a low-end computer - Water details: Low
- Show FPS: On
- V-Sync: Off
- Max FPS: Uncapped
- Player Nameplate Amount: 2-5
Test this setting to see what you can handle - Cap FPS in Background: Off
- Dynamic Resolution Scaling: On
NVIDIA Settings
To go on 3NVIDIA Settings, right-click your desktop, and click NVIDIA Control Panel
Image Settings
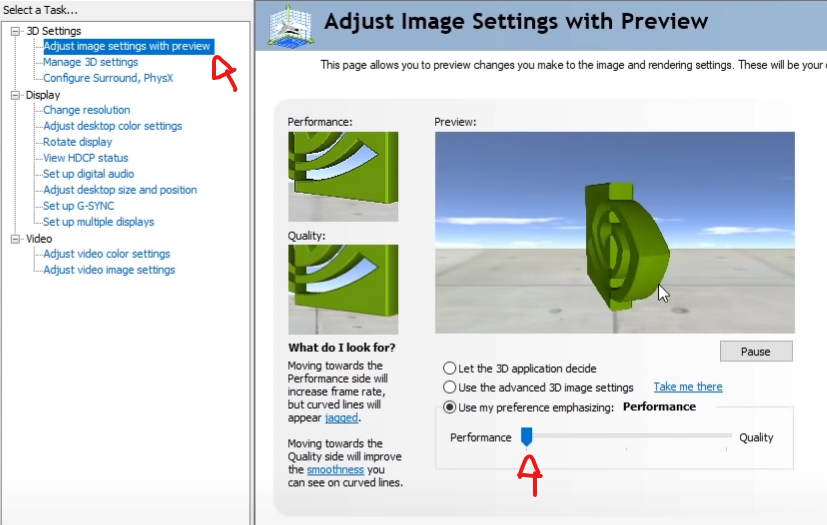
1- Select “Adjust image settings with preview” on the left
2- Select “Use my preference emphasizing:”
3- Drag the slider to “Performance”
4- Click Apply
 ⠀
⠀
3D Settings
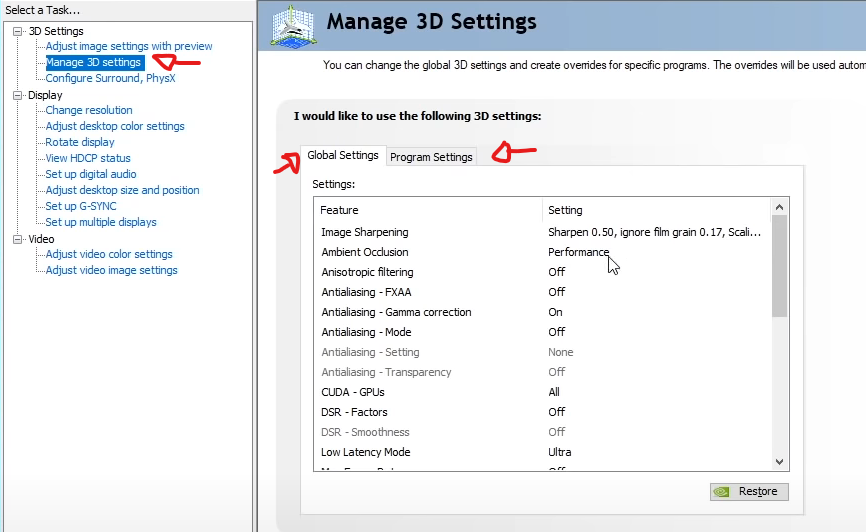
1- Select “Manage 3D settings” on the left
2- Select “Global Settings” or “Program Settings” if you want to change only for New World
3- Change your settings to the following:
- Image Sharpening: Sharpening Off, Scaling disabled.
- Ambient Occlusion: Off
- Anisotropic Filtering: Off
- Antialiasing – FXAA: Off
- Antialiasing – Gamma correction: Off
- Antialiasing – Mode: Off
- Antialiasing – Setting: None
- Antialiasing – Transparency: Off
- CUDA – GPUs: All
- DSR – Factors: Off
- DSR – Smoothness: Off
- Low Latency Mode: On / Ultra (Different on different computers)
- Max Frame Rate: Off
- Monitor Technology: Fixed Refresh or G-Sync if you have G-Sync Monitor
- Multi-Frame Sampled AA (MFAA): Off
- OpenGL rendering GPU: Choose your NVIDIA GPU
- Power management mode: Prefer maximum performance
- Shader Cache: On
- Texture filtering – Anisotropic sample optimization: On
- Texture filtering – Negative LOD bias: Allow
- Texture filtering – Quality: High performance
- Texture filtering – Trilinear optimization: On
- Threaded optimization: On
- Triple buffering: Off
- Vertical sync: Off
- Virtual Reality pre-rendered frames: 1
4- Click Apply
 ⠀
⠀
Configure Surround, PhysX
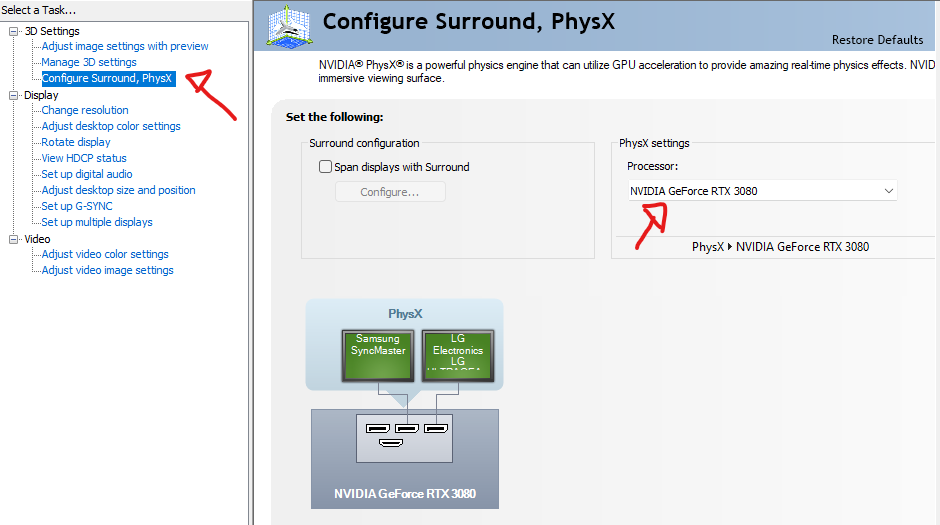
1- Select “Configure Surround, PhysX” on the left
2- Under “PhysX Settings” choose your video card
3- Click Apply
 ⠀
⠀
Monitor’s Refresh Rate
Surprisingly, there are many people who get 144hz monitors and never change their refresh rate in the control panel. Here is how to do it:
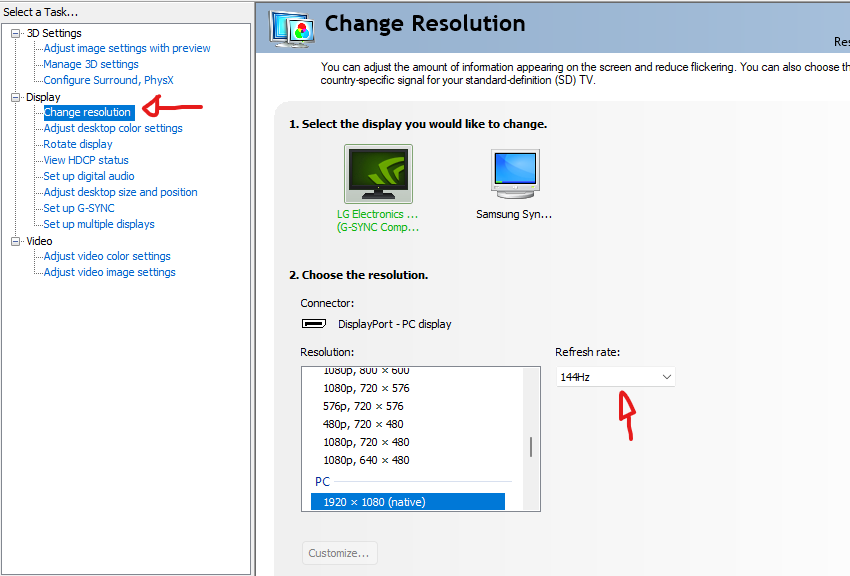
1- Select “Change resolution” on the left
2- Select the monitor you will be using to play New World
3- Select the highest refresh rate for that monitor
4- Click Apply
 ⠀
⠀
1- Open GeForce Experience or click here[www.nvidia.com]
2- Download and install the latest drivers
AMD settings
To open AMD settings, right-click your desktop, and click AMD Radeon Software
1- Click Gaming – > Games -> Global Graphics
2- Select eSports
3- Change your settings to the following:
- Radeon Anti-Lag: Enabled
- Radeon Chill: Disabled
- Radeon Boost: Enable (For low-end computers)
- Radeon Image Sharpening: Enabled
- Sharpness: 70% – 90%
- Radeon Enhanced Sync: Disabled (Different on different computers)
- Wait for Vertical Refresh (V-sync): Off
- Anti-Aliasing: Use application settings
- Anti-Aliasing Method: Multisampling
- Morphological Anti-Aliasing: Disabled
- Anisotropic Filtering: Disabled
- Texture Filtering Quality: Performance
- Surface Format Optimization: Enabled
- Tessellation Mode: Off
- OpenGL Triple Buffering: Disabled
- Reset Shader Cache: Perform a reset every 6-12 months to free storage
Display
AMD Freesync / AMD Freesync Premium: Enabled
DriversDownload and install the latest drivers [www.amd.com]
Other Settings
1- Search game mode on the Windows search tool
2- Click “Game Mode Settings”
3- Turn Game Mode On
1- Open Windows Settings (Windows key + i)
2- Click Gaming
3- Click on Xbox Game Bar and disable it
3- Click on Captures and disable background recording
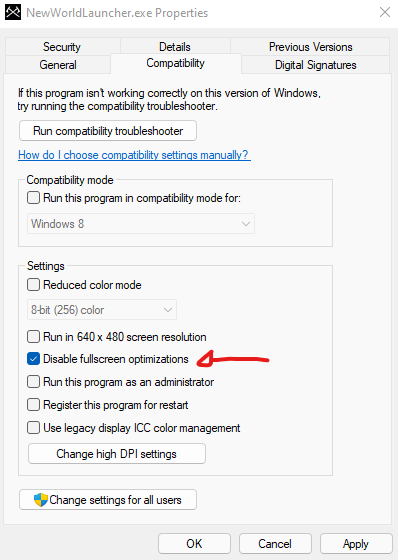
1- Go to Steam library and right-click New World
2- Hover on manage and click Browse Local Files
3- Right-click “NewWorldLauncher.exe” and click Properties
4- Click Compatibility tab and check “Disable fullscreen optimization
⠀
1- Open New World
2- Open Task Manager
3- Go to Details and right click NewWorld.exe
4- Click “Set Priority” and set it to high
It will increase loading times. If you do not have an SSD, try to install New World on the fastest HDD and that is being used less by other processes. Ex: install New World on a separate drive than your windows.
1- Open Discord and click Settings
2- Click on Advanced and turn off Hardware Acceleration
1- Open steam and click on settings on the top left
2- Click In-game and uncheck “Enable the Steam Overlay while in-game”
Make sure to disable any overlays from third-party software like Discord and Overwolf
This is optional however if you are able to manage your computer without an antivirus, disable real-time antivirus softwares.
Clear Cache
Thanks to praieme for his great guide, all credit to his effort. you can also read the original guide from Steam Community. enjoy the game.
Related Posts:
- New World: How to Use a Controller
- New World: How to Fix “Refreshed Credentials Already Expired” Issue
- New World: How to Fix Windowed Mode Bug
- New World: Factions Guide (Which One to Choose)
- New World: Leveling Guide (Start to Endgame)