
This is intended to be a better tutorial for the Kingdom of Wreck Business game.
Introduction
Welcome to this guide, which I hope will explain most of the basic gameplay mechanics of Kingdom of Wreck Business.
When starting a new game, you have the option of enabling tutorial hints. These are varying degrees of useful; a lot of the basics have to be figured out as you go. Full disclosure, I think this game is broken. However, I will try to outline everything you CAN do in this guide.
Tutorial Mission: U-190
When you start a new game (by default, in Liverpool) you will receive your first mission to locate and explore a sunken submarine, U-190. There isn’t too much you can do to deviate from this first mission, so it’s a good time to learn the game basics.

The game will guide you to the messages tab, where you will accept the contract to locate the sub.
It will also outfit you for your first mission aboard your default base vessel, a little fishing boat.
When you arrive on the wreck site, take a moment to look around the bridge of the fishing vessel; the basics here will translate to the other upgrade vessels you can purchase later.

Approach the steering wheel, which can be selected by pressing [F]. Toggling the third-person vessel view can be done by pressing [V]. More on that later.

To the right of the steering wheel, you will notice a console (in this case, it controls the anchor). You won’t need this right now, but it’s useful later.
Moving to the left, there will be an empty socket on the wall for a drone. You will be able to use this later….

Further to the left, you will notice a telephone on the wall. This can be activated by pressing [F]. Later in the game, this will be used for calling barges for recovering sunken vessels from the seafloor. This is also known as wreck lifting within the game.
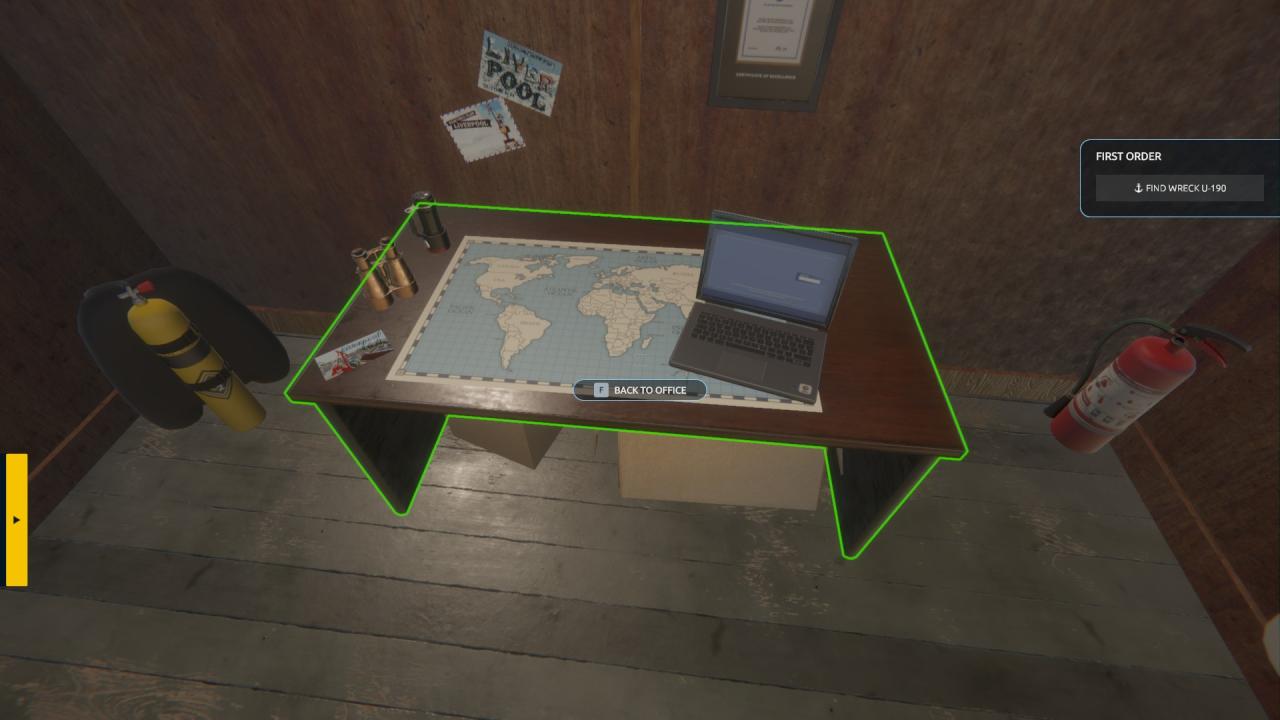
Further to the left, you will notice a table with a computer and map. By pressing [F], you can return to port–the home screen for your game.
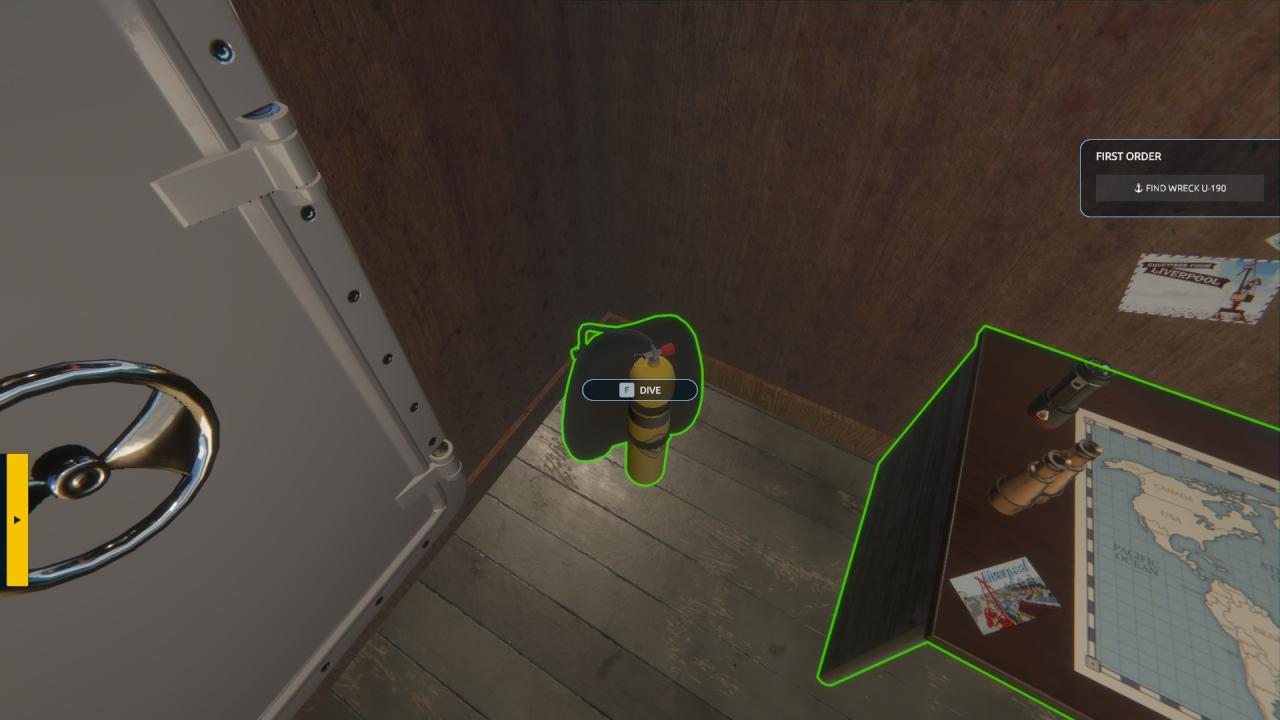
Finally, to the left of the map table, there is a set of yellow dive tanks on the floor. Approaching these and pressing [F] will get you started on your first scuba descent in the ocean below. Go ahead and try it now….
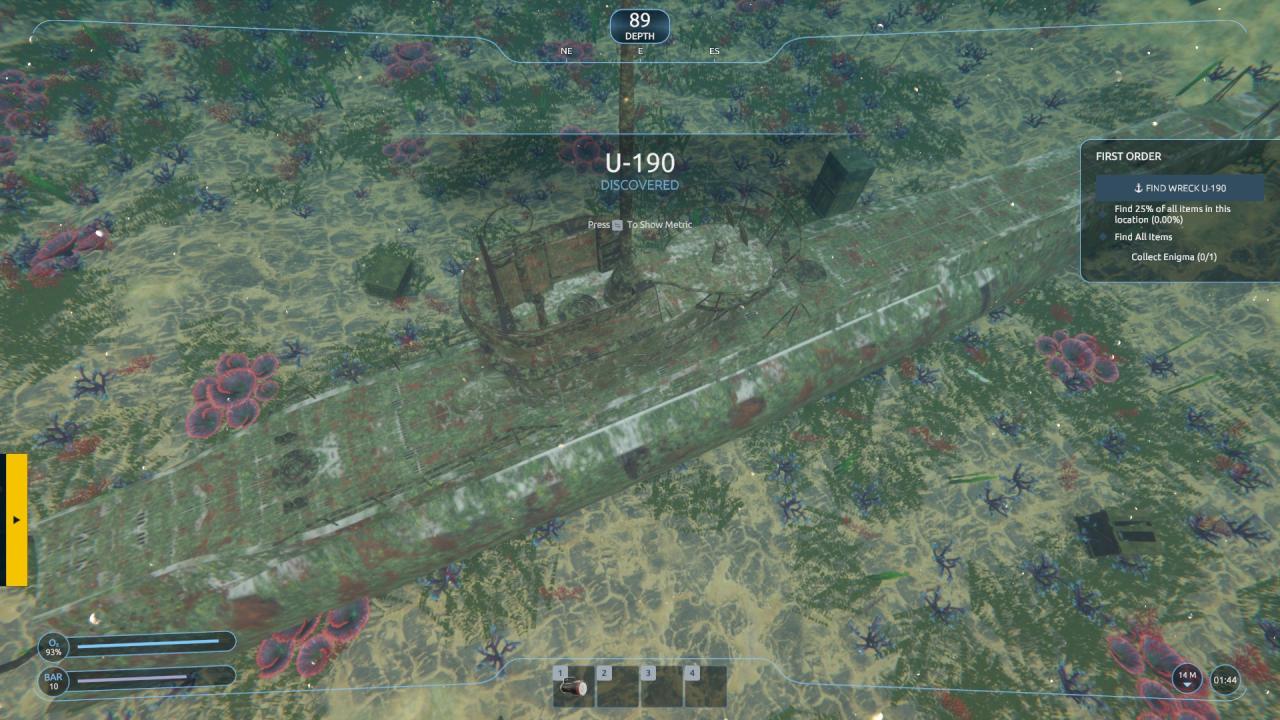
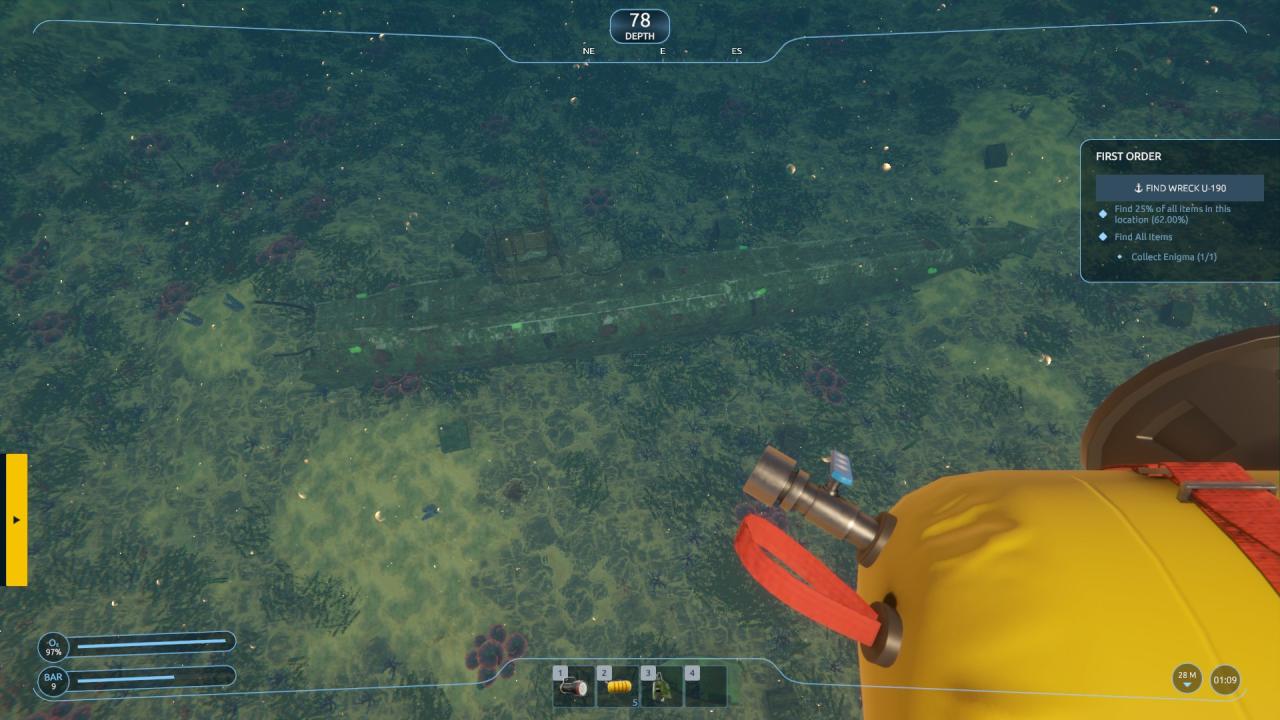
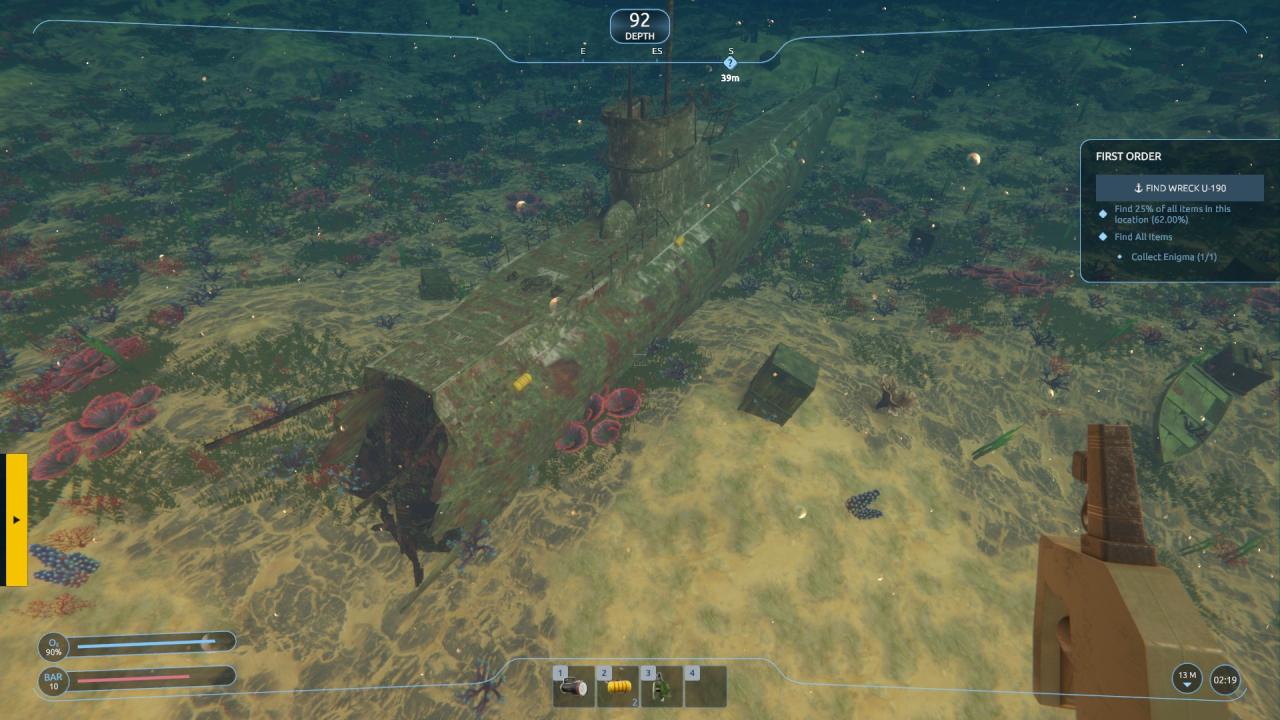
You’re under the water. Movement is pretty basic, with standard [W, A, S, D] for rotational movement and [Space/Ctrl] for Up and Down. If you dive directly below, you’ll see the submarine U-190 lying in two pieces on the ocean floor. Approaching it will give you a message indicating it has been discovered.
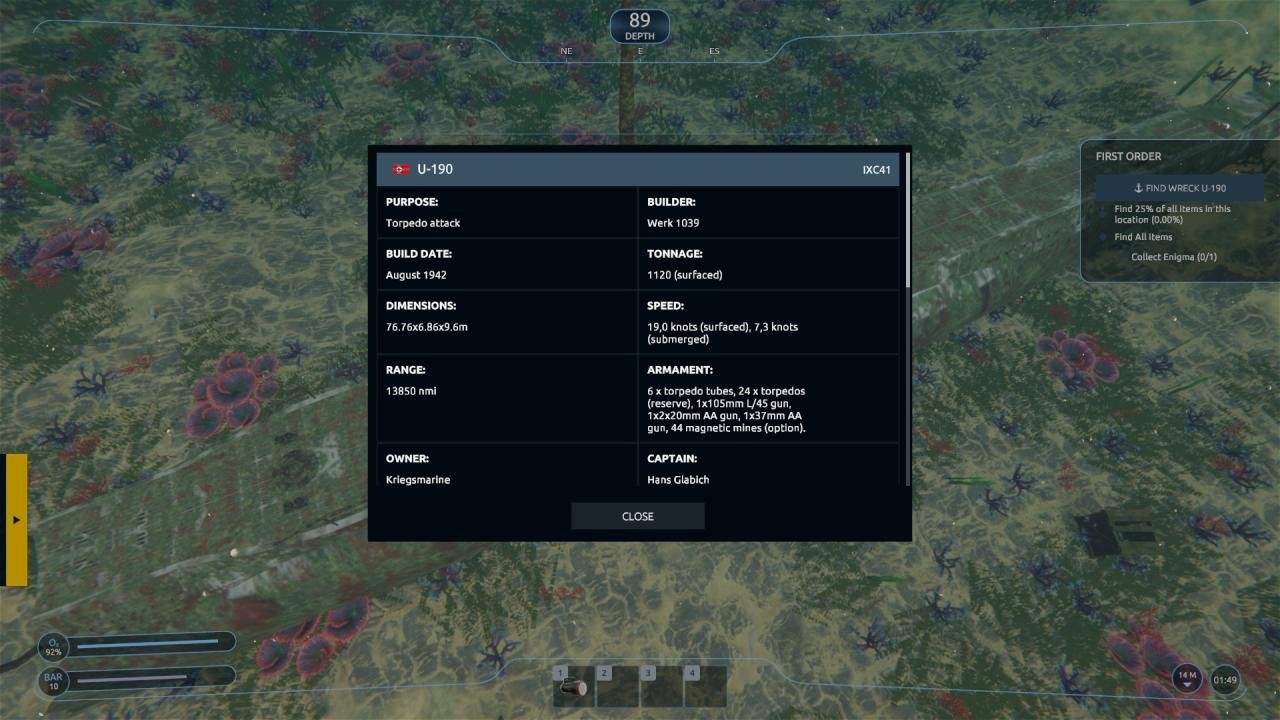
You can press [Tab] at this point to display the “wreck metric”, all the pertinent information about the shipwreck in question. It’s worth mentioning here that the actual U-190, a Type IX-C Nazi U-Boat, was captured and scuttled after the war. I am generously extending the benefit of the doubt to the developers that they were aware of this fact and fictionalized the details of this wreck entirely, because what we’re about to do is technically looting a war grave…
You will notice that the mission parameters on the right-hand side of the screen have changed: you now have new objectives, including collecting 25% of the wreck’s artifacts and locating the Enigma machine, particularly.
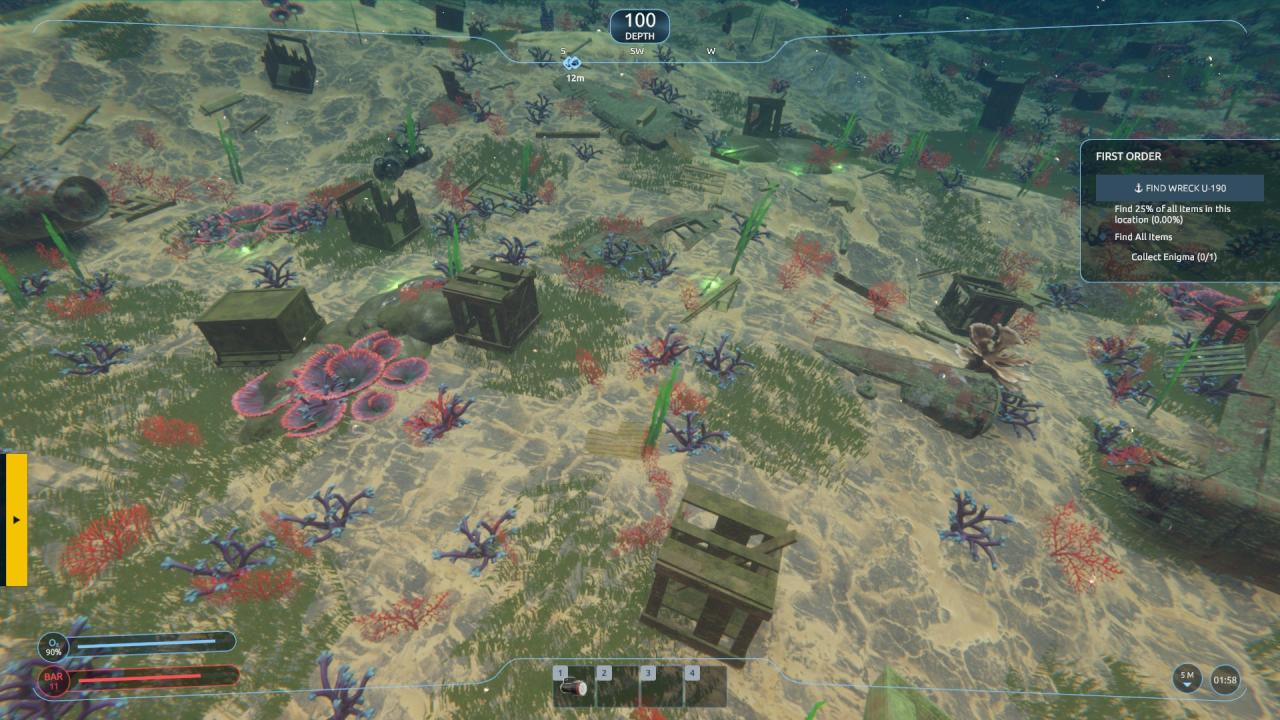
Looking around you, notice that there are many glowing green objects. These are your artifacts: in this particular debris field, you can expect to find some German weaponry (and curiously, one American BAR), as well as some human remains. All of it may be collected by approaching and pressing [F] and sold later in the game. Every item counts toward the 25% metric required. As an aside, you may indeed collect and attempt to sell the human remains, though you will likely receive a notice that it is illegal and have them seized by the authorities without any detectable penalty. My advice is this: don’t be a ♥♥♥♥, leave the skulls where you found them. Or not, whatever.
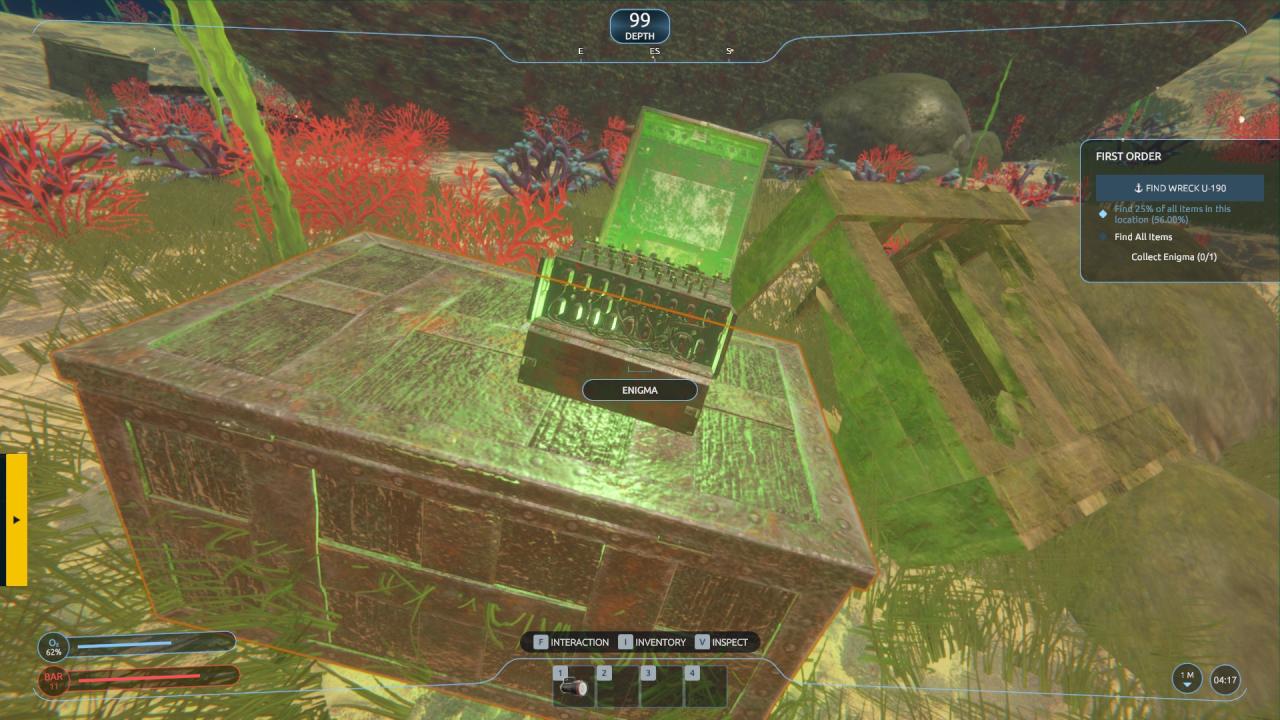
Across the debris field beyond the main wreckage you will locate the detached bow of the submarine, and resting beside it is your Enigma machine.
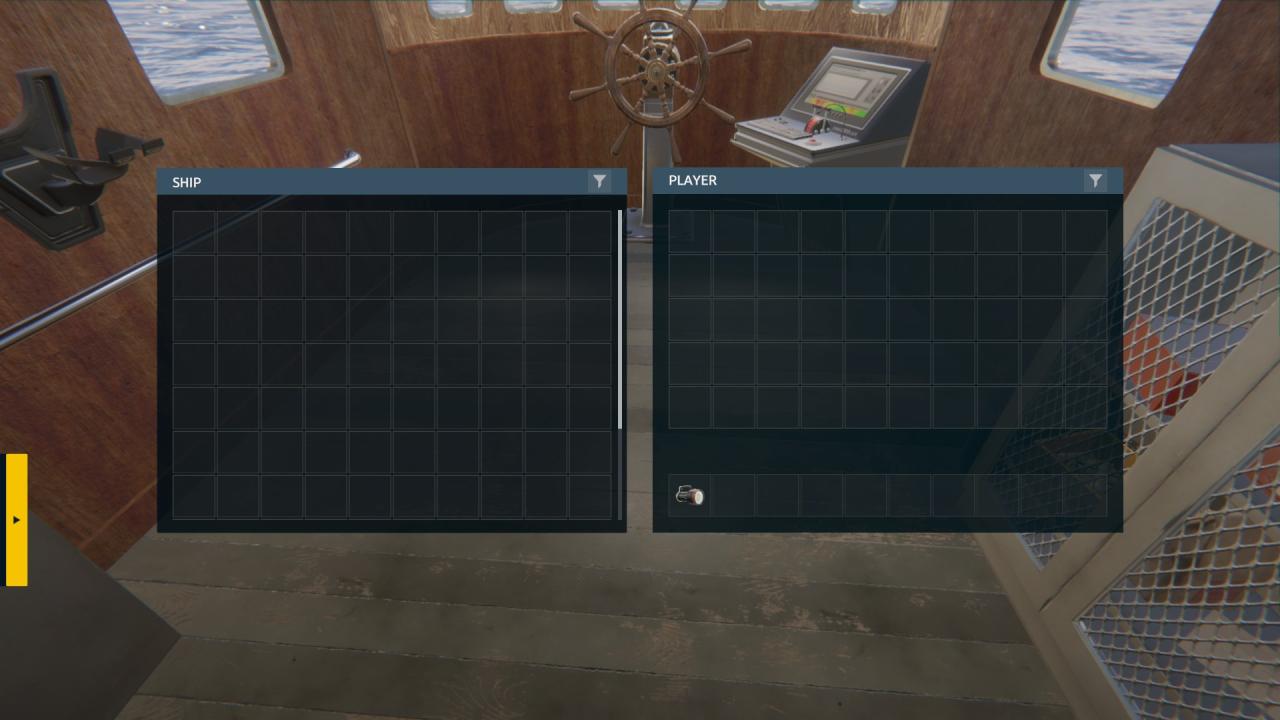
It is possible at this point that your inventory will be full: this is easily remedied–you can either move away from the Enigma and press {I}, opening your inventory, and drag some items out of the grid, or, return to your vessel and do the same thing, but this time transferring them from your personal inventory to the ship. All items in the ship can be transferred later to land storage, where you can sell them.
By now, you should have fulfilled all the objectives. Mission complete! Head back to the surface and find the ladder on the side of your vessel, press [F], and use the map table to return to port. You will receive a summary of your expedition upon returning, and you will be able to open the message tab, where a new message will contain a link to your reward money.

Navigating the Home Screen
At this point in the game, you are literally turned loose without much further instruction. Clicking on the various icons and buttons may provide some instruction, but not much. I’m hoping I can break it down a bit.
We already covered this a bit. There’s not much else to add. New contracts appear here. You can negotiate the fee and choose to accept them or delete the message. Some contracts are time-sensitive, but there is currently no penalty to failing them as far as I can determine. Upon completion of each mission, you will receive a nearly identical message to the contract offer with a button to accept your reward. I highly recommend deleting unnecessary messages often.
This tab is probably the most useful. Here, you can buy equipment, unlock and purchase upgraded gear, and sell your recovered loot. There is a mechanism for selling artifacts through the auction function, but with the current abundance of starting money, it’s easiest to sell them directly through the pawn shop tab. You will notice that prices fluctuate (buying and selling) from day to day, but again, with so much money in circulation, it really doesn’t matter.
I will cover the items for sale a bit later…
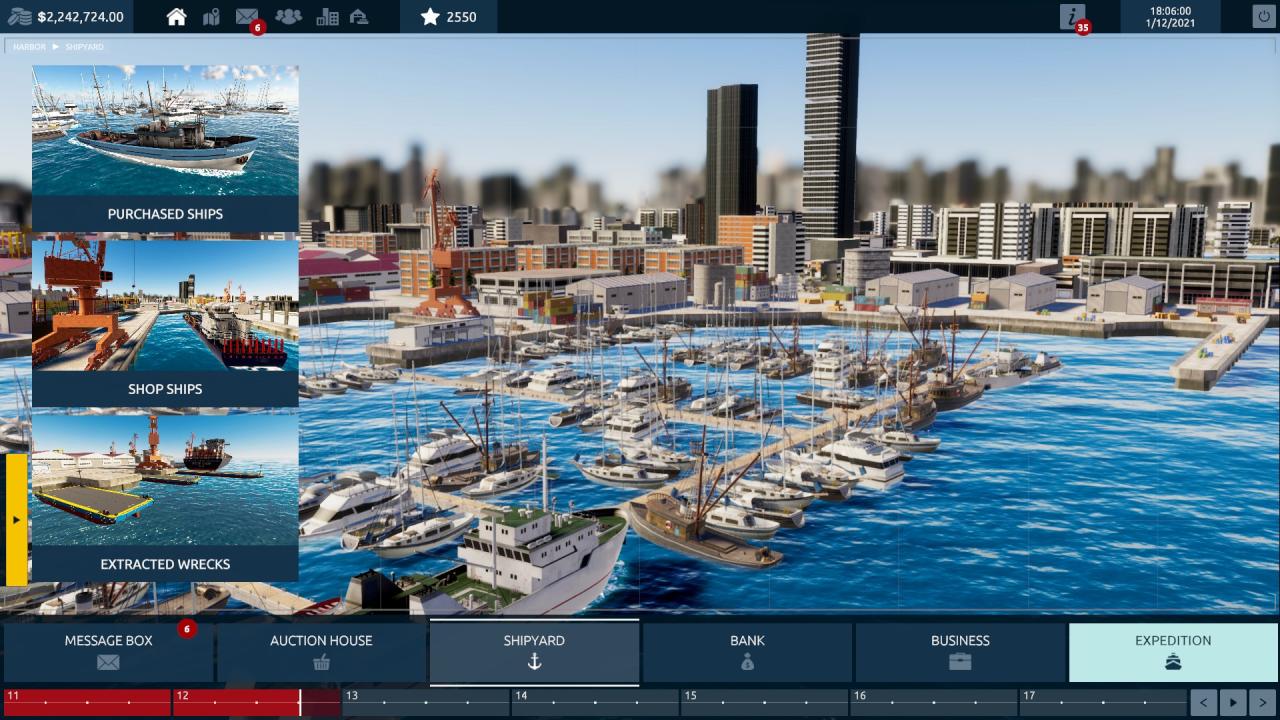
The shipyard tab is where you can buy and sell vessels, purchase recovery barges, and access any shipwrecks you have raised. I will cover this specifically coming up…
Do not bother with this, there is no reason.
This is useful for a couple of reasons. I currently don’t see any reason to mess with the expeditions function, as the random vessels I discovered were completely bugged.
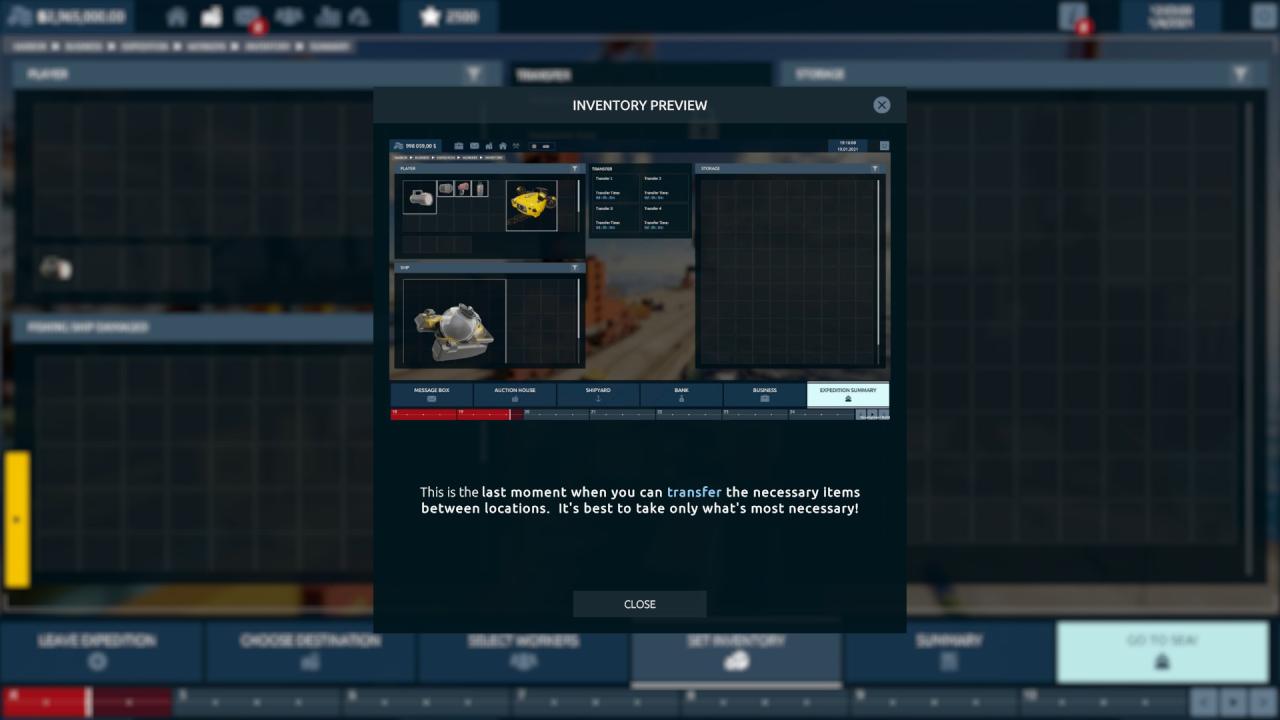
However, you can access your storage from this tab–your personal storage, your dockyard storage (for selling artifacts), and anything stored on your vessels, which must be entirely unloaded before you can sell them. You will notice that items unloaded or loaded from vessels must be transferred–you have to select them, press the little blue arrow on the transfer square at the center top screen, and advance the timeline in the game. Annoying.
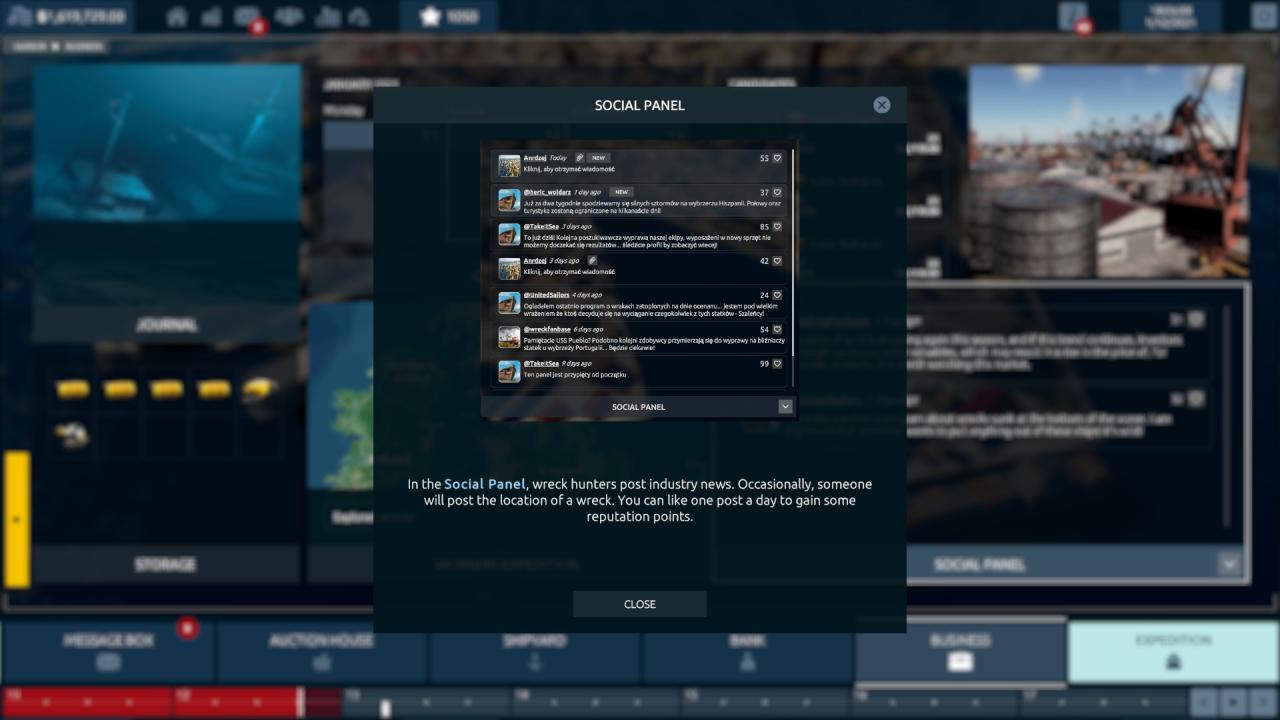
Also, there is a single interesting feature in the social media tab. Clicking on it announces that you can gain one experience boost per day by “liking” a post in the feed. However, I was able to click the little heart icon repeatedly to farm points. Not ideal, but amusing.

Selecting the Expedition Tab was covered in the tutorial. Here you can select a destination, your vessel (if you own multiple), and staff your crew. We will cover that with the crew upgrades coming up.
At the top of the screen, the building-shaped icon is for upgrading your facilities.
We will cover that next as we discuss how to start your game…
How to Get Started With Upgrades
First, the bad news: the game is terribly bugged and everything from here is really a toss-up. But the good news: you start with such a ridiculous amount of money and XP that you can circumvent all the crap to get the best shot at success. So, here we go.
You need to start at the city upgrade tab, which is the little building icon at the top of the screen.

First, we need to upgrade your shipyard by selecting the first upgrade in the sequence. This is important because you need to purchase a better vessel, but you can’t purchase a new ship or sell your old ship without an upgrade.
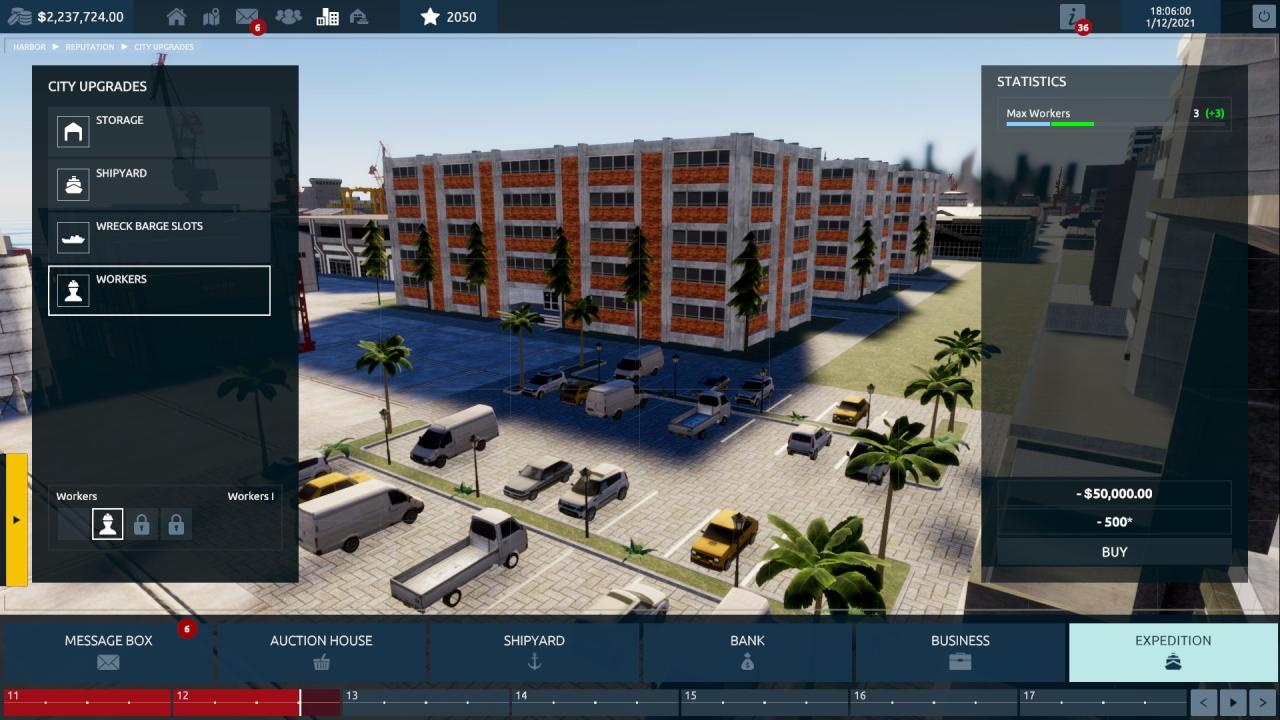
Next, the workers upgrade. You need to upgrade your workers setting so you can hire enough crew to staff your upgraded vessel. The first upgrade in sequence will be adequate.

Finally, the wreck barge upgrade. Because, why not? I don’t know for certain if you need this, as you appear to rent barges later in the game. But do it anyway.
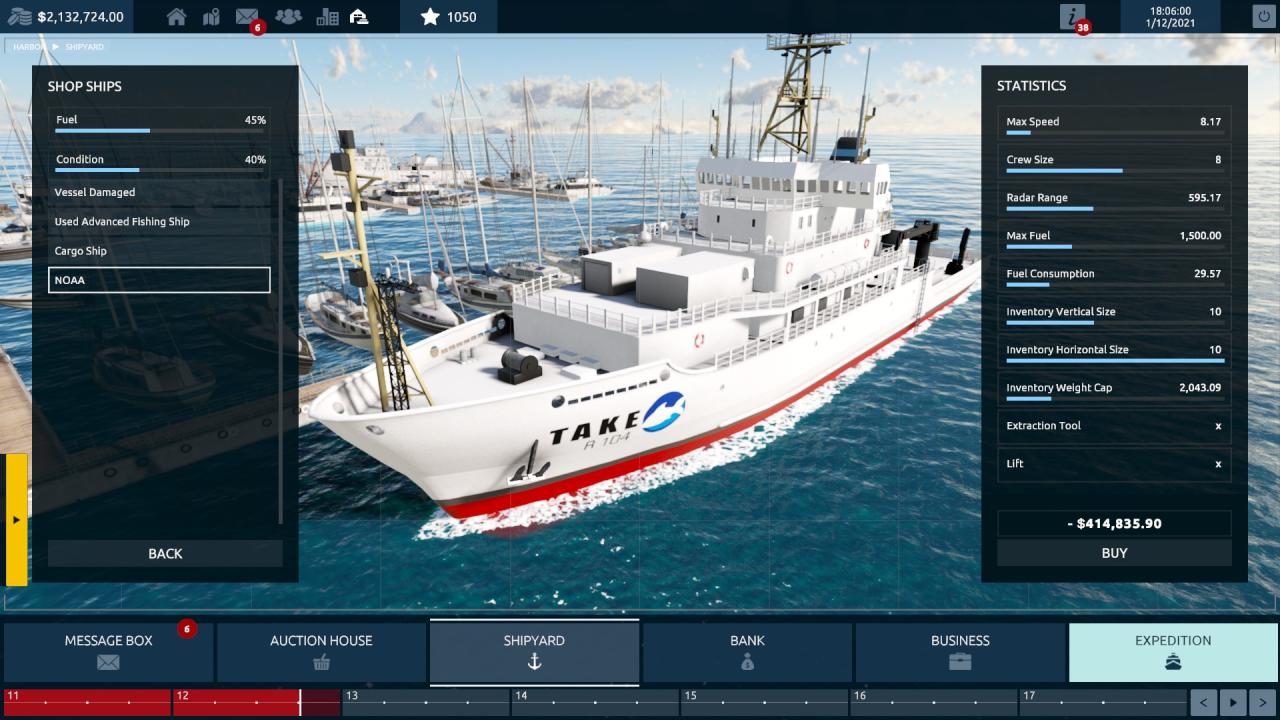
Go to the Shipyard tab: now that you have upgraded, you can purchase a second ship. Select the NOAA vessel–if it is not available, advance the timeline and wait for one to appear.

You can now access the “Purchased Vessels” section within the shipyard and sell your old fishing boat for a profit.
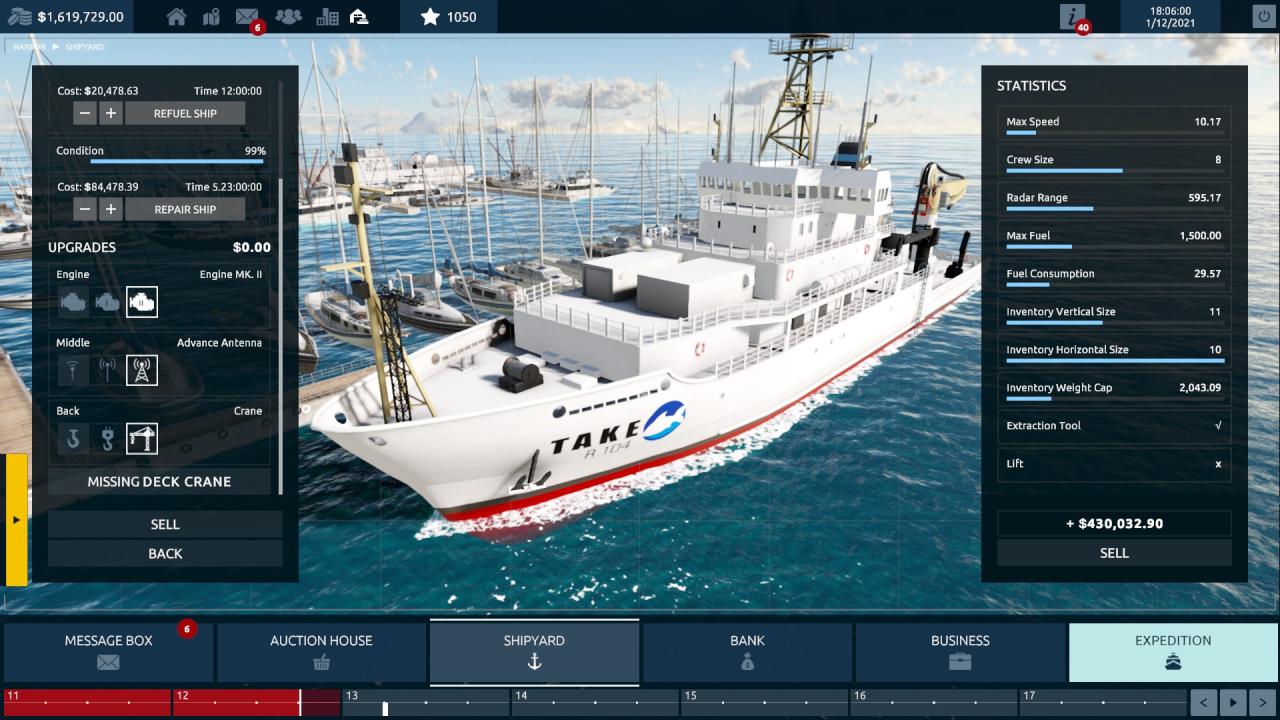
Now take a look at your purchased NOAA vessel. You can upgrade it on the left side of the screen with a better engine, scanner, and, most importantly, a crane. By selecting the crane upgrade on the back, you will be able to use the extraction tool later. This will be confirmed on the right side of the screen by the appearance of a check mark next to the extraction tool item if you have done it correctly.
The lift upgrade allows for the installation of a bathysphere, but at this point, I do not think there is ANY point whatsoever in using one. But we’ll get to that, too…

Finally, you need some workers. You can hire them through the Business tab or the Expedition tab, and you should now be able to hire six with the upgrade you purchased. Just click on any of them and hire enough.
That’s it. You should be all upgraded and ready to go. But before you set off, you need some equipment. Let’s take a look…
Tools, Equipment, and How to Use Them
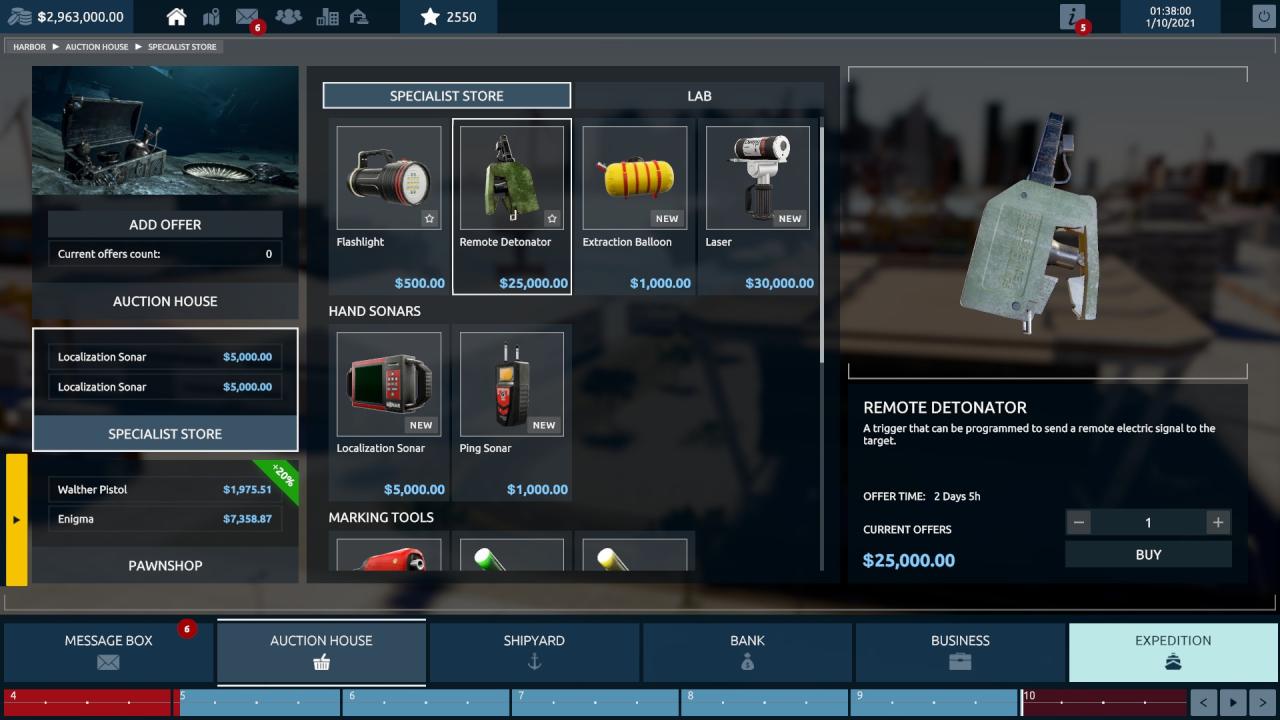
As stated before, you can purchase everything you need from the Auction House tab. Go there now.
There’s really no reason not to buy everything, so go ahead and splurge. I recommend purchasing the following:
- 1x Remote Detonator
- 15x Extraction Balloons
- 1x Laser Tool
- 1x Localization Sonar
- 1x GPS Marker Gun
- 10+ Scan Darts
- 10+ GPS Darts
Be sure to keep these items in your inventory before leaving port, otherwise you’ll have to return to retrieve them.
There is really no reason to purchase the ping sonar, as the localization model is superior. Also, I don’t recommend purchasing the drone or bathysphere. But it’s up to you. To do so, you need to access the Lab tab.

Here, you can select and purchase upgrades to your dive tanks, and unlock drones and bathyspheres. Again, there is currently no reason to use the drones/bathysphere. But I highly recommend purchasing the highest-tier tanks and “wearing” them.
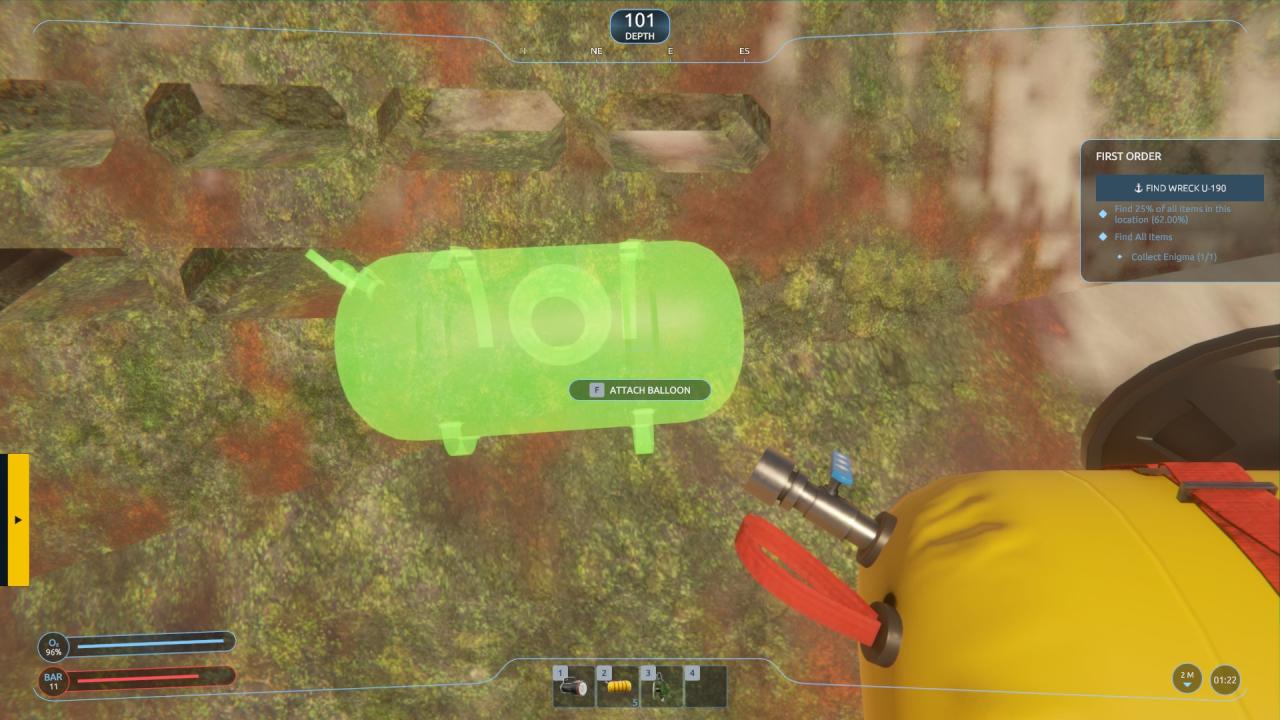
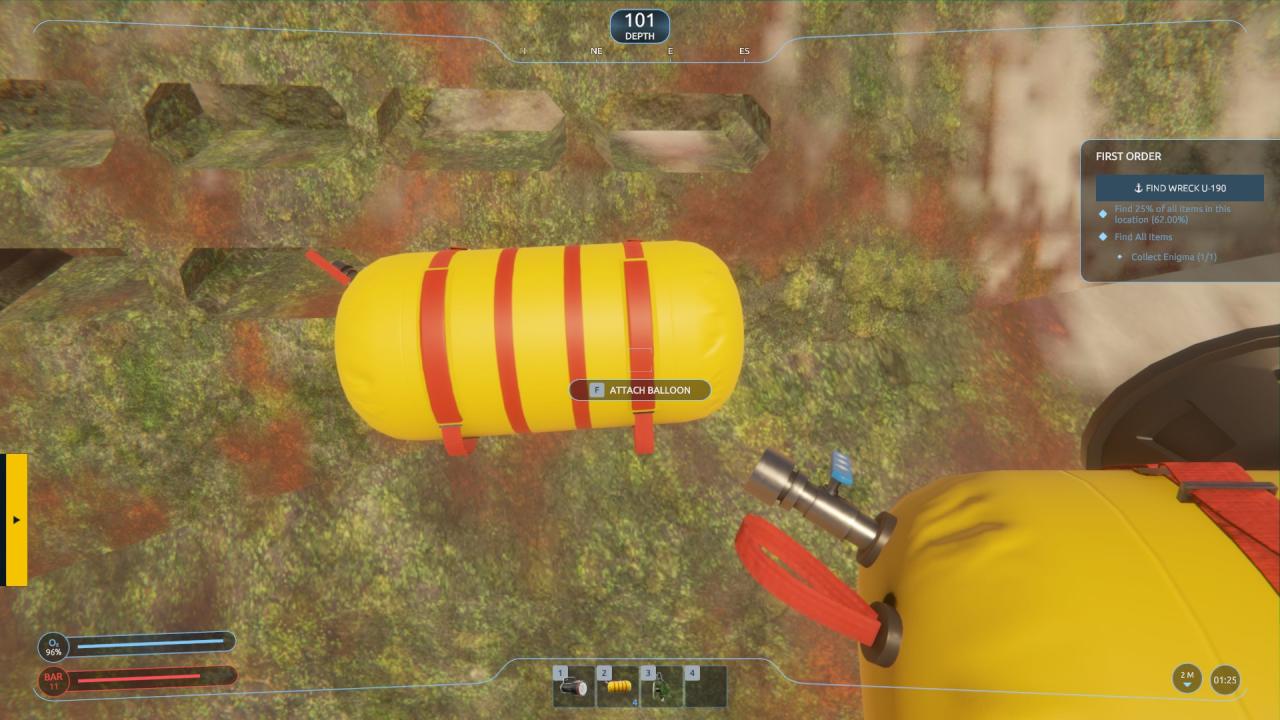 Balloons are used to lift wrecks. I have only been able to use them on the U-190 submarine, but they work. When equipped in hand, green silhouette attachment points appear along the hull. You can attach them by approaching the location and pressing [F].
NOTE: They do not work without the remote detonator.
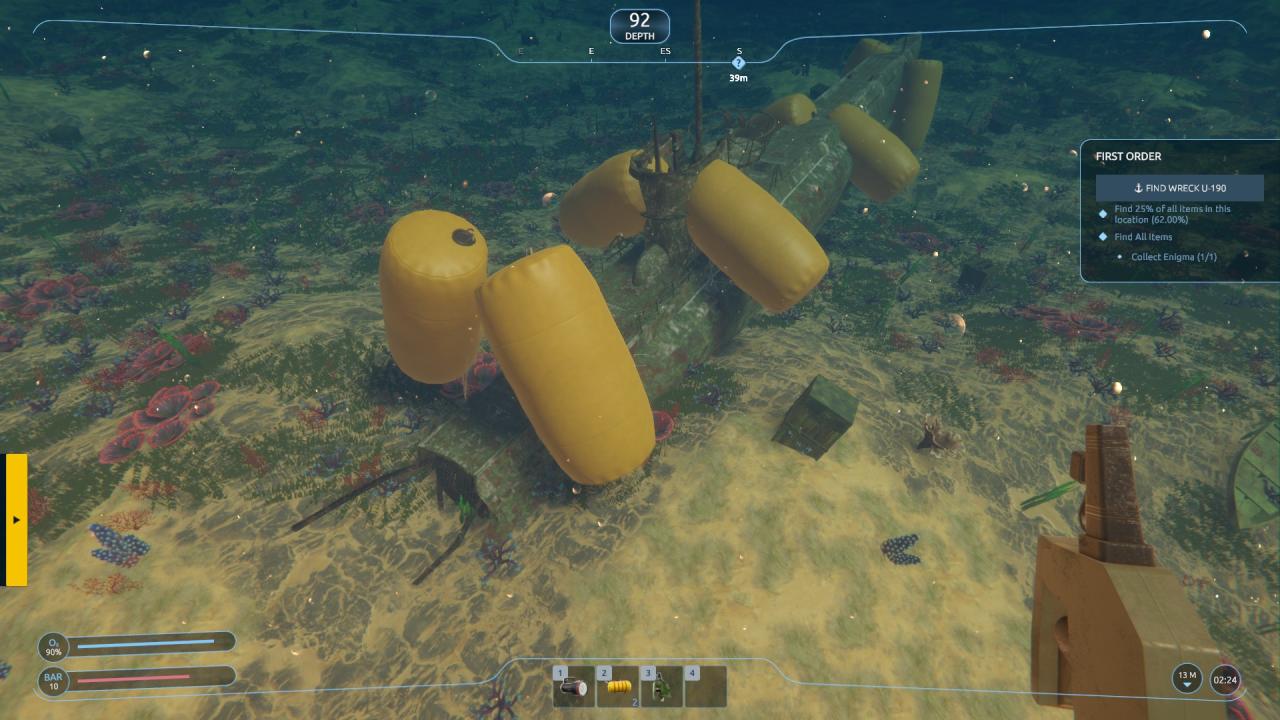 The remote detonator inflates the extraction balloon. When in the near vicinity of the placed extraction balloons with detonator in hand, point the detonator at the balloons and click to activate them.
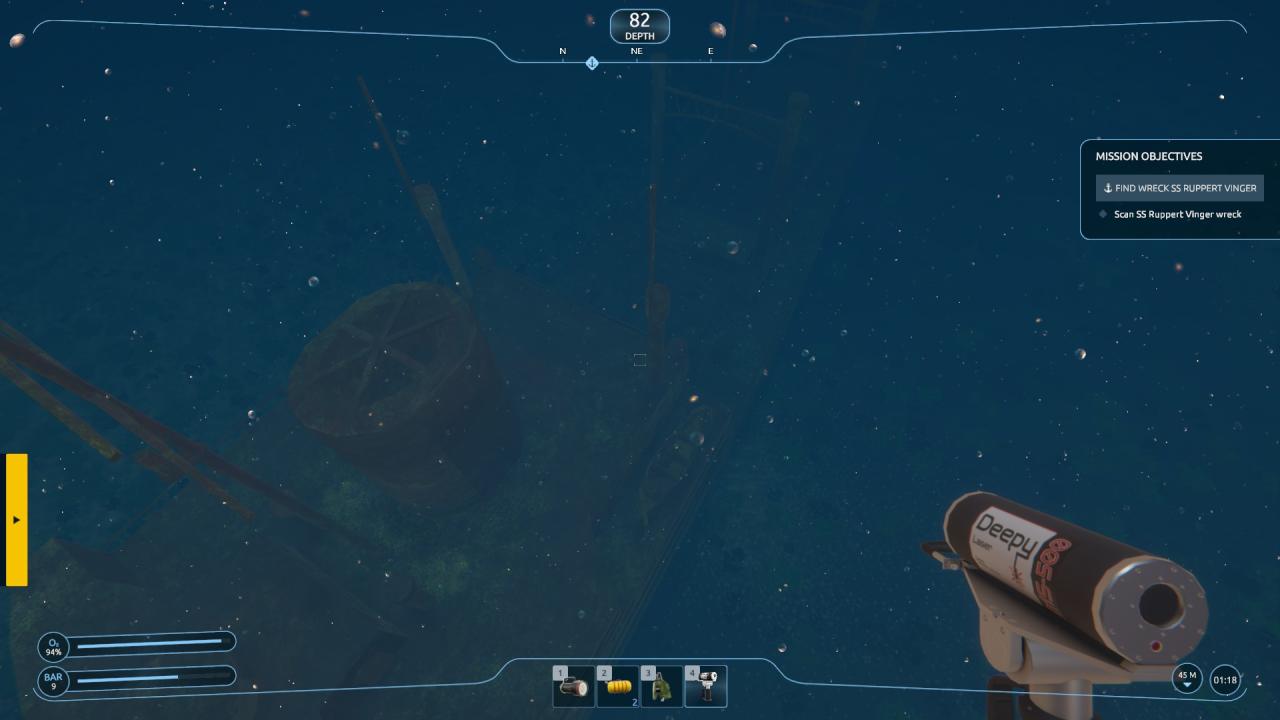
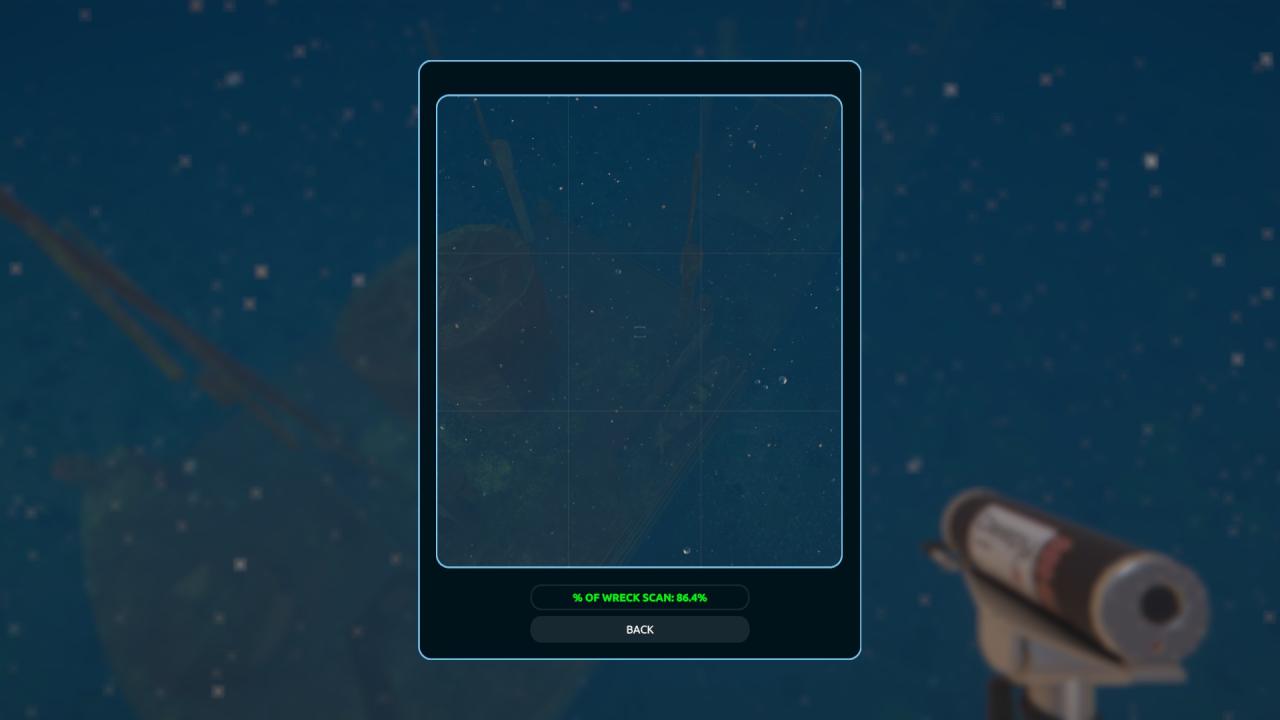 The Laser Tool is used to scan wrecks as part of the mission objective. When close to the wreck with the Laser Tool in hand, activate it to bring up a camera screen that takes a photo of the vessel. You must attempt to capture a wide enough view that a large percentage of the wreck is visible in order for the scan to be considered successful. When the wreckage is in to pieces, you might need to scan both pieces separately. Also, a bug seems to be present that sometimes requires you to tag the wreckage with a scan dart prior to scanning.
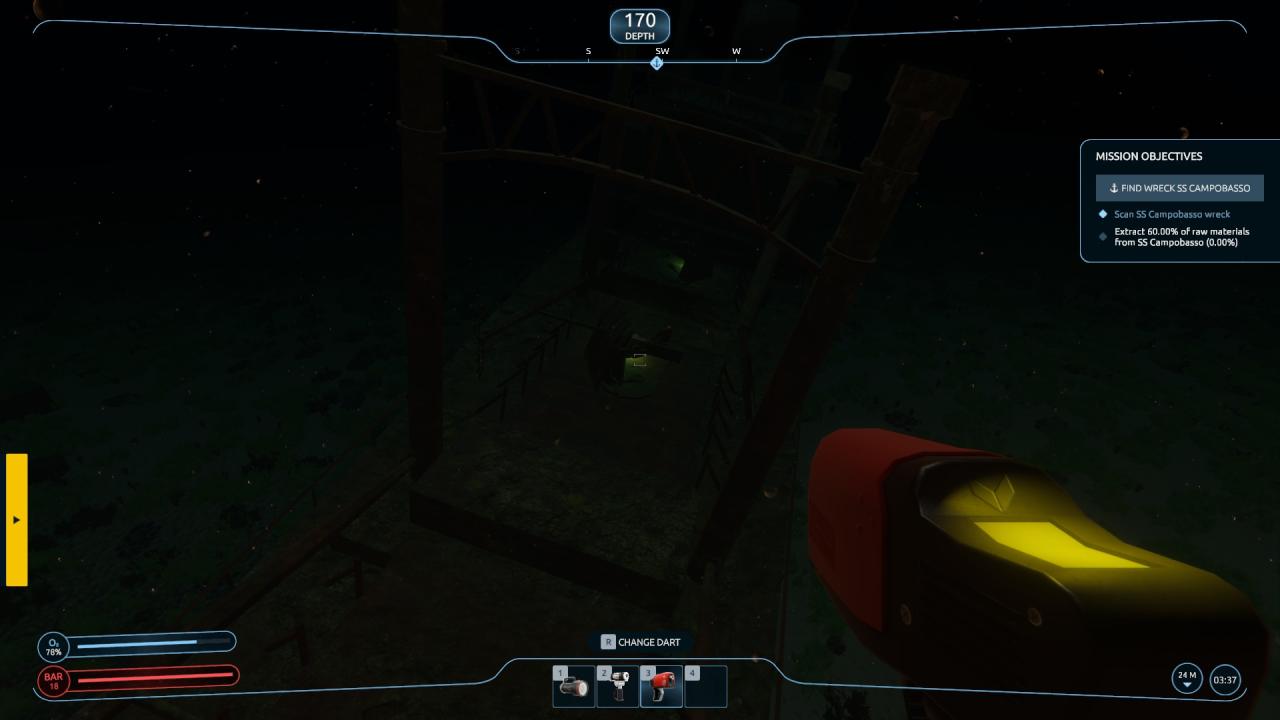 The GPS Marker Gun is used to mark pieces of wreckage and debris with scan or GPS marker darts. The gun has a colored indicator light to show which dart is currently equipped: yellow is the GPS marker dart, and green is the Scanner dart.
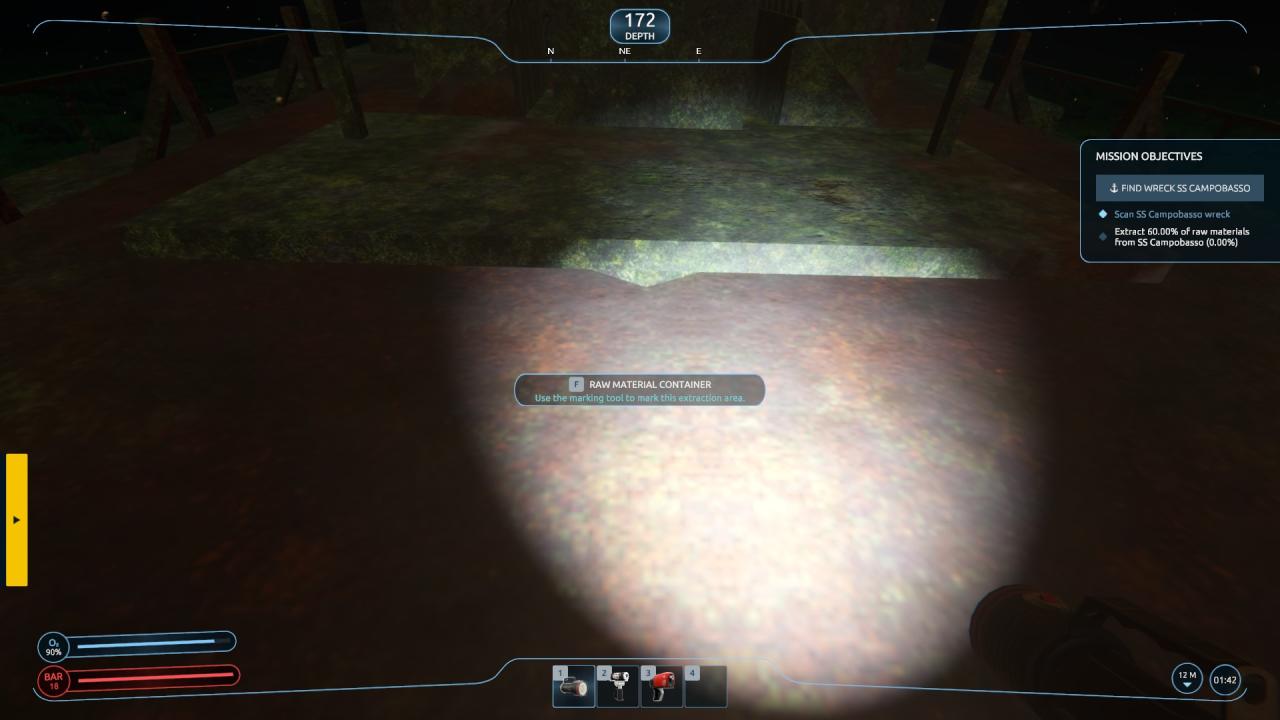 The scanner dart is used to mark cargo hatches for raw material extraction. It is also sometimes needed for laser tool scans, but not usually.
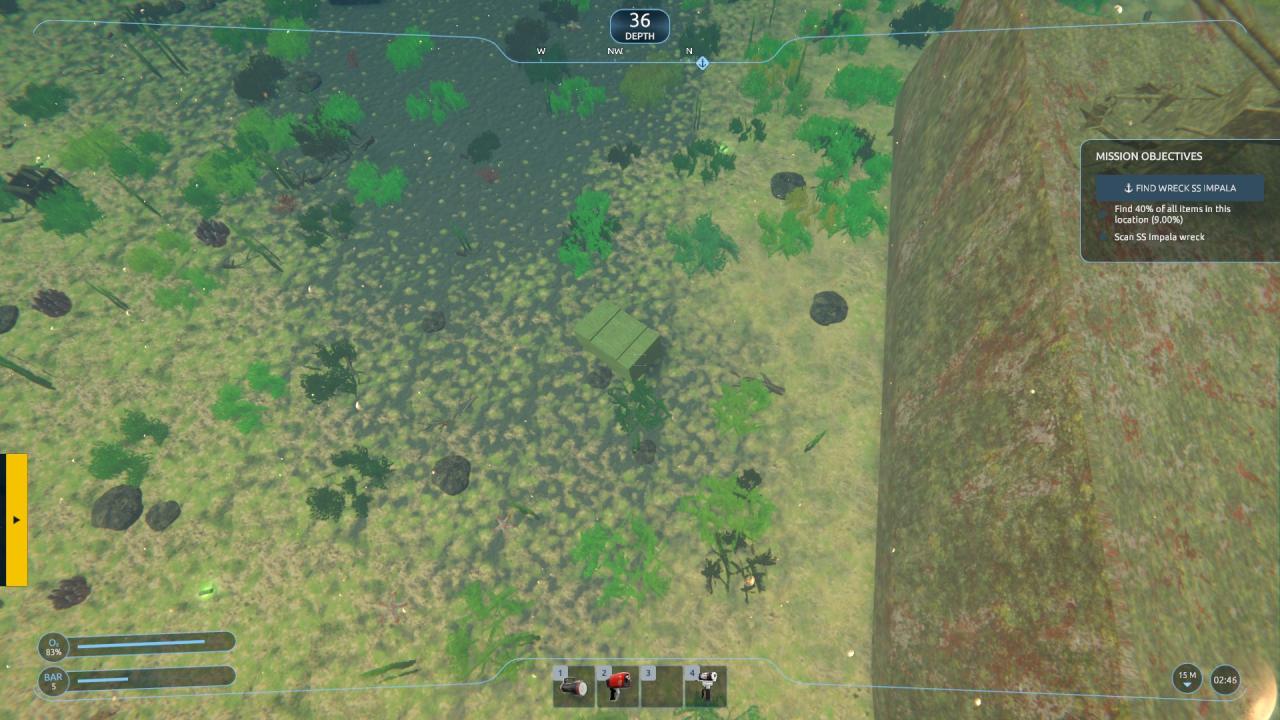 The GPS marker dart is used for marking crates for extraction when it is a mission objective. These crates look a bit like bales of hay and are usually on the sea floor near the wreckage.
(NOTE: the picture above is not accurate as I grew impatient waiting for this objective to appear–the containers look pretty much like that…)
The localization scanner requires no particular instruction, as it shows the location of artifacts as green blips on the radar screen. Quite useful.
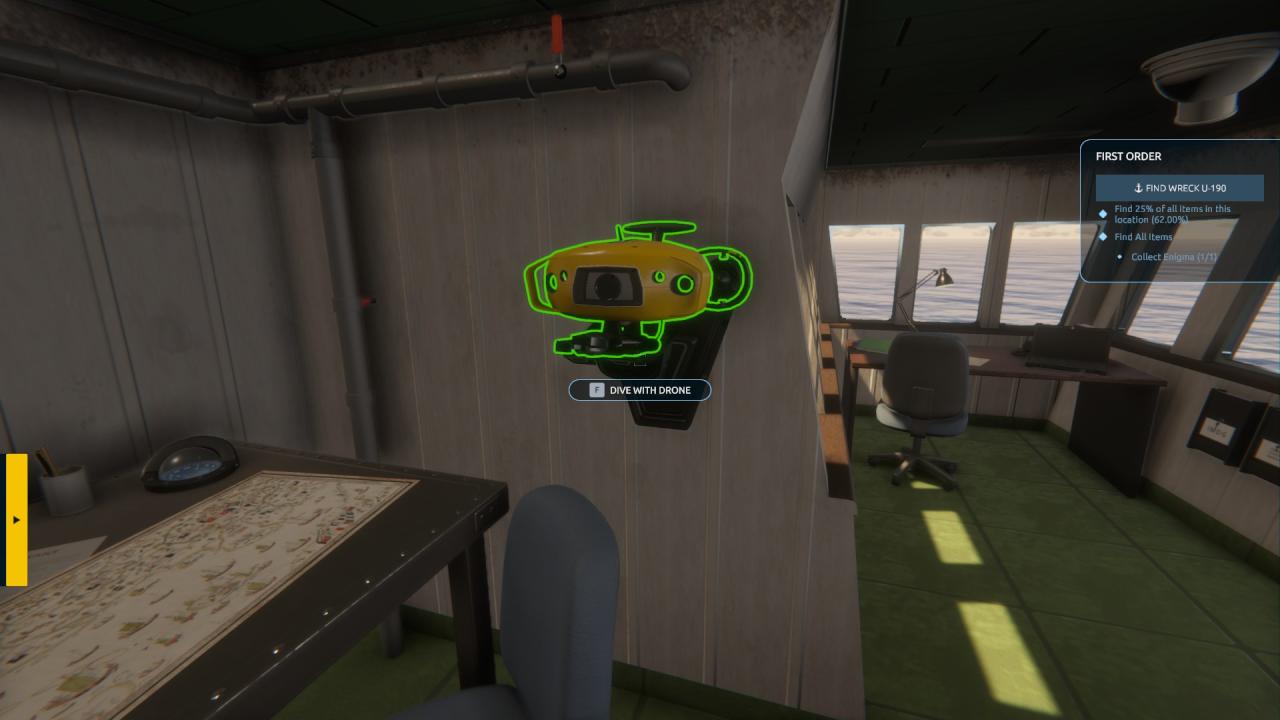
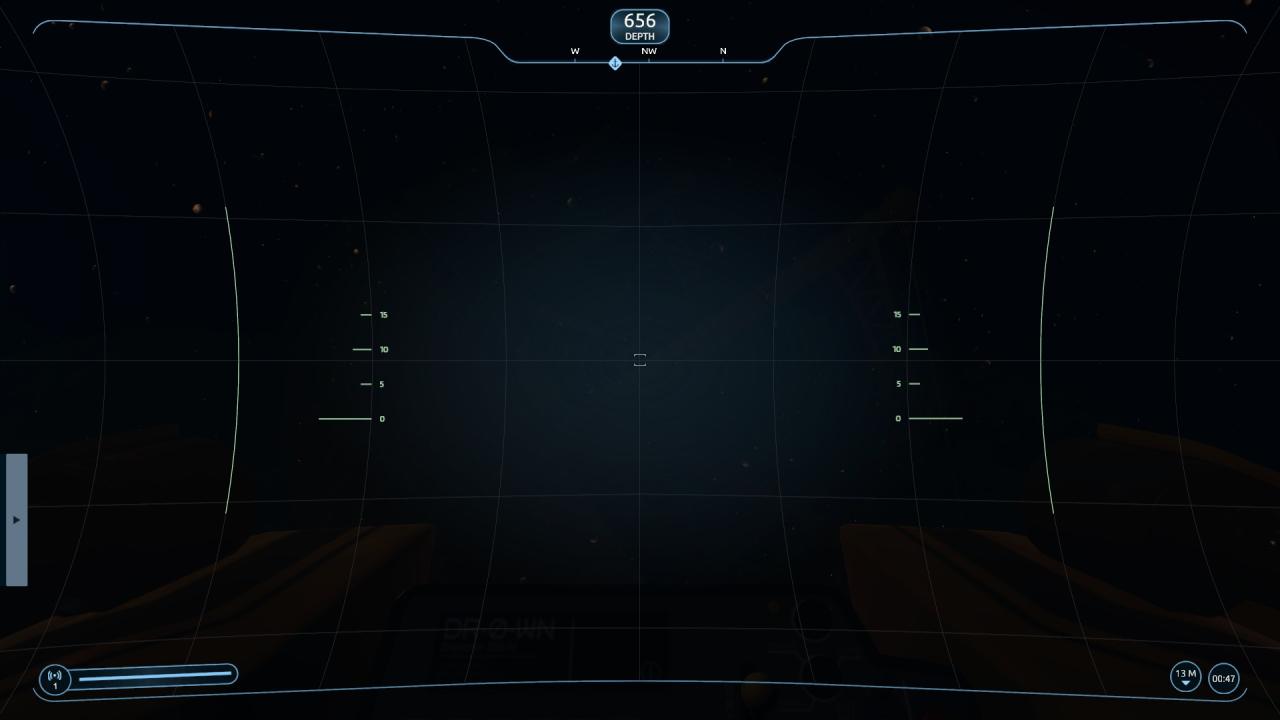
 The drones can be purchased and stored in the ship’s storage compartment. They will appear on the bridge of the vessel and can be deployed from there. It cannot really do anything except dive deeper than 300m, which your diver cannot do alone. However it does not seem capable of discovering wrecks or interacting with anything.
 The bathysphere currently serves no purpose. Worse than the drone…
Raw Material Extraction & Wreck Lifting
I am getting a little worn out now, and short on time.
I have already posted guides on these topics which are fairly close enough to accurate. I will update them when I have time.
Raw Material Extraction: here
Wreck Lifting: here
Thanks to Radar14 for his excellent guide, all credits belong to his effort. if this guide helps you, please support and rate it via Steam Community. enjoy the game.