
Simple guide with explanations for each puzzle solution. No story spoilers, but there will be screenshots of locations/mechanisms that some may consider light spoilers.
Intro
(This is a walkthrough in progress; I’ll continue to edit as I finish uploading the relevant screenshots.)
This guide will take you through the steps of Homebody organically, i.e. fairly close to what the developer likely intended. There are no sequence breaks, and the steps are ordered such that you are never given knowledge before you could have otherwise inferred the next step with just the information present in the game.
As this is mostly a puzzle-box/escape room style game, I feel this is a more appropriate approach than simply listing all the lock combinations, etc. However, the direct solutions to each puzzle are also included in the guide for readers who simply want to be done with one puzzle and move on to the next part of the game.
If you find any errors or misinformation, please don’t hesitate to leave a comment and let me know. I’ll update the guide as soon as I can.
Good luck, and I hope this walkthrough proves helpful!
Walkthrough I (pre-Cellar)
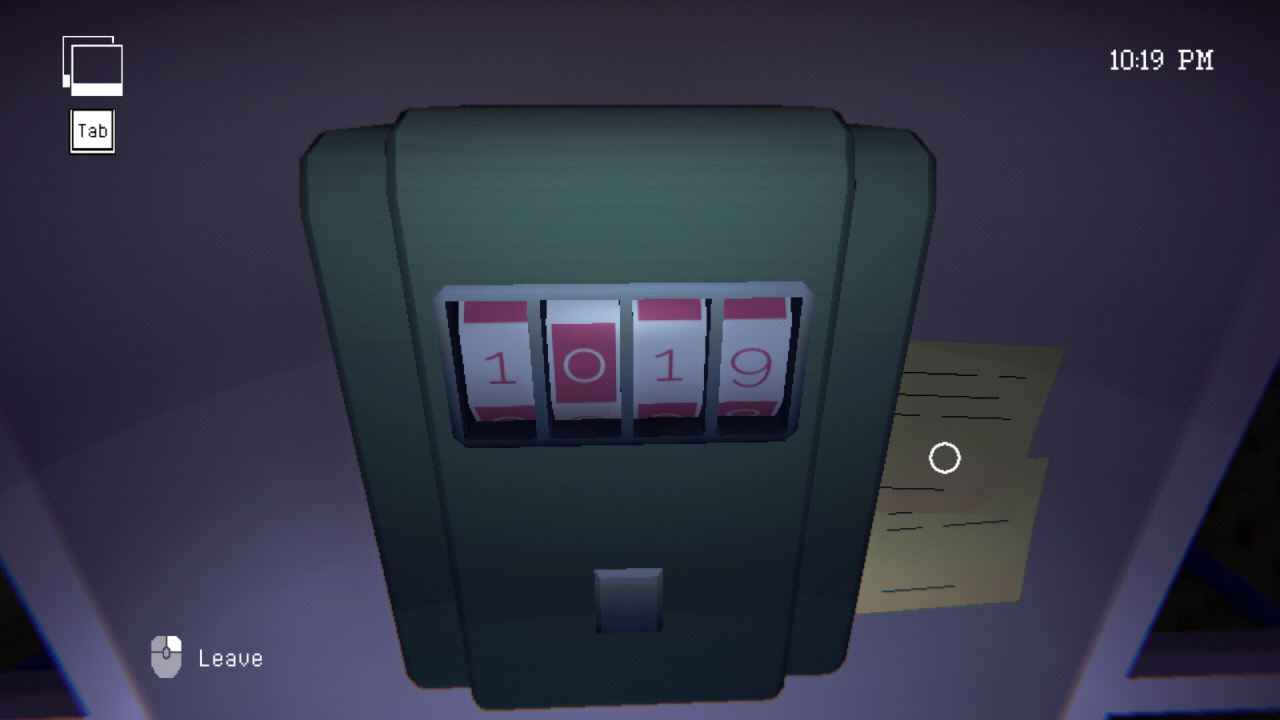
 Check your Memory Log for the keypad combo (it’s the third number listed on the post-it note beside the keypad by the gate)
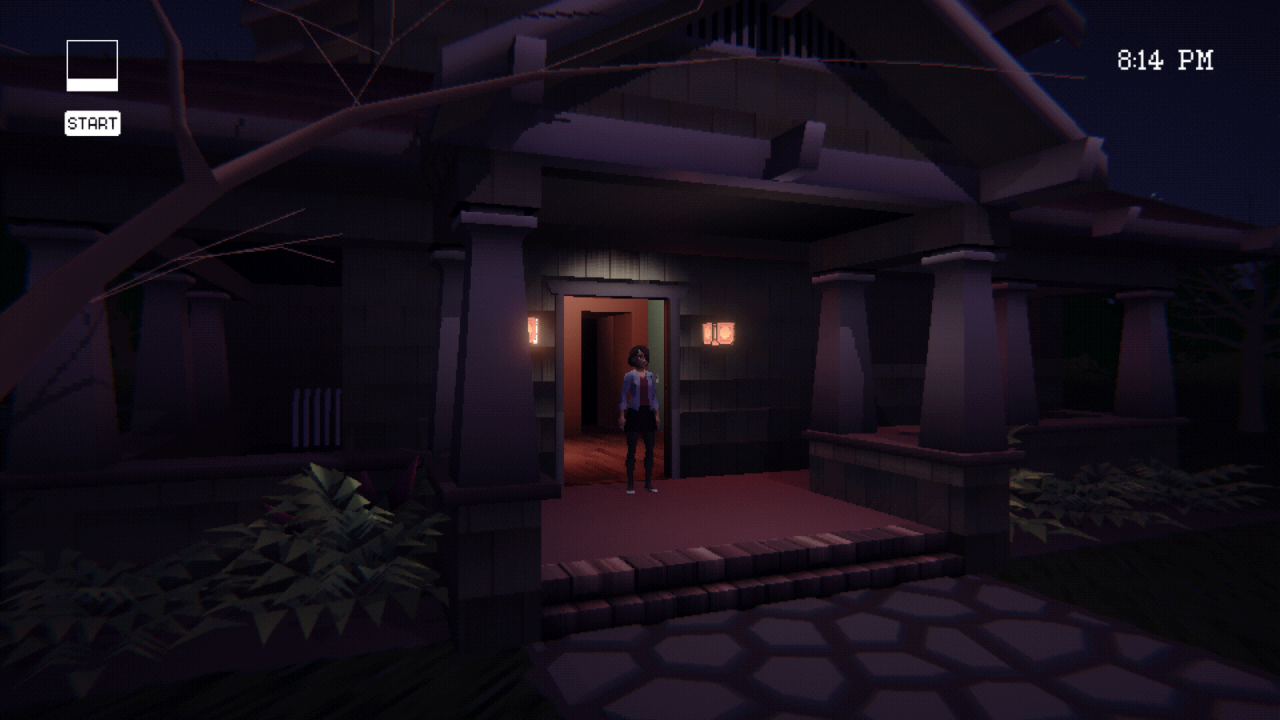
 Enter the house; you’ll be standing in the Foyer. Check your Memory Log for the combination to open your briefcase (nothing important is inside it yet).
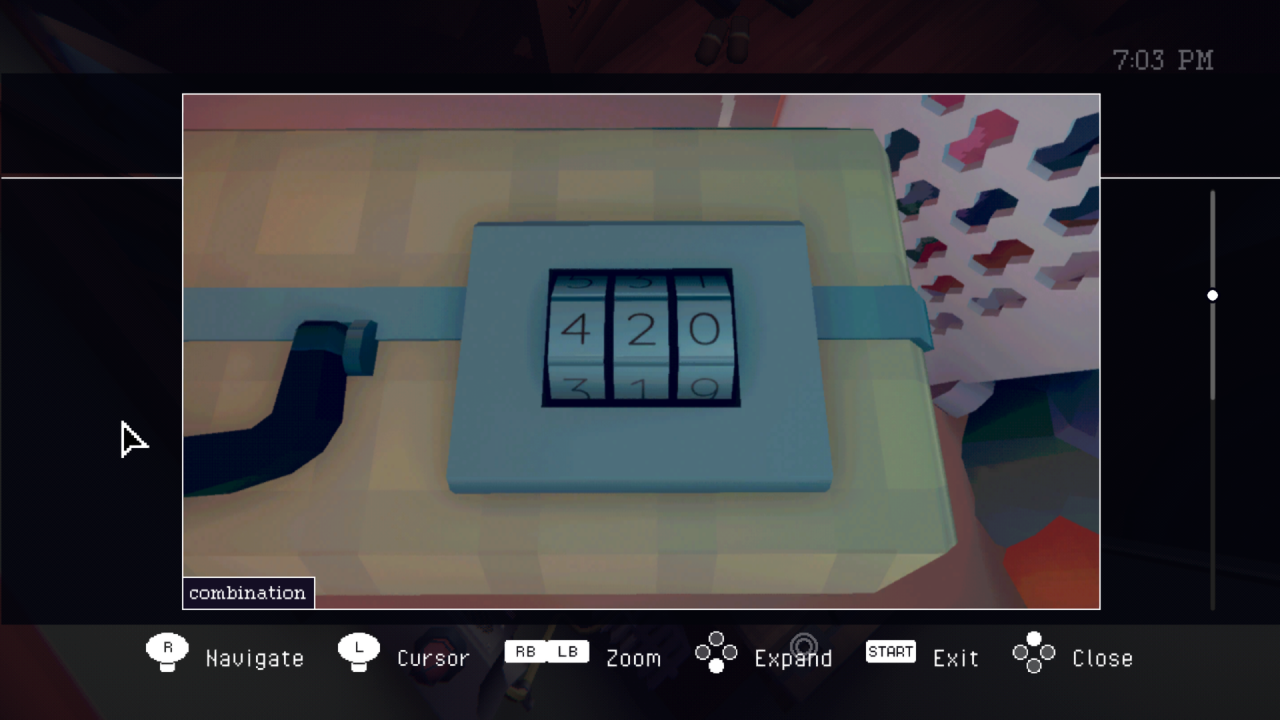
Optionally, socialize with your friends to get some backstory.
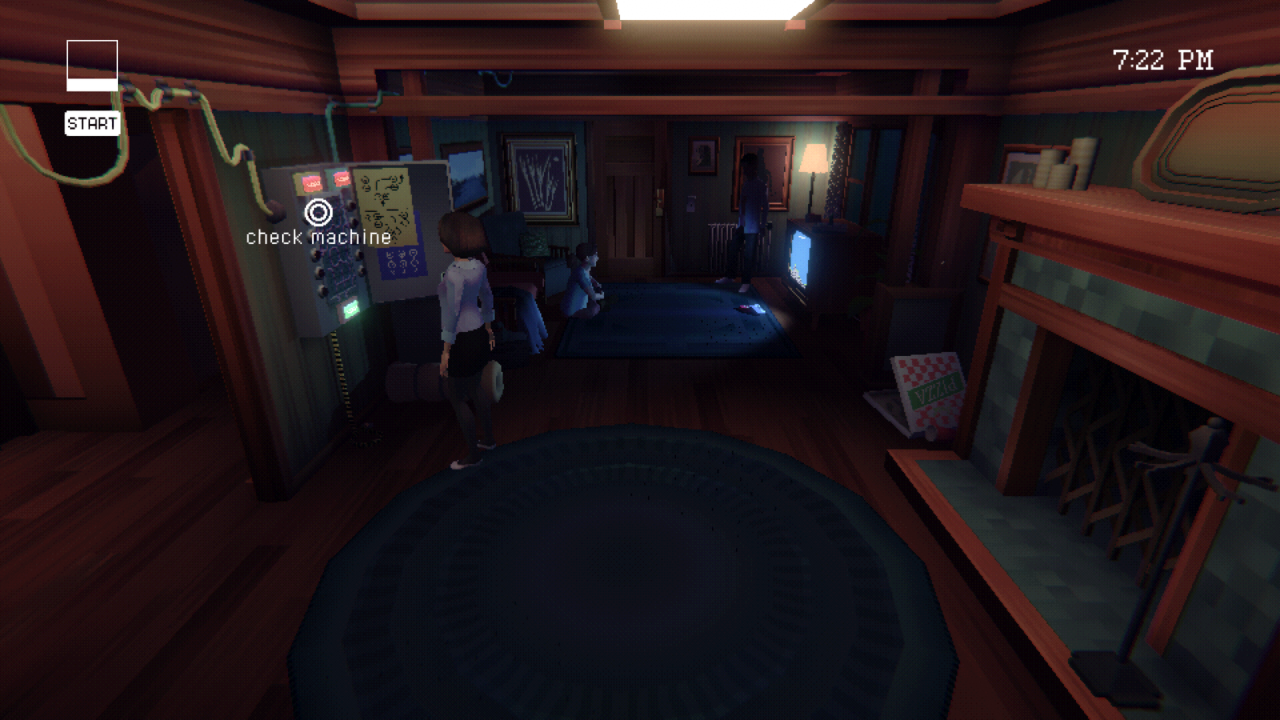
Gary will start in Living Room/Dining Room, which is directly to your right from the Foyer.

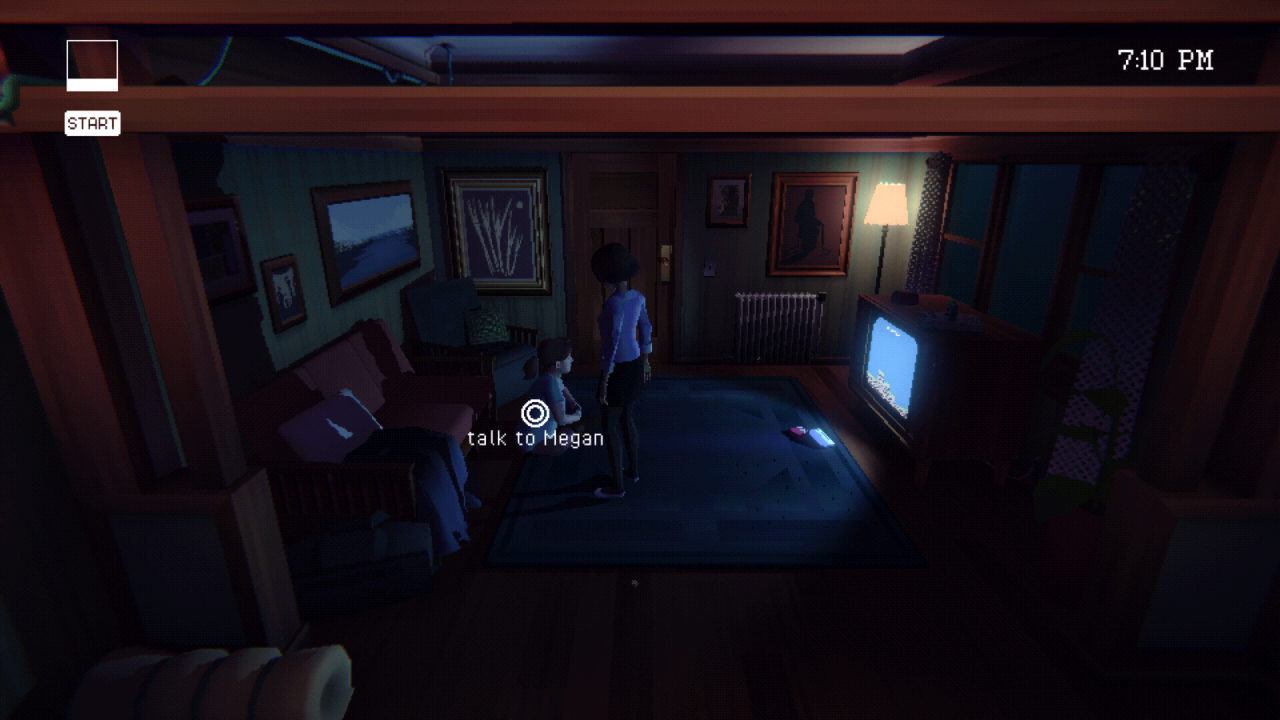
Megan can be found in front of the TV in the Living Room, playing a video game. You can play the game too – though it won’t be relevant until later.
Cliff can be found in the Kitchen, just past the Living Room.

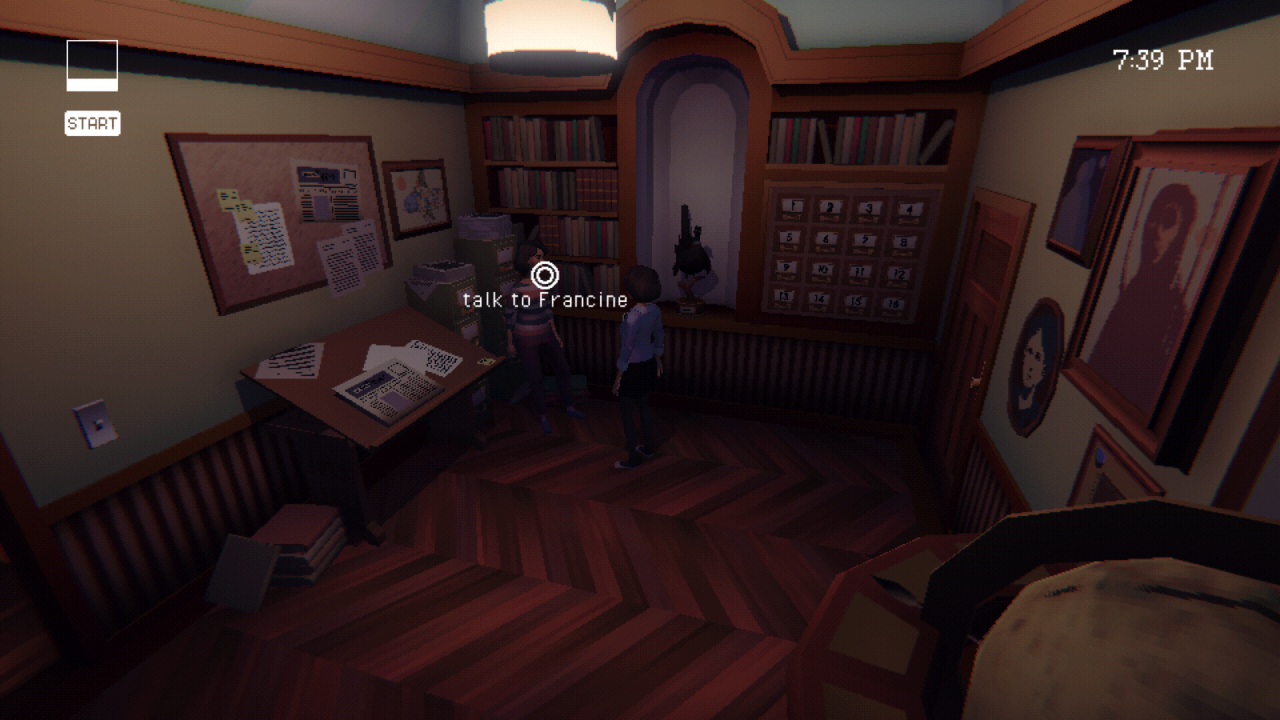
Francine starts out upstairs in the Study, on the second floor of the house (the lefthand doorway at the top of stairs from the Foyer)
Francine will mention something funny about the pipes in the Bathroom upstairs. Go up the stairs from the Foyer, head through the righthand doorway, and the Bathroom door is right in front of you.
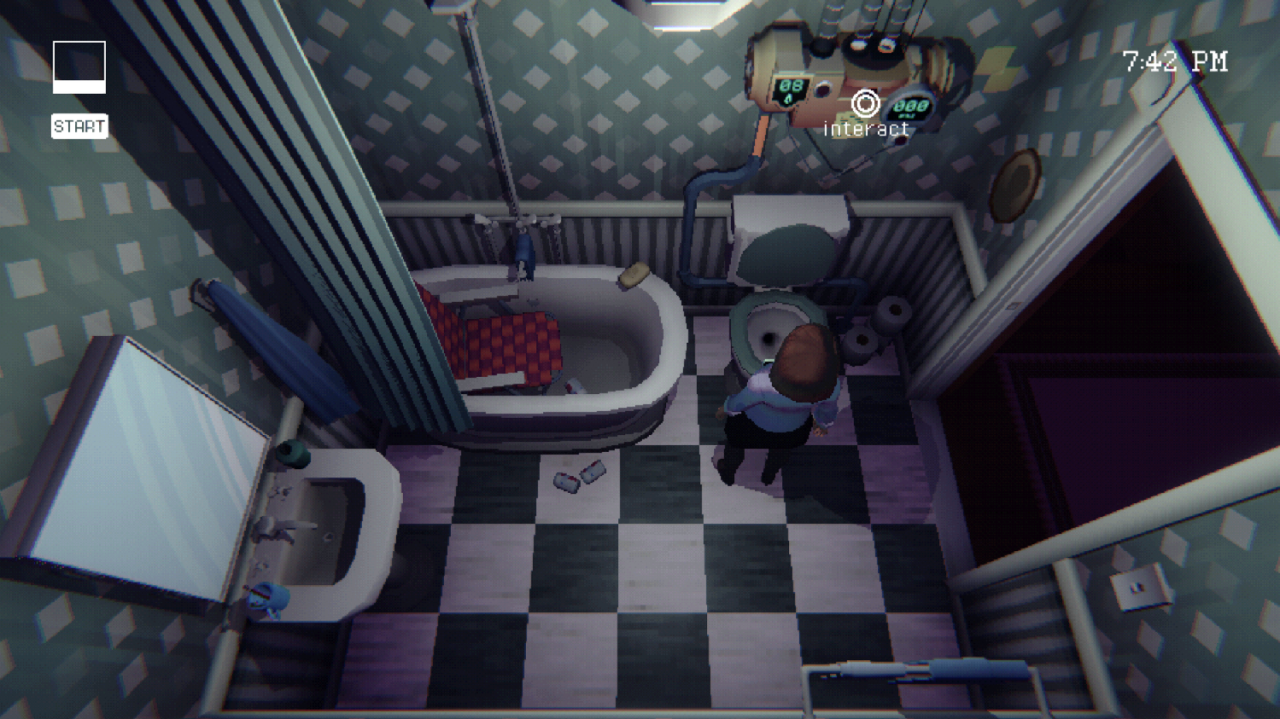
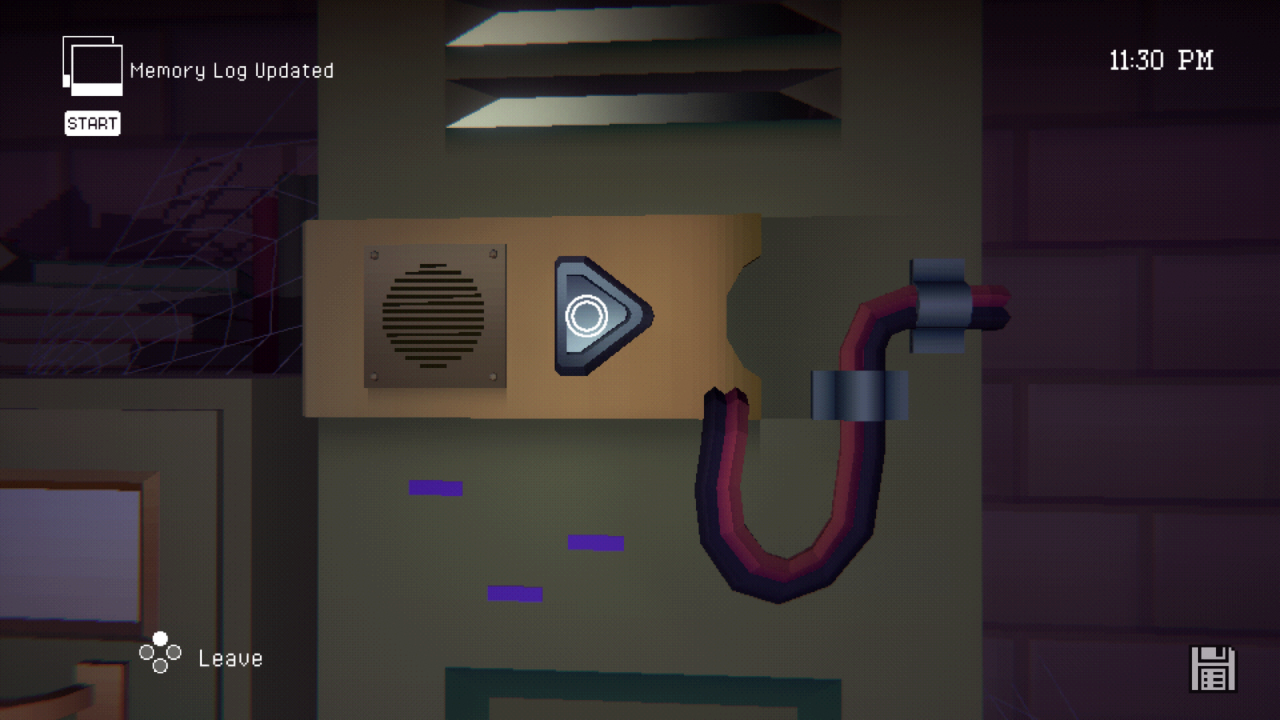
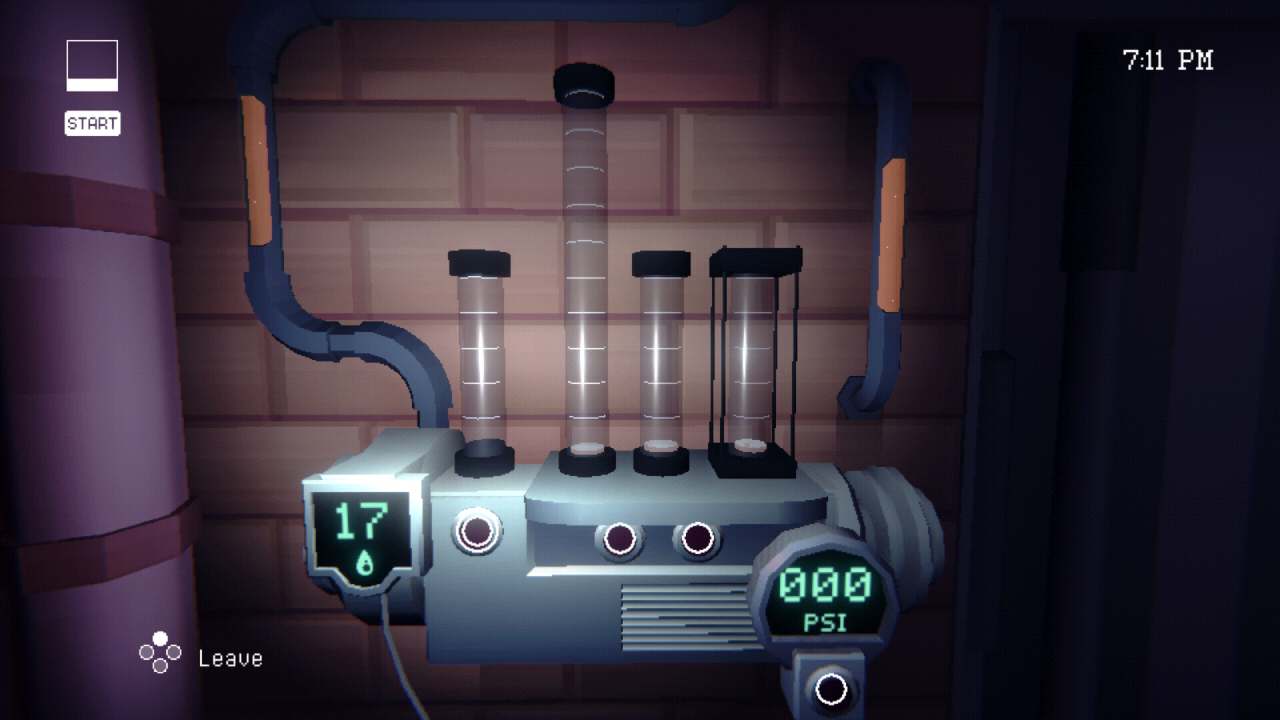
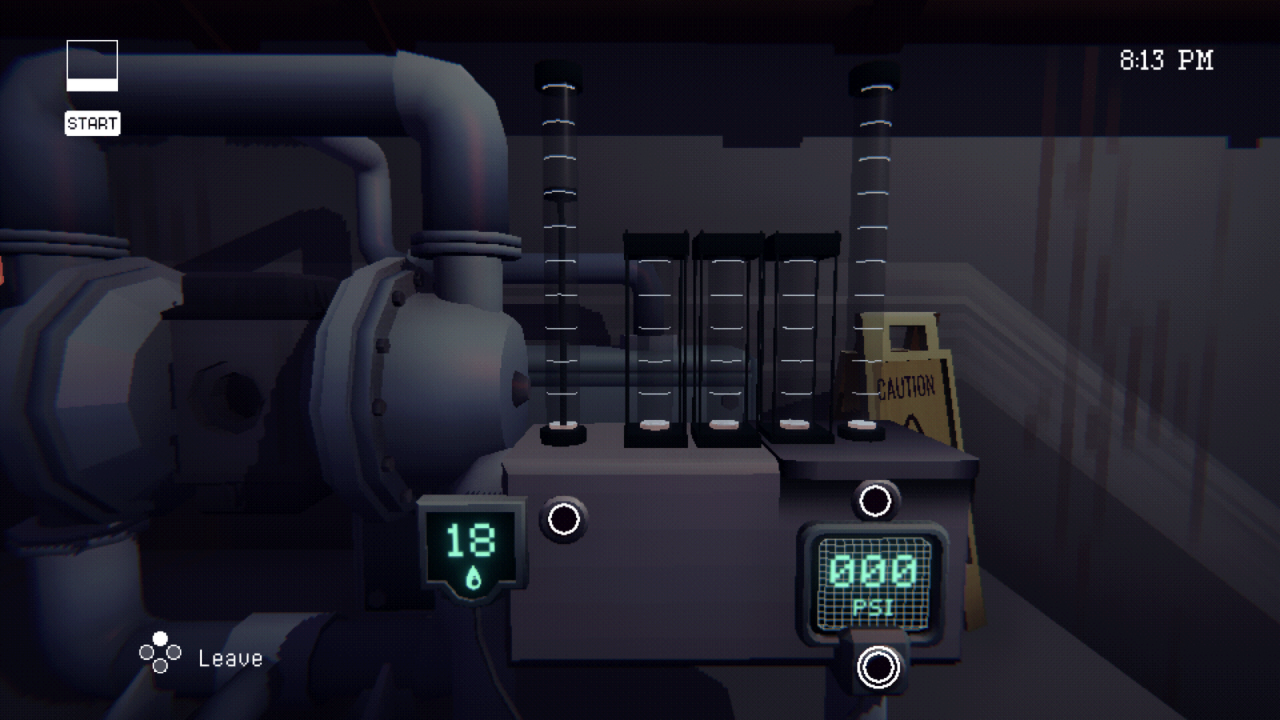
Check the pump machine on the wall. Read the sticky note to get a hint about aiming for 12 PSI.
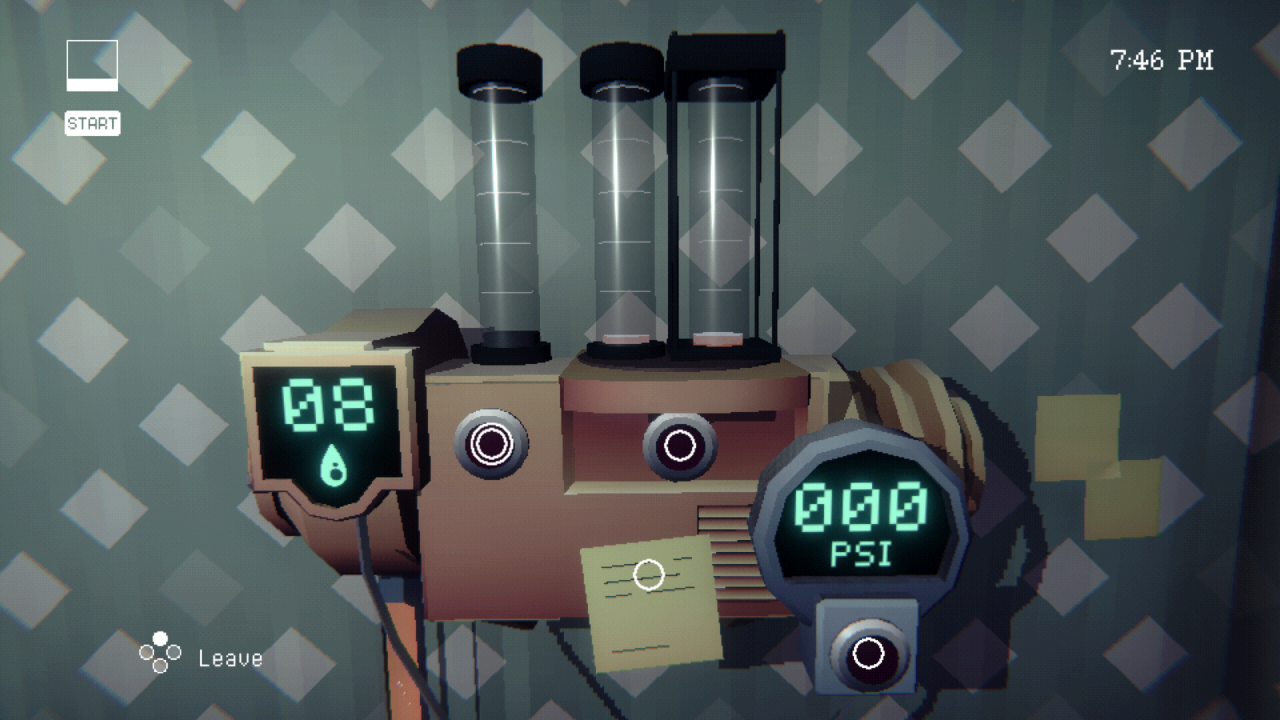
Interact with the button on the left to move an internal roof inside the leftmost tube, restricting how much water that tube will hold when water is pumped in. Interact with the button on the right to swap the positions of the normal tube, and the tube with reinforced siding.
Feel free to give the machine a test run; you’ll notice the water gets pumped in sequentially, filling tubes left to right. Assume the PSI doesn’t hit 12 exactly, the water will automatically drain back out of the machine.
The pump’s PSI goes up by 1 per segment filled with water on the normal tube, and 5 per segment filled on the reinforced tube. The total number of segments that will be filled once you start pumping water is shown in the display on the left (it should say 8).
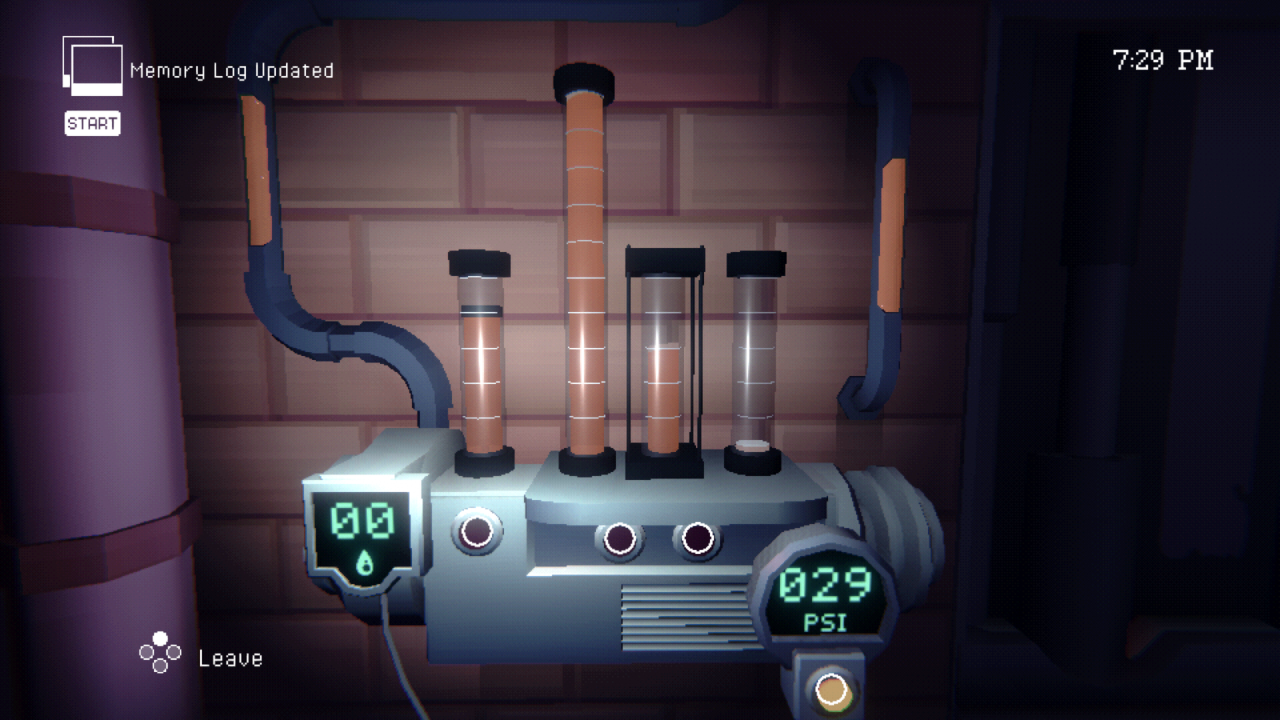
The pump machine makes for a fun little visual math problem, and will show up a few times throughout the game. But for those who just want the solution, here it is (hover over the black bar to reveal the image):

Completing the pump puzzle will result in a portion of the wall falling down. Inspect the crawlspace that is exposed as a result.


The guide on the pumps shown here is basically information you already know at this point, but it serves as confirmation of the pump’s mechanics for people who only solved the puzzle with a lucky guess.
Now head all the way to the other end of the upstairs hallway, and enter the door just before the end (the red door at the end of the hallway is locked for the moment).

This is the Main Bedroom.
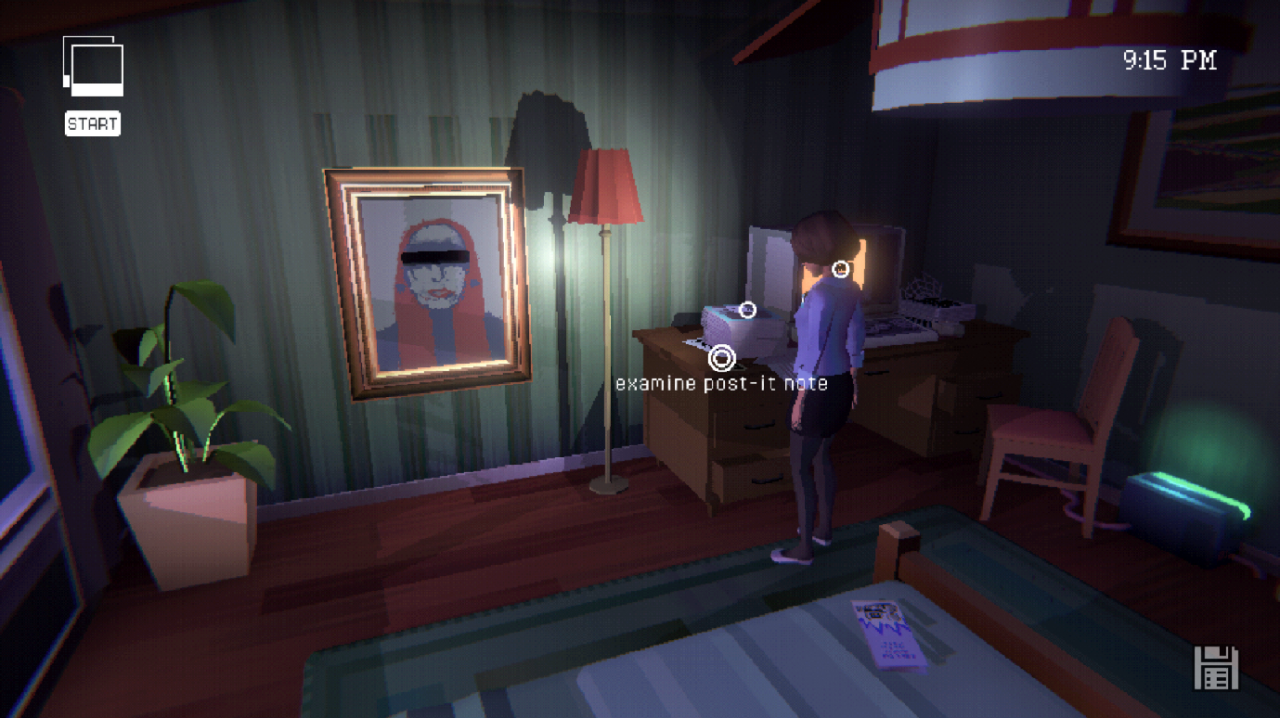
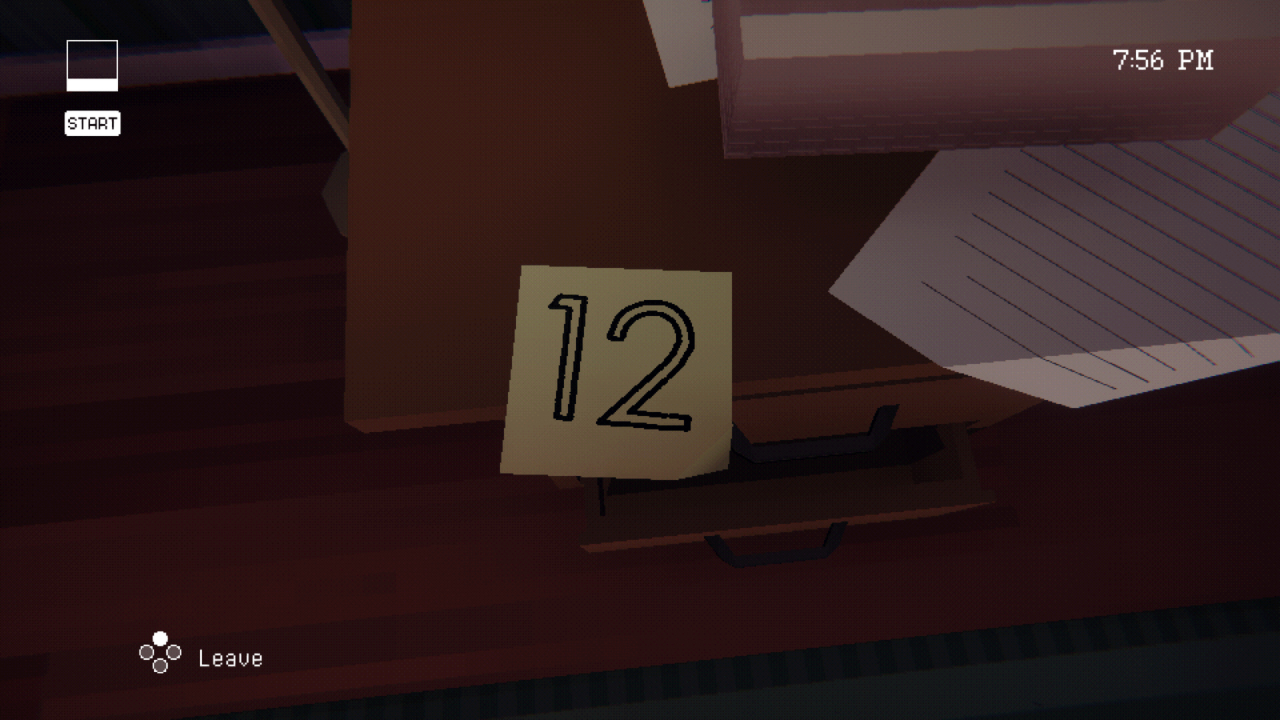
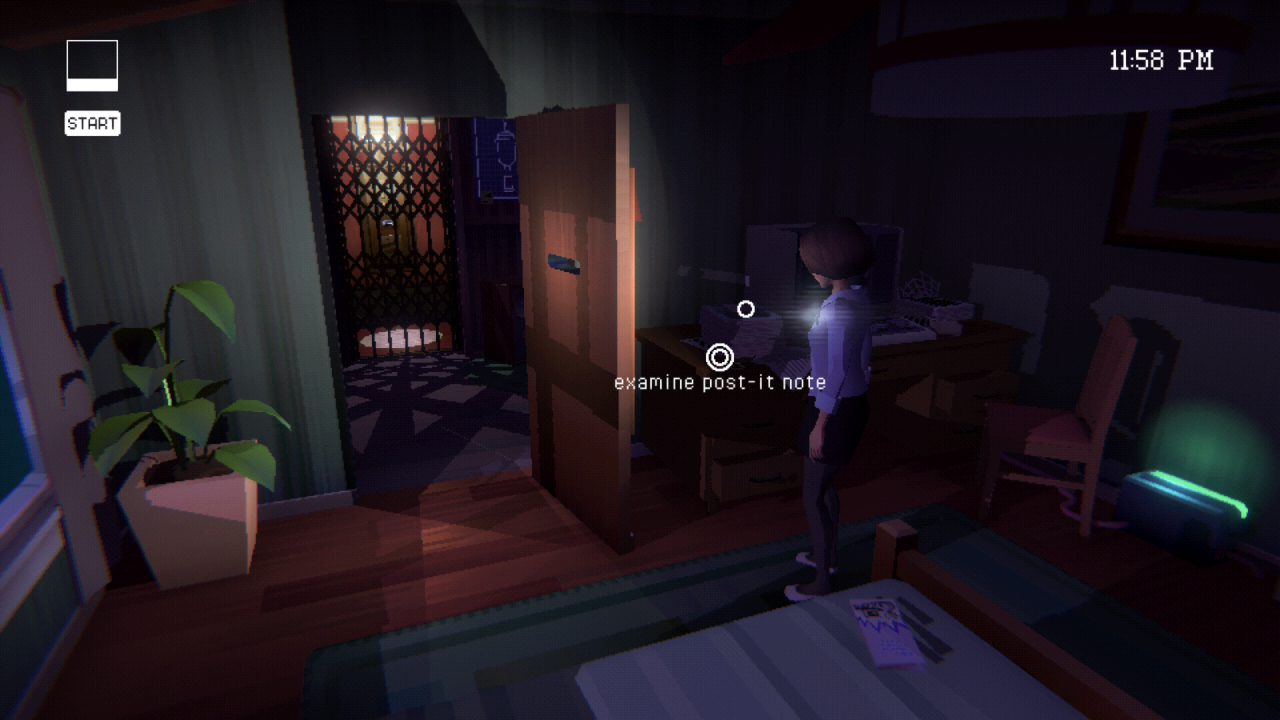
Examine the Post-It Note on the desk on the left for a Number 12 hint.
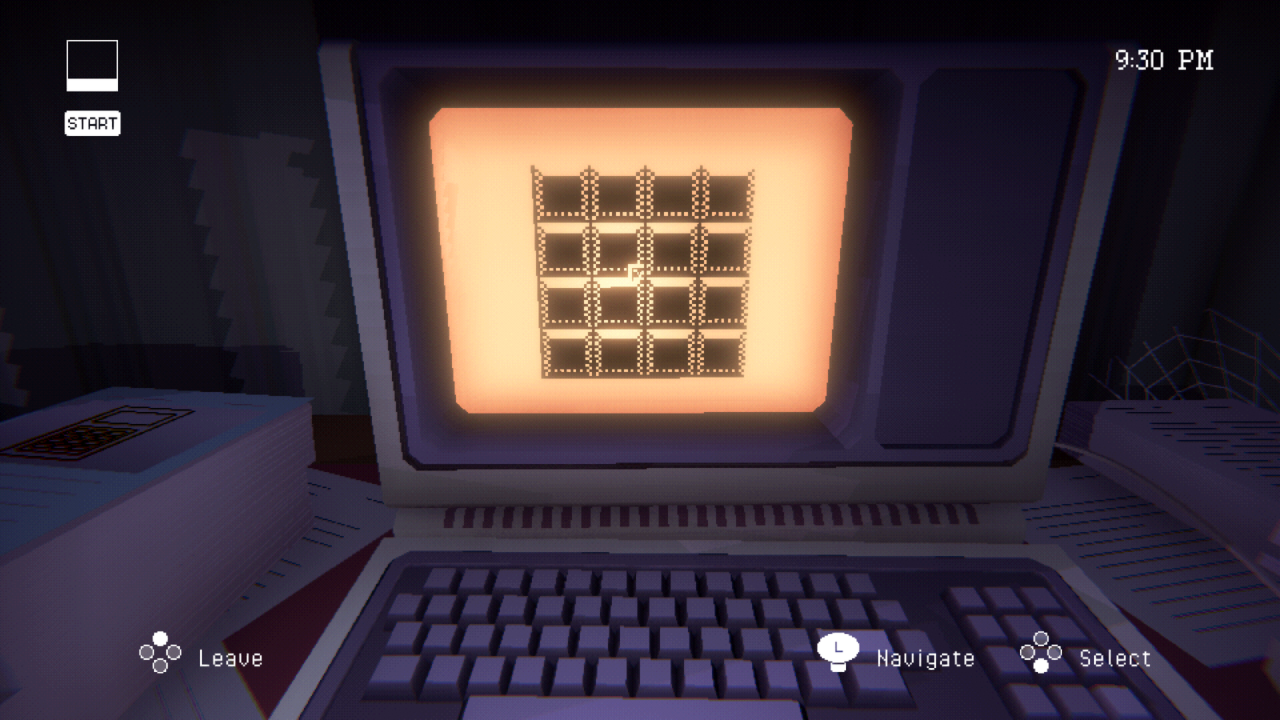
Examine the computer to play a game of Minesweeper. You must win the game to proceed; the rules of Minesweeper can be found with a quick google search, and it’s a relatively simple game.
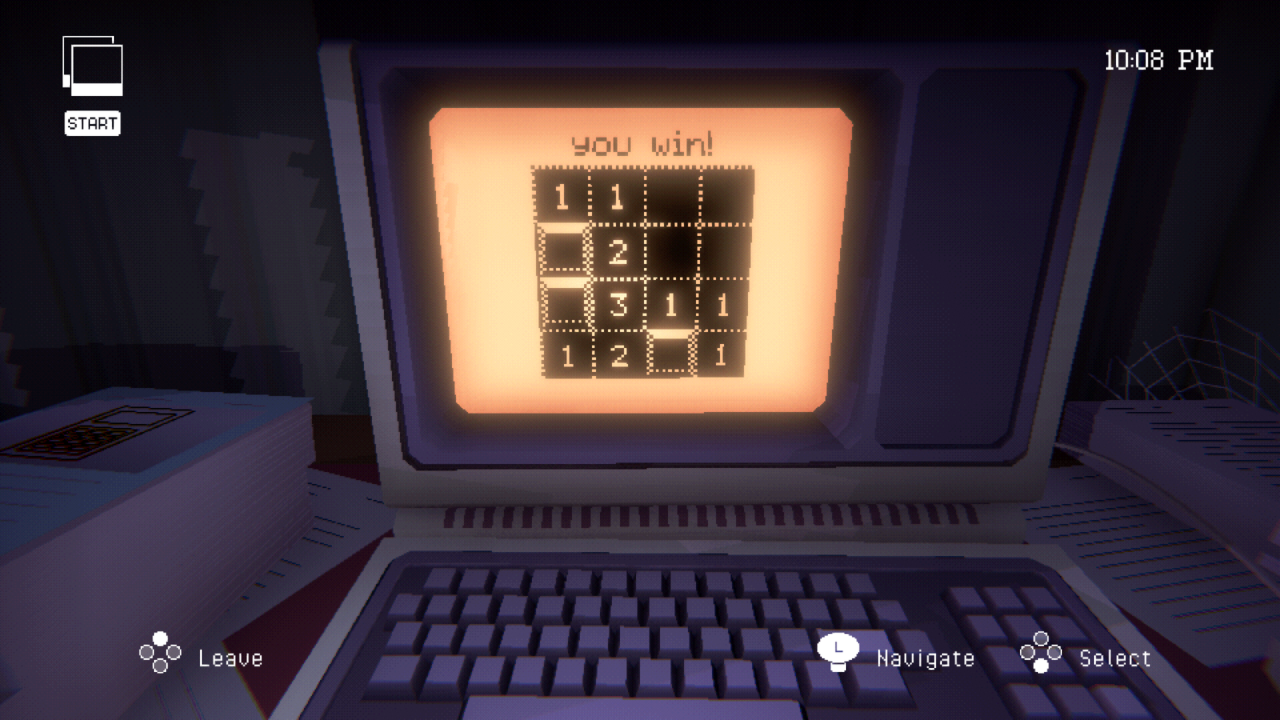
After you win at Minesweeper, take note of the positions of the remaining squares on the computer screen. The position of these squares within the grid is an important clue for later. I believe these positions are randomized each playthrough; this screenshot is just an example.
You can peek through the hole in the painting on the wall, but you can’t enter that area yet.

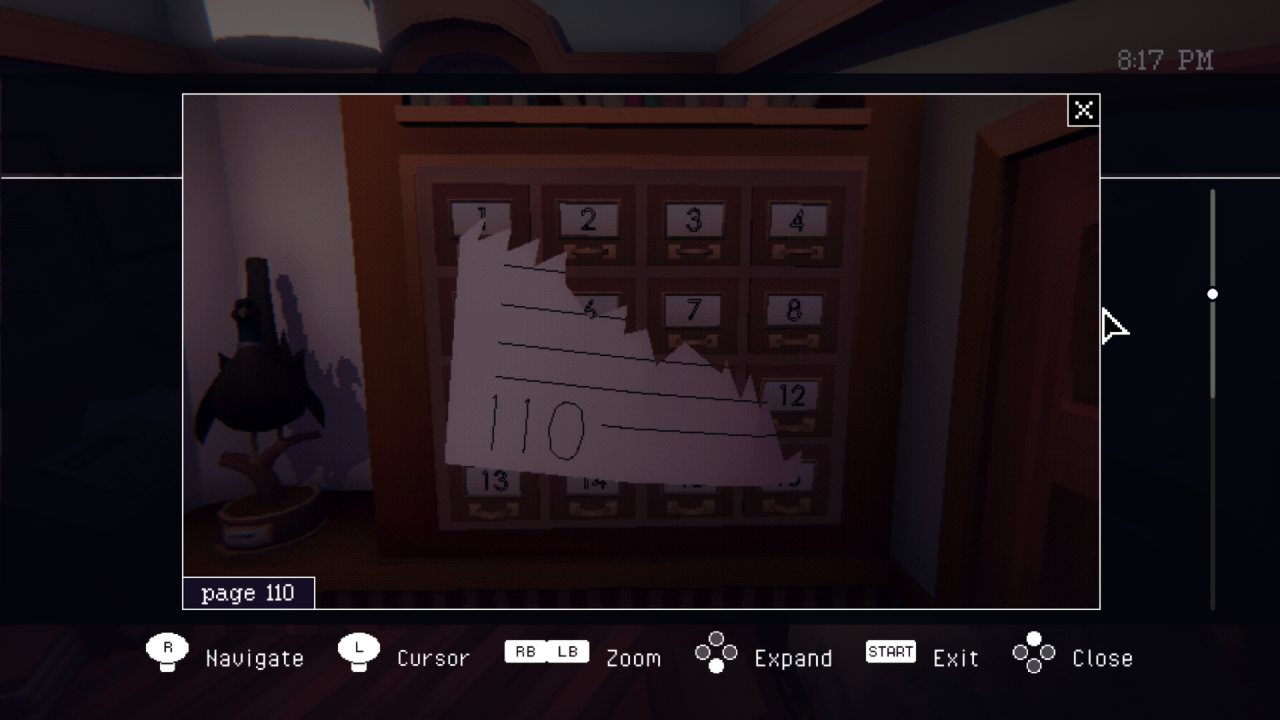
Head to the Study next – it’s the lefthand door at top of stairs from the Foyer. Examine the shelves on the right side of the room.
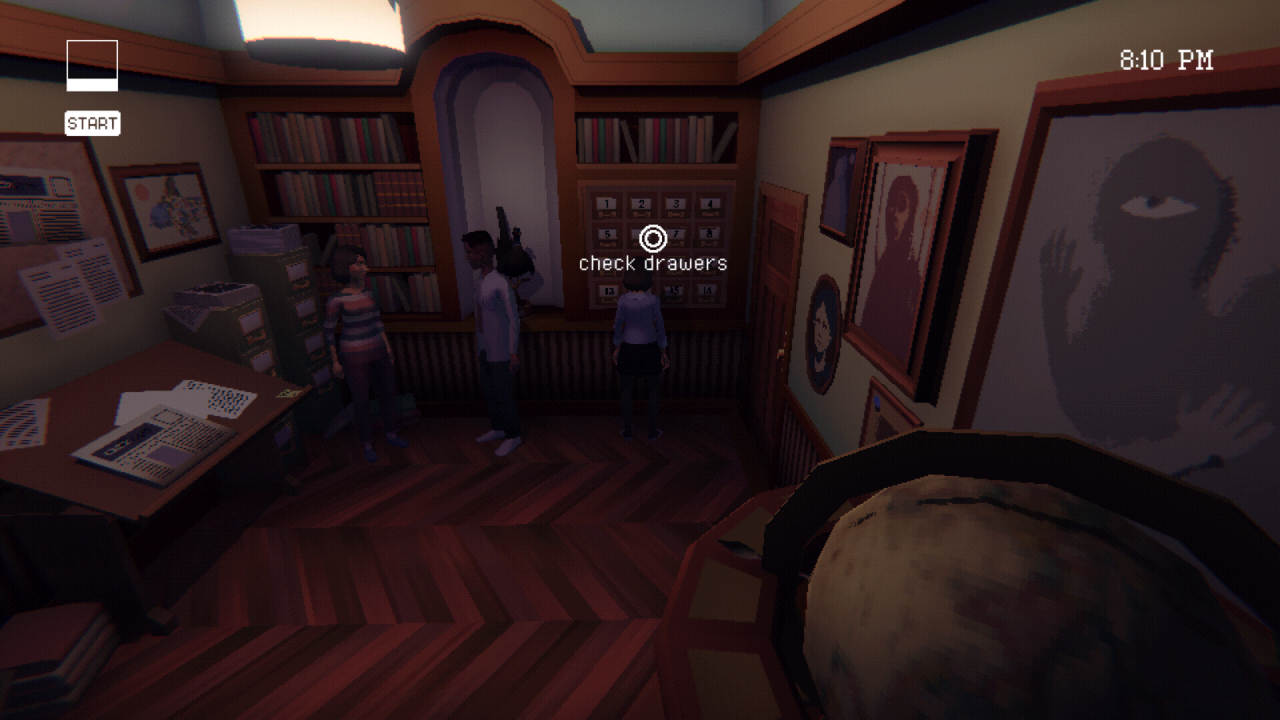
Notice how the font numbering these shelves matches the font of the sticky note.

Open the shelf labeled “12” to find a piece of paper with the number “110” on it. From the look of it, it seems to have been torn from the page of a book.
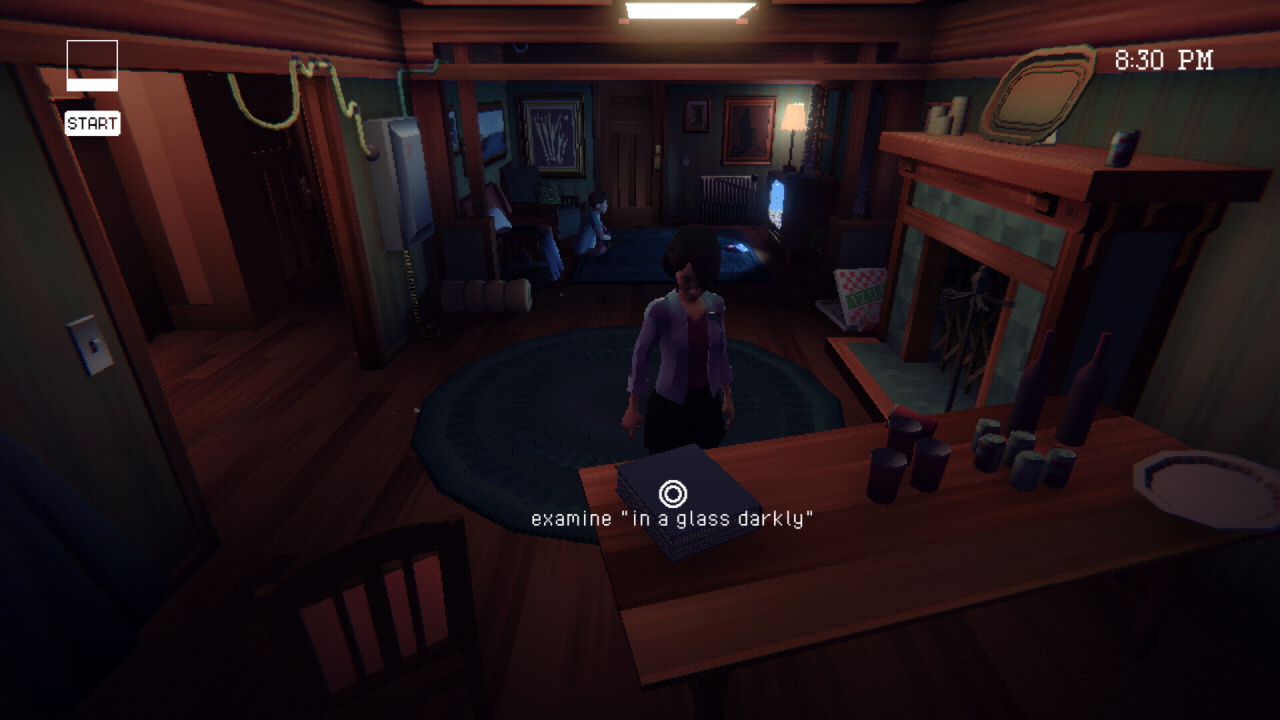
There are several books (Dracula, the Bhagavad Gita, etc.) scattered around this house. Most of them are red herrings; through trial and error, we can determine that the only book with something interesting on page 110 is located in the Living Room, titled “Through a Glass Darkly.”
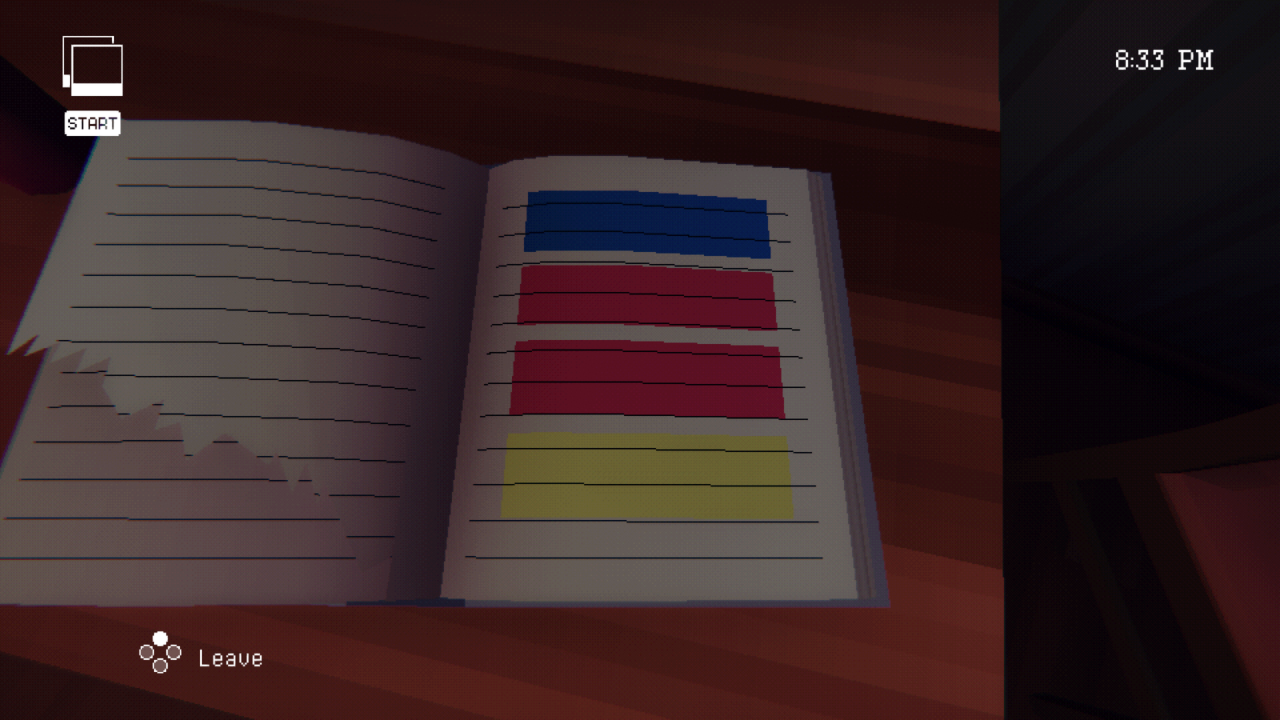
Open this book and flip to page 110 to find a color-coded clue:
At this point, we’ve found all the most important clues available to us before the in-game time hits 9:15PM. At that point, a new route will be made open to the player.
Walkthrough II (Cellar and Antechamber)
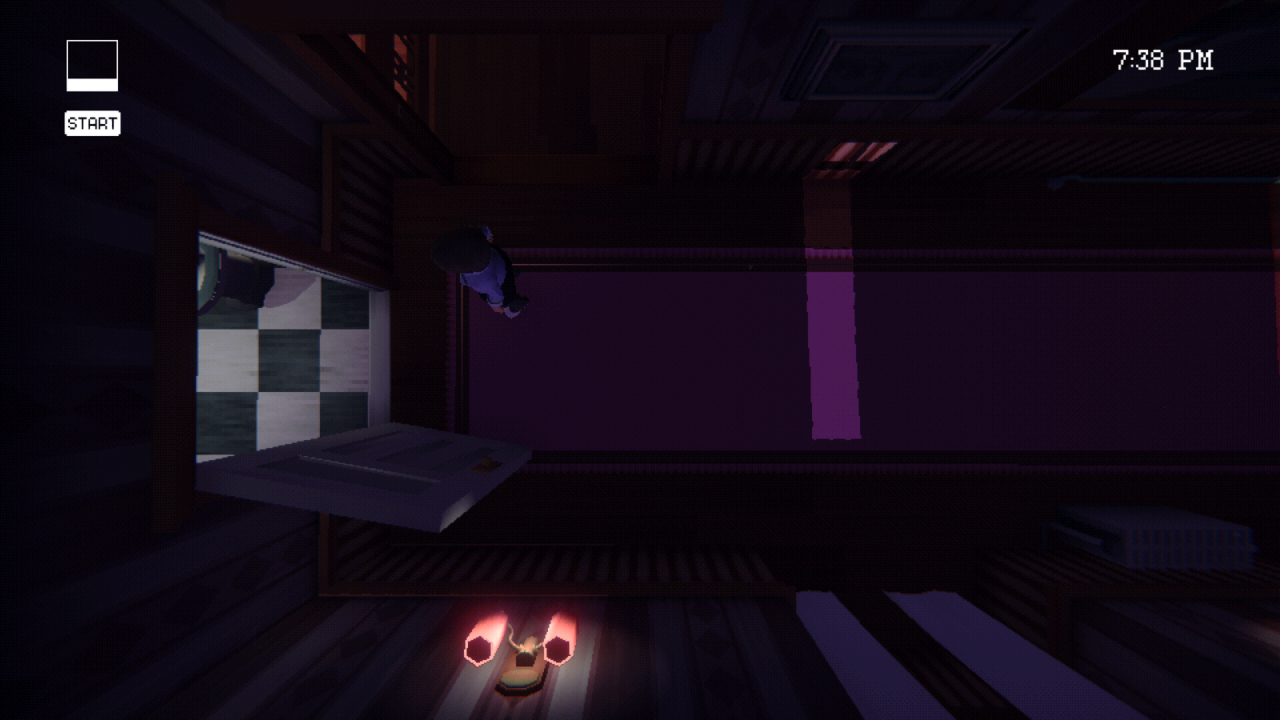
At 9:15PM during each iteration of the night, lightning will strike a power generator near the house, knocking out the main power grid and disabling most light switches and other basic electronics around the house (for a creepy little easter egg, be in the middle of playing Megan’s video game at the moment the lightning strikes).
Crucially, the door to the Cellar (adjacent to the Foyer) will now be open. This door is typically locked by a keypad – but when the power goes out, it seems to trigger some kind of failsafe mechanism that automatically opens the Cellar door.
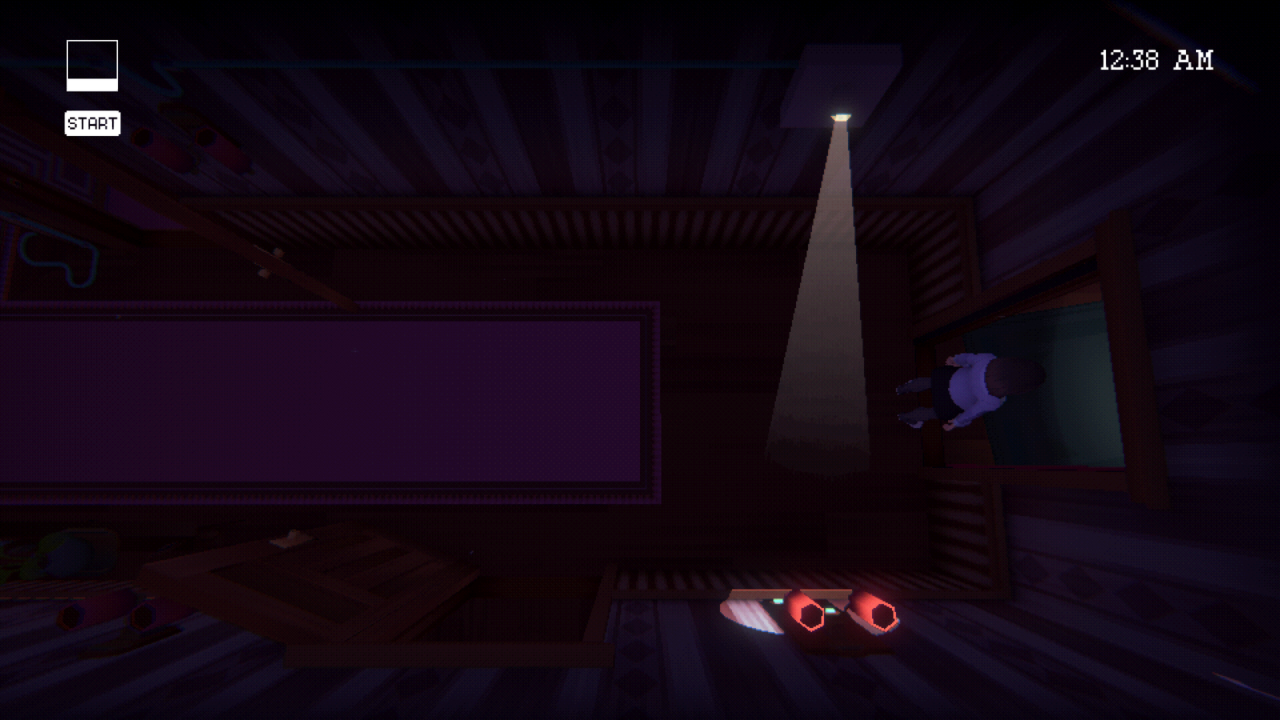
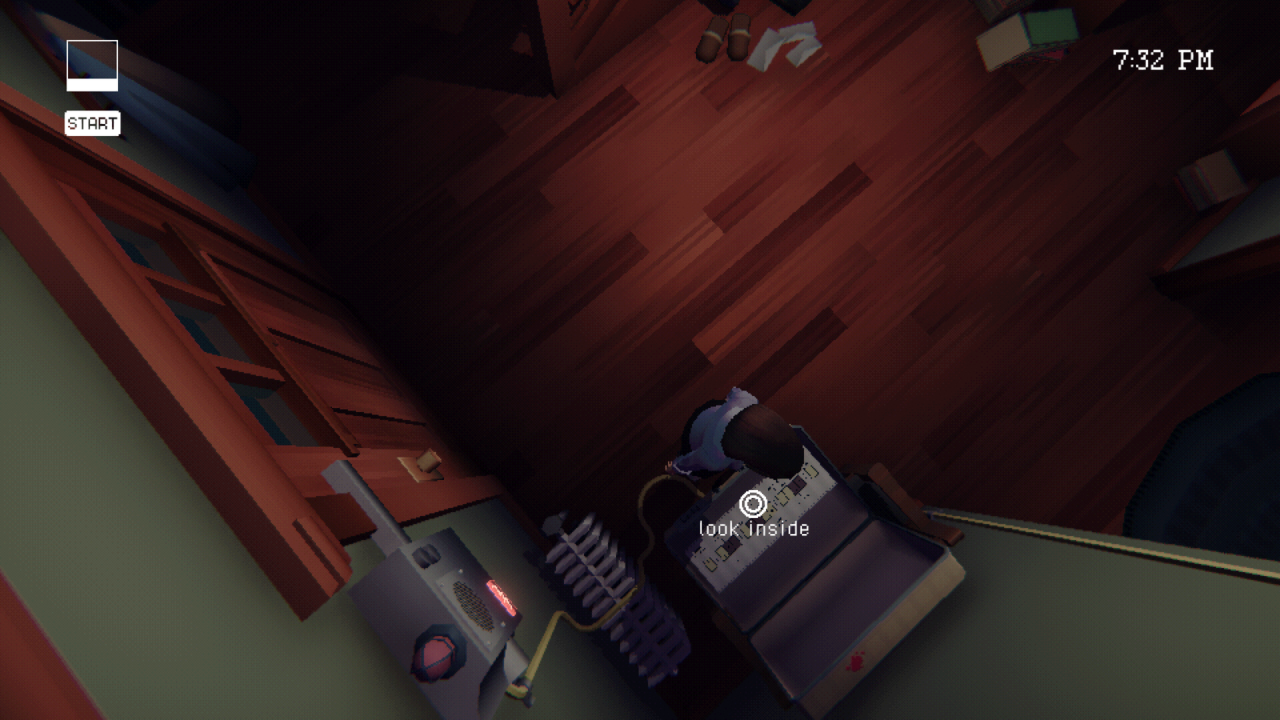
Head down the stairs to the Cellar and inspect the locker near the wall. Interacting with it won’t do anything helpful, but take note of the three carefully positioned color segments on the front. These will be saved in your memory log and are relevant for a future puzzle.
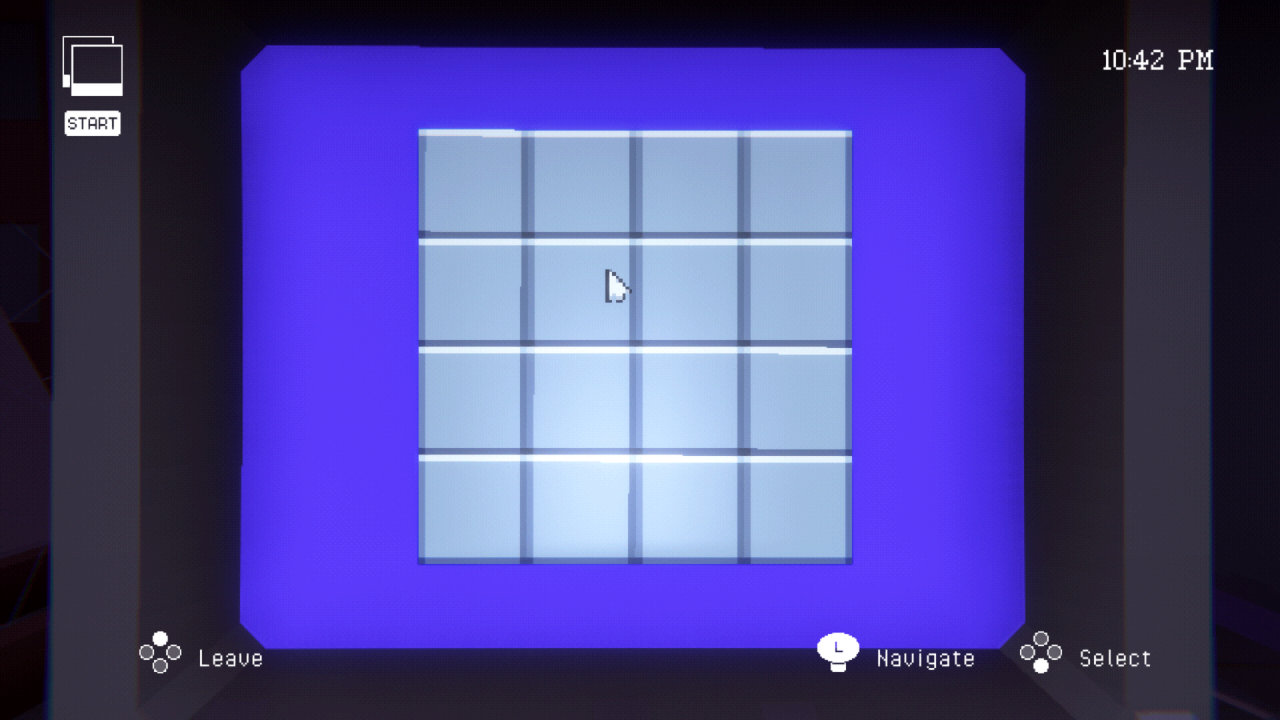
Now turn around and head deeper into the Cellar. Inspect the gridded panel mounted on the wall of the room’s central pillar. The buttons on this panel form a 4×4 grid. Each button on the grid can be toggled on/off.
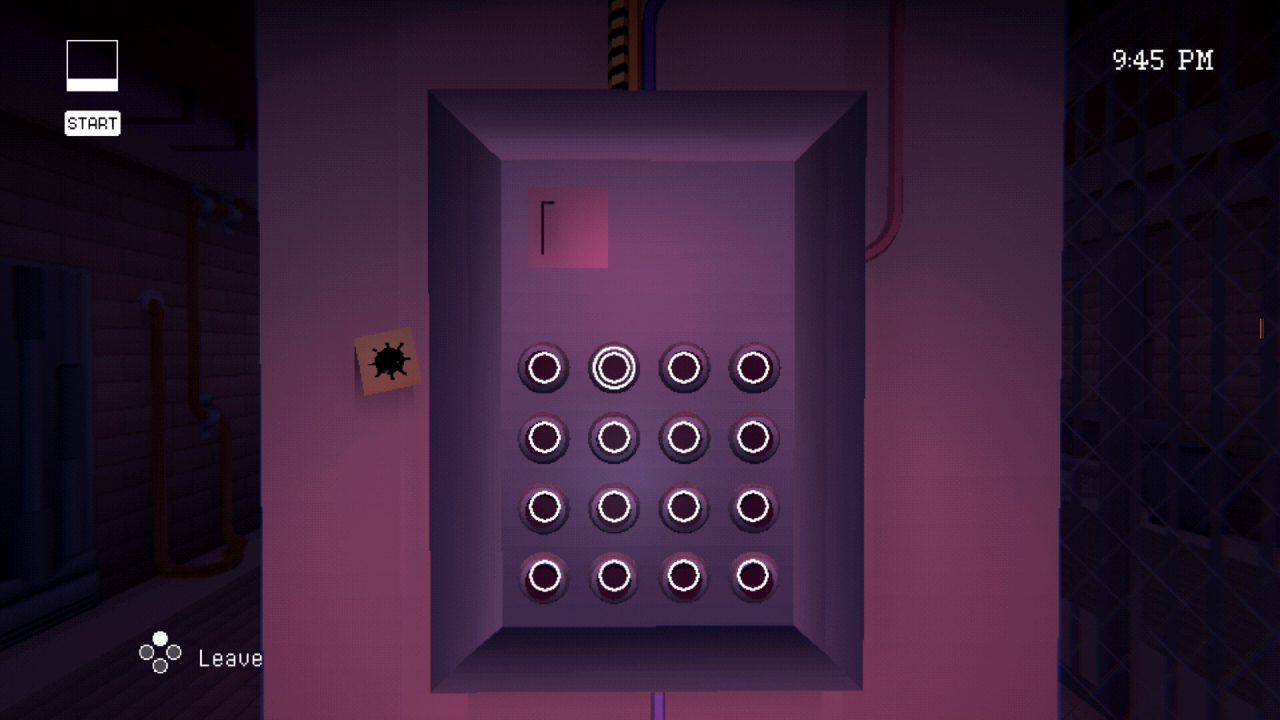
You can inspect the post-it note on the left to find an image of a mine from minesweeper. This implies a link between the minesweeper field configuration, and the combination to unlock the panel.
To unlock this panel, simply toggle on the buttons on the grid corresponding to the only remaining squares from the minesweeper game after you beat it (you can check your Memory Log to confirm their positions in the grid). I’ve included what my solution was as an example.

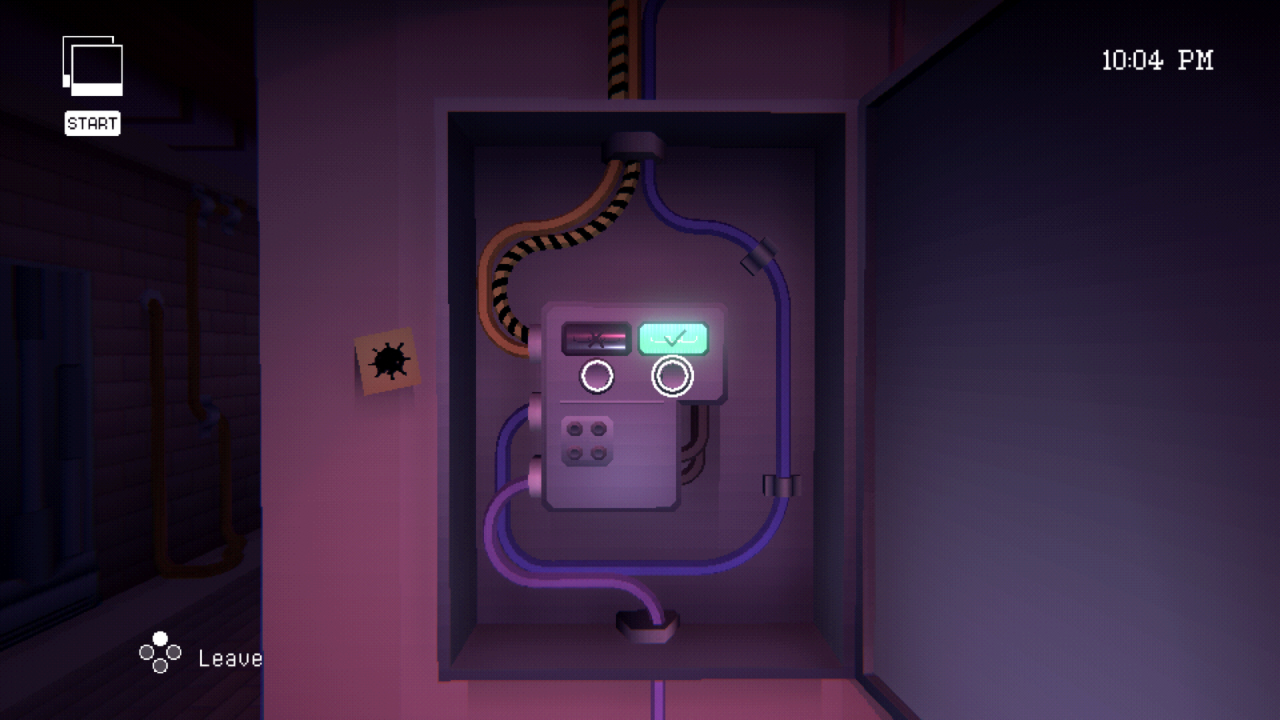
The panel will open to reveal a power switch. Switch it on (interact with the right-hand button, which will turn green). This provides power to another power box in the Living Room, but we won’t handle that just yet.
Go around the corner of the pillar to find an iron door. Interact with the door to reveal a color-coded combination lock.


Interacting with the left and right buttons will rotate the top segment of the lock left and right, cycling through the colors Blue, Yellow, and Red. The buttons only rotate the top segment at first, but you’ll notice that after rotating it twice consecutively in one direction, the third time you rotate it in that same direction, the second segment now rotates along with the top segment. The same relationship exists between the second and third, and third and fourth segments. Rotating the top segment once in the opposite direction stops the whole process of multiple segments rotating together.
To open this lock, you need to make it match the color-coded clue you found in the “Through a Glass Darkly” book. The combination is Blue, Red, Red, Yellow (not sure if this is randomized between playthroughs).
The easiest way to approach this puzzle is to resolve the colors starting from the bottom, e.g. first aim to get the bottom segment yellow, then make the third segment red, etc.
For those of you just looking for a direct solution, the following sequence of hitting the left and right buttons will open the door:
- Right x7 (bottom segment is now yellow)
- Left x5 (second and third segments are now red)
- Right x1 (top segment is now blue)
Head inside the opened door and inspect the schematic on the wall to find a three digit code. This is the code to the keypad next to the Cellar door near the Foyer upstairs. This means that during future loops, you don’t need to wait for the clock to hit 9:15 and the power to go out before coming down to the Cellar.

There isn’t anything else left to do down here at the moment, so head all the way up to the second level of the house and return to the Main Bedroom.
Assuming it’s past 10:45 in your game, the wall behind the painting has swung open to reveal a small antechamber.
For context, right around 10:45 during each loop is when the Killer arrives, emerging from behind the hidden wall in the Main Bedroom. (you can actually hide in the closet in that room and watch them arrive, before heading out to hunt down your friends).

I can’t say for sure, but I believe the Killer actually starts arriving earlier and earlier in the night as you make progress through the game, so keep your guard up.
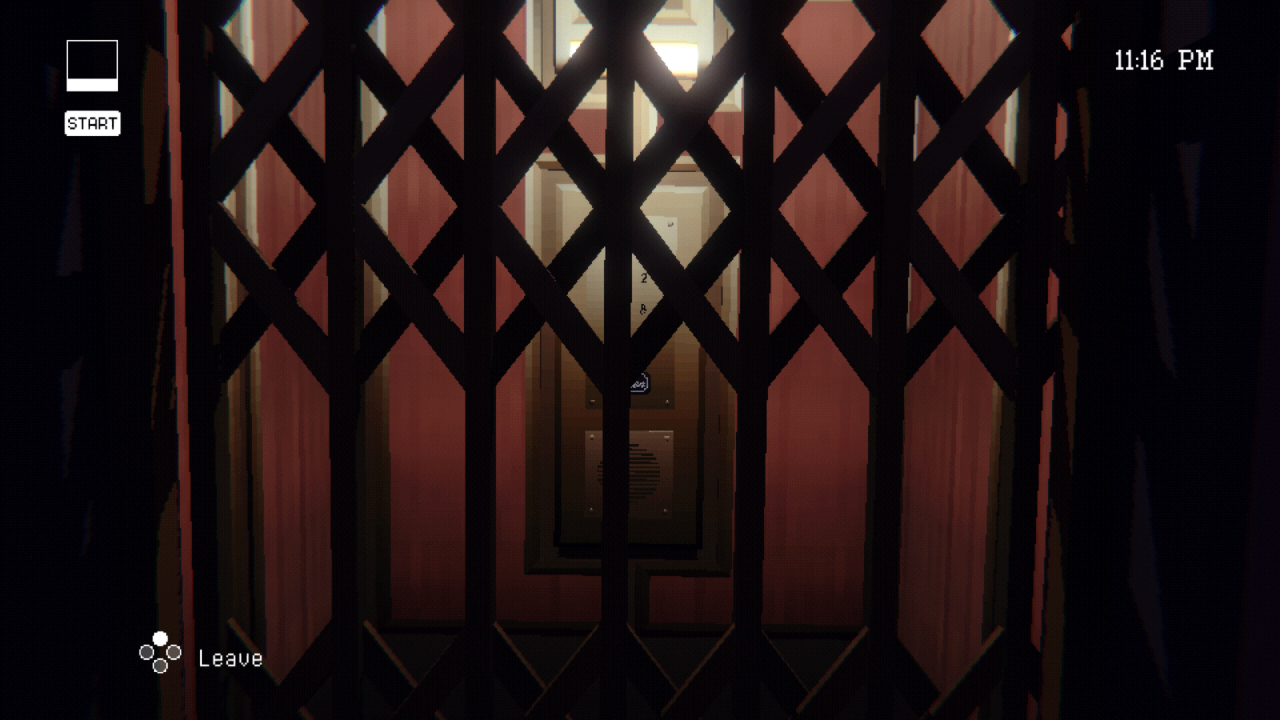
In the small antechamber behind the false wall, you’ll find an elevator – but you can’t do anything with it just yet.
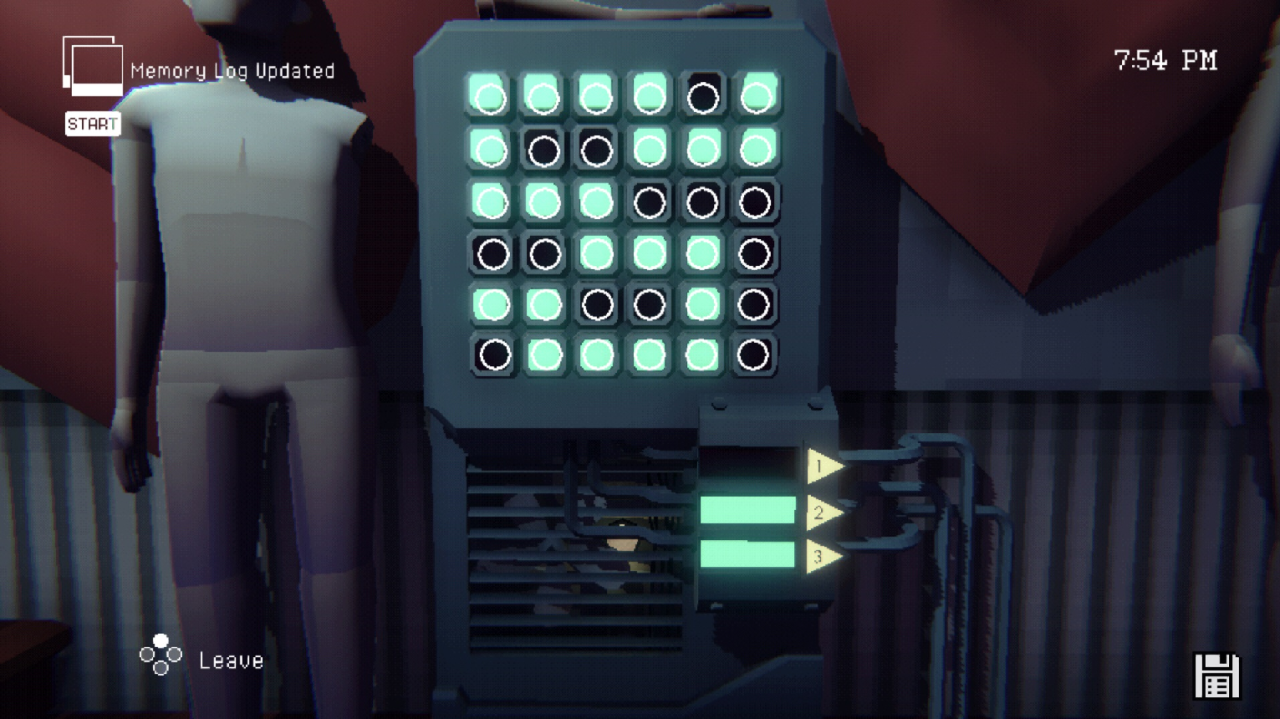
On the desk in this antechamber, interact with the Synthesizer.
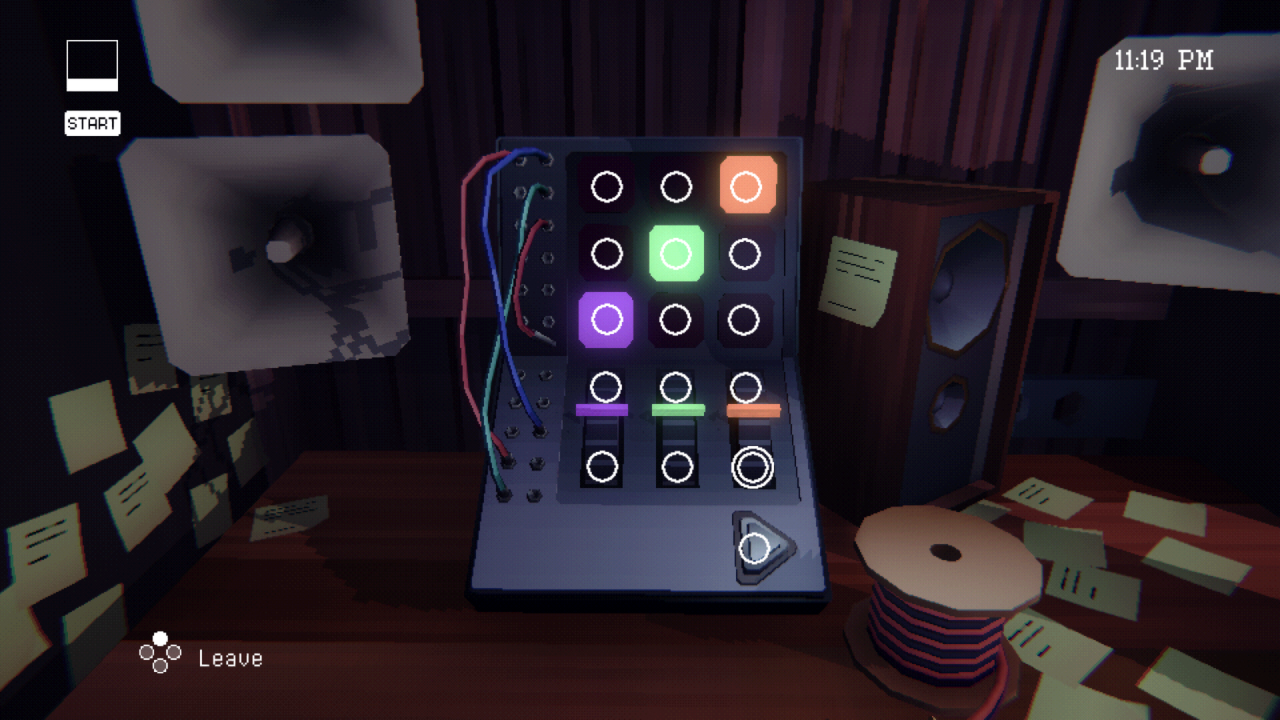
You want to make the pattern here match the one you saw earlier on the front of the locker, down in the Cellar. To do so, you need to match the positions and colors of the three bars that were drawn on the front of the locker.
First, set the three levers on the bottom of the synthesizer to match the positions of the three bars from the locker visual (each bar will either be top, middle, or bottom). Then, the three squares in the grid on the top of the synthesizer need to be made to match the three bars from the locker visual. you can position them in the top, middle, or bottom row of the grid to change their colors. Set each square to its matching color from the locker visual.
Here’s an example of my solution, given the picture of the locker from earlier in the guide:

Note that setting the colors for each panel on the synthesizer makes a loud noise, which will likely attract the Killer to you. You’ll need to move quickly and carefully during the next few steps.
Now that the colors and positions of the squares are correct, press the “play” button on the bottom-right corner of the synthesizer. The locker in the Cellar will open.
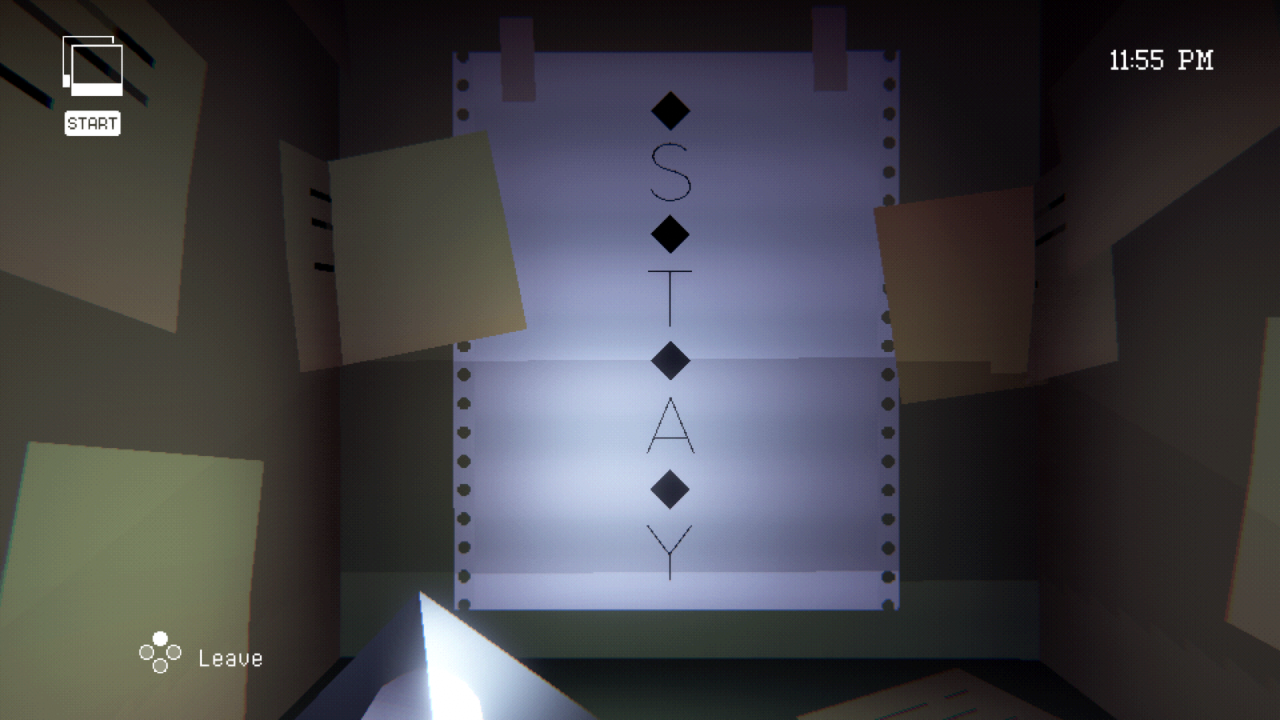
Proceed to the Cellar and inspect the locker. You’ll find a note on the wall with the word “S T A Y” written out. This clue will be relevant later.
The Antechamber in the Main Bedroom is the only place that can only be explored after the Killer arrives, and you now have all the clues you need from it. Thus, you should feel free to follow the next several steps during the “safer” opening hours of each loop. If you ever need to quickly refresh and start a new loop from 7PM, you can always return to the main menu and reload your save.
Walkthrough III (Attic, Waiting Room, Art Studio)
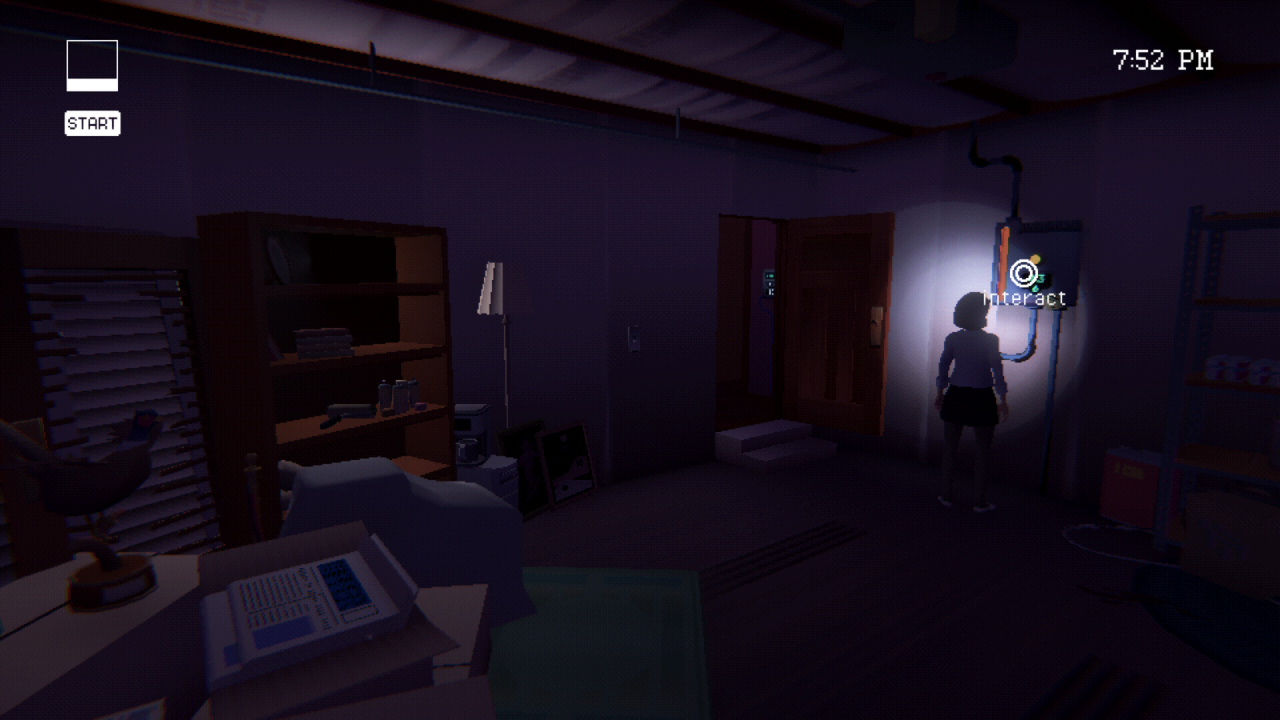
If you’re starting a fresh loop here, you’ll need to re-activate the power box in the living room. Thankfully, this can be done very quickly with the information you’ve picked up so far: use the keypad next to the Cellar door in the Foyer, enter the combination you got from the Cellar (inside the door with the color-combo lock), head into the Cellar, open the panel on the wall by using the minesweper grid visual, and turn on the power switch inside.
Return to the Living Room. You’ll now find that the power box on the wall is open.
Interact with the box to reveal a circuit board puzzle.

This puzzle, when solved, can do one of two things: (1) open the lock on the front door of the house, or (2) turn on a light in the upstairs hallway, just outside the Master Bedroom (for those curious, you can infer these two possibilities by following along the different power cables emerging from the box and seeing where in the house they lead).
Power is being provided from the bottom of the box, at the plus and minus nodes near the green light. You can interact with the nodes running up and down the sides of the circuit board to swap the positions of the two wire segments adjacent to that node. The goal here is to reorganize the wire segments as necessary in order to create a path that links the bottom plus and minus nodes to either the left or right plus and minus nodes.
As indicated on the blue note on the side of the circuit board, you’ll want to link plus with plus, and minus with minus. Connecting the bottom nodes to the left nodes will open the door, while connecting the bottom nodes to the right nodes will turn on the upstairs light.
This puzzle can be pretty tricky, and takes some foresight to solve (though you may be able to solve it by just messing around enough).
For those interested in the direct solutions, here are the minimal set of moves to solve the circuit board puzzle in both directions.
(To keep the notation simple, assume the top-left interactable button on the circuit board is L1, below that is L2, etc etc., down to L5, and the same for the right-hand nodes.)
Left-side solution (open the front door lock):
- L5
- L4
- L3 (minuses are now linked)
- R3
- R1
- L1 (pluses are now linked)[/spoil
The lock over the front door in the Foyer is now powered on. Interact with it to retract the deadbolt.

Head through the front door and off the porch to make your escape!
 Good luck…
Right-side solution (turn on the upstairs lamp)
- R5
- R4
- R3
- L3
- R3 (pluses are now linked)
- R2
- L1
- R1 (minuses are now linked)
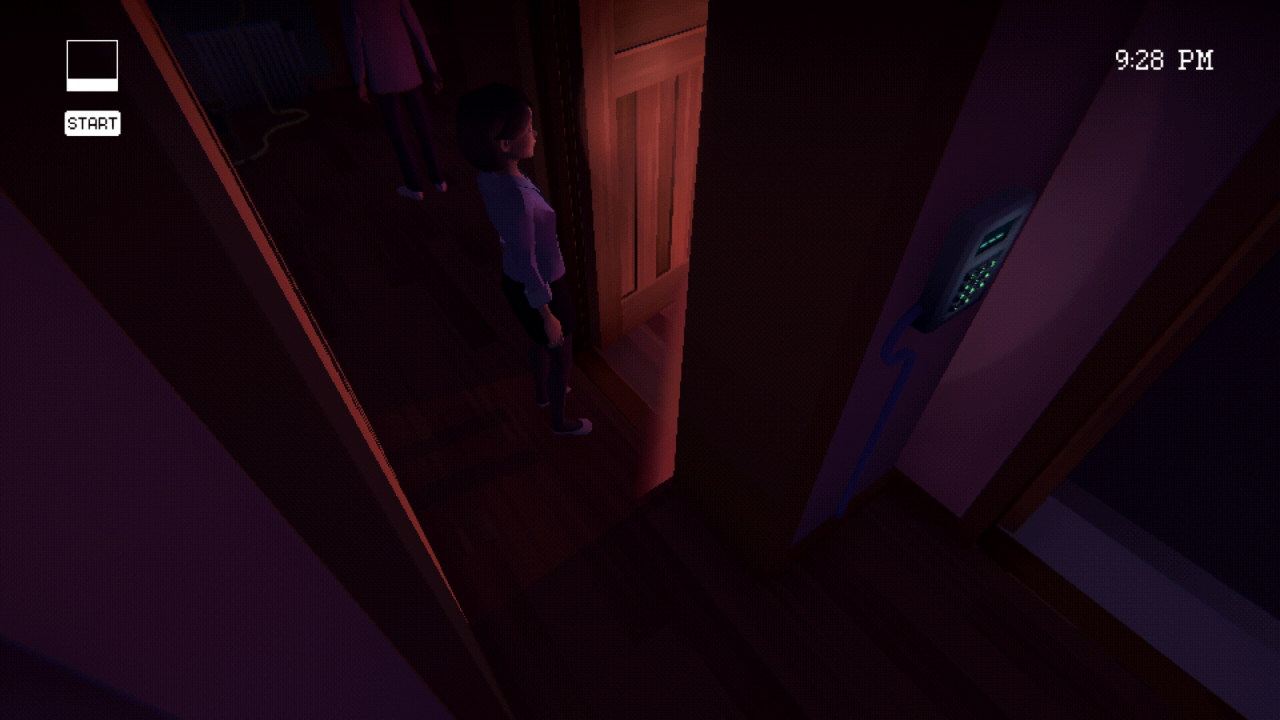
with power now supplied to the right-hand side of the box, head back to the upstairs hallway, just outside the Main Bedroom. You’ll notice a lamp is now shining on the panel beside the bedroom door.

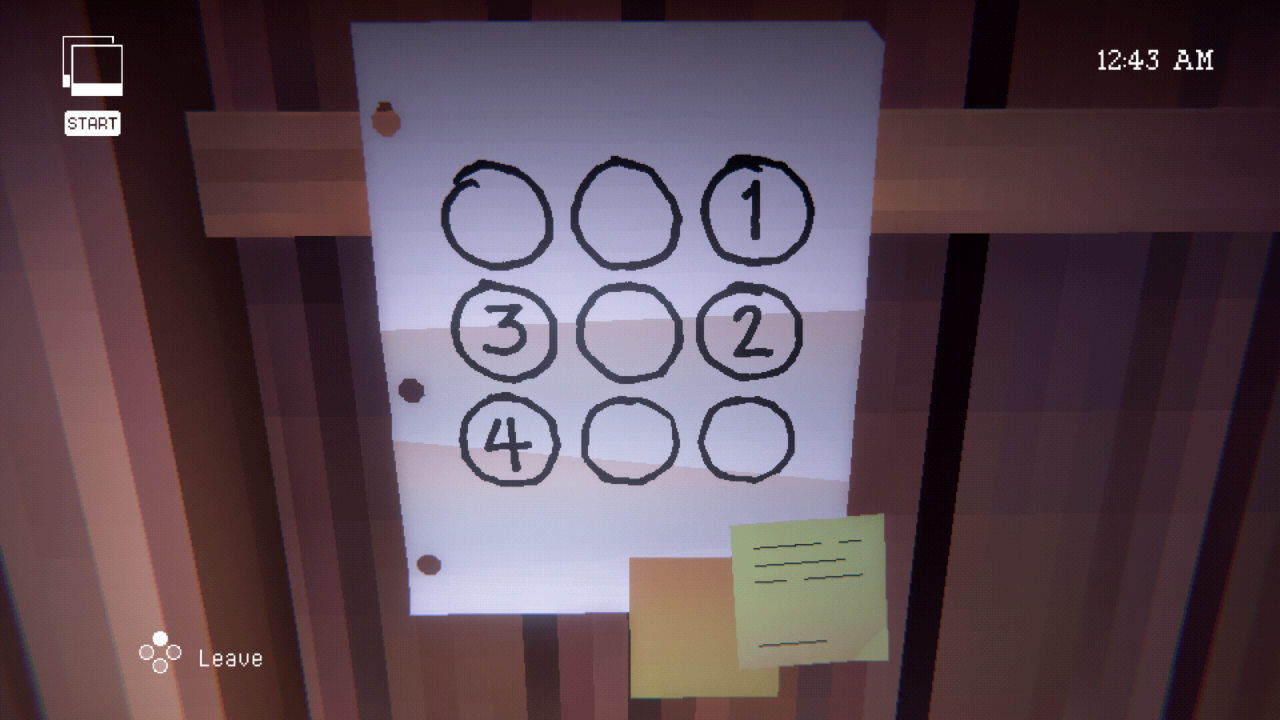
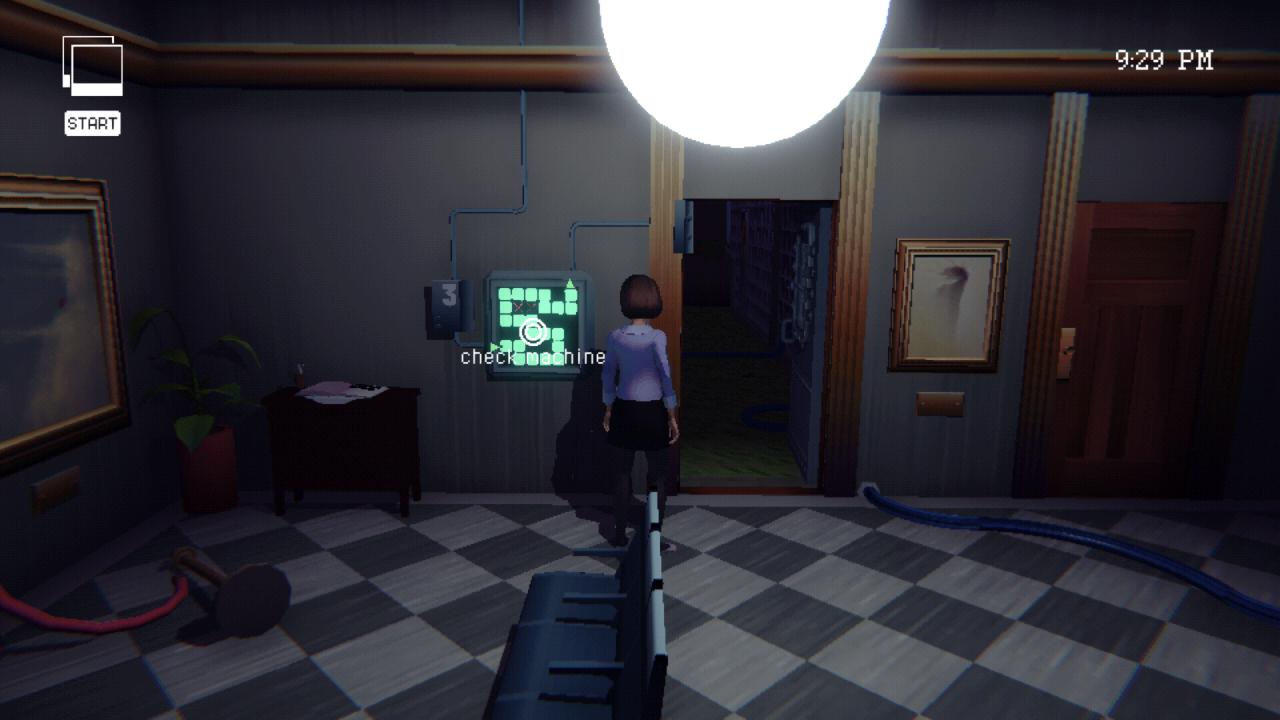
Inspect it to find a 3×3 grid of buttons – some of which are now illuminated by the newly-activated lamp.
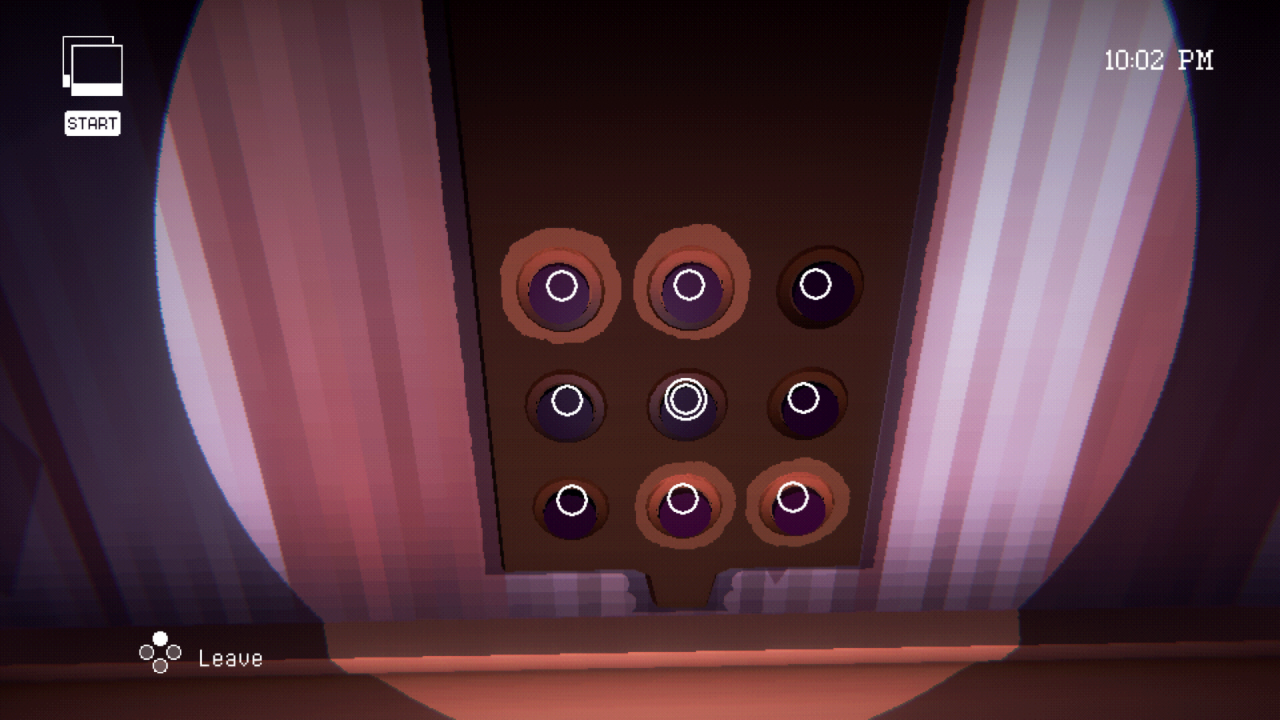
Pressing a button will toggle the on/off lighting status of that button, and also any buttons directly above/below/left/right of that button. The goal of this puzzle is to light up only those buttons in the grid which are being illuminated by the overhead lamp (top-left, top-center, bottom-right, bottom-center).
For those only interested in the solution, hit the buttons as follows:
- top-right
- center-right
- center-left
- bottom-left
The door to the attic is now open.
On the wall inside the doorway, you’ll find a note detailing the easiest way to open the light-panel outside (it’s the same as the one in this guide). Armed with this knowledge, you can now enter the Attic at anytime, without needing to activate the power box in the Living Room.
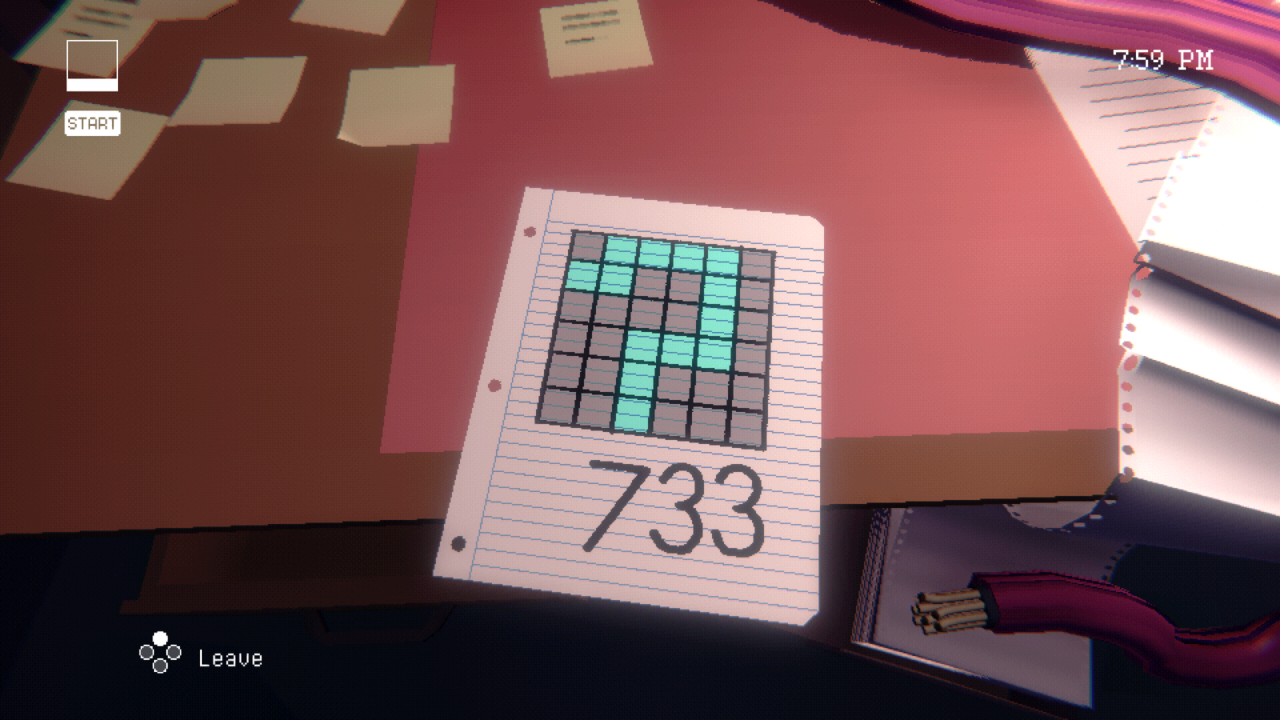
Head up the attic stairs, and inspect the papers on the desk inside. You’ll find the combination to a 3-digit keypad, and an accompanying green symbol shaped vaguely like a question mark.
Inspect the blueprints on the wall in front of you to see a schematic detailing 3 different power cables leading to a central device.
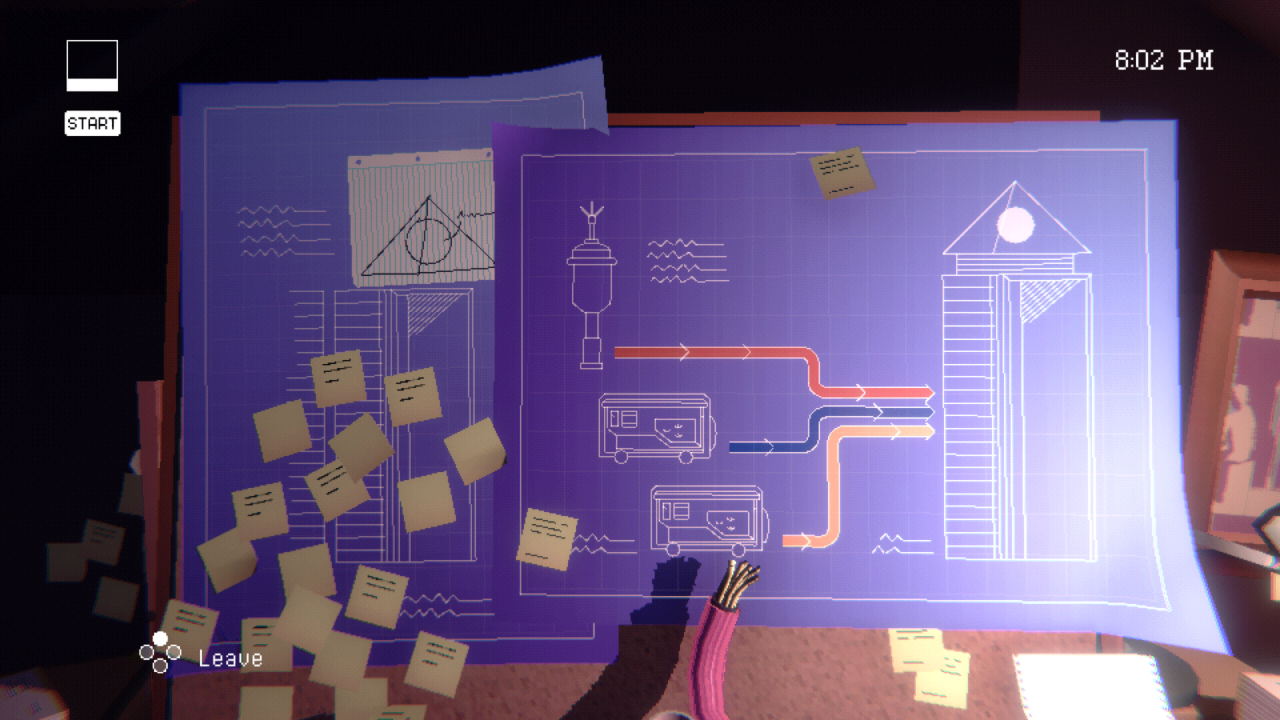
That device is located here in the attic, on the other side of the room. Ultimately, your goal is to restore power to each of these three cables, which will activate the device in this attic and (hopefully) enable you to escape. However, you can’t do much with it yet.
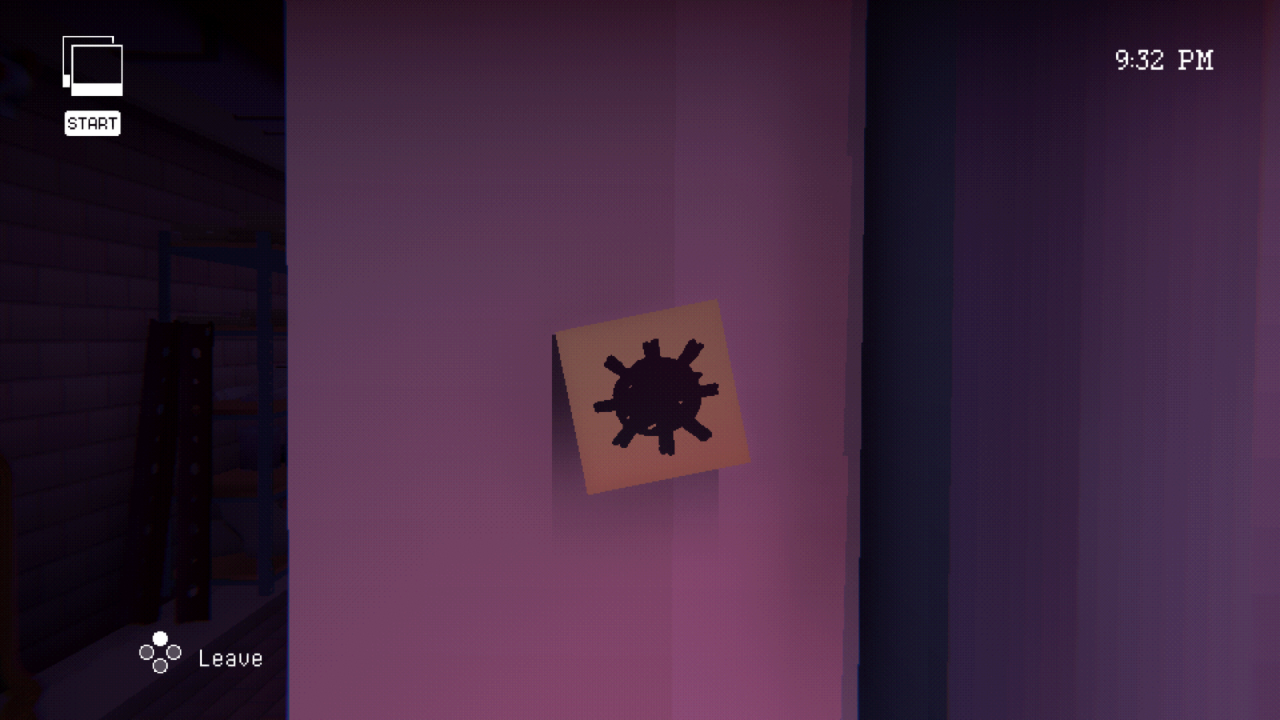
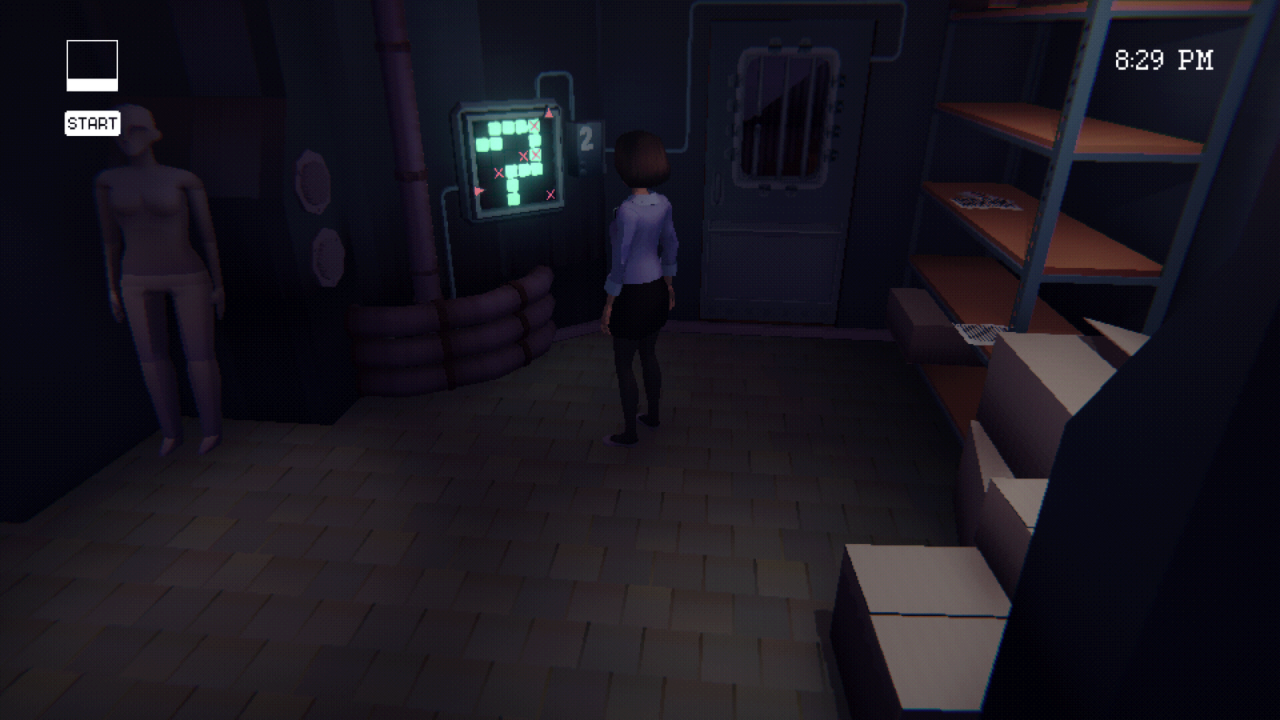
Head back down to the Cellar and proceed past the pillar. The door here has a gridded panel next to it labeled “1,” with a symbol matching the one you found in the attic.
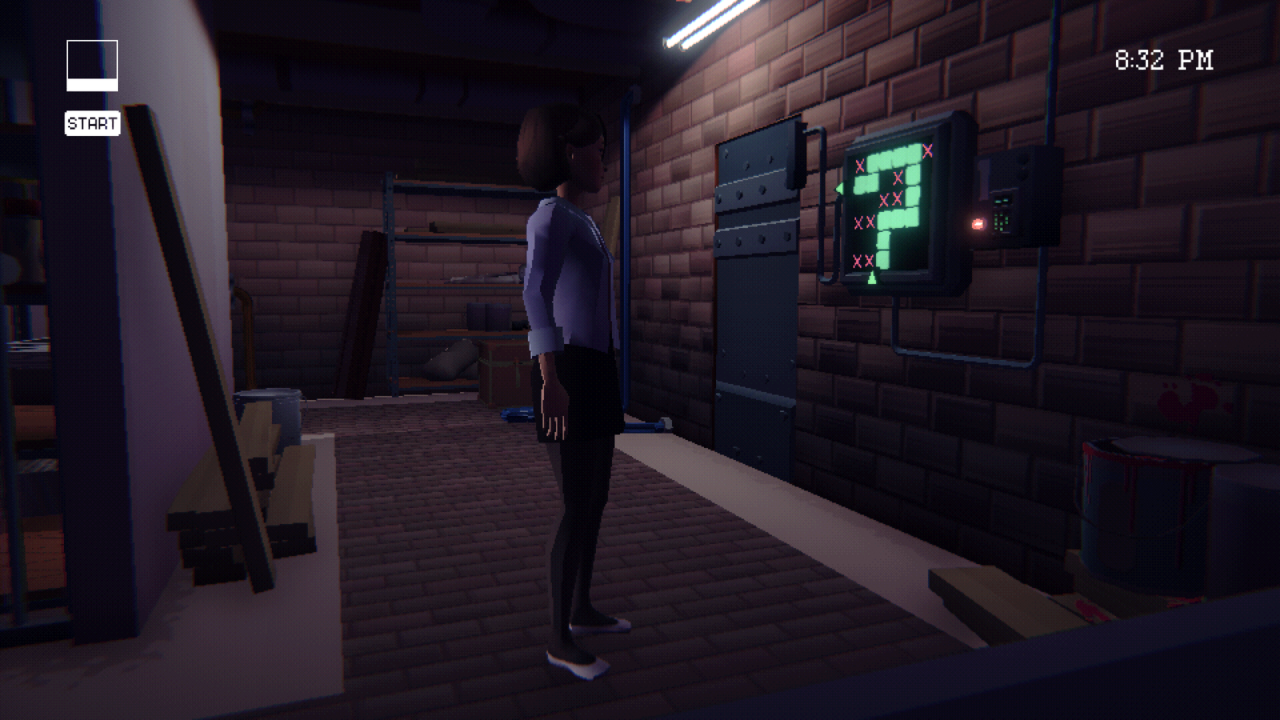
Interact with the 3-digit keypad beside the grid, and enter the combination you found in the attic. The door will open. Head through, and you’ll find yourself in some kind of waiting room.

Inside, you’ll find a similar panel on the wall whose pattern matches the door just outside. This one labeled “3,” and you may notice that the red X’s on this grid are in different locations – one of which intersects the green symbol. As a result, this door is locked and cannot be opened just yet. Note also that it seems someone has mostly scrubbed off the red X’s on the panel. This will be relevant later.

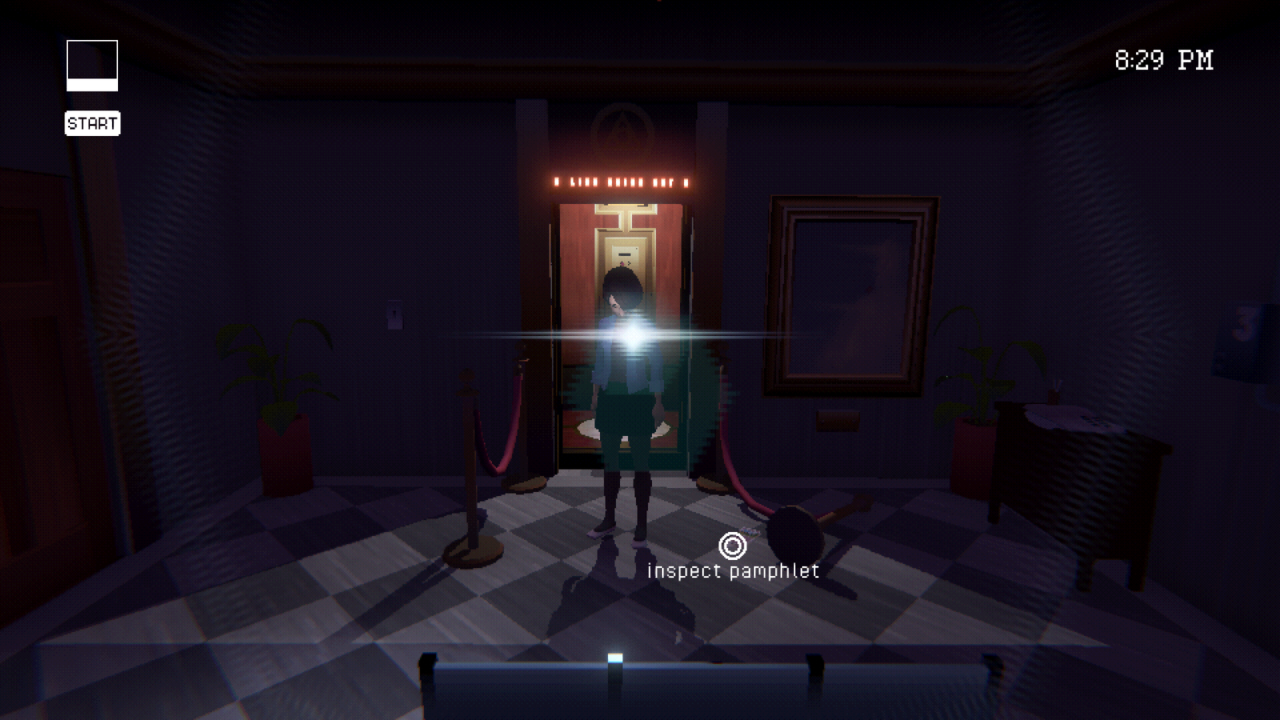
TThe elevator at the far side of the room can’t be used just yet, but take note of the string of lights atop the doorframe. This will be relevant much later.
For now, head through the door just to the left of the entrance from the Cellar.
In this hallway, approach the device on the wall. Notice how it continually ticks to reflect the current time. This is a clue for a future puzzle.
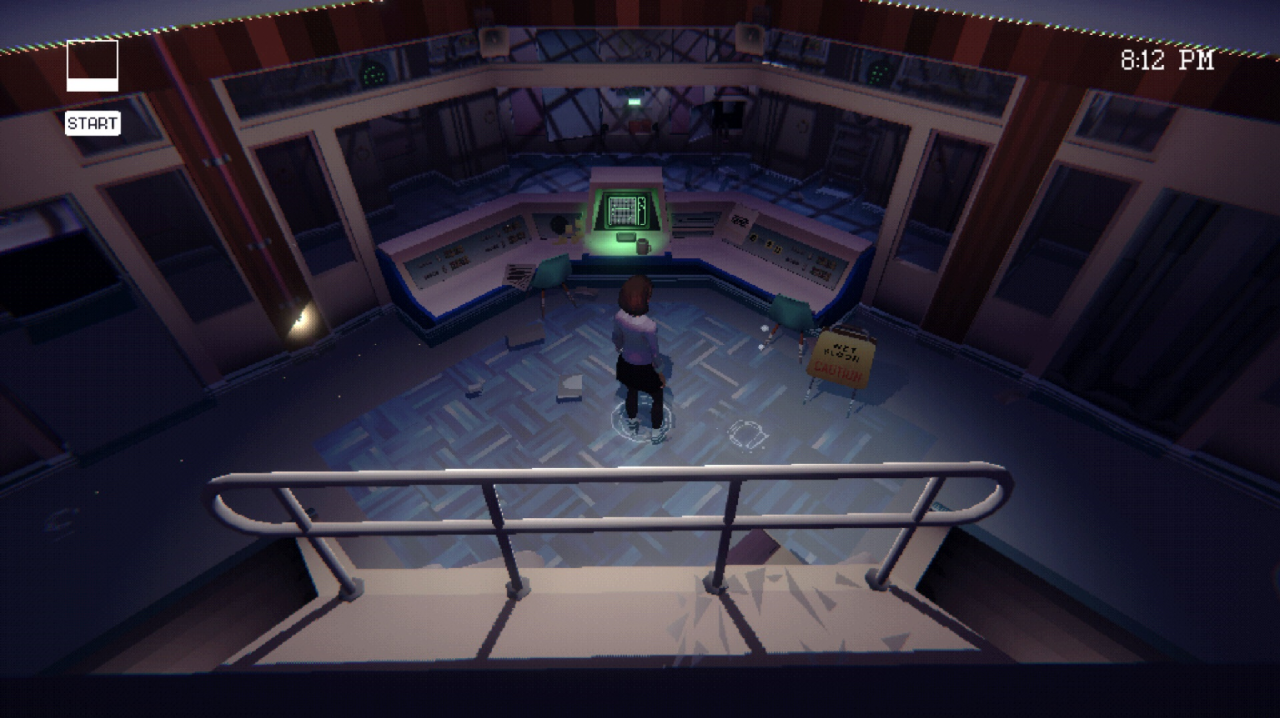
Head to the other end of the hallway, and you’ll emerge in a small Art Studio. There is a computer in this room, accompanied by a drawing and a note.

The drawing appears to be a rough screenshot of the game Megan was playing earlier in the night.
You can interact with the computer itself to play another game of Minesweeper, but you’ll lose no each time no matter what.
You can’t do anything else down here just yet, so return to the Living Room and start playing Megan’s video game to hunt for the next clue.
Walkthrough IV (Video Game, Gas Tunnels)
 This game, called Pird Mystery, is played by jumping over gaps and avoiding the eggs that the birds drop from overhead. Running will slowly accumulate points, but jumping over an egg as it falls will grant a large amount of points.
Keep playing until you hit the high score. Your score will stop increasing when you reach it (don’t worry, this only takes a minute or so if you’re jumping over eggs consistently).
At this point, continue to head right and a new area should very quickly appear in the game: double arches, matching the drawing you found in the art studio.
(Note that on my first playthrough, I had to die once or twice after reaching the high score in order to make this area appear. However, on my second playthrough I did the whole thing in one life. I’m not entirely sure what the determiner is for this, or if it was just a bug.)
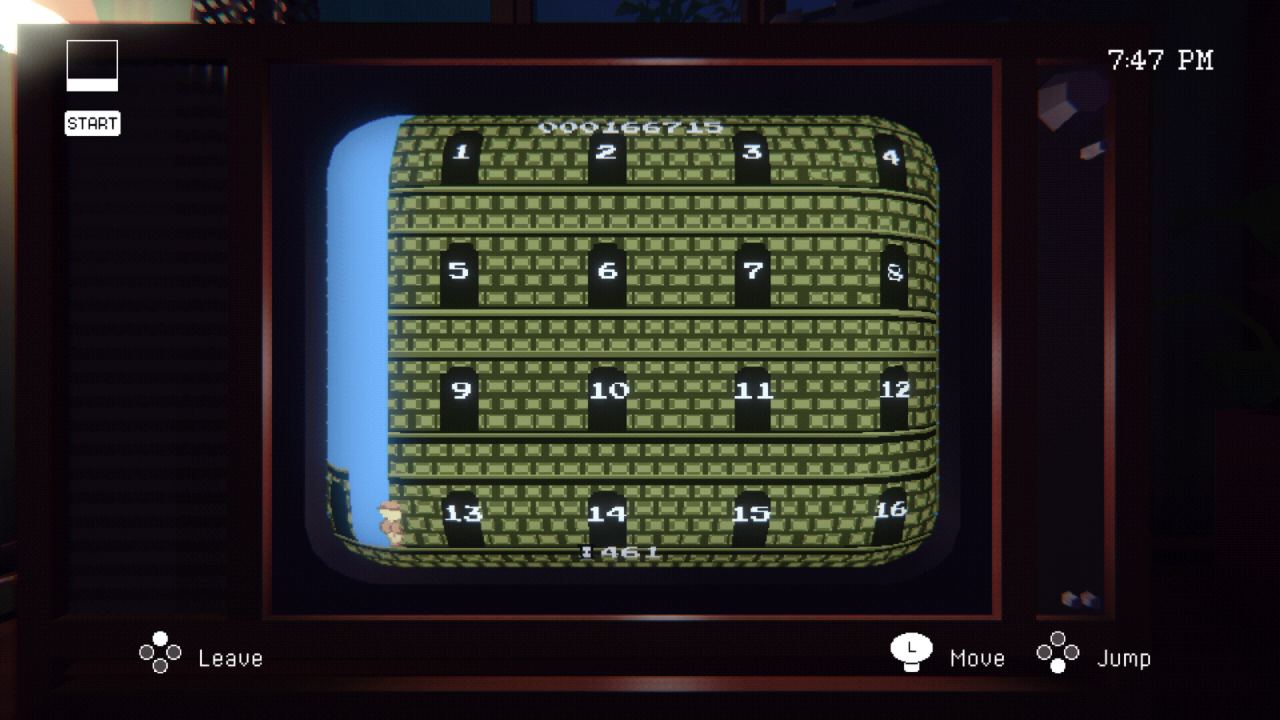
As indicated in the drawing from the Art Studio, stand under the right-hand arch and press up. Your character in the game will appear in front of a large structure with many archways, numbered 1-16.
On the note accompanying the drawing you found in the Art Studio, notice the delineation of the digits:
00XX|X|X|XX
This is a nice simple cipher. You can substitute the X’s here for the digits from the high score in the video game, resulting in this pattern: 0016|6|7|15. Taking into account the vertical separators, this parses into four numbers: 16, 6, 7, and 15.
Take note of the positions of the archways with those four numbers on this screen. You can go to each archway in sequence and press “up” to enter, and the numbers will turn red as you do so. Go through all four, and the image will be saved in your Memory Log for future reference.
Now return to the Art Studio (in the Waiting Room, down past the Cellar), and start playing the Minesweeper game on that computer. Notice how this grid is also a 4×4, same as the arrangement of numbered archways in Meg’s video game.
Click the bottom-right square, which corresponds to the location of the “16” archway. You’ll lose the game, which is fine; just click again to start a new game. Now repeat this process for the “6” box (second row, second column), then for “7” (second row, third column) and finally for “15” (just to the left of box 16).
The iron door to your right will open; proceed up the stairs.
Inspect the papers on the desk nearby to find a drawing of a grid labeled “3” containing several red X’s.

These are the actual locations of the red X’s on the mysterious panel we found in the Waiting Room labeled “3,” though you still won’t know just what to do with this knowledge yet. For now, this important image will be saved in your Memory Log.
Return to the Waiting Room, and enter the door just beside the elevator.

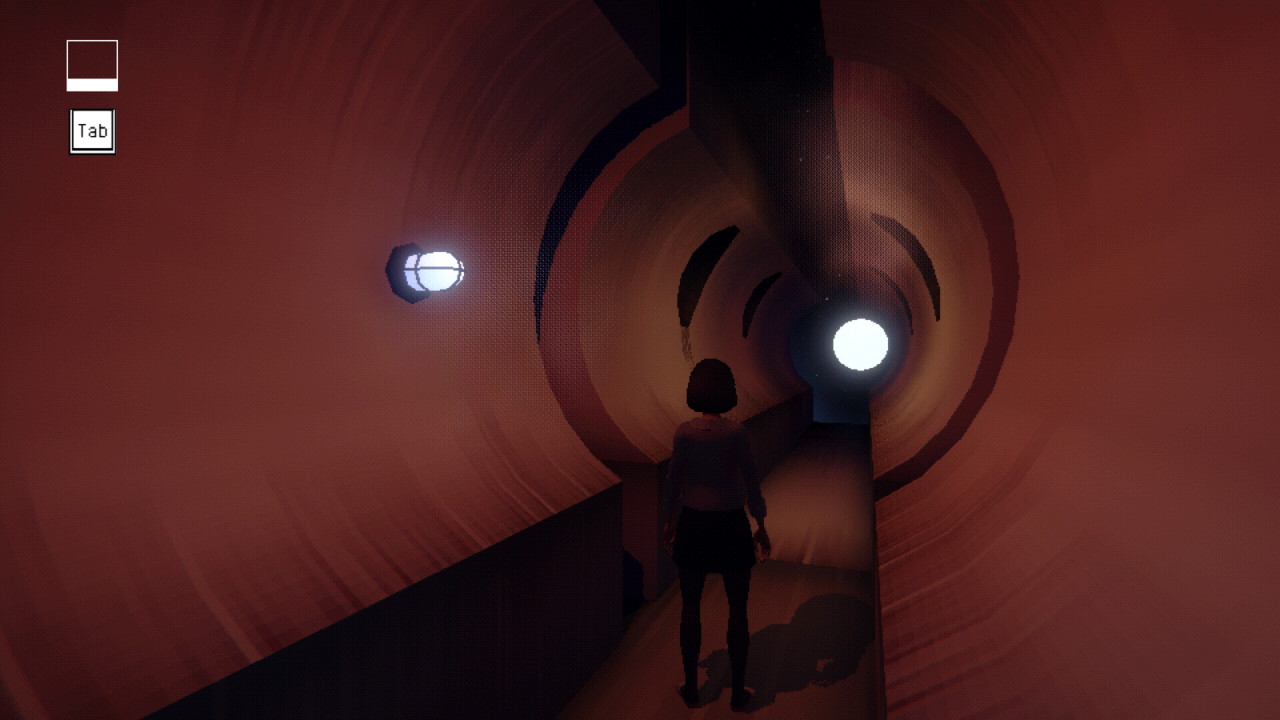
Head through this tunnel and read a sign on the whiteboard about someone’s jacket being left in a “little blue room.”

Head to the end of the tunnel and inspect the panel on the wall.

This is a map of the upcoming area (the “Gas Tunnels”). Note how some hallways are color-coded, how the three lights above the map match those colors, and how these lights turn on and off in sequence from left to right.
The idea here is that when a certain color light is on, that same color of hallway is currently filled with deadly hot gas. if your character is caught in the gas, they will instantly die. however, only two colors are ever active at a time, meaning there is always one safe color. the lights just cycle through the same order repeatedly (first red is safe, then blue, the yellow, then red, then blue, etc.), so you can easily plan a safe path through the gas tunnels.
The grey rooms on the map are safe rooms; each safe room is also equipped with an identical map and indicator lights. Note that between each activation of gas, you get a few seconds where the doors between hallways are opened, and all colors are safe. Use this brief interval of time to head to the next safe hallway.
In this way, proceed through the gas tunnels until you reach the bottom-right safe room on the map. There is nothing important to find along the way – though if you stop in the little blue room near the end of the tunnels, you’ll find the aforementioned jacket with a note inside. The note references a few people traversing the hallways in the opposite direction you’re coming from, which is meant to seed the idea for an upcoming puzzle solution in the player’s mind.
For those of you looking for explicit directions on how to navigate the Gas Tunnels, here is a safe and easy route:
- Wait in the starting room until yellow is safe (i.e. yellow light is off). Red will be safe next, so the next time the doors open, enter the red hallway.
- Enter the safe room past the red hallway.
- Wait in the safe room until until red is safe again (i.e. red light is off). Blue will be safe next, so the next time the doors open, enter the blue hallway.
- Enter the safe room past the blue hallway.
- Wait in the safe room until until blue is safe again (i.e. blue light is off). Yellow will be safe next, so the next time the doors open, enter the T-shaped yellow hallway.
- Immediately turn the corner of the T-shaped yellow hallway and wait by the door to the red hallway.
- Red will be safe after yellow, so the next time the doors open, enter the red hallway.
- Enter the long safe room past the red hallway.
- Wait near the door to the long yellow hallway until blue is safe (i.e. blue light is off). Yellow will be safe next, so the next time the doors open, enter the long yellow hallway.
- You won’t be able to sprint through the entire hallway in one go, so instead run to the little red room halfway down the hall (the little red room is to the south). Red will be safe next, so run through the door as soon as it opens.
- Blue will be safe next, so the next time the doors open, run straight across the hall and enter the little blue room to the north (this is also where the jacket is, though again, it isn’t important to interact with it).
- Yellow will be safe next, so the next time the doors open, run back into the long yellow hallway and run towards the end (to the right).
- The next time the doors open, exit into the safe room past the long yellow hallway.
At the last room on the map, you’ll find your third and final green symbol panel.
This one is labeled “2.” Like the others, this panel sports its own configuration of red X’s, and again they intersect with the green symbol. Thus, the door beside this panel is also locked. A picture of the grid is saved to your Memory Log when you inspect it.
You should now have the red X configurations of all 3 panels stored in your memory log. They will be relevant in a moment.
Walkthrough V (Garage, Gas Tunnels Return, Hedge)
Return to the ground level of the house (the fastest way is to either die by hot gas, or return to the main menu and reload your save).
We will now enter a new room that this guide has thus far ignored: the Garage. The door to the Garage is located in the hallway adjacent to the Foyer.
Inspect the device on the far wall of the Garage.


Note that this is the same device as the analog clock in the hallway which leads to the Art Studio downstairs. We can thus reasonably assume that to open this lock, we must set the values of the four sliders to match the actual in-game time, displayed in the top-right corner. Note that this game does not use military time – so for example, 7:46PM equates to 0-7-4-6 on the lock.
The door will open. Enter and immediately head towards the camera to reveal an out-of-the-way staircase leading down a level.
At the bottom of the stairs you’ll find two things: first, a sign on the wall indicating that the target PSI of the pump in the Cellar (which we haven’t yet dealt with) is 29.

Second, you’ll find a panel labeled “2” beside a locked door. It is safe to assume that this is the same locked door that was accompanied by the “2” panel at the end of the gas tunnels – and thus, this door is a back entrance to the tunnels, and by extension, the rest of the Waiting Room area.
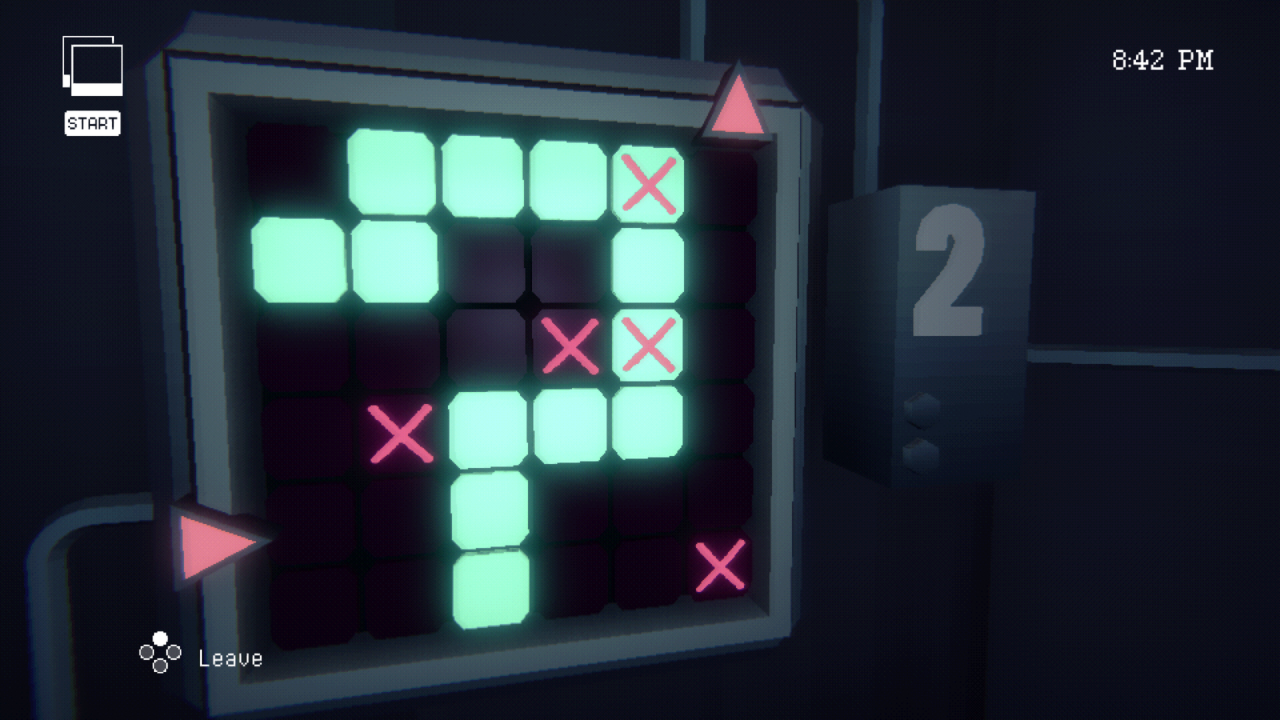
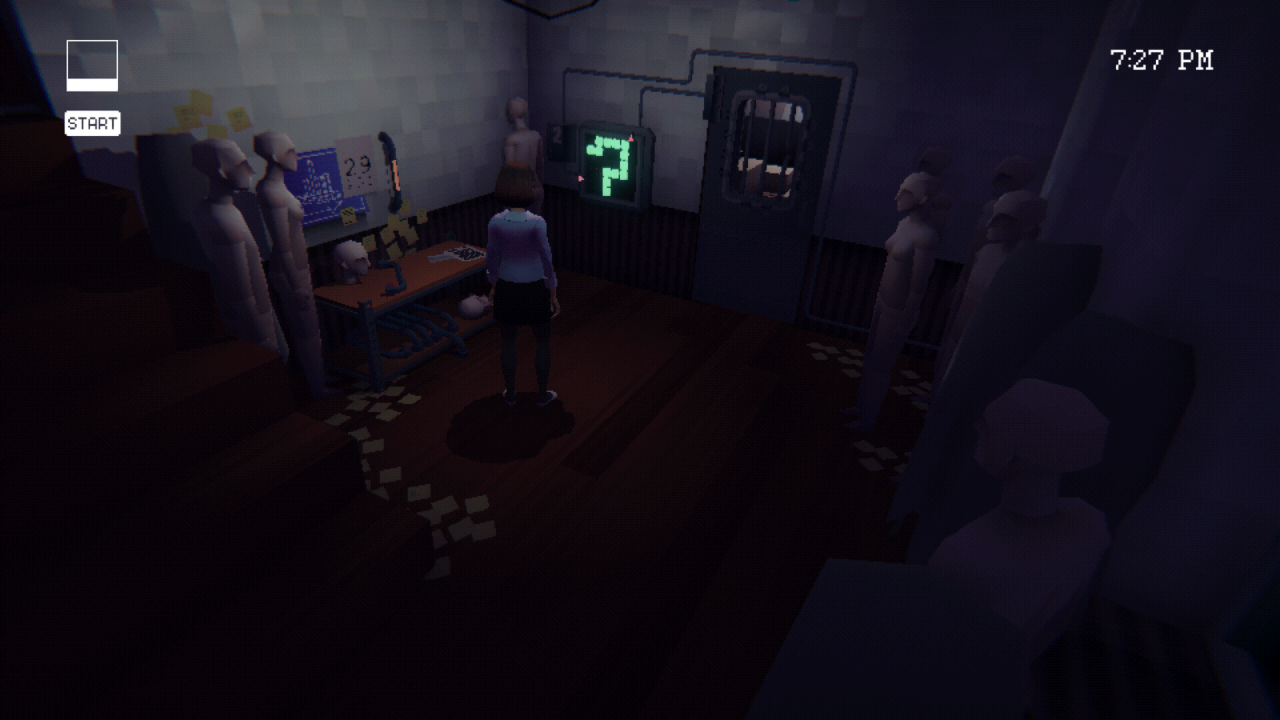
Return upstairs and proceed to the other end of this room, navigating around fallen shelves and mannequins, to find a machine with a grid of green buttons. These buttons can be toggled off and on freely. Note how the pattern matches the pattern currently displayed on each of the “1,” “2,” and “3” panels found around the house.
Recall that each of the three numbered panels contains its own configuration of red X’s, as well as a two triangles situated somewhere around the border. To activate an individual panel and unlock its corresponding door, you must manipulate the grid on this machine so that a continuous green path connects the two arrows, and does not touch any of the corresponding panel’s red X’s.
The twist here is that you can manipulate the grid in such a way that it satisfies two different panels’ layouts at once, thus opening two doors at the same time. Due to the layout of panel “1,” however, it cannot be active at the same time as either “2” or “3.”
As we know, the “1” panel leads from the Cellar to the waiting room with the elevator; the “2” panel lies at the end of the Gas Tunnels, and just down the stairs in this room; and the “3” panel is located in the Waiting Room, its destination unknown to us. Thus, to reach the “3” panel, we must activate the “2” and “3” simultaneously, and reach it by way of the Gas Tunnels.
The border arrows for the “2” and “3” panels are in the same places – however, their red X’s are in all different places. Thus, you must create a path of green squares which avoids all red X’s from both the “2” and “3” panels.
The solution ends up being quite circuitous. For those solely interested in the answer to this puzzle, here it is:
The door downstairs in this room is now open, and as expected, it leads to the back entrance of the Gas Tunnels.
You must now traverse the Gas Tunnels in the opposite direction you traveled before. You can use mostly the same strategy as last time, just in reverse, and possibly with one or two modifications.
For those of you looking for explicit instructions, here is a safe and easy route to go through the Gas Tunnels in reverse:
- Wait in the safe room until blue is safe (i.e. blue light is off). Yellow will be safe next, so the next time the doors open, enter the long yellow hallway.
- You won’t be able to sprint through the entire hallway in one go, so instead run to the little red room halfway down the hall (the little red room is to the south). Red will be safe next, so run through the door as soon as it opens.
- Blue will be safe next, so the next time the doors open, run straight across the hall and enter the little blue room to the north.
- Yellow will be safe next, so the next time the doors open, run back into the long yellow hallway and enter the safe room all the way to the left.
- Wait near the door to the red hallway until yellow is safe again (i.e. yellow light is off). Red will be safe next, so the next time the doors open, enter the red hallway.
- Run to the end of the red hallway (ignore the door leading to the yellow T-shaped hallway) and wait by the door to the blue C-shaped hallway.
- Blue will be safe next, so the next time the doors open, enter the blue C-shaped hallway.
- Yellow will be safe next, so the next time the doors open, enter the yellow T-shaped hallway.
- Enter the safe room past the yellow T-shaped hallway.
- Wait in the safe room until until red is safe (i.e. red light is off). Blue will be safe next, so the next time the doors open, enter the blue hallway.
- Enter the safe room past the blue hallway.
- Wait in the safe room until until yellow is safe (i.e. yellow light is off). Red will be safe next, so the next time the doors open, enter the red hallway.
- Run through the red hallway, and enter the safe room at the end.
- You should now be back at the original entrance to the Gas Tunnels, in the room with the lockers and whiteboard.
Once you’re back out of the Gas Tunnels, head to the end of this chamber with locker rooms and the whiteboard, and you will end up back in the Waiting Room.
The “3” panel door should now be open. Go through.
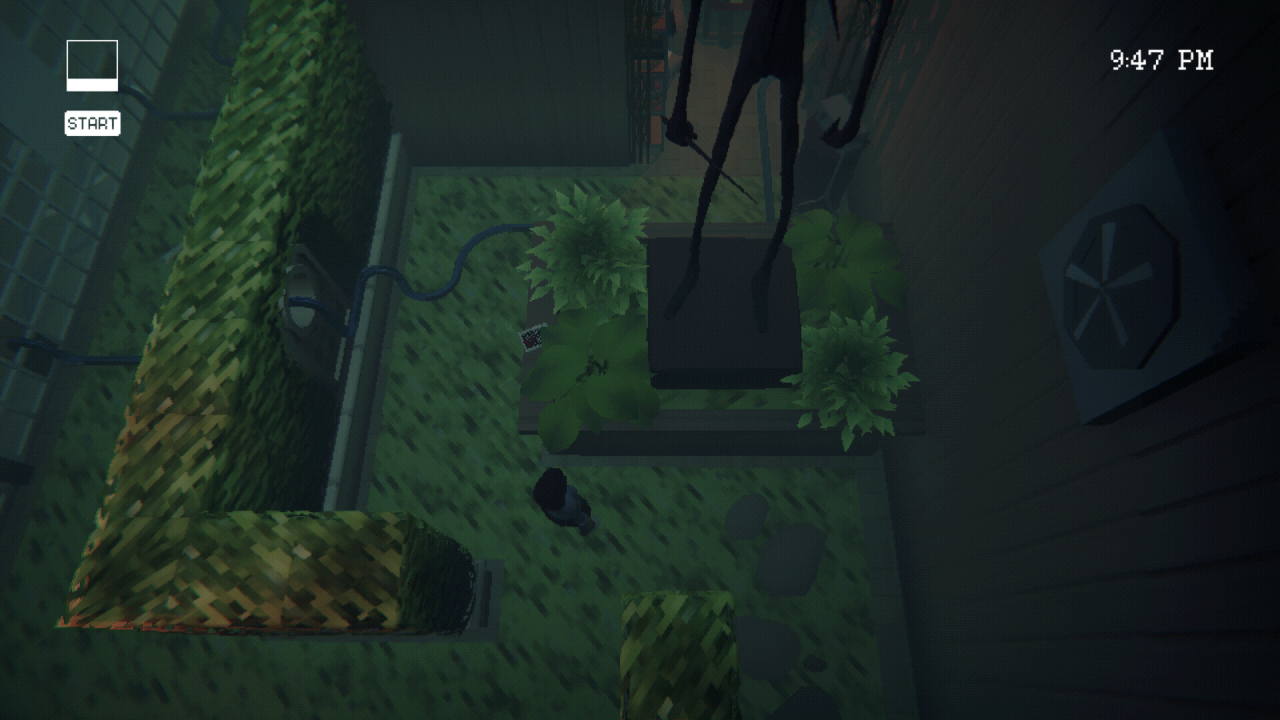
Proceed through the hedges and interact with the power generator at the back.
This is one of the three power sources required to activate the machine in the Attic. Also take note of the sign on the wall, with a 4-digit passcode.
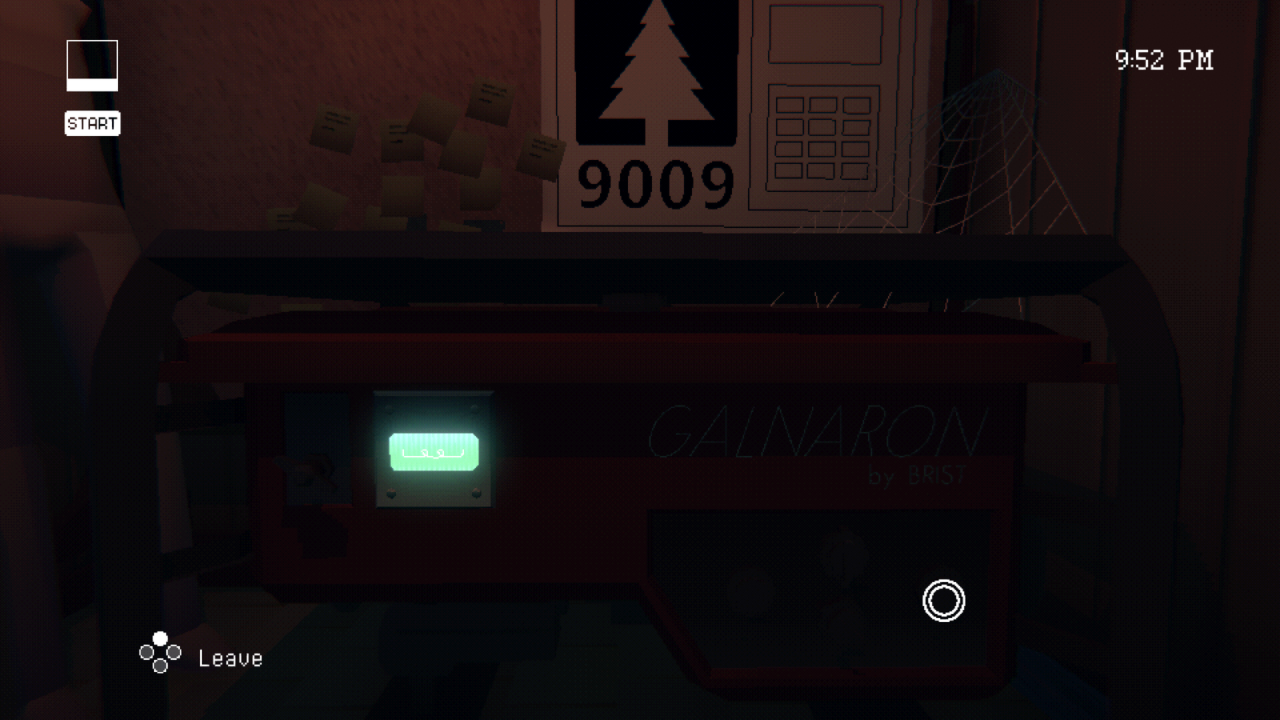
This code will allow you to enter the hedge maze by way of the Art Studio. This means that during future loops. you won’t need to go through the Gas Tunnels again to reach this generator.
Turn on the generator to save this code to your Memory Log.
Walkthrough VI (Flooded Room, Second Generator)
This puzzle is the same as the Bathroom pump puzzle upstairs, though it’s made a bit trickier due to having more options for tube placement, and a higher PSI target. Note that unlike the Bathroom pump, which drains automatically if you mess it up, this pump must be manually drained via the machine on the wall in the Garage, pictured here:
For those simply looking for the solution, here it is:
A door will open beside the pump. Proceed through, go down the stairs, and head through the second door on the right.

You will arrive in the Flooded Room. The water on the floor will gradually rise until 10:30PM, at which point it makes contact with an exposed wire. if you are standing in the water at that point, your character will instantly die.
Approach the computer terminal and inspect the notepad over on the right.
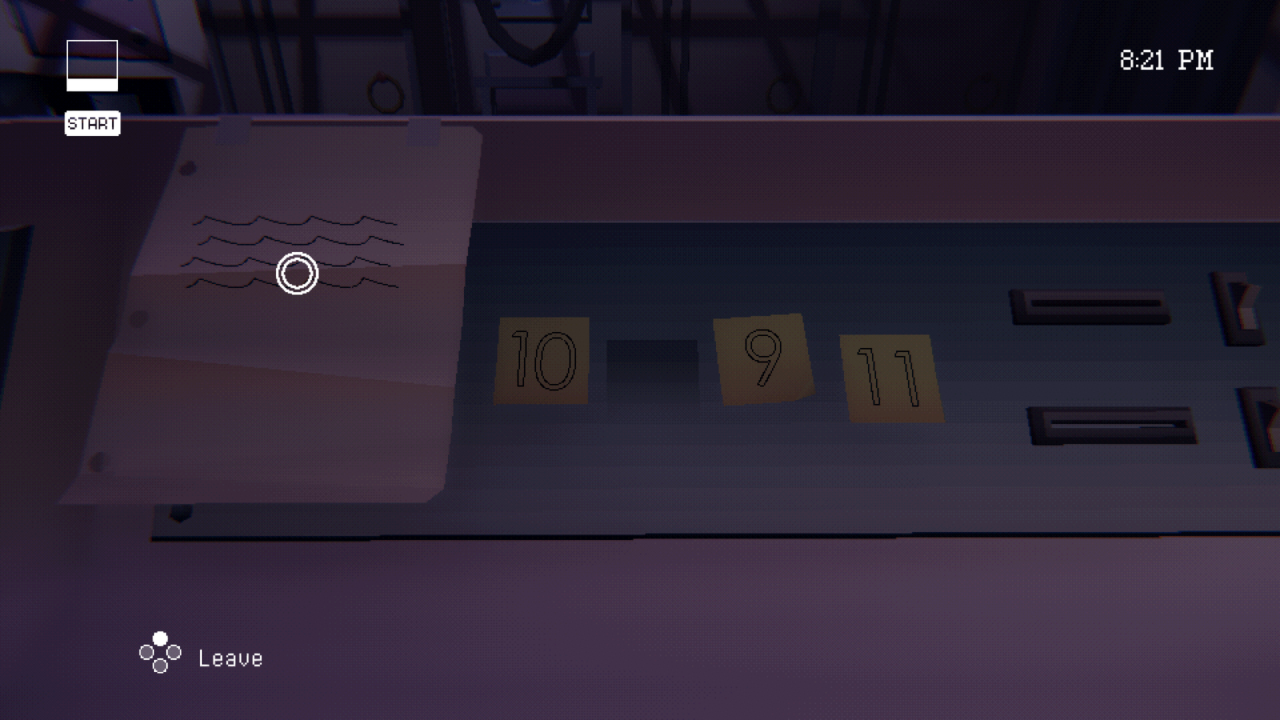
A sequence of four numbered sticky notes goes 10 (blank) 9 11. A note on the left instructs us to use the “REWIND” and then “PRINT” commands on the computer, though we have no way of knowing what that means just yet.

Note that the font on the sticky notes matches the font of the earlier sticky note we picked up labeled “12.” Thus, the number sequence is likely 10 12 9 11.
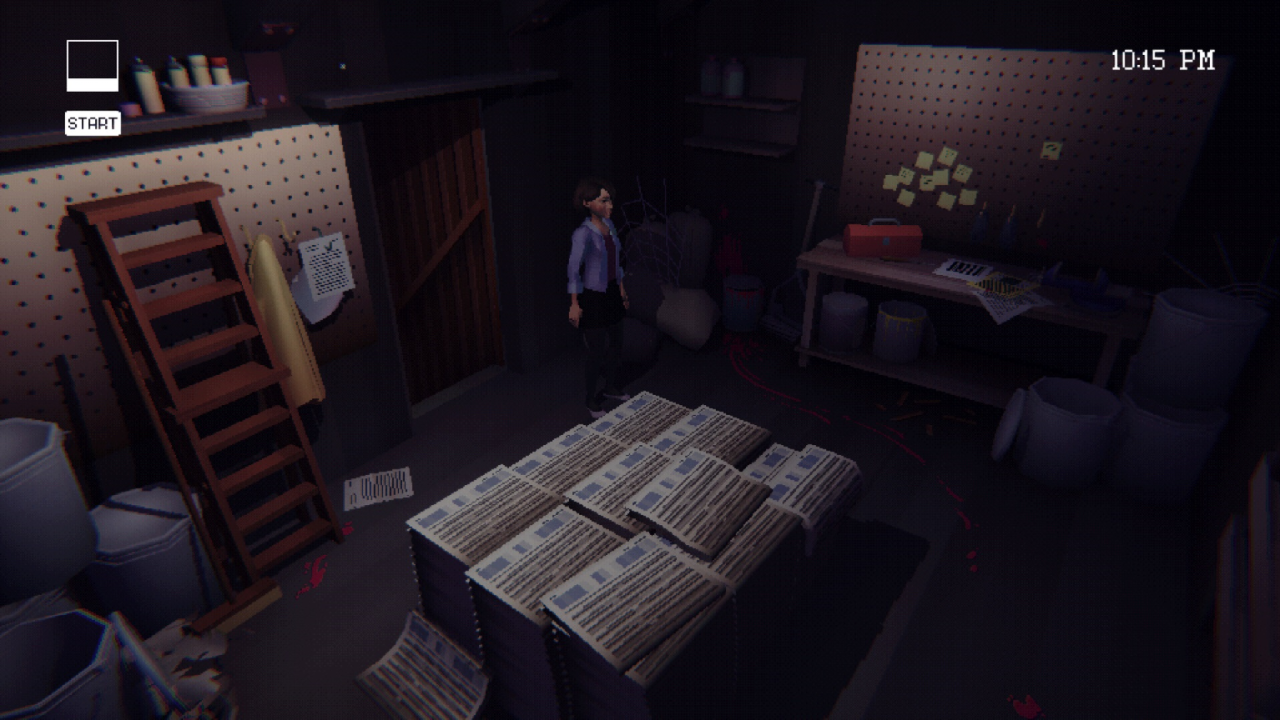
Return to the Study (second floor of the house, lefthand doorway at the top of the stairs), and approach the shelves on the right side of the room.

Pull out those four drawers in order (10, then 12, then 9, then 11), and the entire shelf construct will tilt forward to reveal a hidden message.

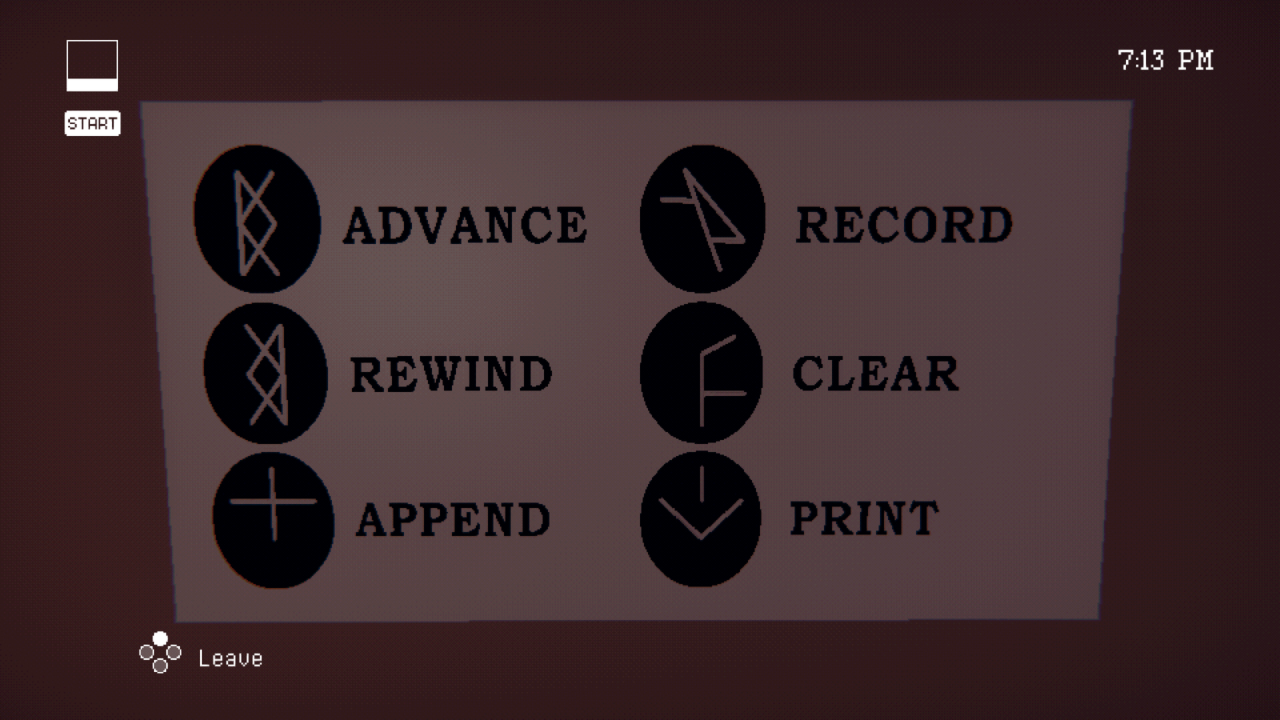
This message contains a series of words and corresponding shapes. Note how both “REWIND” and “PRINT” are present here.
Armed with this new knowledge, return to the Flooded Room behind the pump machine in the Cellar. Proceed through the doorway to the left of the computer terminal.
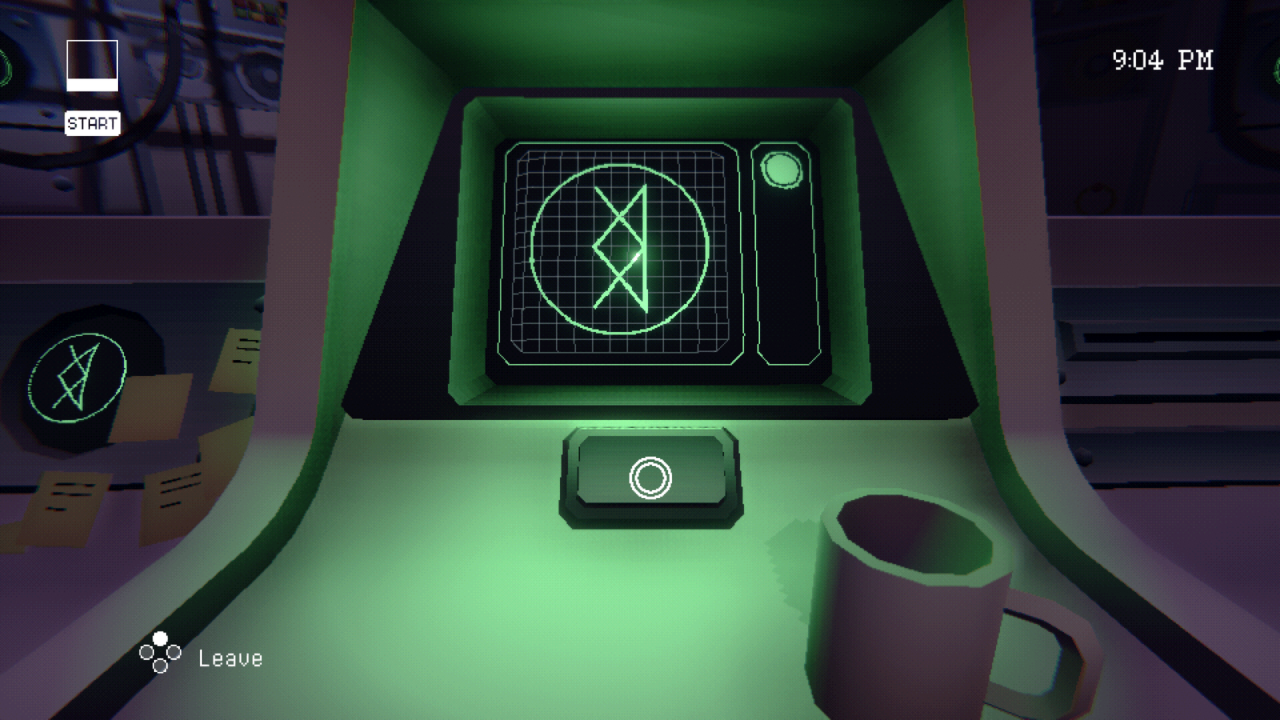
You’ll find a terminal here, with a display that shows a green 3D mesh shape, and three buttons underneath. The left and right buttons rotate the mesh, while the one in the center toggles part of the mesh between a straight line vs. an arrow shape.
If you head further down this corridor, you’ll find a power box with a circuit board similar to the one we encountered in the Living Room.

This box controls which of two doors are open in this room: the left (which we just passed through), or the right. The mechanism at play here is the same as before: connect the pluses and minuses from the bottom nodes to either the left or right nodes to open the corresponding door, allowing you to freely move up and down the hallway to solve the upcoming puzzle.
Unlike last time, swapping which door is open and closed via this circuit board is very easy. To toggle which door is open, simply interact with the node on the active side, and then interact with the node on the opposite side.
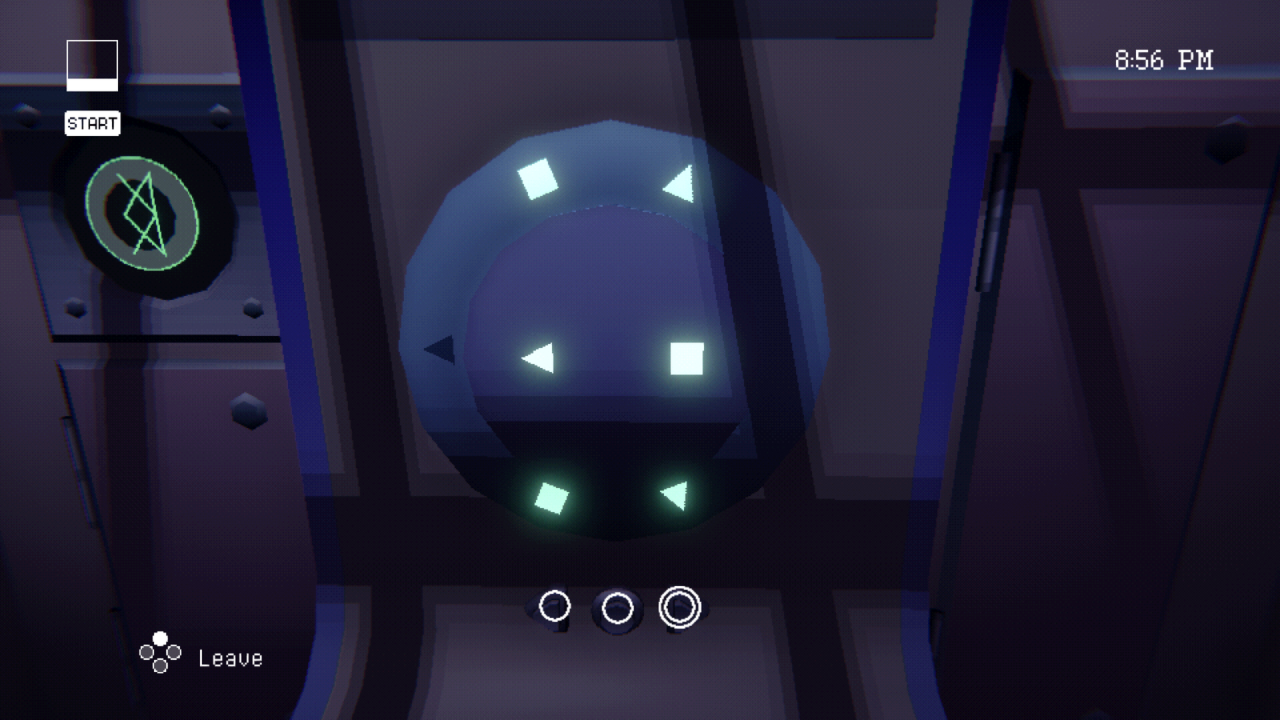
Toggle the circuit board so that the right-hand door is now opened, and proceed through. You’ll find a similar panel with rotator buttons, and a display showing the same green 3D mesh. This panel’s rotator buttons rotate the mesh along a different axis than the other panel.
The first goal of this puzzle is to create the shape from the secret message labeled “REWIND.” to do so, you must use these two panels collaboratively to rotate the mesh shape until it resembles the “REWIND” symbol. Remember that as you run back and forth between the two panels, you’ll have to stop at the circuit board and swap which door is open. And of course, this must all be done prior to 10:30PM.
For those simply interested in the solution, here is what the orientation of the panel looked like for me at the end:
Look at the orientation of the shapes around the border of the wheel in this screenshot, and make yours match. The panel at the left end of the corridor rotates the outer wheel, and the panel at the right end of the corridor rotates the inner wheel.
After you have made the “REWIND” shape, return to the computer terminal, interact with it, and hit the button in the center of the terminal. If your shape was correct, one of the two circles in the top-right corner of the display will light up.
You must now do the exact same task for the “PRINT” symbol. Remember that the panel on the left-hand side of the corridor has a third button which transforms part of the mesh.
Again, for those simply interested in the solution, here is what the orientation of the panel looked like for me at the end:

Once the “PRINT” symbol is formed, return to the computer terminal, interact with it, and hit the button in the center of the terminal. If your shape was correct, the second circle on the display will light up, and a paper printout will appear on the side.

Interact with the printout to see a new PSI value and save it to your Memory Log.
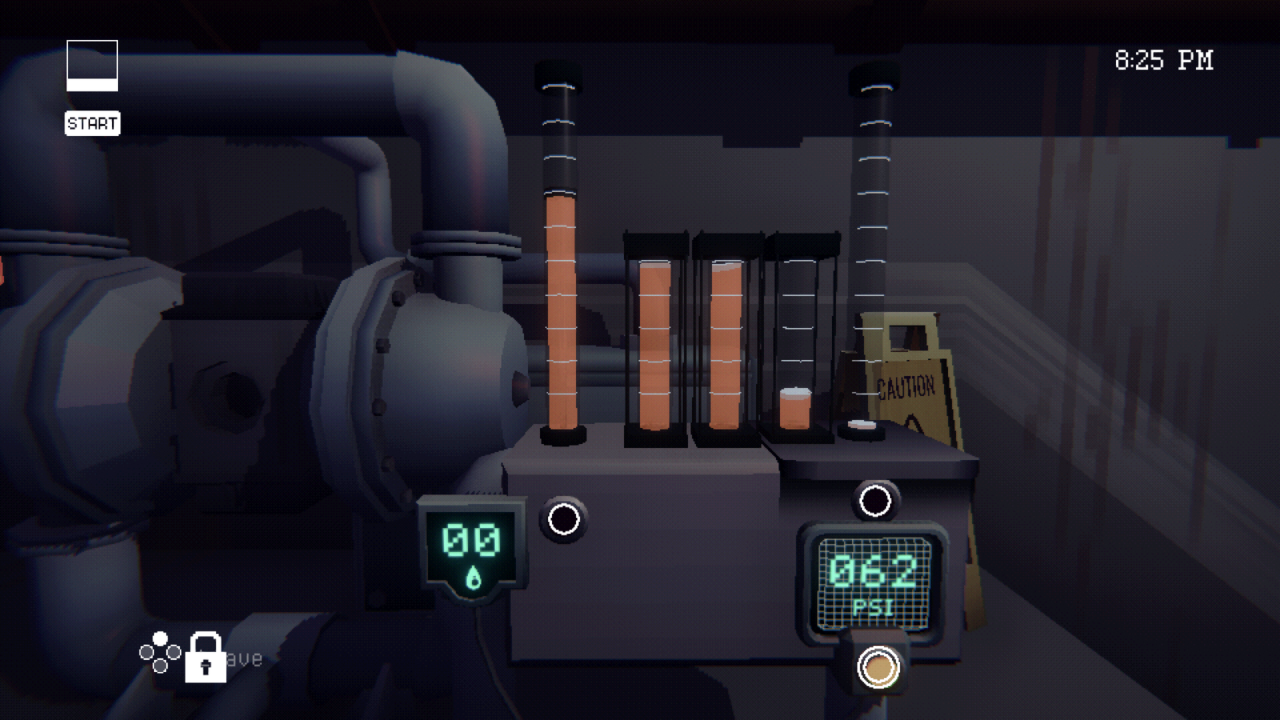
Return to the hallway just outside the Flooded Room. TThis time, head through the first doorway on the right. This room contains the final pump machine, with a target PSI of 62.
The trick with this pump is that it will use all remaining water in the house that has not already been sent to another one of the other two pump machines. In its default state, this will always result in way too much PSI for the final pump, no matter how you arrange the tubes.
To lessen the amount of water used for this final pump puzzle, you must go back up to the Bathroom on the second floor of the house, and solve that pump puzzle first (refer to earlier in the guide for a refresher on that solution if need be).
After solving the Bathroom pump puzzle, return to this final pump and solve it in the same way you’ve solved the other ones.
For those only interested in the solution, here it is:
This will open a door at the far end of the room, leading to another area and another power generator, the second of three power sources that you’re looking for (no screenshot for this one, as the environment is best seen with fresh eyes).
You can turn this generator on now, but cances are you’ll need a fresh loop anyway before actually using it.
Walkthrough VII (Lightning Rod and Finale)
You’ll hear glass breaking down below. Return to the Study and observe the glass shards on the floor.
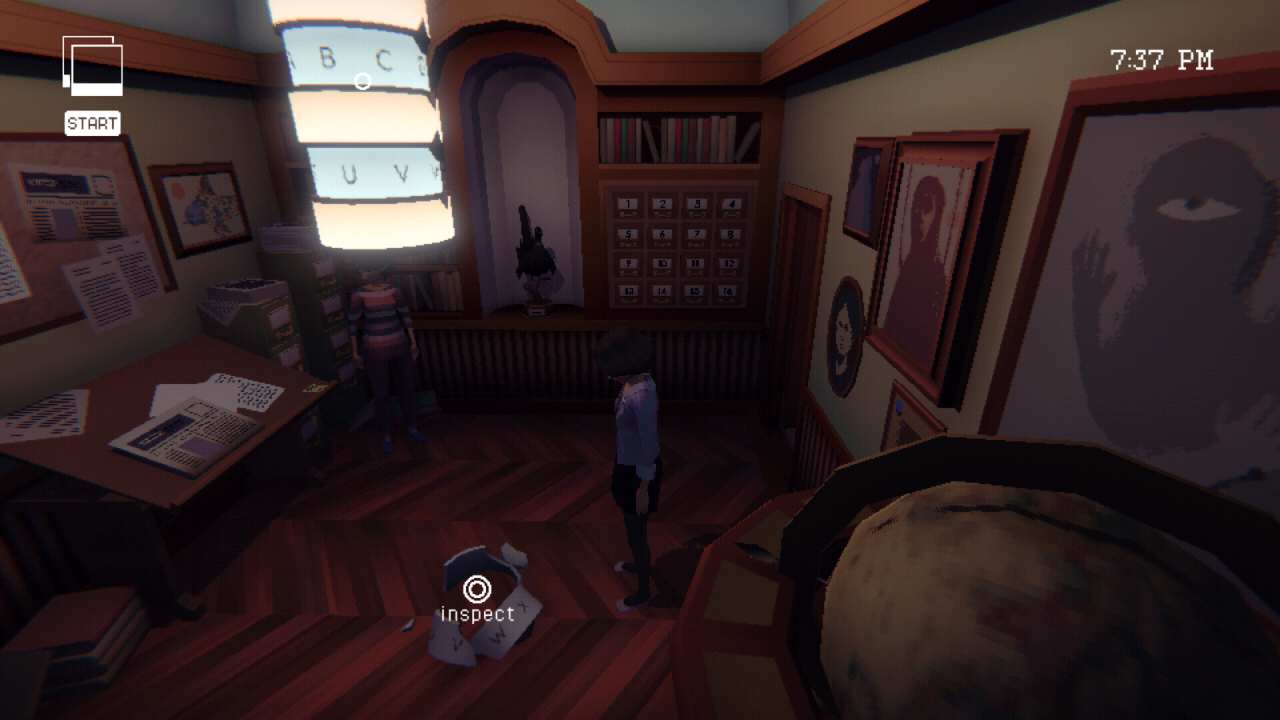
You’ll see a note about how they are lettered: S T U V W X Y Z. Eight letters, the same number as the rings on the machine above.
Interact with the newly-revealed lamp up above.

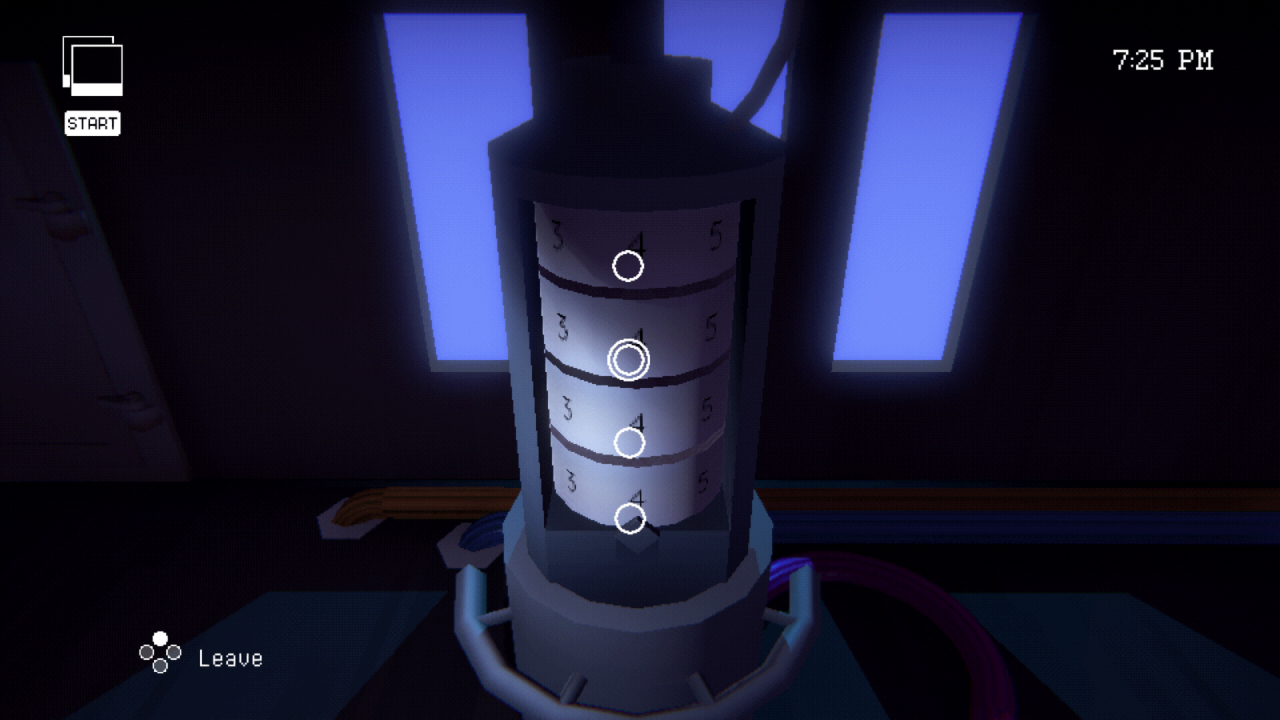
You’ll see four rings of letters, each either ranging from A – H, or from S – Z. These rings correspond to the number rings in the attic; the currently selected letter corresponds to that number ring’s number 4. The second number ring is missing, as it has dropped to the floor.
The goal here is to make the lamp spell out the word “S T A Y”, the clue that we received much earlier from the locker in the Cellar. To do this, you must rotate the numbered rings on the attic device, which will cause the corresponding letter rings on this lamp to also rotate. The goal is to spell out the word “stay,” read from top to bottom. As for the missing ring – if you have the other three number rings set correctly, you can simply scroll the missing one from 1 through 8, and one of those values will result in the correct sequence.
For those only interested in the solution, set the number rings on the device in the attic to the following sequence: 8 7 1 2.
The device will unfold into a lightning rod. This lightning rod will be struck by lightning at 9:15PM, activating the power source.
You must now activate all three power sources within a single loop. I suggest first going to the Attic to activate the lightning rod, then solving all three pumps in sequence to reach the generator behind the final pump (next to the Flooded Room), and finally heading through the Waiting Room and Art Gallery into the Hedge Maze, activating the final generator from there.
Once all three power sources are activated (with the lightning rod being struck at 9:15PM), return to the Attic and approach the machine to trigger a lengthy cutscene.
When you arrive back at the house, open your briefcase in the Foyer.
Inside you’ll find a list of room names, accompanied by rectangles that are either bright or dark.
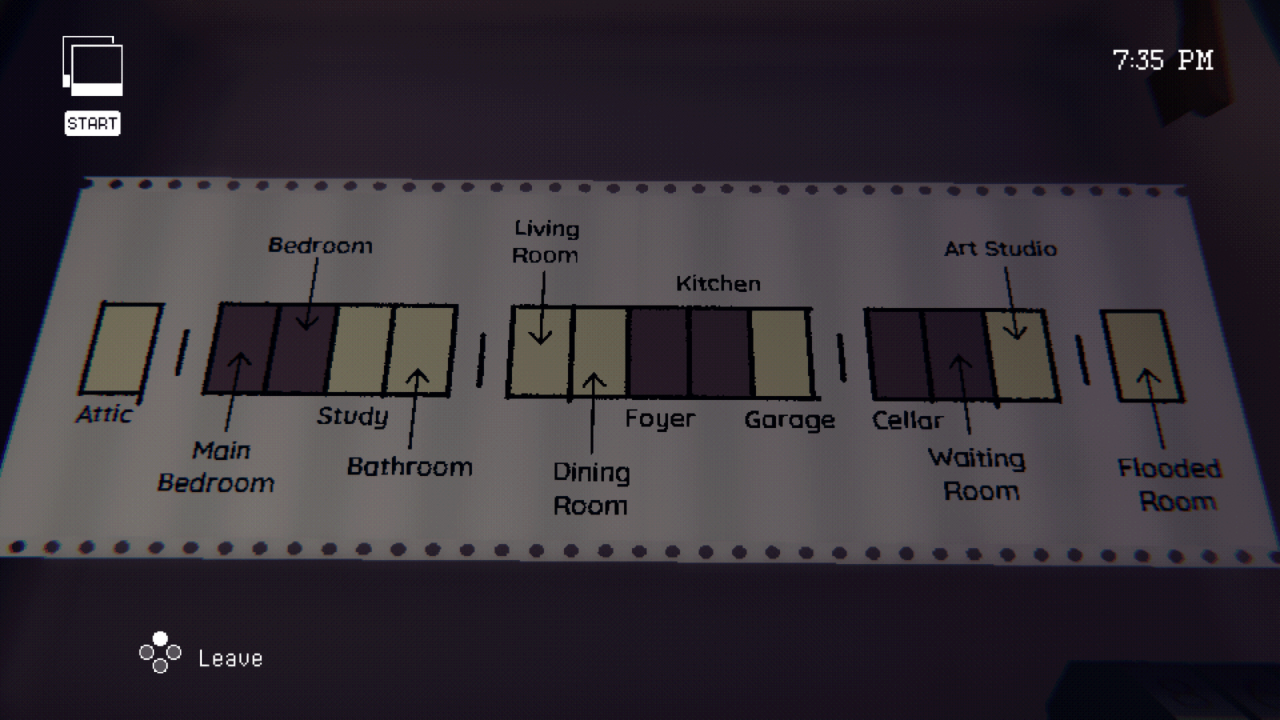
For context on how to interpret this final puzzle, consider the elevator at the far side of the Waiting Room, and take note of the string of lights at the top. Note that flipping the light switch on and off in this room also toggles one of the lights above the elevator to turn on and off accordingly. You can thus infer that the lights above the elevator are indicators of whether or not the lights in certain rooms around the house are currently either on or off.
By extension, you can conclude that this note you’ve just found in your briefcase is meant to indicate the light switch “goal state” of the house: you must travel around the various rooms and either turn the light switch off or on, according to this note.
There is no real correct or best order to tackle the rooms, though i recommend starting at the Attic, then tackling all the second floor rooms, then all the first floor rooms, then the Cellar and Flooded Room, then the Art Studio, and finally the Waiting Room.
Once all lights have been set to their indicated state, return to the Waiting Room next to the Cellar, and you will find that the elevator door is now open.
If you think the elevator should be open and it isn’t, check the lights above it, and compare them with the note from your briefcase. You want to ensure they match.
Enter the elevator and select B2 on the panel inside to descend.
Everything from here on out is linear/scripted. Just proceed to the other end of the apartment and go through the red door a few times.
After the cutscene, talk to the NPC, choose the “I’m ready to go” dialogue option, and confirm your choice to end the game.
Thanks to tki_scatter for his excellent guide, all credits belong to his effort. if this guide helps you, please support and rate it via Steam Community. enjoy the game.