This guide will help you get familiar with the user interface and will give you some helpful tips to get your started. Spoilers will be kept to a minimum so that you can make your own discoveries and enjoy the game. You will not find lists of consumables or quest walkthroughs here.
Quick HUD overview
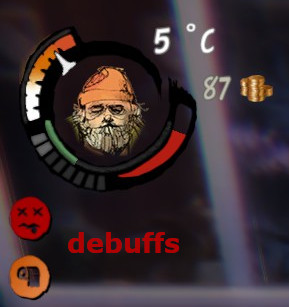
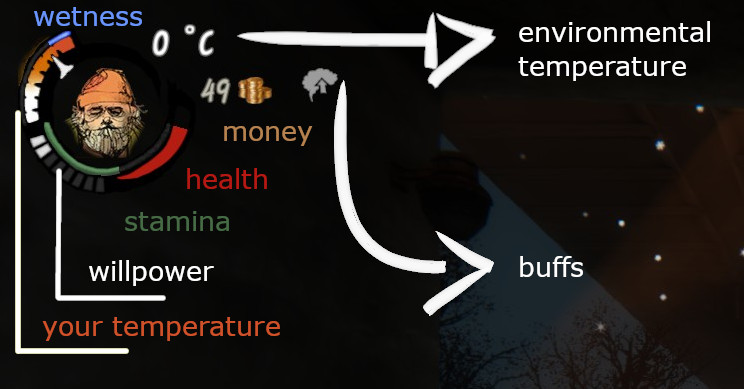 Starting at a certain environmental temperature depending on your clothes and resistances, your body temperature will start going down. Your temperature also decreases while you’re sleeping. The orange area is ok, the white is dangerously low and if the arrow reaches the bottom, you will start freezing and losing health. You need to warm up at a fire barrel, for example.
The wetness meter increases when you are not under some kind of roof while it’s raining or snowing. If it completely fills up, you become “soaked” and your temperature starts falling at twice its normal speed. Again, you can dry up at a fire barrel.
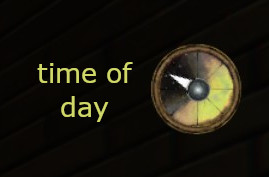
The environmental temperature is different during different times of day.
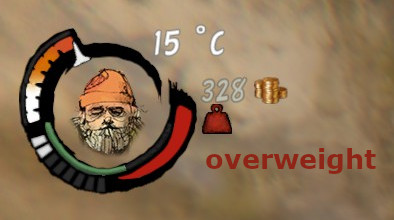
When you’re overweight, your stamina doesn’t regenerate. Your current maximum stamina depends on your energy level.
Your Stats
- stats that are continuously decreasing
- stats that only change when influenced by environmental conditions, items or debuffs

The first type includes Energy, Food and Morale. Whatever you do, these stats will always slowly tick down. Energy is further decreased by crafting or performing certain actions as part of quests and Morale is decreased when stealing. If you get sent to prison, this will also break your morale. You need to plan accordingly to take care of these stats daily.
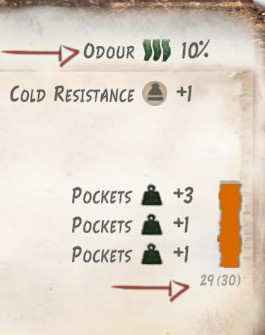
The rest of the stats can be affected by various events and you will be notified by a pop-up at the right side of your screen when this happens. Here it’s important to note that the third grouping of stats in the menu lead to negative effects when they’re high so you would want to keep them low. These are Alcohol, Poisoning, Illness, Number Two and Odour.
The red line in the picture denotes the critical boundary and the yellow one – the warning boundary. Different debuffs are applied to your character when those boundaries are crossed. You can click on a stat to see an explanation of the status and advice how to recover from it. Most stats cause you to lose health when they’re in their warning or critical stage. The exceptions are Dryness, Alcohol, Number Two (though it drains Morale in its warning stage), Odour and Health itself, however, they have other significant consequences so they should not be underestimated. Keep in mind also that the health drain is higher in the critical stage.
It’s not always practical to open your inventory and click on the “Condition” tab just to check your stat levels. The second way is the debuffs that pop up on the left side of your screen under the character portrait. Orange icon color corresponds to the warning stage and red – to the critical stage. Stats which have no negative effects before their critical stage won’t appear here until they are dangerously low. This leaves us the third way: open your inventory and look on the right side.
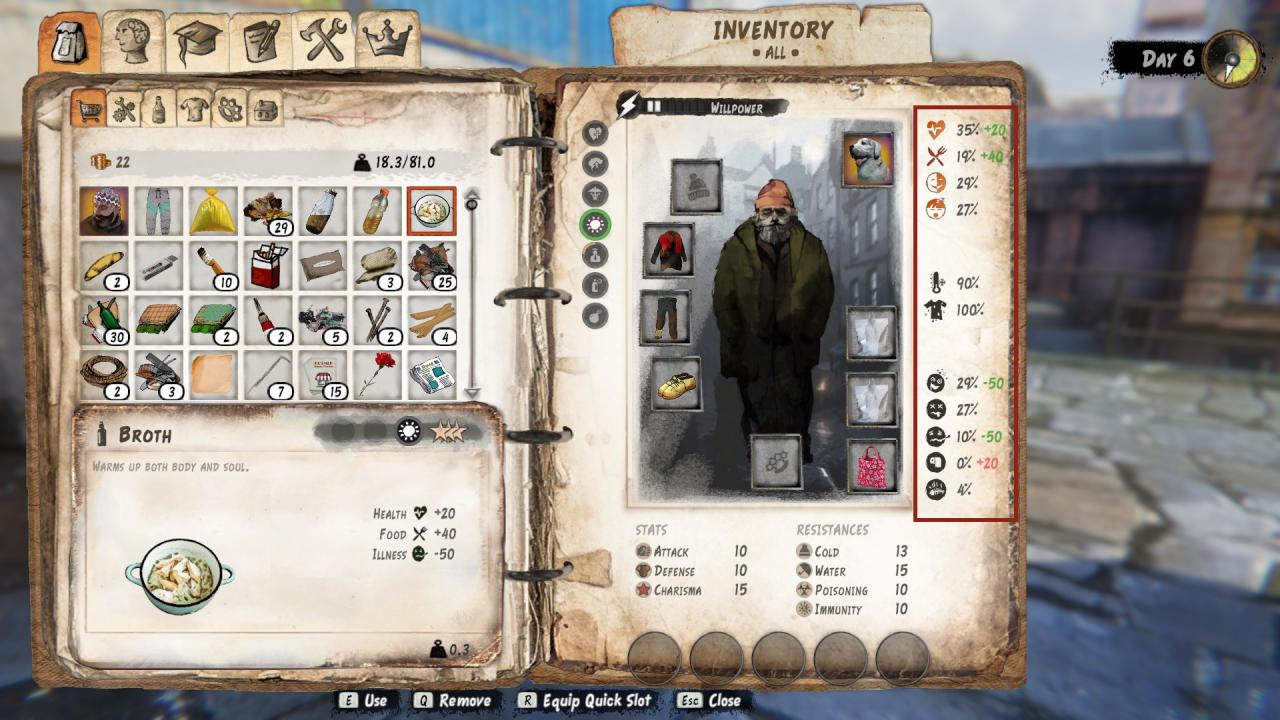
You can see that some stat numbers are in orange and some in red. This signifies the corresponding stage again. For example, if your Energy is orange, maybe you should start thinking of a place to take a nap before the situation becomes critical and you start losing health. This view allows you to easily plan ahead at the press of a button.
Pay attention to the +/- numbers in green or red next to the stat numbers. If you mouse over a consumable in your inventory, you can preview its effect on all your stats and not all is listed in the item description alone. For example, we don’t see in the description of Broth that it decreases Alcohol by 50 and increases Number Two by 20 but we can see it in the stat preview! Green numbers mean beneficial change and red – the opposite.
Help, What’s Happening to Me?
Significant changes in the stats are broadcasted in big letters on screen so a quick check in your stat list (“Condition” tab) should help you quickly clear up the situation. One message I see people often getting confused by is “You are beat up”. It comes out of nowhere and your character suddenly falls on the ground and is incapacitated for several seconds. What has happened is that your health has reached a critically low level and, as the game puts it, you are “at death’s door”.
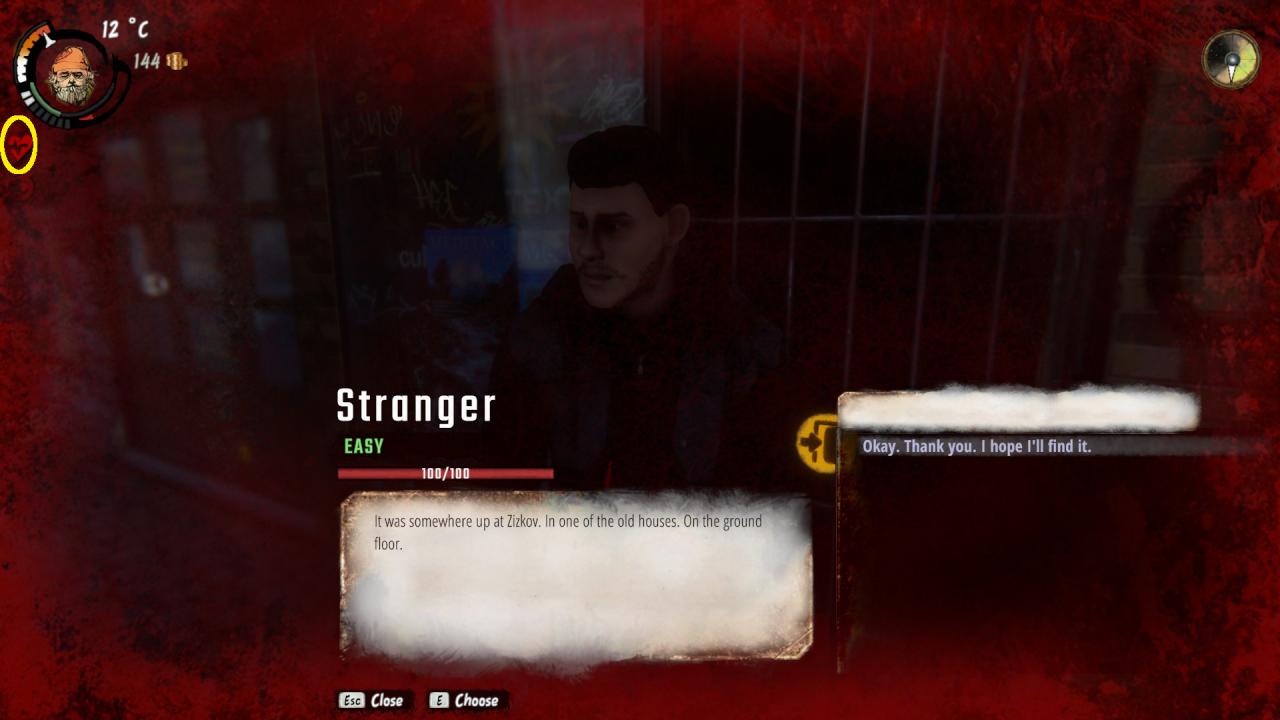
You can see the icon circled in yellow and your screen has a red edge. You didn’t get beaten up by invisible assailants, instead something must have been draining your health. As we see on the screenshot, the critical health icon is not alone there but accompanied by critically low morale. If you reach a critical health stage, your first step should always be to clear up the reason so that you can counteract it effectively. Do throw a bandage on it meanwhile though, if you have one handy.
Inventory Tabs
- Inventory: self-explanatory
- Condition:
- Parameters: these are your stats
- Buffs: Here you can see what the buffs do. You can get buffs from certain consumables or by sleeping on benches but keep in mind, you need to reach a milestone to get the buff.
- Addictions
- Character
- Skills: Remember to check your Dumpster Diving level (see: Dumpster Diving section in the guide)
- Perks
- Quests
- Main quests
- Favors aka Side quests
- Completed quests
- Crafting: When checking requirements for items that require a Crafting Bench, check on the bench itself, they will be faded out in your personal crafting menu even if you have all the ingredients. Also not all the tabs in your personal crafting menu show up on the bench as well. Use “R” to toggle between ingredient icon and ingredient name.
- Elections: Here you can keep track who will vote for you.
Map Tabs
When you open the map, you have four different views at your disposal.
“Quests” is the main one. Here you can click a second time on a quest so that an icon like in the screenshot appears next to it. Now every time you open the map this quest will be displayed first.
“Favors” is like “Quests”, just for side quests.
“General” is where things get interesting. Fire barrels, stores and some other locations that you have interacted with will be displayed here. It is not enough just to walk by a fire barrel, for example, so that it appears here. You need to at least open it with “E”.
In “Characters” you can see a list of all the characters you have talked to and their locations.
Hideout Interface
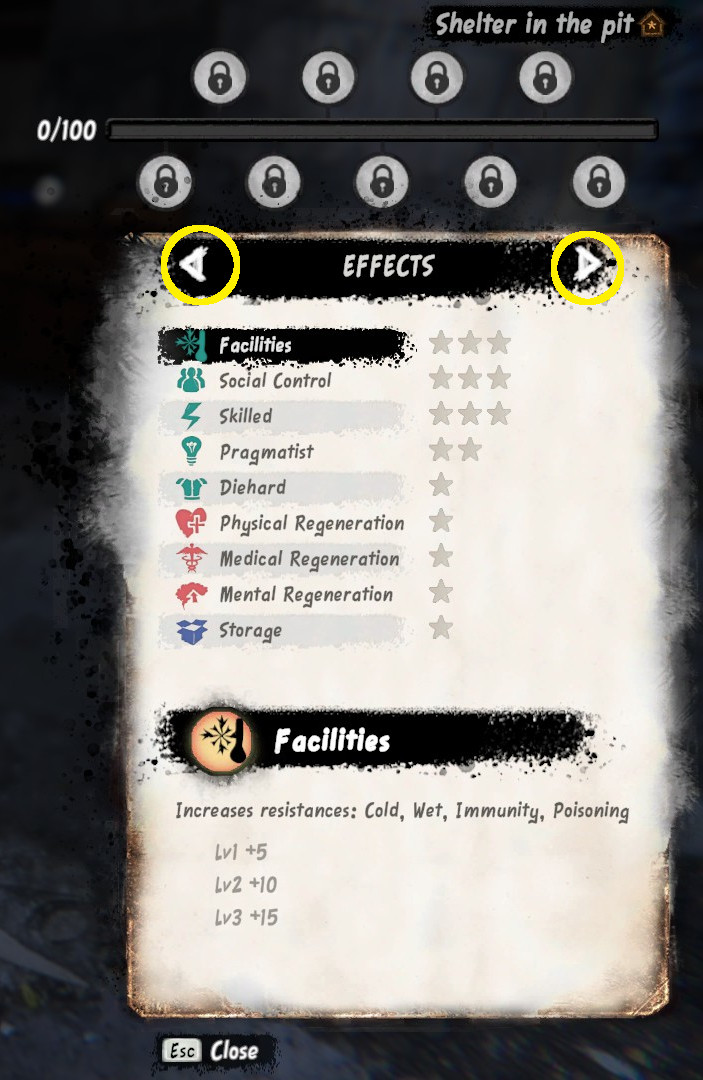
On the first page we see the list of possible effects. You can click on them to read a description. As we put different kinds of structures, furniture and items in our hideout, we will reach milestones and that will give us points which fill the bar at the top of the page. When the bar fills enough to reach a circle, we can choose an effect to equip in that slot. As the game lets us know, the choice is irreversible. One star fills one circle.
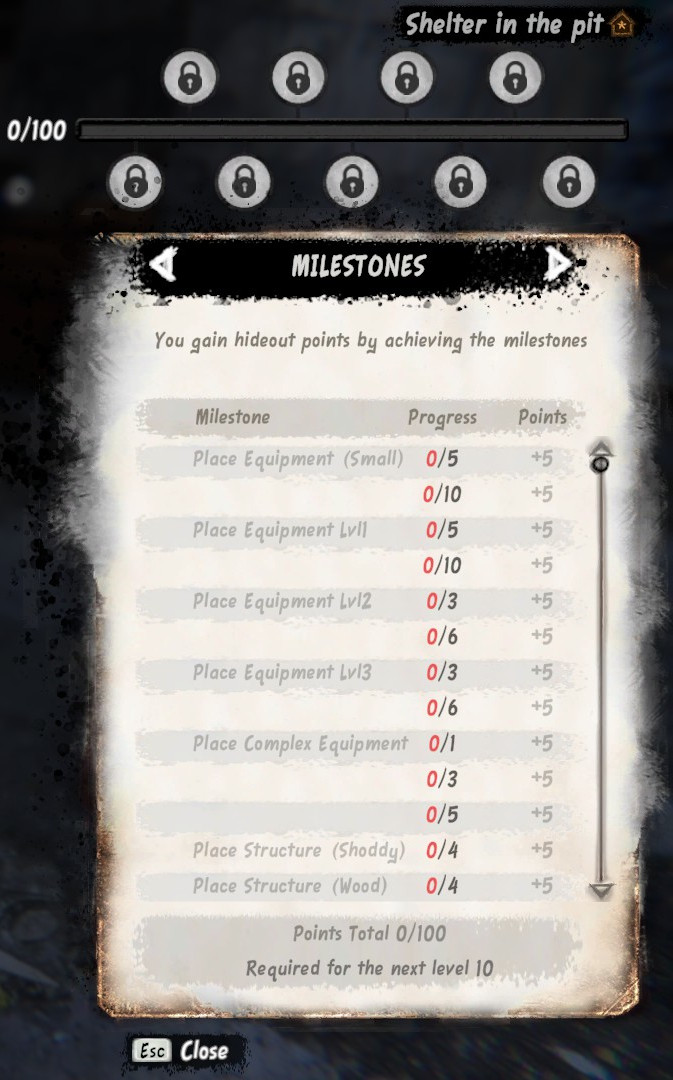
On the second page you see the requirements to reach the different milestones. You can see in the description of items which can be placed in the hideout which category they belong to. Some of the items can be upgraded with materials to level 2 and 3.
Dying
You can continue or restart your playthrough. In the very beginning when you are still figuring the mechanics out, it might be easier to restart but it’s down to personal preference.
Begging
Dumpster Diving
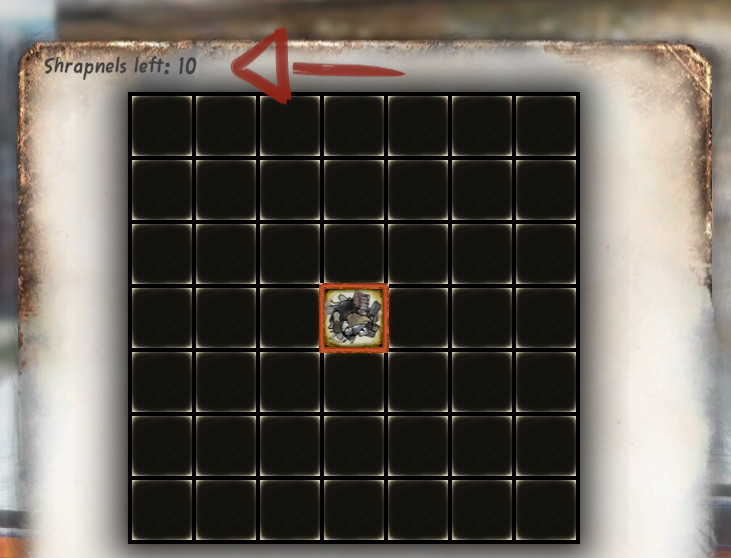
Damaging your clothes will make it harder to survive the cold weather and your smelly clothes slowly rub off on you too (i.e. your Odour stat increases) and the smellier you are, the less inclined people will be to talk to you.
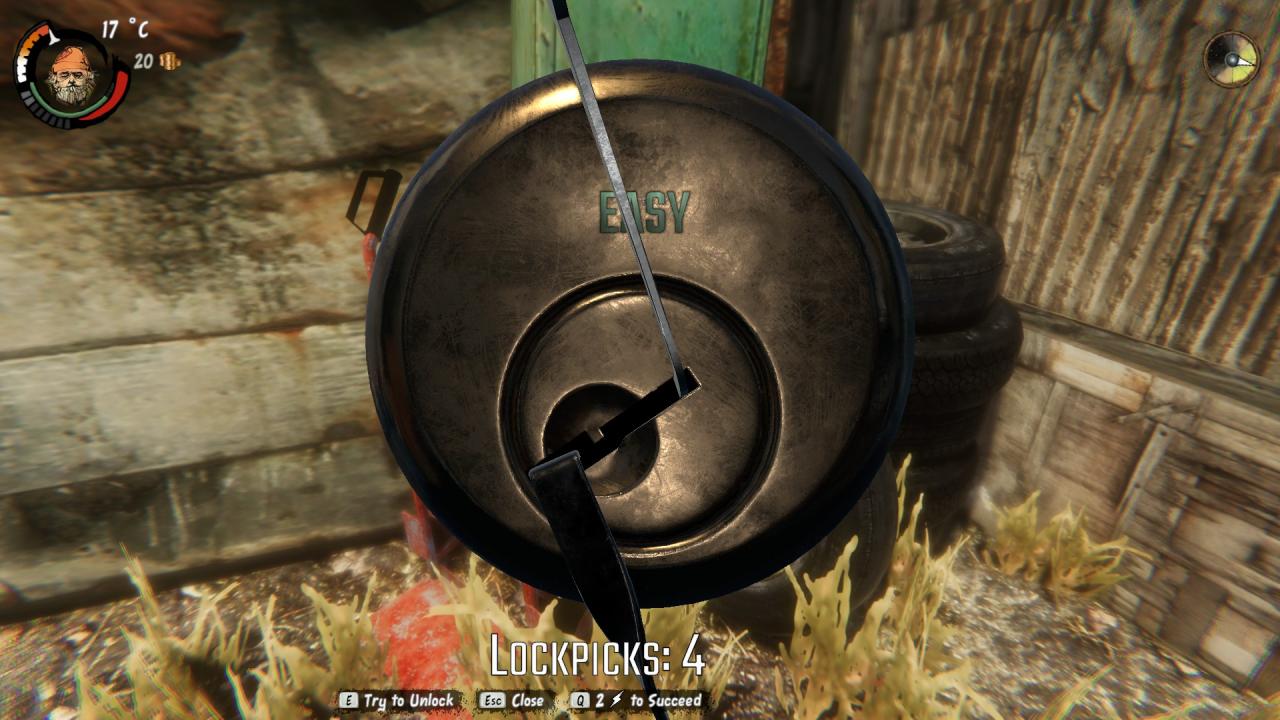
The goal with lockpicking is to turn the lock 90 degrees to the right. The screenshot shows the lock mid-turn. You want to press “E” and adjust the mouse so that the lock keeps turning. If the lock gets stuck for too long, your lockpick will break. You can quickly press “Esc” to reset before your lockpick breaks if you see that it’s not going well.
Stealing drains your moral per item. You can get caught too and get into trouble so always keep an ear out for people noticing you and calling you out on stealing. You can cancel the stealing attempt with “Esc” and if you haven’t stolen anything yet, they most likely won’t call the police or arrest you.
Questing
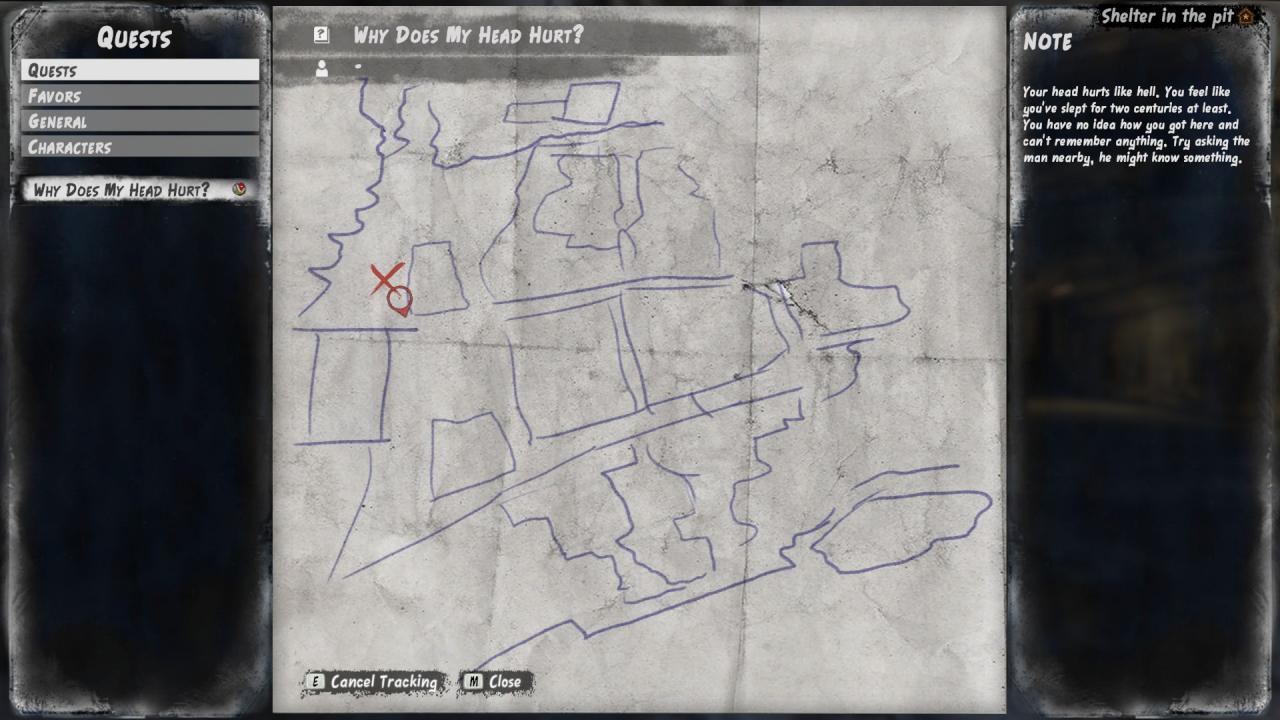
Start at Maisner and explore. There’s no right or wrong order to do things in. This is how Maisner’s shelter looks like.

Some More Tips
- You can use your flashlight without assigning it to a quick slot by pressing “F”
- You can cycle between items in quick slots with your mouse wheel and press the wheel to use the item
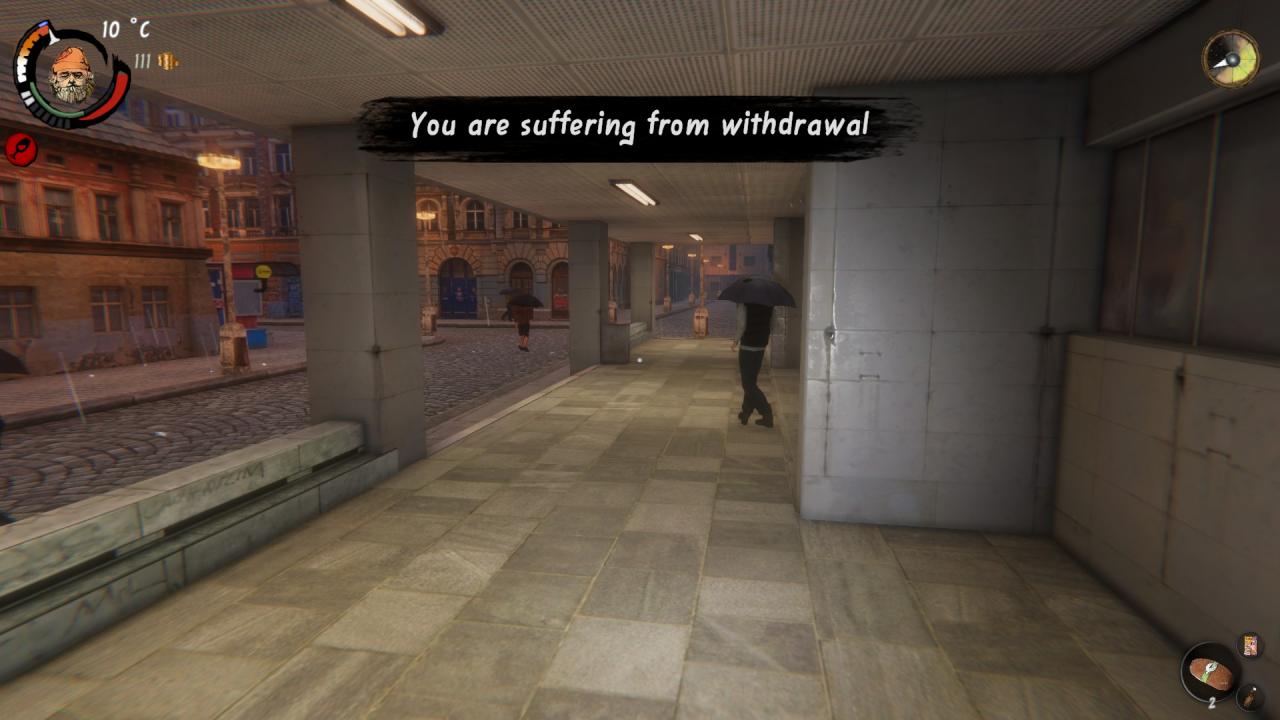
- If you get a warning that you’re in addiction risk, take it seriously. Living with the addiction is not too hard but getting rid of it can be challenging.
Thanks to Azibo for his great guide, all credit to his effort. you can also read the original guide from Steam Community. enjoy the game.