
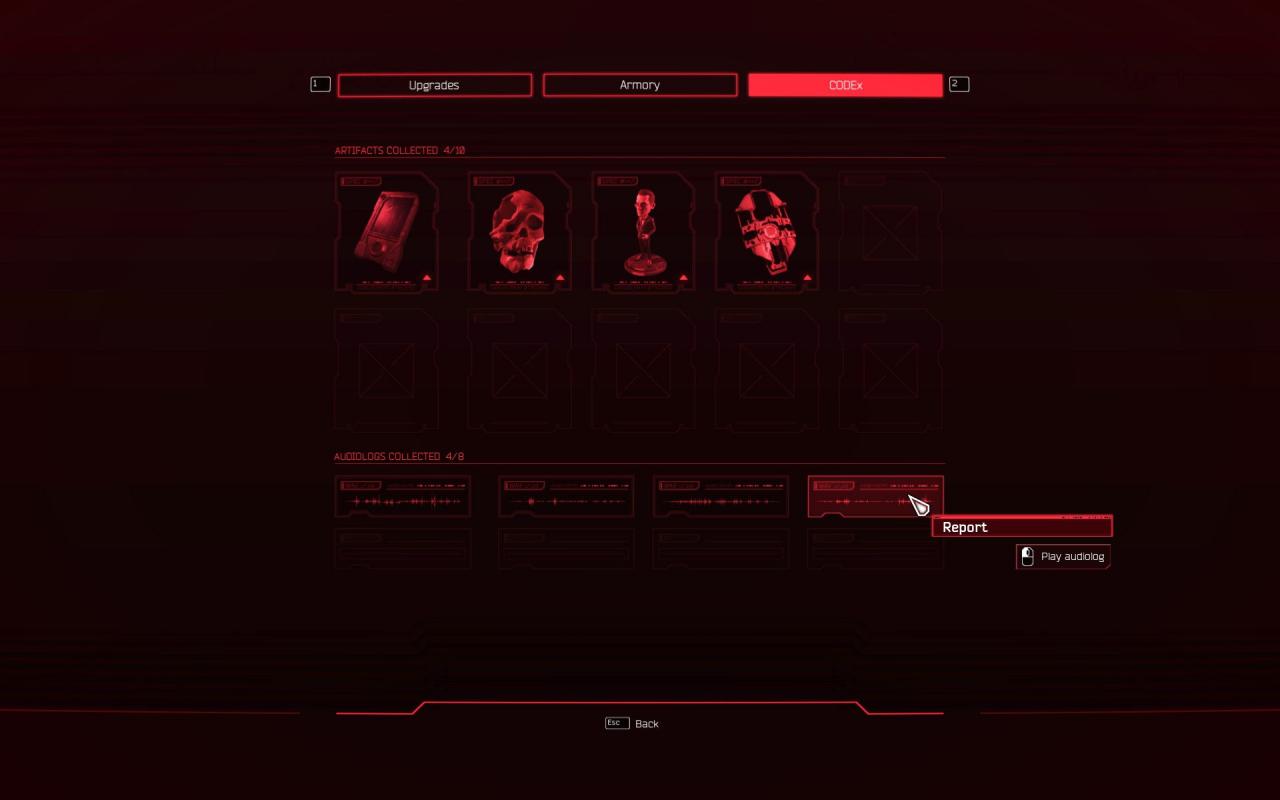
A guide to get the [Everyone Needs A Hobby] achievement, by collecting all the collectibles (swords, artifacts, audiologs).
With numerous amounts of screenshots with points of interests.
Level 1: Another Awakening
Artifacts: 2
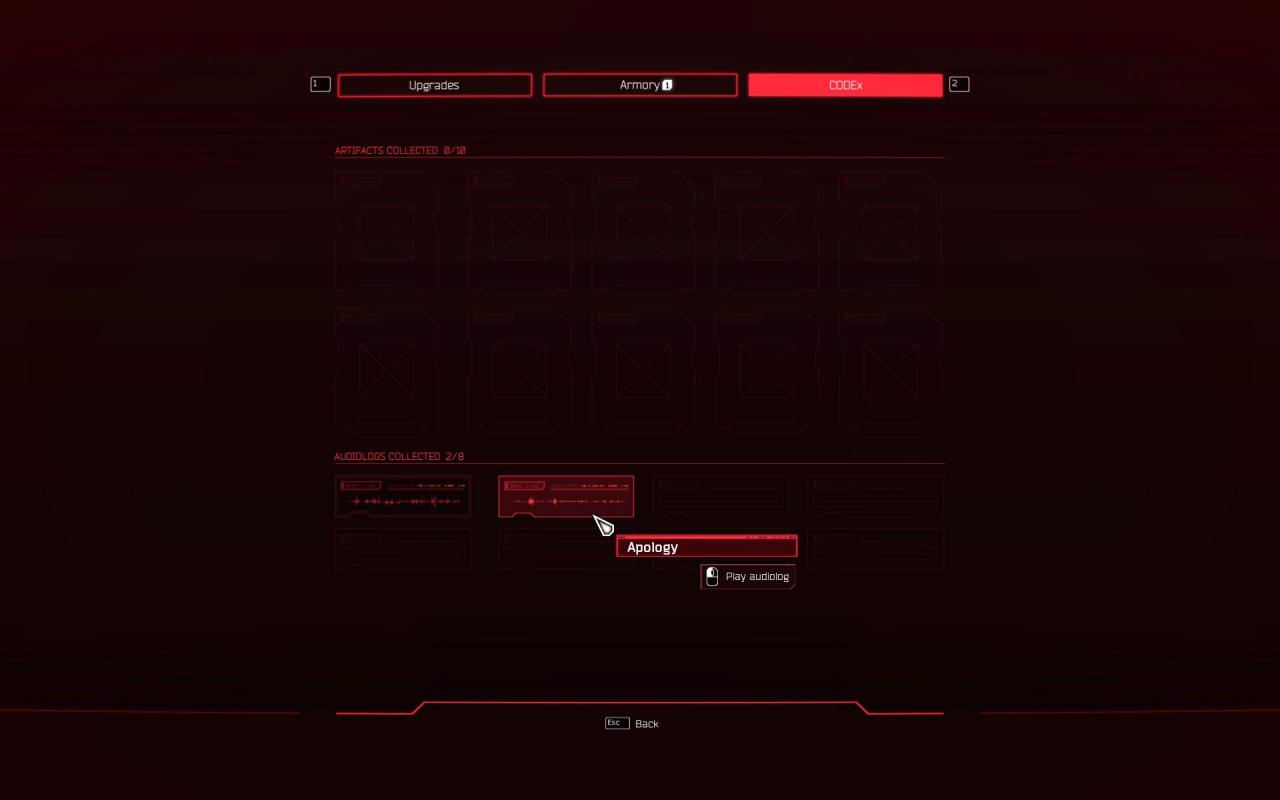
Audiologs: 2
Swords: 1
Audiologs: 2
Swords: 1
Audiolog 1
───────────────────────────────────────────────────────────────
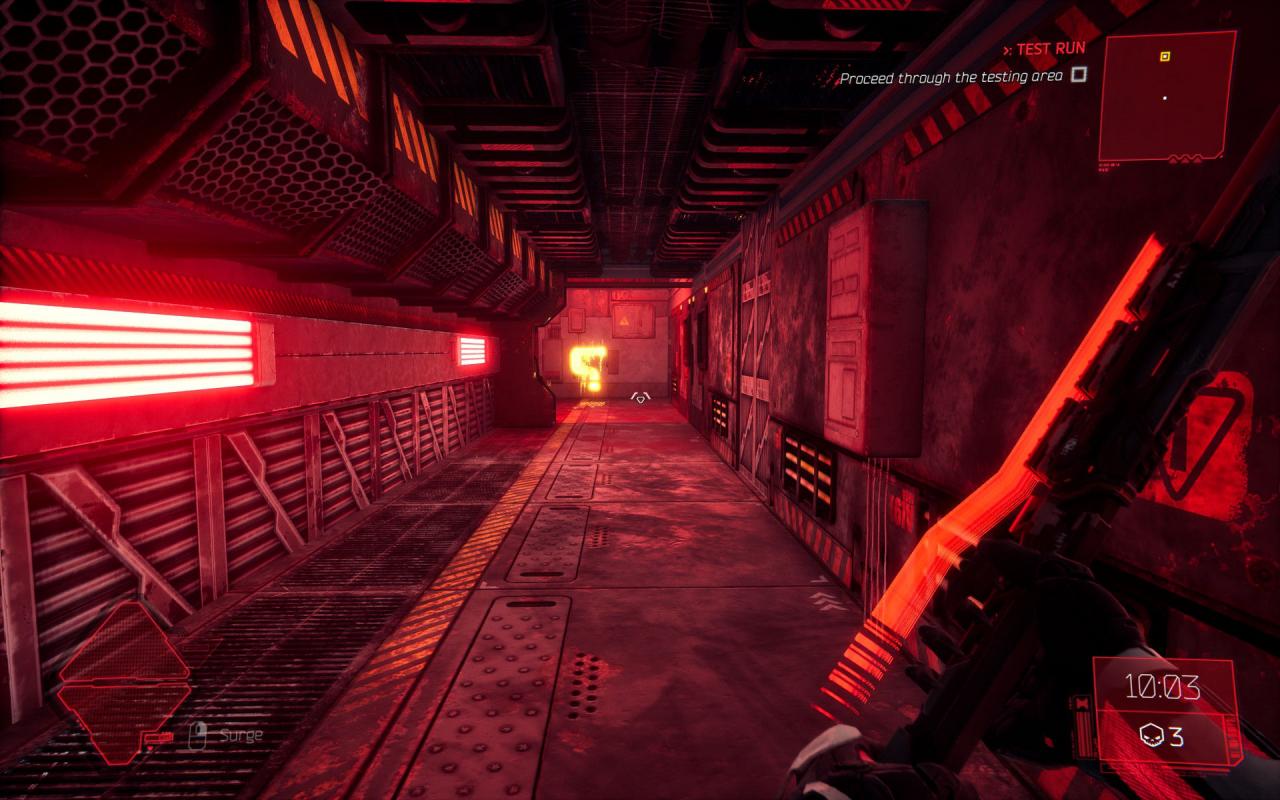
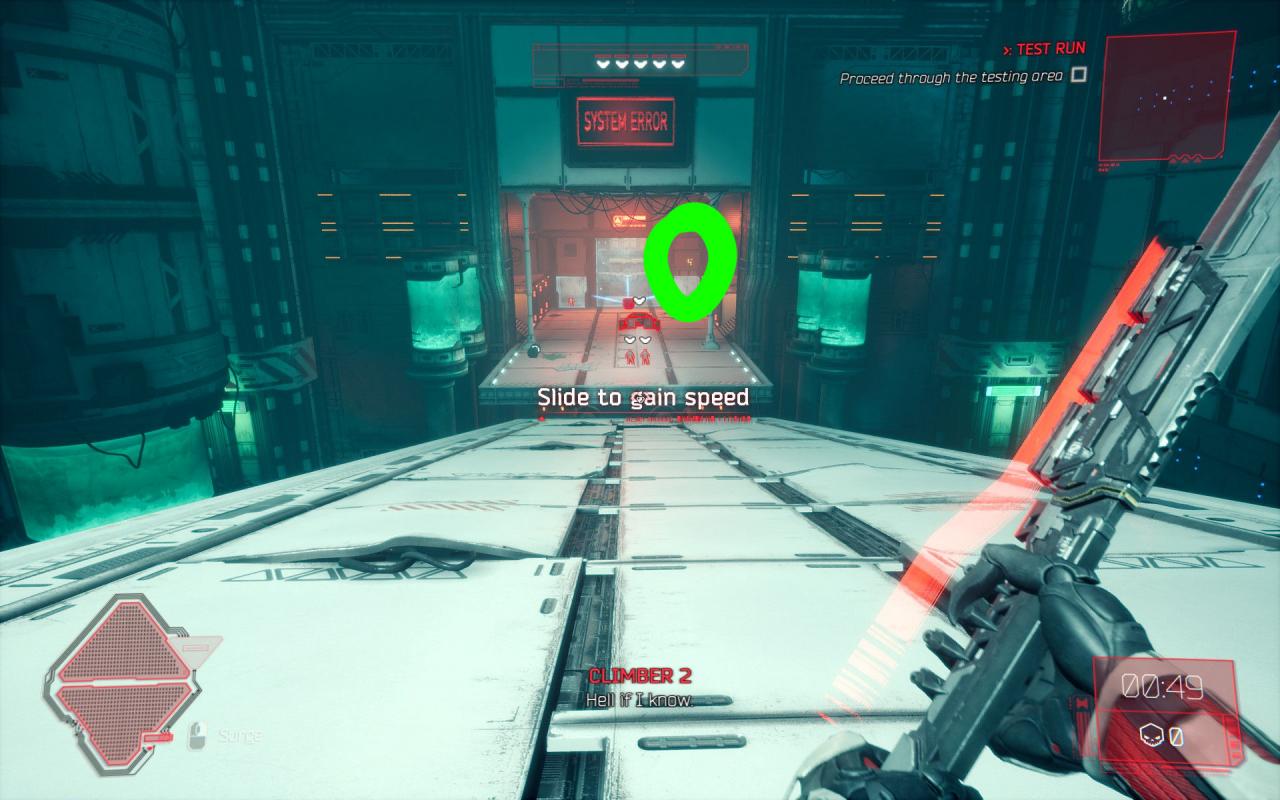 First clear the room ahead as usual
───────────────────────────────────────────────────────────────
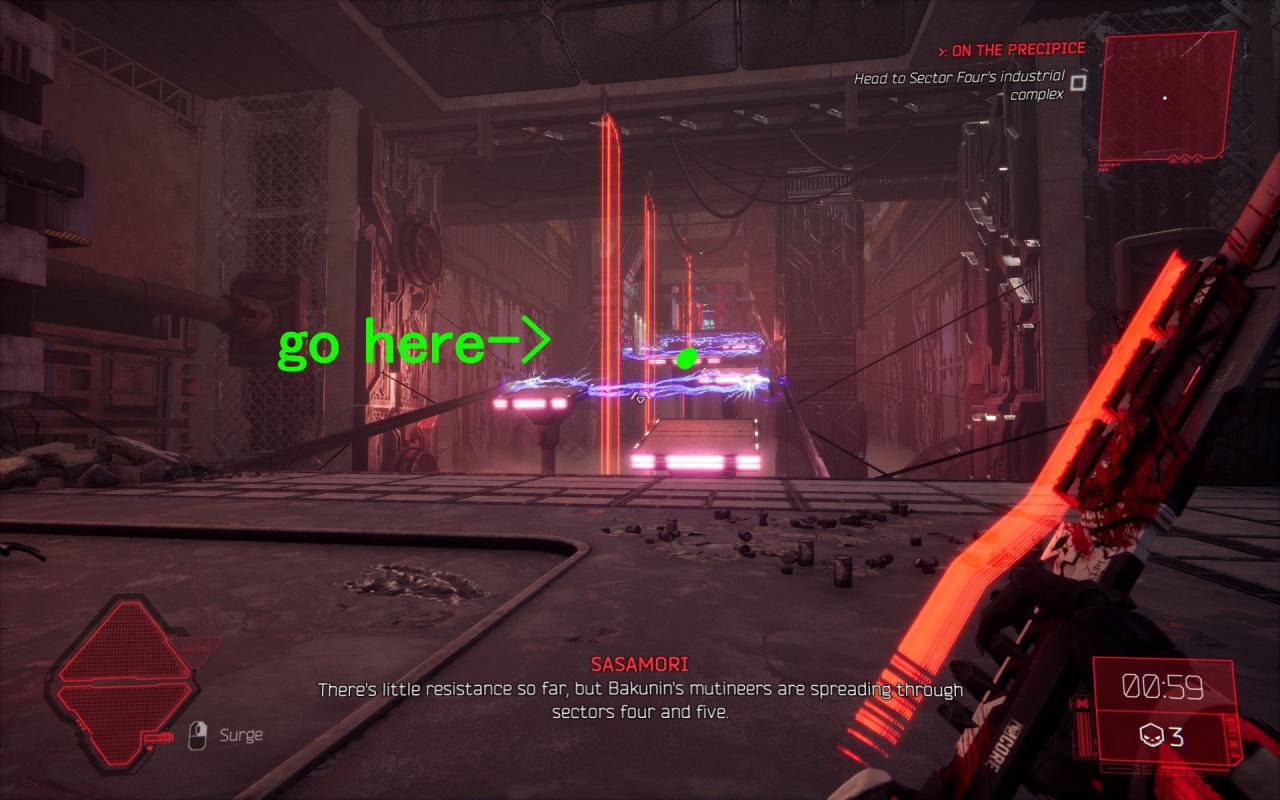
 go here
───────────────────────────────────────────────────────────────
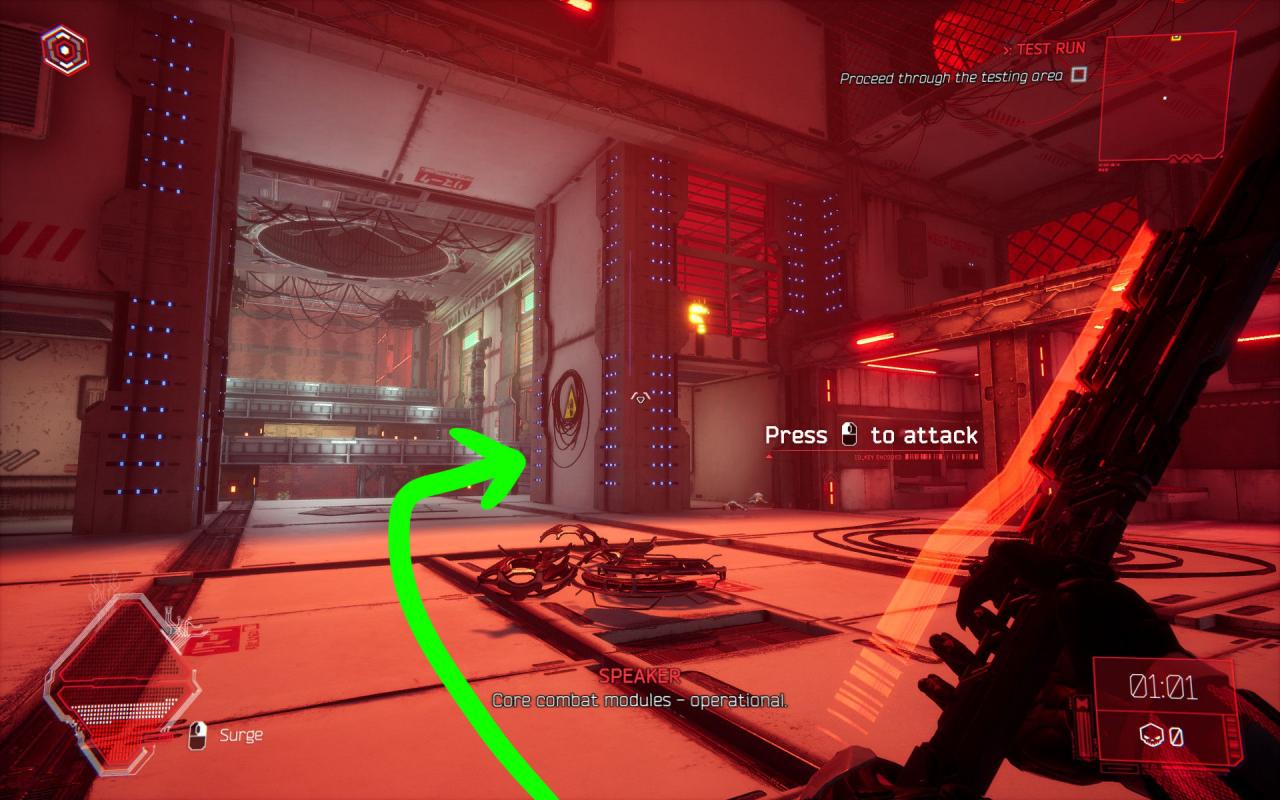
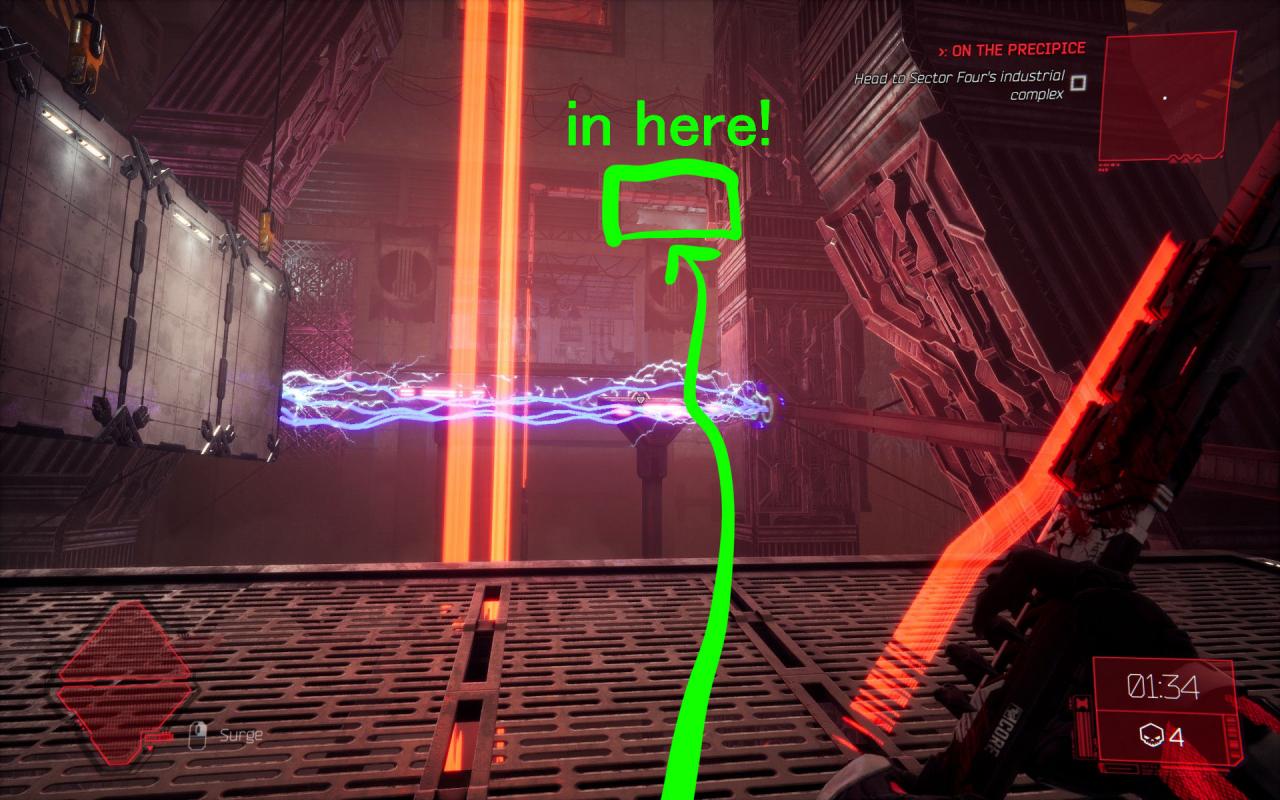
 go over there
───────────────────────────────────────────────────────────────
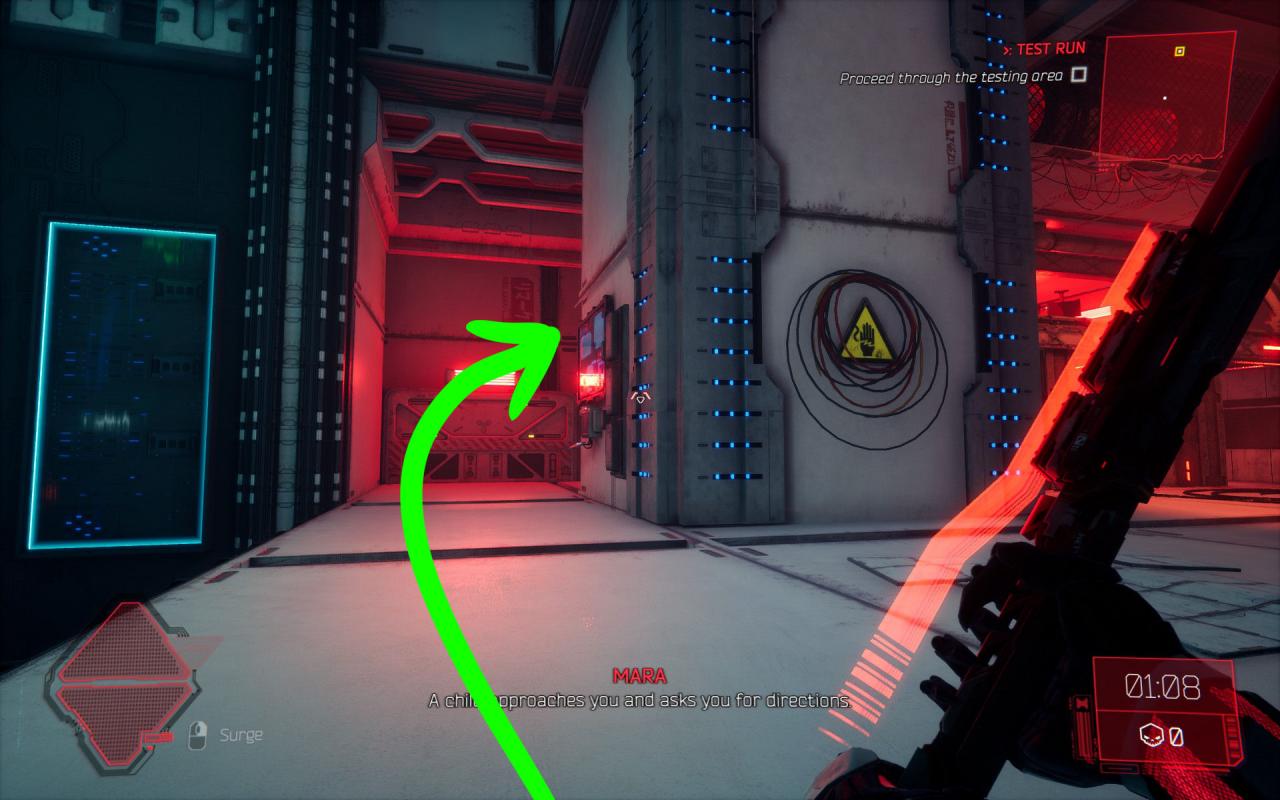
 go up
go up
───────────────────────────────────────────────────────────────
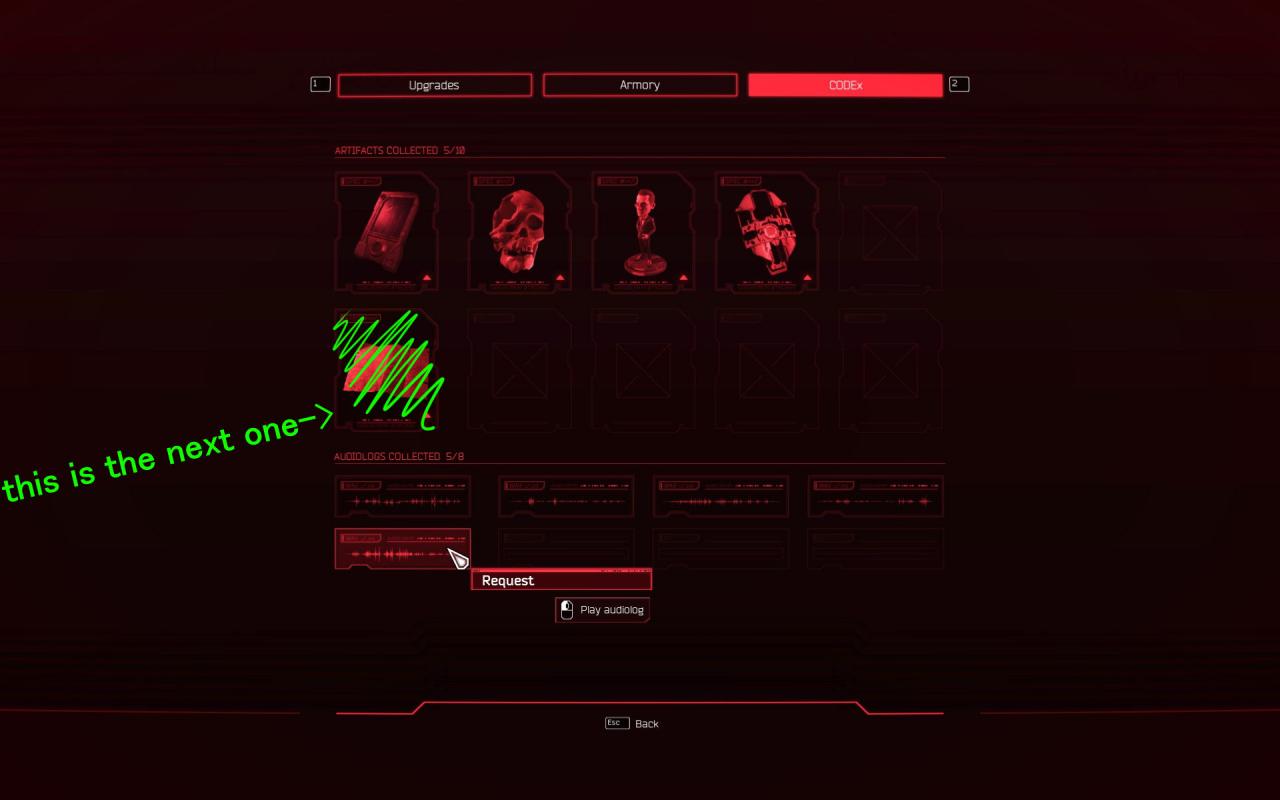
 and here’s the first audiolog!
 ───────────────────────────────────────────────────────────────
First clear the room ahead as usual───────────────────────────────────────────────────────────────
go here───────────────────────────────────────────────────────────────
go over there───────────────────────────────────────────────────────────────
go up───────────────────────────────────────────────────────────────
and here’s the first audiolog!───────────────────────────────────────────────────────────────
Audiolog 2
───────────────────────────────────────────────────────────────
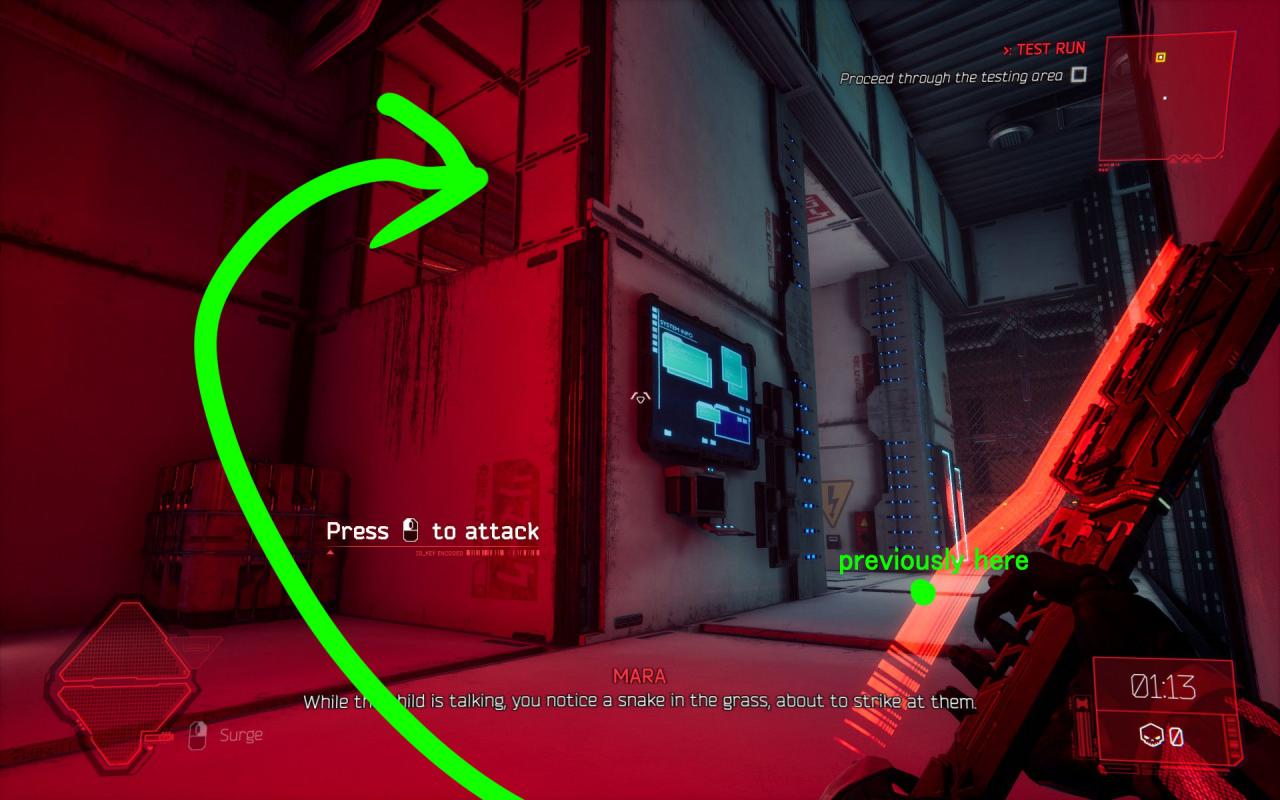
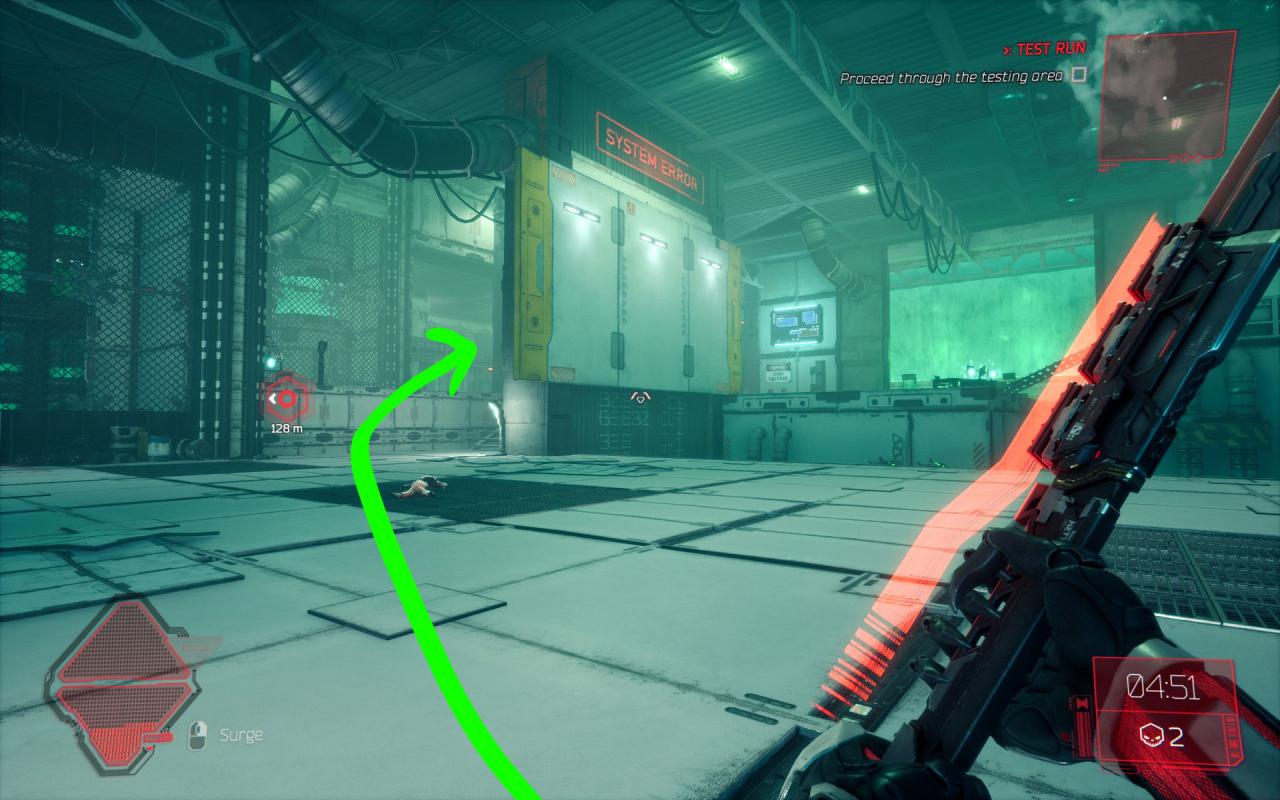
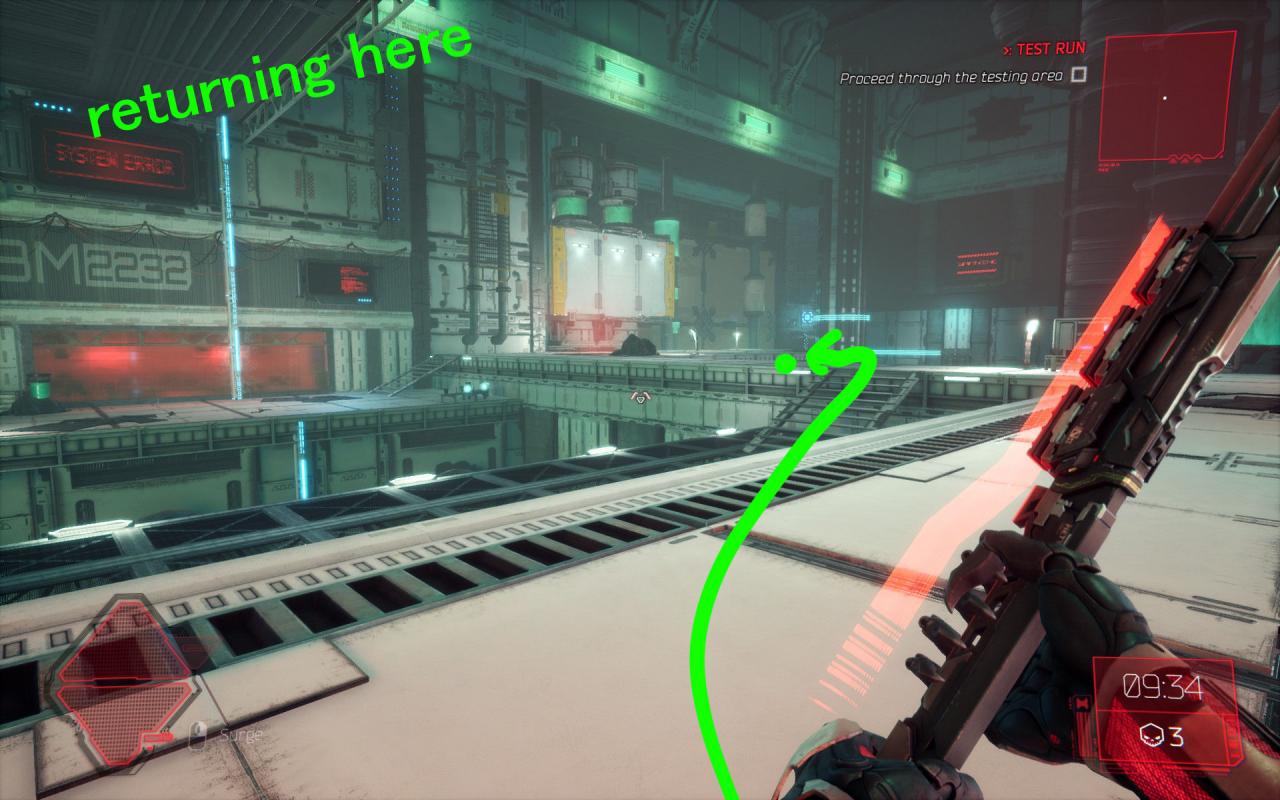
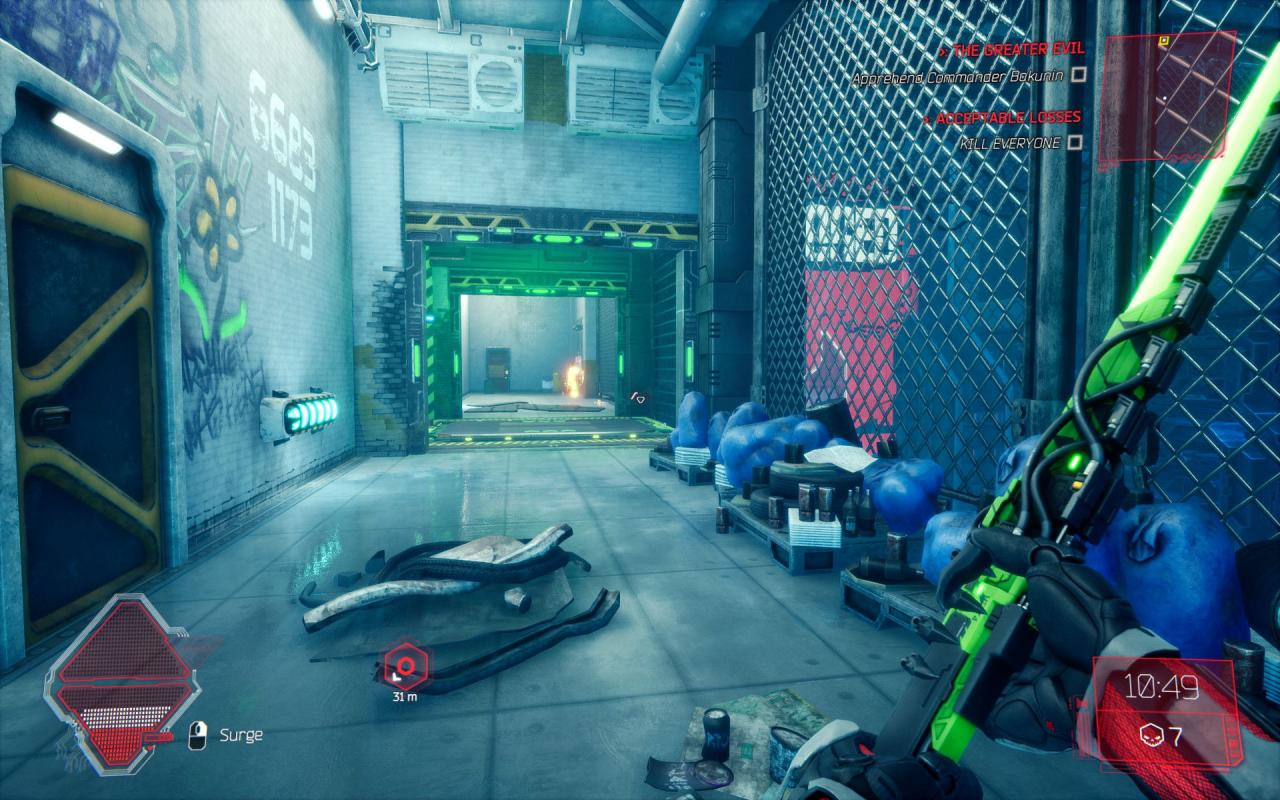
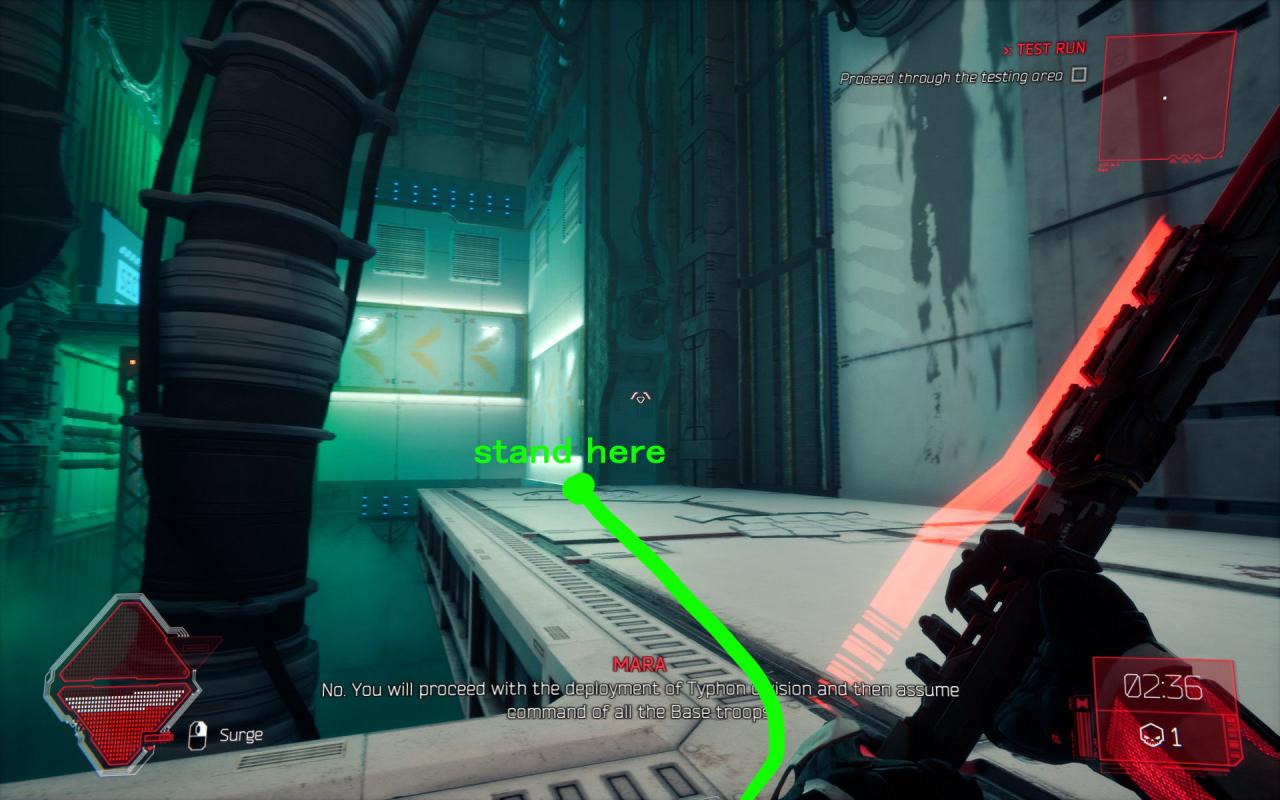 When you reach this room, go and stand right over here, and look to the right
───────────────────────────────────────────────────────────────
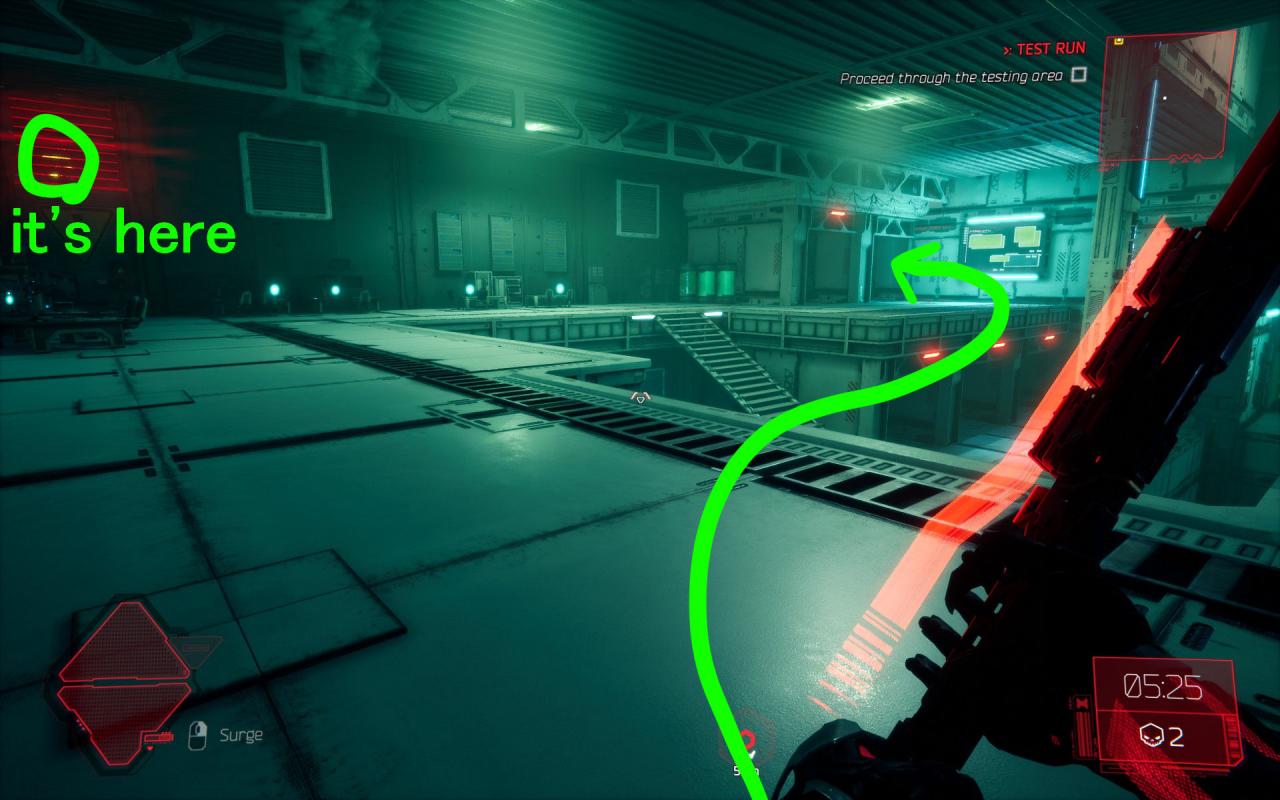
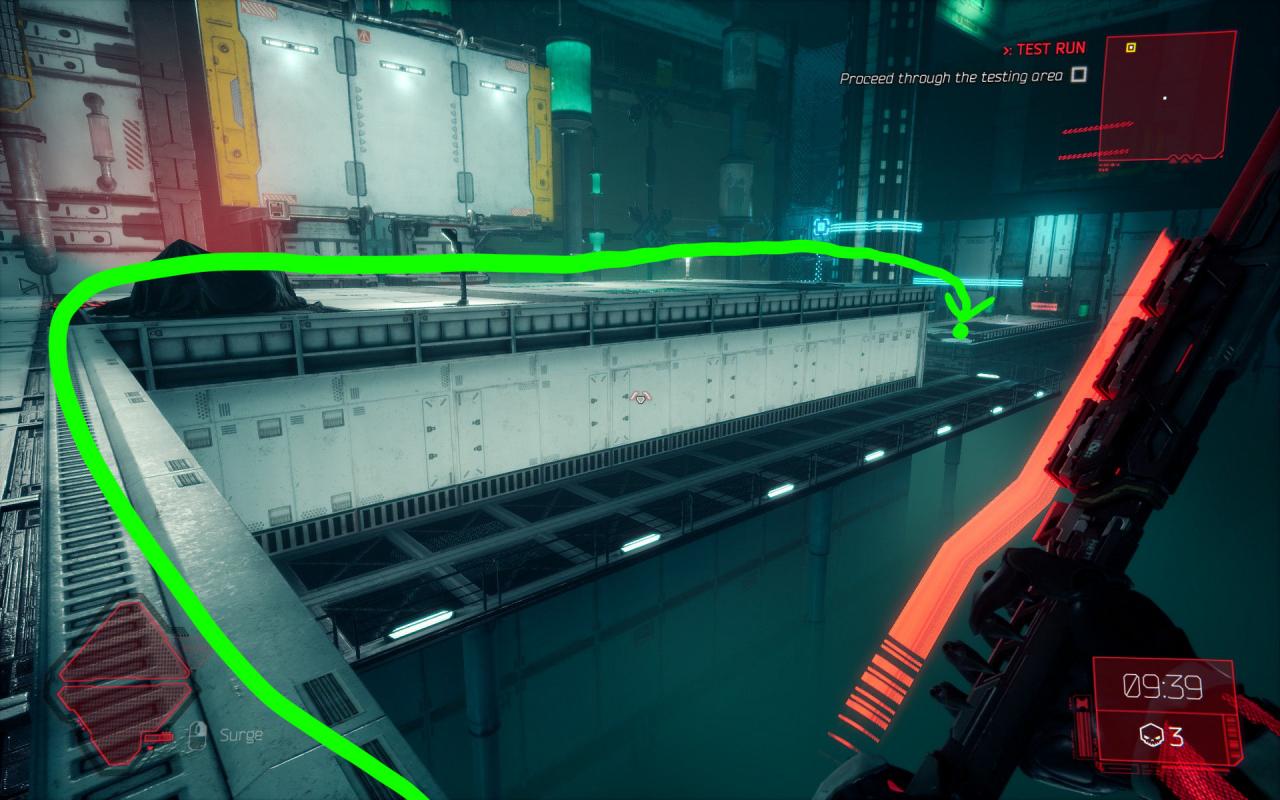
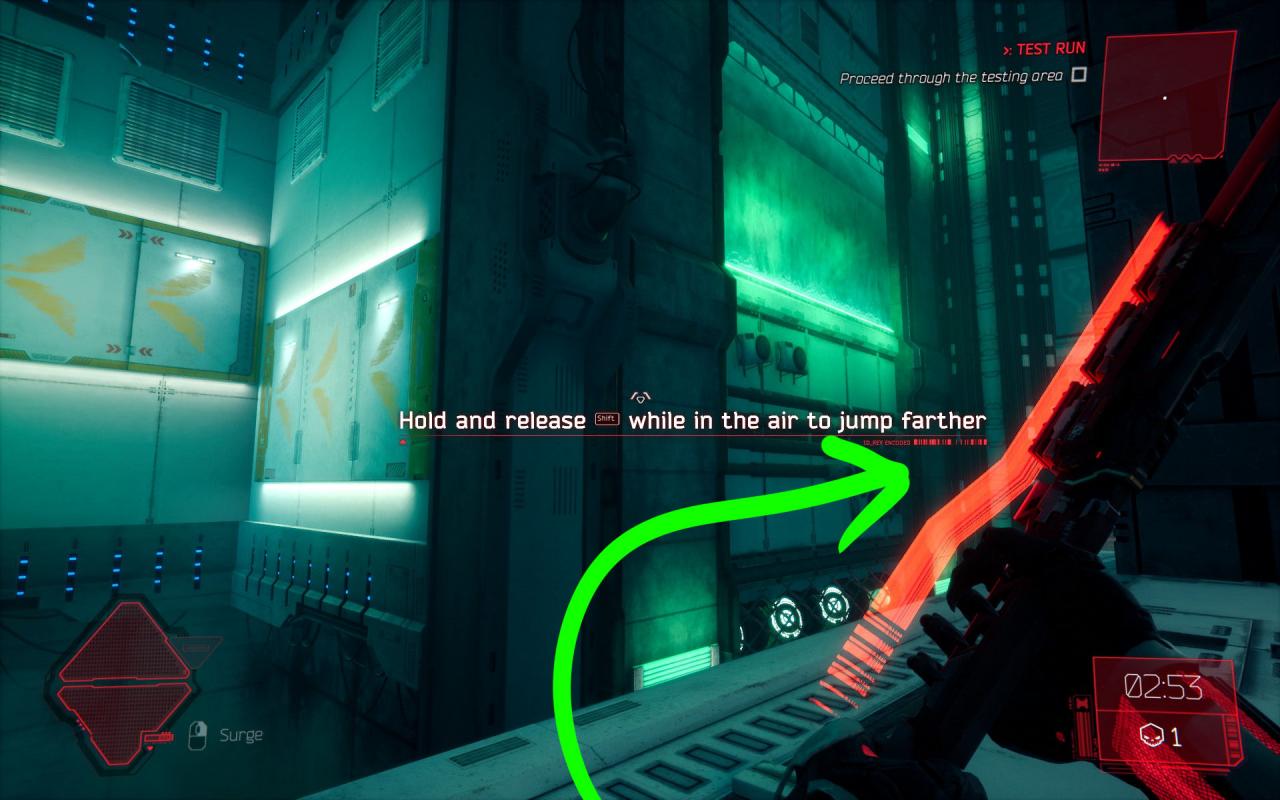 then go to there
───────────────────────────────────────────────────────────────
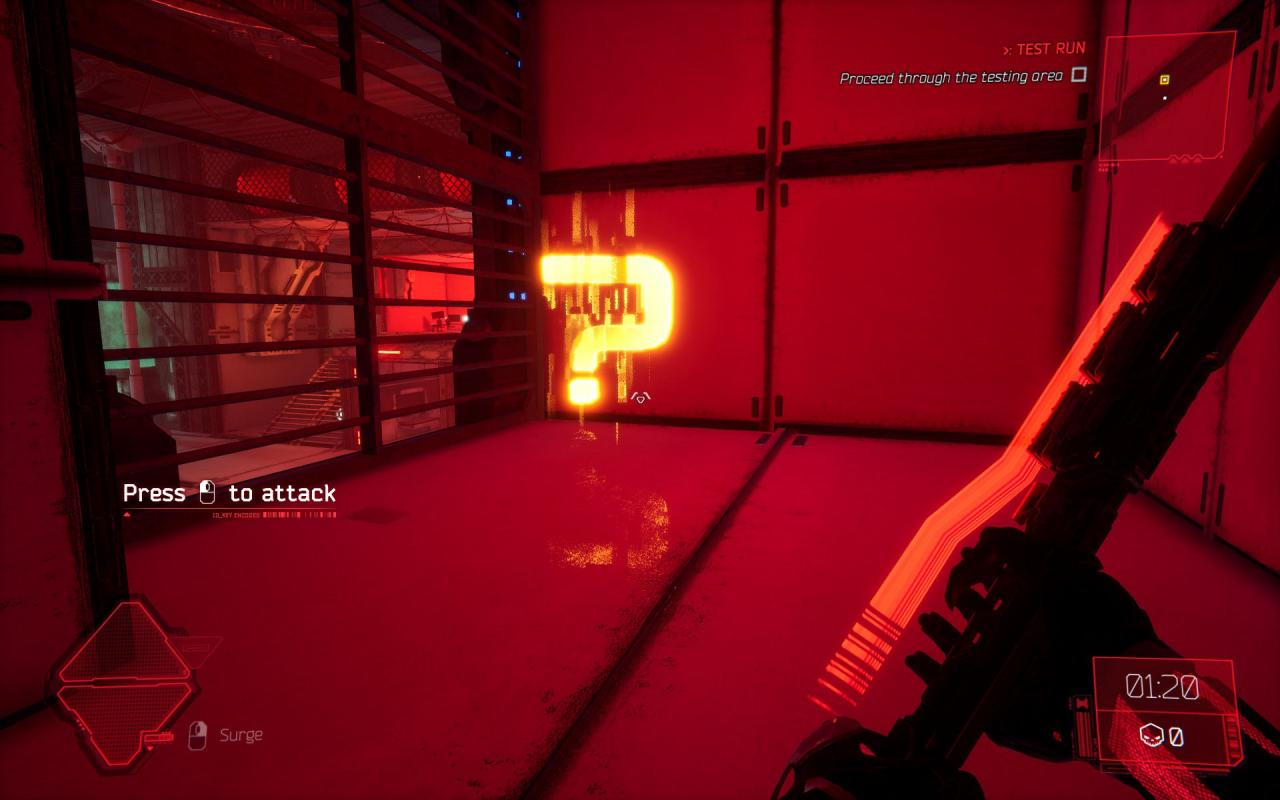
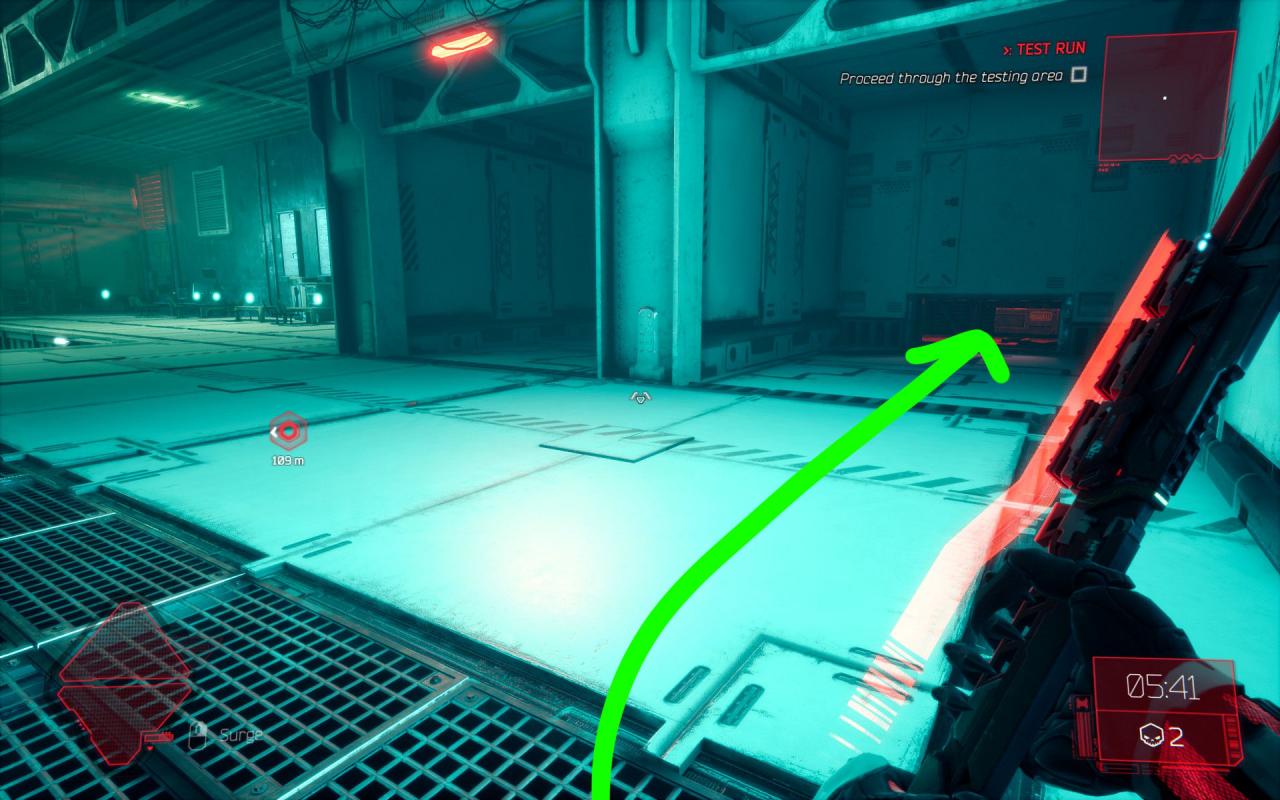
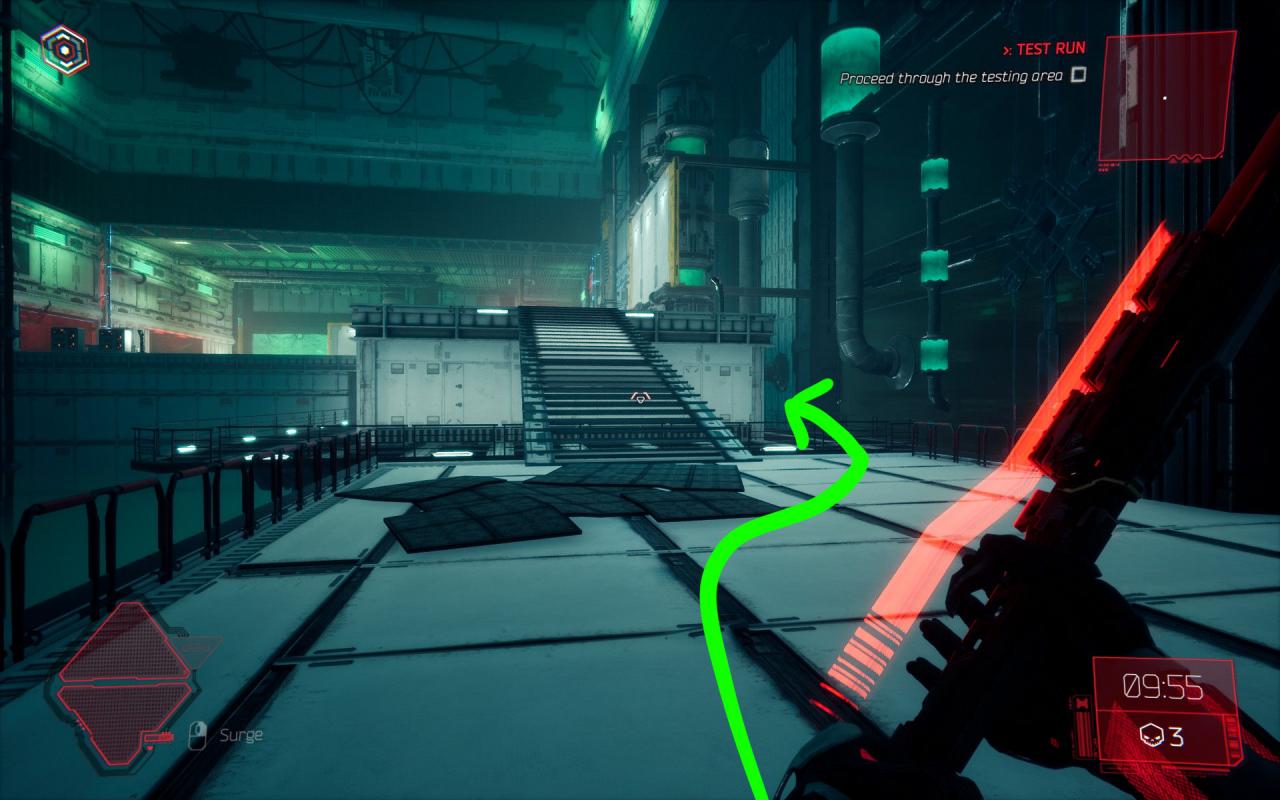
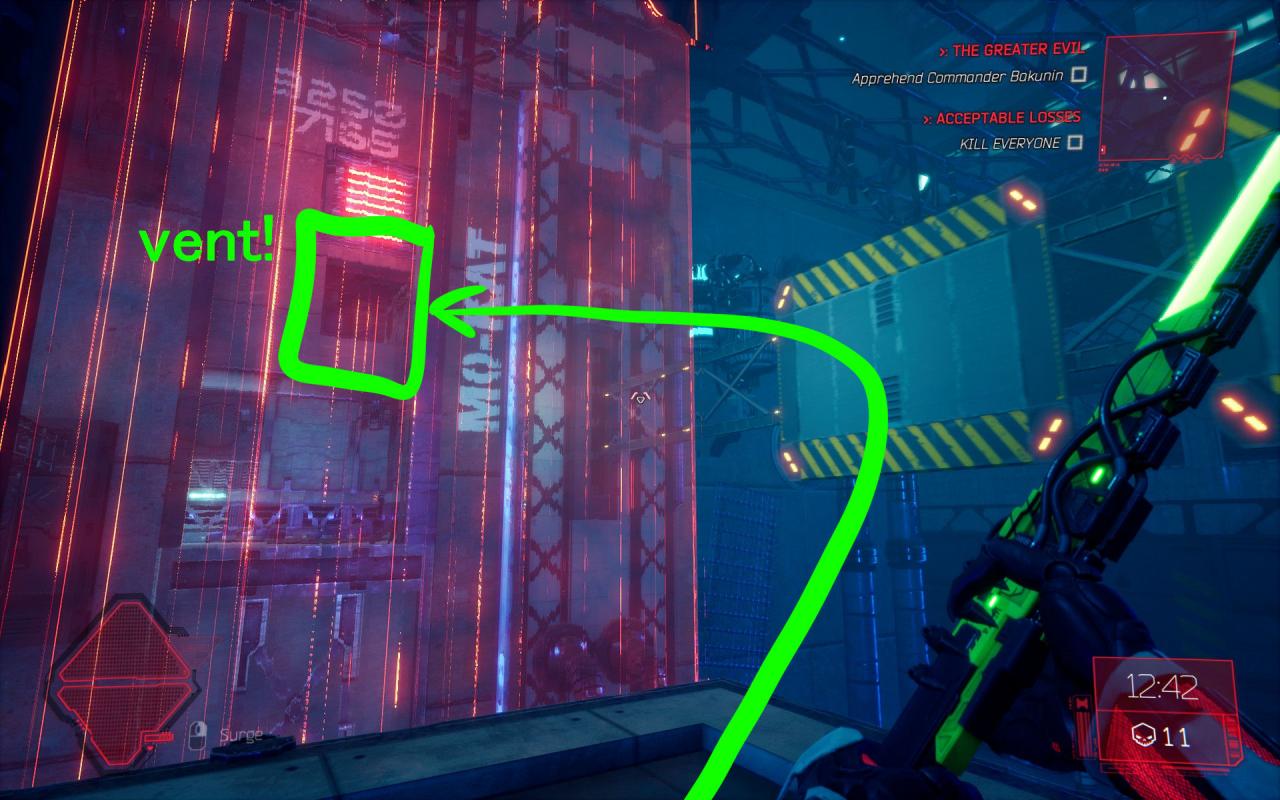
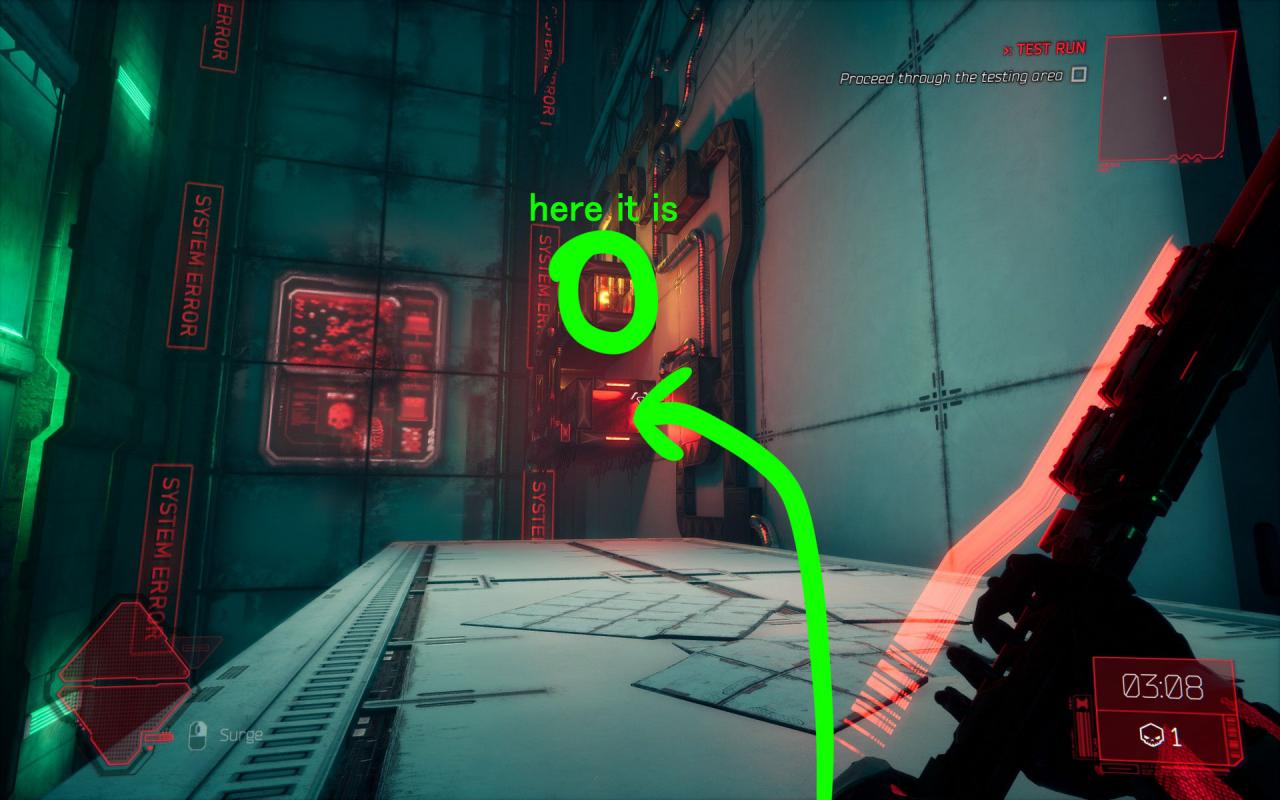 jump into the vent hole, you can see the collectible from here
───────────────────────────────────────────────────────────────
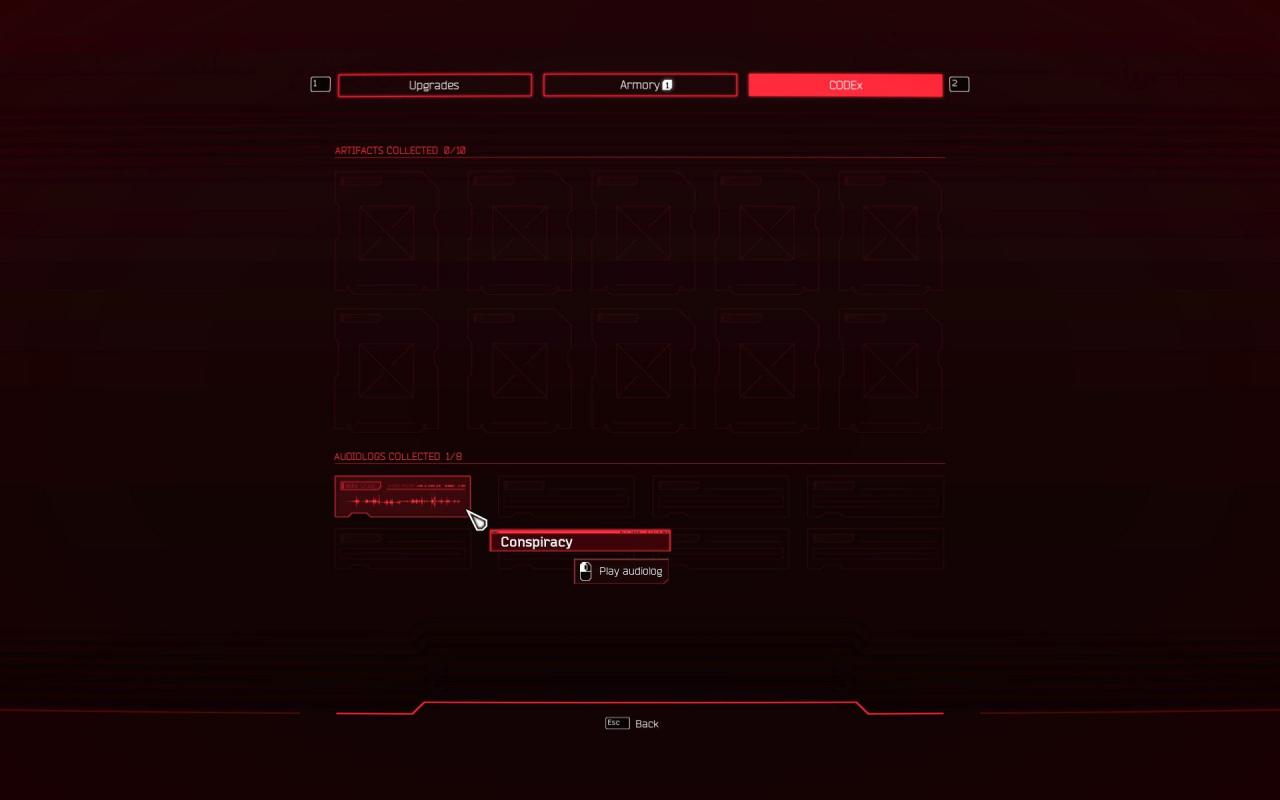
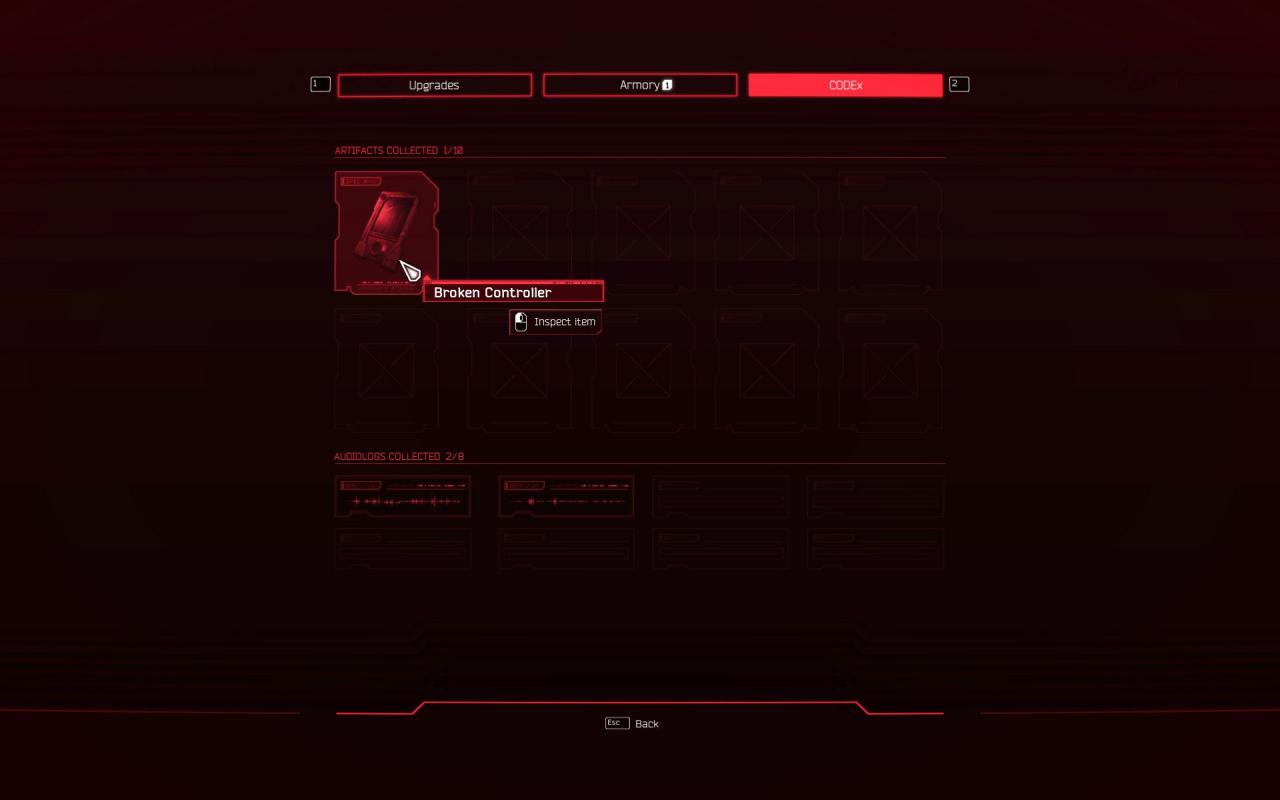
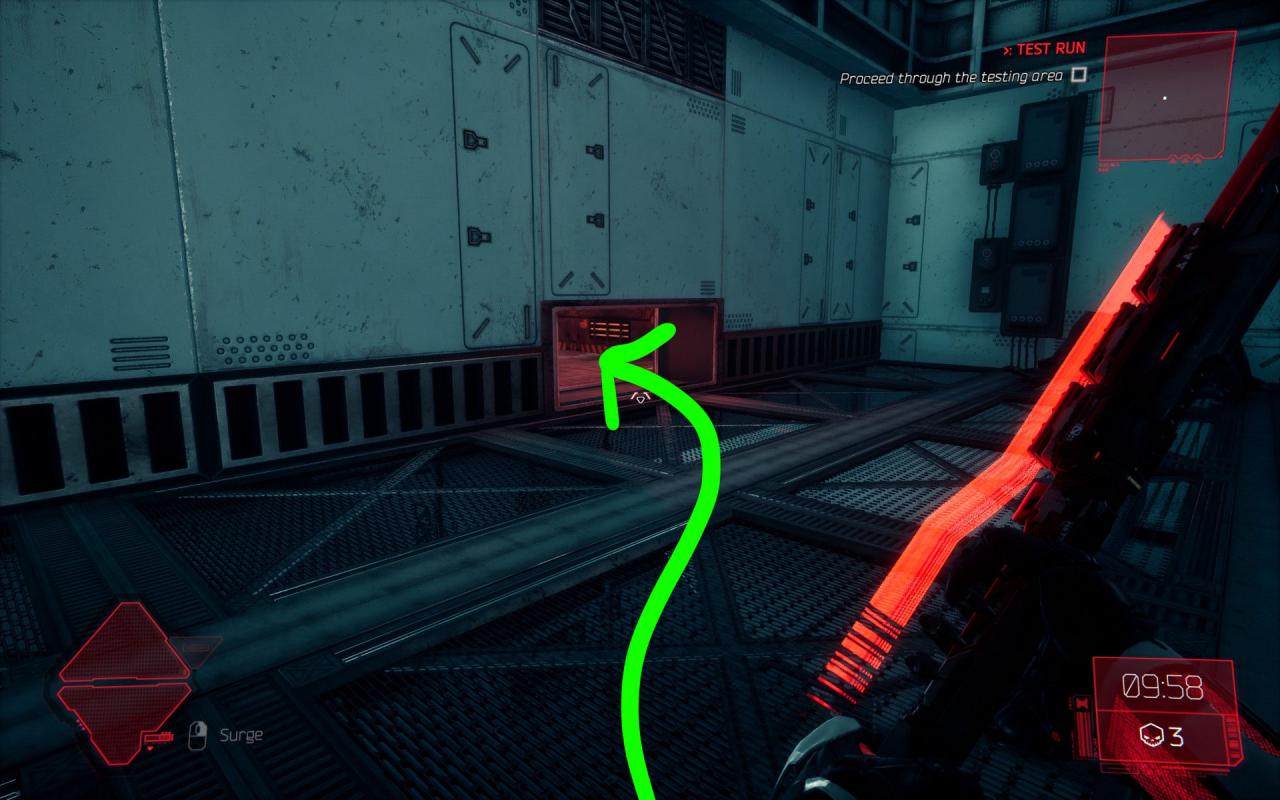
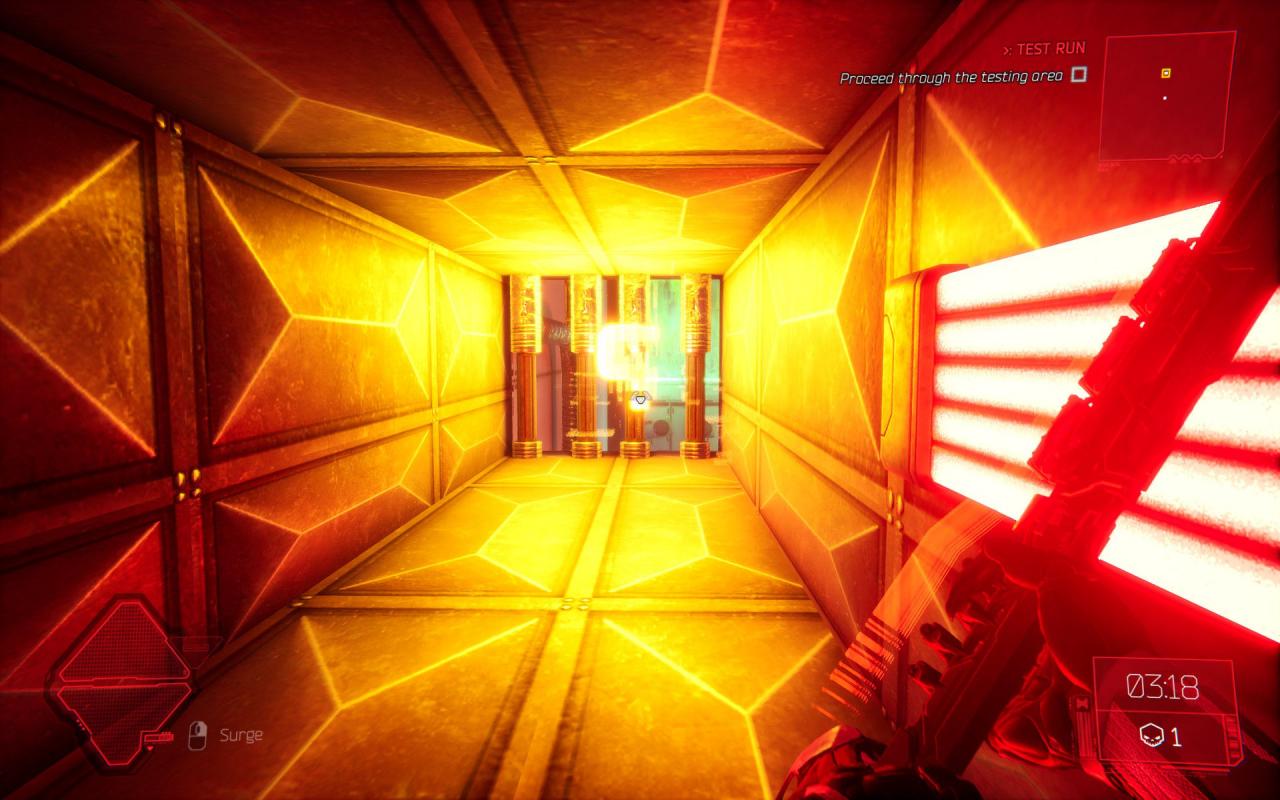 and here we have the audiolog number 2!
 ───────────────────────────────────────────────────────────────
───────────────────────────────────────────────────────────────
then go to there───────────────────────────────────────────────────────────────
jump into the vent hole, you can see the collectible from here───────────────────────────────────────────────────────────────
and here we have the audiolog number 2!───────────────────────────────────────────────────────────────
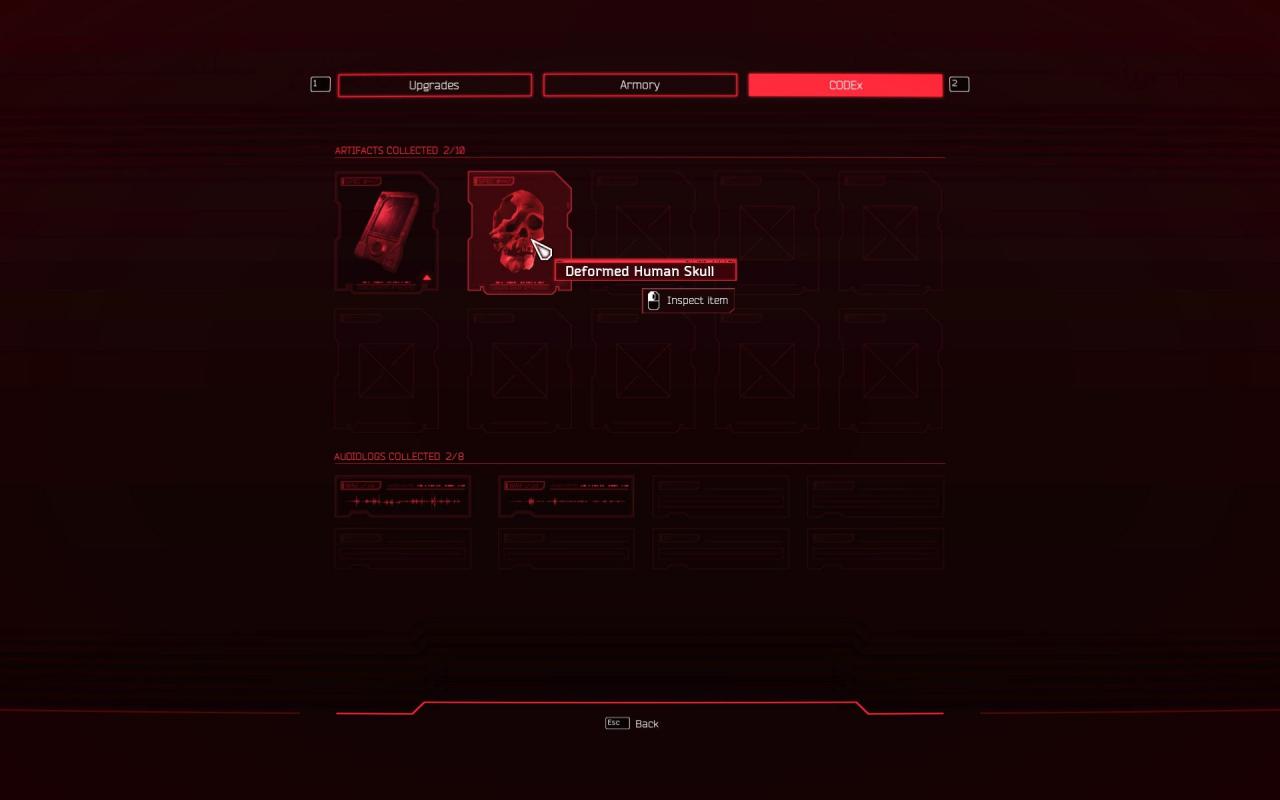
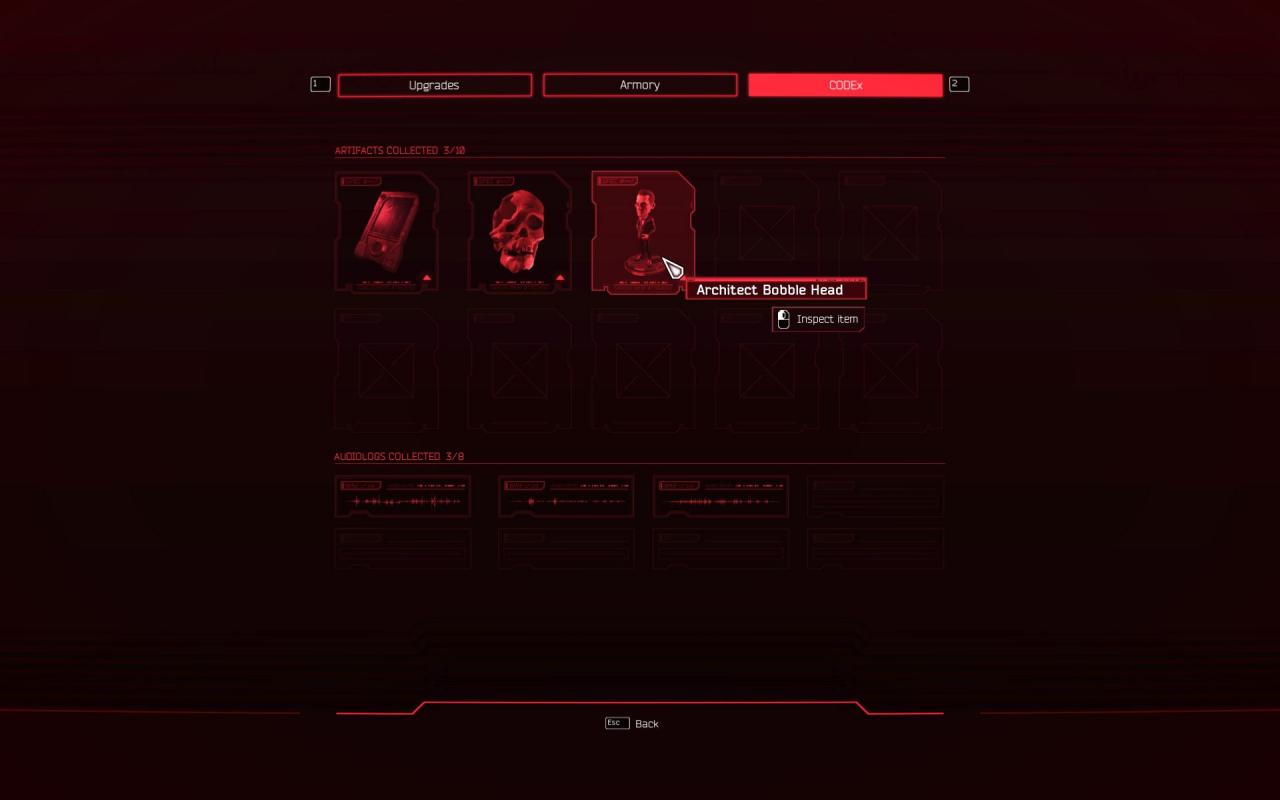
Artifact 1
───────────────────────────────────────────────────────────────
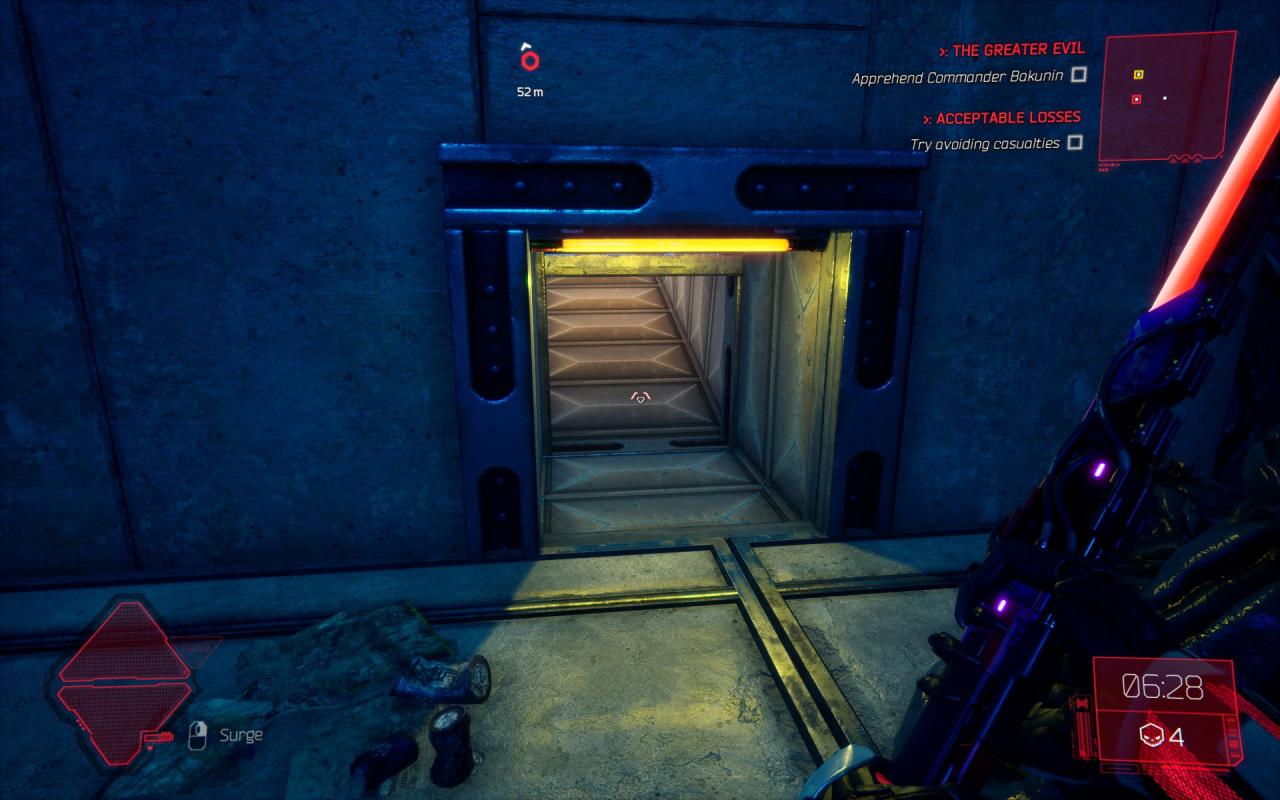
 Clear the room ahead, and go to the furthest corner of that room, near the cells
───────────────────────────────────────────────────────────────
 the cells are just up ahead
───────────────────────────────────────────────────────────────
 go to the second cell
───────────────────────────────────────────────────────────────
 and go into the vent
───────────────────────────────────────────────────────────────
 you got it!
 ───────────────────────────────────────────────────────────────
Clear the room ahead, and go to the furthest corner of that room, near the cells───────────────────────────────────────────────────────────────
the cells are just up ahead───────────────────────────────────────────────────────────────
go to the second cell───────────────────────────────────────────────────────────────
and go into the vent───────────────────────────────────────────────────────────────
you got it!───────────────────────────────────────────────────────────────
Sword 2
───────────────────────────────────────────────────────────────
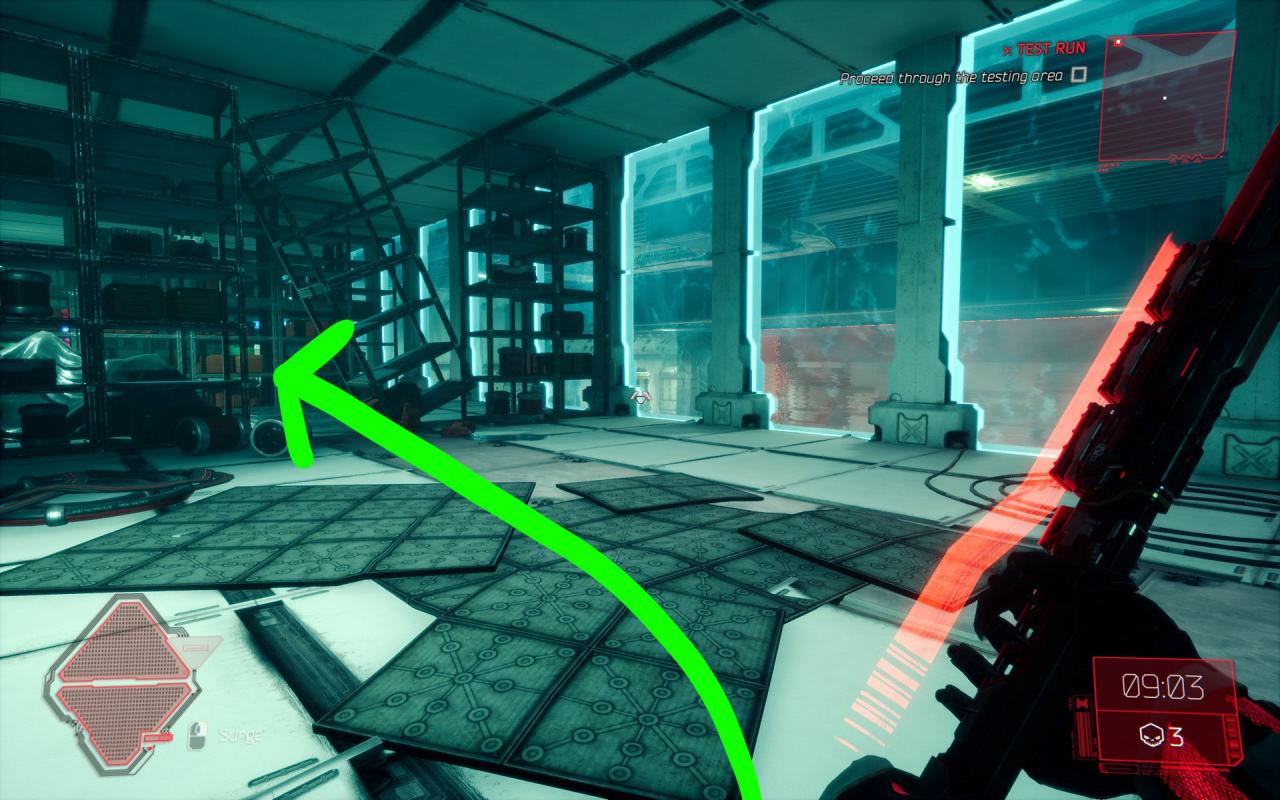
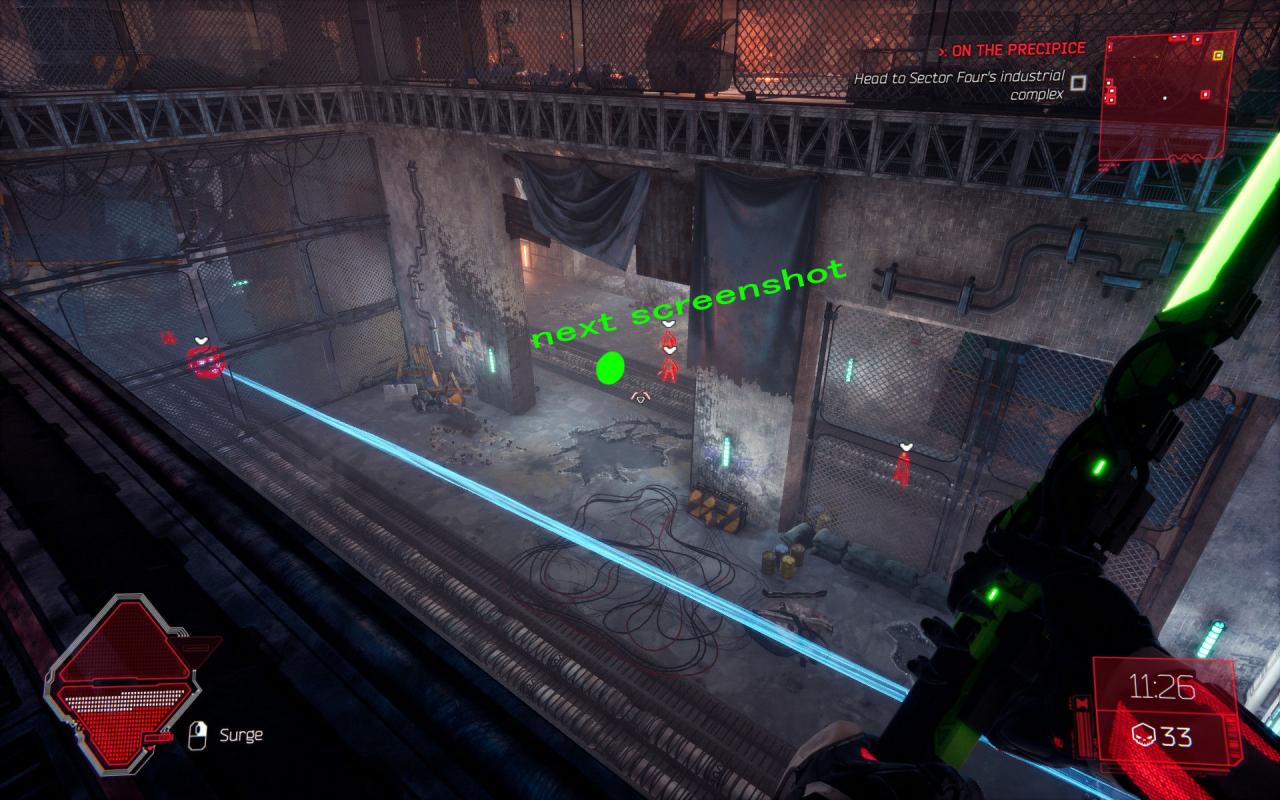
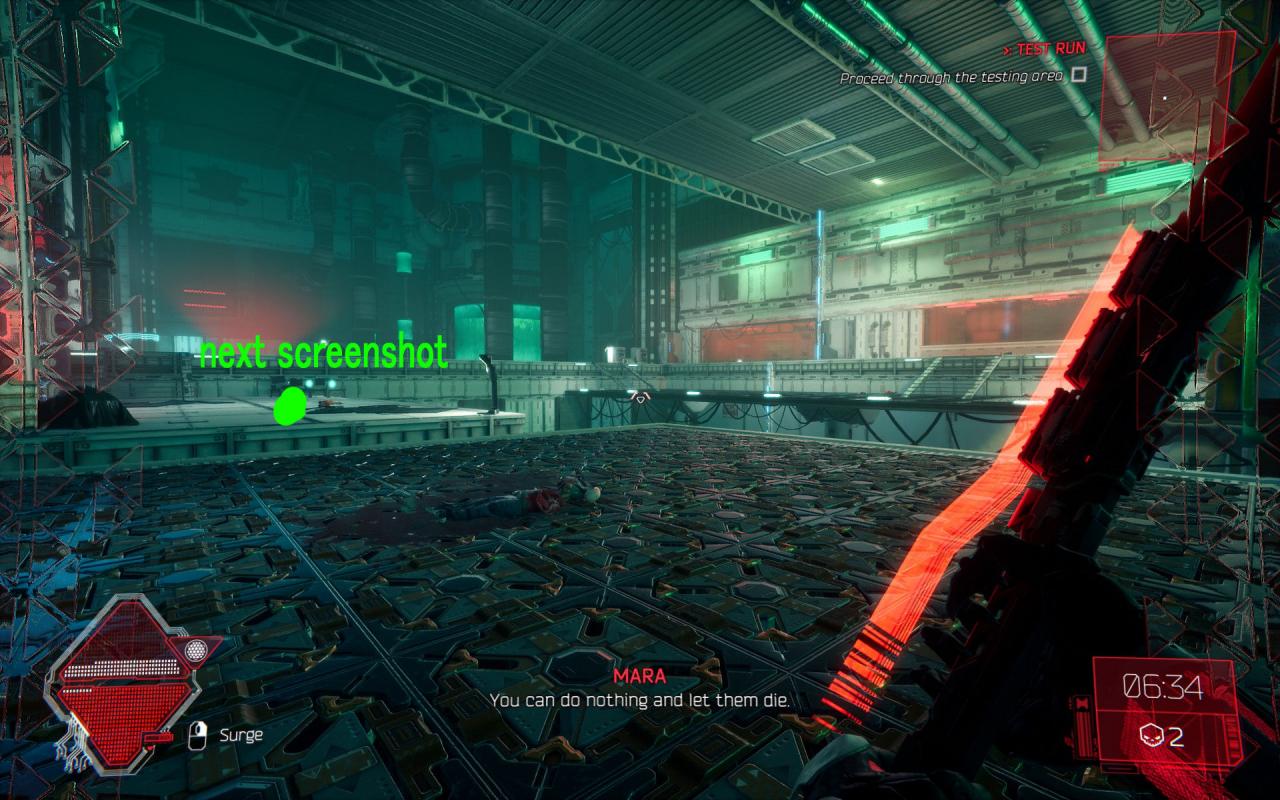 Clear the room, and go to the marked position to see better
───────────────────────────────────────────────────────────────
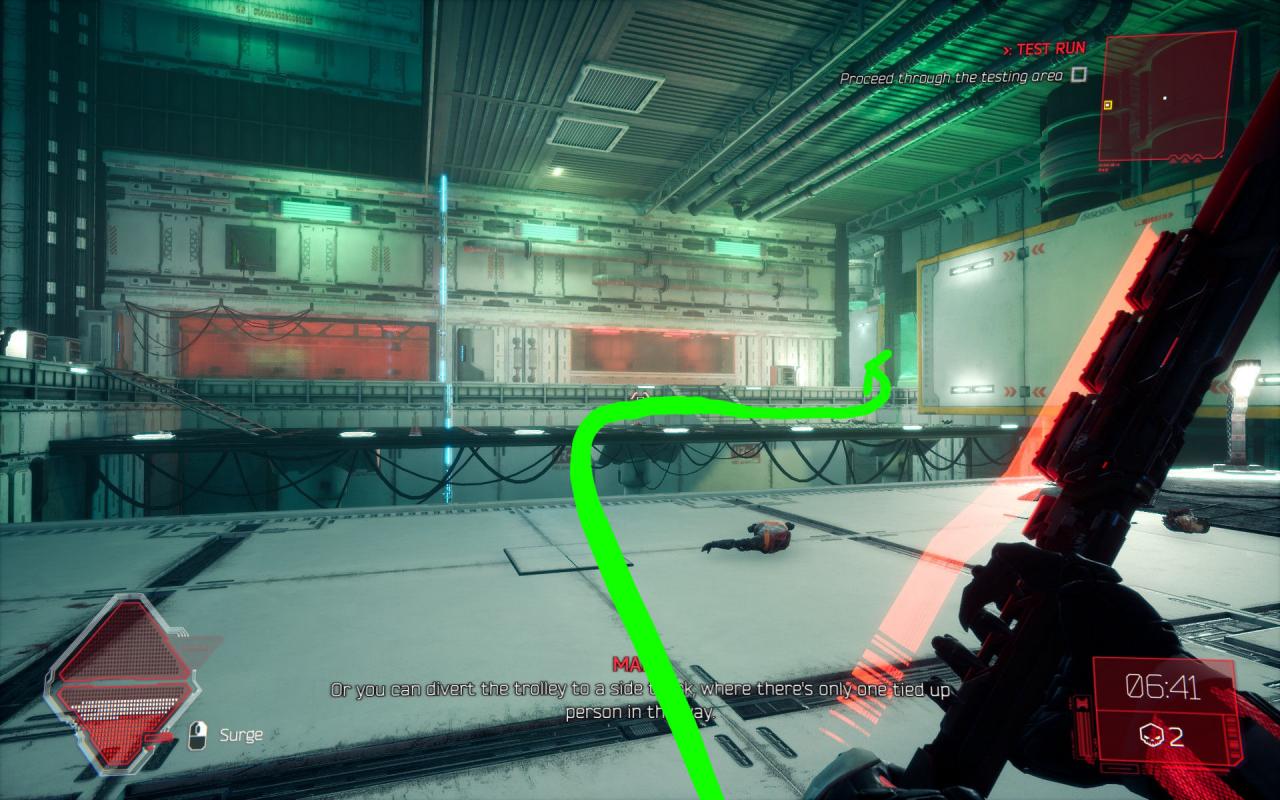 go somewhere over there
───────────────────────────────────────────────────────────────
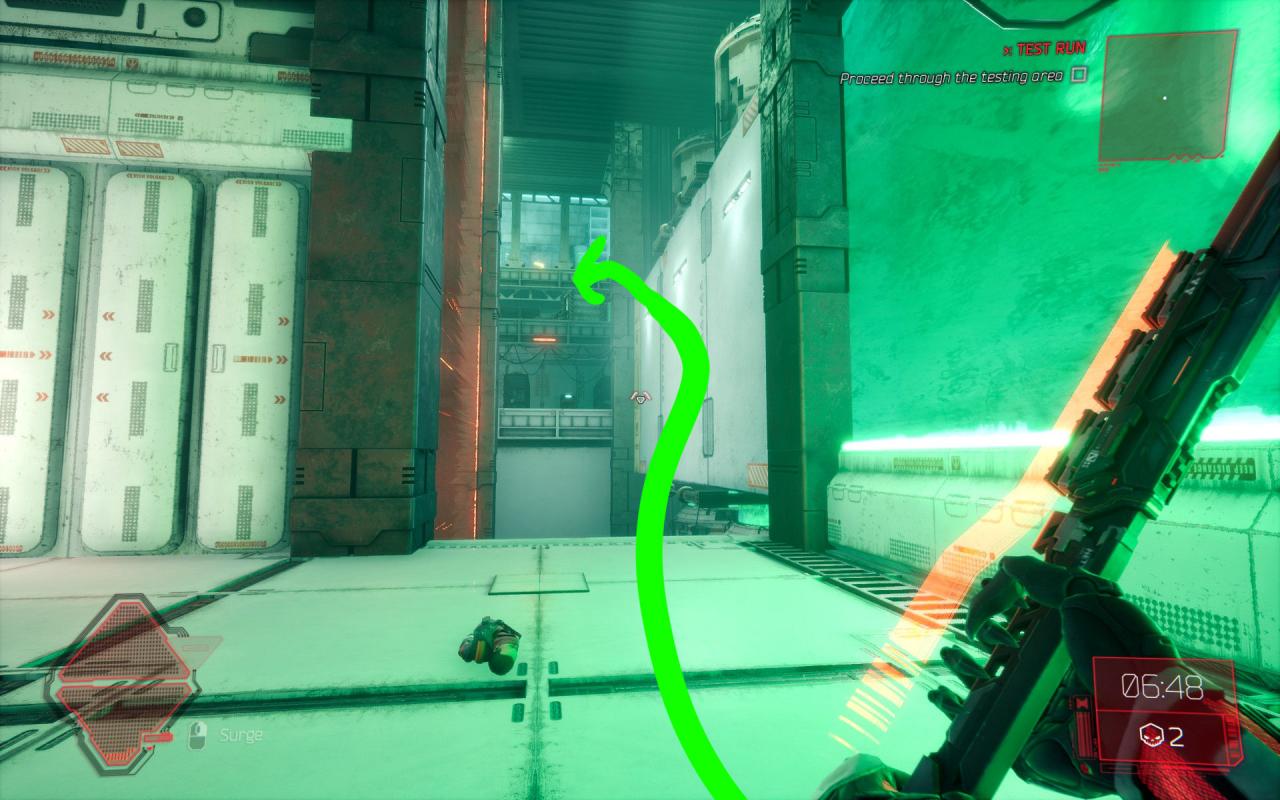 wallrun and go right there
───────────────────────────────────────────────────────────────
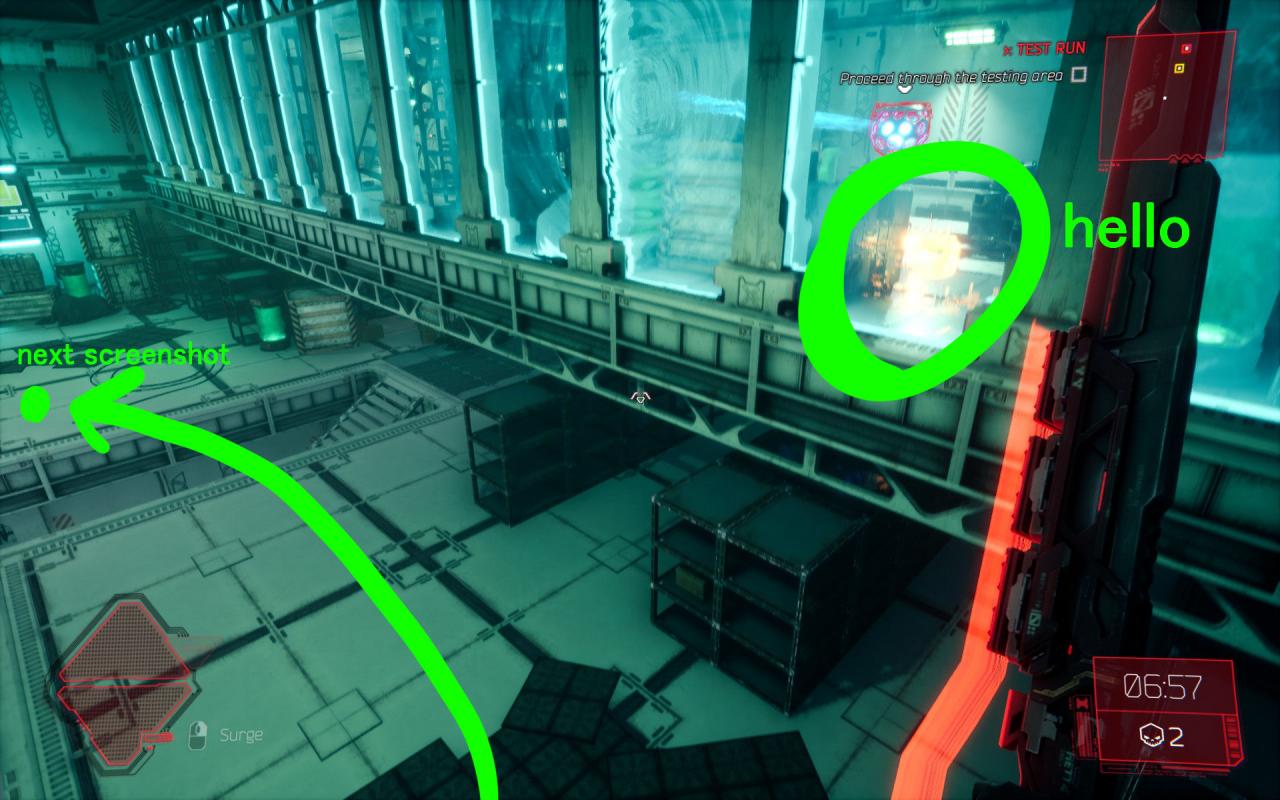 as you can see, it’s behind the glass. How to we get there? Go to the marked position
───────────────────────────────────────────────────────────────
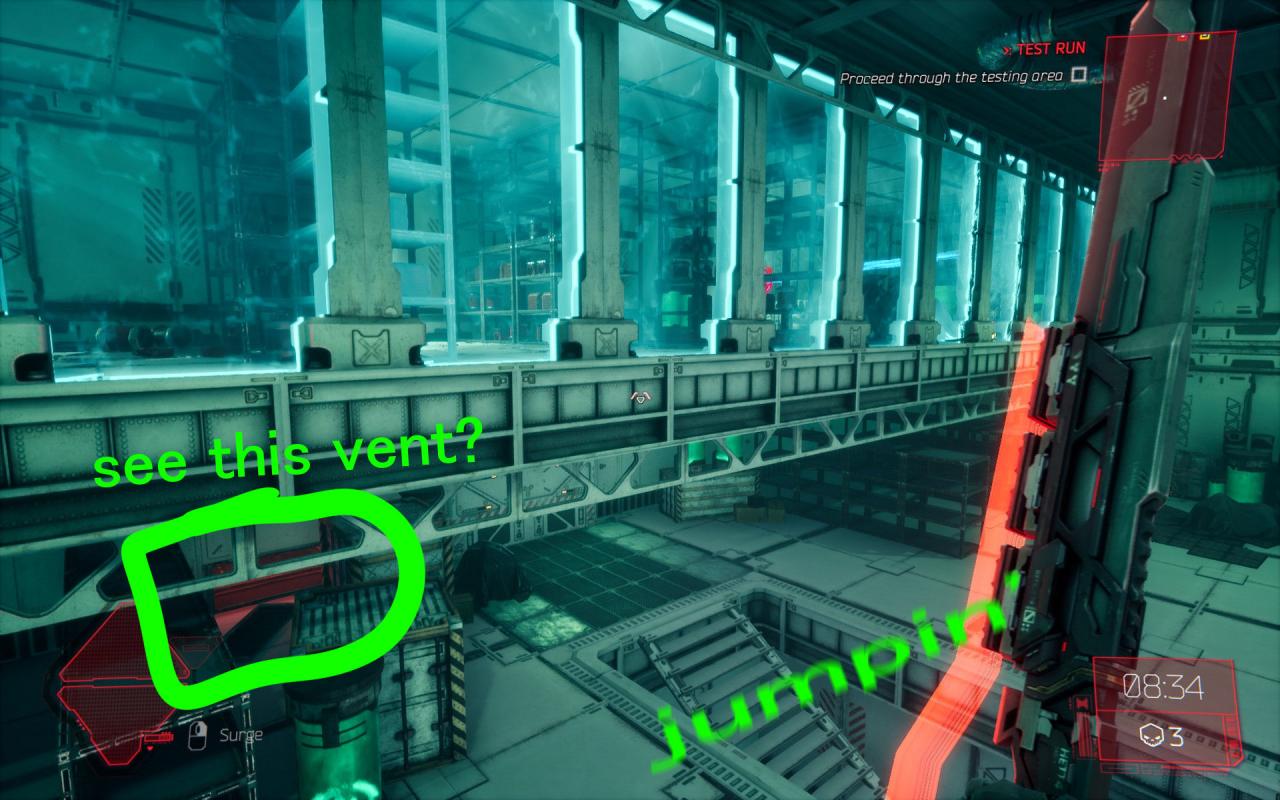 can you see the vent?
───────────────────────────────────────────────────────────────
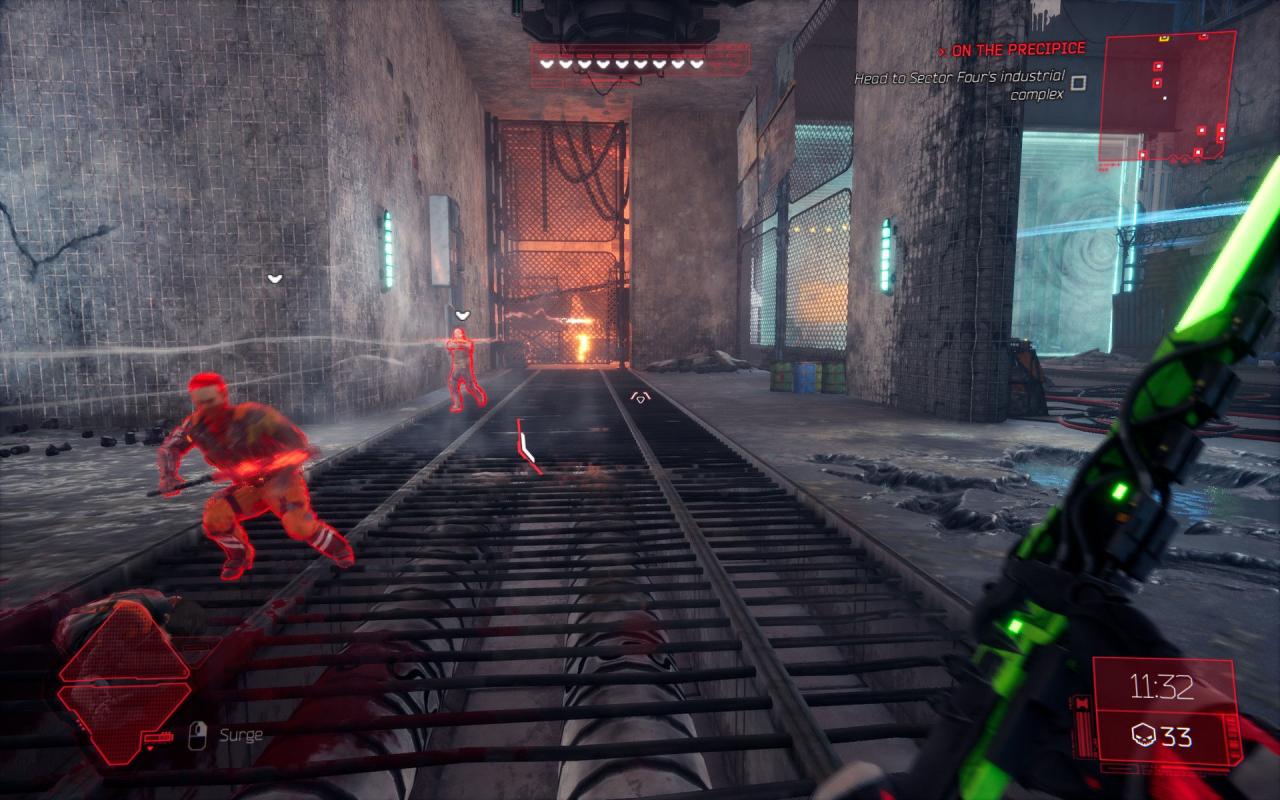
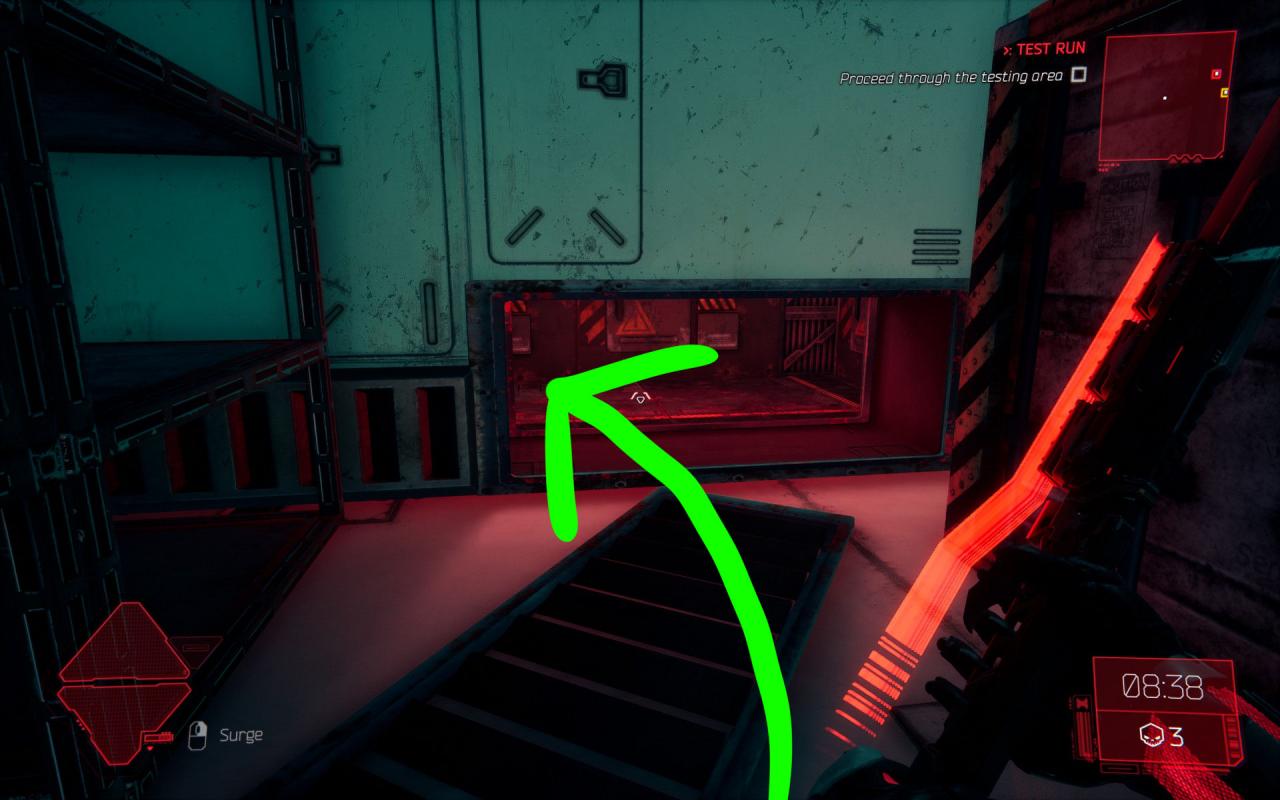 go in there, despite what Mara tells you when you’re in
───────────────────────────────────────────────────────────────
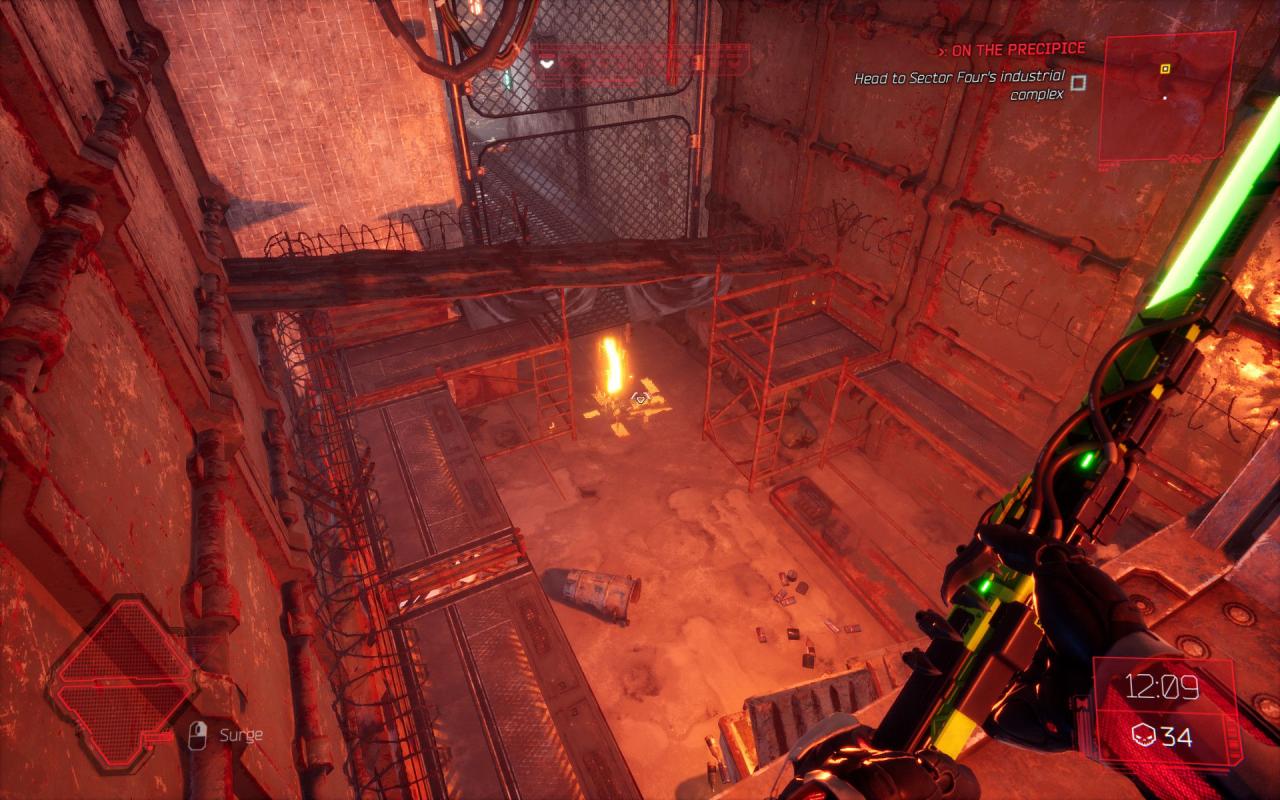
 now we’re behind the glass. Neat!
───────────────────────────────────────────────────────────────
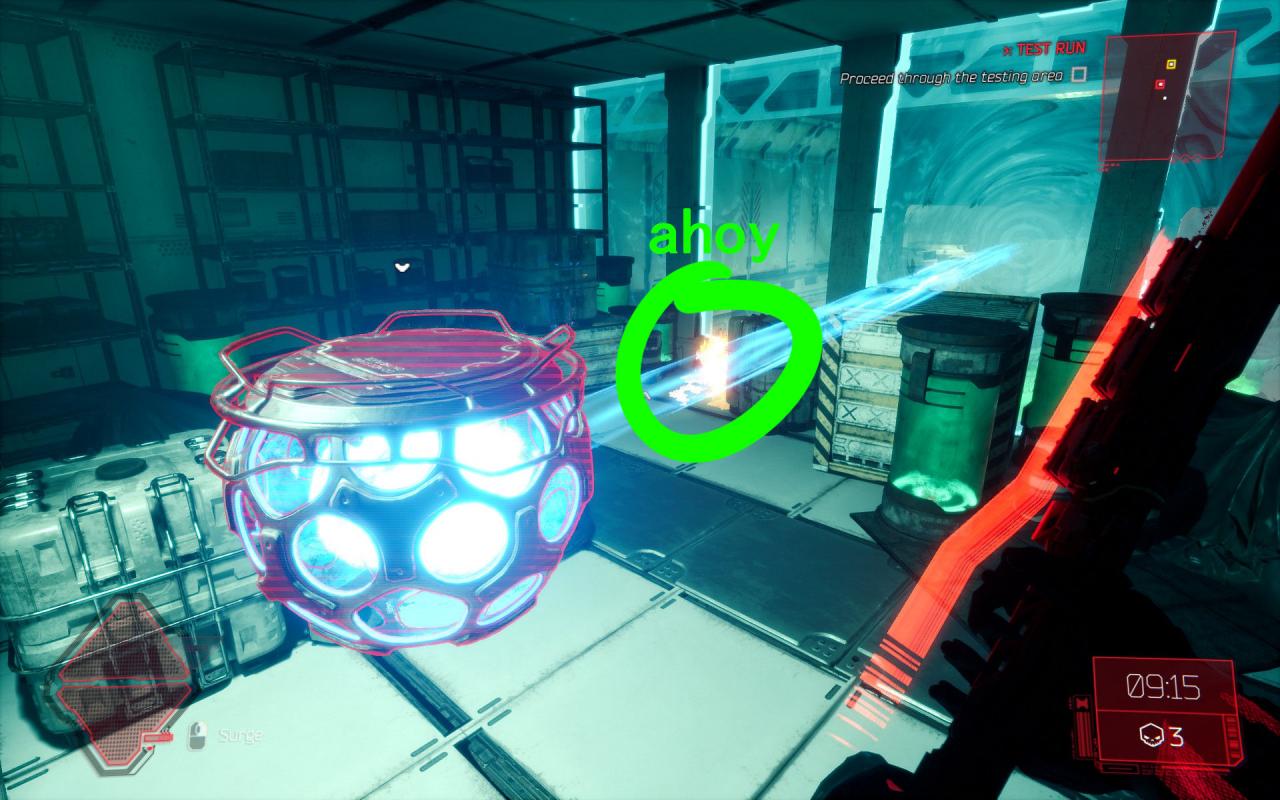 got the sword!
 ───────────────────────────────────────────────────────────────
Clear the room, and go to the marked position to see better───────────────────────────────────────────────────────────────
go somewhere over there───────────────────────────────────────────────────────────────
wallrun and go right there───────────────────────────────────────────────────────────────
as you can see, it’s behind the glass. How to we get there? Go to the marked position───────────────────────────────────────────────────────────────
can you see the vent?───────────────────────────────────────────────────────────────
go in there, despite what Mara tells you when you’re in───────────────────────────────────────────────────────────────
now we’re behind the glass. Neat!───────────────────────────────────────────────────────────────
got the sword!───────────────────────────────────────────────────────────────
Artifact 2
───────────────────────────────────────────────────────────────
 Now return to this room where we just fought the enemies a moment ago and go to the marked position
───────────────────────────────────────────────────────────────
 go here to see where to go
───────────────────────────────────────────────────────────────
 go behind the walking platform right over there
───────────────────────────────────────────────────────────────
 go into the vent hole
───────────────────────────────────────────────────────────────
 eyyy!
eyyy!
 ───────────────────────────────────────────────────────────────
Now return to this room where we just fought the enemies a moment ago and go to the marked position───────────────────────────────────────────────────────────────
go here to see where to go───────────────────────────────────────────────────────────────
go behind the walking platform right over there───────────────────────────────────────────────────────────────
go into the vent hole───────────────────────────────────────────────────────────────
eyyy!───────────────────────────────────────────────────────────────
Level 2: No Other Choice
Artifacts: 2
Audiologs: 2
Swords: 2
Audiologs: 2
Swords: 2
Sword 3
───────────────────────────────────────────────────────────────
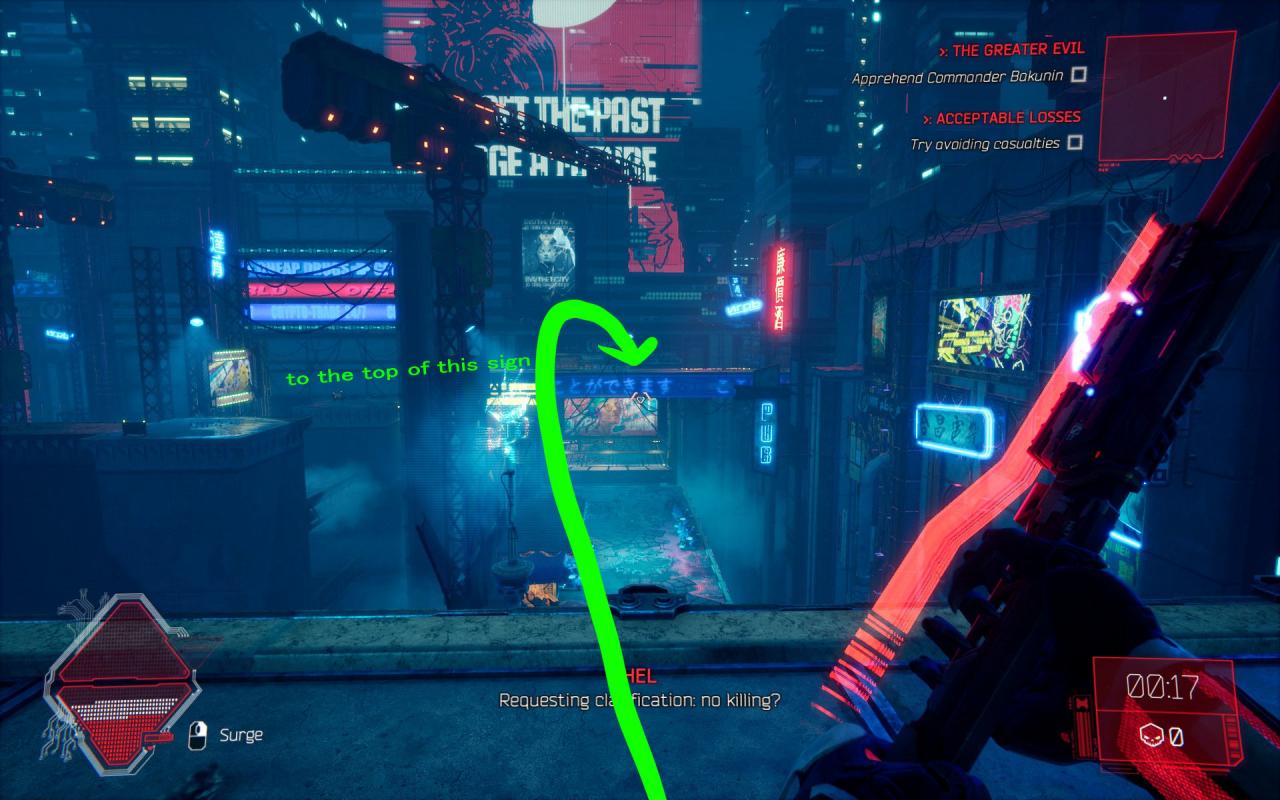 When you reach this area, jump onto this long sign with japanese text on it
───────────────────────────────────────────────────────────────
 go there
───────────────────────────────────────────────────────────────
 keep going
───────────────────────────────────────────────────────────────
 nice!
nice!
 ───────────────────────────────────────────────────────────────
When you reach this area, jump onto this long sign with japanese text on it───────────────────────────────────────────────────────────────
go there───────────────────────────────────────────────────────────────
keep going───────────────────────────────────────────────────────────────
nice!───────────────────────────────────────────────────────────────
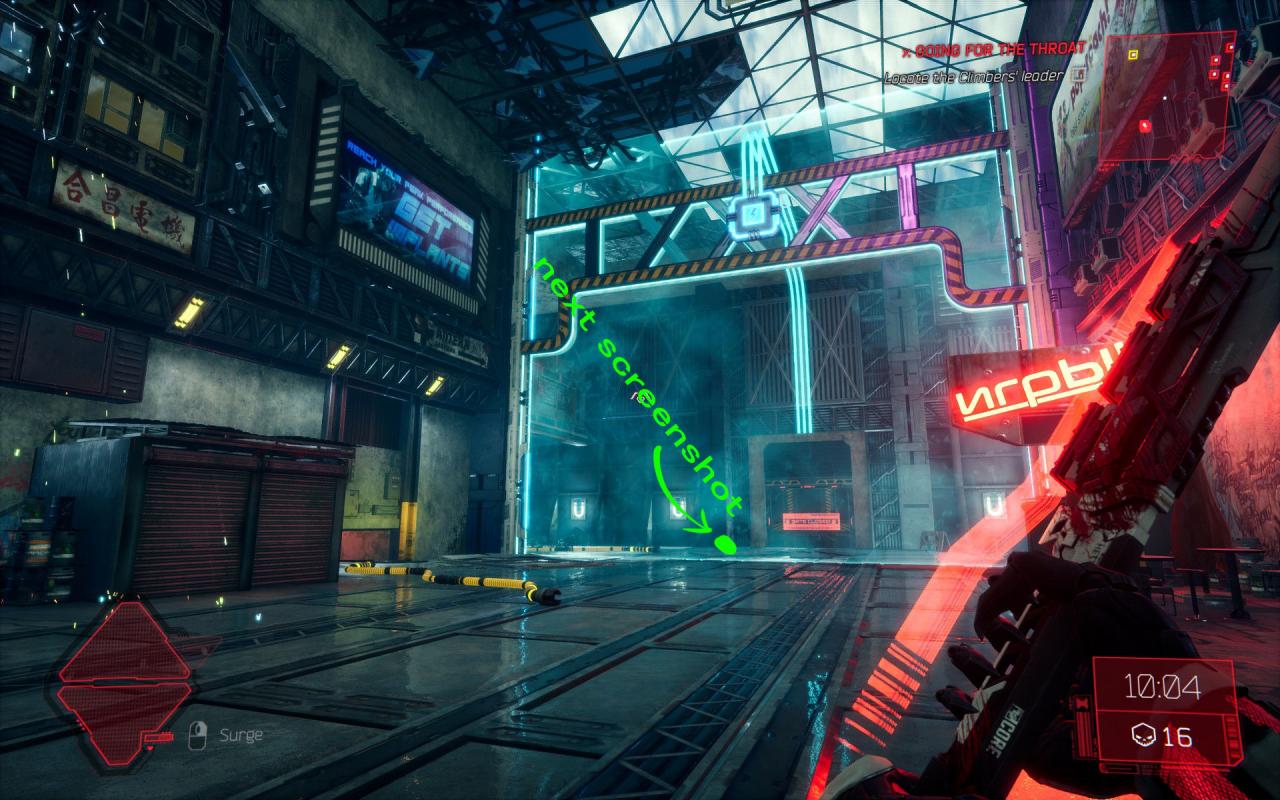
Audiolog 3
───────────────────────────────────────────────────────────────
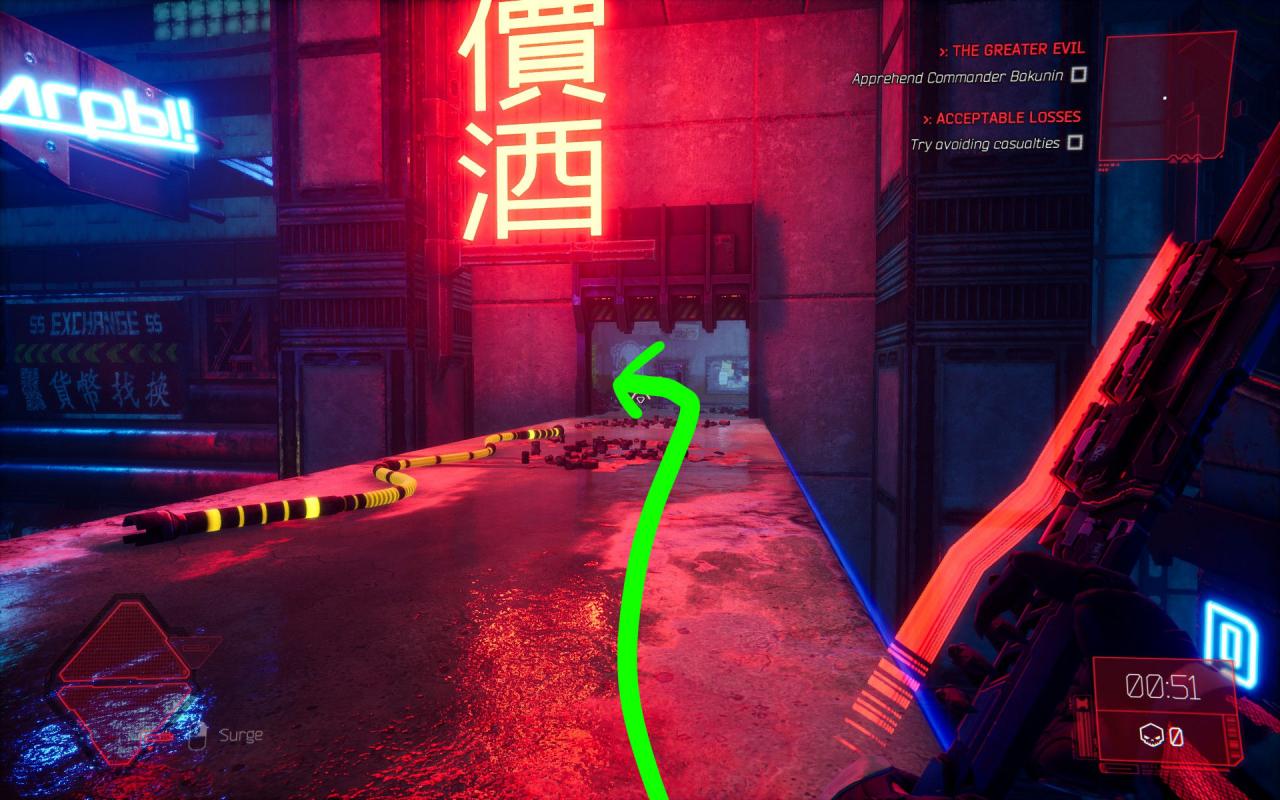
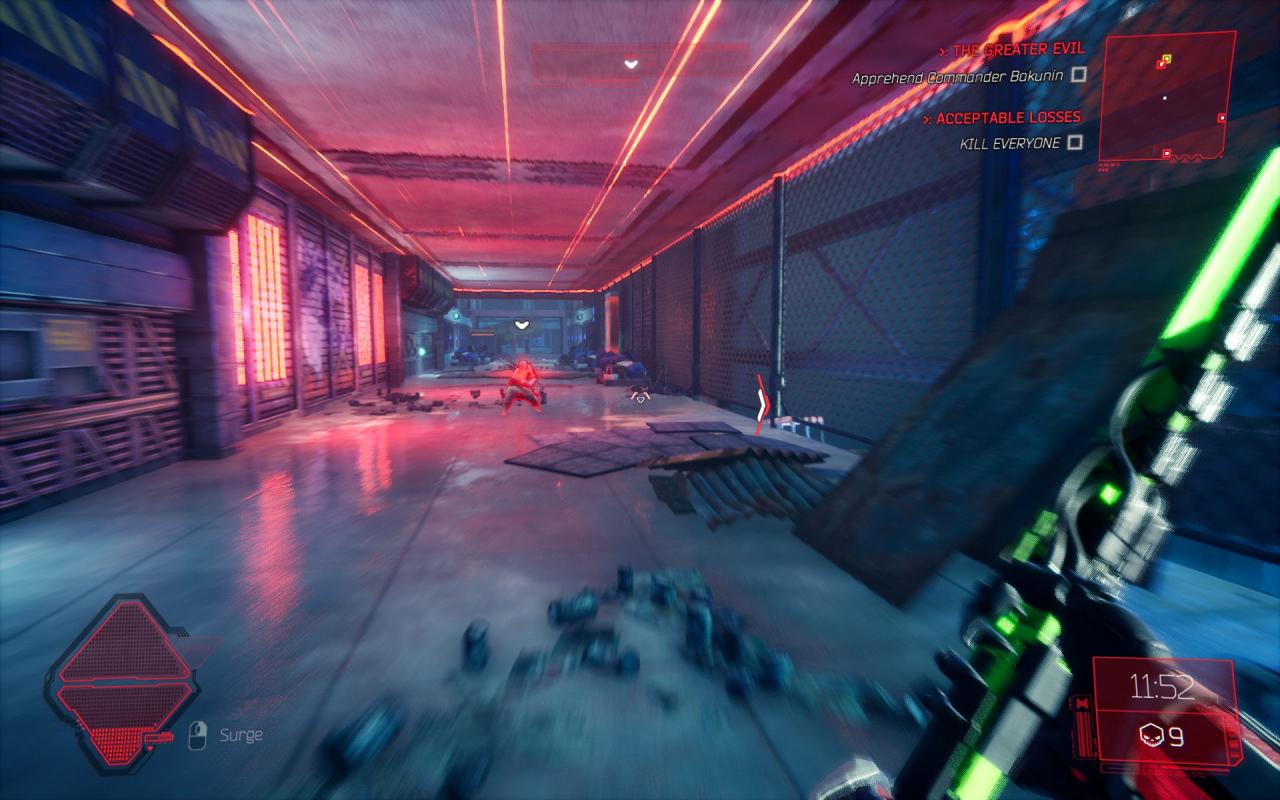
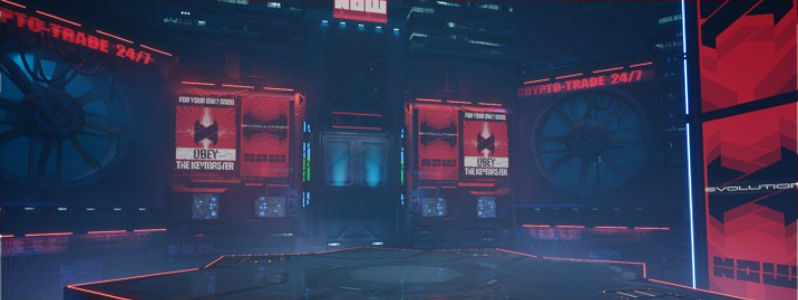
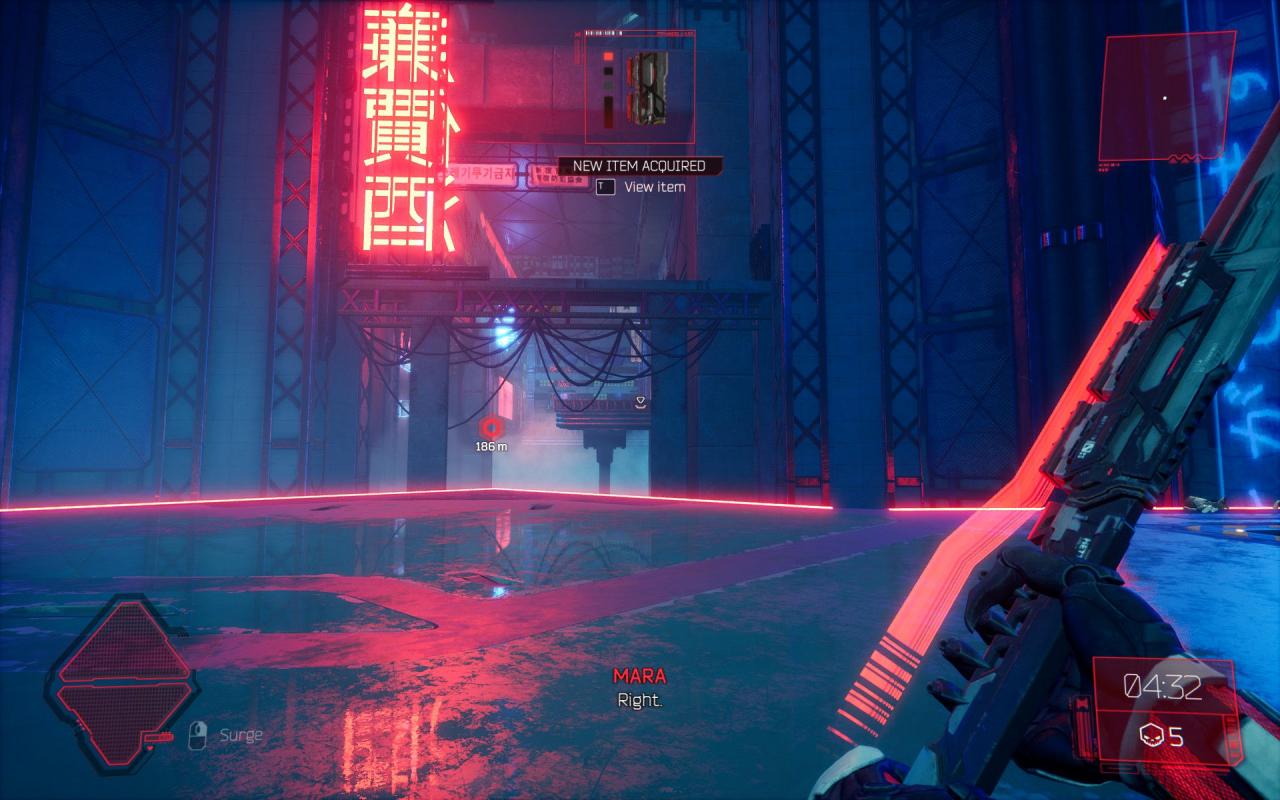
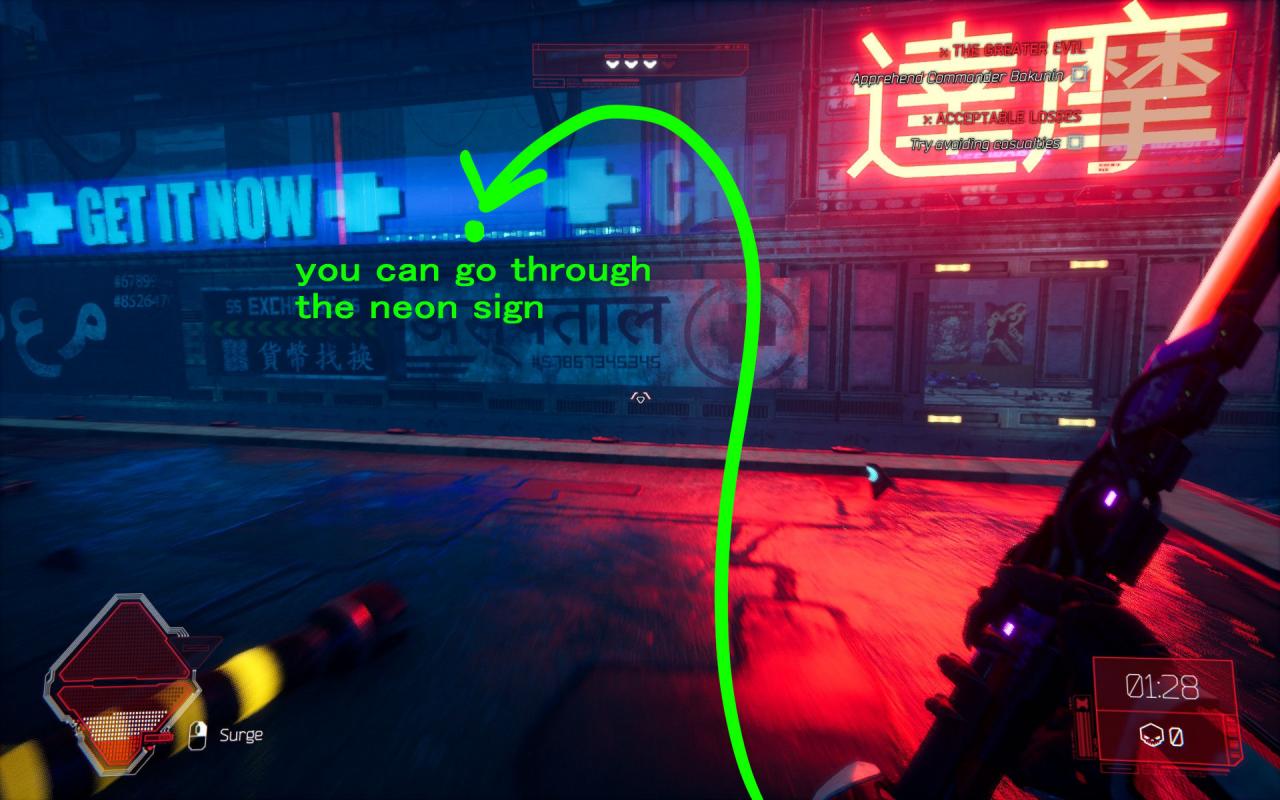 As you go through Mara’s forces, jump over there and go through the neon sign
───────────────────────────────────────────────────────────────
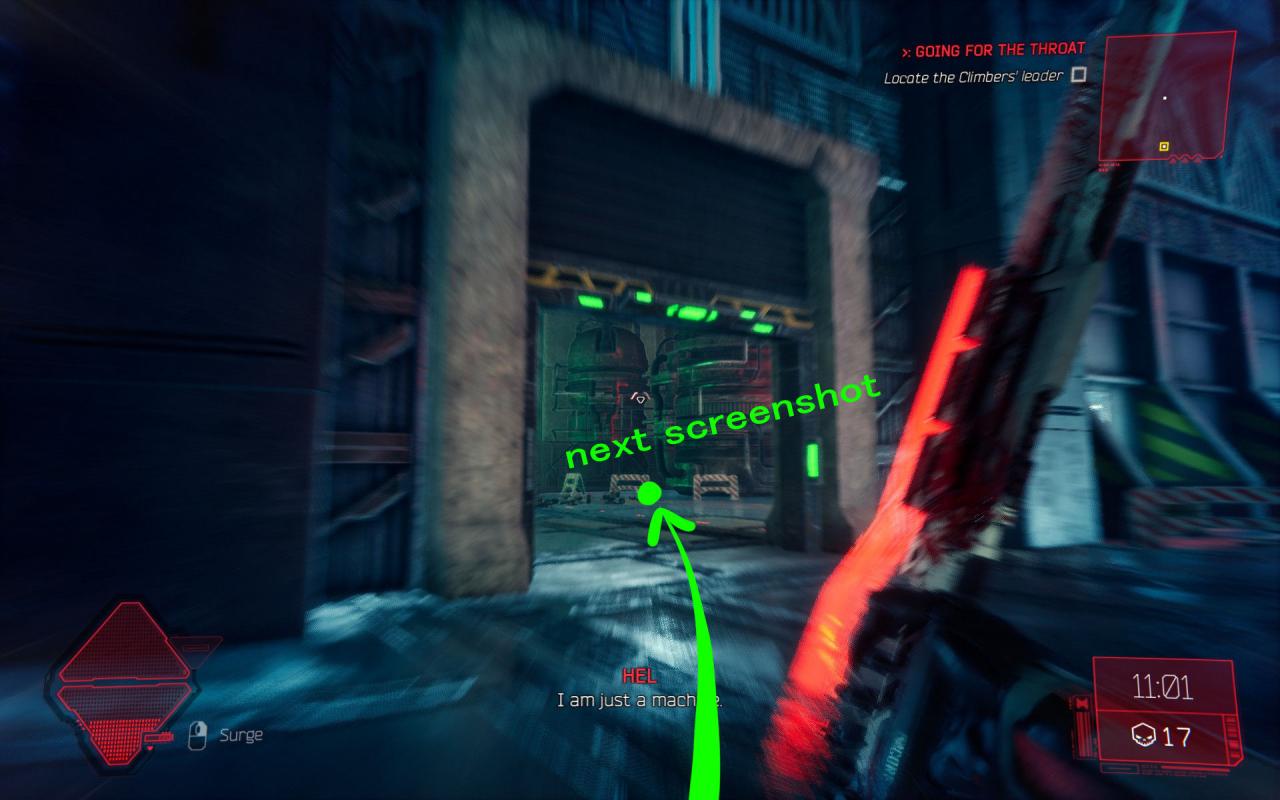
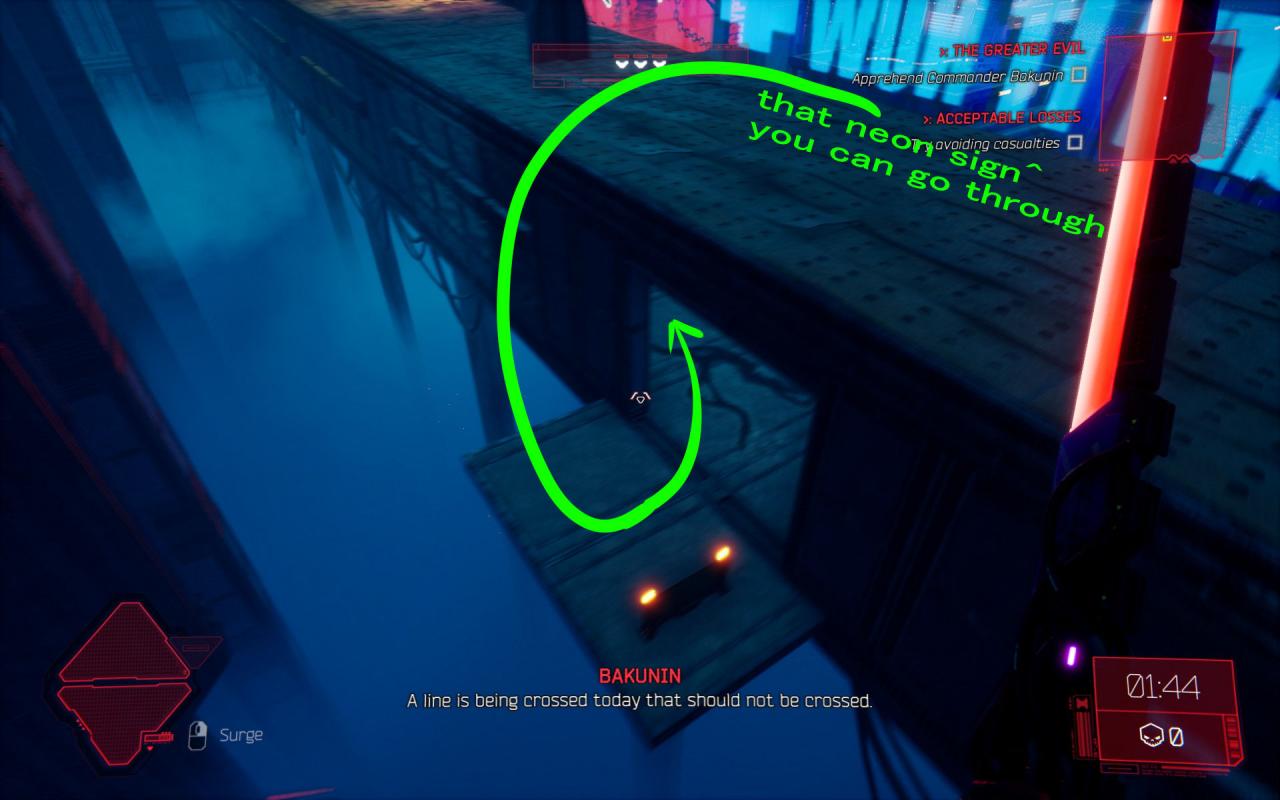 go over there now
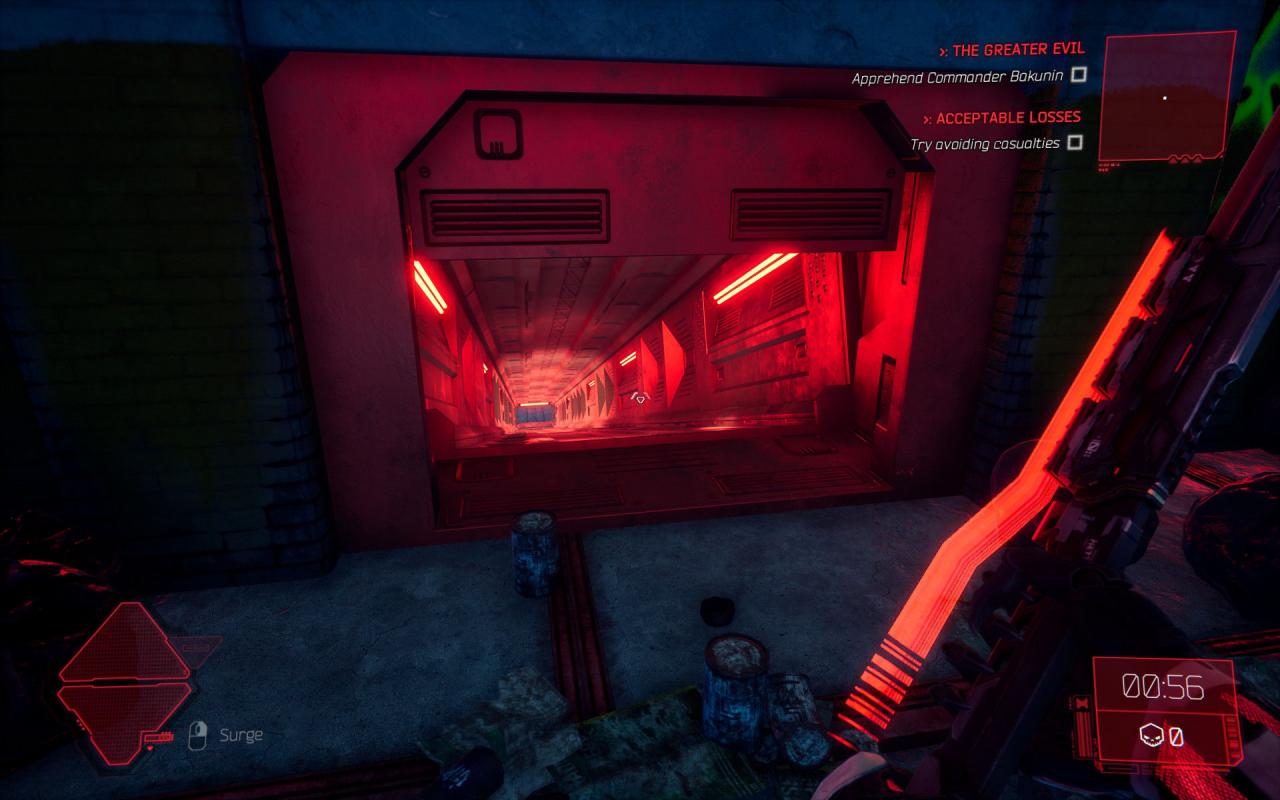
───────────────────────────────────────────────────────────────
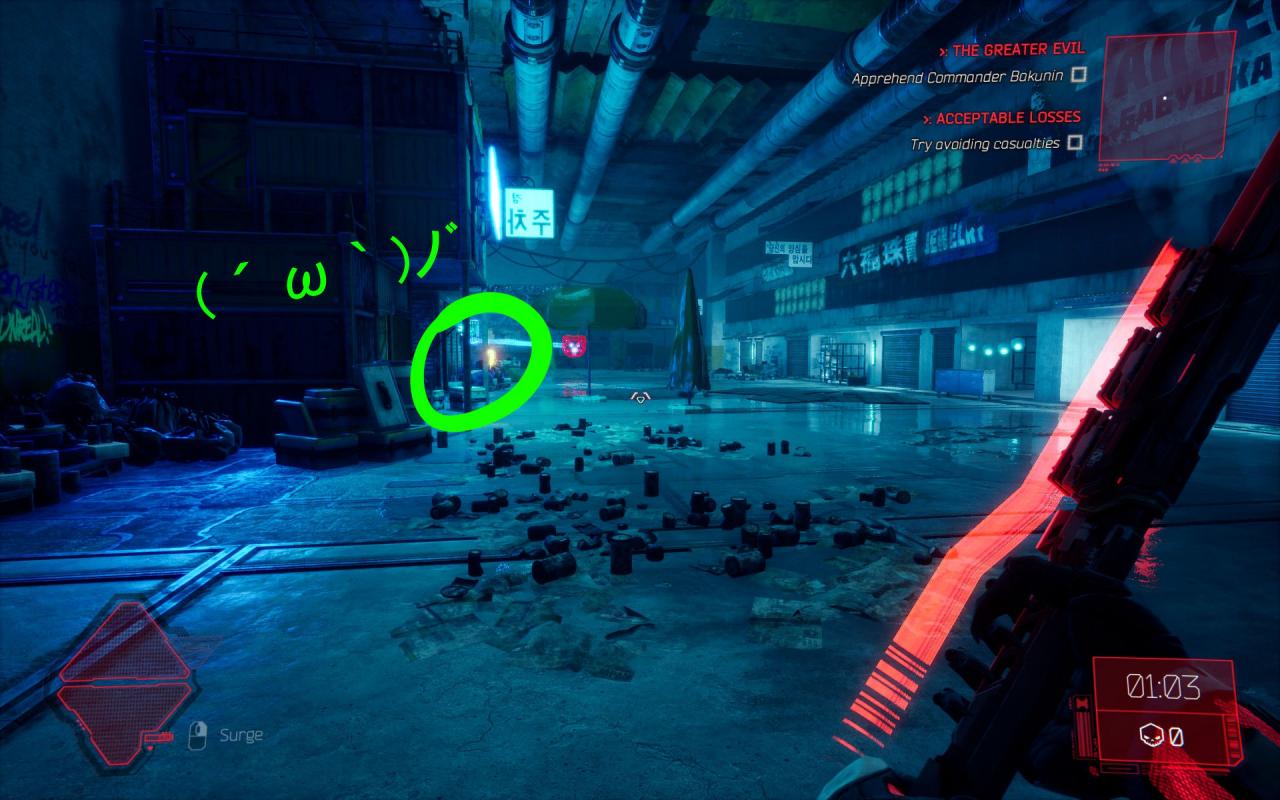
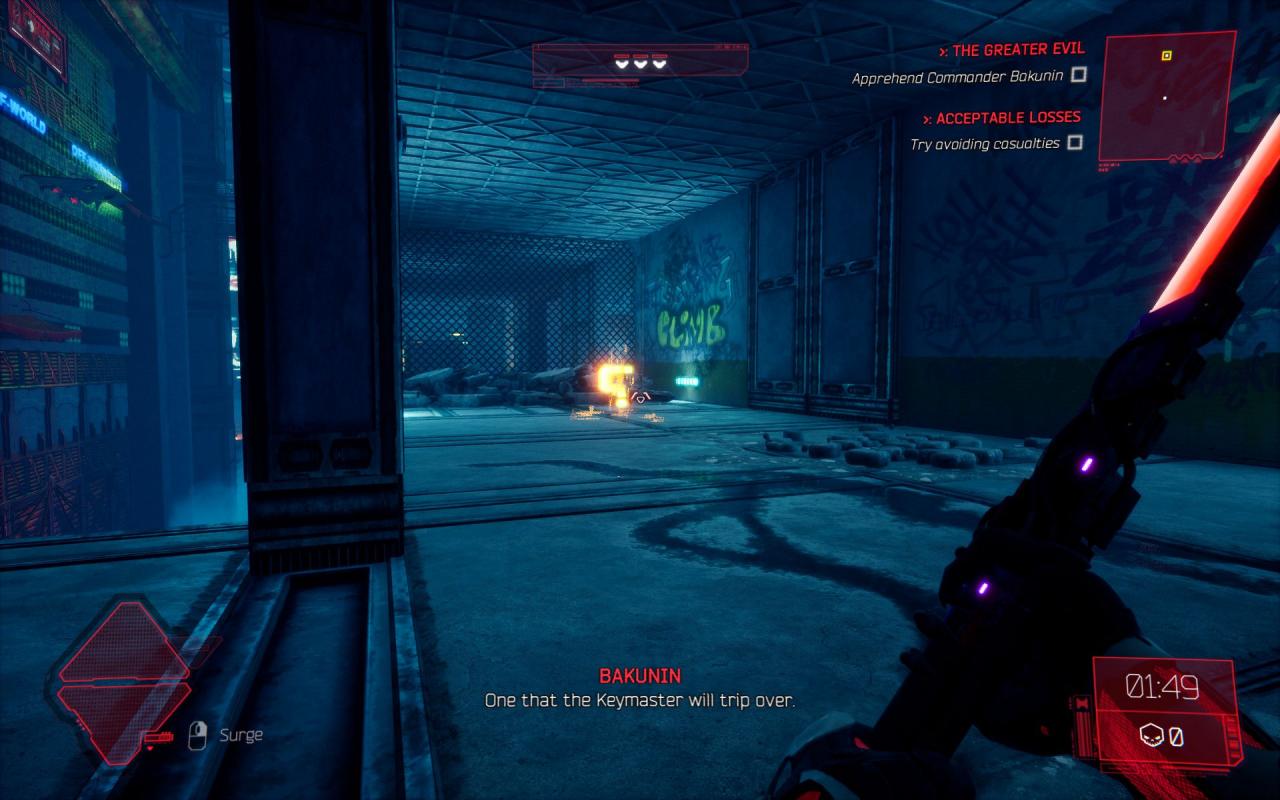 and collect!
 ───────────────────────────────────────────────────────────────
As you go through Mara’s forces, jump over there and go through the neon sign───────────────────────────────────────────────────────────────
go over there now───────────────────────────────────────────────────────────────
and collect!───────────────────────────────────────────────────────────────
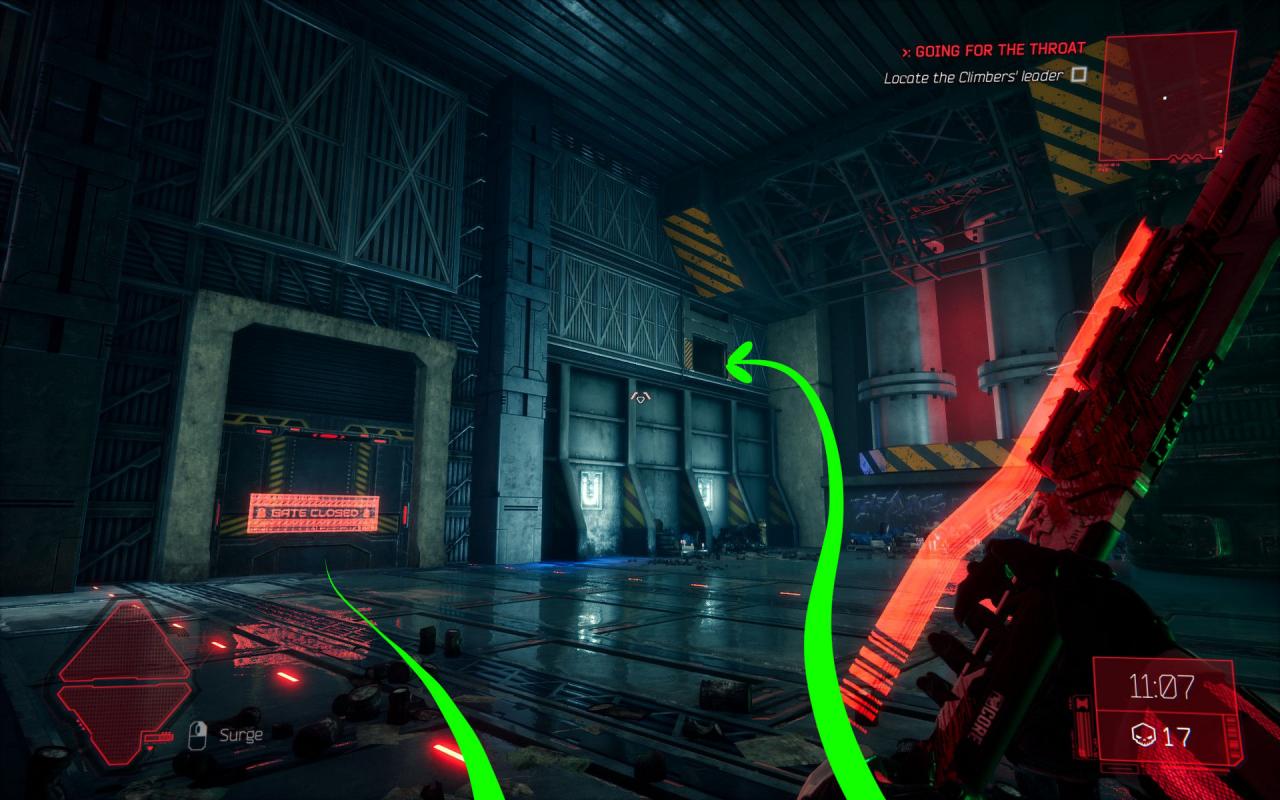
Artifact 3
───────────────────────────────────────────────────────────────
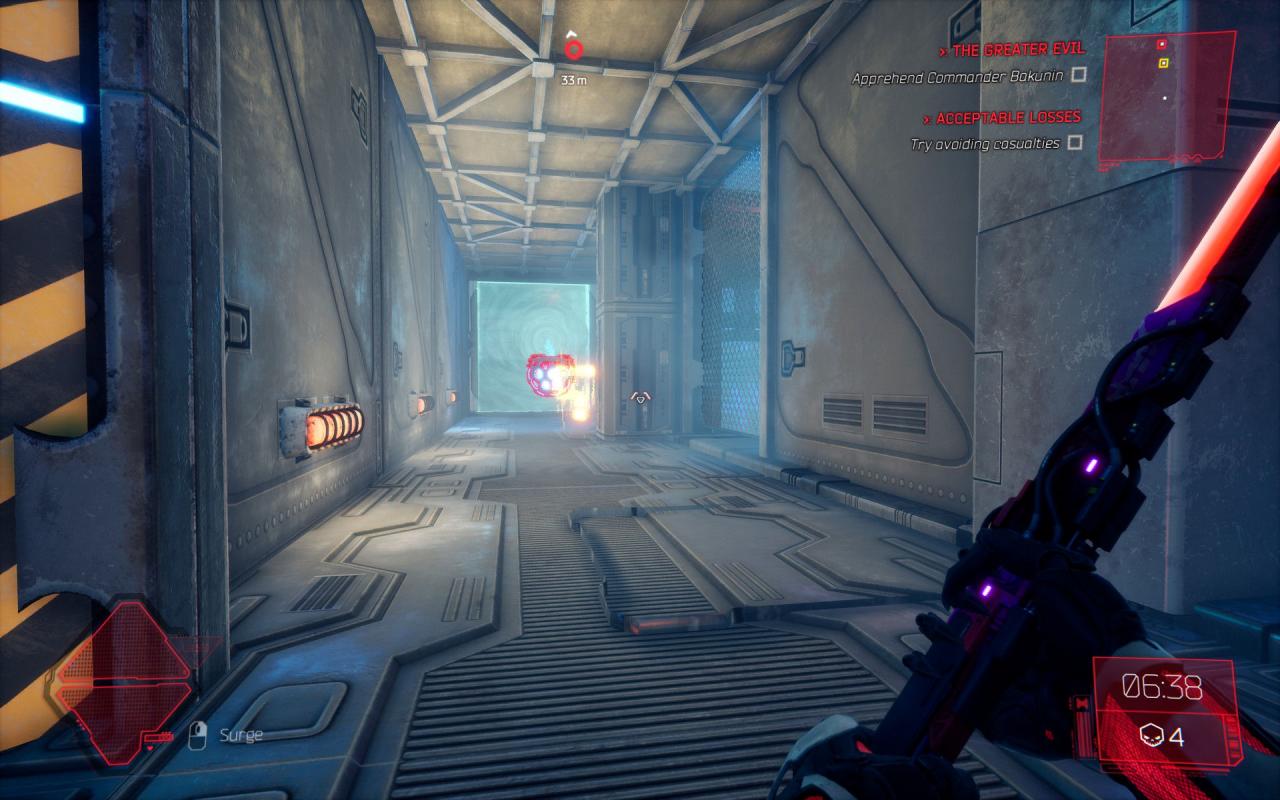
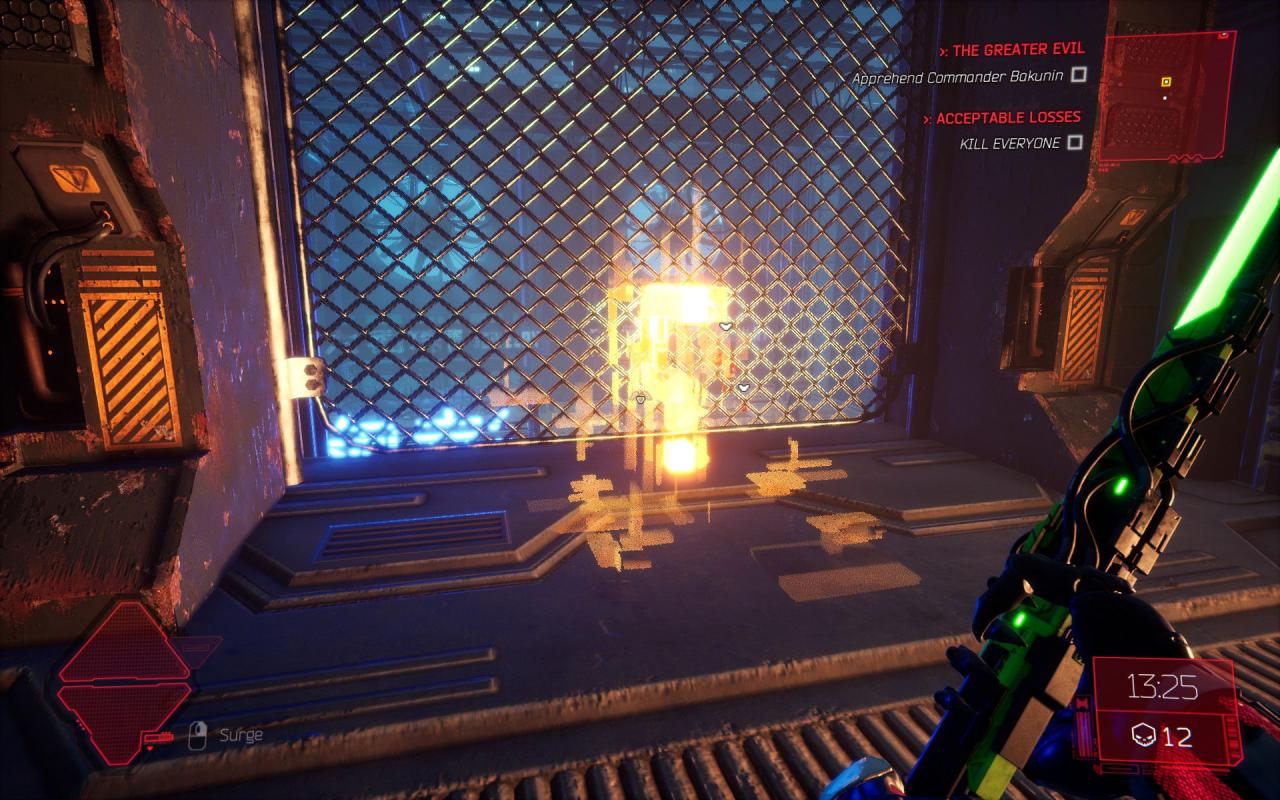
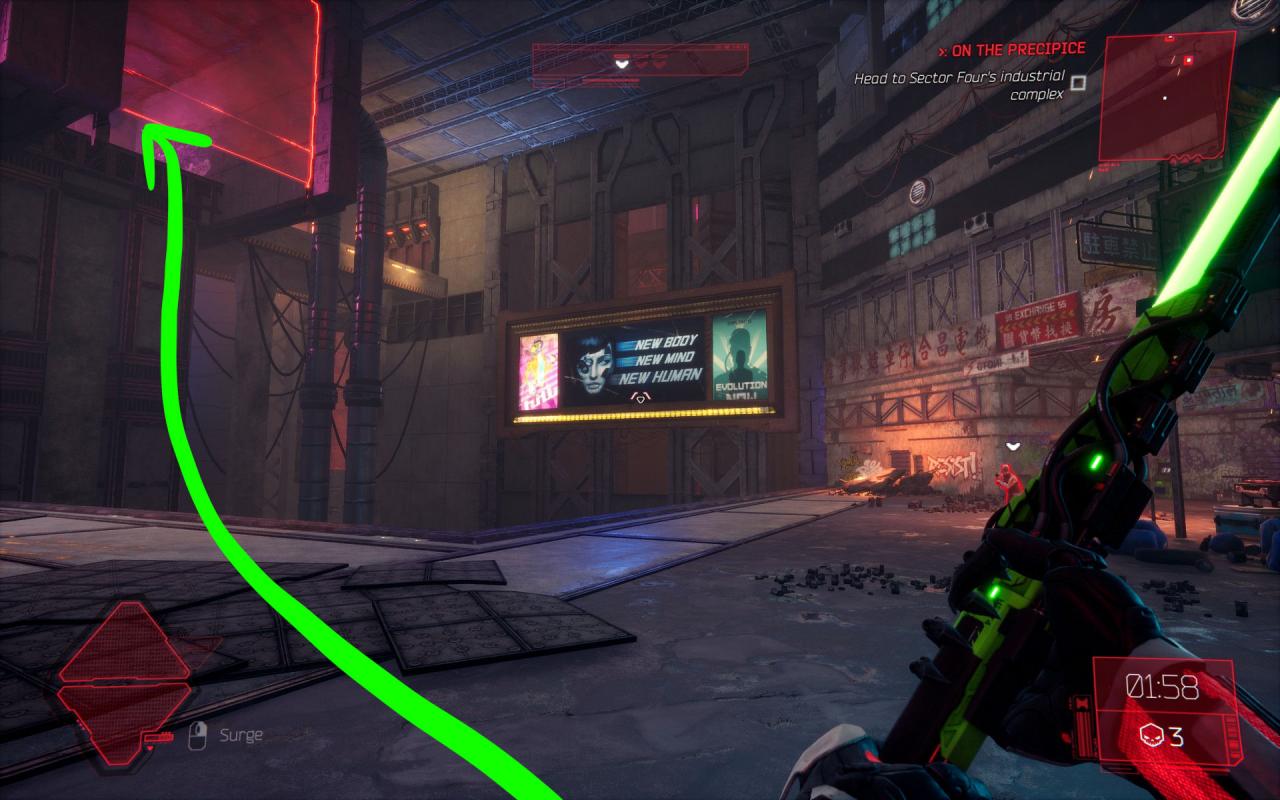
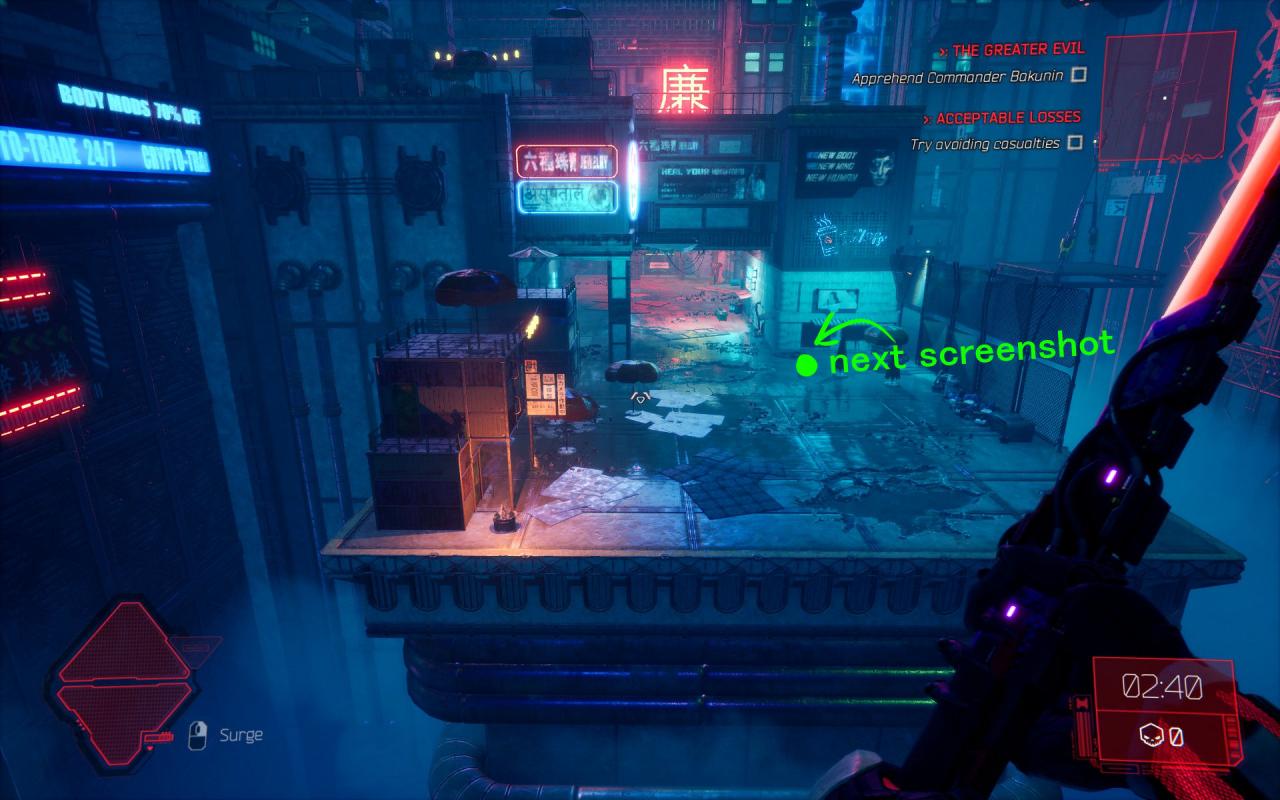 When you reach this area, stand over there to see the target
───────────────────────────────────────────────────────────────
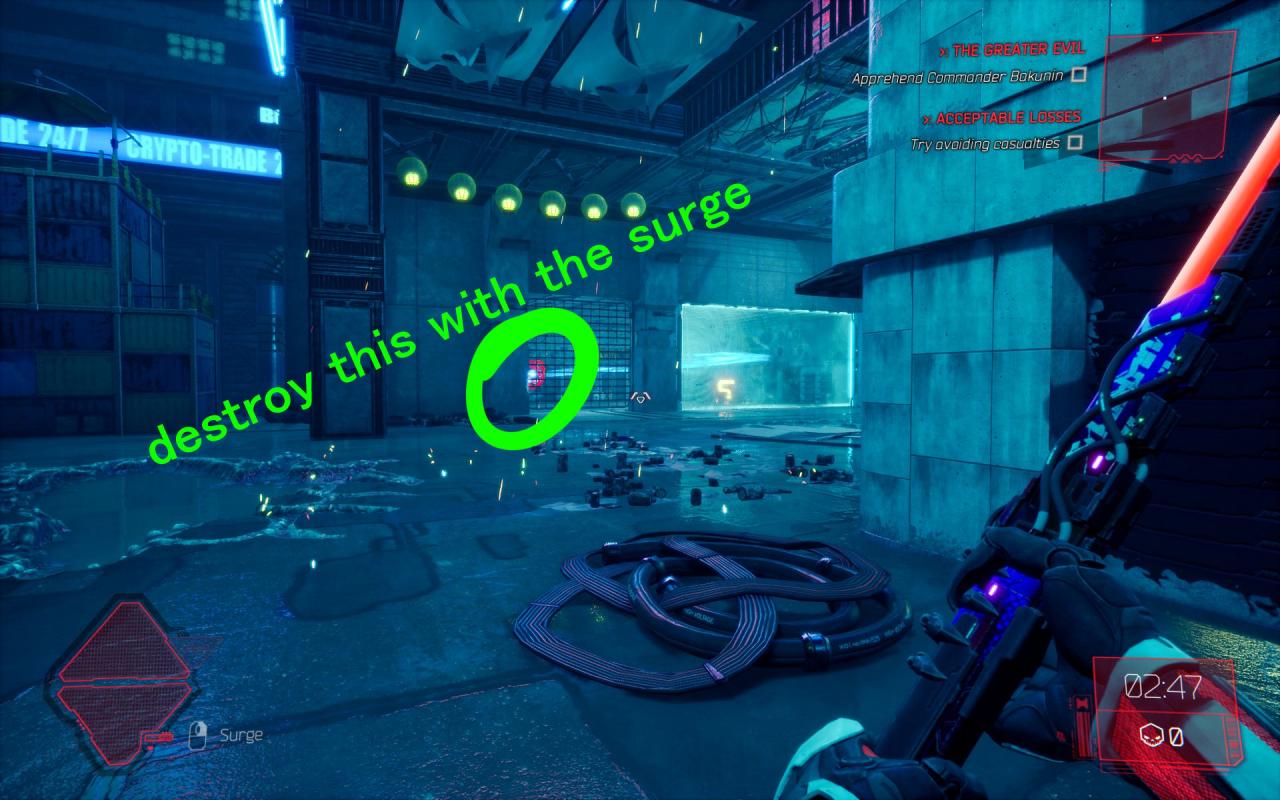 you have to destroy this with the surge
───────────────────────────────────────────────────────────────
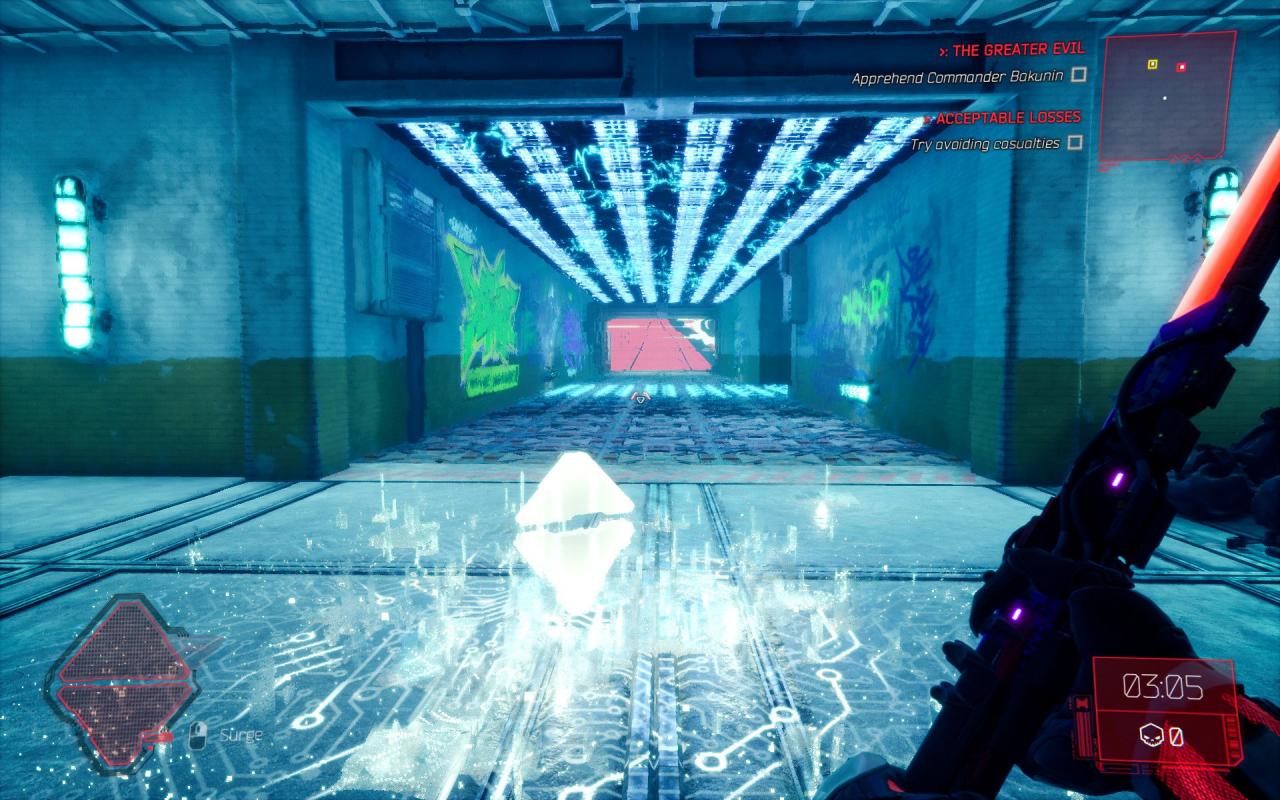 pick up the rage pickup and go destroy the thing
───────────────────────────────────────────────────────────────
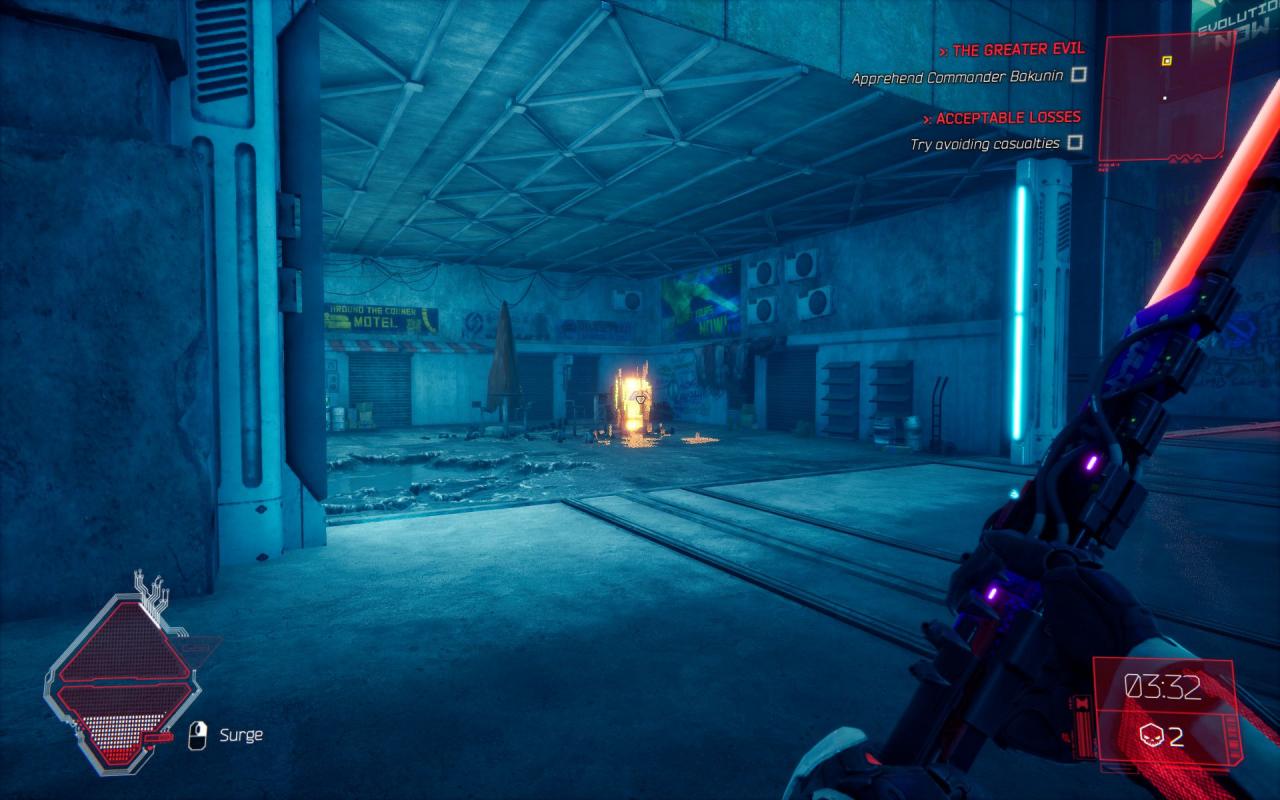 EZ
EZ
 ───────────────────────────────────────────────────────────────
When you reach this area, stand over there to see the target───────────────────────────────────────────────────────────────
you have to destroy this with the surge───────────────────────────────────────────────────────────────
pick up the rage pickup and go destroy the thing───────────────────────────────────────────────────────────────
EZ───────────────────────────────────────────────────────────────
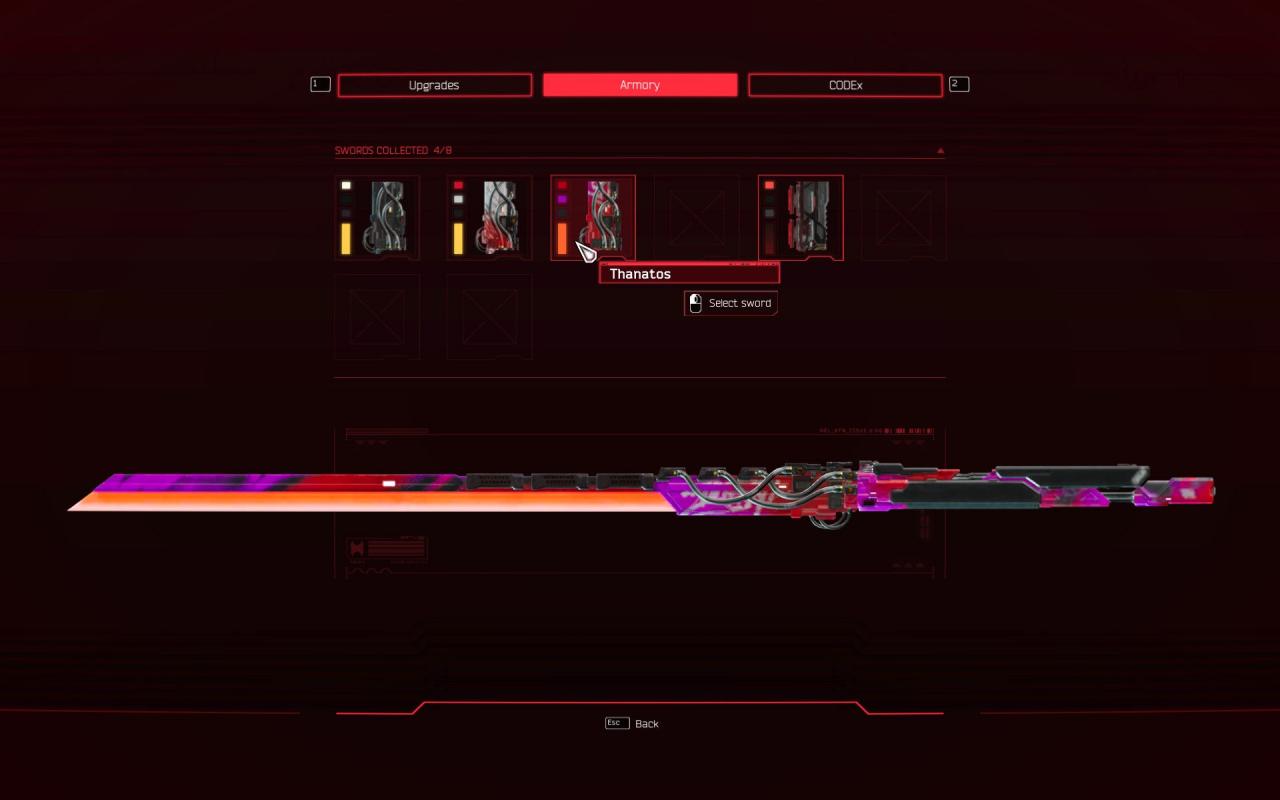
Sword 4
───────────────────────────────────────────────────────────────
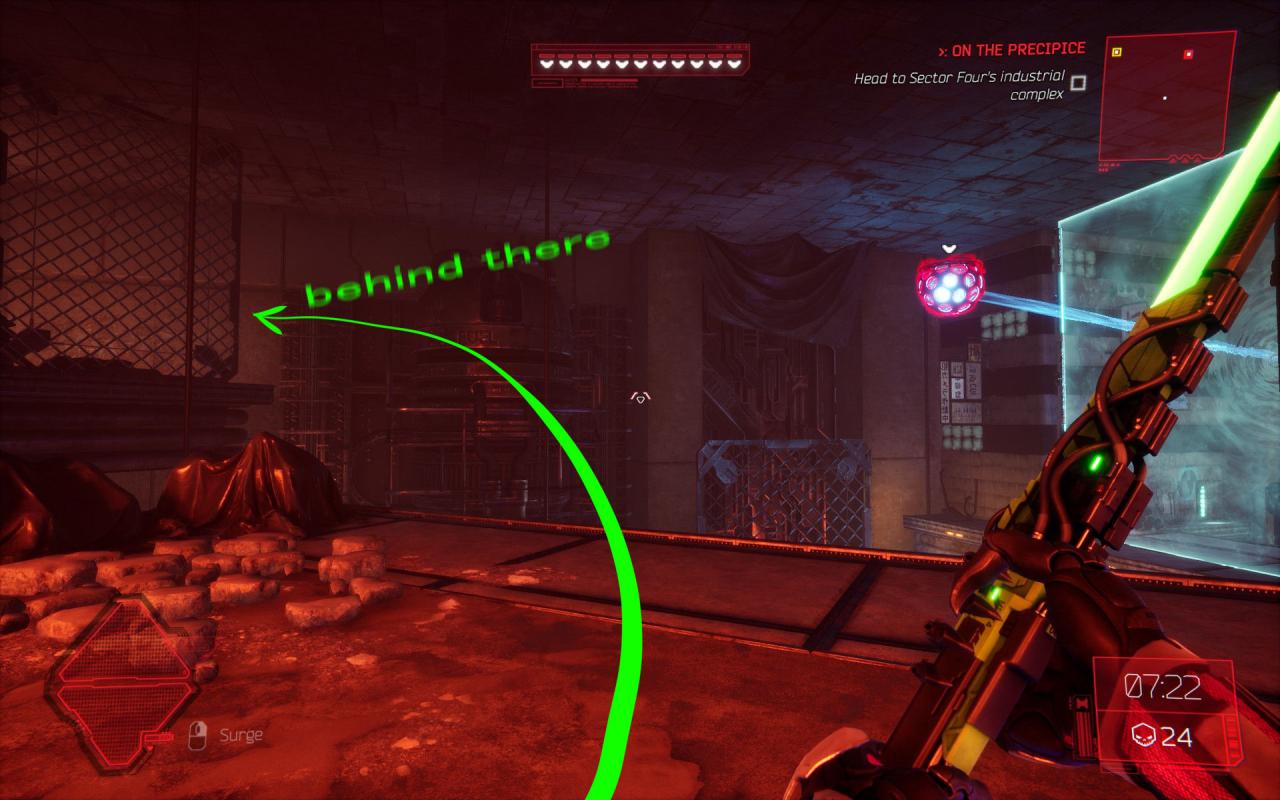
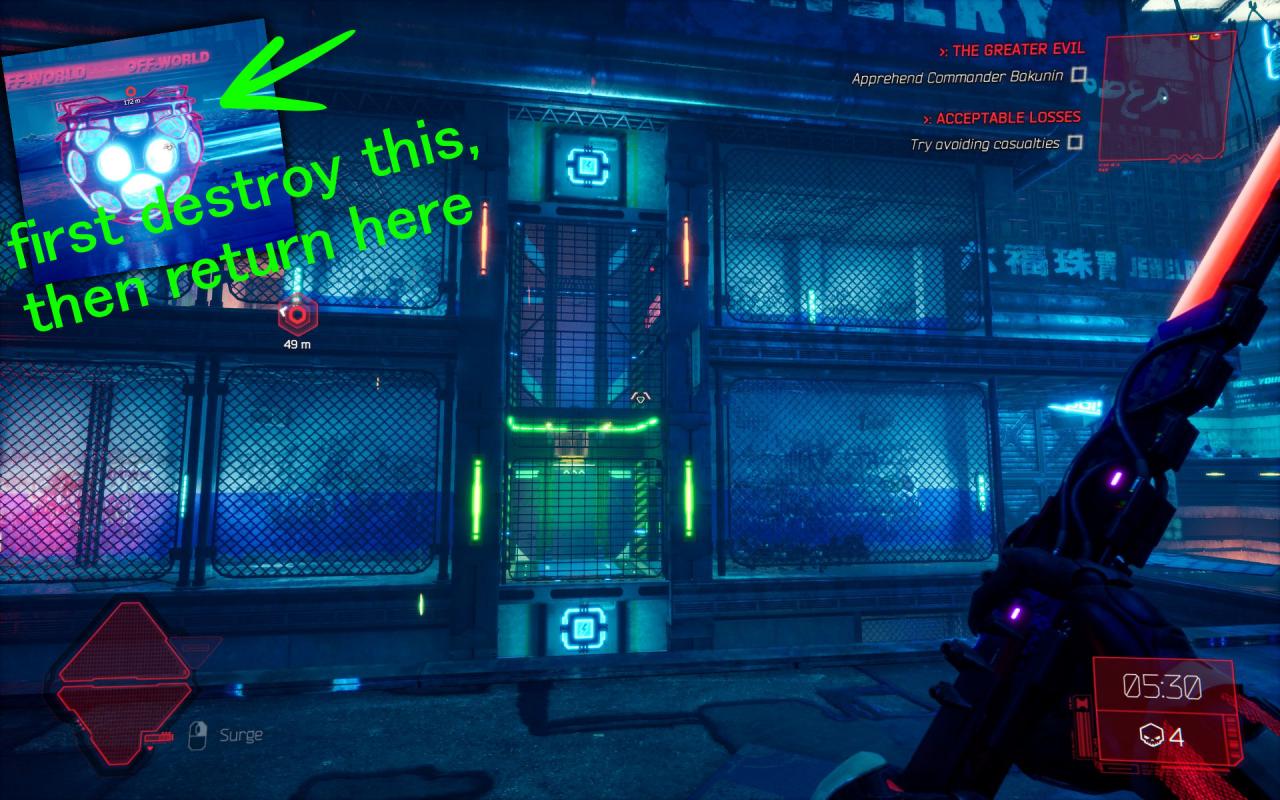 When you reach this place, first continue the usual route to destroy that thing, then return here
───────────────────────────────────────────────────────────────
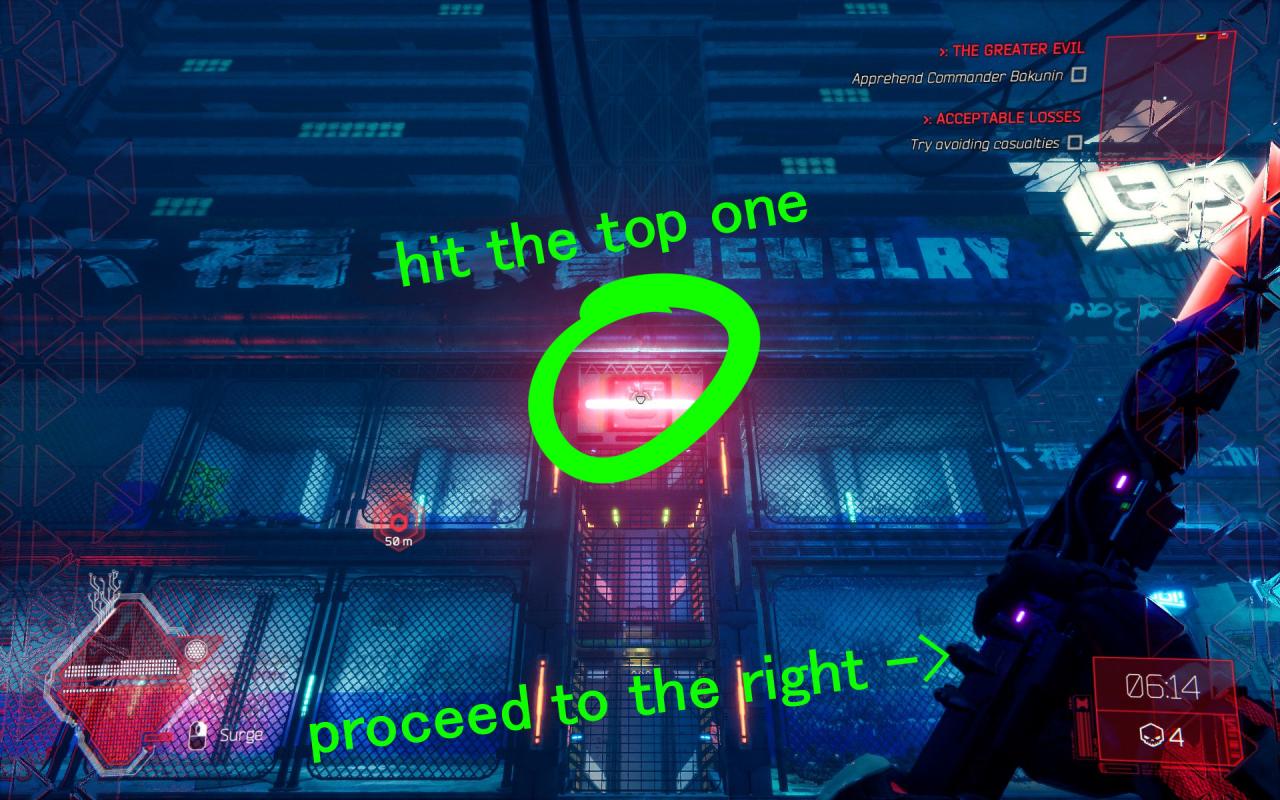 Hit the top one with a surge as you usually do
───────────────────────────────────────────────────────────────
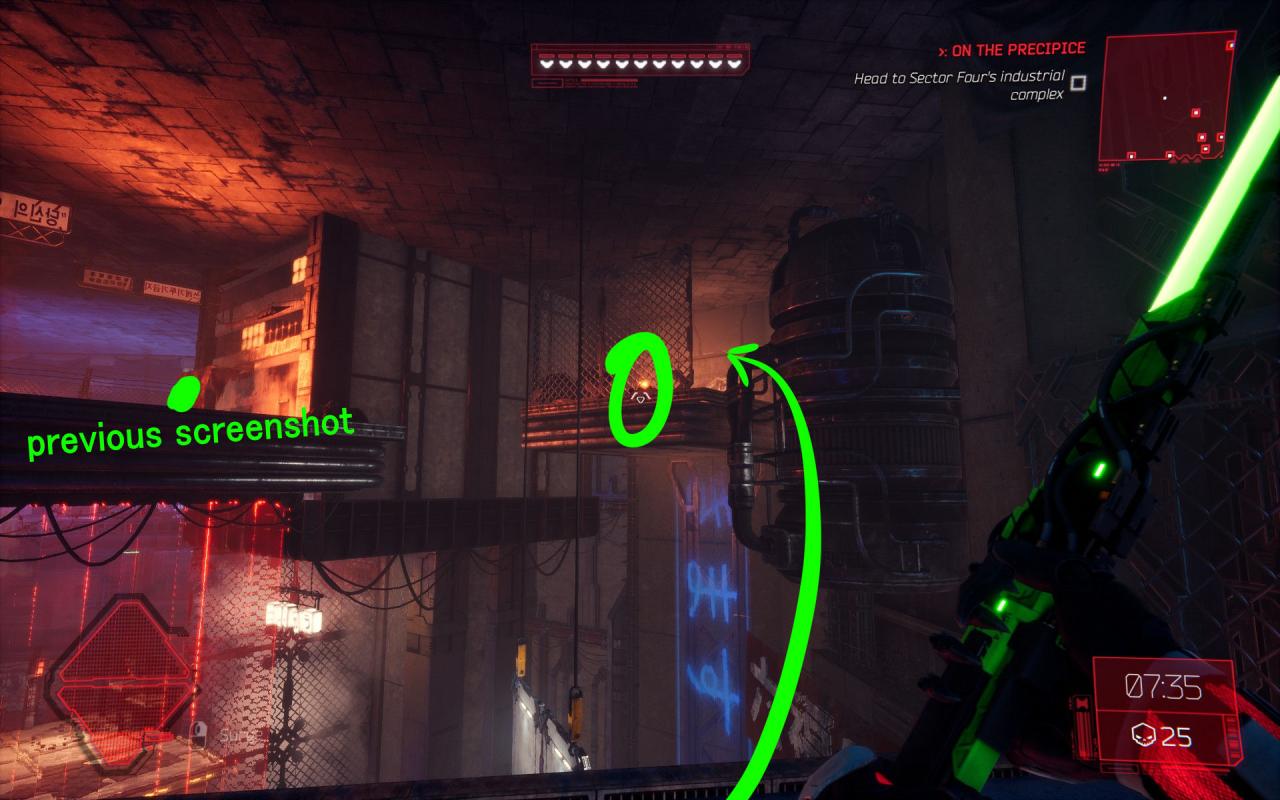
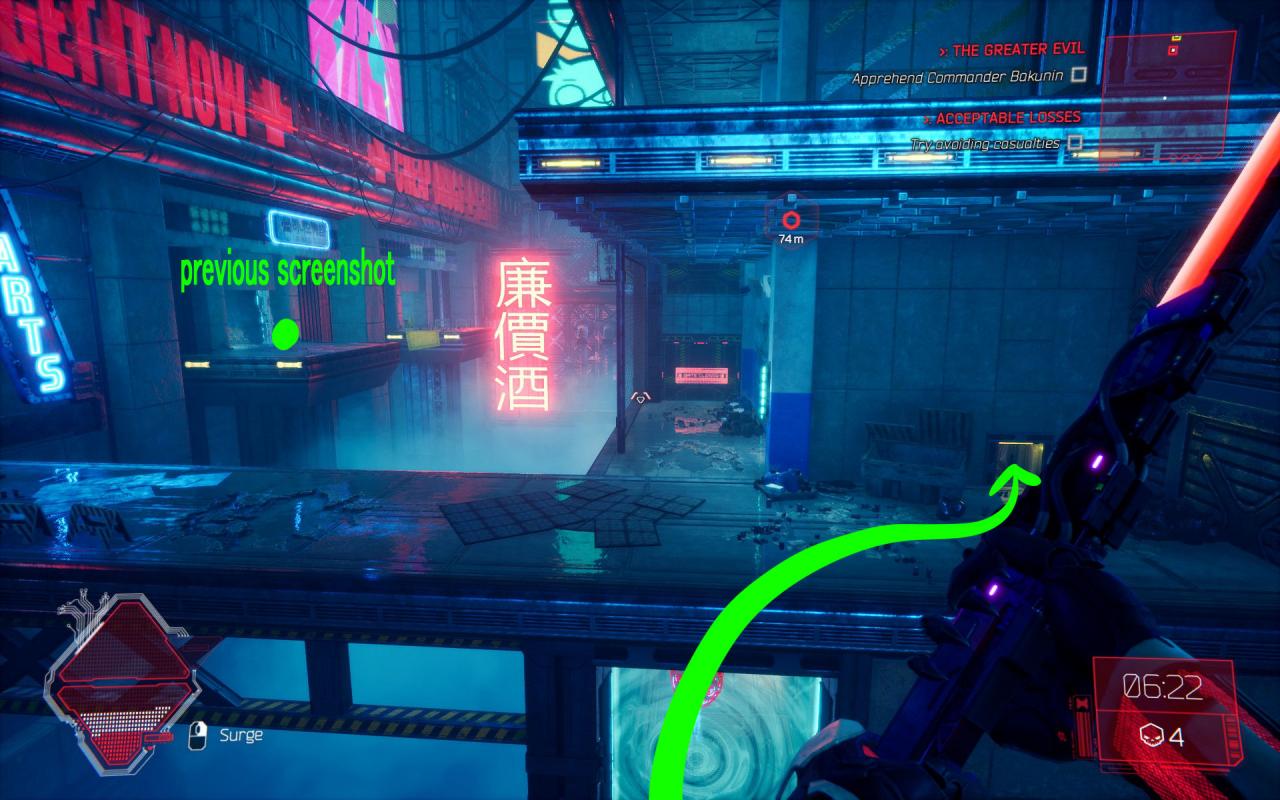 go to the vent on the right. Note where the previous screenshot was taken
───────────────────────────────────────────────────────────────
 that’s kinda sus
───────────────────────────────────────────────────────────────
 sword 4, here we go!
 ───────────────────────────────────────────────────────────────
When you reach this place, first continue the usual route to destroy that thing, then return here───────────────────────────────────────────────────────────────
Hit the top one with a surge as you usually do───────────────────────────────────────────────────────────────
go to the vent on the right. Note where the previous screenshot was taken───────────────────────────────────────────────────────────────
that’s kinda sus───────────────────────────────────────────────────────────────
sword 4, here we go!───────────────────────────────────────────────────────────────
Artifact 4
───────────────────────────────────────────────────────────────
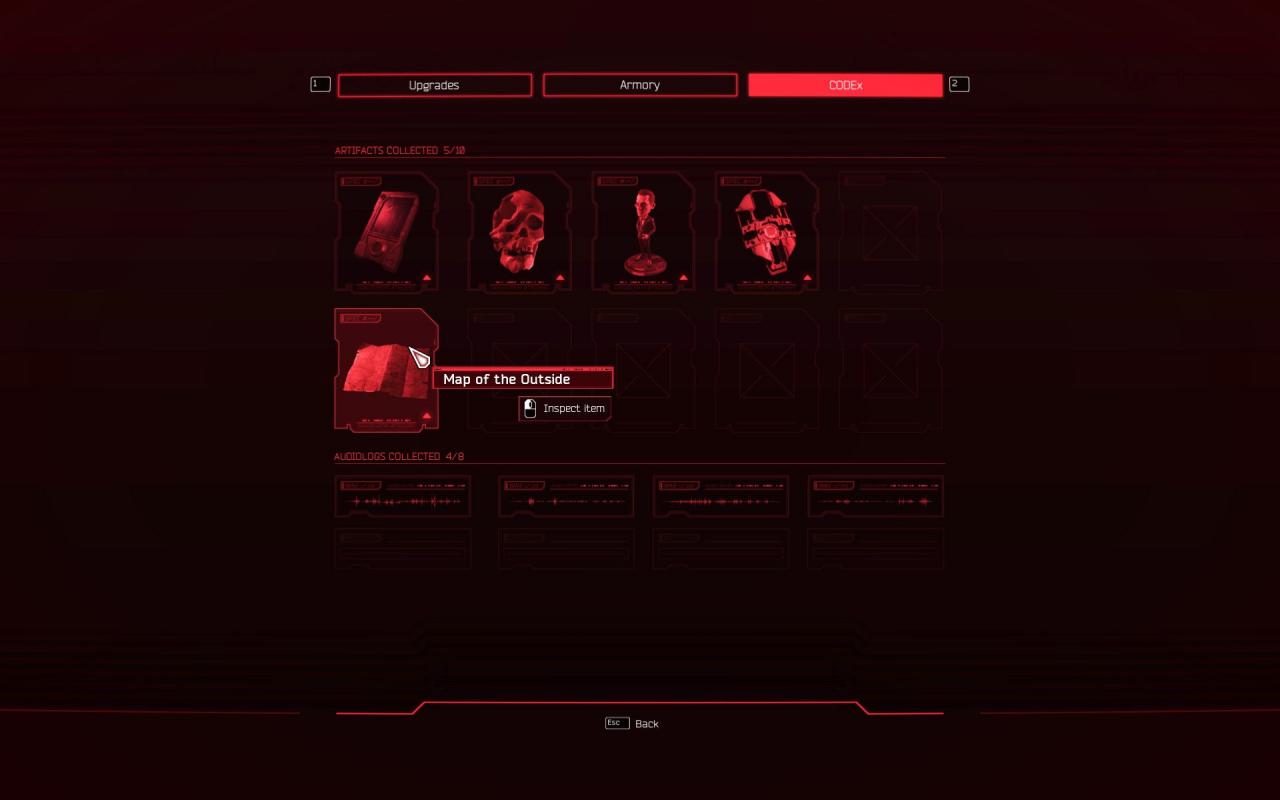
 And now this agonizing room… I assume you’ve cleared the game once by now, you get this artifact practically automatically as you solve this puzzle. Good luck ghostrunners!
───────────────────────────────────────────────────────────────
 As you can see, this is part of the normal story route. You can’t miss this can you?!
 ───────────────────────────────────────────────────────────────
And now this agonizing room… I assume you’ve cleared the game once by now, you get this artifact practically automatically as you solve this puzzle. Good luck ghostrunners!───────────────────────────────────────────────────────────────
As you can see, this is part of the normal story route. You can’t miss this can you?!───────────────────────────────────────────────────────────────
Audiolog 4
───────────────────────────────────────────────────────────────
 Next, after you’ve gone through this fun place…
───────────────────────────────────────────────────────────────
 go over here briefly to check where we need to go
───────────────────────────────────────────────────────────────
 into the vent we go~
───────────────────────────────────────────────────────────────
 here’s the last collectible of this level
 ───────────────────────────────────────────────────────────────
Next, after you’ve gone through this fun place…───────────────────────────────────────────────────────────────
go over here briefly to check where we need to go───────────────────────────────────────────────────────────────
into the vent we go~───────────────────────────────────────────────────────────────
here’s the last collectible of this level───────────────────────────────────────────────────────────────
Level 3: Excessive Force (SPOILERS)
Swords: 1
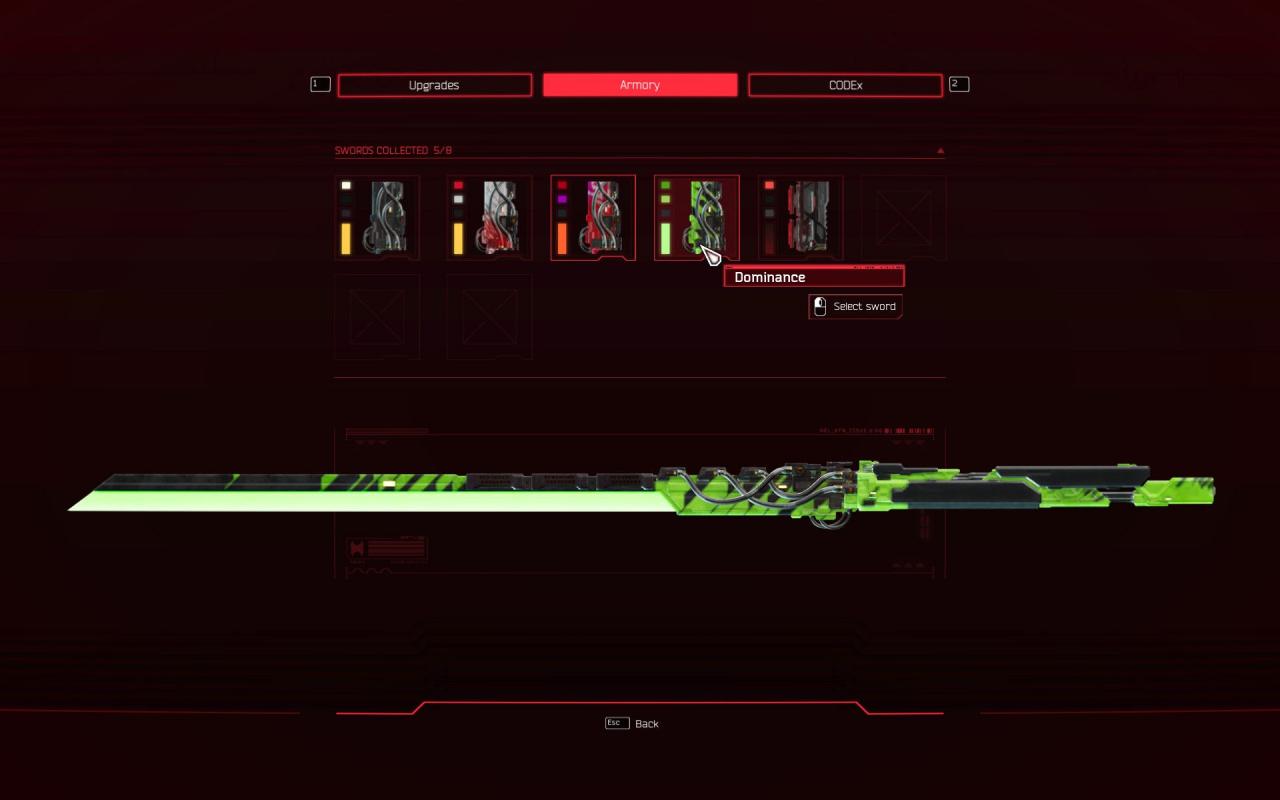
Sword 5
───────────────────────────────────────────────────────────────
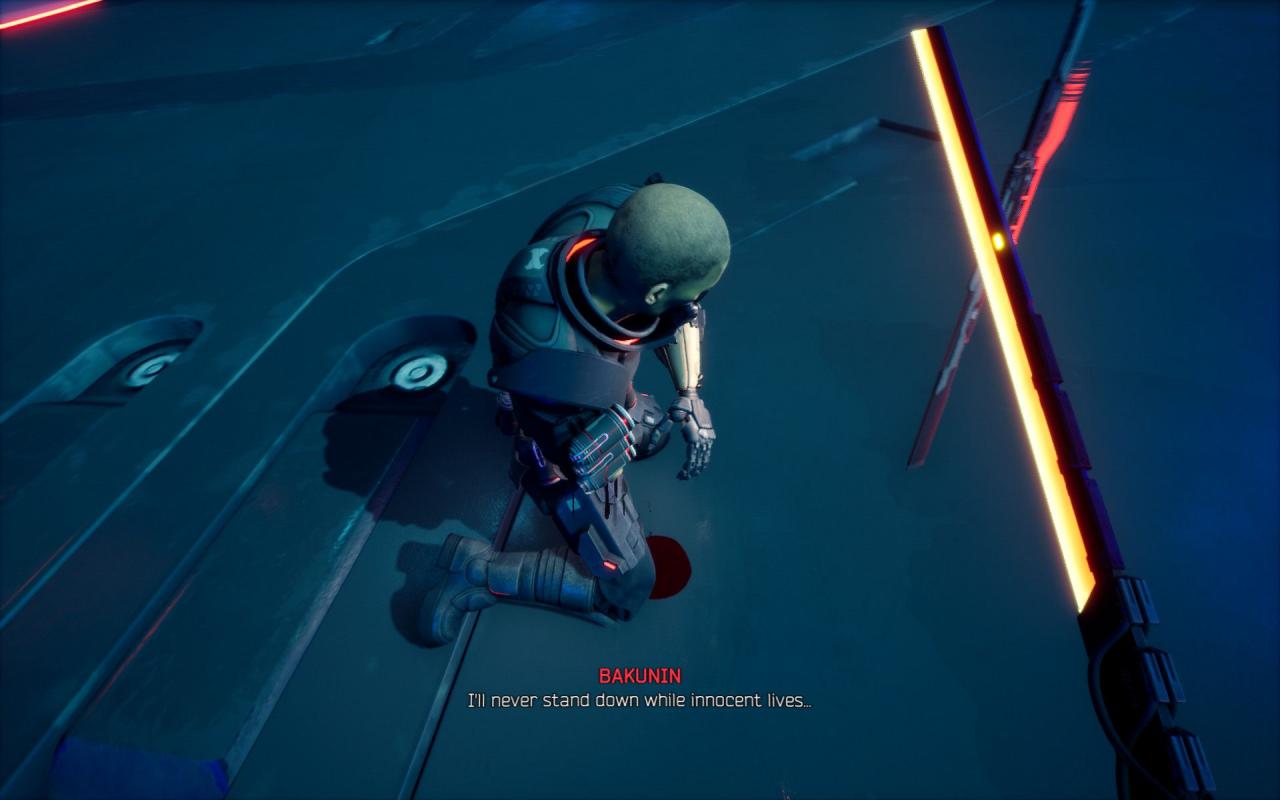 You get this one automatically when you finish the boss battle
 ───────────────────────────────────────────────────────────────
You get this one automatically when you finish the boss battle───────────────────────────────────────────────────────────────
Level 4: Down Below
Artifacts: 3
Audiologs: 2
Swords: 1
Audiologs: 2
Swords: 1
Audiolog 5
───────────────────────────────────────────────────────────────
 When you reach this area, go over here
───────────────────────────────────────────────────────────────
 there’s a hole up there, jump there
───────────────────────────────────────────────────────────────
 go down~
───────────────────────────────────────────────────────────────
 yay!
yay!
 ───────────────────────────────────────────────────────────────
When you reach this area, go over here───────────────────────────────────────────────────────────────
there’s a hole up there, jump there───────────────────────────────────────────────────────────────
go down~───────────────────────────────────────────────────────────────
yay!───────────────────────────────────────────────────────────────
Artifact 6
───────────────────────────────────────────────────────────────
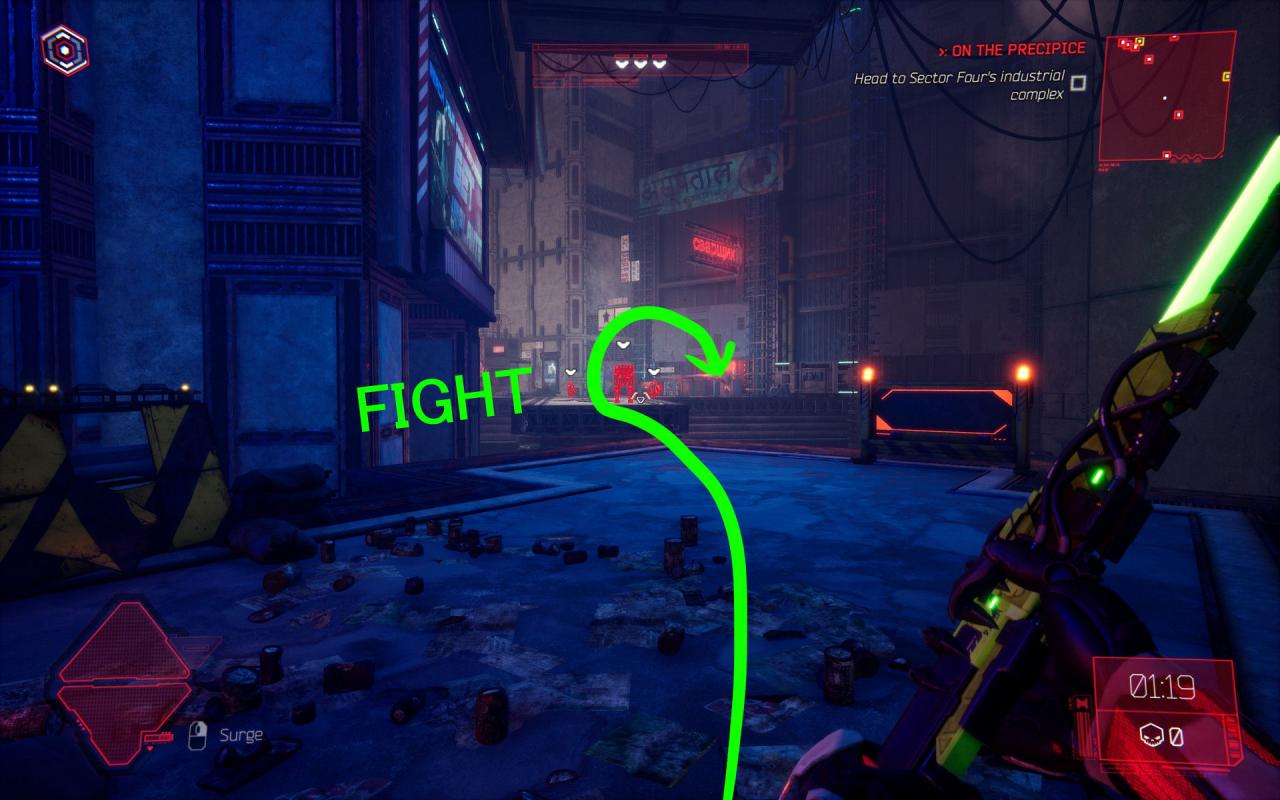 Fight these guys, then go stand over there
───────────────────────────────────────────────────────────────
 turn around, and go under the red barrier
───────────────────────────────────────────────────────────────
 heeere we gooooooooo~~~
 ───────────────────────────────────────────────────────────────
Fight these guys, then go stand over there───────────────────────────────────────────────────────────────
turn around, and go under the red barrier───────────────────────────────────────────────────────────────
heeere we gooooooooo~~~───────────────────────────────────────────────────────────────
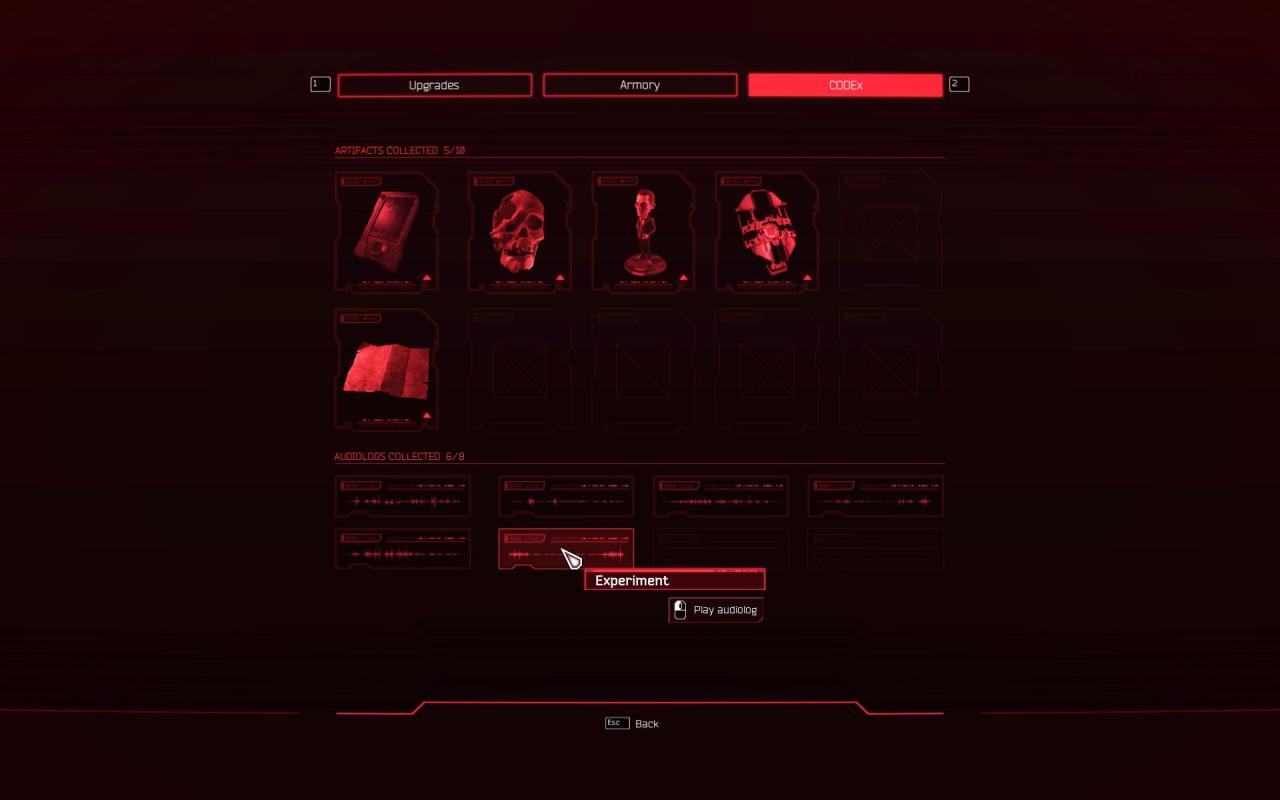
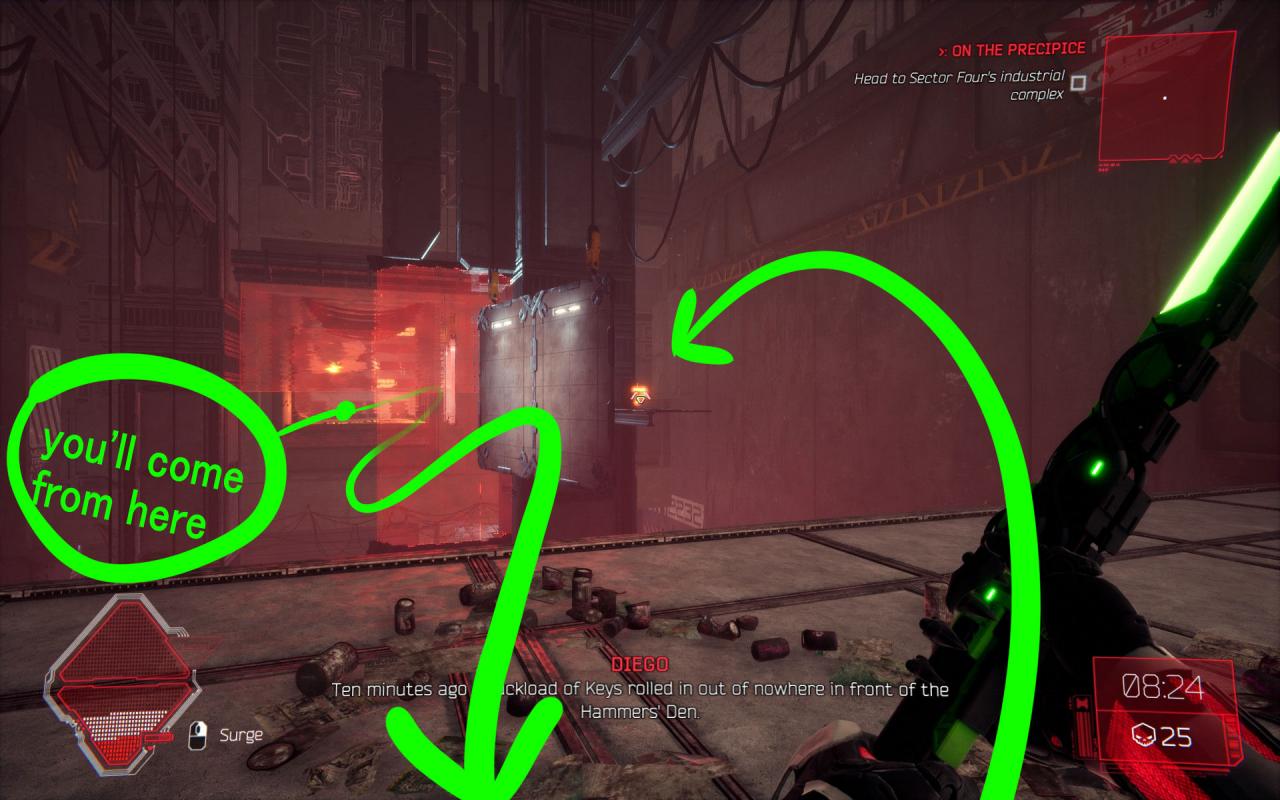
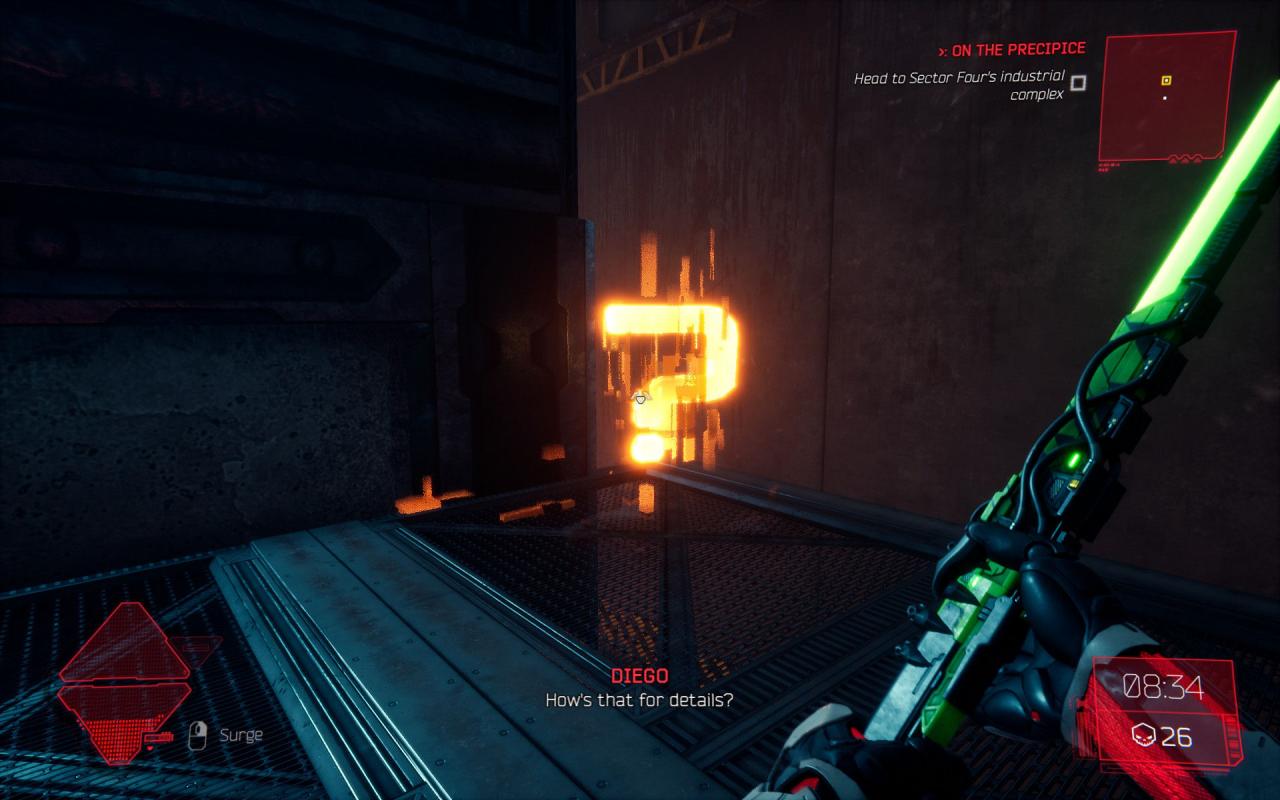
Audiolog 6
───────────────────────────────────────────────────────────────
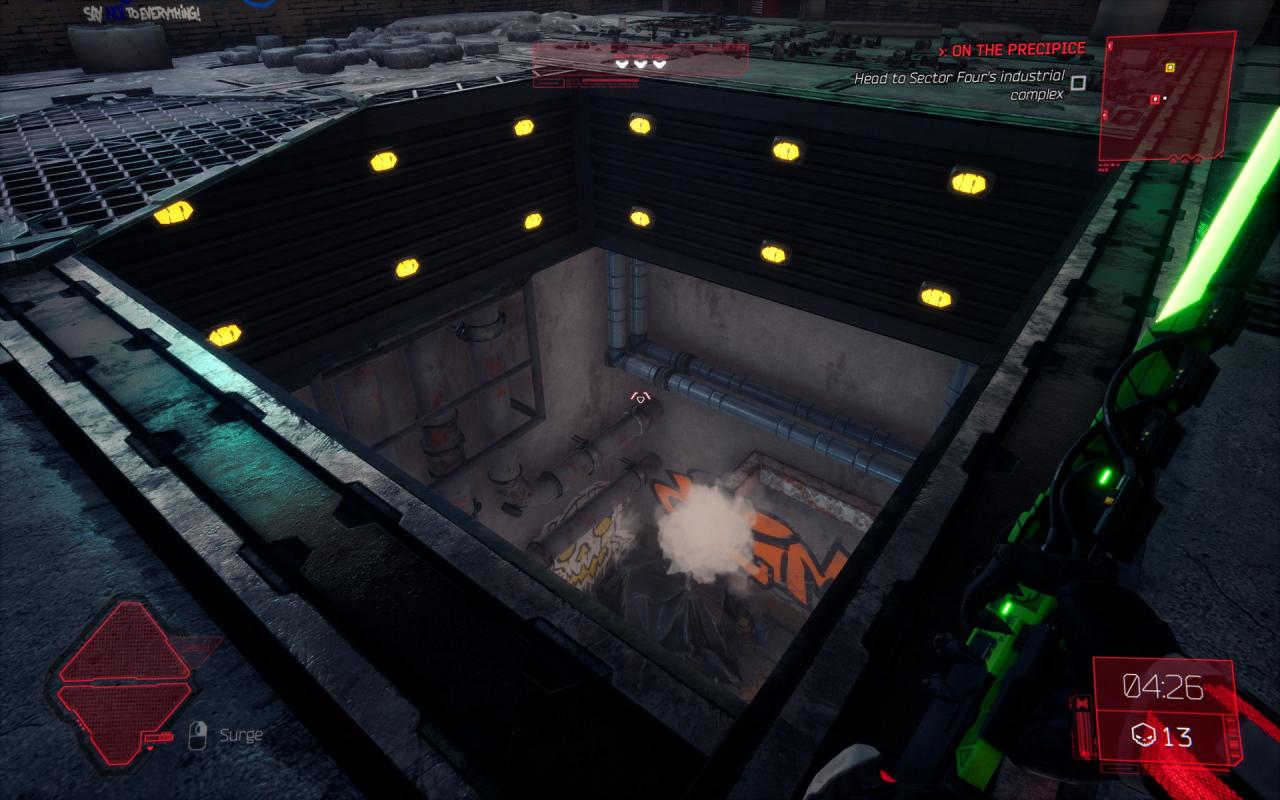
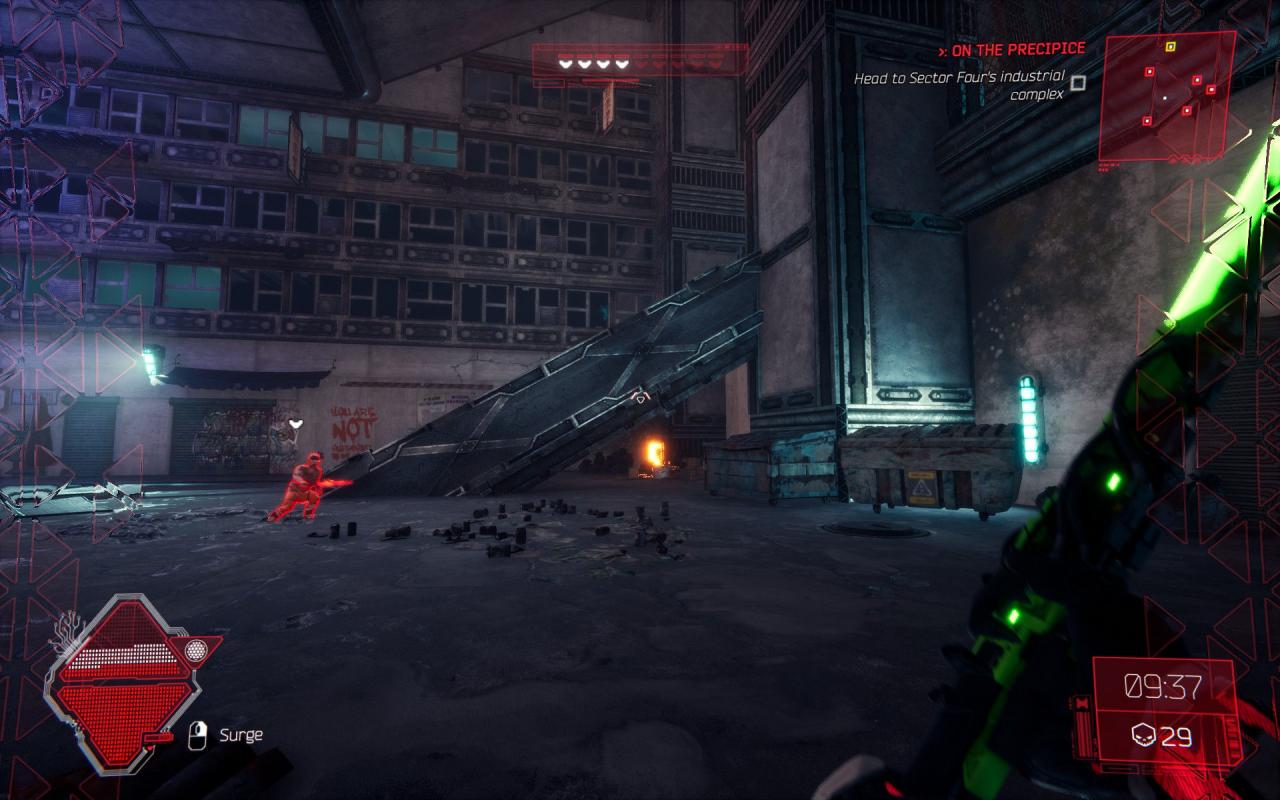
 Inevitably, you’ll reach this place. The collectible is right there
───────────────────────────────────────────────────────────────
 as you can see
 ───────────────────────────────────────────────────────────────
Inevitably, you’ll reach this place. The collectible is right there───────────────────────────────────────────────────────────────
as you can see───────────────────────────────────────────────────────────────
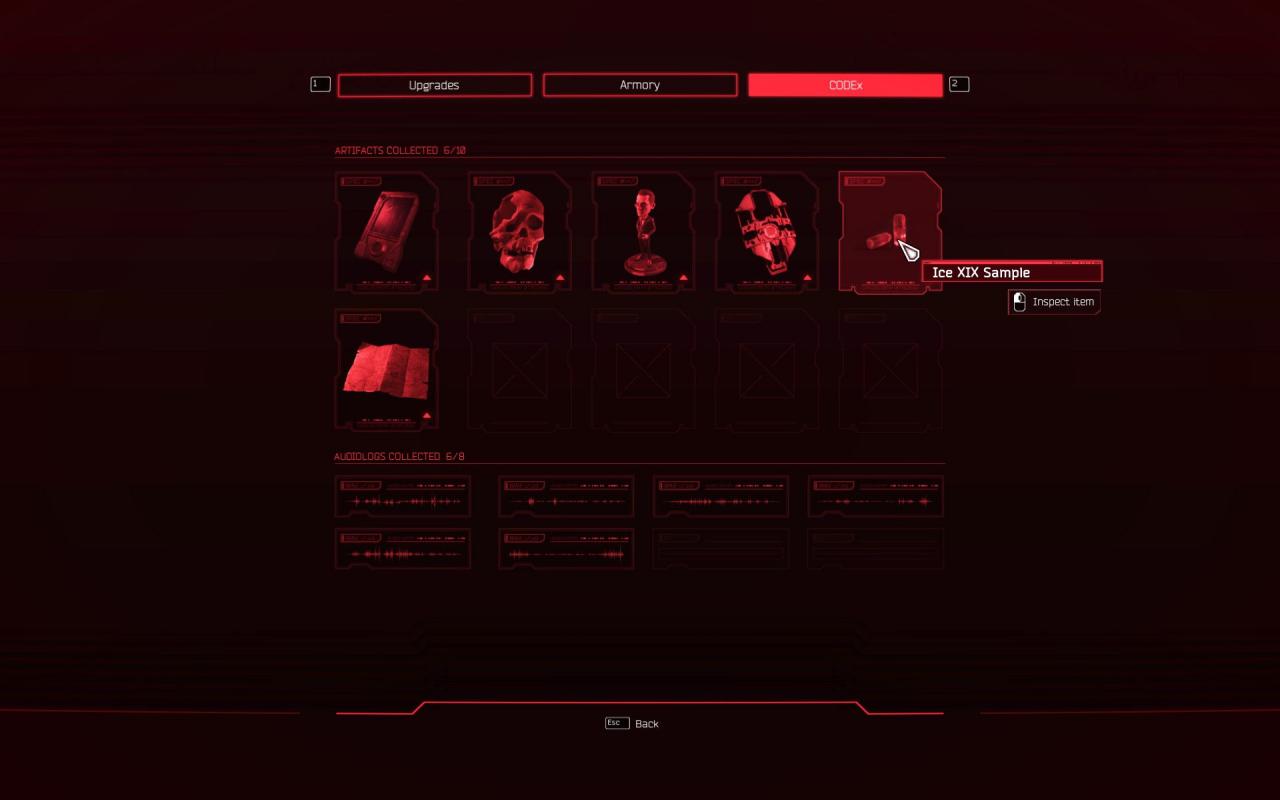
Artifact 5
───────────────────────────────────────────────────────────────
 After you’ve gone through this funky place, turn around
───────────────────────────────────────────────────────────────
 literally the easiest one…
 ───────────────────────────────────────────────────────────────
After you’ve gone through this funky place, turn around───────────────────────────────────────────────────────────────
literally the easiest one…───────────────────────────────────────────────────────────────
Artifact 7
───────────────────────────────────────────────────────────────
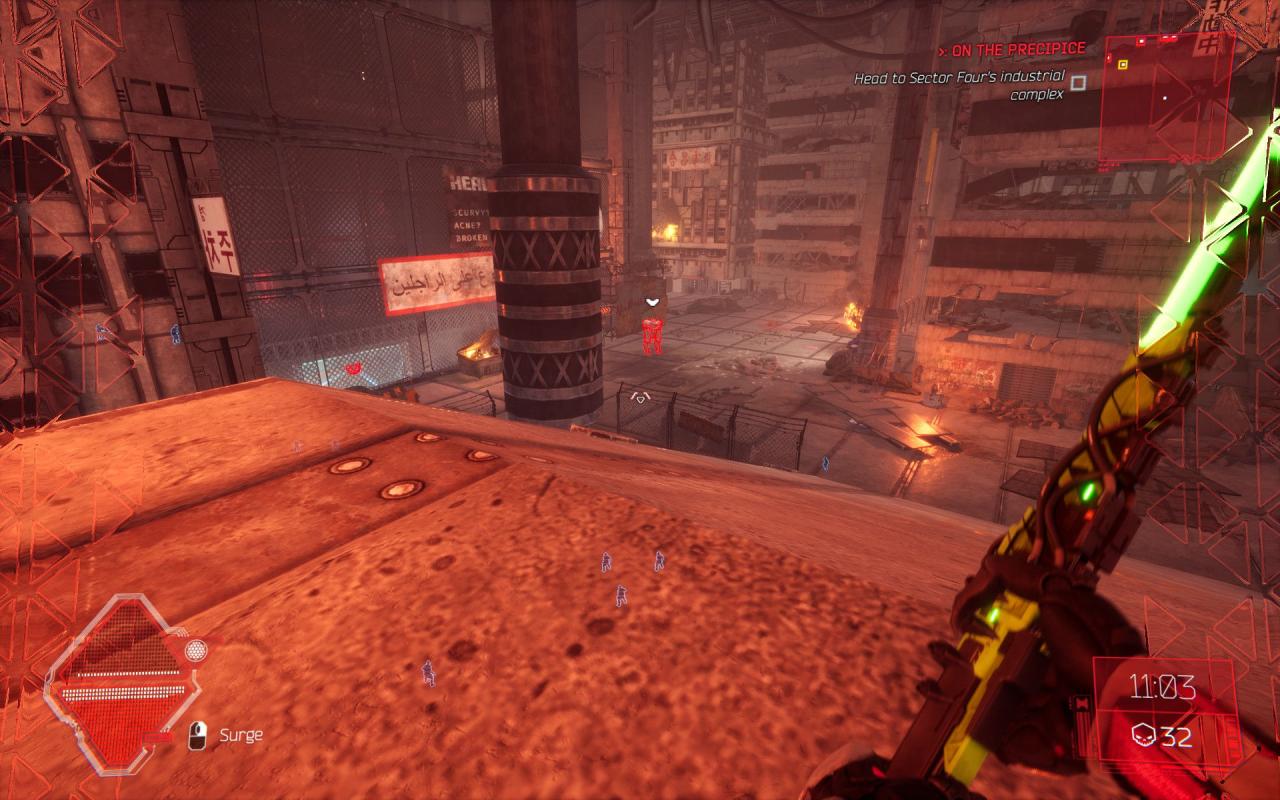
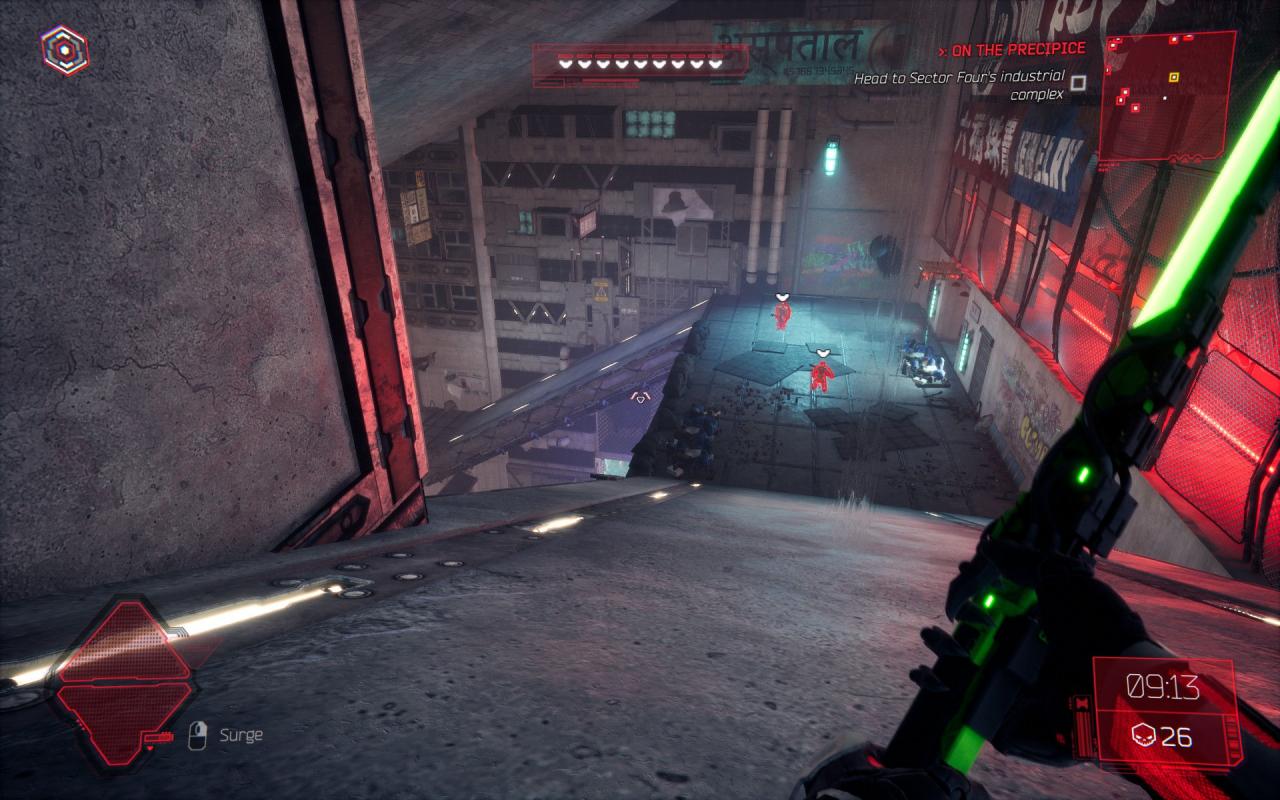 In the upcoming room, you’ll encounter a handful of enemies
───────────────────────────────────────────────────────────────
 bottom floor, under the slope
 ───────────────────────────────────────────────────────────────
In the upcoming room, you’ll encounter a handful of enemies───────────────────────────────────────────────────────────────
bottom floor, under the slope───────────────────────────────────────────────────────────────
Sword 6
───────────────────────────────────────────────────────────────
 Proceed as usual, clear the guys
───────────────────────────────────────────────────────────────
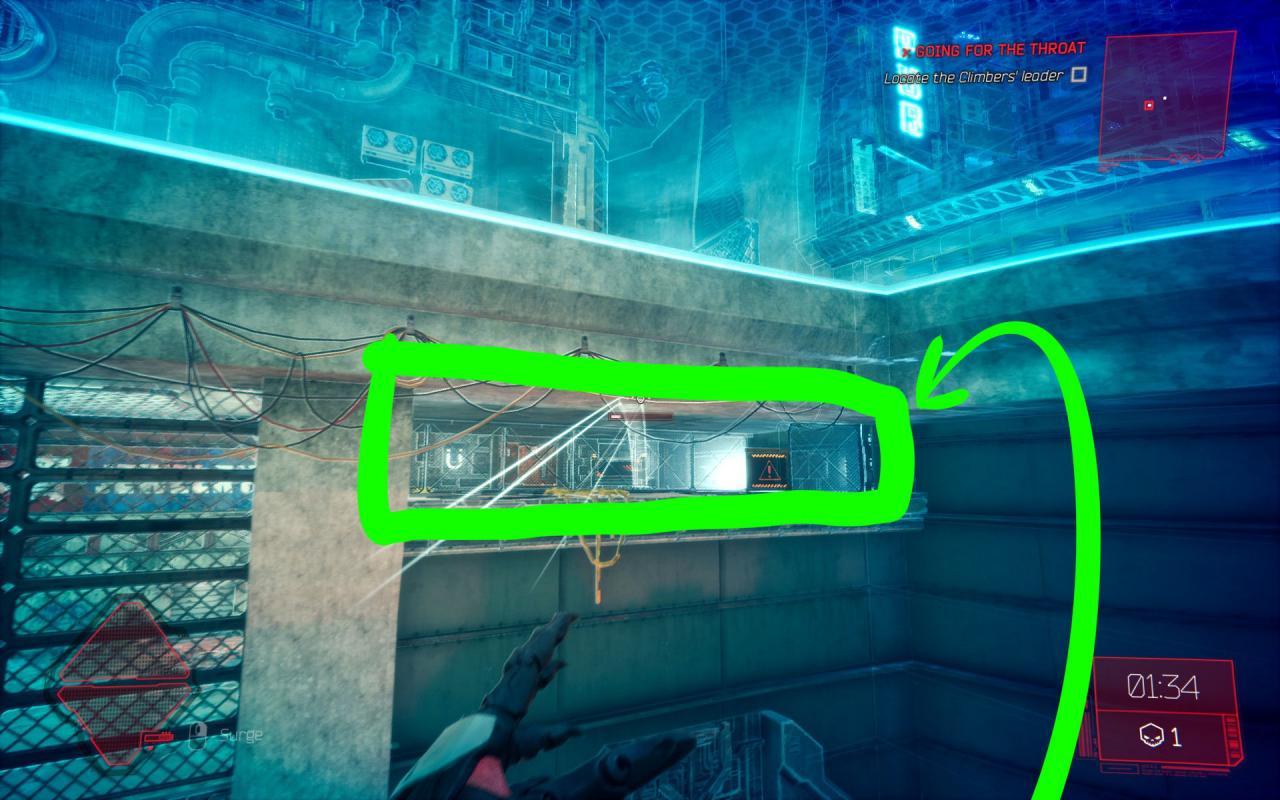
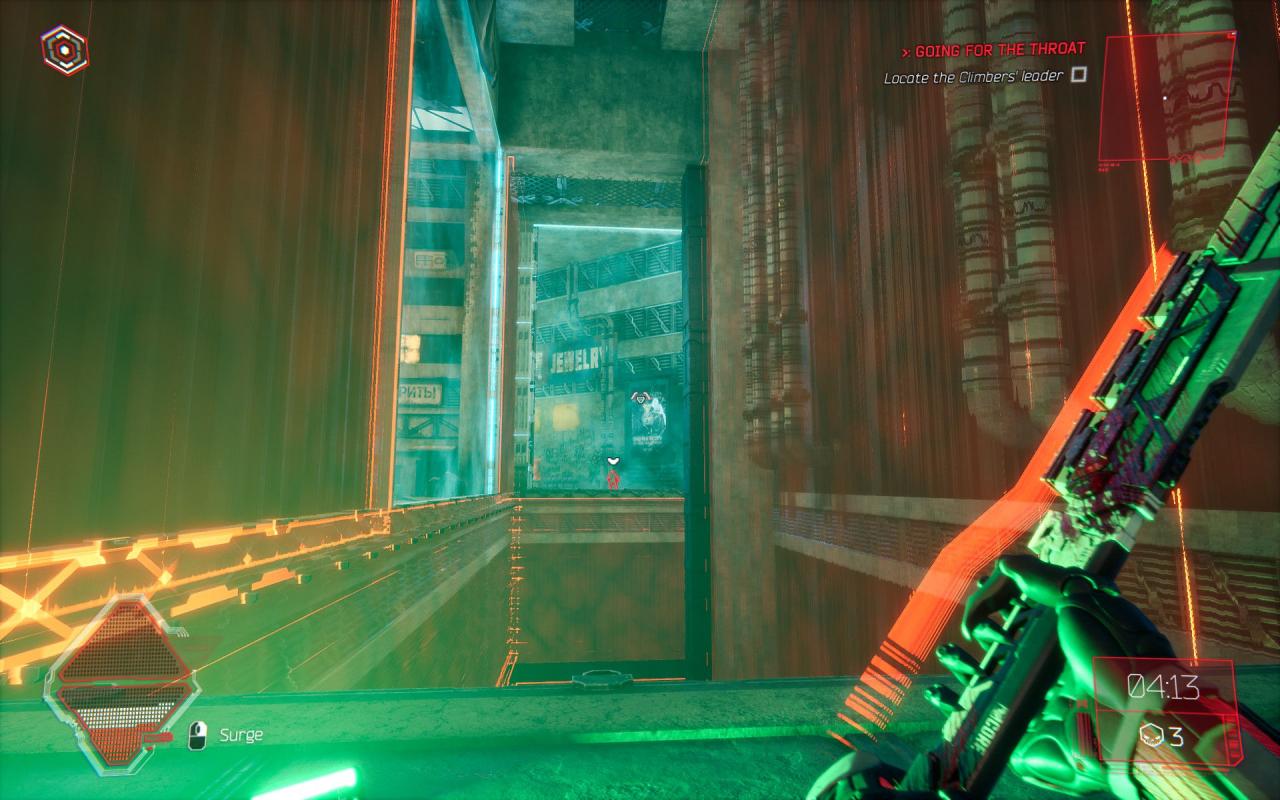
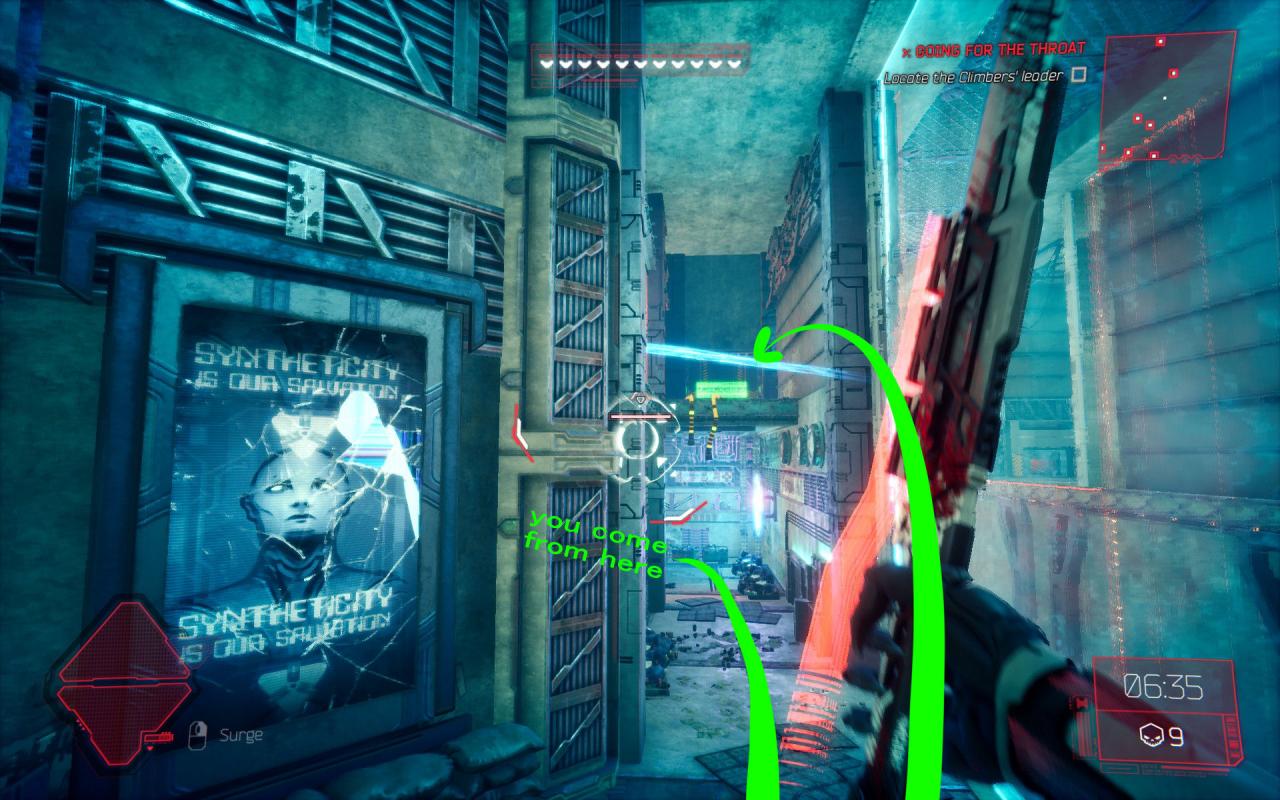
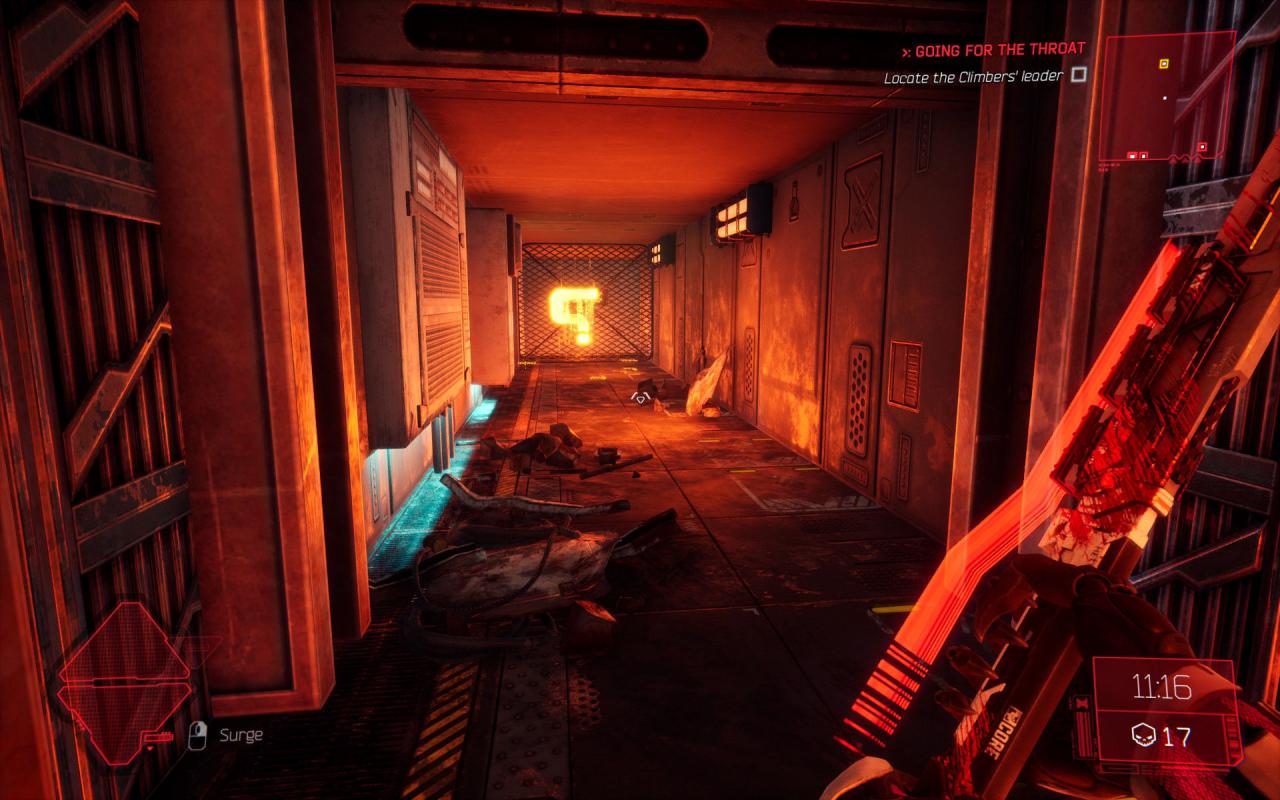
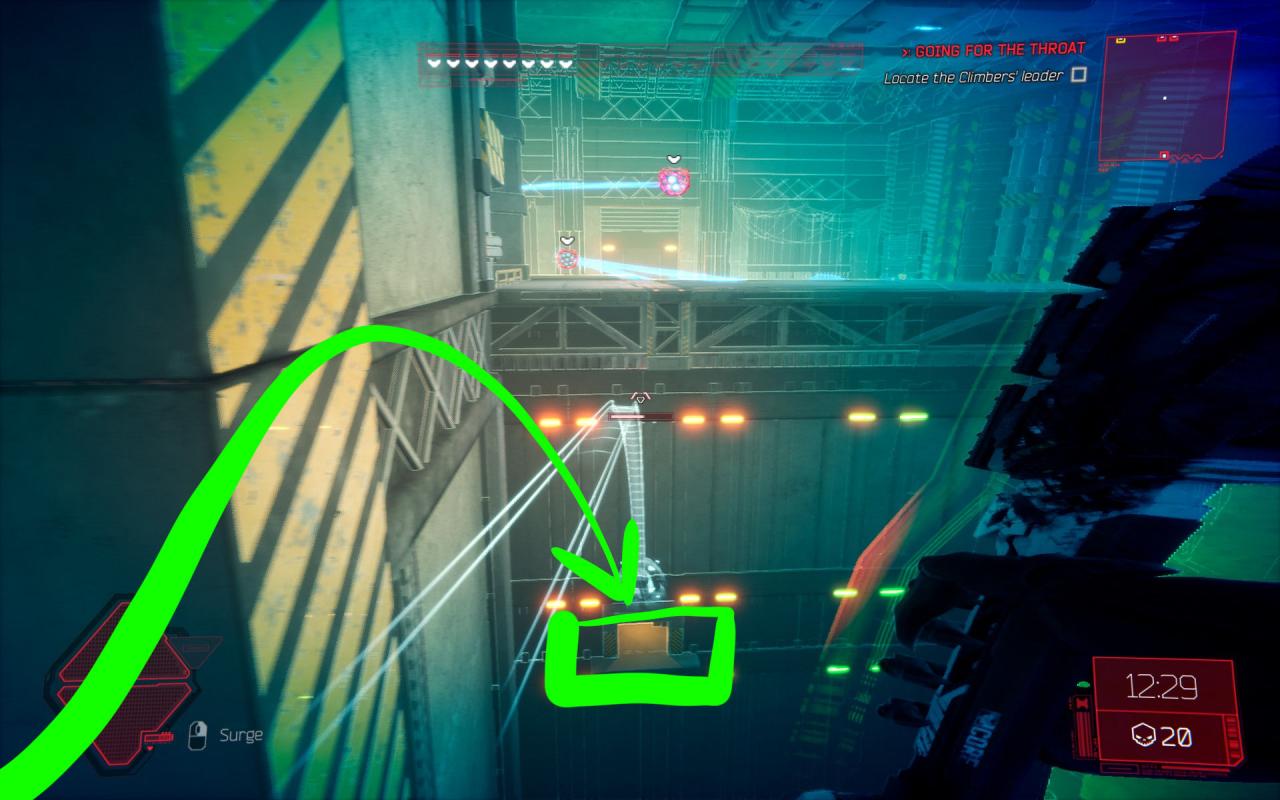
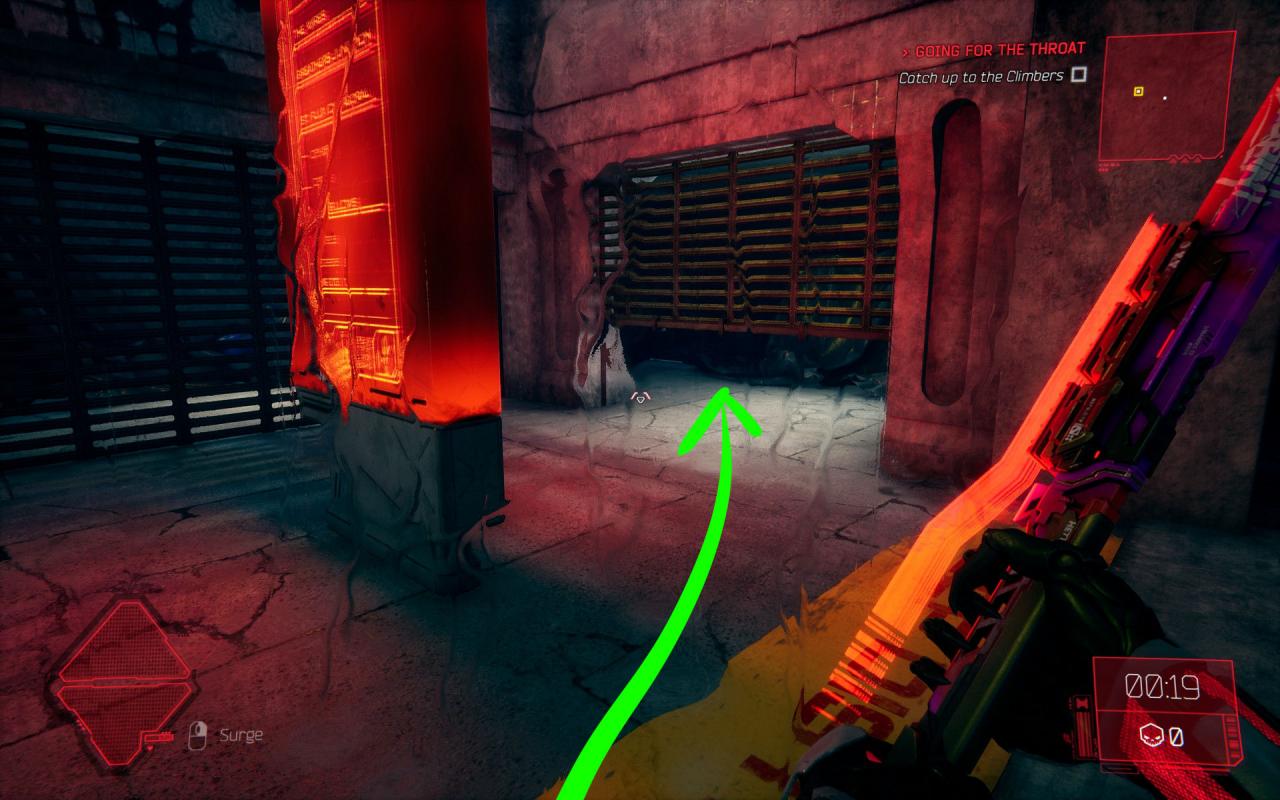
 Go here to see the collectible
───────────────────────────────────────────────────────────────
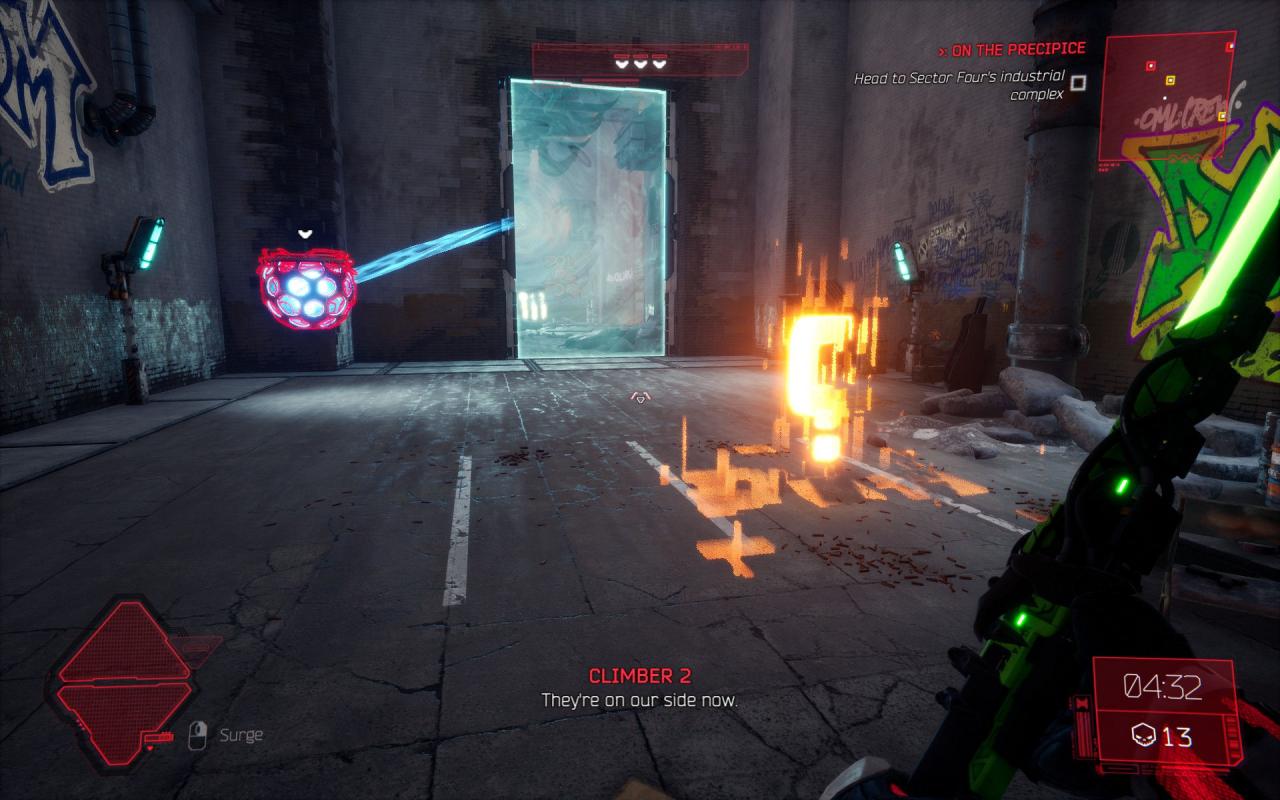
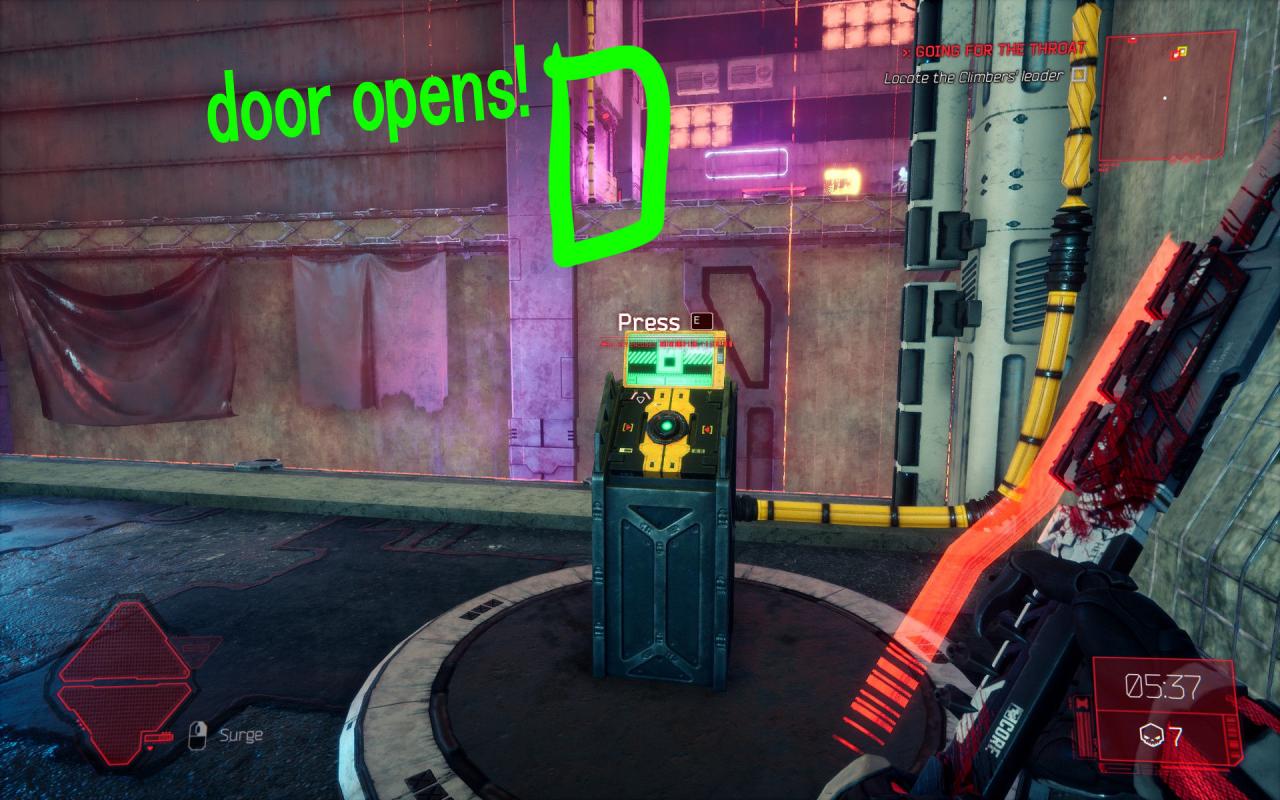
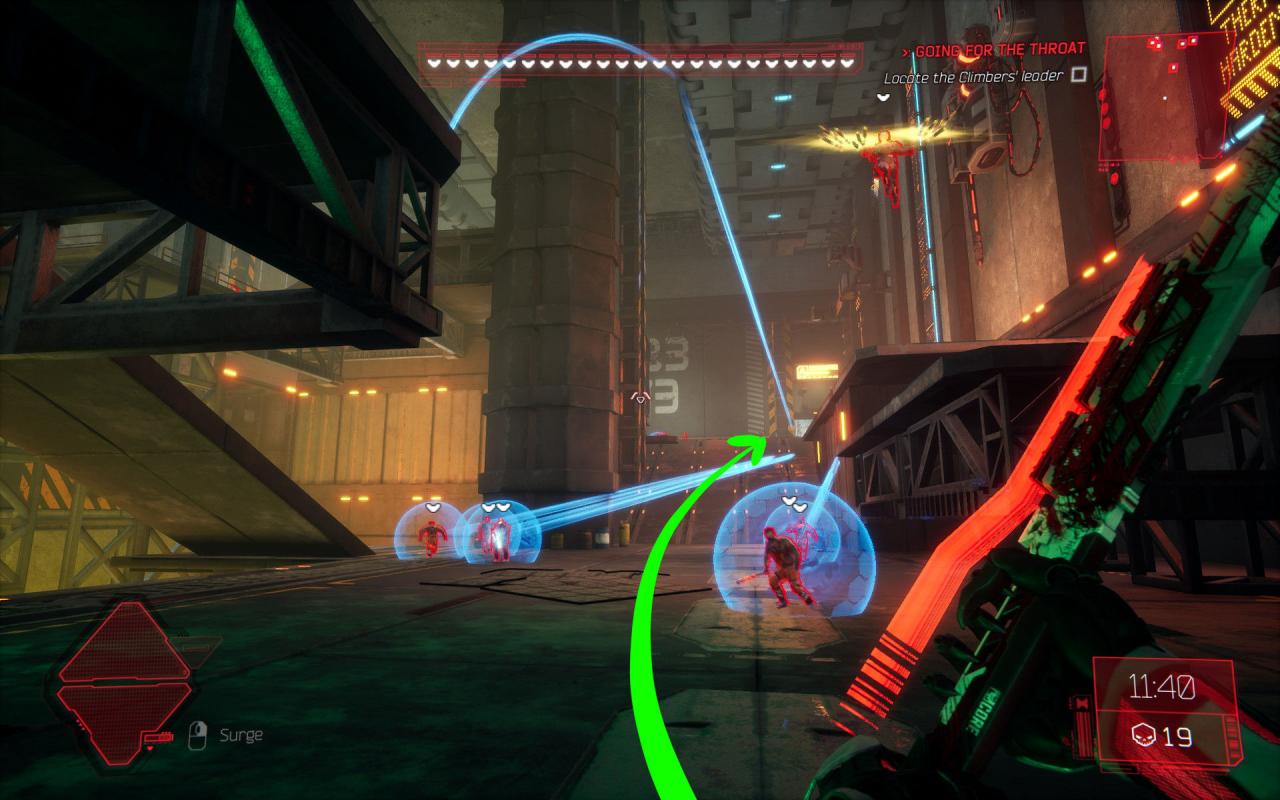
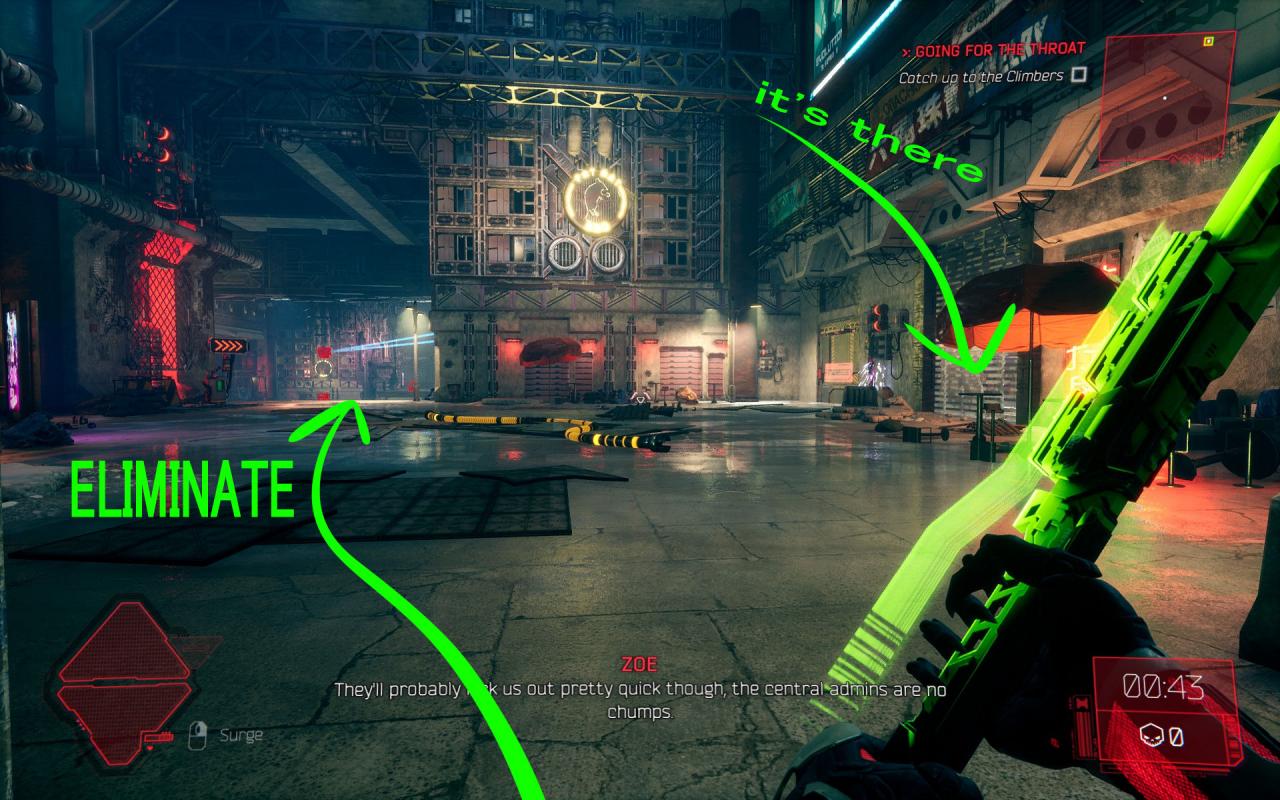
 It’s riiiiiight there. Now eliminate the climbers, kindly
───────────────────────────────────────────────────────────────
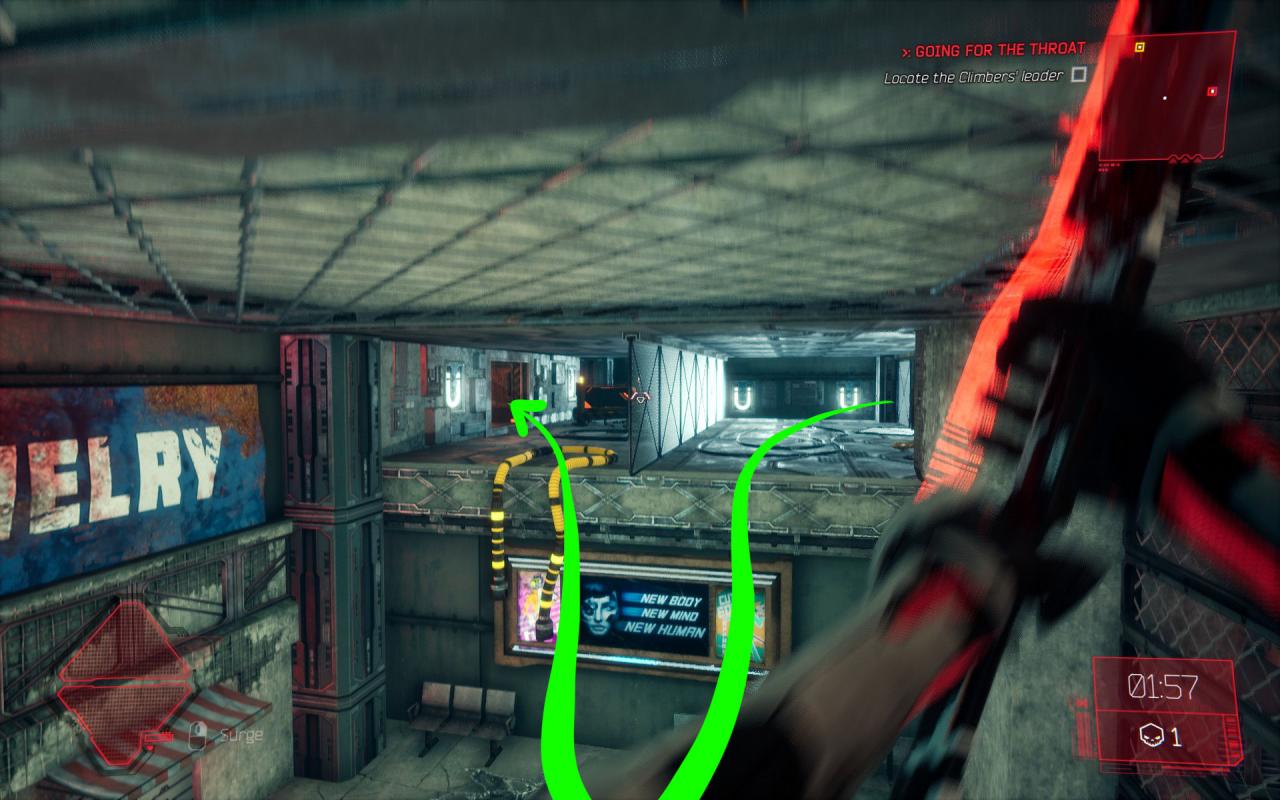
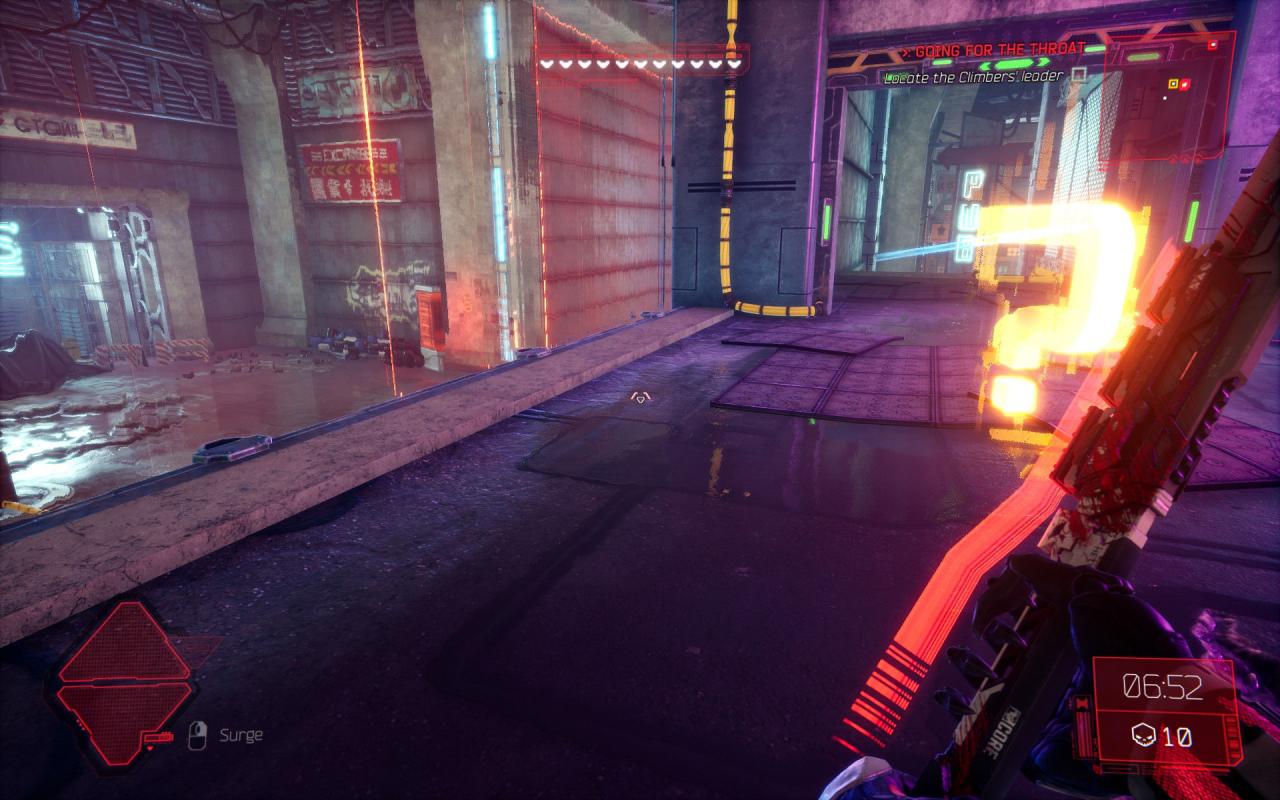
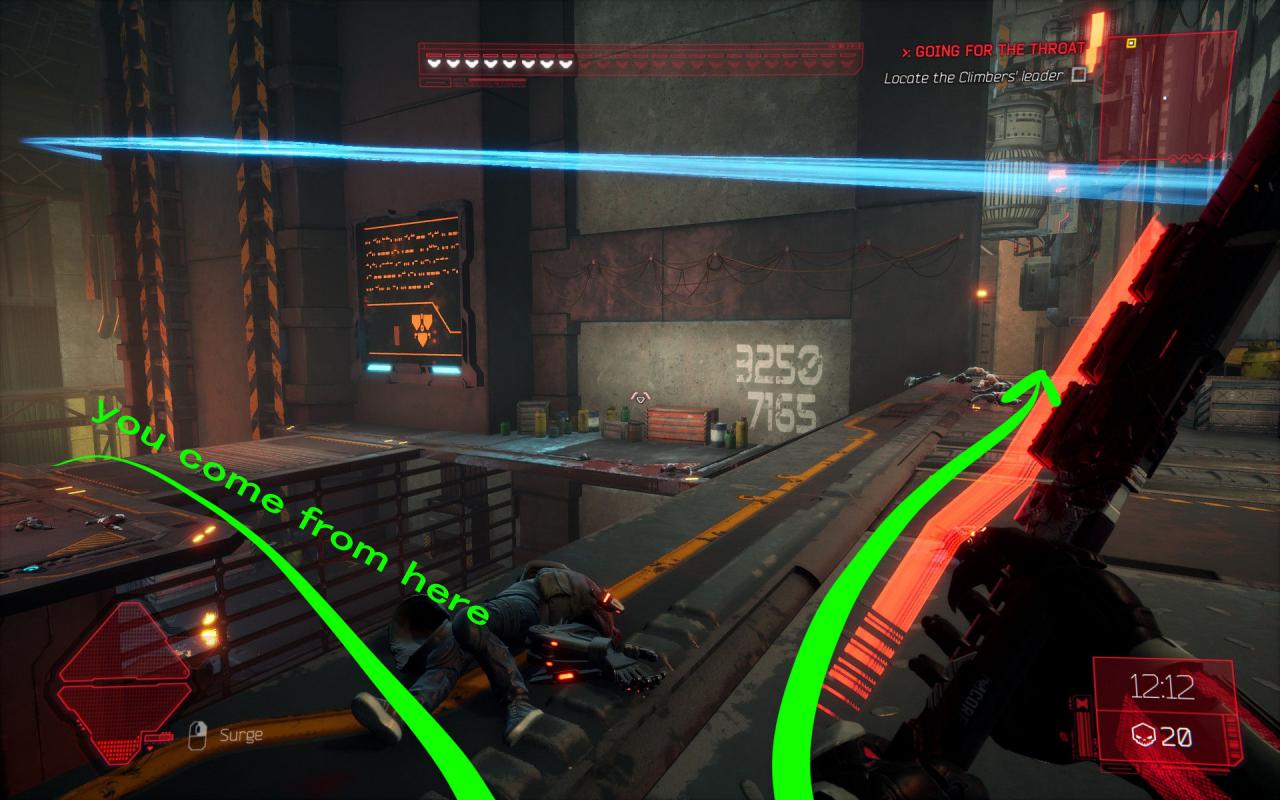
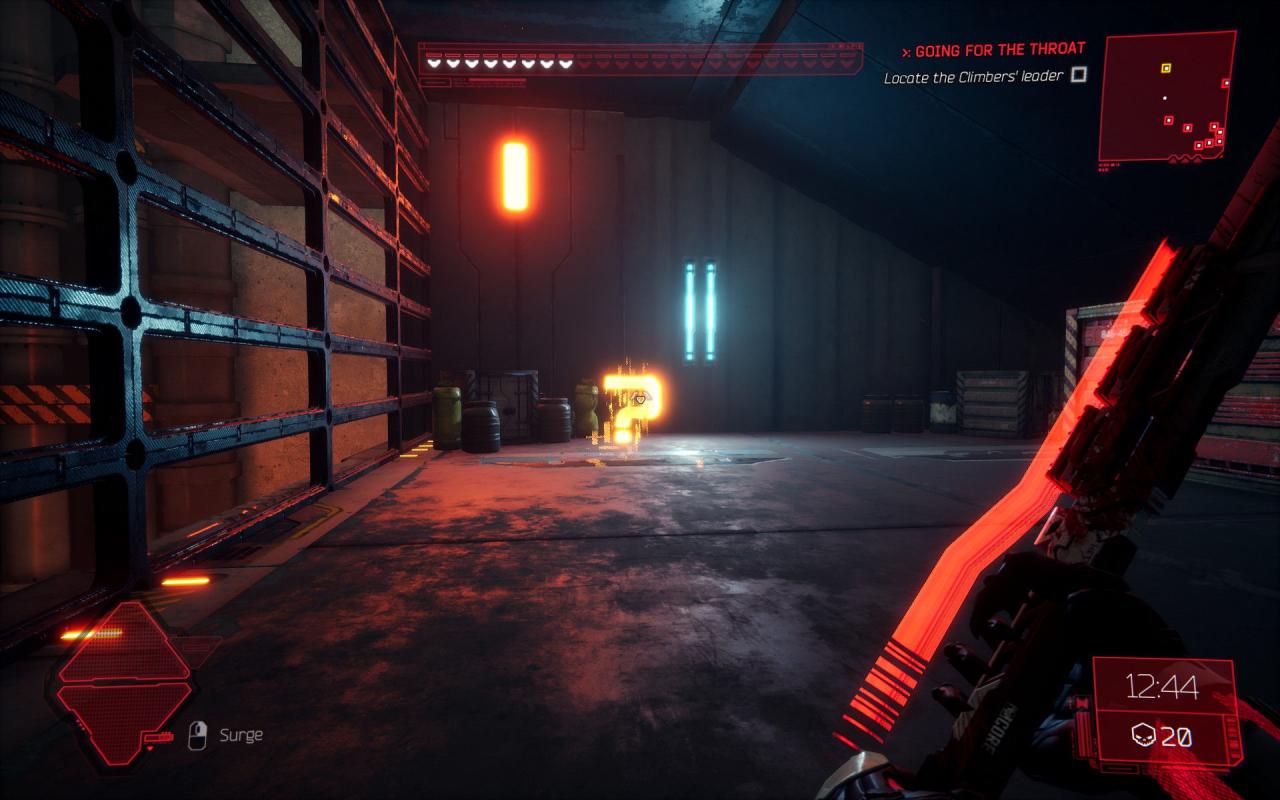
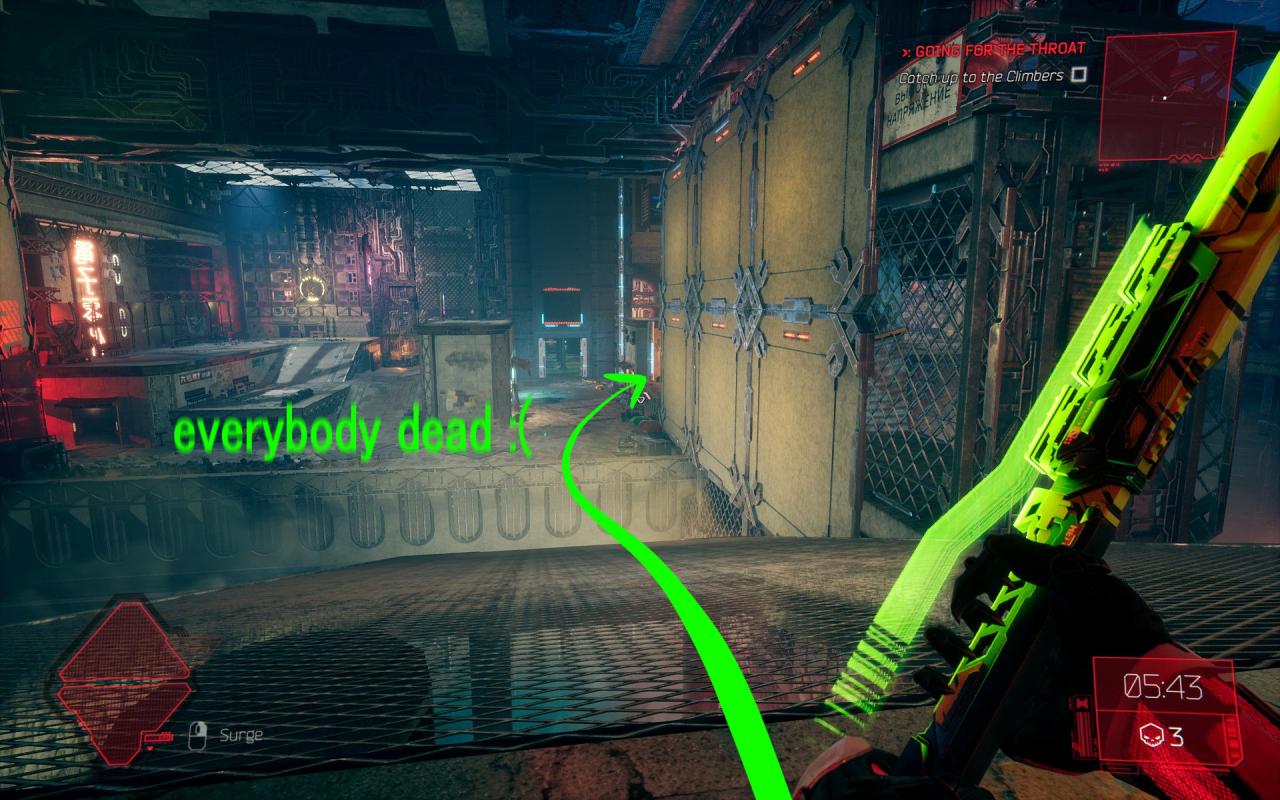
 after the coast is clear, go over there
───────────────────────────────────────────────────────────────
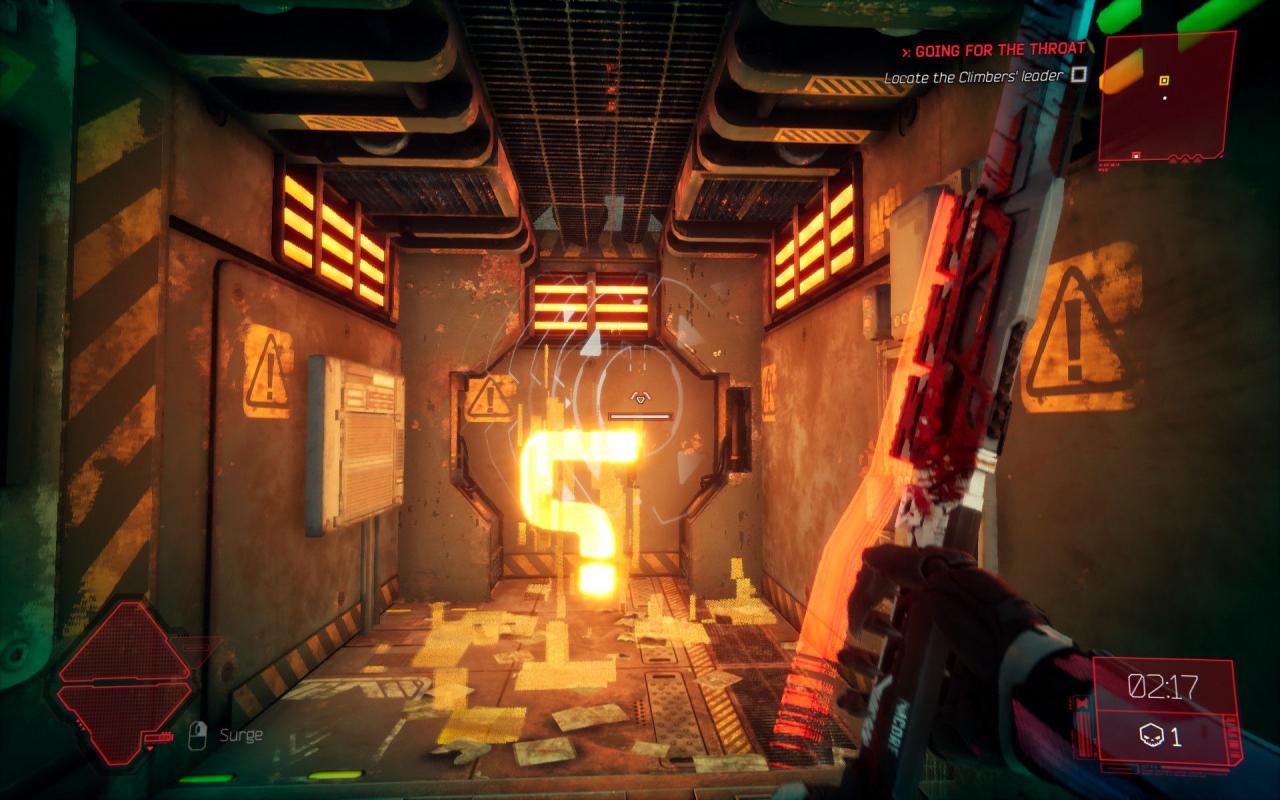
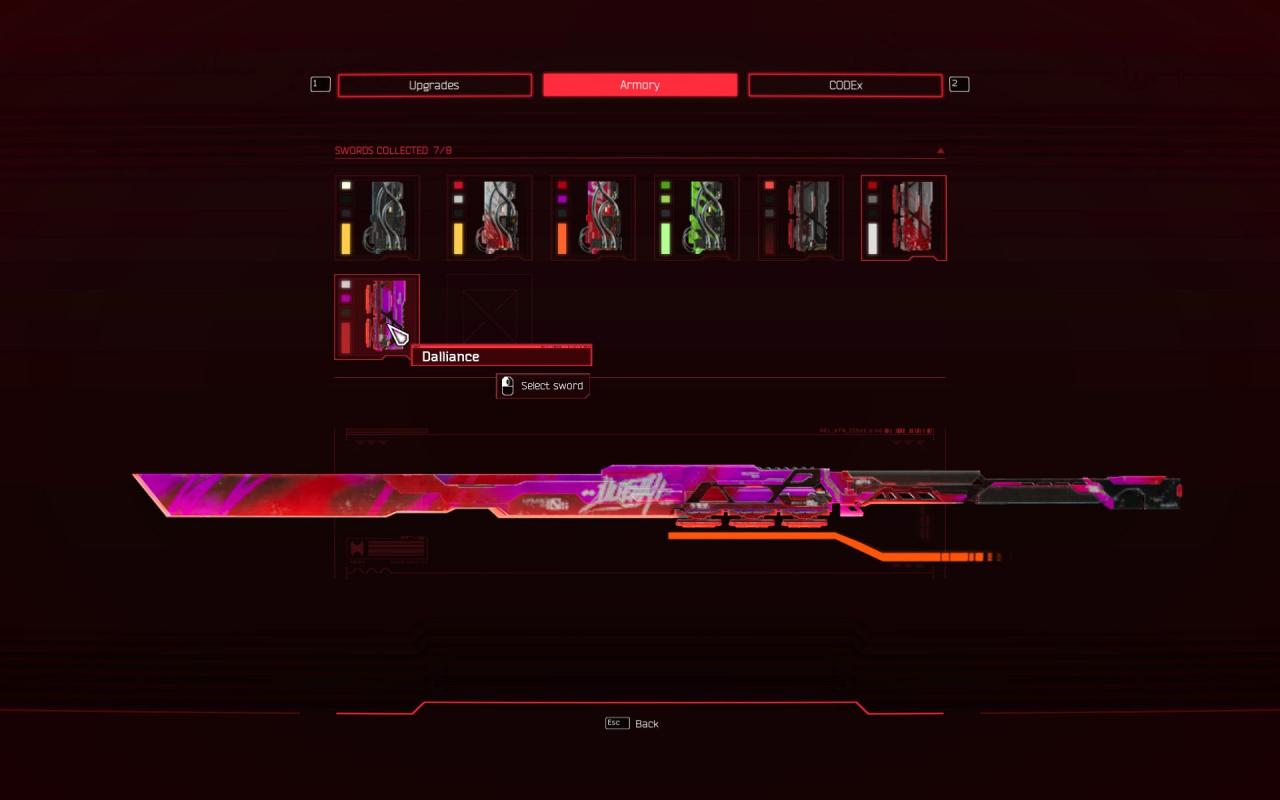
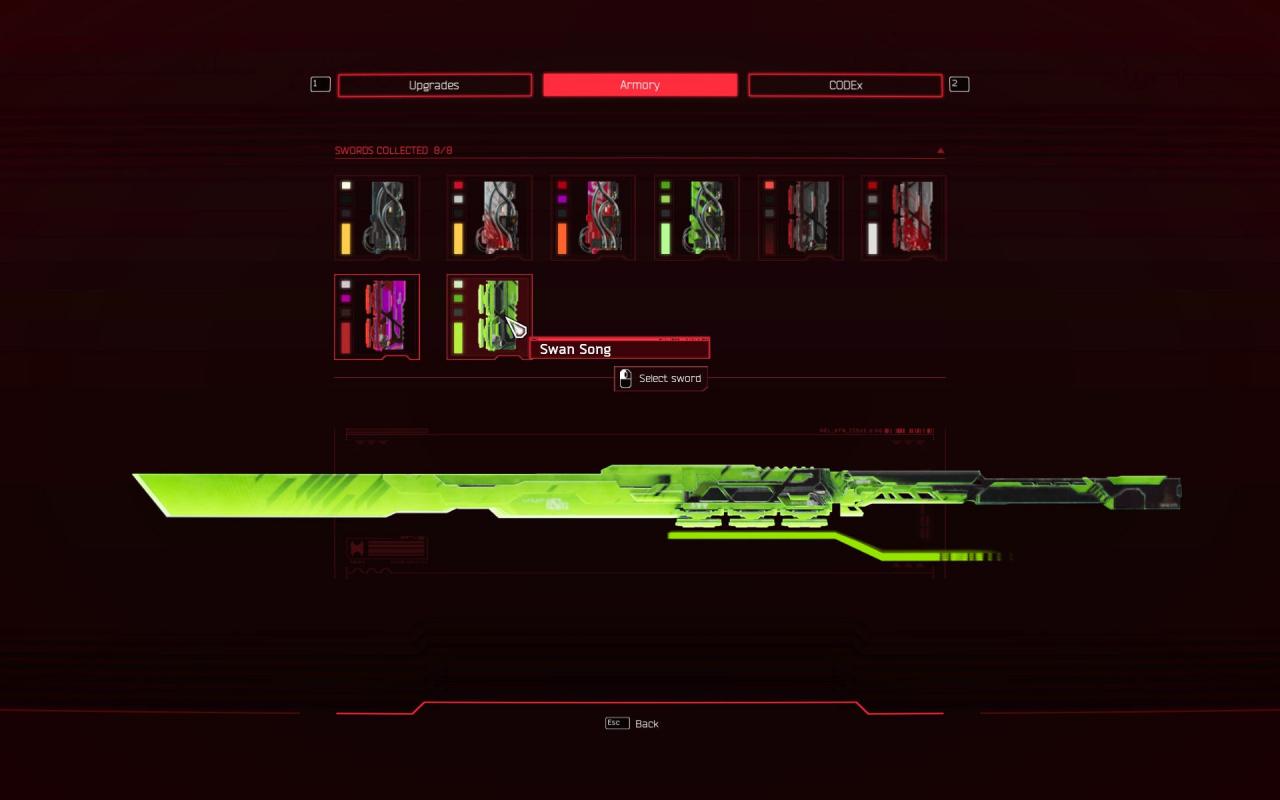
 bow chika wow wow
 ───────────────────────────────────────────────────────────────
Proceed as usual, clear the guys───────────────────────────────────────────────────────────────
Go here to see the collectible───────────────────────────────────────────────────────────────
It’s riiiiiight there. Now eliminate the climbers, kindly───────────────────────────────────────────────────────────────
after the coast is clear, go over there───────────────────────────────────────────────────────────────
bow chika wow wow───────────────────────────────────────────────────────────────
Level 5: My Friend
Artifacts: 3
Audiologs: 0
Swords: 1
Audiologs: 0
Swords: 1
Artifact 8
───────────────────────────────────────────────────────────────
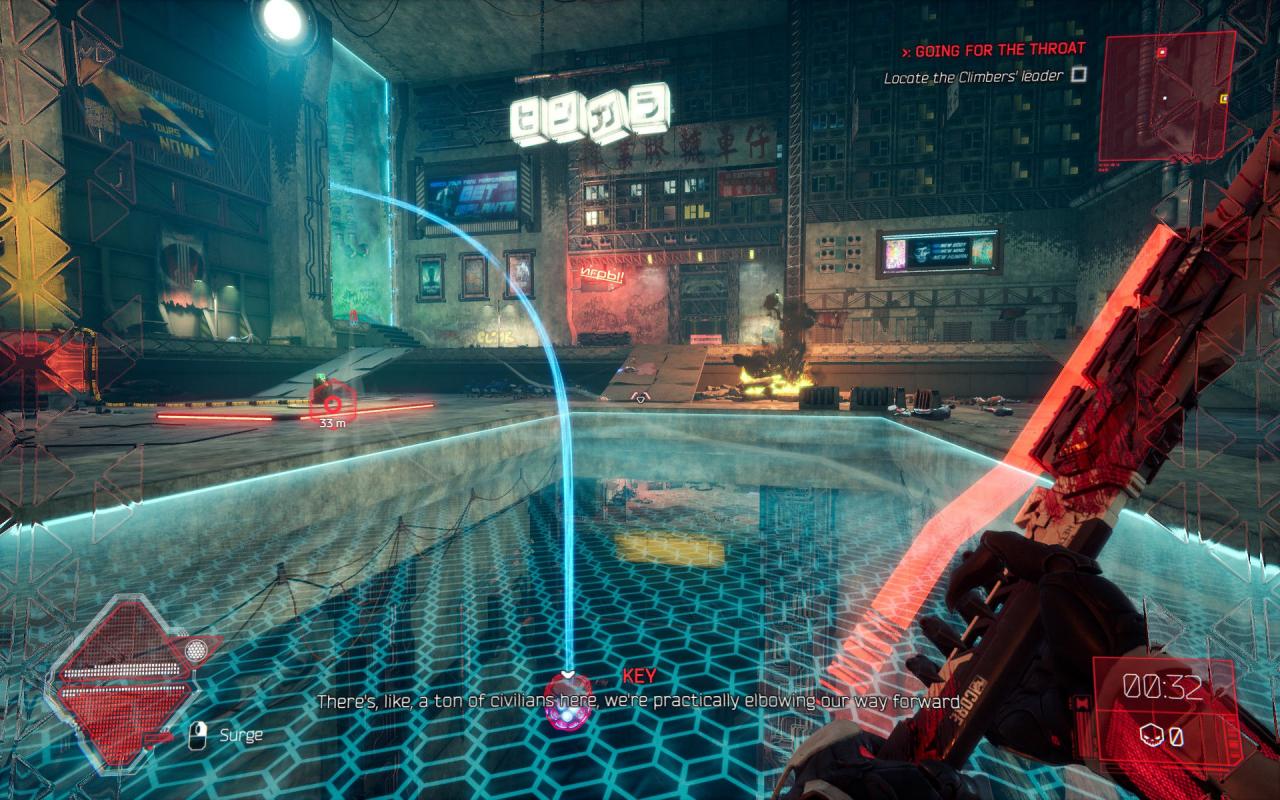 As you reach this room, proceed through the normal story route, until…
───────────────────────────────────────────────────────────────
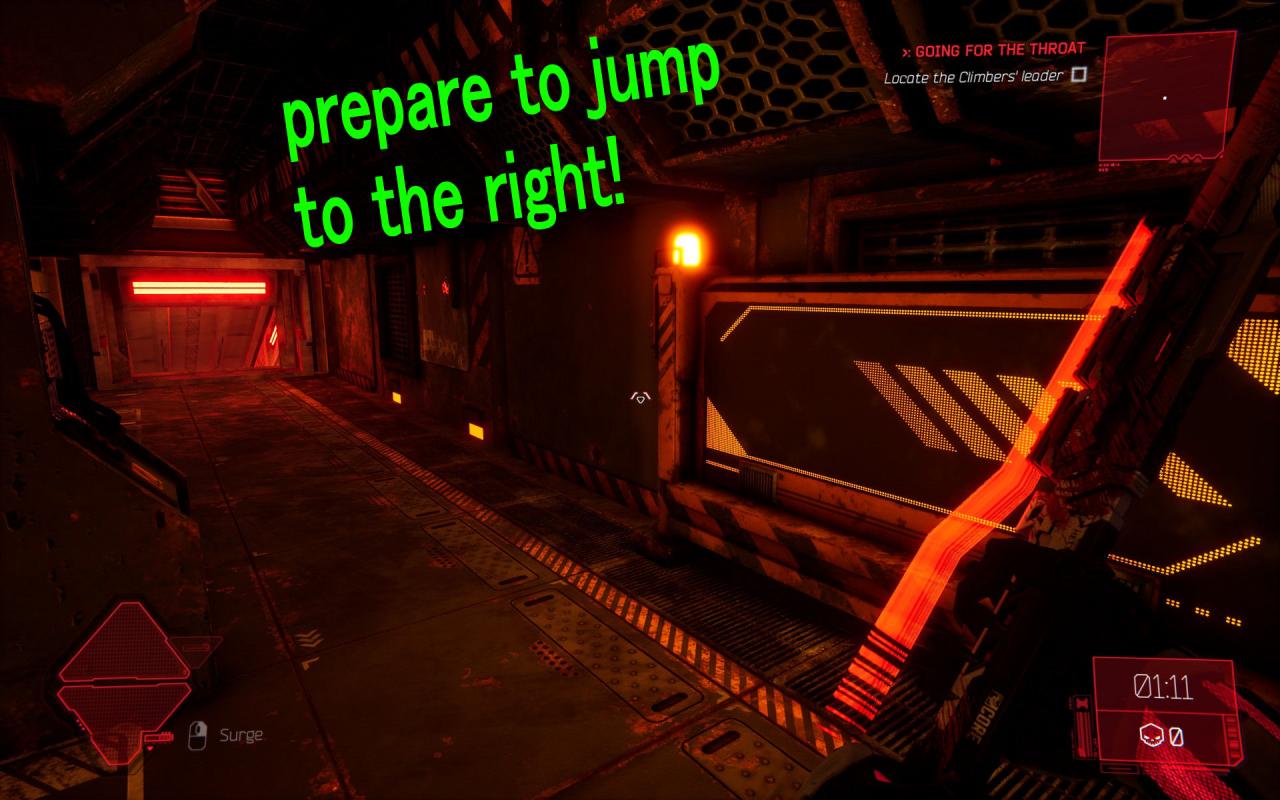 right here. Prepare to go right as you jump off
───────────────────────────────────────────────────────────────
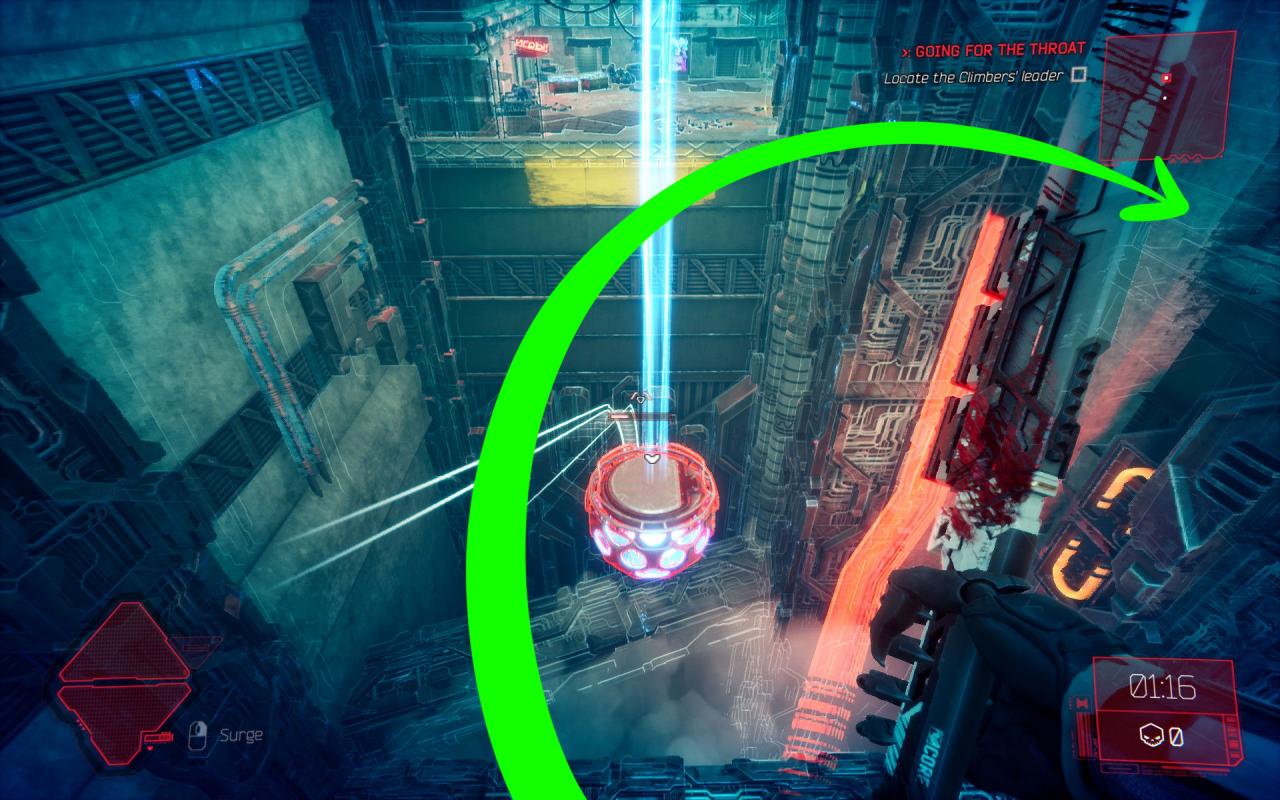 JUUUUMP and turn right
───────────────────────────────────────────────────────────────
 go into this area
───────────────────────────────────────────────────────────────
 keep going~
───────────────────────────────────────────────────────────────
 TADAA!
 ───────────────────────────────────────────────────────────────
As you reach this room, proceed through the normal story route, until…───────────────────────────────────────────────────────────────
right here. Prepare to go right as you jump off───────────────────────────────────────────────────────────────
JUUUUMP and turn right───────────────────────────────────────────────────────────────
go into this area───────────────────────────────────────────────────────────────
keep going~───────────────────────────────────────────────────────────────
TADAA!───────────────────────────────────────────────────────────────
Artifact 9
───────────────────────────────────────────────────────────────
 Go through this section as you would
───────────────────────────────────────────────────────────────
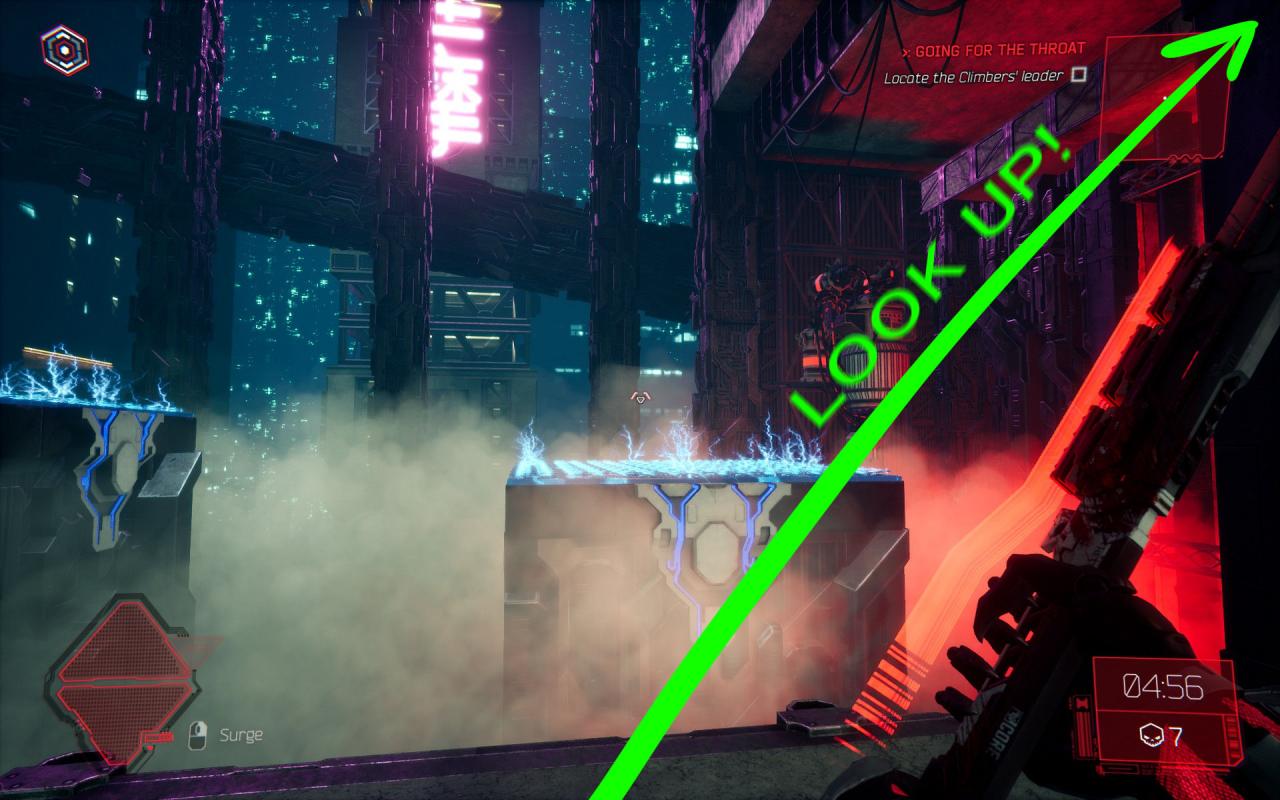 look up
───────────────────────────────────────────────────────────────
 go there
───────────────────────────────────────────────────────────────
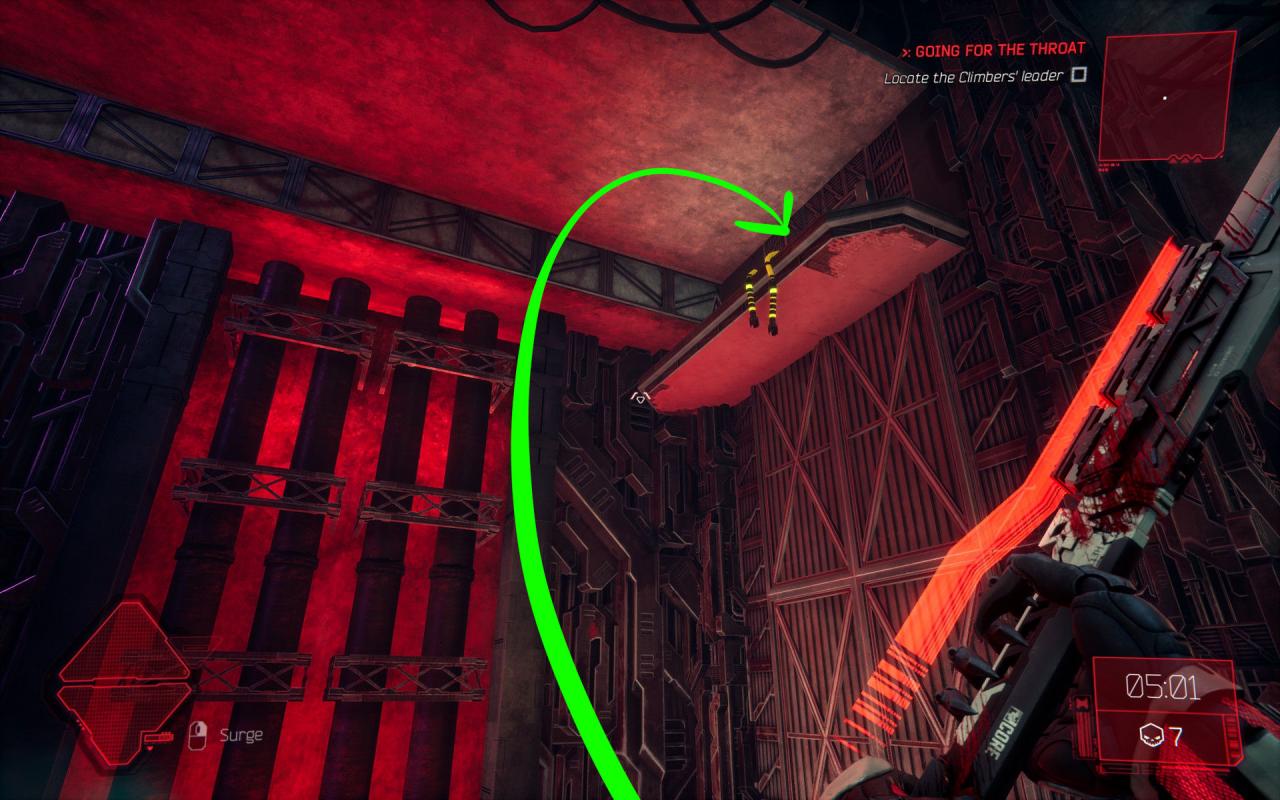
 right there
───────────────────────────────────────────────────────────────
 oh yes
───────────────────────────────────────────────────────────────
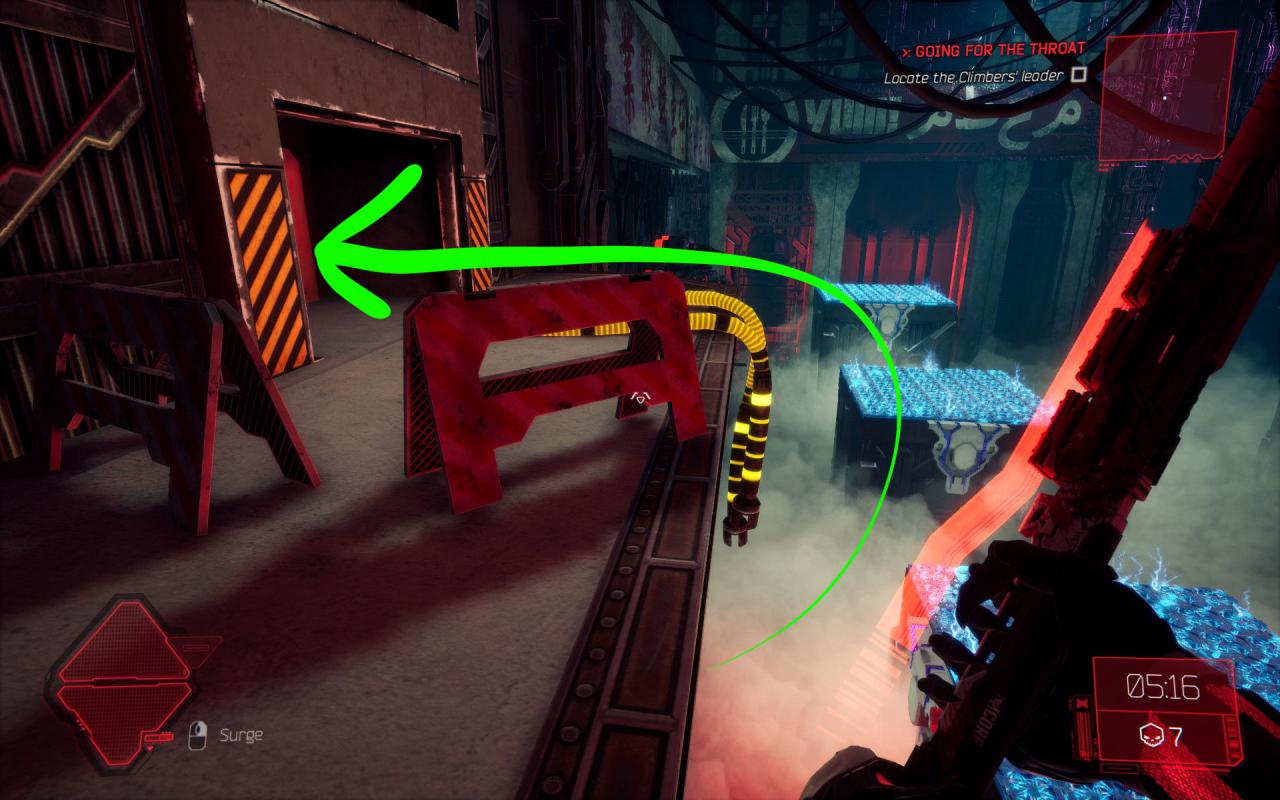
 proceed through the normal route, but turn around after you encounter some enemies, you’ll now see an open door
───────────────────────────────────────────────────────────────
 here here
 ───────────────────────────────────────────────────────────────
Go through this section as you would───────────────────────────────────────────────────────────────
look up───────────────────────────────────────────────────────────────
go there───────────────────────────────────────────────────────────────
right there───────────────────────────────────────────────────────────────
oh yes───────────────────────────────────────────────────────────────
proceed through the normal route, but turn around after you encounter some enemies, you’ll now see an open door───────────────────────────────────────────────────────────────
here here───────────────────────────────────────────────────────────────
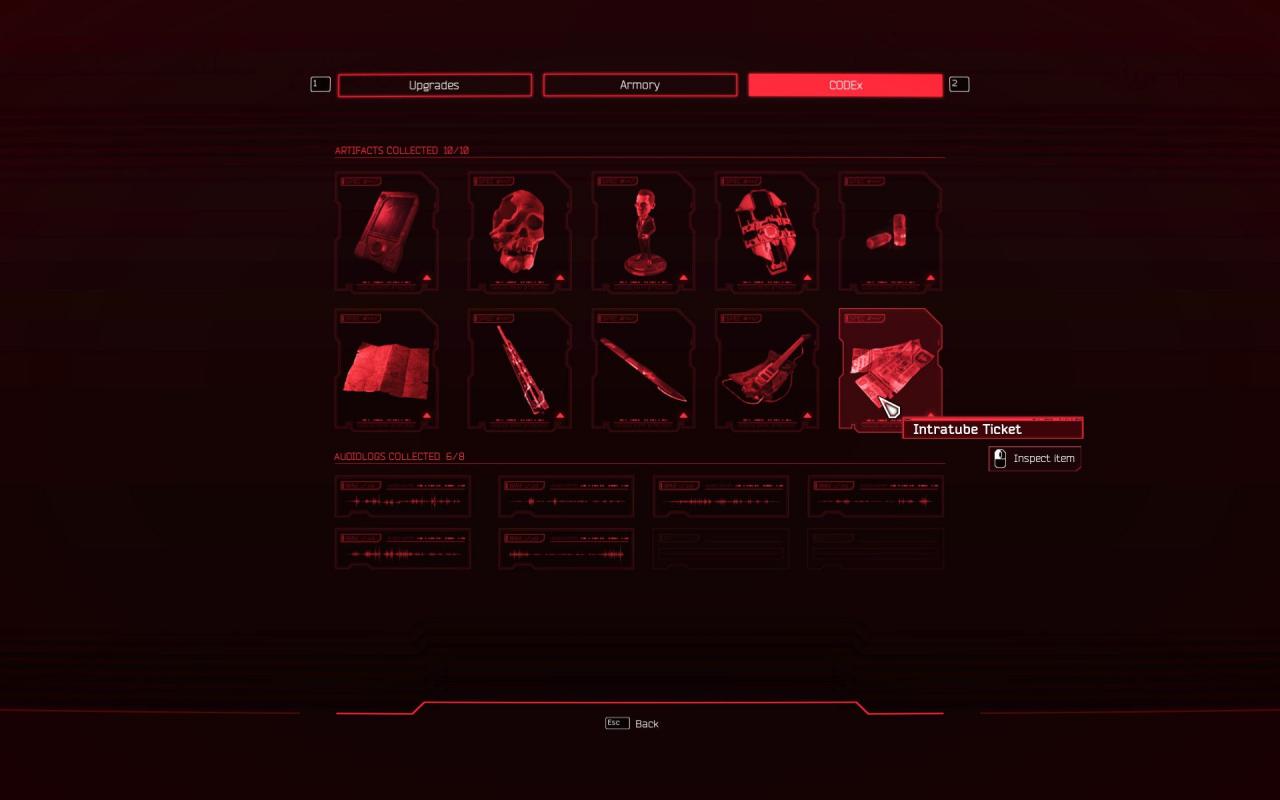
Artifact 10
───────────────────────────────────────────────────────────────
 As we approach this area, clear the area and proceed through the door
───────────────────────────────────────────────────────────────
 over here~
As we approach this area, clear the area and proceed through the door───────────────────────────────────────────────────────────────
over here~
───────────────────────────────────────────────────────────────
 into the vent we go
───────────────────────────────────────────────────────────────
 very good!
 ───────────────────────────────────────────────────────────────
into the vent we go───────────────────────────────────────────────────────────────
very good!───────────────────────────────────────────────────────────────
Sword 7
───────────────────────────────────────────────────────────────
 Go through this roomful of bad boys
───────────────────────────────────────────────────────────────
 go over there and jump
───────────────────────────────────────────────────────────────
 and land over there
───────────────────────────────────────────────────────────────
 gotcha!
 ───────────────────────────────────────────────────────────────
Go through this roomful of bad boys───────────────────────────────────────────────────────────────
go over there and jump───────────────────────────────────────────────────────────────
and land over there───────────────────────────────────────────────────────────────
gotcha!───────────────────────────────────────────────────────────────
Level 6: Beyond the Barricade
Artifacts: 0
Audiologs: 2
Swords: 1
Audiologs: 2
Swords: 1
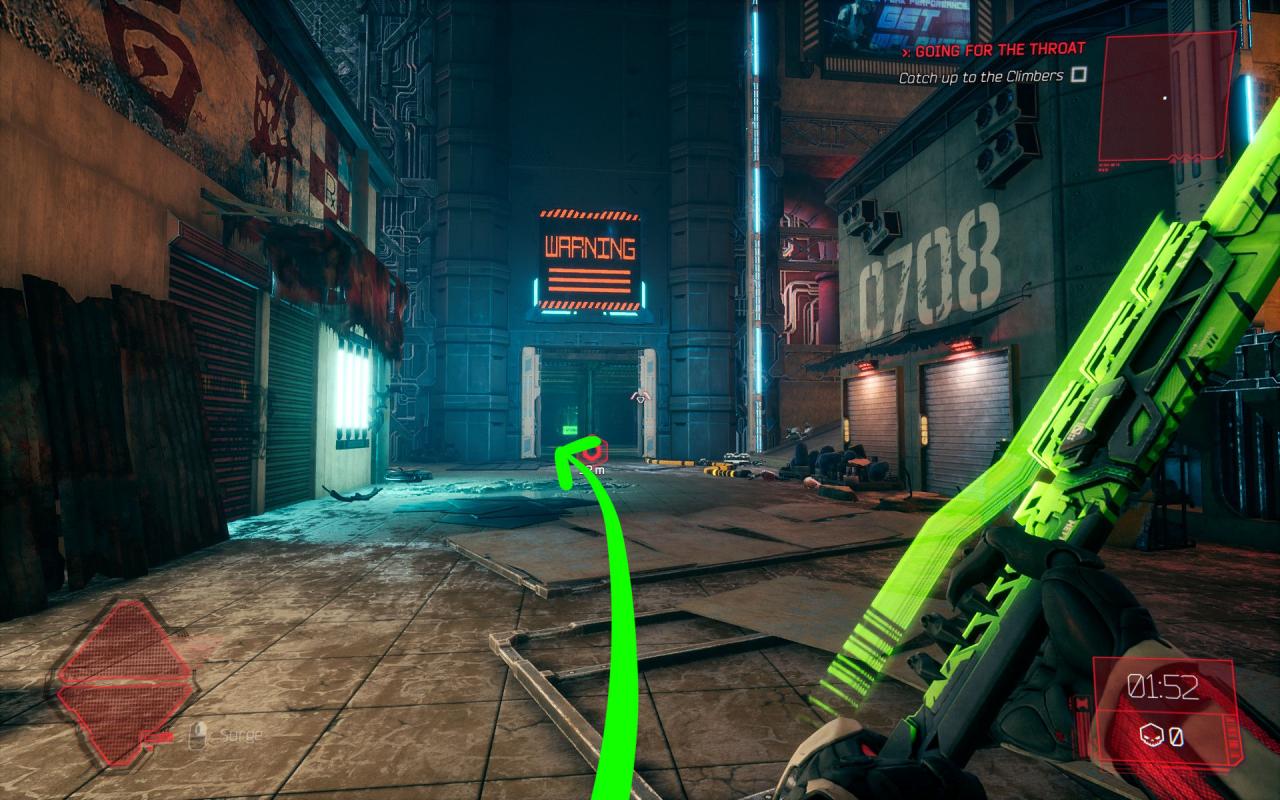
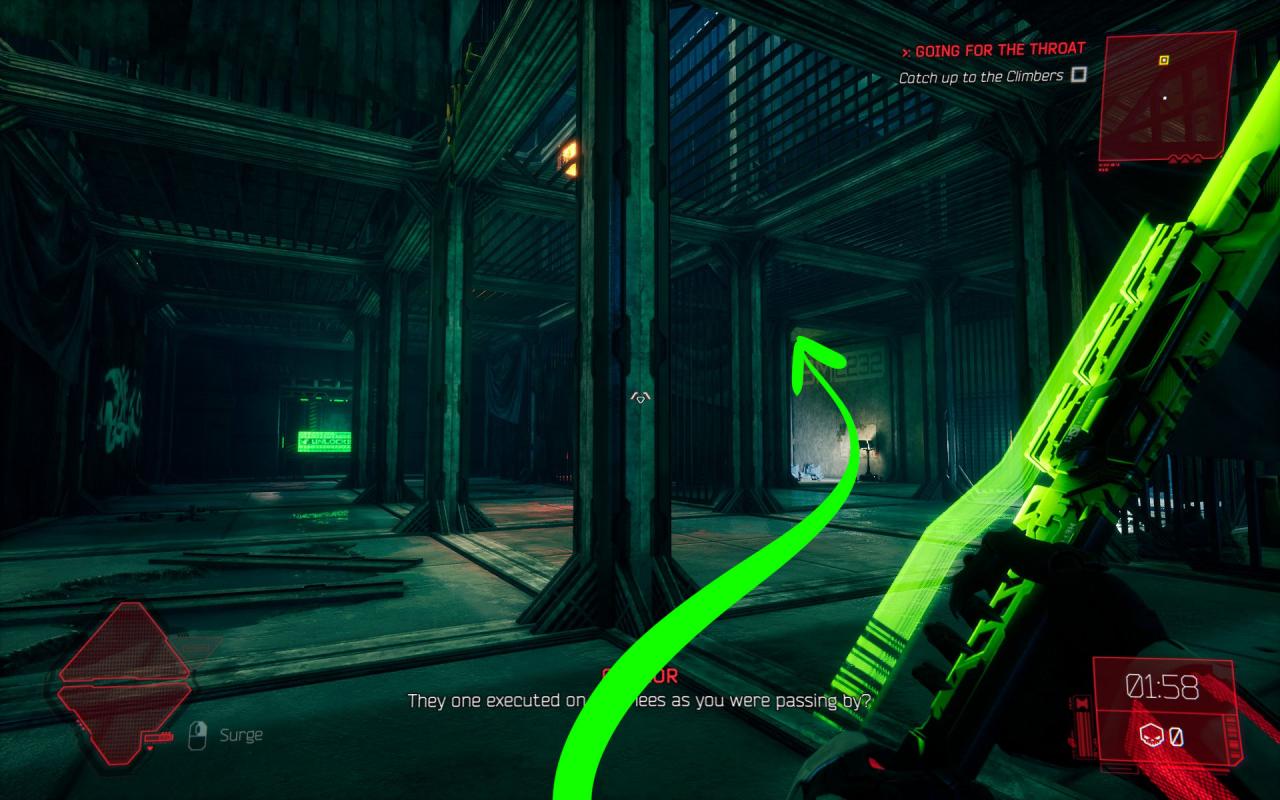
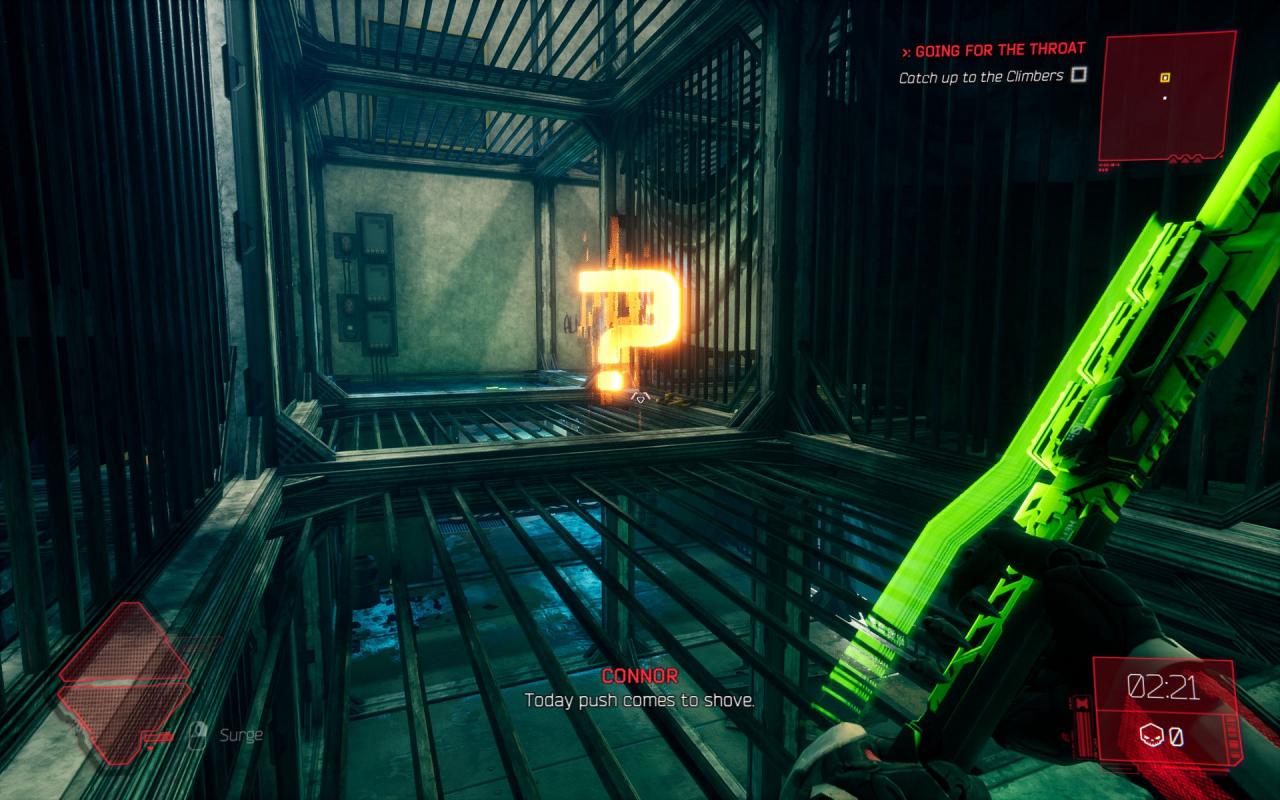
Sword 8
───────────────────────────────────────────────────────────────
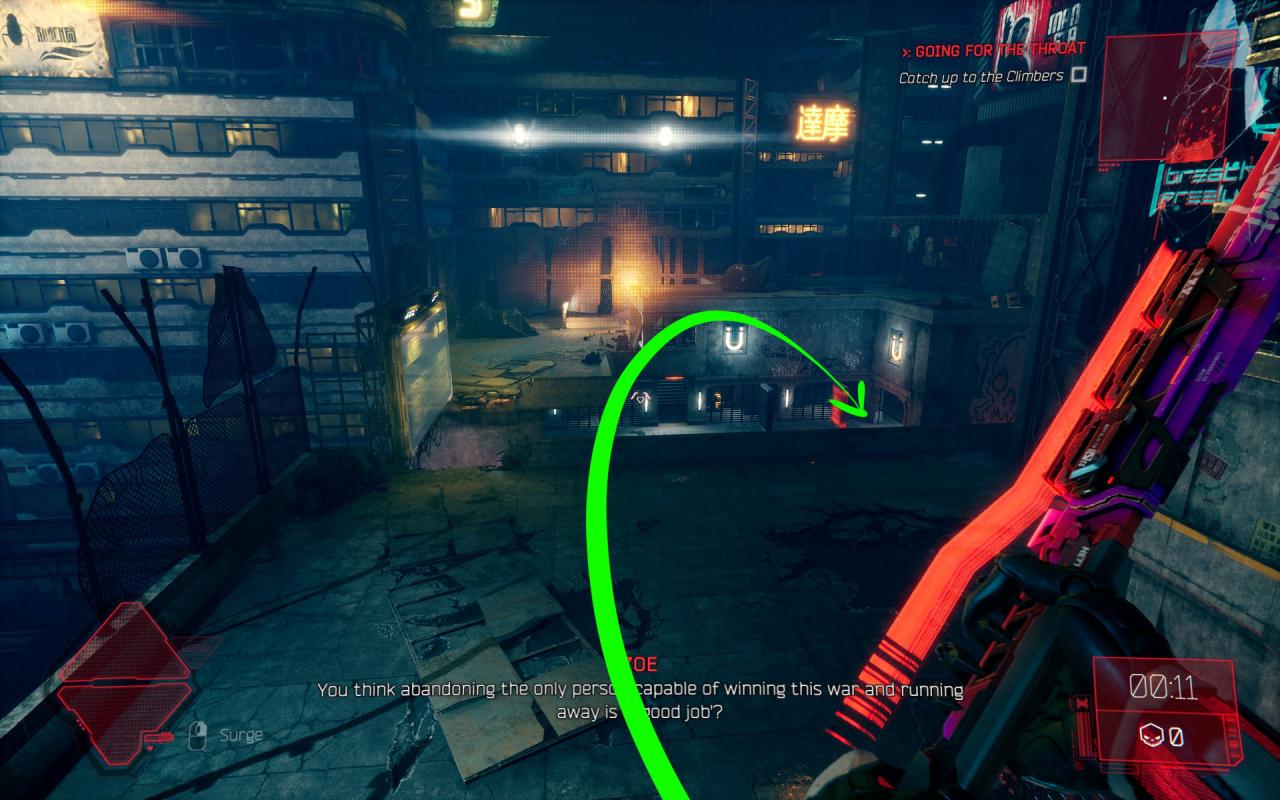 At the start of the level, as you approach this familiar territory, go over here
───────────────────────────────────────────────────────────────
 go under there and you’ve basically found it now
 ───────────────────────────────────────────────────────────────
At the start of the level, as you approach this familiar territory, go over here───────────────────────────────────────────────────────────────
go under there and you’ve basically found it now───────────────────────────────────────────────────────────────
Audiolog 7
───────────────────────────────────────────────────────────────
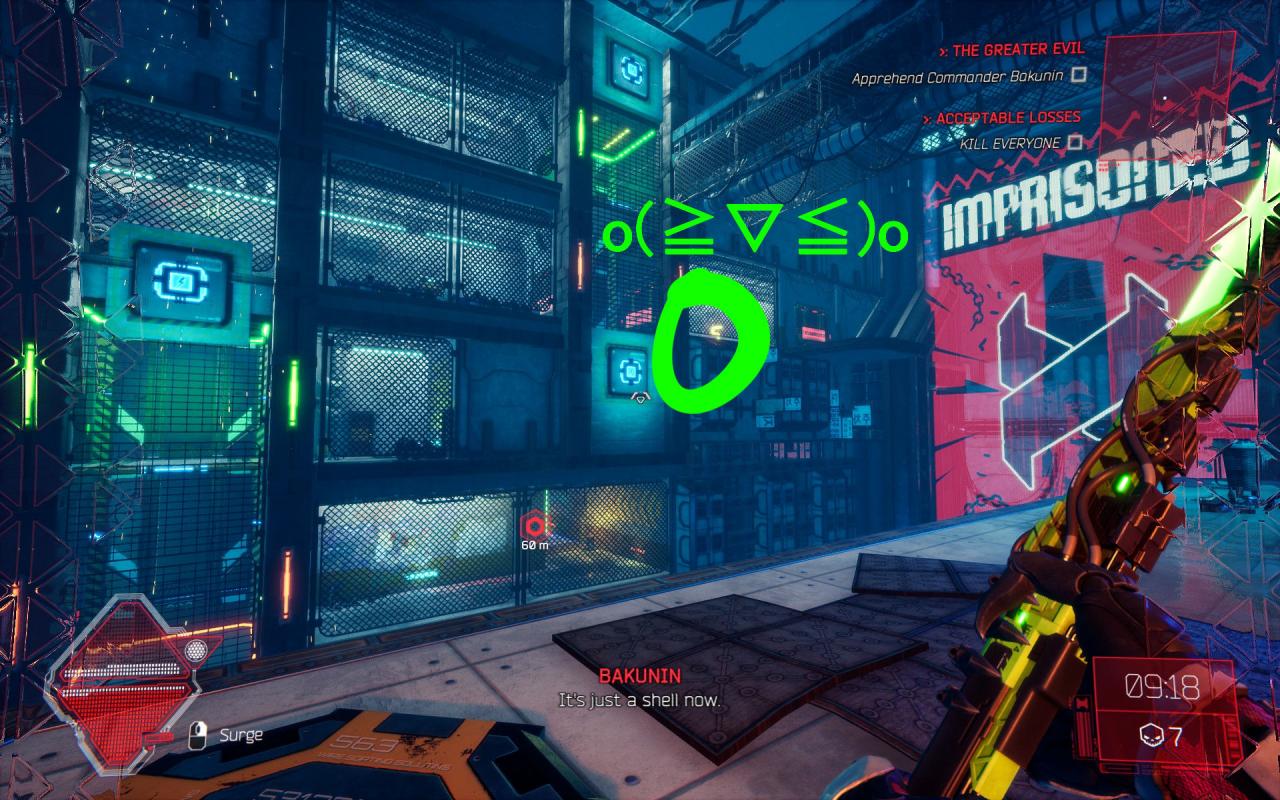
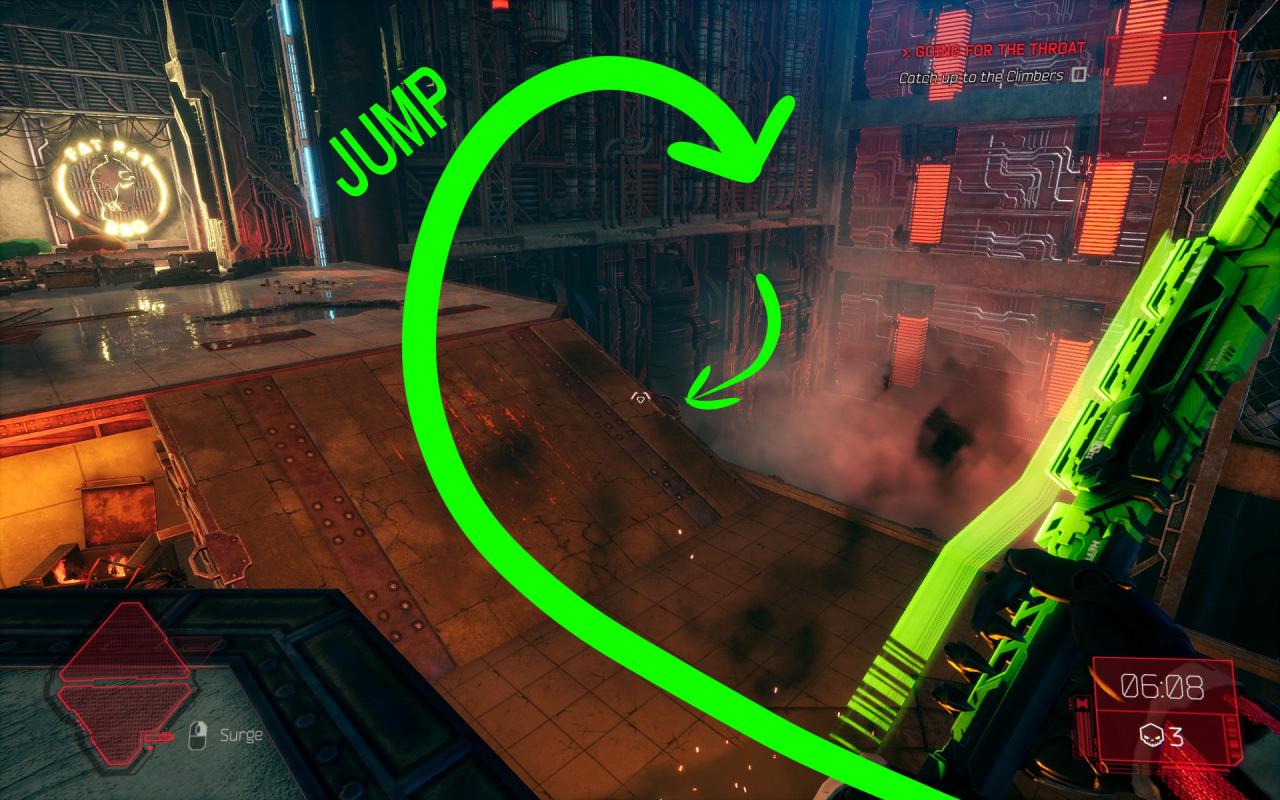
 When you reach this place, you might notice that the collectible is right there on the right. Ignore it for now, and proceed to eliminate the guys in the next room
───────────────────────────────────────────────────────────────
 go forward into the room with the guys (they’re dead already) and turn right
───────────────────────────────────────────────────────────────
 jump and prepare to leap as you turn around
───────────────────────────────────────────────────────────────
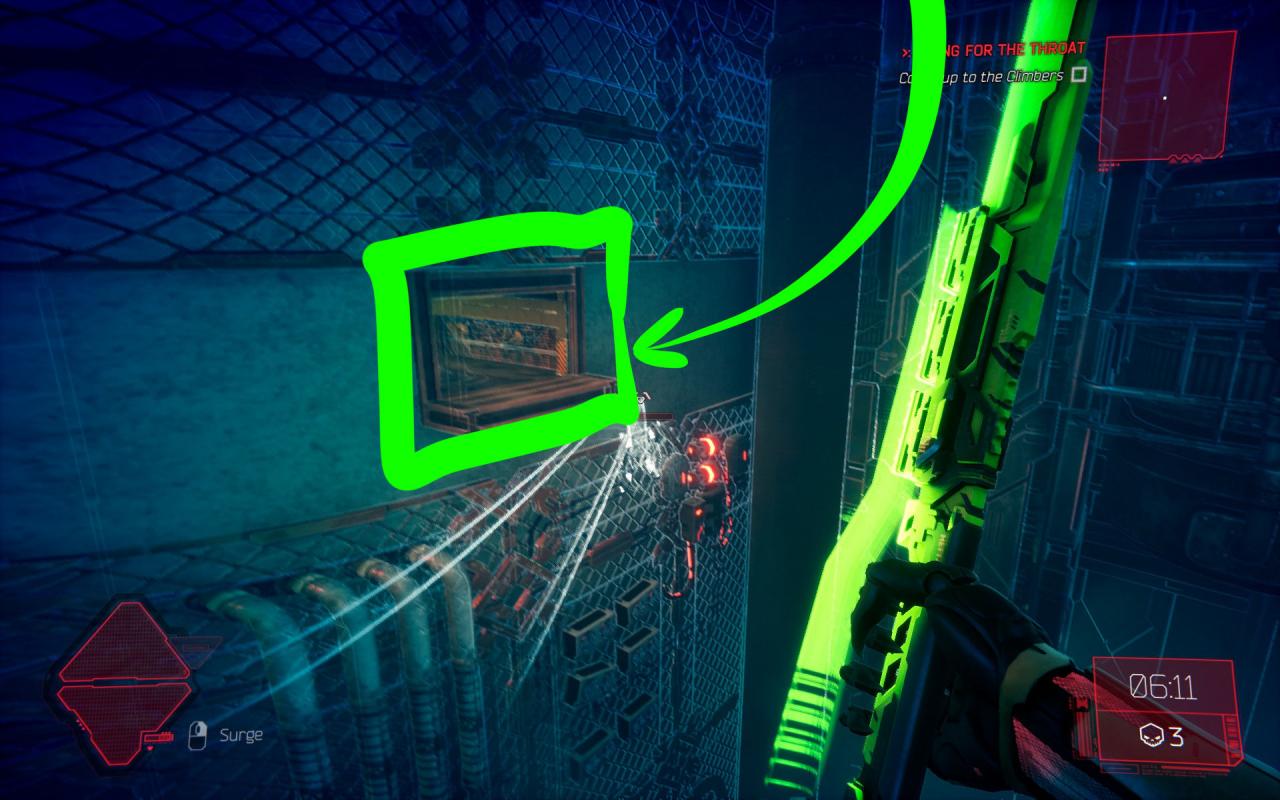 leap over here and enjoy this funky trial
───────────────────────────────────────────────────────────────
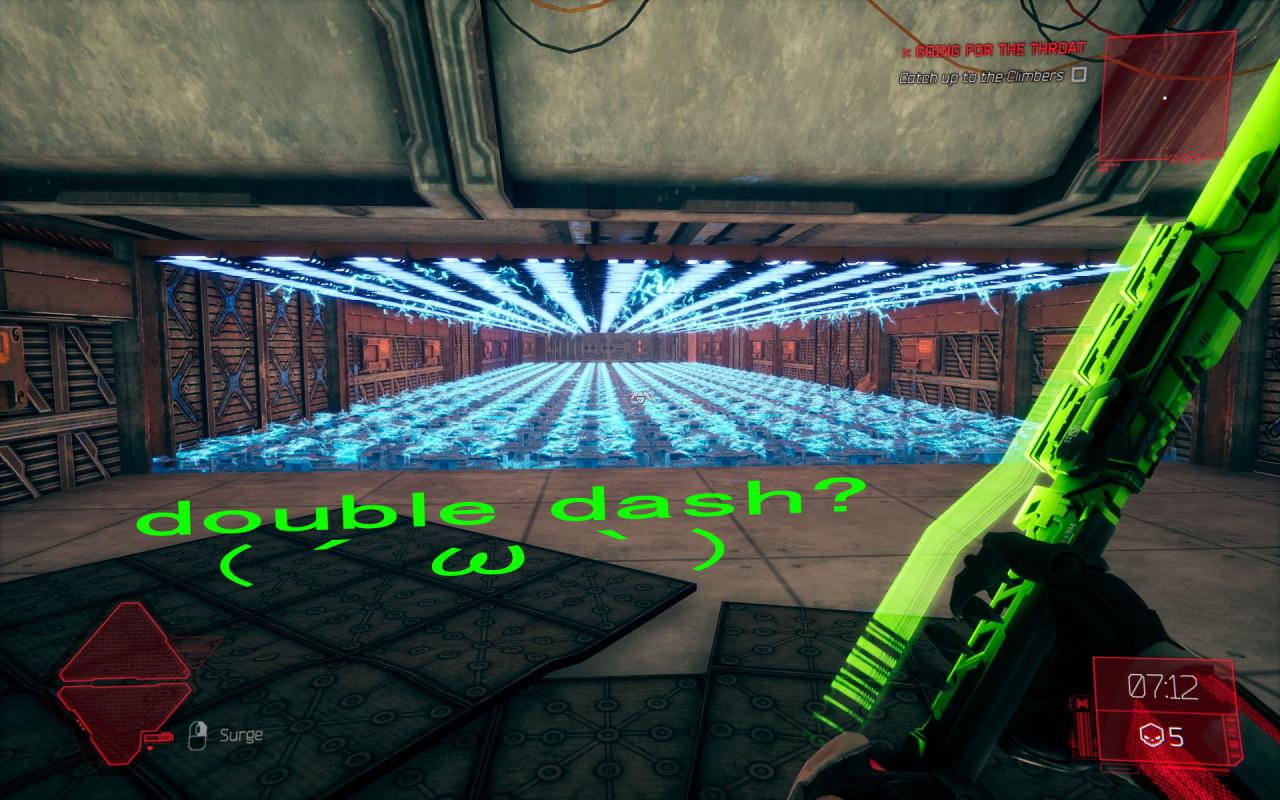 a double dash might be necessary…
───────────────────────────────────────────────────────────────
 and here it is!
 ───────────────────────────────────────────────────────────────
When you reach this place, you might notice that the collectible is right there on the right. Ignore it for now, and proceed to eliminate the guys in the next room───────────────────────────────────────────────────────────────
go forward into the room with the guys (they’re dead already) and turn right───────────────────────────────────────────────────────────────
jump and prepare to leap as you turn around───────────────────────────────────────────────────────────────
leap over here and enjoy this funky trial───────────────────────────────────────────────────────────────
a double dash might be necessary…───────────────────────────────────────────────────────────────
and here it is!───────────────────────────────────────────────────────────────
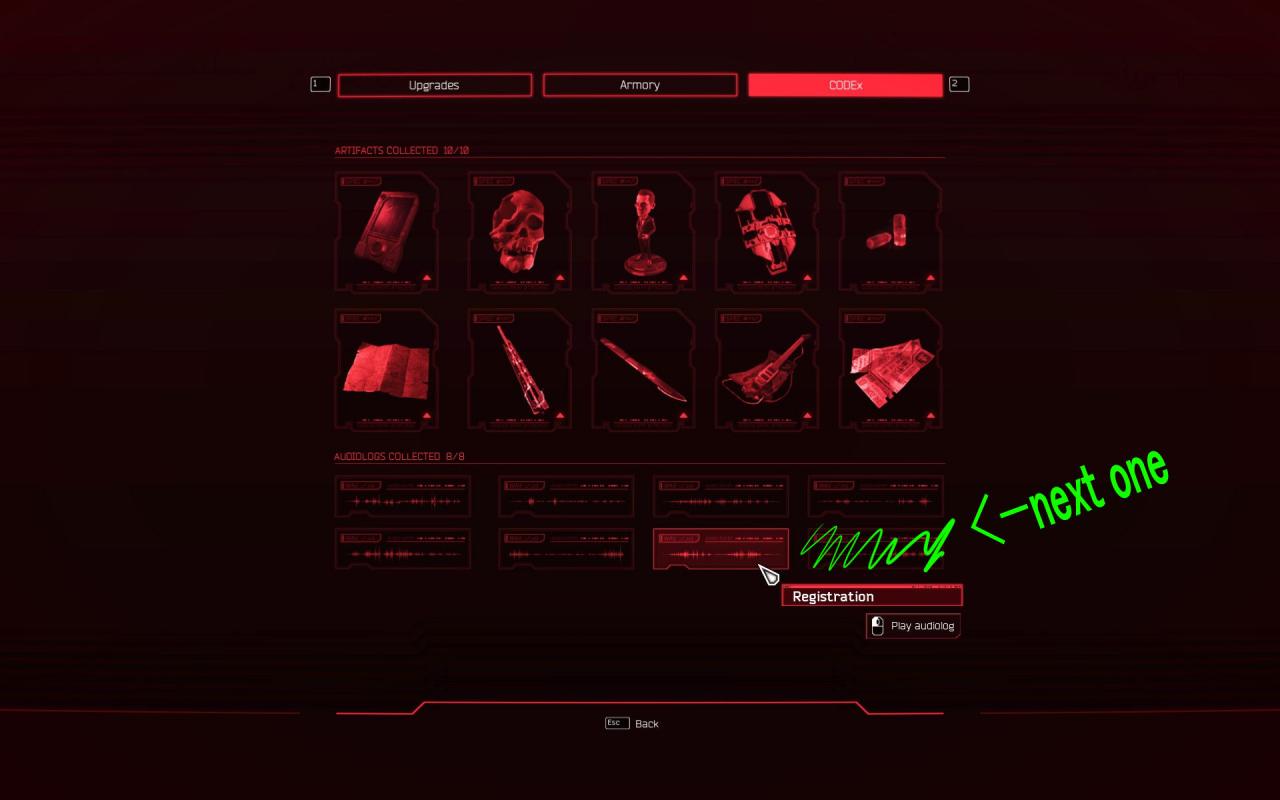
Audiolog 8
───────────────────────────────────────────────────────────────
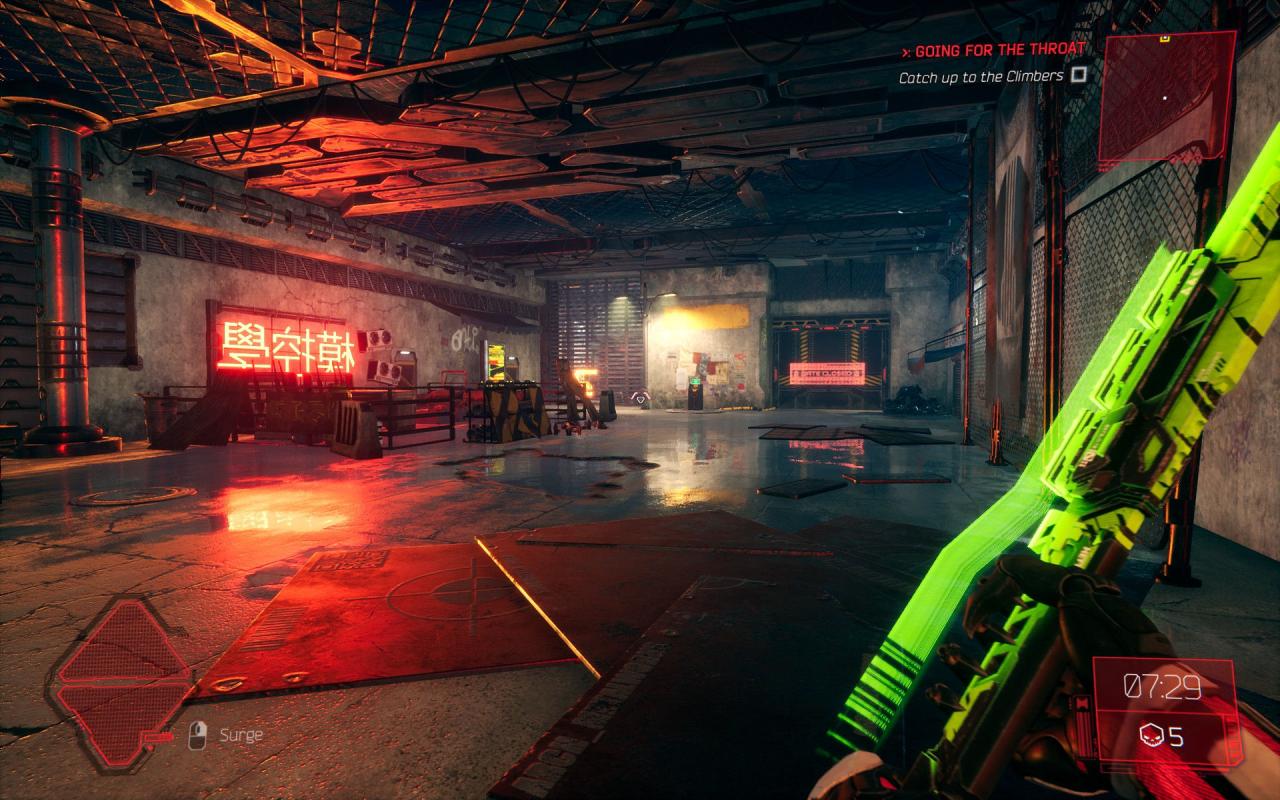
 Proceed to the area with cells and shiz
───────────────────────────────────────────────────────────────
 just go up there and you’ll get it eventually as you fumble around~
───────────────────────────────────────────────────────────────
 very nice
Proceed to the area with cells and shiz───────────────────────────────────────────────────────────────
just go up there and you’ll get it eventually as you fumble around~───────────────────────────────────────────────────────────────
very nice
Thanks to Neptor for his great guide, all credit to his effort. you can also read the original guide from Steam Community. enjoy the game.
Related Posts:
- Ghostrunner: All Collectible Items
- Ghostrunner: All Collectibles (Level 1-15)
- Ghostrunner: Enemy Guide (How to Combat)
- Ghostrunner: All Puzzles Guide
- Ghostrunner: How to Deal with the Bosses