
A comprehensive guide covering:
* How to play the game
* Best strategies to use
* Weapon damage guide
* Details about all enemies
* Upgrade descriptions
Intro and Basic Controls
Success comes down to understanding your characters strengths and weaknesses, and augmenting them with your movement and upgrade choices.
I believe the game feels the best when you discover the mechanics on your own, since it makes you feel really smart and satisfied.
However, I will write this guide for anyone who is struggling to beat it or feel that the game is unfair. Believe me, while there is a lot of RNG, there is almost always a way to escape or win in a situation. Every decision matters.
The info in this section is the same info in the tutorial, but with some helpful gifs to demonstrate them.

Use WASD / Arrow Keys to move (or DPAD / LS on Gamepads).
Consider avoiding using an analog stick to avoid mis-inputs in tense situations!

Use E, Q, or T to SKIP your turn (or LB, RB, or Y on Gamepad).
This is the most overlooked mechanic in the game that most players forget.
Reasons to Skip Your Turn:
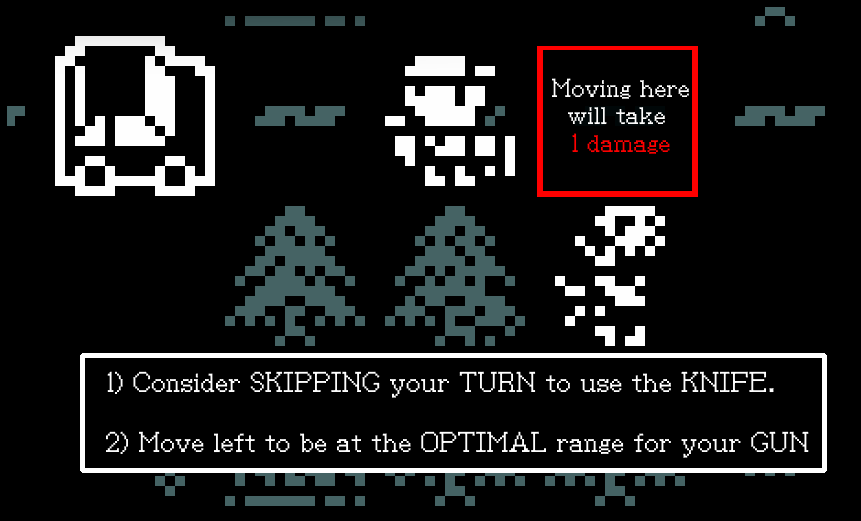
- Get an enemy close so you can use your knife, without taking damage
- Let an enemy walk into your line of sight to fire your gun
- Get an enemy to walk past you undetected, or simply observe where they are moving
(I think my tutorial isn’t the greatest at teaching it, but I hope this guide reminded you to use it!!)
Walk into enemies to attack with your knife, dealing 1 damage. Be careful using the knife, some enemies have up to 4 Health Points (max).
Use Right Click / Spacebar (or Left Trigger) to Aim the gun.
Use Left Click / F (or Right Trigger) to Fire.
You have limited ammo and cannot reload without the Ammo Item. So, be very careful when you decide to use your gun.
Your overall objective is to Survive 28 Days to win the game.
Each day, you must find a Gas Can and return back to the car to leave the current level.

Movement and Skipping your Turn
 There may be times where you take damage when you could have avoided it.
This usually occurs because:
Moved too fast, and walked into an enemy’s attack range
- Remember that the game is turn-based, and enemies only move when you move. Take your time if you need to, there is no rush! (unless you are speed running)
- Consider using the Snapped Camera mode if you want to move as fast as possible without losing visual information
Not using the Skip Turn mechanic.
- If you need to use the knife, skip your turn so enemies walk into your knife range.

If there is an enemy chasing you, be careful if you decide to let them follow you. Often times this leads to getting ambushed, which is almost always certain death!
Try to defeat mutants that get this close, unless you plan on running them over with the Car!
Dead ends will quickly be the end of a run if you are not careful with your resources.
Generally, the only reason you need to approach a dead end is when it has a Gas Can or an Item Box. If you can, find a way to open the item box without committing to the dead end to see what it contains.
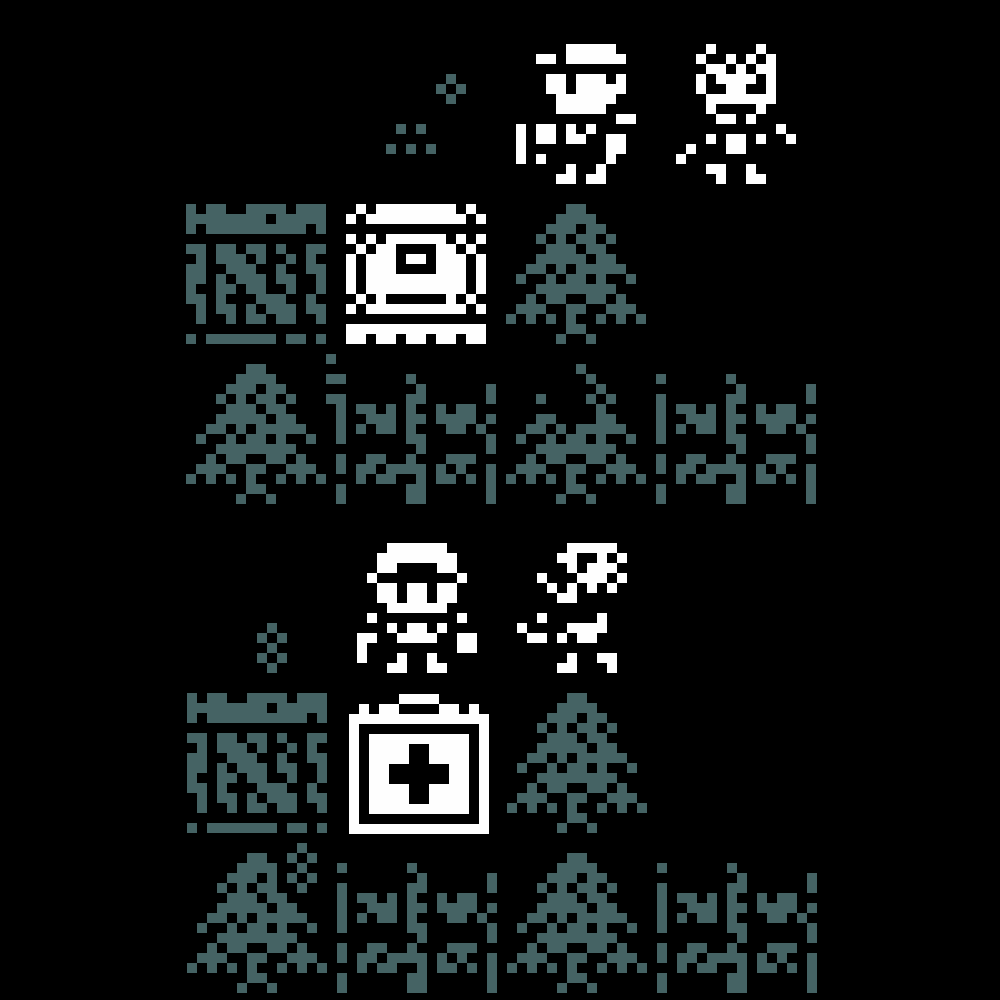
In this scenario, the box is in a small dead end. Open it to see what is in the box before you decide how to defeat the zombie.
Therefore, you should use the Knife to defeat the Zombie, since you can heal immediately after.
But what if you find yourself in a large dead end hallway, or an essential item like the Gas can is in a dead end? This is where resource management becomes important!
There is one final way to avoid getting stuck in a dead end, which is somewhat of a spoiler. If you are the type of person that prefers to discover mechanics on your own, do not read the following:
If you still have bullets in your gun, you can shoot a wall to destroy it, and escape the dead end!
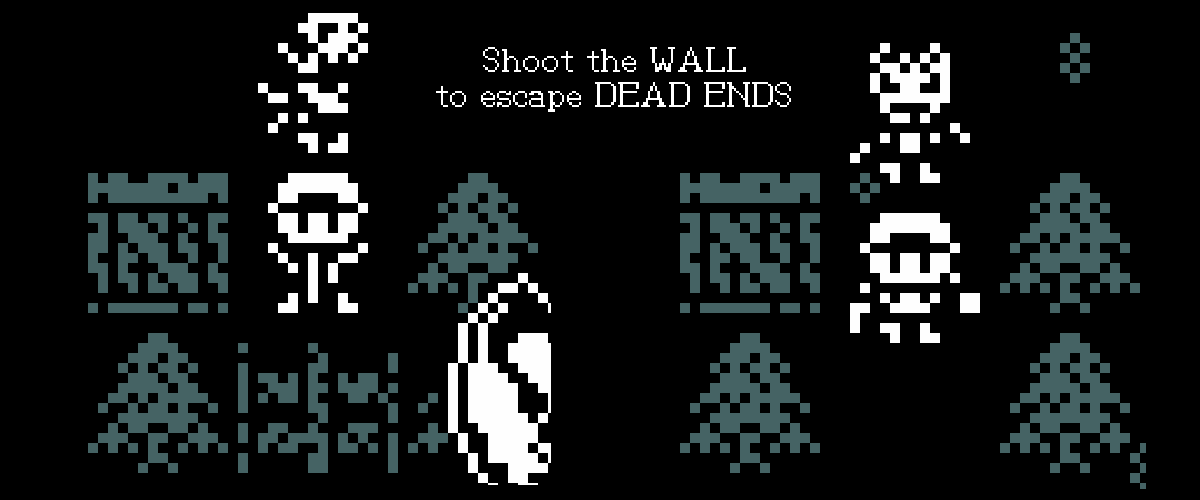
However, note that this strategy will damage you, so make sure you have at least 2 HP left.
Advanced Weapon Mechanics
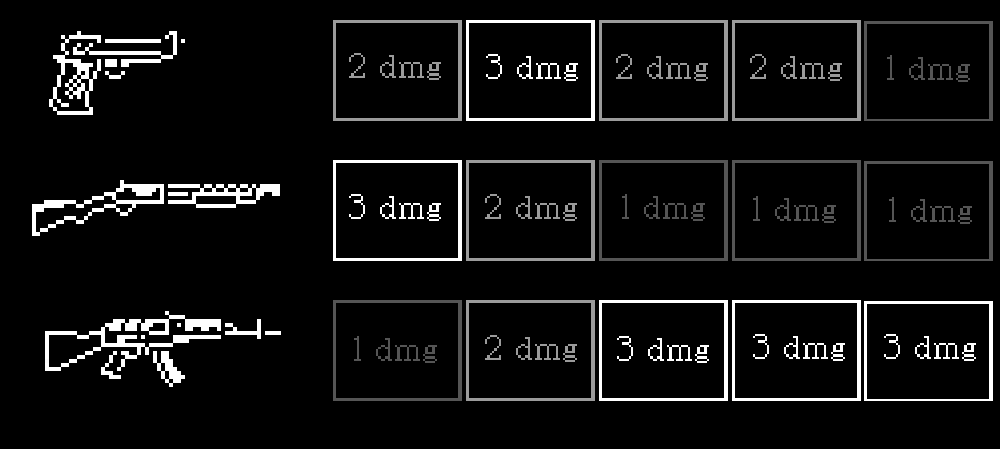
Therefore, you always want to be tactically positioning yourself and other enemies do deal your weapon’s optimal amount of damage!
For the Survivor, the Pistol does the following damages:
Range 1 – 2 Damage
Range 2 – 3 Damage
Range 3 – 2 Damage
Range 4 – 2 Damage
Range 5 – 1 Damage
Range 1 – 3 Damage
Range 2 – 2 Damage
Range 3 – 1 Damage
Range 4 – 1 Damage
Range 5 – 1 Damage
Range 1 – 1 Damage
Range 2 – 2 Damage
Range 3 – 3 Damage
Range 4 – 3 Damage
Range 5 – 3 Damage
Enemies
Consider this section a spoiler, since it is more fun to discover how to defeat the enemies on your own.

Health Points: 1 HP
Aggro Range: Low
Appears in: All Biomes
Bugs appear early in the game, but start to appear less often the more days you survive.
Tactics:
- Always attack using the knife. Don’t waste ammo on this dudes.
- Or combo using the Pierce upgrade

Health Points: 3 HP
Aggro Range: Medium
Appears in: All Biomes
Zombies begin to appear more often the longer you survive
Tactics:
- Shoot them at the optimal range of your weapon
- Shoot them at the less optimal range (2 damage) and follow up with a Knife Attack
- Attack with the Knife and lose 2 HP
- Attack using the Knife upgrade and lose 1 HP
- If you upgrade your weapon’s less optimal range (2 damage –> 3 damage), you can defeat them with a single bullet

Health Points: 3 HP
Aggro Range: Medium
Appears in: Desert, Graveyard, Village
Special Effect: When this enemy takes 1 damage, it spawns a Bug into the level
Tactics:
- Shoot them at the optimal range of your weapon
- Avoid attacking them with your knife, which may cause an Ambush
- Attack using the Knife upgrade and lose 1 HP
- If you upgrade your weapon’s less optimal range (2 damage –> 3 damage), you can defeat them with a single bullet
Health Points: 2 HP
Aggro Range: Medium
Appears in: Swamp, Sewers, Hospital, City
Special Effect: When this mutant dies, it explodes dealing 1 damage to all adjacent tiles. Also breaks walls.
Tactics:
- Shoot them at either the optimal or less optimal range of your gun (must deal at least 2 damage)
- Avoid attacking them with your knife, which can lose you up to 2 HP
- Can die in a single hit with the upgraded knife, but you lose 1 HP
- Will not damage you if you have the Knockback upgrade, which will push the enemy 1 space away from you before they explode
- Be careful not to put yourself in an ambush if they blow up too many walls

Health Points: 4 HP
Aggro Range: Far
Appears in: Temple, Tundra, Forest, City
Special Effect: When this enemy attacks, they also knock you back
Tactics:
- The deadliest enemy in the game, they are a hard counter to players that do not utilize the Skip Turn mechanic
- Shoot the enemy at the optimal range (3 damage) and follow up with a Knife attack (1 damage)
- If you attack with the knife, you will lost 3 HP to defeat the Imp
- With the knife upgrade, you can defeat them and lose 2 HP
- If you upgrade your weapon’s optimal range (3 damage –> 4 damage), you can defeat them with a single bullet
Upgrades Explained
Please note that the upgrades are intentionally without a description. The game wants you to experiment with your upgrade choices and learn how they are used on your own, increasing the satisfaction of using them well!
Therefore, this section might be considered as a gameplay spoiler.
To get an upgrade, you must first find the Upgrade Wrench inside an Item Box. The wrench will spawn randomly at some point during the week, but it is guaranteed to drop before the end of the week.
Upgrade Spawning Chance Spoiler:
The wrench increases in chance to spawn the closer you get to the final day of the week.
If you avoid opening item boxes for 6 days and only open them on the final day, you are still guaranteed to get an Upgrade Wrench.
Therefore, you could avoid opening item boxes during a speed run until the last day should you choose!
The following section details what all the upgrades do in the game.
———————————————
Increase Ammo Capacity +1 and Reload the Magazine

———————————————
Increase Max Health +1 and Heal the player to Max Health
(does not count as a heal in end-game stats)

———————————————
Increase the damage +1 at Ranges 1 and 2.
———————————————
Increase the damage +1 at Ranges 3, 4, and 5.

———————————————
Shoot through multiple enemies with one bullet

———————————————
When shooting an enemy with the gun, push them back by 1 tile

———————————————
Increase the damage of the Knife by +1
———————————————
Walk into a wall twice to break it with the Sledgehammer. Can be used infinitely.

———————————————
Increase the Field of View of the player

———————————————
When you have 0 HP left, heal to full health instead of dying. Can only be used once.

Thanks to acherontigames for his great guide, all credit to his effort. you can also read the original guide from Steam Community. Enjoy the game.