
Your guide to unlocking the encryption keys of the Samaritain.
Introduction
This guide focuses on completing protocols and activating Wizard Mode, which generally should be thought of as the aim of Xenotilt.
The guide is now complete and as of Sep 2023, is accurate and correct to the best of my knowledge. Any and all feedback, typo fixes, suggestions, and clarifications are welcome. Also please let me know if any pictures are missing or wrong.
Good luck P.A.L.A.D.I.N!
Table summary
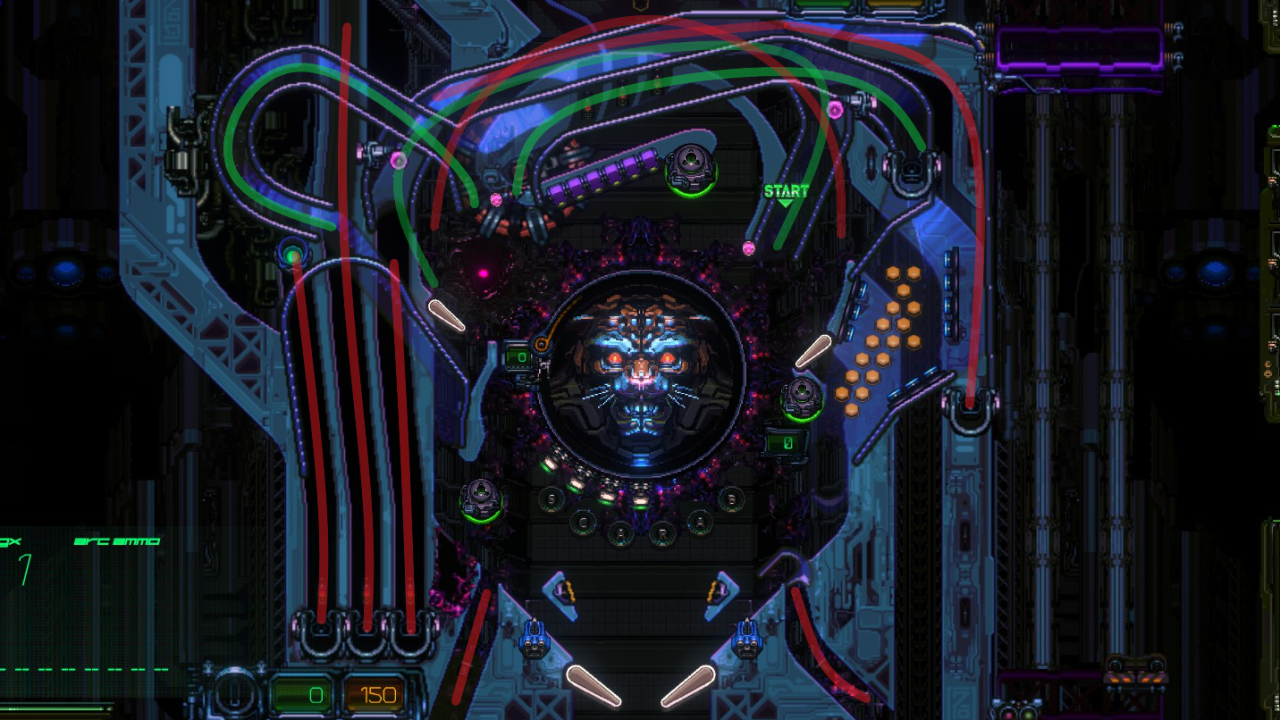
General PROTOCOL flow
For each letter you need to hit the START shot to begin the protocol. As such, consistently being able to hit the START shot will help you master the game. The protocol will stay active until you complete the objective, at which point the letter will be lit. Currently protocols are marked with white letters on the right of the HUD. You can also check your current objectives for each tier on the HUD. You can and should aim to have 3 active at the same time.
Completing each protocol has several benefits:
- Awards +2 MX multiplier
- Lights standard jackpot (JP) for the tier you completed the protocol
- May unlock the matrix arm for the tier you completed the protocol
- Completing any 3x protocols awards +1 JX jackpot multiplier (up to 9x JX)
MX and JX multiplier awarded from protocols are not lost when you loose a ball (this changes slightly after activating wizard mode).
Completing every protocol on each tier starts WIZARD MODE.
LARVAE (T1)
LARVAE (L)
Number: 12
Kill the small purple or yellow centipede type bugs. Larger flying bugs don’t count, and neither do domeheads. Luckly, drones appear often and are easy to kill. Turrets make this easy work. It seems that hitting the boss or doing other various actions make them appear.

Number: 3
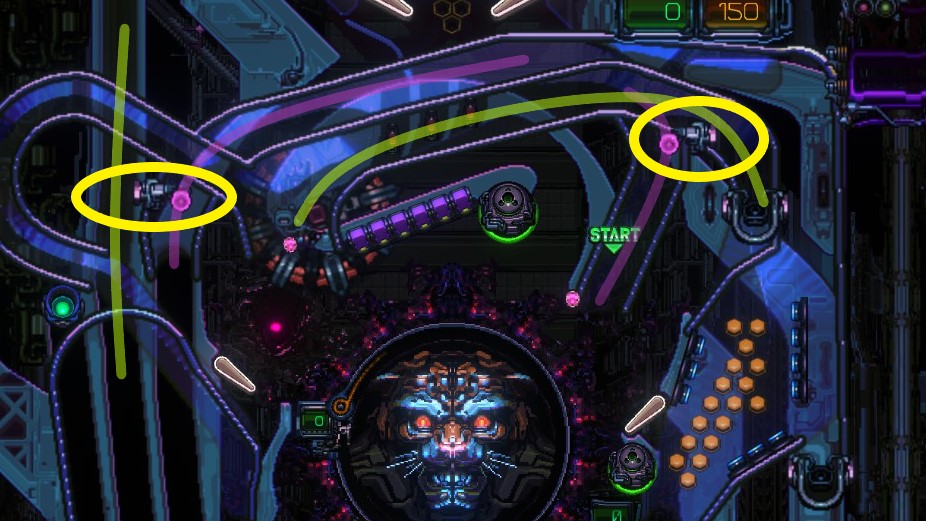
Hit one of the three spinners. Will almost complete itself.

Number: 25
Domeheads are the smaller purple headed swarms that crawl about in groups. They look like aliens from a certain movie series. For this protocol, you can kill them on T1, T2, or T3. The announcer will declare when a swarm arrives. They seem to appear between T1 bosses, or between boss phases on T3, they do appear out of the airlock (and other places), but you don’t necessarily need to enter the airlock. If you need them to spawn, concentrate on defeating T1 bosses.

Number: 12
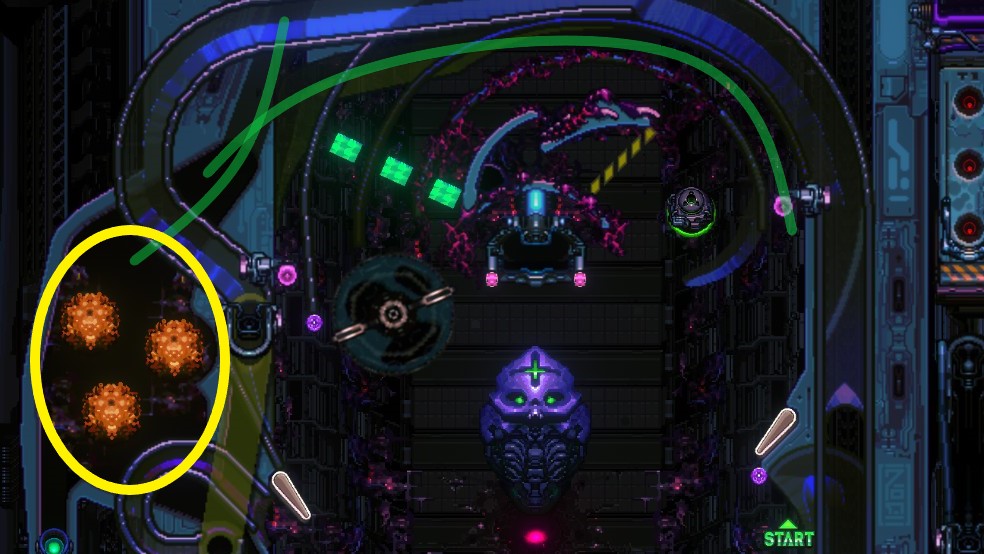
Hit the orange spores in the left side of T1. To enter the spore area, shoot the T1 ramp on the right to loop around, or alternatively, you can enter from the left “out lane” in T2, if the kickback is not active.
Number: 4
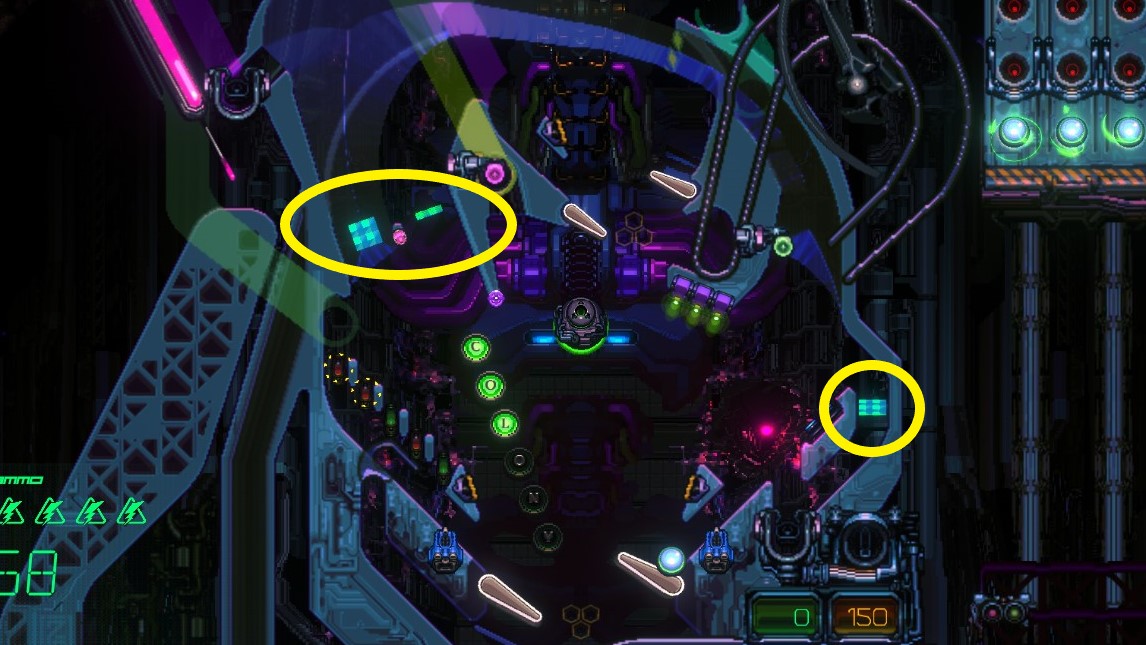
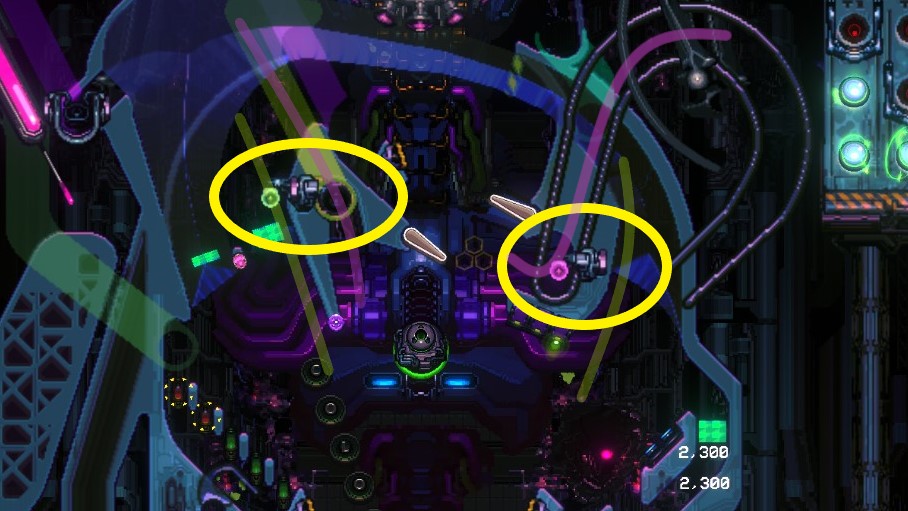
The two pink/green targets on the ramps. These have an interesting duality where they change color and switch between ramps when you hit them. Simply identify which ramp they are on and make your shot. The image below shows the targets in yellow, with pink/green ramps labeled by their color.

Number: 25
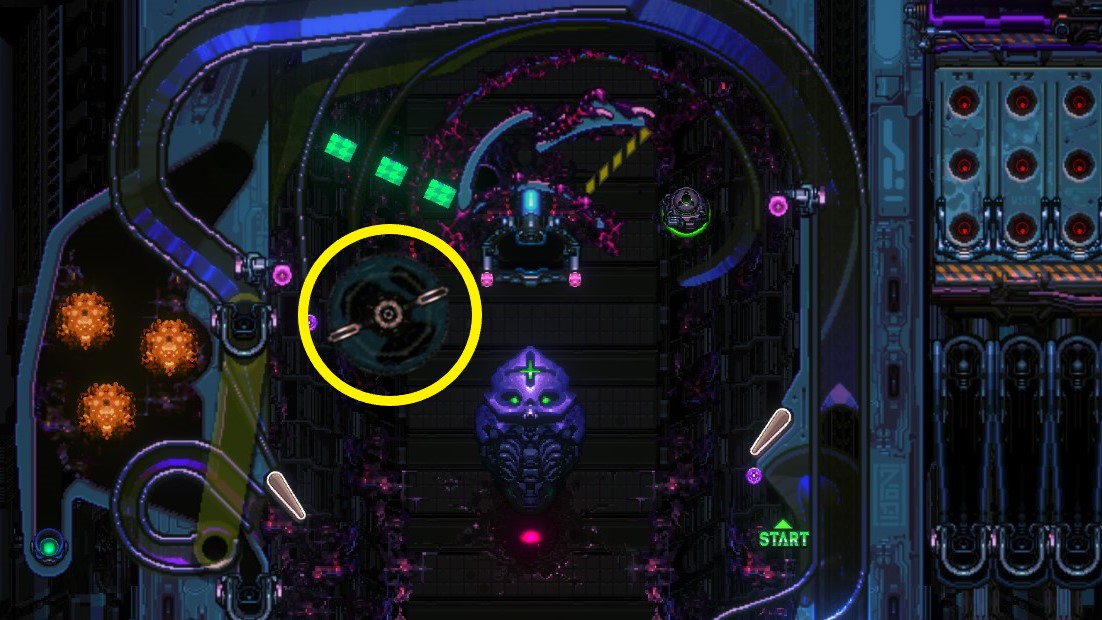
Spin the large crank wheel on the off-left of T1. Almost the same as the T1 SPINNERS protocol. You need a reasonable amount of spins to complete the protocol, so it’s likely you will need to hit it more than once. It helps to hit the spinner flaps at the correct angle, but no need to overthink it.
SCARAB (T2)
Number: 18
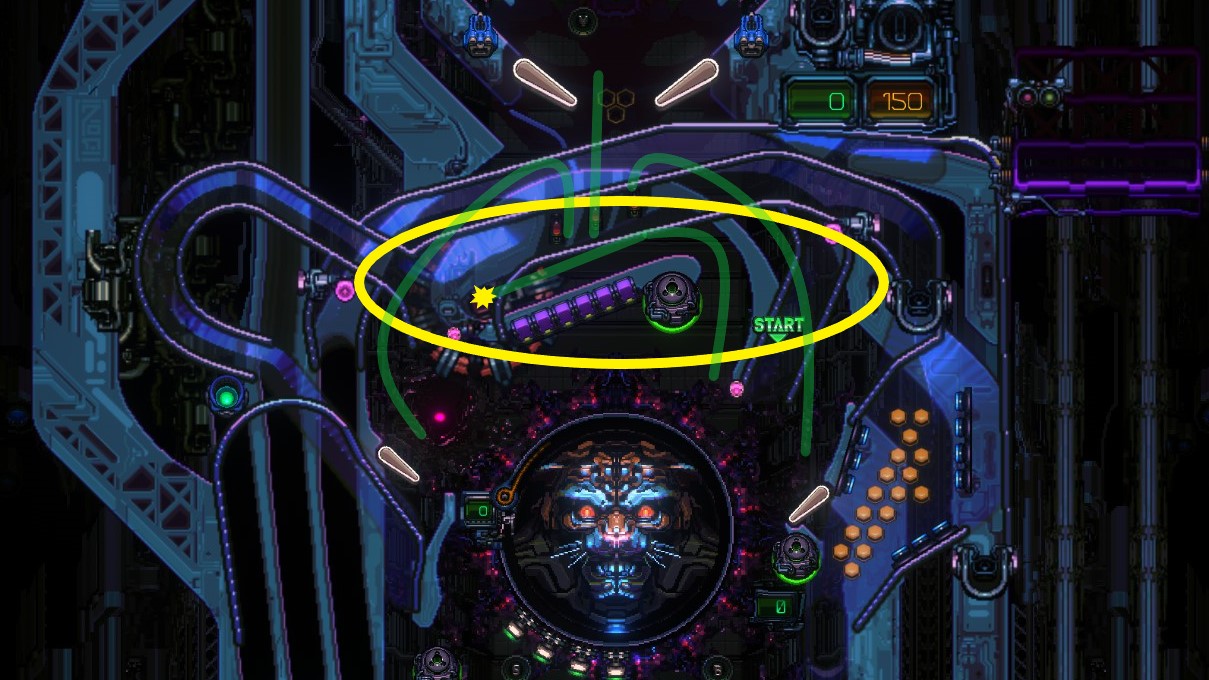
Charge the central generator that sits at the top of T2. This seems to be one of the harder objectives to complete consistently. After the ball is ejected, the generator will be charged a certain amount. You may need to enter the generator a few times to complete the protocol. You can enter the generator from below in T2, or allow the ball to drop in from the 3 slots on the top. Try a slow moving shot around the ramp, and nudge the ball in. Alternatively, you can move up to T3 with the intention of dropping the ball down into the generator. See the generator marked in yellow below, with possible entries marked in green. You can also get the ball to sometimes stall inside the generator rail, giving you a 2nd hit for free.
Number: 3
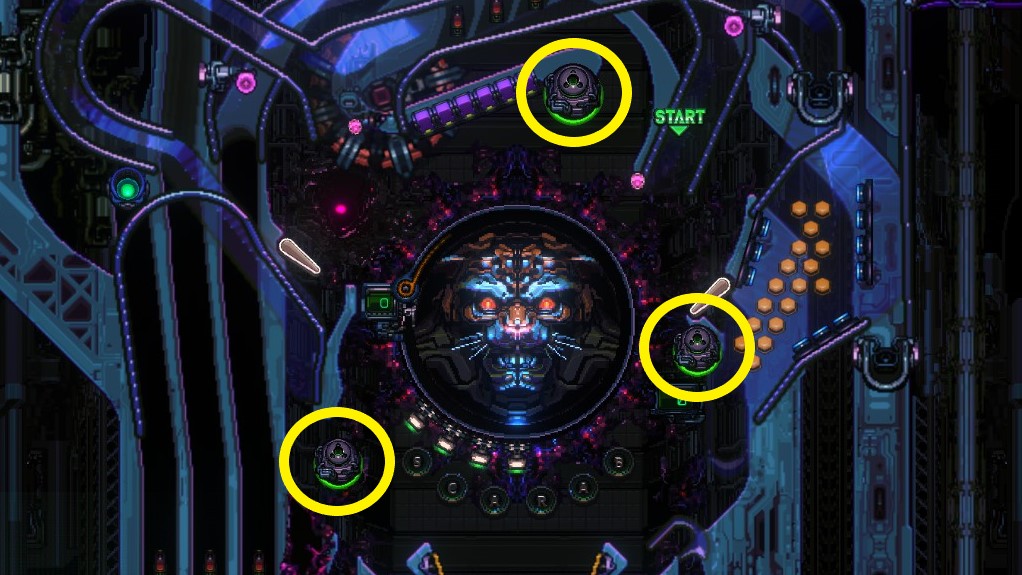
Hit any of the three T2 green charge pops. They don’t need to be charged, all you need to do is hit them.
Number: 4
Use the ramps on T2. The bottom exit ramps don’t seem to count, and neither do the 3x accelerator rails on the left. See below for confirmed ramps in green and things that don’t count in red.
Number: 12
Destroy the drones on T2. They are the small hovering enemies. Same as T1. Guns recommended.

Number: 12
Hit the target kickers on T2 to progress. This is easiest by entering the badge ramp on the right side of T2. Hold the left flipper to cheese the loop if needed. The stand-up targets above the boss do not count.

Number: 4
Hit the dual targets on T2 ramps to progress. Same as T1. See below for the dual targets marked in yellow. Pink and green ramps are also marked.
COLONY (T3)
Number: 6
Hit the green spinners on T3. There are 2 on the left and one on the far right. I find the 2 on the left to be easier.
Number: 12
Destroy the drones on T3. They are the small hovering centipede type bugs. The larger flying bugs don’t count, and neither do domeheads. Turrets make this easy work.

Number: 6
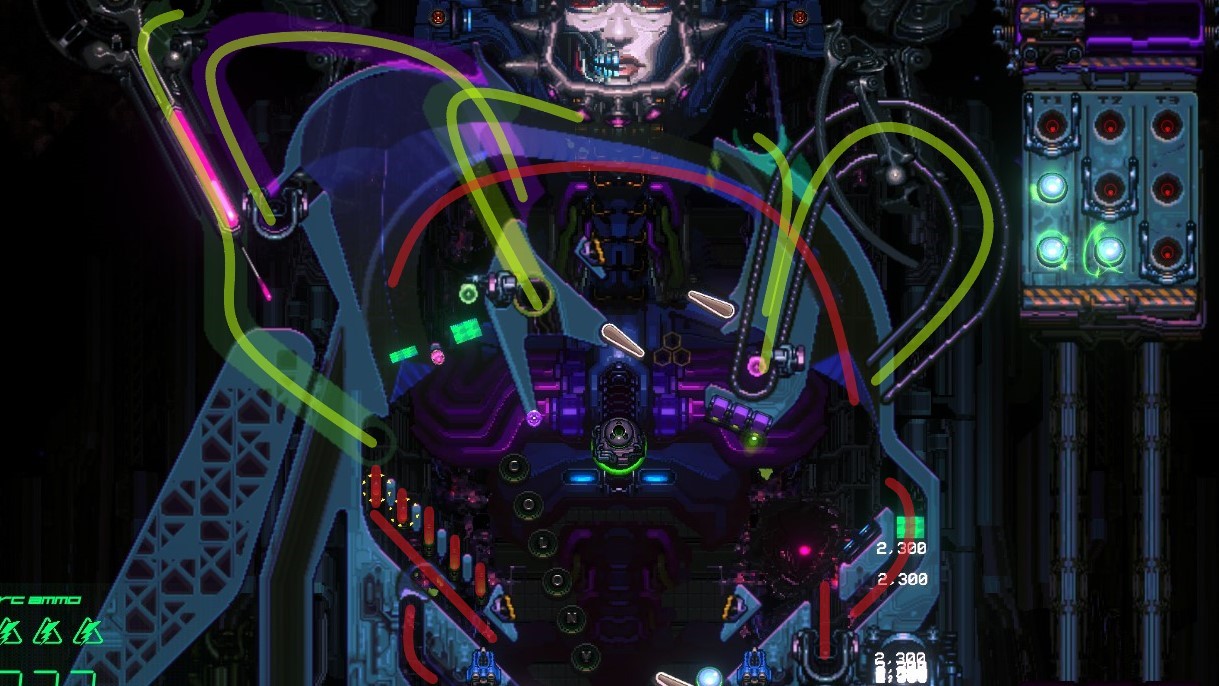
Use the ramps on T3 to progress this protocol. There are a few ramps that count for this one. The protocol start ramp also counts, and I find that the easiest to hit. See below for confirmed ramps in green and things that don’t count in red.
Number: 4
Hit the dual targets on T3 ramps to progress. These are the two pink/green targets on the ramps. These have an interesting duality where they change color and switch between ramps when you hit them. Simply identify which ramp they are on and make your shot. See below for the the dual targets marked in yellow. The pink and green ramps are also marked.
Number: 4
Hit the green charge pop on T3 to progress. It doesn’t need to be charged, you just need to hit it. Easy to hit from the bottom, but if you drop down from the top flippers you can sometimes bounce on the pop for more than one hit. Nice. It sometimes also moves up and down or can be protected by the collar.
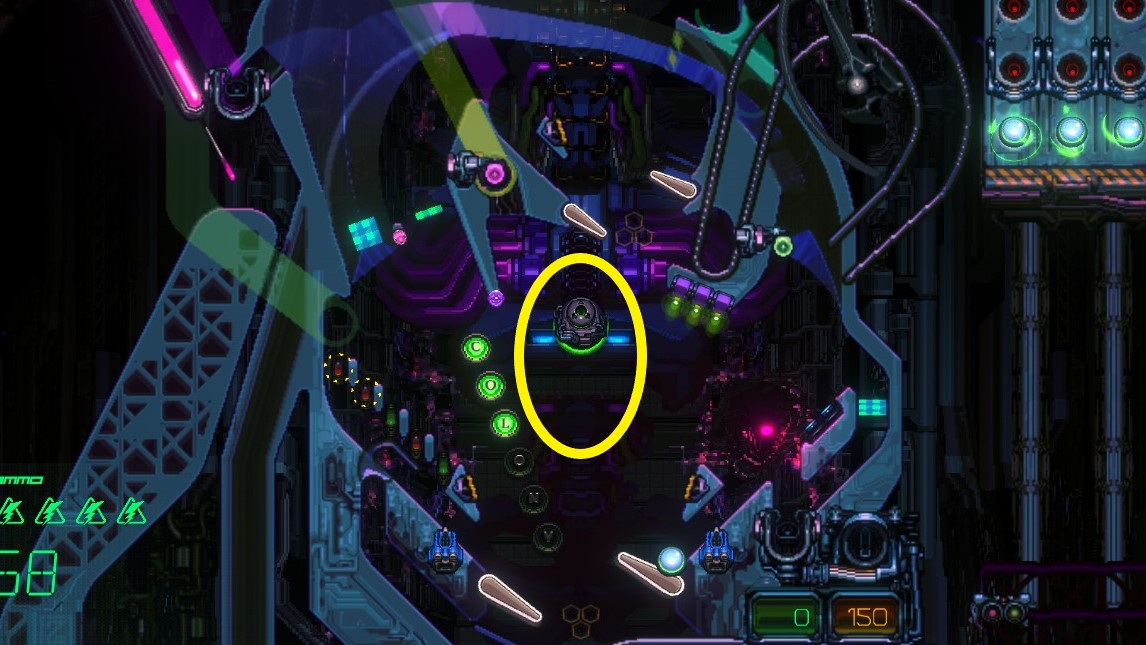
Number: 9
The hardest part about this one might be the timing. You have to hit the face plates of the T3 Hera boss at the top of the table. Generally, you can only do this during the first phase of the boss, meaning that you may need to first defeat the final phase to pass this protocol. Either way, I recommend trying to time activating this protocol before defeating phase 3 of the Hera boss.

WIZARD MODE
You made it! Welcome to wizard mode.
Wizard mode triggers an insane multiball, leading to hectic gameplay in combination with some of the most chill music you’ve ever heard. A surreal moment for sure. If you keep your cool and keep wizard mode going for a while, you can bank massive points, particularly with ULTRA JACKPOTS.
- +4 balls are added to the playfield, giving you a 5-ball multiball
- Activating wizard mode gives you a permanent +1x global jackpot Multiplier (GX). This is not lost, even on ball drain.
- While wizard mode is active, you also gain an additional temporary +1 GX.
- Wizard mode stays active as long as you have 2 or more balls in play. Once you are back to a single ball, the mode ends and you lose your temporary +1 GX.
- On wizard activation, all JP, SUPER JP, and ULTRA JP are lit (but not other types of jackpots). Due to the active multipliers, jackpots during wizard mode can bank massive score. Potentially billions!
- After reaching wizard mode for the first time in a single game, the order of the protocol objectives for letters are randomized.
- Activating wizard mode makes blue targets appear T1 and T3. Hitting all blue targets on a tier will light the “+ADD+ BALL” target for that tier, hopefully helping your wizard mode last longer.
Congratz and hope you enjoyed Xenotilt!
Thanks to Dubsta for his excellent guide; all credits belong to his effort. If this guide helps you, please support and rate it via Steam Community. Enjoy the game.
Hello, Dubsta here, original author of this guide on steam. Just letting anyone know that a much more up-to-date version is available on the steam platform, the place originally published. Feel free to visit there, and like and favorite, if you found it useful.