
This guide covers starting out and how to play the game. WIP
Common FAQ
Starting Out
Well here we are a new Early Access Game. Lets see what we can find shall we? You start out in the tutorial but I am skipping that to start this guide.
- First, gather some friends… You can not play this game solo. I mean you can but lord have mercy its not worth your sanity. IF no one wants to buy the game there are plenty of public lobbies. Make sure your microphone works in the settings first.
- Second, You will need to realize that levels in this game are everything. You can not build anything except the absolute basics your first run through. But do not worry you gather levels pretty fast.
- Third, Just have fun and carry on.
Multiplayer Hosting
Per the developers difficulty scales based on the amount of players in the lobby plus the difficulty selector. Having 1-2 players will be an easier time and it scales every additional player added up to the max of 4.
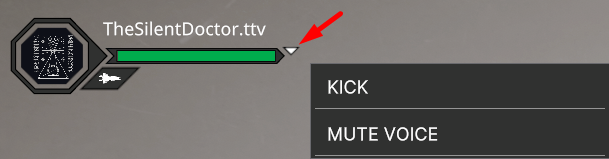
So you want to be the head honcho? Here are some things you should keep in mind. Even though this game has a great community some people may decide to not support the cause. These people can be kicked quite easily thankfully. Press the letter “K” by default to unlock your cursor. Click on the little arrow to the right of the players info. Then press Kick.
(Example Player, Nice Guy)
Your First Adventure
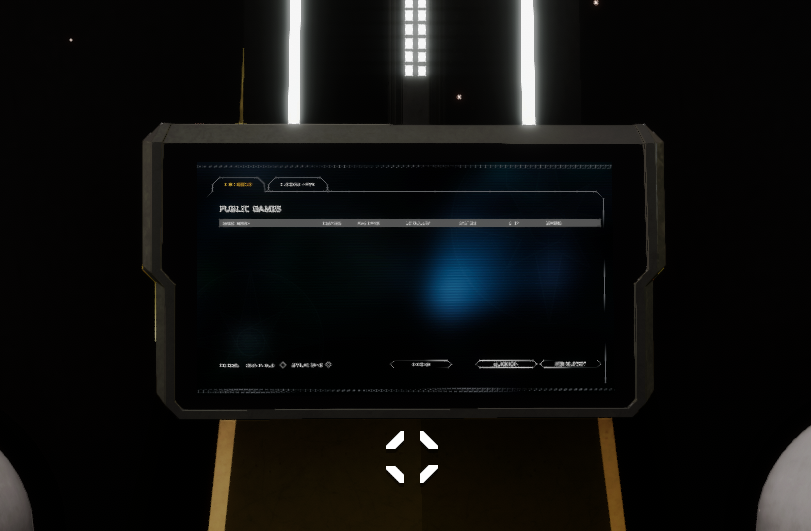
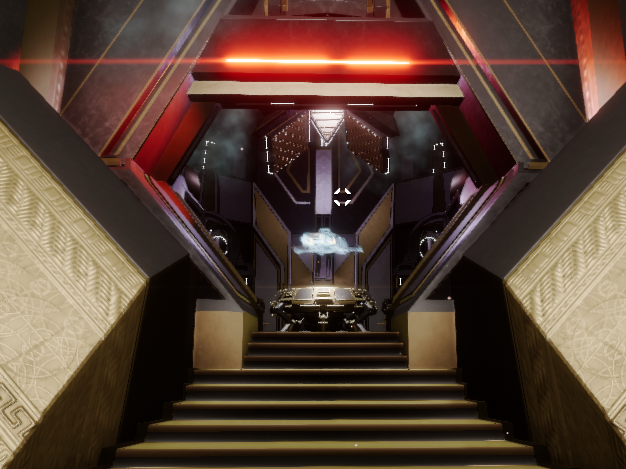
- First things first, Join a Group. A reminder to what I said earlier this game is nearly impossible solo. so keep that in mind. Enter the server manager as soon as you leave your pod it is to the left or right. See the image below for what it looks like.
 ⠀
⠀
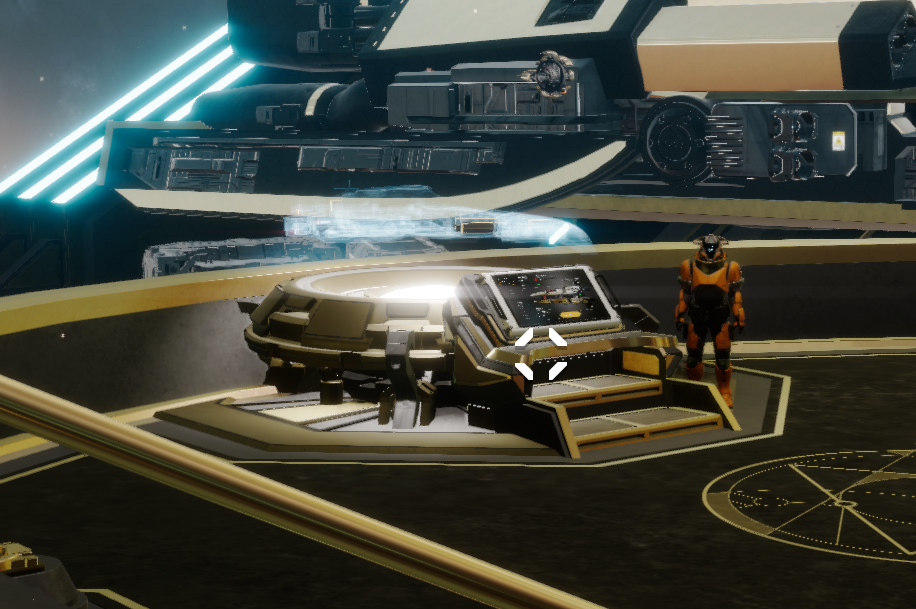
⠀ - Second, Pick a Ship. If you are the host you will need to pick either a 2-3 person ship or a 3-4 person ship. Once you exit your pod and enter the large room with the map the terminal will be on your left. The top set of ships contain the 3-4 person ships and the bottom set of ships contain the 2-3 person ships. This heavily effects game play so pick the right kind for your team.
 ⠀
⠀
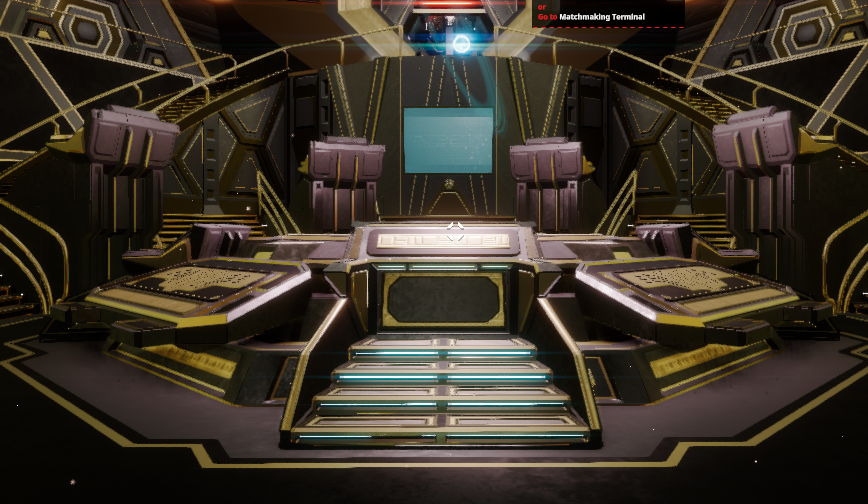
⠀ - Third, Select Your Mission. If you are the host you will need to now pick a mission in the center of the room. Enter the terminal and we can go over the mission types in the next chapter.
 ⠀
⠀
⠀ - Finally, Once you select your mission you and your team of spacemen will proceed to the doors in the rear of the room and take your seats GTFO or DRG style.
Mission Types
⠀
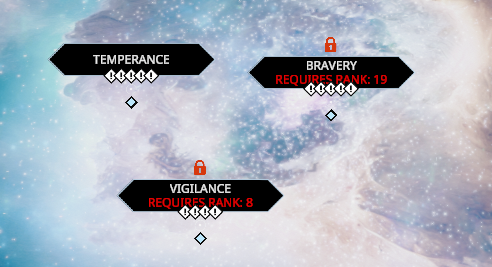
There are 3 Main zones to Helios at this time. (I can not see into Vigilance or Bravery yet but will update once I can)
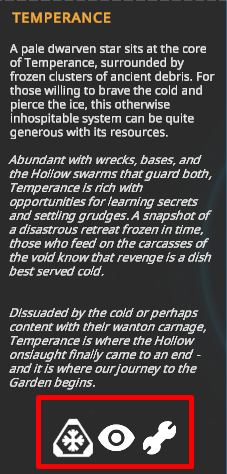
- Temperance – Starting Level 0 – 5 Missions
- Vigilance – Starting Level 8 – 4 Missions
- Bravery – Starting Level 19 – 5 Missions
⠀
You may choose a mission that only has one of these mission types or multiple. I have seen missions of up to 3 types so far in my game play. You gain XP and Cosmetic Loot boxes for completing missions. No pay to win and I hope it stays that way.
⠀
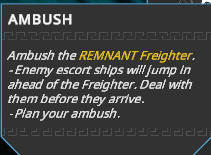
- Ambush – A Skull
Ambush is exactly what it sounds like. During the mission you will have an Ambush encounter. During the encounter you will lure a ship in and destroy it gaining loot for your ship. This loot converts into XP at the end of the mission and does not carry over.
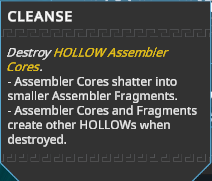
- Cleanse – A Geometric Globe
Cleansing is an interesting one. Your mission is to just destroy fragments floating around in space. But be warned its not all sunshine and rainbows you will be attacked.
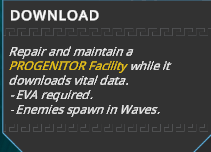
- Download – A Satellite Dish Broadcasting
Download missions are fun. It requires someone to go out and repair a large satellite spire while the rest of the crew defends it. There are many puzzles and repairs that need to be done to the dish but you have a limited amount of time so be quick.
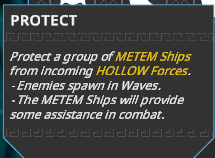
- Protect – A Shield
Protection missions require you to protect allied ships. Think of them as escort missions except without the annoying walking speed of half your running speed. It is wave based defense.
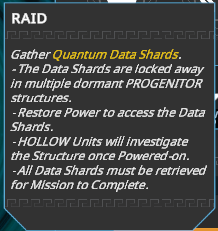
- Raid – A set of Hands Stealing a Box
Raid missions involve gathering resources from inside derelict structures while having to repair those structures to get in. Similar to the download missions there are many puzzles and repairs that need to be done to complete them.
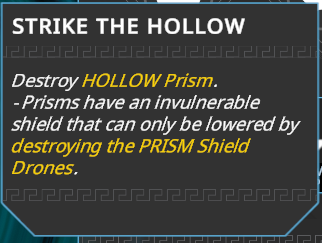
- Strike the Hollow – Arthur’s Fist
Strike the Hollow missions involve large shielded ships that require you to destroy a bunch of shield projection ships before you can attack the main ship.
Zone Modifiers
⠀
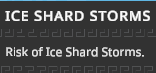
You can find the modifiers at the bottom of any of the zone pages. I have included a screenshot example of Temperance during my play.
⠀
⠀
Current Modifiers -Temperance
![]() ⠀
⠀
These little monsters will mess you up if you are outside or mess up parts of the ship. They come at random intervals and are just not fun to deal with.
⠀
 ⠀
⠀
⠀
![]() ⠀
⠀
Limited Visibility messes with your system sensors and reduces how far out you can see. This can be scary when dealing with ships but I do not think it is a major scare factor.
⠀
 ⠀
⠀
⠀
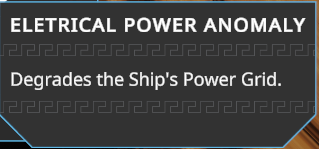
![]()
⠀
This one is painful. It causes a static like fuzz around your screen and makes things hard to see/use. It can also cause some systems on your ship to malfunction like power. We had our power go out and overload because of this modifier once and it was not a good time.
⠀


Heat Storms will randomly start. These storms cause the internal temperature of the ship to skyrocket. You need to have the life support system online in order to lower the internal temperature.


This reduces your power by 2 for the entire sector.

These little monsters will mess you up if you are outside or mess up parts of the ship. They come at random intervals and are just not fun to deal with. They appear to only spawn from a singular direction so getting behind a rock or structure to block them is a good way to avoid them.

![]()
⠀
This one is painful. It causes a static like fuzz around your screen and makes things hard to see/use. It can also cause some systems on your ship to malfunction like power. We had our power go out and overload because of this modifier once and it was not a good time.
⠀

This reduces your power by 2 for the entire sector.
Shield Disruption will be updated once i get there 🙂
Gene Trees (Skill Trees)
Access the gene tree menu via the customization terminal in the hub. You may reset your skills at anytime with no penalty while at the Hub. You get Gene Points by leveling up and completing optional missions.
Lot of things are possible to be changed after the launch of game I expect these to get re-balanced a lot so take what you see in the game as fact over what I say here. There are 4 Major Gene Trees. You can only have 1 tree selected at a time so make sure that ALL of your points are within a single tree. At the time of writing your points are wasted outside of your active tree. Active trees have an orange circle around them.
- Scavenger
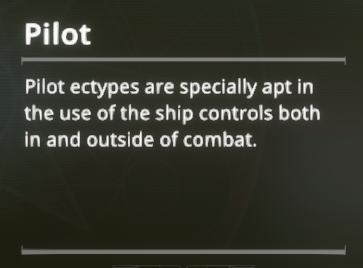
- Pilot
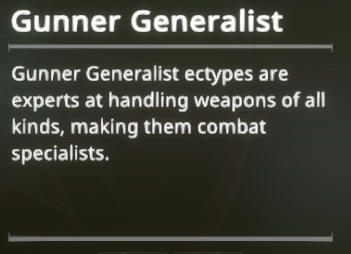
- Gunner Generalist
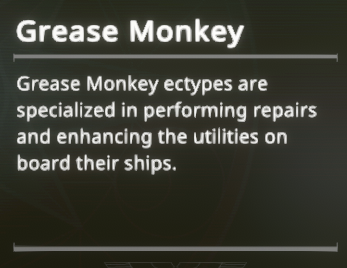
- Grease Monkey

Scavenger excels at EVA journeys and gathering resources from wrecks/derelict structures. Their abilities are well suited for powering up facilities and using turrets that exceed the power of our ship weapons for long periods of time. They are also very good for going out and repairing the ship with their dash speed and low cooldowns.
- Oxygen Tank Extension – 1 Level
Increase jetpack oxygen tank capacity. Useful for longer periods outside the ship.
+200% Oxygen Capacity Max Level - Heat Resistance – 3 Levels
Reduced damage from heat. Useful for taking less damage during scorching modifiers.
LV1 – 30%, LV2 – 60%, LV3 90% - Dash Recharge – 3 Levels
“Improves” (Reduces) jetpack dash cooldown. VERY good for moving around quickly while in EVA.
LV1 – 25%, LV2 – 50%, LV3 -75% - Dash Thruster Augment – 3 Levels
Increases jetpack dash speed. Combined with Dash Recharge you can zoom around in space.
LV1 50%, LV2 – 100% LV3 – 150% - Dash Oxygen Compression – 4 Levels
Improve (Reduces) jetpack dash oxygen consumption. Makes it so you can zoom around more.
LV1 – 20%, LV2 – 30%, LV3 40%, LV4 – 50%


Pilot excels at exactly that. Being a pilot. This guy usually never leaves the helm and uses his speed to evade all incoming fire. The Rotation and Strafing upgrades are insanely powerful and you should max them as soon as you can.
- Engine Efficiency – 1 Level
Increases ship’s engine efficiency while you are seated at the helm. (Negates some trim modifiers)
+20% Engine Propulsion - Channeled Void Jump Charge – 3 Levels
Increases Void Drive charge rate while you are seated at the helm. (Reduces time taken)
LV1 – 50%, LV2 – 75%, LV3 100% - Strafe Thruster Sync – 4 Levels
Increases ship strafing speed while seated at the helm. (Left Right movement using Q and E)
LV1 – 20%, LV2 – 30%, LV3 40%, LV4 – 50% - Thruster Booster Duration – 3 Levels
Increases the duration of the ship’s Thrust Boosters. (Shift Key)
LV1 – 30%, LV2 – 60%, LV3 90% - Rotation Acceleration Matrix – 4 Levels
Increases ship turning speed also known as yaw while seated at the helm. (Turning using A and D)
LV1 – 20%, LV2 – 30%, LV3 40%, LV4 – 50%
- Focused Fire – 1 Level
Increases damage output by 1 level. +1 Modifier per level inside of turrets.
+1 Modifier at Max Level - Trigger Finger – 3 Levels
Increases rate of fire by 1 level. +1 Modifier per level inside of turrets.
LV1 – +1, LV2 – +2, LV3 +3 - Steady Aim – 3 Levels
Increases accuracy by 1 level. +1 Modifier per level inside of turrets.
LV1 – +1, LV2 – +2, LV3 +3 - Focused Fire – 3 Levels
Increases damage output by 1 level. +1 Modifier per level inside of turrets.
LV1 – +1, LV2 – +2, LV3 +3 - Range Aim Compensation – 4 Levels
Increases maximum range. +25% per level inside of turrets.
LV1 – 25%, LV2 – 50%, LV3 – 75%, LV4 100%

- Electrical Resistance – 1 Level
Reduces damage from electrical sources.
75% Reduction in damage. - Enhanced Magnetic Boots – 3 Levels (Appears Bugged)
Improved resistance to inertia and other movement effects.
LV1 – 30%, LV2 – 60%, LV3 90% - Battery Charger – 4 Levels
Allows you to charge a battery in your hands faster than a power port.
LV1 400%, LV2 – 600% LV3 – 800%, LV4 – 1200% - Suit Enhancement – 3 Levels
Reduces damage from oxygen deprivation and freezing.
LV1 – 25%, LV2 – 50%, LV3 -75% - Master Engineer – 3 Levels
Chance to auto-complete repairs when interacting.
LV1 – 20%, LV2 – 40%, LV3 60%
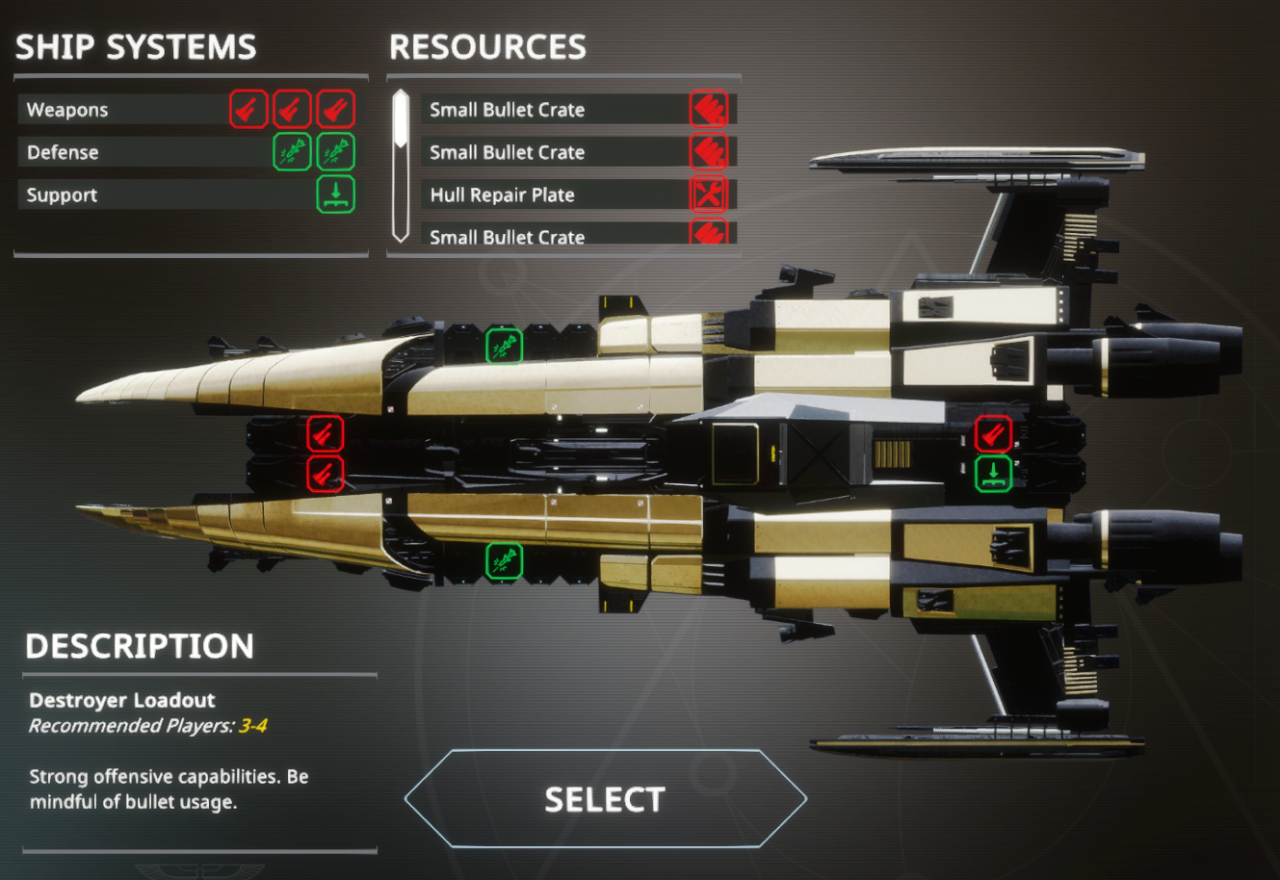
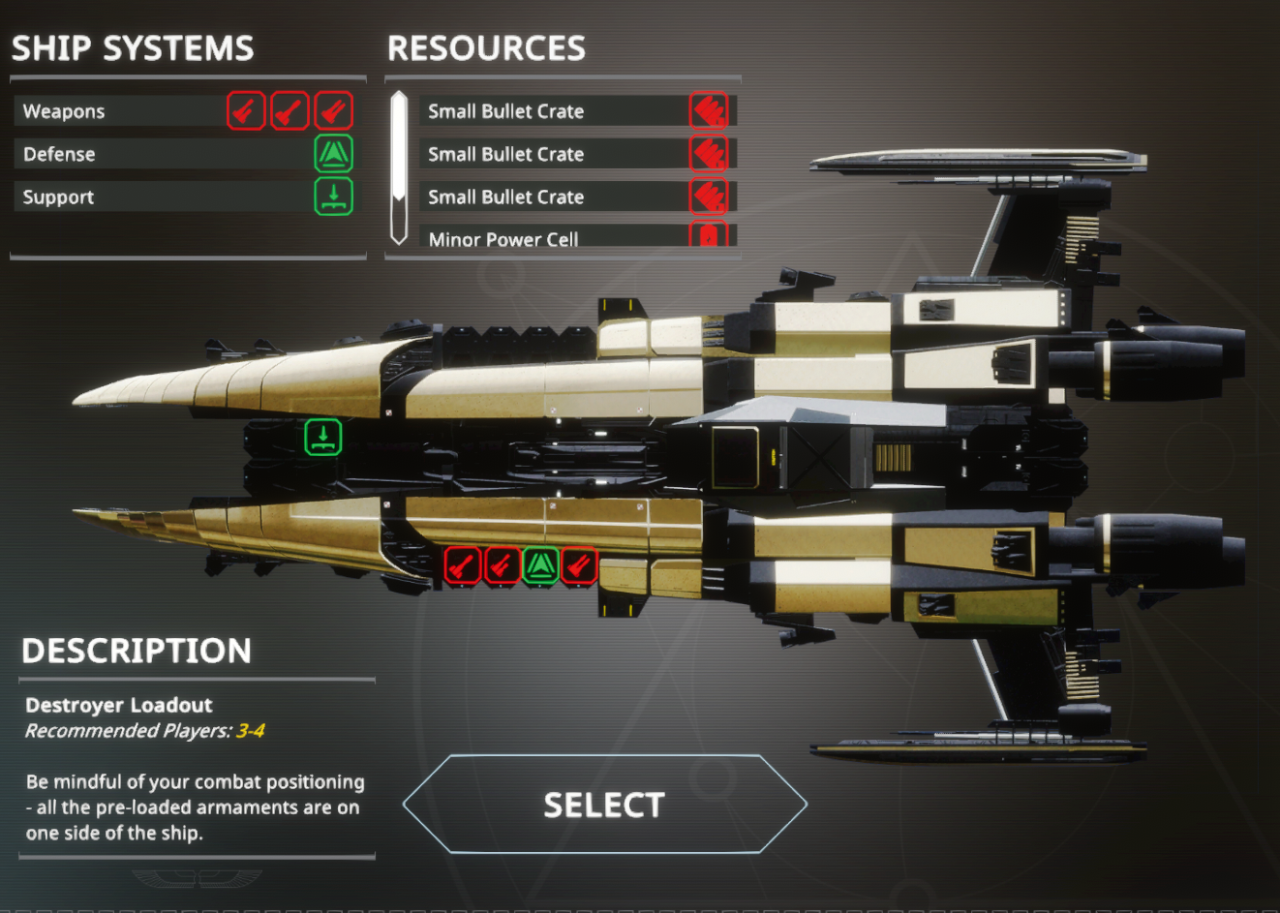
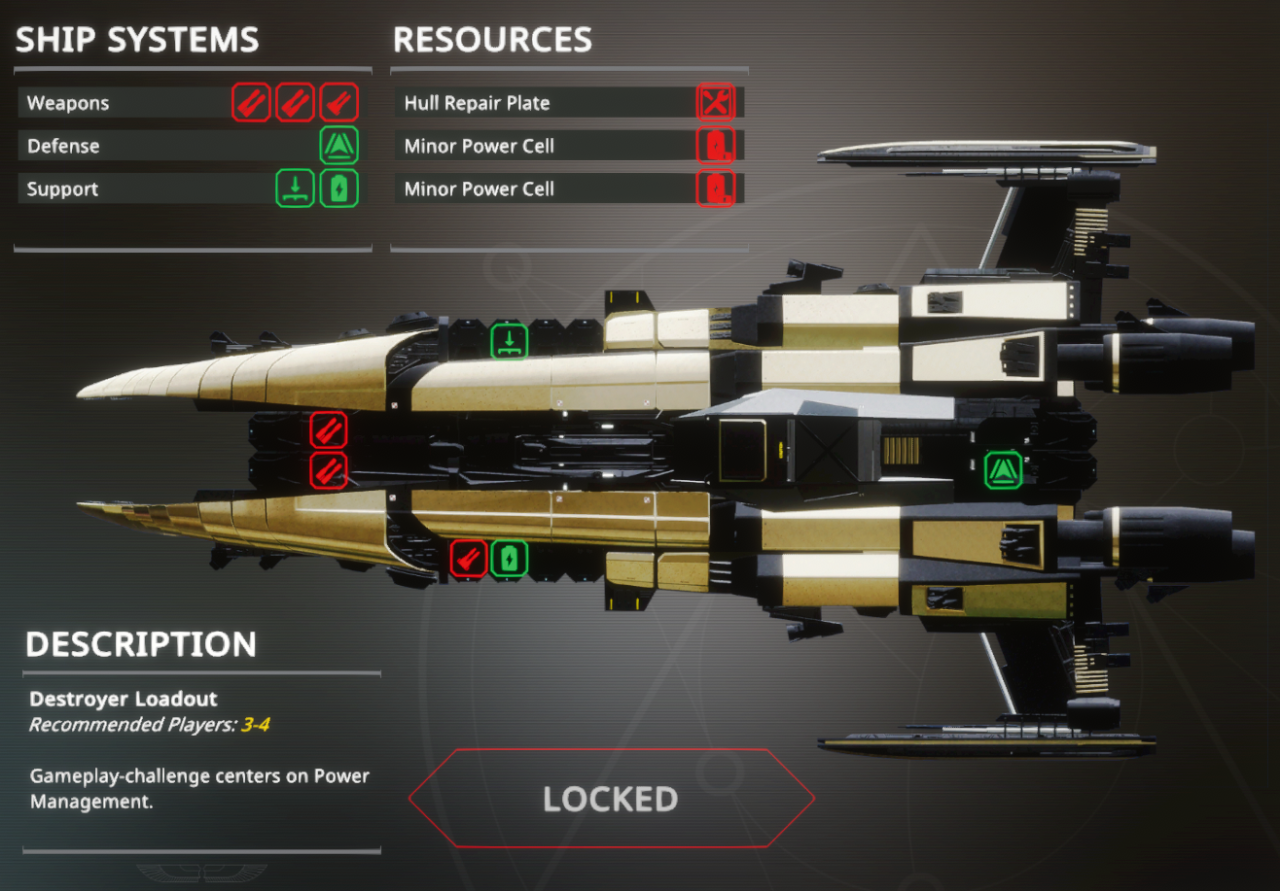
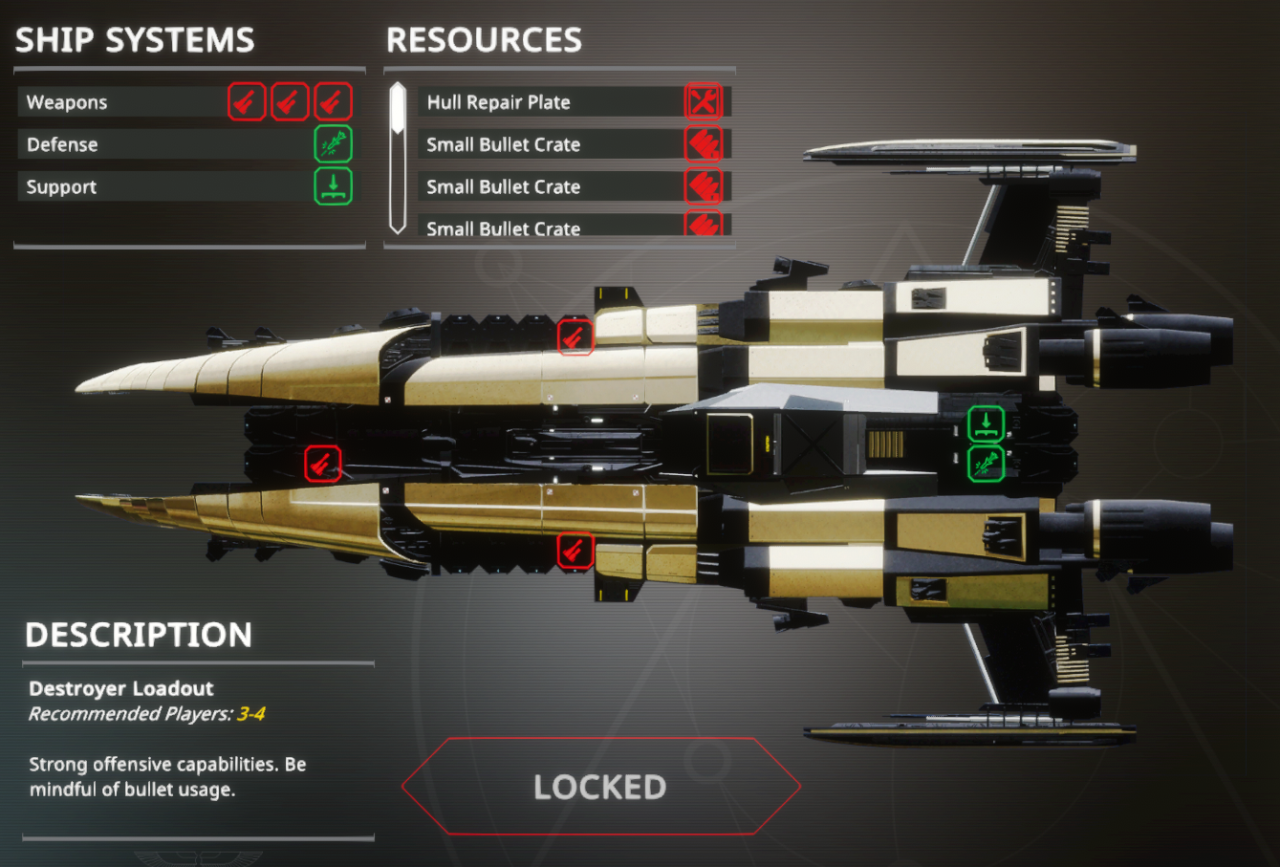
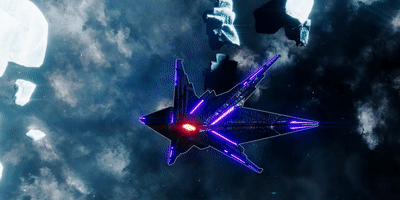
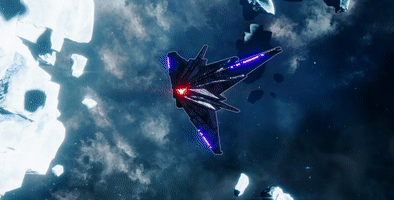
Player Ship Types and Variants
*DISCLAIMER* This information can be changed at any time by a patch or rebalance. Please let me know if something needs updating.
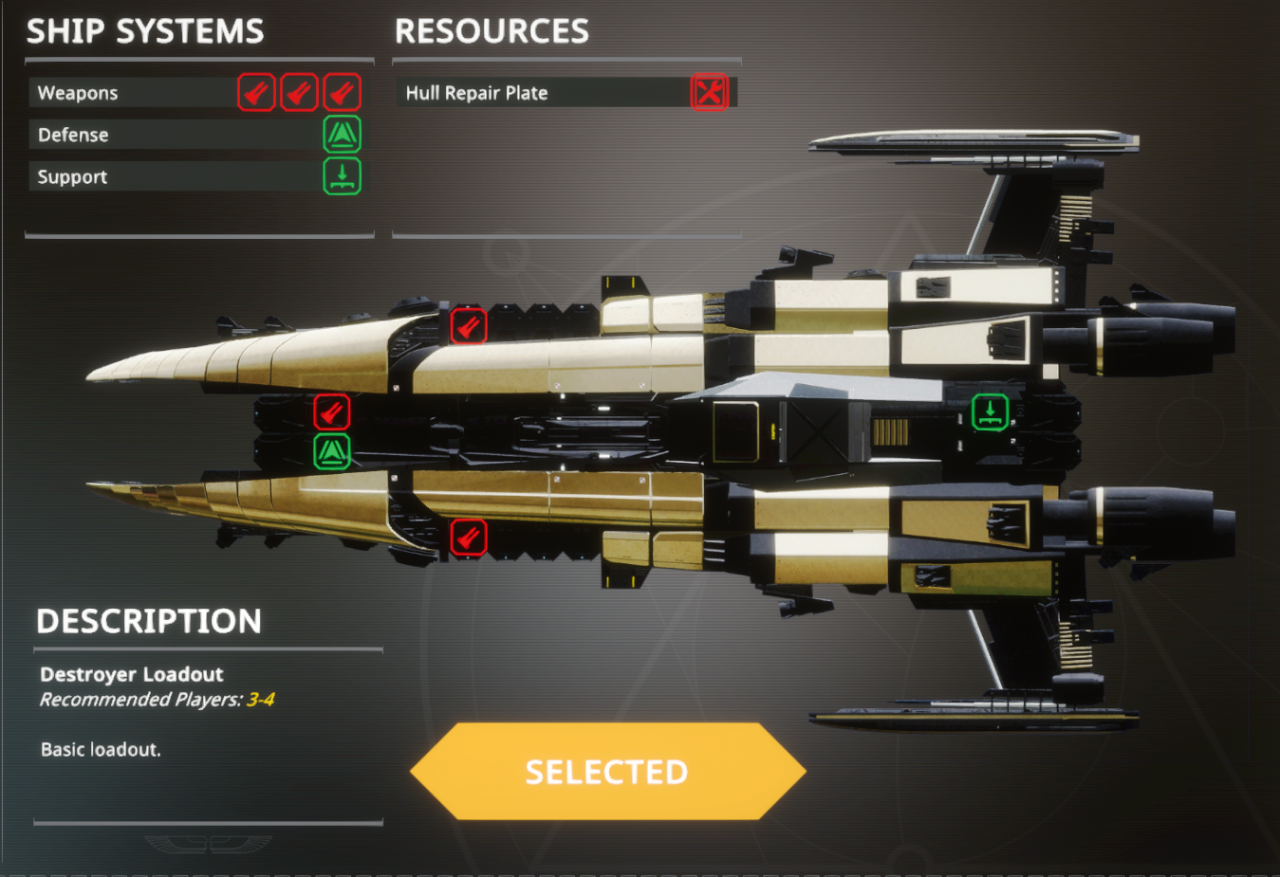
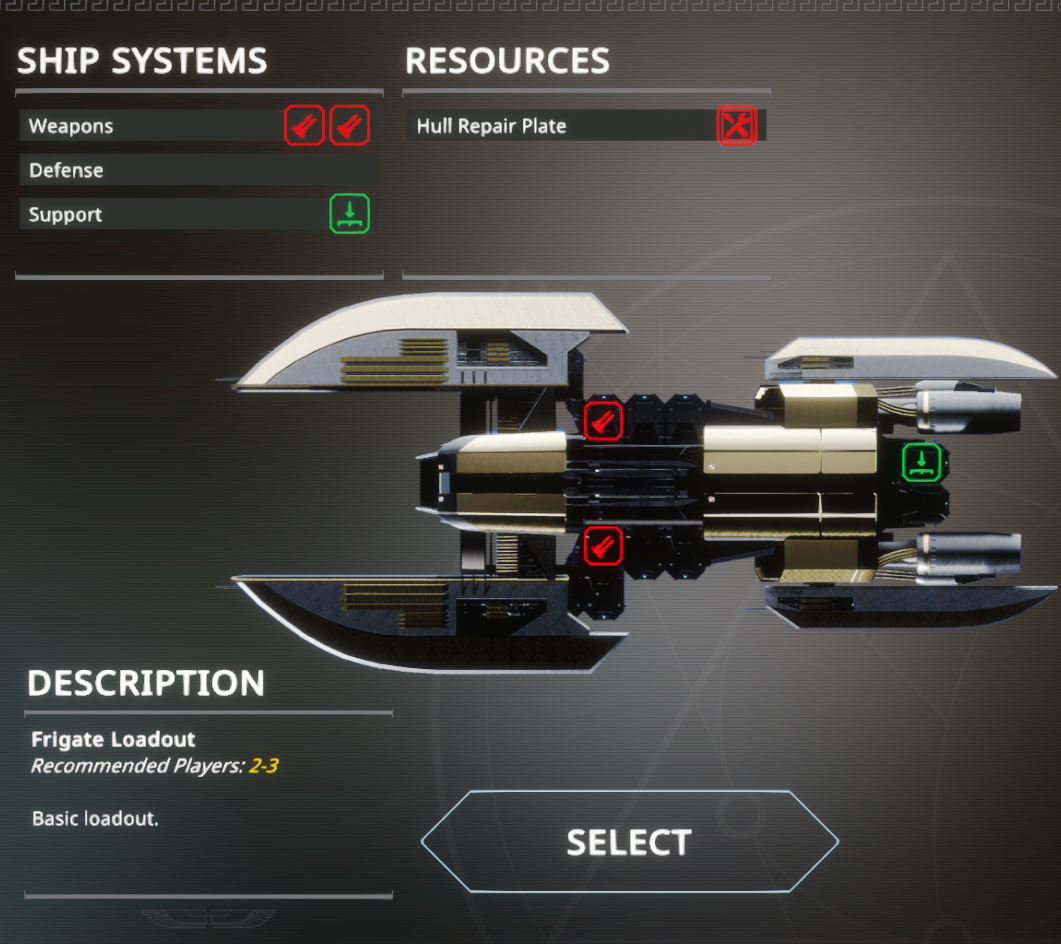
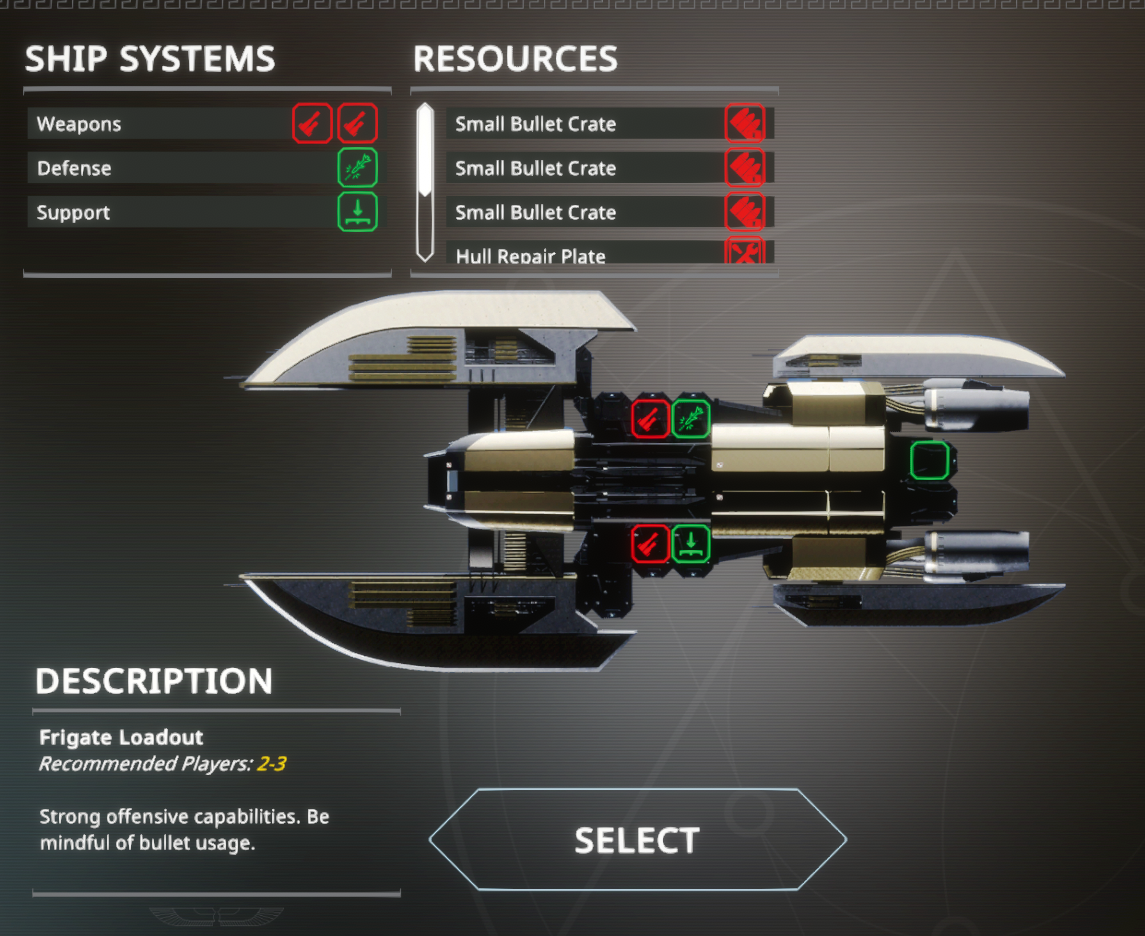
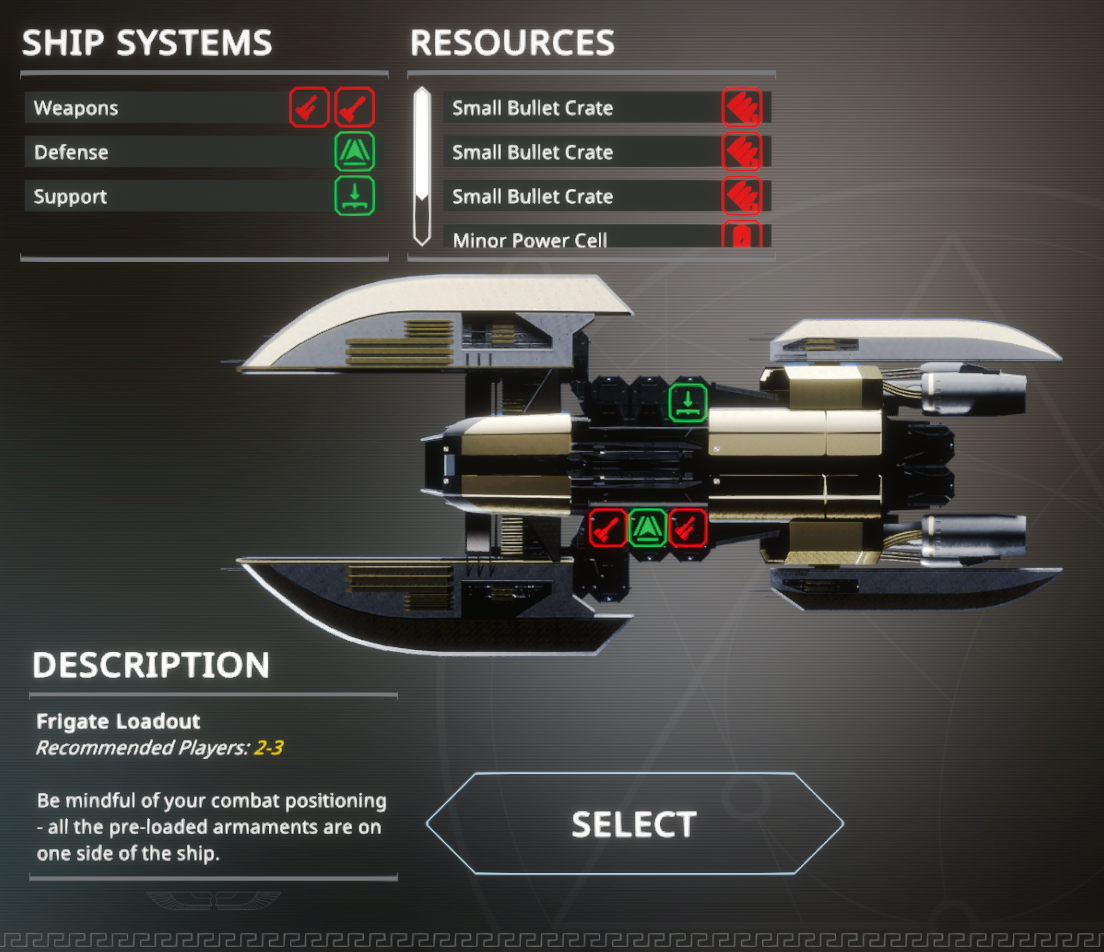
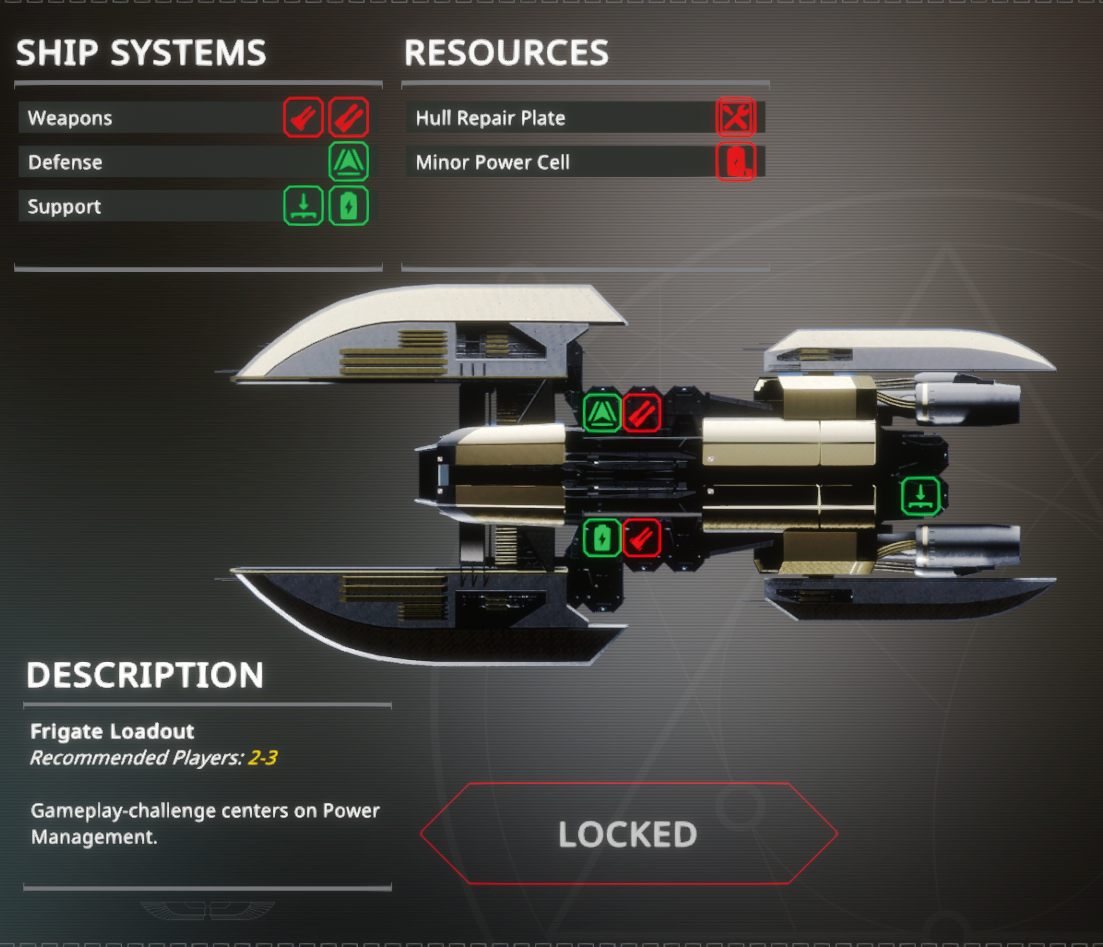
There are currently 2 main ship types that players use in the game. The METEM Destroyer and the METEM Frigate. The main key difference is the amount of players needed to run each comfortably. A destroyer requires between 3 and 4 players while a Frigate requires between 2 and 3 players. If you are trying to solo cause you want to be the best player use a frigate.
Bow = Front, Port = Left, Starboard = Right, Stern = Rear
- Rookie
- Weapons
Benediction Cannon MK1 X 3 – Bow, Port, and Starboard (Front, Left, and Right) - Defenses
Arc Shield MK1 X 1 – Bow (Front) - Support
Gravity Scoop MK1 X 1 – Stern (Rear) - Resources
Hull Repair Plate X 1
- Weapons
- CQB
- Weapons
Litany Minigun MK1 X 2 – Bow (Front)
Benediction Cannon MK1 – Stern (Rear) - Defenses
Kinetic Point Defense MK1 X 2 – Port and Starboard (Left and Right) - Support
Gravity Scoop MK1 X 1 – Stern (Rear) - Resources
Hull Repair Plate X 1
Small Bullet Crate X 8
- Weapons
- Broadside
- Weapons
Litany Minigun MK1 X 1 – Port (Left)
Benediction Cannon MK1 X 1 – Port (Left)
Shuriken Carronade MK1 X 1 – Port (Left) - Defenses
Arc Shield MK1 X 1 – Port (Left) - Support
Gravity Scoop MK1 X 1 – Bow (Front) - Resources
Hull Repair Plate X 1
Small Bullet Crate X 3
Minor Power Cell X 1
- Weapons
- Energy Boat
- Weapons
Shuriken Energy-Gatling MK1 X 2 – Bow (Front)
Recurser Beamcaster MK1 X 1 – Port (Left) - Defenses
Arc Shield MK1 X 1 – Stern (Rear) - Support
Charge Station X 1 – Port (Left)
Gravity Scoop MK1 X 1 – Bow (Front) - Resources
Hull Repair Plate X 1
Minor Power Cell X 2
- Weapons
- CQB MkII
- Weapons
Litany Minigun MK2 X 3 – Bow, Port, and Starboard (Front, Left, and Right) - Defenses
Kinetic Point Defense MK2 X 1 – Stern (Rear) - Support
Gravity Scoop MK1 X 1 – Stern (Rear) - Resources
Hull Repair Plate X 1
Small Bullet Crate X 9
- Weapons
- Rookie
- Weapons
Litany Minigun MK1 X 2 – Port and Starboard (Left and Right) - Defenses
None - Support
Gravity Scoop MK1 X 1 – Stern (Rear) - Resources
Hull Repair Plate X 1
- Weapons
- CQB
- Weapons
Litany Minigun MK1 X 2 – Port and Starboard (Left and Right) - Defenses
Kinetic Point Defense MK1 X 1 – Starboard (Right) - Support
Gravity Scoop MK1 X 1 – Port (Left) - Resources
Hull Repair Plate X 1
Small Bullet Crate X 5
- Weapons
- Broadside
- Weapons
Litany Minigun MK1 X 1 – Port (Left)
Shuriken Carronade MK1 X 1 – Port (Left) - Defenses
Arc Shield MK1 X 1 – Port (Left) - Support
Gravity Scoop MK1 X 1 – Starboard (Right) - Resources
Hull Repair Plate X 1
Small Bullet Crate X 3
Minor Power Cell X 1
- Weapons
- Energy Boat
- Weapons
Shuriken Energy-Gatling MK1 X 1 – Starboard (Right)
Recurser Beamcaster MK1 X 1 – Port (Left) - Defenses
Arc Shield MK1 X 1 – Starboard (Right) - Support
Charge Station X 1 – Port (Left)
Gravity Scoop MK1 X 1 – Stern (Rear) - Resources
Hull Repair Plate X 1
Minor Power Cell X 1
- Weapons
- CQB MkII
- Weapons
Litany Minigun MK2 X 1 – Port (Left)
Benediction Cannon MK2 X 1 – Starboard (Right) - Defenses
Kinetic Point Defense MK2 X 2 – Port and Starboard (Left and Right) - Support
Gravity Scoop MK1 X 1 – Stern (Rear) - Resources
Hull Repair Plate X 1
Small Bullet Crate X 5

- Weapons
Ship Mechanics (Power Bar)
Power is a fun thing to manage. But really you don’t need to manage it if you have enough players :D. You can produce 1.21 Gigawatts easily with this bad boy and never run out. Just make sure your breakers are always reset. You can see the breakers statuses on the energy bar.
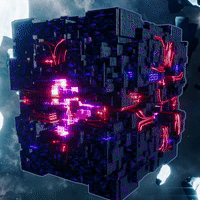
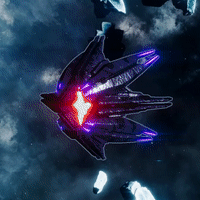
Hollow Ships (Enemies)


In-Game Resources
- Animus Crate
- Bullet Crate
- Data Shard
- Hull Repair Plate
- Power Cell
Resource – Animus Crate
The Animus Crate is the building block of all modules. It is required in order to build anything.
Resource – Bullet Crate
Bullet Crates are used in Kinetic Point Defense and Miniguns. They are crafted in the Fabricator.
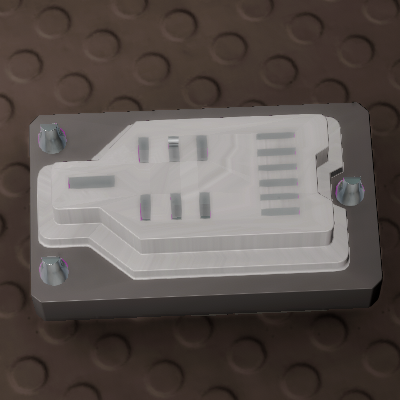
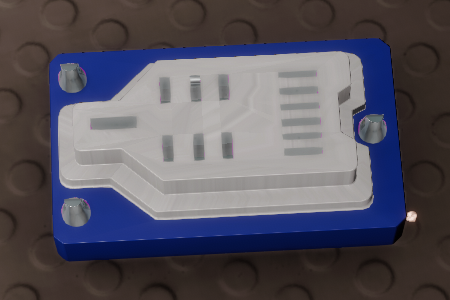
Resource – Data Shard
Resource – Hull Repair Plate
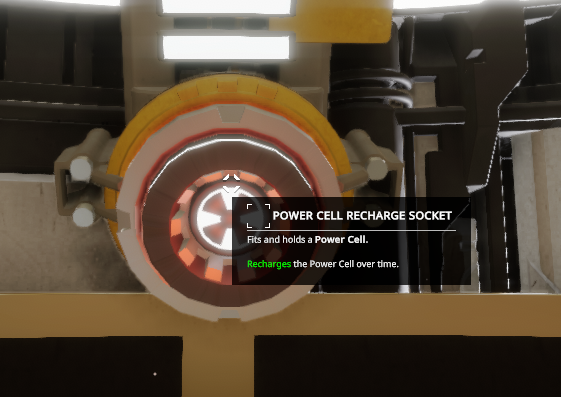
Resource – Power Cell
Resource – Decoy Signature Lure
Ship Modules – Core
This is the list of Core Modules in the Game. Please see the associated section for each.
- Airlock
- Astral Map
- Breakers
- Charging Ports
- Fabricator
- Pilot Seat
- Elevator
- Engines
- Homonculous
- Thrusters
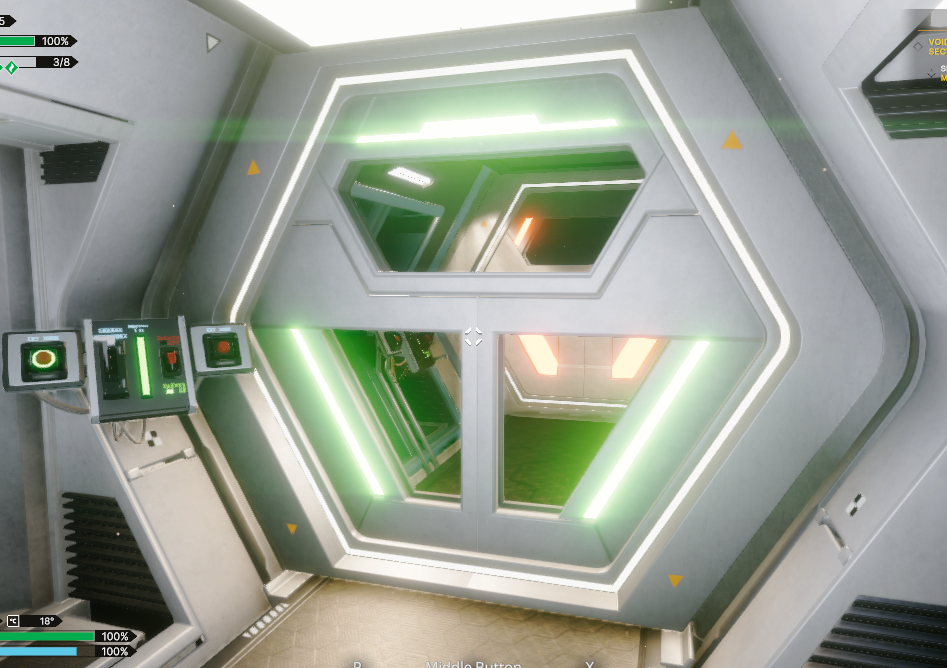
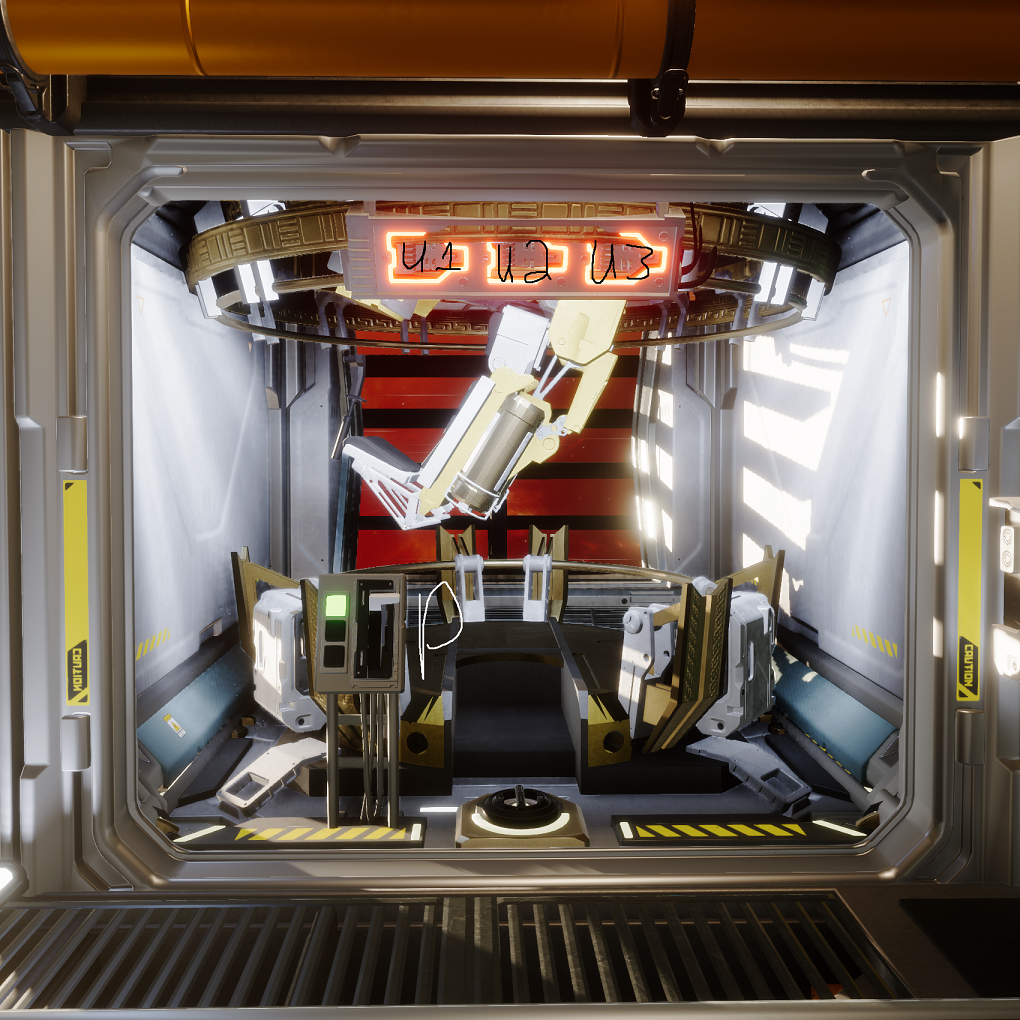
SM Core – Airlock
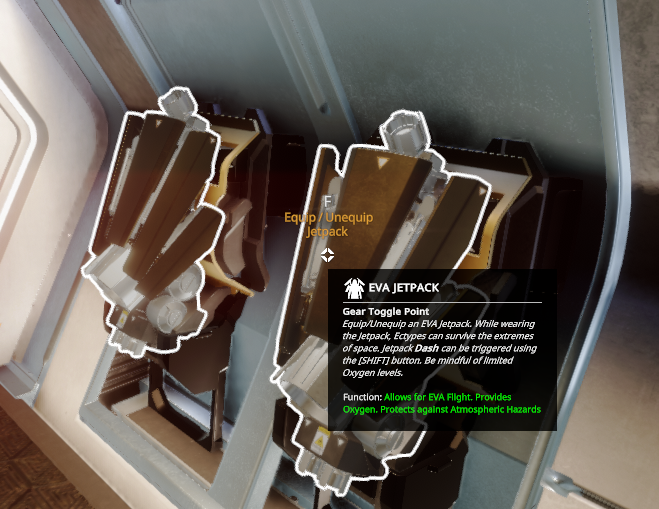
Sometimes you need to venture out into the cold expanses of space. Do not get stranded like Sandra Bullock without any fuel in her EVA suit. Wont be a fun time.
There will always be at least one EVA port on your ship.
⠀
⠀
The Green Button on the left always Opens/Closes the inner door. The Red Button always Opens/Closes the outer door. The pressure switch on the left lets you pressurize/depressurize the airlock. The middle shows you the current pressure. Filled means you can open the inner door. Empty means you can open the outer door.
Thankfully the devs put in a safety override for all of us feeling on our wild side. Do not flip this switch unless you want to be dangerous.
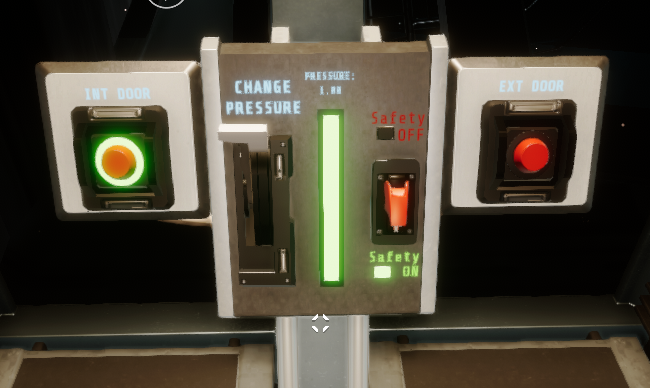
You will need a spacesuit to go out and survive. You can go out without one but you wont get very far. Grab a suit to prevent yourself freezing and notice that your O2 is now used as fuel as well as your survival tool. Watch your O2 closely. Press Shift to make a speedy dash but note this uses a good chunk of O2. Put your spacesuit back once you are done.
SM Core – Astral Map
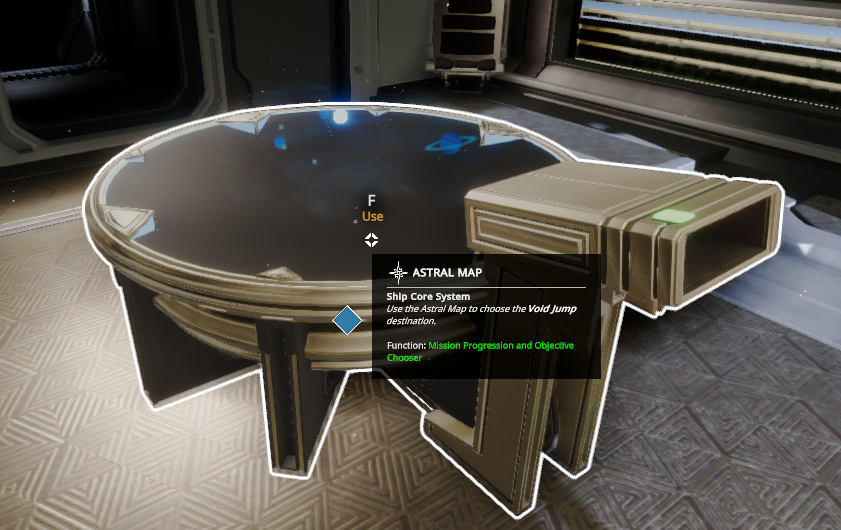
Once you access the map you will be greeted by all your possible destinations. Select what task you want to complete next and have your pilot send it. Compliance!
There is a Support Module slot on the astral map. You can place any of the support modules into this slot to call in some support. You can also place navigation chips into this slot as part of quests.
Module Minefield: Summons a heat seeking minefield to your current location. Has a 3 Second delay that will place the minefield wherever you are 3 seconds after inserting the module.
Module Escort: Calls a Frigate in to assist you in battle. Follows you in the current system. Does not follow to the next star system.
Module Navigation: Unlocks a new destination on your warp map.
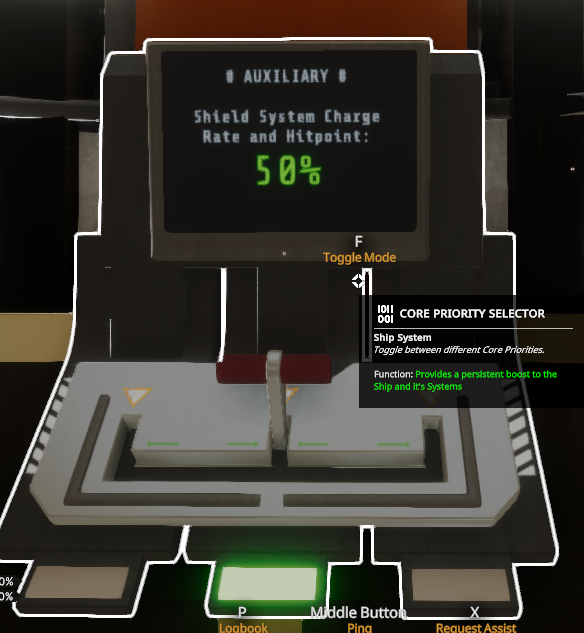
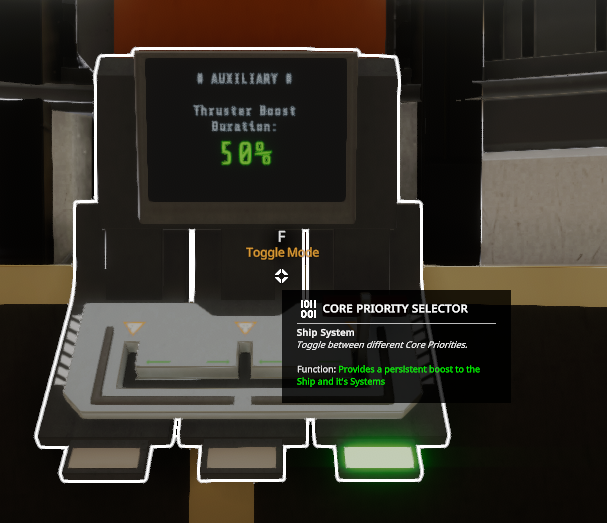
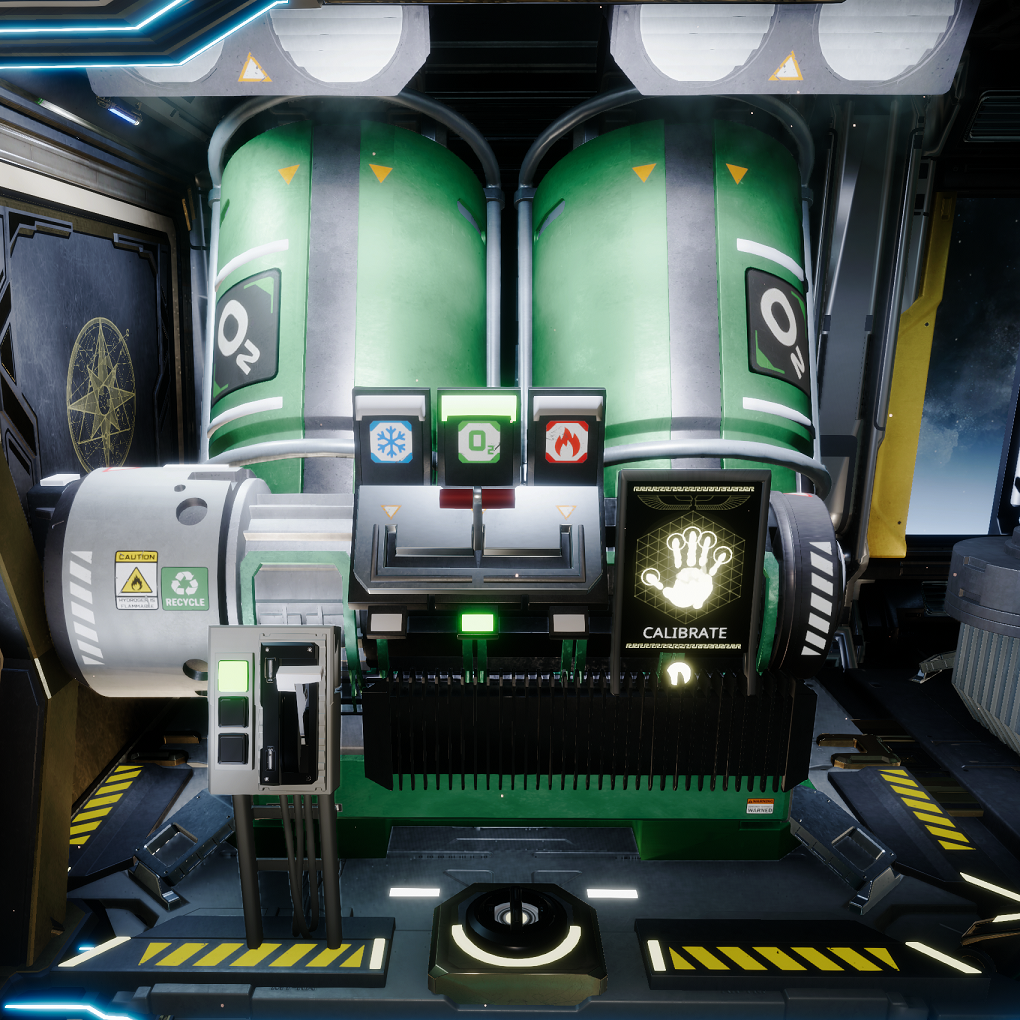
SM Core – Auxillary Power
Some ships do not have an Aux Terminal. Inside the power room is a small terminal for Auxiliary Power. This terminal can grant 3 specific buffs to the ship that do not run out or expire.
⠀
Auxiliary Weapons increases the damage level of all turrets by +2.
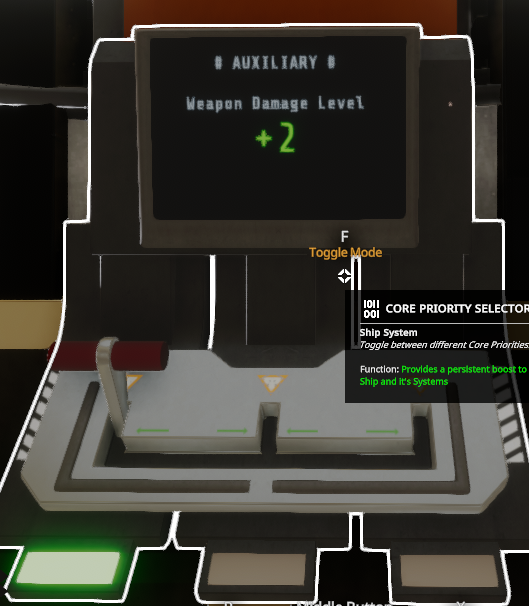
Auxiliary Shields increases the charge rate and the hitpoints of your shields by 50%
⠀
Auxiliary Thrusters increase Thruster Boosters (See Engines Guide) duration by 50%
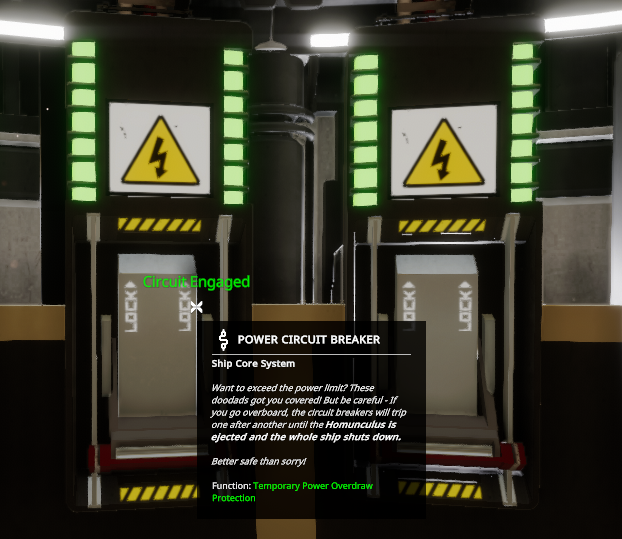
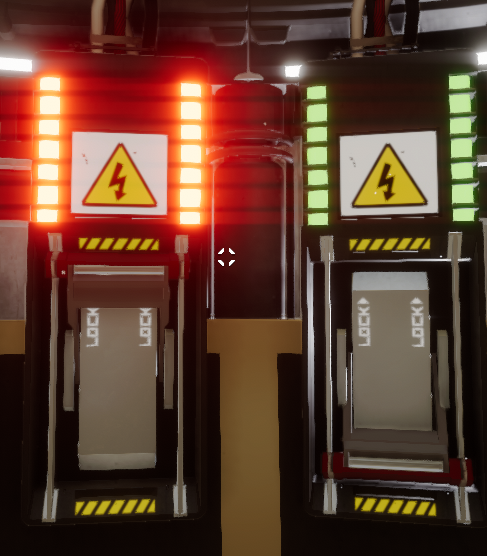
SM Core – Breakers
The main breakers can be found inside the power room. These allow you to overload your power for near infinitely as long as someone keeps resetting them. Each breaker will pop after a certain amount of time being overloaded. Once all 4 breakers pop and energy consumption continues the Homonculous will pop out and you will need to restart the ship. If someone keeps resetting the breakers though it is near infinite time.
SM Core – Charging Ports
Once you unlock power cell crafting you can charge the cells inside the power room.
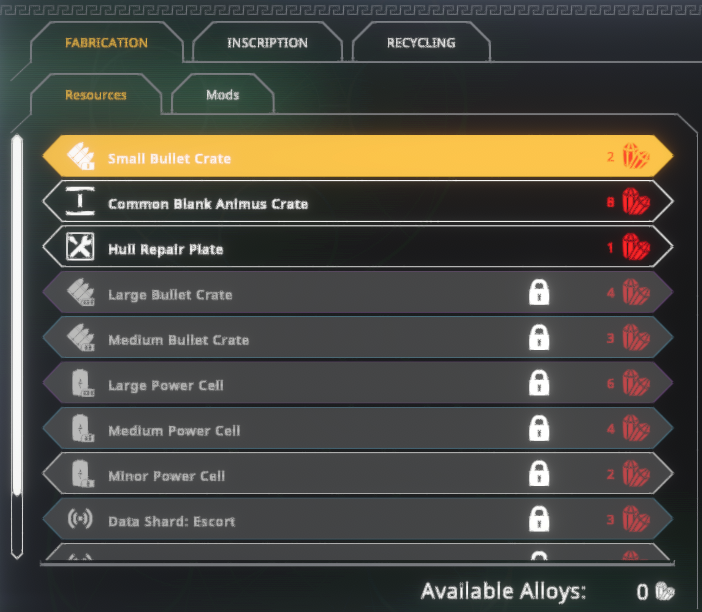
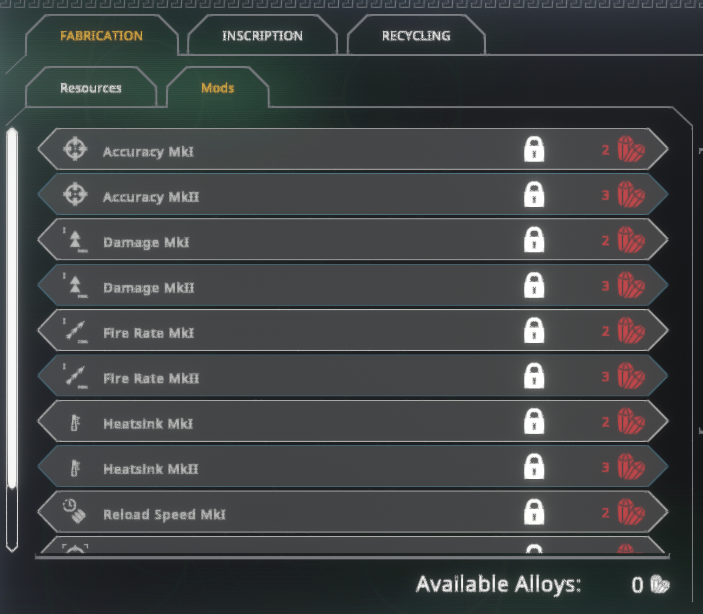
SM Core – Fabricator
Fabricator
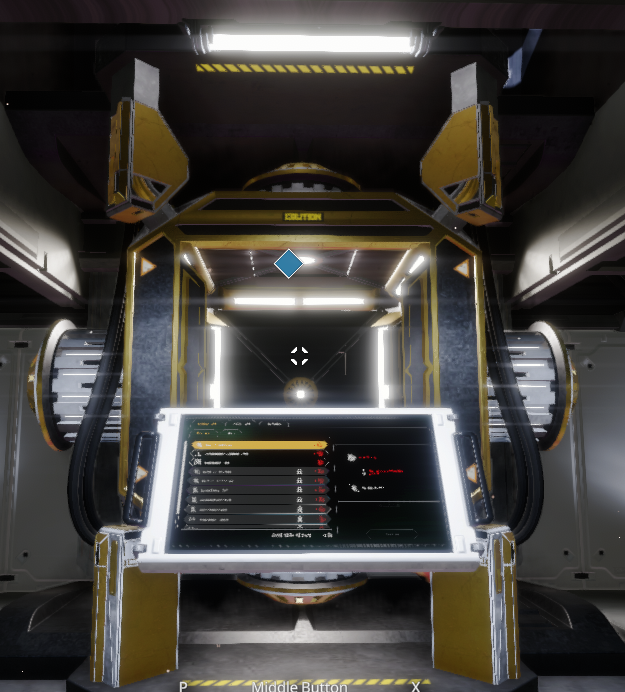
⠀
Resources can be anything ammunition crates (for higher tier weapons), Animus crates (building blocks of modules, power cells, hull repair modules, and Data Shards for calling in support ships.
⠀
Mods are entirely used for upgrading your weapons. See the Ship Mechanics Weapons section on installing mods and what each mod does.
⠀
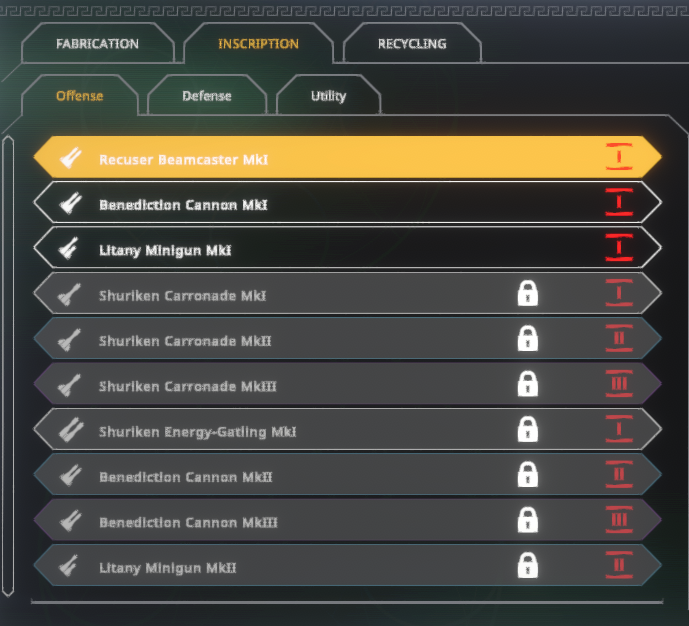
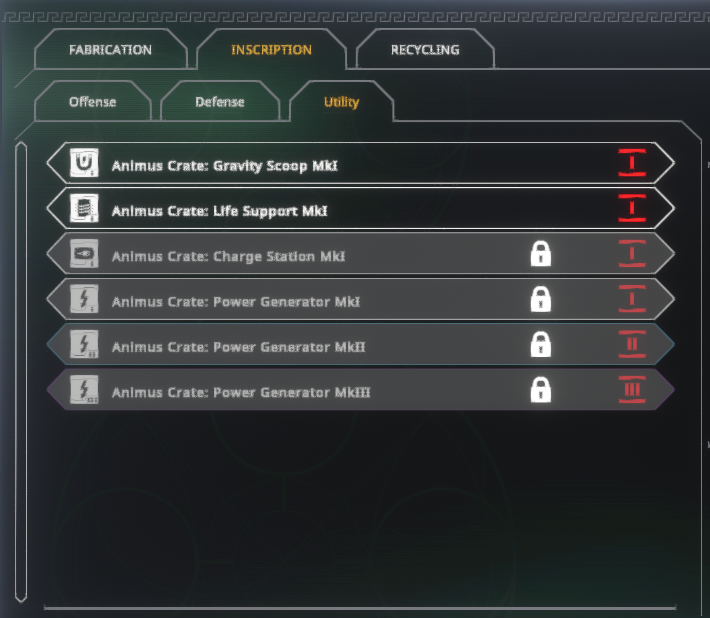
Inscription can be broken into 3 sections. These are all modules that you can install on the ship giving you new modules or replacing broken ones. Offense, Defense and Utility.
⠀
These are all of the weapons modules you can place on your ship.
⠀
These are all of the shields and antimissile modules you can place on your ship.

⠀
These are all of the generators, life support, and gravity scoop modules you can place on your ship.
⠀
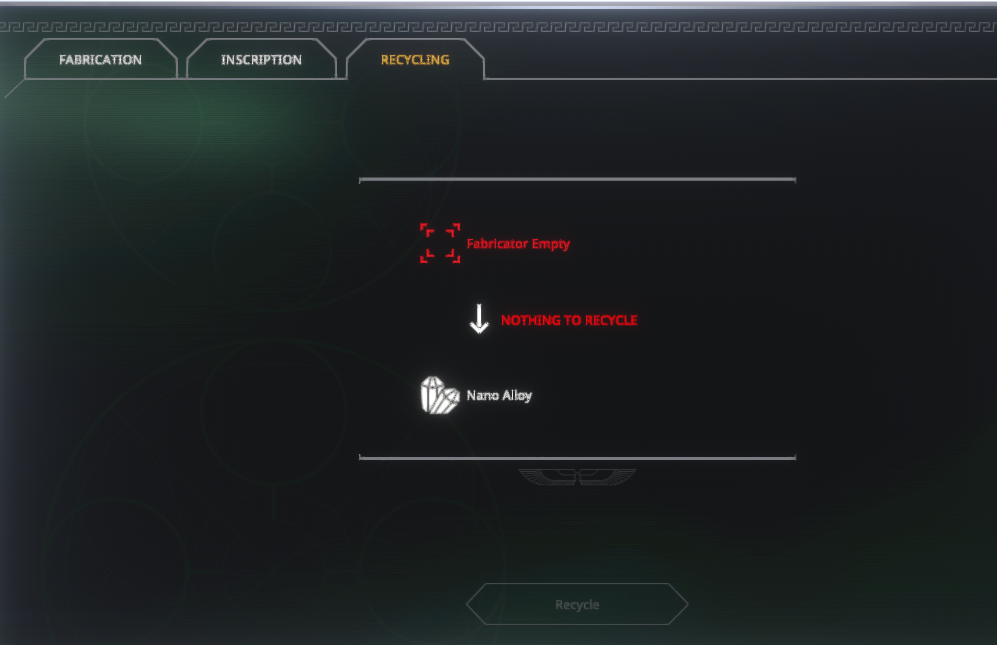
Reduce, reuse, recycle, and most importantly let it grow.
This menu allows you to recycle scraps you find in your travels into alloys.
SM Core – Elevator
They are basically pressure tubes. They let you go up and down on larger ships.
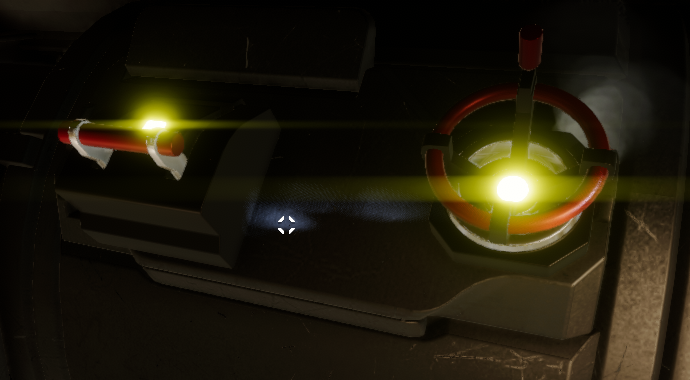
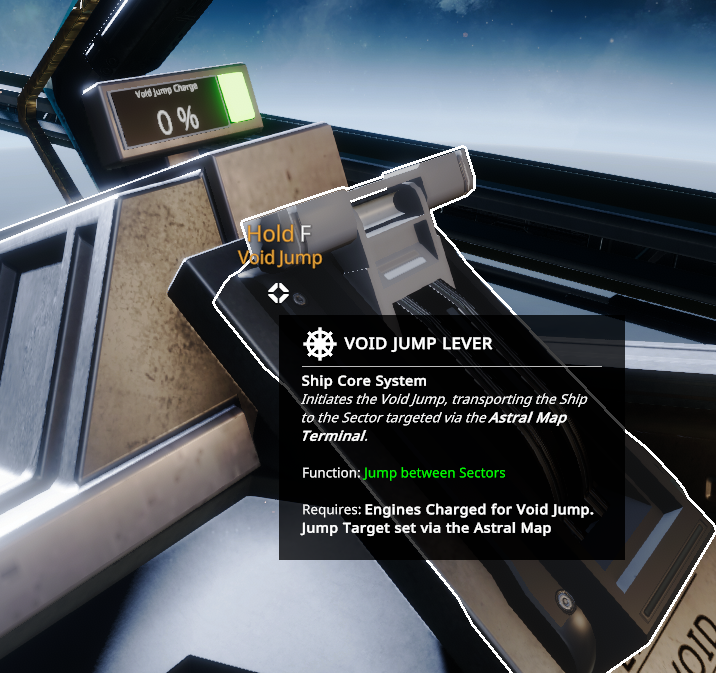
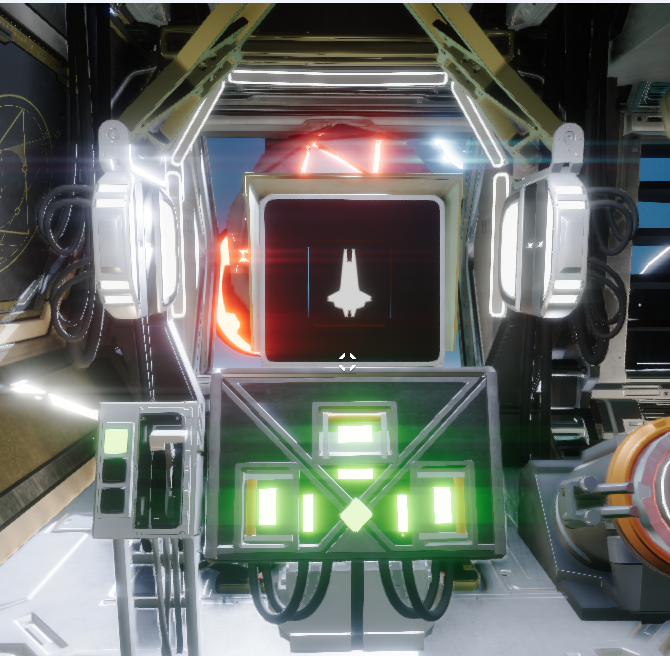
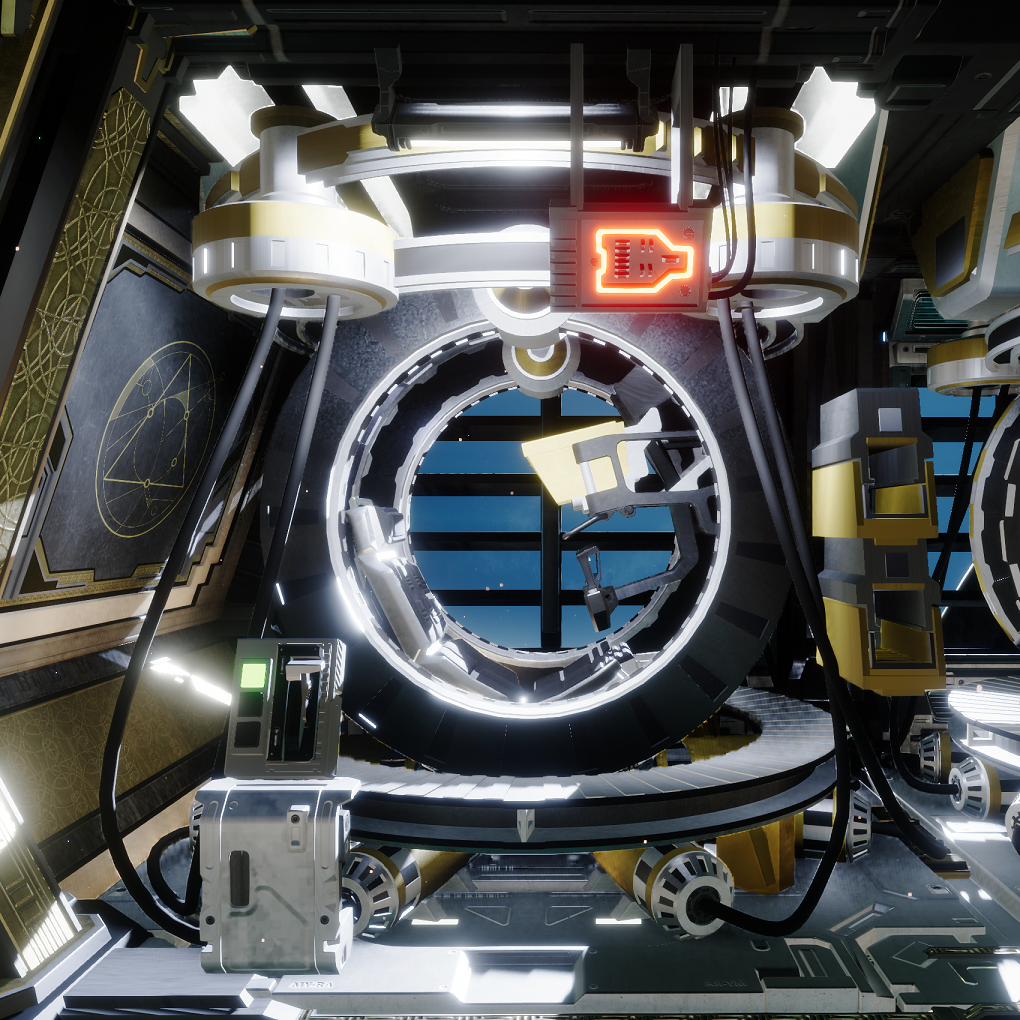
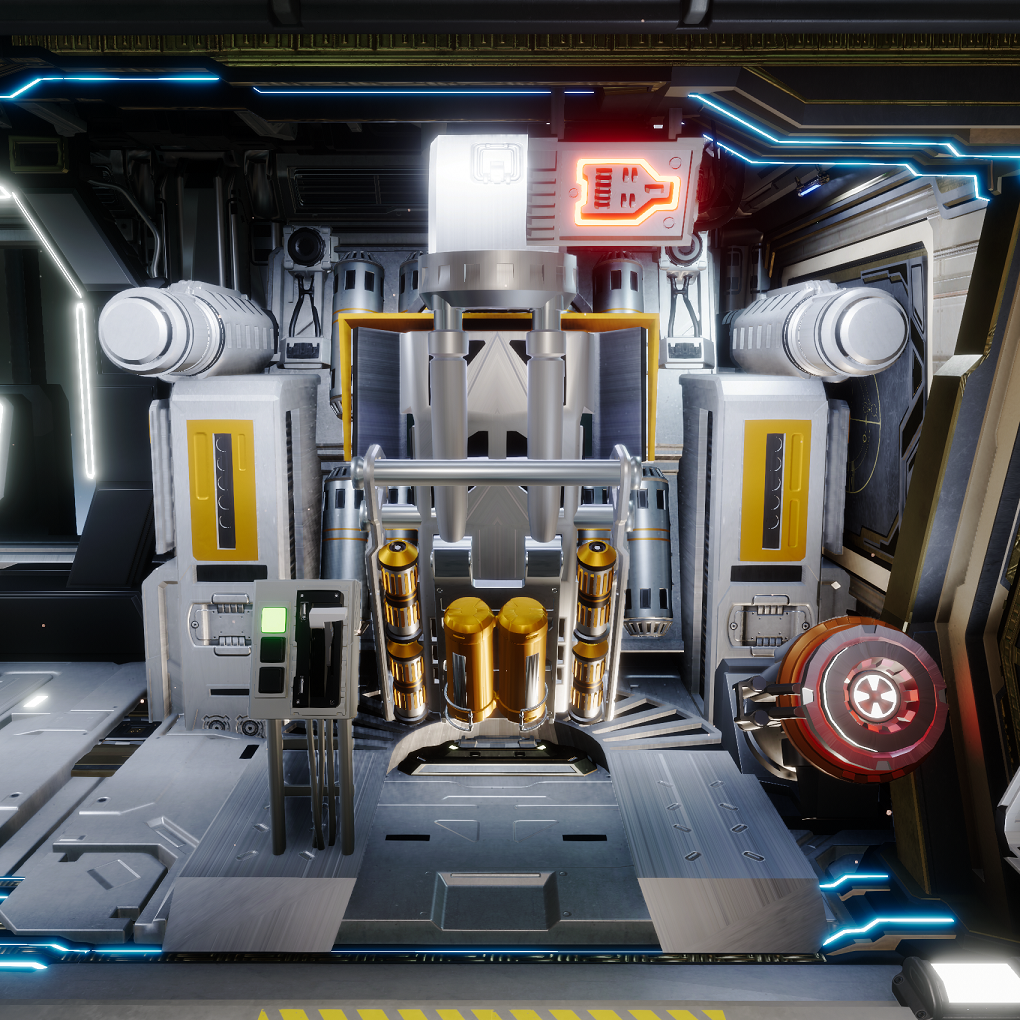
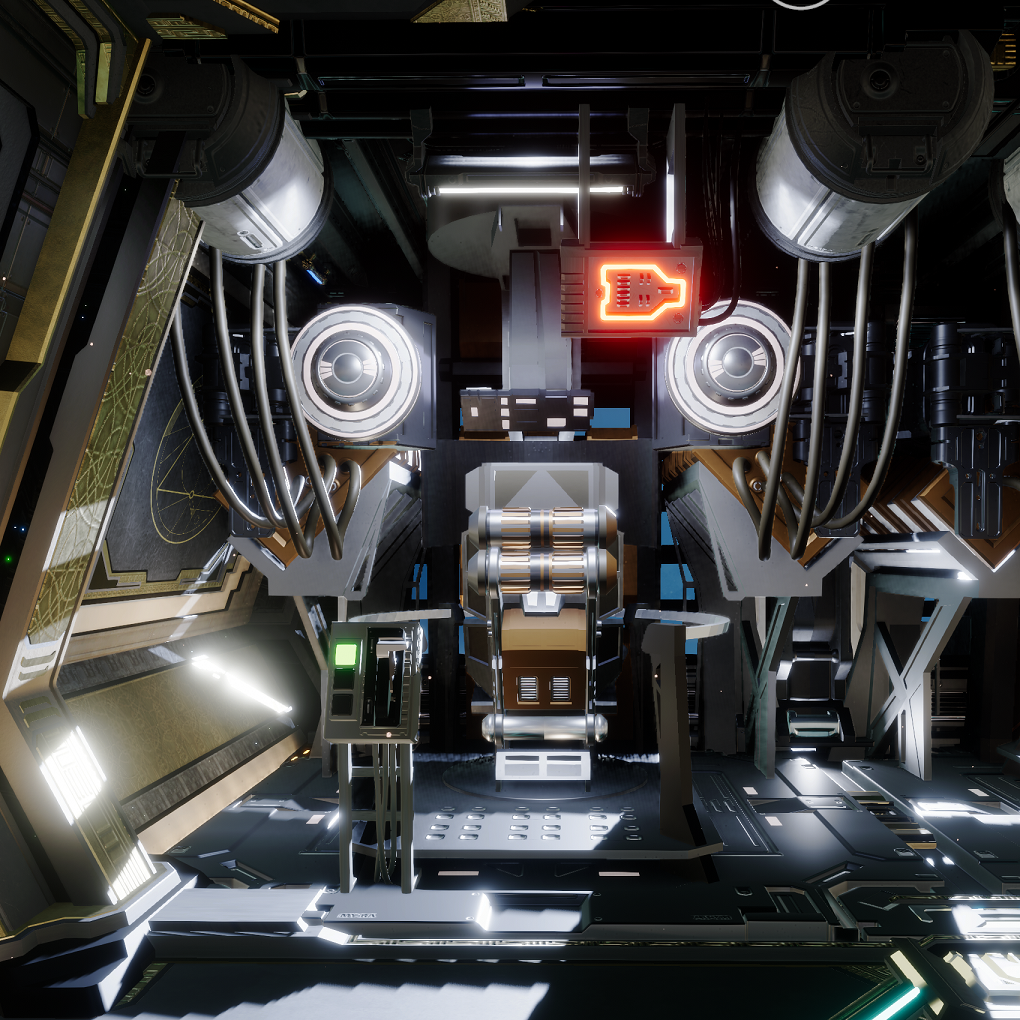
SM Core – Engines
⠀
The Warp Drive/Void Drive allows you to travel between distant star systems in the matter of seconds. Make sure you are inside the ship and seated during warp travel otherwise you can either take large amounts of damage or die. This will result in the loss of Organic Matter which we do not want. *Slaps hood of the void drive* Plenty of Void in this bad boy. Be glad it does not explode.
⠀
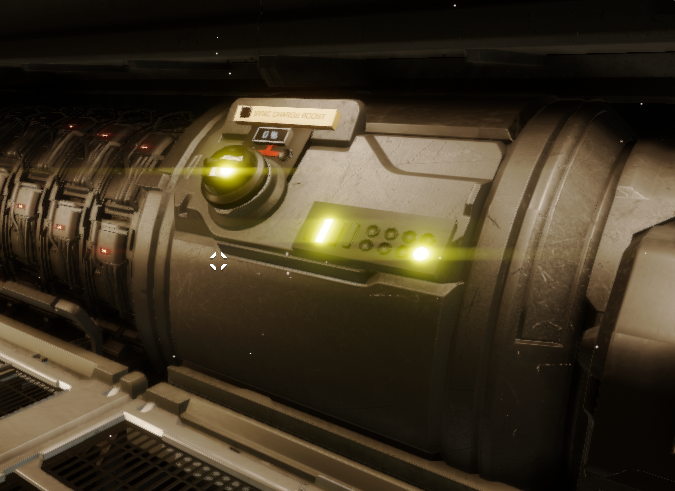
 ⠀
⠀
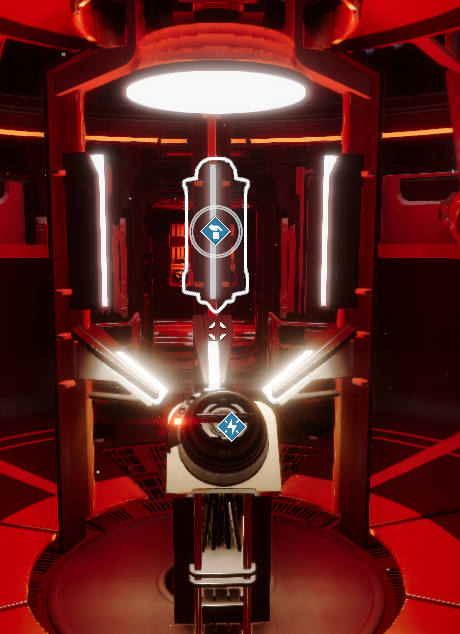
To charge the void drives you must activate both charging switches (pictured above). This will start the charging of the void drive. It is recommended to have two players in the rear and activate both switches at the same time for a faster charge. But, in some circumstances you can just charge it on your own by activating both. Once charged the pilot can activate the drive (See Pilot Seat Section) after someone selects the destination on the world map (See World Map Section).
⠀
⠀
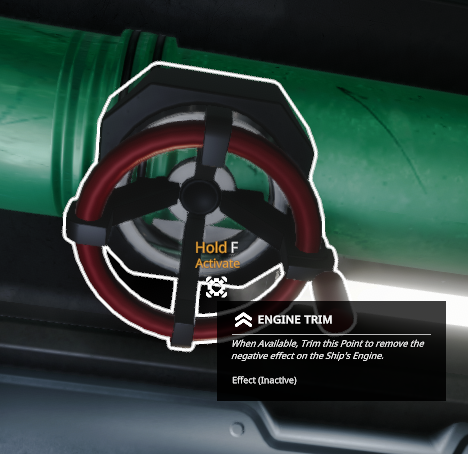
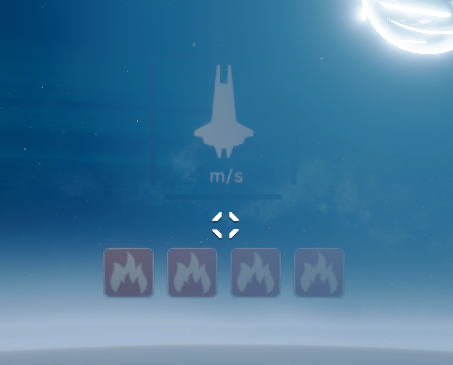
Near the engines will be a set of engine boosters. These each grant an amount of extra thrust but have a limited duration. They can be recharged infinite times after usage.
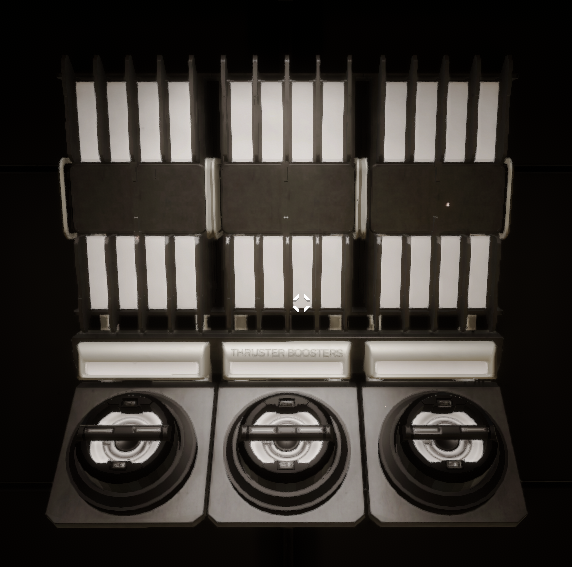
⠀
⠀
If I did not tell you that this mini game is exhausting I would be lying. This is a true mini game inside the game and you will find out for yourself.
⠀
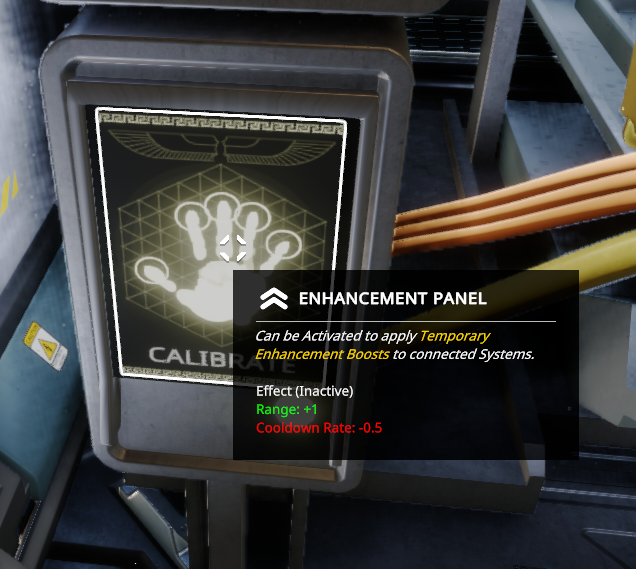
In the engine room and throughout the ship you will find Valves, Switches, and Levers. These all control what is called Engine Trim. The engine trim effects how fast you can go and slows you down rapidly if not taken care of. If one of these activates you will need to run up to it and repair it. You will hear an audible hissing noise coming from it as well as a flashing yellow light. The Pilot is notified whenever the engine trim has a negative impact and can tell you how many items need to be repaired.
⠀
Needs Repair
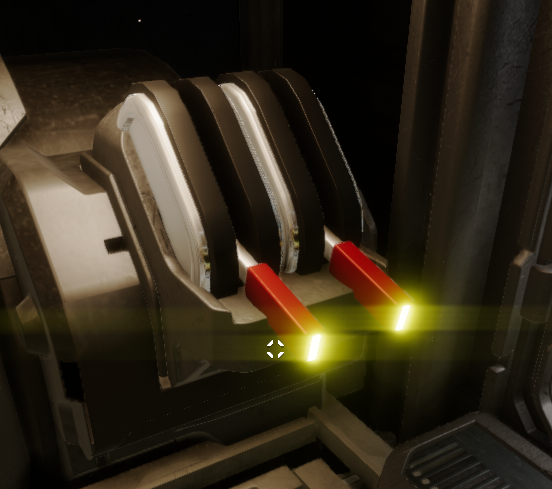

⠀
Repaired
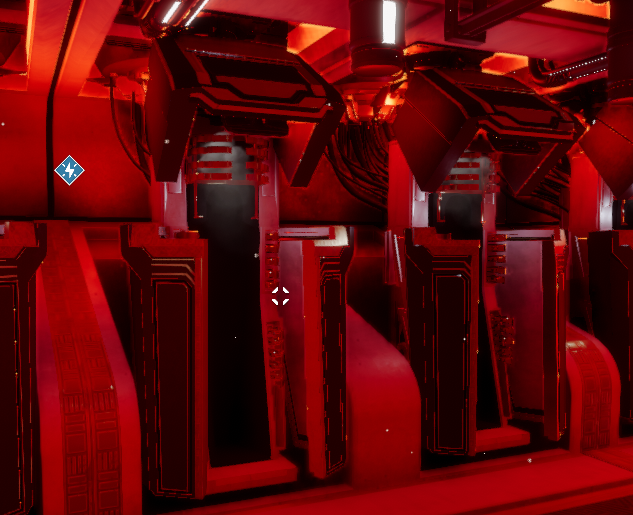
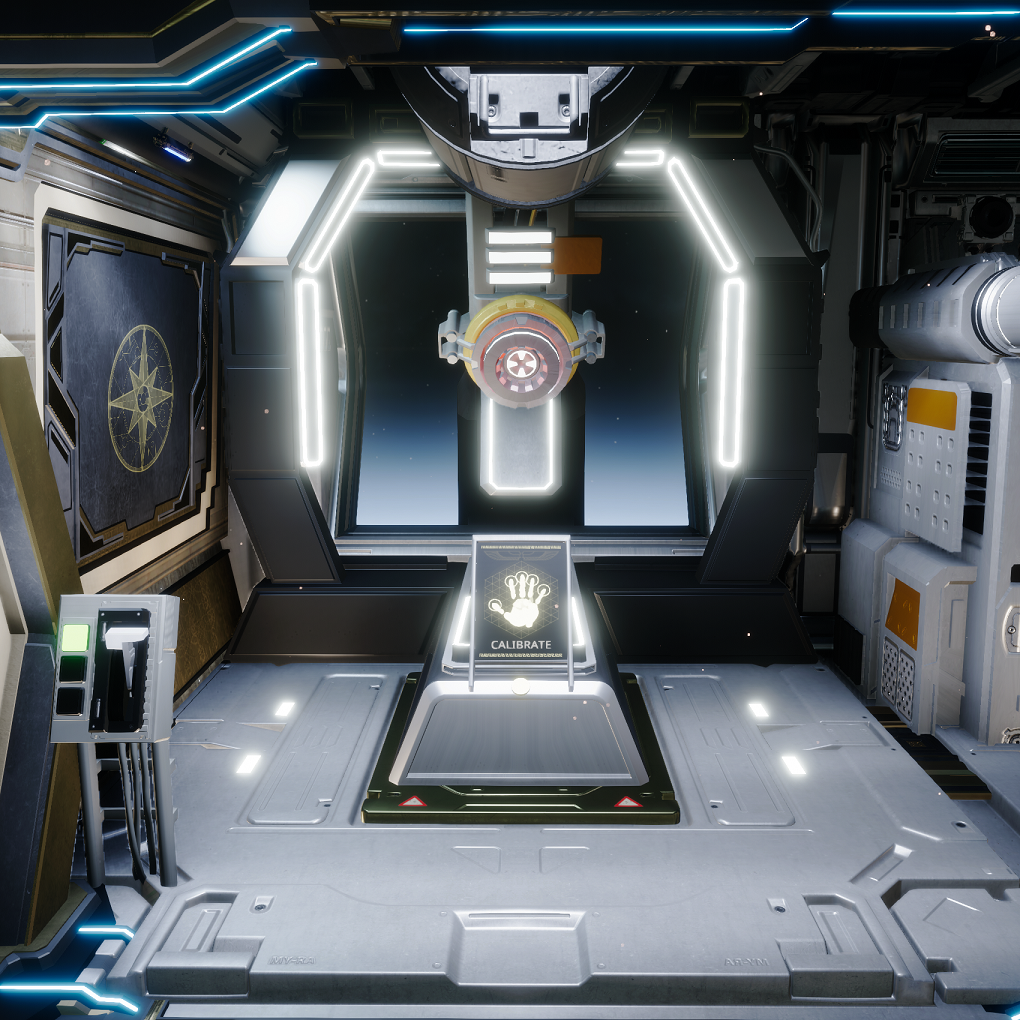
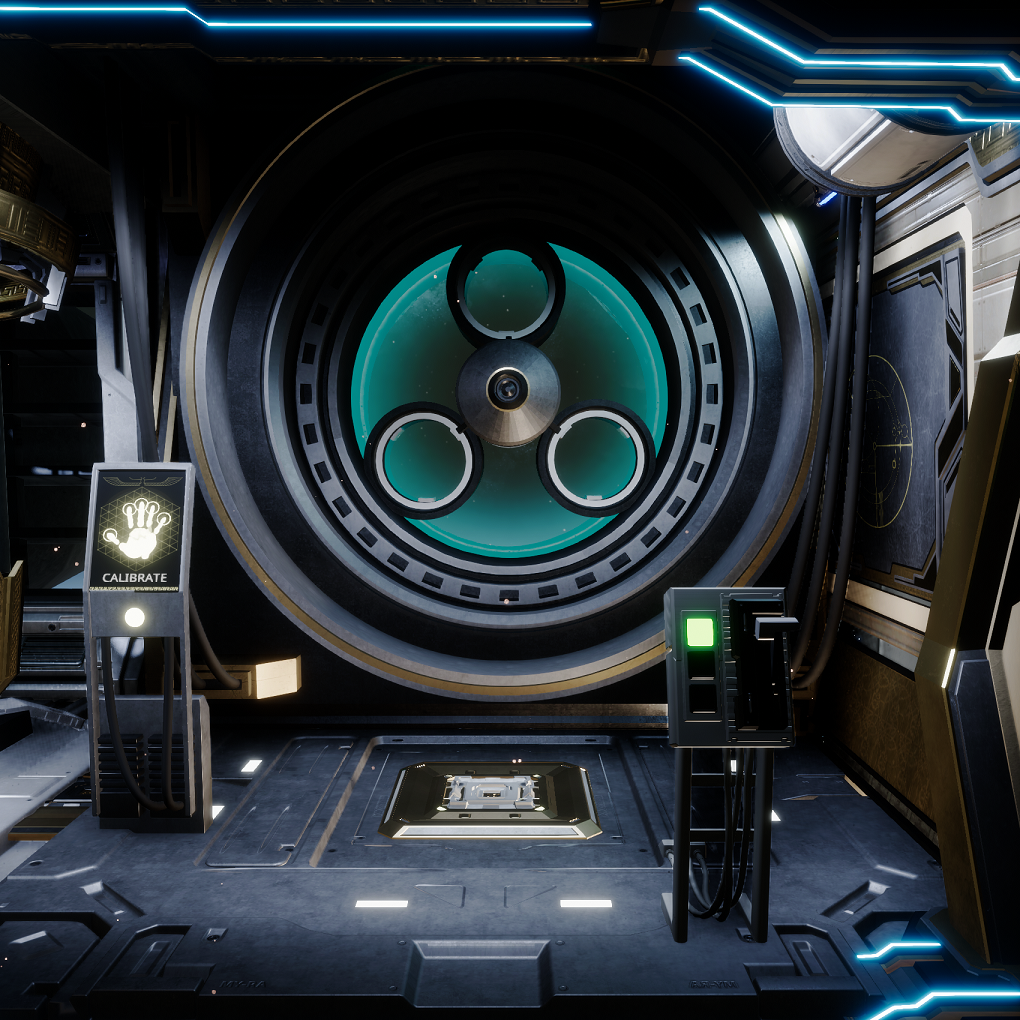
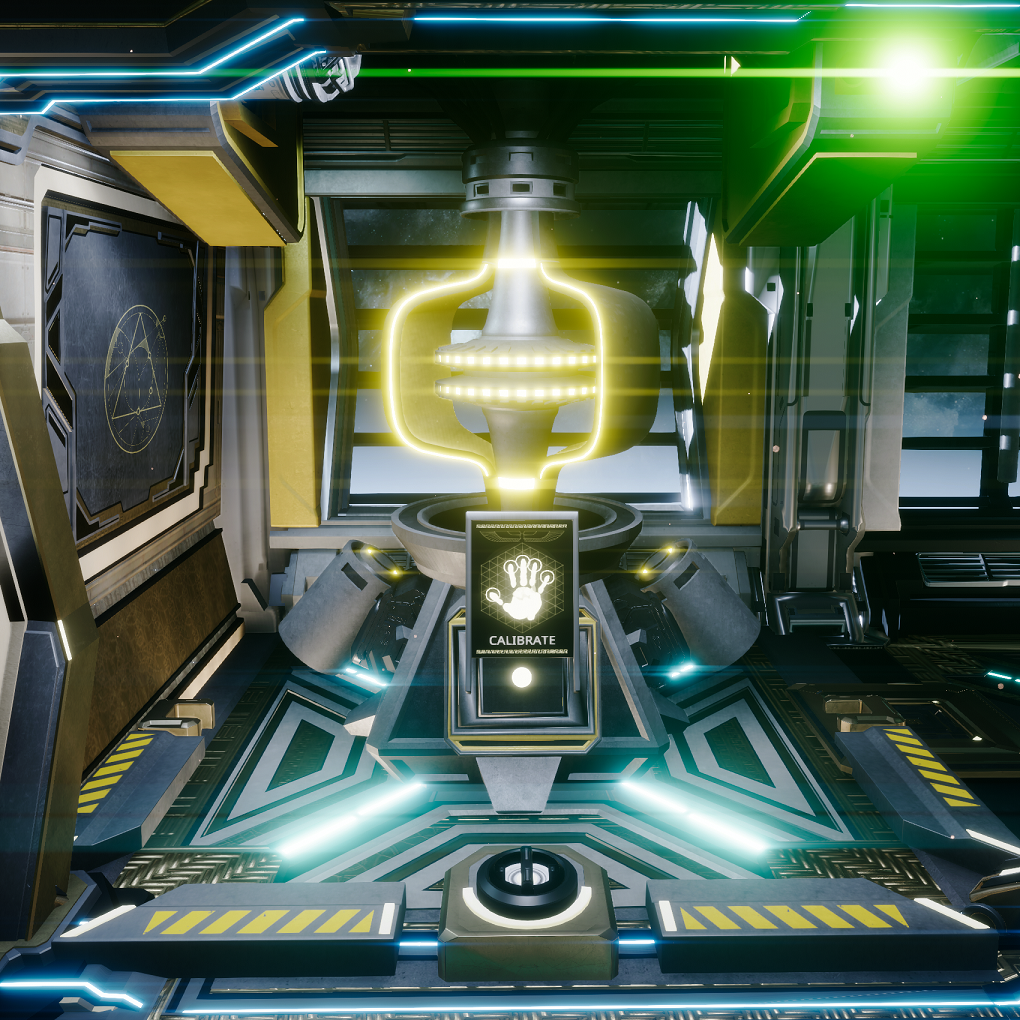
SM Core – Homonculous/Medical
The in game ship mechanics are long and pretty complex to deal with. You need to familiarize yourself with each ship before beginning your adventure. You will want to press TAB so you can get way point markers.
You start out within your Medical Pod. This pod can heal you and even reconstruct your body in the event of rapid deconstruction. You will notice a Biomass Storage indicator, this shows you how much matter you have to re-spawn with and heal with. You can find more out on your adventure.
⠀
Grab the Homonculus.
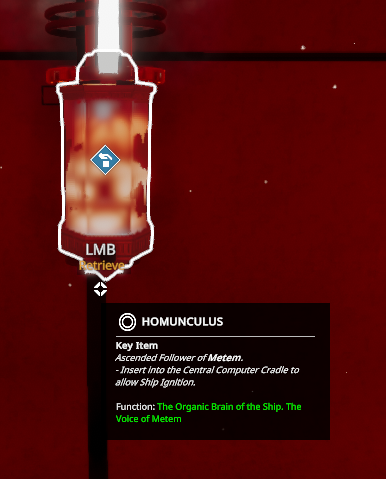
Find the computer station and insert the Homonculus. After inserting the Homonculos start the ship via the switch below the terminal.
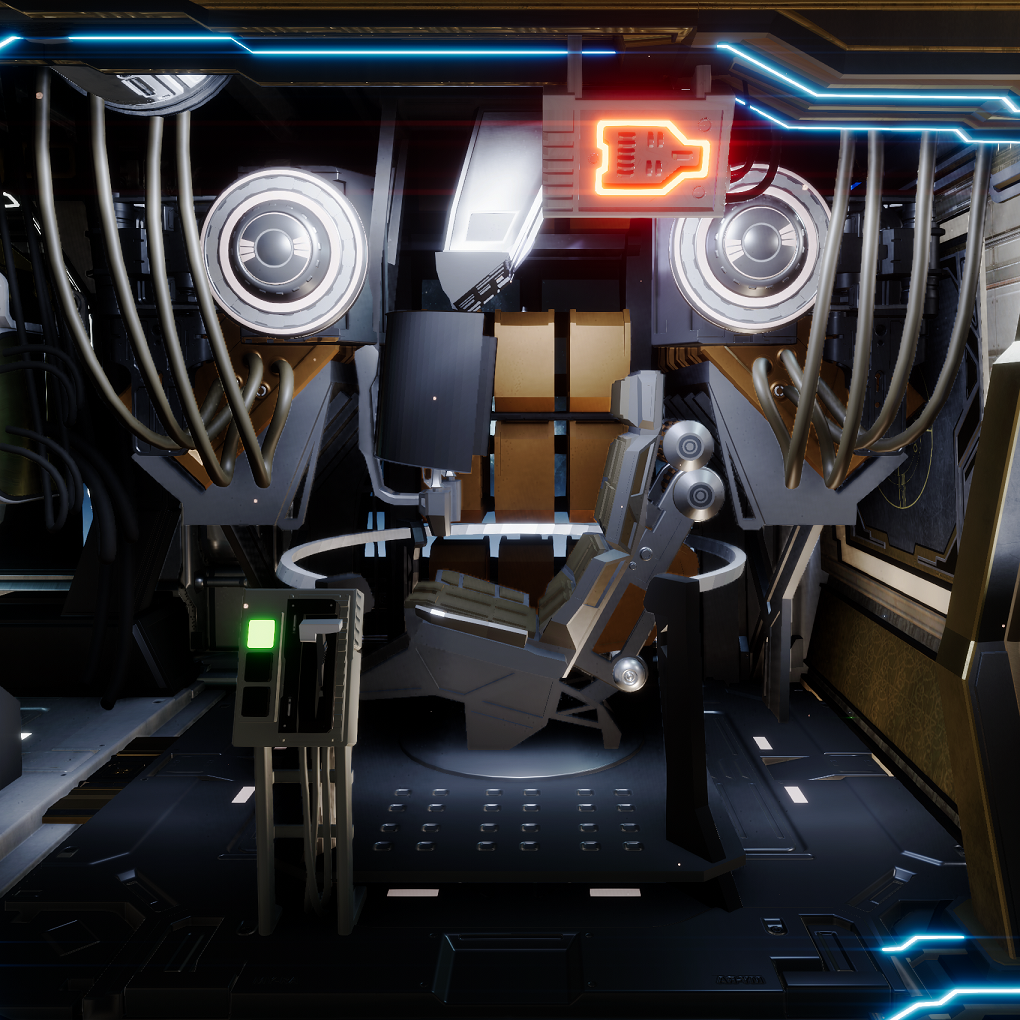
SM Core – Pilot Seat
Pilot Seat
Seat takes 1 power to control the ship. In first person toggle the switch on the left.
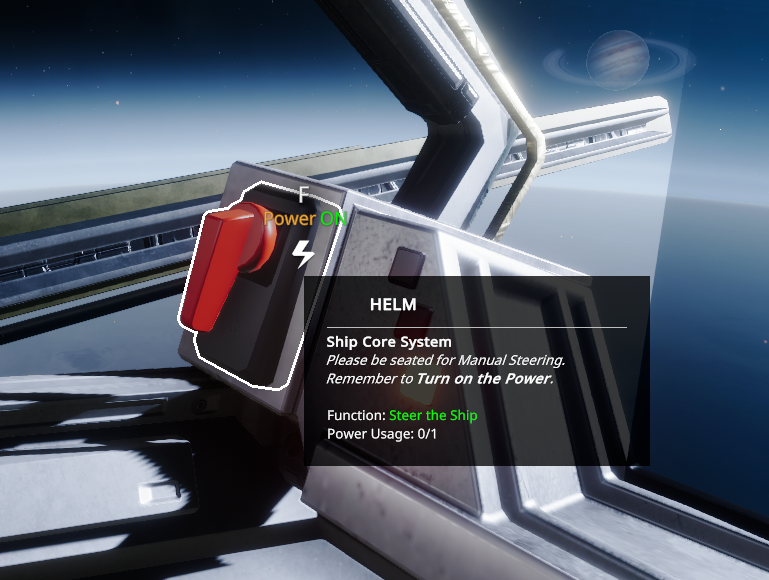
Depending on your ship type you will either have 3 or 4 boost indicators. These boosts are powered up in the engine room. Press shift to activate the boosters and increase acceleration in all directions. Oranges = Charged, Yellow = Charging, Empty = Needs Charging (Colors hard to see in 1st person)
Shields are kind of weak right now but they are useful in some cases. You can see where the shields are directed and how much power is in them to steer your ship to take hits if necessary.
The warp drive is scary. Line up to target and pull the lever. Make sure everyone is seated or they will go splat. They need to be seated at the start of the warp and end of the warp. Have maybe 5 seconds to get up and switch seats.
SM Core – Storage
Every ship has a set of storage drawers that can hold X number of small items and X number of large items. I am working on a list of each item size for reference.
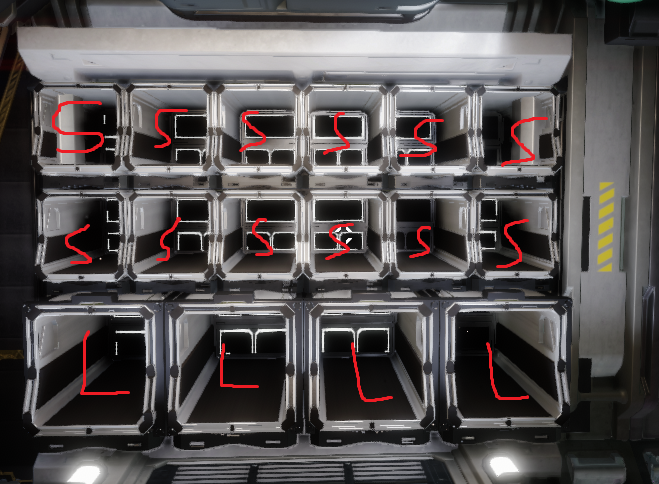
Small Items
- All Items Except Constructable Modules
Large Items
- Constructable Modules
SM Core – Thrusters
Ship Modules – Defense
This is the list of Defense Modules in the Game. Please see the associated section for each.
- Arc Shield
- Kinetic Point Defense
SM Defense – Arc Shield
Shields are just shields. As long as no one uses a bass cannon I think you will be fine. The shield generator is fairly simple compared to everything else…
⠀
Flip the Switch on the left. Then activate all switches on the inside panel. You will need to hold the activate button for a bit till the levers click in. The basic shield does not cover the rear of itself. The 3 sides it covers are based on where it is placed. If it is placed on the left of the ship only the Rear, Left, and Front will be covered on the basic tier shield.
⠀
You can boost the shield generator by throwing energy cells into the right slot. This increases the recharge rate by a good margin. You will need to have energy cells unlocked by leveling up first and charge them inside the energy room. (See Power Mechanics)
SM Defense – Kinetic Point Defense
Point defenses go brrrrrrrrrrrrrrr. Each ammo box grants them 1000 rounds. These things fire like madmen. These things take out missiles and projectiles like its a fire sale.
⠀
CA = Current Ammo in the Module
P = Power Status
A = Ammo Slot for adding ammunition

⠀
Running the enhancement adds some range to the interception.
Ship Modules – Utility
This is the list of Utility Modules in the Game. Please see the associated section for each.
- Charge Station
- Gravity Scoop
- Life Support
- Power Generator
Ship Modules – Weapons
- Benediction Cannon
- Litany Minigun
- Recurse Beamcaster
- Shuriken Carronade
- Shuriken Energy-Gatling
- Upgrade Modules
The Friends That Helped Along the Way
Popchip – Assisting me with adding information on Kicking players. Corrections to the modifiers section. Thanks!
Naut – Provided final zone Modifiers
Mysticalblue – Corrections to power data
Factions
Proginetors
Remnant
Thanks to Tylerun for his excellent guide; all credit belongs to his effort. If this guide helps you, please support and rate it via Steam Community. Enjoy the game.