I’ve seen a lot of people asking how to get their controller working for this game. This Guide should work for any controller that steam recognizes. I have personally used this method to get an Xbox360, PS4, Switch pro, and steam controller working.
Using community layouts
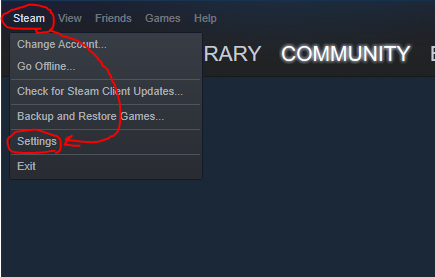
Step 1. plug in your controller, then open the steam settings by clinking on the word “Steam” in the top right corner of your steam client, then click settings on the drop down menu.
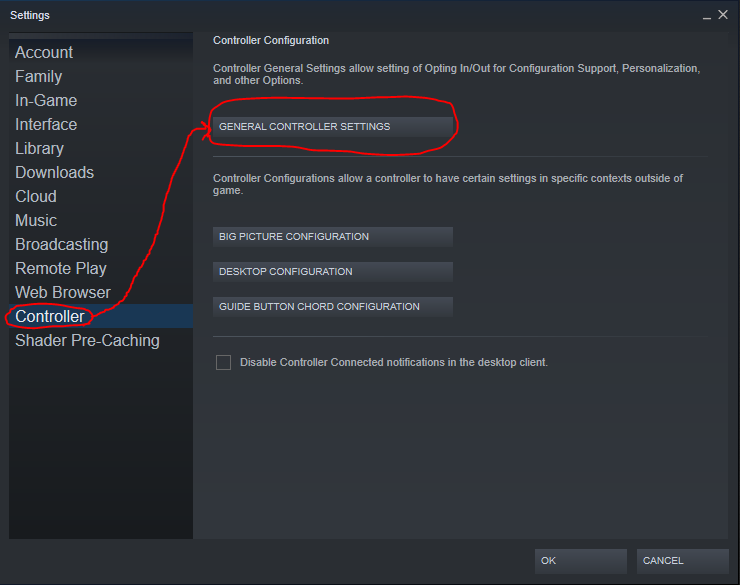
This will open the settings menu. click on “Controller” on the list of options on the right hand side.
From there click the “General Controller Settings” button.

This will open yet another new window .
This menu shows a list of controllers steam has configuration support for. Check the box for the type of controller you have, or generic gamepad configuration support. In the picture you will see i have most of the options selected. this is because i was testing different kinds of controllers.
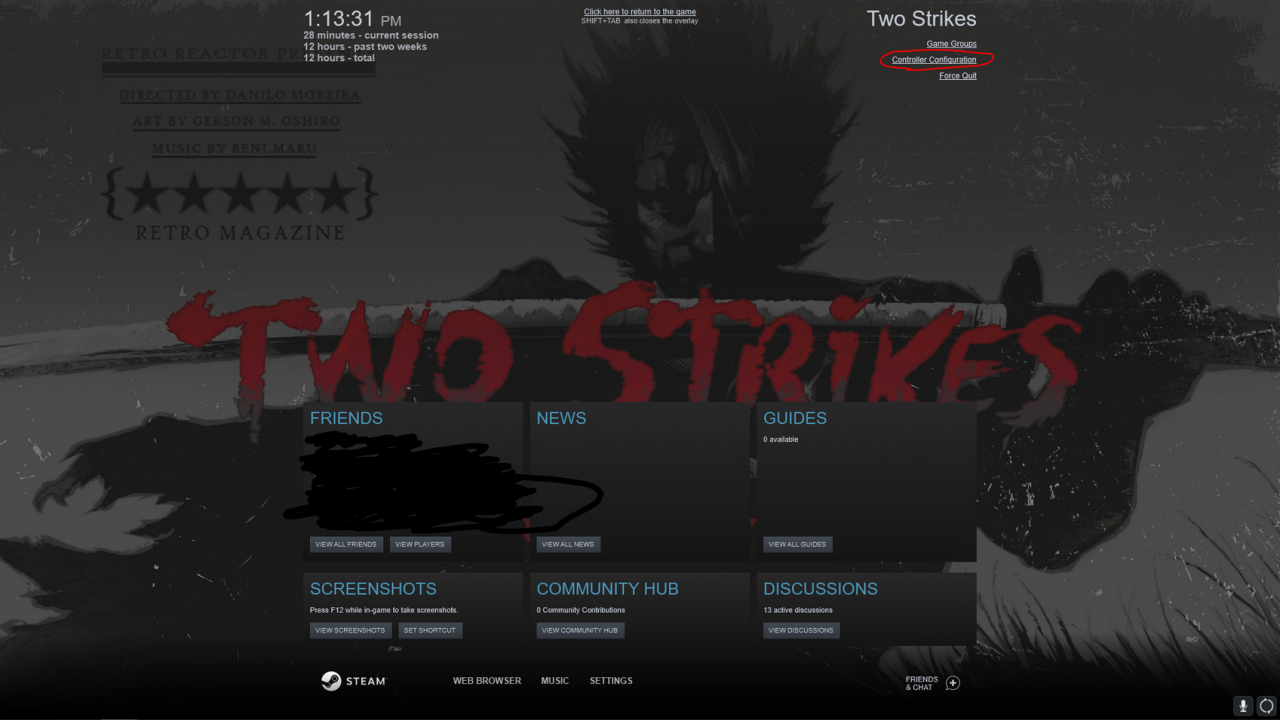
Step 2. Open up Two Strikes on steam, then open the steam overlay by pushing Shift+tab by default.
In the top left corner of the overlay there should be an option for “controller Configuration” select it.
This will open yet another new window. (please note that if you still have “general controller settings” menu still open you will need to close it before it will reopen here)
Note 1. If you are using one of the types of controllers i mentioned at the start of this guide and want to use my config so you don’t have to make your own continue here. otherwise skip to the next section.
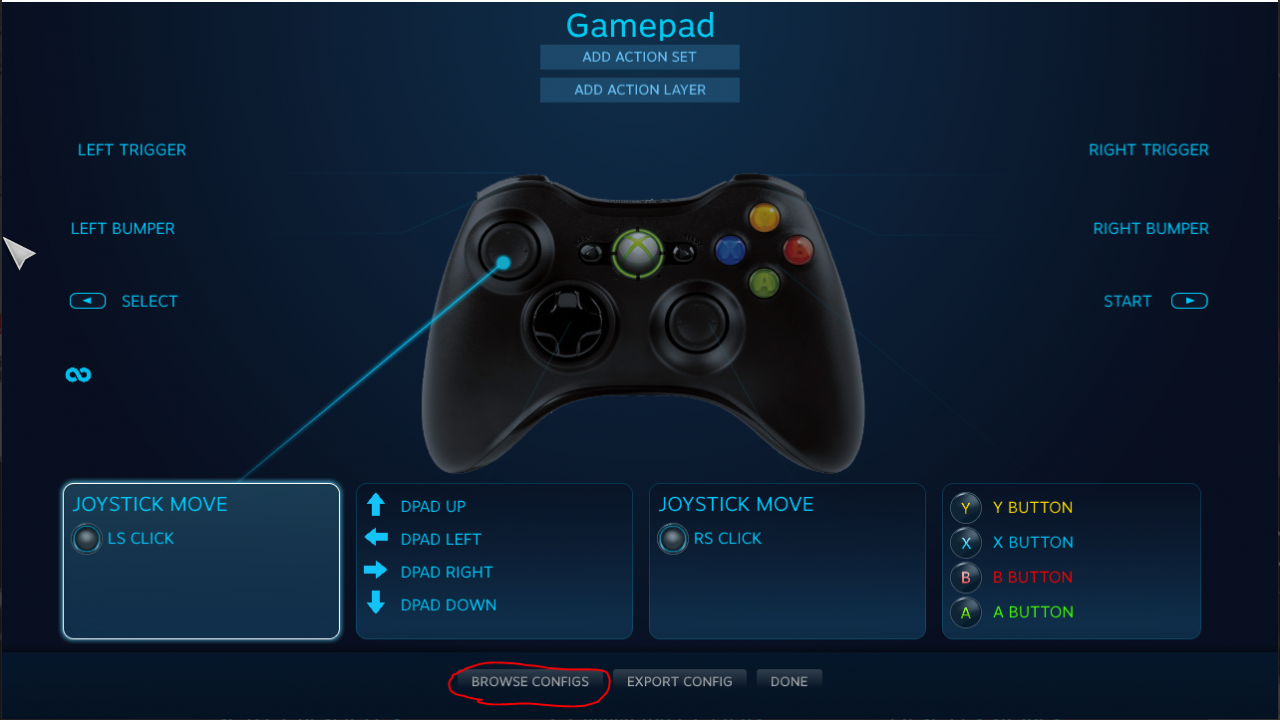
Step 3. Select “Browse Configs” at the bottom of the menu.
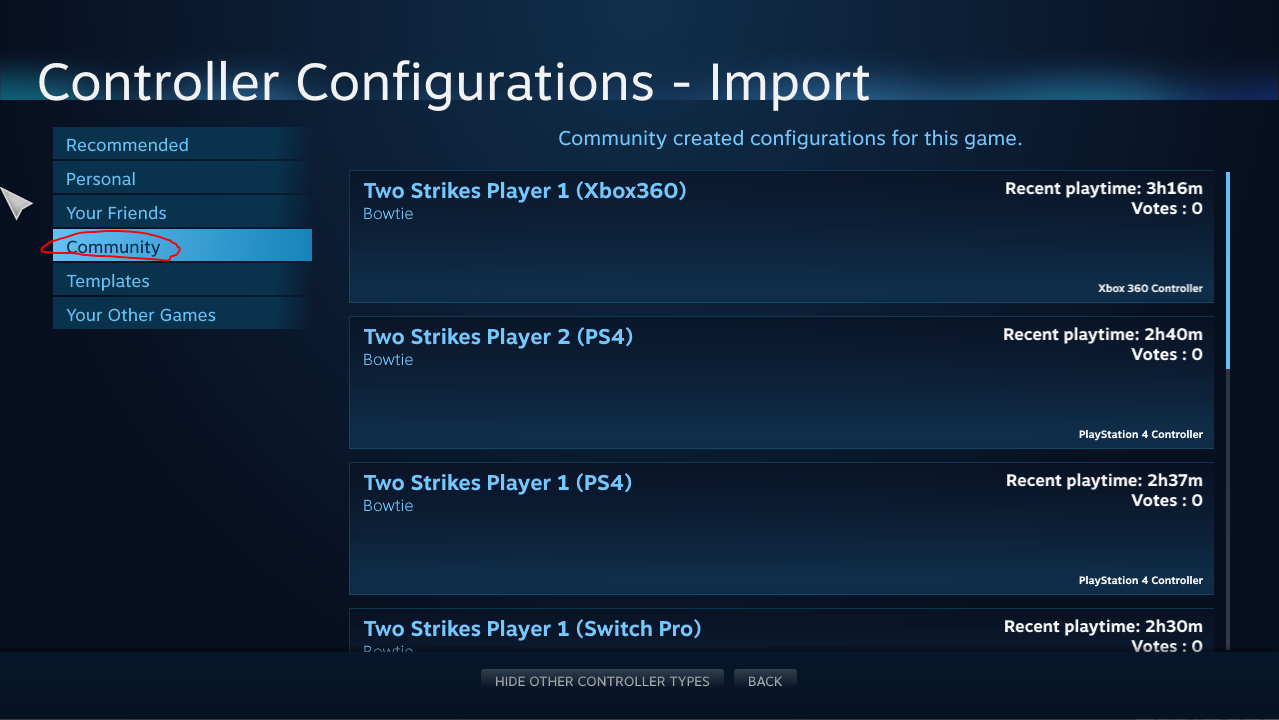
Then select the Community Tab and all my pre-made setups are there as well as anyone else who decides to add their own to the list.
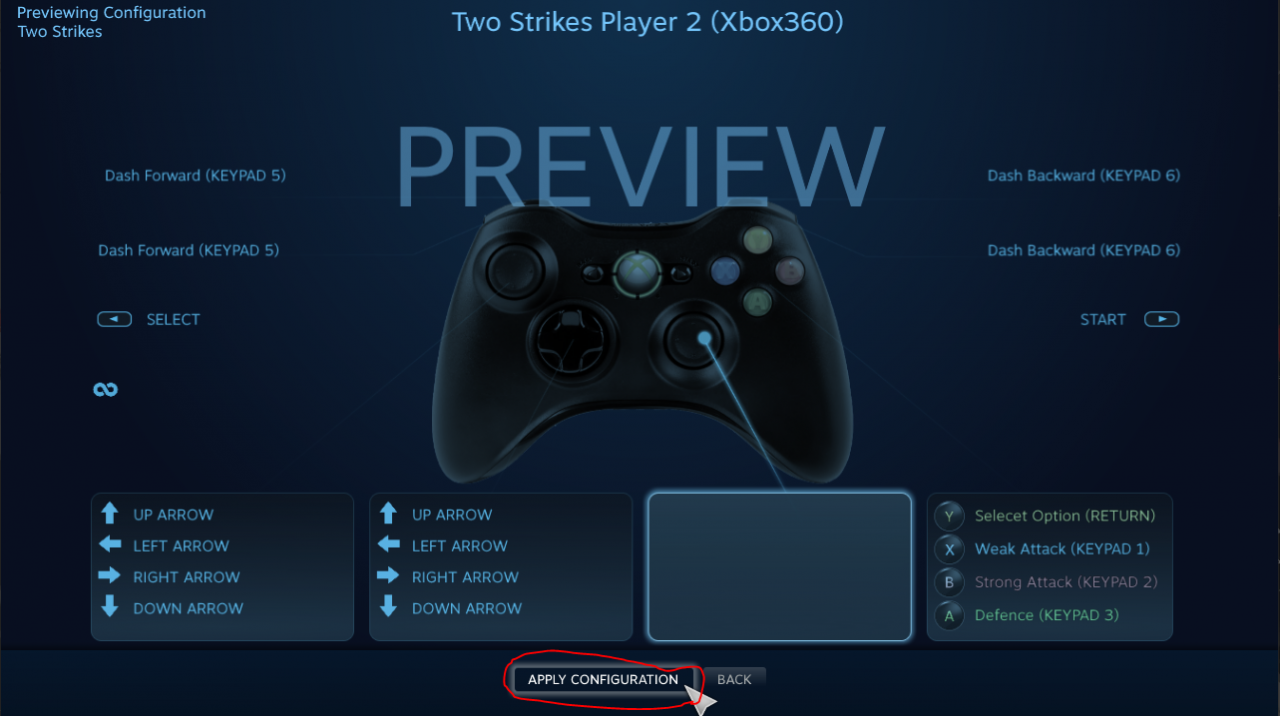
Find the one you want for player 1 or 2 then select it, click “Apply Configuration” then click “Done”
Push Shift+Tab once again to close the overlay and enjoy the game.
Making your own Layout
Step 1. Follow steps 1 and 2 from the first part then from this menu you can manually make your own controller layout.
In this guide i have put an image of the default layout as well as the in-game controller settings menu.
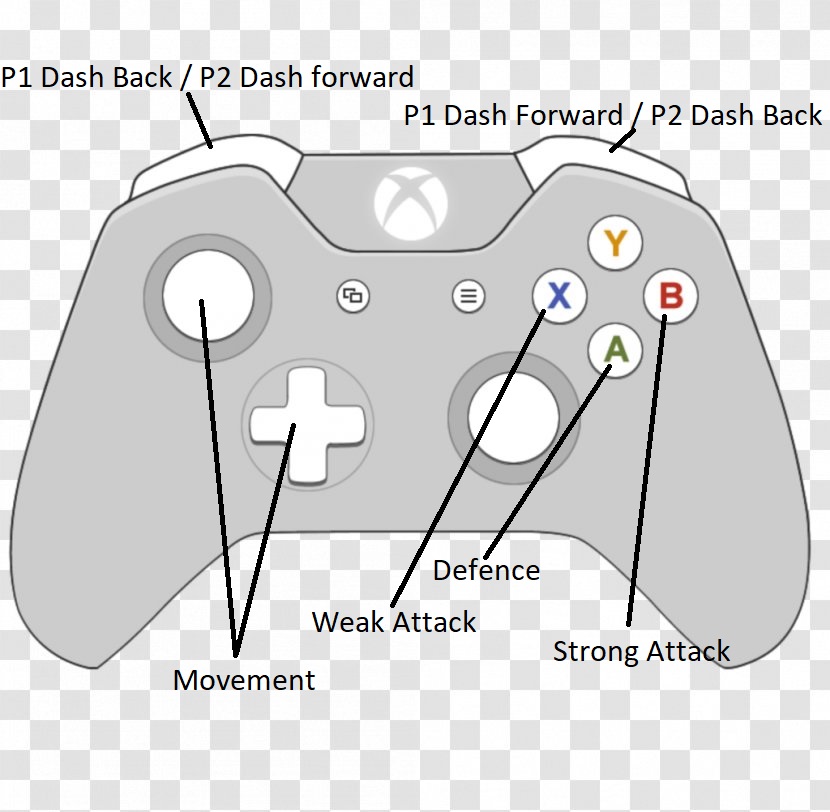
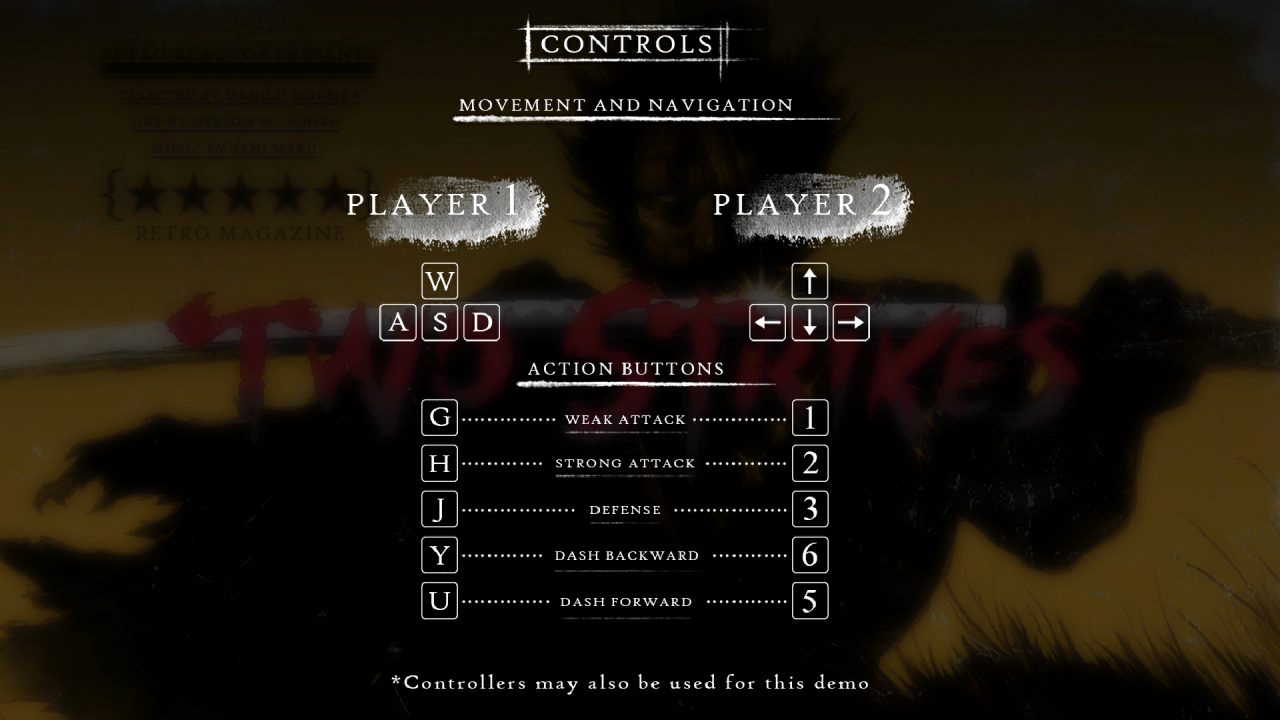
The ingame controller settings show you what key to bind your buttons to.
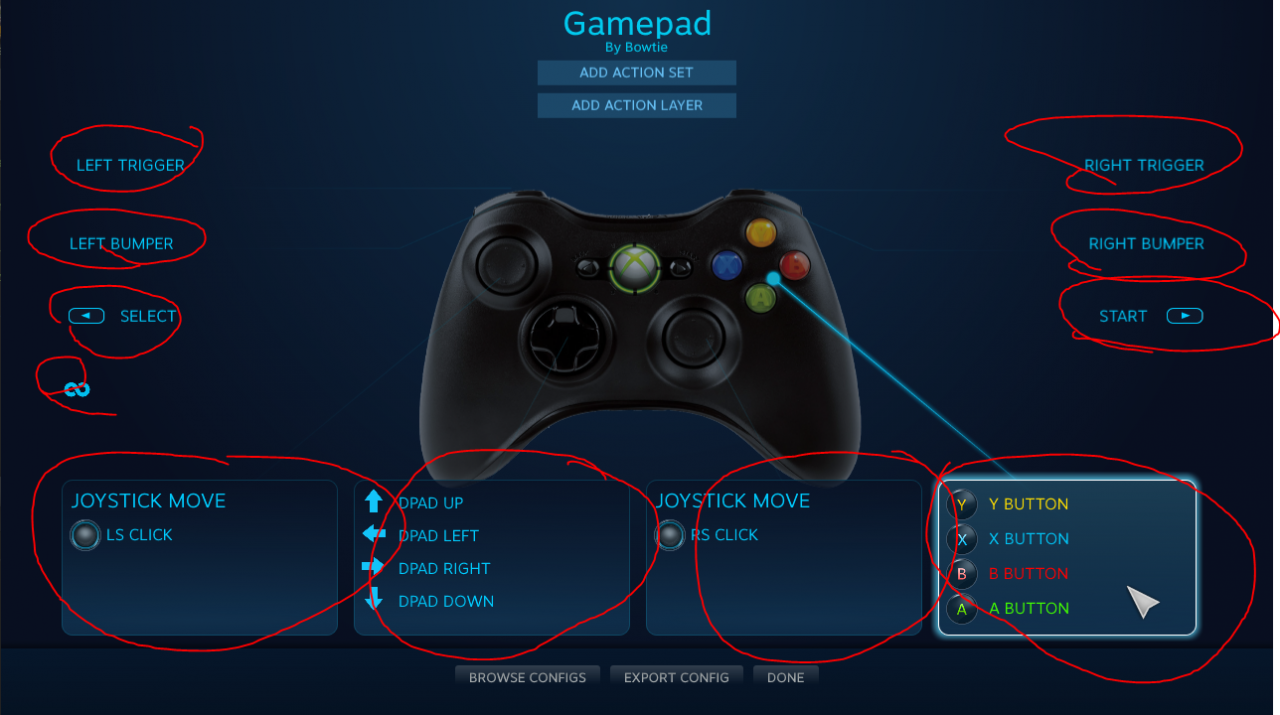
Step 2. Click on each section to bring up the bind.
Click on each button to chance the bind.
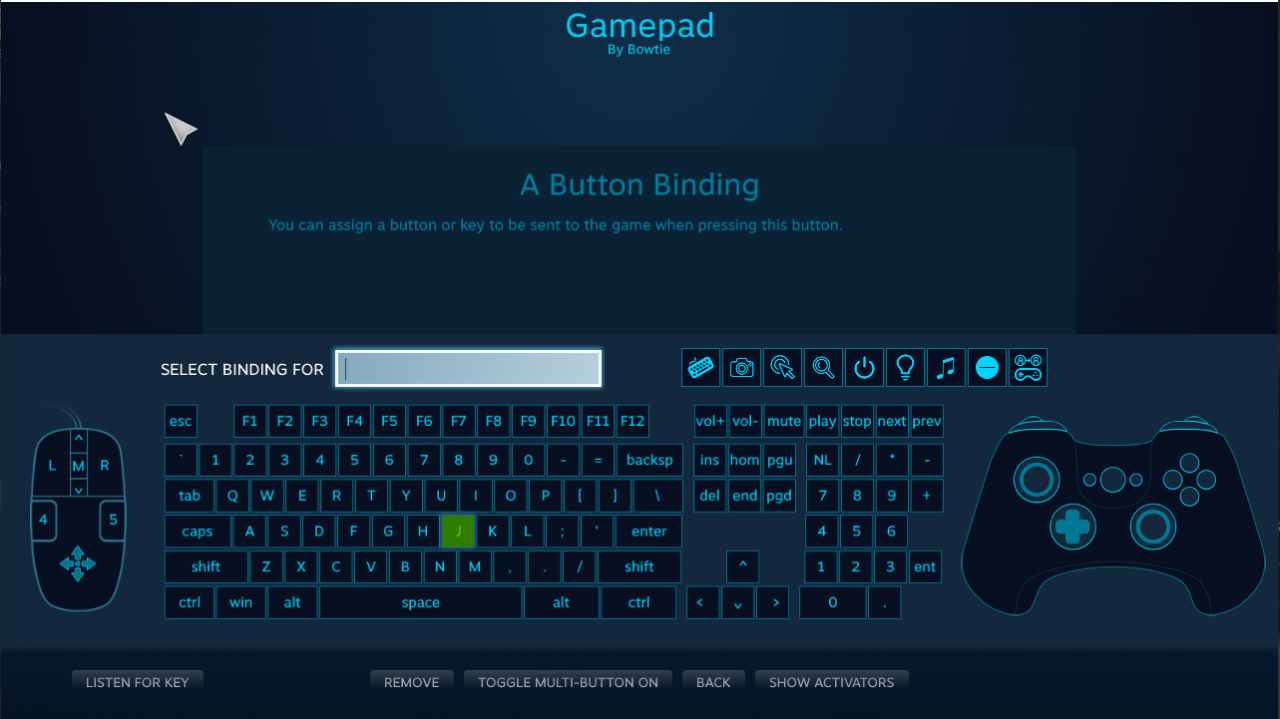
From here you can name your bind and choose what to bind it too. for this we are just using keystrokes from a keyboard.
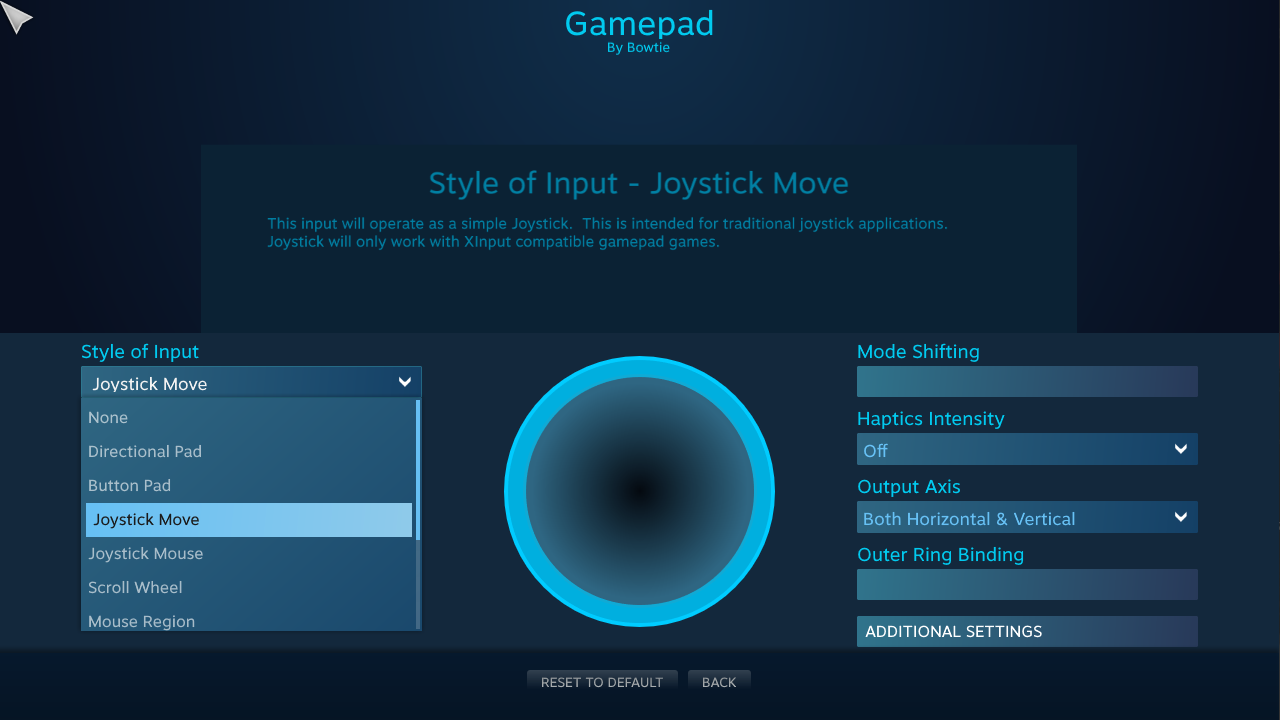
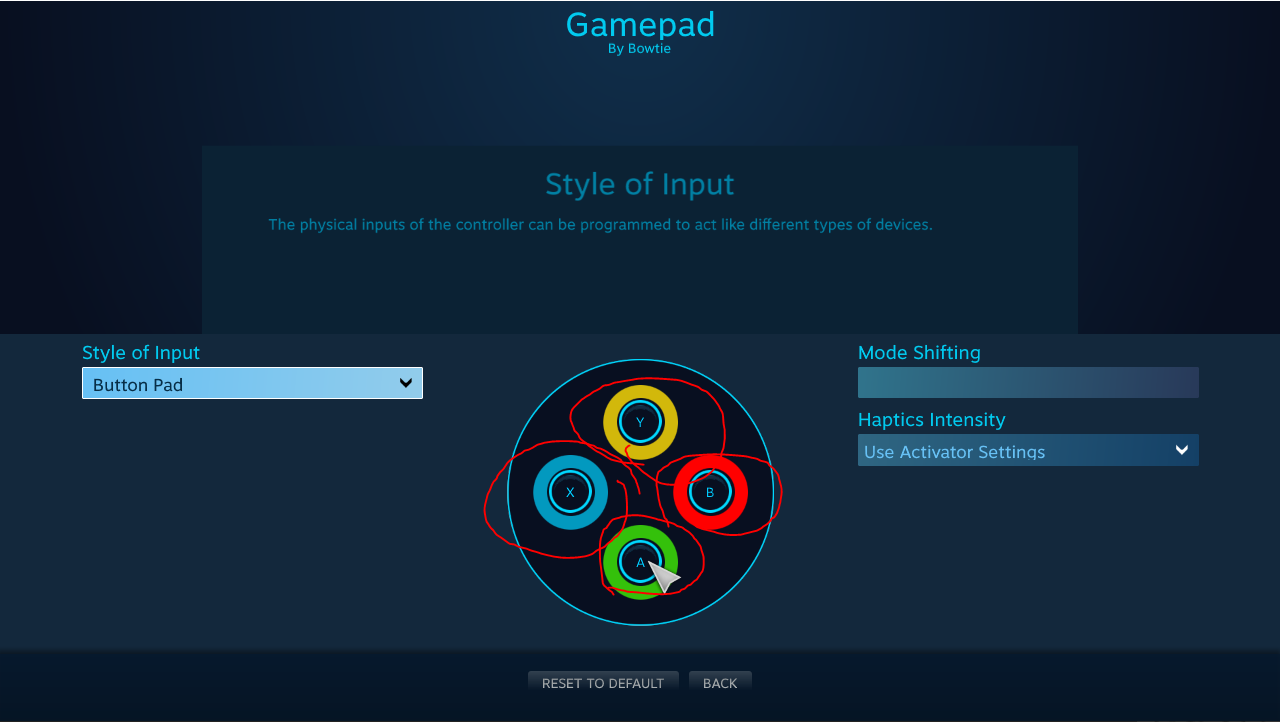
If something doesn’t match up with the way you want to bind something (wanting to bind the joystick to keystrokes for example) you can always check the “Style of Input” button on the top left of this menu,
Note 2. The numbers for player 2’s controls are keypad numbers
Note 3. You will also need to bind a button to “select menu option” (I chose the the top button for this as its not used in the default controls, Y for Xbox, Triangle for PS etc.)for selecting character, picking menu options, and picking your character. This is spacebar for player 1 and the return key or enter for player 2.
Note 4. Some controllers have extra keys bound to mouse click by default on steam as well as some analog sticks to mouse movement. make sure to unbind these so you don’t hit them by accident.
Note 5. Some controllers have more then one trigger pull amount. be careful you don’t leave any extra keys bound to a soft pull or full pull if you are using the other.
Note 6. it may also be a good idea to bind some button (i use start) to escape. escape brings you back to the main menu from character select if you have chosen the wrong option and need to return to the menu.
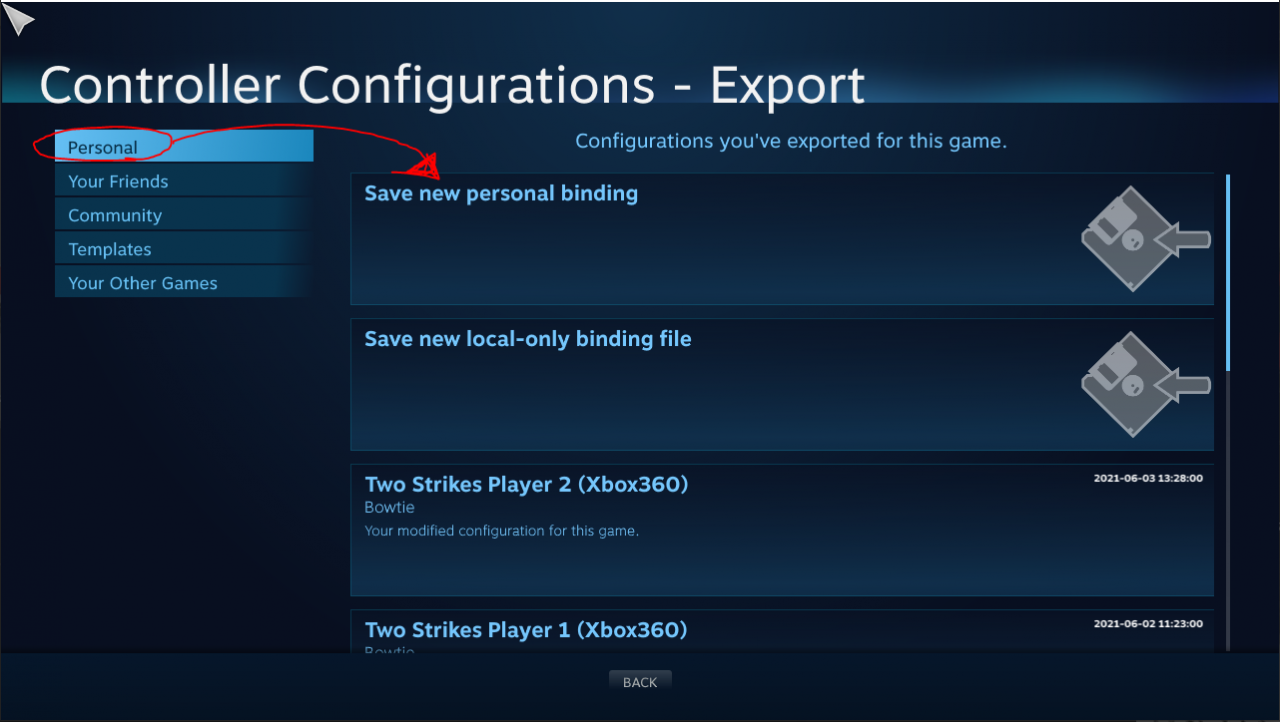
Step 3. Once you have a setup you are happy with push “export Config” at the bottom
Under the personal tab on the right there should be an option that says “Save new personal binding” (for me this option is at the top of the list)
Steam will ask you to name your binding and give it a description that way you know what it is when you look at it in 4 years and cant remember why you made that controller layout.
Note 7. If your new controller layout doesn’t apply right away then open the menu back up the same way you did back in step 2 of the first part of this guide. Then click “Browse Configs” at the bottom. find the one you just made under “personal” select it, and click “Apply Configuration” at the bottom