Have you just entered the dungeon, and don’t know how to proceed? Trying to understand how do the mechanics of the game work? Well, here you have some insight that might be useful to you!
Introduction
If you’ve already played Tower Princess, then you probably know most of these things just by intuition. But still, I thought it would be nice to point them out, so anyone misses these mechanics!
——–
This guide has been made based on the Knight’s Trial Version / Beta Version! I’ll try to keep this guide up to date in case there are some changes in future versions!
——-
Controlling your knight!
There are the keyboard controls, but you can see the gamepad too within the controls menu!
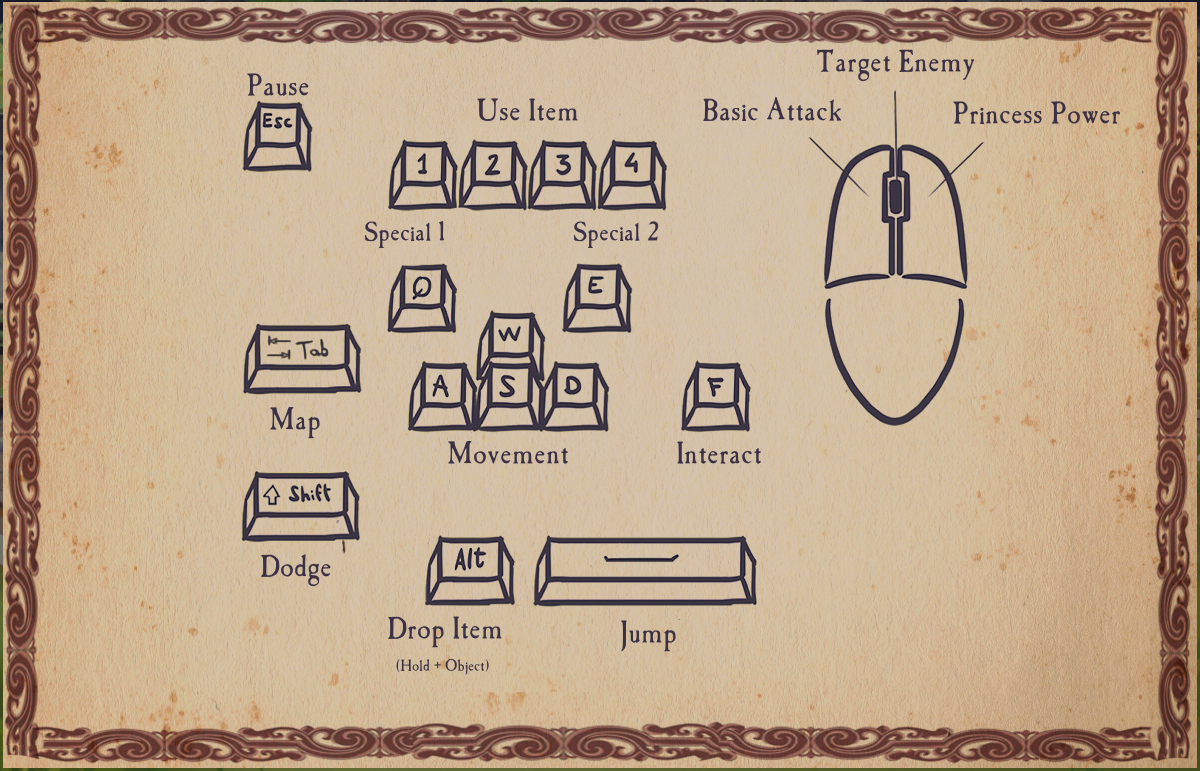
Though they don’t seem complicated, there are some things that are worth remembering!
- Don’t forget to aim!: Targetting enemies is really useful, especially if you’re using the musket!
- Interact with (almost) everything!: Each time you find a prompt at the bottom of the screen with some text interacting with it will work! For example, it’s used to speak with NPCs, pick items or open doors!
- Attack everything else!: There are a few things that can’t be interacted with, such as magic crystals and levers! You’ll see a red exclamation pop up over the knight once you get close to them!
- Remember the basics: Some things, such as dropping items or opening the minimap, won’t seem too useful at the beginning, but the further you progress, the more you will need them!
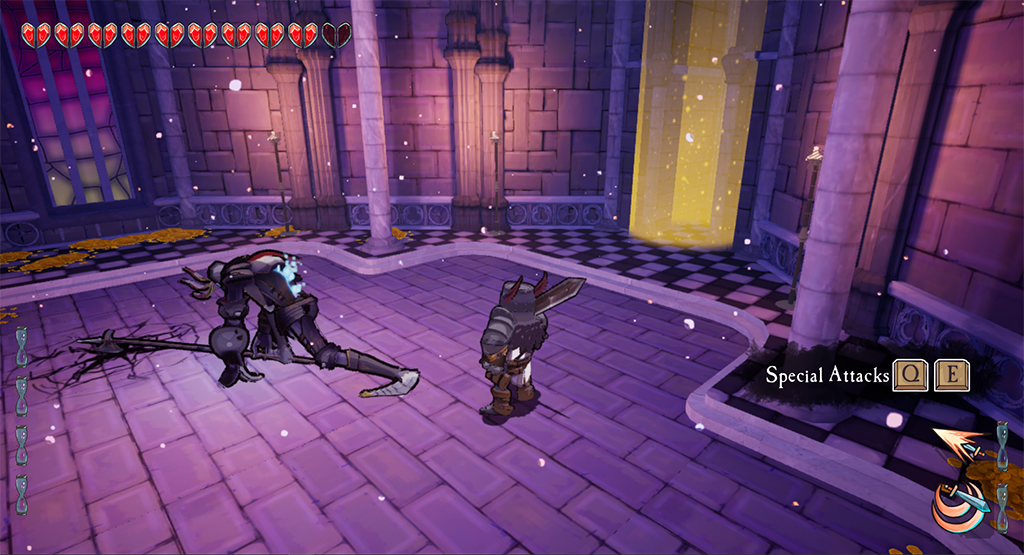
- Unlock your skills!: During the tutorial you can use the two special attacks available for the sword. You won’t be able to use them until quite later on in the game, once you’re able to unlock them, but don’t forget they exist!
Some enemies add a few mechanics more (for example, the Hollow Armors are invulnerable until they’re hit on their weak spot!), but taking these details into account should be enough to understand the basics of combat and the knight’s gameplay.
How to manage the princess
The gameplay offered by the princesses is actually quite straightforward and easy to use! But knowing beforehand these couple of details will make their rescue easier!
The first thing to take into account is that you have to talk twice with a princess in the Entry Hall to rescue her. The first one appears with the prompt “Talk”, and lets the princess introduce herself. With the second one, where the prompt changes to “Rescue”, you’re confirming you’re rescuing that princess.
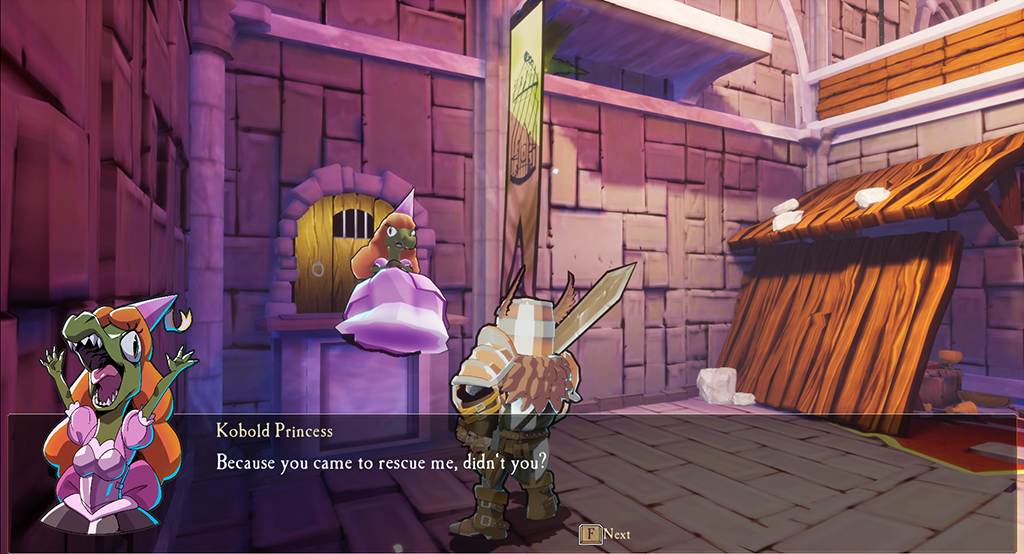
Once you’ve chosen which one are you trying to rescue, you can enter together into the dungeon to face the Evil Dragon!
Each princess has her own special power, with different mechanics from one to another. I want to keep this guide for the basics of the game, so we’ll leave those for another occasion!
As far as you progress through the dungeon, and have some special details with the one you’re rescuing, you will be unlocking more dialogue options from the princess! This will reveal more of her background, and may give you a hint for the gifts she may like!
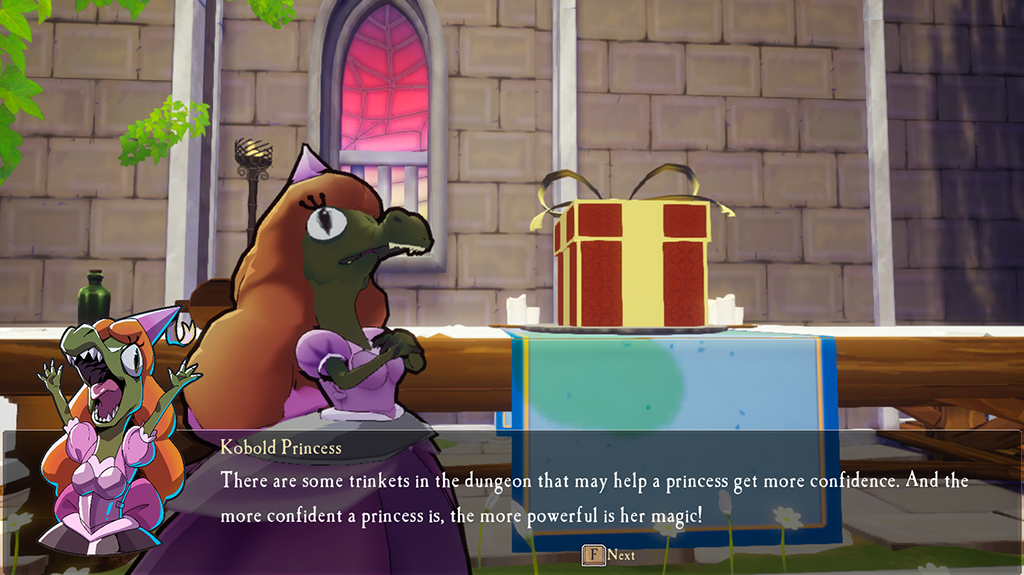
You may find trinkets or gifts in the dungeon that some princesses may like! To offer them you must choose which princess to rescue, and instead of entering the dungeon go to the table that there’s on the entry yard, and interact with the gift you want to offer!
Offering enough gifts unlocks a special and hidden passive power for each princess, which adds one layer more to their gameplay! Too many powers to remember? Don’t worry, you can always check the description of her abilities on the stats menu!
You can also discard gifts interacting with them before rescuing any princess.
The Upgrade System
In the beginning it will be really limited, but it will expand more once you free the Kobold Shopkeeper and get the Bureaucrat Leader to come to the Entry Hall.
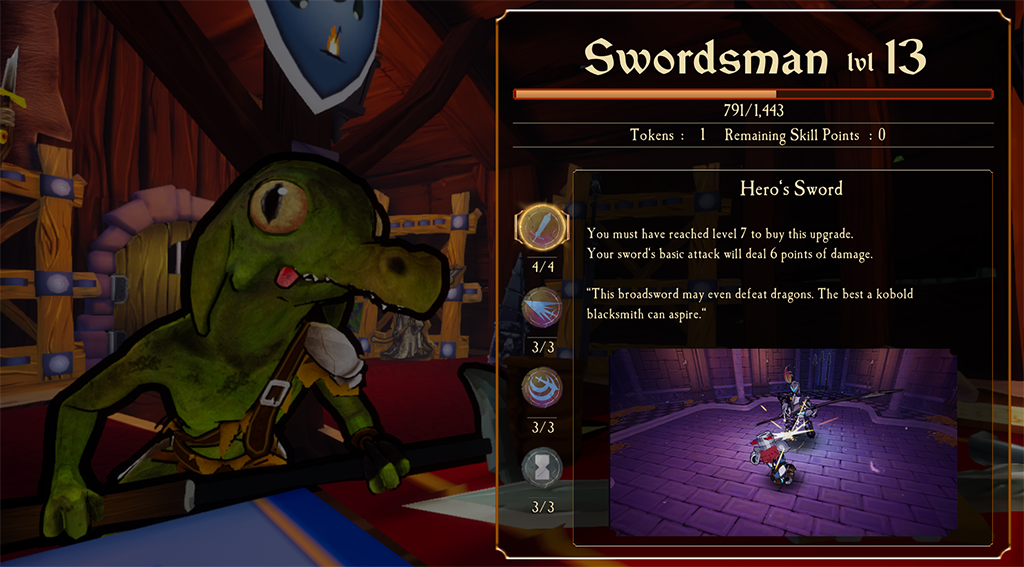
There are four main elements to upgrade:
- Armor: Represents the health of the incoming knights. It levels up using healing items! This one is managed by the Kobold Shopkeeper even if he’s jailed.
- Sword: It measures the damage and special abilities when using a knight with a broad sword. You can level this stat by defeating enemies with the sword! Managed by the Kobold Shopkeeper at his weapon workshop.
- Musket: Mostly the same as the previous one, but with a musket!
- Map: Improving your map lets you see the location of certain rooms before exploring them. Exploring new rooms raises this stat. This is the only one managed by the Bureaucrat Leader.
To buy these upgrades you will need two things!
- Tokens: You earn these by achieving certain milestones in the dungeon, such as rescuing princesses, opening chests or defeating bosses. These are the points you actually spend to buy upgrades.
- Skill Level!: Each one of those elements has its own level, which increases separately. You can’t spend more tokens than the level you have in the skill. Remember that some upgrades also require a minimum level to be bought!
The Inventory
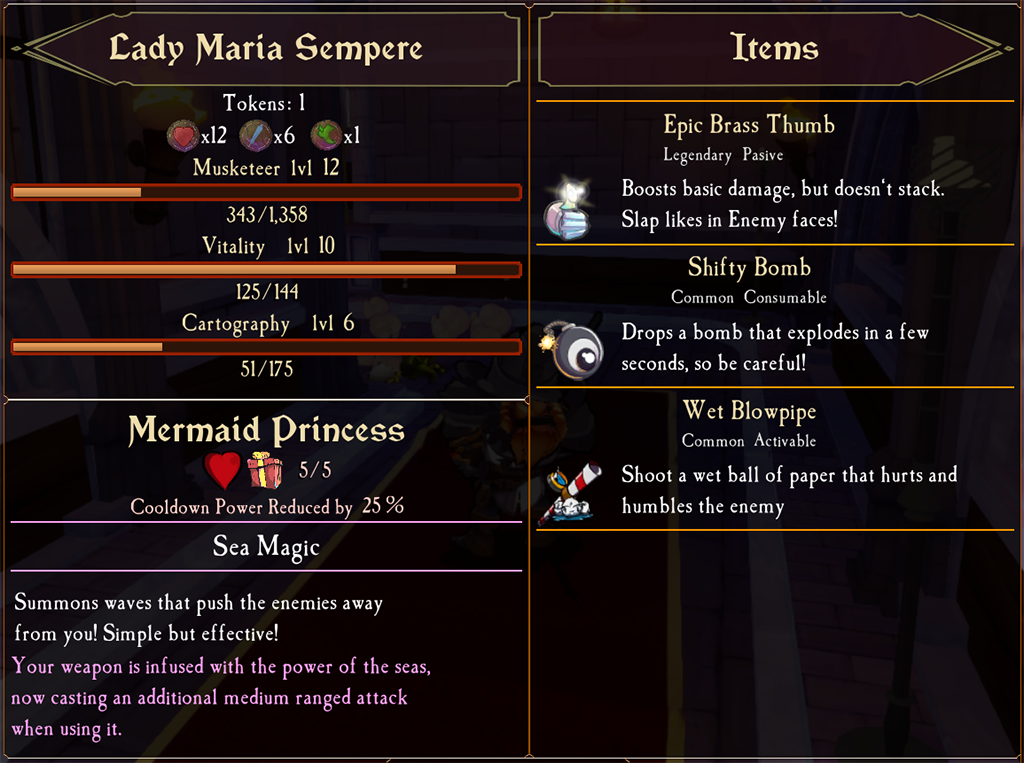
The base is quite simple. You interact with an item found in the dungeon, and then you can press the key assigned to that slot to use the item. What may not be so obvious is that the colour dot next to the item indicates the usability of the item!
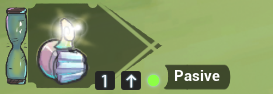
The green dot indicates that the item is passive. This means that only by having this item in the inventory it will take effect. The only passive item is the Epic Brass thumb, which can’t be stacked (you can’t have two Epic Brass Thumbs at the same time)
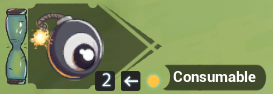
The yellow dot is for the consumable items. These have only one use, so decide wisely when to expend them! Most of these items are for temporal buffs or healing potions, but some of them can damage enemies. And beware, if they can damage enemies probably they can also damage you!

Lastly, the red dot is for activable items. These are quite similar to consumables, but you can use them as many times as you want. You only have to wait until the cooldown ends and the icon is not shadowed to use it again!
Each time you pick an item appears a prompt indicating its effect. You can always check it again at the stats menu!
Thanks to Nugvy for his great guide, all credit to his effort. you can also read the original guide from Steam Community. enjoy the game.