A Guide / Walktrough to players looking to try out the Iron Teeth faction. From starting out to building your first dam.
Foreword
If you make it through this guide, you should be able to handle the Iron Teeth to a degree that you can handle most maps, reach a population of around 30 beavers, and build your first dam. This also includes reaching a well-being score of 8, and being self-sufficient enough to keep expanding past that point.
Keep in mind that you are generally on a time-table in Timberborn. While there are of course always periods of downtime, you should always be working towards your next goal. My screenshots have the current day/cycle in the top-right so you have a rough idea of when milestones happened for me. I generally recommend reading the guide first, and then maybe having it open on the side as you play, so you can pause and reference it as needed. I also recommend at least skimming the “General Tips” section, as it has useful knowledge for the game as a whole.
Feel free to ask questions in the comment section.
Starting out
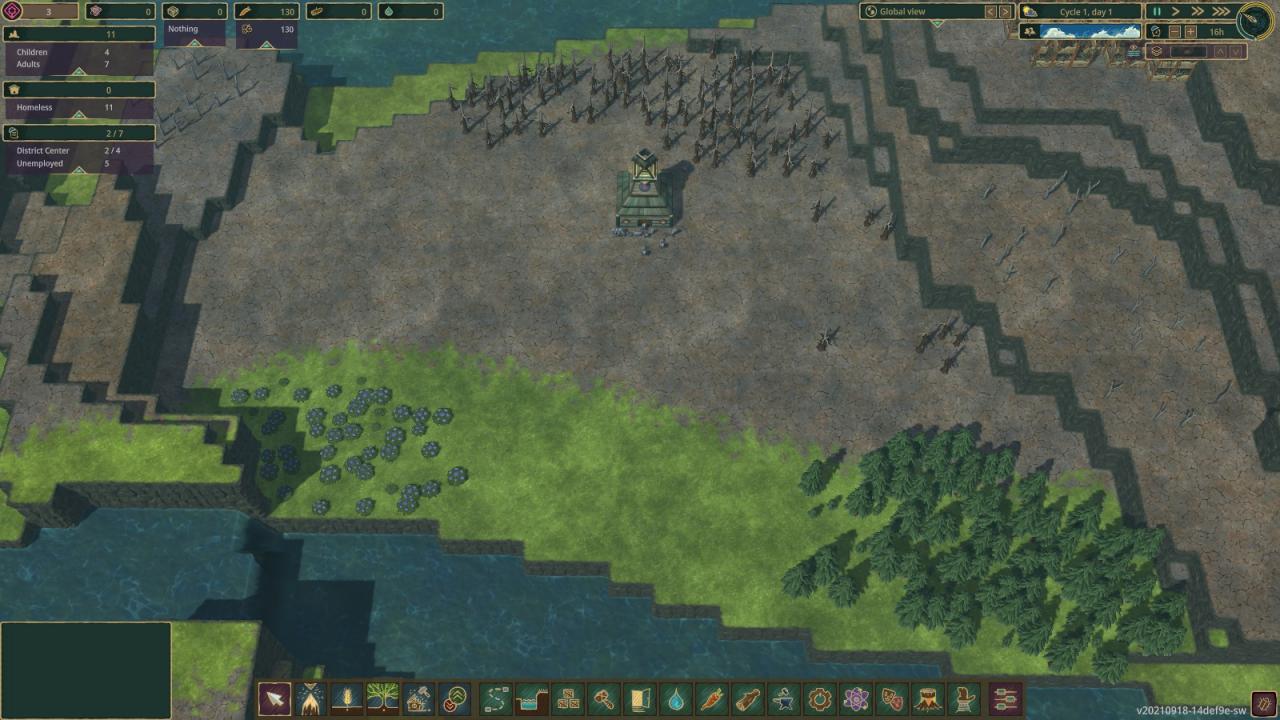
We are starting out on a Plateau, with what I will begrudgingly call 2 “forests” and some berries. Even if you are relatively fresh to timberborn you can probably guess: This won’t last us very long. The observant player will notice a bunch of ruins in mere spitting distance of our HQ. Meandering is, to my knowledge, the only Map where one can reach metal within their first district. In addition to this there are smaller Plateaus around us with small gatherings of dead trees. Keep those in the back of your head, once we’ve researched stairs and platforms, these can be reached to supplement our log production.
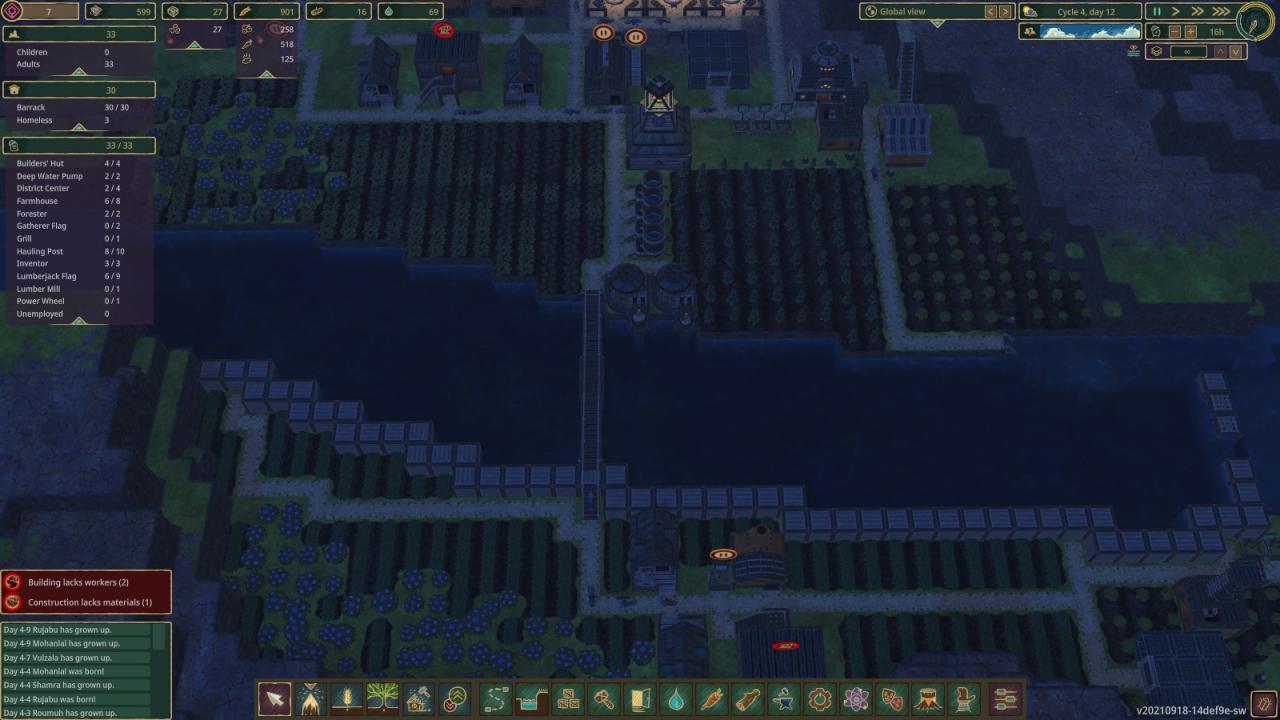
But let’s take a look at the river and the area around it.
Southwards is another bank with a bit of building space, berries, some greenery and probably most enticing: A massive plateau with quite a bit of dead tree to go around. What about the bend in the north?

I’ve turned the camera around, so don’t be confused! The bank on the opposite side here provides much less building space. And to dam it up in a way to make more of the dried out area fertile would take up much time and more importantly logs we do not have. So the choice seems fairly obvious: Our first long-term goal will be to reach the southern bank, and dam up the river.
This is a future melody, however. For now, let us take care of the basics:

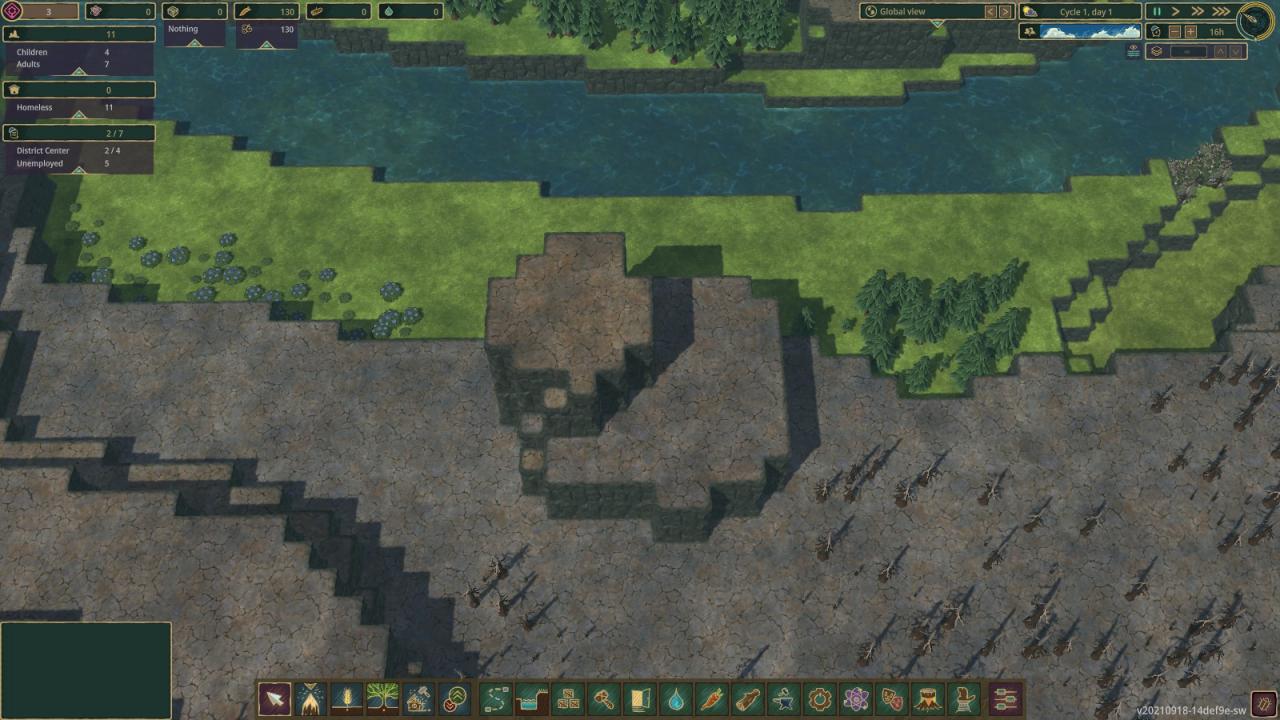
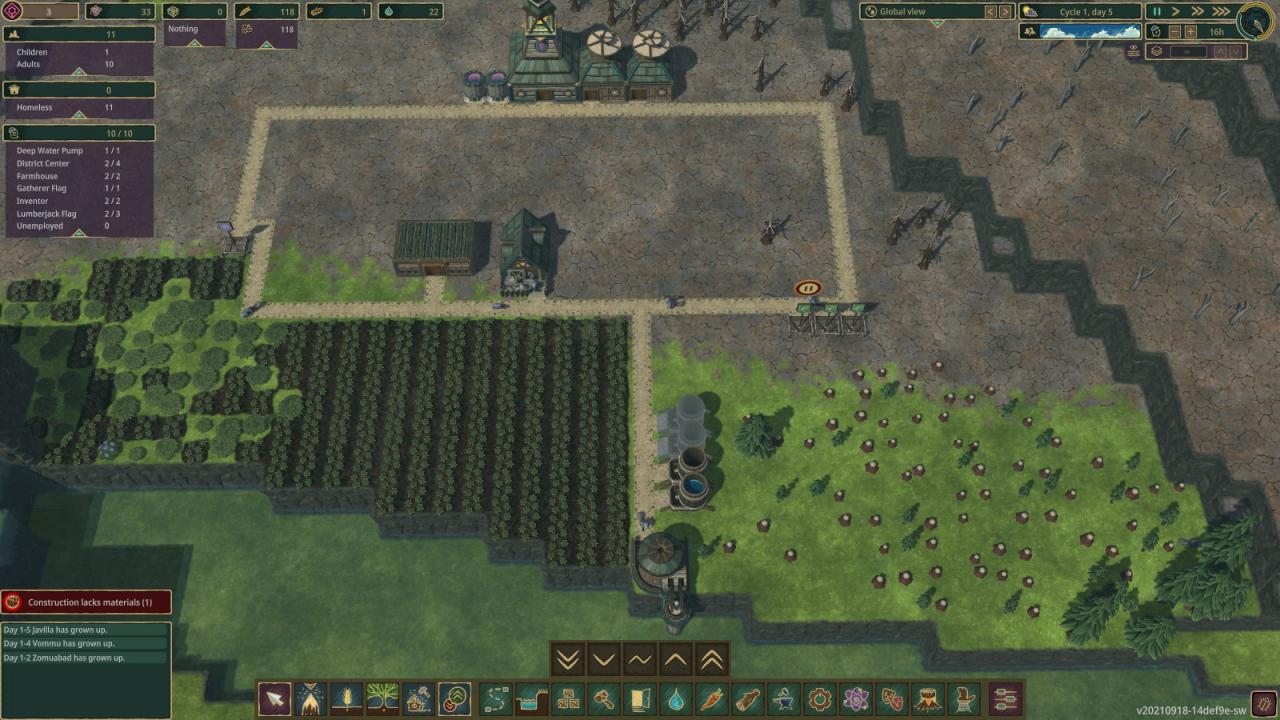
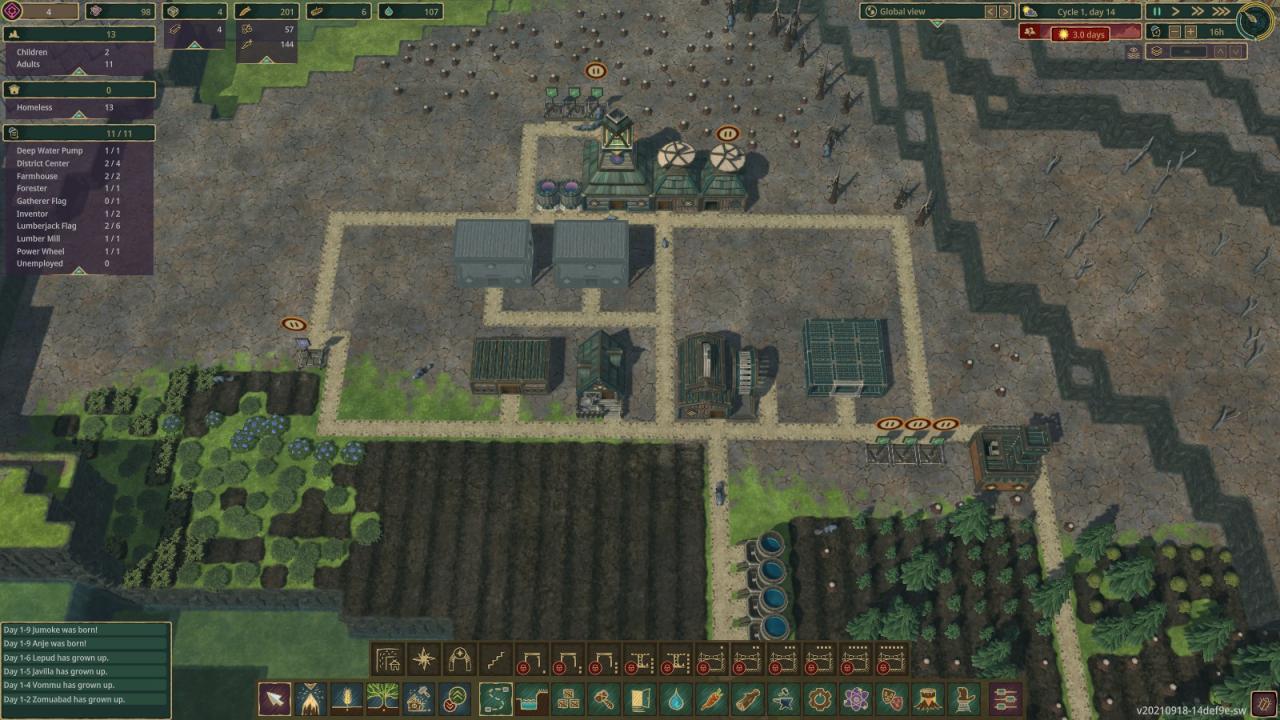
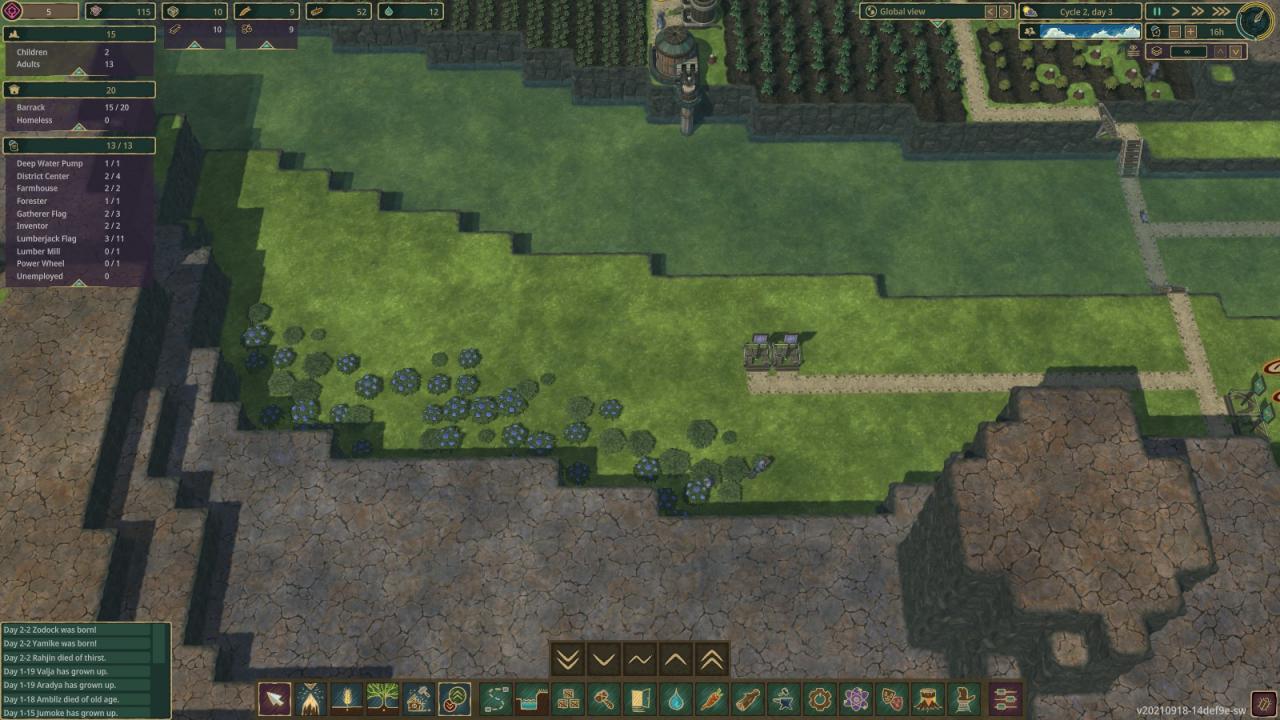
Just as you would with the starter faction, we need at least 2 (You might as well do 3) Lumberjack flags, a water pump and a gatherers flag. This adresses the 3 most important ressources in the short-term: Wood, Food and Water. Designate the GREEN trees to be cut down. Whenever you have the choice between these and dead trees, do the green ones first. As opposed to the dried out variant, these will regrow, albeit slowly.
Once this is constructed, we need a farmhouse and storage next:
Take note of the area I’ve designated for farming. Carrots only for now. Potatos need to be grilled before they can be eaten, which needs logs we can’t afford. It is CRITICAL to get this done quickly, even fast-growing carrots need 4 days to mature. If you don’t do this quickly, your fledgling populace will starve within the week. Ensure that the farmhouse is manned with 2 beavers, disable one of the woodcutters flags if you need to, as some of your beavers are still too young to work.
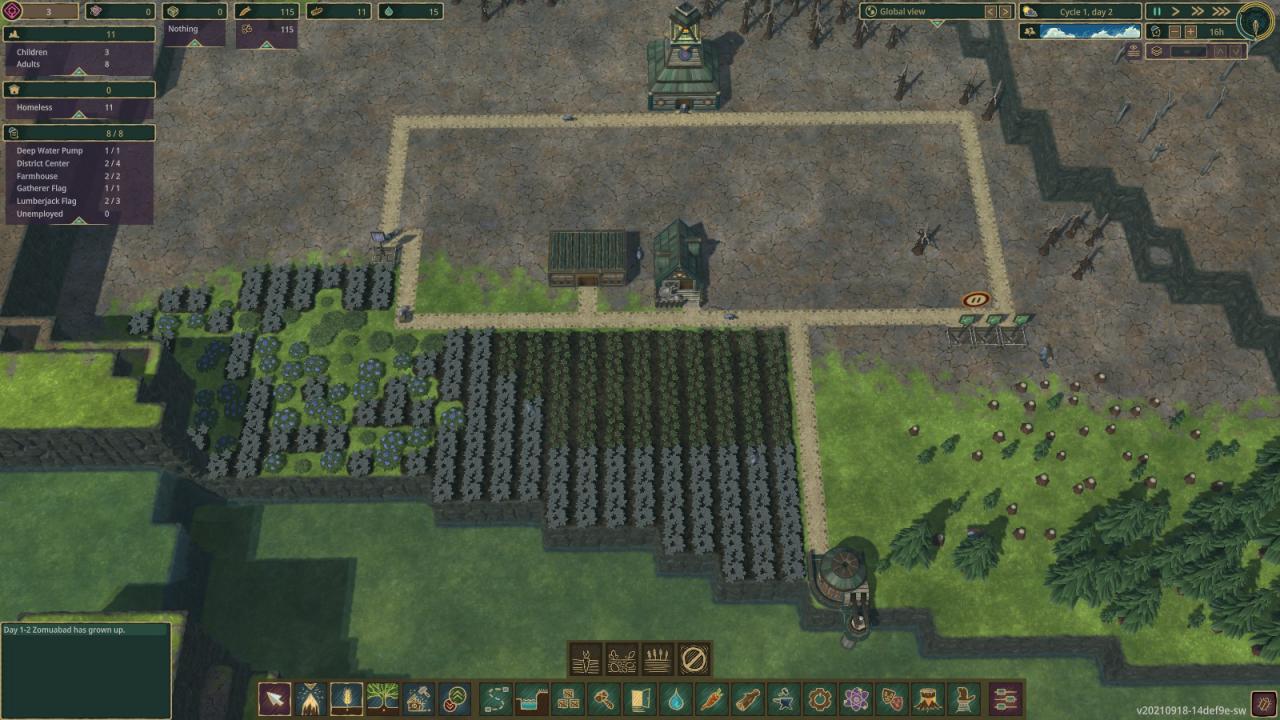
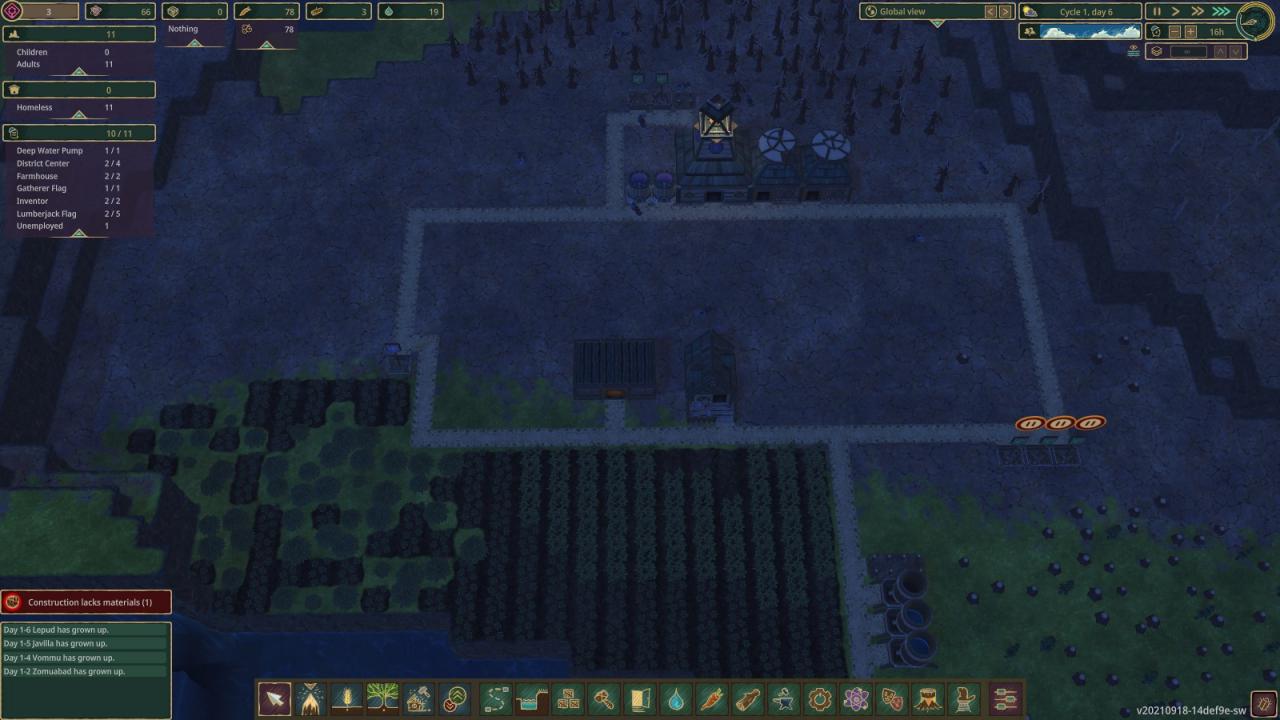
Next up are water towers, and two science structures:
Ensure the water towers are built first, as the pump is probably already filled up. You might be wondering why we build 4 of these, let me explain.
Due to the river in the south being in lower elevation, we won’t be able to dam it up until we have stairs researched. This in turn means we won’t get the second dam structure unlocked as early (The Leve), which only costs 12 logs to build as opposed to the regular dams 20. Long story short: We are unlikely to dam the river before the first drought hits, and thus it is wiser to simply “tank” it by storing up food and water.
In my game, 4 towers was just enough. The water came back in just as my reserves were gone and the first beavers started showing the “thirsty” bubbles. if you are the paranoid sort, you might want to put down a 5 water tower for safety.
If you feel adventureous, you can of course try to research stairs and leves ASAP and see if you can dam the river before the drought hits. Let me know if and how that worked out!
As a final note: The two science buildings can and should be paused if you need the workforce elsewhere. Do keep in mind however, we need the forester, stairs, platforms and leves unlocked in time to dam the river for the second drought. Try to keep at least 1 running as much as you can.
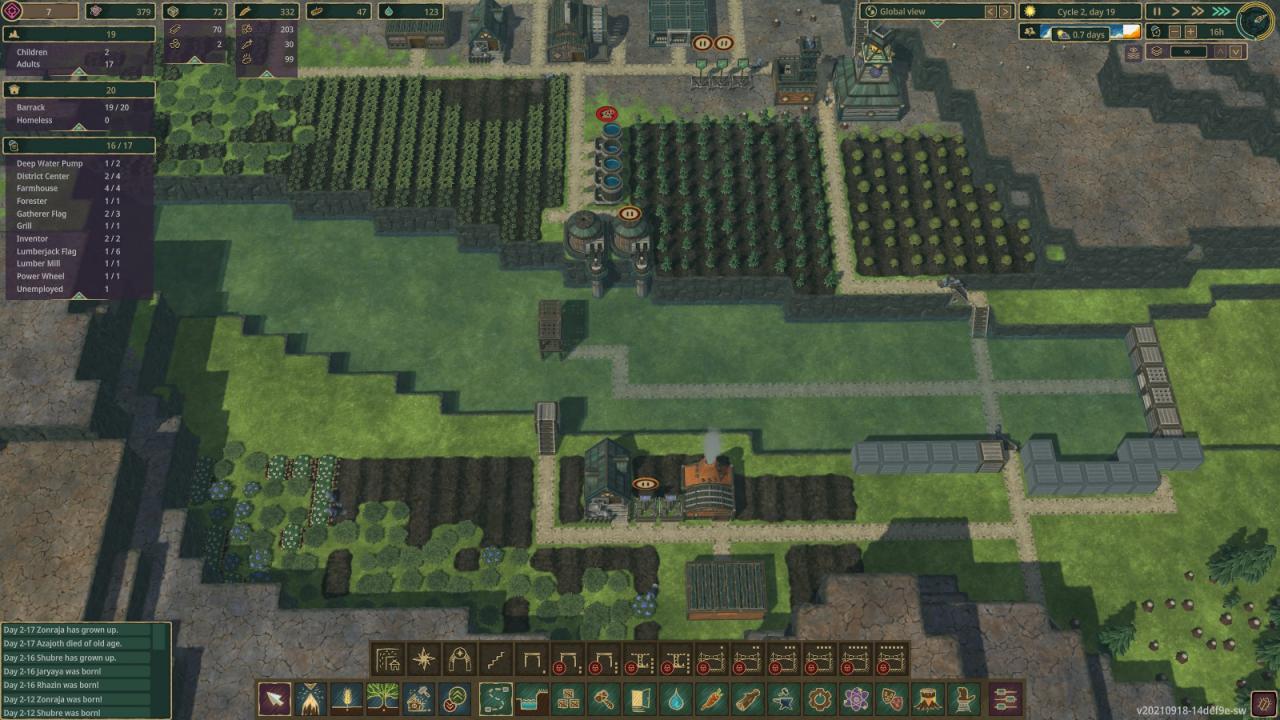
With all this done, our next important step is ensuring future beaver generations. In this regard, the Iron Teeth are special:
Unlike their cousins who simply, ahem, “beaverly breed” new pops as long as there are empty slots in buildings, the Iron Teeth Population is born out of Breeding Vats, the two purple buildings next to the HQ. The downside to this is a ressource investment of water and berries, combined with an incubation period, followed by the beaver being a child and thus unable to work. This adds up to our little buddies taking slightly longer to procreate overall. The upside is that you have direct control over your population at all times, and if done correctly, you can pop out baby beavers practically at a click.
While we do not want to increase our population at the moment, some of our starting beavers will die of old age soon, and we need to be able to replace these. Two breeding Vats was basically just enough that I could’ve kept them running throughout, but I did pause them briefly towards the end of the first drought to prevent 2 extra hungry mouths from eating my reserves.
You can also see slightly above the HQ, that I constructed new lumberjack flags there. The green forest is depleted, and woodcutters should always have a short route towards their workplace. Remember to pause the southern flags, so your beavers use these closer ones.
If you had your science buildings running, you should have enough, or at least be closed to unlocking the forester. The unlock you want after that is stairs, just in case you saved up some extra. To build both of these, we need planks, and as such:
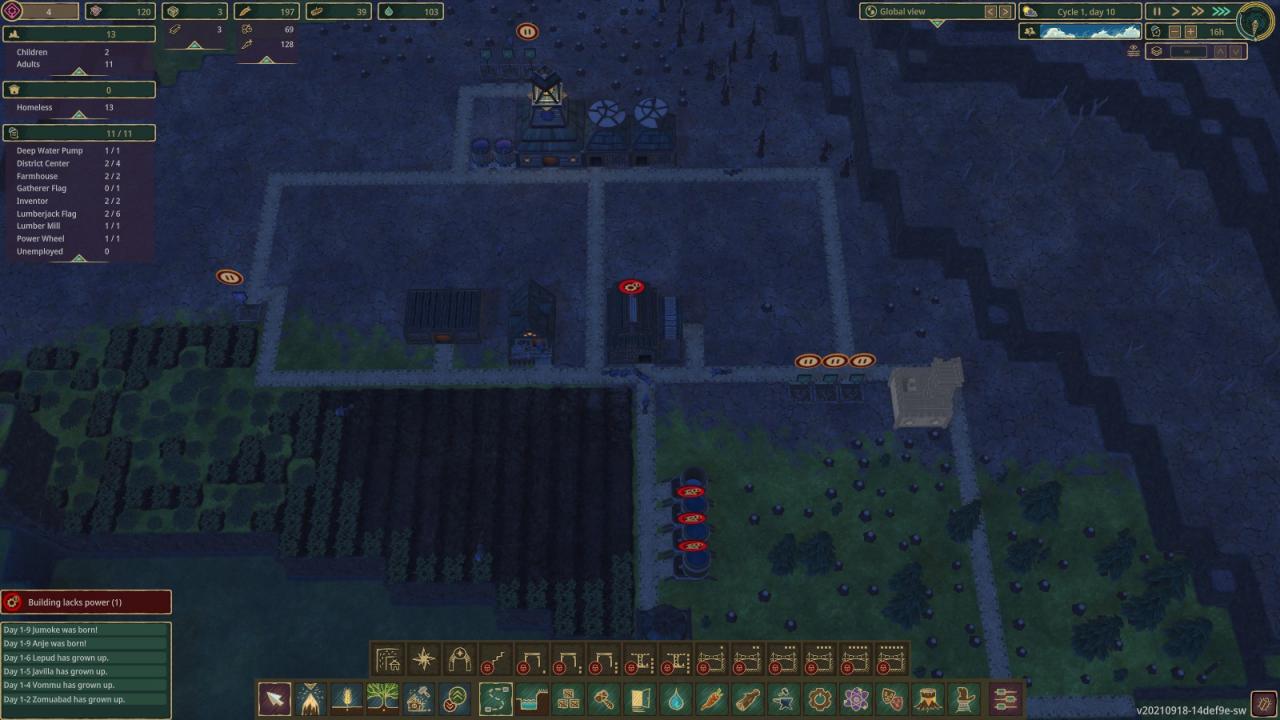
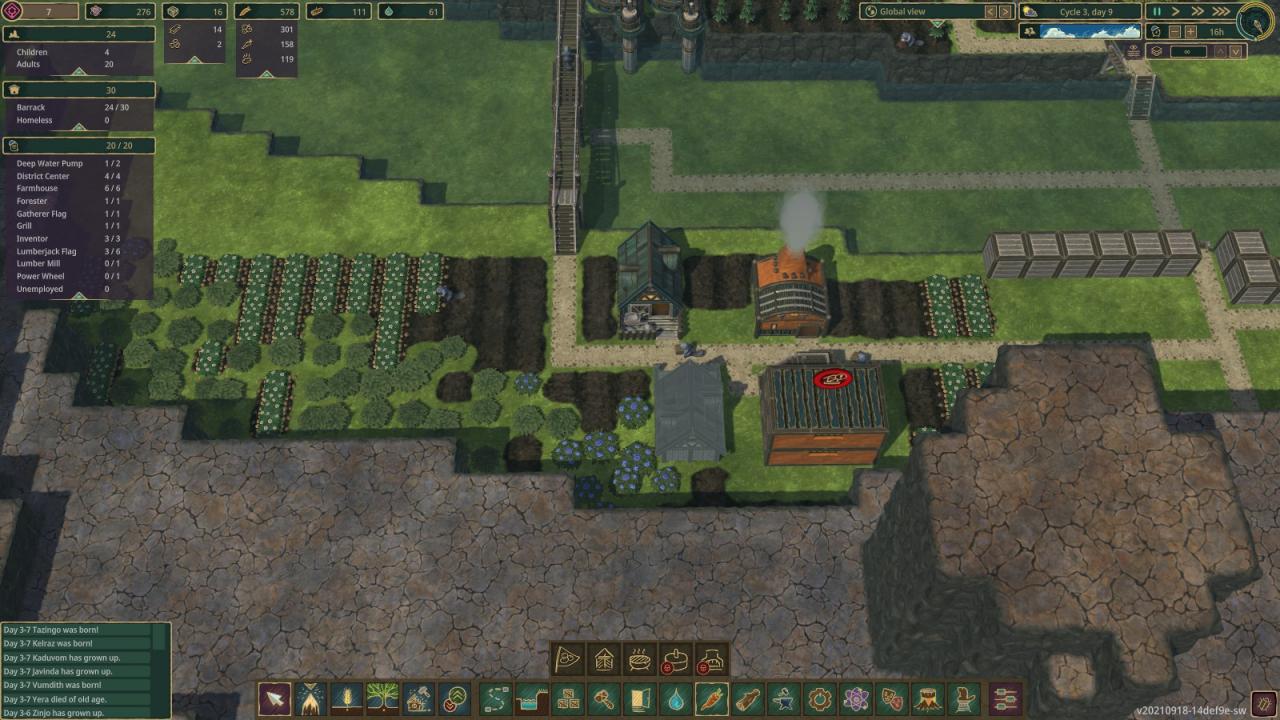
The forester is another one of those things that you’d want to get up early. But the construction requires planks. The Lumber Mill needs power as well, so this is a hefty investment in logs and beaverpower, and that’s before we take into account the 60 science to even unlock the building in the first place.
Put the power wheel right next to the Mill as pictured, make sure the darkish blue power cog is pointed towards it. Buildings that are adjacent share their power network, so we safe a few logs this way.
The Mill is somewhat of a trap in the early game, and needs a bit of attention. In this phase of the game, we generally only want to produce as many planks as we need in the immediate future. In our case it’s 10 for the foresters hut, and then 4 more for each set of stairs we are about to build (We will be constructing 6 sets, plus a platform, so you want about 40 total).
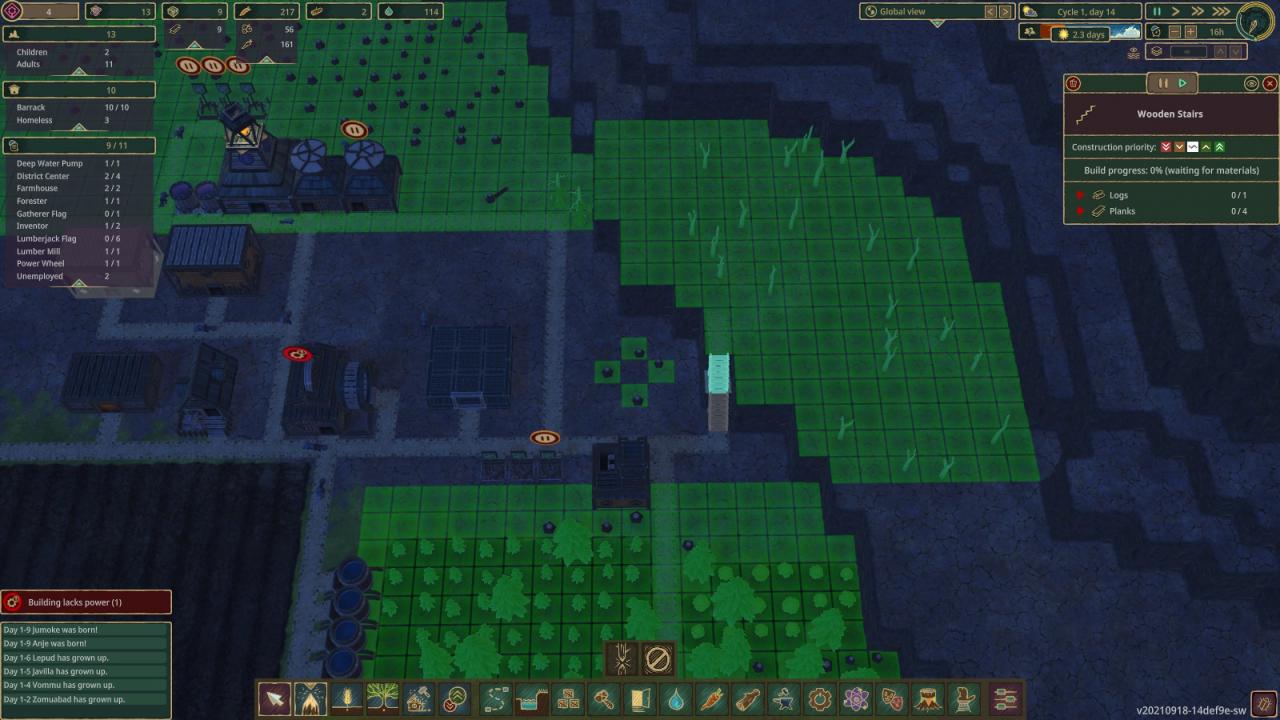
Remember to designate space for the forester to plant his trees, but leave a trail towards the edge. There we are building our stairs to reach the river, and from there the other bank:
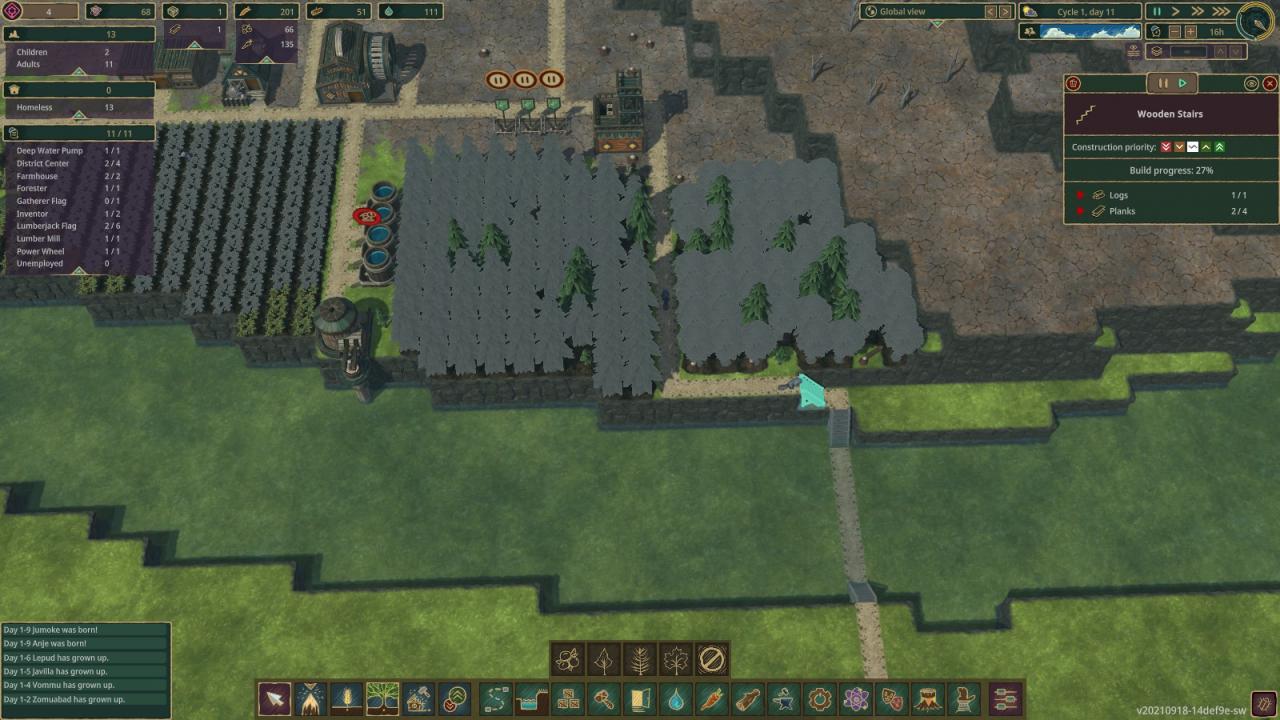
As for the trees I ordered to be planted: The left hand side are Birches, the right are maples. Maples are by far the best in terms of log to time ratio, but take a whopping 24 days to grow. We need the birches to supplement our wood production in the short-term. Once the birches are harvested for the first time, you can replace them with maples. I kept forgetting.
Dam 1 – Damming Evidence
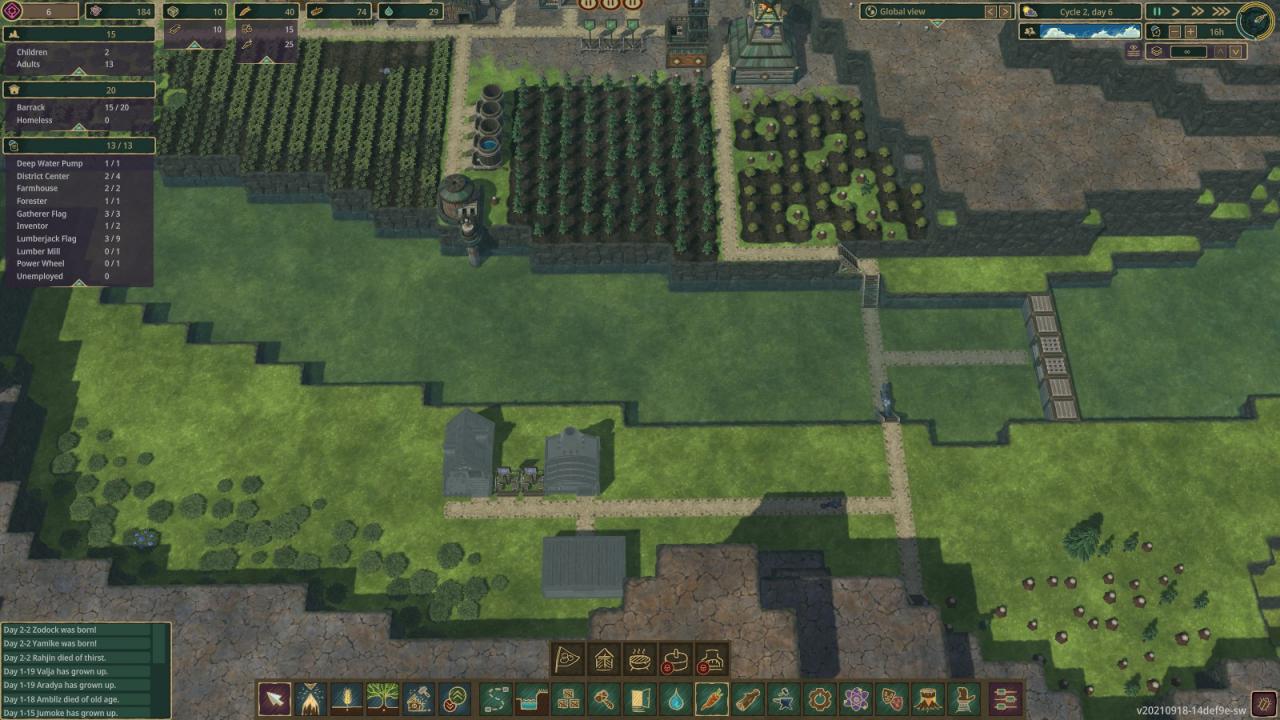
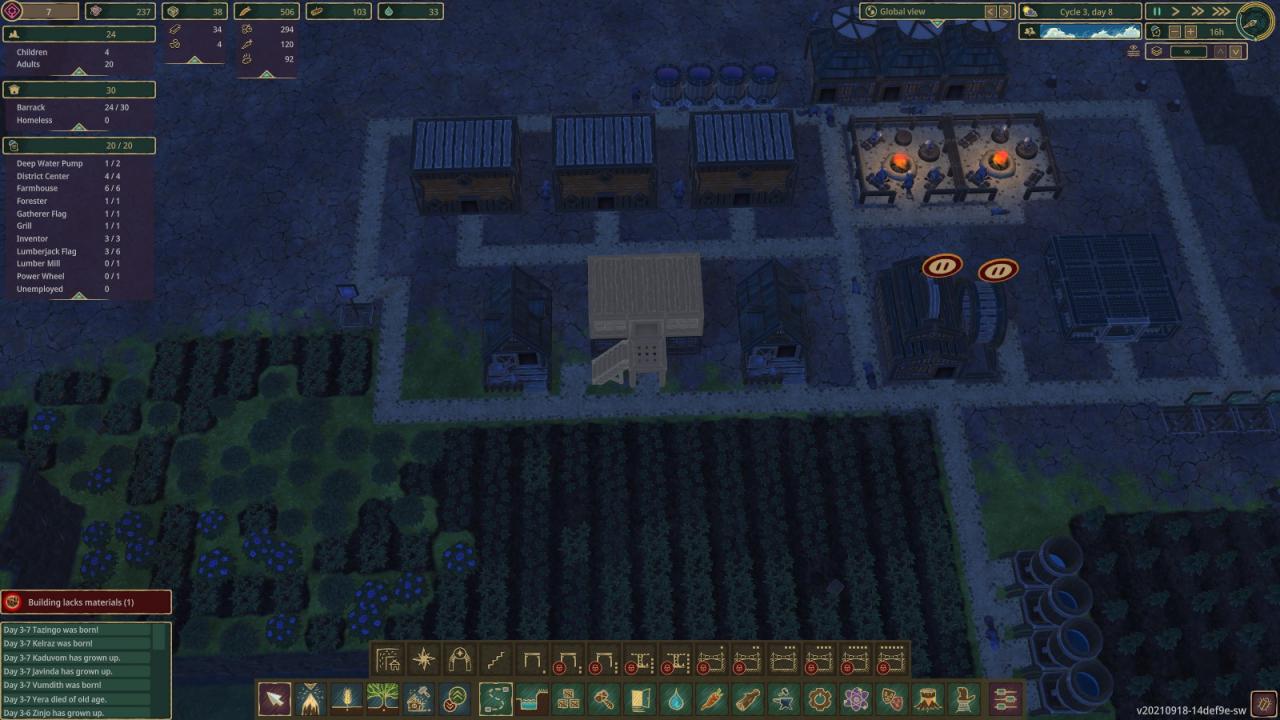
So I decided to stick to my “Just tank it” strategy. Instead, we are building two structures some of you might have wondered about: Housing and Log storage.
Housing is not nearly as pressing a matter for the Iron Teeth, as they do not require empty housing slots for more pop. In addition to this, Iron Teeth housing costs a whopping 40 logs to build (But houses 10 beavers at a time!) and is thus a pretty sizeable ressource and time sink. Since our dam is now a delayed project somewhere after the first drought, we can afford to get this done to increase our beavers comfort rating.
The Log storage on the other hand… is just not that important early game. Up to this point we were always building _something_, so there was little need to get this structure built earlier. You’ll notice that the log storage is another building unique to the Iron Teeth. It is considered “solid” and allows buildings to be placed on top of it, most notably more log storage.
One thing I neglected to mention earlier with the regular stoarge: I generally build “solid” structures with a space of room around them away from the road, to facilitate the construction of stairs around them to reach the higher levels. A good habit to get into.
On the side, I build two more stairs to reach the little plateau to the right. Short-term this is to get at the trees up there. Long-term, we will want to get up there for the metal:
Make sure you mark those trees to be cut.
Our final bit of beaver comfort comes in the form of two fireplaces:
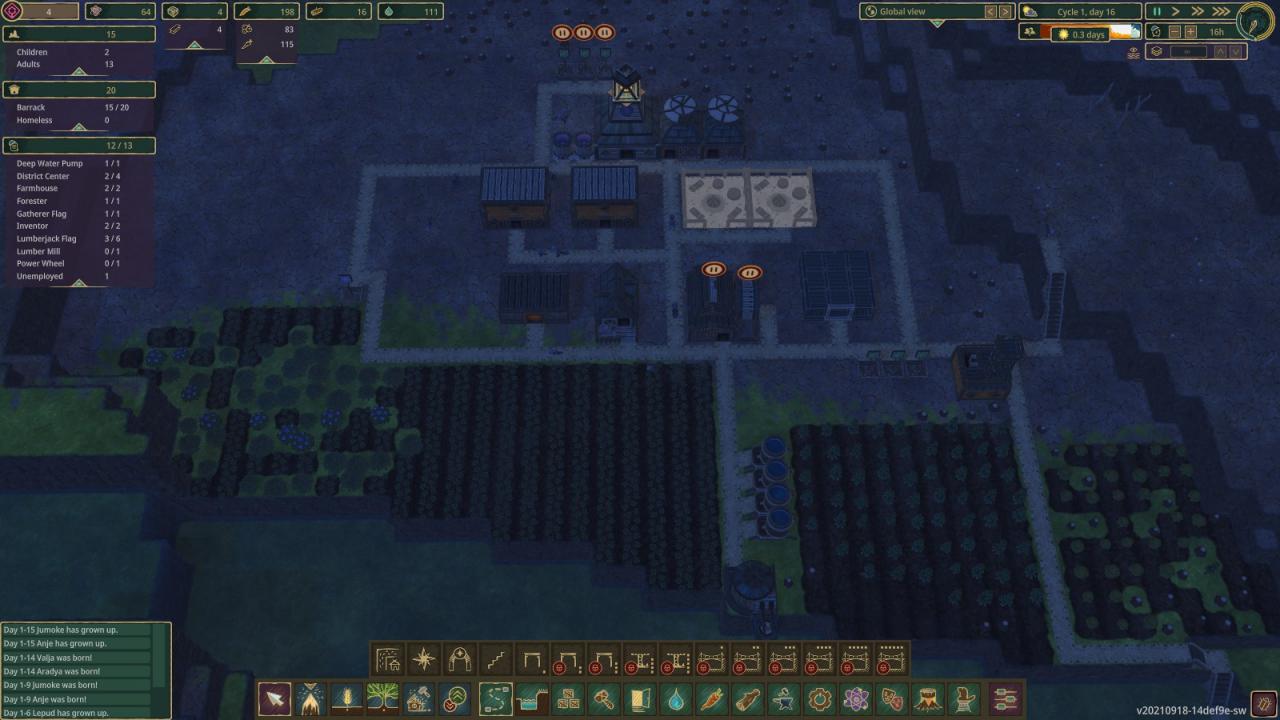
Yet again, not nearly as critical as with the starter faction. Our only benefit here is that baby-beavers get a 25% growth increase. This might not seem like much, but as our population grows, this will become more and more relevant.
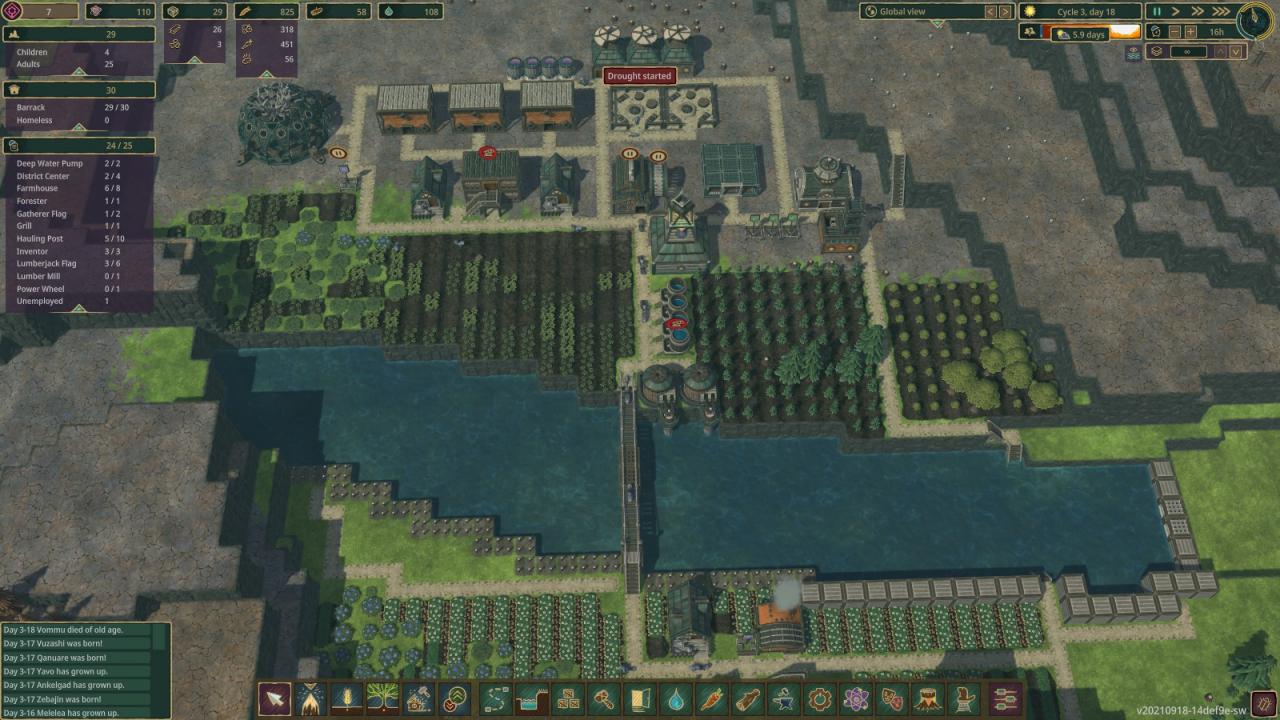
And thus, the drought hits. You can see my reserves in the screenshot below. Roundabout 180 food and just above a 100 water. Both of these were just enough to get me through more or less comfortably:
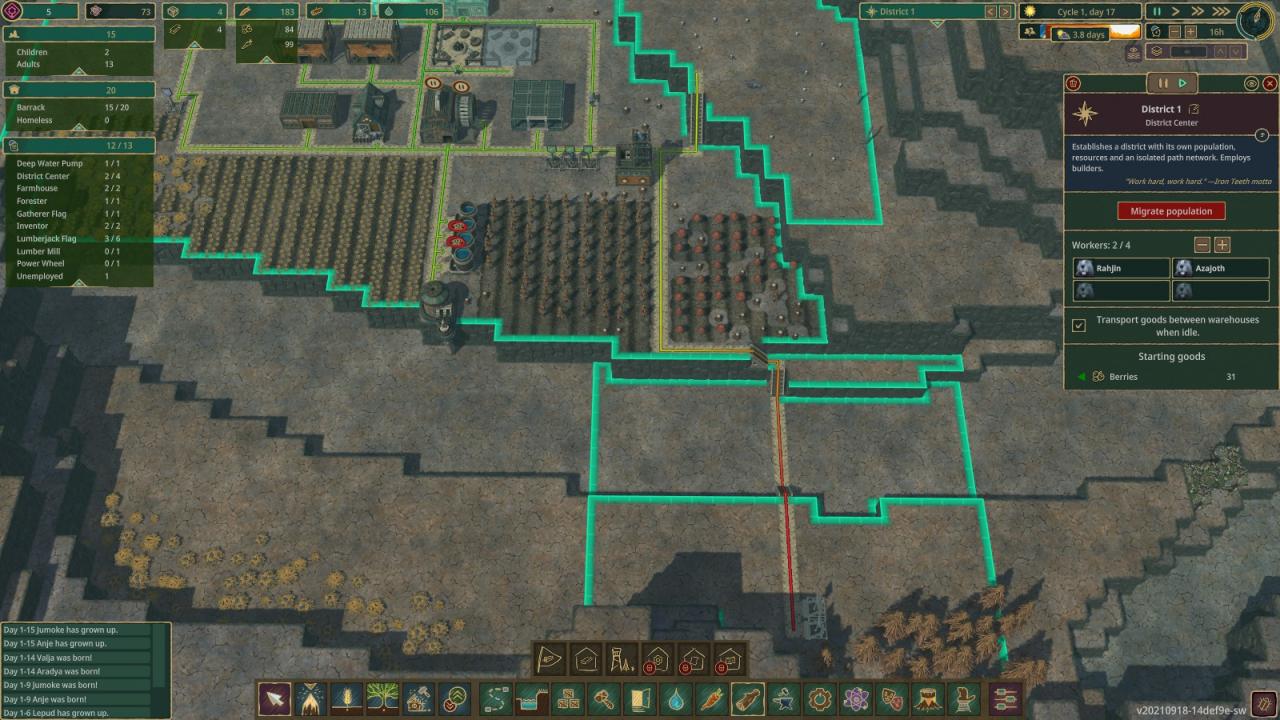
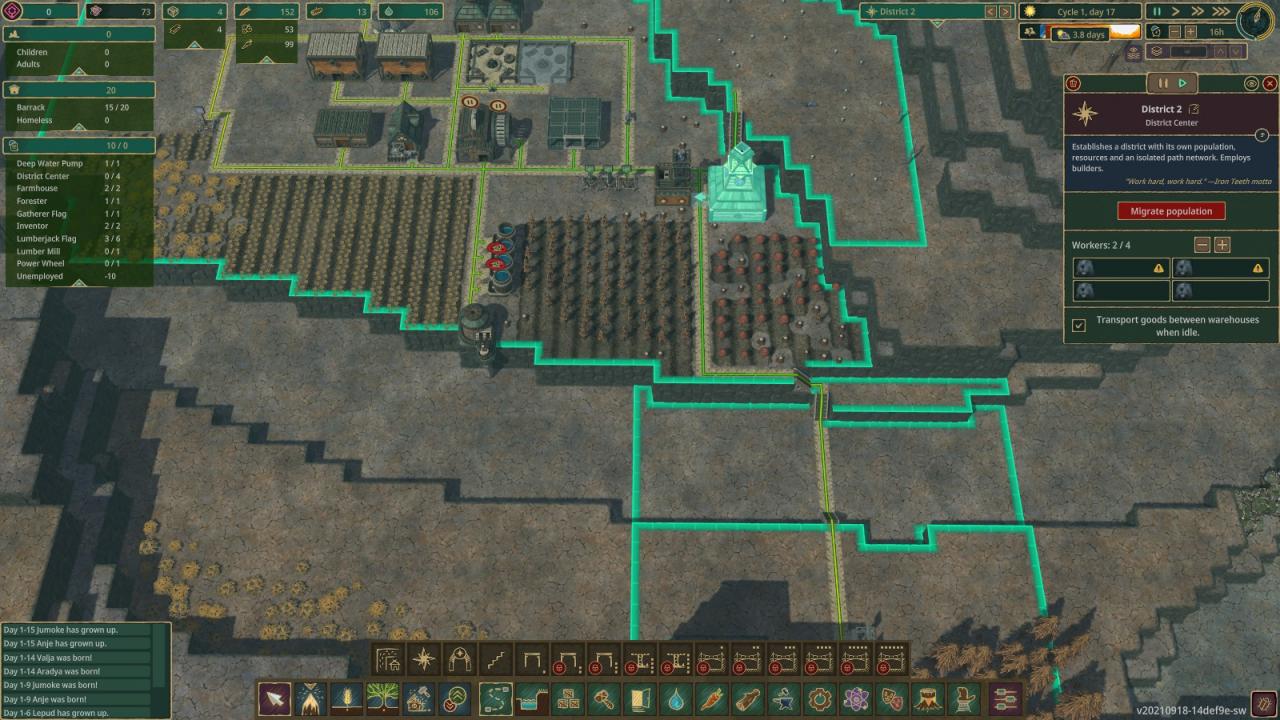
As you can also see, with my district center selected, the other river bank is just on the edge of what it considers to be “in range”. We want to get at those berries though. Luckily, this is easily adressed by simply moving the center. Pause the game, delete your current one, and place a new center closer to the edge of your plateau:
Much better. As you can see, I focused on getting at those trees first. As later screenshots show, I was running somewhat close to starvation after the drought period ended. You are probably better off immediately putting down two gatherers flags at this point, and start collecting the still ripe berries to supplement your reserves.
After this is done, we want to get up to that southern Plateau. I turned the camera to show the platform and two sets of stairs I built:
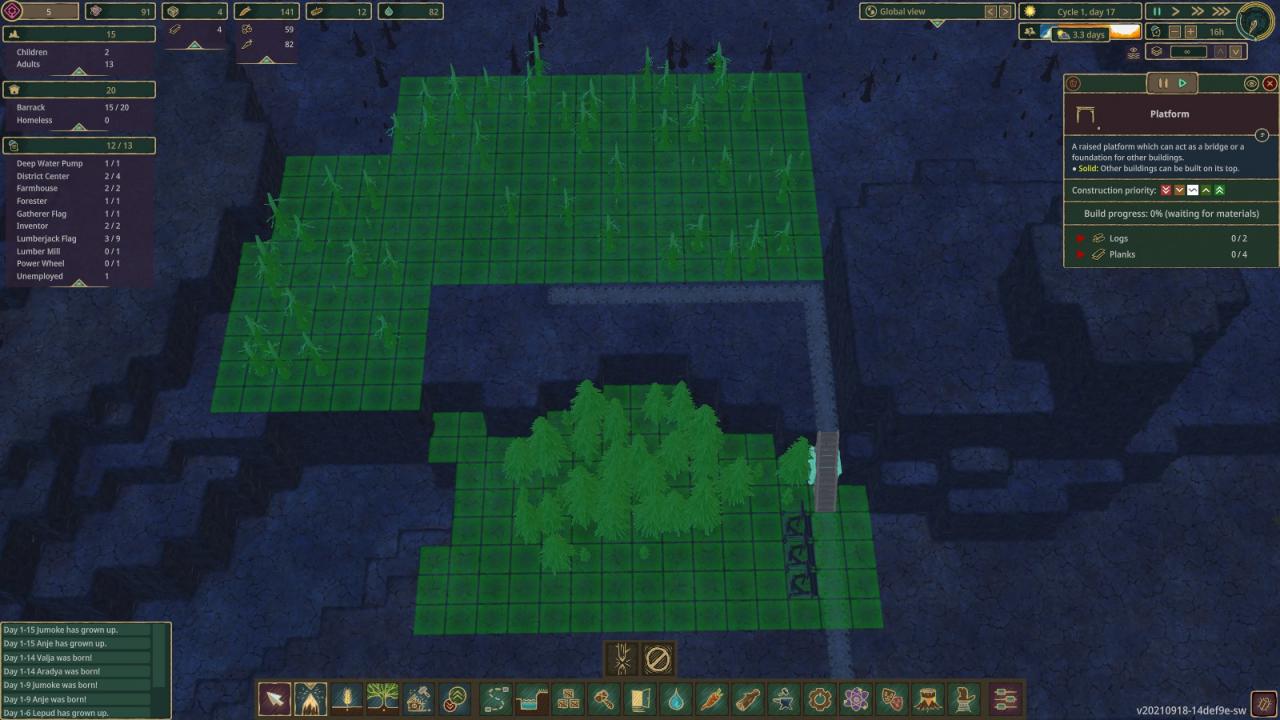
This should stretch our log production once more, until our first trees at the forester grow up.
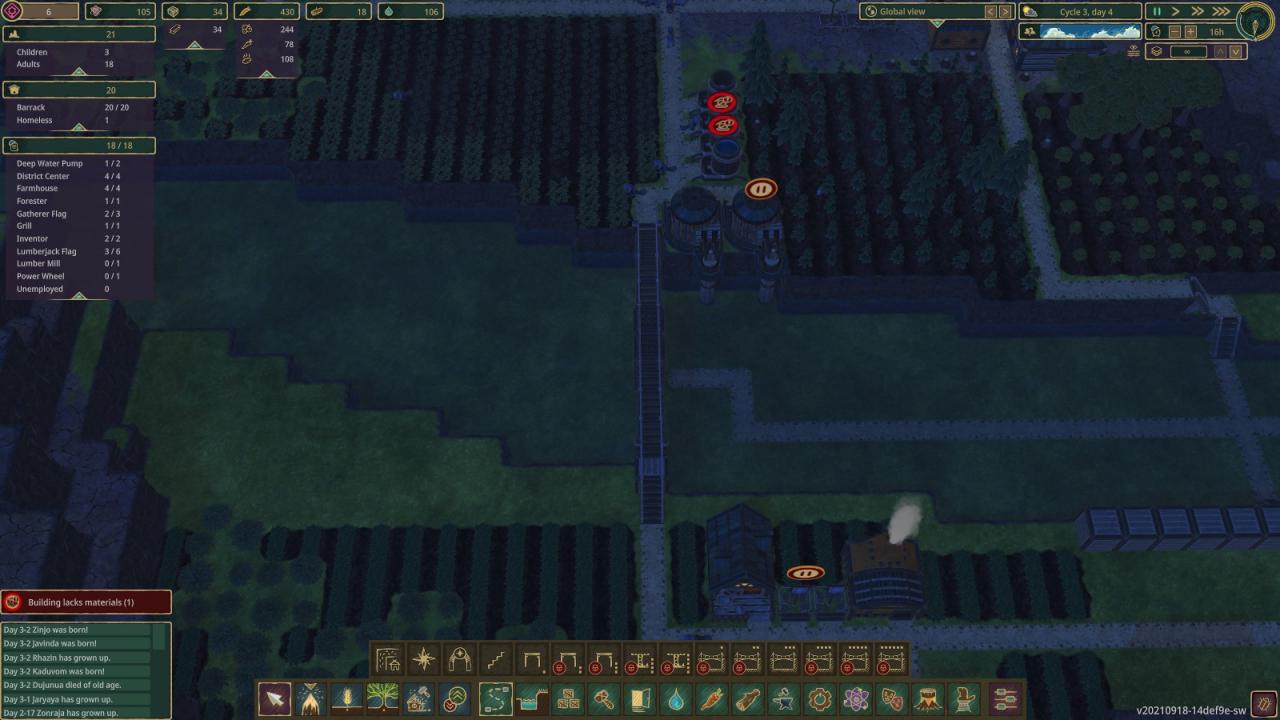
Finally, it is time to start working on our dam:
Strictly speaking, we have quite a bit of time before the second drought. But the dam costs us around 80 logs to build, and I want to make sure this is done so we don’t run into a log shortage at just the wrong moment. Note that the middle 2 spaces are the already unlocked “Dams” while the two above and below are “leves” which must unlocked with research. Just to repeat, the order of unlocks for us was: Forester -> Stairs -> Platform -> Leve
As mentioned further above, I had just run out of water, and low on food, as the drought period ended:
If you built a fifth water tower, and built those gatherer flags on the southern bank when I recommended, it should be not nearly as close for you. I did end up fine, only a few beavers had the “thirsty” bubble for a few ingame hours, and were thus still almost a day away from actually dying to dehydration.
Just to show it off for completion, here is my realizing my food shortage and building those 2 gatherers flags about a day late:
Since there were plenty of blooming berries, this too was “good enough” and I never had any starving beavers running around. It is still wise to build these earlier than I did.
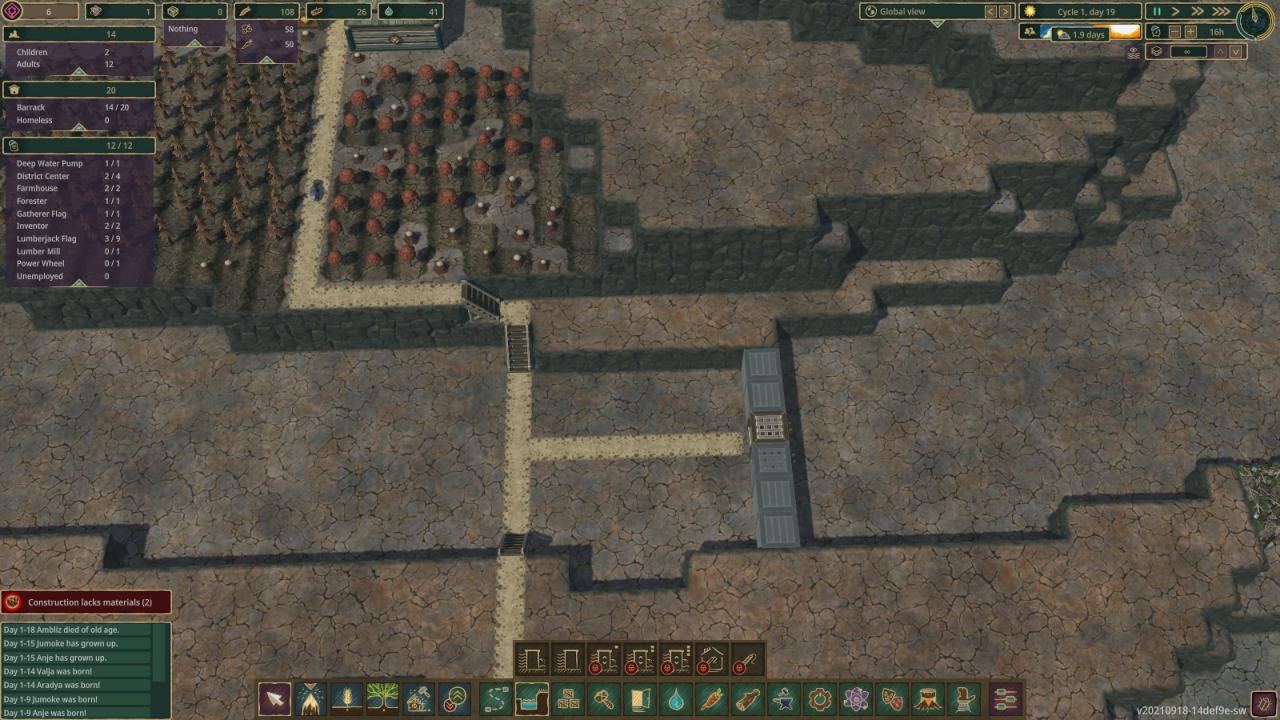
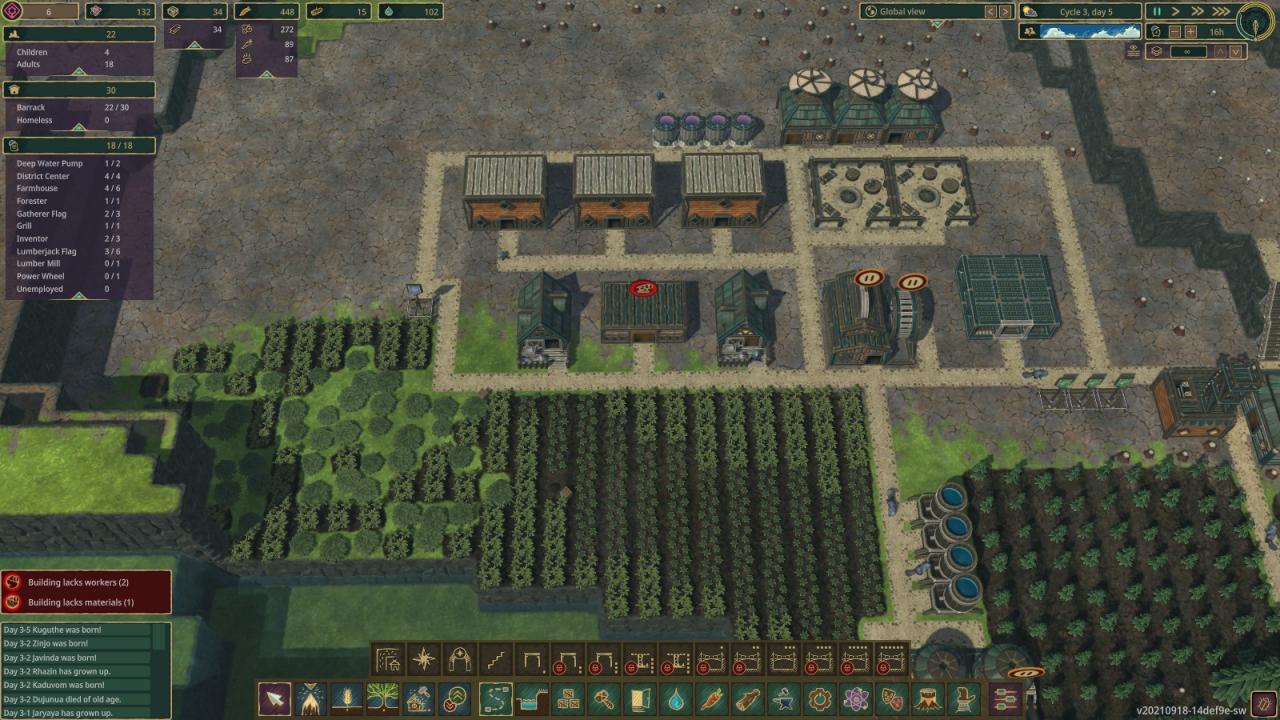
Our final step for this section is to finish the dam, and start working that southern bank:
Once the dam is done, build another farmhouse, storage and add a grill next to the two. This farmhouse will focus on farming potatoes. The Storage and Grill are right next to it, to keep those delivery lines short. Don’t forget to actually order some potatoes planted, otherwise that farm is doing nothing for anybody:
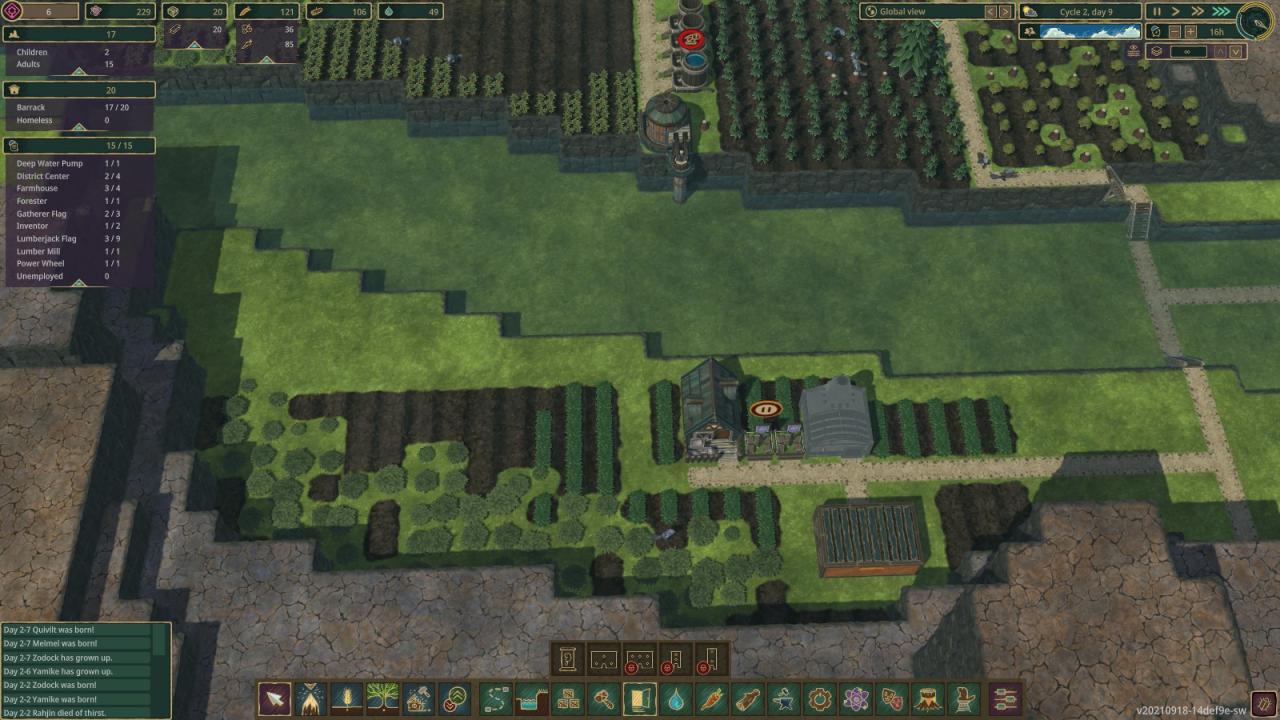
Note that I left some space. We will be expanding the dam to be two levels high later on. In addition, I plan to bridge the gap in the middle to make those walks a little shorter for our poor beavers.
Dam 2 – “Damn, what a nice Dam”
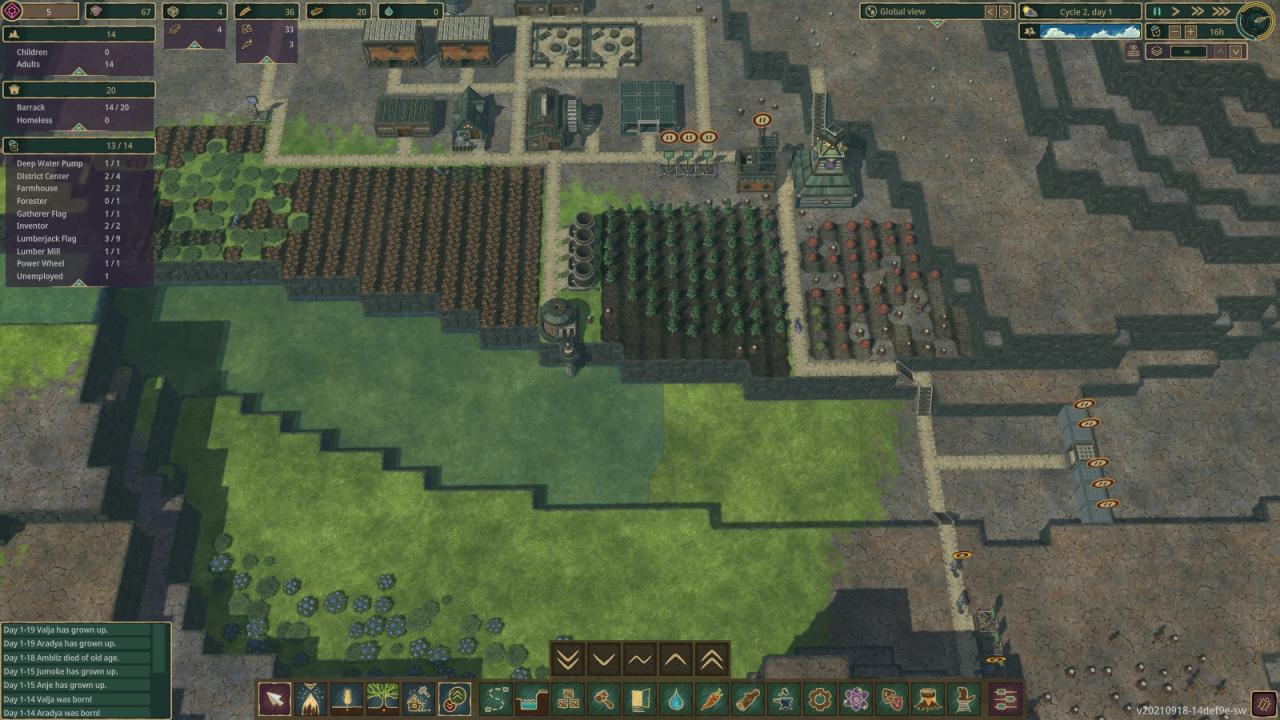
First things first:
Our carrots are blooming again after the drought, and this heralds that it is now time to expand our population. With drought periods no longer halting our plant and tree growth, and potatoes now being added to our beavers diet, we start working towards reaching 30 beavers. To facilitate this, I’ve added 2 extra breeding vats. You could honestly do more if you wanted, I just wanted to make sure I don’t accidentally overdo it.
Before we build our new dam, we need to actually ensure there will be a way across it:

In my case, I opted to achieve it with a 3 tile suspension-bridge on each side, which means I need 2 platforms in the middle of the river to make them reach (That is, 4 platform in sets of 2 stacked).
Before you do this yourself, I want to make sure you are aware that this is resource and research inefficient. 3 tile suspension-bridges cost a whopping 400 research to unlock, as opposed to simply using platforms we already have. In terms of resources, let’s do the math:
In our current scenario we are 2 levels above the riverbed. As a result, 6 platforms would achieve the same thing as a 3 tile suspension-bridge. 6 platforms cost us a total of 36 logs (I am ingoring the extra work involved in making planks, for simplicty). The suspension-bridge costs us a total of 60 logs. So resource wise, this is a waste of 24 logs.
To drive the math a bit further, if we were 3 levels above the riverbed, the platforms would cost us 54 logs, meaning they are still 6 logs cheaper. Long story short: The suspension-bridge would only really be worth it if we are building it 4 levels above ground level, as you start saving logs for platforms at this point.
So why did I do this? I just like how they look, nothing else. In fairness, having them unlocked means I can use them in other places in the level, and meandering does provide the opportunity to do this in quite a few spots. If you don’t care about the looks, or just want to do it without waste, just build platforms straight across! Do note however, paths still need to be built on platforms, as beavers will otherwise not consider them to be for walking.
While my platforms are being built in the middle of the river (Note the path to make the beavers actually reach it), I’ve started construction on our next dam stage:
It will take a while to build the entire thing across the bank, so try to keep your builders busy. Just to show it off, here is how my finished suspension bridges look:
Again, I just like how it looks. Your mileage may vary. On the northern bank, I constructed a second farmhouse next to our existing one, a third piece of housing, and added a 3rd science building to speed up research:
You might have noticed that there is quite a bit of downtime between carrots being harvested and new ones being planted. A second farmhouse can be used to adress this: Set the first farmhouse to focus on carrots and harvesting, and the second to carrots and planting. This will maximize the amount of food coming out of your fields.
At this point, food will rapidly start to accumulate, so I expanded our storage facility by a level:
Don’t forget to add a path to the platform! The same thing can be done in the south, except with potatoes instead of carrots, of course:
At this point, I was starting to store mass amounts of food. It pays at this point to start specializing your warehouses a bit. I personally set my storage in the nothern quadrant to accept carrots, berries and grilled potatoes only, while the southern one only accepts the raw sort. You can then build a seperate “Planks only” storage somewhere near the mill. This should cut down on beavers delivering random foods to random places.
Since we have quite a bit of industry going on, there is another structure we want to implement around here:
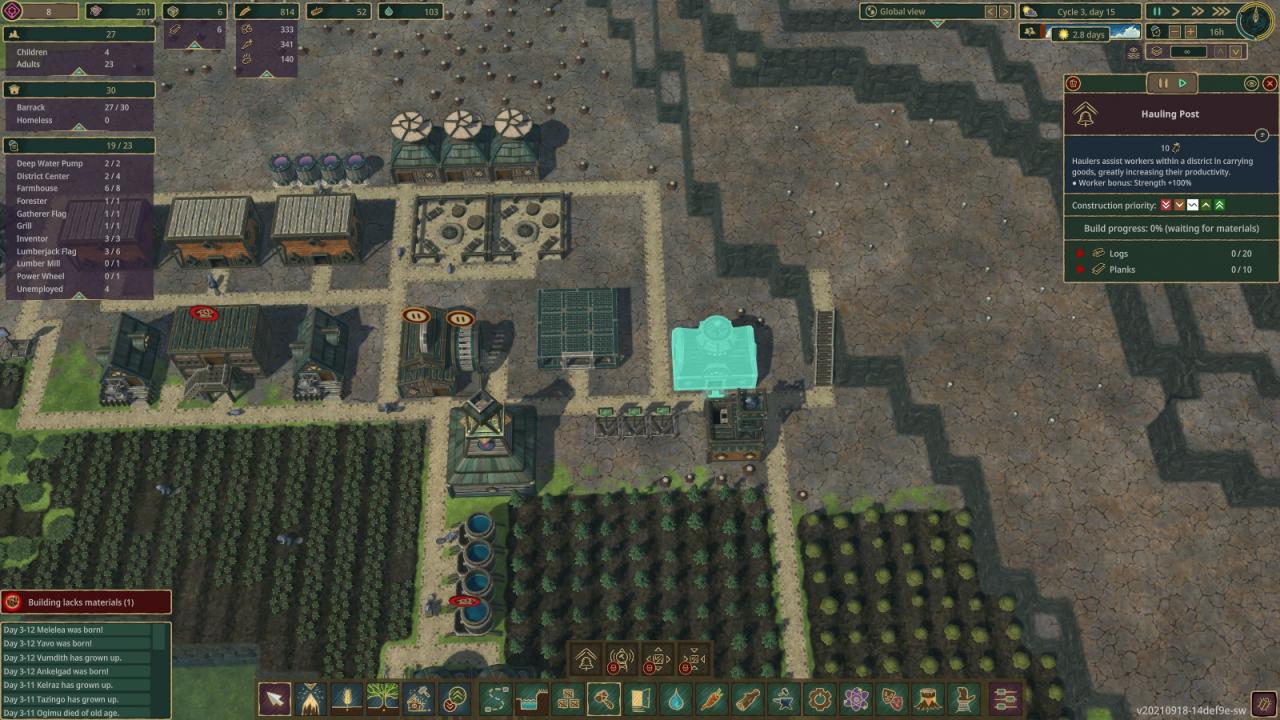
The Hauling Posts employs delivery beavers with increased strength, that will take care of all the random carrying a lot of your production facilities are doing. Generally speaking, unemployed beavers should work here, as it has a whopping 10 worker spots, and helps your community greatly.
Not quite on the screenshot (It’s to the left of my housing): I saved up enough research to unlock the “temple” leisure building. It satisfies the need for “Spirituality” in your beavers, which increases their productivity by a massive 30%. A good investment!
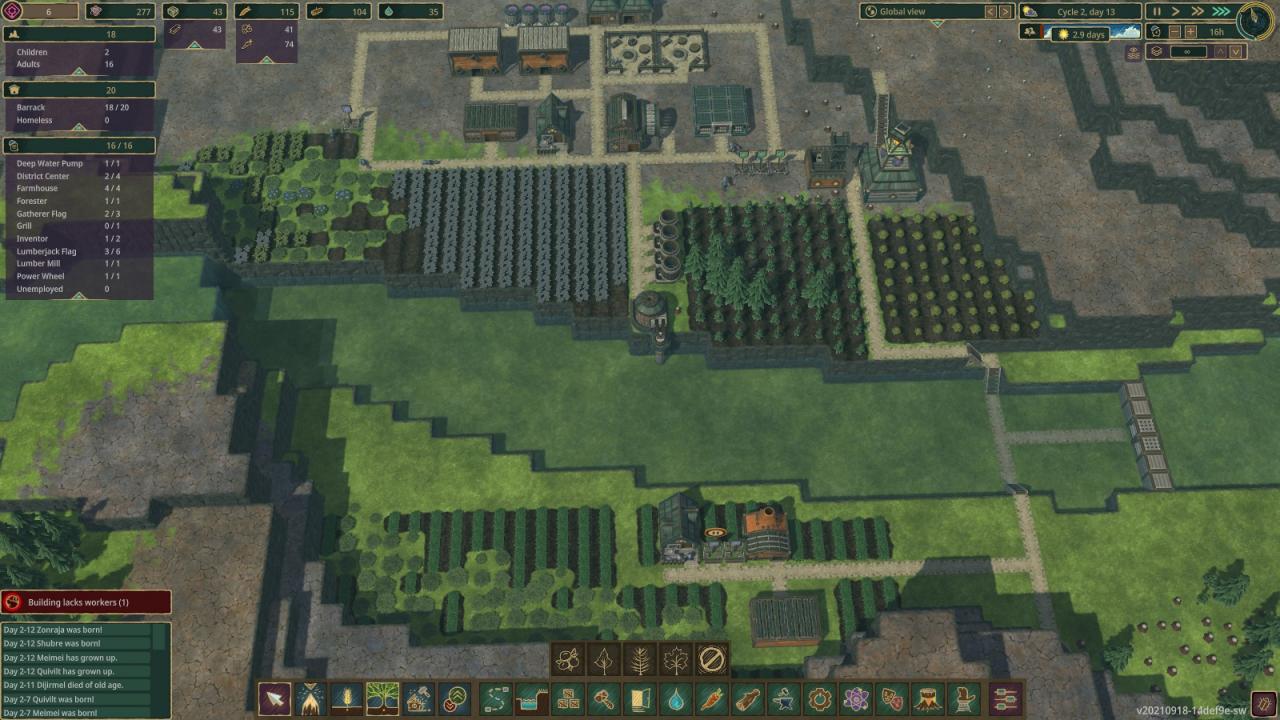
As you can see here, I keep expanding the dam across the southern bank. Droughts are lasting for a full 6 days at this point, and I’m worried about my water drying up. Time to get it done:
At the same time, I need to add a third fireplace to keep “social life” satisfied. Our pop is too big for only 2 at this point. Since progress on the dam is slow due to the amount of building sites, I spend a 100 research to unlock the builders post, inside the “Labor” category:

This allows you to hire 4 additional builders, which should speed up construction of our dam considerably. At this point, my grown trees are frequently too slow to keep up with my demand for logs, so I expand my forestry to the south:
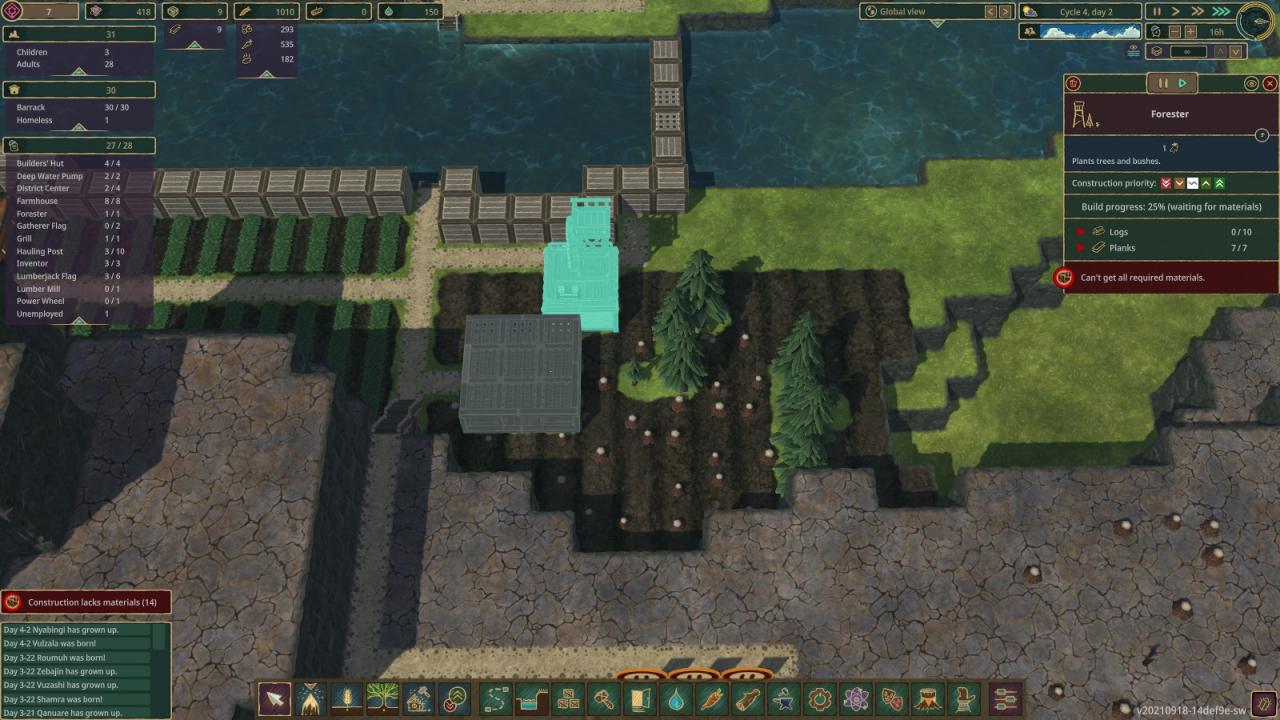
This has the added benefit of ensuring some logs on the other side of the river, once these trees grow up. All maples, because might as well.
Finally, just before my 4th drought would have hit, it is done:
As you can see, I had to open the upper part of the dam, since the water flooded my plateau. If this happens to you: Replace some of the “Leves” in your construction with regular “Dams” to allow more water to pass through. In the screenshot, the “Holes” are about to be plugged by more dam structures.
I had just hit around 30 beavers, food storages are full to bursting, and with 2 levels of water, I should have plenty of time to think about my next move. This concludes the main part of the guide. Check out the “Now what?” section for some ideas for the future. Or head to “Tips and Tricks” if you want some more general advice.
What now? (Ideas for the future)
– Research Metal structures and start gathering scrap at the ruins. This unlocks more advanced buildings, such as the leisure building “Carousel” which increases the productivity of your beavers further.
– Take advantage of your river and build waterwheels where the water flows fastest. Use it to power your lumber mill, and once you unlock it, your gear workshop.
– Pick a spot for your second district. Grow your pop to around 40, and then migrate 10 beavers to a new location. Ensure said location has berries, wood and fertile ground. Expand the district and connect it to your HQ with delivery and drop-off points. Build a second dam to make your new district self-sufficient and increase water storage.
– Research explosives and start terraforming dedicated farm- and woodland. Your initial district is relatively tight on space, try to make more room for farms, trees and other buildings.
– Alternatively, build aquaducts to create more fertile soil elsewhere.
– Research net and better versions of buildings (Bigger Storage is a good investment) and start improving your existing infrastructure. Try making your beavers walk as little as possible.
– Try playing on a new Map without a guide and see how far you can get.
General Tips
The very first things in the game you do should always be this:
2-3 Woodcutters flag -> Water Pump -> Gatherers Flag -> Farmhouse -> Storage
There is no real reason to deviate from these 5. You need logs to build stuff, water so your beavers don’t die, the gatherer to keep your beavers fed until your farmhouse produces food, and the storage to keep your food stockpiled.
After this there can be variation depending on faction, map and what your plans are. But always do these 5 first to ensure your beavers survive the first two weeks.
Probably the most important concept in the game, is juggling your workers around to where you need them. Certain buildings have periods of downtime during which any beaver working there is wasted:
– Gatherers Flag / Lumberjack when berries/trees are not in bloom/grown.
– Farmers during growth periods.
– Lumber Mill when you don’t need planks (Might be actively wasting logs!)
– Power Buildings not actually powering anything (Duh.)
– Grill when no potatoes are in storage.
You need to keep an eye on what your beavers are doing. Construction slow? Have more beavers work in the district center or builders post. Just reached a new berry patch? Assign 2-3 gatherers and then take them off once the bushes are blank.
If you do this regularly, you can get more work done with less beavers, which is particularly important in the early game.
Beavers can and will waste a lot of time carrying stuff around if you are not careful. If a storage facility is full, beavers WILL walk across the entire map delivering their goods to a non-full building. Generalized storage should only be a thing early game, when your production is still slow, and food is scarce. Don’t just build new storage whenever you see that your existing one is full, you will have half a dozen of them full with raw potatoes or carrots that way.
Your first 4-5 unlocks should follow a relatively strict order. The forester should be first whenever you can, so trees start growing ASAP. Leves should come next unless you NEED stairs to access your future dam area. Remember: Beavers can build things from above. If your workers can walk up to the river and are no further than 1 level from the bed, they can build a dam across it.
On certain maps you might not be able to dam your river before the first drought comes in. This is not a game-ender. If you plan for it, the first drought can simply be “tanked” through. While you should strive to dam up your river as quickly as possible, if you are doubtful that you can do it before that first drought hits -> Stock up food and water instead. 4-5 Water towers are all you need to survive the first drought, provided you built your farmhouse early enough, which you should ALWAYS do anyway!
Planks are produced quickly, and only used in a select few constructions in the early game. Generally plan how many planks you need for your next set of constructions, and then produce more or less exactly that many. Logs are a borderline luxury in the early game, and turning too many of them into planks by accident can be run-ending.
Timberborn is not a game where you should have workers on “standby”. Beavers eat your food and drink your water. If they don’t provide anything meaningful in exchange, you are wasting resources. When you build more housing / breeding vats, have an idea what those beavers will be working when they grow up. If you have food and space, but no workplaces: Expand! You can always use more farmhouses, foresters, lumberjacks and such. Like any colony sim, Timberborn is about going from small, to big, to bigger to biggest. When in doubt, more carriers and builders speed up most of the things that happen in the game.
There are never enough dams on a map, and as a result, not enough water. The hidden timer in the game is lack of water. Every beaver needs water on the map, and each tile of water needs a dam to hold it. The next dam should always be your long-term goal. Don’t think “I want a district over there.” think “I want a BIG ASS DAM over there, and need a district to get it done.”
A lot of stuff in this game can be stacked. Platforms can be built to make more space, stairs can be used to reach higher places. Only build on green tiles if you need to (And move buildings on them later if you can), otherwise stack it all onto dried out dirt and plateaus. Green land is for farms and trees, never forget!
Thanks to Stübi Senpai for his great guide, all credit to his effort. you can also read the original guide from Steam Community. enjoy the game.
Related Posts:
- Timberborn: Goods Distribution in Update 4
- Timberborn: Basic Guide (Resources, Buildings, Waterways)
- Timberborn: Beaver Maps Guide
- Timberborn: All Building Guide (Shapes & Sizes)
- Timberborn: Gravity Batteries Guide (New Update July 2022)