This is a basic player guide that seeks to aid any Director new to the craft of leading the Pegasus Expedition to victory. This space manual does not aim to replace the in-game tutorials but to provide a combination of cues and tips to easily immerse yourself into the game.
IN ORDER TO VIEW A FULL IMAGE, RIGHT-CLICK ON IT AND CHOOSE TO OPEN LINK IN NEW TAB OR WINDOW
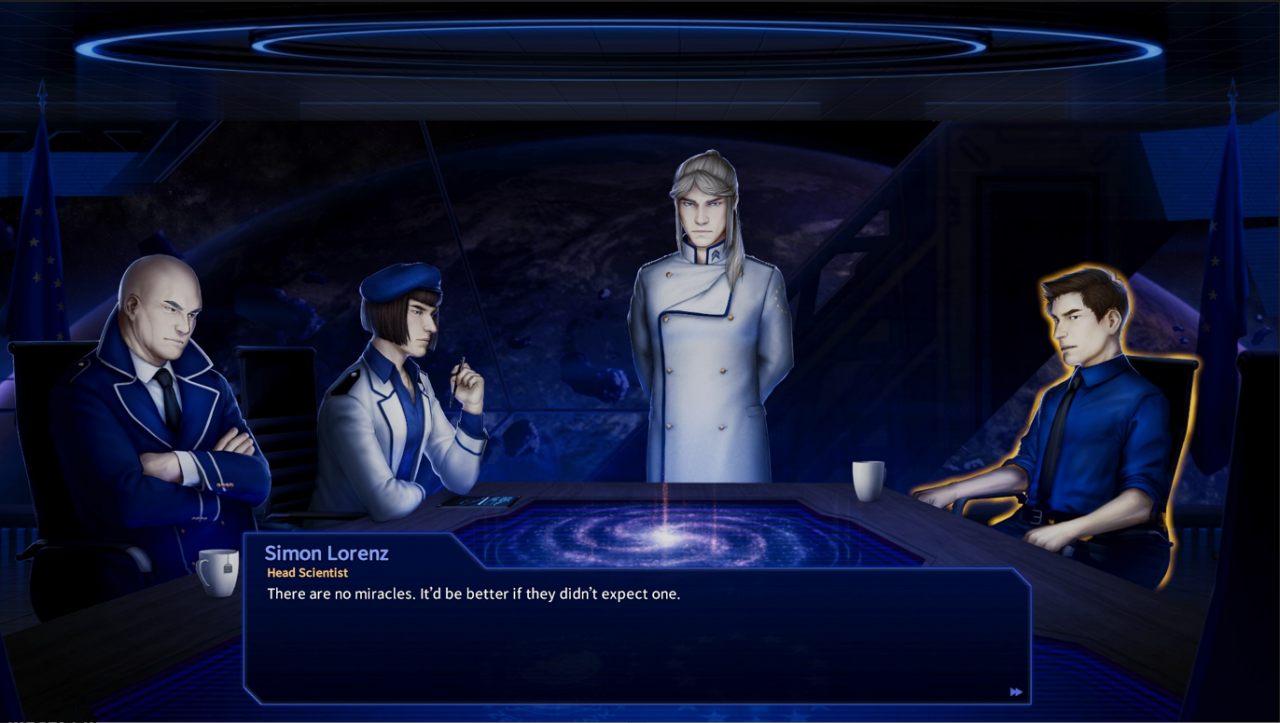
Narrative screen
The great emphasis on story requires a very short introduction to the way the story beats are delivered in Pegasus:
- The narrative screen forwards the plot and is used both for the main quest and the side-quest conversations.
- The current speaker not only has the name and title in the head of the text box but their person on the narrative screen is enveloped by a golden outline to make them instantly recognisable.
- You move forward by clicking into the text box (or simply just clicking LMB) or choosing one of the dialogue options.
- Your choices matter – if you refuse a side quest or pick one of the sides of a conflict, you step on a path unique to the playthrough which will not only result in experiencing different story beats, but the overall outcome of your campaign may be radically different.
- Left Mouse Button (LMB) click and Space key speed up the text, so you can speed up any section you prefer
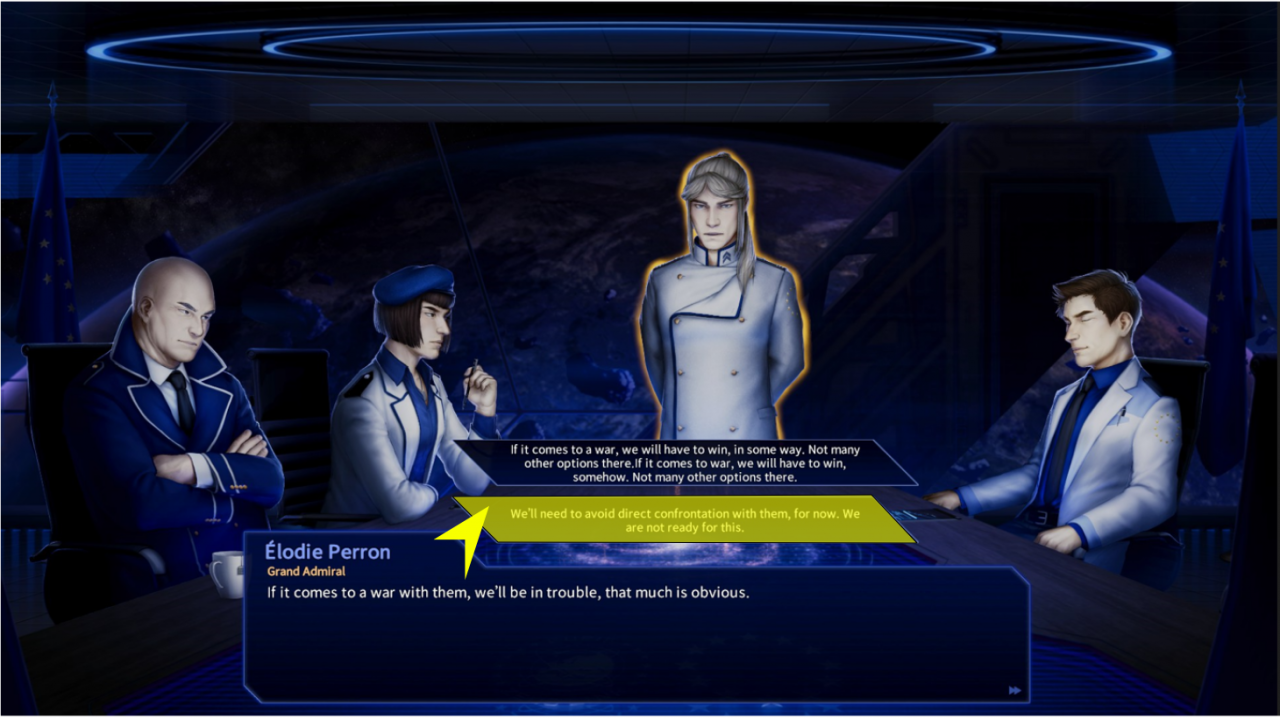
- When you have several choice boxes, you choose by clicking LMB (as on the screen below).
- There are other types of narrative windows the game presents and you will have an easy time choosing from the options they offer as they work similarly to the main choice window, offering to choose from several options.
- REMEMBER: Always pay attention to the conversation – some choices lock the dialogue as you choose your path. Sometimes it might be in your best interest to avoid conflict, sometimes to instigate it, so always be mindful of your replies and choose wisely!
Starmap
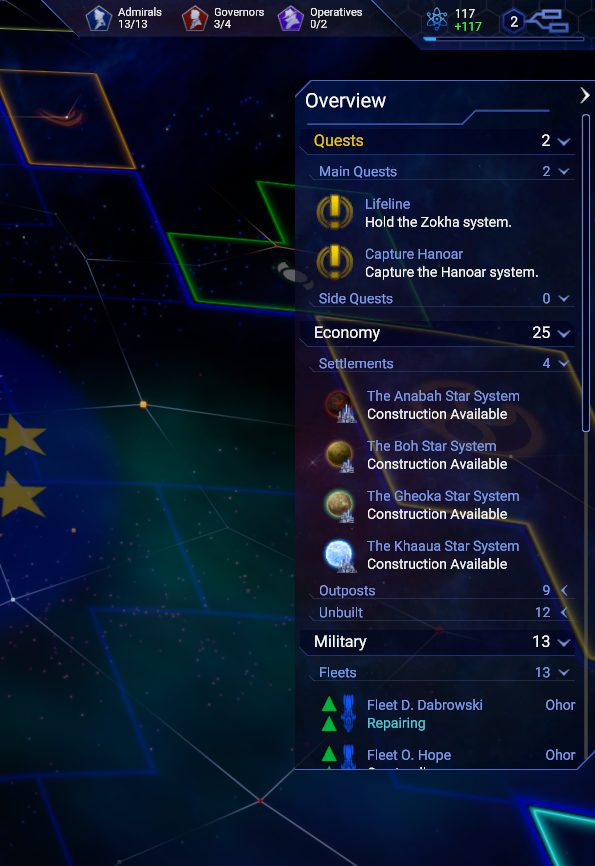
The most expansive and detailed screen that holds information about your resources, notification info, fleet and planet info as well as all the UI necessary for the control over the gameplay elements (such as the sidebar).
- All of the Star systems and their information as well as recruitment and strategic layer of combat take place on the Starmap.
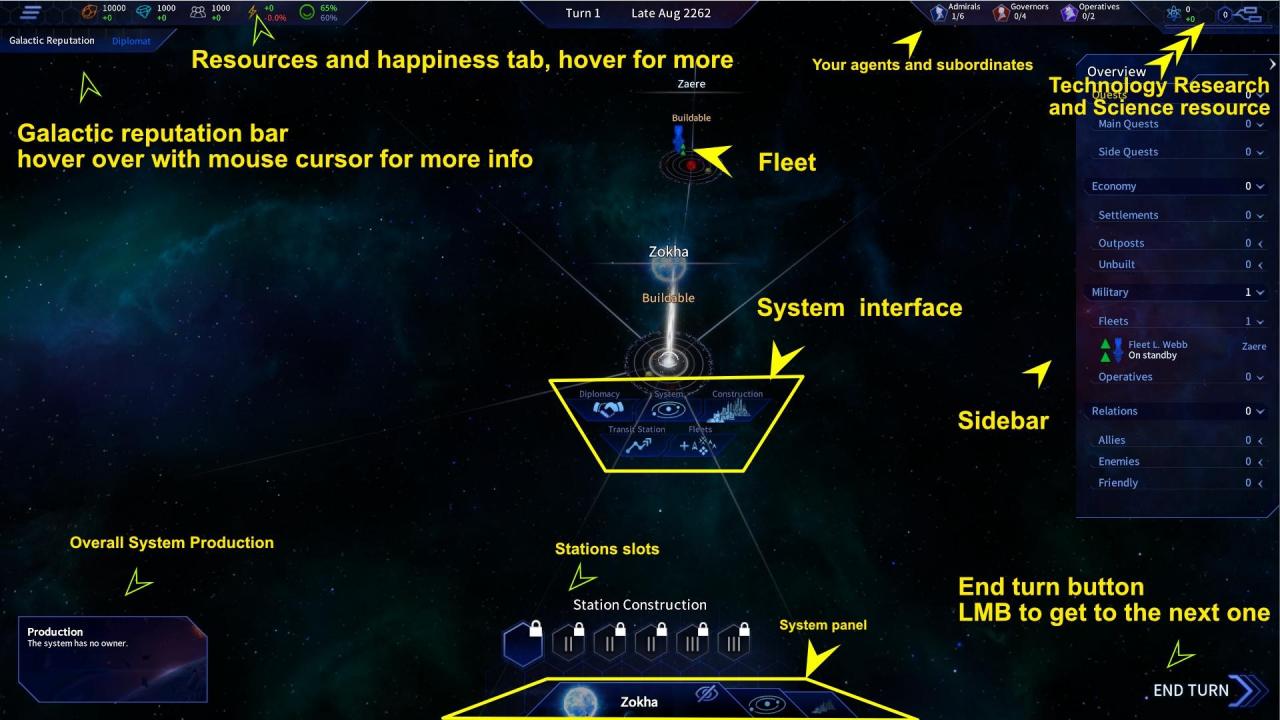
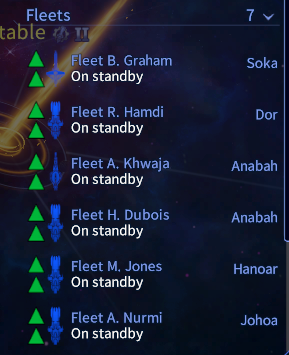
- The sidebar is an essential tool where you can check on all your systems, fleets, enemies, friends, quests and side quests.
- By clicking LMB on the fleet icon, quest, system etc. on the sidebar the camera will move to its location.
- By clicking RMB on an agent icon on the sidebar the camera will move to its location.
- By pressing RMB over a system or economy entry/subentry the player switches over to the construction screen, or to a detail of the fleet if he uses the Right Mouse button on it
- Develop your own workflow on the sidebar and experiment to customise it the way you feel is most effective for your style of play. Each of the categories can be expanded or minimised/collapsed by clicking on its header present in the sidebar.
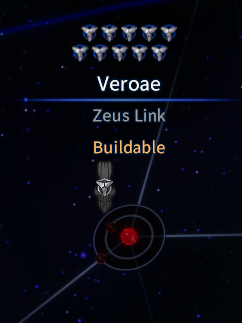
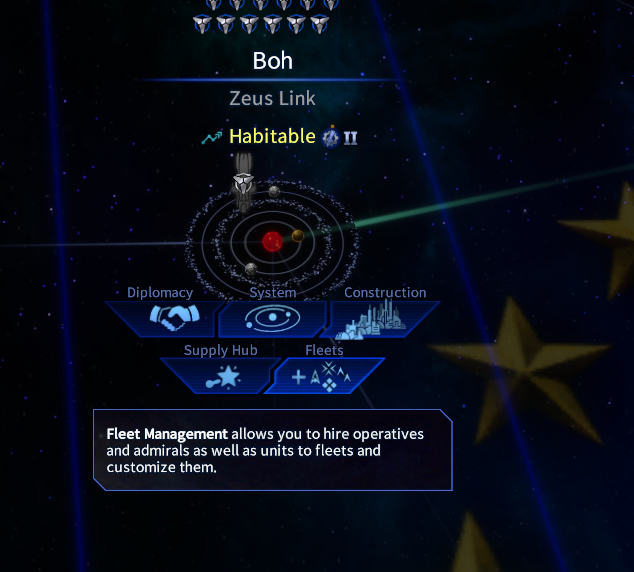
System screen
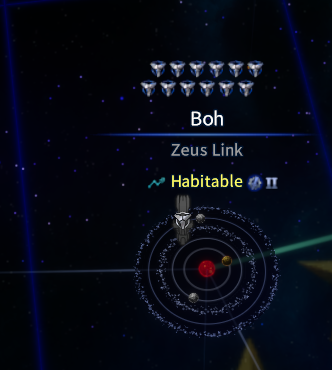
- On this screen you see a visual representation of the various planets and other celestial bodies in the system.
- Shows the visual representation of the system which allows you to use it for various tasks – such as exploring certain objects you discover or use your agent directly on a particular structure.
- It gives a clear visual indication whether an agent has something to work with in the system.
- You can move seamlessly to the construction screen by LMB clicking one of the interactable elements.
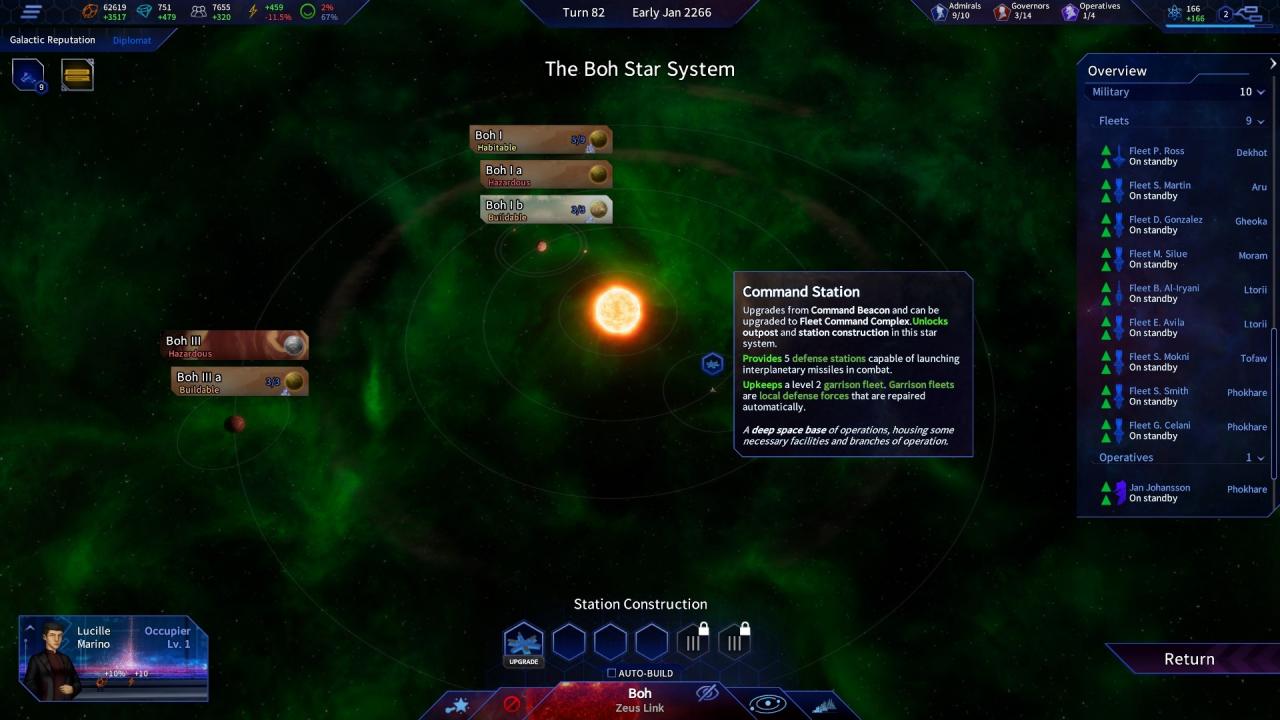
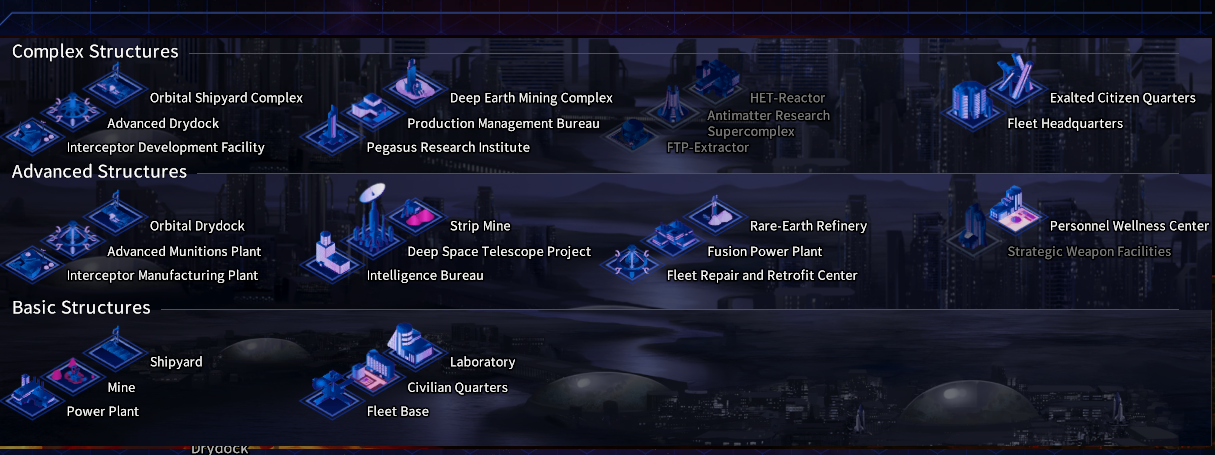
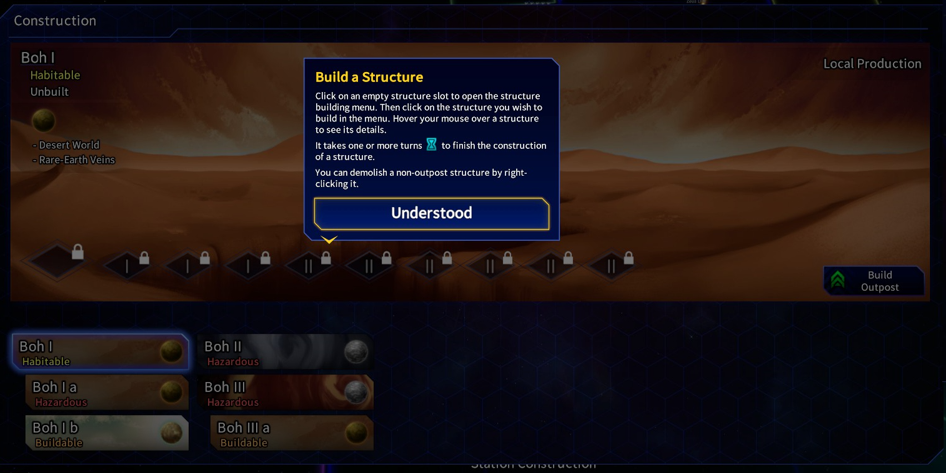
Construction screen
You use the construction screen to fill in the slots available for each planetary object in the system that can be inhabited or built on.

- There are three planetary tiers of habitation – outpost, settlement and colony. Each allowing for a different number of the building slots – 3, 9, 12 respectively. They each also allow access to tier 1-3 of buildings.

- It is a good idea to specialise and think ahead about what kind of buildings you want to set up in which system of your territory. Tier 3 buildings allow for powerful ships to be built and high tier support structures for research, population control, resource extraction etc.
Combat and War
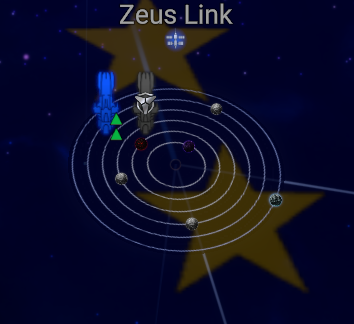
- The fleets gain two movement points after each End of Turn, allowing them to traverse two space lanes – a single fleet is chosen via left mouse button click on its blue representation on the Starmap – you move the chosen fleet (which has white selection sign over it) by right clicking on the target star system one or two lanes away (thus spending one or two movement points).
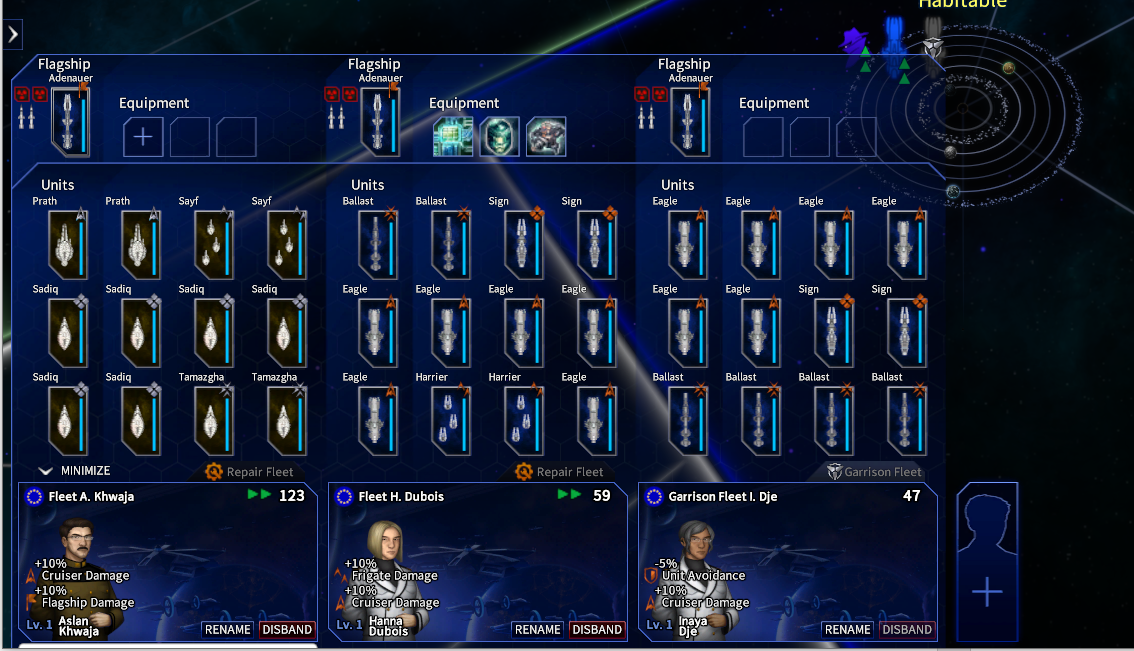
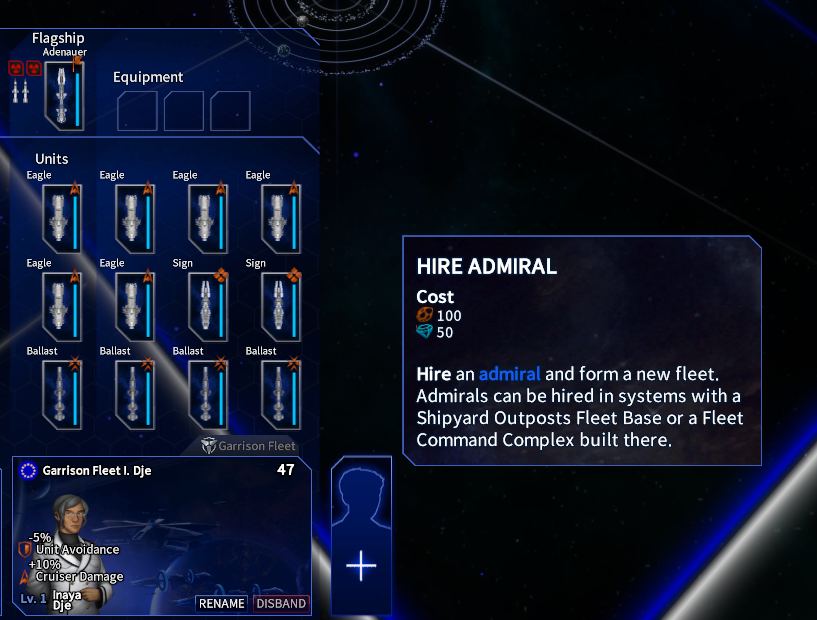
- Each fleet (apart from the immovable system garrison fleets) is headed by an admiral who can level up and has varied stats
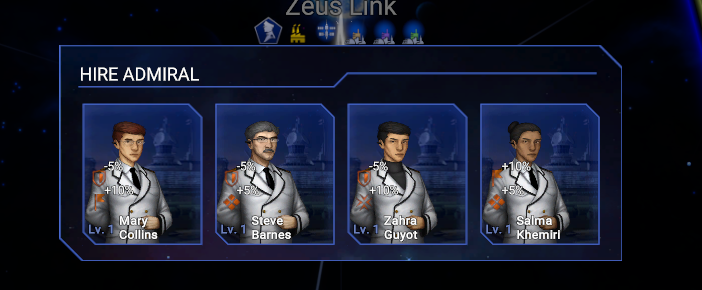
- You recruit each fleet by clicking the maximised menu for each new admiral and clicking the plus icon, which opens the selection of ships based on the Star system buildings
To display full-size image, RMB click on it and choose to open link in a new tab or window.
- The individual ships are recruited by clicking the “plus icon” in the “units” list – you can delete any ships in construction by simply using the RMB to clear out the ship construction queue.
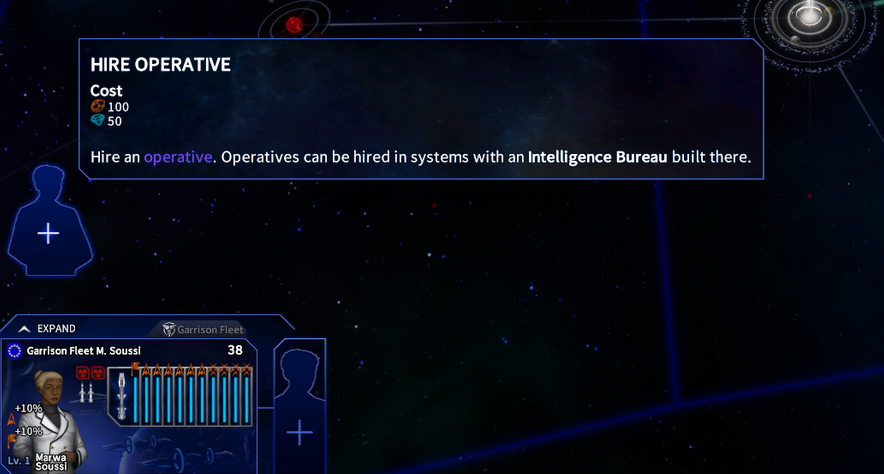
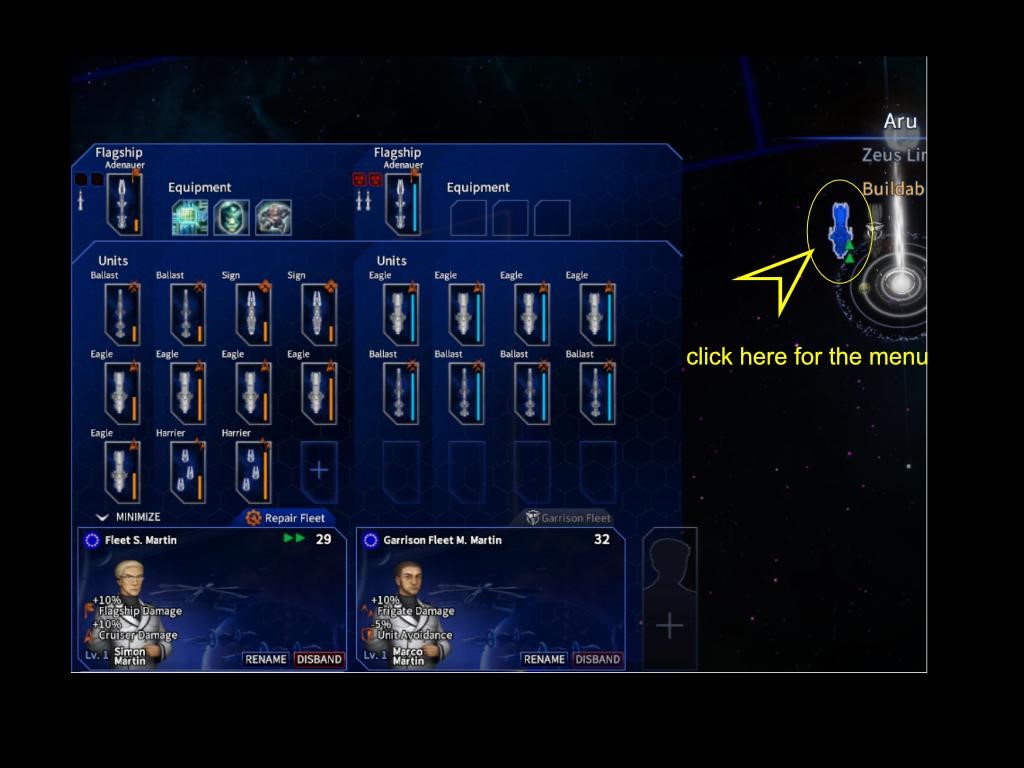
The same fleet management menu allows for hiring of agents who can explore objects, sabotage enemy fleets, plant bombs and destroy structures. The icon is similar to the admiral but is higher in the Starmap’s bottom-left corner (and can get obscured by the expanded fleet menu atm).
To display full-size image, RMB click on it and choose to open link in a new tab or window.
There are two layers to war – the turn-based strategy on the Starmap and the real-time tactical battles.
On the Starmap your goal is to manoeuvre, protect, replenish, upgrade your fleets to maximise the advantage you will have in a battle. You are the logistician and you have to keep your armadas repaired, positioned and upgraded.
- Retreating is always costly. Before you commit your fleet(s), ensure that this remains your last option as penalties for retreating both from the pre-battle situation and the battle itself can easily lead to the destruction of your forces.
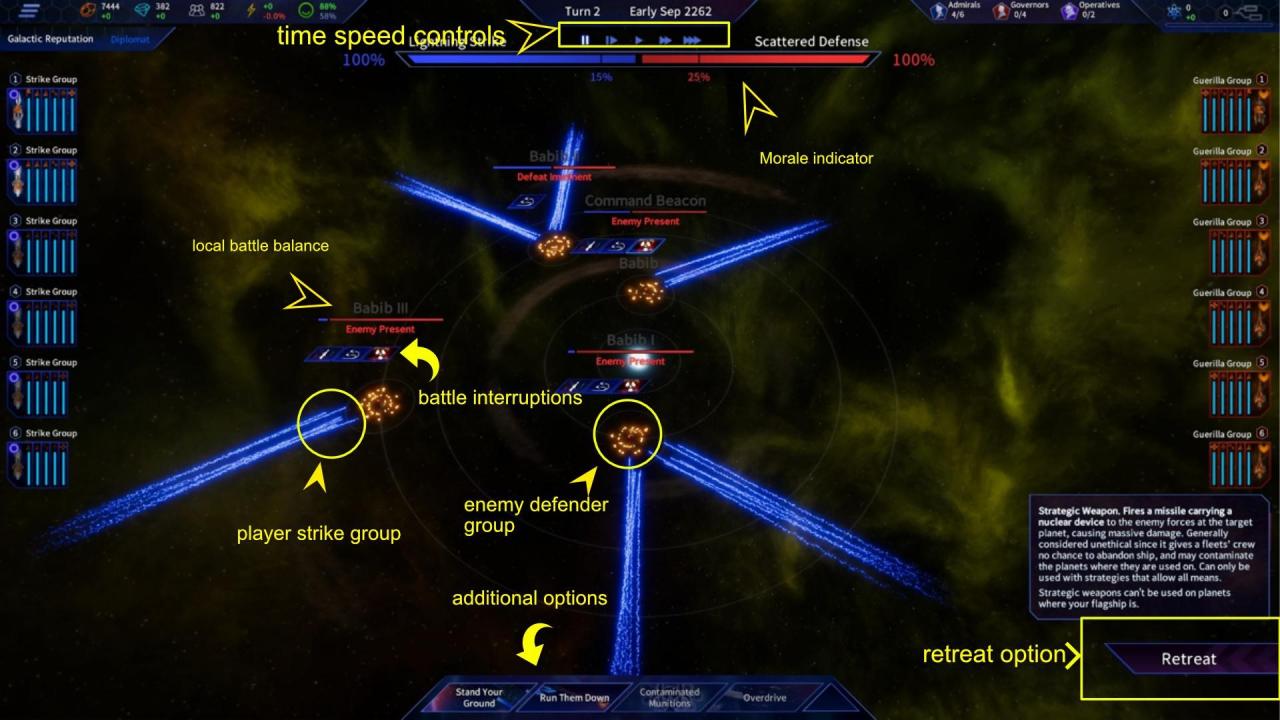
In the real-time battle your goal is simple – ensure that the enemy morale drops to 0% (or the limit) before the morale of your fleet does so. The morale of each side is indicated by the blue and red bar on top of the screen. However, leaving your fleet severely depleted leads to defeat in case of multi-fleet, multi-stage battles.

- REMEMBER: When the enemy morale is below the threshold, the enemy fleet will retreat. If there is nowhere to retreat, it will be destroyed. The same rule applies to the player’s fleets.
- Nuclear weapons and All Means Allowed strategies are a valid tool to use on your journey. You should weigh their use against the consequences – such as a change to your Galactic reputation.
- Experiment with various combinations of crafts and their weapons, you can always check their stats on the fleet/fleet recruitment menu by hovering over their icons with a mouse cursor.
- Plan your conflicts and map out the systems you need to conquer or gain to formulate the overall strategy as you do not need to invoke enemy Nemesis fleets in order to achieve your objective.
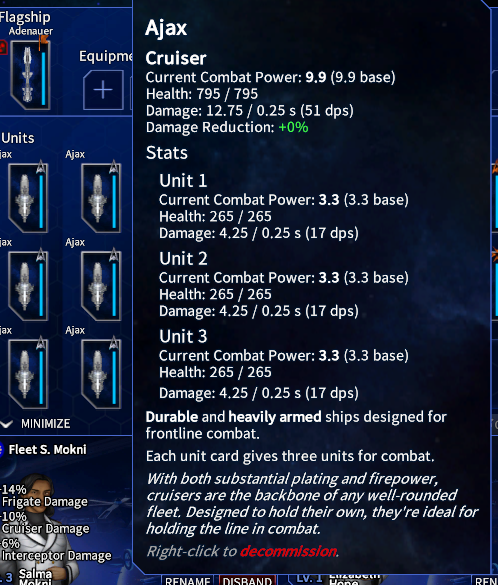
- You should definitely try different loadouts of Fleet equipment that you can switch at any point, for a price.
- The same goes for the flagships as upgrading these is crucial for the late campaign.
- If you decide to resupply your ships with the heavy munition the resupplying of the consumable ammo is going to cost you (100 rare resources for every nuke, 50 for every missile), again making sure you are doing well economically will reward you with greater combat capabilities.
- Both of these options slowly open up depending on your research.

TIP: You can get to the displayed menu by clicking on the blue icon representing your fleet(s) in the system. See image below:
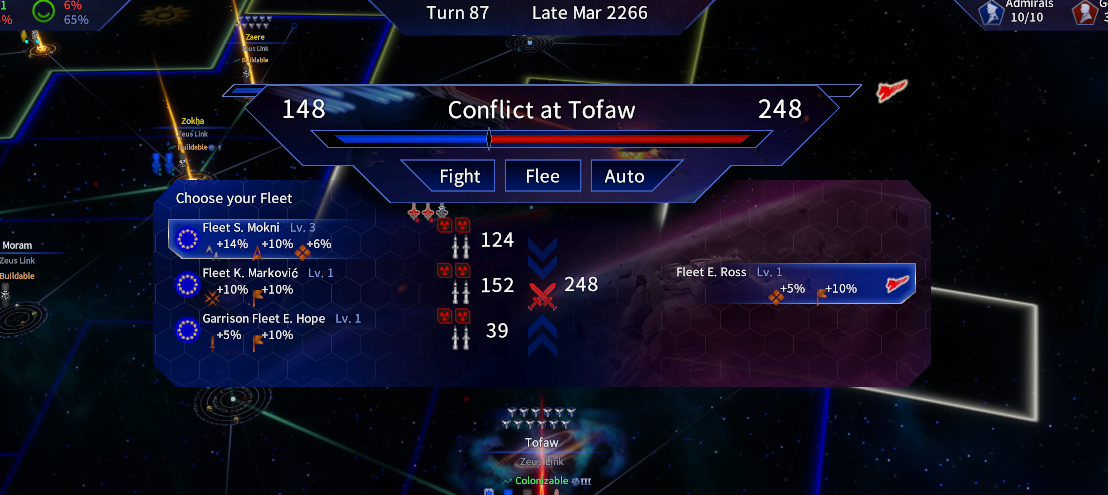
- Once the player is attacked or becomes the attacker a balance of forces screen (below) will appear making sure that you have overall idea what it is that you are facing. Once you are satisfied with the setup, you can choose to FIGHT, FLEE or have the AI to automatically fight for you.
- You can also choose the fleet that is to fight by clicking on it in case of multiple fleet battle
- There is damage that the fleet suffers upon retreat
Then the battle is on.
Battles
The real time battles in The Pegasus Expedition rely on both direct and indirect control. There is also a difference between the strategies and the setup for offensive and defensive battle types.
First, you have to correctly analyse the enemy forces you are facing and select the best strategy (indicated by the different cards on the bottom of the screen) and choose the positioning for your approaching battlegroups (see below). Once the battle commences, you will have no more direct control over the movement of your fleet.
The direct interruptions such as nukes, missiles and sacrificing structures and EMP blasts rely on you researching, building/stockpiling and deploying them at the right time to achieve maximum effect.
- When you are dropped into battle, you have to choose your strategy. This is crucial and you have to take into account the enemy battle group composition, their possible defences you can see on the Starmap as well as the power level you checked pre-battle.
- You have the option to choose your fleet’s approach by clicking on one of the directional nodes and by dragging and moving them to the desired position.
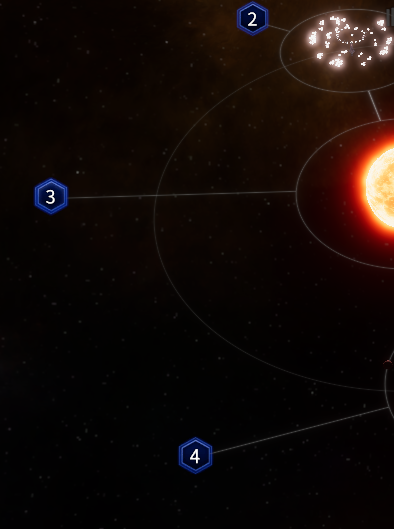
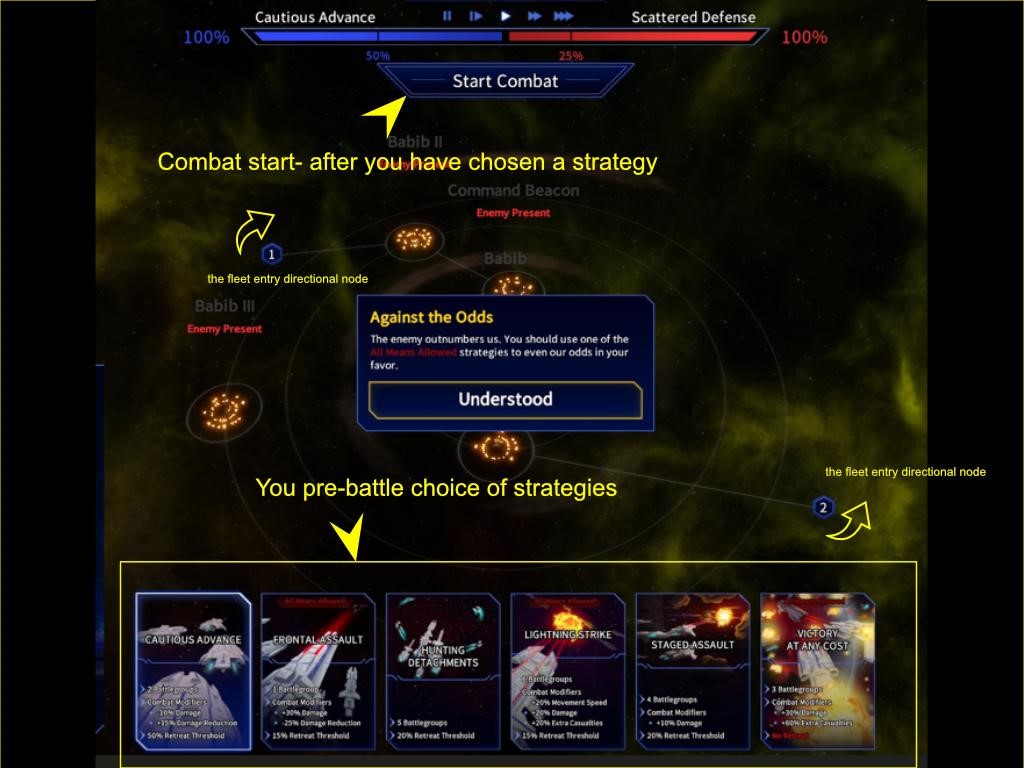
To display full-size image, RMB click on it and choose to open link in a new tab or window.
Once you have finished all preparations, start the battle and make sure to use the various interruptions as well as the additional options available to sway the battle your way. Just hover over the options with your mouse cursor to get additional info – so you know what you are paying for the extra power.
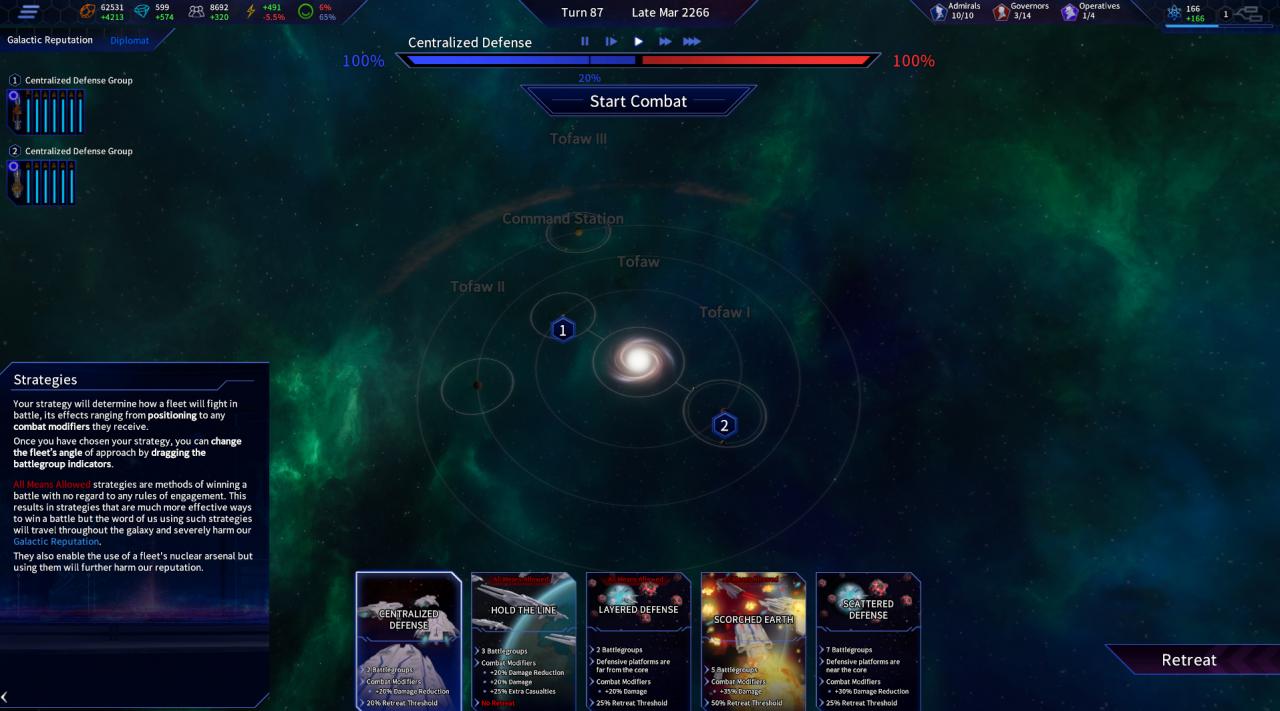
The game has a slightly different combat and strategy layout when your system gets attacked. Your goal is to deplete the enemy attacking force by using any advantage you have in addition to the strategy and ideally managing to repel the entire (sometimes multi-fleet attack).
- There is no choice of direction, but instead you choose how concentrated your force is across the system.
- Make sure to use any structures to destroy the morale of the attacking force.
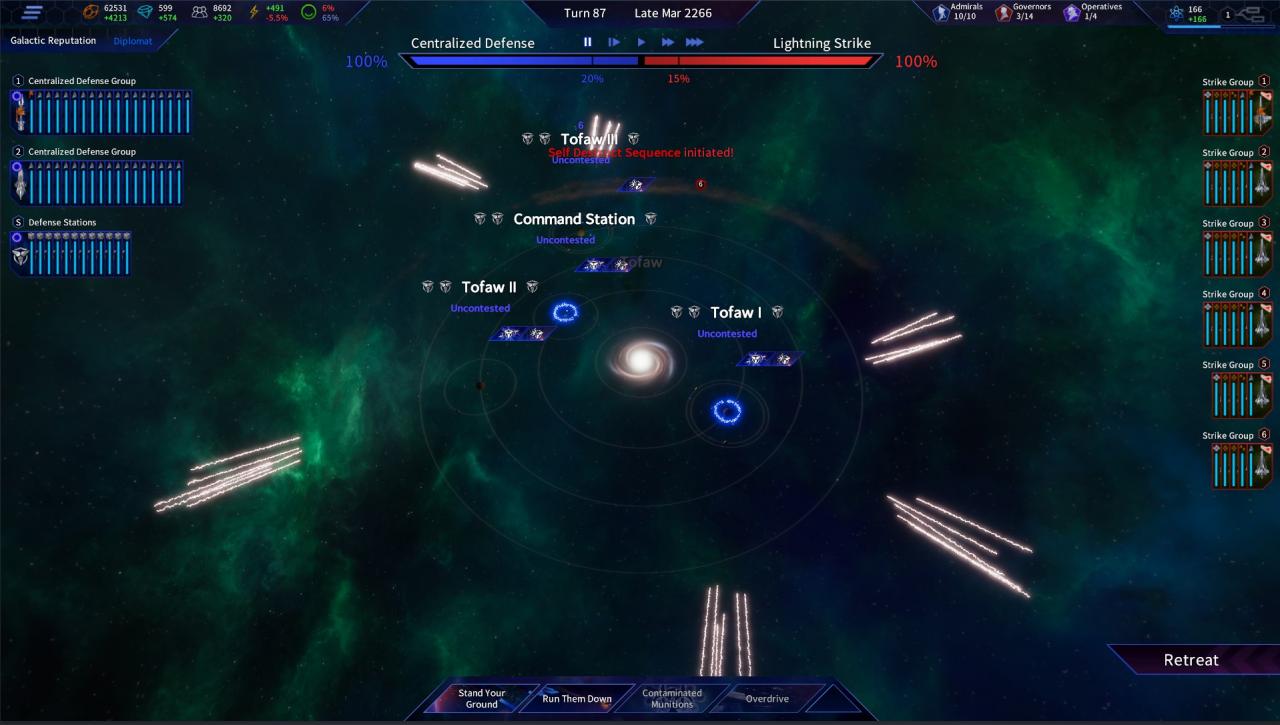
To display full-size image, RMB click on it and choose to open link in a new tab or window.
- Do not leave systems undefended, check the star lanes and where they lead as well as the positioning of your fleets before the end of turn, unless you want the enemy to take advantage of your bad positioning.
- Winning a battle with almost no units left will lead to your defeat in the next round – be mindful of the location of your battle as well as the approximate possibilities of what the enemy can bring to fight in that turn.
REMEMBER: When your fleet is under repair, it is defenceless. Make sure to keep an active fleet around, otherwise the enemy will have an easy time destroying them. The other option is to build sturdy defences that serve as fortresses for your fleet under repair.
- Research and building/settlement upgrades are crucial to upgrading and strengthening your fleet.
- Shipyard is a basic building for production of level 1 ships and essential to be able to produce at least these in the most systems – available from System and from the construction screens, strategically place them and their higher tiers across your territory.
- Connect the ends of your territories with a handy Fast Travel option, but always be mindful of the expense both for maintaining the network and the cost of travel that is paid in ENERGY resource. A single line from one end to the other might mean a difference between transporting your fleets on time and losing several star systems.
Tutorials and Basic Controls
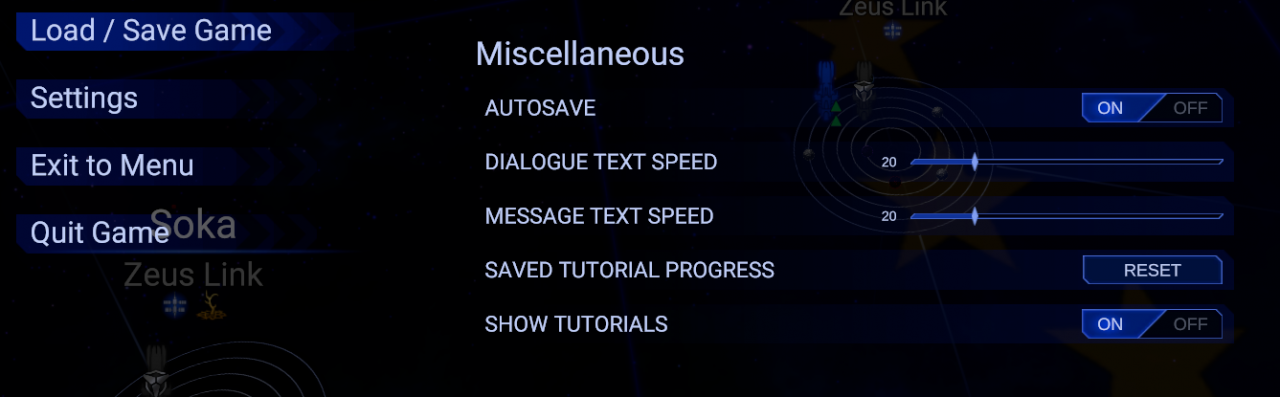
- You can reset tutorials at any point by using the reset button in the settings. We encourage you to use it in case you need the tooltips at the start of a new campaign, these are automatic for the first-time player.
- During the tutorials, you have to follow a set of golden arrows and several tooltips that allow you to learn about the processes and the functionality of the game and its interface.
To display full-size image, RMB click on it and choose to open link in a new tab or window.
- There are also tooltips explaining the basic functionality strewn across the UI, we definitely recommend reading these as the information available might explain some of the finer details
- Left mouse button to choose in the menus, holding right mouse button allows to rotate the camera as the player moves the mouse
- WASD key combination is used to move around the Starmap.
- Mouse wheel for zoom in and out on the Starmap
- CTRL + LMB click or double LMB click on multiple fleets allows all of them to move at once
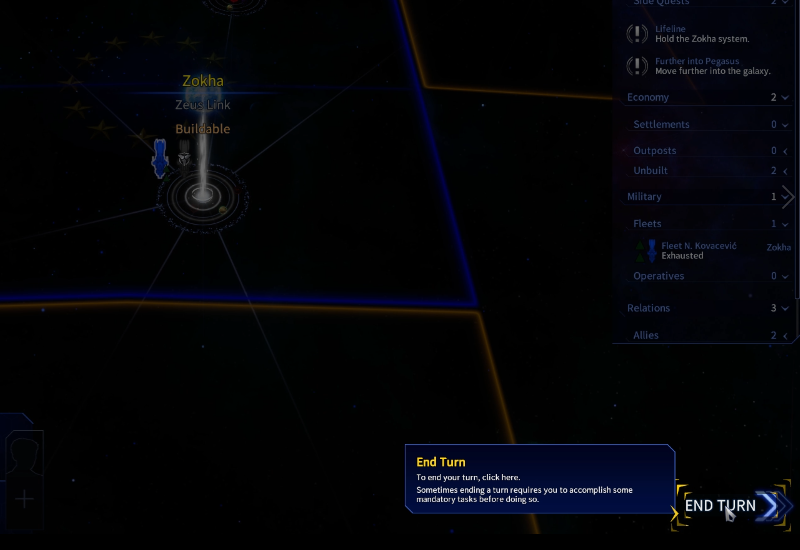
- The territory of the Star system that has been conquered is only added to the Player’s/Expeditions’ territory once the End Turn button has been pressed. The territory becomes integrated when the enemy turn ends allowing for construction of buildings, orbital structures etc. depending on the level of control and the settlement type.
- Territory control is crucial to a successful campaign as well defended territory allows the player to produce enough resources to successfully clear all the quests of the campaign.
- Building details can be found just as most UI item details by hovering over the item in one of the menus which activates the pop-up info
Diplomacy
You initiate diplomacy with other factions by visiting one of the systems they control, hovering over it with the mouse cursor and LMB clicking it.
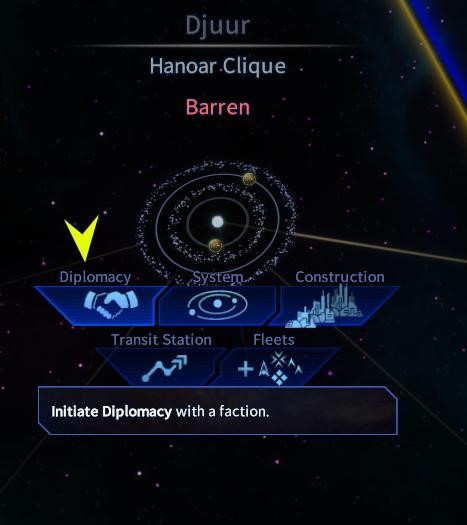
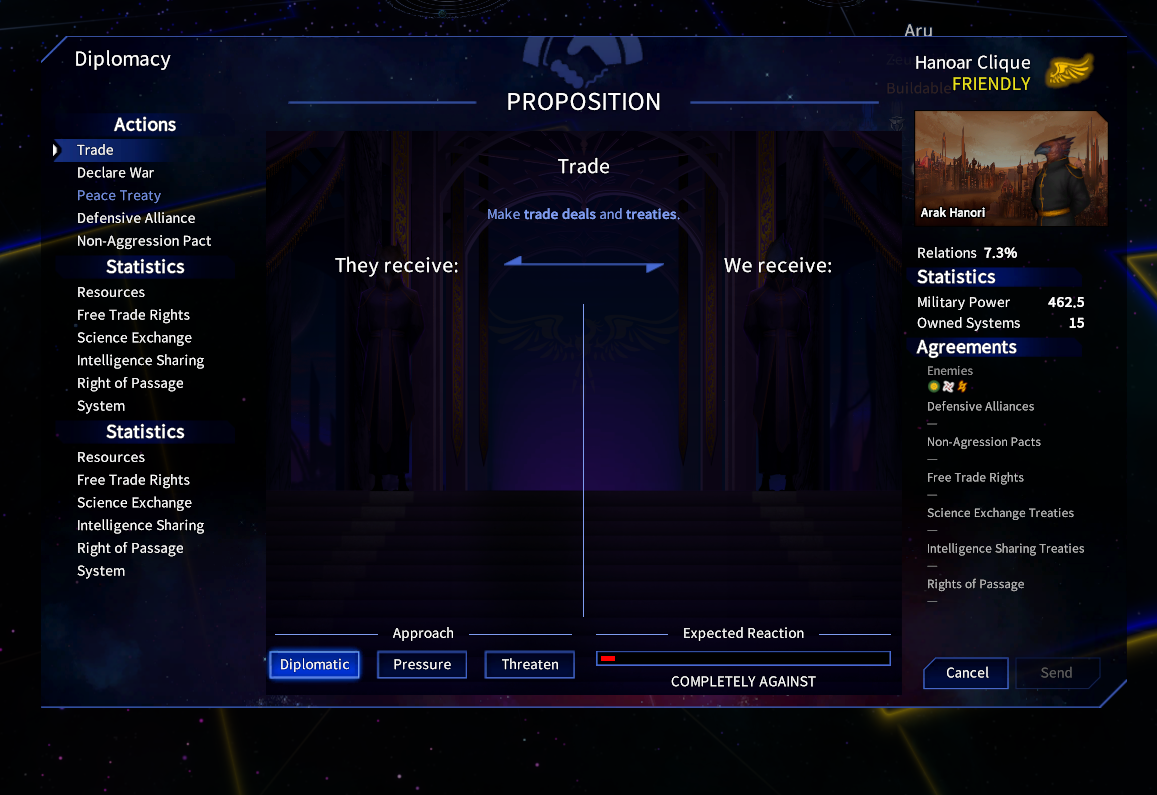
This action opens up the diplomacy menu and allows you to perform standard diplomatic actions- such as Declaring War, signing Peace Treaty or avoiding conflict by agreeing on Non-Aggression Pact.
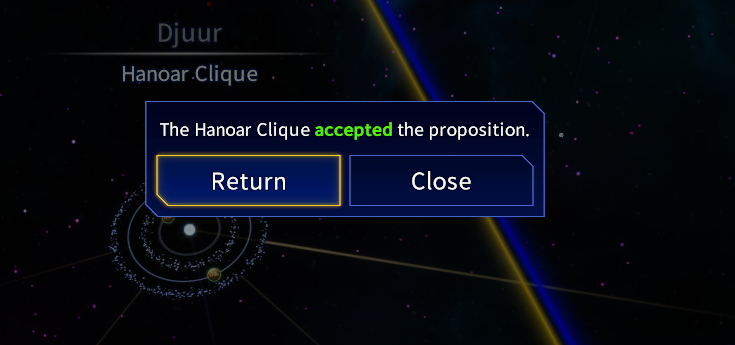
- There are two sides – yours and the opposing faction. Everything has a price and you can bargain either with resources or with the exclusive rights and treaties you have in your options. Once you have reached the ideal green or high yellow expected reaction, there is a good chance that you will be successful with such a balance and can send your offer which will be either accepted or declined.
- Peace treaty cannot be signed if you are the aggressor who declared war and it takes time and military victories to convince the other side of your overall victory.
To display full-size image, RMB click on it and choose to open link in a new tab or window.
- You can also vary your approach during the negotiation which might bring the diplomatic success you sought or complicate things and your relationship with the opposite faction.
Thanks to FQ_MichalC for his excellent guide, all credit to his effort. if this guide helps you, please support and rate it via Steam Community. enjoy the game.