Helicopter startup
- Start Battery 1 and Battery 2
- Start Fuel pump 1
- Start Engine 1 crane
After that, you need to start starting the first engine on the panel on the left, under the landing gear button:
- Use the arrows to select engine number 1 and hold down the Start button until engine 1 RPM (on the dashboard on the left) reaches 0.5
After that, proceed to start the second engine:
- Start Fuel pump 2
- Start Engine 2 crane
- Use the arrows to select engine number 2 and hold down the Start button until engine 2 RPM (On the dashboard on the left) reaches 0.5
When the left engine speed reaches 7 revolutions per second, the generator will turn on.
After starting both engines, turn on the remaining systems:
- Sighting navigation system on the right panel
- Ejection seat on the right panel
- Radio message (Radio) on the right panel
- Ejection seat on the right panel
- Ballistic calculator for missiles behind the pilot’s seat on the right
- Attack warning system (SPO) behind the pilot’s seat on the right
- IR trap dispencer (Activate flares) behind the pilot’s seat on the right
- Aim monitor (SHKVAL) search and target acquisition system to the left of the pilot
- Laser designator (Laser) to the left of the pilot
After turning on the systems, you need to spin the engines to operating speed, to do this, place the engine control lever at the rear left of the pilot in position 1.
The helicopter is ready to take off!
Control in normal mode
Arrows – control the direction and pitch of the screw
1. Zoom in on the picture from SHKVAL
2. Capturing a point on SHKVAL
3. Eject IR traps
4. Cabin light
5. Ejection
6. Navigation/main lights.
HUD
A small description of the indication on the HUD:

Also at the top left is an indication of an attack warning.
To switch the helicopter to combat mode, you need to select the type of weapons on the central panel.
Fight mode
0 – Navigation/pilot mode
1 – Movable autocannon
2 – Missles “VIHR”
3 – Rockets S-8
When the combat mode is turned on (and the SHKVAL laser is on), a targeting mark will appear on the HUD:
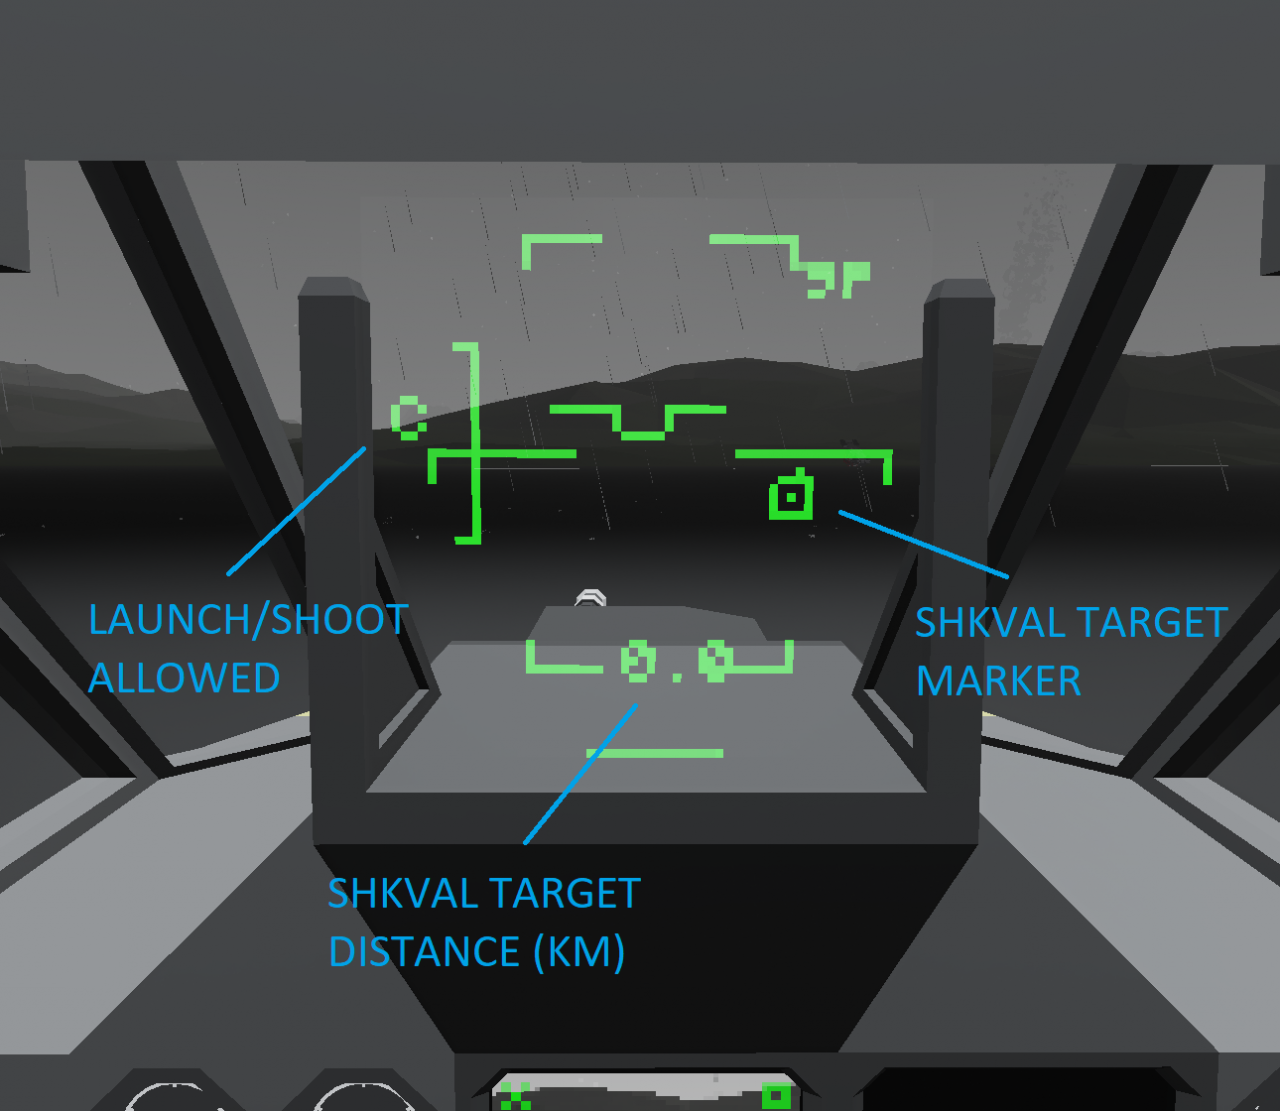 The letter C on the left means that the launch is allowed, and the numbers below show the range to the target in kilometers.
Autocannon
When you select a gun, a large rectangle will appear on the HUD. This is the cannon’s kill zone, in order for the cannon to hit the target, the SHKVAL mark on the HUD must be inside the rectangle:
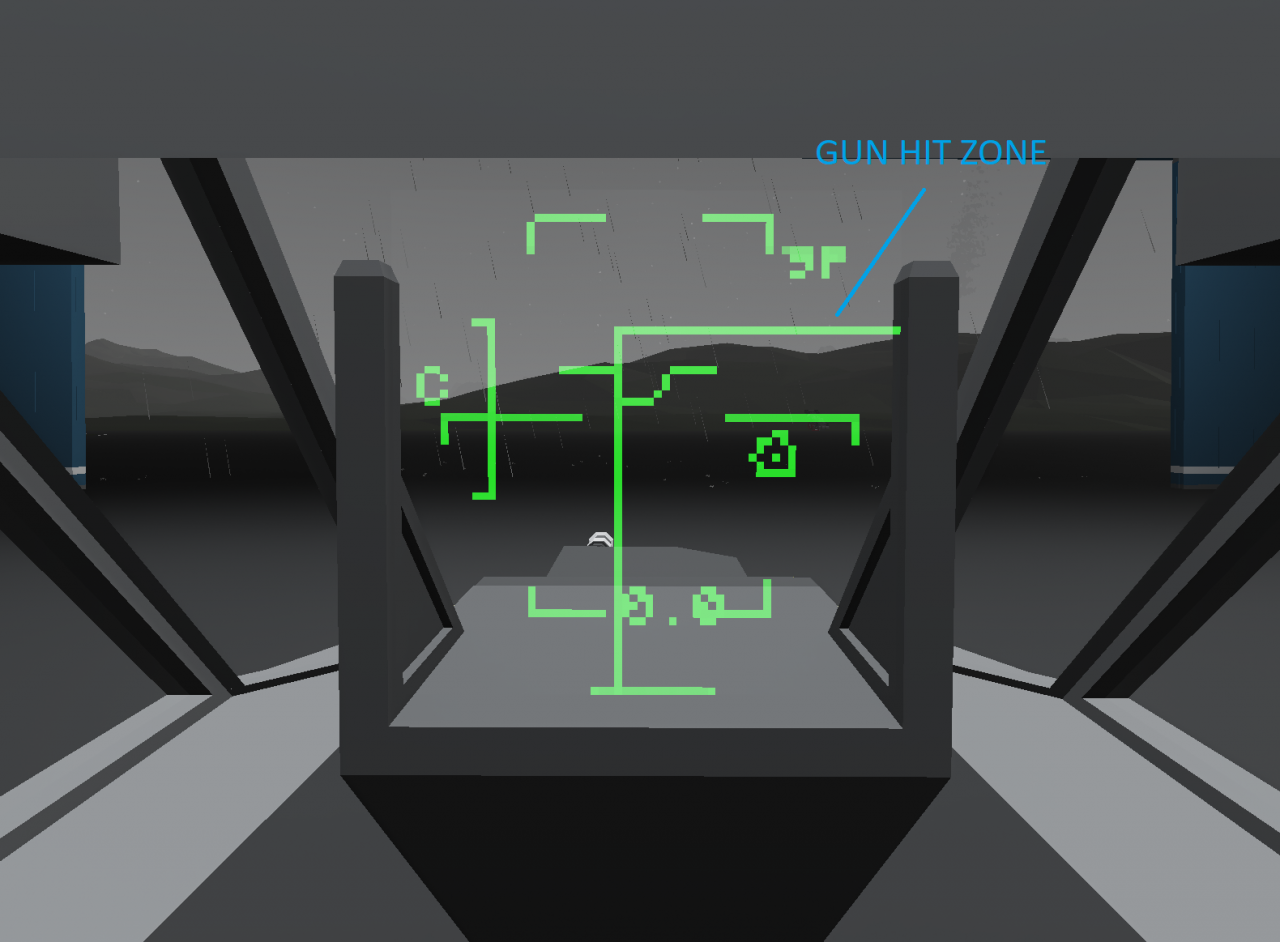 If the target is outside the range of the gun, then a cross will appear on the HUD, and the rectangle will start blinking:
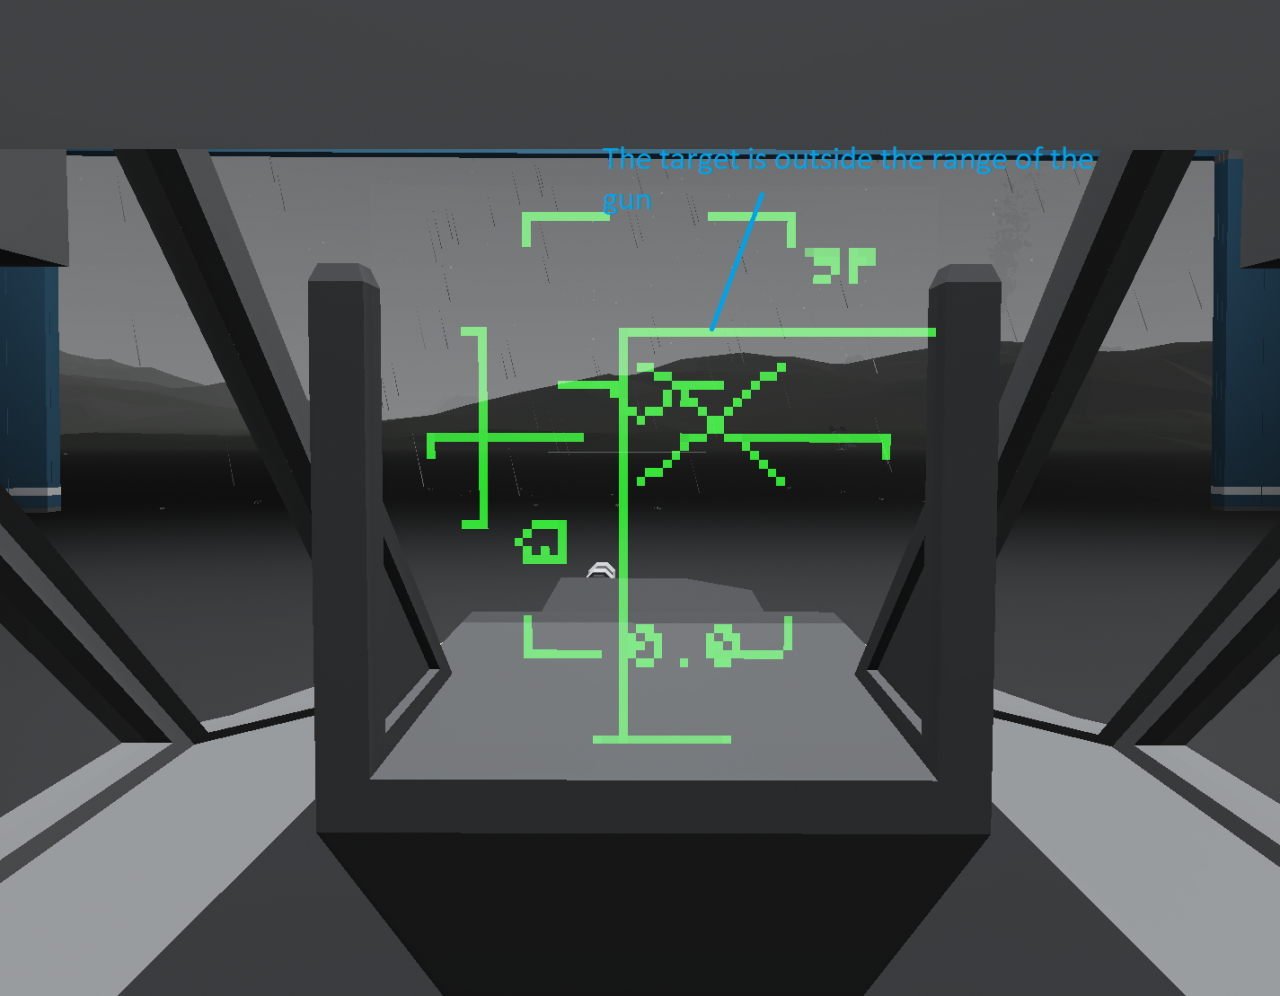
Recommended firing range of the cannon: 400 – 500 meters.
Gun ammo: 200 rounds
Shooting ATGM (Missles)
When you select the “VIHR” ATGM, a second, larger circle will appear on the HUD. This is the missile kill zone, in order to fire a missile, the SHKVAL mark on the HUD must be under the missile kill zone mark. Also, for convenience, you can enable auto-turn to the target (Auto turn to the target) on the left panel:
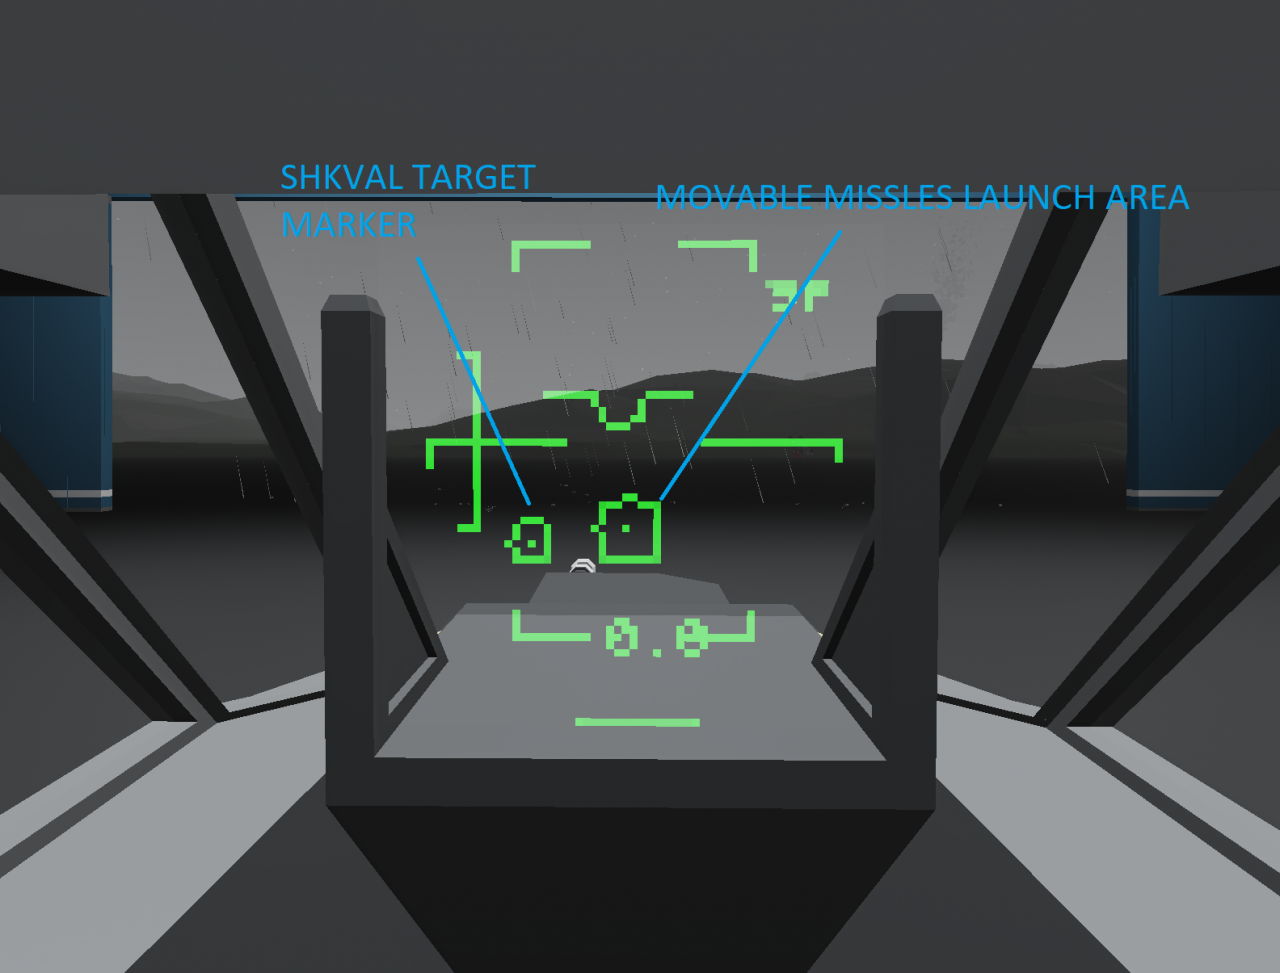
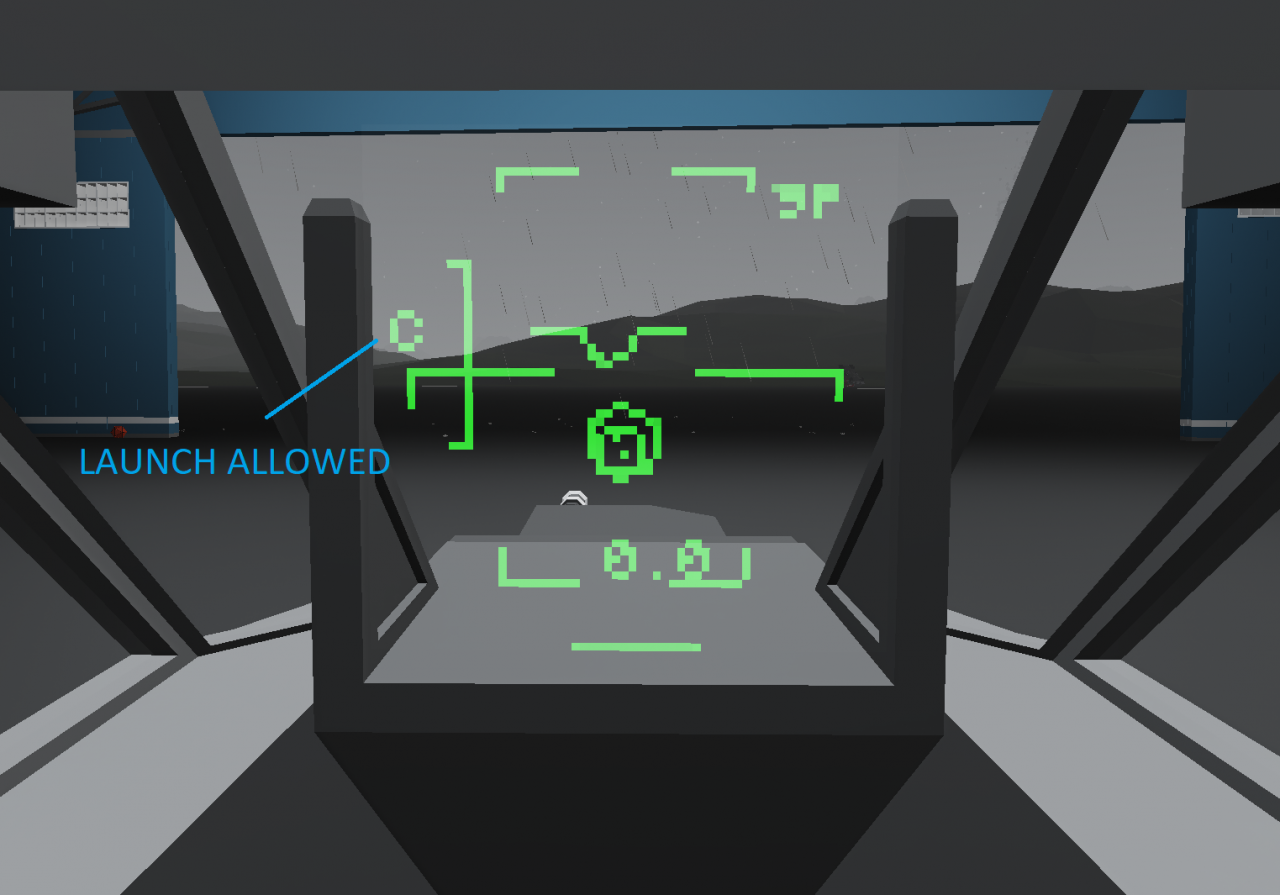 Recommended missile launch range: < 1km
Thanks to Deahesi for his great guide, all credit to his effort. you can also read the original guide from Steam Community. enjoy the game.
Related Posts:
- Stormworks Build and Rescue: Types of AI Enemy Vehicles (DLC)
- Stormworks Build and Rescue: ow To Improve Engines For Torque
- Stormworks Build and Rescue: Useful Logic Tricks For More Complex Processes
- Stormworks Build and Rescue: Shell Type Guide
- Stormworks: Build and Rescue – How to Load Modules on the Oxchild 84-M (Selection Tool Tutorial)

