
A more or less step-by-step walkthrough tailored to Survival difficulty detailing routes for minimal backtracking and some strategies to handle specific rooms
Its not specific for any particular ending (i dont include anything related to the secret ending), just to get you through survival. I dont detail picking up non-critical documents and such altho the routes should enable doing so if you really want.
Penrose Prologue
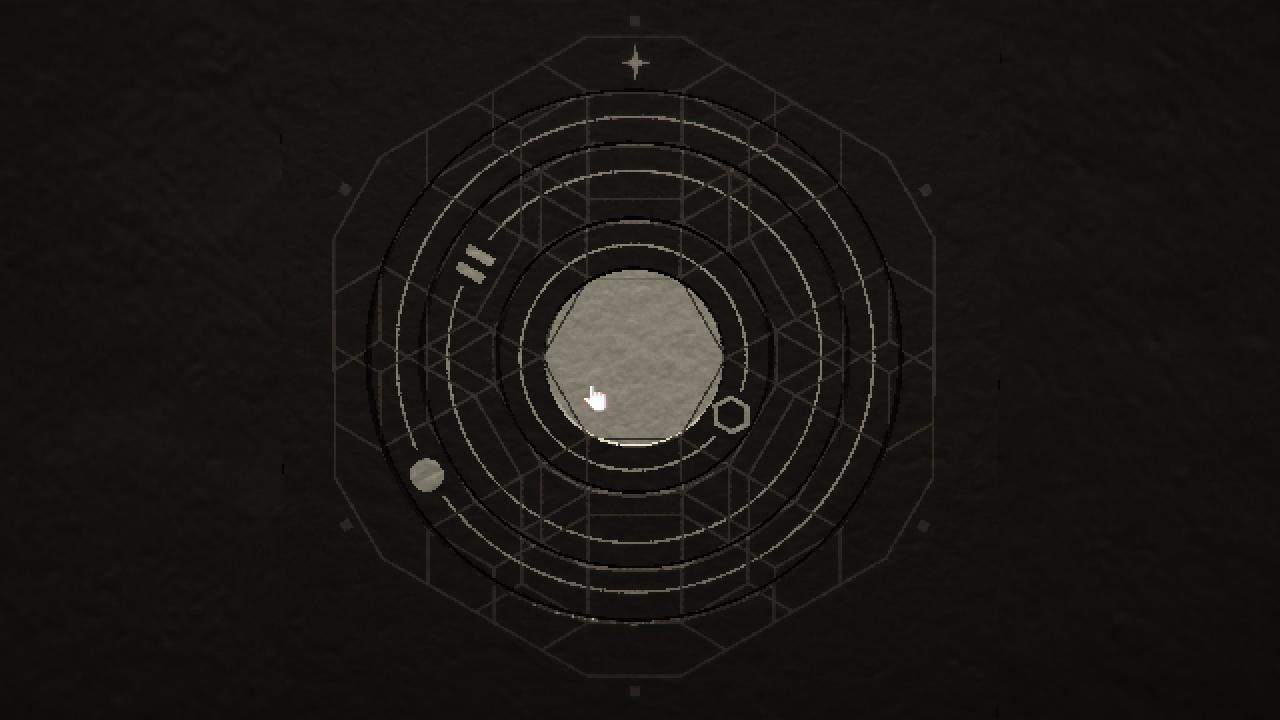
Go to Cryotube, enter code highlighting buttons 1-3-5-8-9, get ripped keycard, get tape from another room, combine tape with the keycard, use lift out, walk towards gate, go into hole, touch book
Biersinski B1
Get the keycard from the Window, go into the right door, notice first locked door to observation (NOTE: “Notice” will generally mean marking an object or door by gettin next to it)
Then go into the upper door then right door to reach the safe room
Go a into the right door and then right again to reach the class room.
Open the safe with 204512 then leave back the way you came (NOTE: “Leave” will generally mean leaving a room the way you came)
Go into the upper door
Talk to elster, use the classroom key on the upper door. Dont go in and jump in the hole yet, unless you fancy a no pistol run. Take the protektor key on the bench
Go back to the first locked door, take the stuff in the drawers
Now we wanna return to the Elster room (Aula). Stuff will wake up, ignore ignore it.
You could go to the library and meet Isa and also grab a new note, not necessary tho
In the Aula take the new patch and ammo
POINT OF NO RETURN: enter the upper door and jump in the hole
B2
Go out the upper door, then left door to reach the elevator lobby, mark the locked west wing door
Call and go into the left elevator, grab the hatch key
Go back into the south corridor and into the top middle door
Go all the way up and use the key at the door
Solve the lockpick puzzle (press f button to get pin positions, adjust accordingly)
Youre now in the north corridor
Go into the middle upper door, grab the patch and dump everything in the box. Save, leave
Go into the left upper door, grab the east wing key and prod, mark the safe and leave
Go into the right upper door to mark the butterfly box on the shelf, leave,
Use the east wing key on the east door, go in
The first door is a spooky toilet, grab the patch, leave
Enter the Second door and grab the spray and ammo, leave
Proceed and go into the door at the bottom
In the kitchen dont disturb the cook and walk to the lower left door
Grab the mensa key, leave
Use the mensa key on the right door in the kitchen but dont go in
Go back to the safe room, dump all your stuff in the box (NOTE: “Dump” will mean putting everything that isnt specified in a box). SAVE, stuff actually gets dangerous now
Return to the kitchen and enter the right door to the mensa
In here we wanna reach the bottom door. If you absolutely wanna be safe, stand near the door until the lower patroling dude walks next to the table youre standing at the walk around
Grab the ammo on the lower right, the other stuff isnt worth it imo, leave thru the bottom door.
Theres a dude in here so go right immediately and into the rightmost upper door, grab west wing key and prod, talk to one of the last sane storch units and leave.
Evade the dude again and go into the leftmost bottom door to get a butterfly piece
Wait abit so the aggroed dude outside is gone then leave and go into the left door
Juke the two awakended dudes – run by the first one and upwards, wait for the second one, evade – getting hit once shouldnt be a problem – and go into the left door to the Elevator lobby
Now use the west wing key on the left door, go in
Now into the upper left door
Grab the ammo, run by the dude into the upper door
In the showers grab the second piece and combine em.
Go into the right door, grab the prod, EQUIP it
In the next room prod the dude (NOTE: “Prod” will mean stun with prod, ill not explicitly mention stomping them when down but ofc you should do that too) its almost impossible to evade in that narrow space
Go into the upper left door, grab the frequency note, leave
Go into the upper right door grab and grab the spray (dont use it even if ya got hit since its a more valuable instant one), leave
Lastly thru the right door and youre back in the north corridor.
If you got hit make a stop at the safe room to heal, keep the butterfly key however
Back to the butterfly room. Use key, take thing, have radio tutorial
Go back to the wall safe room. Check the note for frequency according to the symbol of the manufacturer, get the ID card.
Return to the elevator
In the elevator use the card and go up to 1
Grab the shells and say hi to Isa who’s looking for her sister. I strongly assume her sister Erika was Elsters template, so youre her half-sister or something now? Anyway
POINT OF NO RETURN: In the elevator use the card again and choose 3 or lower
B3
Go into the right door then immediately upper door
Grab the shotgun, dump everything but keep one prod and your loaded pistol
Go up to mark the card pc in the next room, leave, save
Prod the wandering dude – lure it into the open area at the top and try downing it in the middle so theres space to walk around. Its not quite confirmed but running near or over downed enemies might make em wake up faster. Each time youre back here id recommend walking thru the room, same with the other ones we gonna prod (without burning) in the future
Go into the lowest door on the left
Notice the big door in the waiting room, PICK UP THE NOTE then leave
Go into the lower right door across
Sneak past the dude and go into the middle lower door
Position yourself next to the pistol ammo, shoot everything, grab everything and after reloading the pistol you should still have 2 open slots. Leave
Stay sneaky and go into the last upper door.
Talk to the sad eule if you want. Use the frequencies and sword notes to open the safe. Letters are numbers, its randomized but 8 is always F. Grab the incinerator key and the prod, leave the eye for now
Back to the east corridor, monstie should still be napping but be sneaky. If it awakens at any point during the many returns here it should be avoidable easily enough
Then into the upper right door to reach the north corridor. Notice the first upper locked door to examination.
Go into the last upper right door
Be sneaky, avoid the patroller. Take the shells, some floor dudes will maybe spawn, ignore em but stay quiet
Unlock the upper door and in there are the holy FLARES, also mark the furnace switch
If you made a commotion and the patroler was right next to you when you entered you risk running into it when leaving, in that case wait abit. If not just leave again
Return to the safe room (nappy man should still be napping) and unload everything
Return to the south corridor and go into the first upper door.
Grab an autoinjector, mark the TV, leave
Go to the wall safe at the Nurse station and take the eye
Return to the safe room (dont disturb sleepy) and dump everything but a prod
Return to the waiting room with the big door then use the left door
Prod the dude patroling the hallway, if possible centered enough so that theres space to walk around
Go into the upper left door, get a spray and the handle, leave
Into the middle door, get the pump room key and spray, leave
Use the key on the lowest right door, in there grab the prod then do the pump puzzle:
(Start with full A tank)
A -> B
B -> C
C -> A
B -> C
A -> B
B -> C
C -> A
(Also notice the sneaky first mention of the factories pre-censorship designation)
Go back into the unflooded toilet, jump down
Grab the water key and patches, leave the room
Prod another dude then go into the upper left door to enter the sleeping ward
Go in abit to grab the vhs and patches but leave again
Now into the middle right door for a save room, grab everything, unload everything but the exam key and handle (i always confuse it with a stun prod), save if you want, leave
Go into the lowest right door for the blank key and some ammo, leave
Use the lowest left door across to go back to B3
Return to the exam door in the north corridor, unlock it, enter
Grab injector and socket, combine that with the handle to get a wrench
Now back to the sleeping ward on B4. This time go all the way left, grabbing ammo and evading dudes, run into the upper door, the dude there might have woken up
Use the wrench on the vent, grab the key.
Return to the B4 saferoom, heal up if you got hit, dump everything but the blank key, air and water key and vhs. Save and then get the hell back to B3
We wanna go to the TV room (ICU 1) first
Go thru the waiting room and use the air and water keys on the big door while passing thru
In the TV room use the tape on the vhs player. Remember pre-covid public transportation? Ha ha ha that was 5000 years ago. Anyway grab the gold key
Go back to the incinerator room. If sleepy boi is still sleeping we wanna keep it that way
Fiddle with knobs until all lights go out. ^ (arrow up) means the temperature is too high, v (arrow down) too low

After thats done return to the PC room
Imprint the blank key at the PC like so

When youre done go to the big door and stuff the remaining keys in to unlock it
Grab everything in here, heal any damage you might have taken, dump everything but your loaded pistol and shotgun and TWO flares, SAVE
POINT OF NO RETURN: jump into the opening in the middle
Big Sister
She will try to shoot you, evade by running, its abit delayed. Or just keep the pillar between you
Dont come too close, she will slap the piss out of you
After a while she will summon up to two friends and also resurrect them if you kill em
Prioritize taking them out and burn em, use the shotgun close up
Wait until she pukes and shoot her face from the front. Id recommend the pistol, stay outta the puke
If theres still stuff around grab that first
Without her friends shes pretty easy, otherwise good luck. On normal it shouldnt be a problem still
Seems always being in her line of sight making her aim at you makes her resurrect less.
You should just have enough ammo to kill her, dont miss too much. Otherwise take some more pistol ammo before jumping in the hole
After that Adler steals your photo from the box and sends you to school
Coincidentally we were in room 512. Theres a weird hole remnant smear on the exit door and you can stall the cutscene if you walk backwards and dont look at it for giggles
Some pretty clear linking of Elster and Erika here
B5 and other fun places
Go into the lower left door, mark the fusebox and leave
Go into the lower right door for a saferoom, grab the key, spray and flares then unload all your stuff in the box. Keep the key, two flares and a prod. Save, leave
Use the key on the left door, use the ladder to B6, go into the door
Mark the big red postbox and the owl door on the upper right.
Go into the lower right door for some ammo, leave
Now go into the right door
Check the poster for a hint and grab the ammo
Now in the lower part be sneaky and grab the patch on the right then enter the door on the right to the repair bay
In there move northeast abit to grab another patch in the dark on the half lit box (be sure to get it now!), leave
Theres an autoinjector left in the shower, not worth it tho. Go into the bottom door and grab another patch, then go into the bottom door again
Prod and stomp the big dude in the next room, go back two doors to the big shower to de-aggro the other mook and then return and burn it piece (can be fiddly if its in the wall)
Now the workshop hallway is safe as long as youre quiet. Also notice the middle upper locked door to the workshop and the elevator thing left of it, the paternoster
Go into the middle lower door.
Grab the prod on the bed, and also the ammo on the bottow. Grabbing ammo will make a dude appear who will most likely hit you, no biggie, jump in the hole
Grab the ammo but leave the spray, the poster has a hint. Leave the room. Sometimes the dude in there instantly aggroes for some reason, in that case just leave right away and come back
Grab the shells, mark the paternoster but leave the dude and ammo on the left alone
Go into the middle upper door to map the dining room, leave.
Go into the right upper door into the piano hallway
Prod and flare the guy, mark the shutter
Now go back to the hole room and take the spray unless the dude randomly aggroes, in that case go out and wait and retry. If you got hit earlier, use it to heal
Return back to the piano hallway and proceed up
In the next room quickly go into the right door
Grab the patch, use it to heal some more if necessary then leave (Behind the guy in there are like 3 pistol bullets, not worth it)
Avoid the shield dude and go into the middle door.
Adjust the frequency about 3 times to make the Jacobs Ladders die (no need to attack), mark the painting, leave
Evade shield guy again and unlock the door to the B7 big tube outside
Return to the B5 safe room by climbing all the way up
Unload everything, heal if youre still hurt. Take the fully loaded pistol, save
Now back to the dining room on B7 via the outside ladders
In the dining room kill and grab everything – most importantly the fuse. Also another poster hint
Go back to the fuse room on B5 use the fuse and from the left flip litte switch 2,4,6 and 7 up then the red main. If you didnt know a paternoster is basically just a set of constantly moving boxes, elevators without the fancy stuff like doors, buttons and not possibly hurting yourself while trying to hop out
Go to the safe room and dump your stuff, save if ya like
Climb down to B7, go to the paternoster then ride it down to B8
After exiting go into the left door, in there grab the shutter handle
Go up twice (stuff will spawn, ignore it) to reach Elsters room.
Grab all the stuff in there, mark her box (huehue). Also seems like she aint dead, the monitor has readings
Go back out to the library hallway
The lower middle door has puzzle solution
Enter the lower right door to mark the storch dorm, leave
Go back to the B7 shutter door via paternoster, unlock it
In there grab the owl key, dump everthing but this key, save
Now we wanna go to the owl door in the B6 hallway
Use the paternoster to B6, grab the patch in the workshop hallway on the way
In the owl room grab the casette, patch and prod
Now back to the paternoster, down to B8
Enter the right upper door to the B8 east hallway.
You can sneak past in front of the dude to mark the hummingbird door on the right or just remember it. Anyway go up into the next room
Next room can be abit tricky. Evade the two dudes and go into the middle upper door, this is Adlers bedroom
That poster above the bed has weird stains on it. Anway note the locked door, grab the flashlight and ammo, leave
Outside evade the dudes again, unlock and enter the west door to the ladders on the outside of B8
The other upper left door back there lead to the mines. Another poster hint next to the ladder.
Return to the B5 safe room, dump everything but the flashlight and a prod, save
Now back to the repair bay on B6
In the repair bay use the flaslight to see a monster in the room. Aggro it but stay next to the door where ya can see it, equip your prod and down it. Pick up another prod, ignore the new monster and go thru the upper door
In there you should have just enough space to grab the 4 things. Who is “Tank” ?
Now return to the B7 piano room
Combine the tape and cassette, dump everything but the flashlight and a prod. Heal if you got hurt, save if ya want
Now go to the B7 dining room halway
Tase the dude on the left, grab the ammo and enter the left door
Be careful not to rile eveyone up with the flashlight and go up
In the next room grab the island key and ammo. On the top sneak behind the dude for the hunters key. Another planet poster hint
Go back to the B7 piano room.
As a side note the dude you prodded might already wake up again, no matter. This resets it back to the default position away from the paternoster. Otherwise it might wake up later, same difference.
You can now open the box with the key, rejoice. Its not the usual big ♥♥♥♥ magnum design, i like it
Then dump everything but the island key, flashlight and casette, save
Return to the island painting room, sneaking around shield dude again
In there “open” the painting to get the workshop key
Now get back to the B6 workshop hallway (probably easiest with paternoster) and open the workshop door.
In there grab the pistol and shotgun ammo, put the tape in the radio and attune frequency 142
Take the paternoster to B8
Go briefly into the dark storch dorm to grab some shotgun ammo and maybe a file on the desk. Theres abit more farther in but its stuffed with enemies, just leave
Go to Falkes room – B8 “Flkr bedroom”
Play her a tune to get the hummingbird key (need to be looking at the box). Disable the radio again unless youre bored
Return to the B7 piano room to dump everything but the hummingbird key and flashlight
Now go to the B8 east hallway, open and enter the locked door
Grab the eagle key, rod and patch. Go right into the next room
Kill the bobbleheads with the radio. Grab the postbox key and the shotgun ammo. Theres also 2 pistol bullets but likely no more space. We can manage without them
Return to the B7 piano room to unload once more. Keep the flashlight, postbox and eagle key
Go to the B6 postbox, open 512 (that number keeps popping up huh) to get the library key
Then go to the B8 library hallway and use the key on the middle upper door to enter the library
Grab the patch and spray, talk to the sad kolibri, solve the book puzzle
I dont have a by the numbers solution for this myself, you wanna move the grabber thing counterclockwise around the edges all the way and then get it below the bock at around 6 o clock to get upwards to it. Trace a path backwards from the book. Fiddle with it until the book comes out and you get the astrolabe
Now return to the Adler bedroom and use the key on the door to enter his mancave
Use the astrolabe on the box, rotate according to the picture below ( II at 10 o clock, circle at 8, other thing at 4), push the button, get the admin key
POINT OF NO RETURN: Now leave and back in the hallway go into the upper left door and down into the mines
Enemy Mine
Only one way, in the third big room with the golden monofilament spools theres rifle ammo hidden above them
Talk to Beo in the upper right. If you keep talking shell finally say “Goodbye” after some “…” dunno if that does anything
Go downwards to enter a safe room.
In there grab everything but especially the flare gun and flares. Dump everything but the flashlight, save
Go into the bottom door and ride the big lift down. No tyrants or soldiers jumping onto it for a big fight tho
In the next room keep the light off, keep down and left for an extra room.
Use the flashlight to not run into wires. Grab the spray, revolver and pistol ammo, maybe talk, leave
Back outside walk upwards, theres alot of dudes. Make a dash for the top door.
If you got hit heal up.
Now heres a sealed pipe down. Youll have to press the button on it, which will make it slowly open but also raise an alarm.
With the flashlight off go to the button and press it. Now switch the light on, aggro the dude on the right. Now move abit down towards the entrance but keep right, if you got two shield dudes on the upper right youre on a good way. If possible wait until you see a big girl there too then run left around the pipe and up, grab the spray there and heal some more if necessary.
Now if everyone is below you just run around to the right, the pipe should be open and the way free enough. Often biggie will still be on the right side, depending on space juke her or the other two guys to get back down. Anyway jump down the pipe
Grab the ammo and a spray to the left then head further down into the hole
Take a stroll around on the beach. To the left theres a paper trail leading to a book in a hole which seems very reachable. To the right is some more paper and alot of skulls which is maybe all thats left of the gestalts who were sent down in the mines. Also a flesh cave.
Times up
NO MAP HELL
Go up, grab the spray, (ill call this the Morgue)
Go into the top door and in there grab the injector, notice the offering stand
Now leave back to the morgue and go left.
In the next room (OP antechamber) grab everything then go right
In the next room (Blood basins) grab the ammo and head up evading the dudes. Read the warning on the upper wall then go down the hole
Youll be next to a ladder. Further up will be another two dudes so keep right and enter the upper right door
This will be the Classroom save room. Its labeled like that, hey
Dump everything, take the loaded flare gun with one extra flare shell. Save!
Now go back outside and permakill the two dudes. After being shot with the flare theyll fall down, make sure to stomp em or thats a wasted flare. Best shoot one guy, reload in the menu, shoot the other then stomp em both.
Go back up the ladder to the blood basin room and grab the injector and doll
Now return to the Classroom and dump everything, save if ya want
Leave and go into the upper door to the meathole (i aint writing Sarlacc pit a bunch of times)
Grab the patch at the top then go into the right door to the evil tv room.
This is were youd get a bunch of door combinations by playing with the radio. Grab the ammo, wedding ring and spray
Back to the classroom. Left, down, right
Dump everything but the revolver and ammo. Included loaded bullets that should be 18 bullets. Save!
Back to the meathole (left, up). Jump in
Mr Hands
He gets downed randomly, i would stop shooting him at that point
After you pumped all your revolver bullets into him keep dodging him for abit, Isa should stand up after a while and finish it.
If you hit all 18 shots it should be enough. Ive hit 17 once and it took a notably longer time for Isa.
I dont know if theres a hard limit of actual damage you gotta do or if its all time based. Ive tried both just unloading into him and holding off when hes downed – with no misses – and it seemed to take about the same time. I assume if you miss more not shooting him when downed helps run down the clock until Isa decides to end it
If you just miss alot and it doesnt seem to end you could take the pistol and some extra ammo to compensate.
If you wanna bring the shotgun keep at least 10 bullets in the box, we gonna need those.
Ultimately the best solution is to not miss tho :p
As a funny side note you cant use the thermite on him but hes targetable and burnable with the flare gun, its an absolute waste tho
In the next room theres a patroling snout and a stationary dude next to another door on the upper right. We want stationary dude gone for good.
Wait until snout has finished going around the crate and is far enough back to the right side (about when he goes next to the second one of the bigger cages on the right side. Prod and stomp the stationary dude, and dash into the upper door to get away from snout.
Grab the shells, go up the ladder, grab the spray
Now go back to were you prodded the dude and burn him, snout should be de-aggroed.
Grab the patch on the box. Sneak right past snout (theyre really blind but dont push it) and grab the prod. Go into the right door
Grab the ring and shells then go back to Isas room by goin left all the way
Dump everything except the flashlight. Safe if ya want
Now go back to the room where you just picked up the ring by goin right all the way this time. Go into the upper door.
This is a pretty linear monofilament “maze”. Use the light to see the wires. Grab the rusted key, spray and flesh plate. The spray in the middle is a trap. You can leave by hugging the wall at the bottom, the wires dont reach all the way down
Go back to isa and dump everything but the flashlight, rusted key and an instant heal. Definitely save now and leave again thru the right door.
Now go thru the upper door, up the ladder, unlock and enter the north door to get back to the op antechamber
On the north door here push 1-2-6-7-8, then enter.
This big ass room shall be known as the OP room. We wanna go thru the left door so wait until big momma is patroling away then enter
This room should be dark as hell but you should see a tiny ring to the left. What we wanna do is walk up to it, quickly turn on the light to grab it, turn it back off and leave. If youre quick nobody should even notice. Farther back theres ammo but its not worth it and we need the space.
Back in the OP theres also a little grey thing on the bed in the center, we want that. To set it up we wanna be abit below the lower right pillar while biggums patrols the upper area
Now walk up to the thing and grab it. If you dont get spotted while grabbing it, retreat downwards abit and then sneakily leave thru the upper door. More likely youll be seen tho and also take a hit. Use the instant repair and circle around the left and again go into the upper door to escape the ensuing chaos. Theres more stuff in the OP but its just not worth it
Anyway back in the OP antechamber go right to be back in the basin room
Go up past the ladder hole into the newly opened door.
In there grab the bottle then leave.
Go into the ladder hole, unlock the left door with the rusted key. Dont go in however, instead go into the right door to be back in the Classroom
Dump everything. Heal up if necessary. Take a loaded pistol and 10 bullets, the flashlight and the 3 rings. Save if ya want. Input 1-5-6-8-9 into the north door and enter.
Proceed down and shoot the two dudes to be safe. They can be evaded too but its just safer and quicker in my opinion. Go into the bottom door.
In the next room take the ammo.
Ring puzzle:
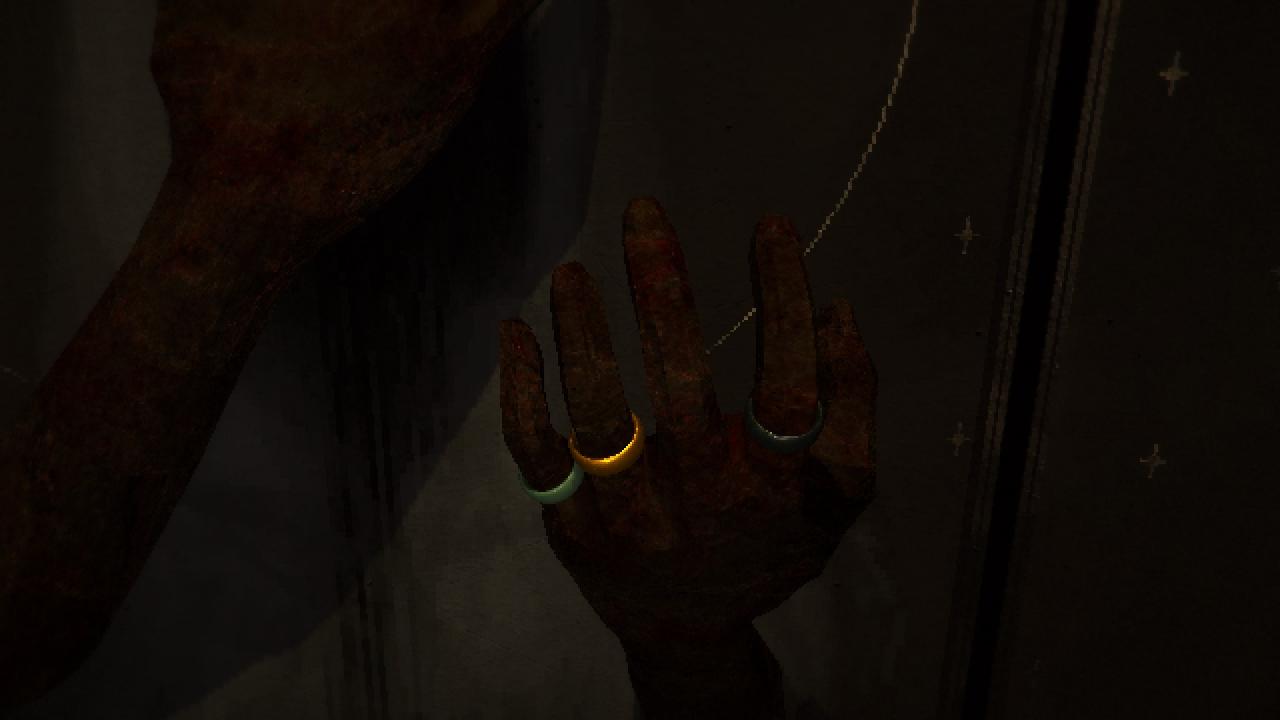
Nothing on the thumb, regents ring on the pointy finger, nothing on the birdie finger,
wedding ring on the ring finger, and then serpent on the tiniest fingie.
If you dont know fingies it should just look like this from left to right: serpent, wedding, x, regent, x
Heres a pic for good measure
Take the plate of knowledge and then slather the goop all over yourself in a suggestive manner. The queen should use some product for her head problems i think
Return to the safe room
Dump everything then go into the left door and left again thru the door you opened with the rust key.
This is the F*CK Antechamber for reasons youll know soon. Grab the doll, grenades and ammo
Now we wanna return to Isa. Go back right, then thru the upper door and jump into the meathole
In Isas room, dump eveything again then get the loaded pistol with 10 bullets, the bottle and the three dolls from the box. Combine the dolls into a big doll
Give isa the bottle, talk to her for abit then take the rifle and put it in the box. Save
Input 1-2-5-6-7-9 into the north door and enter
Shoot the dudes, take the ammo and patches and enter the bottom door. For some reason the auto aim gets really broken in this room but thats just me
Take the plate of balance from the pedestal – you should have space after reloading the pistol – then put the doll in
Go back to Isas room and dump stuff. Take the 4 plates you got and a prod. If you got hit earlier because of stupid auto aim heal up. Save
Back to the big OP room, so go thru the right door, then upper door, up the ladder, again upper door and then again upper door until you reach it
Now we wanna go thru the right door. Read ahead abit
As soon as we enter theres gonna be bobble head hell. Run downwards instantly until youre fully covered by the wall then run all the way right and enter the door.
This looks somewhat familiar, its the otherworld waiting room. Put all the plates in the door then unlock the door on the right.
Go thru it (its the meathole) then back into the waiting room. The point of this is to reset the dudes in the bobble head hell hallway
What we wanna do is kill the bobble heads with the radio, but theres usually not much time until the other guys get to you. So we wanna enter, input one frequency, leave, reset the patrols and repeat until the bobbleheads die
Anyway you should be in the waiting room. Go left again to the bobbleheads, enter one frequency, wait for the screech, go left twice to reset em, return and repeat
After the bobbleheads are dead reset one last time by goin right twice then back again
Prod and stomp the normal dude. The snout prolly noticed so reset one..last..time then return. This room sucks.
Now in the finally cleared bobble head hell hallway go all the way left, picking up a spray and ammo on the way. Enter the west door.
In this room pick up everything but especially the incense.
Now go back east all the way to the meathole room. From there enter the south and then east doors to reach the Classroom.
Dump everything but the incense. I dunno about you but after all that ♥♥♥♥ i would save
[Splitting this because theres apparently a character limit for guide sections oh no lmao]
NO MAP Hell Revengeance
Leave thru the left door, go up the ladder into the basin room.
Go downwards and use the door on bottom right to reach the OP antechamber
Now go into the left door to reach the morgue and then finally up and here we are.
Use the incence, take the plate
Retrace your steps to the nonmeat save room:
(Starting from the Incense room) down, left, right, go up all the way to the ladder hole, down the ladder hole, right door.
Deep breath, we are goin to war.
Dump the plate then take the flashlight, two prods, the flaregun loaded with one grenade shell and one extra grenade (to be clear the grenade ones, NOT the burn ones) and the loaded shotgun. This should leave one open inventory slot. SAVE
Remember the F*CK antechamber? Prolly not, so leave the save room thru the left door and go left again. Enter 1-3-4-5-7-9 on the north door.
At first glance another filament labyrinth. Use the flashlight to see wires
Follow the path up northeast until you see a dude standing there. Switch to the prod walk up to him and prod him. Some other guy should have spawned behind you, ignore him.
Re-equip the light. Continue south-west-ish to the other dude, prod him too. Another guy spawns
Now run abit farther to the west, spawning yet another dude
Equip the flare gun, turn and fire the first flare shell into the crowd. Re-equip the light to see
Run abit north-east towards the pedestal, reload in the menu and shoot the second grenade at your fellowship.
Nothing died prolly because shells are super weak for some reason so finish up the rest with the shotgun. Not gonna use the shells anyway so maybe that saved some shotgun ammo
Now grab the plate and the spray. Another dude might spawn, if hes too inconvienient shoot him
On normal this room is a joke. You can pretty much just run thru tanking the hits and heal once
Leave this hellhole and go east twice to get back to the save room,
Dump everything, take the last two plates. Heal and save if you want
Back to the big door, so leave the saferoom thru the left door, then go thru the top doors twice.
Put the last two plates into the big door
POINT OF NO RETURN : go in
The End
Very fun game i must say
If you copy this guide or parts of it without asking and/or at least crediting me youre a big stinky butt
Begin the game again to awaken on the nice shiny Penrose with a shiny new hat
Dont think this needs a detailed guide
Run around, do your job according to the checklist in the stern hall
Read stuff including secret stuff about why youre so badass. Then meet the boss
This is much less shiny, also your hat is gone 🙁
Proceed and rip off your own arm
Someone apparently reached that book and tossed it in the sea
Have a boat trip. Something has changed
Proceed until you reach the save room
Get the flashlight and loaded pistol with 10 bullets and a instant repair. Save
Go out the east door and right into the east door again
Take the grenades, open the safe with 204512, leave
The next part is kind of a gauntlet. Use the heal at your disgression, best not to get hit obviously
We just wanna go up
Run on the right side then left side to evade dude and snout, enter the upper door
Next hallway is empty, proceed
In the next room shoot the left dude until hes down, then either the other one or just evade. Heal if youre hurt or youll prolly die in the next room
In the next room go left instantly and around, unlock and enter the north door.
If you didnt get hit before you prolly got hit fumbling the keycard into the door
POINT OF NO RETURN ALTHO WHO CARES: Down the meathole
Notice the mural on the north wall
Go into the upper right door to map the pipeworks room, leave
Go into the lower right door, then the first upper door to mark the keypad there
Return to the mural room
Now go to the upper left door, then up into the door next to you.
Grab the ammo and submachinegun – if you still got the instant heal from earlier and didnt use it youll have no space for the gun, no biggie
Mark the pc, download stuff if you want. Go thru the upper door to reach the safe room
Grab stuff, heal up if needed if you havent already. Go back to the other room and get the gun if you had no space, dump everything
Keep the flashlight, 3 thermite flares and the loaded shotgun with 5 extra shells. Save
Go back outside into the hallway.
Take aim at the dude right next to you then start shooting, they should all come to you and youll score multiple hits due to the spread. Stomp and burn em all
Behind the middle door are some shotgun shells and flare shells. Walk to the shotgun ammo, grab it then run back outside. Dudes will spanw, you might take a hit, no matter. Theres also some grenades but dont bother
Go thru the west door at the end of the hallway to pick up a spray and ammo, mark the painting
Return to the saferoom and dump your stuff, heal up if necessary
Take the flashlight and the flare gun loaded with a flare. Save
Go back outside into the hallway and into the leftmost upper door
Grab the prod then go up the ladder. Then go right.
In here we wanna get rid of the patrolling shield guy
Wait until he turns around then walk past the other guy staring at the wall to keep behind the shield guy. At this point he should walk abit downwards, shoot him in the back with the flare gun, run up to him and stomp him, then go into the upper right door
From now on the other dude will go stare at the wall so unless you disturb him this place is also safe now
Quietly grab the ammo on the table then go around the right side of the table to grab the handle and run back outside into the blue hallway. Snout will prolly hit you but youll live. Theres more stuff in here but we dont need it
Now go into the lower middle door.
The room is very dark but you should see another door on the bottom. On the table above it is some sort of cartridge, right next to a shiny pot thing, we wanna grab that
Sneak there around the outside with your flashlight off
Now quickly activate the light, grab the developing tank and disable the light again
Nobody should notice if youre quick, otherwise just run. Return to the blue hallway
Mark the upper left locked patient door then return back to the safe room
Heal up, dump everything but the handweel. Save
Go to the pipeworks room, use the handwell at the pipe. Wait abit for the steam to dissipate
Go into the north door, grab the ammo and disk, leave
Go into the right door, grab the acetone and spray in there
Go into next door to the right. Grab the prod, jump into the meat grinder
Arianna is toothing in the cooler. Leave
In the next room, the public house (i call it diner) grab everything you can but youll have to leave two things prolly, we get em later
The next hallway down is a kolibri hallway again, be warned.
Go outside, input the first frequency shown to not be totally blind then run downwards all the way against the wall and then right towards the upper right door and into the safe room
Dump everything, grab the key and spray. Go into the upper door to pick up more ammo then go back into the safe room
Dump everything again. Take a prod and your last thermite flare (if you dont have one left for some reason take the flaregun instead). Save
Get rid of the kolibris outside by entering the door, quickly inputting the combination then leaving again like before with the other kolibri hell hallway in meatworld
Unfortunately its very hard to see. If you get spotted too quick you can do the two-door-reset by going up the ladder in the fire escape room behind the safe room
[Too many words again, continued below]
Go out into the metro and walk left. The shield guy should come towards you, when he spots you run up to him and prod, stomp then run back into the safe room
Wait abit then return to safely burn him. Now just dont disturb the two guys left and this hallway is safe as well
Take the ammo and prod on the benches
The upper left door with the red flag is Yeongs photos for future reference
Go back into the diner to get the stuff you left, most importantly the tarot card
ACHTUNG: This one doesnt but generally taking tarot cards will to some extent meat up and block the sections of the map where they are in. If you dont want this to happen for whatever reason just leave the cards, most of em will be easy to get at the end
Go back to the safe room, dump stuff. Take the flare gun loaded with one flare. Save if ya want
Now thru the upper door and up the ladder.
The next hallway is nothing but a “shortcut” full of monsters. Theres a file abit down but itll spawn a monster as well
Just go up the ladder again, then enter the door.
Another kolibri room. However just stand still and enter the frequencies until they die, theres no threath. Pick up the spray, look at the poster. Leave thru the left door
In the next room a shield patroller should just start moving towards you, quickly walk behind the nearby pillar, he shouldnt see you
When hes passing you and walking to the right prepare to shoot him in the back when hes near the lower right door. Stomp him, youll most likely take hit but just do it. Run back right to the kolibri room
Use the spray ya just got if you got hit. Deaggro the hallway by walking outside to the ladder then return there. Just be sneaky in there and it should be safe
Go into the right upper door. Pick up the flare and the ammo. Mark the safe, we dont need it yet however. Leave
Now carefully wallhug along the upper wall and the garbage to the upper left door to not aggro the other shield gal staring at the wall
In there id preferably get the disk and 8mm ammo. If you got hurt pick up and use the patches and you should have space to get everything
If not just grab the 8mm ammo and disk. We can live without some more patches and abit of shotgun amm. Leave
Carefully go left and unlock and enter the door
In the next hallway go thru the upper door. In there mark the magpie box. No space for anything, leave
Unlock the door on the left, go in
This should seem familiar. Return to the saferoom on this side, put the red disk into the pc on the way, read and download the data if you want
In the safe room dump everything. Heal, save if ya want. Take the blue disk and acetone, leave
Put the blue disk in the pc
Select “Antenne”. Align the antennas so they cross at Antenna 43
Select “transmit”. Enter 43 and select the magpie file. Frequency 125 or 210 should now play a tune
Go outside into the hallway and all the way west to the painting room. Splash acetone on the painting and take the card. This will meat up this room but theres nothing left anyway
Return to the hospital hallway on the upper floor via the apartment shortcut unlocked earlier
Grab the signal flare shells and go into the bottom door, stuff will spawn, ignore that
In the Atrium theres something in the netting, cant do anything however. Grab the spray and leave again
Return to the magpie box (hospital room). Grab the injector, play the tune (125) for the box. Grab the store key and Star tarot card. This will meat up the shortcut
Now return alll the way to the computer store safe room
Dump everything, heal, save, the usual. Take the store key and photo tank
Now go outside to the metro platform and to the locked door on the upper left
In there grab the ammo and fluid. Combine tank with fluid. Look at the photo (Lilith huh), leave
Go thru the left door. In the next hallway sneak past the dudes and enter the left upper door
Plop the photo into the paket box (doesnt seem very secure). Grab the sun card and leave
Now go thru the left door and just proceed till youre back at the mural room
Enter the lower right door
Now go into the upper left door. Enter code 560524, proceed
RIP Isa. Take the injector and death card from the altar
Now return to the blockwart safe room, however just go back the way you came. The book store front door puts you in the middle of monsters
At the safe room dump your stuff and take all the cards (should be 5) and the patient key
Now we wanna go to the blue hallway upstairs and open the locked door there
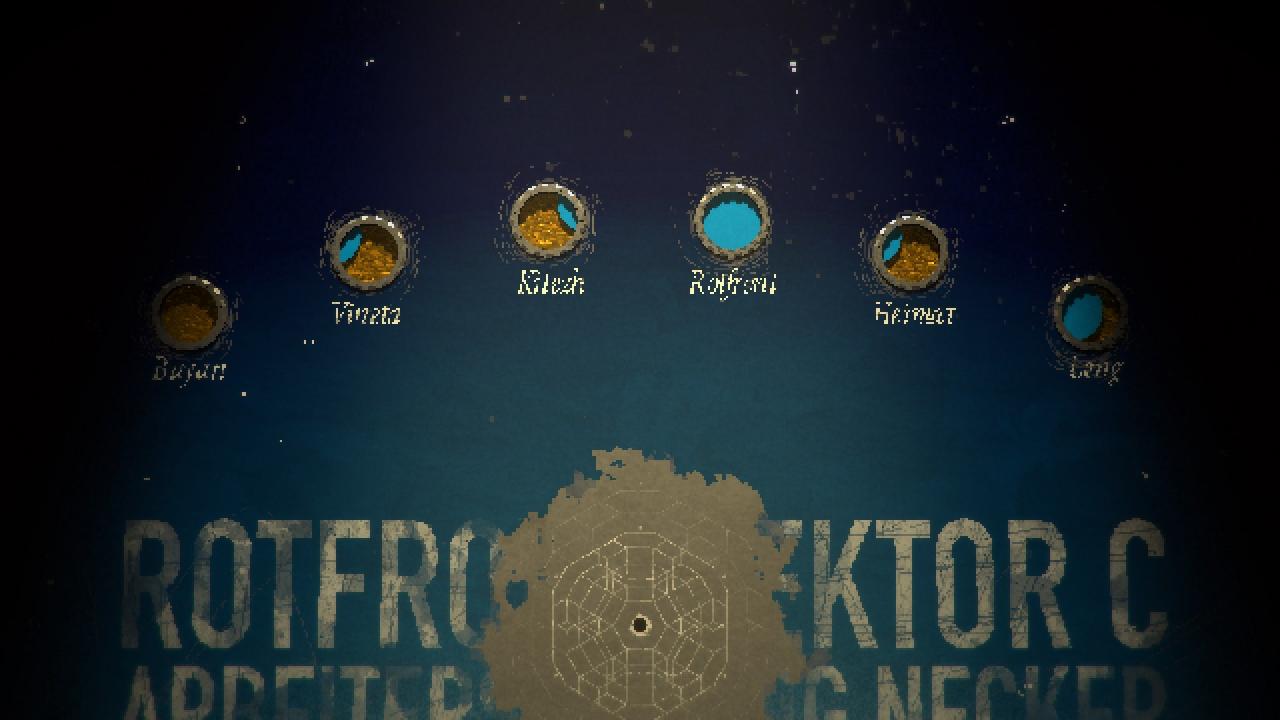
Stuff is getting meaty already. in the patient room place cards as follows:
heimat – star
buyan – sun
vineta – tower
leng – death
kitzeh – lovers
Flip the switch for funsies
Now make your way back to the butterfly safe room. Dont go thru the Atrium.
You gotta go thru the grinder hole to the computer room and up the fire escape. Its abit of a roundabout way due to all the meat but it should all be safe
Once here open the safe with AEON and take the last card
Now go back outside. You can go into the dentist room to grab the remaining stuff in there or jump into the garbage chute and return to the lobby
Everything is super meaty now. Pick up the little ring in the middle of the room
POINT OF NO RETURN:
Go to the mural, use the dial ring on Rotfront
Enter the moons according to the picture and go into the hole
Seems familiar altho the cardboard box beneath the desk is gone. Touch the book again, leave
Grab stuff, dump it in the box, heal. Even if youre blue id use a patch to top off for real
Then take the submachine gun with all ammo ya got, same with rifle. Also 3 injectors. Leave one inventory slot empty. Save for the last time
Go thru the upper door
Walter Sullivan
Reload in the menu
Her most dangerous attack is prolly the fast spear throw, if she arches back abit while holding a spear thats the tell
Another attack is a spear rain indicated by little crosses on the ground. She will drop a load of spears, if they glow red stay away, theyll explode. Afterwards theyre safe to get tho
Shell also do a bullet hell and 3 shockwaves, not that hard to evade
Wait until she does the spear rain then grab one. You cant have more than one :p
Dont attack her too much if you dont have a spear
Shoot her until she goes down then use a spear on her, optimally right after a spear rain so you can grab the next one instantly due to them still being around
If she spawns dudes dont shoot em, make em run into her attacks
Be certain to always pick up ammo, dont miss too much. Youll barely have enough
If youre hurt grab healing items and use em up first even if its abit of a waste
Youll prolly run out of rifle ammo at around the same time she gets her shields. Use up all the rifle bullets then switch to the smg
And thats that. Theres abit more but i dont think youll need a guide for that :p
If you copy this guide or parts of this guide without asking and/or at least crediting me youre a big butt, dont do it
Lore Addendum : My wild, probably false interpretation
I fully admit that its a very literal interpretation. However i find the gate actually existing and being able to create things – in this case from the Penrose who by pure chance crashed nearby – more interesting than the abit tropey “it was all a dream/its a metaphor” thing.
I fully recognize that its my own interpretations and not some ultimate truth. Here we go however:
Certain is a malfunctioning Penrose 512 crashed on the alien Planet with dead Elster and barely alive Arianna (White hair girl).
Either Ariannas Pod opened due to malfunction and she stumbled onto the surface and into the Gate or it made a connection due to her bioresonance while shes still in her pod.
Clarification : The gate recreates persons or locations from the memories of persons entering it. Since Elster itself is a recreation originating from Ariana entering the gate and the gate then creates further stuff from the recreated Elster entering the gate herself, lets assume the gate recreations have complete memories somehow. Hey its an alien gate, watchu want
If i say someone creates something its by way of the gate doin it
Altho i cant say what Falke created when entering the gate. Maybe meatworld. Maybe nothing because she got hit with Arianas bad vibes too hard and got mixed up with Elster at the same time. Or maybe the recreated Elster only could serve as a source for further recreations because of her strong connection to Ariana
The Gate created Ariannas versions of Penrose (likely the pristine one and the ♥♥♥♥ one) and Rotfront and brought a copy of the dead Elster back.
Im not seeing her connection to Sierpinski, she was never there.
New Elster awakens on a copy of Penrose (the real one as seen at the end is a decaying ♥♥♥♥♥♥♥♥) and goes into the gate which creates her happy memory version of the Penrose and Sierpinski with everyone in it.
Elster having been to Sierpinski before Penrose is the simplest explanation, Adler mentions a Elster Unit maybe being there or not.
Elster also creates Isa, the sister of her template Erika and imbibes her with her Promise Obsession towards Ariana
Probably a promise they made to each other to always be together (See happy memory Penrose)
However due to some mixup Isas Promise search is misdirected towards Erika. Maybe influenced by her own regrets brought back due to a resurfacing gestalt memory – the school flashback
Adler mentions “taken apart and put together by someone who doesnt know how it works”
Before Isa melts in the book store she regrets not finding “her”. She means her sister Erika, not Ariana. Her first note you can get in the library when you meet her for the first time says as much as the optional conversation in the Floor 1 lobby. Kinda tragic considering Erika was Elsters template. Both Erika and Isa are long dead, as indicated by the bookstore altar
The gate recreating Sierpinski from someone other than Elster gets abit thin. Elster creates Isa who in turn creates Alina who worked there and she brings Sierpinski with her (and then possibly dies in the mines/beach)? Arianna knew Alina on Rotfront and read her mind and it comes from that? Elster as the source is just simpler than a memory cascade of some sort
The Piersinski recreation may have been in a little bubble, trucking along as normal for abit, altho operating under abit of a shortage, thinking theres supply issues. If it ever was a real physical place is unclear, not relevant in the end. Elster and Falke leave and enter it but theres no tangible connection to the surface, altho an exit elevator is shown.
At some point Falke leaves this Sierpinski, possibly trying to get help, and enters the gate (Imagery of Elster/Falke overlapping at the gate). She probably contracts the sickness from Arianna (which is probably her degrading mental state impacting the simulation) who was also there or connected to the gate and theres also some sort of merging with Elster who will enter the gate in the future. As the endboss, she mentions becoming whole and the promise. Also again, imagery of Elster/Falke at the gate.
Falke returns to Sierpinski and ♥♥♥♥ goes south. Opposed to Rotfront people are aware of a decline.
This might loop depending on Elster dieing or reaching Arianna at the end, with only Adler being aware, maybe due to touching Elster on her “deathbed”. He talks to Isa about having been there and tries to stop elster saying “this world” (the recreations?) cant take much more. Altho why wouldnt he want the whole thing to fail and end – maybe this isnt an option, it just degrades further into nightmare, forever with each loop? Maybe Meatworld is a sign of that
Rotfront seems more slice of life with no mention of a decline, it just stopped. Theres Gestalt death scorch marks but thats it, some seem to just have died eating at the diner. This may be due to Arianna not really knowing or caring about anyone there altho she has insights due to her bioresonance.
One note mentions Elster templates stemming from a single decommissioned unit on a penrose. there might not be much more to it but it stands out. Maybe it hints at copy-of-a-copy causing persona problems. Maybe its some funny internal dream logic, after all elster came from the dead elster on the crashed penrose.
Thanks to GRRRR for his excellent guide, all credits belong to his effort. if this guide helps you, please support and rate it via Steam Community. enjoy the game.
Related Posts:
- SIGNALIS: Inventory Guide (How to Manage)
- SIGNALIS: Endings Requirements Guide
- SIGNALIS: All Maps (Equipment, Enemies & Key Item Locations)
- SIGNALIS: How to Get All Achievements
- SIGNALIS: How to Access Debug Menu
Thank you for the guide, and all the laughs!
This guide is amazing. I beat the game normally then wanted to go at it on survival to get 100% on the game and this made it soooo much easier. Thanks for all the time and effort you put into making this comprehensive guide. Can’t imagine how long it took you to figure out the best way to get through the game.