This guide includes basic info to help new explorers, tricks and hidden chest locations that intermediate players may not know about and useful facts I’ve learned through lots of testing. There’s plenty of pictures too! This guide is based on the first two tiers of the game (tier one green whips/temple & tier 2 blue whips/caverns). I will add info about tier 3 red whips/inferno to this guide later when I gain mastery of that area.
Last updated: June 28th 2021.
Introduction
I wouldn’t call anything here a spoiler, there will be no story spoilers, but I will reveal some hidden chest locations. So if you want to find them yourself then don’t read that part.
I’m going to assume you know what the game is, but I’ll run through it quickly to establish some terminology I’ll use in this guide.
From the hub, you choose a whip and start a new run. A run starts on the first floor of a tier 1 temple. When you spawn on the first floor, you go through a number of rooms filled with traps, and potentially find some rooms without traps that just have treasure chests, called vault rooms. You continue going through rooms until you reach the final, safe room of the floor, the shrine room. On the final floor of each tier of the temple, along with a shrine, you’ll be able to continue to the next tier of the temple, or head to the relic floor. On the relic floor, you’ll have to light a number of braziers to open the relic room door, so you can enter the relic room and claim the relic.
I refer to temples, whips, relics and keys in terms of tiers. I’ve seen some people use colors but that can be confusing for the color-blind and also for looking at whip pedestals because the pedestals don’t show you the color unless you hover over it.
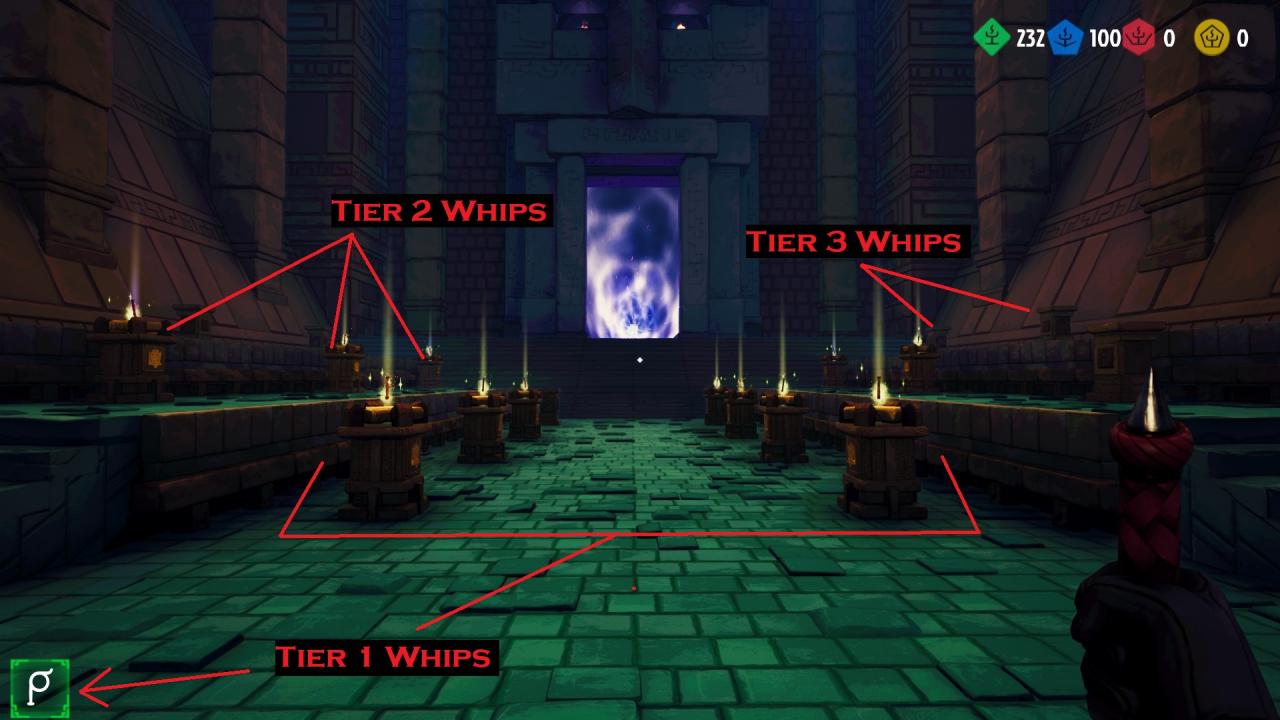
Tier 1 is the lowest and easiest tier to access. All new runs start at floor 1 tier 1. You start with the tier 1 starter whip, and 7 more tier 1 whips can be unlocked. The key and relic flame color is green. Tier 1 temples require lighting 2 braziers to open the relic room.
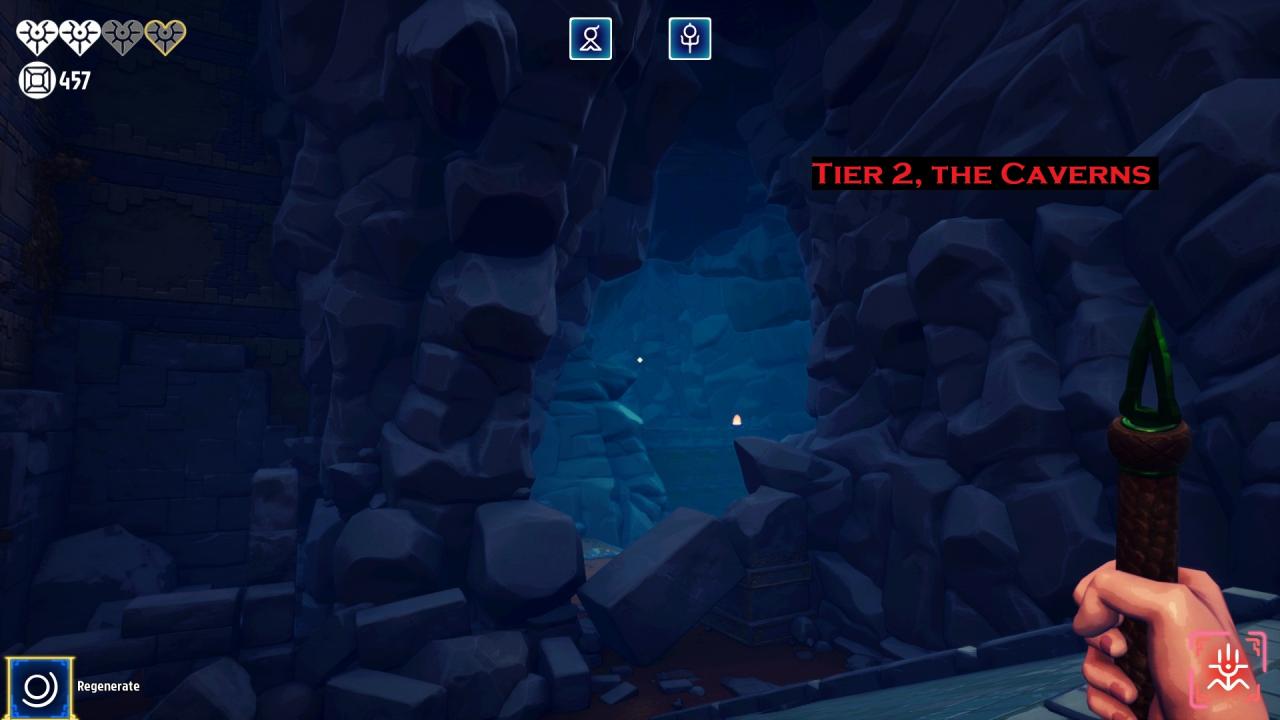
Tier 2 is the current middle tier, with blue whips, relic flames and keys. Known as the Caverns, tier 2 temples introduce new traps such as the toaster disks, moving walls and dart statues and require lighting 4 braziers to open the relic room. Tier 2 whips are more powerful than tier one, but also harder to bless.
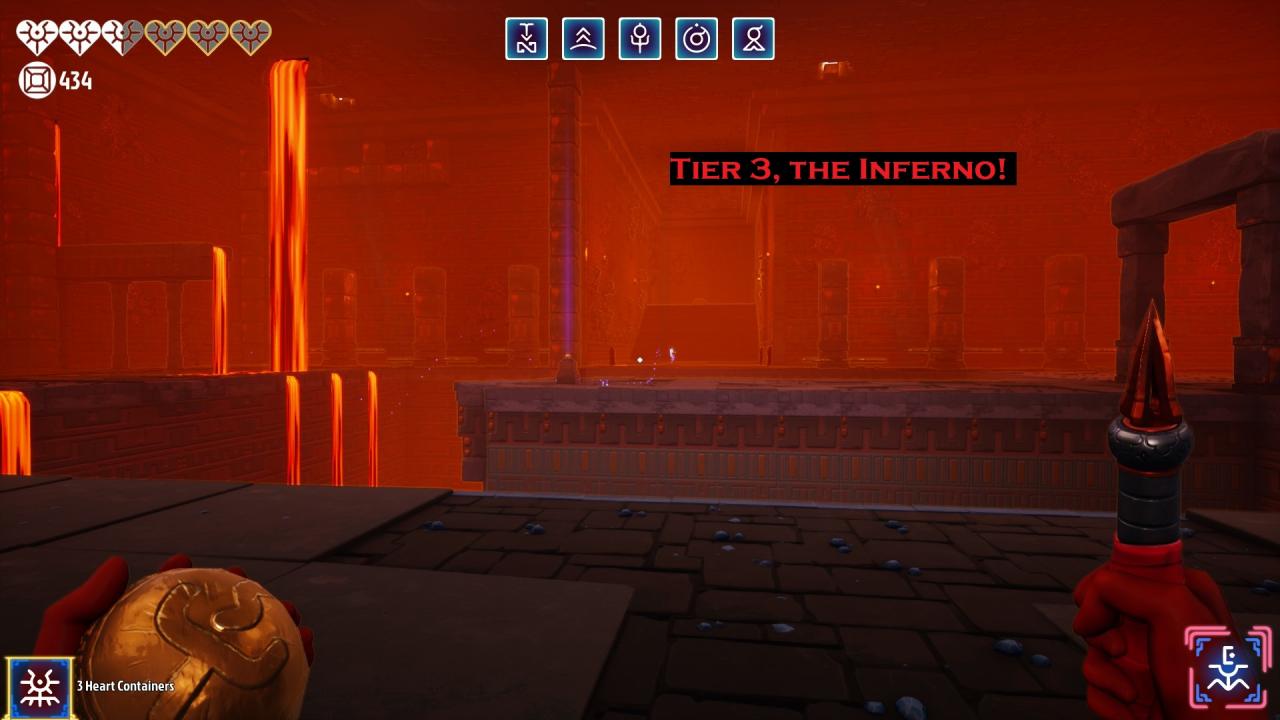
Currently the final temple tier is tier 3, the Inferno. Tier 3 temples add lava and boulders to the mix of obstacles, but still only require lighting 4 braziers to open the relic room. Tier 3 whips are even more powerful, but also more punishing and even harder to bless. This guide won’t cover much of Tier 3 because I am still learning about it. Tier 3 first chamber:
Whips
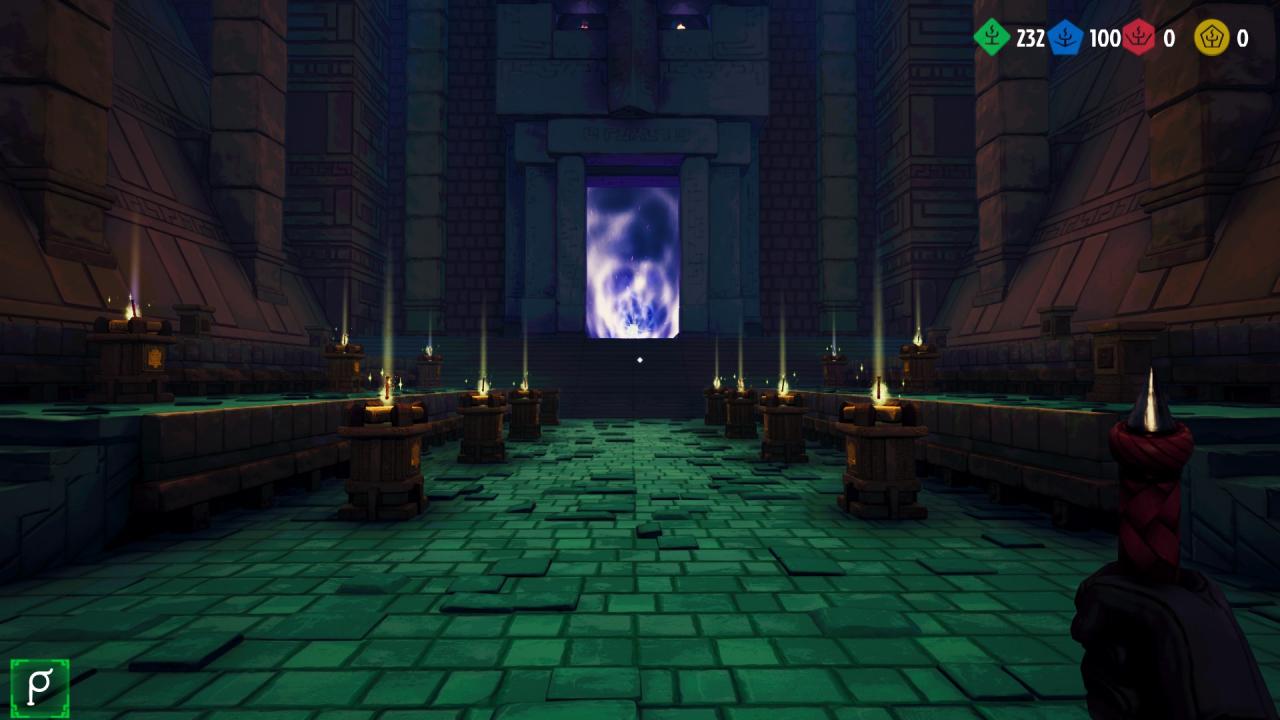
After completing the little tutorial, you’ll only have the starter whip. Whips have a random chance to appear when you enter the hub after completing a run. You don’t have to claim a relic for new whips to appear, a new whip can appear even after dying on a run. Once a whip appears, it can be purchased with keys of the corresponding tier.
- Whenever a new whip appears, buy it immediately! If you do not buy a whip it will disappear and you may have to wait a long time for it to appear again.
- Whips will only appear if you have keys of the tier corresponding to the whip. Example: if you have no tier 3 (red) keys, no tier 3 whips will be offered.
- Again, always buy new whips, even if you don’t like the whip’s passives. Passing on buying a whip doesn’t guarantee you’ll be offered a different whip anytime soon.
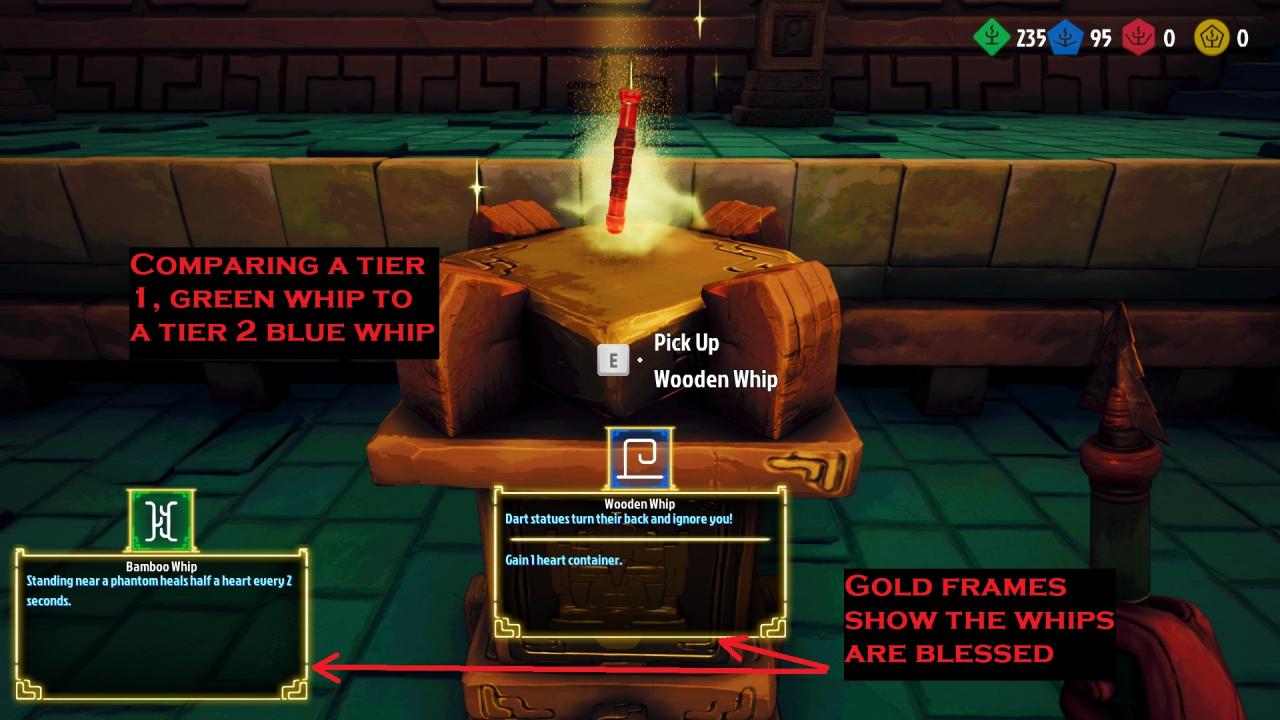
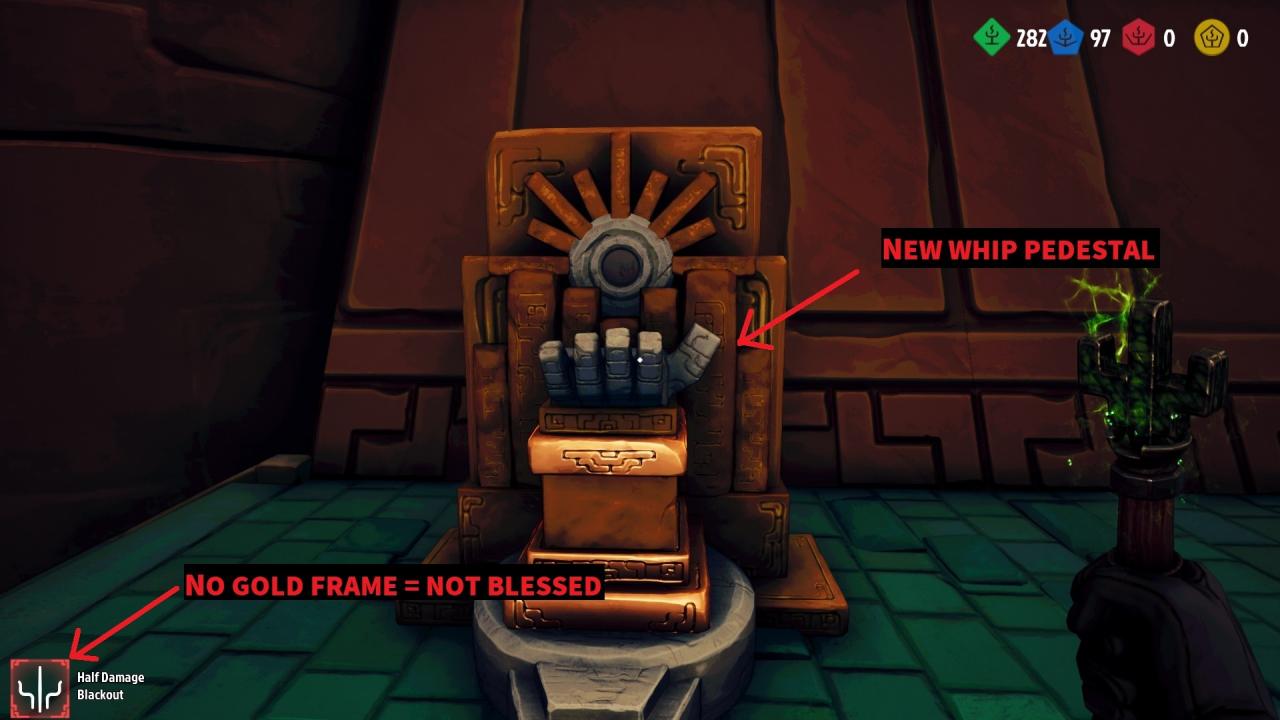
When you get a new whip, it will have one or more positive and negative effects. At first glance, this can make new whips seem worse than the starter whip which has no negative effects, but you can bless a whip to remove the negative effects. To bless a whip, you must claim a relic of a tier equal to or greater than the tier of the whip. For example, claiming a tier 1 relic with a tier 2 whip will NOT bless the whip, but claiming a tier 2 relic with a tier 1 or tier 2 whip will bless the whip. Blessing a whip is different than buying a blessing with treasure at a shrine.
- Once a whip is blessed, it is blessed forever and you don’t need to re-bless the whip.
- Using a blessed low-tier whip to complete a higher tier temple is a good way to earn higher tier keys and practice higher tier temples, until you can complete it with ease.
- The starter whip cannot be blessed.
- Blessed, high tier whips can be very powerful and make runs much easier, though their initial negative traits can make them harder to bless than low tier whips.
- A gold frame around a whip icon/description indicates it is blessed:
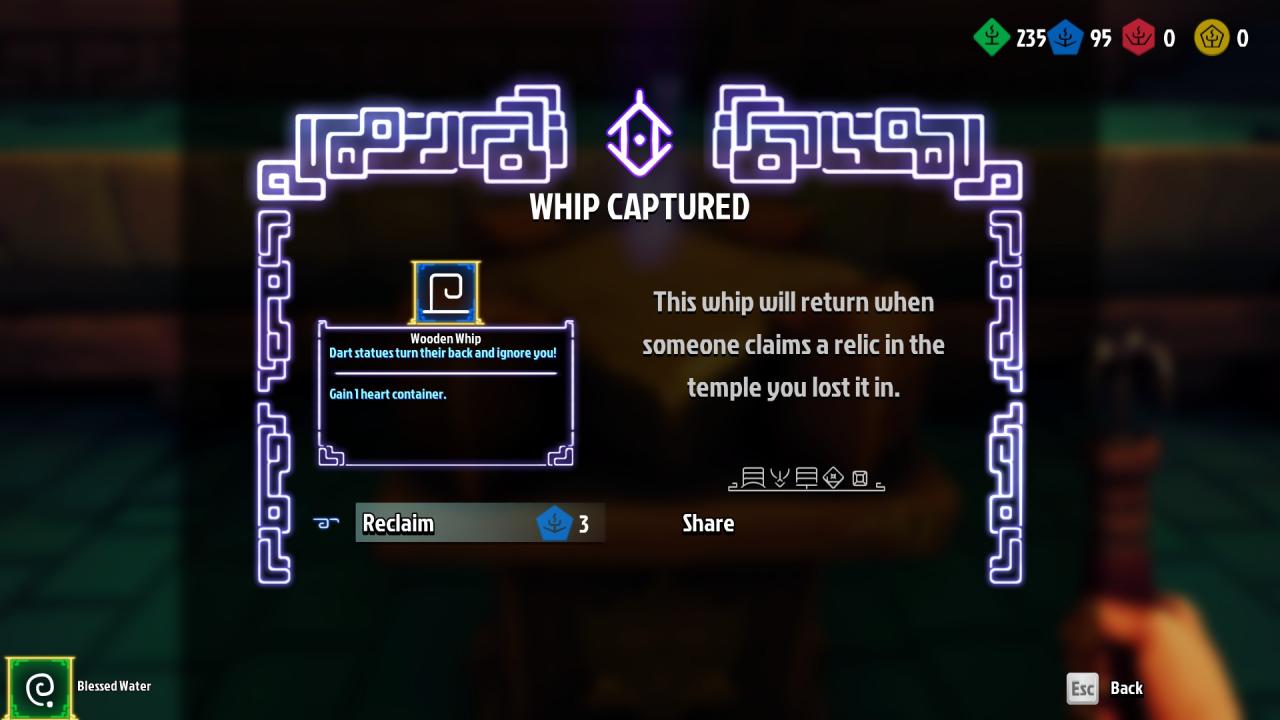
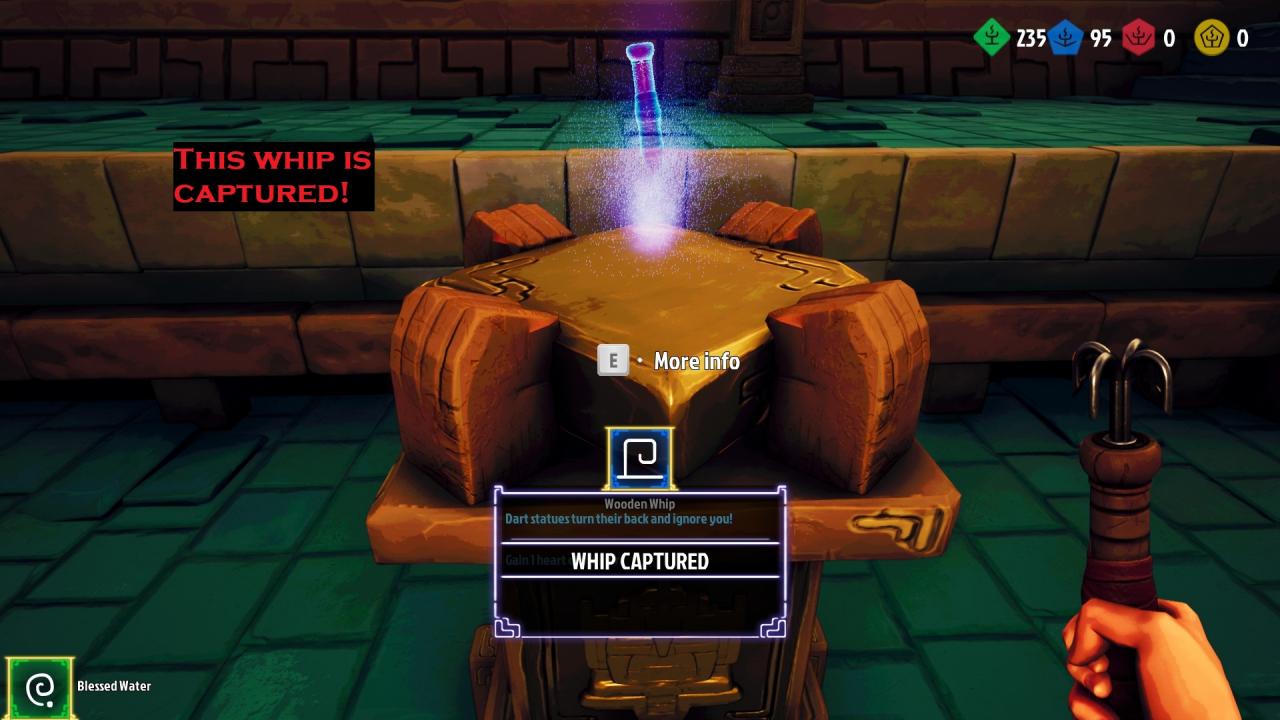
If you die on a run, that whip will be locked until someone else claims a relic in that temple, or you pay some keys of the whip’s tier to unlock it. Locked whips have a purple icon. Interact with its pedestal to buy it back. Alternatively, you can copy the code from the altar and send it to a friend. If the friend gets the relic from the temple code you send them, you’ll get your whip back.
If you don’t send the code to anyone, a random person will usually complete the temple and return your whip after a day or so. Losing a whip doesn’t remove its blessed status.
Whips are the main progression system in the game, so try out all the whips, experiment and have fun! Some of the stronger whips are ones that give you more starting heart containers or increase the amount/value of gold you collect, since healing and gaining heart containers are the main things you’re aiming for from shrines.
- If using a whip like the Knight whip which gives you 3 starting heart containers, if you get injured you shouldn’t buy any blessings at shrines until you’re missing 2-3 hearts. This way you can try to buy a big heal and heal 3 hearts in a single purchase, rather than buying 1-heart heals which is less cost effective.
- If you’re having a hard time blessing tier 2+ whips, try to only go for a whip-blessing run versus a guardian you’re comfortable with. If you start a run and find out you’re against a guardian you struggle with, you can always exit the temple early by claiming a tier 1 relic and try again.
- When trying to bless the whip where phantom’s steal coins, you have 3 options: hope you get a temple no one else has visited, sprint ahead to get to chests first, or just accept you won’t get many coins.
- I’ll add more tier 3 whip tips as I master them.
Whips are your only gadget to overcome all the obstacles of the temple, and they’re great. You can do everything in the game (except reach certain hidden relic room chests) without shrine enhancements for the whips.
- Chests can be whipped open if they haven’t been opened by another phantom. The cursor will change to a square when you’re in range.
- Small spinning blades can be whipped to stop them in place for a short duration.
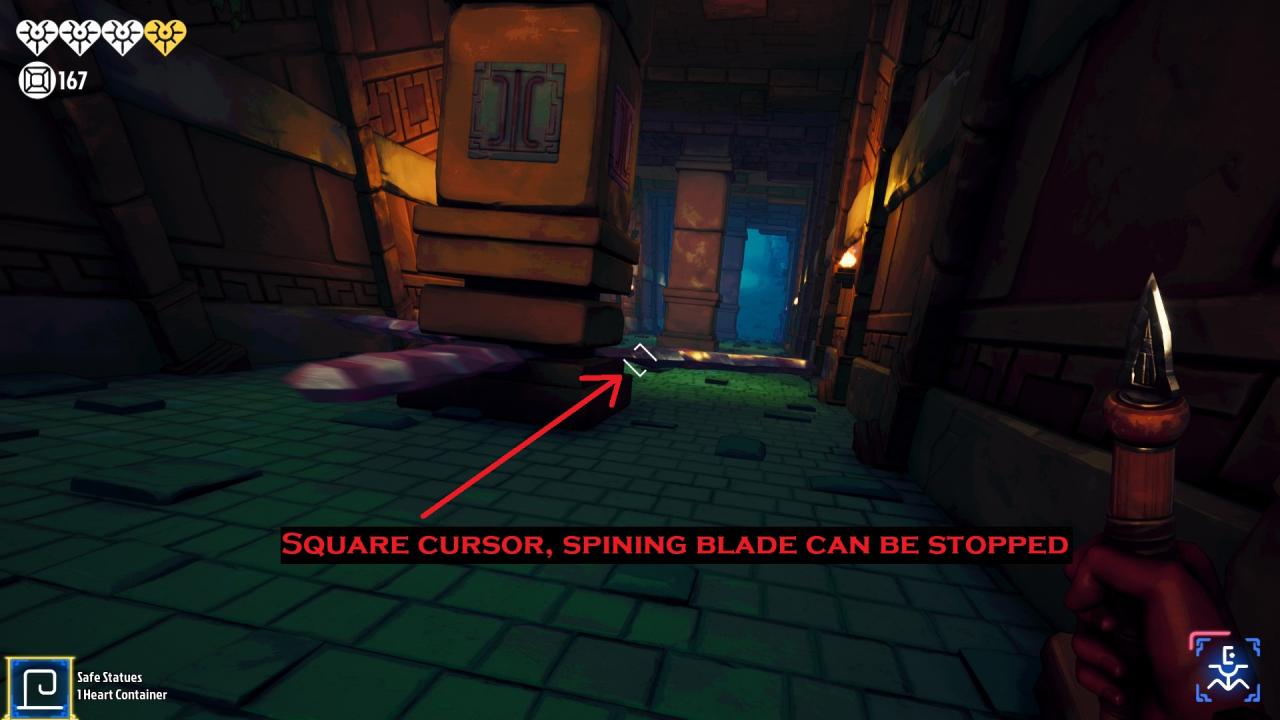
- The large spinning blades cannot be whipped and stopped.
- Dart statues in tier 2+ temples (not wall-mounted dart shooters) can be whipped to make them spin around and not shoot for a short duration.
- Blocks that fall from the ceiling can be whipped to drop them early.
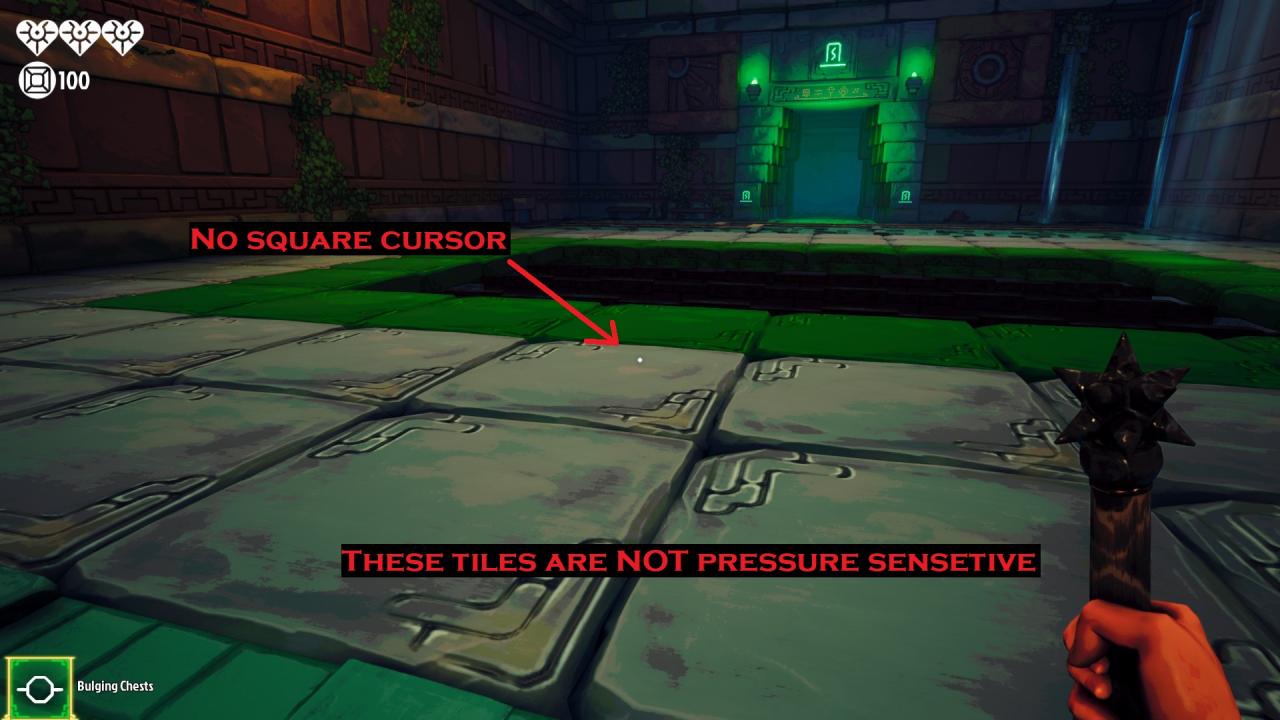
- The whip cursor changes to a square when facing the floor tiles that fall after you run on them. These tiles can be whipped to drop them early.
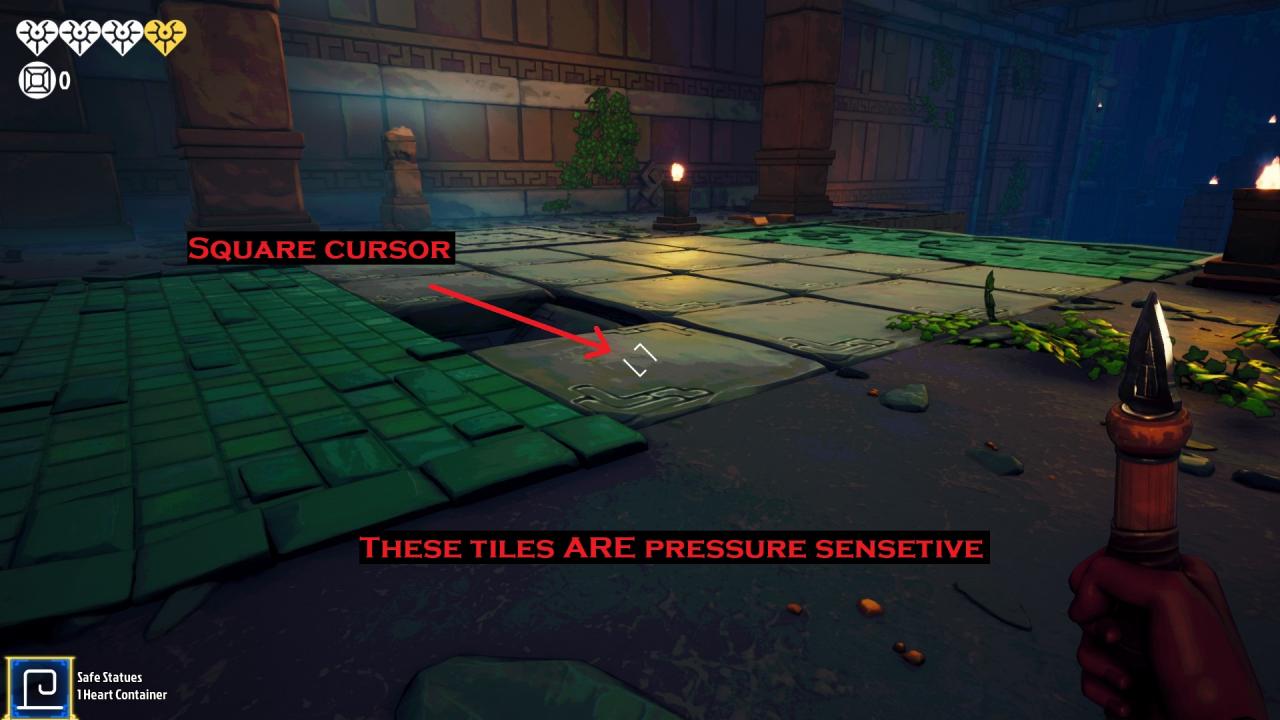
- The floor tiles that fall on a set pattern cannot be whipped and the whip cursor doesn’t change to a square. Checking with the cursor is faster than waiting to see if the tiles start falling in a pattern.
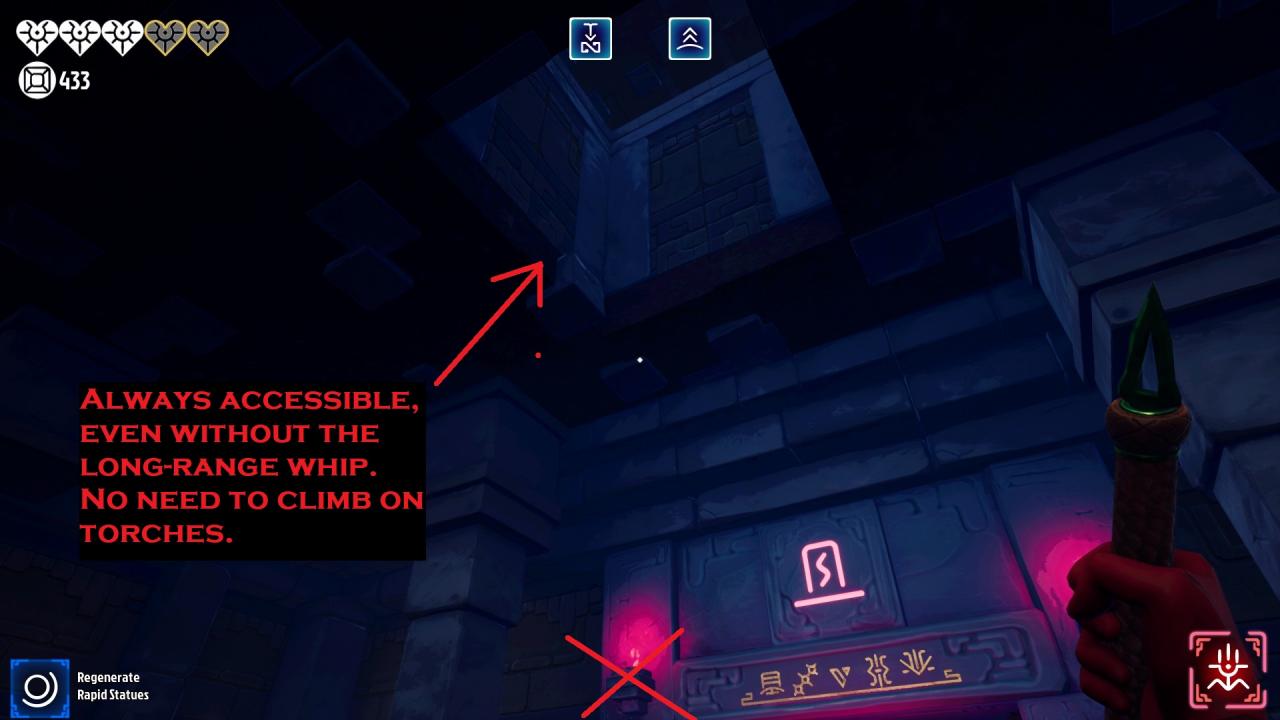
- All ceiling vaults are accessible with all whips, the range enhancement from the shrine is never necessary to reach these ceiling areas.
- How far you can grapple depends on both your current position and your current momentum. While standing still you can only grapple a short distance, but if you run and jump (gaining momentum) you can grapple much farther. You can use this to access any ceiling vault without the ranged whip/double jump/crouch jump upgrade. You can also use this to save time by avoiding tying to stand on torches/sconces to gain height: its not necessary!
- Whipping a chest is faster than a grapple whip and your whip will retract faster.
Shrines, Treasure & Blessings
Shrines can be interacted with to spend the treasure you’ve collected to buy blessings. Each time you buy a blessing, you get one new blessing and the cost of buying the next blessing increases, eventually becoming very expensive. Usually you get to choose between two blessings, but sometimes you have only have one option.
Shrines can be found at the end of each regular floor, at the start of some floors and at the start of the relic floor. There are also hidden mid-floor shrines in floor vaults. These hidden shrines have the same price and selection of blessings as normal shrines.
Treasure is gathered from chests & jars on your run. Any treasure not spent by the end of the run is lost. Treasure is the only resource you have control of during your run so it is important to gather as much of it as you can and to spend it wisely. Aside from buying blessings at shrines, treasure can also be used to unlock shortcut doors (cost 100) which can save you time and health by letting you bypass dangerous areas.
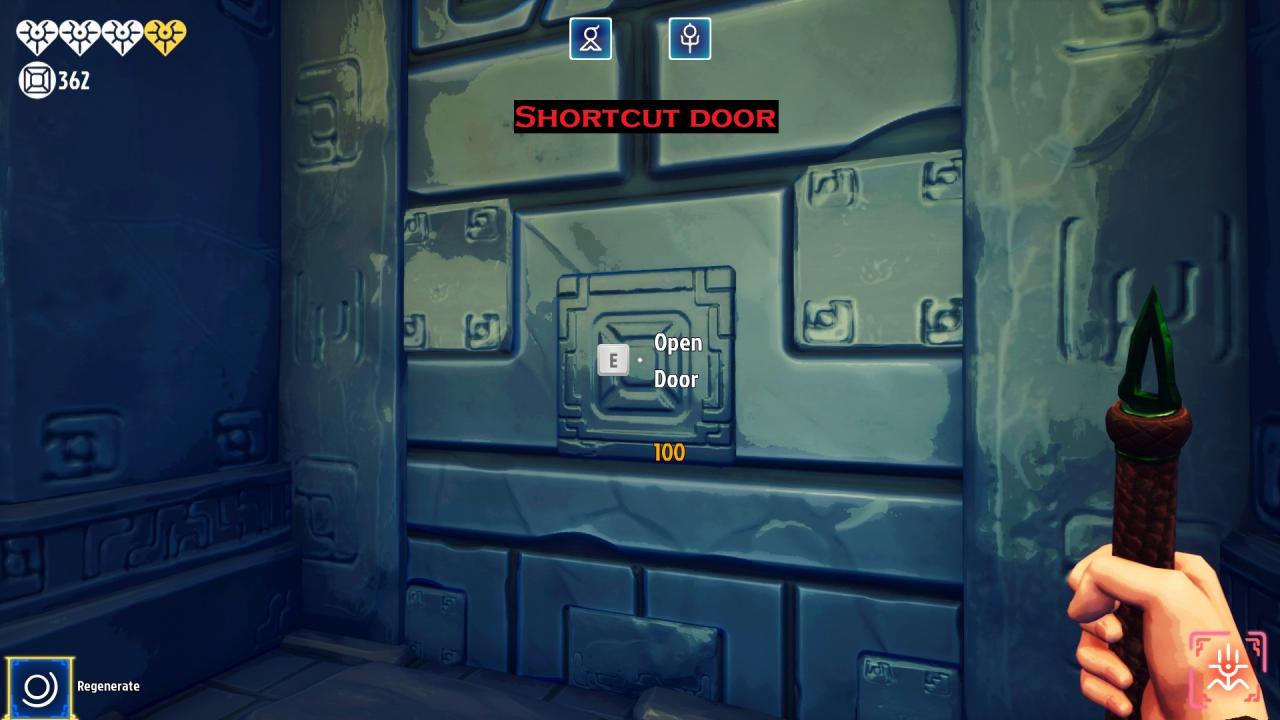
I highly recommend just playing and testing out different blessings to see what works with your playstyle, but if you’re having trouble, here are some tips:
- Don’t buy doors early. Early in a run, a shortcut door is almost as expensive as a new blessing (100 for a door vs 150 for a new blessing). Save your money for blessings. Later in a run (when blessings cost 500+) it makes much more sense to buy doors, especially ones that let you pass a particularly dangerous room, because to replace a lost heart would cost 500, but the door only costs 100.
- Don’t buy any shortcut door without first taking a look at the room it bypasses. Some rooms are super safe, easy and fast to navigate and treasure shouldn’t be spent to skip them.
- Don’t spend all your treasure! Late in a run, try to keep a bank of 100 treasure so you can buy a shortcut door if you need it to bypass a really nasty room.
- Don’t buy blessings when you’re missing only 1 heart, instead, wait until you’ve taken more damage then try to buy a 3-heart heal. If you buy while missing 1 heart, you’ll be offered lots of 1-heart heals, which are not as cost effective as 3-heart heals, and clog your blessing options.
- Hunt for perks you want while fully healed, otherwise your choices will be full of heals.
- I often don’t buy any blessings for the first few floors and I build up a bank. Then I slowly buy a blessing here and there in later floors, keeping a nice bank in case I need to hunt for a 3-heart heal.
Here’s my rough list of which blessings I prefer and why.
- Gain a heart container: always choose this option. It is equal to a 1-heart heal, but also increases your max hearts, so you have more room to take damage and hunt for 3-heart heals later. I take this instead of 3-heart heals if I’m still early in the run and missing less than 3 hearts.
- 3-heart Heal: this is situational, but ranks high among what you’re looking for depending on how much damage you’ve taken. If you’re close to the end of the run, or missing 2+ hearts with only 1 heart left, take this always.
- Wings: Best perk and lots of fun! This gives you a lot of mobility, lots of control while descending, basically prevents ever taking fall damage, and lets you completely abuse some rooms.
- Long Range Whip: This is less for the long range and more for the extra speed it gives you. Its faster/easier to reach ceiling vaults and you can skip intermediate platforms by whipping directly to the final destination.
- Double Jump: I used to not like this perk because I would accidentally trigger it when hovering with the Wings perk, but it is actually pretty useful. A definite buy if you don’t have Wings yet.
- Quick Whip: Not necessary, but nice to have. If you miss a grapple whip, with this perk and Wings you can hover and retry the grapple.
- Lucky: this perk doesn’t proc much, but since I’m counting on having many heart containers and wings, I don’t want many of the below perks.
- 1-heart Heal: I only buy these in desperate situations when I can’t wait for a 3-heart heal or my other option is one of the below blessings. Depending on how many hearts I have left, I might buy Calm instead.
- Calm: this prevents the guardian from appearing on the next floor. I don’t usually buy this because I’m familiar with dealing with the guardians, but it is nice, especially if you’re trying to do a whip blessing run on a whip that empowers guardians (although in my runs they always got to max anger by tier 2 relic floor anyhow).
- Crouch Jump / Ledge Glide: I don’t buy these because I’m not used to using them yet but I recommend trying them. They are best when used together, so you glide off of a ledge while crouching, then crouch jump mid-air to gain altitude.
- Lucky Landing: rarely procs, and why are we taking any fall damage in the first place?! Learn to duck & roll.
Relics
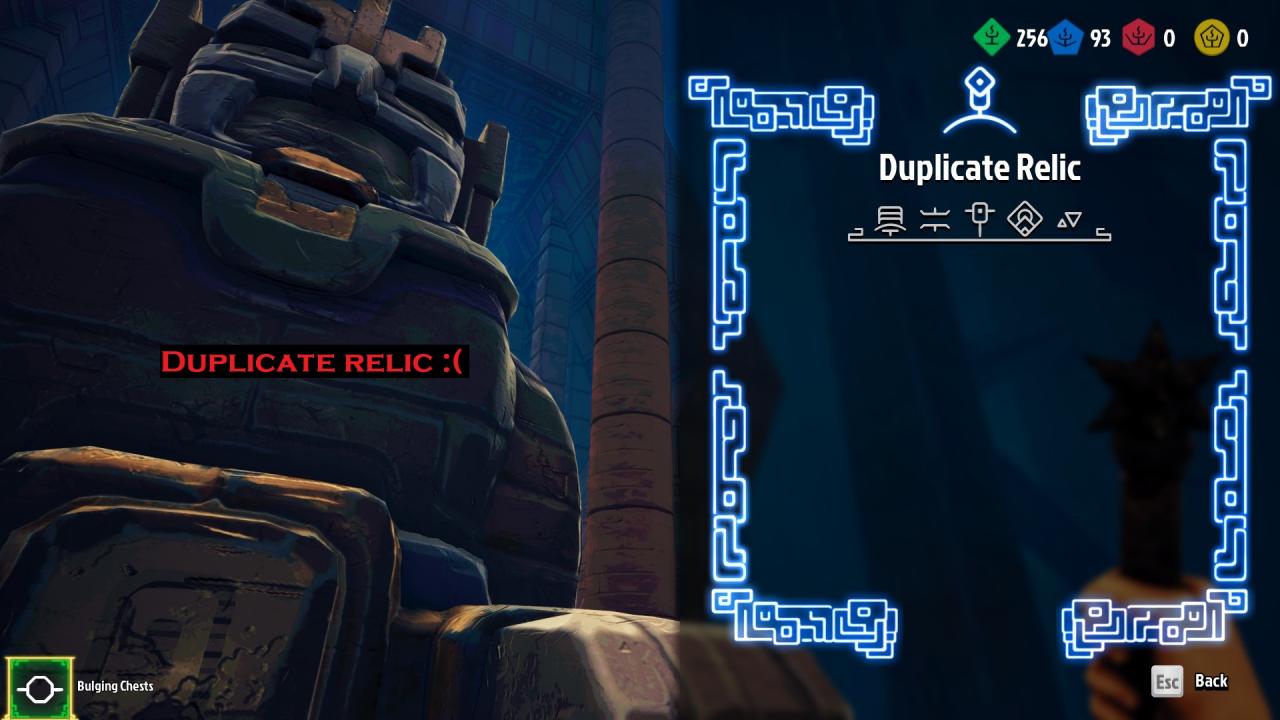 You can get duplicate relics before finding all unique relics. The good news is that duplicate relics can still bless whips.
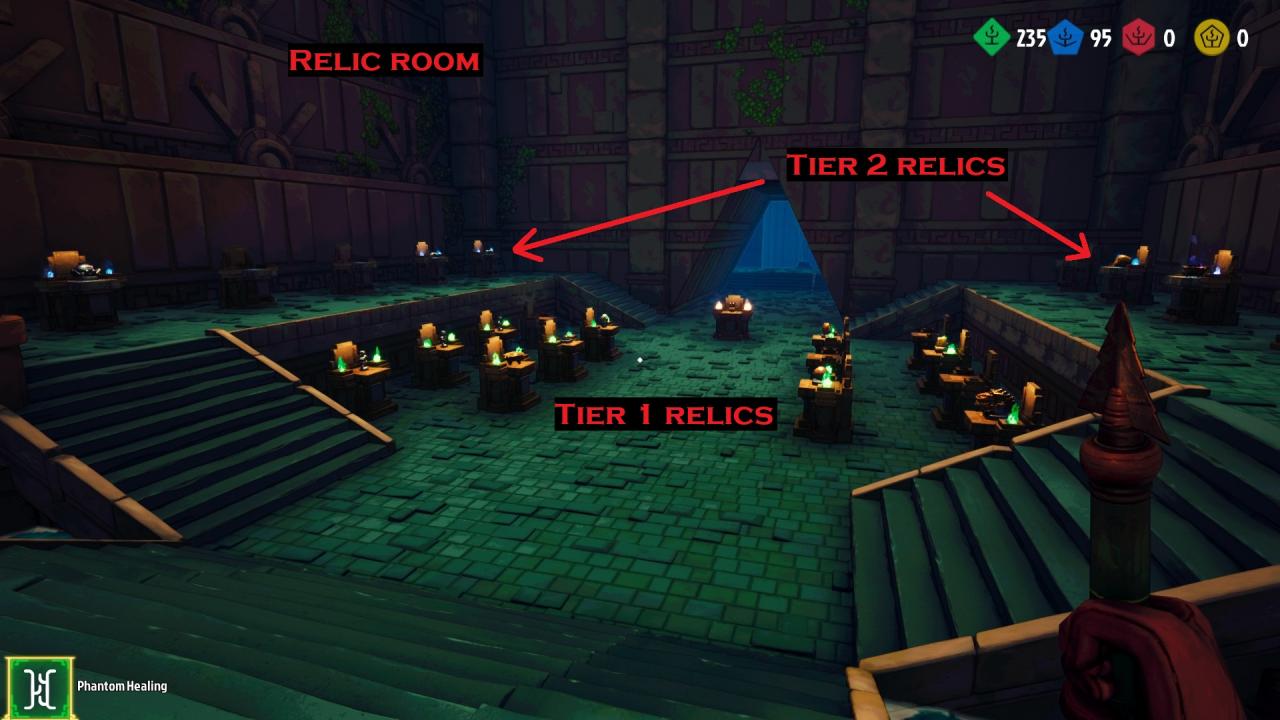
Relics are arranged similar to whips on pedestals on different tiers. Here’s a partially filled relic room:
Guardians Overview
Guardians are big floating heads that attack you and make your runs through floors more difficult. Each run you will face one of three guardians, chosen randomly. The guardian that appears on tier 1 will stay with you through all tiers until you finish the run or die. Each floor you clear angers the guardian, which empowers them in some way.
- Guardians never appear on the first floor of the tier 1 temple.
- If a guardian is currently spawned somewhere on the level, you can see it’s outline through walls.
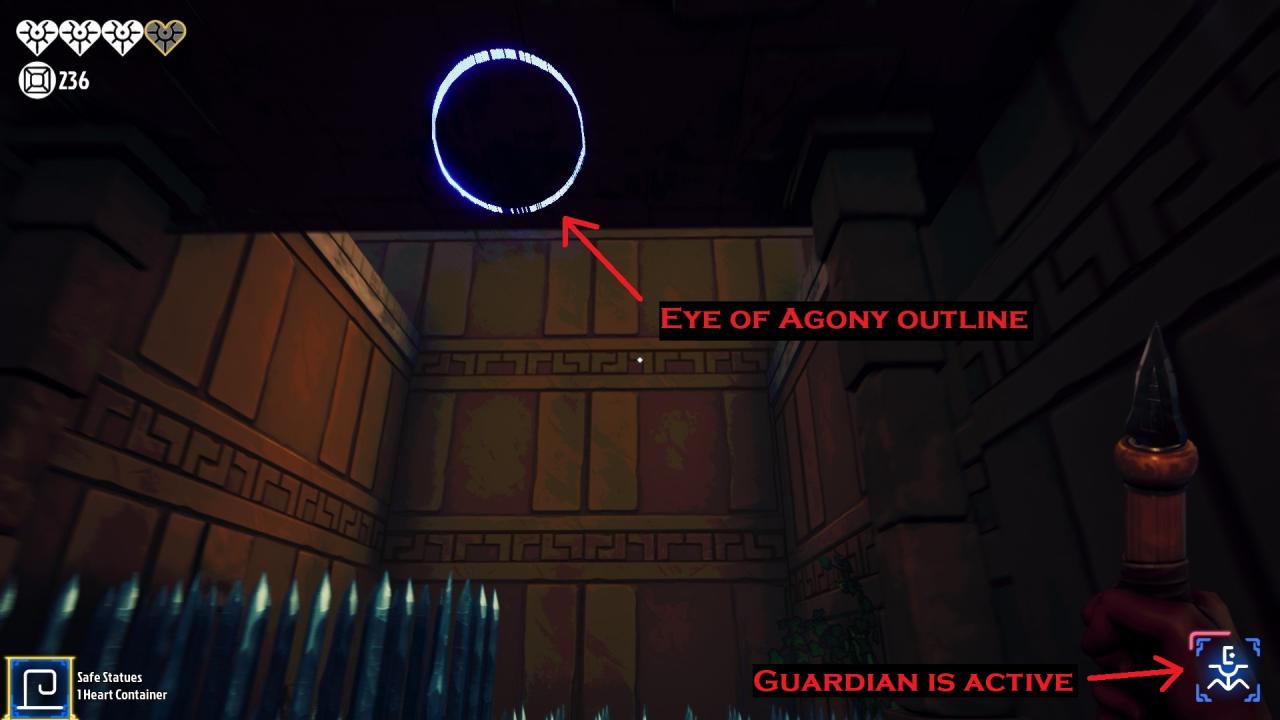
- You can tell if a guardian is spawned by looking in the bottom right corner to see if their symbol is there.
- The red lines surrounding the guardian icon indicate how powerful it is from being angered (aka completing floors).
- The traps on each floor are colored to match the current guardian:
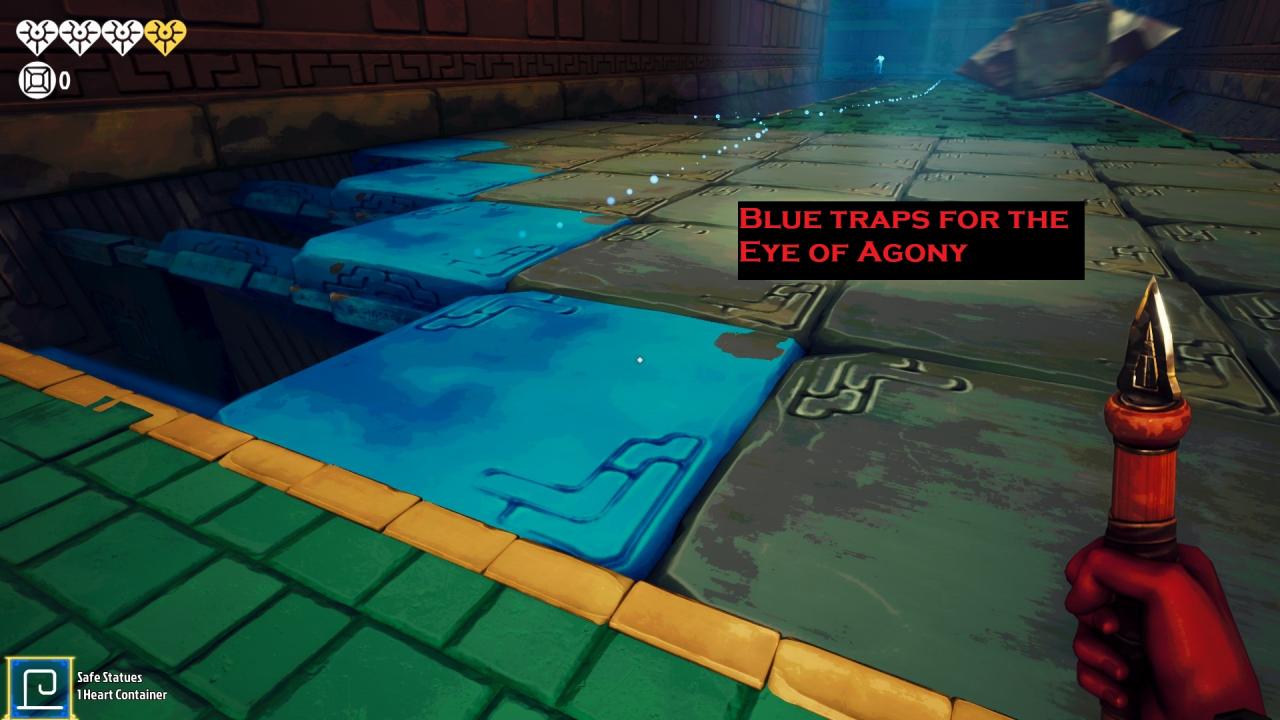
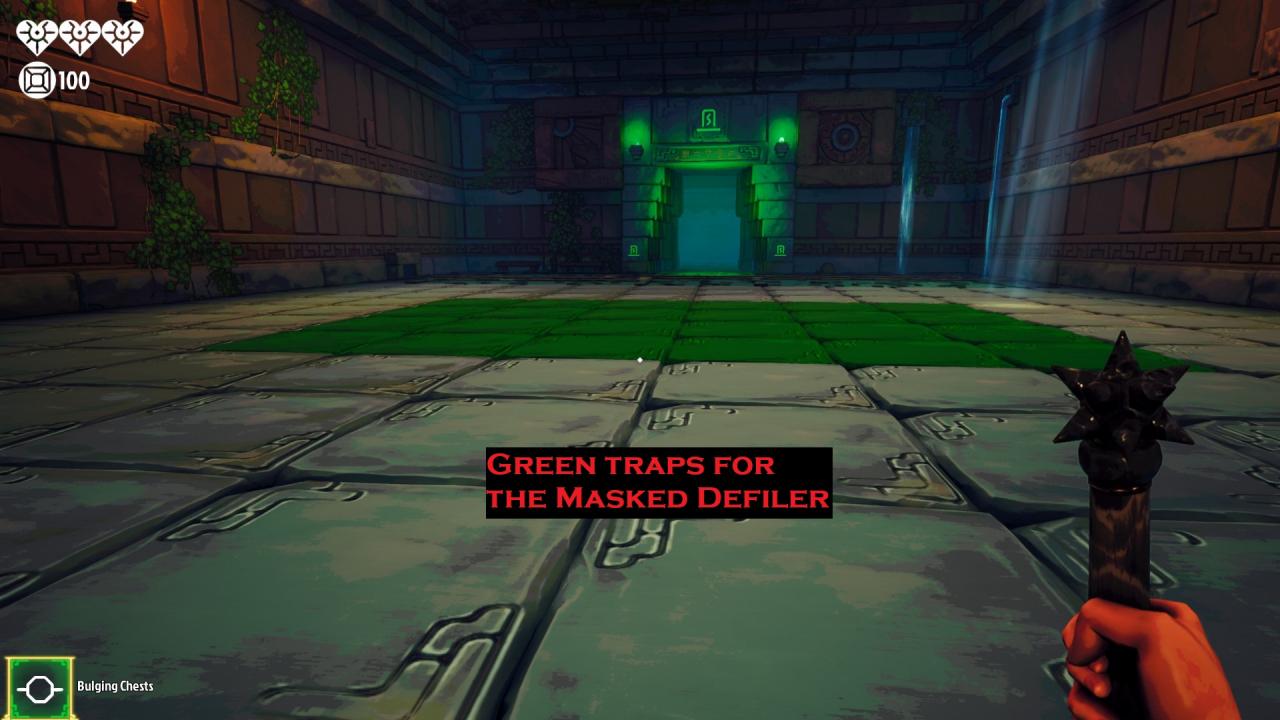
- If you’re in the final shrine room of the floor, trying to decide if you want to go to the next temple or go for the relic, and you forget which guardian you’re facing, you can see the guardian’s face on the door leading to the relic floor, see below:
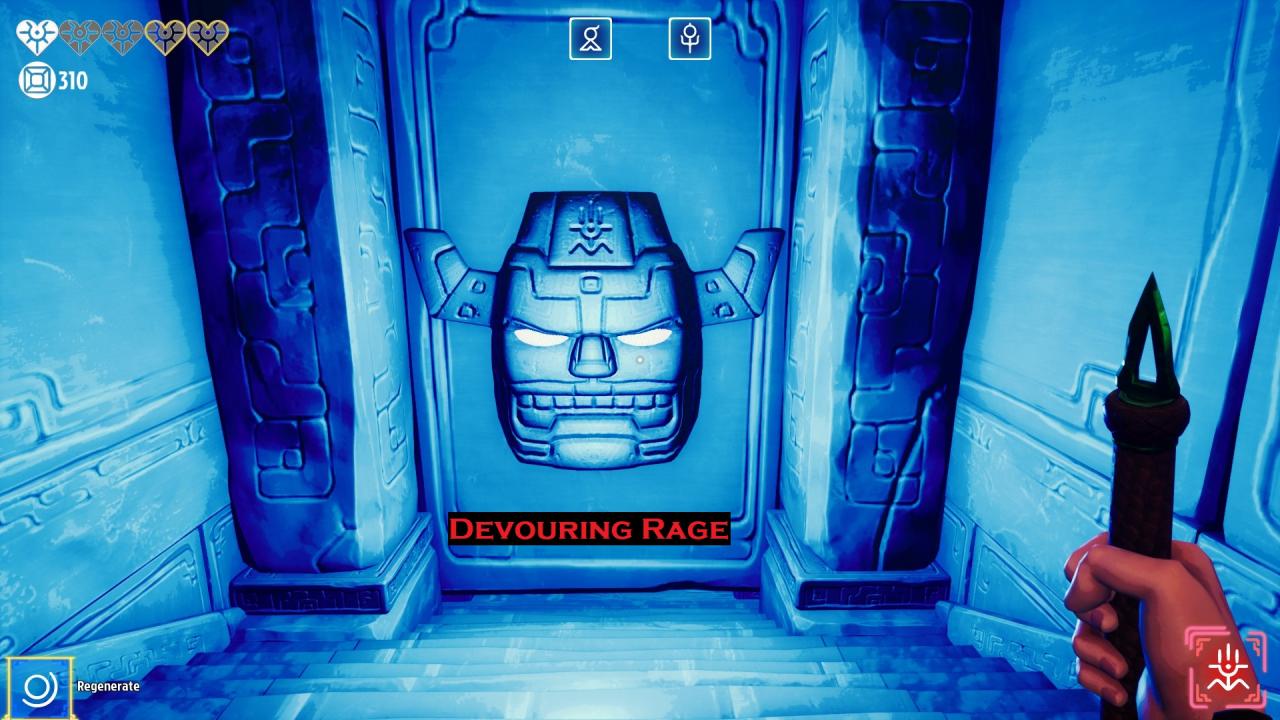
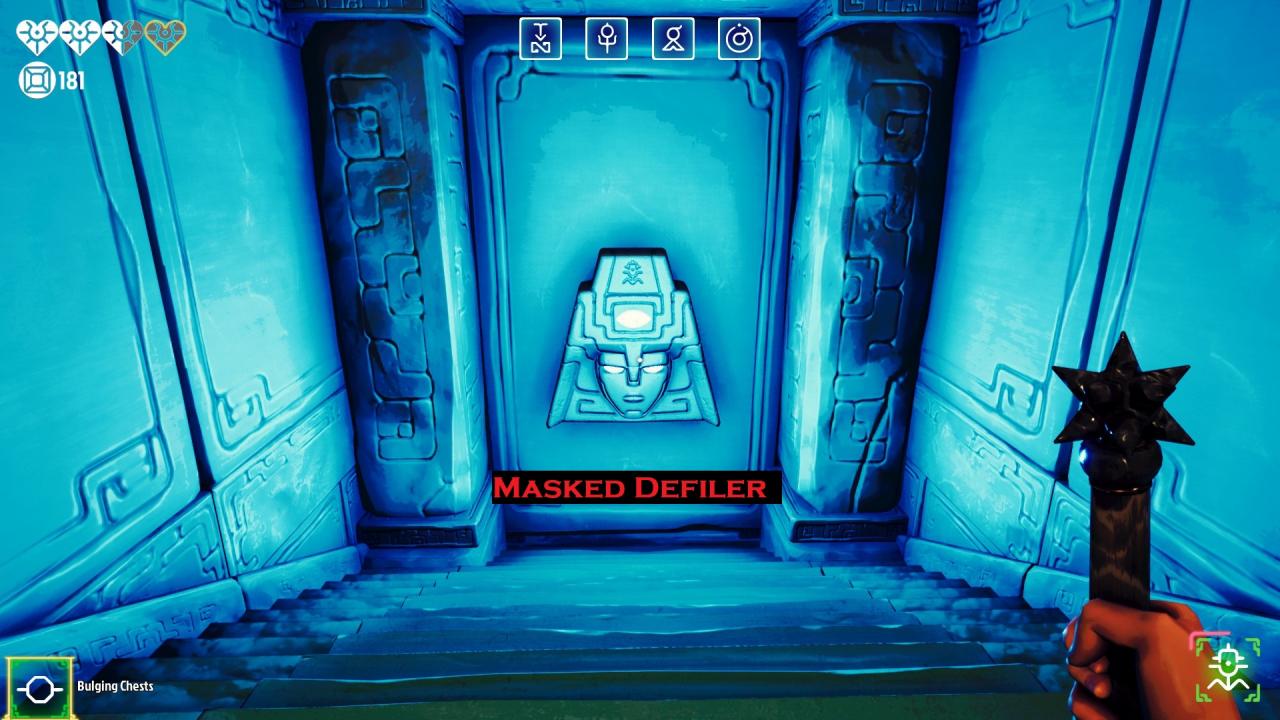
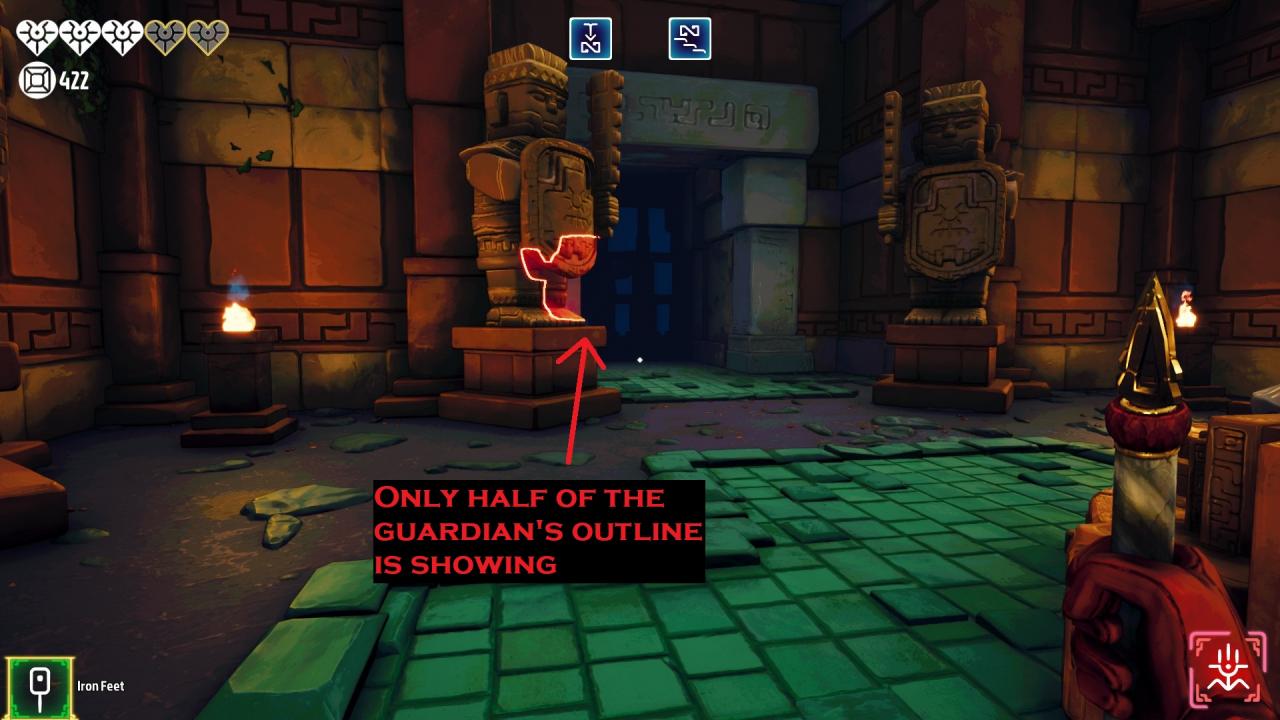
- The guardian outline doesn’t show properly through some textures, like door shadows:
Blue
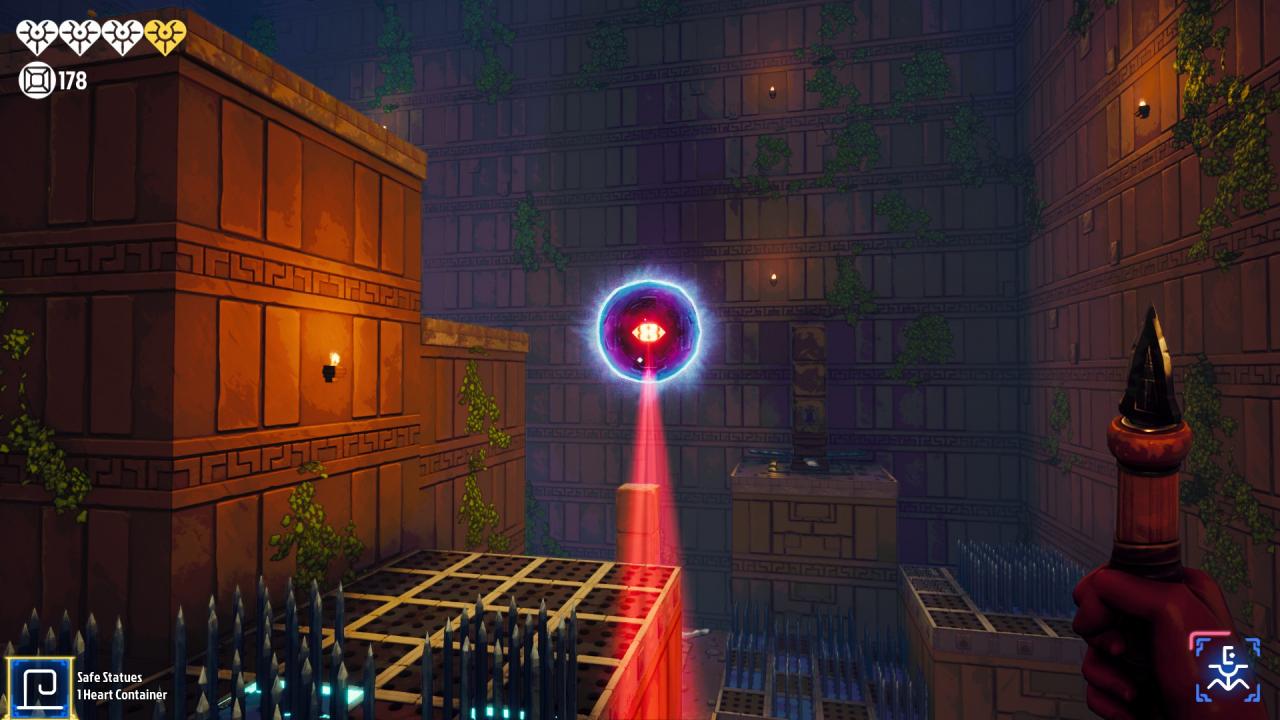
The Eye of Agony spawns in an open space within Line of Sight (LoS) of you. It tracks your movement for a short duration, then fixes on your position and fires after a delay. It does not keep tracking your movement after it fixes on a position. It will stay in the same position as long as it still has LoS on you. It can re-position quickly and often will when LoS is broken.
Each floor, the delay between him shooting his laser beams gets shorter (down to every 0.76 seconds).
The Eye of Agony is one of the safer guardians to face because he shoots a beam that is easily out maneuvered. Getting hit by the beam slows you and deals 1 heart of damage, or more damage if you stay in the beam.
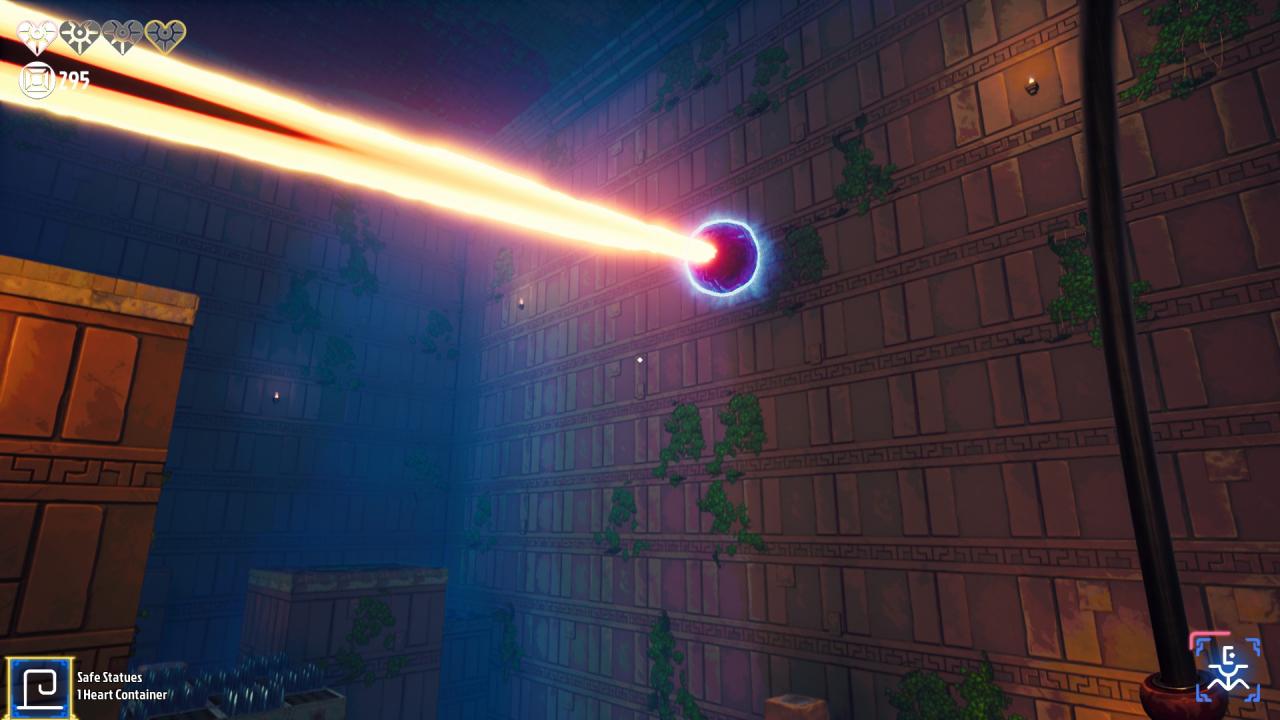
- Don’t run in a straight line towards or away from him.
- If you get hit by a beam, keep your composure and whip away if you can so you don’t take more damage.
- He doesn’t track your movement after he fixes on a position, so as long as you keep moving and don’t cross the path of the position he fixed on, he can’t hit you.
- Learn his aiming/firing sequence. Once you learn this, you can time his targeting so you can have him fix on locations away from where you’re trying to go.
- He spawns in the most aggressive locations because he is smaller and can fit in more places. Be sure not to whip into him.
- Since he requires LoS to target you, he is the easiest to re-position. If he’s in your path, just go back behind a corner and he will re-position quickly.
Guardian – Masked Defiler
Green
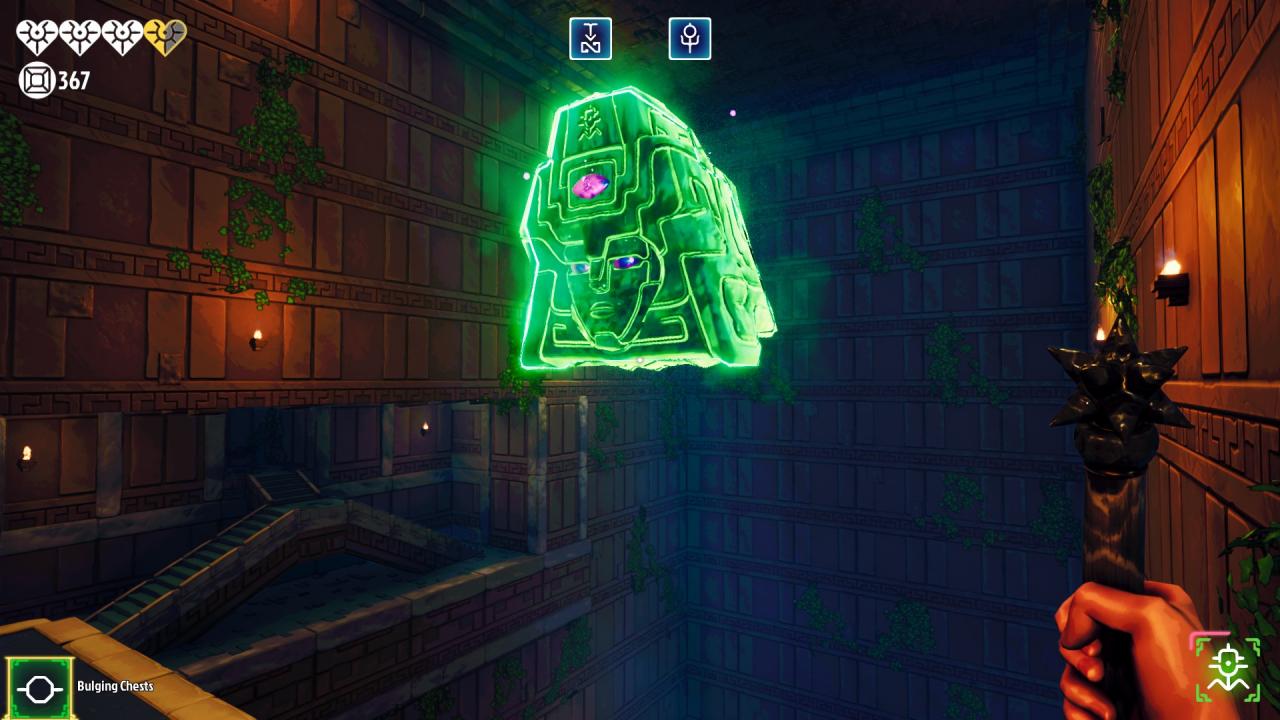
The Masked Defiler spawns in an open space near you and lobs several purple orbs towards you. The orbs have a short lifetime, then burst into a large, poisonous purple cloud. The orbs can bounce multiple times and can even bounce off of the player before bursting. The cloud lasts for 6 seconds. The orbs are fired in an arc roughly in your direction, so they may bounce and potentially cover a large, randomized area with poison. The poison obviously damages you but also stops you from sprinting.
Each floor, the Masked Defiler will fire more orbs (to a maximum of 12).
The more I’ve played, the more I think this is the most difficult guardian. Sure, under normal circumstances, as long as you’re making sure not to go into areas where you can get easily trapped and poisoned, the Masked Defiler is fairly easy to deal with because you can just wait for the poison to disperse before continuing. The real danger is if he is bombarding you while you’re trapped and can’t escape, or you’re in an area where you can’t move quickly because of other dangers (which is often the case on higher-tier floors).
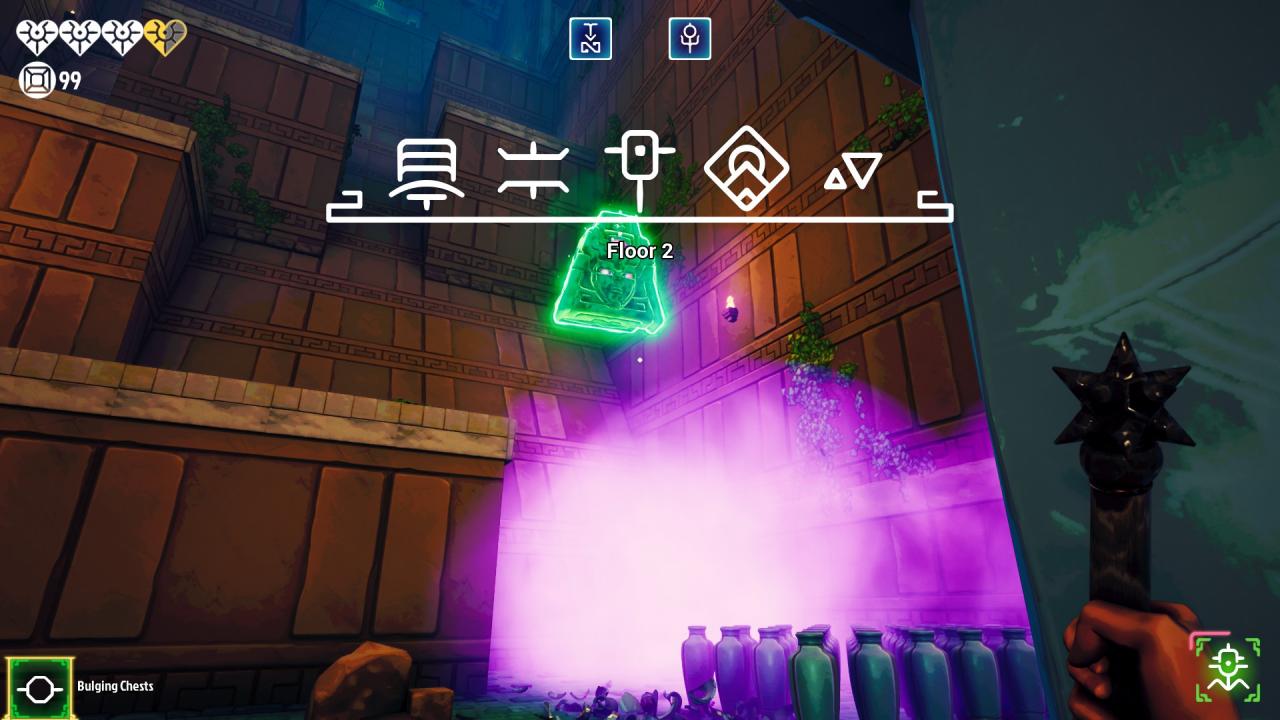
- Be patient with this guardian, don’t try to muscle your way through his poison.
- If you get hit by a poison cloud try to whip your way out, you can’t sprint while poisoned, but you can whip at full speed.
- The poison doesn’t damage you immediately, your character will cough a bit first, then start taking damage, so you have a couple seconds to escape.
- He doesn’t require direct LoS, so sometimes he is happy to stay around a wall and keep lobbing orbs in your general direction. If this is causing him to poison your path, try re-positioning to make him shoot somewhere else.
- If you’ve made it to a room’s exit and see there is enough room for the Defiler to spawn in the next room, wait in the first room until he starts his firing sequence, then go to the next room. He doesn’t teleport mid-firing sequence, so this buys you some time.
- His poison clouds can poison areas through walls and floors, so be careful.
- The purple orbs will bounce off of you without damaging you, you can use this to play volleyball and deflect orbs away from you, but it’s difficult and dangerous.
- The masked defiler is not very dangerous while you have the high ground. He can’t shoot his orbs up at a high angle.
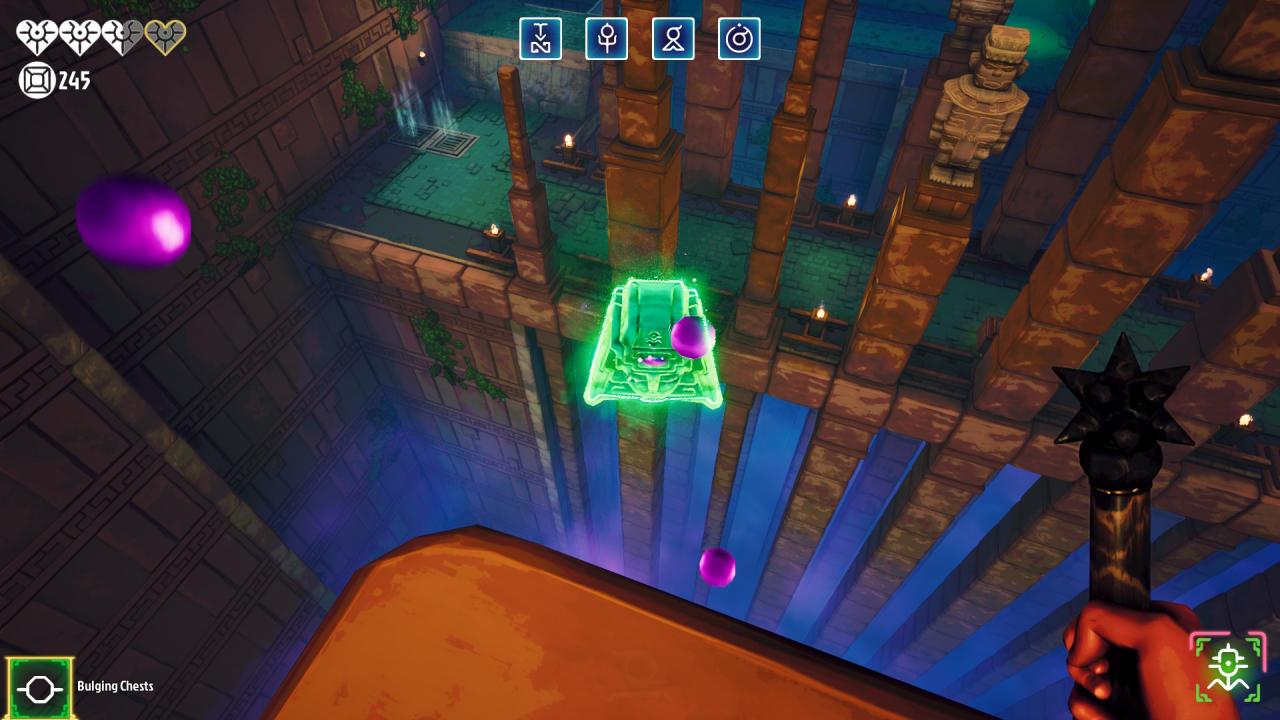
- He’s most dangerous while you’re traversing dense pendulums, forced to wait for things like moving walls or if you’re in a floor vault and he spawns in the ceiling gap so you can’t escape and he’s dropping orbs on you.
- Don’t be afraid to backtrack to wait for his poison to dissipate and bait out his shots before advancing.
Guardian – Devouring Rage
Red
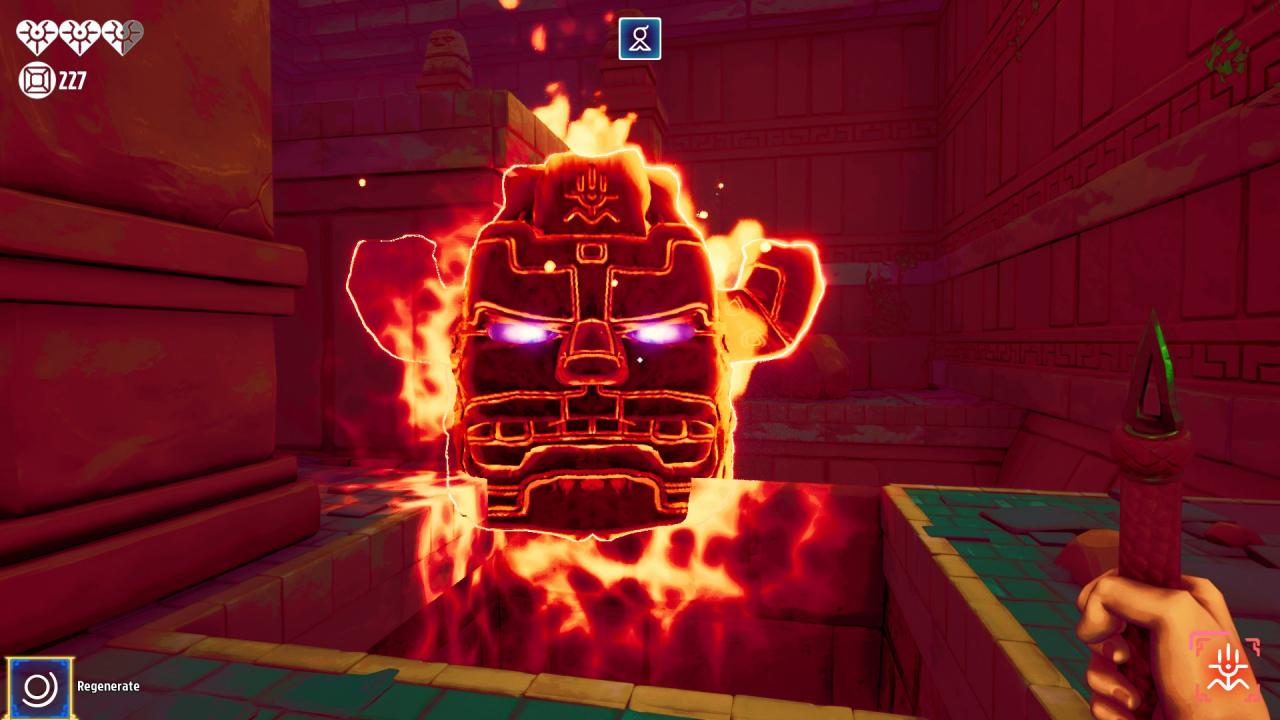
At a random point on each floor, the Devouring Rage spawns a ways away through walls and starts flying directly towards you, passing through any obstacles and walls in the way. It keeps moving towards you until you enter the shrine room at the end of a floor, or until you pass through the relic room doors of the final floor. Whereas if the other guardians touch you they deal 1 heart of damage, if the Devouring Rage touches you, you die, no matter how many hearts you have left.
Each floor, the Devouring Rage’s movement speed increases (to 5+ m/s).
This is the most frightening guardian to deal with, especially for new players, though I will argue not necessarily the most difficult. Pay attention to when he spawns. Until he spawns, you have lots of time to explore and take traps slowly, which is why I think he’s not the most difficult. Other guardians start attacking you and interrupting you immediately once they spawn, but the Devouring Rage just starts travelling towards you when he spawns, so you can continue as normal for a bit. If you move at a decent pace once he spawns, he often won’t get close enough to put you in danger, though you might not be able to get as much treasure. Aside from when he’s really close to you, DR is the most dangerous when he’s near the start of your current room, because if you get crushed by walls or fall off a cliff, you will spawn at the start of the room and he can insta-kill you as you spawn.
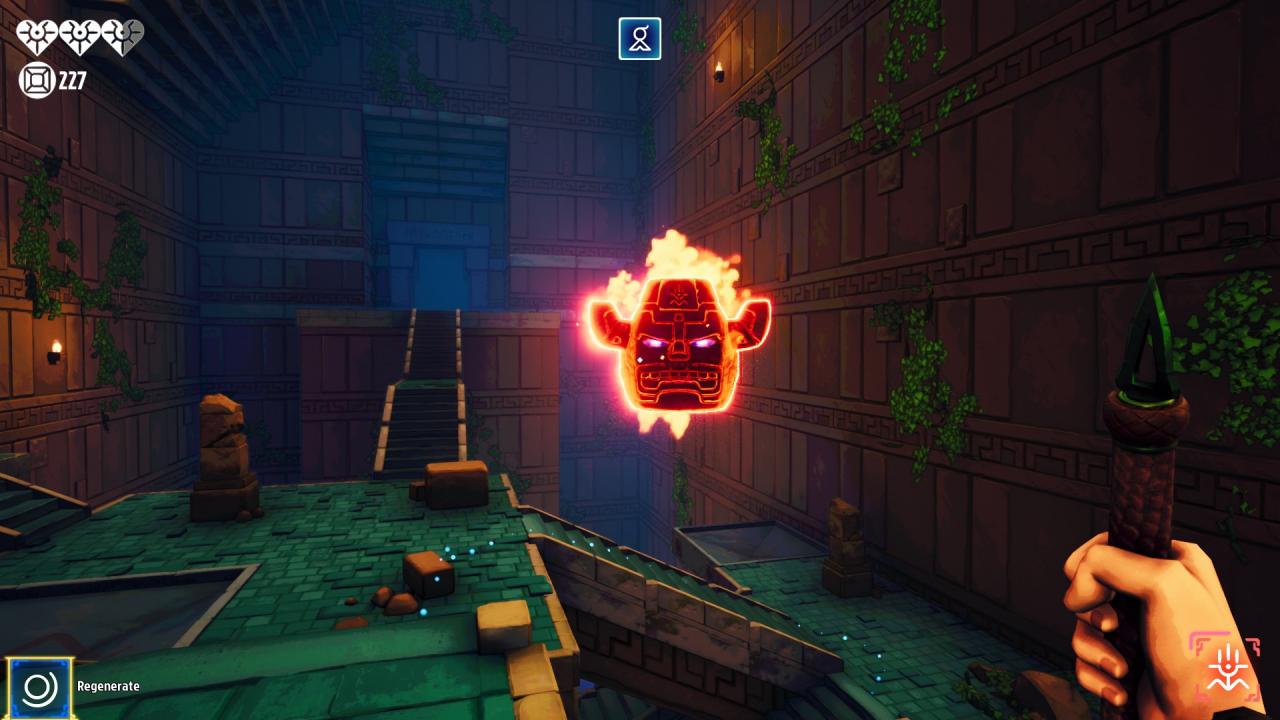
I’ve seen many people in the forums getting this wrong, saying that either he spawns if you spend too much time in one room or he has a chance to spawn when you enter the next room. Both are false. The DR will not spawn purely because you spend too much time in a room. I tested this several times by staying in a room with the game in-focus for over an hour, and the DR did not spawn.
The Devour Rage spawns after a minimum, random amount of time has passed AND you cross a trigger volume. What is a trigger volume? Its something level designers can place in a level, think of it as an invisible tripwire that- when crossed- triggers some action, in this case, the spawning of the DR guardian.
So at the start of a floor, a random time period is chosen, maybe 2 minutes for example. You can go through as many rooms as you want in less than 2 mins and he won’t spawn. It’s only after the 2 minutes has passed AND you cross a trigger volume when he will spawn. So, alternatively to crossing a bunch of rooms in 2 minutes, you could stay in the first room for an hour, then as soon as you cross the next trigger volume, DR will spawn.
There are trigger volumes by most doorways, but there are also some midway through certain rooms.
So, what should you do with this information? Well, you can rest easy if you have to go AFK when the DR hasn’t spawned, he won’t spawn while you’re not moving. If you never want to see him, then the best way is to go quickly through the rooms so by the time he spawns you’re near the end of the floor.
- Keep calm while he’s in the room with you, you have more time than you think.
- Once he spawns, you need to balance greed for treasure with progressing through the floor. If he spawns early in the floor, you may have to skip some treasure. If he spawns late in the floor you may be able to keep going at your normal pace until the shrine.
- You can see his outline through walls to keep track of him, but be careful, there is a bug where he doesn’t show up through certain textures (like darkened doors).
- He can be kited in large rooms. If the room is big enough (both wide and tall) you can do a big loop and lead him to the far side of the room, then go back to the exit to buy some time.
- Keep in mind you can create distance between yourself and the DR by both horizontal AND vertical movement.
- On relic floors, when lighting the braziers, don’t light the brazier until he is very close to you. Unlike other guardians, the DR won’t de-spawn after you light a brazier, he’ll keep chasing you from where he was. Thus, wait for him to get all the way to the brazier (ie as far away from the center room as possible) before lighting it.
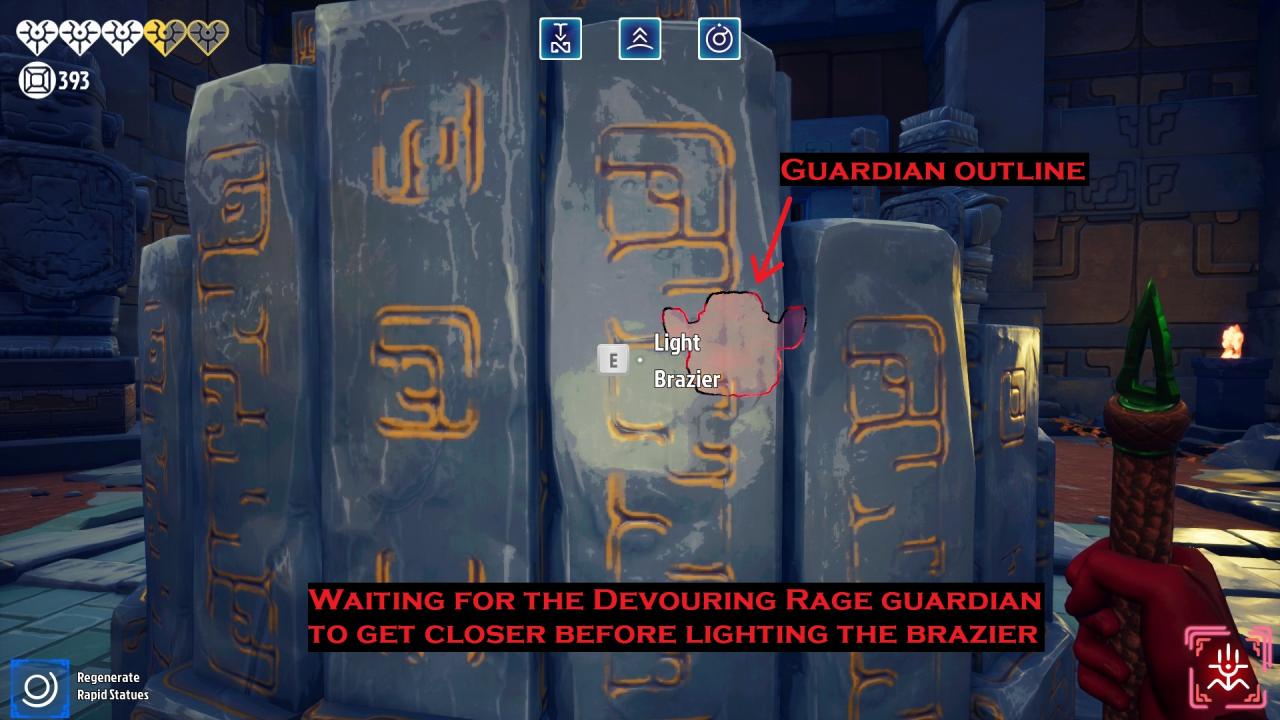
- On tier 2+ relic floors, when lighting the 4 braziers, make sure to alternate going for braziers on the right and left side, to buy you the most time by forcing him to cross the entire map.
- If the DR is about to touch you, consider dropping off a cliff or getting crushed by moving walls. These things will deal 1 heart of damage to you, and respawn you at the start of the room, potentially putting some distance between you and the DR.
- When in doubt, don’t go for greedy treasure when he’s close.
- Don’t go AFK after lighting the last brazier! He will keep chasing you until you go through the relic room doors. On normal floors he stops when you enter the shrine room.
Phantoms
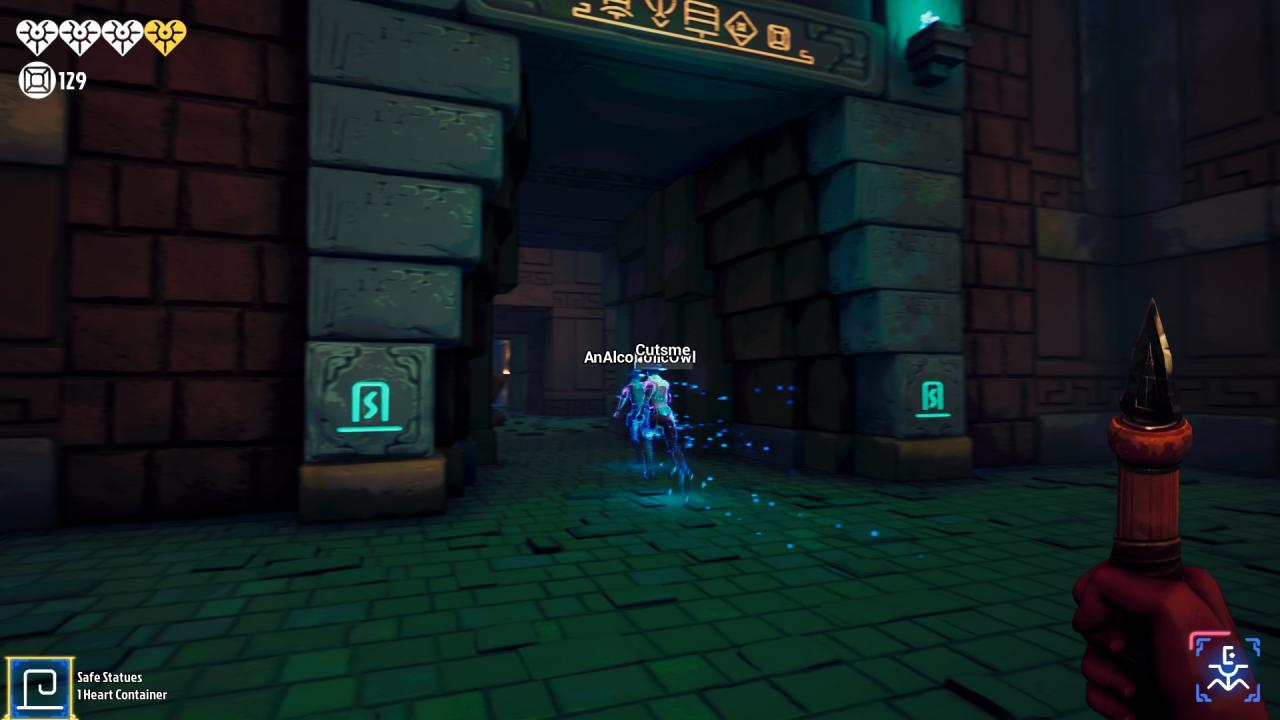
- Beware standing next to breakable jars while phantoms are around. Phantoms can whip and break the jars, which could injure you if the jar is poisoned.
- Be careful of following too closely to phantoms that are running across the floor tiles that drop when you walk on them. The phantom can cause them to drop, leaving you nowhere to stand!
- Following a phantom can sometimes lead you to hidden treasure chests you didn’t know about. Use them to help learn the rooms.
- Don’t try to keep up with the fastest phantoms. They usually are the first ones to die and its hilarious finding their bodies.
- If you’re doing a temple from a code a friend sent you, the friend’s phantom will be yellow instead of blue, and you can see them through walls.
- Arriving to a chest as a phantom is opening it is the worst time to arrive, because you have to wait for all the coins to pop out. Endeavor to either be the first one to open the chest (in which case the coins/keys will fly to you wherever you are, so you can keep moving) or wait for the leading phantoms to go ahead so you can quickly run by chests that already have all the coins deployed and waiting to be picked up.
- When running in a herd of phantoms, even though they’re transparent, they can block your vision and make it hard to see. Its best to wait for them to run ahead and spread out a bit.
Dungeoneering Tips
Here are some miscellaneous tips to help out beginners.
The amount of times I see phantoms run underneath ceiling vaults and never open them makes me feel like a genius for finding them, but also makes me sad that no one is getting their gold! As soon as you enter, and right before you leave a room, do a quick glance at the ceiling to check for ceiling vaults.
 Remember, every ceiling vault can be reached with every whip, even without the range upgrade.
People mostly find the vaults in the floors, but sometimes they are missed, especially if there are branching paths. Don’t forget to look before you leap into a hole in the ground, it could just be a pit! Its so funny watching phantoms dive into a pit and die thinking it was a vault.
Sometimes in tier 2 or higher floors, you can find floor vaults which don’t have treasure chests, but instead just have a hidden shrine. These shrines are the same price and offer the same blessings as normal shrines, but can be helpful if you need hearts mid-floor. I’ve explored the lower level of this room many times and never found any chests, though there is creepy music.
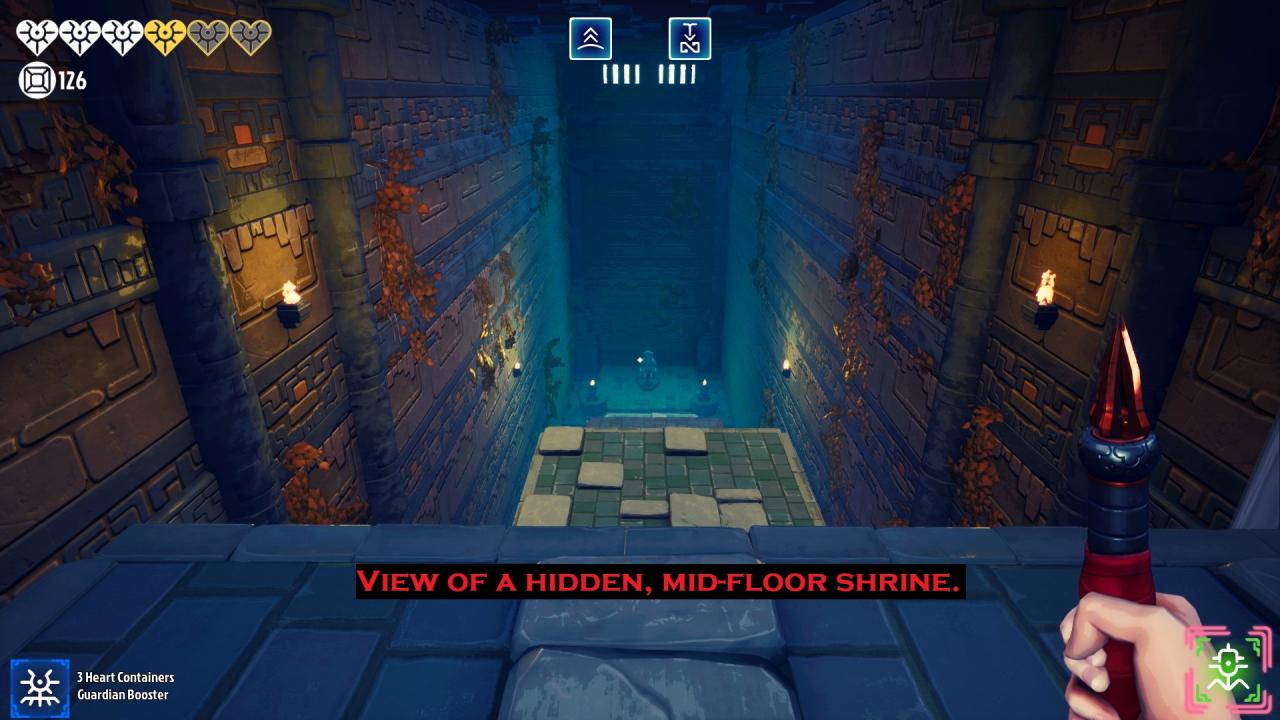 Beware of being caught by a Masked Defiler, just jump to the lower levels and climb up the back if the MD shows up and bounces orbs down to you while you’re at the shrine.
As you get more practice, you’ll start to recognize rooms, and you’ll learn that most rooms can be entered from either side depending on the way the floor was generated. So you essentially have half as many rooms to learn!
Sometimes it can be disorienting coming back to the main level after exploring a ceiling or floor vault. If you don’t remember which door to go through, just look for the glowing symbols. The door going forward will have glowing symbols and you can see through the door, like the door below on the left.
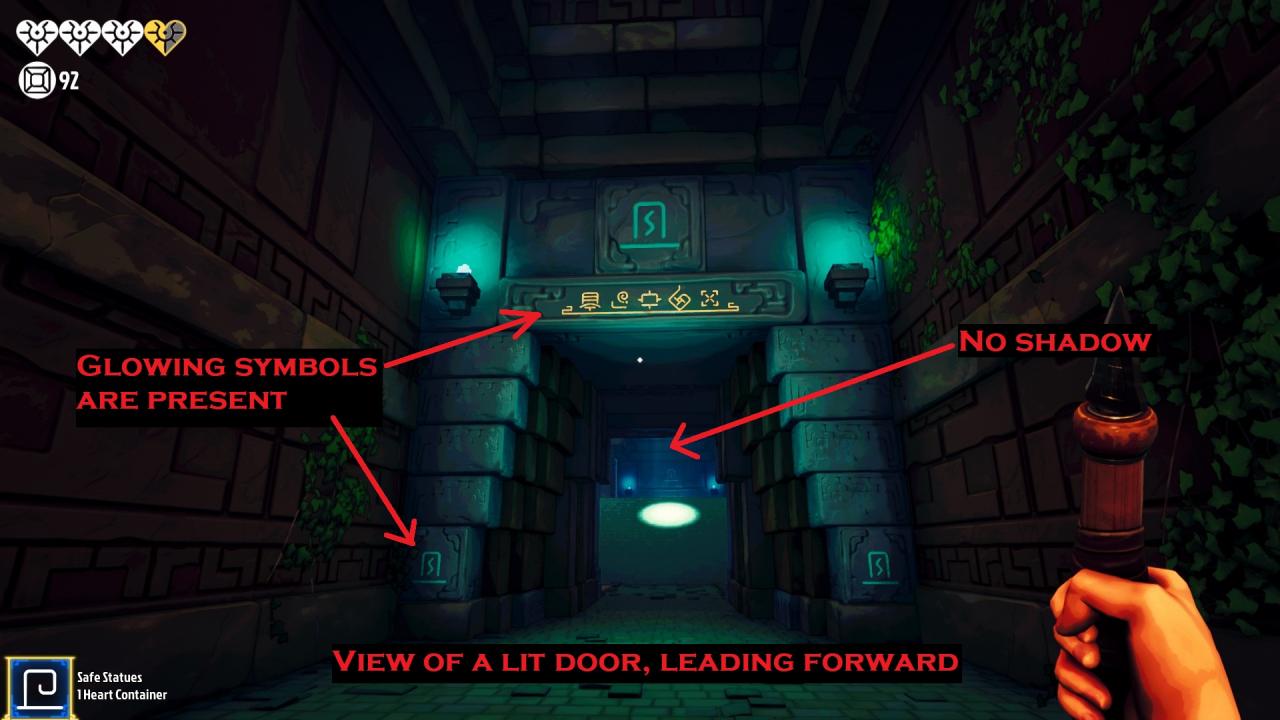
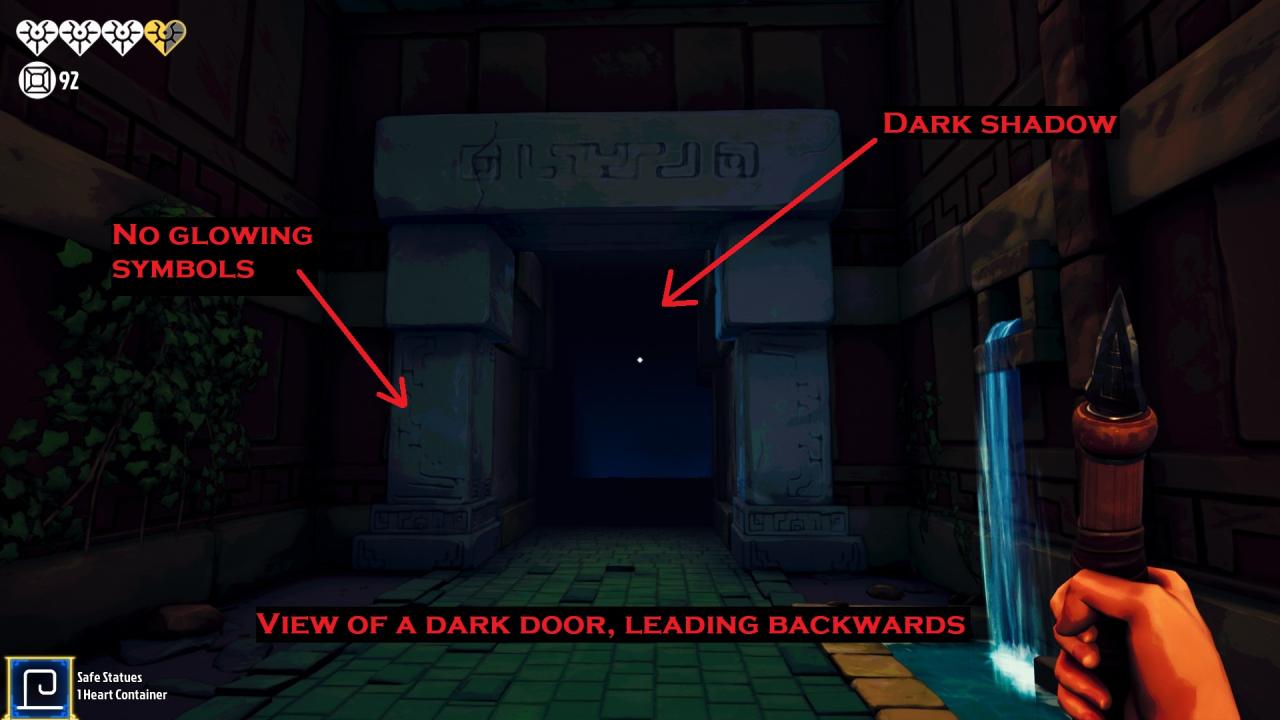 Whereas the door going backwards will have no glowing symbols, and the door will have a dark shadow blocking your vision until you get closer, like the door above on the right.
You don’t need to be able to see the floor to know when to press the crouch button to roll and avoid fall damage. Just look for the white icon at the bottom of the screen. When it appears you can press crouch to roll safely (hard to get a good screenshot while falling).
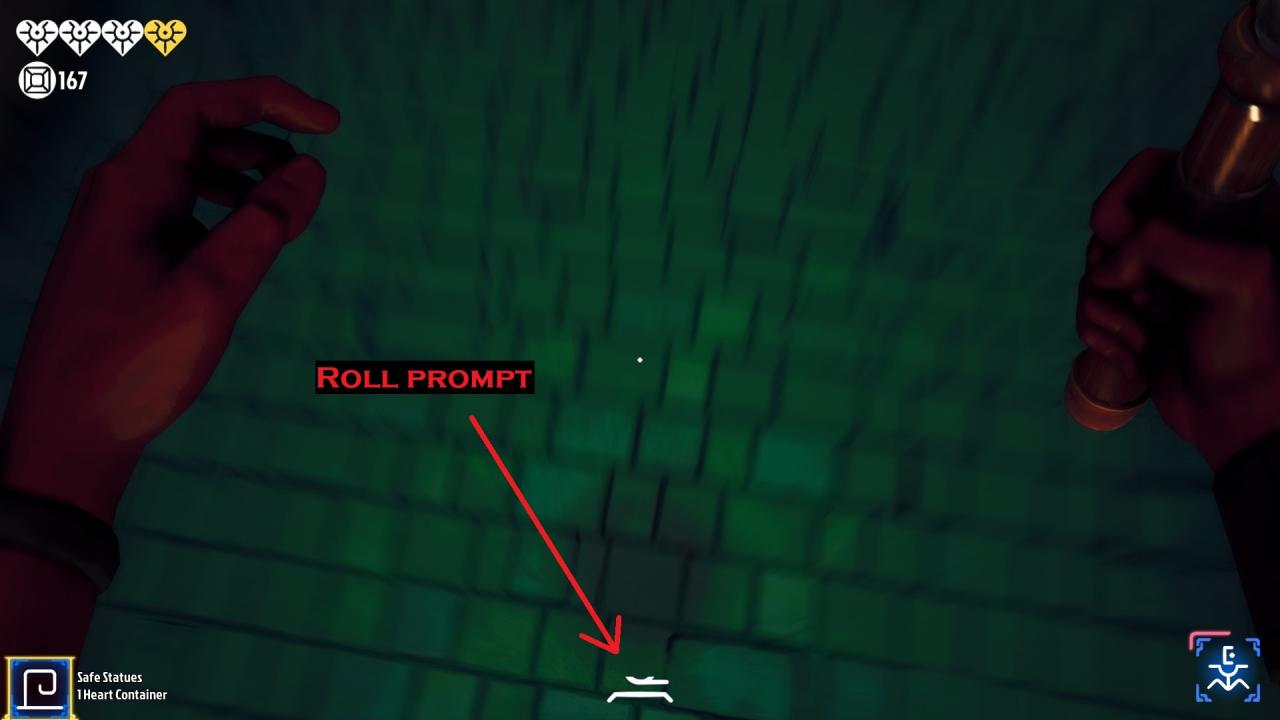 Even with the Ironfoot whip passive which prevents fall damage, it is still better to roll because its faster. Taking fall damage (even if the damage is prevented) slows your character for a moment.
Not all fall damage is the same. Falling a short distance can deal half a heart, while falling farther deals more damage.
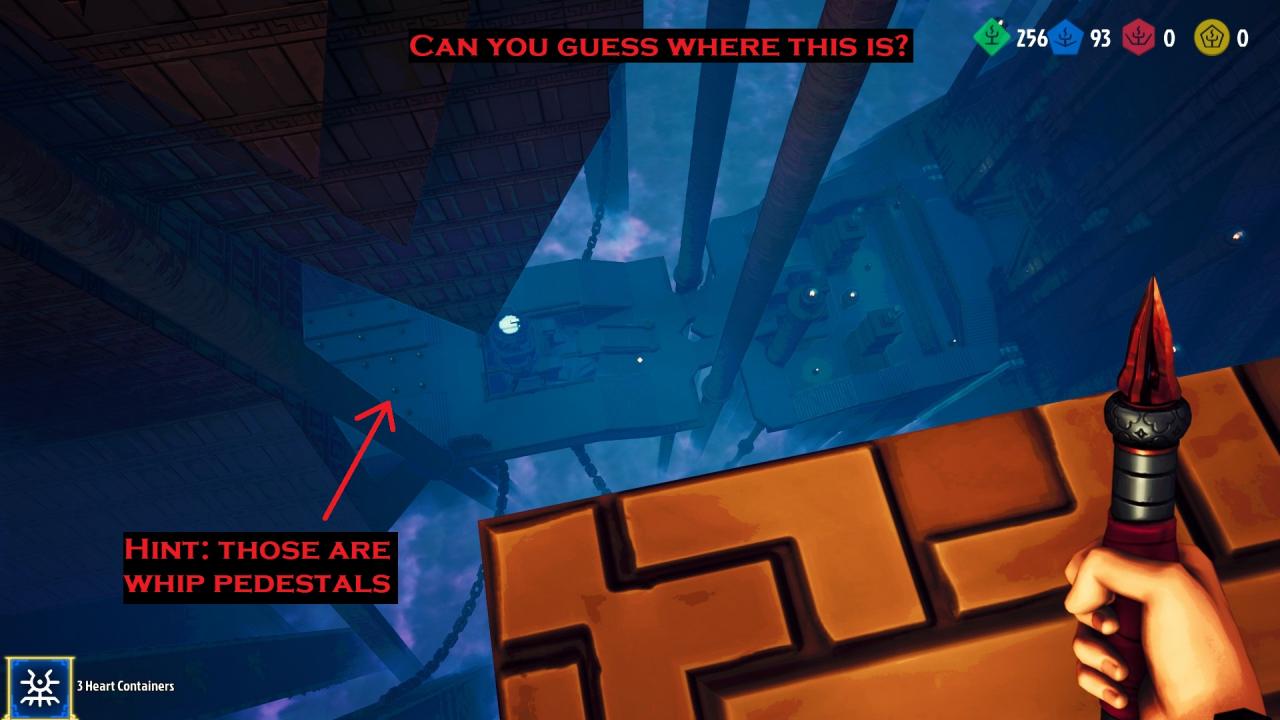
The Hub is a great place to practice without risking losing whips and with no pressure from guardians. Just be aware you suffer no fall damage in the hub, so don’t get too used to that. Also, there are lots of fun places to climb to in the hub, like this:
I recommend this pattern for lighting the 4 braziers, especially when facing the Devouring Rage guardian. This minimizes late-game risk and travel time and maximizes DR travel time between braziers. (Note: you don’t necessarily need to go through the pendulums in the middle, this is just an example.)
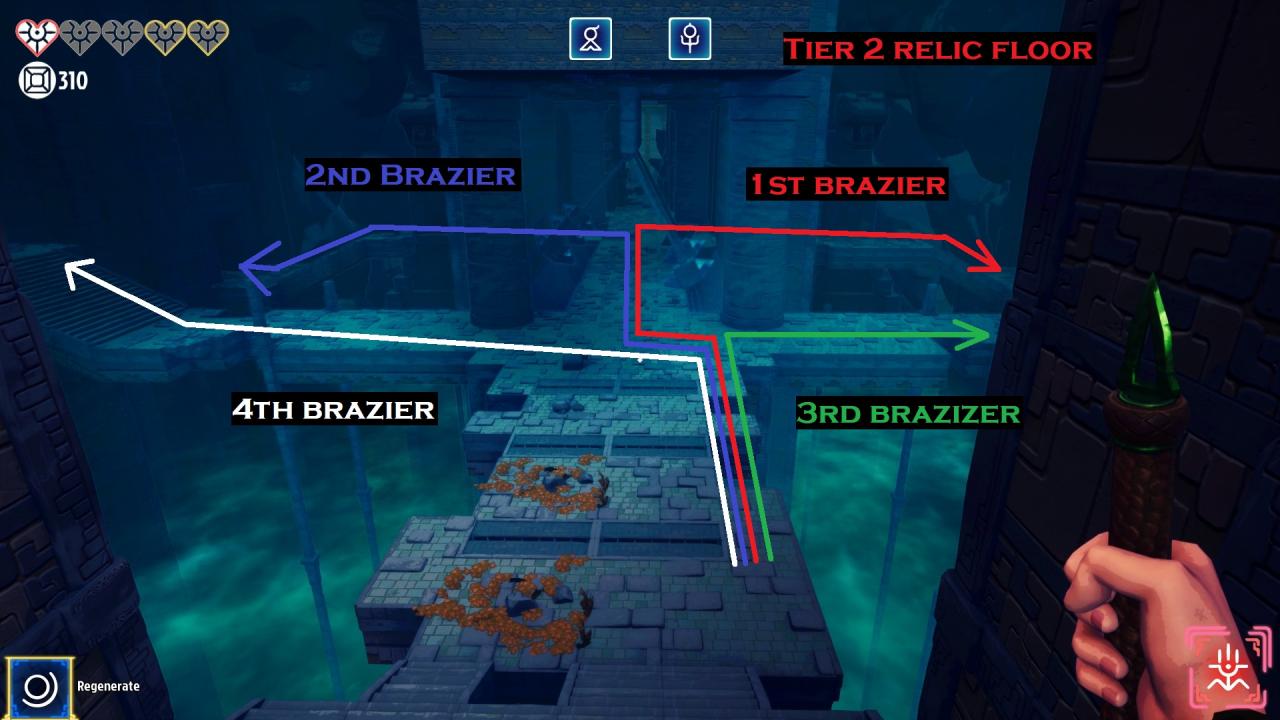
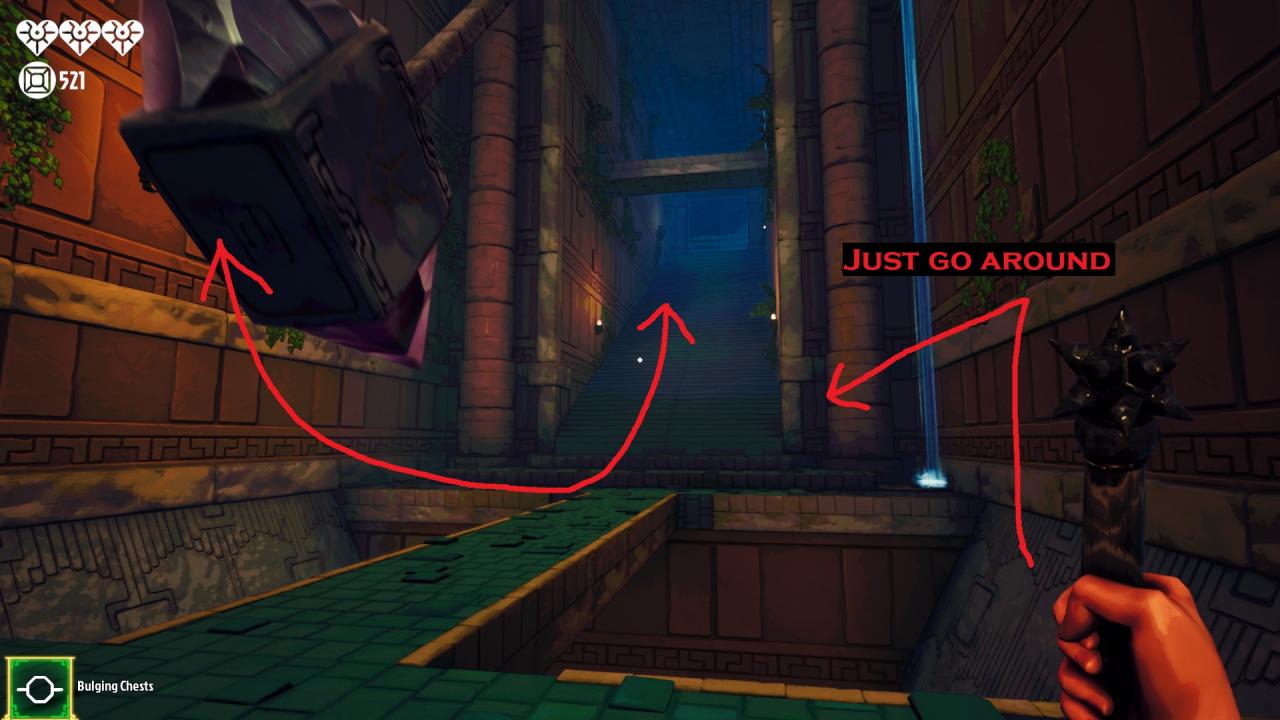
Just go to the sides of non-perpendicular pendulums!
Hidden Chests
Each type of room has their own sneaky chest locations, but these are the most common ones I see missed & unopened on my runs. If you’re having trouble finding chests, there is a tier 2 whip that reveals chests through walls. Its the only t2 whip I don’t have yet 🙁
In this room, most people just choose a side and go left or right, getting the chests in the corners. However, if you look closely behind the waterfall in the center there is usually a large chest that most people miss. (no picture yet)
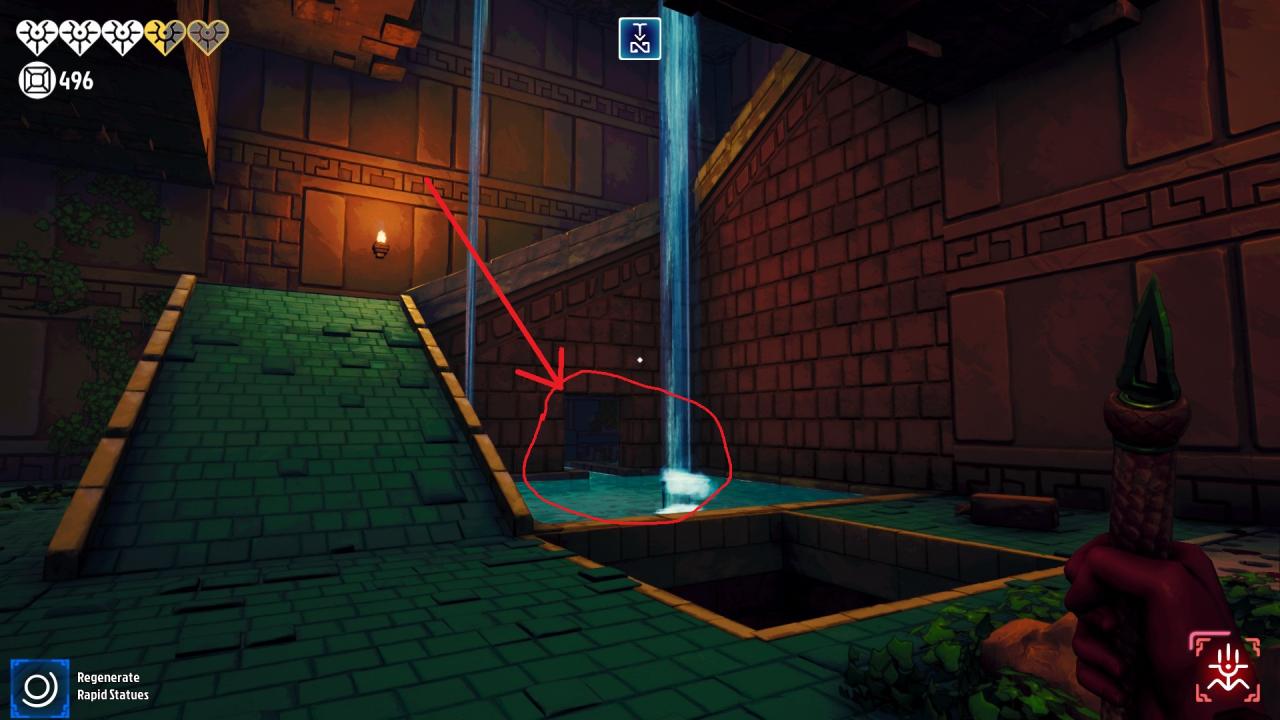
This one is kind of obvious, but I still see it missed a lot, especially when the path goes from upstairs to downstairs. Just cross the pool behind the waterfall to your right and there’s a chest over a short wall.
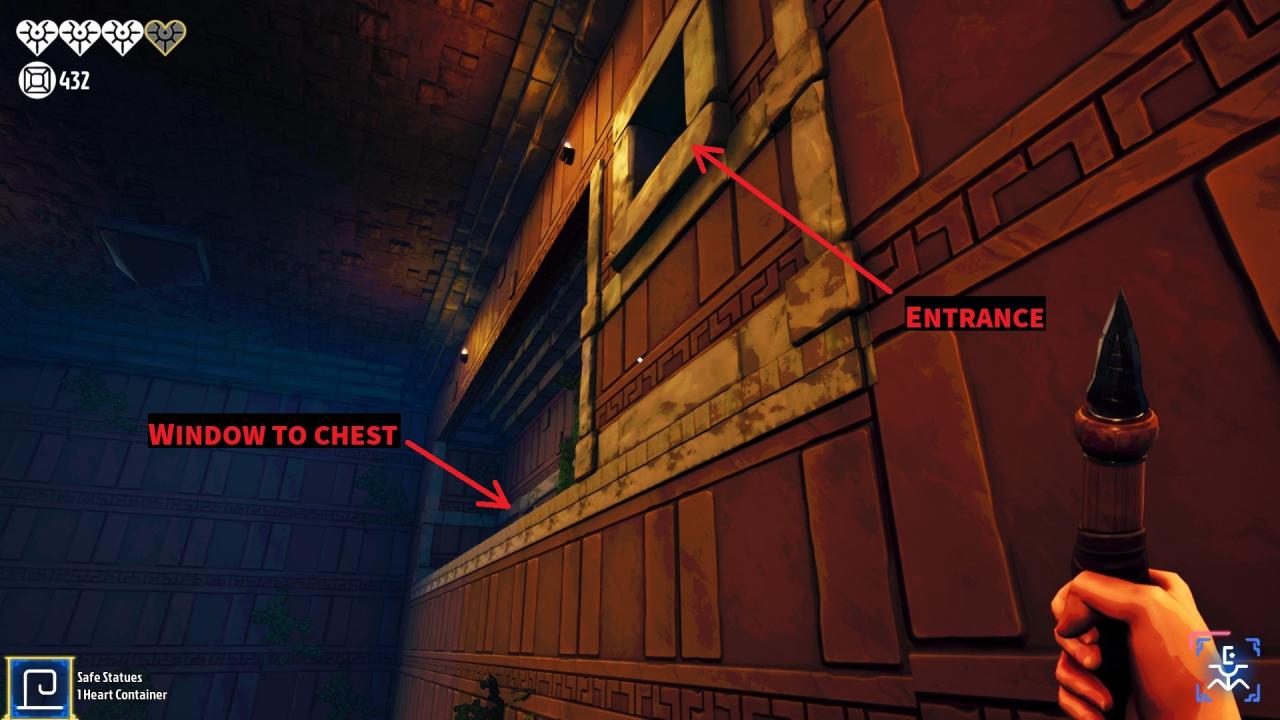
I call this the vent chest because there’s a little window that looks like a vent on one side where you can see through to the chest. You access the chest via a small, raised window, then have to run through some walls of pillars to get to the chest at the end. Alternatively, if someone else has already opened the chest, you can stand next to the vent to collect the coins from the outside, saving you the time of having to go inside.
The ceiling rooms that don’t have the chest on the main level, actually have 3 levels with 1 chest on each level. Don’t forget to go to the upper levels and get your loot!
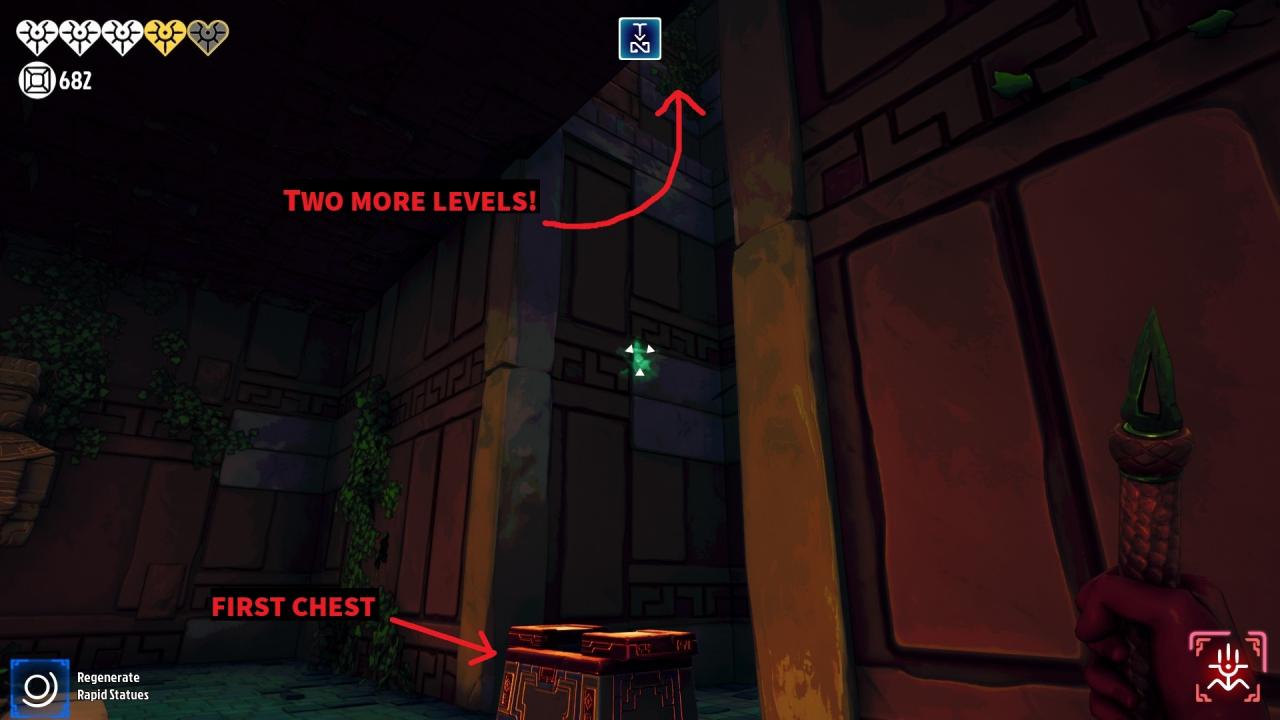
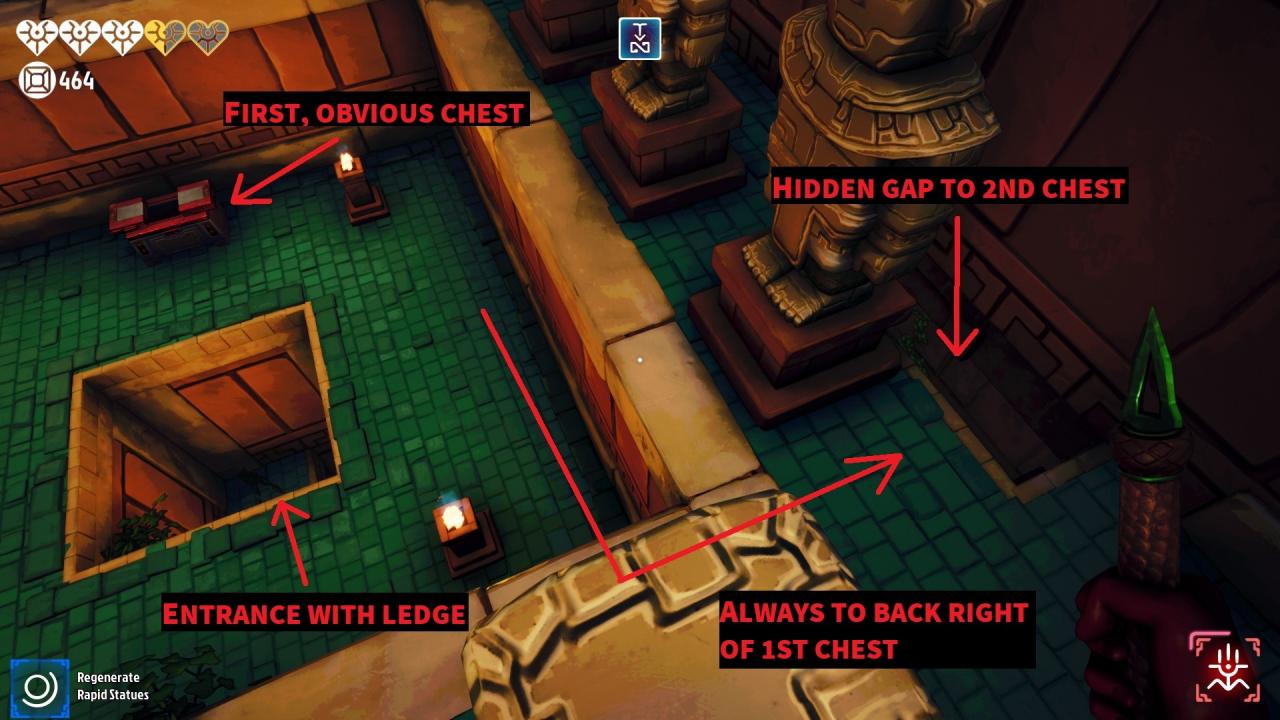
Some ceiling rooms have a ledge half-way up on the way to the room. Every such room has TWO chests. It has one obvious chest and a second one is hidden through a gap on the second level. The gap is always to the back right of the chamber as you face the first chest.
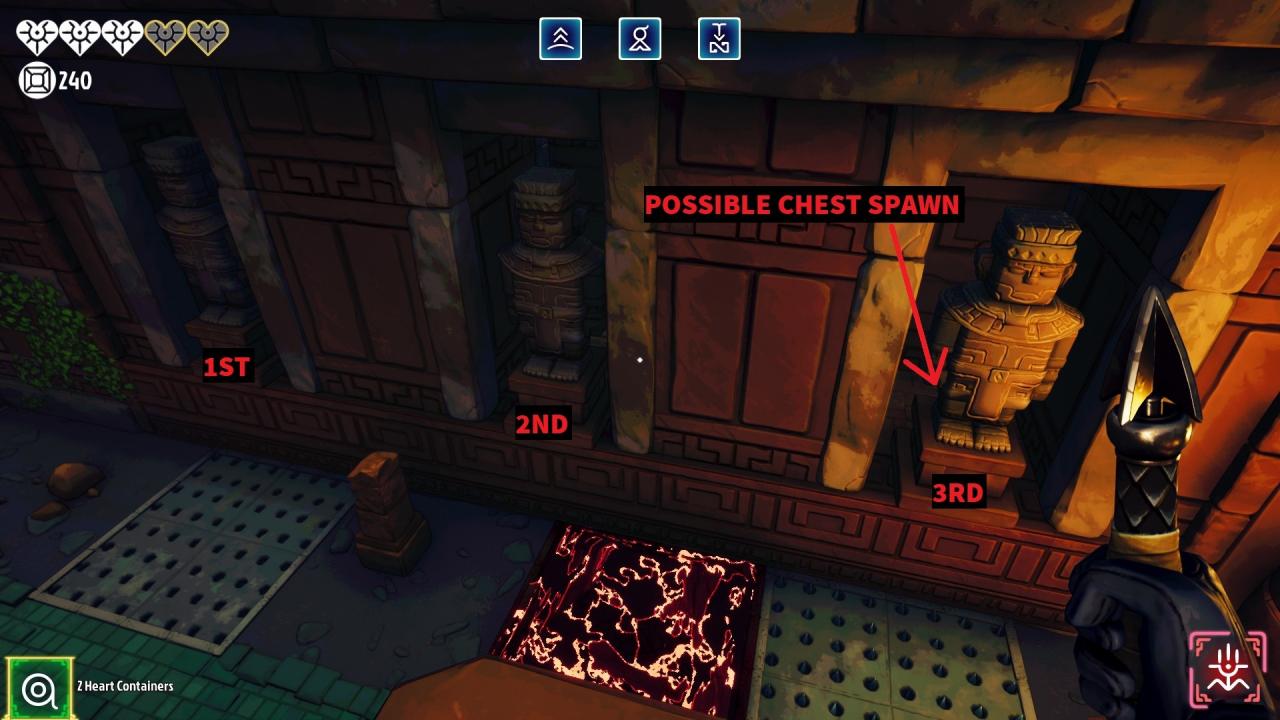
Sometimes the third statue has a gap behind it which leads to a chest.
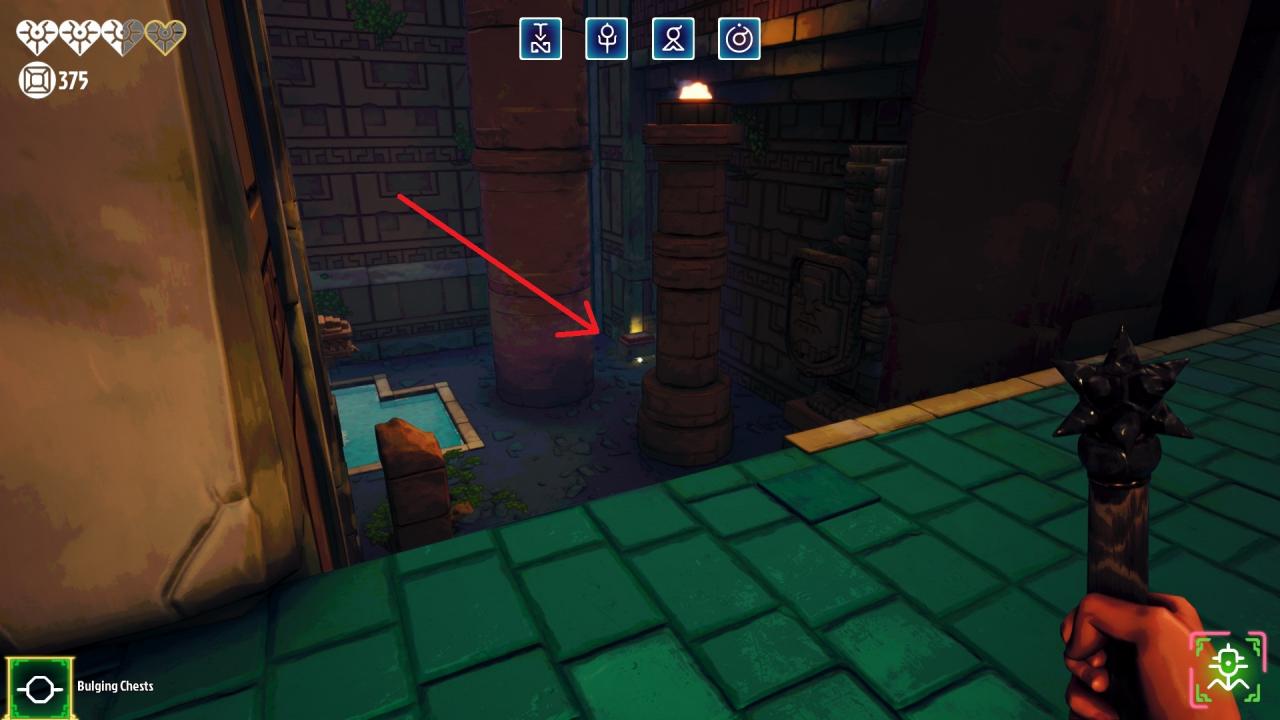
The chests aren’t really hidden, but you might not think to look for them since they’re out of the way. There can be up to 4 chests right in the main chamber of the tier 1 relic floor, so make sure to check the corners.
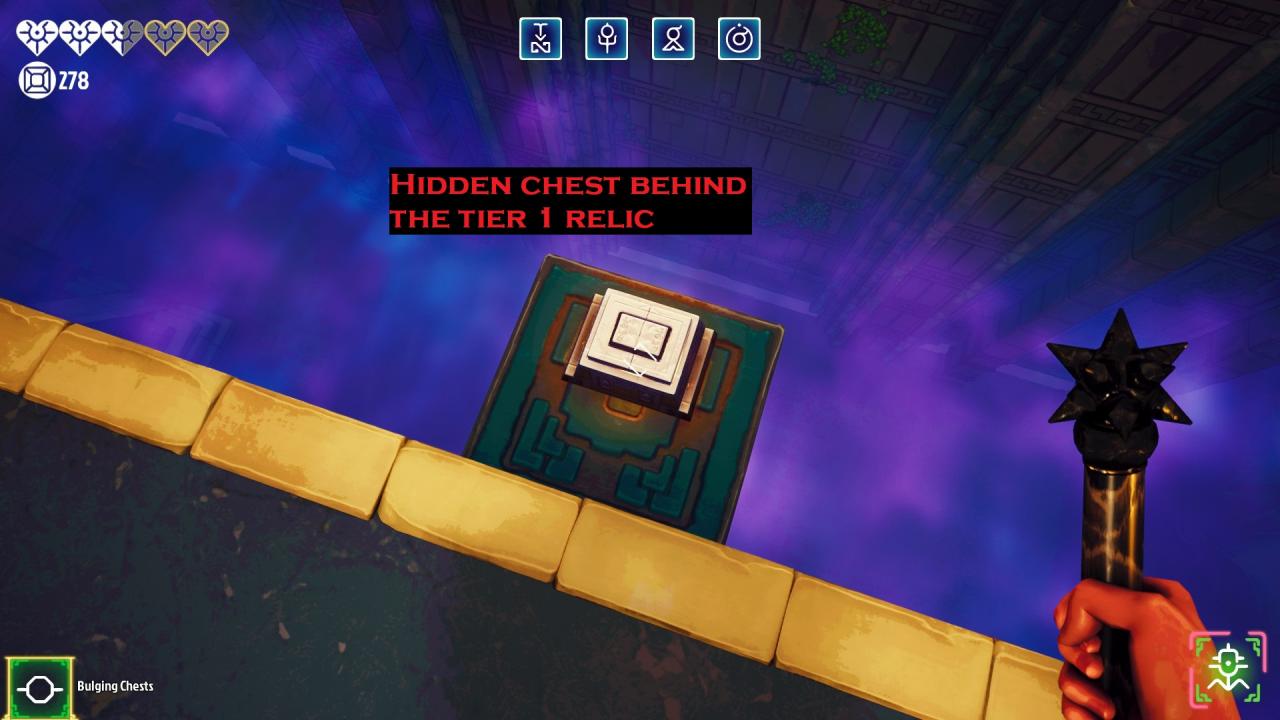
Don’t grab the tier 1 relic too hastily, make sure to get the chest behind the relic first! It looks like this:
 Also, while standing on the tier 1 relic platform, you can see a chest under the platform you came in on, in a cubby hole. You’ve probably found that by now but if you haven’t now you know!
Some people are so focused on avoiding the dart statues they miss this chest which is always in the corner of the second level of this room.
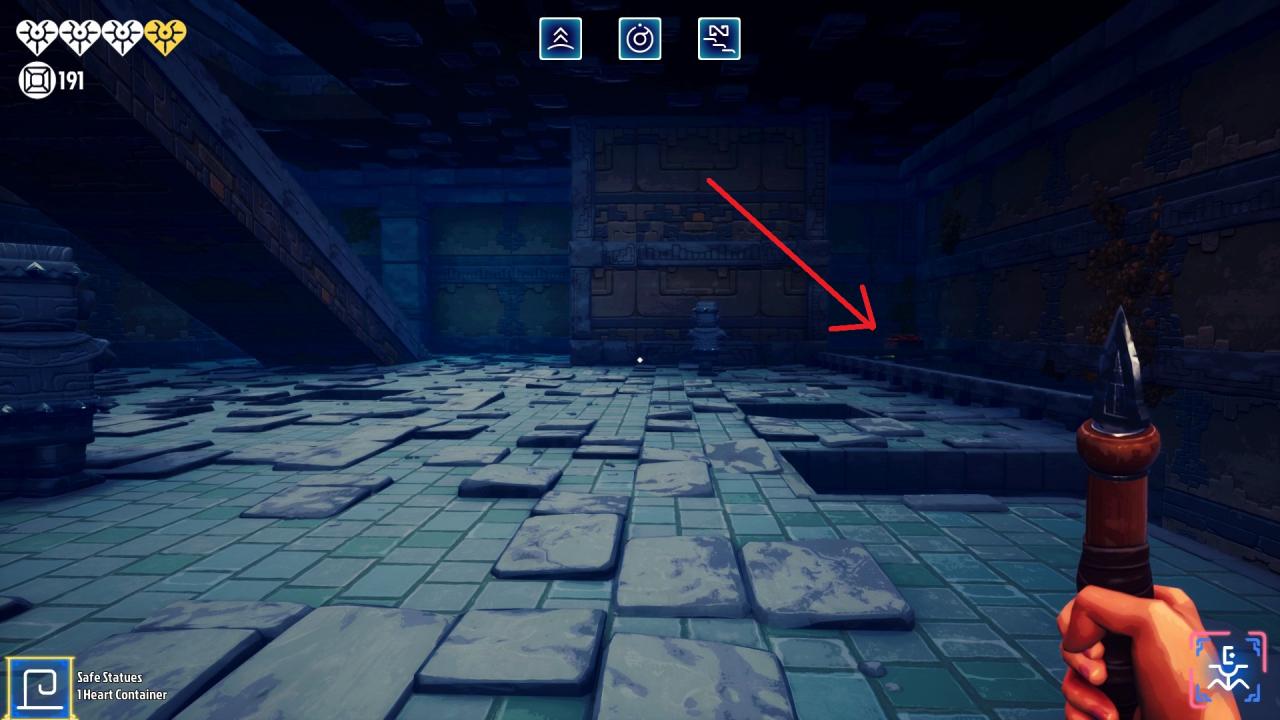
Everyone knows about the chest on top of the ramp, but did you know there’s a chest behind the ramp?
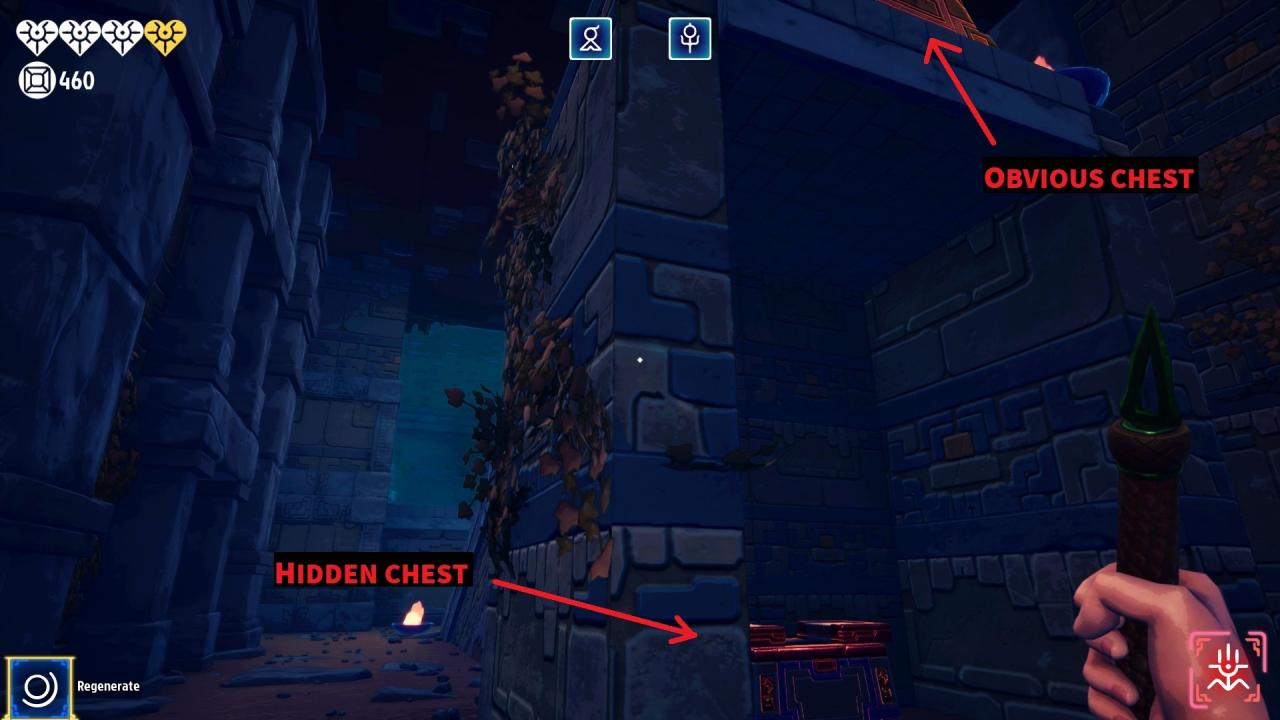
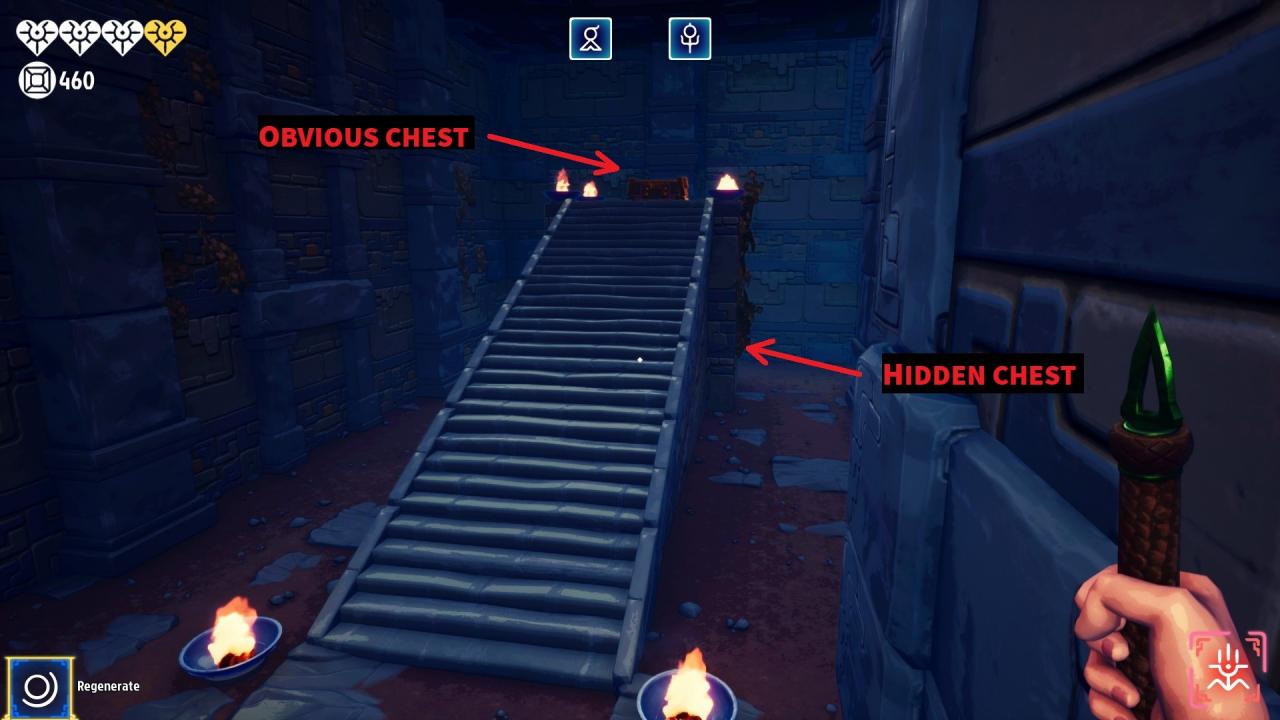
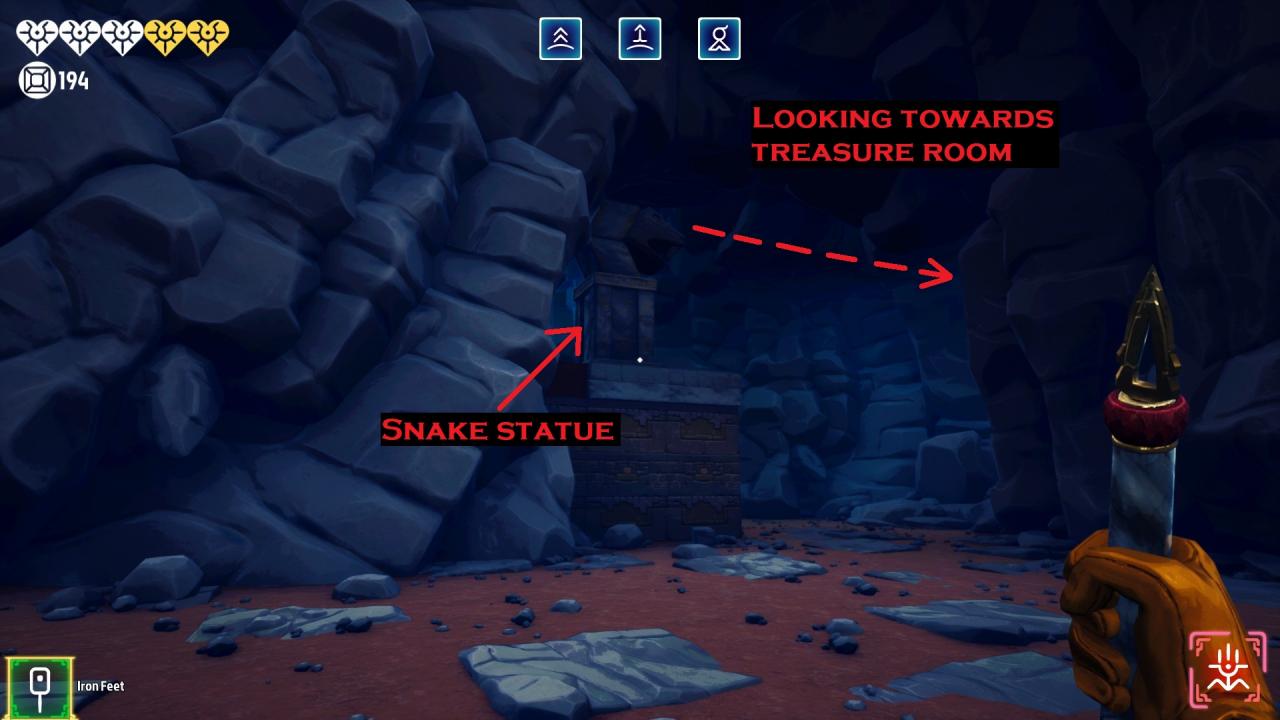
One of the cavern rooms in tier 2 has a snake statue looking towards a room with a vault, which is easy to miss if you’re in a hurry. Always check where the snake is looking, it looks like this:
In the tier 2 relic room, on the far back rock wall behind the relic to the upper left there is a hidden, barely-visible ledge with two chests. Here’s a view of the ledge from the top of the relic tower:
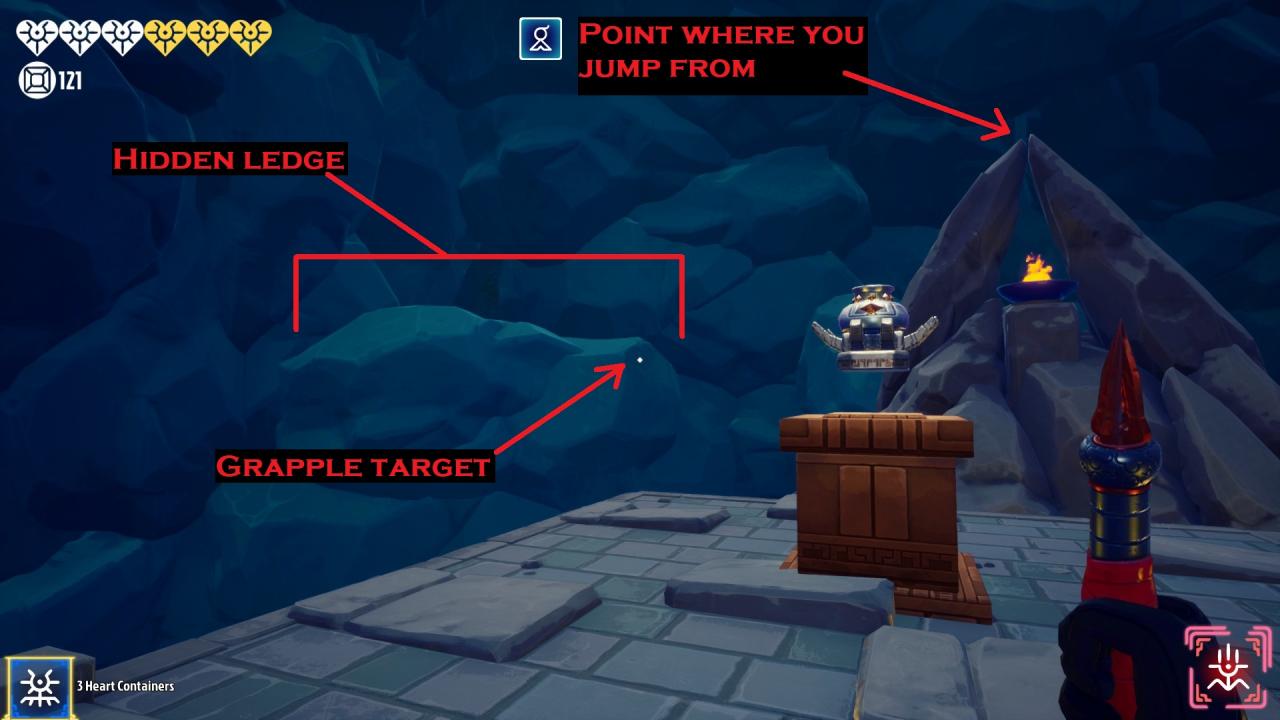 I’m fairly certain you can’t reach this location without the Wings blessing from a shrine, and its easier if you also have long whip or double-jump. You need to stand on top of the rock point behind the tier 2 relic. While standing there and looking towards the hidden ledge, you’ll be able to see the glow of the chests. Your view will look like this:
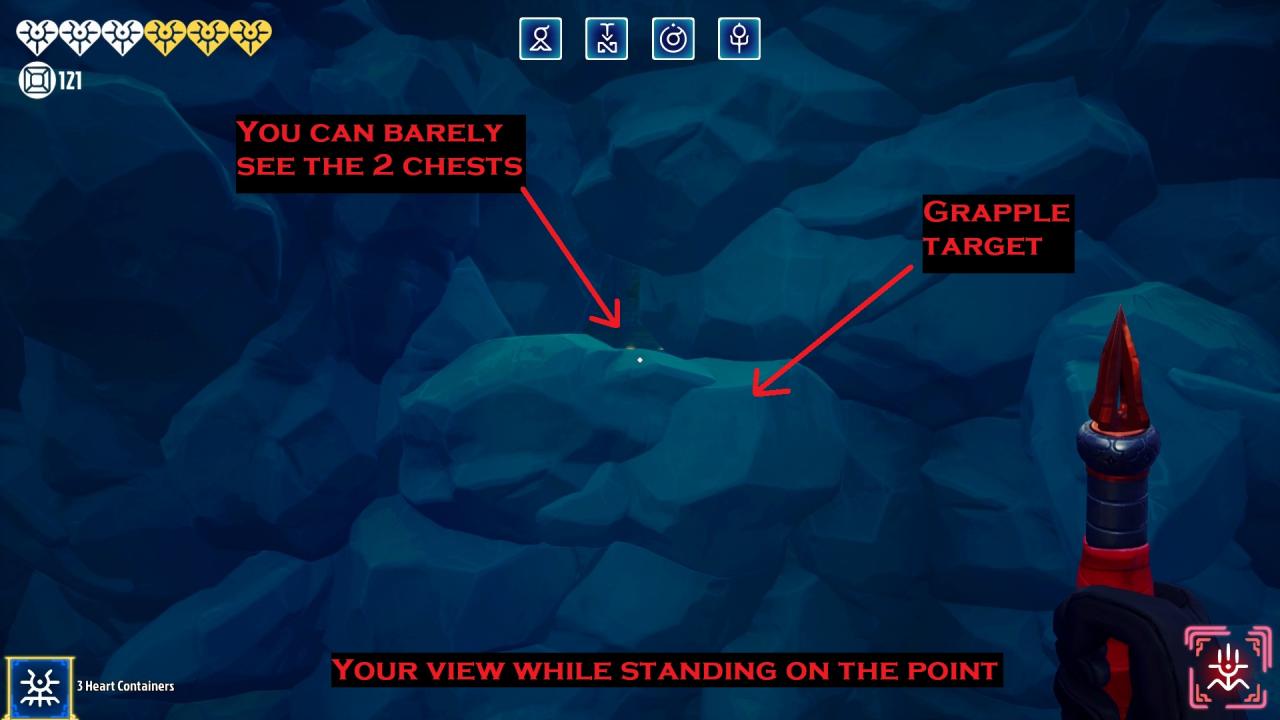 You need to do a mini-run and jump to get some forward momentum, and start gliding with the Wings perk as soon as possible, when you get close enough you can just barely hit the grapple point indicated in the pictures. If you fail to hit the grapple, you can turn around and glide down to a spot on the rocks at the base of the relic tower, where you can eventually grapple your way back up to saftey. If worse comes to worse and you fall in the pit, you’ll take 1 heart of damage and respawn at the entrance to the relic room, so as long as you have 1.5 hearts left, its always worth it to try and jump to the hidden ledge. Here’s your view from the ledge looking back towards the relic:
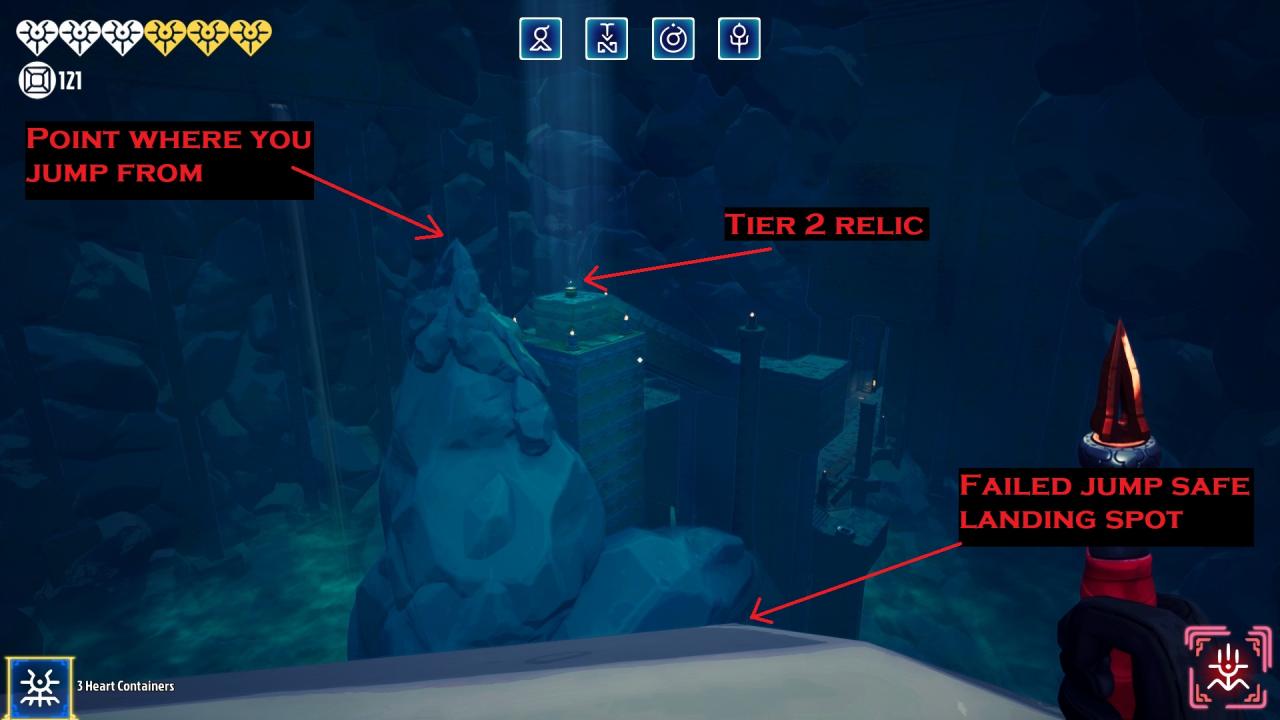 And here’s the loot on the ledge once you get there:
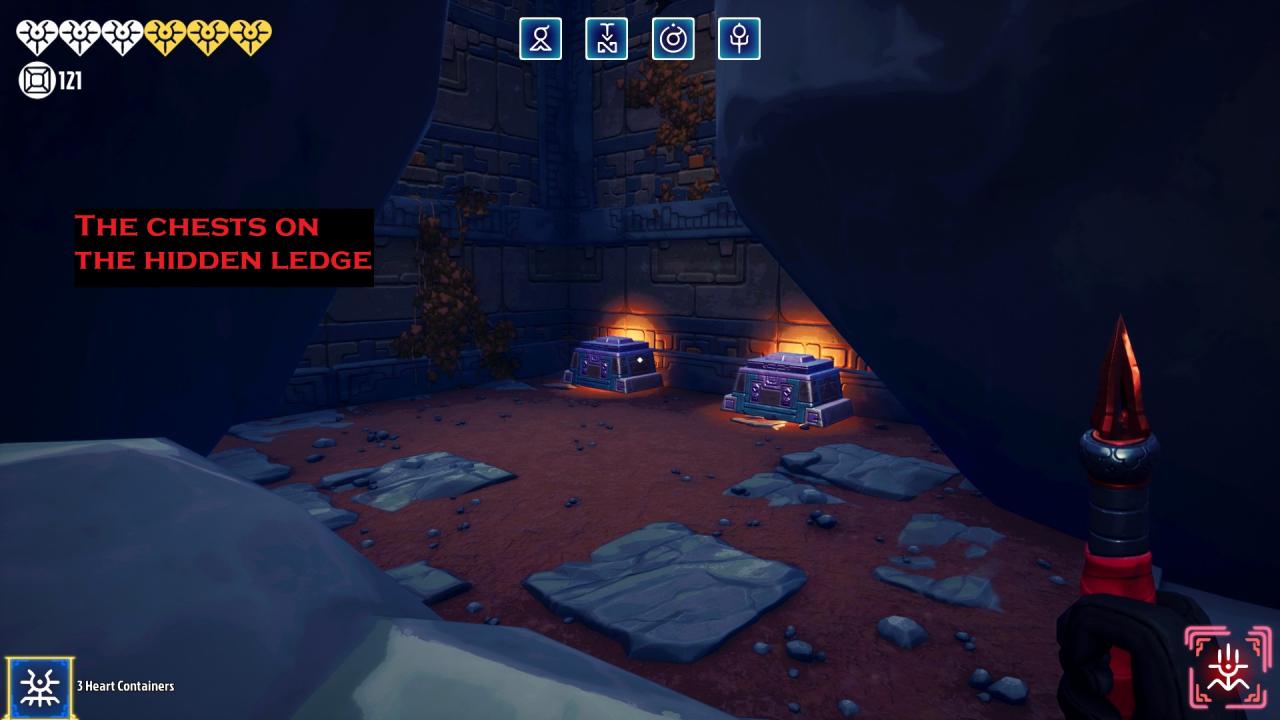 I’ll be adding more spots, especially tier 3 spots, once I’m more familiar with all the tier 3 locations.
Fun Facts
Here are some random fun facts for you.
- The colored, glowing symbols on doorways on the floor also match the color of the guardian. The below door is blue, for the Eye of Agony.
 Note that on the relic floor the symbols on the door are colored to match the color of the brazier the door leads to and they don’t match the guardian color.
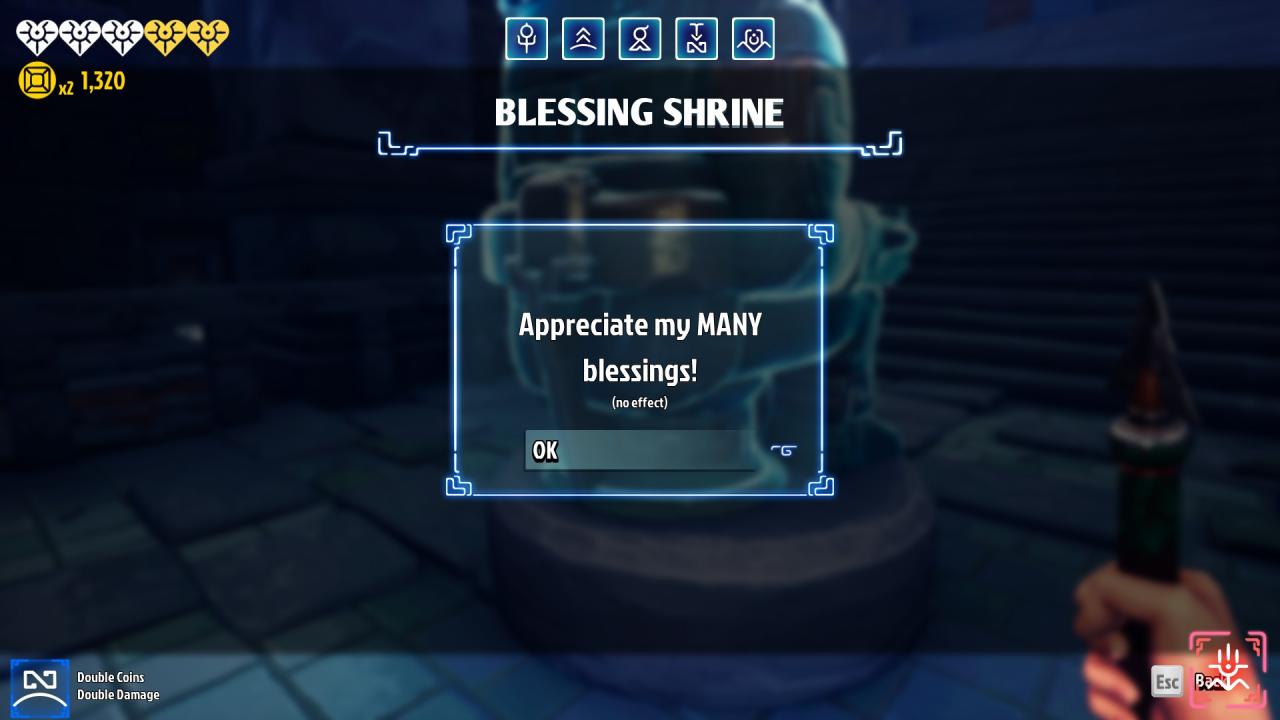
 - Sometimes a shrine will only offer you one blessing, or it won’t offer you any blessings and will tell you to enjoy its blessings. I’m not sure why it does this.
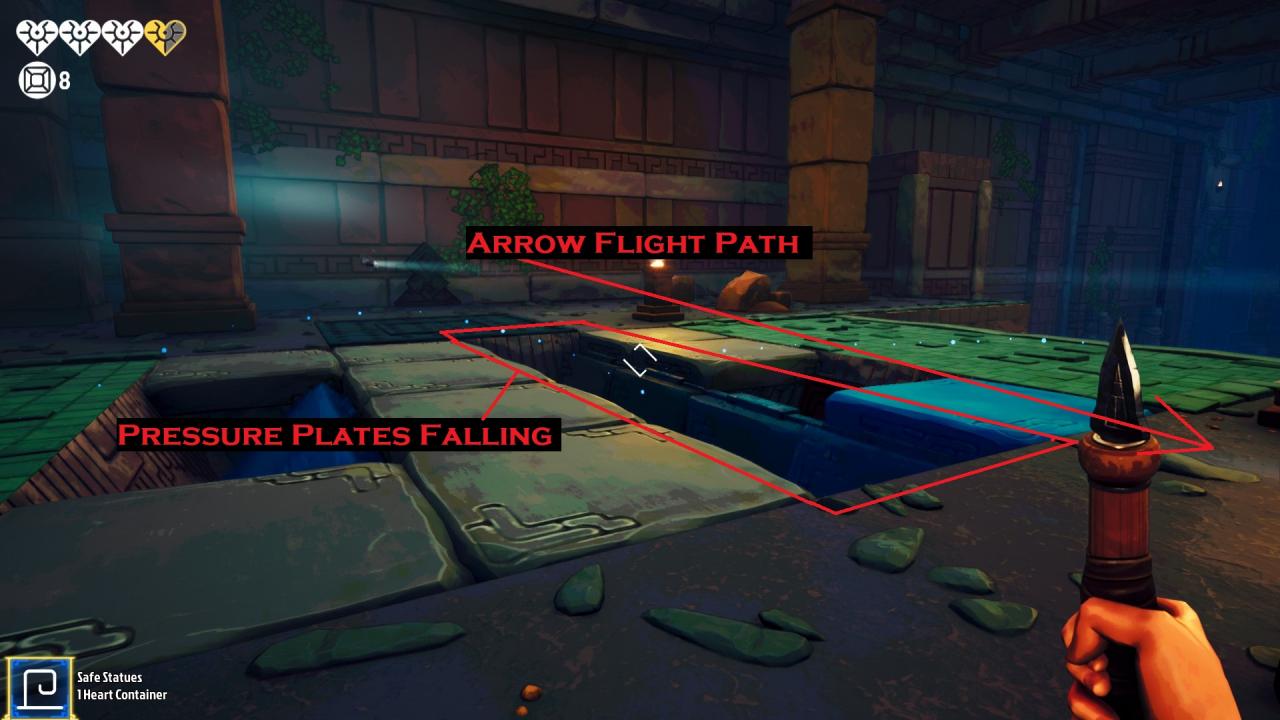
- Arrows (like those from wall-mounted traps) will cause pressure plates to drop, pictured below.
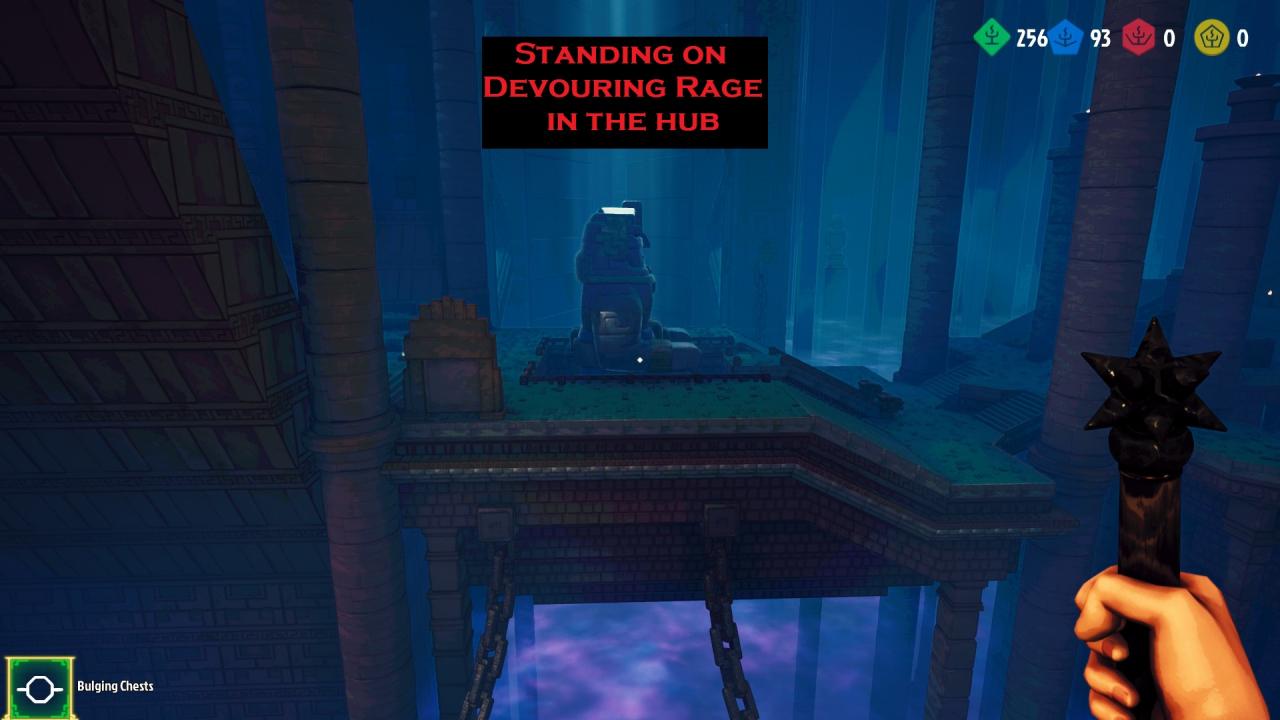
- The altar in the hub room is surrounded by statues of the 3 guardians. Here I’m standing on top of the statue of the Devouring Rage looking back at the altar:
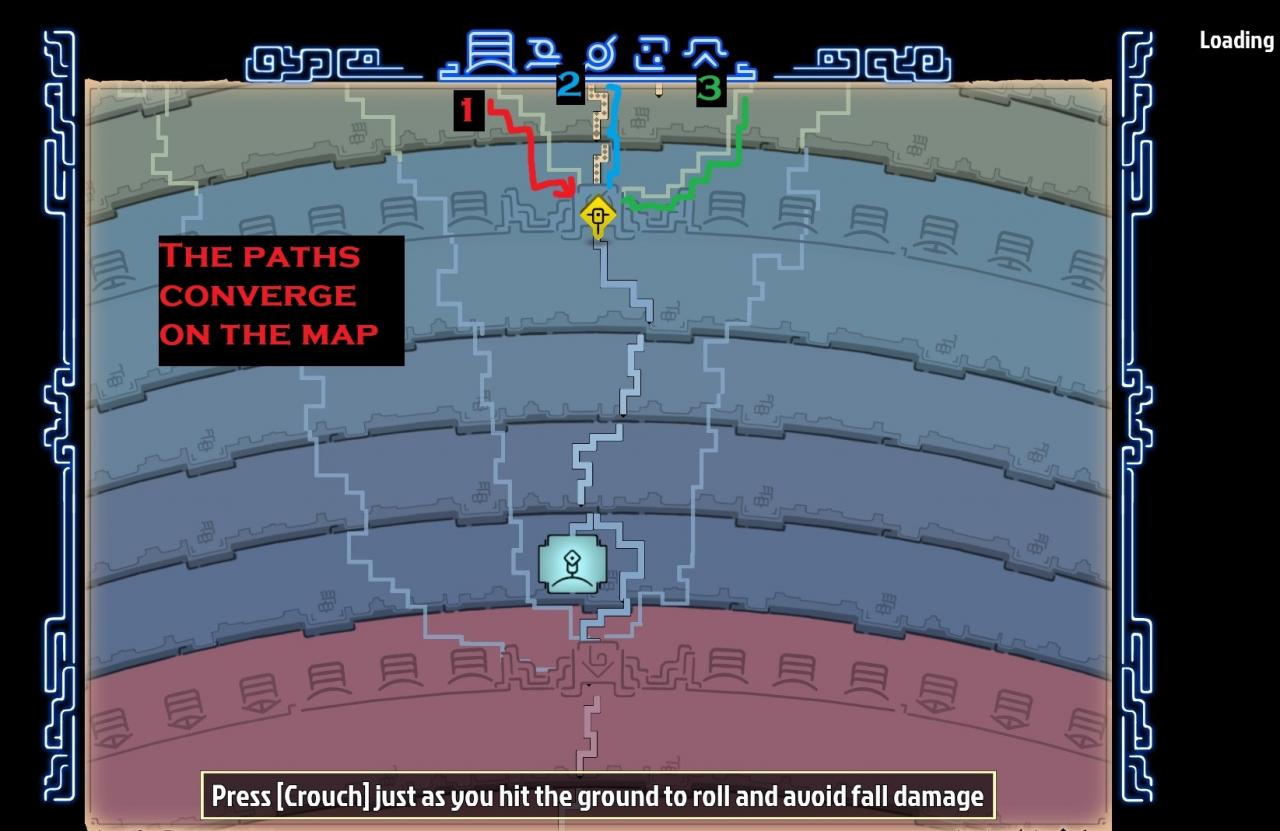
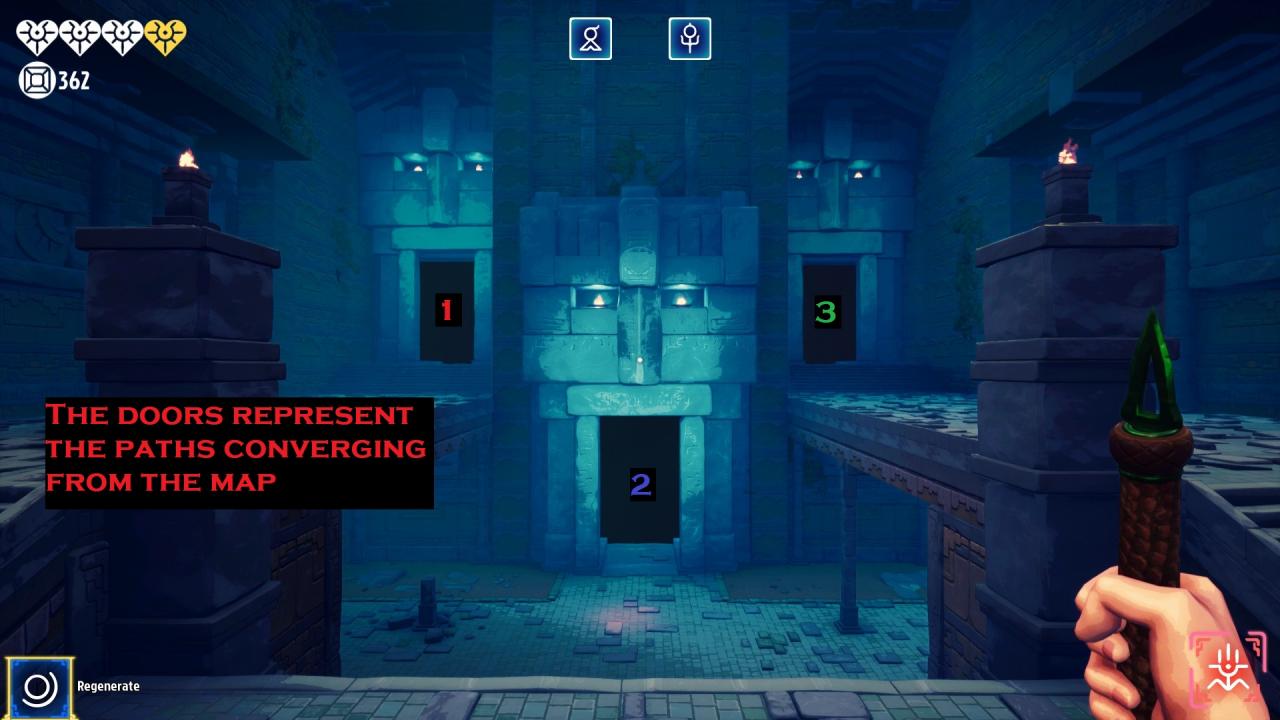
- The paths converging on the loading screen map can be seen on the first floor of each temple:
Thanks to Rossers for his great guide, all credit to his effort. you can also read the original guide from Steam Community. enjoy the game.
Related Posts:
- Phantom Abyss: All Whips Guide
- Phantom Abyss: Blessings Tier List
- Phantom Abyss: How to Navigate the Abyss (Tips & Tricks)
- Phantom Abyss: Devouring Rage Tips

