Guide to the spiritual successor of Barkley : Shut up and Jam, Gaiden
Work in progress – game’s only been out for 2 days xd
The Basics – What am I looking at?
 This is the fearless protagonist, Peglin.
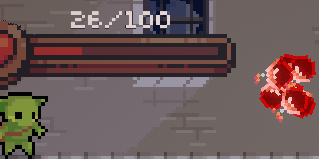
 This is a Crit Peg
Hitting it will make your ball deal 

Crit Pegs will move to different positions every turn, but there will always be the same number of them.
 This is the Refresh Peg
Hitting it will refresh all pegs on the screen, and convert a random peg on the board into a new Refresh Peg. Just like Crit Pegs, the number of Refresh Pegs on the screen should never change.
 This is a Bomb
Hitting it once will light the fuse, and hitting it a second time will detonate the bomb, dealing 50 damage to all enemies currently on the screen. This damage will happen BEFORE your orb is fired down the line.
Detonating a bomb will also rapidly launch your ball away from the detonation.
Typically, bombs will be permanently removed once detonated and there’s no way to get more of them, however certain Orbs and Relics can change this.
 This is a Red Bomb
Hitting it once will light the fuse, and hitting it a second time will detonate the bomb.
Red Bombs damage you for 4 health, and this damage is applied before orbs are thrown, just like normal Bombs.
They’ll only be encountered during Area 3 unless you have Sapper Sack.
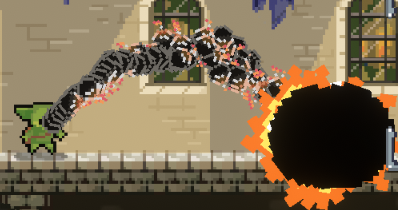
The Basics – Gameplay Intro
The first step to doing this is understanding how to deal damage to enemies effectively.
This here is what a typical orb will look like, with the
As explained above, the ball will deal
For balls like Daggorb, it’s important to recognize that you won’t be able to hit a
This comes into play even more for some unique orbs like the Memorb, Echorb, Doctorb, EGG, etc – discarding is something you should be doing pretty often.
Frequently, you’ll be offered the chance to upgrade one of your Orbs, either through post-combat rewards or through a random event. Orbs can be upgraded to level 3, and in some cases change how they’re used fairly drastically as they’re levelled up. In the Orbs section, this is explained in some more detail.
When you’re aiming, you can also use the mouse wheel for precision control – this does not work if your mouse is not 100% stable while scrolling.
Orbs – Upgrades & Uses
 Stone
StoneLevel 1 :
2 4
Level 2 :
Level 3 :
Stone is a slightly heavy orb that is incredibly consistent, but not in a good way.
There is always better options to add to your satchel, unless you’re doing a Orbelisk run.
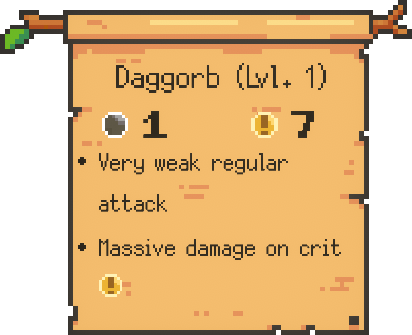
 Daggorb
Level 1 :
Level 2 :
Level 3 :
You start the game with one daggorb, and picking up more is never a bad thing. Landing critical hits is a cakewalk most of the time, and you can always discard it when it’s not viable.
 Orbsium
Level 1 :
Dense, Triggers each hit peg 2 times, can target any enemy on the screen
Level 2 :
Denser, Triggers each hit peg 3 times, can target any enemy on the screen
Level 3 :
Densest, Triggers each hit peg 4 times, can target any enemy on the screen
Orbsium is a heavy orb that gets heavier every upgrade, so it won’t travel as far and won’t bounce as high. Despite this, it’s still very useful.
Orbsium is capable of detonating bombs in one hit at any level, since it triggers pegs multiple times.
Orbsium is also useful with the Eternal SufferRing or Swolorb, since it can hit a higher-damage peg multiple times. Additionally, if you get any damage modifiers like the Power Glove, Orbsium can become a powerhouse of an orb that’s useful for taking out high priority threats.
 Infernorb
Level 1 :
Light, Detonates Bombs in one hit, Deals 2 damage to self when fired
Level 2 :
Light, Detonates Bombs in one hit, Deals 2 damage to self when fired
Infernorb does respectable damage, is good for clearing bombs, and holds momentum well with its Light modifier. The 2 self-damage on fire is barely even a downside, this orb is basically Stone if it were good.
![]() EGG
EGG
Level 1 :
Heals instead of dealing damage
Shatters upon hitting a peg
Cannot be upgraded
EGG is an incredibly unique orb, which in the right scenario can be devestating to use.
It’s only found during the “Shake the Tree” event, and you won’t see this orb very often at all.
The trick to using EGG is that it only shatters on SOLID surfaces – firing it into slime can let you net an insane amount of health AND you get to keep the EGG if it doesn’t hit a solid peg, wall, or bouncer on its way off the screen. Mostly useful for getting some clutch HP during the Slime boss fight.
![]() Orbelisk
Orbelisk
Level 1:
Attacks all enemies in a column.
Gets +
Level 2:
Attacks all enemies in a column.
Gets +
Gets +
Level 3:
Attacks all enemies in a column.
Gets +
Gets +
Gets +
Orbelisk can be found randomly, or during the Orbelisk event. It can be the highest damage orb in the game, and incredibly consistent if you have a few level 3 Orbelisks in your satchel. Unfortunately, it means you need to bog down your deck with a ton of Stones and Bouldorbs to do very well, so if you don’t have bonus discards or persists then this orb’s bonuses will be offset by the bad deck it requires to operate.
 Darkness Eterball
Level 1:
Applies Blind 2 on hit (35% chance to miss for 2 turns)
Level 2:
Applies Blind 3 on hit (35% chance to miss for 3 turns)
Level 3:
Applies Blind 4 on hit (35% chance to miss for 4 turns)
Like most games, Peglin gives you a 100% chance of not taking damage from an enemy that you’ve killed – this is typically better than running Darkness Eterball. If you are seriously having a rough time keeping your HP up, running some healing orbs is infinitely more consistent and useful.
Orbs, Continued
 Omegorb
Level 1:
5 10Downgrades all pegs hit (-1 damage)
Overflow (Excess damage passes to next enemy)
![]() Bob-orb
Bob-orb
Level 1:
Every 8th peg hit gets converted into a bomb
Level 2:
First peg hit gets converted into a bomb
Every 8th peg hit gets converted into a bomb
Level 3:
First peg hit gets converted into a bomb
Every 6th peg hit gets converted into a bomb
This is objectively the strongest ball in the game, hopefully that doesn’t change.
 Reorbanizer
Level 1 :
Shuffle Crit and Refresh every 5 pegs hit
Shuffle Crit and Refresh when this orb is discarded
Level 2 :
Shuffle Crit and Refresh every 4 pegs hit
Shuffle Crit and Refresh when this orb is discarded
Level 3 :
Shuffle Crit and Refresh every 3 pegs hit
Shuffle Crit and Refresh when this orb is discarded
 Bramball
Level 1 :
Applies Bramble 2 on hit
Brambles deal 6 damage per bramble level to passing enemies
Level 2 :
Applies Bramble 2 on hit
Brambles deal 8 damage per bramble level to passing enemies
Level 3 :
Applies Bramble 3 on hit
Brambles deal 8 damage per bramble level to passing enemies
 Icircle
Level 1 :
Regular attack pierces 1 enemy,
This orb pierces the first peg.
 Splatorb
Level 1 :
Applies rubber slime to every fifth peg hit. Rubber slime is durable and extra bouncy.
Level 2 :
Applies rubber slime to every fourth peg hit. Rubber slime is durable and extra bouncy.
Level 3 :
Applies rubber slime to every third peg hit. Rubber slime is durable and extra bouncy.
 Doctorb
Level 1 :
Heals you instead of dealing damage
Permanently removed from your satchel after it is used.
Level 2 :
Heals you instead of dealing damage
Removed from your satchel until end of combat after it is used.
Level 3 :
Heals you instead of dealing damage
Removed from your satchel until end of combat after it is used.
Persist 2
 Nosfuratorb
Level 1 :
Heals you and damages targeted enemy for 1x amount healed
Deals 15 damage to you when fired
Self-damage increases by 7 until end of combat
Level 2 :
Heals you and damages targeted enemy for 2x amount healed
Deals 15 damage to you when fired
Self-damage increases by 6 until end of combat
Level 1 :
Heals you and damages all enemies for 2x amount healed
Deals 15 damage to you when fired
Self-damage increases by 5 until end of combat
This orb will only damage enemies based on the health it recovers – it should not be doing a whole lot of damage most of the time.
If you fire this orb at low health, it CAN and WILL instakill you.
Rubborb
Level 1 :
Extra bouncy!
Level 2 :
Extra bouncy!
Level 3 :
Extra bouncy!
Bouldorb
Level 1 :
This orb is larger and heavier than other orbs
Attacks pierce all enemies
Only hits enemies on the ground
Level 2 :
This orb is larger and heavier than other orbs
Attacks pierce all enemies
Only hits enemies on the ground
Level 3 :
This orb is larger and heavier than other orbs
Attacks pierce all enemies
Only hits enemies on the ground
 Level 1 :
Passes through pegs while travelling upwards
Attacks all enemies
Level 1 :
Passes through pegs while travelling upwards
Attacks all enemies
Relics –
Attacks deal +10 damage to Slimes.
 Weaponized Envy
Whenever you heal lost health, deal 3x that much damage to the targeted enemy.
This only works if you’re recovering health, and won’t do damage for overhealing.
 Improved Catalyst
Makes bombs deal 10 more damage.
![]() Perfected Reactant
Perfected Reactant
Makes bombs deal 20 more damage.
 Bad Cheese
Upon reloading, deals 25 damage to all enemies.
 Monster Training
Deal 2x damage when your health is below 25%
 Suffer the Sling
Stones get +
Useful for Orbelisk builds.
 Well-Done Steak
Heal 4 health when reloading
 Super Boots
During navigation, heal 1 for every peg you hit – No damage from misnavigating
This will also heal you for hitting walls and bouncers if you have those relics.
 Ring of Reuse
All Orbs gain +1 Persist ( Persisted orbs can be used multiple times before moving onto the next orb)
This is either a blessing or a curse. Normally it’s very good, but if you have a lot of junk balls in your satchel then this can make it twice as difficult to hit your powerhouses.
 Sildenafil
Heavy Shaft Potion
Crit Pegs also refresh the board.
This is a little better than Light Shaft Potion, since Crit Pegs move around and don’t have the ability to get “stuck” in an unfavorable position.
 Cursed Mask
All of your attacks get +
Start each battle with Confusion 4 – Your aim rotates quickly, but you can still control when the ball is fired.
You can’t make any precision shots with this item, but it’s incredibly strong for Multiball builds.
 Gift that Keeps Giving
All pegs gain Durable.
Durable pegs can be hit 3 times.
 Sealed Conviction
All of your attacks get +
You can’t discard orbs.
 Enhanced Gunpowder
Bombs clear nearby pegs when detonated – Also allows bombs to hit nearby bombs
 Grabby Hand
Flying enemies are attacked horizontally, avoiding large blocking ground enemies and enabling Pierce and Overflow.
 Buckler
You are immune to damage while reloading.
 Decoy Orb
Enemies do not get an extra turn on your first reload.
 Sapper Sack
Bombs are converted to Red Bombs and deal double damage (300 total before other modifiers)
(Red bombs deal 150 base damage to enemies, and 4 damage to you)
 Glorious SufferRing
All attacks get –
 Want of Ultimate Power
All attacks deal 2x damage, you take 2 damage for every 12 pegs hit.
 Sand Arrow
Attacks apply Blind 1 to enemies (35% to miss for 1 round)
Very strong with Echorb or anything else that can hit all enemies at once.
 Ambidextrosity
You can discard an additional orb.
 Powder Collector
Every 30th peg gets converted into a bomb.
 Bombulet
Pegboards start with twice as many bombs.
 Alchemist’s Cookbook
Pegs can be refreshed into bombs 7% of the time, and all bombs deal 15 less damage.
 Refreshing Punch
Hitting the Refresh Peg clears nearby pegs
 Gardener’s Gloves
Your attacks deal +10 damage to plants
 Short Fuse
Bombs detonate in one hit
 Apple a Day
+15 Max HP
This also increases your total amount of healing when you recover 20%.
 Tactical Treat
The Refresh Peg will change its position every turn.
This is useful for keeping the Refresh Peg from getting stuck in a difficult position to hit.
![]() Power Glove
Power Glove
Adds +1/+1 to all orbs.
 Fresh Bandana
Adds +1 Refresh Peg to the board.
Tech & Tricks

On the Chest Navigation stage, detonating all 5 of the bombs unlocks a BONUS chest.
This only works once per area.
Thanks to Everlasting Dogstopper for his great guide, all credit to his effort. you can also read the original guide from Steam Community. enjoy the game.