A guide to get you up to speed on killing things fast. Warning, this build will get nerfed with 0.9. Enjoy it while you can.
Introduction
First off, is this even possible? Like, at all? Yes.
With that out the way: This guide will help you clear all current content, as of 0.8, without breaking a sweat. Keep in mind that no current content needs this much dps, but it certainly is fun and will make farming things so much faster. I will split this guide into some sections to explain how and why this works, and then 4 parts, each covering the main parts of the game and the gear you want and have available at each stage, so this guide is pretty suitable for all levels, not just max level. Read the setups, then skip to the stage of the game that you are currently in.
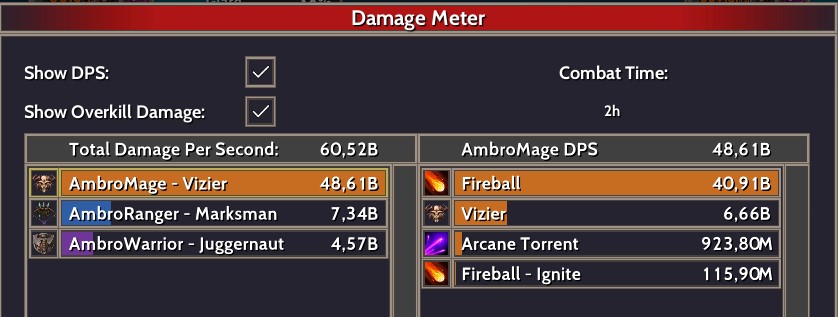
As indicated by the title, you will need to use a Mage character. And then you will be using the basic Fireball attack. It sounds simple, and it is, at first. You will also need a Warrior and the third team member can be whatever you like, as long as it doesn’t use Taunt. Keep in mind that the screenshots are showing the endgame setup and you may have to adjust a few things here and there until you reach the final stages. This build does not focus on having a lot of survivability, so speccing your warrior for a bit more tanking until late-game may be beneficial. Solo my Mage can do 25 billion, but with a warrior, as shown above, it’s close to 50. It cannot do that with a mage or ranger tank. It’s all about Synergy in this game and that’s why this setup works. So, let’s take a look, starting with the Mage and Warrior passives.
Character Passives
The warrior is slightly different as it will be your “tank” in this setup and this needs a little bit more survivability. Don’t worry, you will kill things fast enough to not risk dying constantly, it’s just a tiny bit safer.
When you get to level 100, you can spec into your Ascendancy passives, as well as your chosen Ascendancy class. For this guide, go with Vizier for the mage and Juggernaut for warrior. Barbarian has a very minor edge over Juggernaut in terms of total output for the team, but I prefer Juggernaut for the increased survivability. For mage, this is what I found best.
And again the warrior is slightly different.
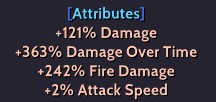
For mage, you should spec Vizier when reaching level 100, simply due to the fact that you get access to Echo. Echo will cause your Direct damage attacks to do 10% bonus damage to the other enemies (20% with relic bonus), not just your primary target. This is irrelevant. What is relevant is that Echo will cause your Area attacks, which Fireball will be, to do 100% damage to your primary target. Without Vizier relic it is a 50% chance, but the relic doubles it to 100%. This ability will in the end account for around 6 of the 40 billion dps, so it is definitely worth it! And far more than what you can get from going Archmage. Here’s why:
Shocking Echo will trigger Shock, which makes affected enemies take 10% more damage by default. This is buffed by Ailment Effect in the Ascendancy passives and Nature’s Blessing to 12%.
Echoing Destruction makes Echo an Execute ability, instantly killing enemies below 20% hp.
Mirror Image gives you a…… mirror image. Oddly enough. This enables Strength in Numbers to give you 15% more damage, until you dodge and lose the image, but as you have a tank, you shouldn’t be hit very often.
Power Generation does nothing by itself while it is building stacks. But it works wonderfully with Power Boost and Overwhelming Power. While you are building stacks, OP will make you do 10% more damage. When PG hits 90 stacks, you lose all stacks and do 30% more damage for 5 seconds. The first attack after that will be boosted by 50% damage with PB because you have no stacks. You just lost them.
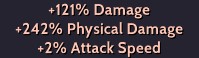
As for the warrior, you will want a lot of defensive options. The offensive picks are not really important, but you can do a couple of billion dps with the warrior, so they aren’t totally irrelevant. Building for HP helps with resistances through Endurance, armour through Hardened Armour and self-heals through Recoup. Adaptive Armour is really nice, as it gives you a scaling damage increase based off your armour, which was increased by your HP.
The choice of relic for a warrior isn’t as important as for the mage, so go with whatever you like. I prefer the Assassin at endgame.
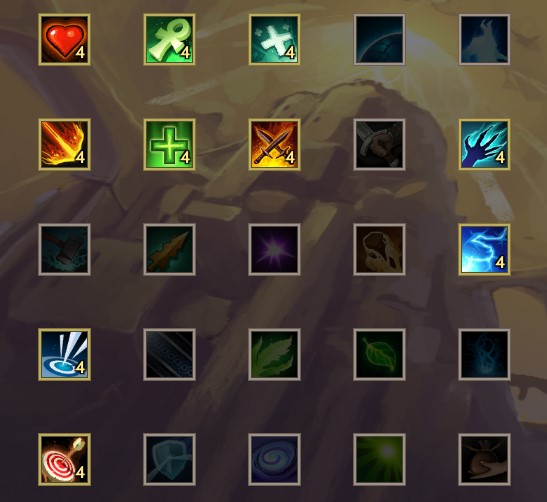
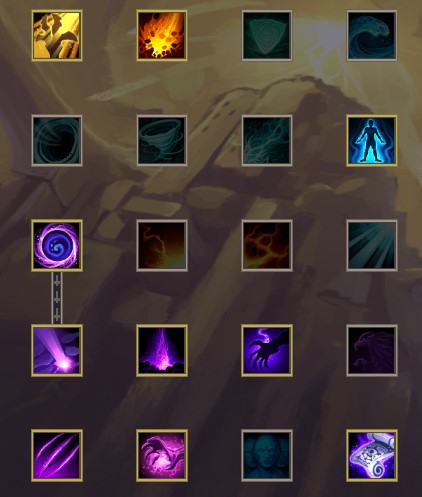
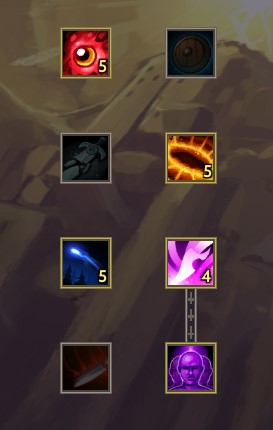
Mage skills
Your Offensive cooldown should be Arcane Torrent. Now, why use Arcane in a Fire setup? Certainly not for the damage it will do, let’s be clear on that! But Arcane Torrent, when hitting a target, will give you 4% damage for each hit. And with this spec, it can hit up to 5 times, granting you a potential 20% damage buff. It might be able to go higher than 5, but I haven’t seen it. Firestorm will have a similar buff, going 8-24%, but while it may seem better on the surface, it is not. Firestorm has a longer cooldown and more downtime in between buffs. To compensate, it buffs more damage. But Arcane Torrent has potential to be a more constant buff of several stacks, it has a shorter cooldown and will reduce it even further for each target hit, making you do more overall damage, even if you get some unlucky 1-stacks of 4%.
Your Defensive options are limited to one choice only. Stasis. While affected by stacks, the target takes more damage. That means you kill it faster. When you do kill it, it makes your team do more damage for each remaining stack, for 10 seconds. To ensure maximum amount of damage, get max stacks and reduce the chance to lose a stack if the enemy gets a hit in. Do not worry about the cooldown reduction from Equilibrium, it does not work when killing the enemy, only when the stacks are removed and the enemy is alive. This will be a 20% buff, with the rare 19% now and then if unlucky.
For those that are in the Factions stage of the game, you have access to Nature’s Blessing. This is a really good lifesaver that shouldn’t be needed, but because it also gives you damage and attack speed, this beats all the other skills. Last row is a 51/49 choice in favor of Toxic Aura for a tiny bit more damage. The cleanse might be good, but you shouldn’t need it. You shouldn’t get hit either, which is what triggers TA, but it can happen. Take your pick.
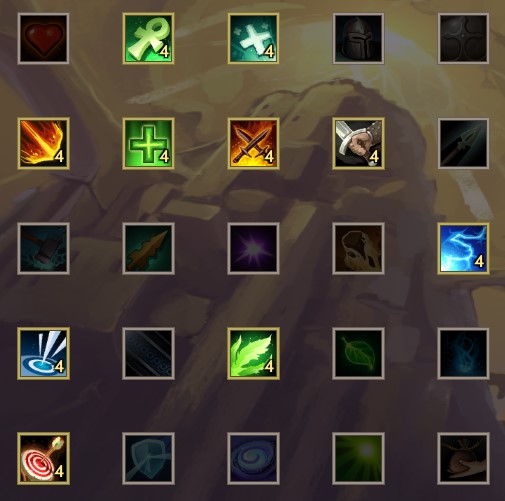
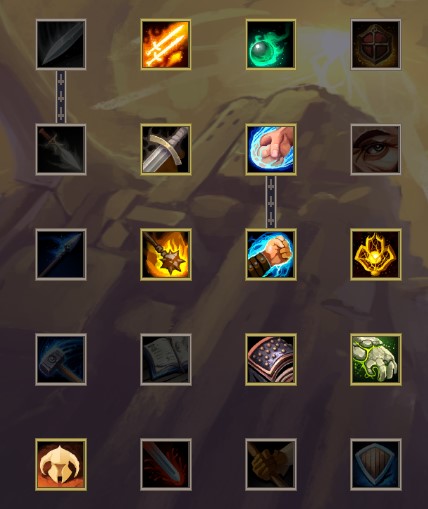
Warrior skills
Dragons Roar is another reason why this warrior should be in the team. Not only does it give the warrior an Attack Speed buff and a Double Damage buff, it can also share the buffs with the rest of the group. And every time you kill an enemy, the cooldown is reduced. With fast enough kill speed, this is a permabuff.
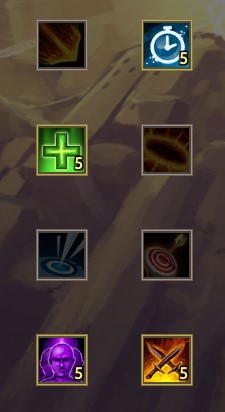
Your Defensive Cooldown should be Imposing Cry. While Defensive Stance is a good defensive choice and Ground Slam is the most offensive of them all, Imposing Cry is a good middle ground. It provides the same Distract debuff as Taunt, but can be specced for additional reduced Crit Avoidance which allows the group to do even more damage. This version of Distract overwrites the one from Taunt, because it is better, but as soon as it is not available (target killed), the other one takes over, maintaining the 10% damage taken debuff until Imposing Cry is ready again. Which it will be fast, because every taunted target that is killed will reduce the cooldown.
And Nature’s Blessing on the warrior. Slightly different here, because the extra damage from Toxic Aura is nothing, while the heal and removal of ailments might make the difference between life and death. Swapping the first two rows might seem tempting. You don’t need the damage reduction, but you do need the attack speed, so keep them like this.
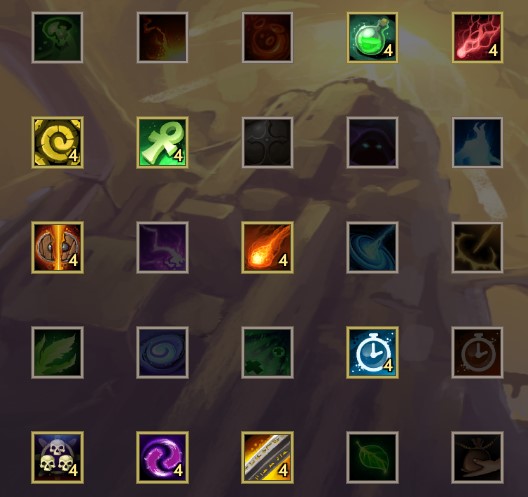
Gems

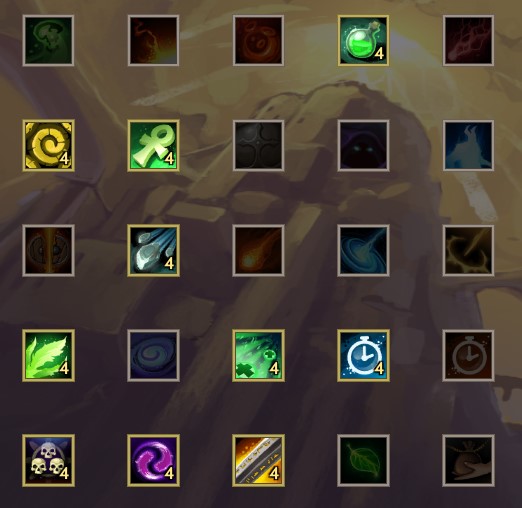
And for the warrior
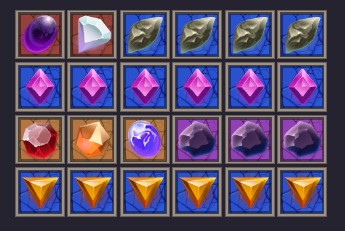
Stats on the White, Red, Yellow and Blue gems should be like this for the mage
And this for the warrior.
Use the 4 Elemental stones for the damage and Penetration buffs they provide to the mage, even if it feels like 3 of them are a waste of slot. They’re not. Use Ferrous Core for the same benefit to the warrior. The Meteors should be Attack Speed and Fire Damage OR Damage Over Time for the mage, Attack Speed and Physical Damage for the warrior. Before you get Amethyst, use Ruby for a lesser bonus.
Cut Amber is a really good set. Not only do you get more Attack Speed for each one you use, and a little bit of damage, the set bonus is a Multiplier to your attack speed. Now, at first and while your general attack speed is low, this isn’t a really good set. Other sets may be better, like Malachite for more Crits. But when your gear improves, your attack speed goes up and suddenly that multiplier is worth more than what Malachite or even more Meteors provide.
The Heart Of The Abyss must have Incinerate for the mage and Conflagrate for the warrior. Those two are mandatory! There are many acceptable combinations, so it is fine to use whatever you find first, but the end-goal is Incinerate/Thrash and Conflagrate/Thrash. If you find these, use them and forget every other combo.
Enchants
Weapons: For mage, you will want to use 2x Incinerate. As most enchants now stack, this is mandatory on both Heart Of The Abyss and your weapons to be able to cast as many Fireballs as possible.
For warrior, use 2x Conflagrate. Combined with the Conflagrate/Thrash option on Heart, you provide your mage with a lot of Fire Resistance reduction really fast. This is mandatory.
Helmet: Bruiser for mage. Yes, you lose some attack speed, but that is not a problem at higher gear levels. However, the +25% damage is worth more and more as your base damage increases.
For warrior, go with Onslaught. As there is no real cooldown reduction for Dragons Roar, and the warrior doesn’t need to do a ton of damage, the tiny chance at resetting cooldown is useful.
Belt: For mage you want to use Butcher. 6% more damage after killing 3 bosses, no duration, permanent until death. For warrior, Envy is my go-to. You might steal a useful buff now and then and due to the fast attacks, you have a lot of chances to do so. But because it is so random, I do not recommend it for the mage. A flat damage bonus is better than random chances to get something that may or may not be useful.
Trinket: The mage should use Overwhelm for a 2% chance to do Triple damage. The warrior can settle for Distil, giving bonus to flasks. Mend can be good for survivability, but Distil wins in my book.
Shoulder: Recoup
Chest: Defiance
Bracers: Rebound
Gloves: Amplify
Pants: Combo. While buffing Offensives might not bring a lot of damage to the table, it’s slightly better than Toxic.
Boots: Expedient
Amulet: Blessed. Mandatory, without this your damage will be very very very low.
Cloak: Cleanse. Removal of debuffs that Nature’s Blessing doesn’t take care of.
Rings: Circumvent. You will want +20% Ailment Avoidance that covers all 5 types, because even though the mage shouldn’t get hit, it can happen and it will help. As you often won’t know which type you get hit by, 40% to everything is better than 50% to 2 of them. Also, this stacks with the warrior passives, bringing you to 70% for everything. And the warrior does get hit due to Taunt.
Flasks
Power: +20% Double Damage
Strength: +20% Damage
Speed: +30% Speed
Abrasion: +300 Physical and Elemental Penetration
Use other flasks for survivability as needed, until you can safely use these 4
Stat priorities
Ideally, all of your gear should be either 5 Offensive and 1 Defensive (only possible on weapons), or 4 Offensive and 2 Defensive with proper imbuements. A few slots can only be 3-3, so they will have to do. How to do the imbuements will be covered in the next sections, because it changes depending on your progress. But for stats, your main focus should be like this:
Attack Speed, Critical Chance and Critical Damage should be on all pieces that allow them. Some slots only have Attack Speed, helmet only allows for the two Criticals, but make sure all your gear gets what it can of those before anything else. You want to hit fast, crit often and crit hard! Make them Nemesis when possible.
Next is Magic/Melee, followed by Fire/Physical. These will make your standard hits hit harder and your crits will benefit from it. If an item has spare Nemesis slots, use these two.
If you have an Offensive stat to spare, go with Damage Over Time (only relevant for mage) on your Gloves, Shoulders and Chest. For other slots, use Damage or Elemental Damage. The output is the same for those two. It may be low, but better than nothing. One thing to note here: At time of writing, DOT is stronger than using Fire due to a previous buff that Arrow will soon scale back down. It will still be useful to have it on gear after the nerf, it will just not be as effective as it is right now. It will be exactly the same as Magic and Fire, so the resources spent on transmuting will not be a complete waste. If you are following this guide before Arrow nerfs DOT scaling, make sure you use this stat before Magic and Fire whenever possible.
For Defensive stats, always go with Health Points first. On your Amulet, Rings and Trinket, Elemental resistance is next, for all other slots it is Physical Resistance. If you have 3 Defensive options, pick All Resistance on the amulet, Magic on the rest.
At endgame you will not need Regen, Barrier or the other resistances.
Gear from Missions, 1-150
Mage Weapon/Offhand: Guide To The Abyss + The Contract
Mage Relic: Vizier
Warrior Weapons: 2x Demonic Claws
Warrior Relic: Assassin
Helmet: Berserker Helm
Shoulder: Imbued Pauldrons
Chest: Bouncers Breastplate
Bracers: Royal Cuffs, alternatively Satin/Dragonscale/Iridium Bracer
Gloves: Emperor’s Strength. Requires insane luck with Nemesis drops. Use Traveller’s Gloves until you get them or move on to next stages.
Belt: Ravagers Cord
Pants: Traveller’s Leggings. Only drops from Magic monsters, so a decent alternative is Imbued Tassets.
Boots: Swift Striders. Only drops from Rare monsters, so Toxic Waders until you get them.
Cloak: Jungle Cape
Amulet: Royal Pendant
Trinket: Emperor’s Blessing. Like with the gloves, needs insane luck. Use Element Stone for Mage and Spare Eyestalk for warrior until it drops. Save Element Stone for later!
Rings: 2x Ring of Manipulation for mage, 2x Hybrid Band for warrior.
Many of these items will make you attack really fast, which directly increases your damage done and as a side-effect your survivability. A few of these items will last you through to current endgame and won’t need replacing at all. The fast attack speed is required for your weapon enchants to proc more often. More fireballs means more damage. Faster applications of Conflagrate means each fireball does even more damage in the first few seconds and that means a lot in the end.
Bounty gear
Mage Weapon/Offhand: Guide To The Abyss + The Contract
Mage Relic: Vizier 5-0
Warrior Weapons: 2x Demonic Claws
Warrior Relic: Assassin 5-0
Helmet: Berserker Helm
Shoulder: Imbued Pauldrons
Chest: Replace Bouncers Breastplate with Pathfinders Tunic. The Buff Duration is good!
Bracers: Royal Cuffs, alternatively Satin/Dragonscale/Iridium Bracer
Gloves: Emperor’s Strength for mage. Requires insane luck with Nemesis drops. Use Traveller’s Gloves until you get them or move on to next stages. Warrior should use TG.
Belt: Ravagers Cord
Pants: Upgrade to Pathfinders Pants. If you find yourself taking damage often, keep the old pants, but save PF for later!
Boots: Upgrade to Pathfinders Boots
Cloak: Jungle Cape
Amulet: Royal Pendant
Trinket: Emperor’s Blessing. Like with the gloves, needs insane luck. Use Element Stone for mage or upgrade to Pathfinders Trinket for warrior until it drops. Save Element stone for later!
Rings: 2x Ring of Manipulation for mage, 2x Hybrid Band for warrior.
If you don’t get hit, the pants are super awesome, but they do require you to be at full hp. You will be using them in the end, so make sure you don’t scrap them if you take damage too often for them to actually work.
Agony gear
Mage Weapon/Offhand: Upgrade to Cobalt Tome, imbue it with your Guide To The Abyss. Replace The Contract with Eldritch Artifact.
Mage Relic: Vizier 5-0
Warrior Weapons: 2x Demonic Claws imbued with Obsidian (sword) or Sundown (pistol) to get 5-1 stats.
Warrior Relic: Assassin 5-0
Helmet: Upgrade to Evoker’s Hood for mage, warrior should use Berserker Helm.
Shoulder: Imbued Pauldrons, that you now imbue…. with Tattered Wings. But only for the mage. Regular IP for the warrior.
Chest: Pathfinders Tunic imbued with Conduction Plate for 4-2 for the mage, regular PF Tunic for warrior.
Bracers: Upgrade to Elegant Cuffs.
Gloves: Emperor’s Strength for mage. Requires insane luck with Nemesis drops. Upgrade to Nature’s Gauntlets until you get them or move on to next stages. Warrior should use NG.
Belt: Ravagers Cord. Imbue it with any 3-3 belt you can find.
Pants: Pathfinders Pants for mage. If you find yourself taking damage often, use Occult Leggings, but save PF for later! Warriors should use OL.
Boots: Pathfinders Boots
Cloak: Upgrade to Assassin’s Cape for mage, warrior should use Jungle Cape imbued with 3-3 stats.
Amulet: Upgrade to Charm of the Elements for mage, use Royal Pendant for warrior.
Trinket: Emperor’s Blessing. Like with the gloves, needs insane luck. Use Element Stone until it drops. Imbue Emperor with Element Stone when you can. If you still don’t have one for your warrior, use Pathfinders Trinket.
Rings: 2x Ring of Manipulation for mage, 2x Hybrid Band for warrior.
Faction gear, current endgame
Mage Weapon/Offhand: Cobalt Tome imbued with 5-1 + Eldritch Artifact.
Mage Relic: Vizier 5-0
Warrior Weapons: 2x Demonic Claws imbued with 5-1.
Warrior Relic: Assassin 5-0
Helmet: Evoker’s Hood for mage, Berserker Helm for warrior.
Shoulder: Imbued Pauldrons with 4-2 for mage, regular IP for warrior
Chest: Pathfinders Tunic imbued with Conduction Plate for 4-2 for mage, regular PF Tunic for warrior.
Bracers: Elegant Cuffs
Gloves: Slayer’s Gauntlets for mage. Nature’s Gauntlets imbued with Slayer’s Gauntlets for warrior for 4-2.
Belt: Ravagers Cord. Imbue it with Lucid Belt for 4-2
Pants: Pathfinders Pants for mage. At this stage you should not be taking damage and can benefit fully from the bonus. Occult Leggings for warrior.
Boots: Pathfinders Boots
Cloak: Assassin’s Cape for mage, warrior should use Jungle Cape imbued with 3-3.
Amulet: Charm of the Elements for mage. Royal Pendant for warrior.
Trinket: Emperor’s Blessing imbued with Element Stone for 4-2. You really should have it by now.
Rings: 2x Ring of Manipulation for mage, 2x Hybrid Band for warrior.
Divine vs Mythical gear
Pillar of Flame vs Cobalt Tome + Eldritch Artifact
Pillar adds a free Ignite whenever you use a skill. This goes for both your attacks and your cooldowns. Sounds really awesome and in my initial runs, it accounted for several billions worth of dps. Not too bad, to be honest. However, with Blessings the speed and critical damage of CT/EA beat it easily. Pillar also has the downside of being a staff, which is by default slow, and with this setup you want to attack fast to get more fireballs out there. Those two things just doesn’t work well together.
Helmet of Command vs Evoker’s Hood
HoC gives your attacks 1% more damage for each unique debuff on the target. When you have low damage, you can easily get numerous things up and running on each boss, because they live long enough for it to happen. HoC would definitely bring you a nice big damage increase there. But Evoker gives you a Crit Damage boost that doesn’t rely on anything else, it just happens. And when bosses do not live long enough to receive all those debuffs, HoC becomes irrelevant.
Wildfire Pauldrons vs Imbued Pauldrons
Wildfire gives you 1% attack speed every time you apply ignite and we do that really fast, so it is easy to maintain a 20% speed boost. Unless you happen to get stunned, which can happen in certain content, and your stacks starts to wear off. Imbued Pauldrons gives you pretty much the same amount of speed, but it never drops off. This makes it a clear win for me.
Slayer’s Gauntlets vs Emperor’s Strength
These two are super close. Slayer gives you a stacking damage buff when killing a target, but those stacks can wear off if you do not kill one target every couple of seconds or so. If you get those gloves and somehow don’t have enough damage to do that, the output is just crappy. For those cases, Emperor’s Strength will win. Sure, the Double Damage is also a %-based chance to do more damage, but it adds to all your other sources of DD and at this point you should be around 90% during combat. My personal preference is Emperor, but Slayer is just a tiny bit better.
Belt of Decay vs Ravagers Cord
Similar to the other items, Decay works with stacks. Now, getting a total of 50 stacks is not the problem, easily done, with lower damage outputs. When you do get to 50 stacks, you get 20% more damage. It’s awesome. But again, because of high output, it just doesn’t work out as well as intended, because it takes time to build those stacks and usually the boss is dead before it happens. Ravagers Cord, like the other Mythicals, is “always on”, so I always get the full benefit from it.
Ring of Manipulation vs Elemental Band
Initially I preferred Elemental Band, because in my testing it came out a tiny bit stronger than RoM. I tried combining them and saw a damage loss. I tried double RoM and lost even more. Felt weird. But after replacing some of the other items I was using at the time, RoM started to shine a bit more. The difference is minimal, there is absolutely nothing wrong with using Elemental Band instead of RoM, but there will always be a winner and in this case it is RoM.
Malady vs Charm of the Elements
Malady will give you a +15% crit chance on targets already affected by Bleed, Poison or Ignite. If you follow my guide and use a Juggernaut, you might not feel like Malady works for you. It certainly didn’t do it for me. With Barbarian it is more likely to work, as it can attack slightly faster and that might make the difference between Yay or Nay in this case. Charm of the Elements is far more reliable, regardless of what you use, so it wins for me. Malady can potentially up your damage by a billion or so, but it is far riskier to go with the Barbarian for me, so I am not doing it.
Final thoughts
Without the warrior present in the team, the mage would do less damage. Ikthallion tried running a team of 3 identical mages, they did lower team damage than 2 mages and a warrior. The buffs from the warrior makes the difference in this composition. Those two together can do anything, so you really shouldn’t worry much about which third character you bring. But if you remove one piece of the puzzle, everything falls apart. The Warrior can’t do much by itself and while the mage can, it will do much less damage. If you deck out the warrior in tanking gear or replace the claws with a Hammer, the Conflagrate stacks won’t be applied fast enough for the mage to do as much damage. It’s really that simple.
As mentioned in the beginning, this build will get nerfed. Already spoken to Arrow about it, so I know. But it’s fine. This build is not at all required for clearing current content. In fact, if you do not go to Endless Spires 999, you will not be able to reach these numbers at all. Enemies dies too fast. In Fallen Circle Tier 4 I am sitting around 18 billion on the mage. The end boss has around 32 billion hp, so it dies in less than 2 seconds. You do not NEED 18 billion dps. You WANT it, that’s for sure, because it really is fun clearing stuff so fast. So enjoy it while you can. I know I will, thanks to the help of Ikthallion.
Thanks to Ambrodel for his excellent guide, all credits belong to his effort. if this guide helps you, please support and rate it via Steam Community. enjoy the game.