
A small and comprehensive guide about KARM secrets ! Lists all available secrets in the game !
KARM Guide : All Secrets
Hello and welcome to this little guide !
Are you lost in the game, seaching after secrets ? Do you want some help finding all secrets ? Well, you came to the right place ! This guide will help you find all known secrets.
Note #1 : It’s obvioulsy recommened to play the game and find secrets by yourselves. Secrets may be needed to finish the levels easier, because they contain a lot of useful loot and gear.
Note #2 : At the writing time of this guide [26/03/22], only campaign #1 is available and some things may have changed. Also, there may be some text errors here and there. Please be kind.
Let’s go ? Let’s go !
E1M1
After cleaning the first room on ennemies, you’ll end up in a room with a poison pool on the right and some explosives barrels. Shoot the barrels on right of the door.
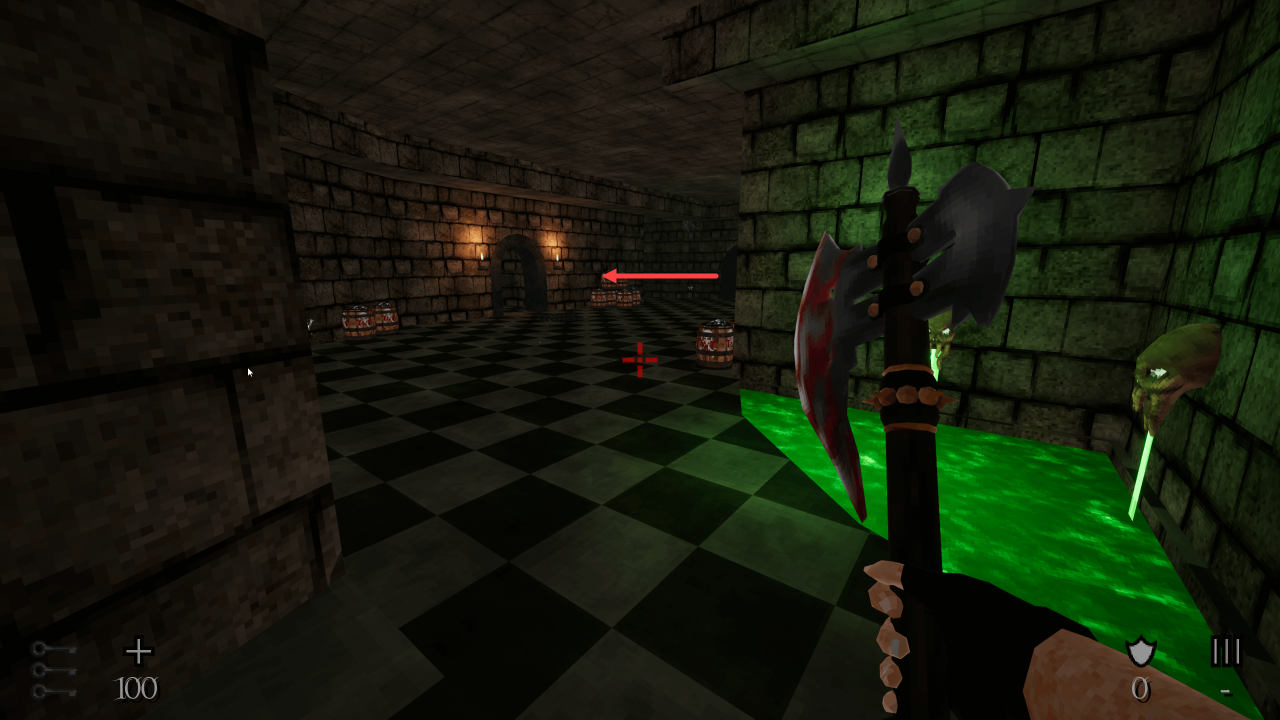 There is some health and armor inside.
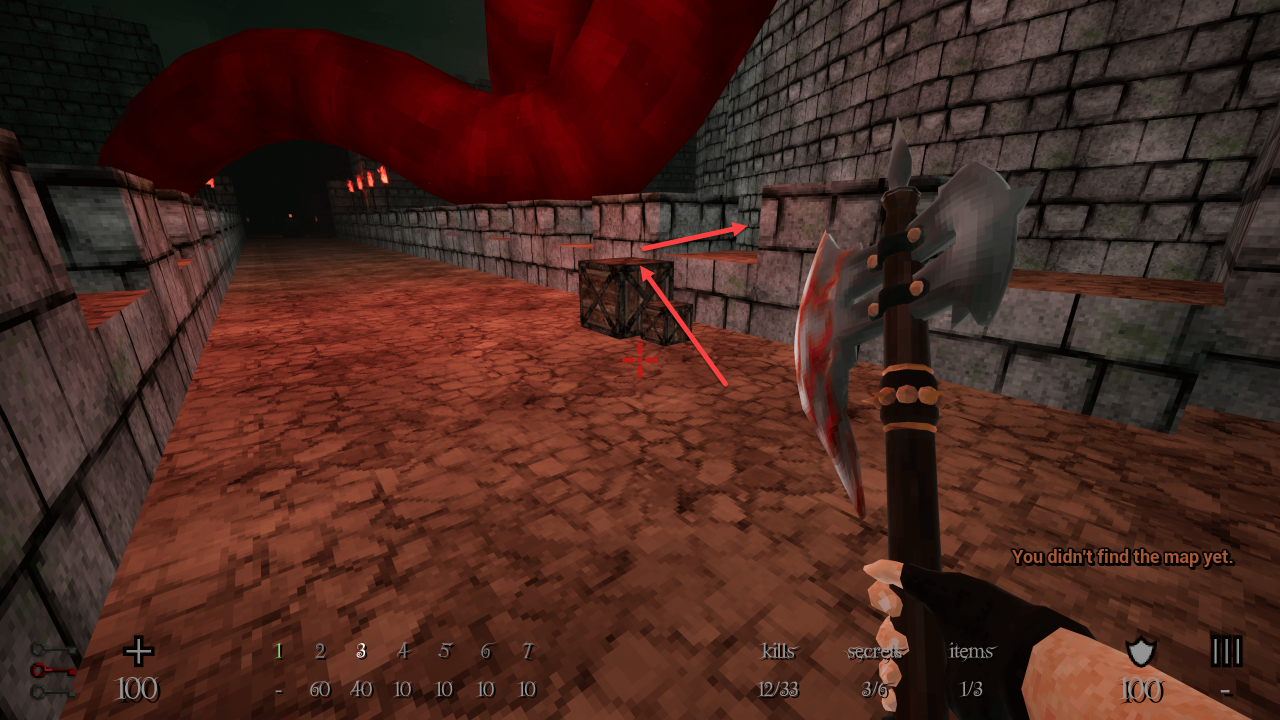
After exiting Secret #1, turn left and enter the little room with a wooden box. Hit the left wall to uncover this one.
 Hit the wall up the elevator to take the armor.
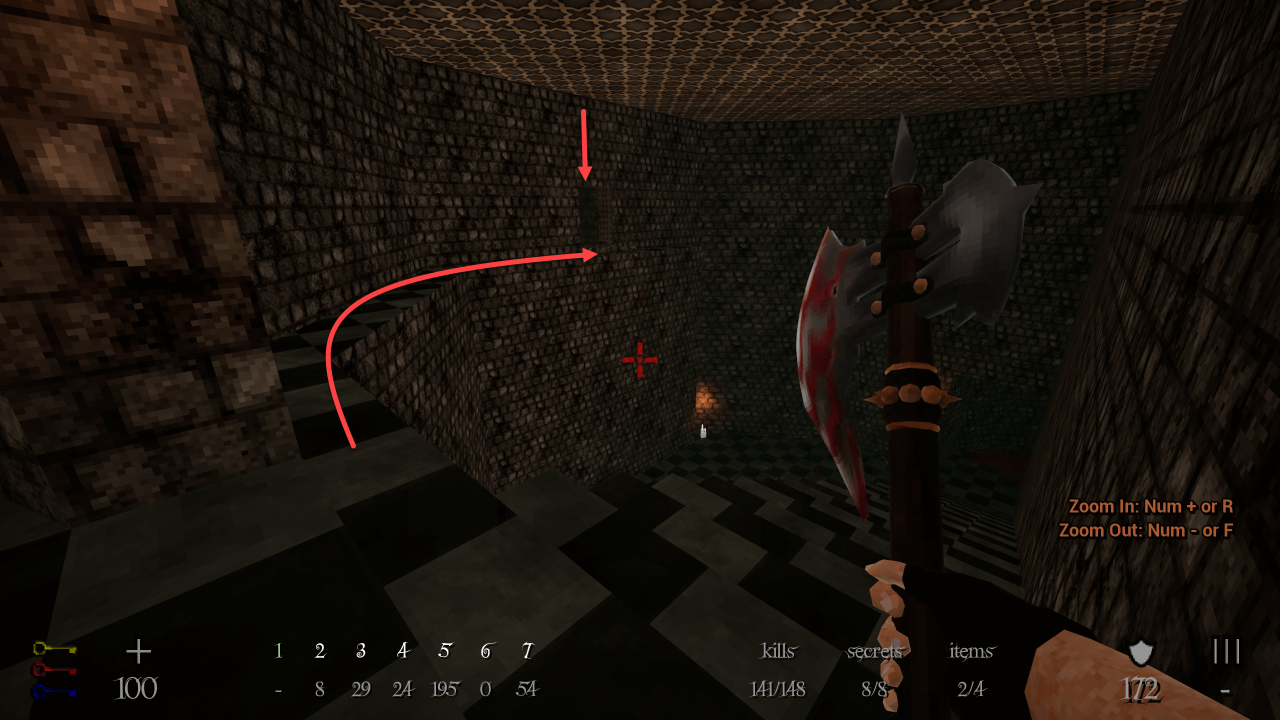
After activating the wooden bridge, before going out, look on the left. Use your axe on the back wall to discover this secret.
 There is some health and armor inside.
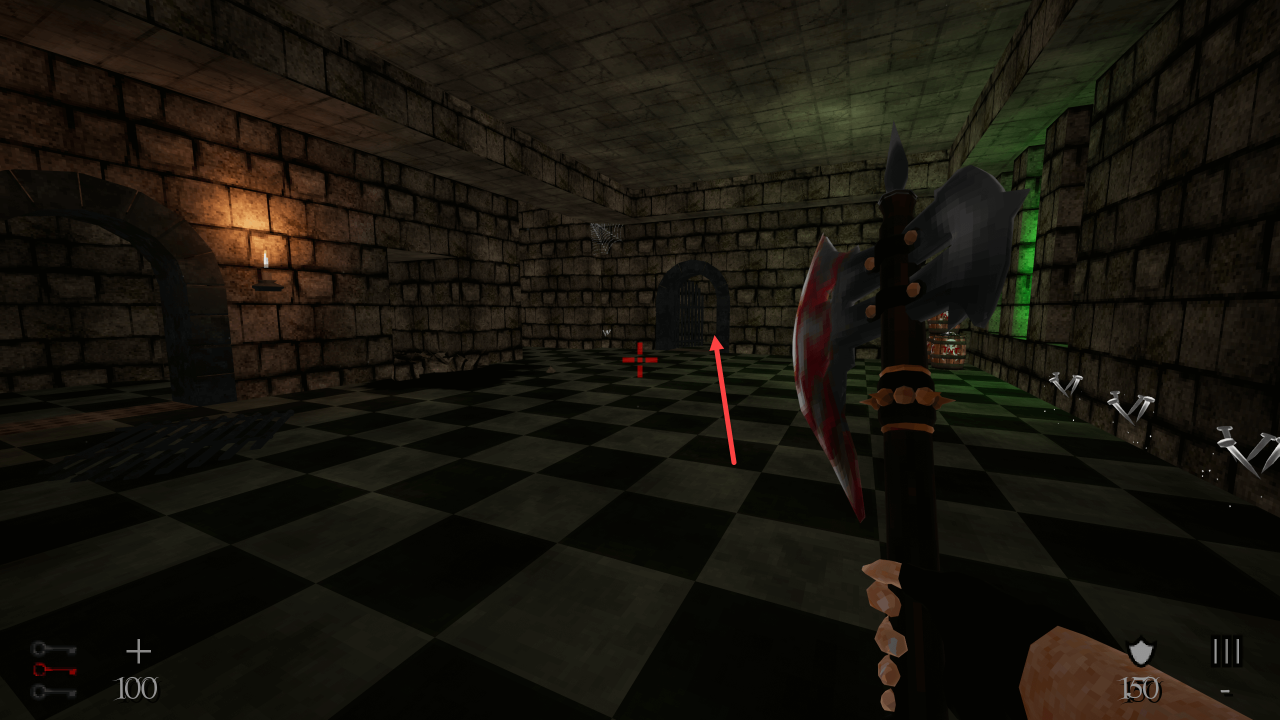
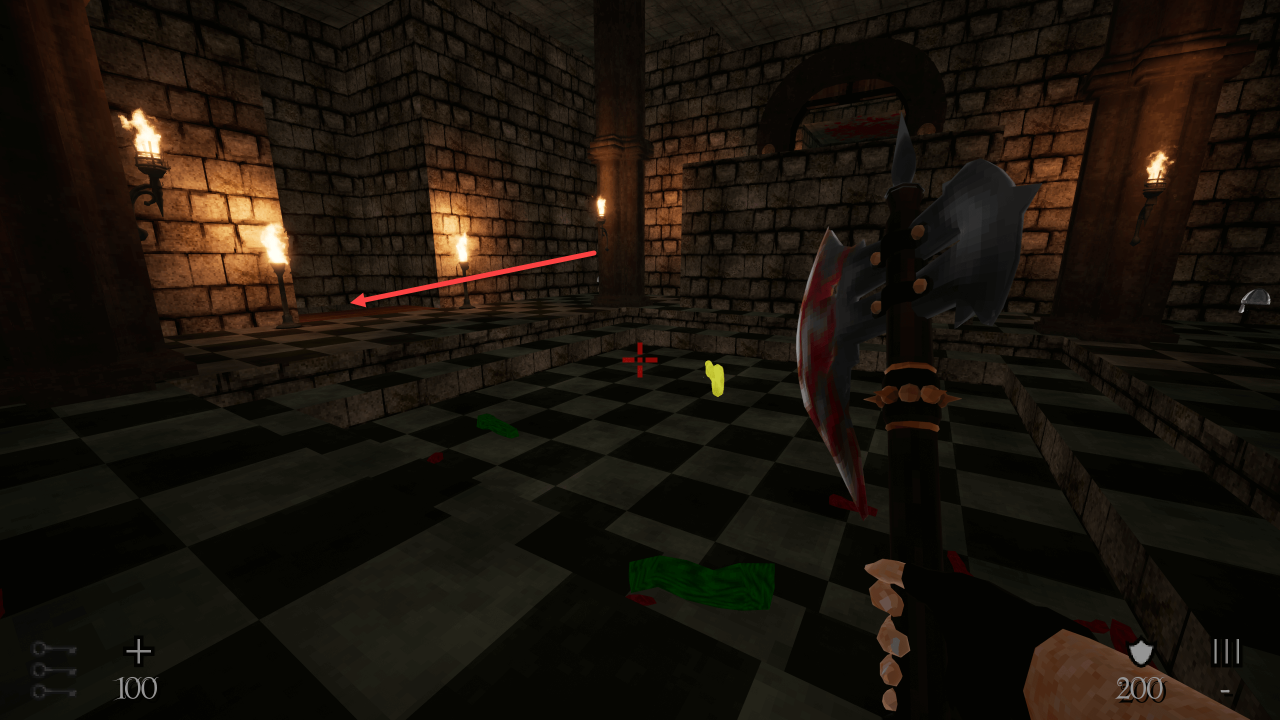
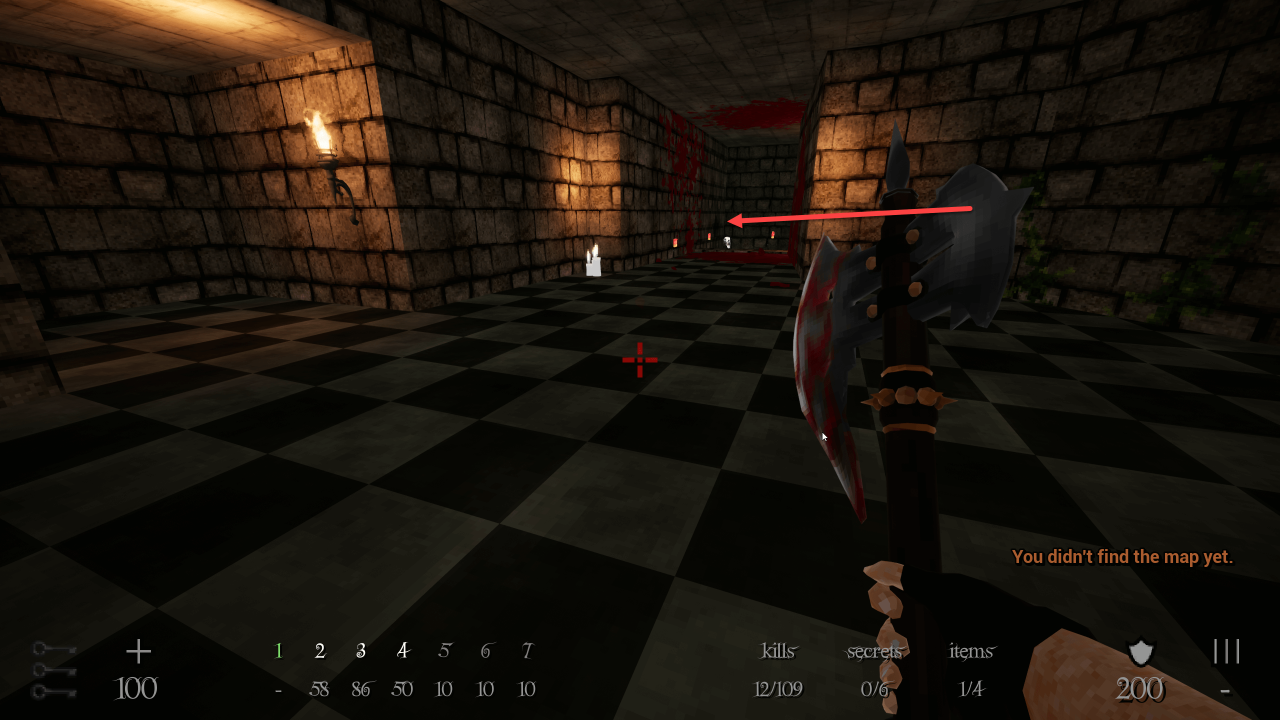
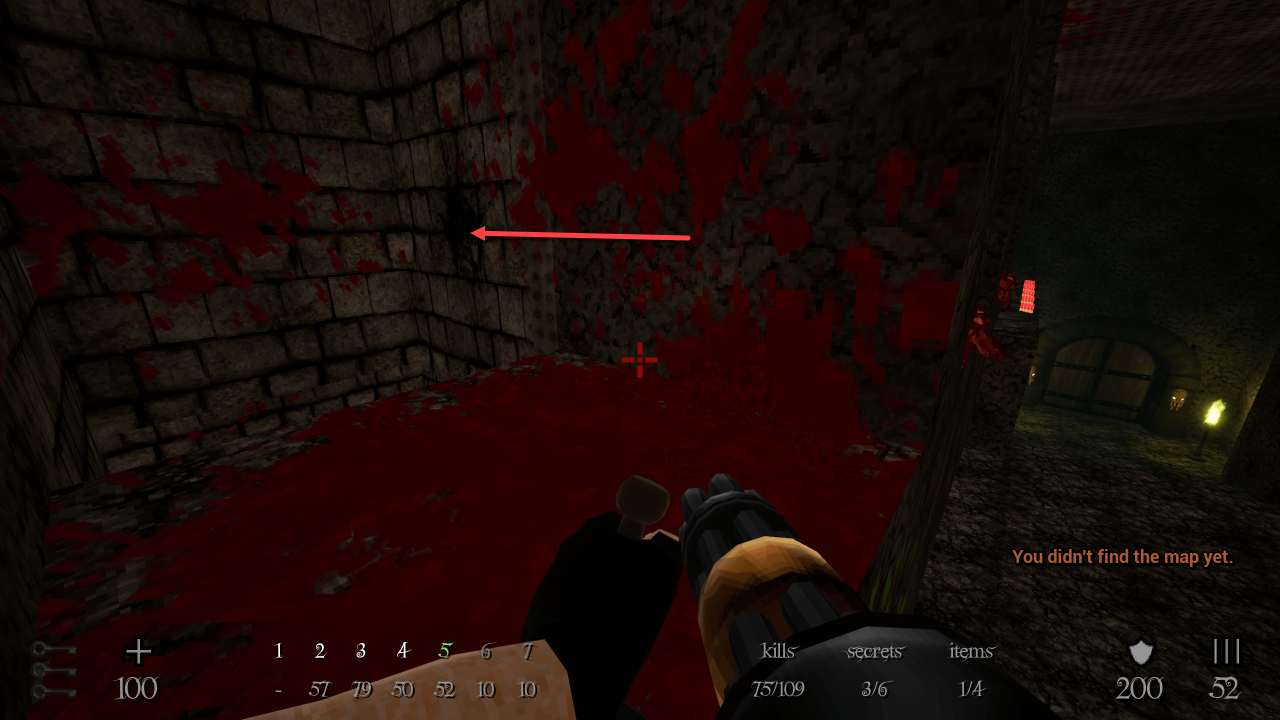
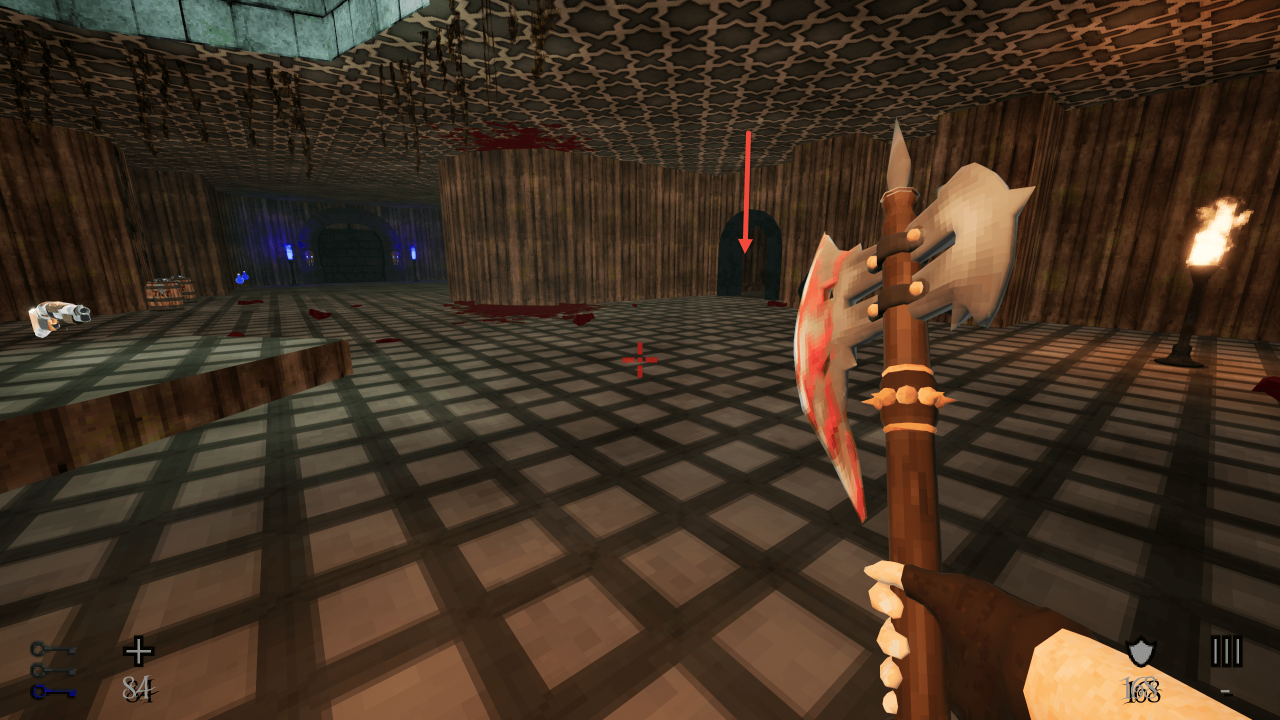
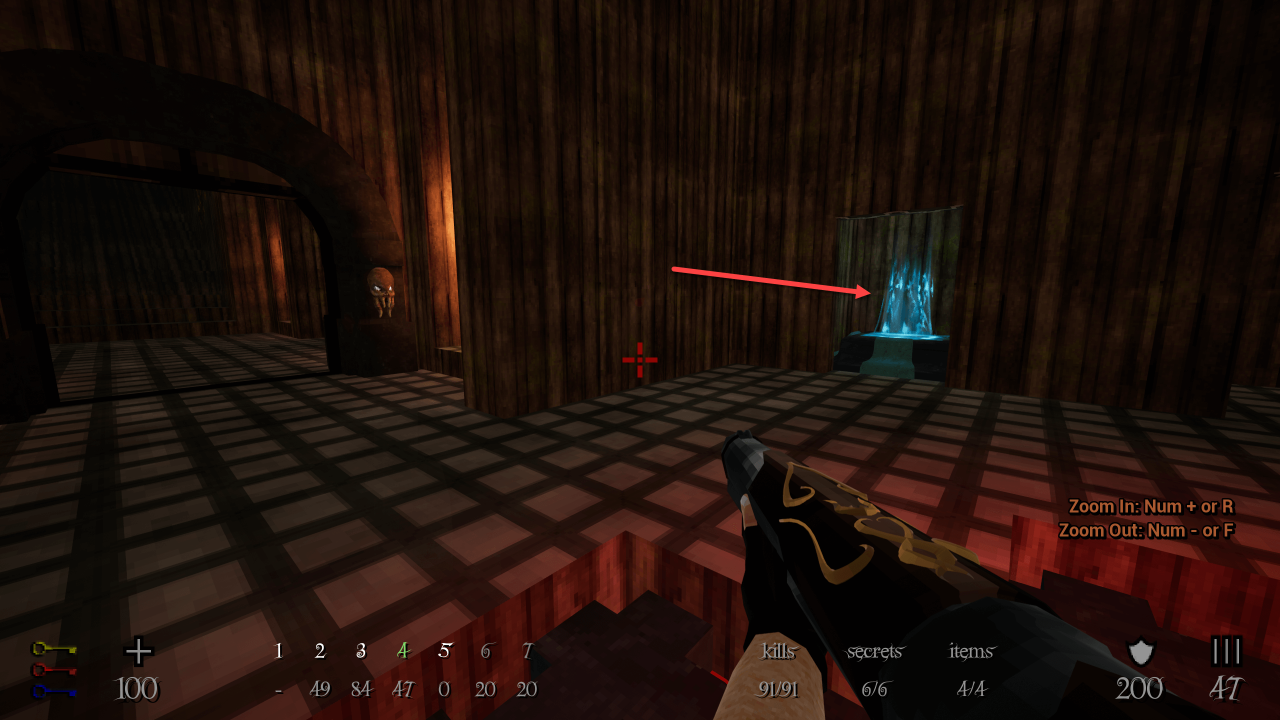
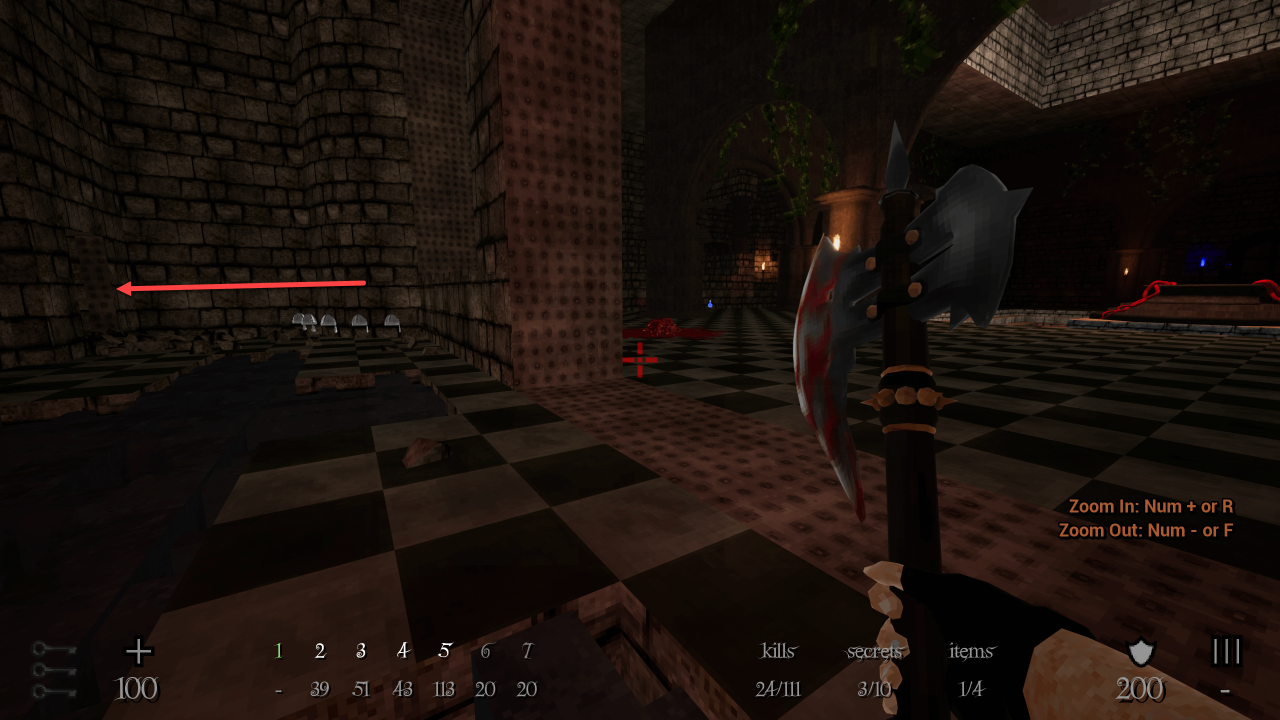
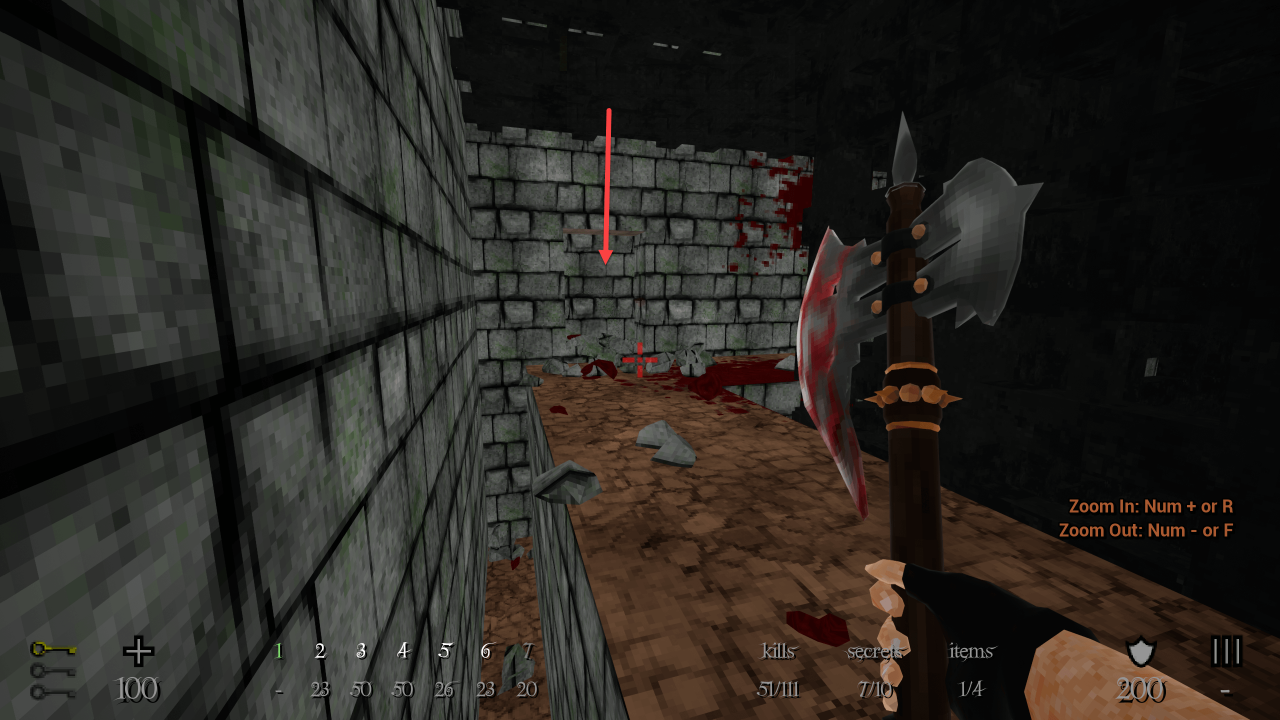
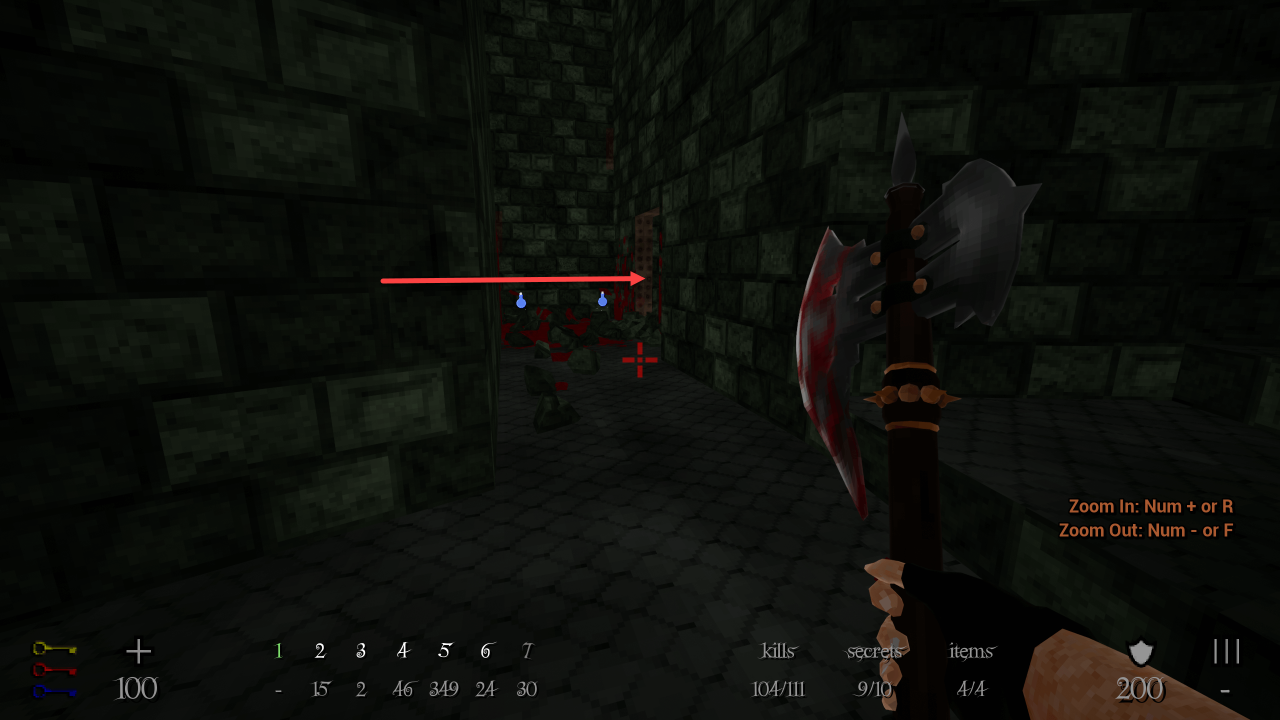
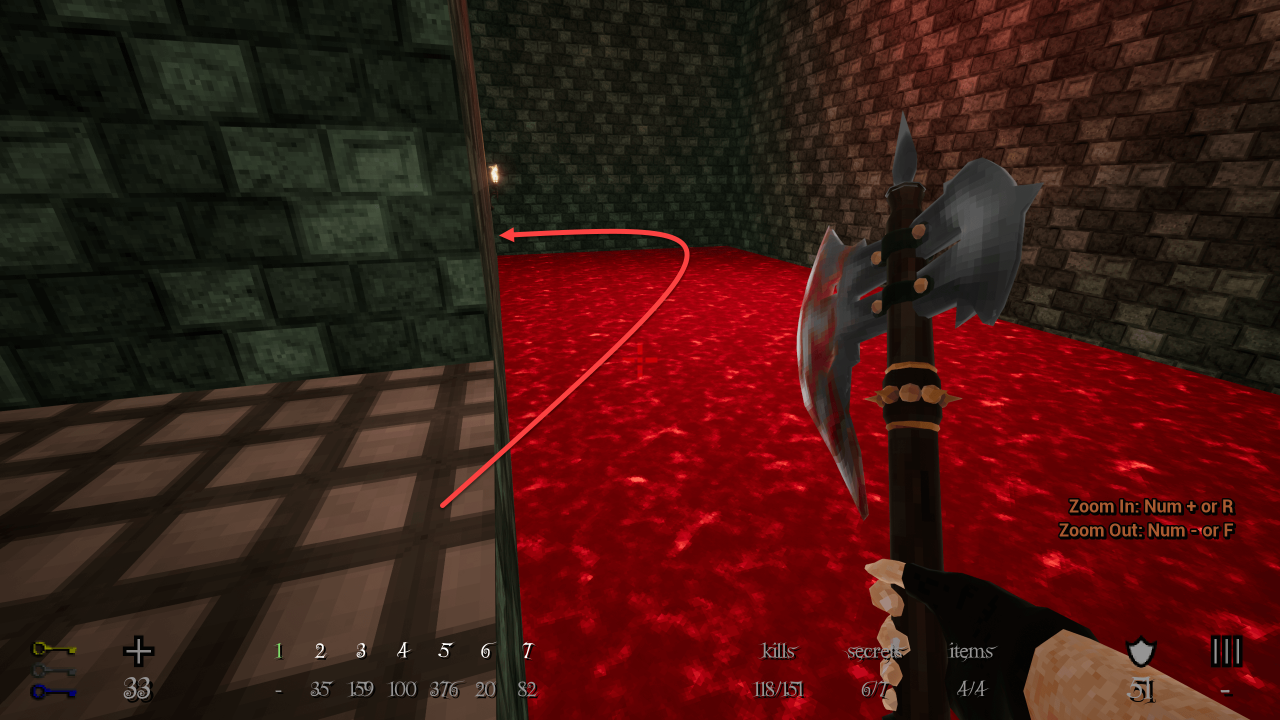
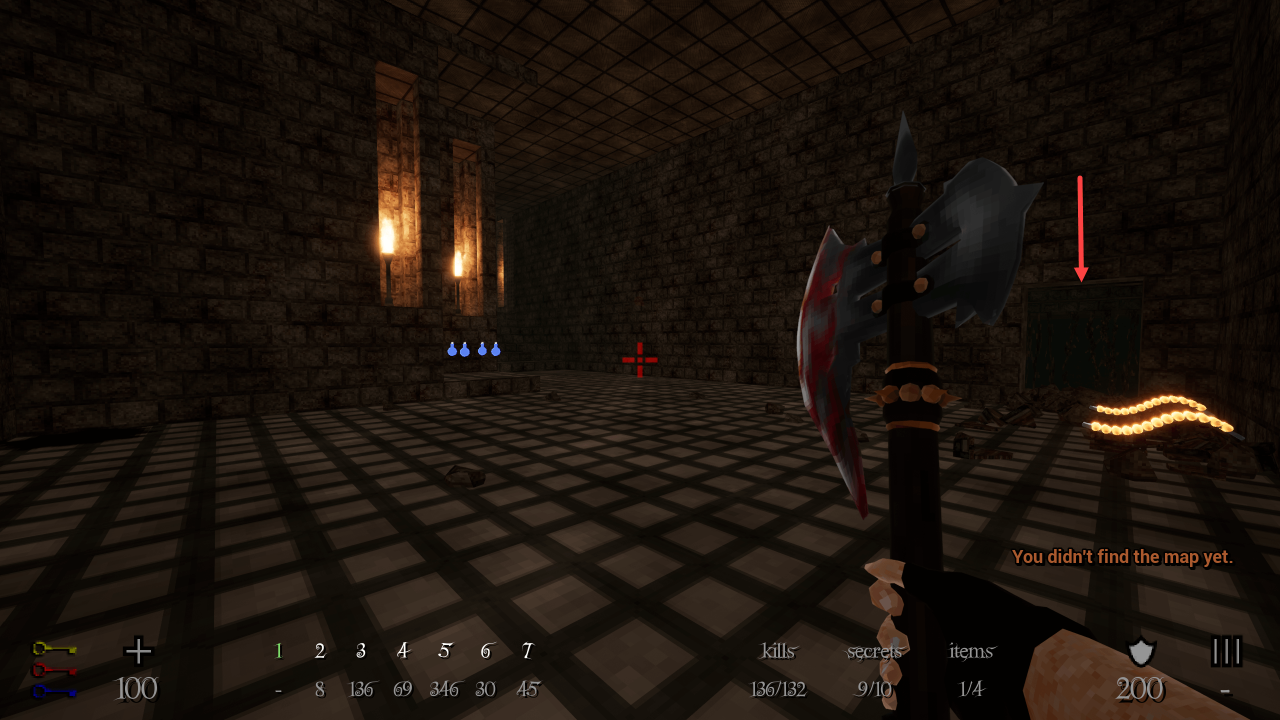
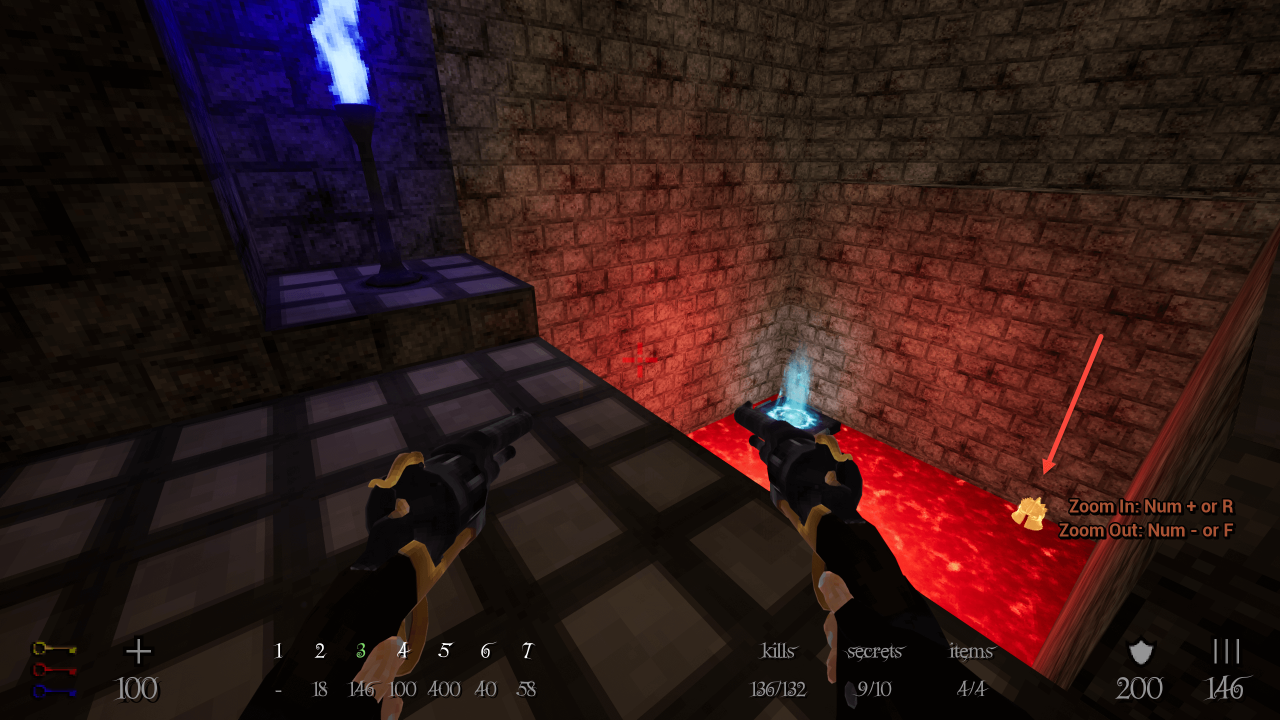
After finding the red key, there will be two wooden boxes near, climb on them to drop behind the wall to unlock this secret. There is a blue telepoter in the water with some items after taking it. Take note of the closed gate at the end of the water body.
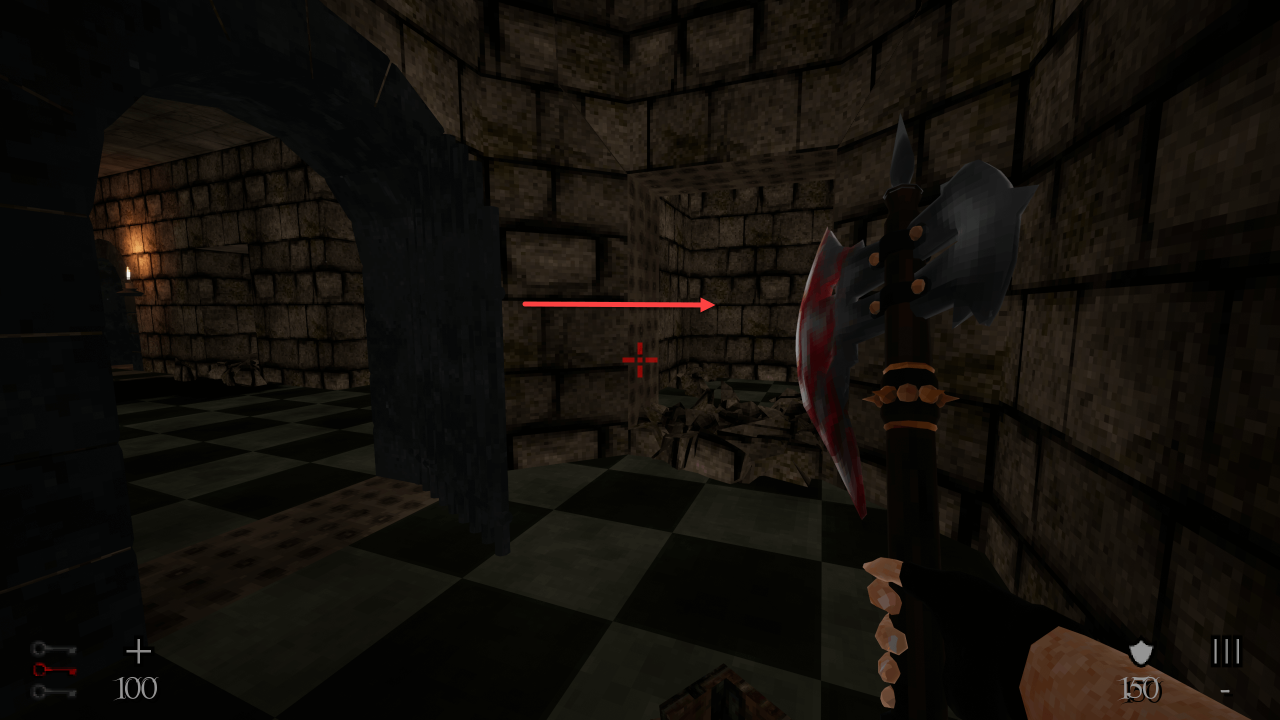
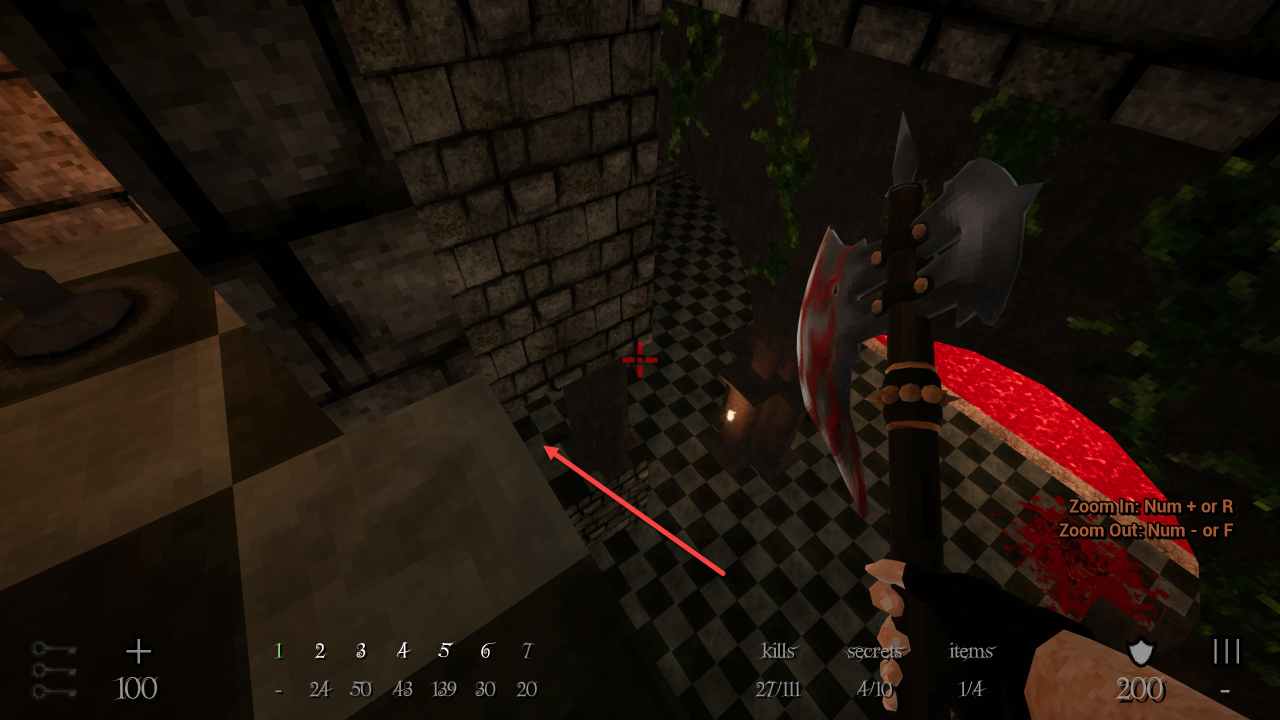
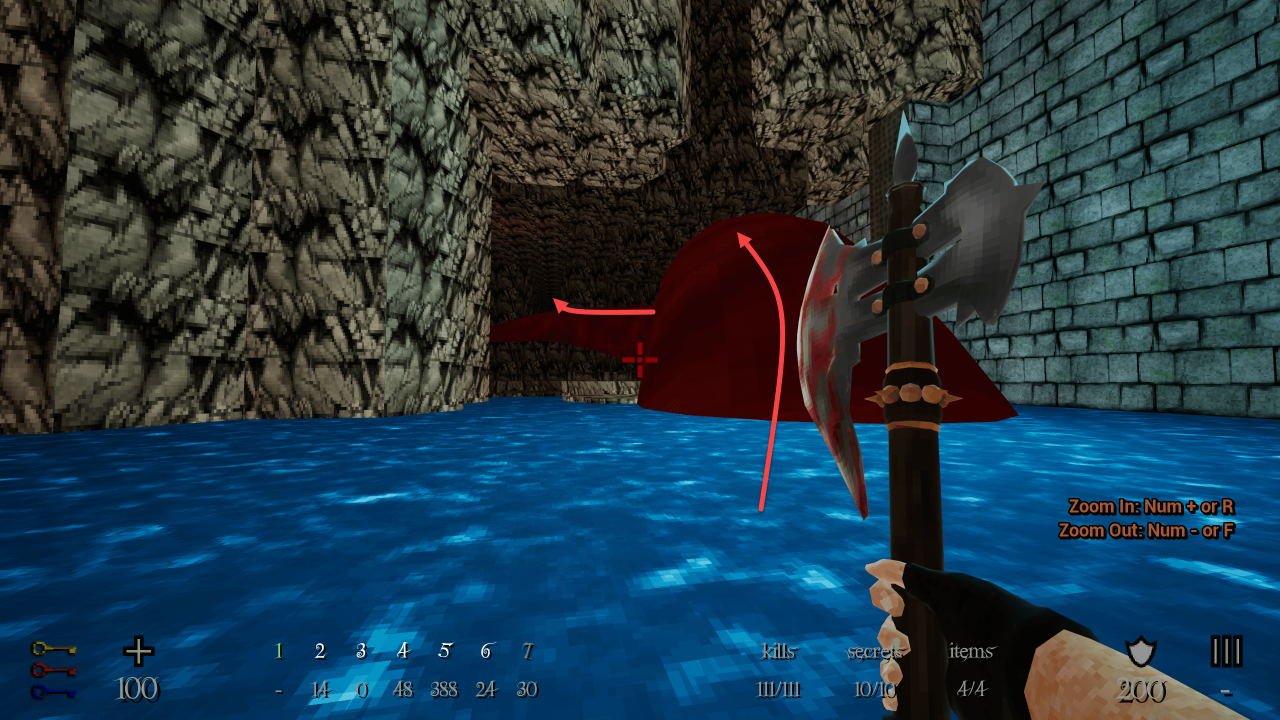
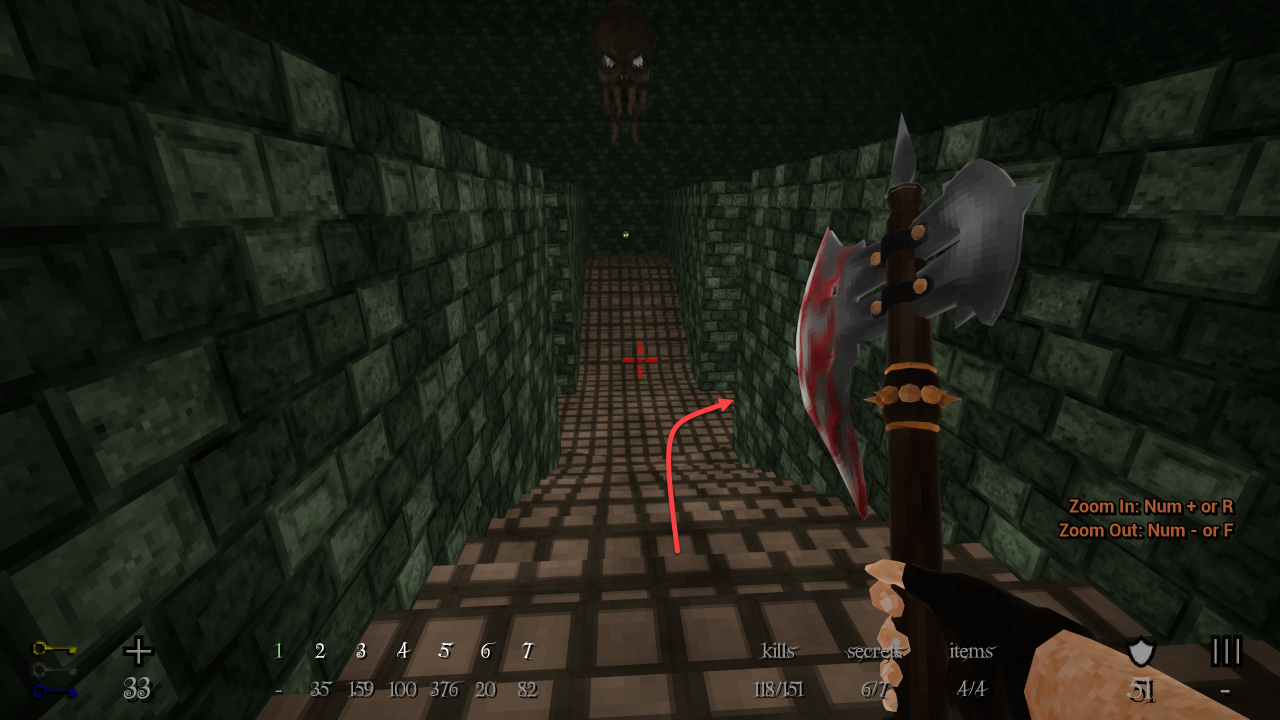
 Before jumping out, take some speed and jump on the other side of the bridge, inside the body of water. You’ll find an easter egg and Secret #5. At the end of the body of water, on the right, don’t forget to activate the skull on the wall. Take the blue teleporter back for some extra health.
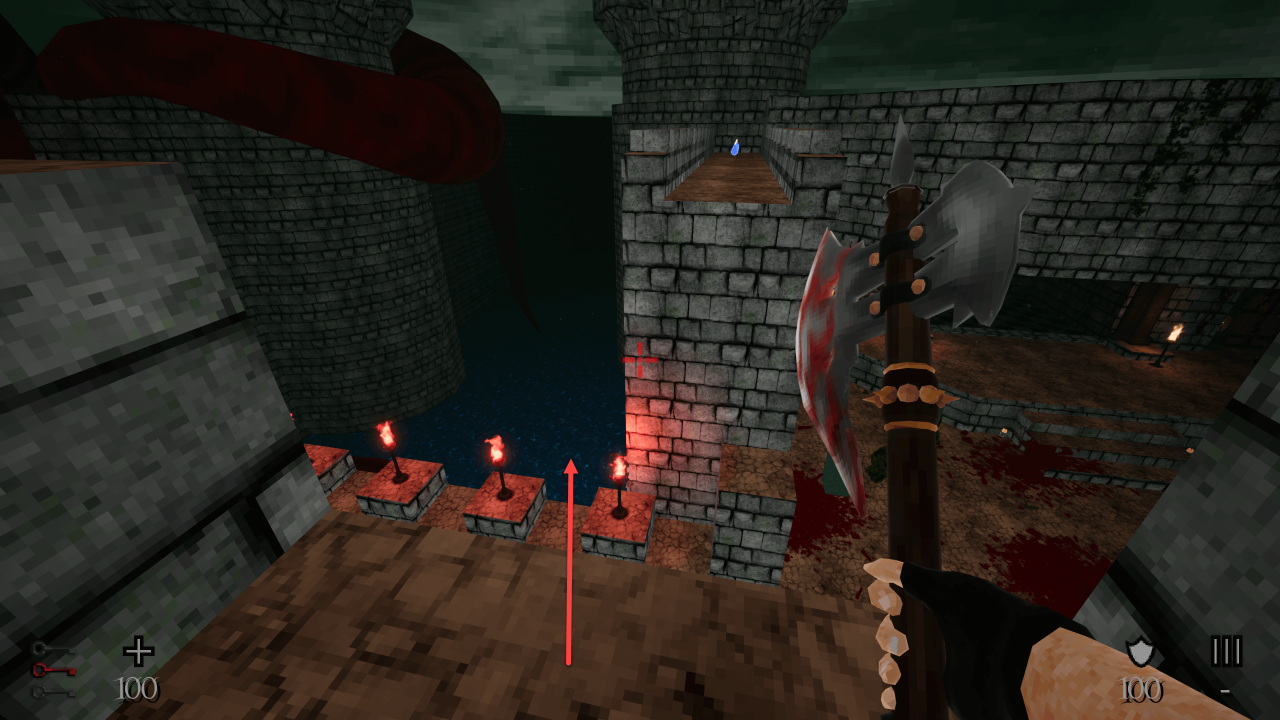
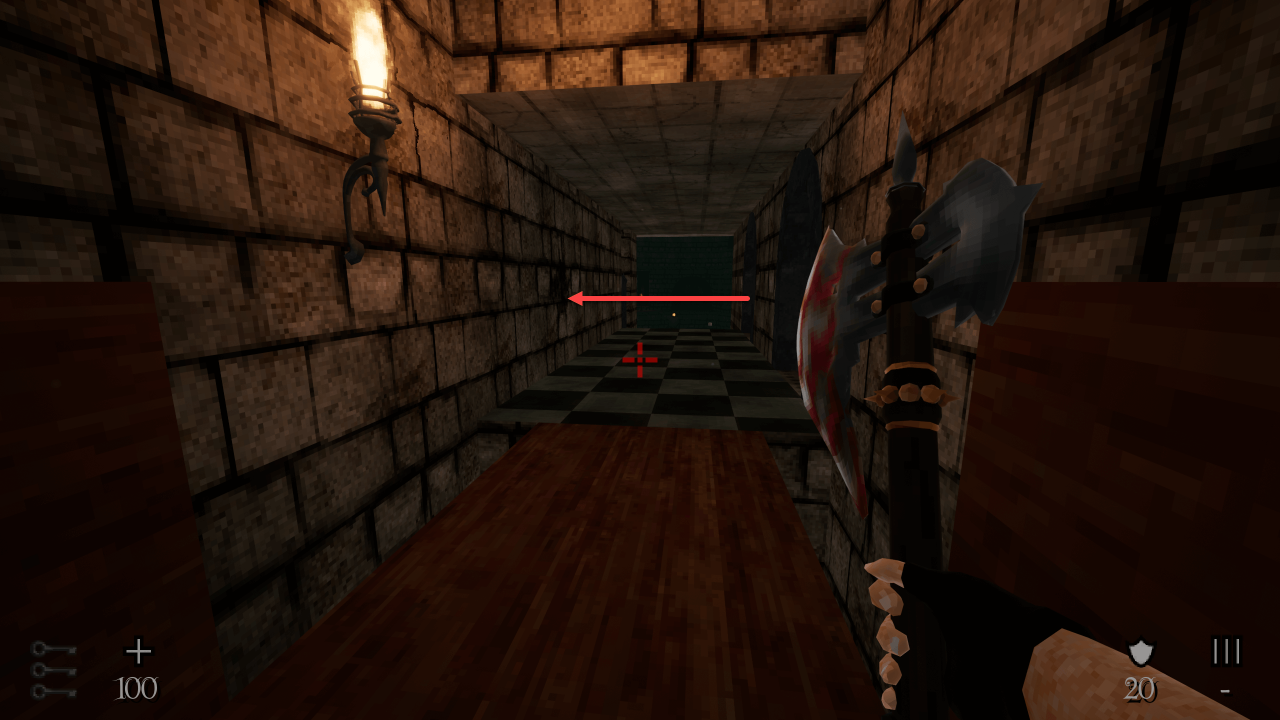
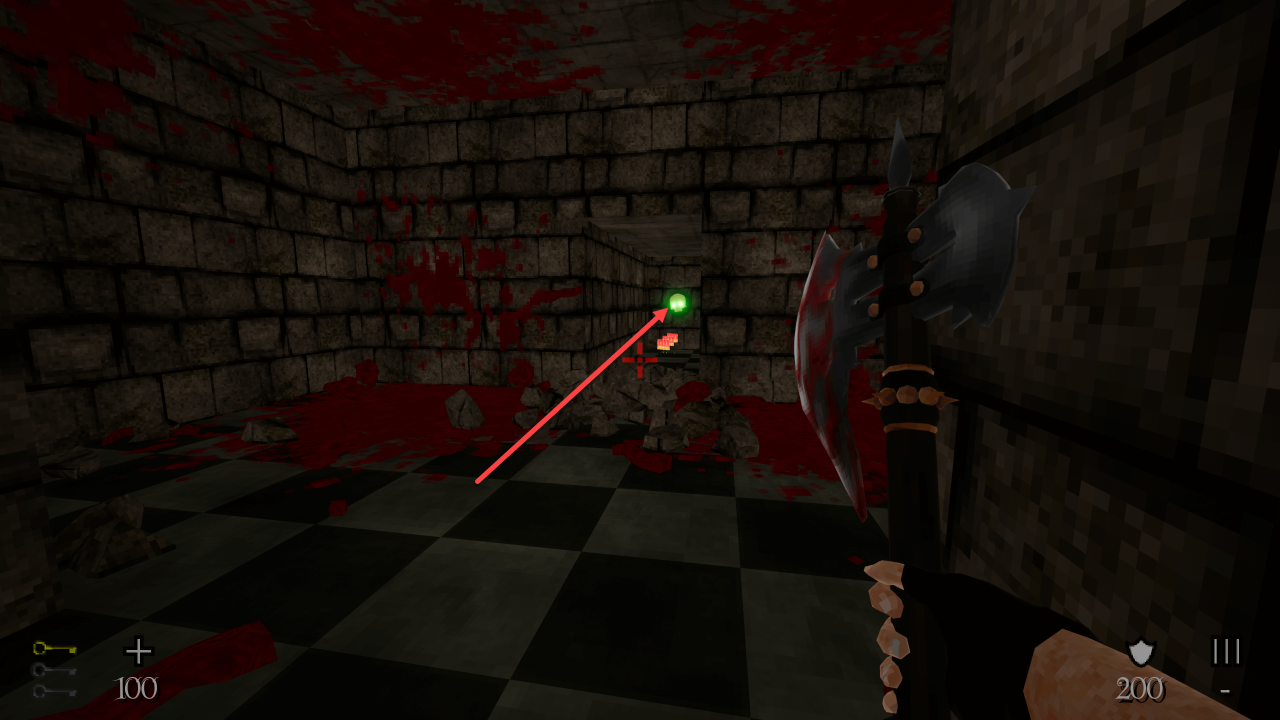
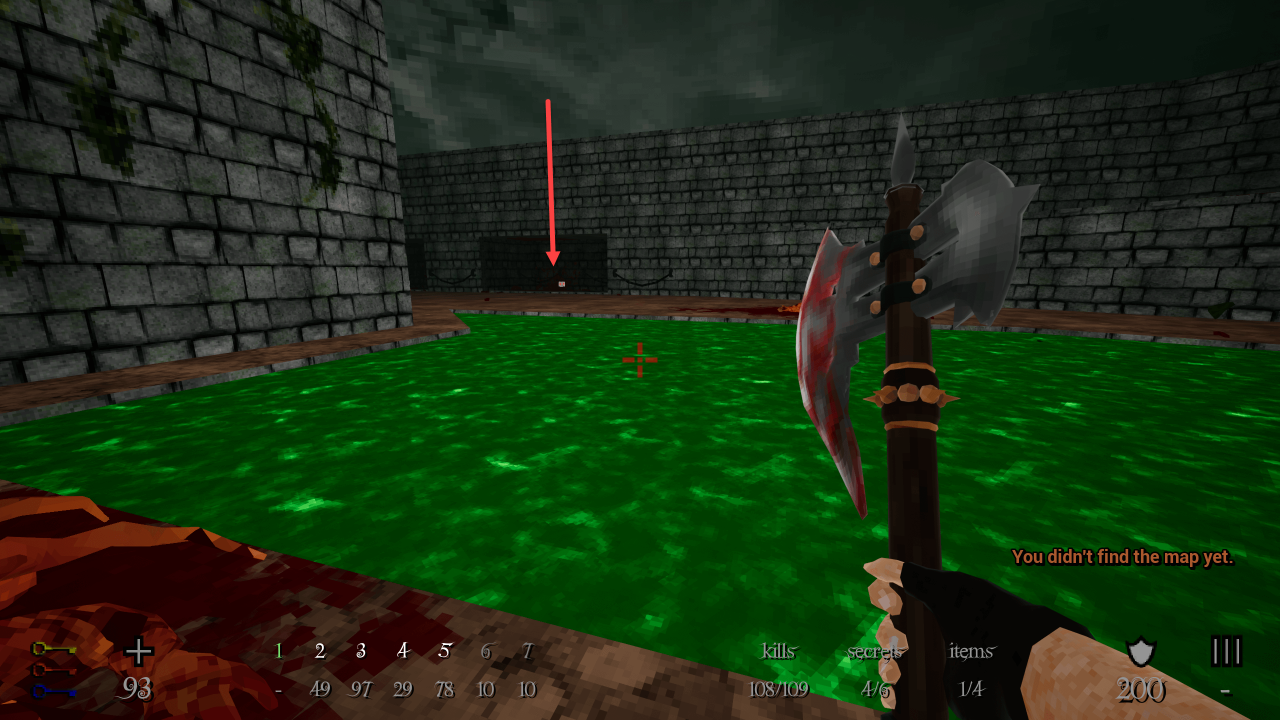
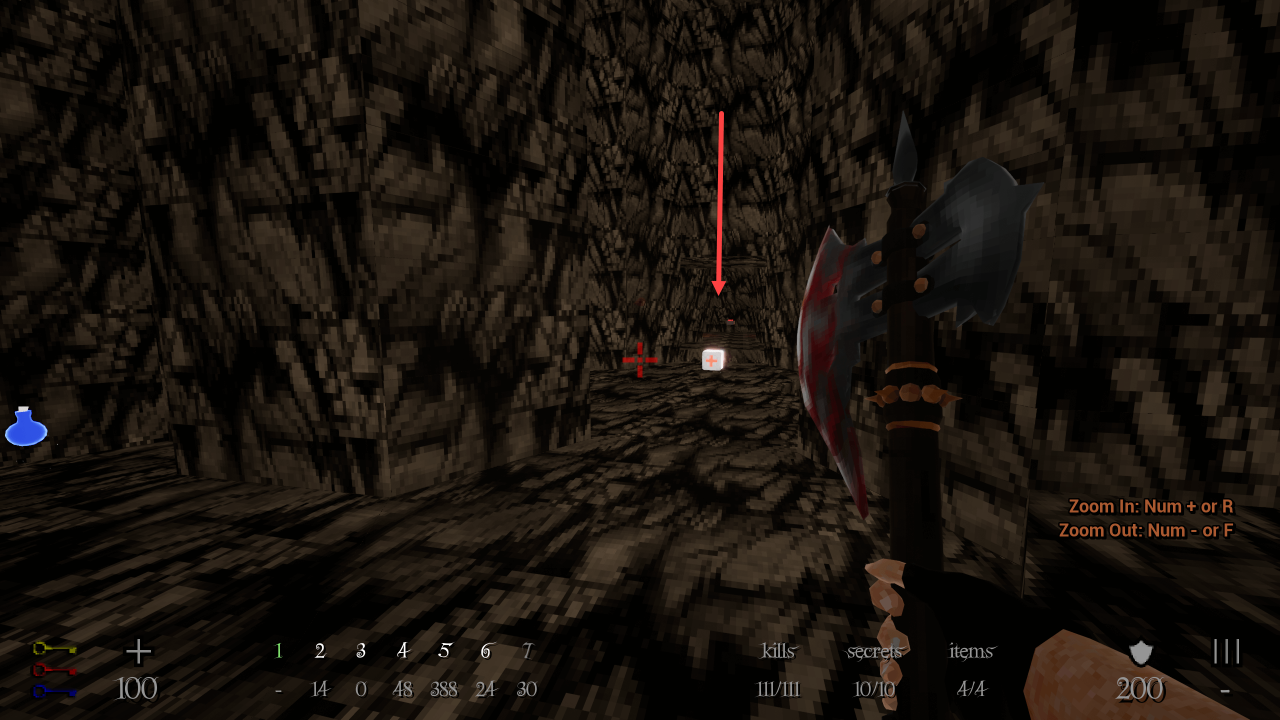
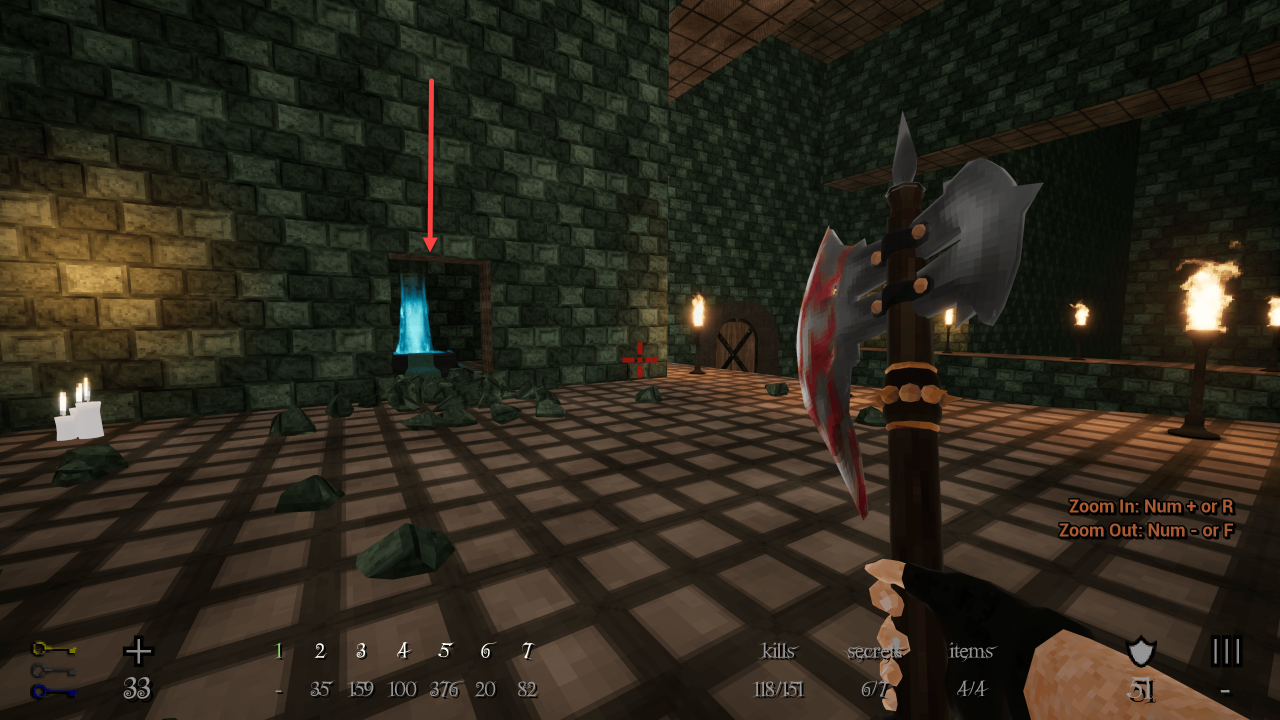
After hitting the switch in Secret #5, backtrack to Secret#4 where the gate was closed, it’s now open. You’ll find the map inside, and a megasphere.
E1M2
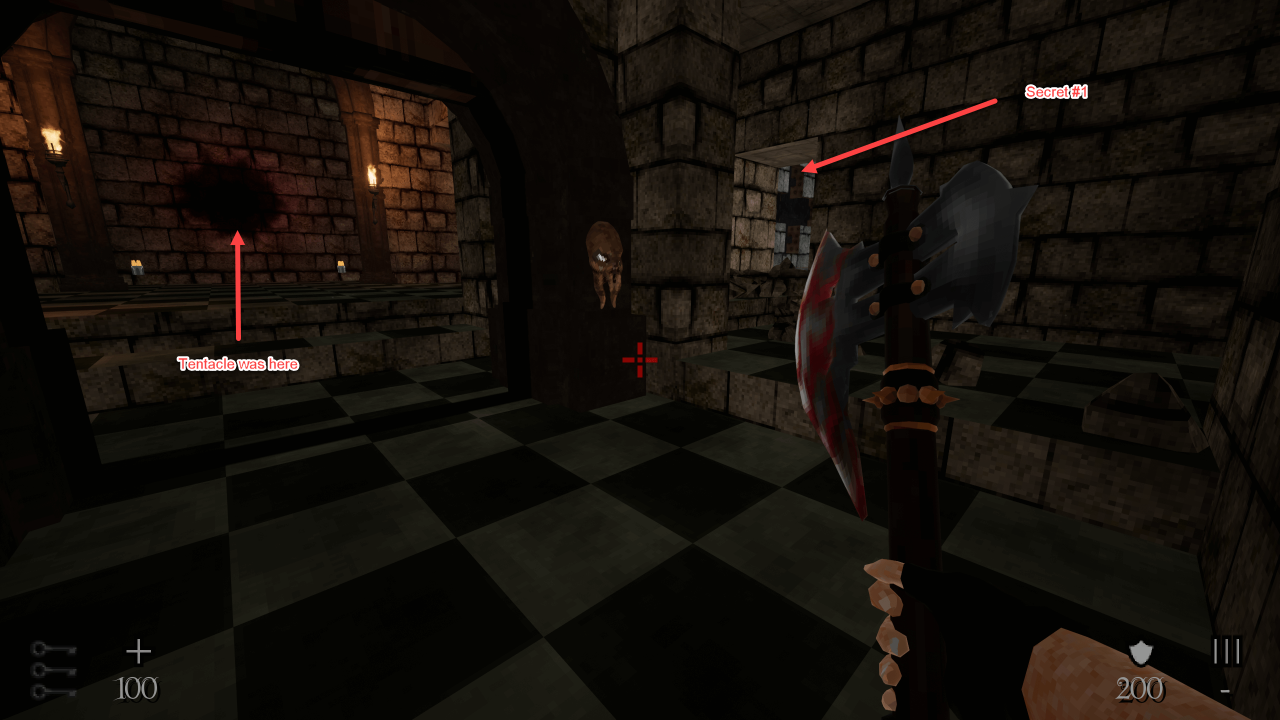
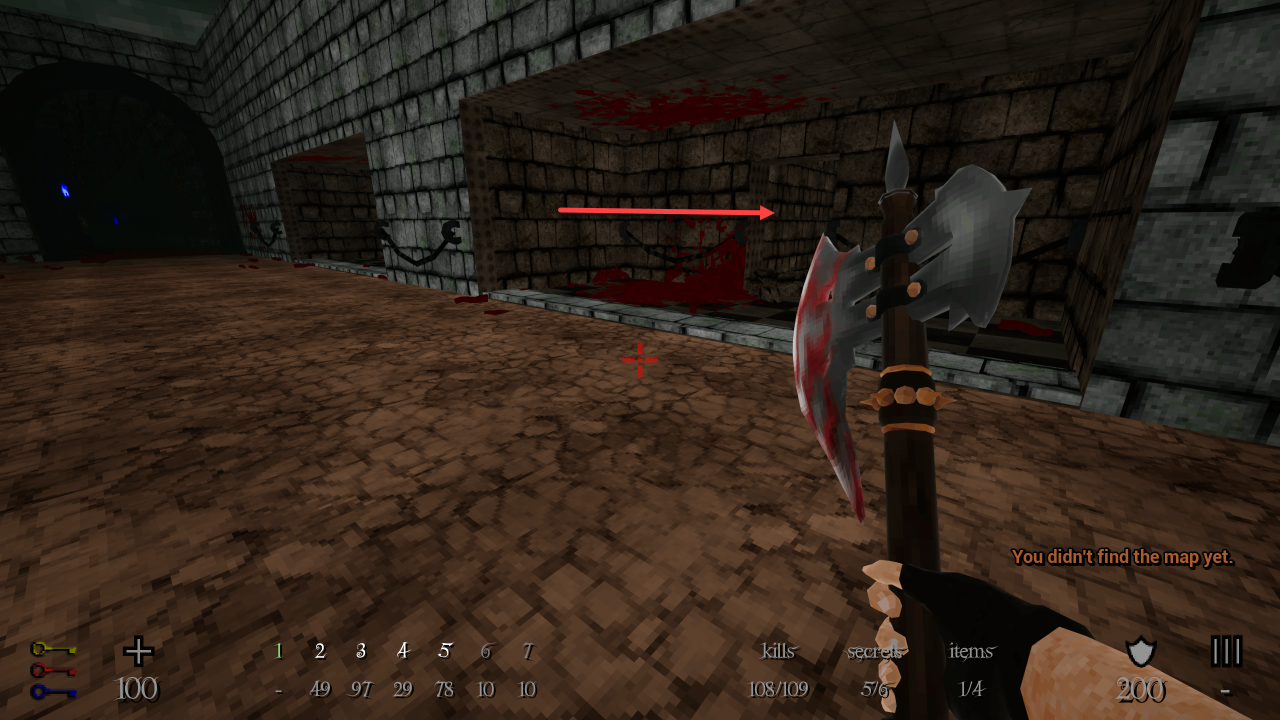
After unlocking the door in front of the tentacle-button with the 3 skulls, go through it. Take left and hit the wall with your axe.
If the yellow key room, there is a lwooden lift on the left, take it, and destroy the wall there. Activate the skull. This is the Secret #2.
 Now, backtrack to the little room with the three doors and the three skulls behind them. Ennemies spawned here. There was a health item unreachable at the very end of this room. The metal door is now opened, so you can reach Secret #3.
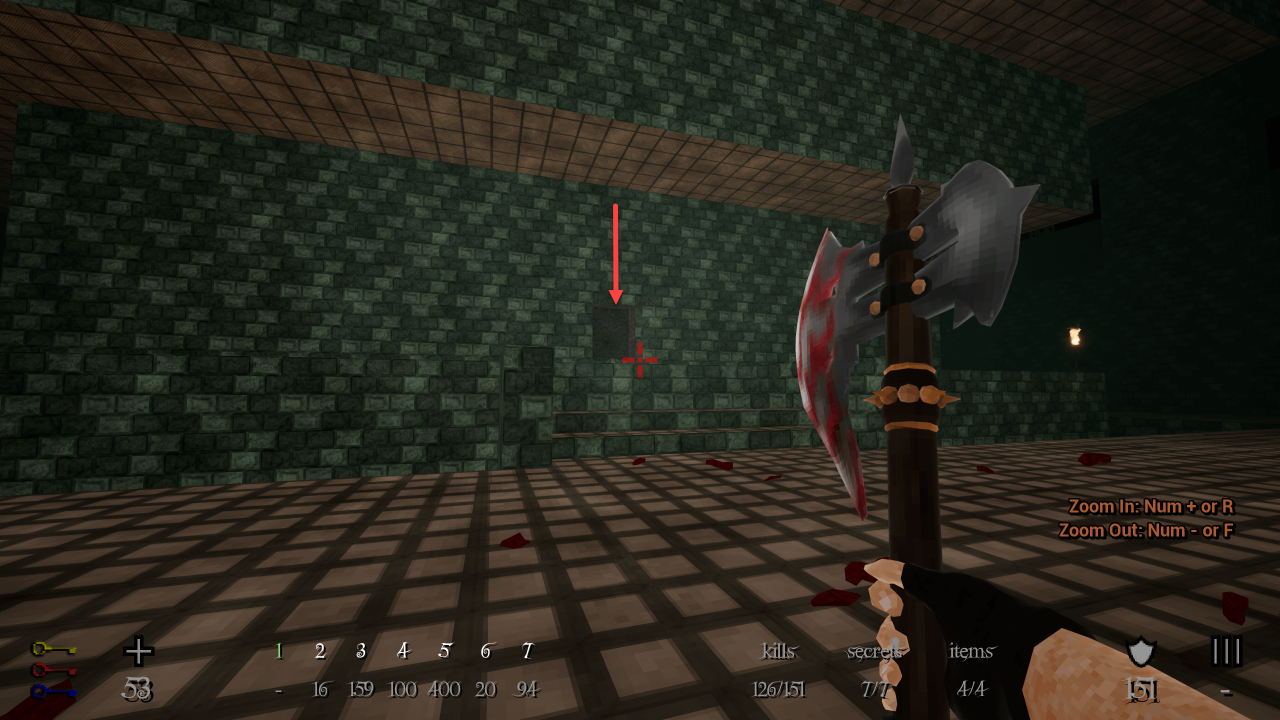
Go back near the yellow key room. A bit before this room, look on your left. There will be a black spot on the wall. Hit it with your axe to reveal this secret. The map and the megasphere are inside.
E1M3
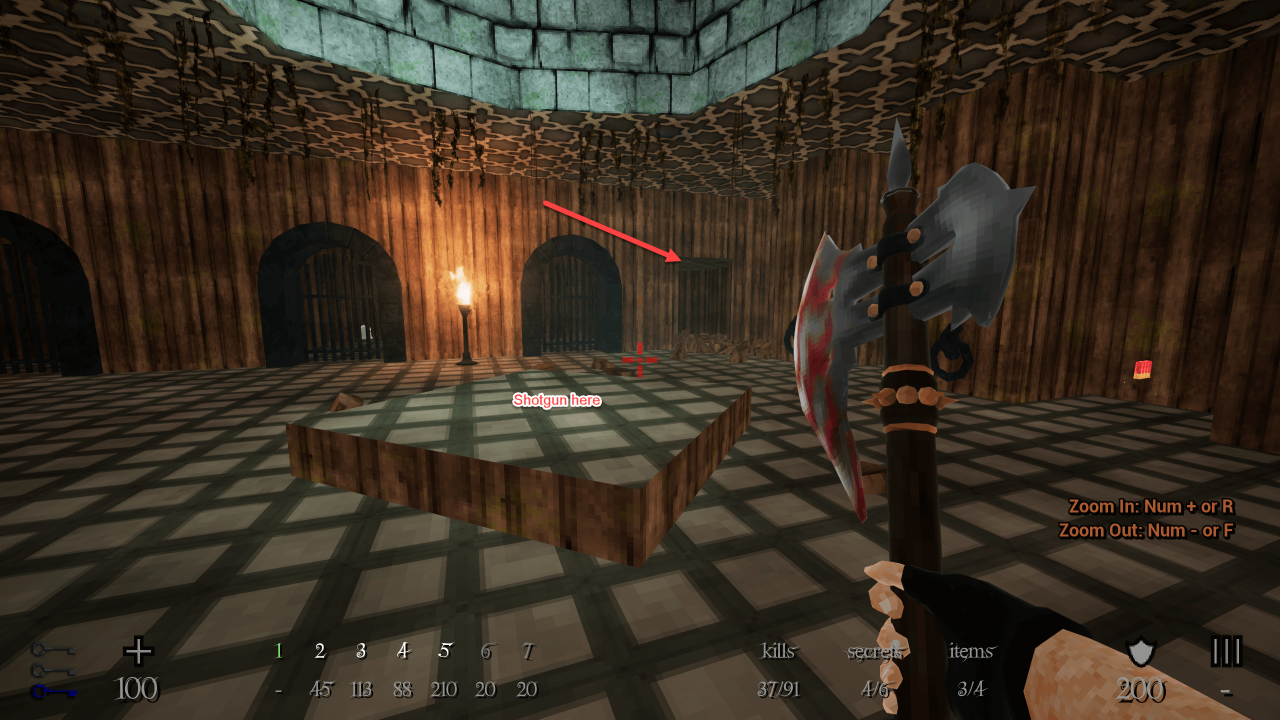
After taking the powerglove at the start of the level, you’ll notice the shotgun directly on your left. There will be a trap here. After killing the enemy, hit the left wall to reaveal the first secret which contains an armor.
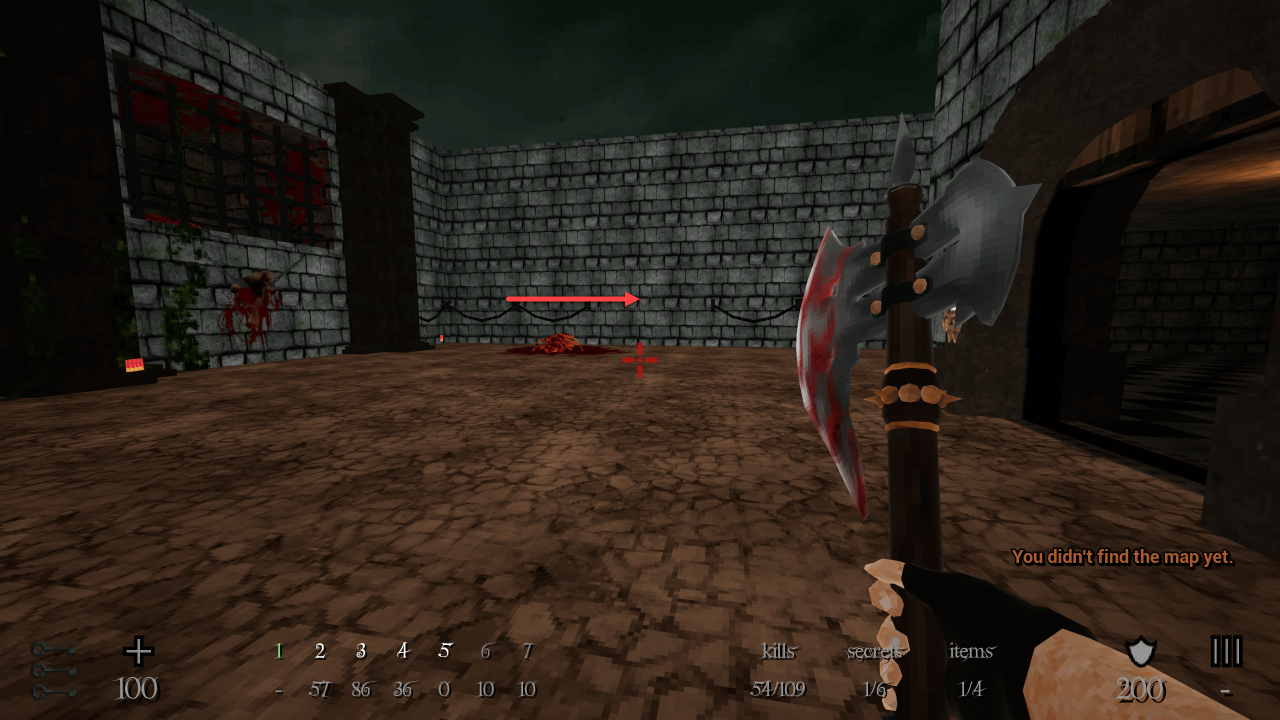
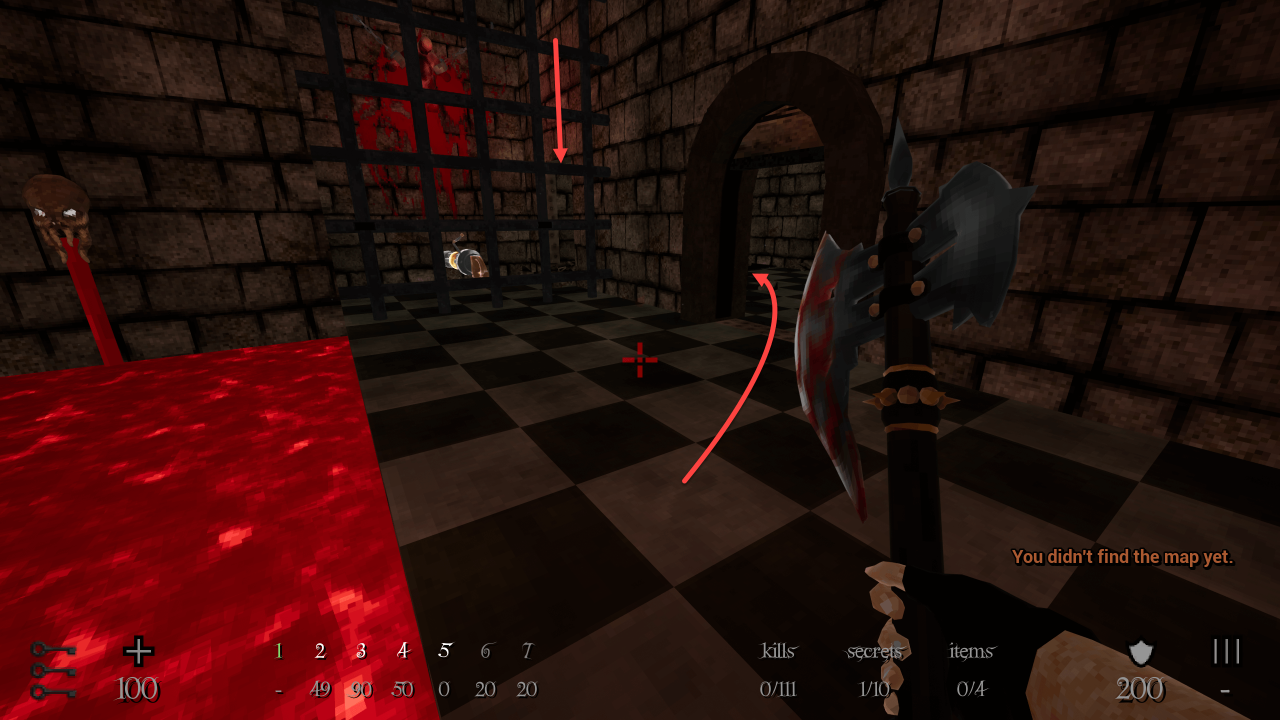
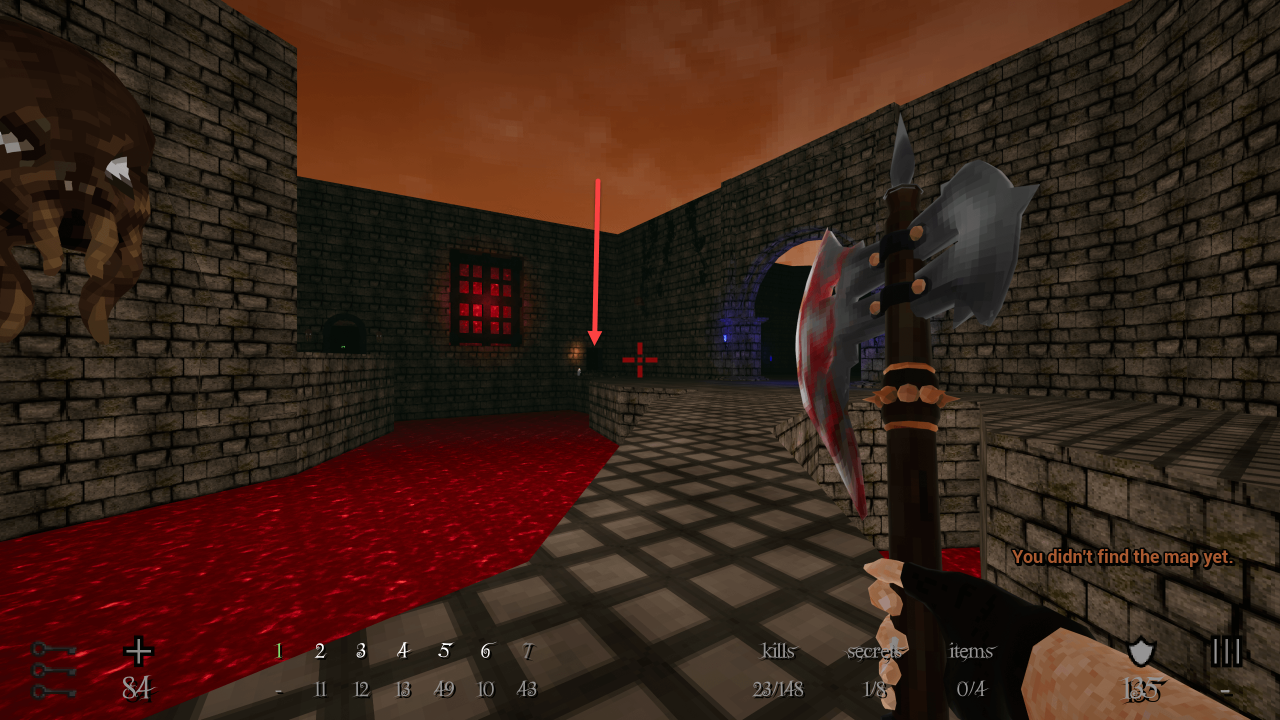
After reaching outside, where some ennemies will be trapped behind metal bars in front of you, turn right. Hit the wall in the center with your axe to reveal this secret.
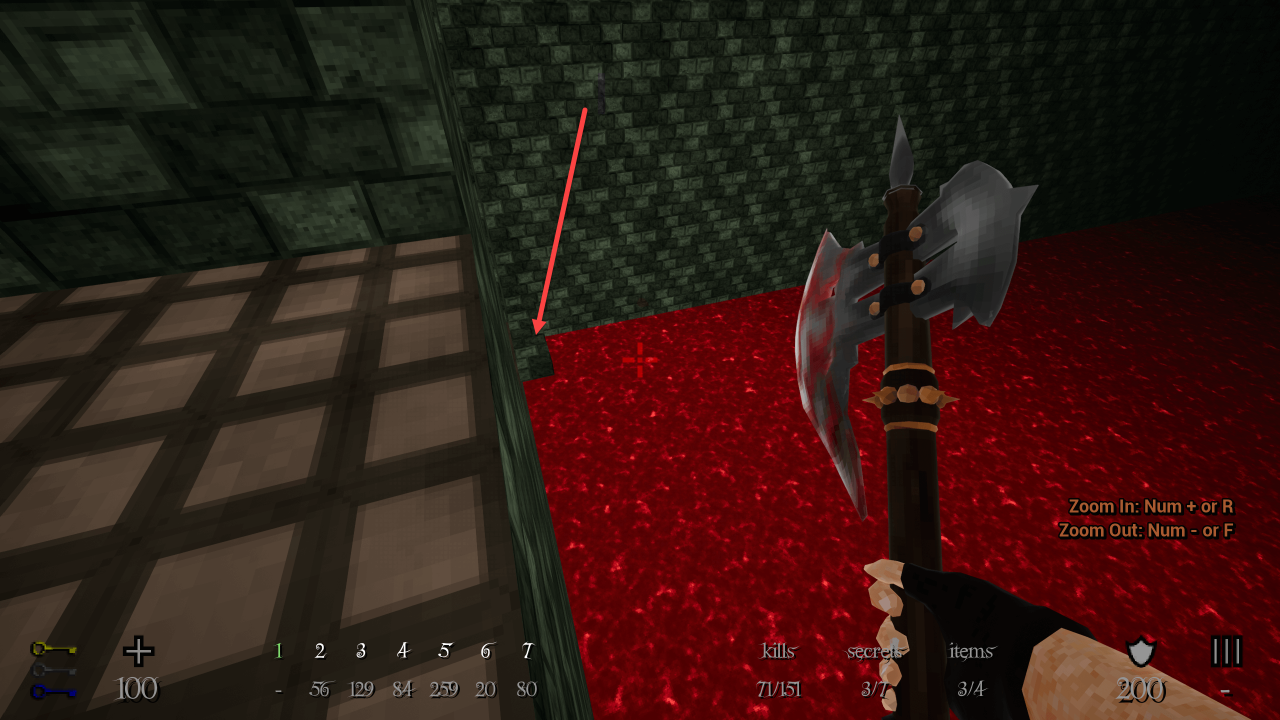
Go back where you found entrance to Secret #2. Explore the little sewers below, outside, to find a bloody area. Hit the wall where it’s thinner with your axe to get this secret.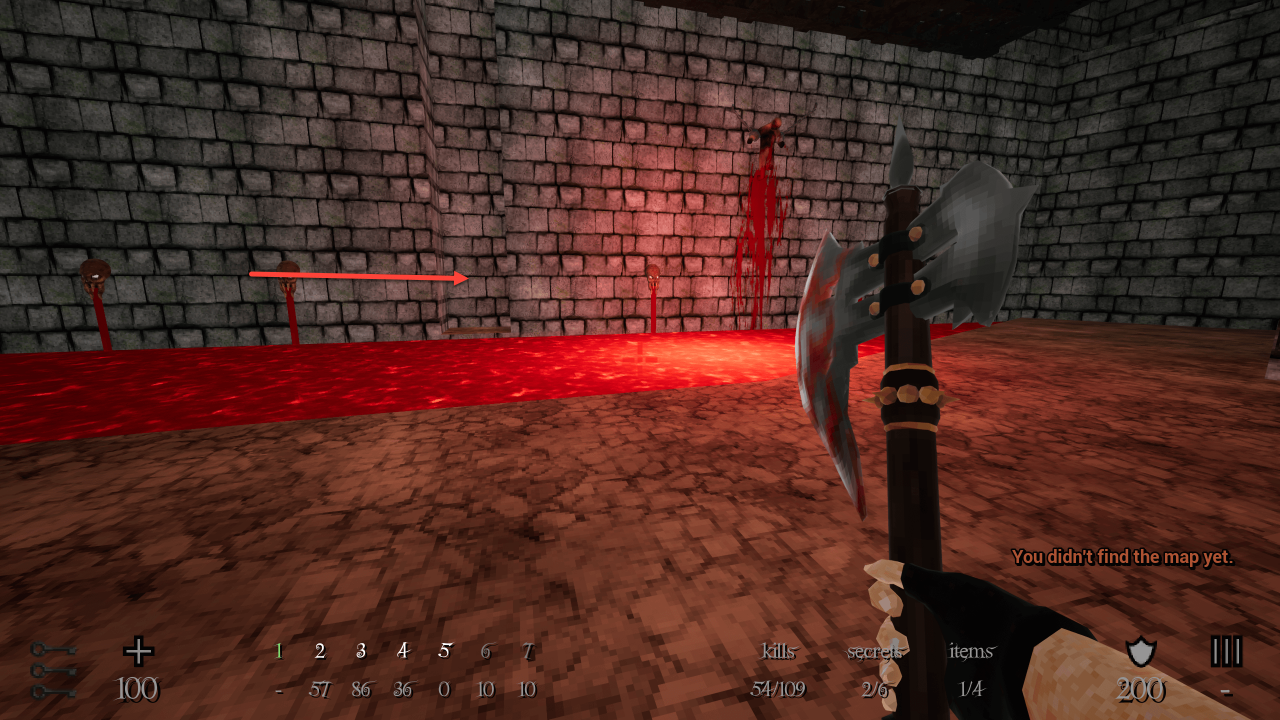
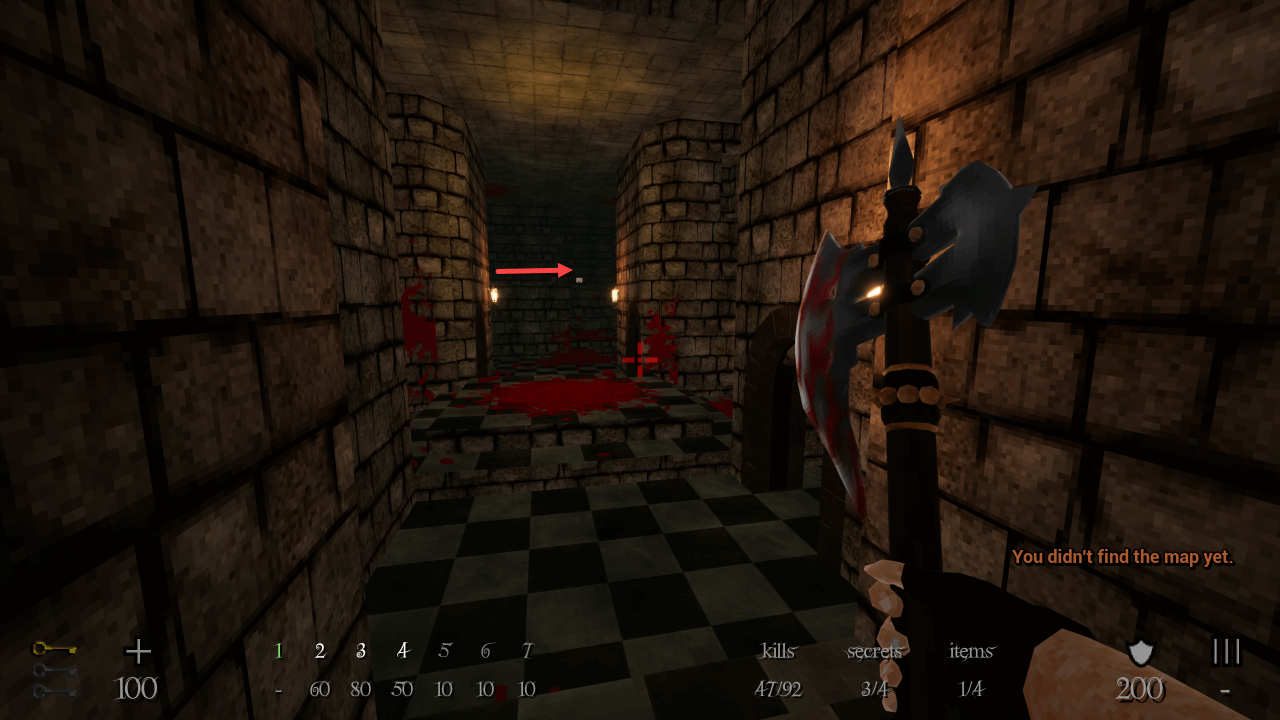
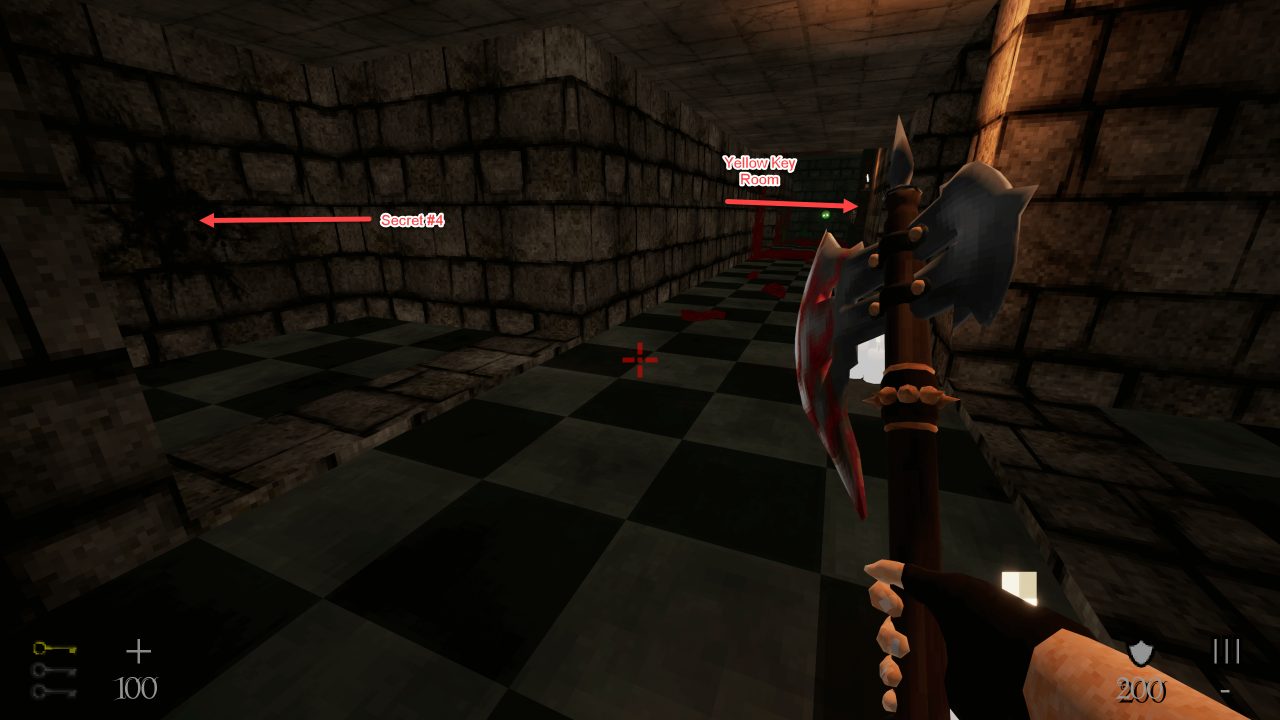
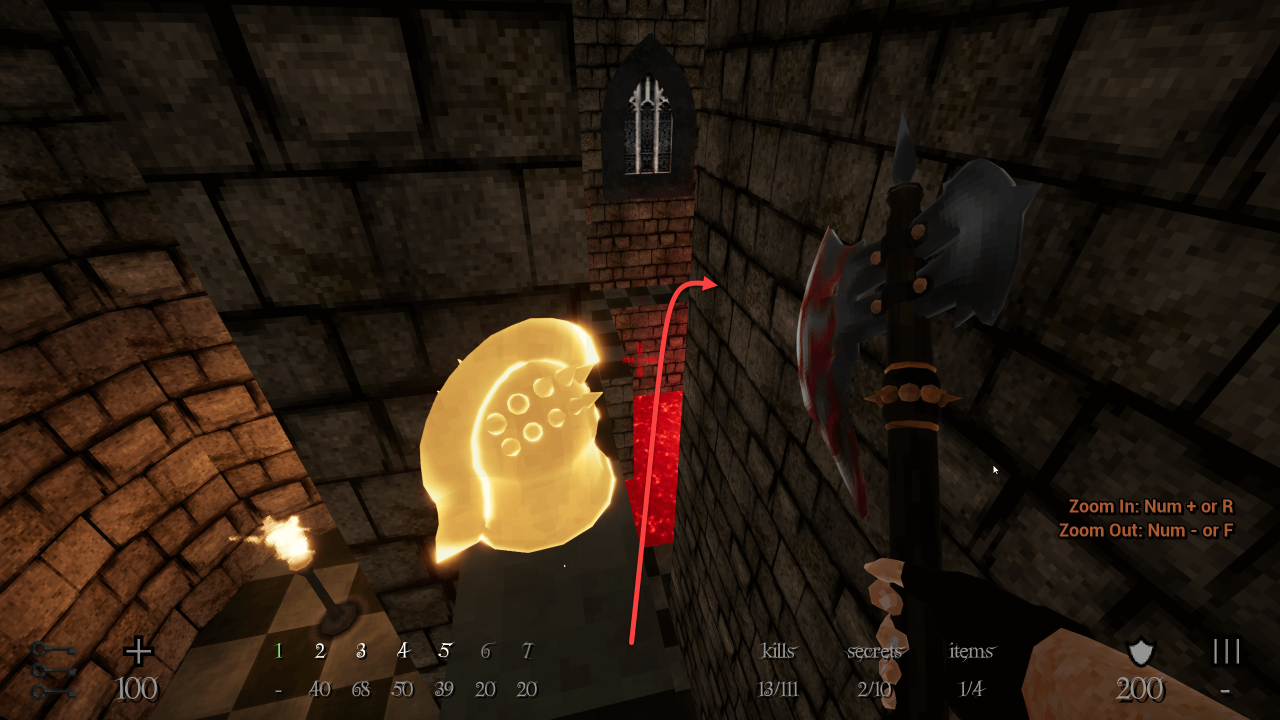
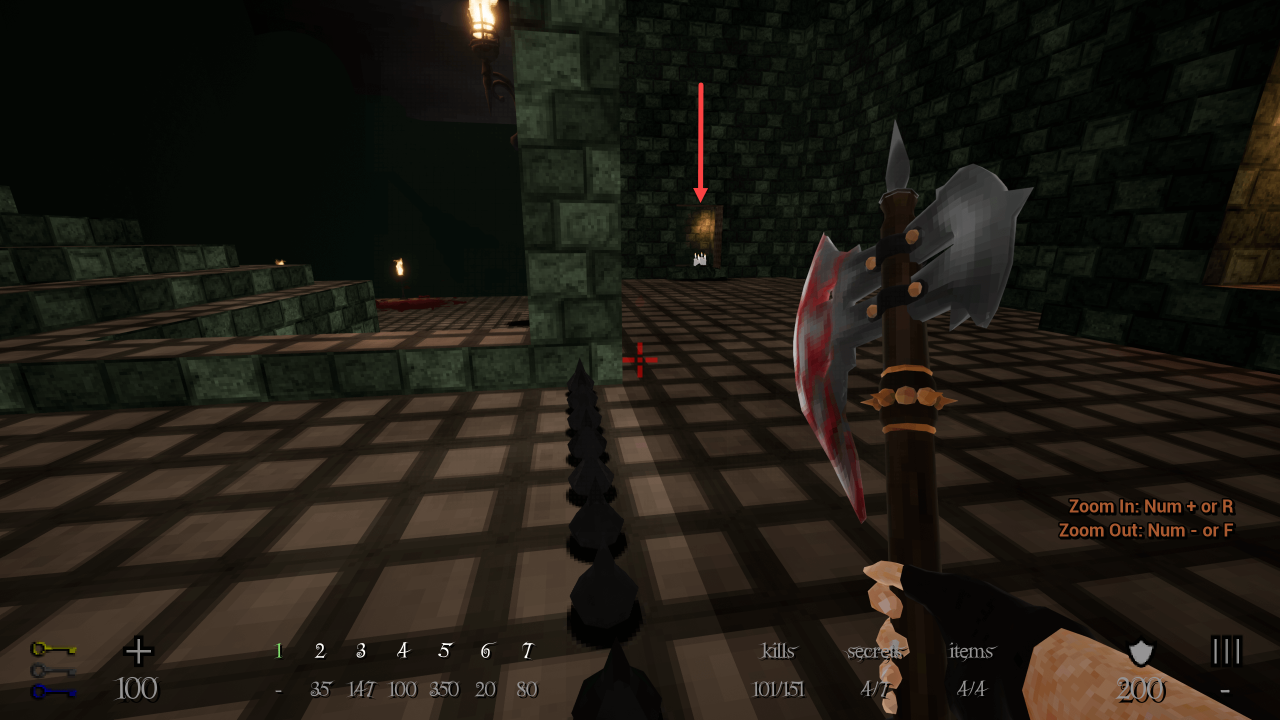
At some point you’ll see a door with yellow flames in a corridor, which requires the yellow key. From the door, turn back, ecit the corridor, and take right then right again. you’ll end up in a smaller corridor with a lift on your right. Hit the wall atthe end to find Secret #4.
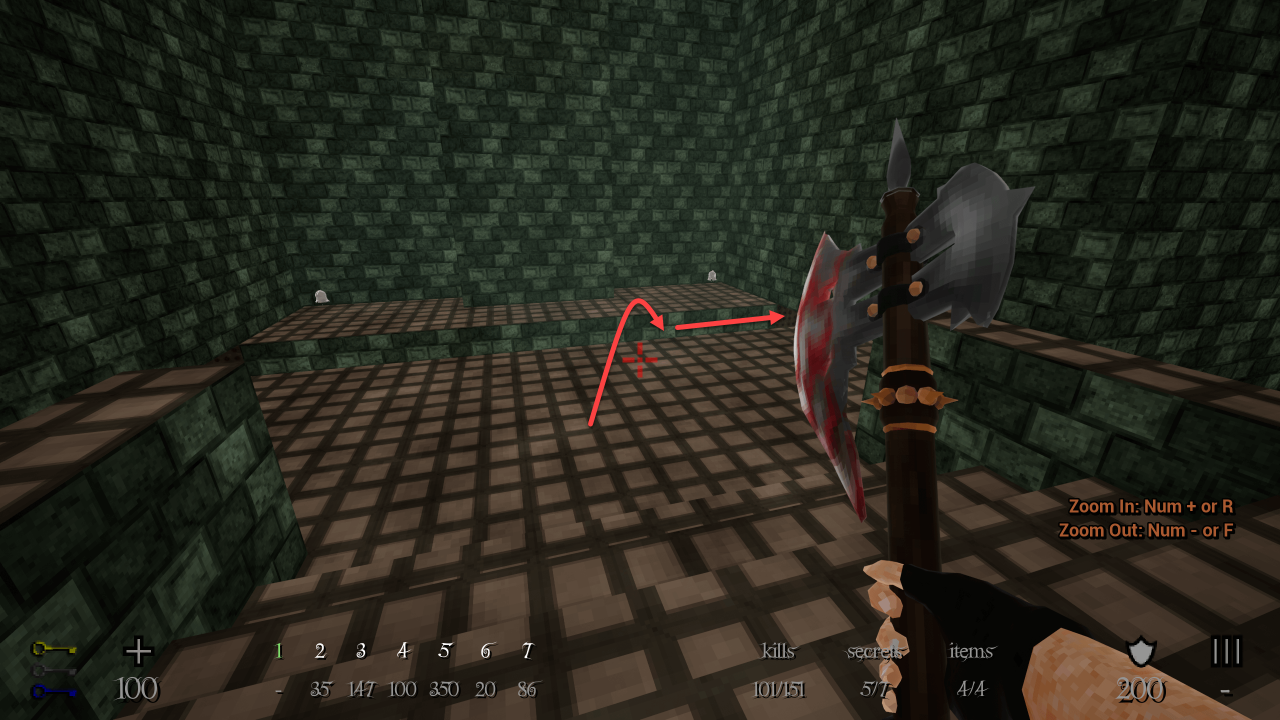
 Now, Take the lift and climb up. Turn around and look at the black spot on the wall. Hit it wit hthe axe to unlock Secret #5. This will get you to some ammo.
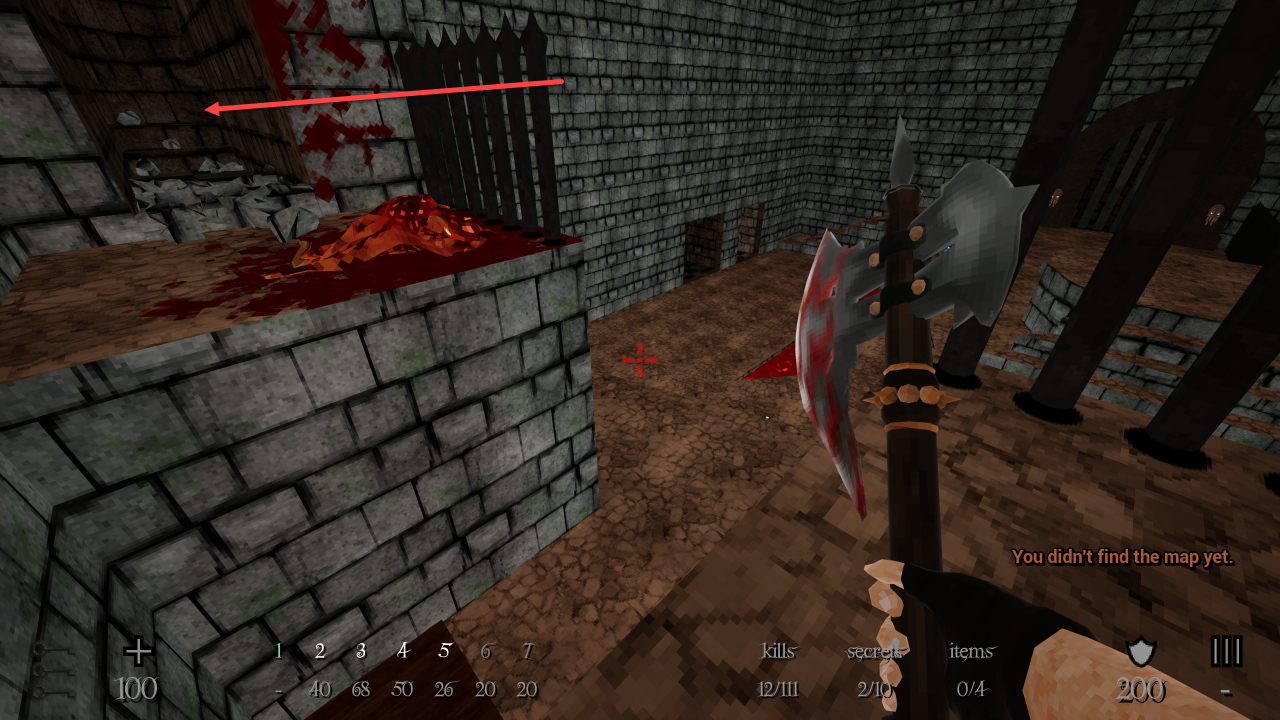
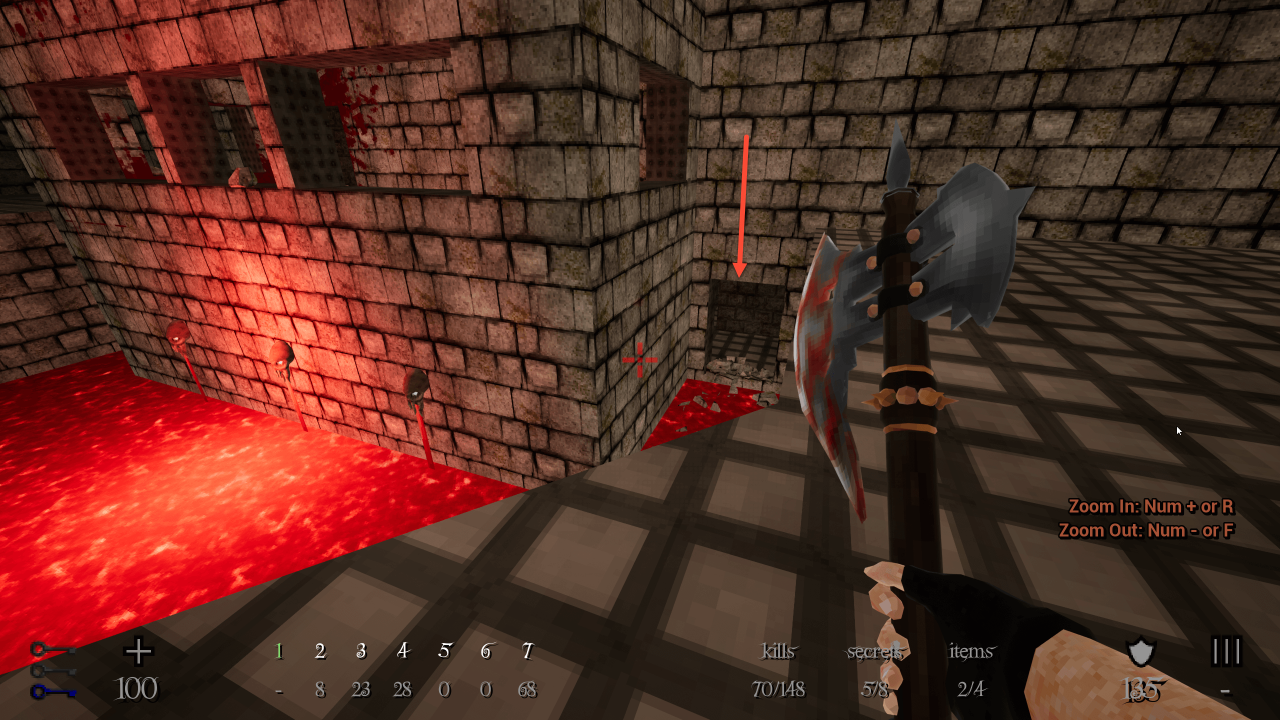
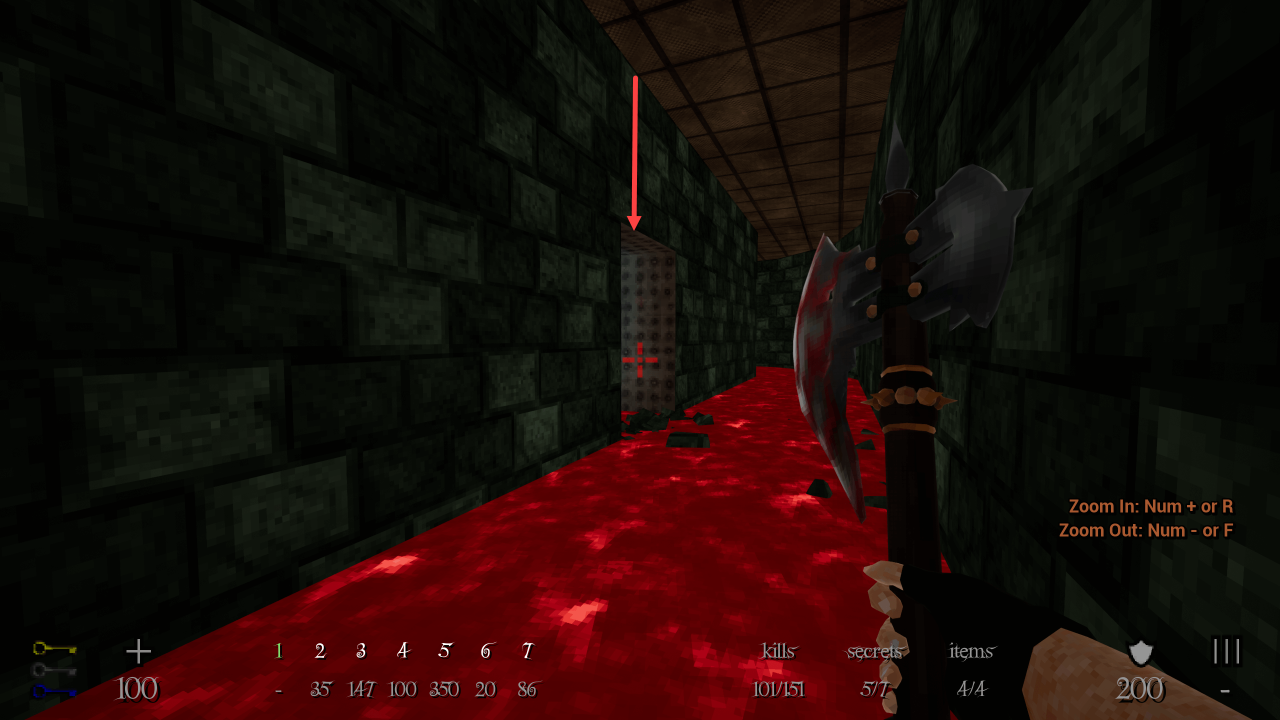
After completing most of the level, go back outside where entrances to Secrets #2 and #3 are found. Go near the poison at the end of the area, and hit the wall in the alcove where some ennemies spawned to reveal the secret. The map is inside, with the megapshere.
E1M4
At the very start of the level, turn back and punch the door nearby. Secret !
Also at t hethe very start of the level, go left to the shotgun, but don’t take it now, take left again. There will be a small room. The wall on the left is destroyable with your axe. There is another wall inside, then some health !
Again, at the very start of the level. There is another destroyable wall behind the shotgun on the wall with metal gates, hit the wall right of the third gate. There is an armor there.
In the room containing the blue key and a switch, follow the right ledge leading to the switch. Destory the wal lthere with your axe. Secret armor ! Shiny !
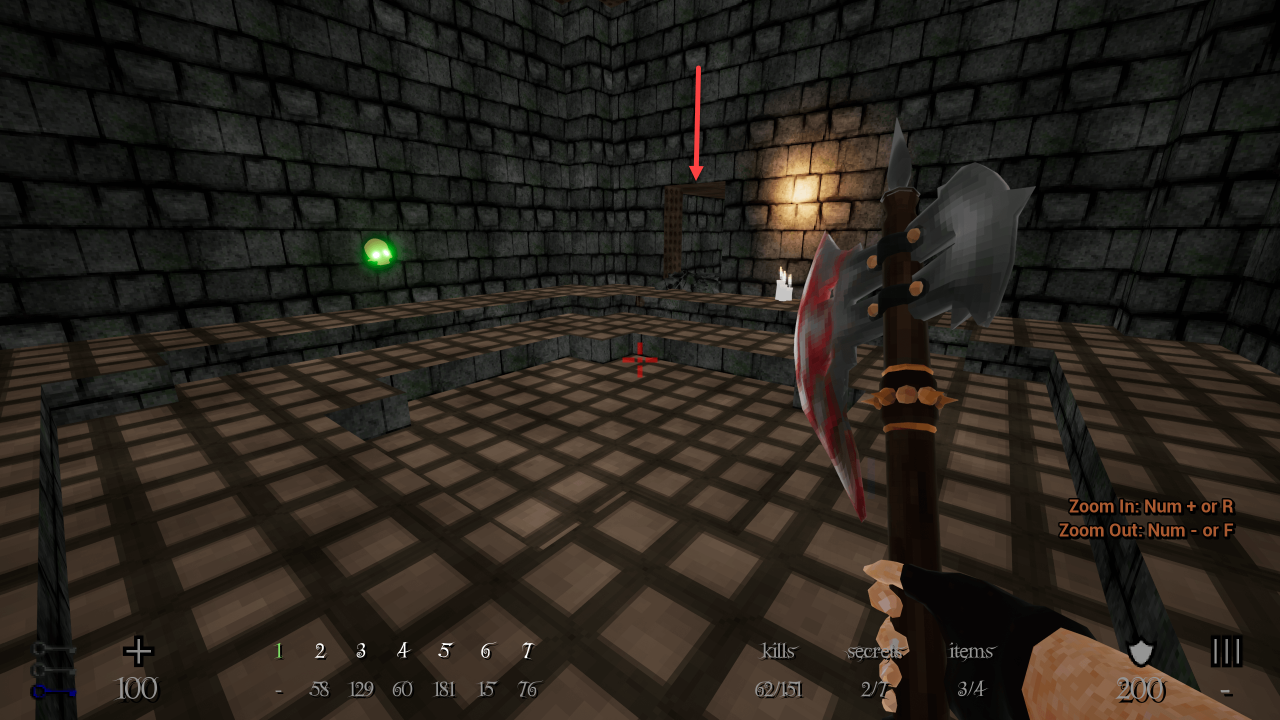
When you’ll reach a corridor with some lights on your left, and a small room at the end contianing a blue teleporter encased with metal beams, hit the wall in the corridor there, there will be the map !
In the map room, there is a teleporter. Take it to be ported to a power glove. Be aware, it’s not alone ! Take this !
 Extra note : in the final part of the level, the cathedral-like room with pillars and tall windows, there are multiple little rooms and passages behind those windows.
E1M5
At the start of the level, go straight until the large metal beams blocking the exit, then turn right to the bloody area. You’ll notice a minigun behind some other metal beams, enter the room on the far right, then hit the left wall after going inside. You’ll find the minigun there.
After going outside for the first time and killing ennemies here, take the little lift on your right. On your left, there will be a skull switch, on the right, hit the wall to reveal this secret room.
 Inside the room, kill the enemy and look where the map is. Take the lift on the right, there will be an armor. Now, look back. Take some speed and rotate your camera to the right just after passing the right corner to land on the map platform.
Before entering the cauldron room with blood around it, hit the left wall at the end of the corridor to find this secret. There is a weapon here.
In the maze-like oustide area with metal railings and switches, take the blue telepoter.
 There will be a tentacle-button here on the wall (if still there). On your left, you’ll find that you’re above the cauldron room. Jump below to reach the left ledge to get this secret.
Still in the maze-like oustide area with metal railings and switches, get in the middle near the central skull switches. Climb on the railing here with the help from the switch’s stairs (if you have no stairs, solve the room first by activating skull switches) and drop down where you can see a golden helmet. Secret #5 !
Again, in the maze-like oustide area with metal railings and switches, get back up where you dropped down for Secret #5. turn around this time and drop down in the water on the other side.
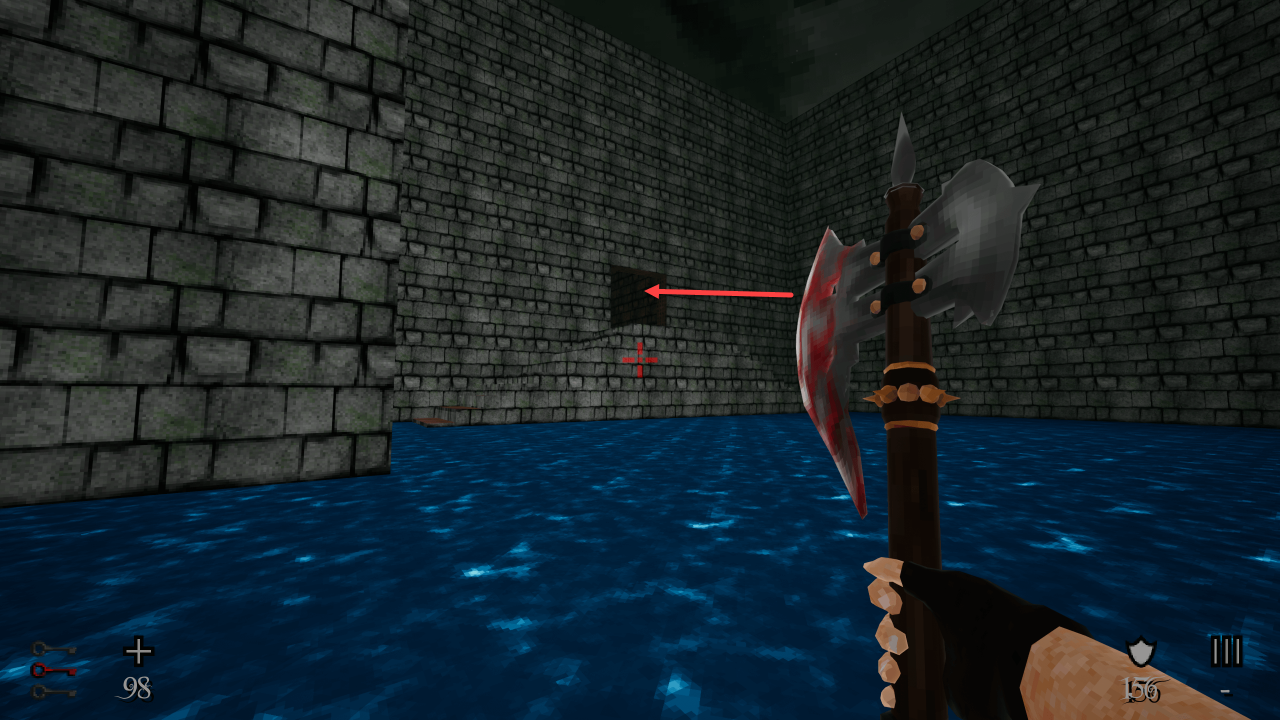
 Run to the wall in the back and take left. There will be a tiny opening between the walls, the secret is at the end.

In the yellow door room, where there is a lot of huge metal cages, go through the puzzle and some wooden lifts until you have a lift with an enemy just above it, then a “L”-shaped corridor with a drop at the end. Do not drop there, instead, hit the wall in the corner of the “L”-shaped corridor to reveal this secret.
 Inside, thake the lift and hit the wall on the right while the lift is up. You’ll find some armor here.
After activating the switches in the blue key room, you’ll open up a big metal gate where Secrets #5 and #6 are located. There is a huge tentacle behind, coming out of the water. Climb on it and enter the cave at the end of the tentacle.
 Now, take the items. There is a breakable wall at the end of this room, behind the health item. The secret is there.
Inside the red key room, the wall on the right when entering can be destroyed. You’ll find the megasphere inside.
After using the red key twice, you’ll end up in a room separated by a metal railing, some enemies will spawn here. Go behind the railing and down the stairs, there will be a small corridor down there with another enemy. Hit the wall on the right with the black spot to find this secret. The powerglove will be just below you.
E1M6
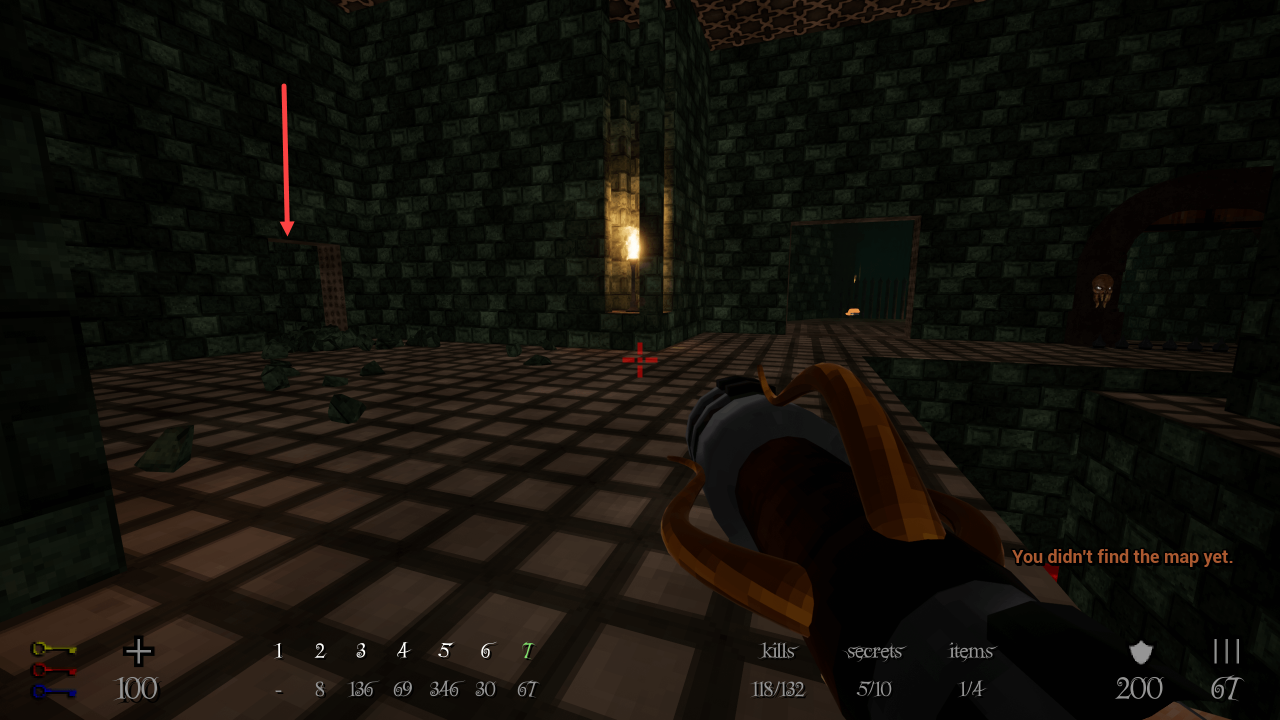
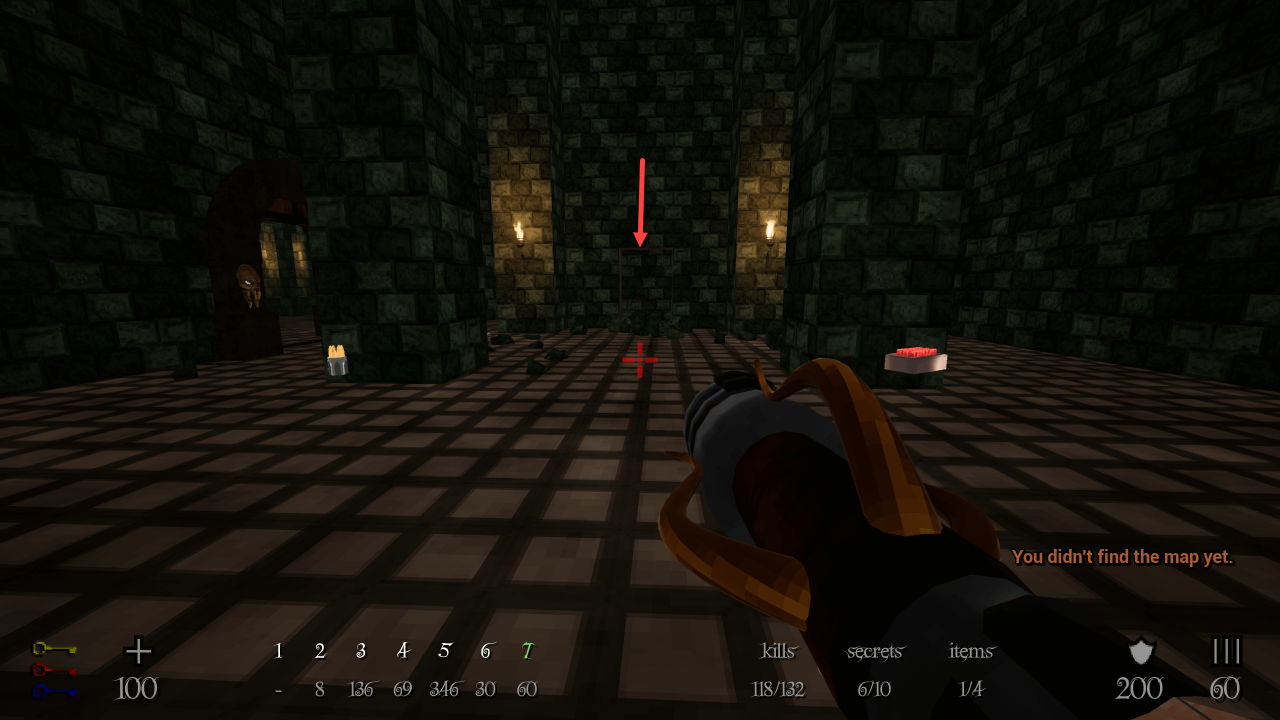
After going outside in the serpentine-like path with the large tree, you’ll end up back in the main room with poison. Before going up the stairs, shoot the barrels on the left wall, you’ll reveal a secret.
When picking up the gatling gun after the yellow key door, look at the wall behind it. The wall there is destroyable. You can use the little platforms on the right side to make the jump easier.
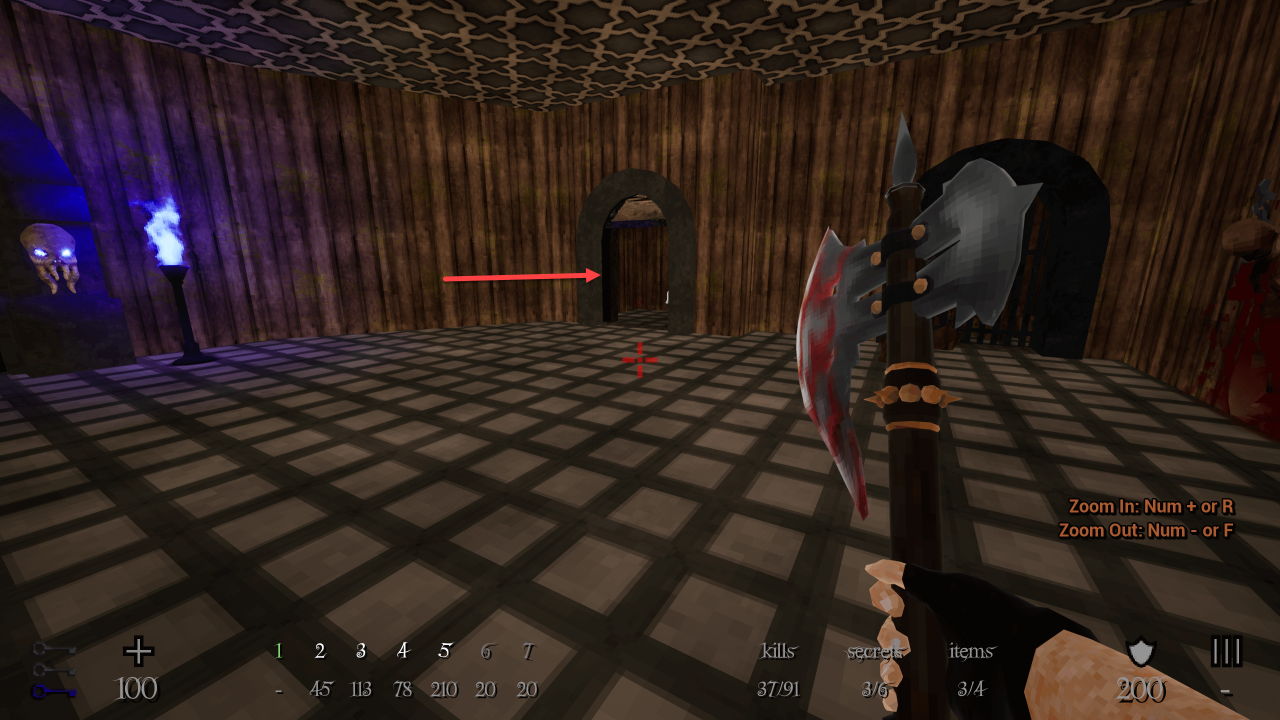
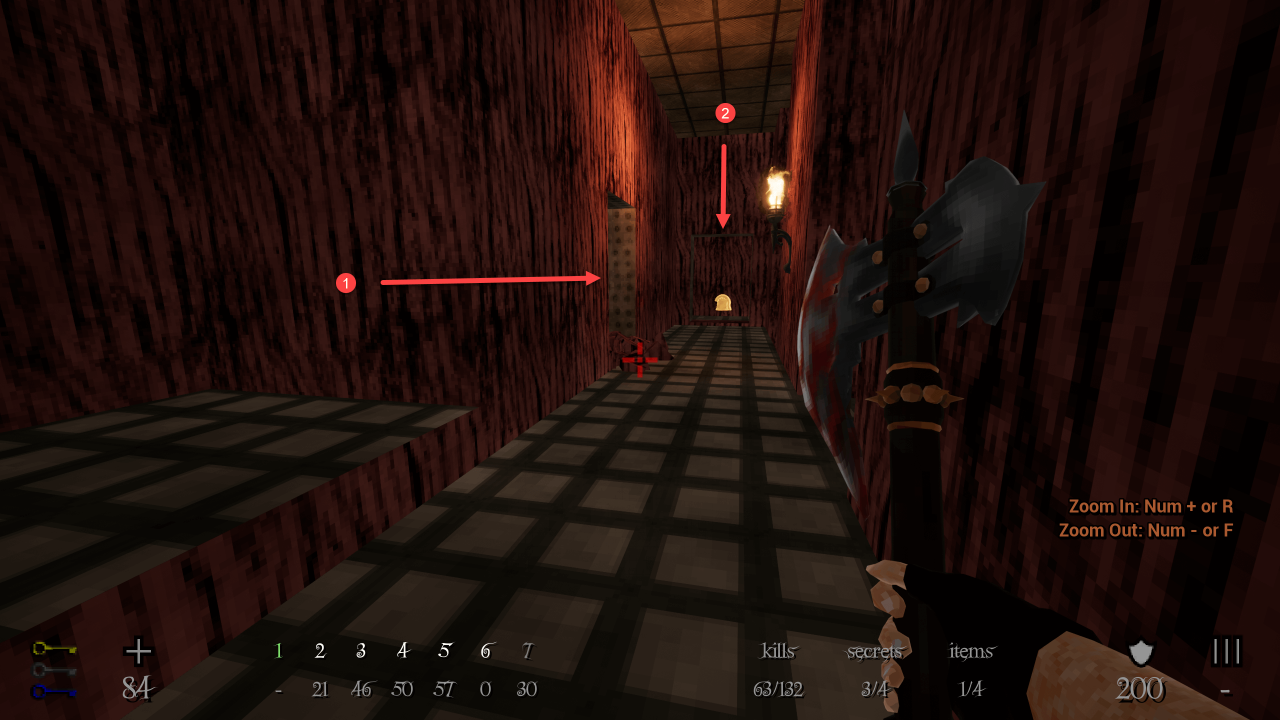
After picking up the blue key and killing ennemies, you’ll enter a wooden maze. A bit before the end of the maze, you’ll find a seemignly empty corridor with a torch on the right. Hit the wall on the left in front of the torch, activate the switch, and the wall at the back of the corridor will open, revealaing the secret.
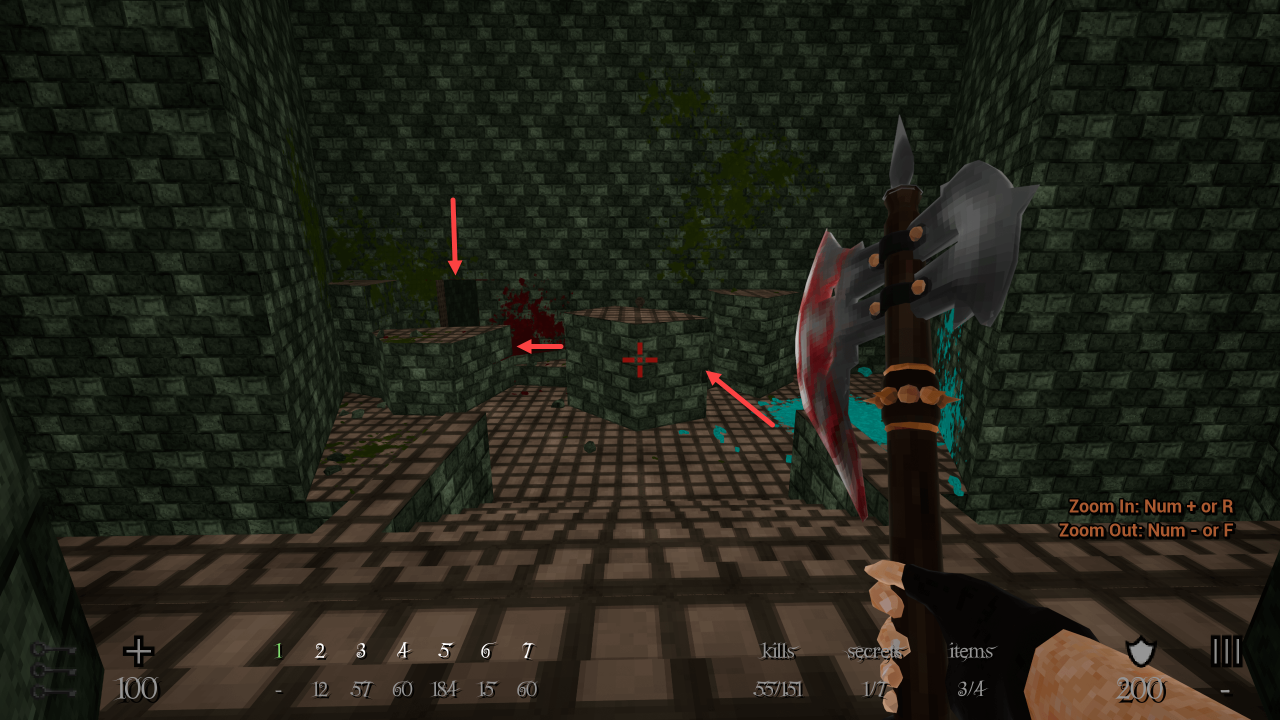
After picking up the red key, climb up the stairs and enter the next room. On the right, a skull switch, on the left, there’s a wall with a small pool of blood and two skulls pouring out blood. The wall bewteen them is destroyable.
 You’ll find the Megasphere inside.
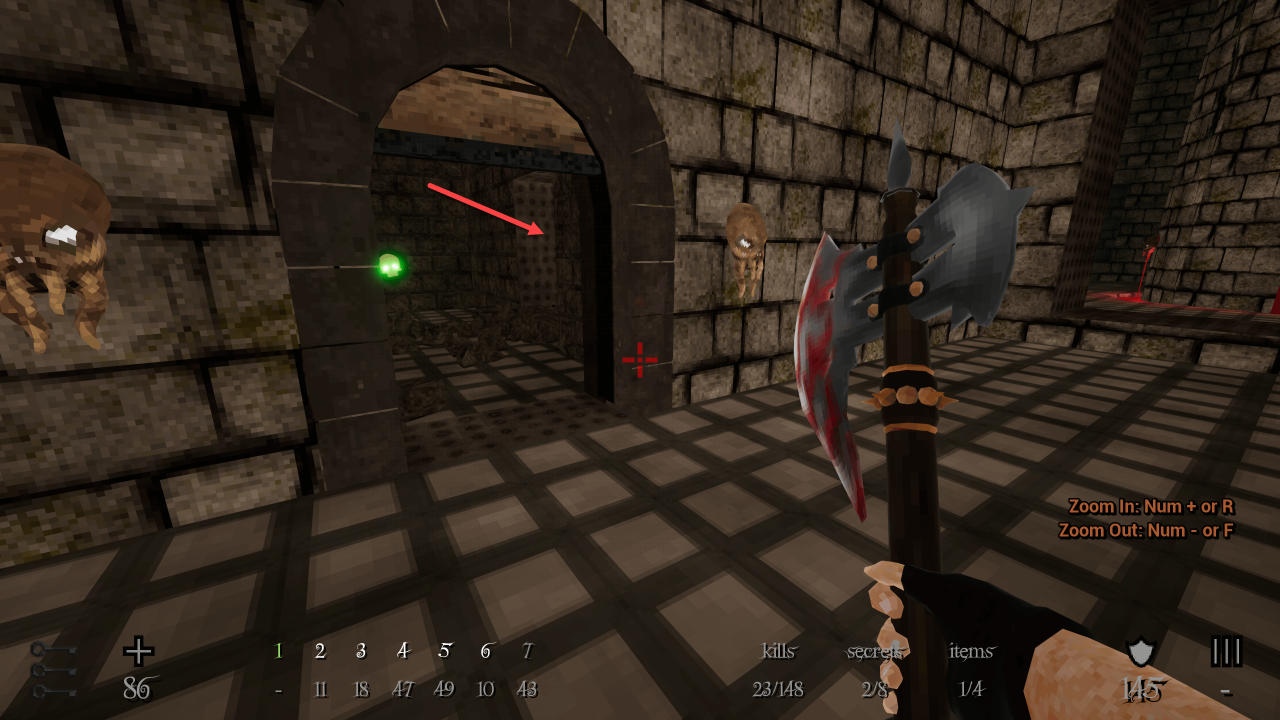
E1M7
At the start of the level, go under the right arch, and go inside the little room in the right again. In this corridor, the walll on the right is breakable.
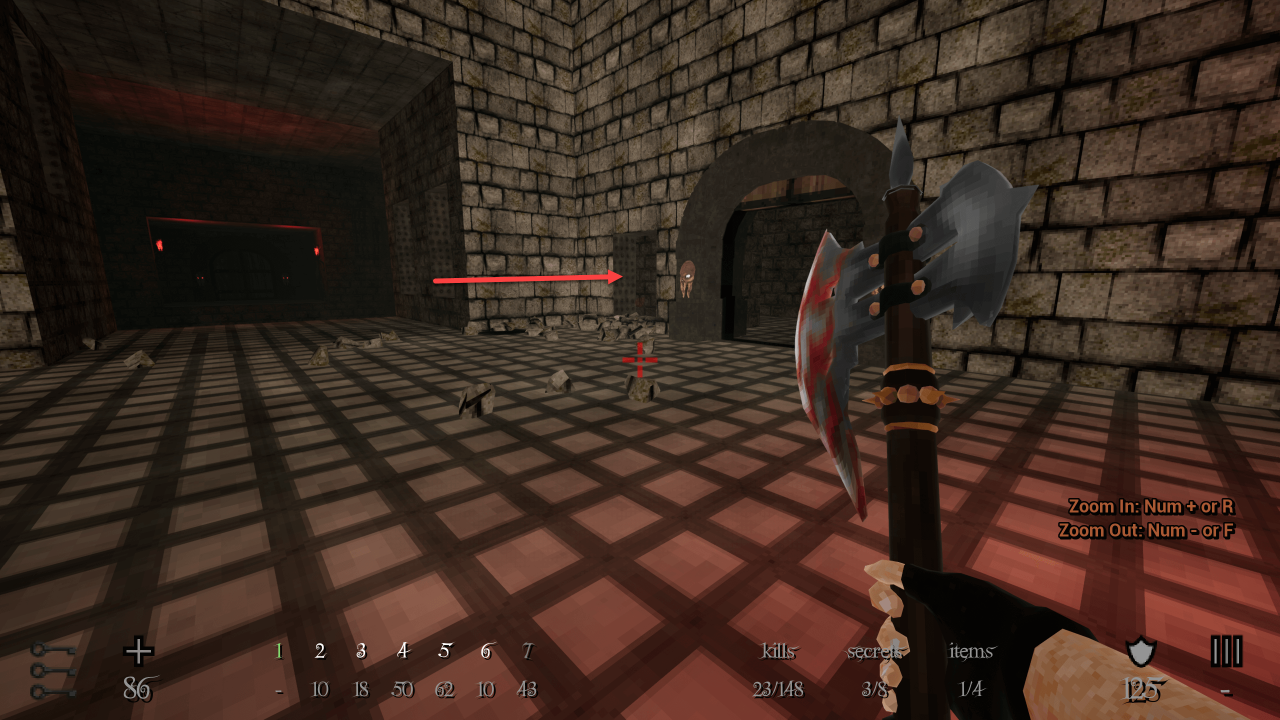
After clearing some more enemies and activating switches, you’ll end up at some point with a very large “C”-shaped room, outside, with a lot of blood and Chutulu heads on the walls. Take the first arch on the right with red torches. There will be a door on the right. On the left of this door, there’s a breakable wall. That’s Secret #2.
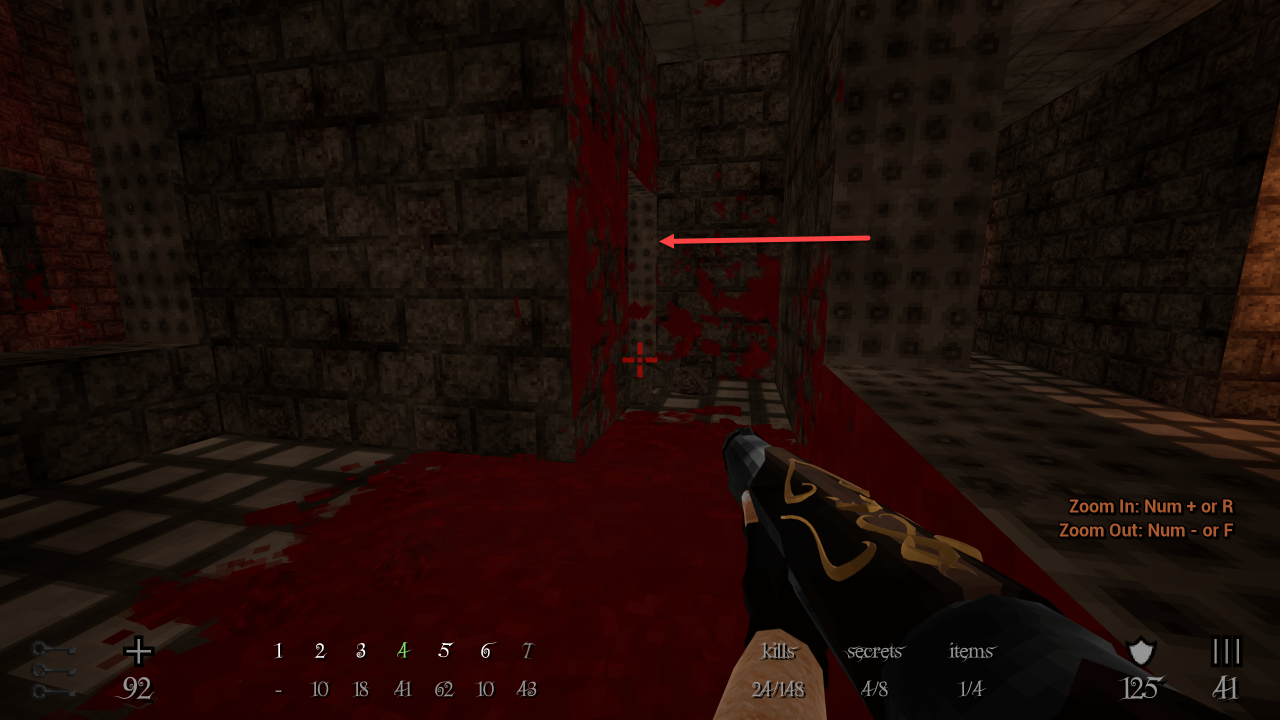
 Inside this secret, there is another breakable wall at the end of the secret room, on the left. That’s Secret #3.
Continuing in the big “C”-shaped room, go through the arch with yellow torches. On the right of this room, there will be a destroyable wall between two windows.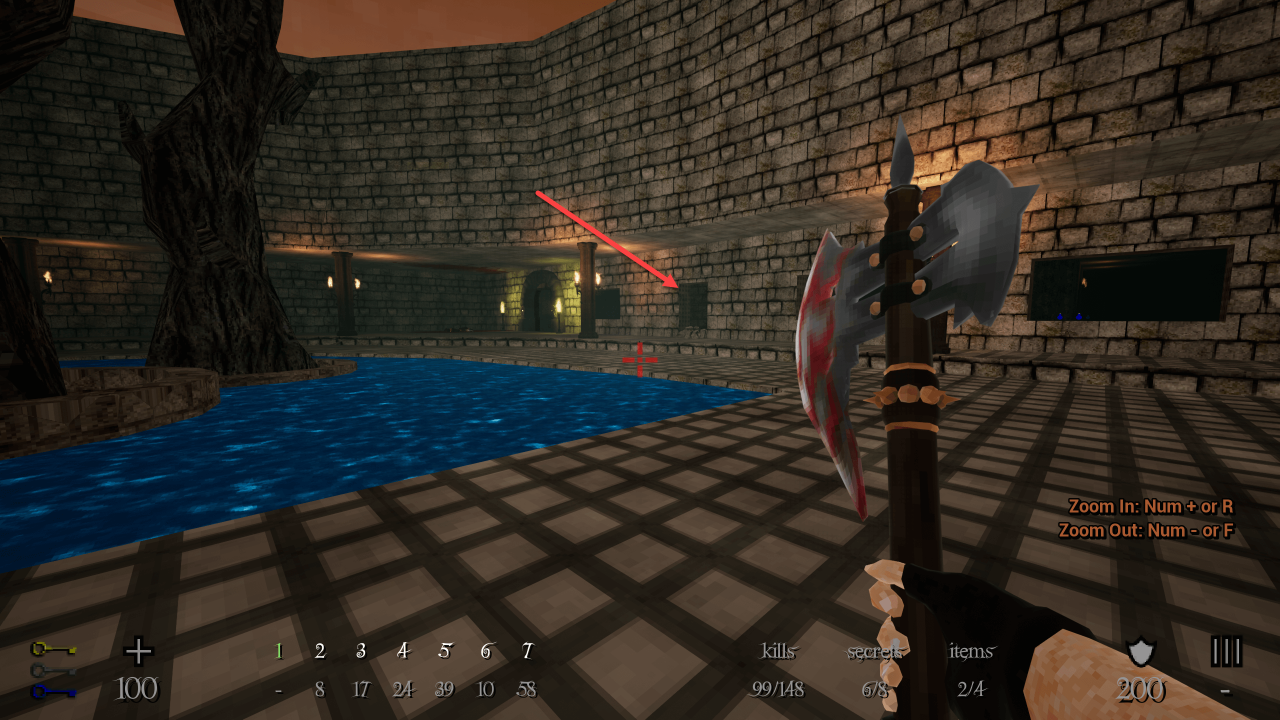
At the end of the large “C”-shaped room, there’s an arch with blue torches on both sides. On the left of this arch, break the wall to reveal a little room with the map.
After going through the arch with blue torches, look down in the blood pool, the wall on the right can be destroyed.
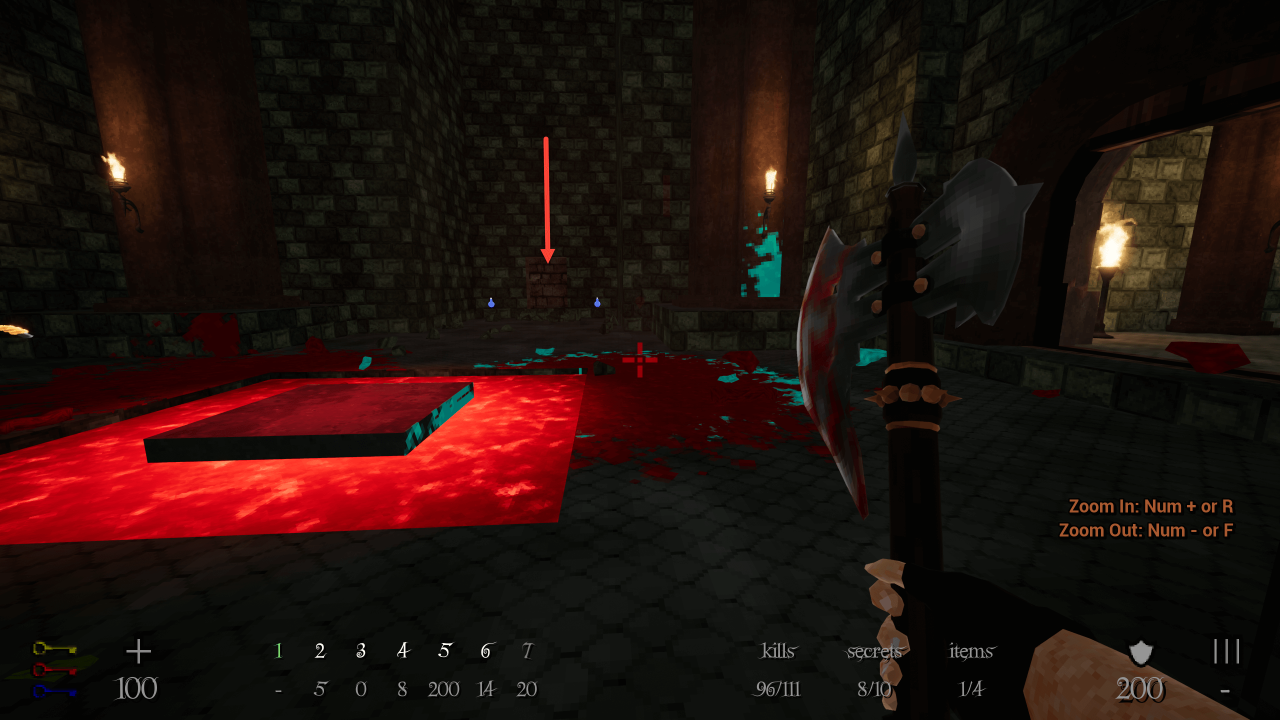
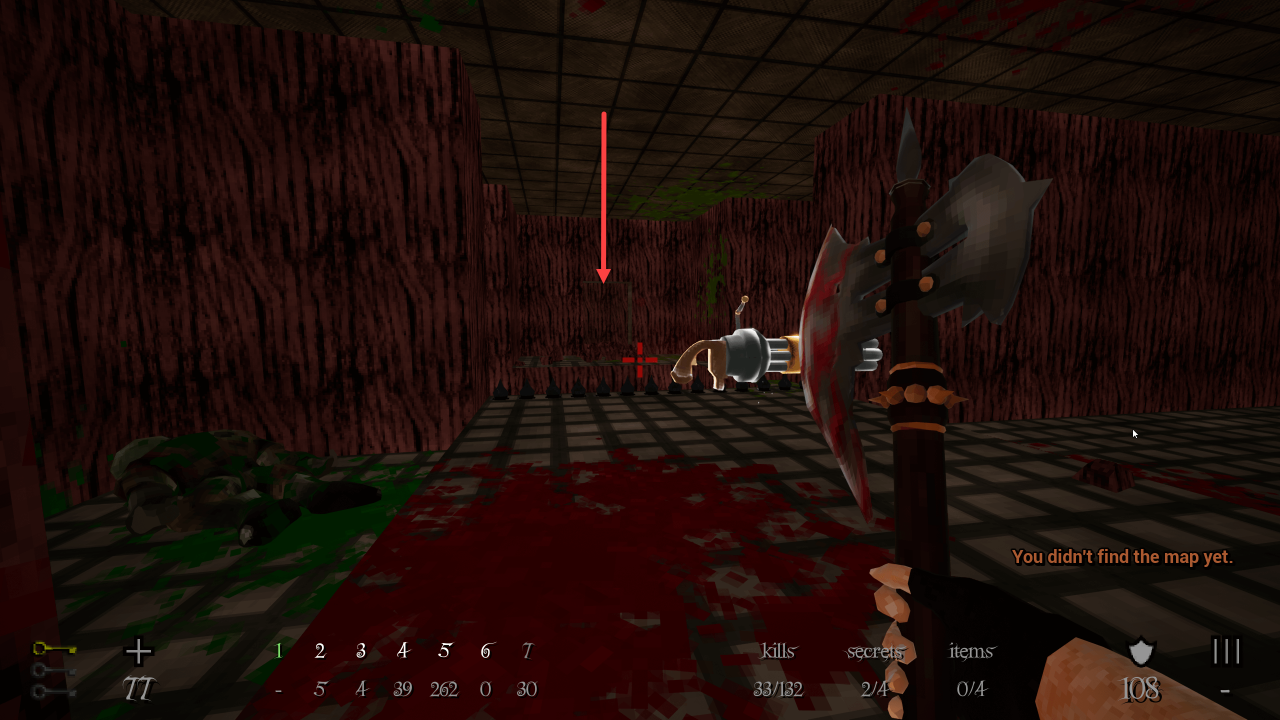
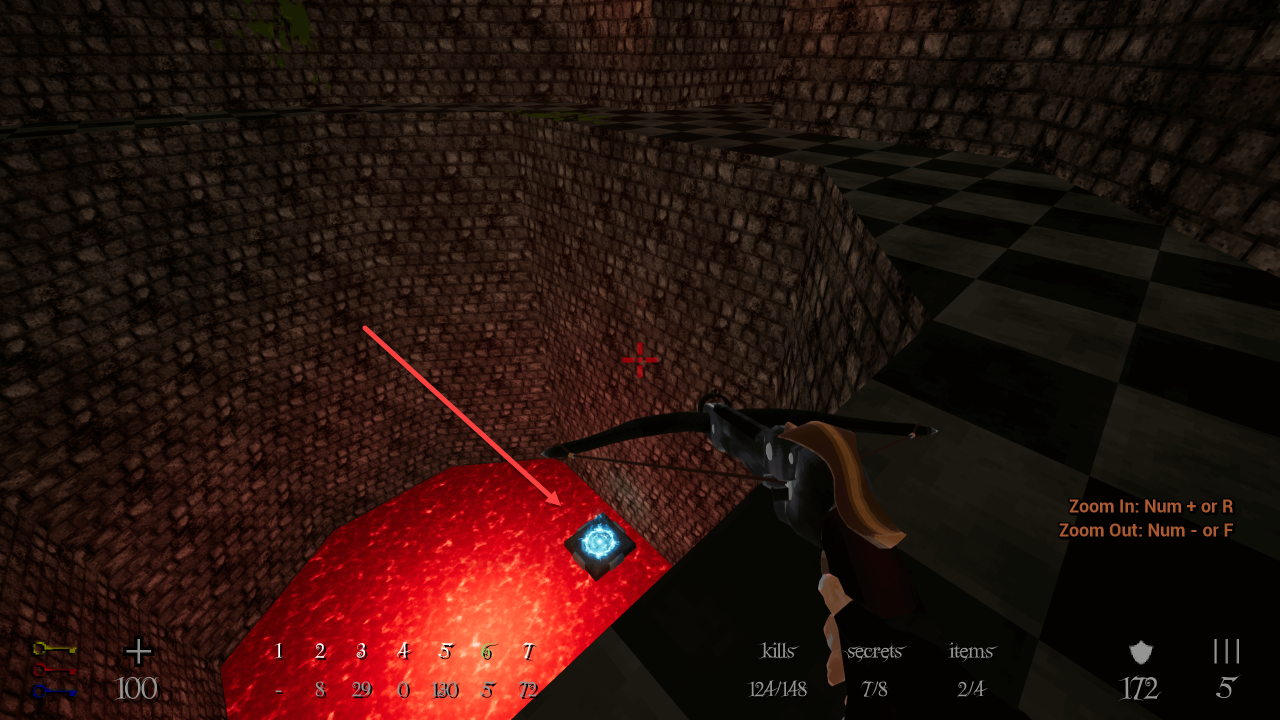
After opening the red key door and activating the switch inside, you will need to drop to a lower part of the level. Inside, there will be a room with some enemies and a pit with blood inside in the center of the room. Just drop down in the pit to take the items and reveal this secret.
A bit after Secret #7 and some fighting, there will be a room with an explosive mob and a large staircase. Go up the staircase, and look directly on your right. There will be a narrow path leading to a destoyable wall. Inside, you’ll find the megasphere.
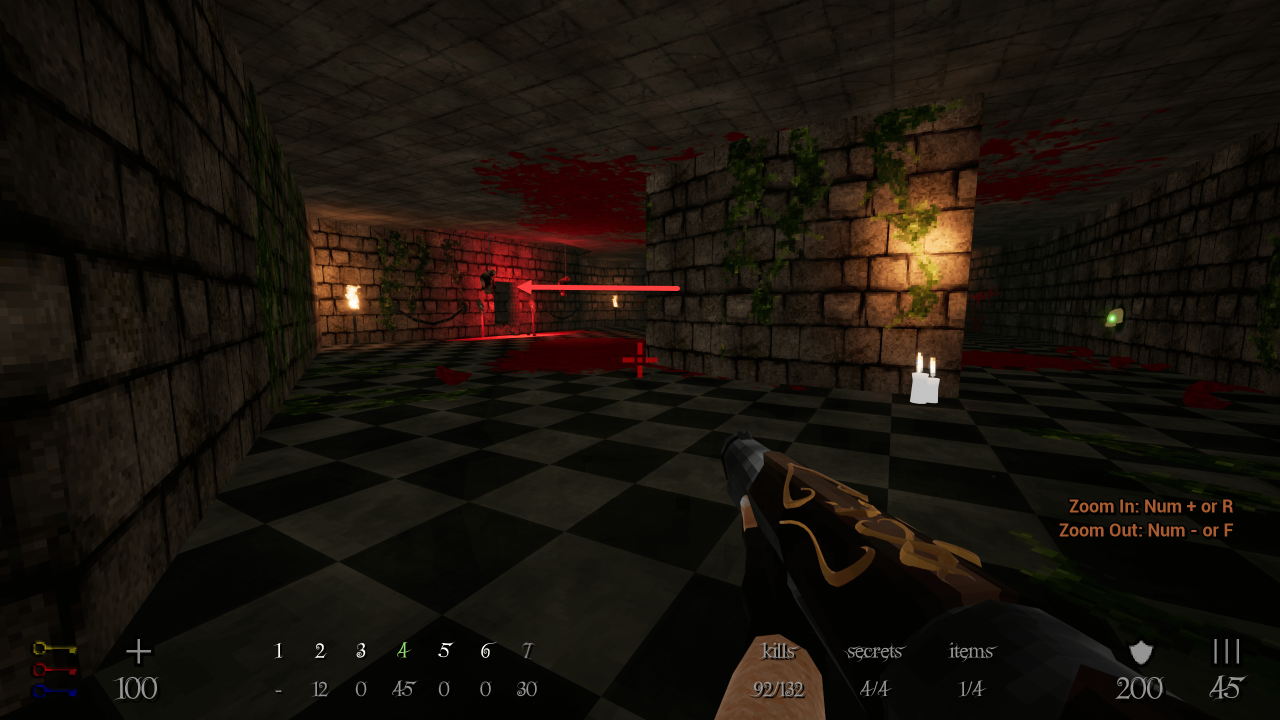
E1M8
After the large area with a narrow path zigzaging over a blood pool and snipers, you’ll end up in a mini temple-like structure. Behind this structure (not where the blue key is), you’ll find some little stone pillars. On the back wall after going around the stone structures, there’s a destroyable wall on your right. The secret room contains the map and the megasphere.
After opening the blue key door, there will be a room at some point with a skull switch (which triggers the yellow key platform). On the awll that is right of this switch, there’s a destroyable wall.
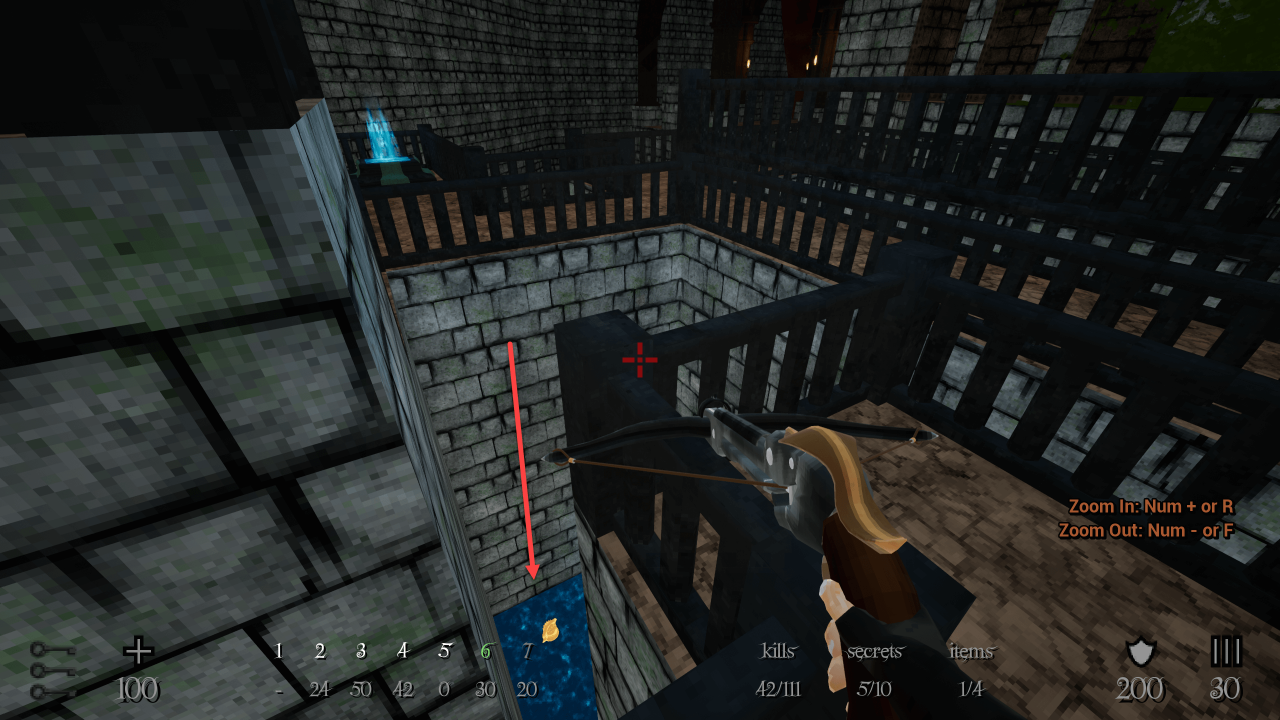
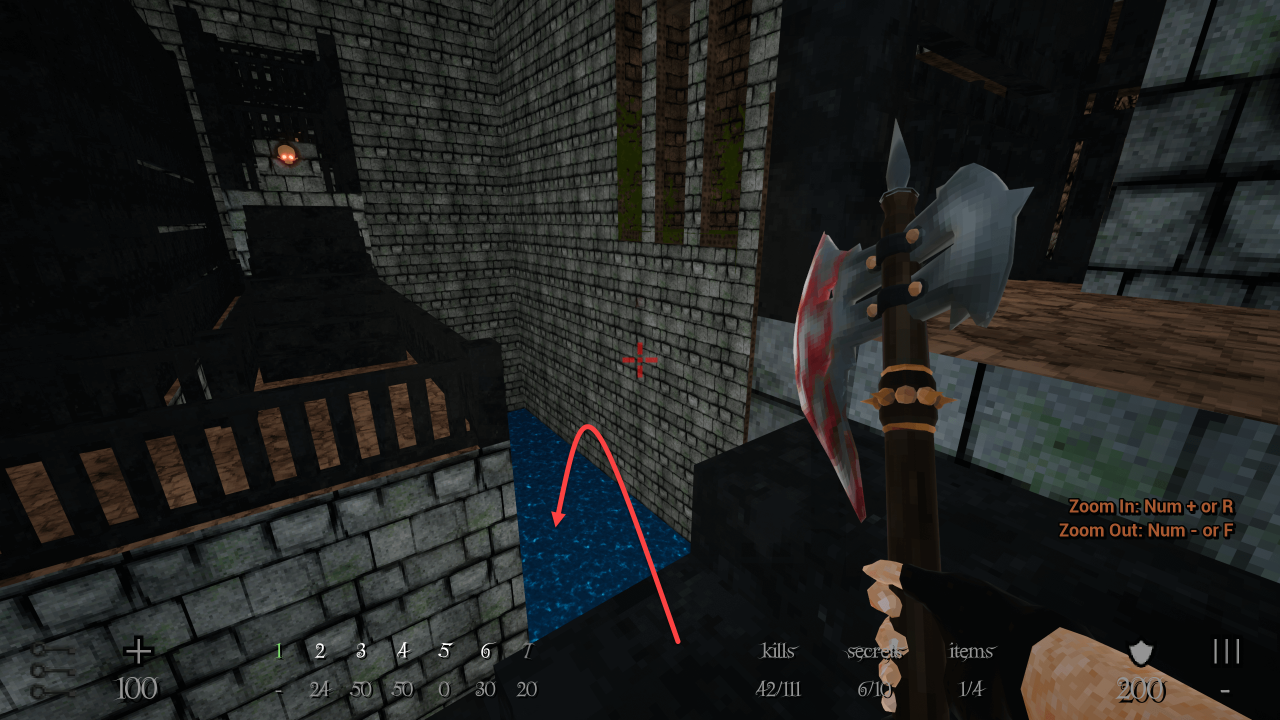
Back in the yellow key room, you’ll find an area outside with “leap of faith” message on your right. Get near the edge of the blood pool on the left.
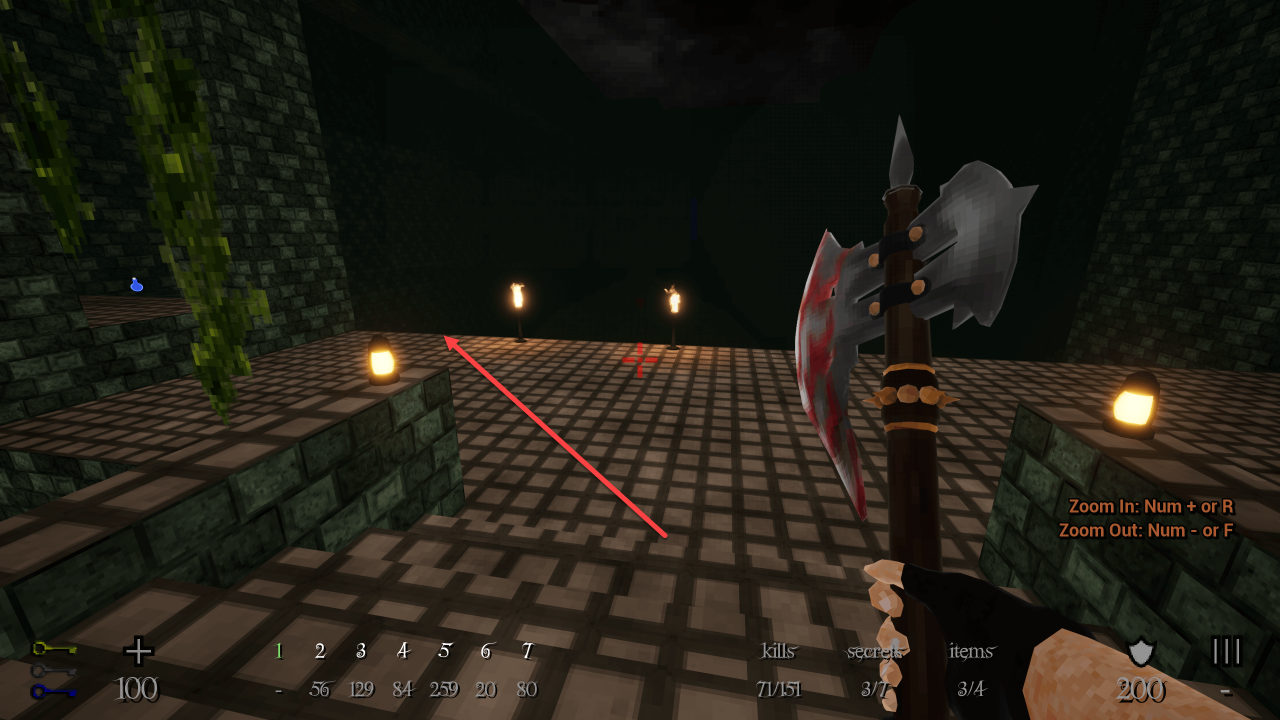 Look down. You’ll see a little platform below. Take some speed, and jump to land on the platform.
 There will be a hidden lift leading you to this secret, containg some ammo.
After the large pool of blood (where Secret #3 is), solve the puzzle there until you have access to the room on the left. In this room, on the left, there are two barrels. Shoot them to reveal the secret room with some armor.
In the opposite room of #Secret4 (so, on the right on the small temple), you’ll find some armor and a narrow passage with blood. Jump in the blood and take right.
 Go around and hit the left wall there to reveal a secret blue teleporter, leading to an armor.
Back at the start of the level when you’ve unlocked the part on the left (when looking the starting door), take right before the switch.
 Stop near the ledge where there is a lood pool and look left, you’ll see a torch. Jump in the blood and run towards the end of it, then take left. There will be an enemy here. Take the teleporter.
 After being ported out, destroy the central part of the wall on this small platform. There will be a blue teleporter there. leading to some ammo and armor.
After taking secret #6 and taking the red key, you’re ready to drop down in the central part of the level. From the metal beams gate (now opened) that is aligned with the starting door, drop down and hit the central wall there atop the stairs, it is destroyable. Inside, you’ll find some health and ammo.
E1M9
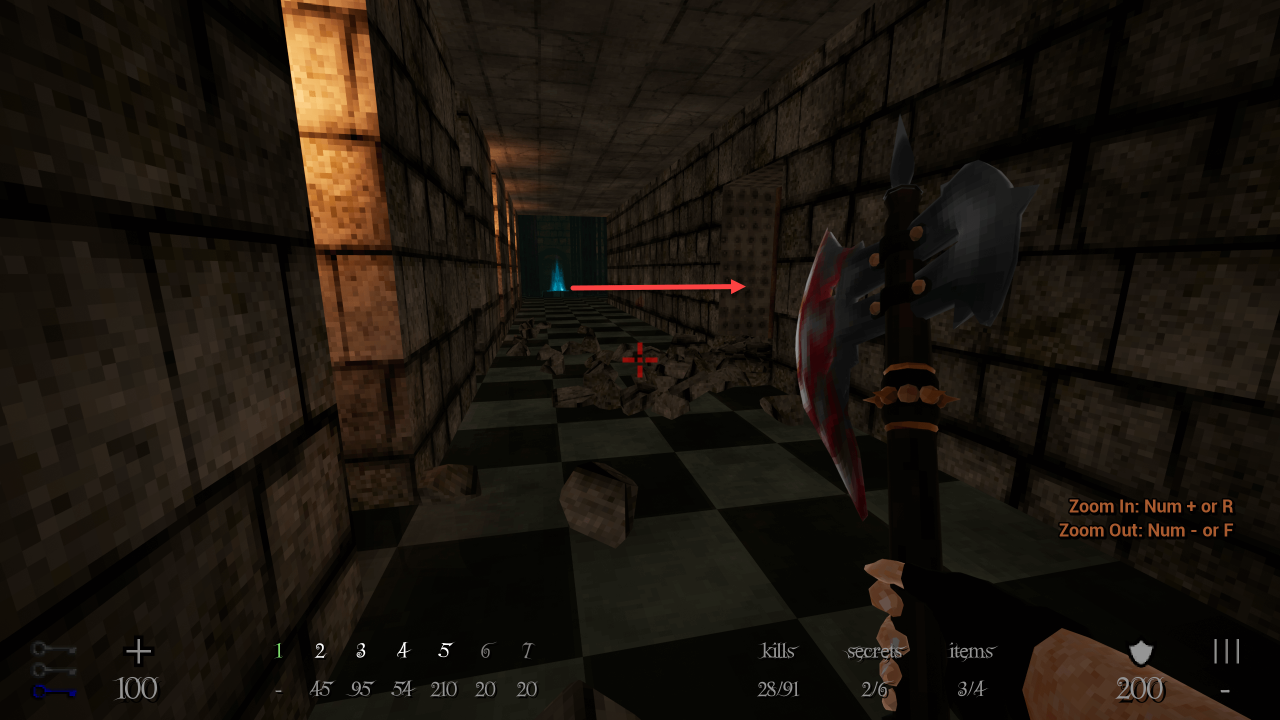
At the start of the level, at the end of the left corridor, there is a destoyable wall containing a crossbow.
After reaching the large room with the three doors and the exit door, look left. There will be a small corridor below and a switch. There are two barrels above. Shoot them for this secret.

In the next room a bit after the previous secret, there is a destroyable wall on the left wall of the right corridor. On the right of the torch standing on the pillar.
After taking the previous secret, continue to the right. A portion of the wall on the right can be destroyed. The pool of blood is a bit after, for reference.
After cleaning up the large room outside and opening the door, you’ll climb some stairs and end up in a little room. with two torches insides pillars and two candles on the right. The wall left of those candles can be destroyed.
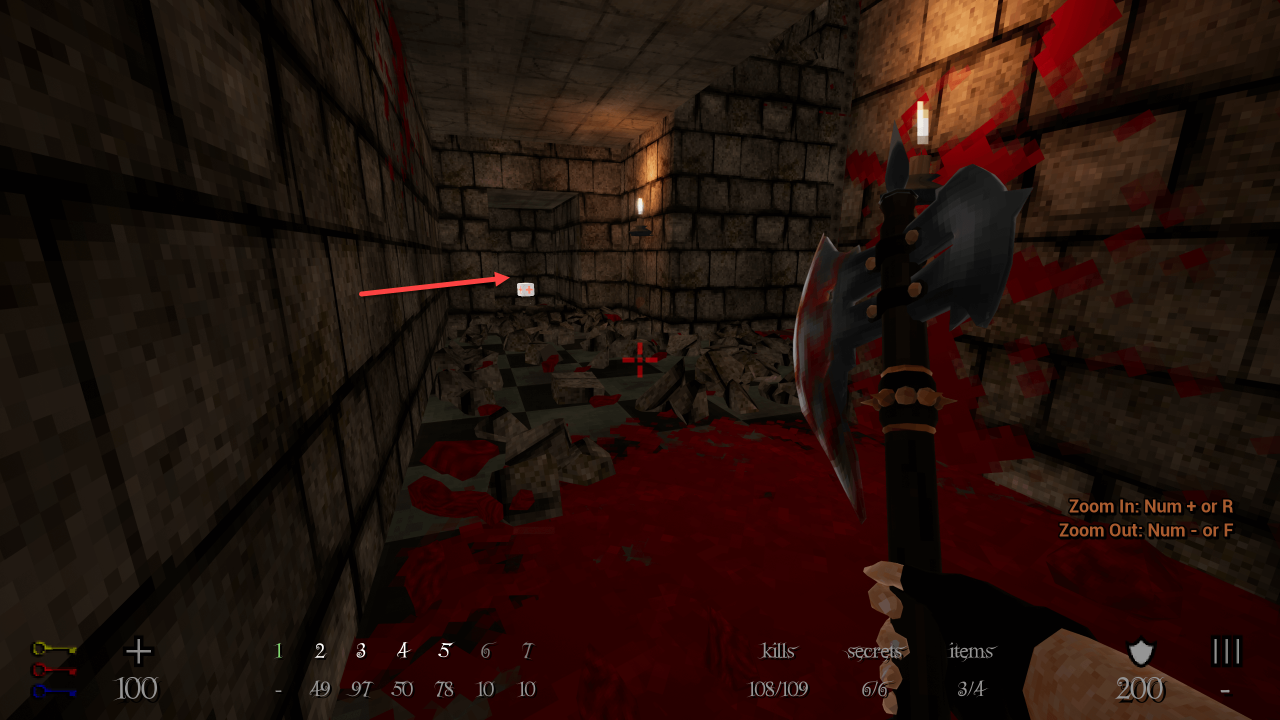
A bit after the previous secret, you’ll walk along a path with a small blood pool on your left then end up in a small room containing some HP and ammo. There is a staircase here going up. Upon entering this room, there is a destroyable wall directly on your right. Behind is the map and a megasphere.
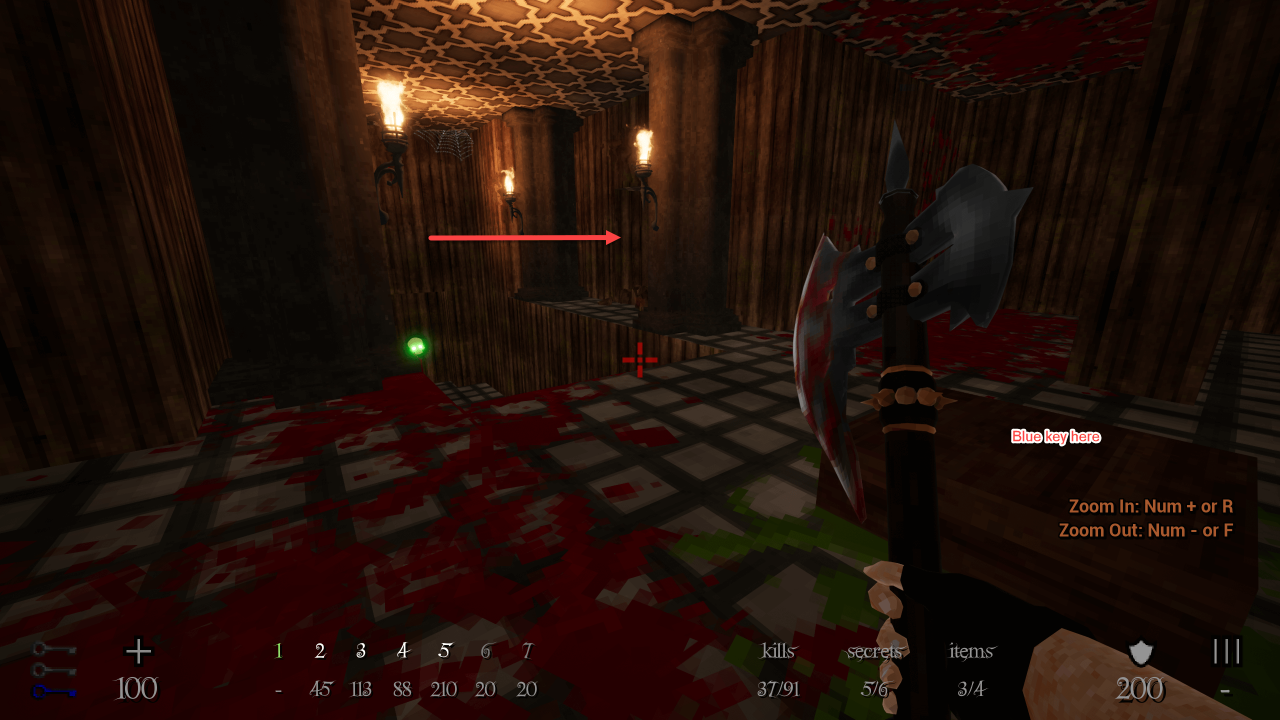
Just before the blue key door, look on the right, down in the pool of blood. There will be an armor.
Directly after opening the red key door, take the left path. Look on the left in the little space to see explosive barrels. Shoot them for the first secret, the second secret is inside this room, behind another explosive barrel.
Shortly after opening the red key door, you’ll find yourself going down some stairs and reaching a small room with two stone pillars and a lift. The wall on the left between the torches can be destoryed.
E1M10
Thanks to Ainillia for his great guide, all credit to his effort. you can also read the original guide from Steam Community. enjoy the game.