I Am The Hero basically has no controller support, as it’s broken and the devs have done nothing about it. Let’s use Steam Input API to fix it…
Introduction
But that should not mean those who bought this game should deal with a broken product! Let’s try to use one of Steam’s handy features to enable controller support for this game; by the means of keyboard input emulation.
First steps
To activate Steam Input API for your controller, plug it in and open Steam’s Controller Configurator:
In desktop mode: Steam -> Settings -> Controller -> General Controller Settings
In Big Picture mode: Settings -> Controller Settings
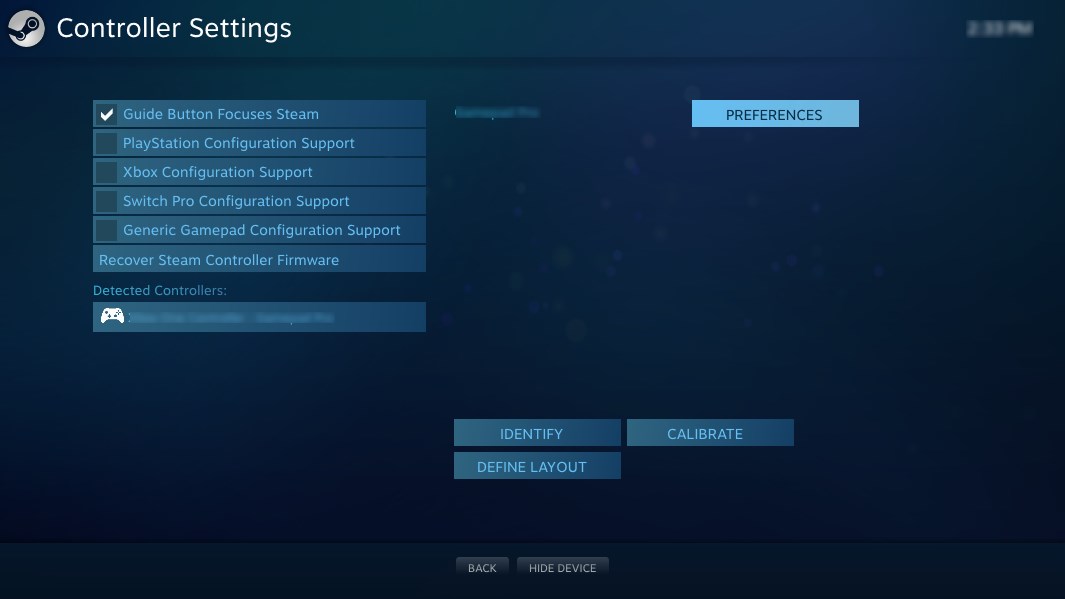
Find your controller there, choose “define layout, configure the buttons and then press save when you’re done. After you do this, Steam asks if you want to upload your configuration for other people who may use the same controller. Type a name for the config and upload it or don’t; it doesn’t matter if you upload it or not.
Now Steam recognizes your controller and is able to use SIAPI for it. But we must perform an extra step in order to use it in the game. Open the game’s properties (by right clicking on its name or choosing the gear icon in its page), go to the controller tab and choose “Enable Steam Input”. This will force the game to use Steam Input if a recognized controller is detected.

Now, let’s talk about how we can use this to enable controller support…
Manually enable controller support
After enabling SIAPI in the game’s properties, a new option appears under the “Manage” option (after right clicking on it’s name or using the gear icon): “Controller Configuration”. By default, this option opens the configurator’s window, which chooses a default controller layout for you. But as the game does not support controllers, we need to change it or it does nothing.
At the bottom of the screen, choose “Browse Configs”, then go to the templates tab and select “Keyboard (WASD) and Mouse”.
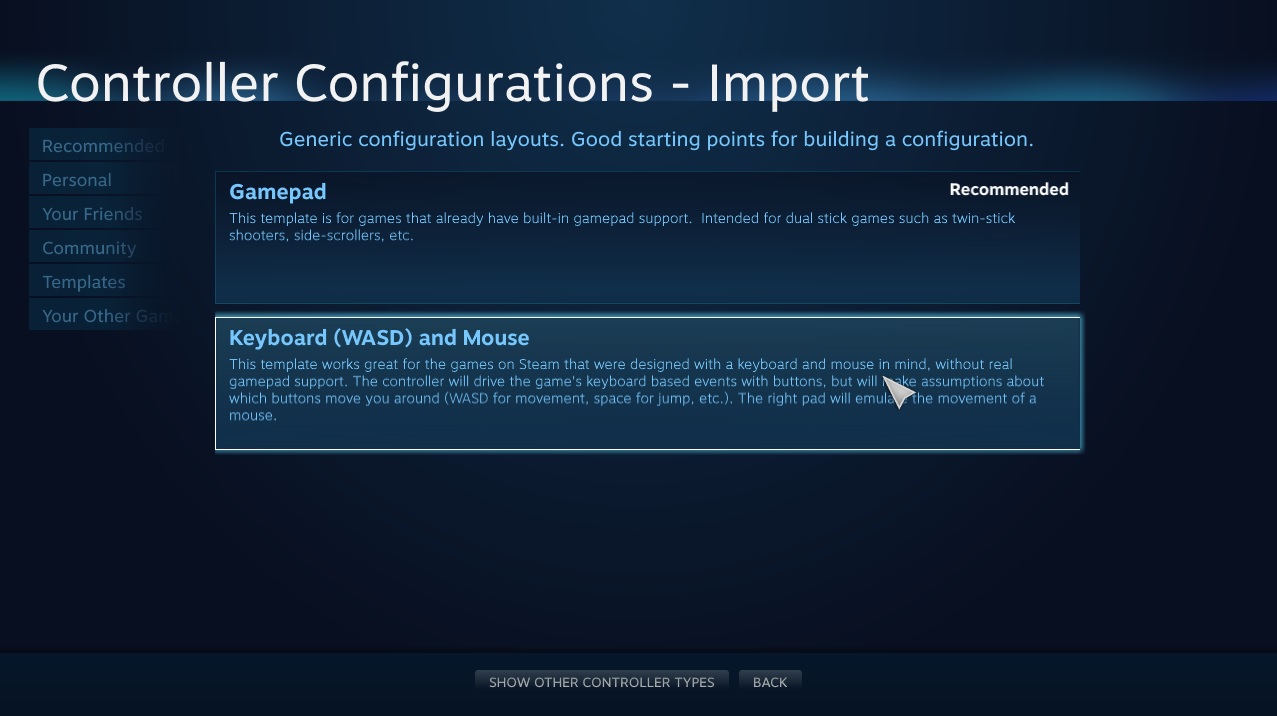
This will open a predefined template which you can modify as you want. Press the “Apply Configuration” button to start using it. Now you need to click on each of the boxes available on screen and change the keys that your controller is supposed to emulate with each button press. To do this, you’ll need the default keyboard configuration of the game. So open the game, take a screenshot of your bindings and start changing the configuration according to that.
It will look like a really hard task at first, given the vast variety of options you can customize. But you can get accustomed to it in no time if you forget about the rest of the options and just focus on changing the buttons. After clicking on each box, a new page will open that offers you several options mentioned above. To change the buttons, just choose the following sections:
Triggers -> Soft Button Press
Bumpers -> Binding
Rest of the buttons (directional and ABXY) -> Just click on each button
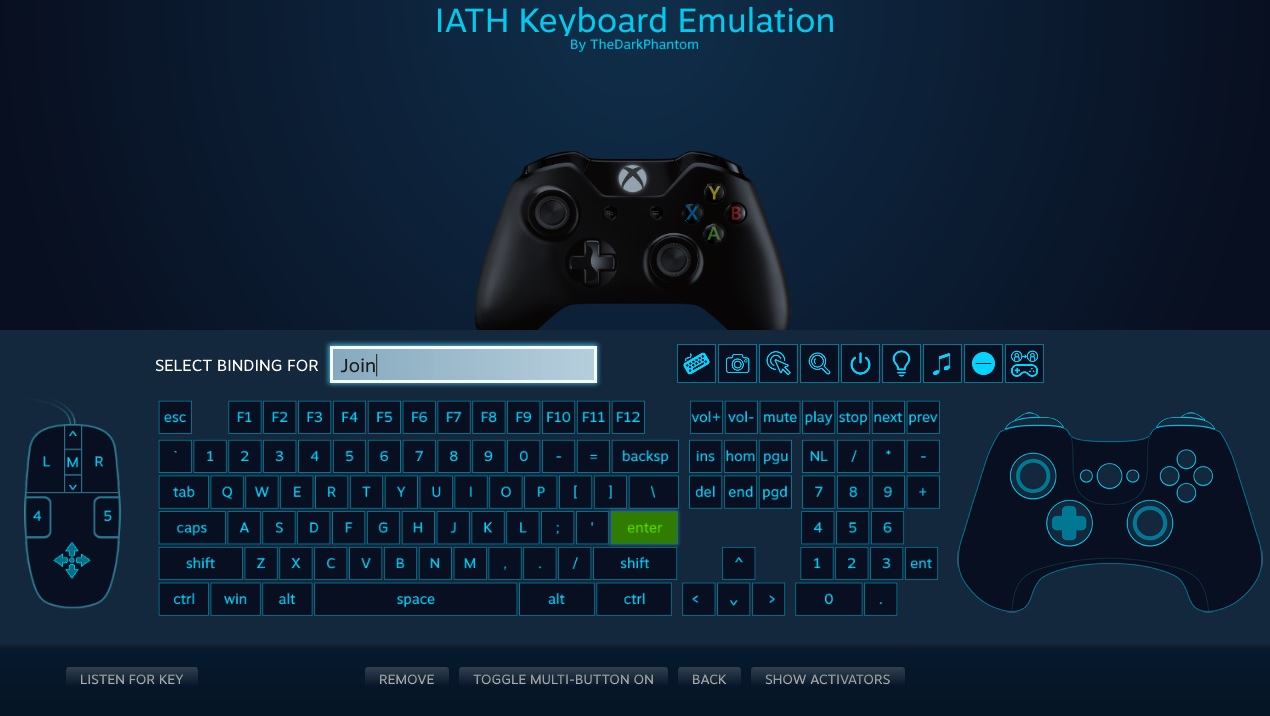
After choosing these sections, you will be greeted with an on-screen mouse and keyboard. Simply choose “Remove” to clear that button’s bindings, then click on the key you want to use for that button and go back (the “Back” button also saves your changes). You can also type a different name in the “Select Binding For” text box if you so desire, to specify what each button does.
After applying your desired configuration, press the “Done” button to finish the process and close the configurator’s window. Then start the game to see if everything works correctly.
Just give me what’s ready!
Method 1:
Simply use this link
steam://controllerconfig/498500/2434500590
Method 2:
Right click on the game’s name or use the gear icon in its page and go to “Manage -> Controller Configuration”. In the configurator’s menu, choose “Browse Configs”, then go to the community tab and select “IATH Keyboard Emulation”. Then apply it and press “Done” to close the configurator.
After applying the configuration, simply start the game and play. However, do have the following notes in mind:
NOTE 1: this configuration was MADE WITH P1 DEFAULT KEYBINDS IN MIND. Reset your keyboard inputs or make your own changes to the template if you have changed the keys in-game.
NOTE 2: Due to my own preferences, the “Switch” and “Dodge” moves are swapped compared to what the game shows in the first level. Meaning “Switch” is RT instead of RB, and “Dodge” is RB instead of RT. You can change this if you want by using the steps from the previous section.