This guide is a relatively comprehensive overview and introduction to guild missions in Guild Wars 2 which very specific details for a variety of guild missions.
Introduction
To view guild missions: Open the guild panel (Default key = G), go to the leftmost column of the guild page, and click on the third icon down from the top.
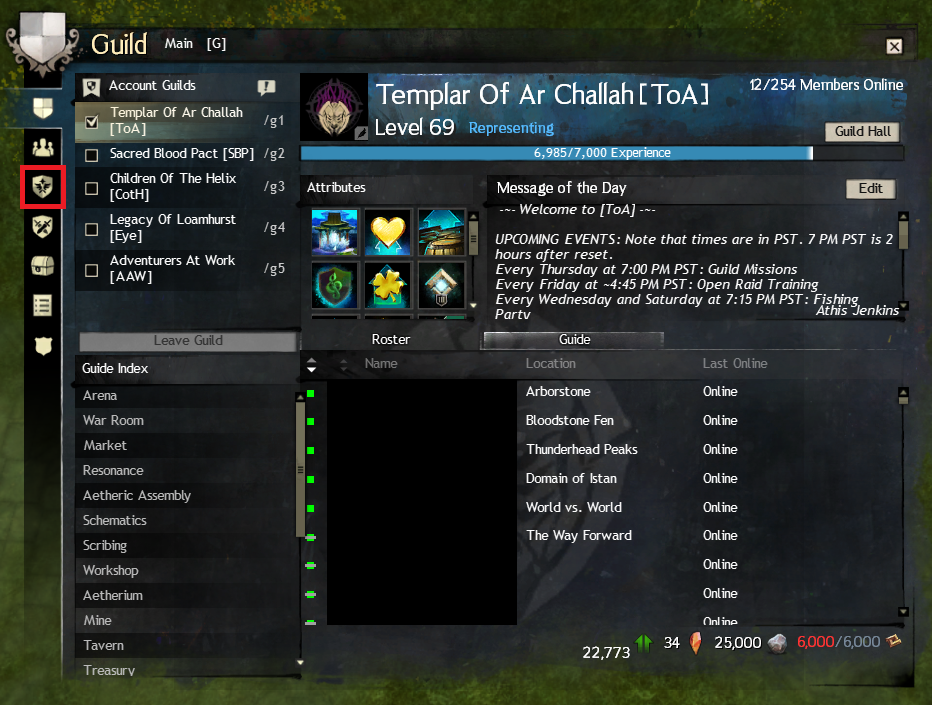
When on this page, you can select individual missions that are available that week for more information. Including what the mission is, where the mission is located, if you (the individual) have earned rewards for that mission that week, if the guild has earned rewards for that mission that week, and more.
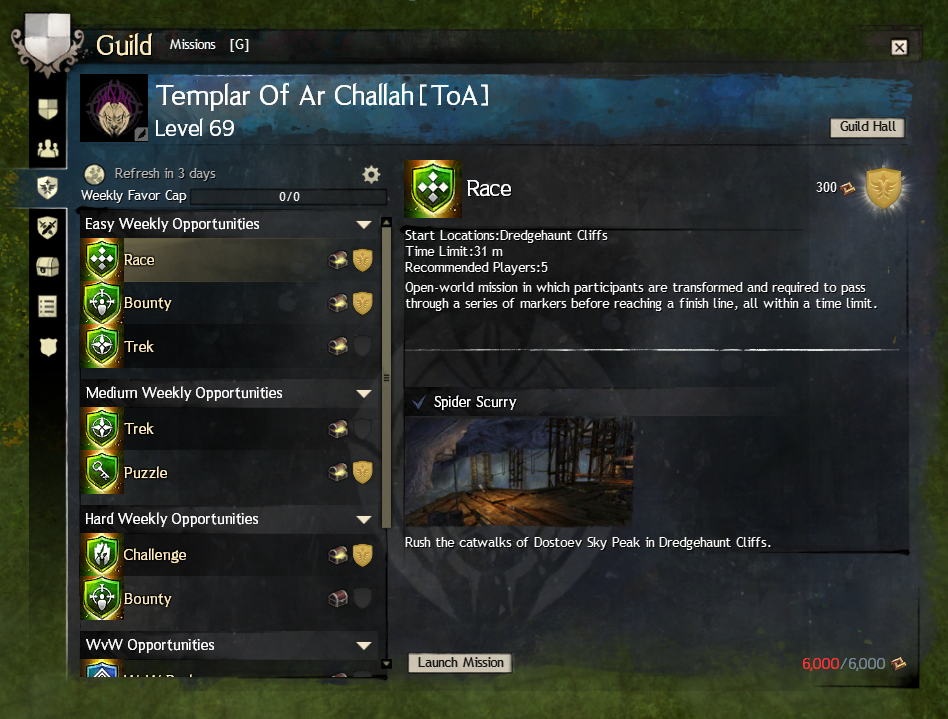
Guild missions are split between PvE, PvP, and WvW. With more missions being unlocked through the guild level as well as guild hall upgrades.
PvE Missions:
- Guild Bounty
- Guild Challenge
- Guild Puzzle
- Guild Race
- Guild Trek
PvP Missions:
- PvP Conquest
- PvP Rank
- PvP Stronghold (Mist Champions)
- PvP Stronghold (PvP Win)
- PvP Top Stats
WvW Missions:
- WvW Capture (Camps)
- WvW Capture (Sentry Points)
- WvW Capture and Hold
- WvW Challenge (Obsidian Sanctum)
- WvW Supply Lines
- WvW Ranks
Individuals with the proper guild permissions can choose the mission preferences to be for PvE, PvP, WvW, or no preference. When one preference is selected: all Easy, Medium, and Hard missions will be for the selected gametype. The set WvW, PvP, and PvE opportunities will always provide a mission for the respective gametype.
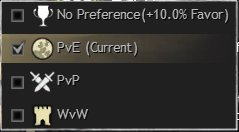
From here on, the guide will talk mostly about PvE missions.
A Guide for doing Guild Missions
For PvP and WvW missions, the missions require a group of players to complete with the exception of WvW rank and WvW Challenge (Obsidian Sanctum). WvW rank is relatively difficult to complete by oneself, but is technically possible. WvW Challenge (Obsidian Sanctum) requires an individual to complete the Obsidian Sanctum jumping puzzle in WvW. This mission is completely possible to do by oneself, assuming one has the skills to complete the jumping puzzle.
PvE missions have a wider variety of different challenges and obstacles for guilds and players to navigate through.
A general tip for guild missions: The Guild Wars 2 Wiki (https://wiki.guildwars2.com/wiki/Guild_mission) is an incredible resource for guild missions. Especially for finding locations for guild bounties and guild treks.
Another general tip for guild missions: All guild missions take place in Central Tyria. Any account is able to access all of the locations where guild missions are located.
Yet another tip for guild missions: Players can use the guild portal in the guild hall to generate a portal to certain guild missions that any player can jump through. This can be helpful for people that do not have a lot of waypoints. Guild bounties and guild treks do not have portal locations and require players to have waypoints or use other means to get to those specific locations.
Guild Bounties
Easy bounties require only one bounty boss to be killed, where medium and hard require three and five respectively to be killed. When doing medium and hard bounties, it is suggested to split the guild up into smaller groups to spread out and fight different bosses.
Easy bounties are relatively easy for individual players to kill. Players with the proper build and skills can find and kill the bosses on their own.
Non-guild members in the map can be utilized to find and kill bounty bosses, given the proper communication in map chat or the random adventurer that finds themself at the boss. Bounty bosses can also be slightly cheesed by beginning the fight near a waypoint, allowing players to quickly and easily respawn upon death and get right back into the fight.
- Blightwater Shatterstrike: Split the guild group into 5 groups with everyone carrying the Charrzookas that spawn at the start. Use the Charrzookas to damage each crystal node to ~10% health. Once all nodes are at 10% health, kill them all together.
- Branded for Termination: Split the guild group into three separate groups. Have each group fight each individual boss. Have each group DPS their boss to 10% health. Once all bosses are at 10% health, kill them all together.
- Deep Trouble: Have each member in the guild go to an individual quaggan by themselves. Defend and escort the quaggan with your life.
- Save Our Supplies: Split the guild group into two groups. Have one group defend the northern entrance to the base and the other group defend the southern entrance to the base. Make sure not a single Charr gets by. It is advised to have a smaller, third group that can roam around and kill enemies from the west and enemies that are shooting the base from afar.
- Scratch Sentry Defense: Split the guild group into three different groups. Have each individual group at a separate defense point to defend against all of the waves.
- Southsun Crab Toss: Designate one guild member to be the crab carrier. Have the crab carrier constantly running in a circle along the inside of the outer ring of the arena. Have all other guild members follow the crab carrier, defending the crab carrier, and killing every karka that gets close.
Guild Puzzles
A tip for all guild puzzles: Upon completing individual rooms, a door will open. This door will close quickly, so all members in the instance must be sure to QUICKLY make their way through the door or they will be locked out.
Following is a quick overview of each puzzle.
Angvar’s Trove:
Room 1: Have three members grab magic bows and shoot icicles down from the roof. Have all other guild members grab icicles and fill steam vents AT THE SAME TIME. The three members with bows jump across to the center, fallen icicle and everyone repeats again. When the three guild members get to the end, have them interact with the torches at the same time.
Room 2: This area is a jumping puzzle that is relatively easy to navigate but some members may have a challenge. The most important part of this area is that there is a cave passageway at the bottom of the cavern that leads to the ship. This cave is often hard to spot.
Room 3: Players must use cannons and powder kegs to break the ice walls in the room. Players must then bring two powder kegs to the final wall to be able to move forward.
Room 4: An invulnerable drake sitting in the middle of the room that will aggro to a player holding a drake egg. The drake egg holder can drag the drake around the room to different totems. The drake will occasionally use a fire breath, which will light the totem on fire. As each totem is lit by the drake, other guild members can grab a torch, grab a flame from each totem (one per player), find the respective totem at the end of the room, and have all six players light the totems at the same time.
Langmar Estate
Room 1: Rock, paper, scissors with statues. Players must grab weapons from weapon racks and bring the weapons to the proper charr statues. Charr statues must counter the human statue directly across from it.
Charr Bow beats Human Sword
Charr Sword beats Human Staff
Charr Staff beats Human Bow
Tip: If a weapon rack spawns a ghost, it will never give a weapon. The rack that spawns a weapon will always spawn that specific weapon.
Room 2: This area is a tiny jumping puzzle with four pressure plates. All four pressure plates need at least one player on it to open the door.
Room 3: This room has 2 areas, an entrance area and the larger area. There are 6 alcoves in the entrance that correspond to 6 alcoves in the larger area.
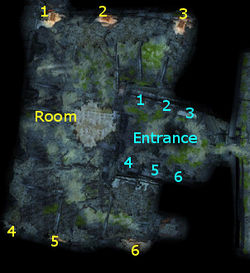
When interacting with the entrance alcove, an image of a human doing an emote will appear. That emote must be done at the other alcove. Players have 5 seconds to activate all entrance alcoves to trigger the event, then have 45 seconds to repeat the emote at the second alcove.
The possible emotes are: ‘/dance’, ‘/bow’, ‘/point’, ‘/sit’, ‘/wave’, and ‘/salute’.
Strategy 1 (requires 6 players): Have 1 player at each alcove, activate all alcoves at once, have each player see what emote they need to do, have all players run to their respective alcove in the bigger area and type their emote.
Strategy 2 (requires 12 players): Have 1 player sitting at each entrance alcove and each second alcove in the bigger area. Have the two players that are at the respective alcoves communicate to each other in ‘/whisper’. Have all 6 entrance players activate the alcove, whisper the emote to their respective player, and the respective player types the emote.
Room 4: This final room is a multilevel puzzle that requires people to stay on each level while others progress downwards.
The top level has two pressure plates. Two players need to stand on the pressure plate to remove the poisonous gas from the second level. Those players need to stay on the pressure plates for the rest of the mission.
The middle level has oozes and exposed gears. Players need to kill oozes and use the drops to grease the gears. One to two players need to stay on this level to continue killing oozes and greasing the gear.
The bottom level has many different ghosts and carts that you kill and search respectively to find parts. Bring all parts to build a Makeshift Ram. Once the ram breaks the door, the mission is over.
Proxemics Lab
Room 1: In the center of the room is a button. Activate the button to begin the event. There are 6 alcoves around the room with trash piles. Search the trash piles and bring 6 batteries to the center to open the door. If trash is found in the trash piles, throw them around the room to distract the skritt.
Room 2: A small jumping puzzle area that confident mesmers can easily teleport players through.
Room 3: This is a 3-floor elevator. Around the outside of the room are 6 different alcoves with an image of an animal above it. For each level, players must find the correct animal from the console in the center of the room, transform into that animal, and run into the outer alcove. Once all alcoves are filled, the elevator will move to the next floor.
Room 4: Another small jumping puzzle room that confident mesmers can also teleport players through. At the end are buttons that players must stand on to open the door to the final area.
Room 5: The final area is a maze. In the northwest corner of the maze is the exit with 6 empty pods. Around the maze are 6 orbs that must be taken to the pods near the exit. These orbs can be identified by a tall beam of white light radiating into the sky from them. Players must find all 6 orbs around the maze and bring them to the end.
Around the maze are various different obstacles and secrets. Traps that can be deactivated if the right panel is found, various mobs including a large golem, and breakable walls that open up new routes through the maze.
Guild Race/Rush
Each animal will have access to the ‘Search’ ability which will reveal hidden traps near you as red circles on the ground. Using the BlishHUD addon (https://blishhud.com/) with the Guild Missions module will draw out the route you need to go to reach the end and avoid any traps.
It is advisable to have some players be escorts for players running through the course. Escorts can heal allies, provide boons such as swiftness, and kill enemies around the area.
The number of players that need to complete the race for all players to earn guild commendations can be inconsistent. Generally, for easy races, only one player needs to make it to the end for everyone to get a reward, with medium and hard races requiring more players. If the guild wants to earn guild favor, the guild race event must be completed.
Guild Trek
Because only one location needs to be found, this mission is very easily soloable. When doing this mission with a large group, the leader can decide which location to go to.
When doing this, people need to be very careful for a few things.
1. ALL PLAYERS MUST STAND ON THE GUILD TREK EMBLEM
2. NO ONE MUST INTERACT WITH THE EMBLEM UNTIL ALL MEMBERS ARE STANDING ON THE EMBLEM
If these two rules are not followed, it is likely that people will miss the reward and an additional location will have to be found.
Using the GW2 wiki is great for finding different guild trek locations: https://wiki.guildwars2.com/wiki/Guild_Trek
Spending Guild Commendations
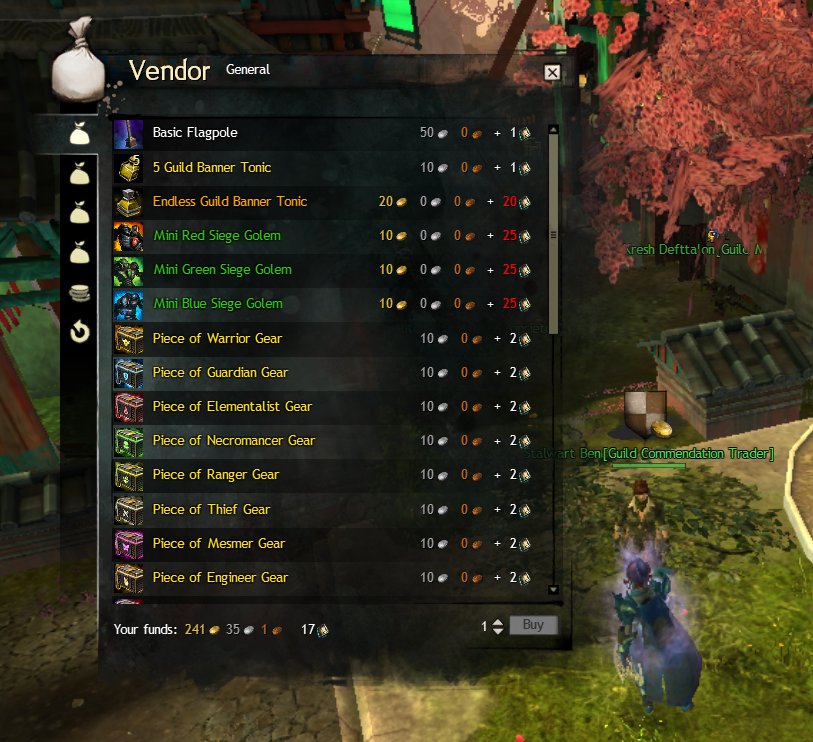
Players can also find speciality vendors in the guild hall to trade commendations with including Guild Armorers, Guild Weaponsmiths, Guild Miniatures, and Guild Traders.
Thanks to Athis for his excellent guide, all credit to his effort. if this guide helps you, please support and rate it via Steam Community. enjoy the game.

