This guide covers my methods for completing all levels on insane difficulty. This does not cover challenges or achievements, however the skills learned here should help with those separately.
Note: Due to schoolwork and various projects I won’t have as much time to work on the remaining missions so I am releasing what I have at the moment. I hope to have the sections for 3.2 and FC3 finished within a few weeks, I will update this section when progress has been made (once I have 3.2 FC3 should follow soon, however other guides for FC3 already exist so I am not too concerned about that section.) Thank you for your patience
Before we begin…
- New colony expansions, usually with new creatures inside, are Rooms.
- Nurseries and other room types are usually built in Hexes (not the curse) where a 3×3 Hex is a hexagonal room with side lengths of 3, or 19 total tiles. These are usually the size nurseries I prefer.
- The 7 starting workers are the crown workers.
- Insects used for food are Critters; aggressive insects, when referred to generally, are Ads. If they require specific tactics, I will address them directly (Tiger Beetles, Adult Coach Horse, etc.)
- Markers are pheromone markers, and will be addressed as M1, M2, etc.
- Marks are specific tasks in time based play that must be fulfilled for further play to be justified. For example, if I say one mark is collecting x food or having x ants at a specific event, that usually needs to be fulfilled for the run to be worth continuing. I do not recommend time keeping, if a run isn’t going to work out, the game has plenty of ways to let you know. Generally marks need to be fulfilled before dawn/dusk on specific days.
I’m going to throw out a huge disclaimer since these levels are covered on insane difficulty. These levels are very, very difficult. Not only that but on certain maps, such as playing 2.1 and 3.1 over the span of around 40+ minutes, certain runs will go better than others for various and entirely random reasons (Tiger Beetles catching you at the wrong time, Hermit Crabs and Spiders attacking ranged ants instead of melee, jungle ads spawning and moving in different ways between attempts, etc.) However, I was still able to replicate these results across multiple runs.
Additionally, it was often helpful to spend a few dummy runs simply getting to know each map on each difficulty (i.e. deliberately digging out critters to see how viable that option was or where exactly I should avoid digging), as well as planning out an effective infrastructure.
Speed is King, and while I’ve done my best to make sure these are generally repeatable runs, you should take these with a grain of salt and modify them to suit your style or preference if you can (you don’t need to place nurseries exactly where I do, and as long as all marks are made, order is arbitrary.) Get in the habit of finding a layout you like and making it as fast as possible, you will need every second you can get, especially in level 2 and 3 maps.
Lastly, each section will likely be the equivalent of its own guide in terms of length and detail. This is entirely intentional, and I do not intend to spare any information. Please be mindful of this.
With these things out of the way, these levels are still doable with proper patience and planning, and remember that, in the end, it’s just a game, and we’re meant to have fun playing it 🙂
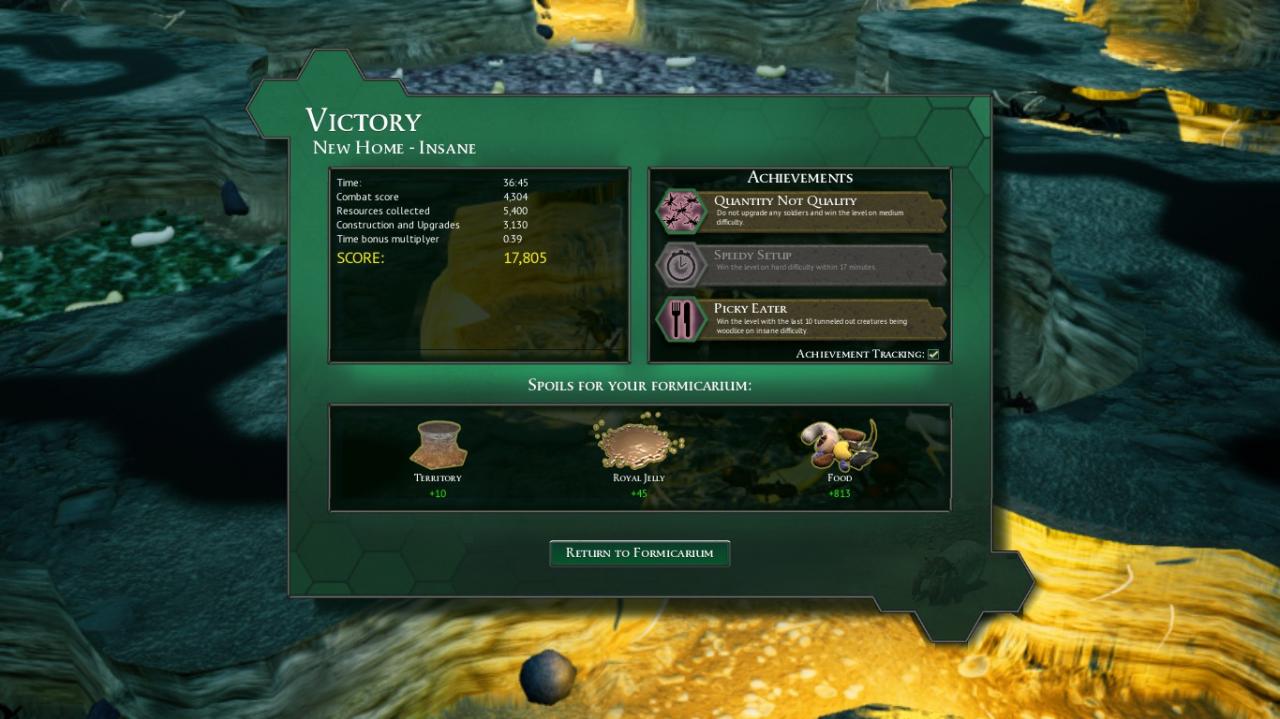
Level 1.1: New Home / Insane
0a. Before you begin go ahead and disable attack/gather on your nest group. This will become apparent later. If you need to gather food, simply add your workers to another group.
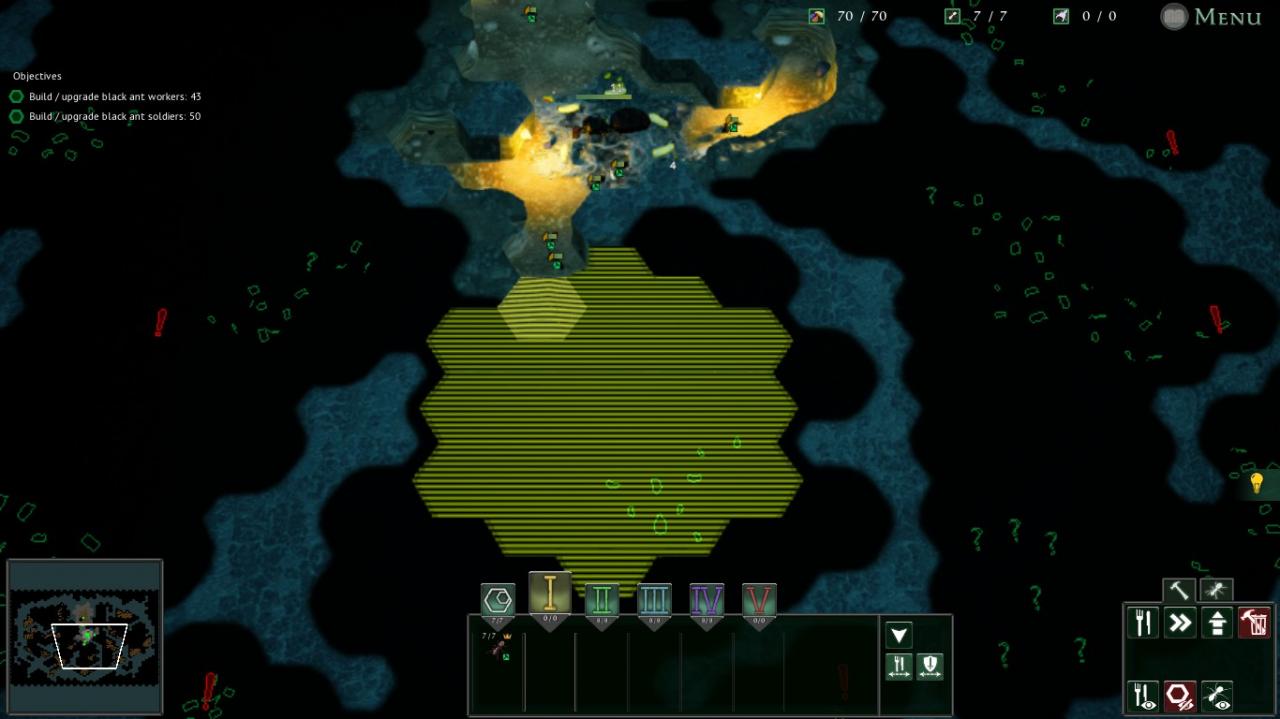
1a. Begin by digging out the two rooms to the west and gathering all food. Build a 3×3 hex for soldier ants separated by 1 speed tile from your queen in that direction and add 4 nurseries here. Take the southern room and eastern room and build up to 7 soldiers and some basic food storage. Until step 3 you can simply place your soldiers outside of each new room to clear them.
1b. Rinse and repeat for a while; dig out the rooms with up to 4 ads to the east and west, building soldiers as you go (Be wary of starvation!) Once you’re ready to tackle the room with 5 ads dig into it with a tunnel from your soldier nursery (this will come into play later.)
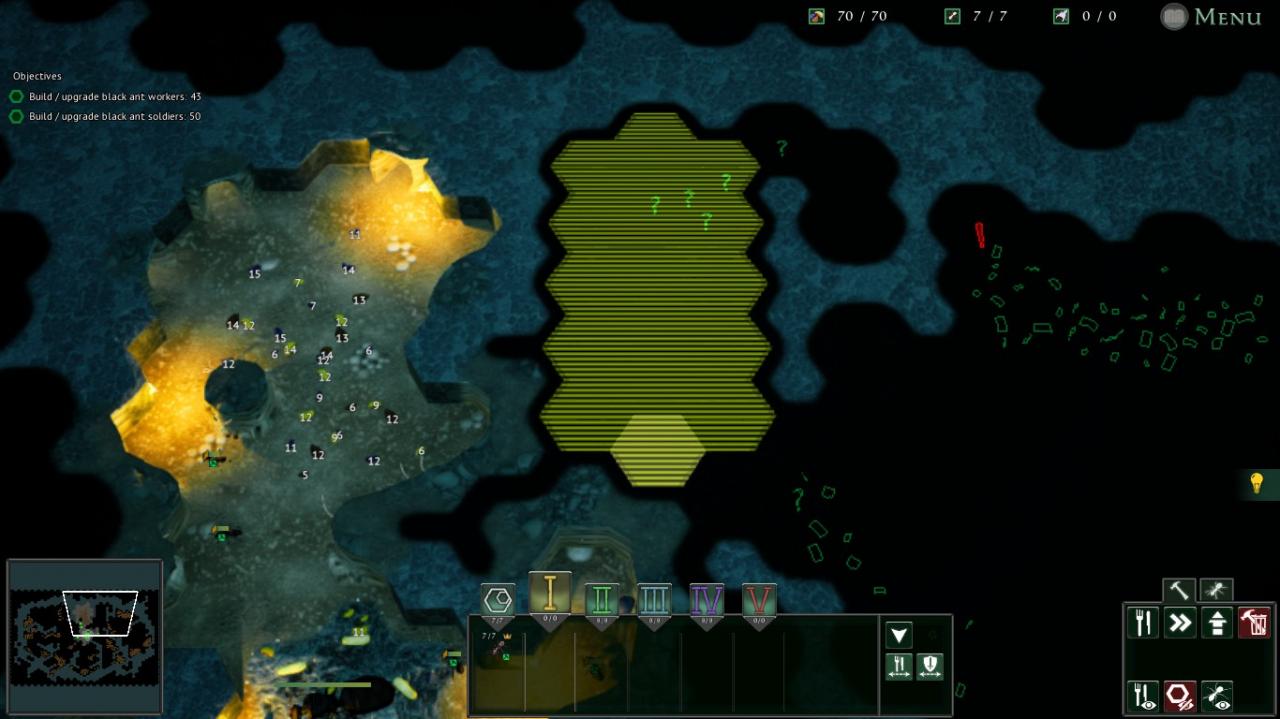
2. You now have access to the rest of the critter-only rooms with the tunnel layouts shown below. Build up to 19 soldiers and begin upgrading them (be sure to leave ~200 food prior to step 3.) You can use speed tiles around the edges to increase the score of the outer nurseries. Once you’ve gathered all food open the 2 remaining southern rooms and the 2 rooms to the northeast. These are the last rooms free of adult beetles.
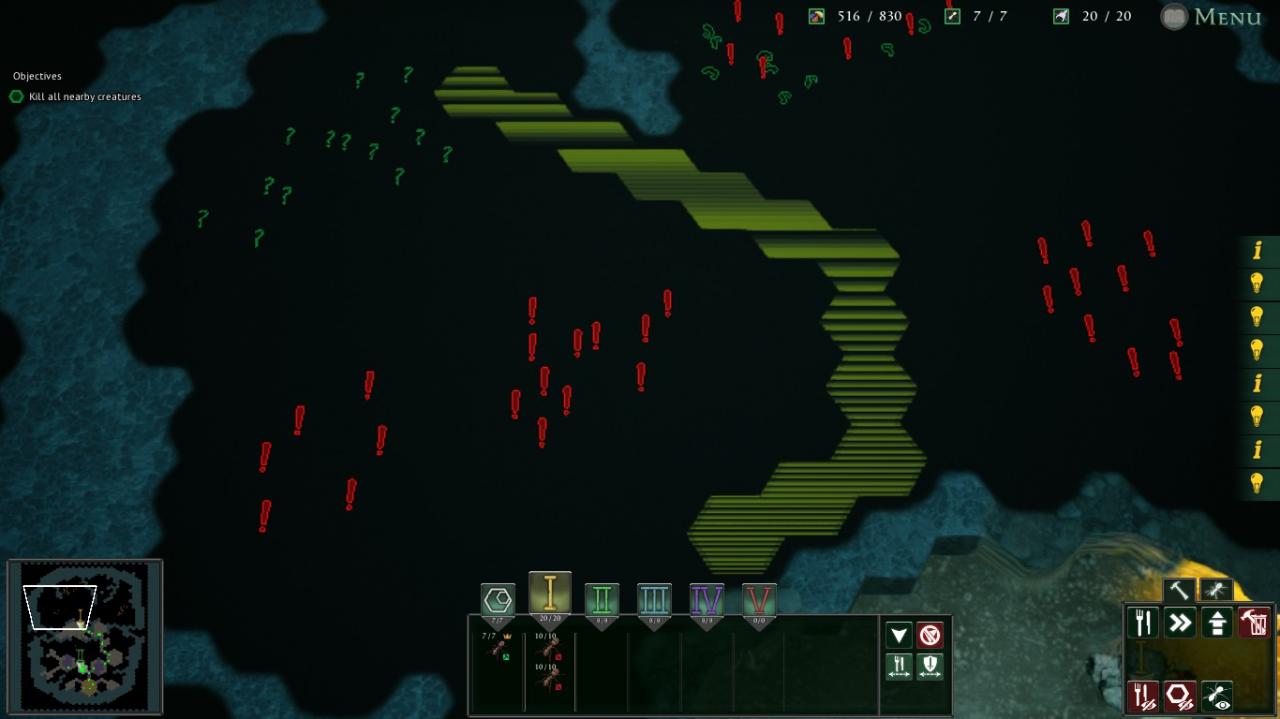
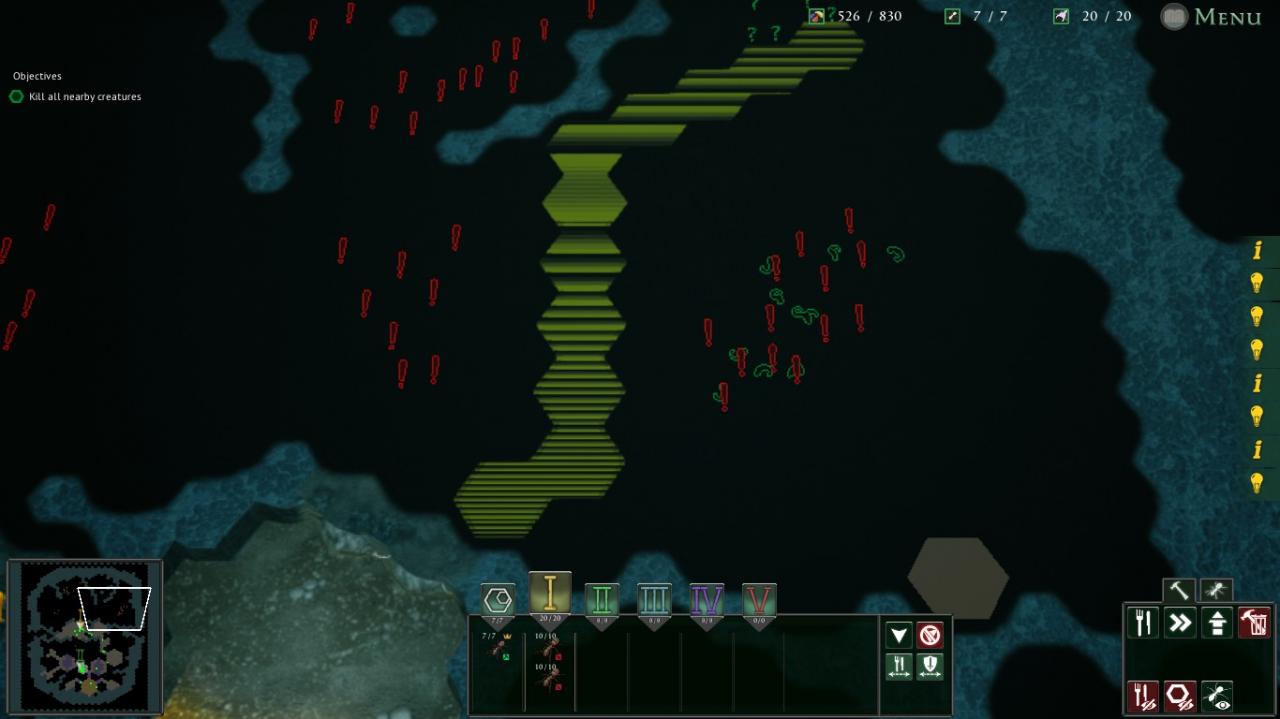
The northwestern and northeastern tunnels
3a.  The rest of these encounters will be battles of attrition. Unless you are gathering food station your soldiers at the mouth of the tunnel leading from their chamber so that the next battles will be just outside; any ants lost here will be immediately replaced. Open the remaining rooms in ascending order of difficulty: center, east, north, west. You should have enough food gathered by this point for 19 tier 3 soldiers and 19 tier 3 food tiles. For the last fight you should add a nursery of 7 worker ants to aid in brood rearing, as your losses will be very high. You should go into the last fight with at least 700 food, but 1000 is not hard to get at this stage.
3b. In the last battle you will encounter 5 adult beetles, and in many of my early attempts I did very well until being slaughtered here. However, as long as you have your 19 tier 3 soldiers stationed outside your nursery, 7 additional workers on nest duty, and lots of food stored up, you should come out of this battle fine. I went in with 1000 food on several attempts and came out with ~500 left over.
Level 1.2: Subjugation / Insane
0a. As with the last level disable combat and gathering for your nest group. Your primary focus here should be gathering food and clearing space for nurseries. Keep in mind that the Slave Maker ants will not begin their assaults until you defeat a Funnel Web Spider, so using this time to plan your moves would be wise.
1a. Dig out a 3×3 hex to the south along with a longer 5×2 hex in the pocket to the northeast dug into from the queen’s chamber. The northern room will be for workers while the southern room will be for soldiers. The cavern directly north of the queen is where your food storage will go, but we’ll get to that later. With the food you can gather (without PO-ing the spiders obviously) you should have enough to raise 9 or so soldiers.
Recommended soldier and worker nurseries
1b. Set your soldiers to M1 and your workers to M2, and have attack/gather disabled on both by default. Only switch these for active fighting/gathering, this will prevent unwanted spider attacks. Going forward any ads exposed should be fought so that your soldiers avoid any conflicts with spiders. Any food gathered by workers during step 2 should be handled as follows:
- Move your workers to the food you want to gather.
- Enable gathering. Your workers should immediately grab the nearest food.
- Once every ant is carrying food, disable gathering. Workers will still deliver any food they are carrying.
- Repeat as necessary.
2a. 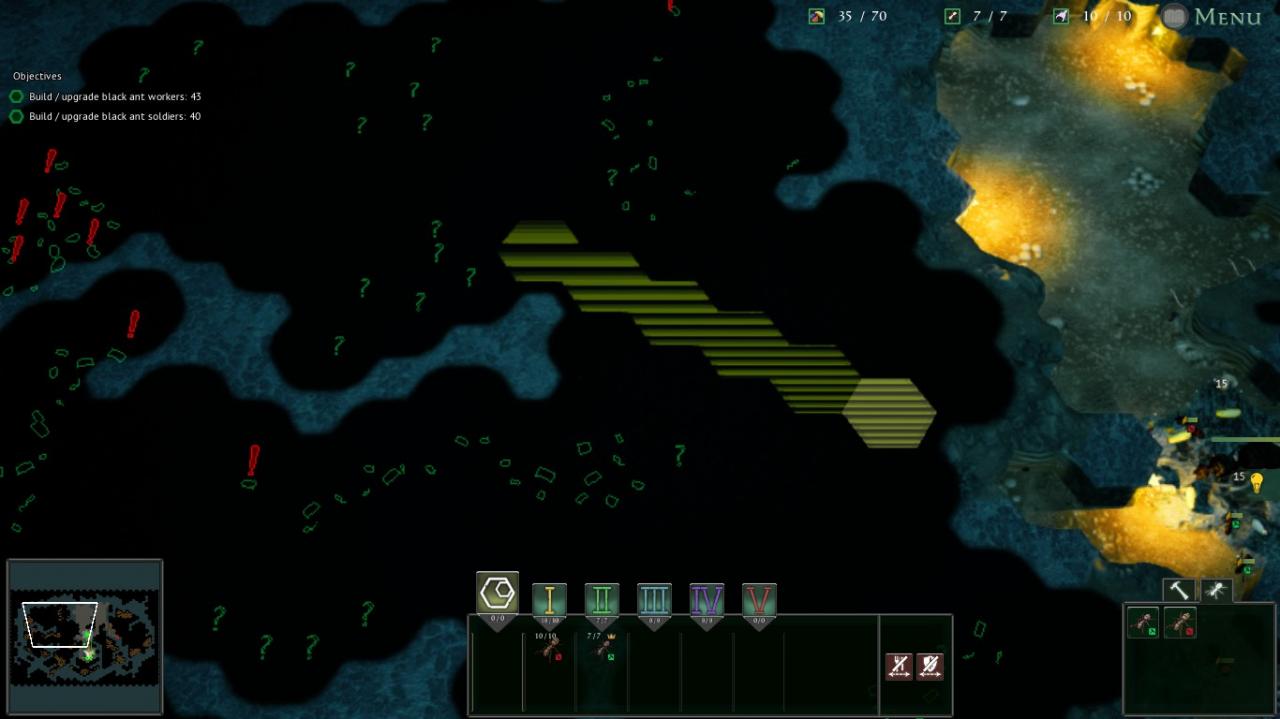 We now need to gather as much food as we can without confronting the spiders; the food east of the nest is heavily guarded by spiders, so we will largely avoid this food until just before we start hunting them. The first rooms we will open are the northwest rooms, populated by a few ads and critters (engage these creatures before they are taken by the spiders if possible. While the food is not permanently lost, you won’t be able to get it until the spider is killed.) Build a size 2 hex of food storage to aid in gathering, and put your food into more soldier nurseries. At this point you should be able to raise 19 soldiers and fill the northern cavern with level 1 food storage.
2b. 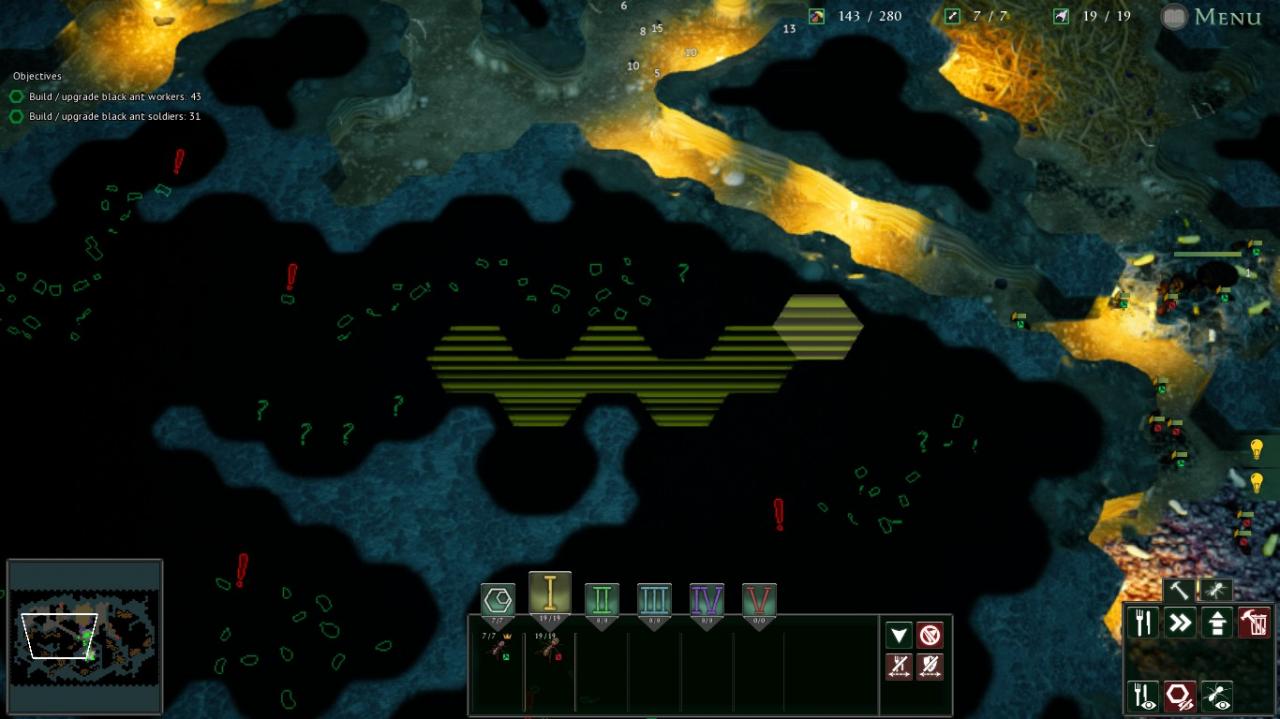
2c.  This step is somewhat optional but is rewarding if you can pull it off. In the far east is a pocket of critters worth a few hundred in food; if you can carefully manage the tunnel dig so as to minimize worker loses and order your soldiers to kill the critters before they wander into the nearby webs, you will pretty much secure all food that isn’t guarded by a spider.
There is another pocket of food to the southeast, however the shape of the rooms and proximity of the webs will typically result in a net food loss from spider attacks. This is best saved for when all other food is gathered, but if this happens you probably aren’t long for this level anyway.
2d. 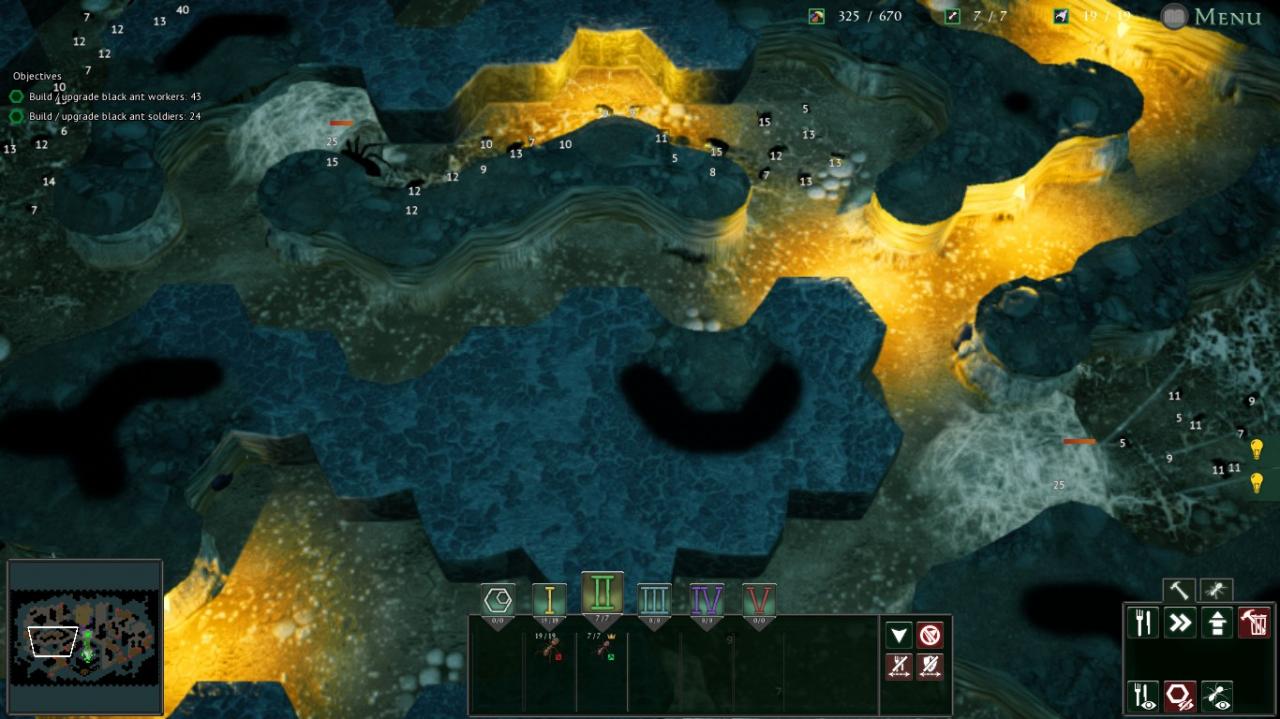 The final preparation requires digging out the actual webs for some of the spiders, making them easier to kill. As you can see in the image here you can actually dig out tiles next to some spider webs, allowing your soldiers to avoid the tripwires altogether, saving precious food. The following spiders can be exposed in this way:
- The spider west of the nest entrance.
- The 2 spiders west of the queen’s chamber.
- The spider east of the worker nursery room.
- The center spider at the southeast corner of the map.
If you have the food, go ahead and build a few extra workers for the sake of having another independent group. Assign the original workers to the nest group.
3a. I won’t lie, these next few steps might take a few tries to pull off, depending on how quickly and efficiently you can manage your food. Begin by taking out the 2 spiders to the east of the worker nurseries; this has the benefits of proximity, a ton of food, and real estate for a second soldier nursery.
Having a separate attack group for spiders will allow you to somewhat ignore the slave makers until the end of the level. Your priority here is gathering the most food as soon as possible; this first move will pay for another 7 or so soldiers who can protect the queen from immediate danger so the first group of 19 soldiers can focus on clearing out spiders. The nest group should remain passive at all times, the queen’s guard should never gather, and the active soldiers and workers both should gather, attack, and defend as needed.
3b. After claiming the space east of the workers chamber send your soldiers to the southwest region, home to 4 spiders, some critters, and a load of extra food. Your attack squad should be able to handle the spiders with proper commands so put any food you gather into bolstering the queen’s guard (be wary of starvation!) Once this is done send your soldiers west to take out 3 more spiders. Build your queen’s guard until you meet the requirement for 50 soldier improvements (don’t go over if you can help it, 1 soldier is worth 2.5 workers.) All remaining food should go into worker nurseries/upgrades.
3c. You should be getting very close to the final stages, having fended off the 4th or so wave of around 2-3 dozen ants. The only viable sources of food left are the lone spider to the north and the 2 to the south. The best way to survive at this point is to reduce the number of waves you fight; if you haven’t met your marks by the start of a wave, you will need to survive yet another, potentially doubling the number of slave makers you have to face. In other words you should focus on meeting your marks first as opposed to building up your army at this point, so facing the single spider for some food may be wiser than spending more time fighting 2 for excess food.
Regardless, if you have managed yourself well enough you should only have to face 5 waves, which can easily be fended off by 60 some odd partially upgraded ants. Don’t forget that these levels can be challenging, so don’t feel too bad if your first few tries don’t go so well. Enough practice with this method should net you the W.
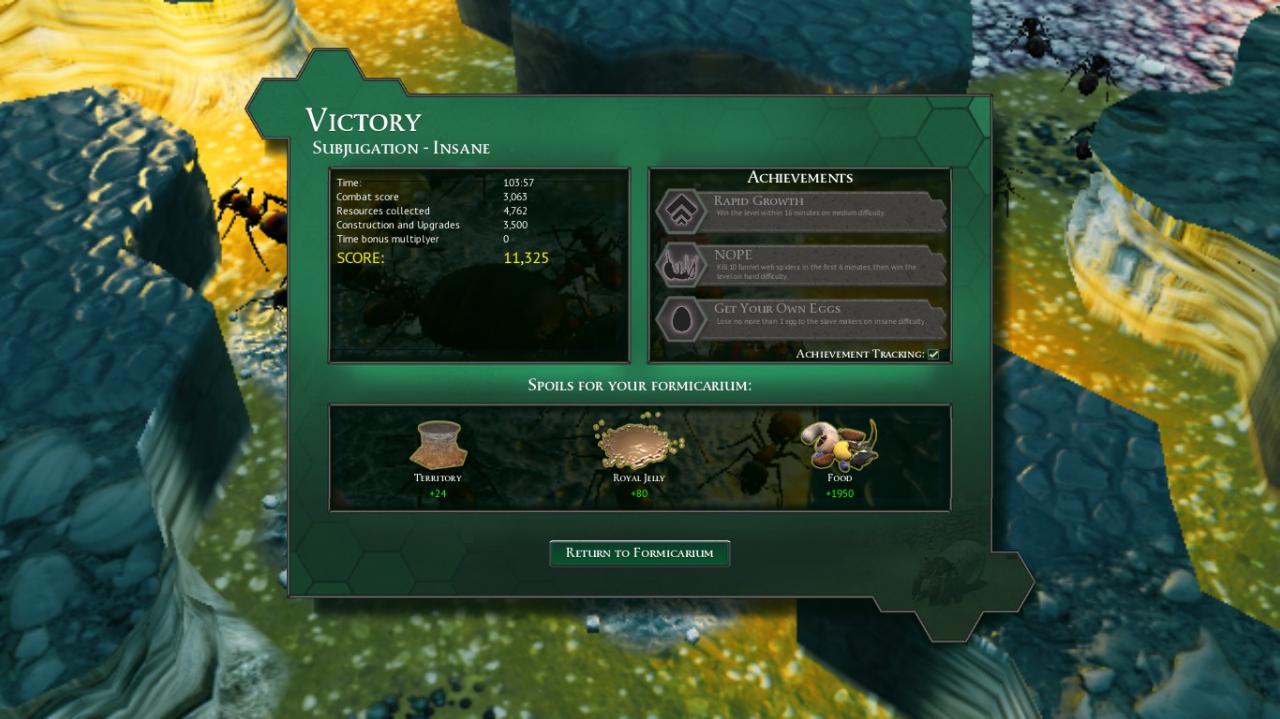
Note: this level usually takes no more than ~40 minutes, not 100+
Formicarium Challenge 1 / Insane
0a. While completing levels on insane can feel rewarding, the actual rewards scale pretty poorly. In fact, completing levels again on easy with the challenge active grants you more resources relative to the actual difficulty. With this out of the way, play the first 2 levels as needed until you have at least 38 fully upgraded soldiers and 19 extra workers, preferably upgraded, and plenty of food (around 2000 should do.) I’ll leave the extra upgrades and colony design to you.
1a. Have your soldiers stationed just inside the entrance to your nest. Any ant that wanders in will be immediately killed, and you should only lose 1 or 2 ants until the cavalry arrives.
1b. After you have faced 30 of both fusca and ereptor the mad scientist will permanently open the feeder colonies and begin dropping ads, finishing off with 6 or so adult beetles. Eventually the scientist will end the experiment, leaving your colony to clear out the remaining adult beetles. While your ants should be able to fend them off at the entrance, a better strategy would be to fall back as far as possible without endangering the queen, meeting the beetles again at full strength. The challenge should end relatively quickly.
Level 2.1: Rising Tide / Insane (Part I)
This mission probably requires the most individual planning, so focus on the strategy that helps you meet the marks for each night the fastest more than anything.
0a. Exploring the underground portion of the map is encouraged before you start playing seriously. Figuring out where you can expand early game will give you an idea of which pockets of ads you can handle at each stage of the mission.
I strongly recommend using Rapid Fire ants for this level. While mortar’s AOE sounds pretty good, I found RF’s ability to decrease ad dps to be most helpful against spiders, arguably the hardest predator.
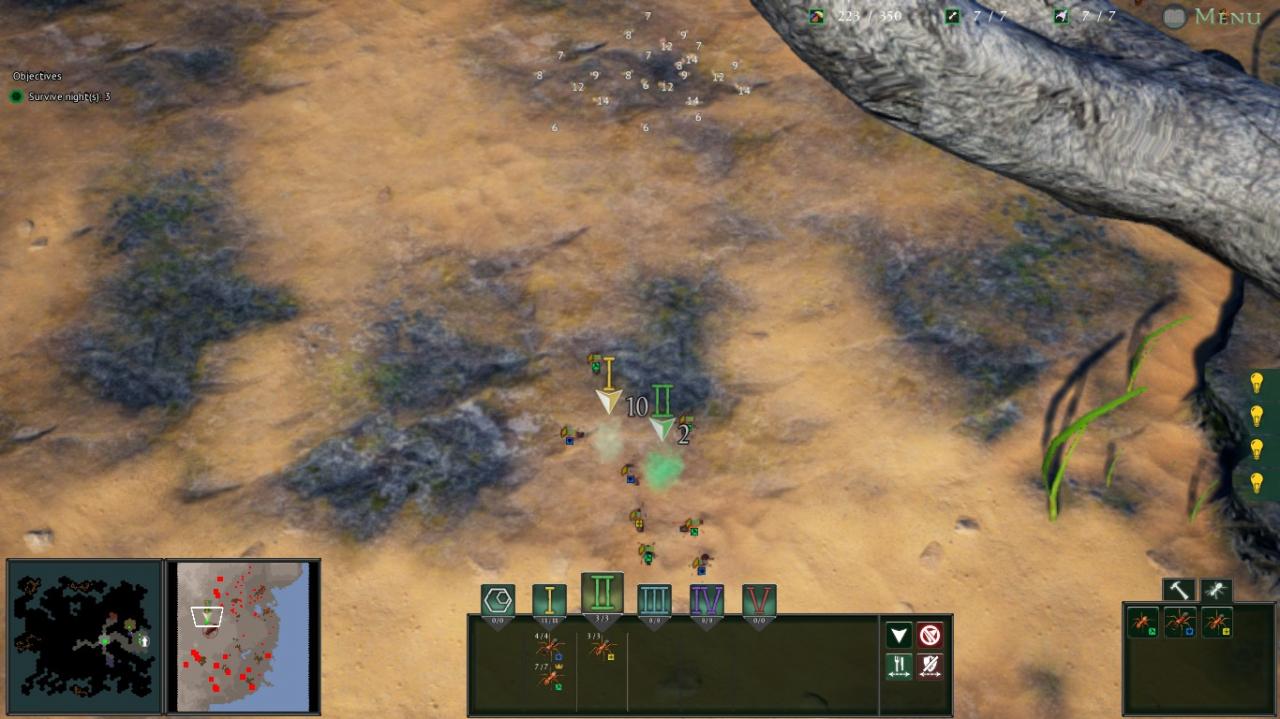
1a. You start the level with a generous 300 food, so while your workers are gathering this build up 4 melee ants, or Tanks, in the southern pocket (don’t bother digging here just yet, just build where you can.) Once you’ve placed all 4 dig out a 2×2 hex near the entrance as well as the entrance itself. Go ahead and build 7 food storage here, capping the storage with speed tiles for upgrading later.
Set 2 markers near the surface seeds and disable combat for both; have your tanks gather the southern pile and the workers gather the eastern one once they’ve finished building. Queue up 3 RF ants in the northern pocket of your colony, and switch your workers back to nest duties. Once they’re raised take over the room to the west. Use the food to upgrade your storage to level 2.
Note: you may find it helpful to have tanks and RF in separate groups for independent orders; RF will get shredded by just about anything, and tanks are not good for dps.
The rest of Day 1 and the beginning of Night 1 will largely be up to you to coordinate, but I will include a recommended procedure. By the beginning of Night 1 you should have 6 tanks, 8-10 RF, and around a hundred food.
1b. 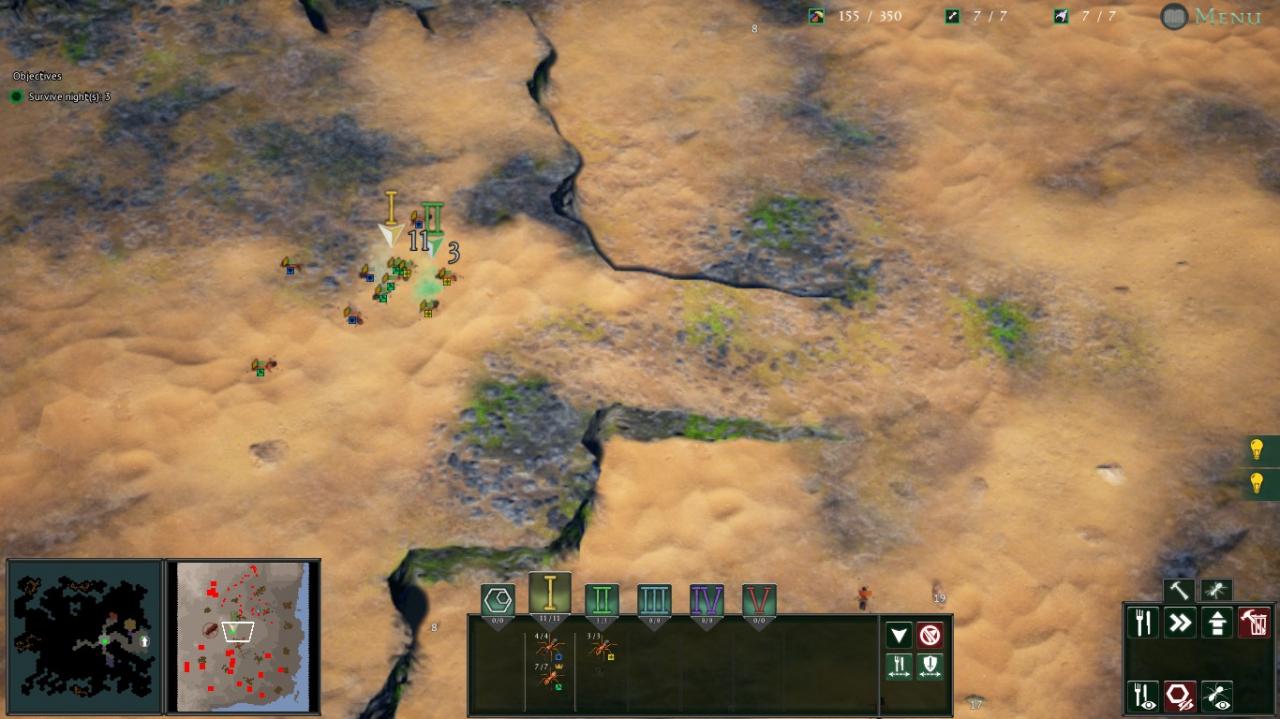 Have your workers join the tanks and send all ants to the edge of the first ramp towards the beach. When the path north is mostly free of ants send your groups to gather the food there then retreat (you may need to disable combat once the food is gathered to prevent them from unnecessarily engaging.) Once your ants have reassembled repeat this move to the south once the tiger beetles give you some room (definitely disable combat here.)
While gathering be sure to queue up RF to free up storage, but keep your workers on gathering for now.
1c. These next moves are high risk but yield high rewards. If you are short on time definitely do the latter two. Only attempt the surface steps once each, focus on getting as much in one go as you can.
 Park your ants just north of your colony with combat disabled. Depending on your luck the 4 beetles to the north will occasionally give you enough room to gather the pile of food here, giving you time to gather about 75-120 food.
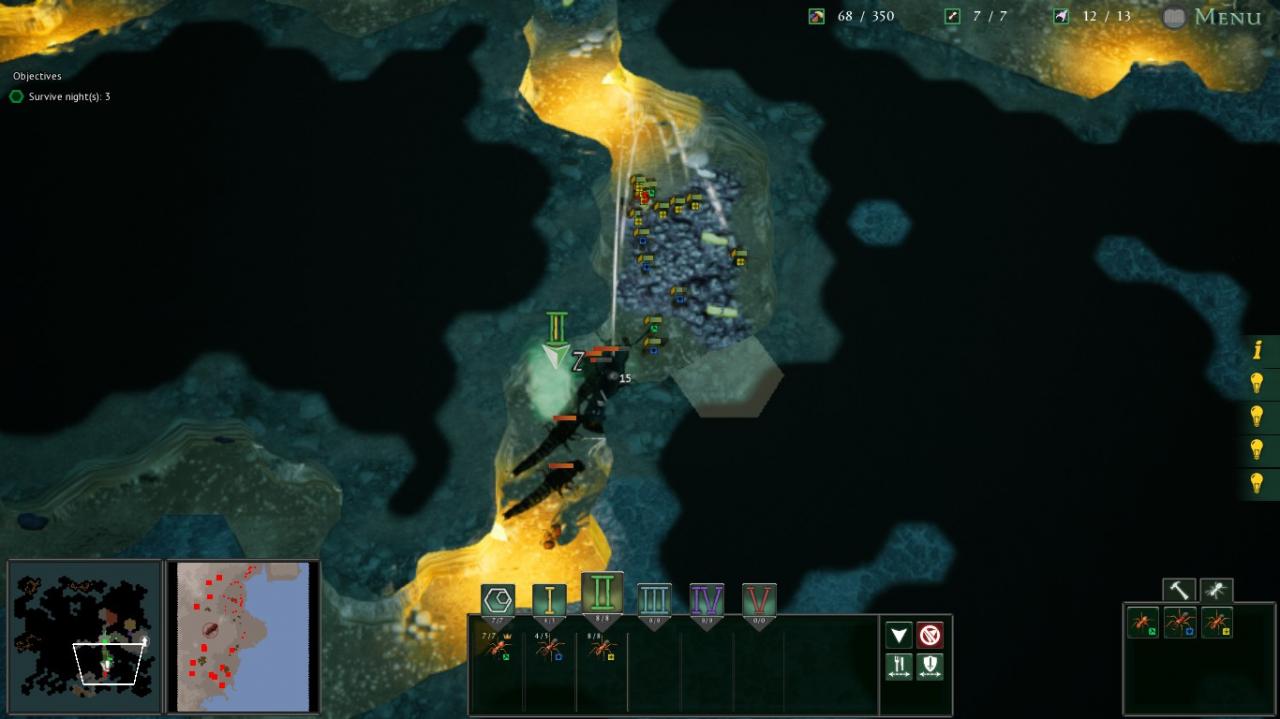 Don’t attempt this unless you have 6-7 RF and preferably a 5th tank. Station just your tanks and RF (make sure combat is enabled!) at your tank nursery and move your workers back to nest duties. Dig out the room south of the nest, then have your tanks engage the ads just beyond their nursery with RF close behind. If done properly this can net you an extra ~200 food.
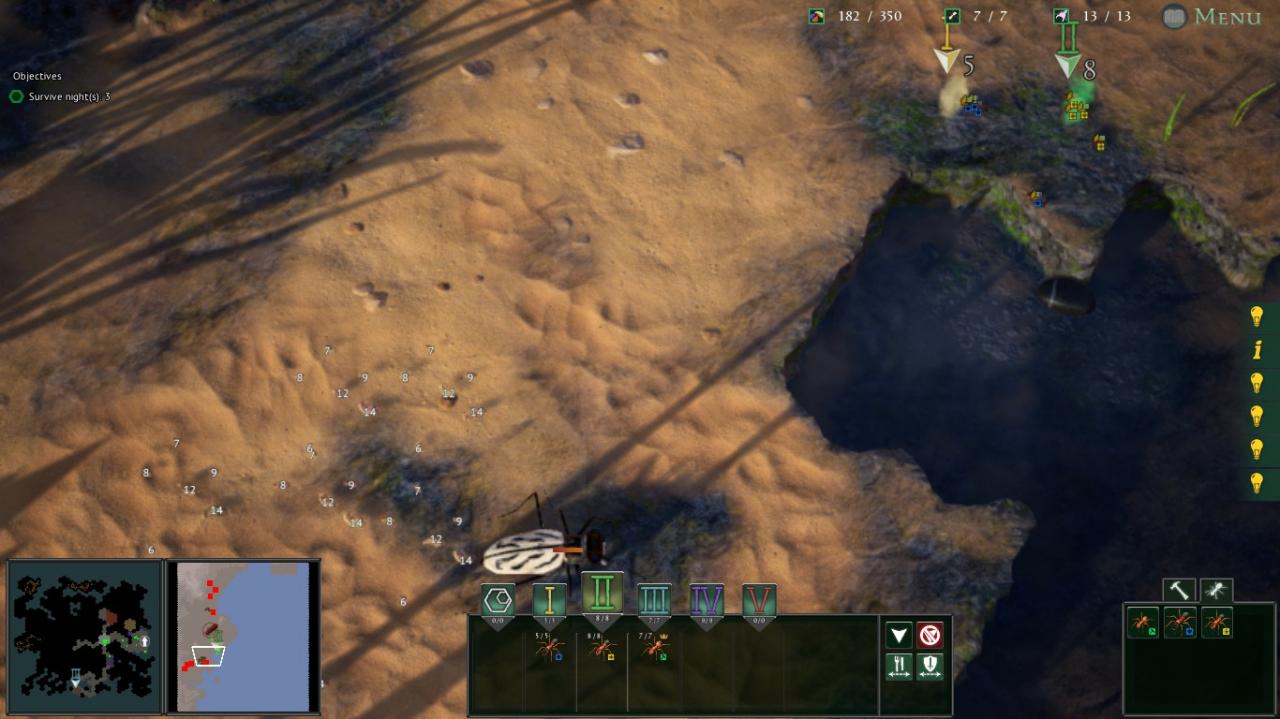 Station all ants southeast of the colony near the overlook to the beach below with combat disabled, just out of reach of a large pile of food. Once the narrator begins talking about hermit crabs the tiger beetles will retreat to their nests, giving you a short window to gather about 100-150 food just before the first wave.
Remember to re-enable combat once these steps are done!
1d. 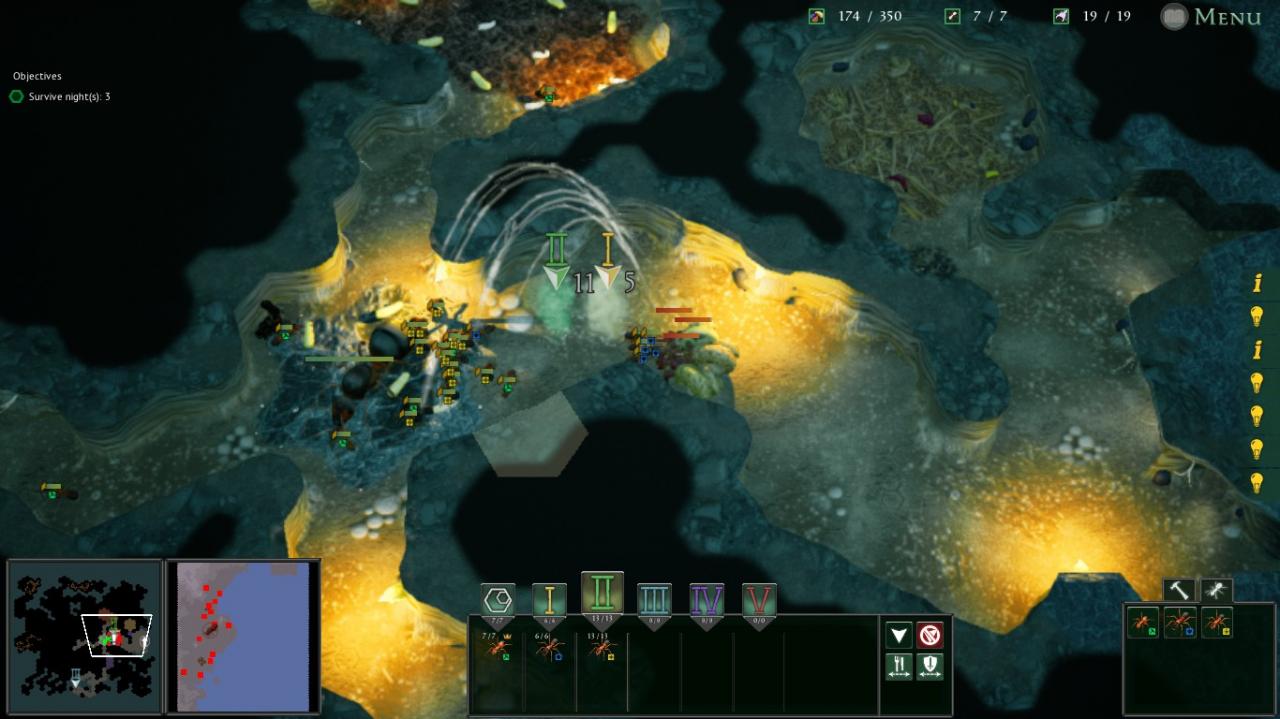 Build up as many RF as you can while sparing around 50 food. Station your RF at the end of the tunnel leading to their nursery and your tanks near the queen. Wait for the hermit crabs to draw close to the queen before engaging, tanks first followed closely by RF. This step is largely shared by all 3 waves. (The first wave may overlap with some gathering from the previous step, but 2 hermit crabs aren’t too hard to kill with what you should have.)
1e. 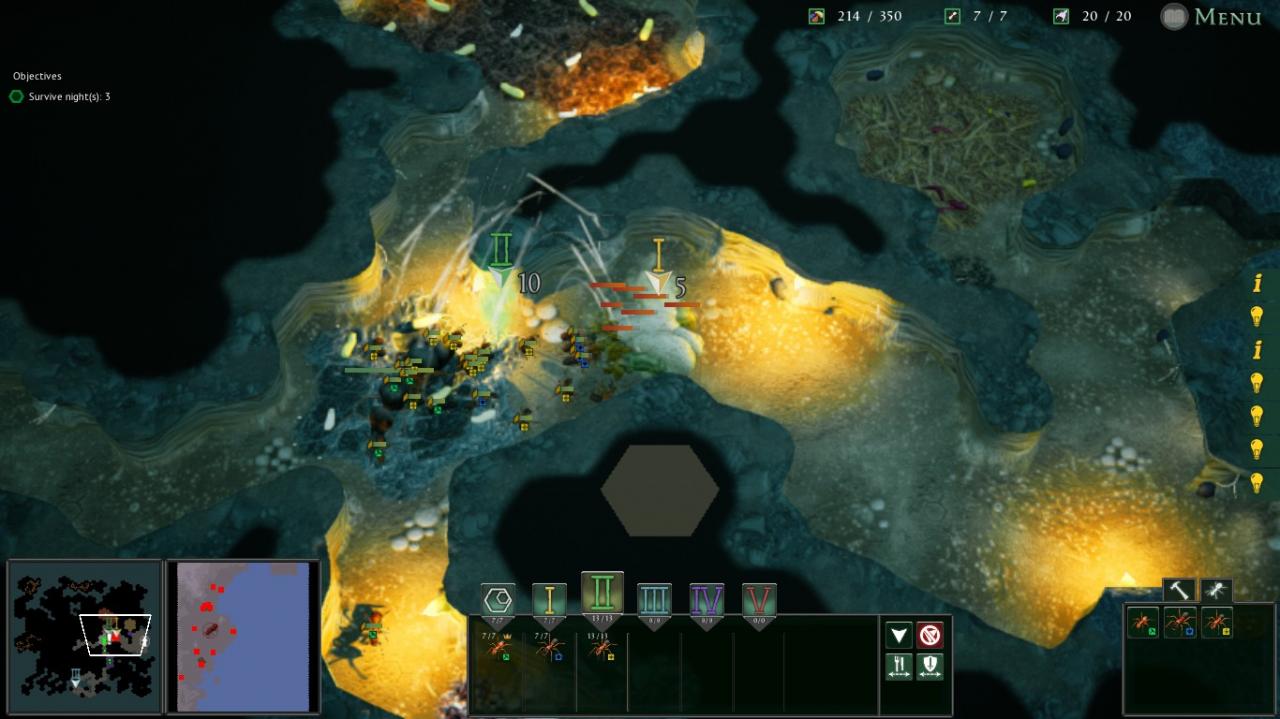 By wave 3 you should have 7 tanks, 10-13 RF, and around 180-200 food. This last wave is fairly hard, during which you face 7 hermit crabs. During my early runs my most common problems were starvation and poor group ordering. If you don’t have enough tanks here you risk your RF being wiped out, and without enough food your workers won’t raise any tanks either. If you position your RF too close to the action you run the risk of a hermit crab targeting them instead of your tanks. To some extent you can use your queen as a damage sponge, but this should be a last resort; you can and should be prepared with the above marks met, just be patient.
Fighting the 3rd wave may run into the next morning so it’s not the end of the world if you have 2 or so crabs left, as their health pools are very large.
2a. Use the food from the night to build up to 8-10 tanks and some RF while sparing 50-80 food. Go ahead and dig out 3 3×3 hexes for tanks, RF, and storage, then fill in the storage.
I recommend building a 2×2 hex for workers connected only to the queen’s chamber, this will be touched on later.
2b. There are 4 pockets of ads in the underground we can clear to the west, northwest, north, and southeast for ton of food; the former 3 are mostly the same with an adult coach horse and some larvae while the southeast pocket has 2 adults while also containing an extra 300 food. As long as all are cleared by Night 2, order is arbitrary; once a room is clear send all available ants to gather before moving on.
2c. You should try to have the underground cleared no later than the last rising tide, but on good runs you can sometimes do this even before tides begin. At this point you should have no fewer than 19 tanks and RF each with a few hundred in food. At this point I highly recommend hunting as many highland tiger beetles as you can before the day is done, giving you 200 food for each one you kill. (Be careful to not attract more than 2 at a time.) It’s possible to hunt all 8, but meeting the mark below is enough.
By the start of Night 2 you should have 200-300 food, 38 RF, and 19-38 tanks as a minimum!
Level 2.1: Rising Tide / Insane (Part II)
2d. If you managed to slay some beetles but have yet to harvest them by now bring your attack groups back to the queen and send your extra workers to gather then with combat disabled (hermit crabs and spiders might give chase, but with your numbers they’re only extra food; be sure to keep an eye on gathering progress though.)
My original assumption that more tanks would be better for this night was very incorrect, at least statistically. My expectation that more tanks would guard my RF worked on paper, however the shear number of spiders was simply overwhelming. By doubling my RF I was almost immediately getting better results than with double tanks, since the spiders were being killed much, much faster.
2e.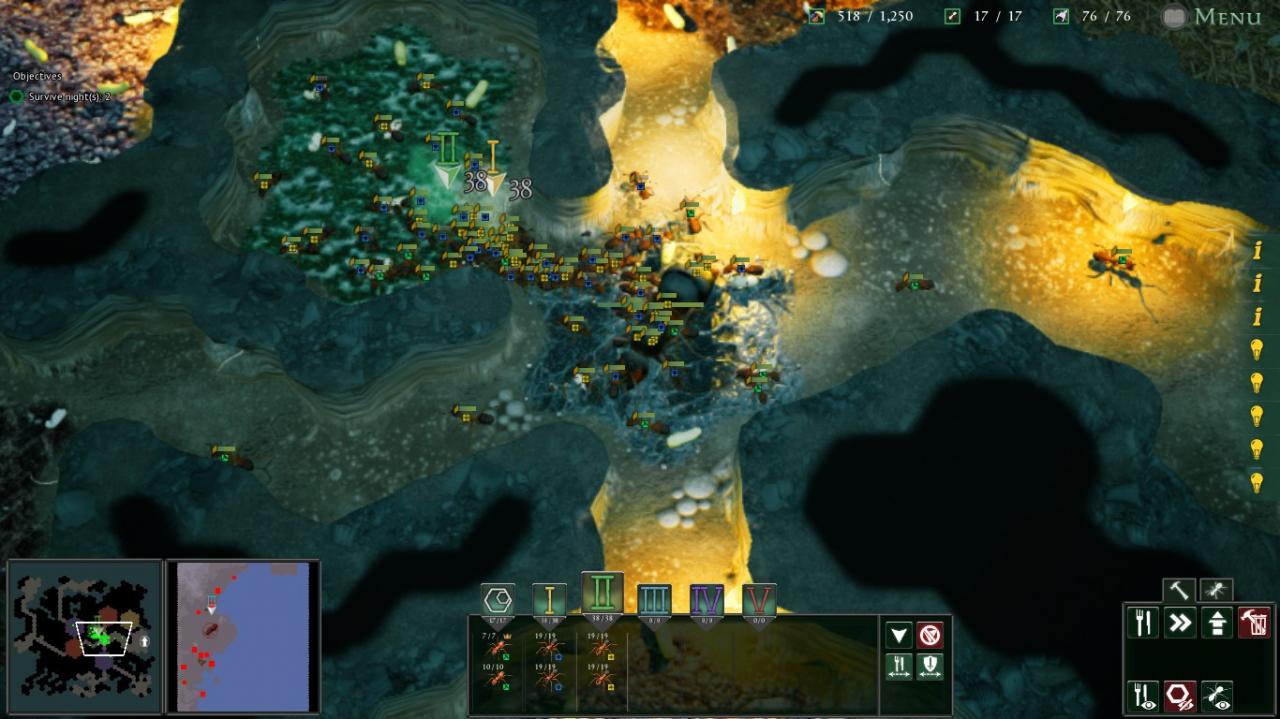 Position your tanks and RF in the worker nursery next to your queen’s chamber. While spider AI generally has them darting between nurseries, they will usually end up at the queen. Once this happens your ants should have little trouble picking them off without your RF getting outflanked. The first 2 waves are quite tame with only 4 spiders each. Try to build up as many extra tanks while staying above 250-300 food.
2f.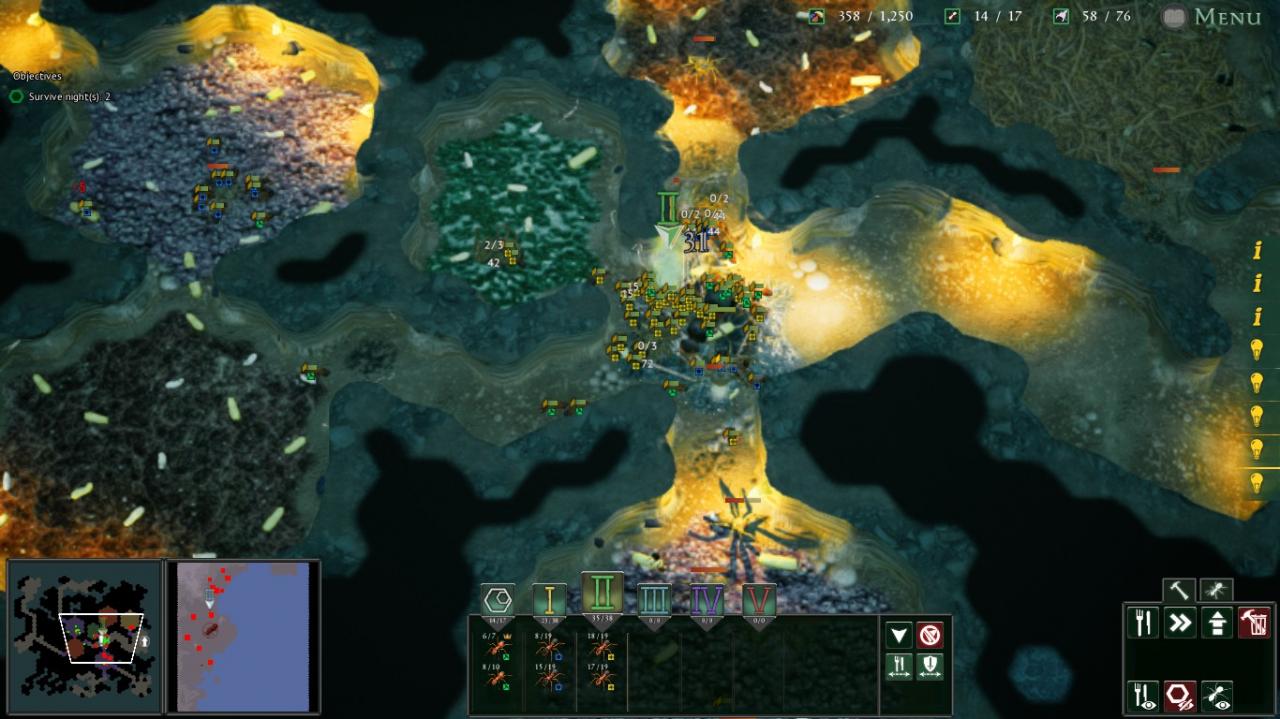 I won’t sugarcoat this last wave as it’s absolutely the biggest hurdle of the level by far. And to be honest even if you’ve met the marks above a few spiders darting into your RF can spell disaster. However compared to my earlier strategies, this one worked far more often than it failed.
As before, station your tanks and RF in your worker nursery and wait for the spiders to descend upon the queen. Once you’ve recovered from this wave move your army to the surface and prepare to fight the highland beetles, splitting both your RF and tanks between 2 “platoons.”
Now that we’ve created a substantial army it’s time to hunt just about every tiger beetle on the map!
3a. Once you’re at full strength have your 2 platoons attack their 4 respective tiger beetles. Next move your army to the east and begin clearing out each level of tiger beetles in ascending order. Make sure to have 38 each of RF and tanks and upgrade your RF as much as you can.
3b. Eventually the tide warnings should begin appearing, at which point it’s time to retreat to the third level, focusing on the 6 tiger beetles here. Time is limited so focus on gathering over chasing down tiger beetles. Retreat back to your queen as soon as the third tide reaches it’s highest point. If done well enough you might have harvested all 20 beetles.
Be sure to have all RF at level 3 and around 300 food stored up. Upgrade tanks if you have extra food.
3c. 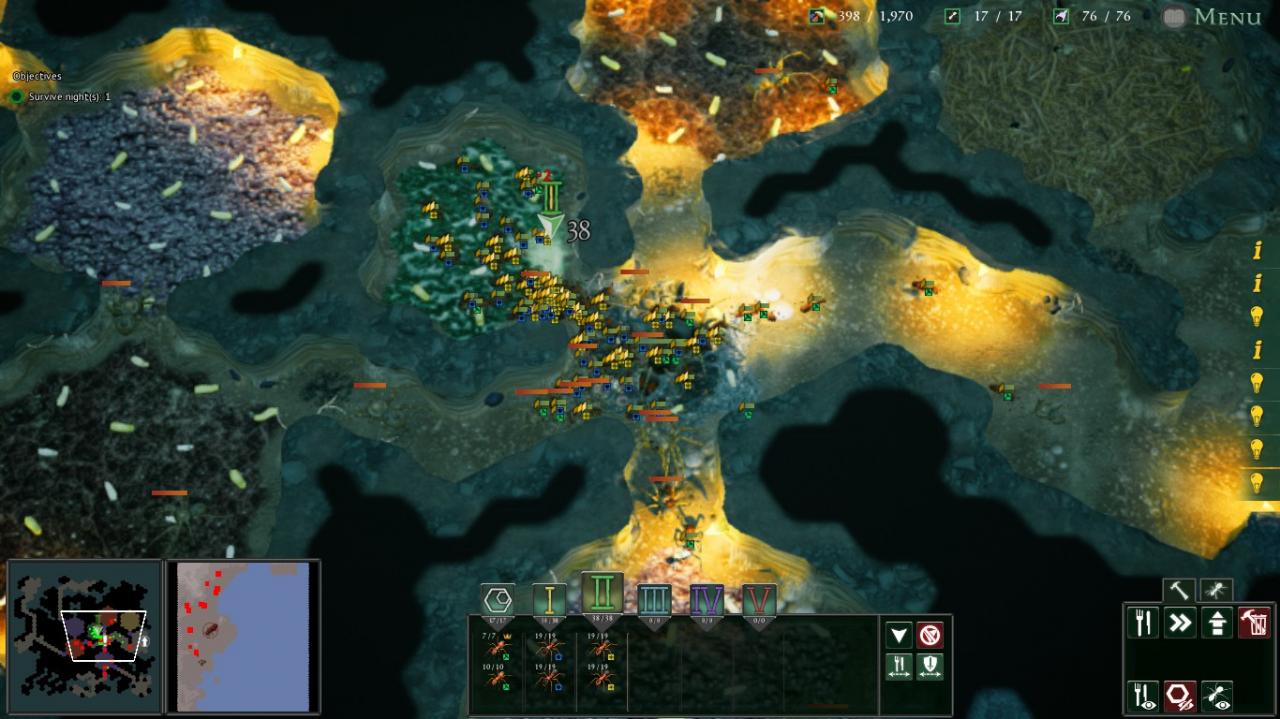 The first wave is almost the same as the last wave of Night 2 only with larger spiders; however with your upgraded RF and the same strategy as before they shouldn’t be too much of a problem. Be warned that your queen can become overcome by venom rather quickly, so don’t let her soak up too much damage. Try to have 400 food in reserves afterward, you will almost never have time to gather this next wave.
3d. 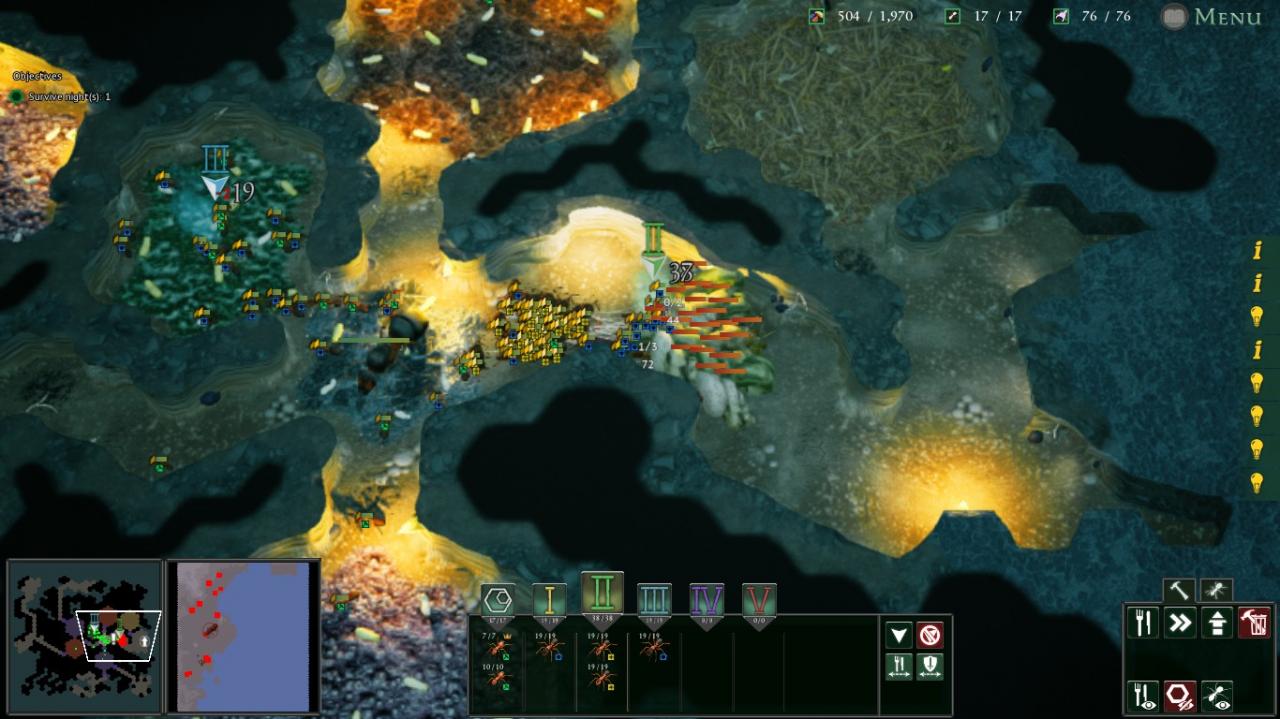 Wave 2 features no less than 25 hermit crabs. Only use your first tank nursery while keeping your second in reserve, preferably in your worker nursery; you may not be able to clear all crabs by the time wave 3 arrives, especially if you had to recover from the first one, and wiping a game because your RF weren’t defended really stinks (trust me, the agony is real.)
3e. The final wave pits you against 2 full wolf spider broods, and while the adult spiders aren’t too difficult the several dozen weaker ads can distract your tanks and RF, not to mention that they may still be chewing on a few hermit crabs. However the reserve tanks and fresh RF broods should save you if they give you extra trouble, so long as you have enough food.
This last night was a pain to test as each attempt required a 40 minute setup. Even on very good setups with mortars I often barely recovered from the first wave and still had a few hermit crabs left by the time the broods arrived. As was the case with earlier attempts on previous nights my results when switching over to RF were much better. If you persevere and focus on improving your first 2 days I have confidence that you can succeed.
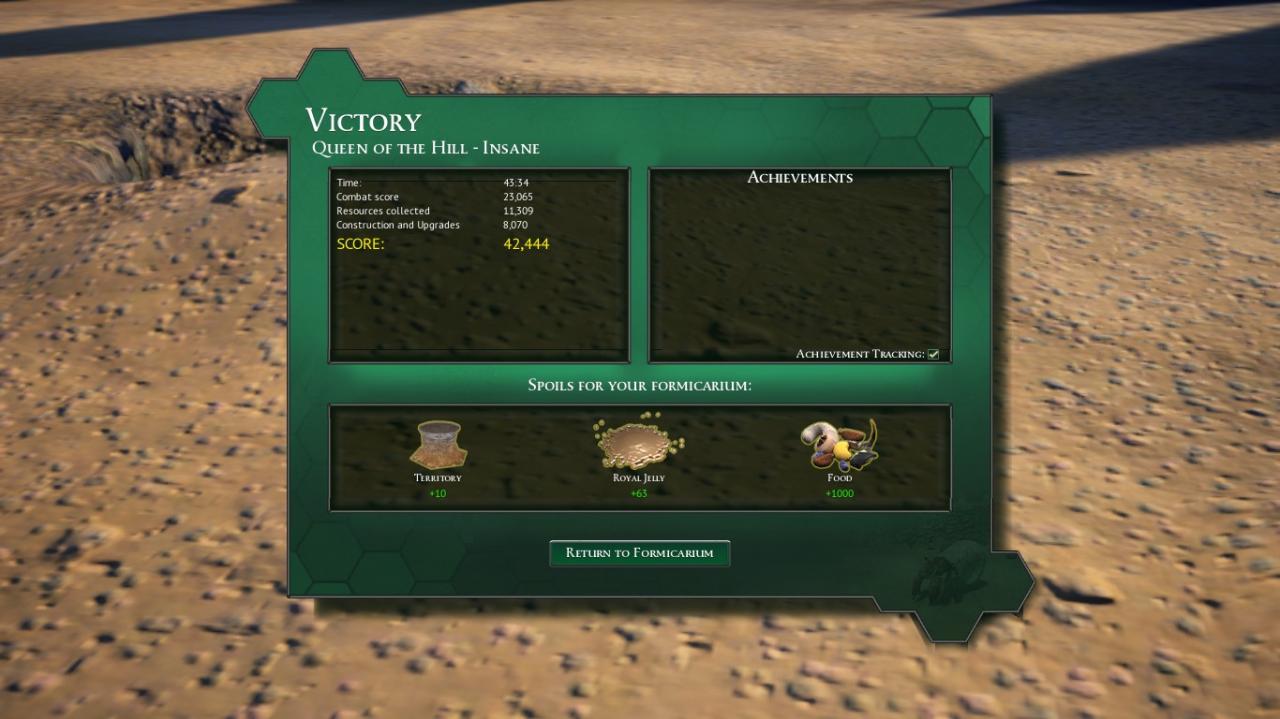
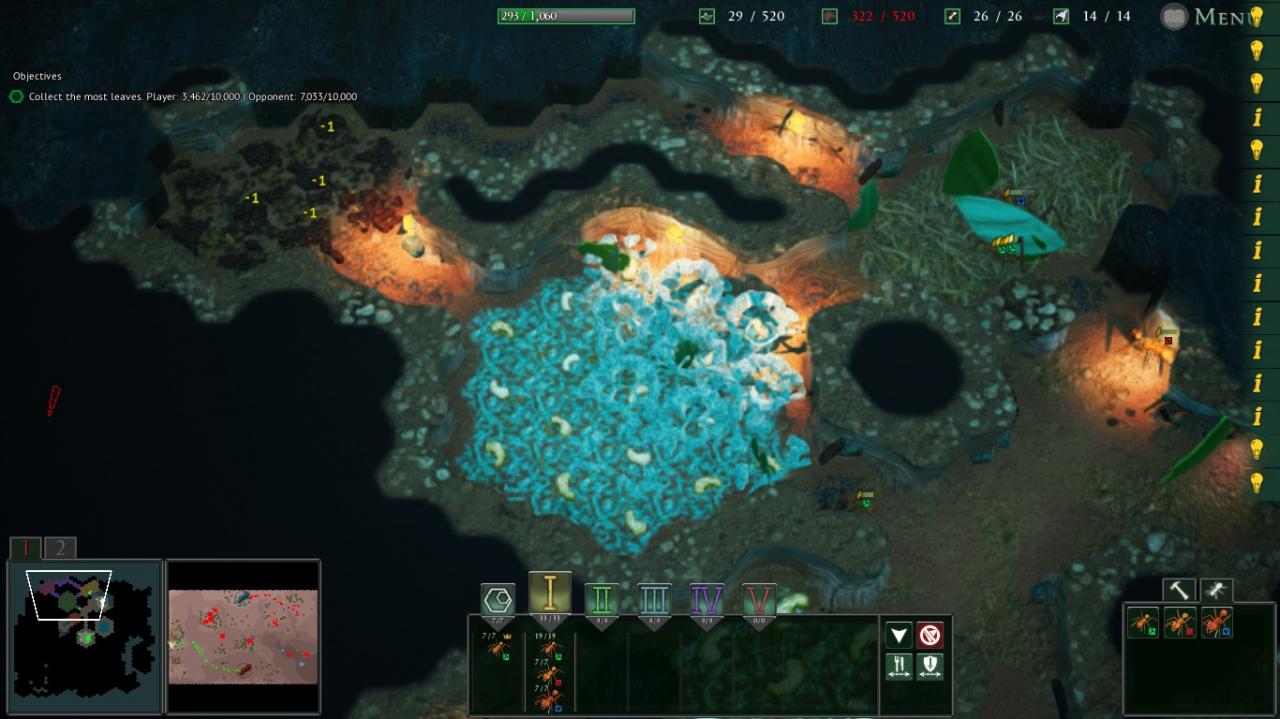
Level 2.2: Queen of the Hill / Insane
However there are two sides to this coin; the rival colonies possess far superior numbers with the final waves numbering in the hundreds. As such I highly recommend using mortars for this level, as these ant swarms will be the primary threat. While RF served us well against the agile wolf spider, the overwhelming ant armies can only really be countered by mortars’ AOE with the time we’re given to prepare.
Fortunately once we survive Day 2 the game becomes far easier. I would still advise taking some time to get used to the early stages of the level.
1a.  Dig into the room directly west; once the workers return food and hatch all 7 workers dig 4 tiles to make a 2×2 hex in this new pocket, which will return more food. Dig another 2×2 hex southeast of the queen, placing 3 workers here and putting them in M1. Dig out the room north of the entrance for a hidden 300 food, beginning work on a 2×2 food storage there. Next have M1 gather the rest of the exposed food while building 3-4 Mortars in the first hex. Once that’s finished send all workers and mortars to take the room to the east giving you food for 7 total mortars.
1b.  Open the entrance and begin gathering honeydew from the aphids, ignoring the ladybirds for now. Dig out a 2×2 hex just south of your queen for 4-5 Tanks and expand your mortar nursery to a 2×4 hex. Continue gathering until the first ant wave begins, then have your ants retreat to the queen; at this point put your tanks in M1 near the entrance and mortars in M2 near the queen (remember to check that combat is enabled.) Once the wave enters your nest have your tanks charge the ants followed closely by mortars. Continue gathering food until you have 5 tanks and 10-12 mortars with 50-100 food, retreating and using the same tactic for wave 2.
1c. 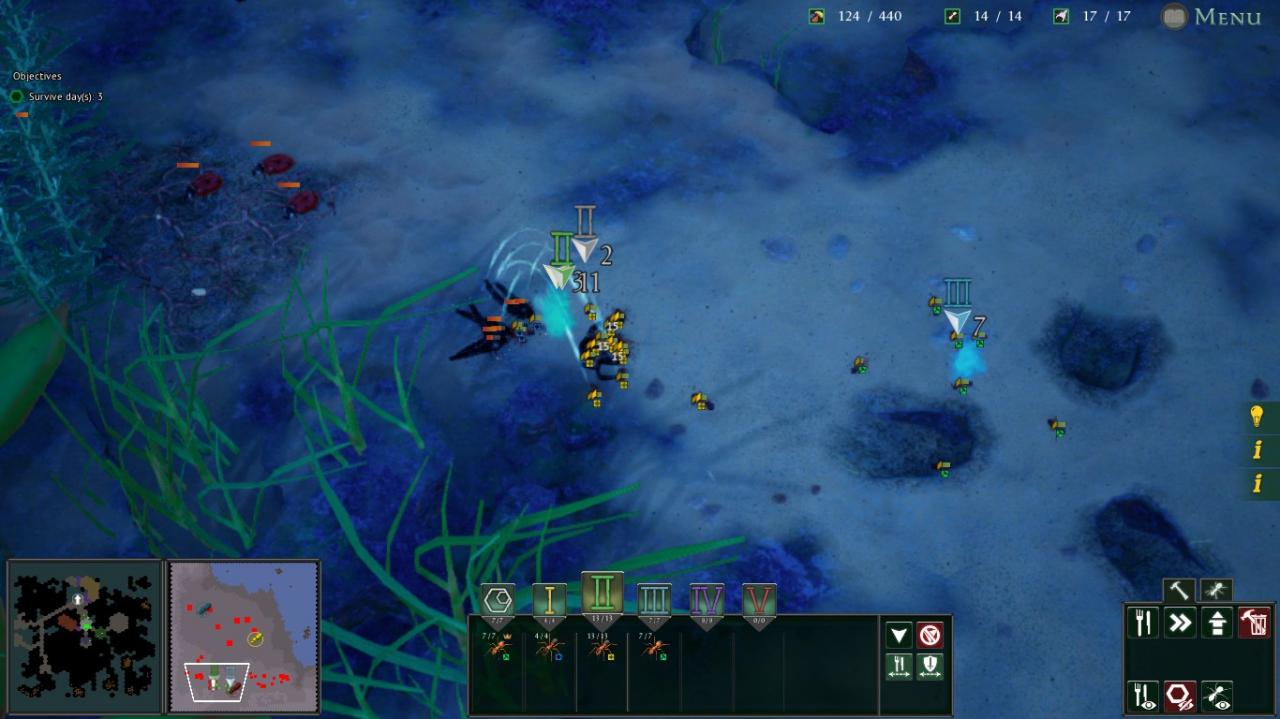 By the end of this night we need to have 7-10 level 3 mortars, 7 tanks, and 300-350 food. While this feels like a very high bar there are more than enough ads we can harvest for food. Dig to the west and take the 2 rooms here and either the room just south of them or the one to the east; the worst that you’ll face here is an adult coach horse and some larvae. Raise up to 13 mortars then begin upgrading them. Once these rooms are clear move your army to the surface and start hunting the highland ads for the rest of the night (be sure to hunt both sides.) This should get you the food required for the above marks. If you have extra food expand your tank nursery to a 3×3 and raise more.
2a. 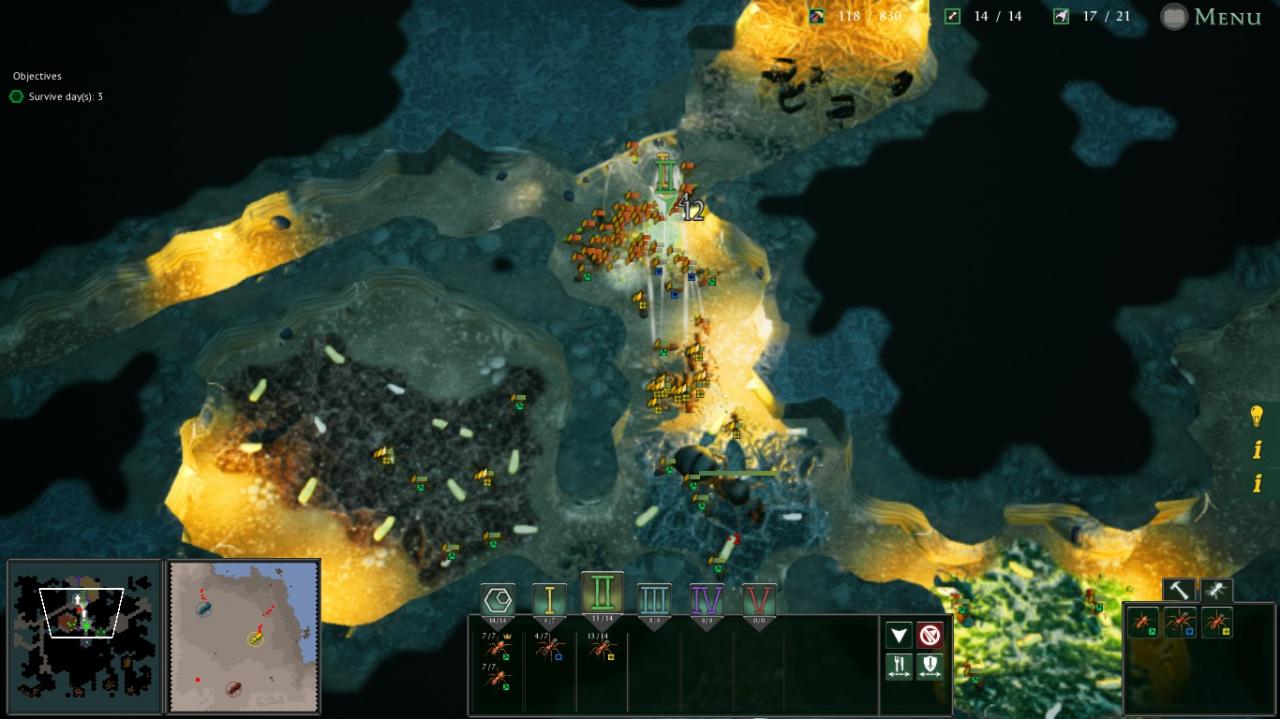 There won’t be a lot of gathering for the rest of the game during the day, so it’s important to have the required food saved up. The strategy here largely remains the same as before with tanks up front and mortars in the rear. The ants will enter combat very close together and remain stationary, and despite the large numbers of enemy ants the rival colonies never actually send upgraded variants. As such your 10 or so level 3 mortars can easily wipe out these waves as long as your tanks hold the line.
2b. 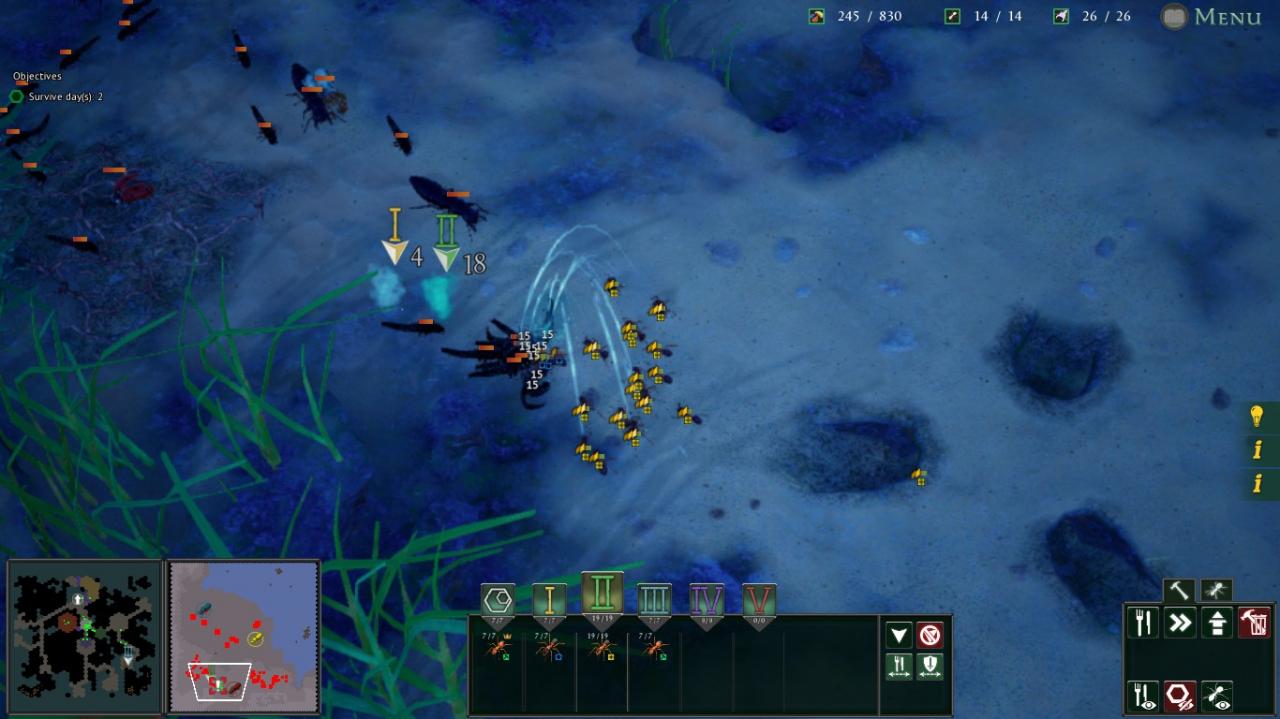 By the end of the night we need to have 19 level 3 mortars, 19 tanks, and 200-300 food. The means of gathering this food is up to you, but my recommendation would be to focus on the surface as by the time you dig out ads in the underground the same number of ads will usually spawn above ground. Keep an eye out for the hermit crabs as each one is worth 180 food, enough for 3 mortar improvements.
3a. 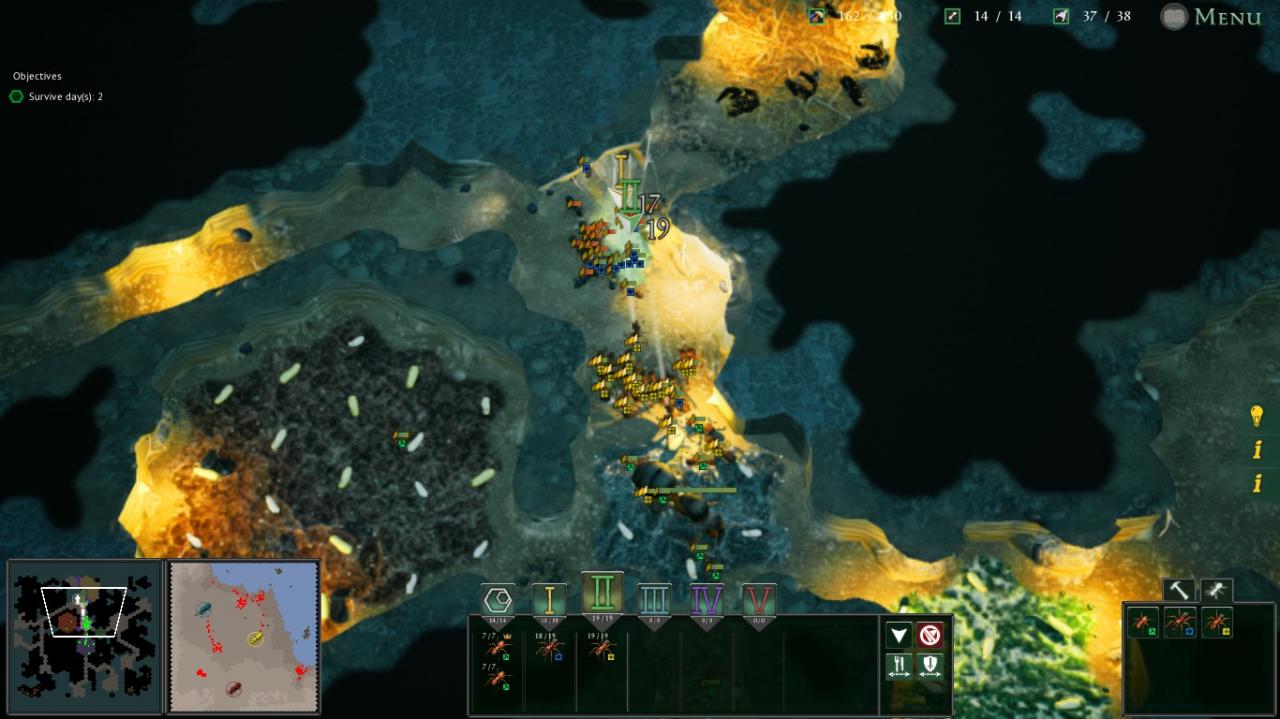 There isn’t much difference between today and Day 2 apart from the wave intensity. However because of the improvements to your army you will actually lose less food despite facing more and harder waves.
3b. 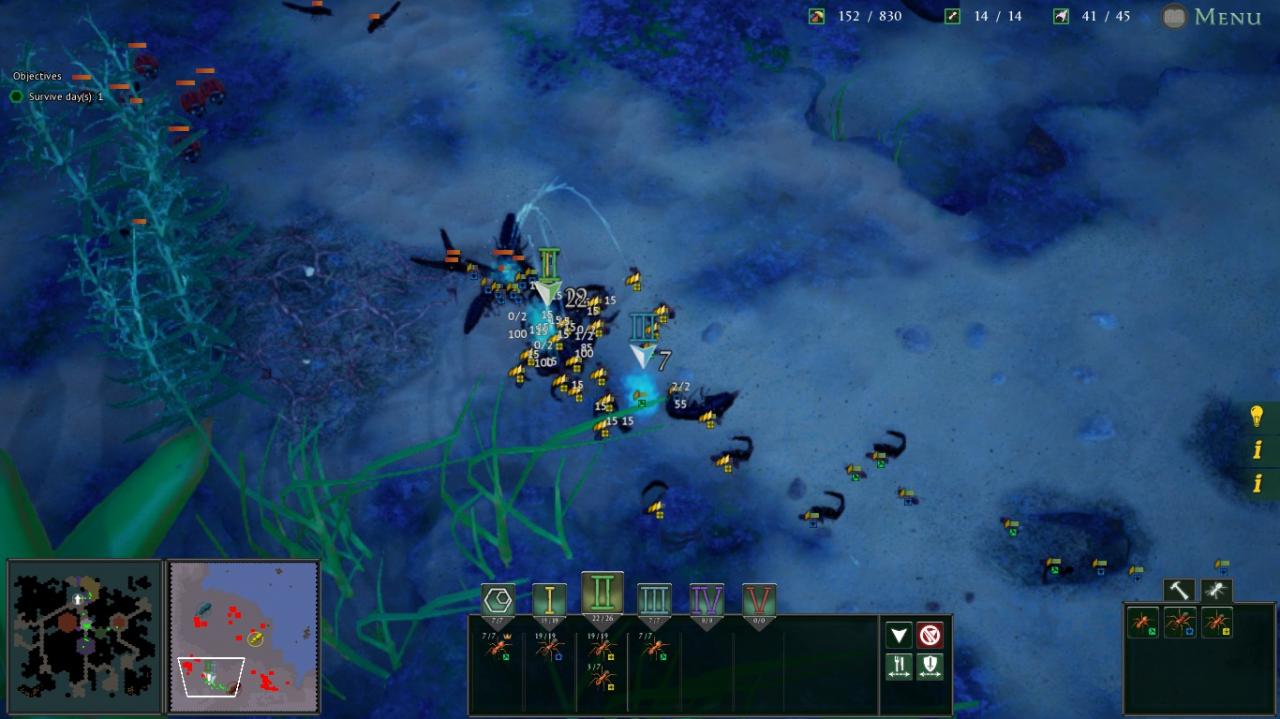 Again the strategy remains the same as before. By the end of the night be sure to have 38 level 3 mortars, 19-38 tanks, and 300-400 food. At this point the ads on the surface provide so much food that the underground can be ignored.
4. The final day ends rather anticlimactically at this point. Even though each wave ranges from 100-300 ants your 38 mortars will destroy any ant that enters your nest within seconds. The victory should be as good as yours.
Formicarium Challenge 2 / Insane
The biggest threat will of course come from the dozen or so large wolf spiders which will avoid the fighting and go straight for your nurseries. Having 1 nursery of fusca guarding the queen will ensure that she is not overwhelmed until the mad scientist ends the experiment. You can then move the rest of your army to neutralize the spiders.
Make sure to gather the reward food before rehousing as you will get a little more royal jelly for upgrades. If you’ve followed this guide entirely you should get enough jelly to fully upgrade the major of your choice.
Brief Leafcutter Guide
1. Food now comes in 3 forms: leaf, fungus, and refuse.
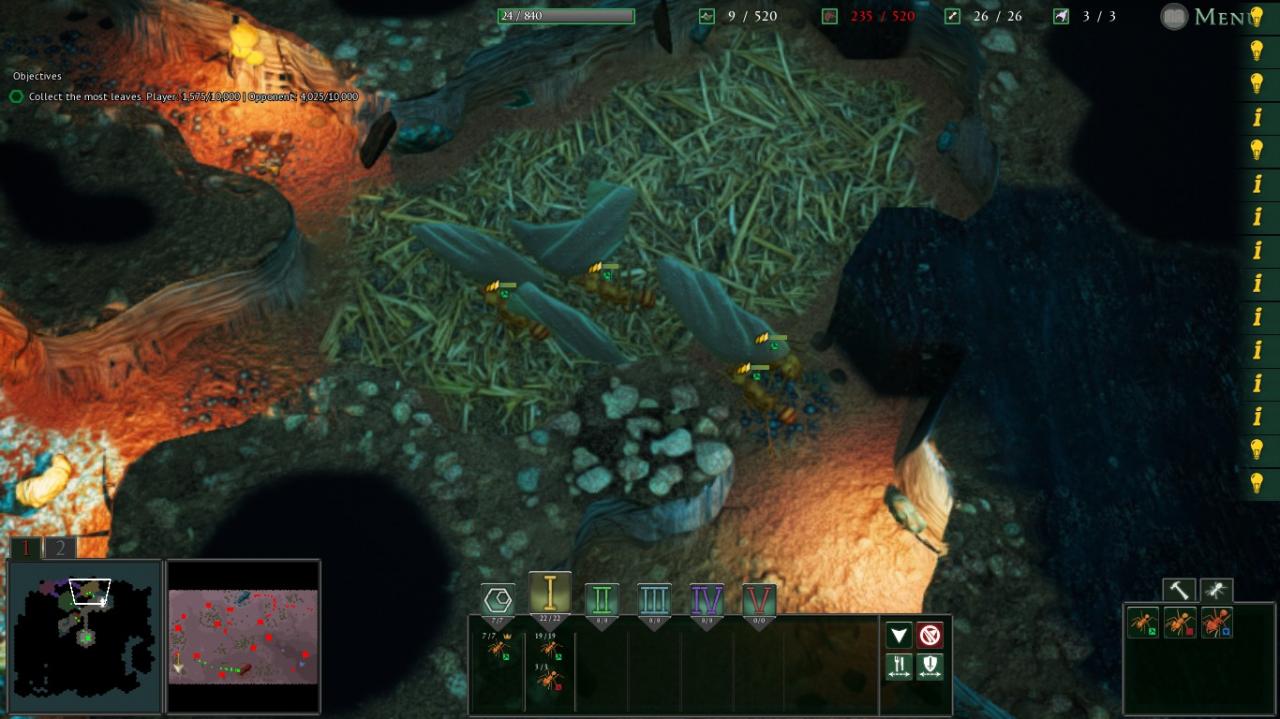 Raw leaves are the resource gathered by your ants. They cannot be stored in the queen’s nursery and require a leaf storage tile to even be gathered. Stored leaves will almost immediately be carried off for processing, so leaf storage will usually be the smallest part of your colony.
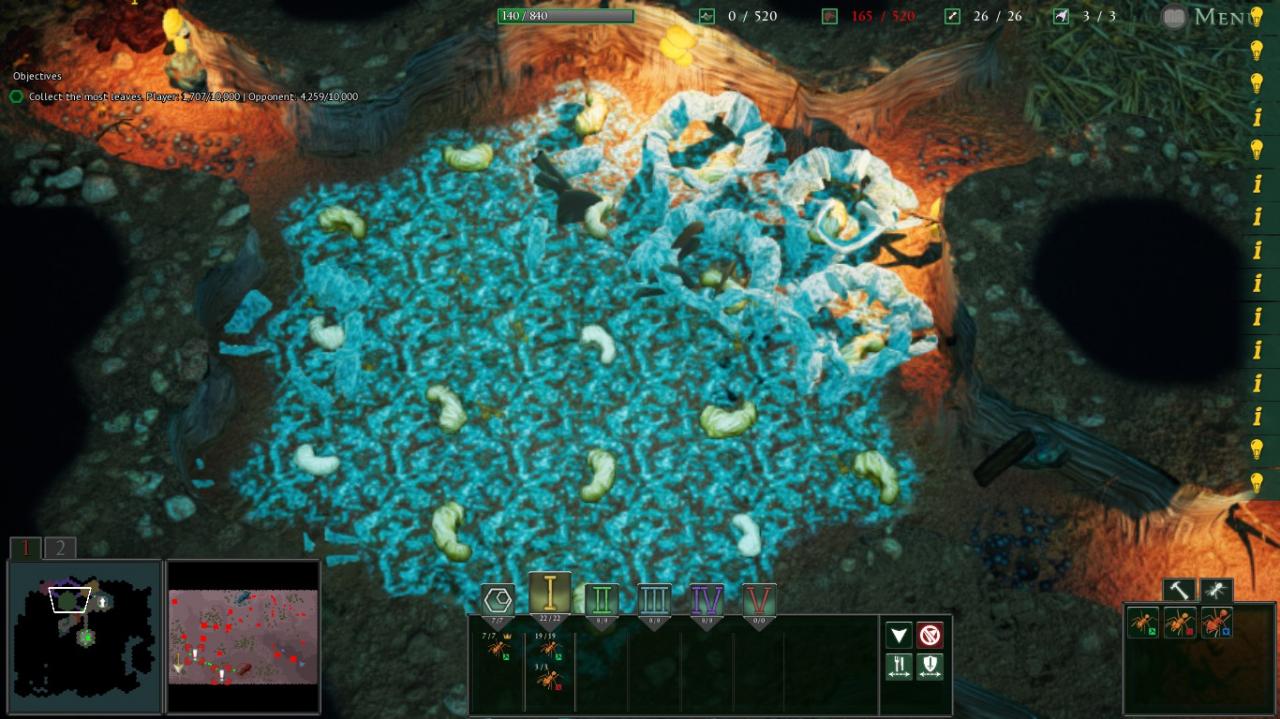 Fungus is the active food resource which is consumed to build other tiles and is generated from leaves at any nursery where it is then stored. The amount of fungus generated is 1 per second per tile, regardless of level, and the amount stored is 20 at level 1 with an additional 10 per level. You should always have at least one nursery very close to your leaf storage for quick generation.
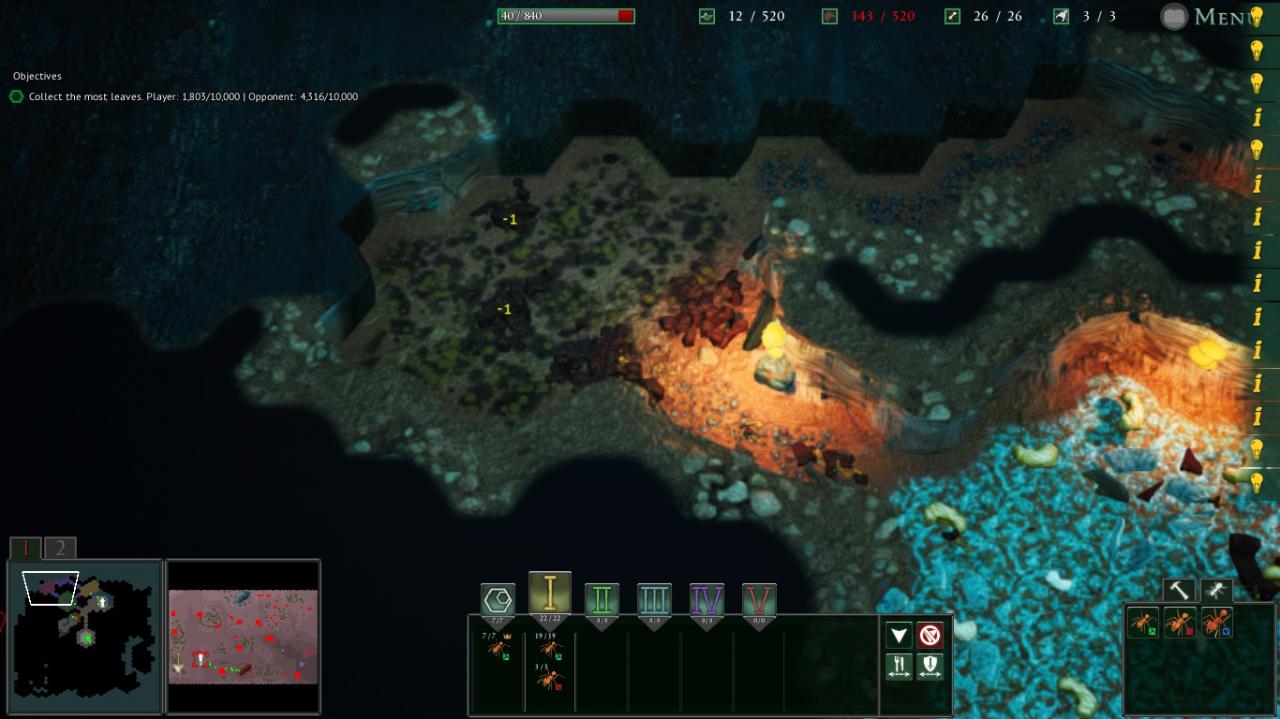 Refuse is essentially spent food in physical form and is generated whenever tiles are built or larvae are hatched. Refuse can be stored at nurseries but must be disposed of at refuse tiles. At a refuse tile 1 refuse decomposes every 5 seconds at level 1, every 4 seconds at level 2, and every 2.5 seconds at level 3 (A 2×2 level 2 refuse dump consumes 1.75 refuse per second while a 3×3 level 3 one consumes 7.6 per second.)
Additionally refuse tiles will decrease the point value of nearby tiles, so while they should be close to primary generation sites they should have a few tiles between them.
A basic leaf processing setup.
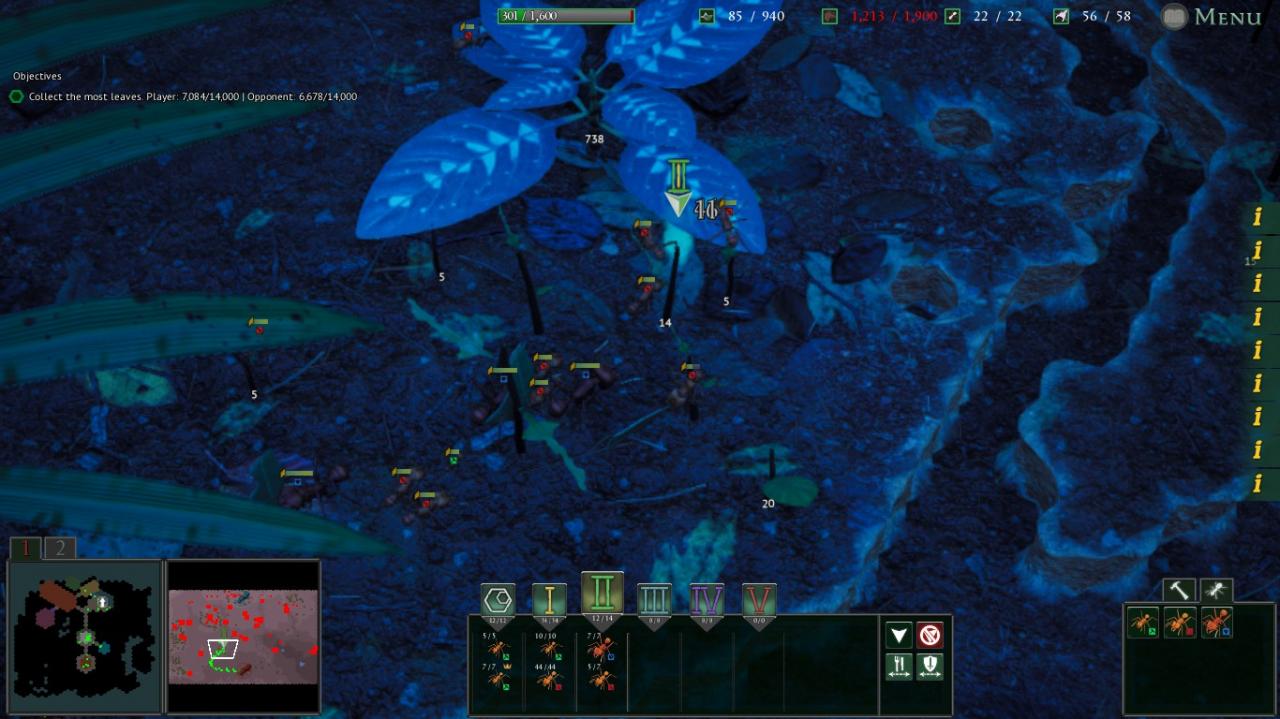
2. Ants are divided into several different castes, each with a specific role.
- Minims – small autonomous workers that carry leafs and refuse to their appropriate locations. These are not raised or upgraded but rather come for free with every nursery tile. The more nurseries you build, the more efficient your food processing will become.
- Minors – the standard worker cast. Primarily used for nest duties but can gather leaves in half portions, albeit at a slower walking speed.
- Mediae – slightly larger than minors, these ants are the primary harvesters able to collect leaves in normal quantities and without any movement penalties. These ants can defend themselves in groups against basic ads but will succumb to greater threats if not protected.
- Majors – these beefy ants are the paladins of the colony, able to hold their ground against most predators in small groups. They can also gather larger leaves but suffer the same movement penalties as minors.
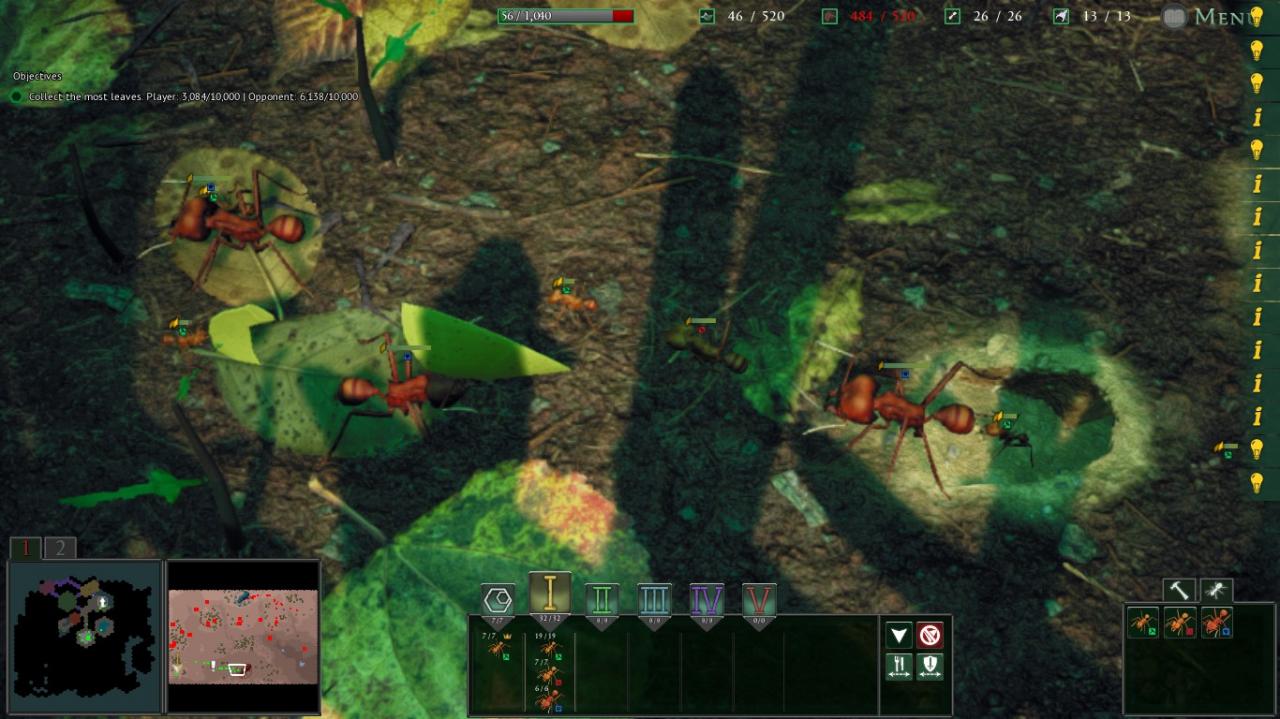
All main ant castes: minors, mediae, and majors.
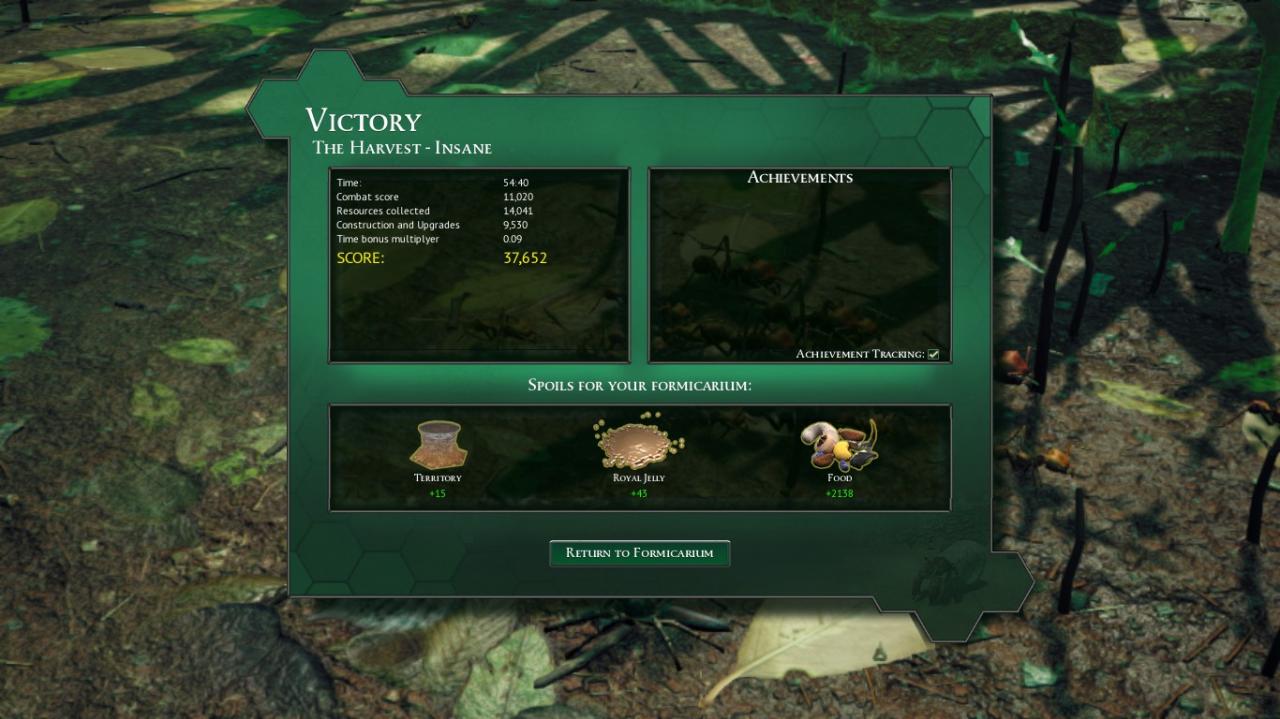
Level 3.1: The Harvest / Insane (Part I)
The main strategy for this level will be both rapid expansion and sabotage. Since we will mainly be building media for this mission we need a major that complements our army type, so while stun majors may be what you’re used to for general play I highly recommend using taunt majors here. We won’t really have an issue with damage output in the later stages of play due to shear numbers so having our majors assume a tank role will work best for us.
1a.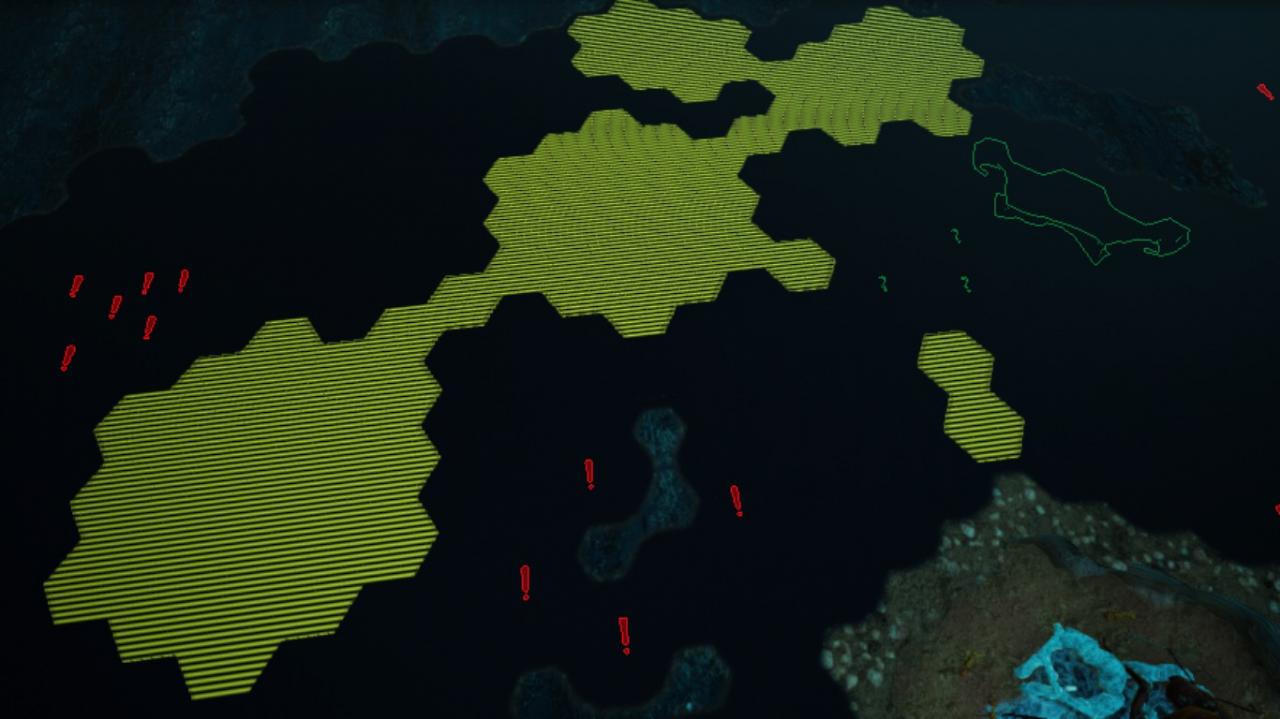 Begin by placing 3 worker tiles and a refuse tile near your queen then dig out the tiles shown here; the room adjacent to the entrance is for leaf storage, the small room north here is the worker nursery, the center room is for mediae, and the western room is the refuse dump. Once cleared place 4 leaf storage adjoining the 2 nurseries and 2 refuse tiles at the rear of the dump. Now open the entrance.
Note: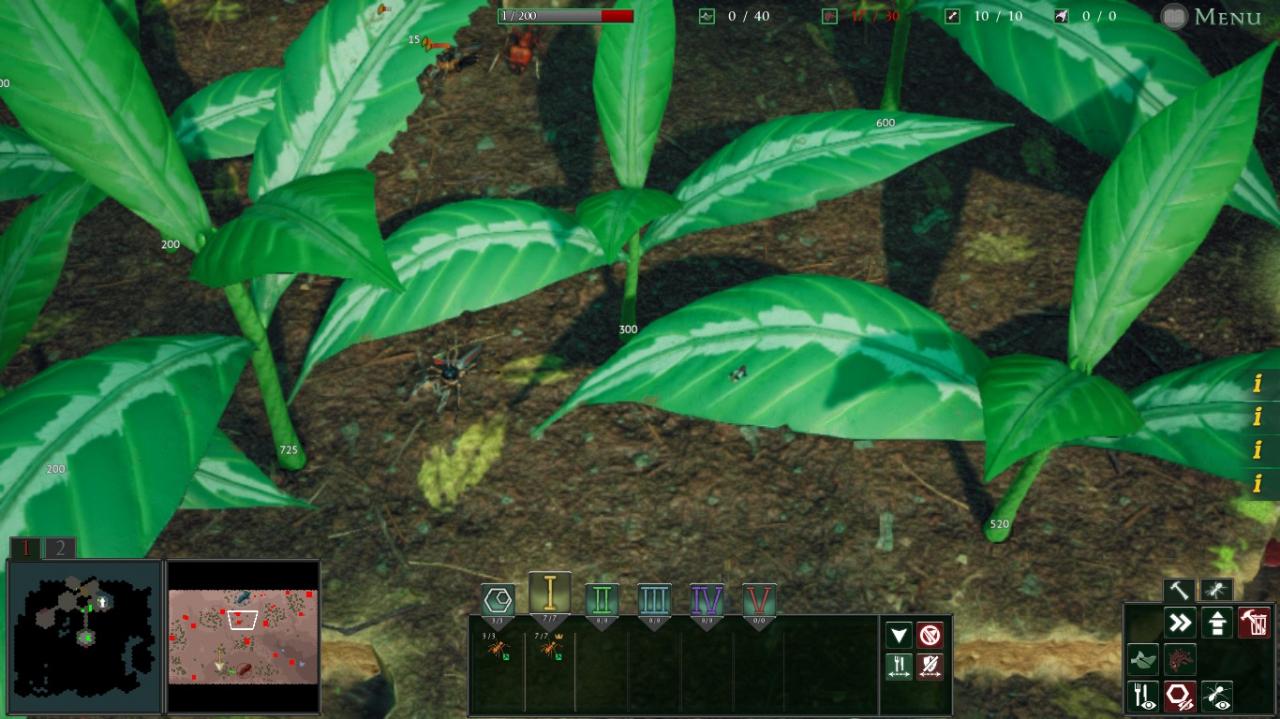 in my best runs having the ability to gather the large plants in the center of the map proved most helpful, and the groves in the northeast corner are our rival’s next most critical source of food. The best possible start happens when the rival colony is gathering from the two western groves as these cause your opponent to progress much more slowly. Consider this before continuing.
1b.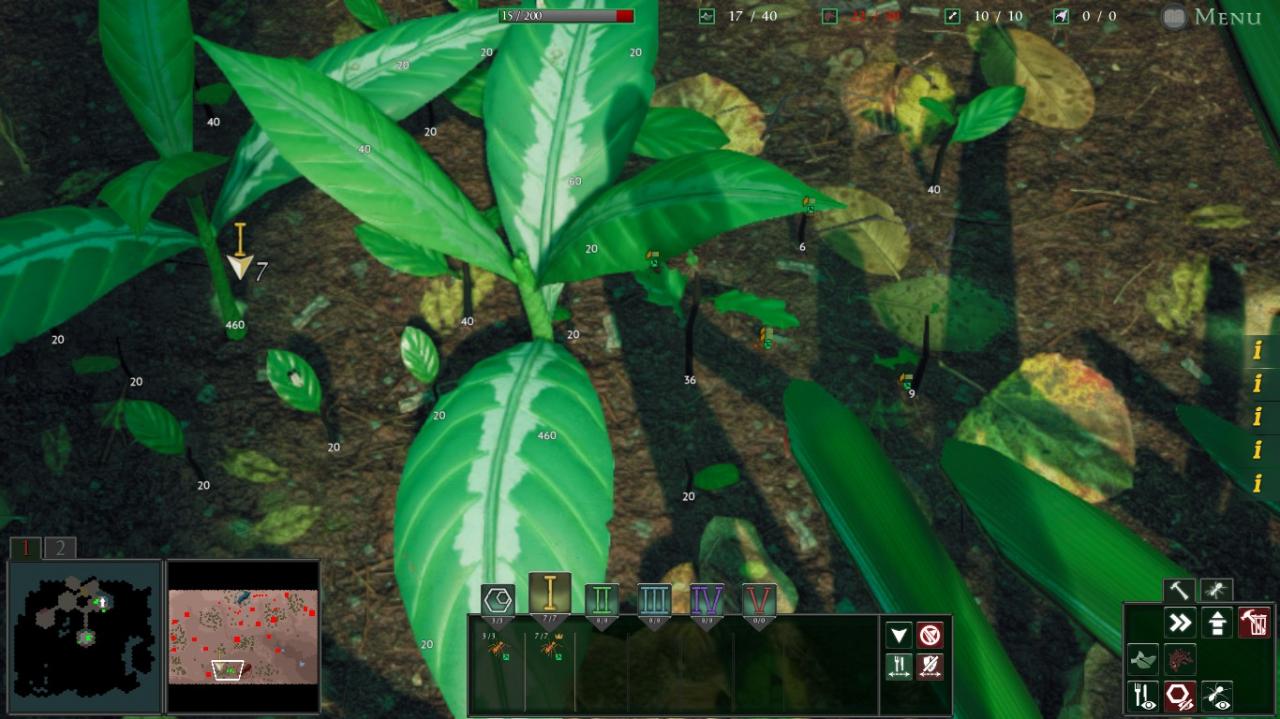 Send your crown workers to the west with combat disabled; the spider(s) shouldn’t cross paths with your ants but if they do simply send them the other way until the path is clear again. As food comes in begin adding workers to their nursery room and adding them to the harvest. You will need to add workers to your nest group to keep up with expansion so I recommend adding a 4th worker at 3 and another at 7.
1c.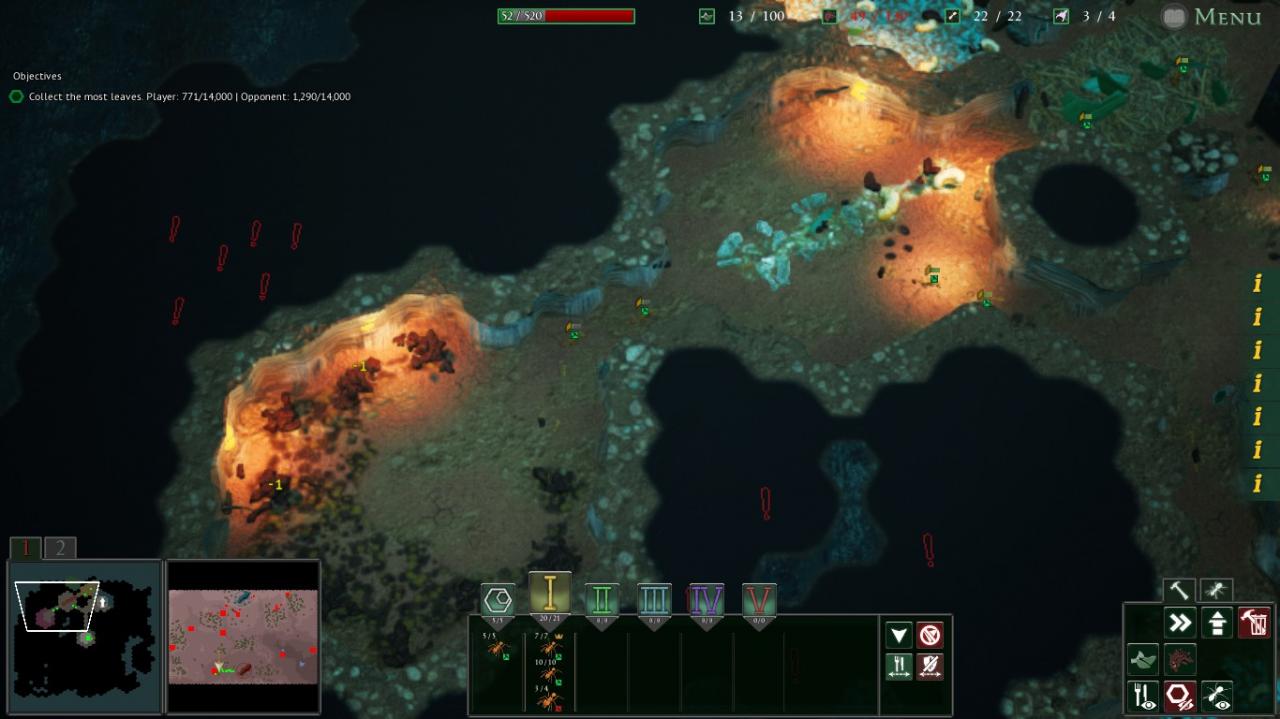 Once the worker nursery is full add 3 storage and 2 refuse (you can also remove the single starting refuse tile.) Our next objective will be to raise mediae since they can gather twice as much food and transport it twice as fast which is vital for longer supply lines. To stay on pace you should try to begin raising mediae by nightfall, but on good runs you can have 3-5 tiles built. Clear as much of the lowland food as you can by day 2.
 1d. Continue raising mediae through the night and enable combat only when necessary (harvestmen and rove beetle larvae are fairly trivial, any adults should be avoided entirely); by daybreak you should have at least 19 media. If you get here early start expanding your media nursery to the northwest and add some more. You will need to expand your storage and refuse as your colony grows to maximize efficiency; as a rule add/upgrade 2-3 refuse and 1 storage for every media (try to have these maxed out by night 2.) Make sure to switch your crown workers back to nest duties at this point and re-enable combat on your harvesters.
2a.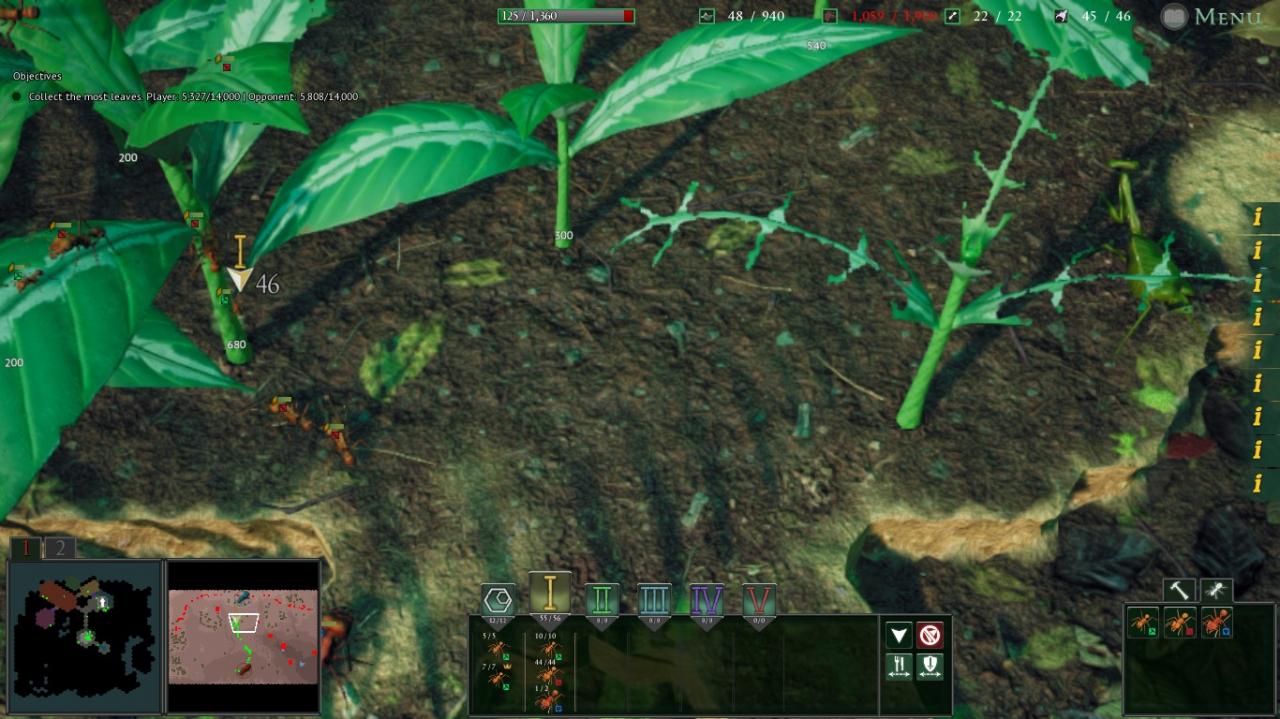 We are trailing our opponent but our pace should be just about matched. You now need to be gathering to the north whether you’ve finished gathering the lowland leaves or not, and we need to gather as much from these 2 sites as possible before nightfall. Be sure to avoid the odontomachus bauri trap-jaws if at all possible as they will cost you time and resources. By Night 2 we need to have at least 44 mediae (3×8 nursery) and have started raising majors which will ensure that our supply lines run fast and relatively uninterrupted; on a good run you can have 7 majors added to the harvest by nightfall. Make sure to save the space southwest of the queen for more mediae later.
It is possible for an adult mantis to spawn in either of these 2 locations as seen in the above image; you can try avoiding them as I am in this case however this mantis actually arrived after I had started and stayed mostly out of the way (this will not always be the case.) If your rival isn’t gathering from the center at this point you can probably get away with gathering to the west for the rest of the day and returning here during the night once the mantis leaves. The nighttime ads can be a pain but this is the best option for saving a run where your rival’s harvesting sites are favorable.
Level 3.1: The Harvest / Insane (Part II)
 2b. The ads during night 2 will infest the center and eastern sectors so for now the best option for food is to the west assuming you managed to clear the center during the day, since this area is both closer and less patrolled by ads. Once you have 7 majors added to the harvest trails start working on a 3×3 nursery of mediae south of the queen. By the end of the night try to have 7-19 majors and an extra 19 mediae, both in a separate attack squad.
It was often the case that delays due to ad encounters caused me to wipe more often than attacks from the rival colony on night 3. Keeping a close eye on enemy movement can prevent you from unnecessarily losing time and resources; you have a few locations from which you can gather so be sure to re-position your supply lines to avoid unwanted attention.
Ads will also begin raiding your nest in assaults can include anything from a few rove beetle larvae or trap-jaws to 3-5 adult rove beetles. As such you may find it helpful to keep your majors near your nest to defend in case your mediae are out gathering, at least until their numbers are bolstered. Try to keep a hundred food in reserve in case you run into these packs of rove beetles.
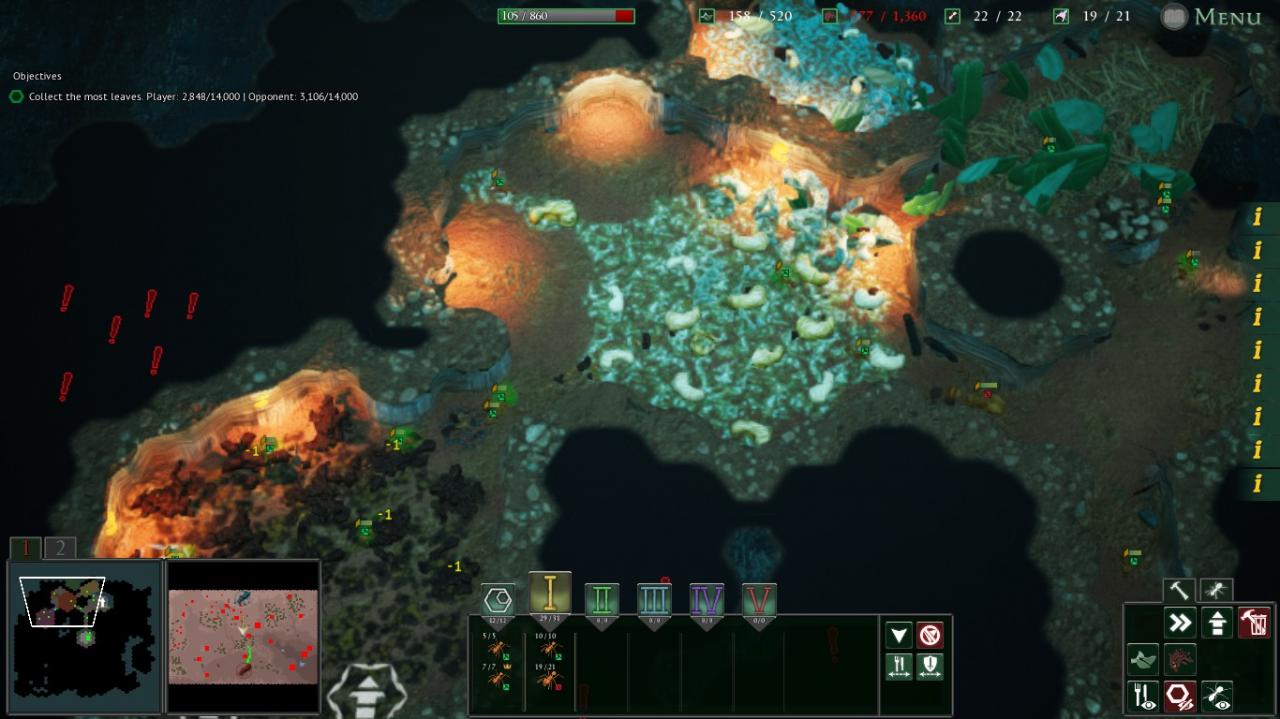
3a.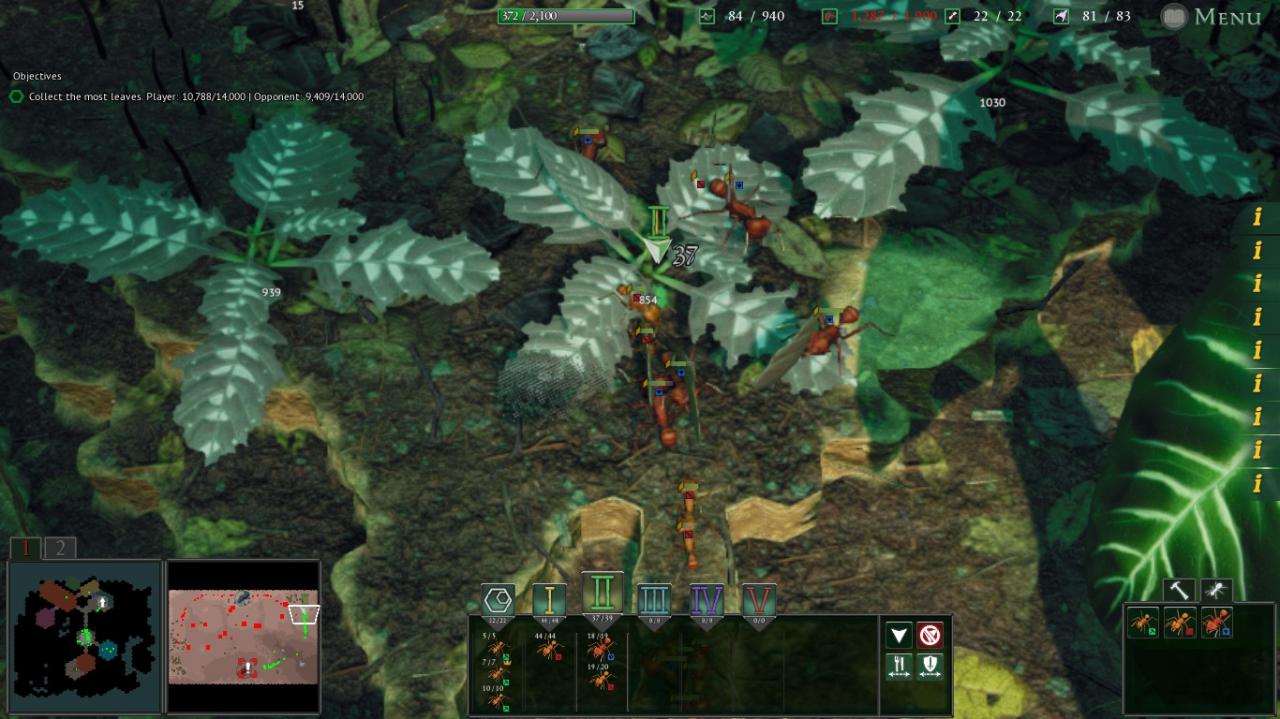 By now you should at least be neck and neck with the rival colony with a better gathering army than what they have to hand. However the remaining food is quickly depleting so you must decide carefully how to proceed; if your opponent was slow at the start you might be able to harvest your way to victory, but if your opponent is still ahead of you it may be wiser to sabotage their supply lines. Be sure to gather all food from an area before moving on as the endgame will come down to the last wayward scraps of foliage.
 Your main objective is still gathering so have your harvesters collect from the closer stems to the east while your attack squad runs interference and/or gathers here as well. If you decide to engage know that your army can usually hold off a counterattack, but having your other 44 mediae on standby can be a good idea (make sure to have a few hundred food stored up before engaging reinforcements.) If you’re lucky this cleared area will be the northeast corner, giving you access to a few thousand food. By the time your opponent begins to assault your base directly you should have 19 majors and 29+ (3×5 nursery) mediae in your attack squad.
3c. If you’ve done well enough you should have passed your opponent’s score by now and in desperation they will strike at your colony with squads of 20 or so level 2+ majors every few minutes. Your attack squad can take on these ants pretty easily (make sure your media have combat enabled), but this will force you onto 2 fronts which can be very challenging especially with the limited food. Be sure to keep a few hundred food in storage for the new brood.
If you are gathering from the west at this point you can actually move your defenders just inside the nest in similar fashion to level 2.2; if you disable combat on your harvesters they will enter the nest in a different direction and mostly avoid the opposing majors while delivering food. Keep in mind that ads and rival ants still patrol the areas around harvesting sites.
If you’re feeling lucky you can try to time your gathering to overtake your opponent in the final moments of the match to reduce the number of assaults you have to face. While this is a valid strategy there are several random ad encounters that can make this hard to execute perfectly, so proceed with caution.
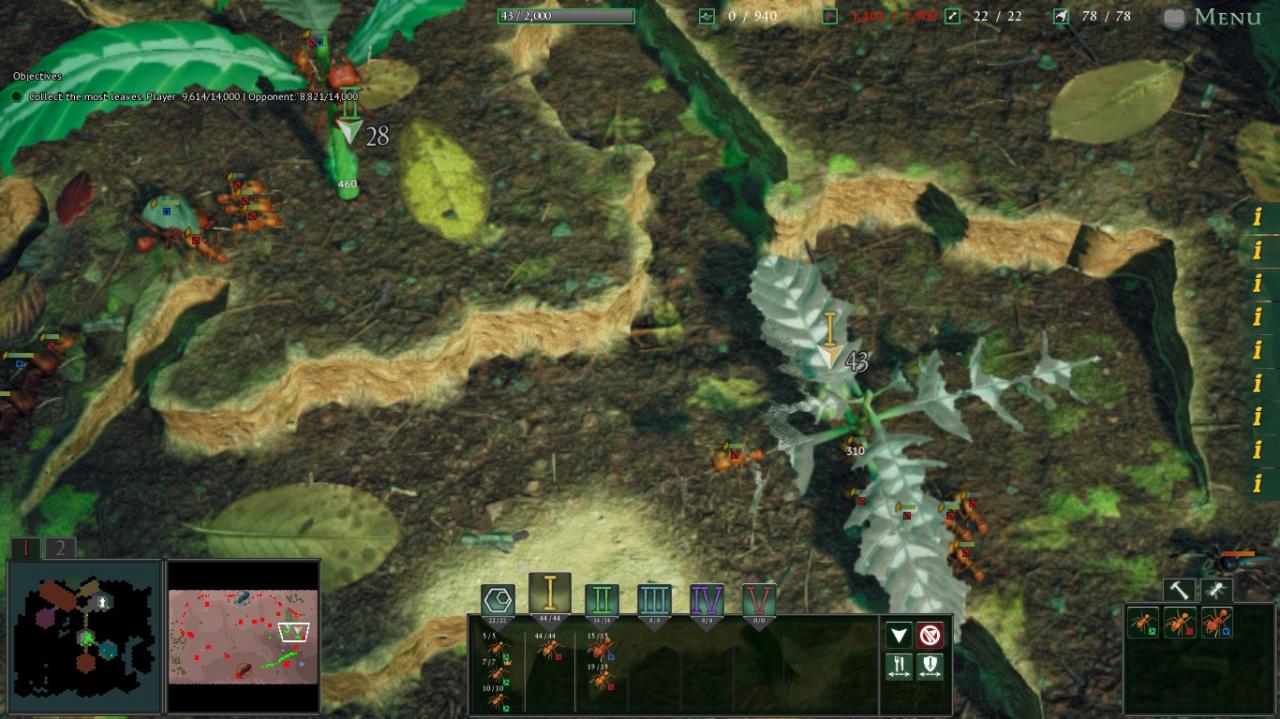
3d. Both you and your opponent will now be very close to 14k food with almost no major harvesting sites remaining. This last stage really depends on how well you played until this point; on several of my runs I only won by margins of 500 or less while gathering from patches of 100 or so uncollected food, and on a few I lost it all with only 100 food remaining from starvation. However my defenders hardly ever failed me when they had food for reinforcements so as long as you continue to gather where you can you will eventually catch a break.
The shot below was actually take on day 4 and the match came down to 100 food that my rival had left uncollected just north of their nest entrance. I also noticed that major ant raids stopped here but whether this was from lack of food or from it being the 4th day I am not sure.
Level 3.2: Front Line / Insane (Part I)
I highly recommend using stun majors for this level. The ability to momentarily negate the army ants’ high damage will prove far more useful than simply redirecting the attacks to a single target.
0a. Put all workers on nest duties. Start by building a 2×2 storage in the open space between your worker and media nurseries and clearing the room southeast of the entrance with your mediae. Next, while your workers clear the space shown here, have your media take the room north of their nursery. Complete the 3×3 storage and refuse dumps in the open spaces, then send your mediae and aux workers to gather the seedlings to the northwest with combat disabled. Raise more mediae as food comes in.
1a. We can largely ignore the army ants today save for the occasional scouting party. As soon as day breaks move your harvesters to the plateau just west of the nest with combat re-enabled. If you notice a scouting party venturing close to your soldiers you will need to chase them down before they return to their nest; failure to do so will result in a squad of a dozen or so army majors and workers intercepting your supply trail, effectively ending your run. With this said be sure to have 24 mediae (3×4) raised by nightfall (the actual start of night, not the time the army ants retreat.) You should be able to clear most or all of the plateau in this time.
1b. Focus on gathering as many of the saplings to the north and northwest as possible. You should have 34 mediae, 7 majors, and around 300 spare food by daybreak. Be sure to upgrade refuse and storage to level 2.
The army ants’ descent upon the nest is nigh but your combined forces are enough to repel them in most encounters. Our goal today will be to hold the line and push the invaders as far back as possible.
2a. Disable gathering and move your ants to the southern edge of the second supply line and wait for the army ant sentries to get into position (ideally your ants should be ready to meet them upon arrival.) Storm their location in force and then push into their supply lines, which will mostly consist of workers and the occasional major squad.
2b. Once you’re comfortable with the state of the progress bar have your army focus on gathering the saplings en route to this location, engaging scouts as necessary. You may also wish to gather from the sapling to the southeast and the plateau southwest of the colony. You should try to raise up to 19 majors and have 300 spare food by night 2. Be sure to return your army to the nest once night begins to fall.
2c. The massive whip spider that has largely stayed in the center of the map will venture towards the colony. Once its location relative to your nest and the other nighttime ads is favorable send your army to confront it; you should only need one wave with the above marks but you may need a tactical retreat if a bush cricket or rove beetle decides to join the party.
2d. Once the spider is eliminated continue to gather all food east of center. If you have the time and means to so you you can try the leaves in the center or north of center. You should have 16-19 majors and 400 food by Day 3. Be sure to move your army to the location described in 2a.
Level 3.2: Front Line / Insane (Part II)
3a. The days tasks remain largely unchanged: intercept the second supply line and hold the southern entry point as long as possible, retreating as necessary to deal with ads and scouting parties. Keep in mind that while some scouts may return from the bivouac with reinforcements any army ant slayed will affect the progress bar. Eliminate the army ants as needed and by the day’s end the army ants should have retreated to the first supply line, if but momentarily.
3b. During these windows you should gather any nearby food, particularly from the southwest plateau and the saplings north from there. When the army ants return you should retreat and focus on repelling scouts. Once the army ants begin their withdrawal continue gathering the food along the central column. By night 3 you should have 44 mediae, 19 majors, and 200 or so food.
3c.