While Easy Red 2 is very well optimized for a Unity game, not everyone can achieve the heavenly 60FPS without some effort. In this guide, I will show you the different ways to increase your performance in ER2.
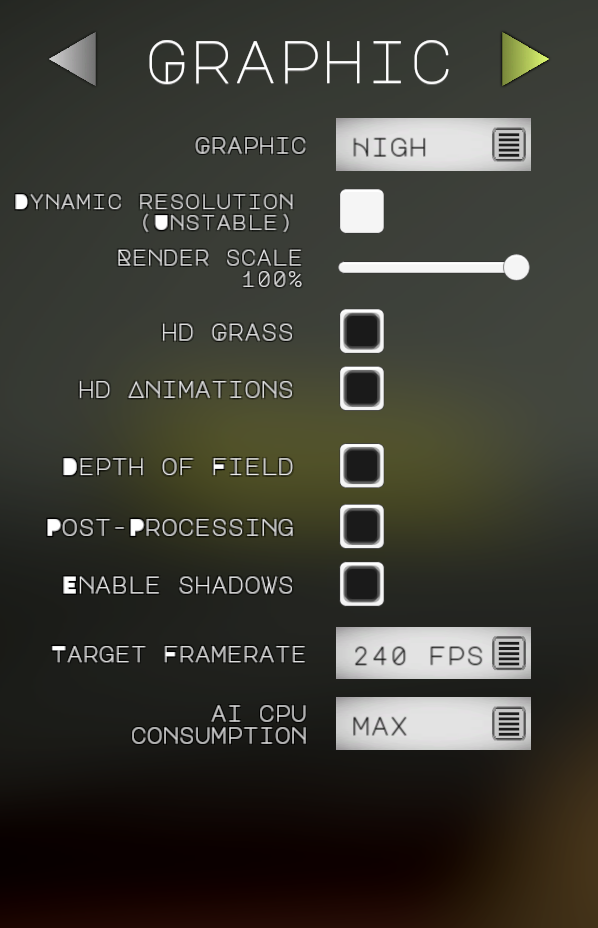
First, there’s a very basic “GRAPHIC” setting with a HIGH, MEDIUM, and LOW setting. This controls two crucial graphical properties, anti-aliasing levels and shadow quality. However, there is actually a hidden feature this setting holds. If it is on anything lower than “HIGH” the framerate will be locked to 60fps. However, I assume if you are lowering the setting it’s because you’re trying to reach 60fps in the first place, so it shouldn’t be an issue. Changing this is a good way to get a quick FPS boost, though the visual downgrade is quite noticeable and the shadows can be a bit buggy. Save this as one of your last options.
Next up is a setting I’d recommend avoiding at all costs. “DYNAMIC RESOLUTION” is an setting related to the “RENDER SCALE” option which we will get into next. In short, this option simply reduces the internal resolution when there is a framerate drop. Internal resolution is different from standard resolution in that it doesn’t reduce the resolution of the HUD, meaning you can still read it on low resolutions. So, why avoid this option? It turns out the “UNSTABLE” part of the name has some merit. Even when you are getting decent FPS, this setting will still lower your internal resolution for some reason. This means even at 60fps you will be losing some resolution, which I don’t think is something most people want. Don’t use this option.
Next is a widely recommended option, and is quite useful for those with weaker CPUs. Easy Red 2 as of now does not have any setting to reduce your resolution, but rather only your render resolution, the difference of which being previously mentioned. While this can be a very helpful option for increasing your FPS, I’d save this as one of your last resorts if you can, because at longer ranges you may find it more difficult to make out enemies with lower resolutions.
Finally, we get into the meaty settings. This one controls the quality of grass, and determines whether or not they waft in the wind. Disabling this setting grants a slight performance boost and lightens the load on your GPU, but in return the difference in quality between the settings is very minimal and won’t take away from the gameplay in the slightest. In fact, the grass with HD GRASS disabled looks better than some games on max settings. Try disabling this one.
This one is quite the ugly duckling of a graphical setting. In short, it lowers the framerate of NPC animations past 35-50 meters. Running, reloading, and bandaging animations of the AI will all be of lower quality. While disabling this might give your GPU more VRAM to work with, it’s very immersion breaking to see a squad of enemies run across the field in what seems to be 10FPS. Try to keep this one on if you can, but disable it if you don’t mind.
DEPTH OF FIELD behaves differently in Easy Red 2 than in other games. Instead of blurring anything that the player isn’t focusing at, in ER2 this setting simply blurs out anything in the distance, in order to mask the lower quality of the models that far away. Peculiarly, this simple effect has a MASSIVE effect on performance. Disabling this setting on my PC gave me a 20% boost to FPS. Definitely disable this effect to help your CPU out.
Another CPU based setting, POST-PROCESSING, as the name suggests, consists of multiple small effects added to a frame after it is drawn by the GPU, meaning this is a purely CPU based graphical effect. Things like vignette, sun-shafts, and some colour contrast effects are all included in PP. Strangely, like the previous option, this setting affects performance dramatically for such small graphical gain. While its effects are pretty, definitely try disabling this for some frames.
A self-explanatory setting, this one enables or disables shadows. Since shadows can be quite intense on your GPU, this is one to consider disabling, however since changing the “GRAPHIC” setting lowers the quality of shadows anyway, its not really useful unless you absolutely have to.
This one sets your FPS limit. It won’t go higher than what you set it to. However, if you changed the “GRAPHIC” setting, it will be limited to 60 anyway. You may want to try keeping this at 60 if you are playing on a laptop, as heat can affect your hardware’s performance as it limits itself to prevent damage.
This one directly affects gameplay. It changes how much CPU power the AI is allowed. Lowering this effectively means the NPCs get less braincells to work with, meaning they are dumber and more predictable. DO NOT LOWER THIS, even with doubled bots I didn’t notice a single frame of difference changing this, and there’s nothing more boring than playing with braindead AI.
While the meat of your FPS fixes will come from the GRAPHIC panel, there are a couple other in-game settings to give you a boost as well.
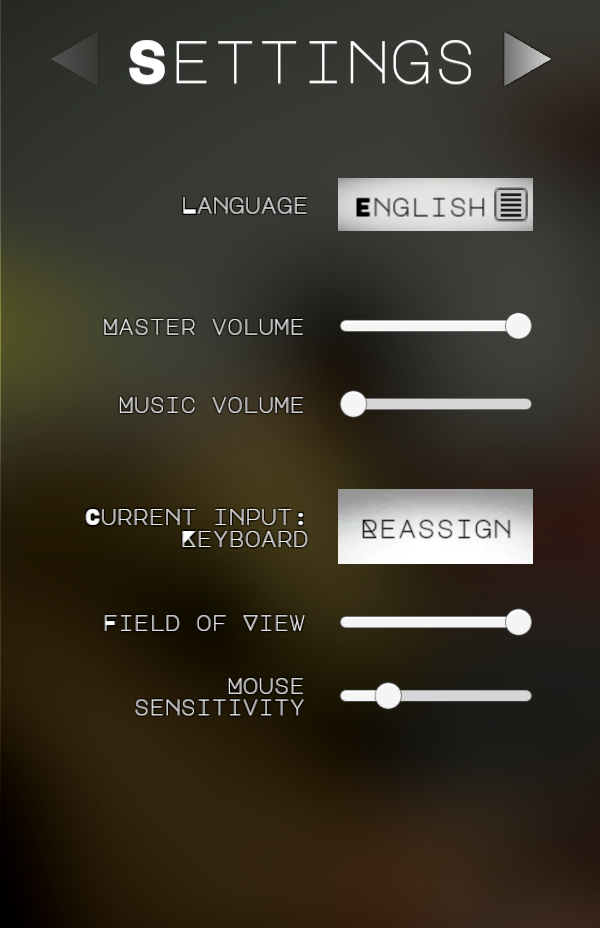 In the “SETTINGS” panel, you can change the FOV to help both your CPU and GPU by rendering less of the world around you, though be advised you will not be able to see as much in your peripheral vision and you may experience headaches at extremely low FOVs.
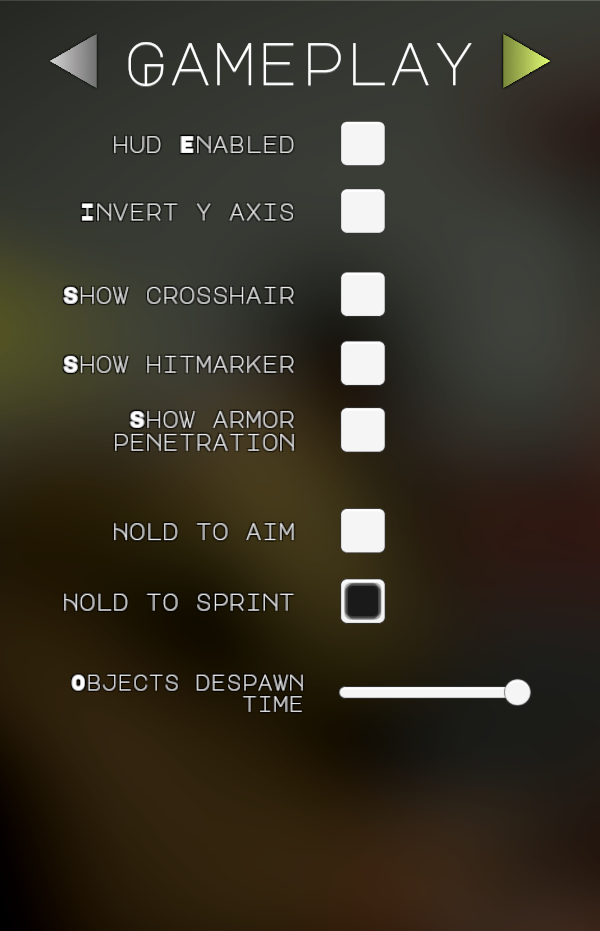 In the “GAMEPLAY” panel, lowering the “OBJECTS DESPAWN TIME” slider will make things like bodies, dropped weapons, destroyed tanks, etc despawn faster. While this will definitely help in more intense battles, it gives you less time to loot downed soldiers and the tank you’re using for cover might magically disappear at the worst possible moment. Try to avoid this one.
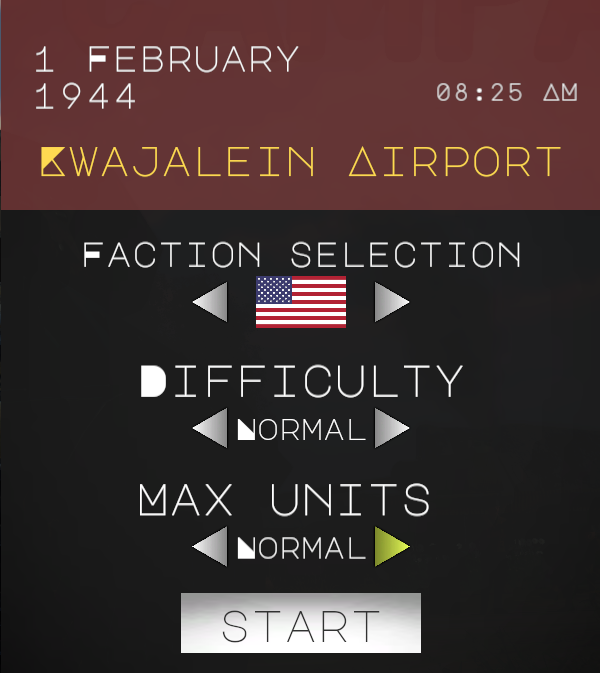 Finally, on the menu that pops up before starting a mission, lowering the max units is a very useful option for gaining some FPS. While your battles might be more lonely, lowering this amount massively relieves your RAM, which, if you are using an integrated GPU, is also being used as VRAM, so you will likely find this the most bottlenecked resource. Lower this one if you’re okay with the lower AI count.
First, let’s go over disabling the Steam Overlay. This feature is the steam media menu that pops up whenever you press Shift+Tab. It also allows notifications like messages to pop up during gameplay. On lower end machines, disabling this can help your CPU out, though it’s quite a hassle to put up with.
 Uncheck this to disable the Overlay.
Next, we’ll add some commands to the ER2 launch options. Right click on Easy Red 2 in your Steam library and navigate to Properties>Launch Options. In the box, paste the following text:
-high -nojoy
“-high” will set the game to high priority in Task Manager, and will allow your PC to allocate the max amount of resources possible to the game, whereas on the normal task priority it has a resource limit. “-nojoy” removes gamepad support for the game, saving you a slight amount of CPU power. Note: You will not be able to use a controller with this launch option.
 Add the commands to this box.
While participating in the ER2 beta branch allows you to get access to new experimental content, it should be noted it is the unoptimized version of the game, thus you will likely experience unstable framerates. Opting out of it is quite easy, simply click and set to “None”
 If it shows this, you’re in the clear.
If you’re still struggling for FPS, you can try lowering some Steam settings altogether. Keep in mind this will affect your entire Steam client, so it will change how other games function as well.


