A quick and easy guide for players who have never played this mod/game and might be stuck, confused or just looking for some pointers.
Quick Introduction
Revision is quite close to the original game, you even have options to make it more like the original or some other poplar mods like shifter and biomod or even human revolution but this guide will be just focusing on Revision
Revision improves the game’s graphics and audio, makes some balance changes, expends the levels, adds Steam achievements, and of course let’s you run the game smoothly among other things.
Let’s Get Started – Gameplay Basics
Now that we’re in the game we can see we have a couple of options, there’s even a training mode that teaches you the basics. Go ahead and play that first to get the hang of the game and it’s mechanics. I won’t be focusing on the tutorial much so after you’re done let’s actually start the game and see what’s going on.
After clicking on “new game” select your difficulty (I’d recommend normal or hard) and we should see the character screen next.
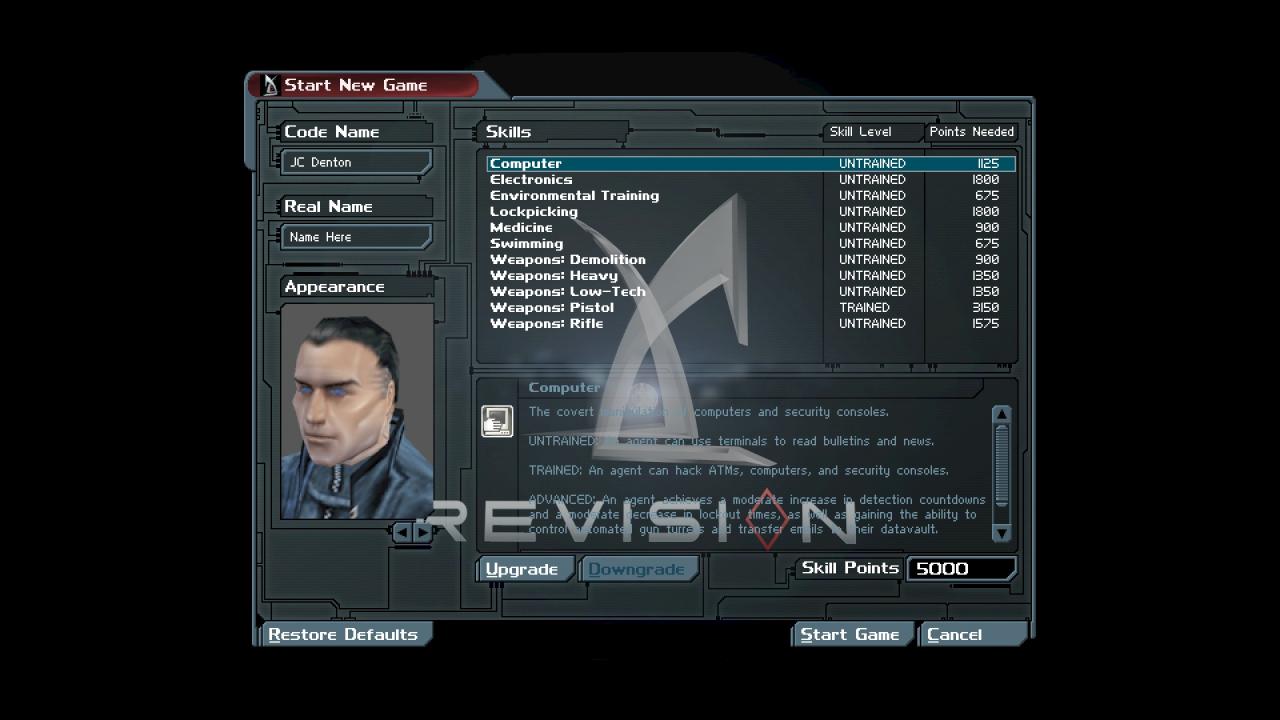
Let’s talk about skills:
Computer – This is your hacking skill, I highly recommend upgrading this skill right away at least once as it let’s you hack anything that you can hack like computers, terminals, etc – there is no lvl requirement or mini-game involved just a bar on the top right showing you how long you can be in the system without being detected upgrading it let’s you hack faster.
Electronics – Higher you have this skill the more efficiently you can hack open control panels and the like with your multi-tools
Environmental Training – Higher you have this skill the more efficiently and effectively you use wearable gear like ballistic armor, camo, and tech googles. – not a very useful skill
Lockpicking – Higher you have this skill the more efficiently you can open locked doors, safes, cases, etc with lockpicks – while I find my self using more lockpicks than multitools you can bust down doors and crack open some safes with your weapons
Medicine – Higher you have this skill the more HP you restore when using medkits
Swimming – Higher you have this skill the faster you swim and can last longer under water – probably the least useful skill, you can upgrade it once and then forget about it as you do have to do some swimming
Weapon skills – Higher you have this skill with your weapon types of your choice the more effective you are with them – will talk more about weapons and shooting later
Spend your free 5000 points wisely as there is no re-specing. the points you do not spend you get to keep, you get more points by doing missions, objectives and exploring
Give your self a name and let’s get into the game.
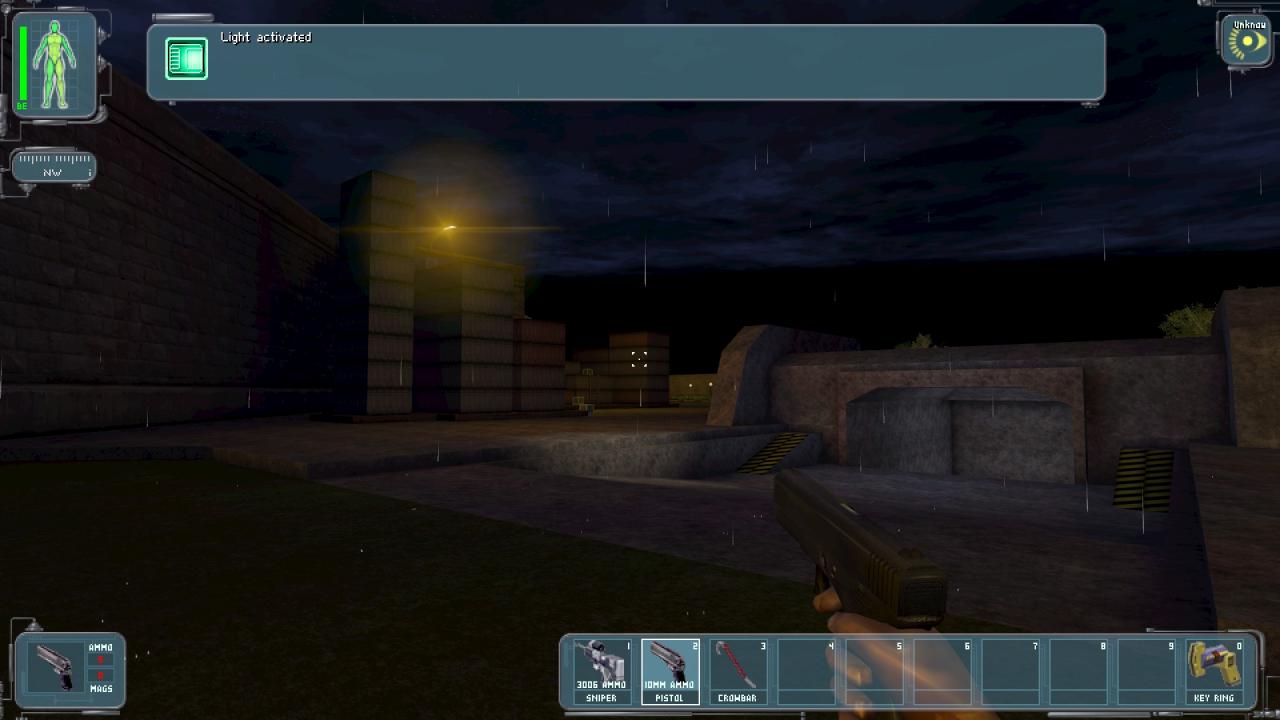
After watching the cut scene and having control over your character the first thing you should do is rebind the controls if you haven’t already in the tutorial to something more modern and comfortable like having reload on “R” , and binding the flashlight key “F12” to something else so you don’t take screenshots every time you want use your flashlight. Look over the controls and what you can do while you’re there. After that we can actually start playing the game.
Liberty Island – How to Play

The correct answer is always the GEP gun, you can find the crossbow and rifle (there even is one rifle in your locker on hard at least) pretty early on. The GEP gun is a lock on rocket launcher with which you can cause massive dmg and has great utility like busting down doors, destroying cameras, etc so stick with the GEP gun.
After you’re done talking to Paul you can explore a bit, you can enter the shed with M2 (you interact and holster you weapons with Mouse 2 by default) get the crowbar, bash down the door and crack open the crates to get some supplies, you can jump in the water for more stuff too, always a good idea to have a melee weapon on you.
Shooting

The shooting in this game is very “unique” as you can see we have a huge reticle and we are very inaccurate, to become more accurate we need to move slowly or stand still and keep the corsair on our target upgrading your weapon skills will let you target them faster and also reload faster, do more dmg, and be more effective with your weapons. shooting them in the head with the starting pistol is enough to take out these guys like Alex said, but you’ll need bigger guns for the later enemies to take them down with headshots.
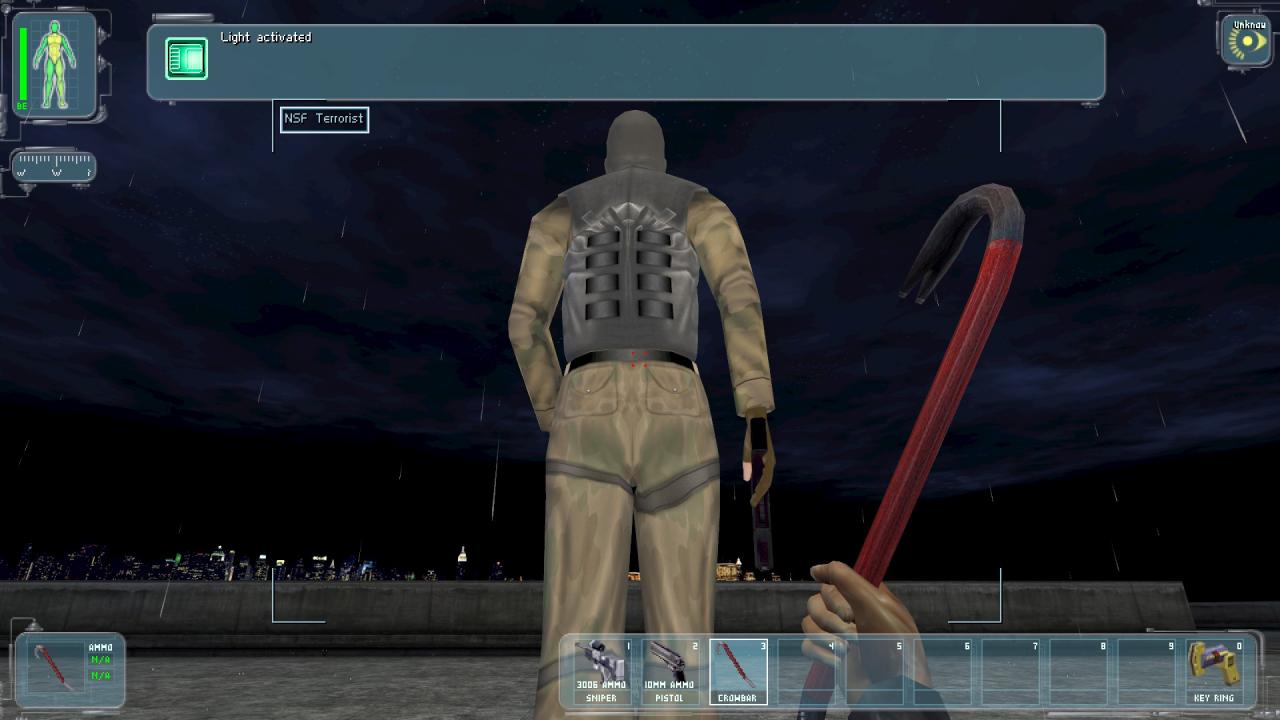 You can also try a melee take down, sneak up behind them and hit them in the back with a melee weapon. some weapons like the baton will just knock them out and not kill them. with the prod you can stun enemies anywhere you hit them even the big enemies and knock them out if you hit them enough – the prod does use ammo though. with other weapons you just straight up kill them or do a lot of dmg in the back. if your weapon is powerful enough you can even gib the enemies’ corpses, just hit their soulless body a couple of times if they start going dark that means your weapon is strong enough and it will gib them. if not you can loot the bodies and then pick it up if your hands are empty and hide the body. M2 to throw MMB to drop.
You can also combine these two methods and just run up to your enemies and shoot them in the head at point blank range so you don’t miss – I call this the Brazilian Assassin, quite effective on lone targets.
Missions, Orientation, Exploration.
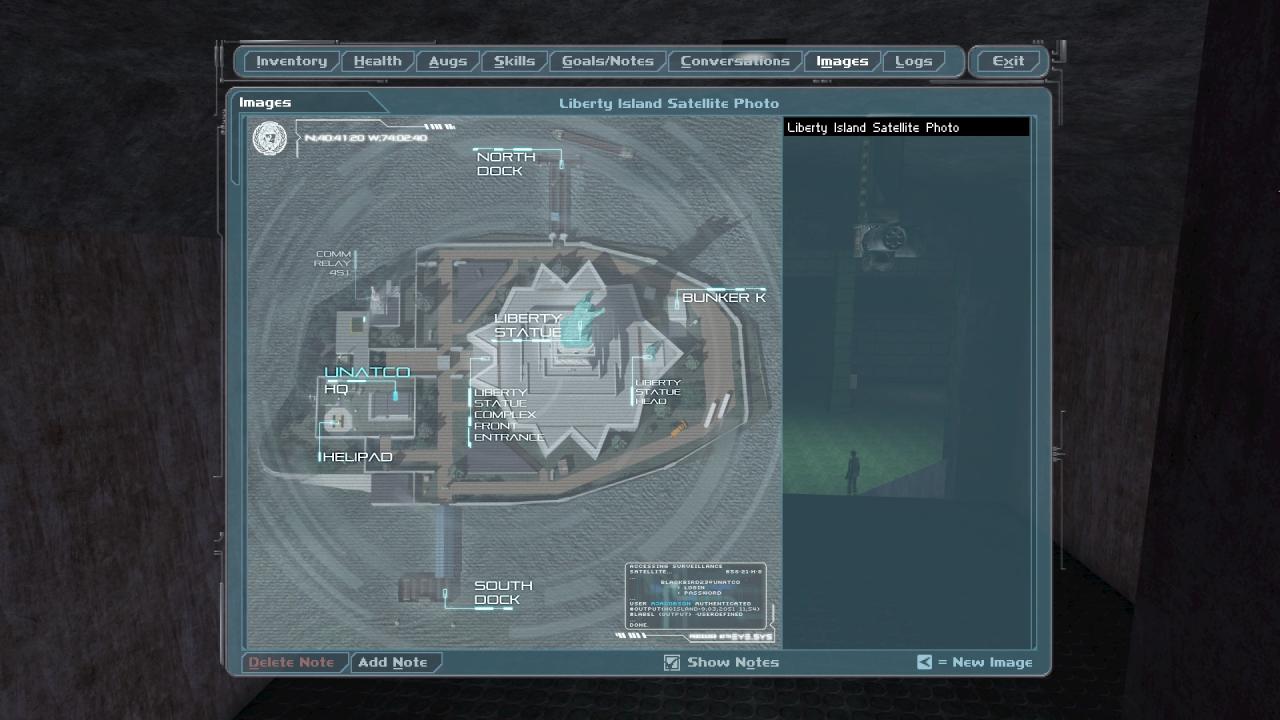 Now that we’re getting the hang of it and taking out the enemies we can focus on the objective, as you can see or rather can’t, you don’t have a way point or anything, you have to keep track of these things your self. open the menu and you can see your objective and the actual map given to you by Paul, we’ll talk more about UI and the menus later.
We need to get inside the statue to deal with the head terrorist and save one of our agents (secondary mission, he can save him self if you ignore him but you won’t get the OP bonus and he’ll keep chewing you out for it). you have a number of ways to do this: blow up or hack your way in through the front gate, go to the dock on the other side to get the key from our ally or my preferred method – go in from the back by stacking some boxes.
Exploring is a big part of this game you’ll find a lot of loot, upgrades for your weapons, xp, other paths etc. make sure to do a lot of looking around.

After you make it inside don’t be fooled by it’s simple lvl design the later areas are just as if not more complex and packed as human revolution or mankind divided.
Health and Surviving
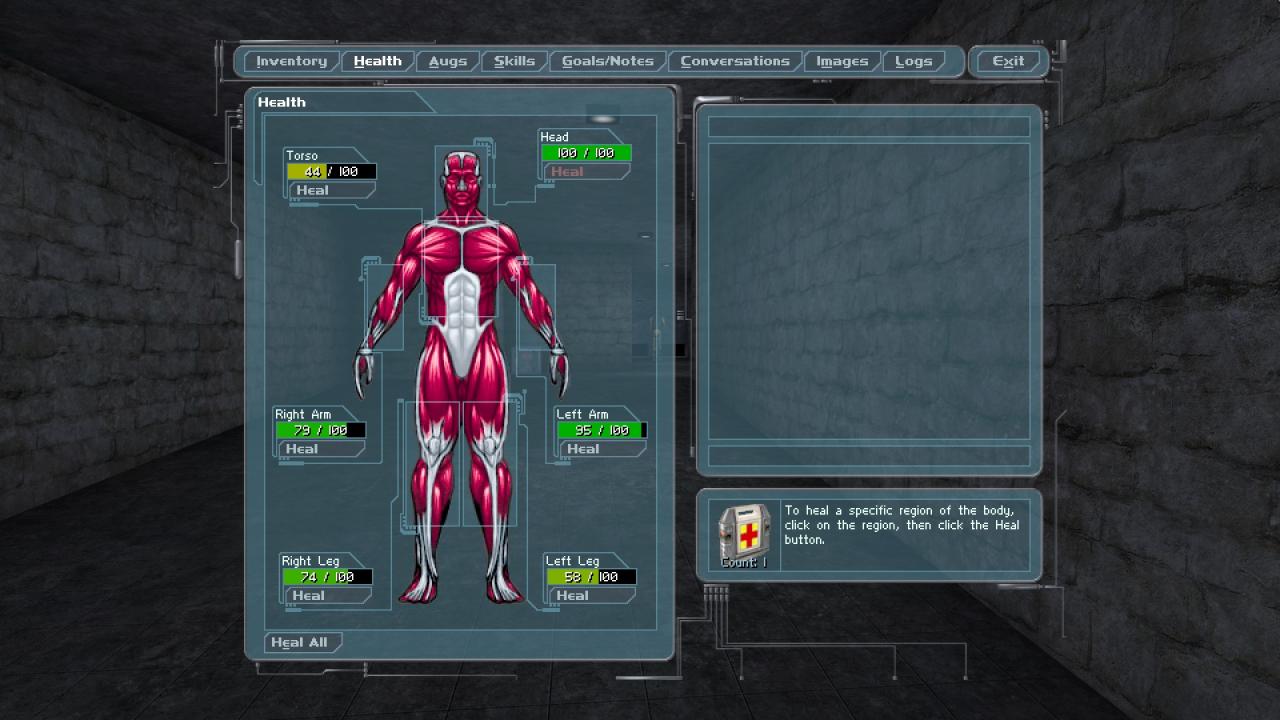
To survive quick save a lot default with “+” on the numpad and quick load “/” – there’s no auto save so you have to do the saving.
If your wondering how wonky is the AI of a 2000’s video game don’t worry just treat them like guards from any modern stealth game and you should be fine.
Alright after exploring the area you can try to find and save the agent or go straight up to the terrorist, you can deal with him anyway you want but the agency wants you to capture him. after doing so the island is safe, grab the aug canister on the desk and head back to HQ (left right after the starting dock).
UNATCO HQ – General Information
Say hi to your new boss Manderley, He’ll give a warm or cold welcome depending on your performance on your mission. people here are much more serious and believable than in most games that came out in the two decades that this game has been out already. they will react and comment on what you do and how you do it so be smart.
After that we can meet the gang, head to the doctor on the lower floor. have a chat with him and make use of his medbot we can talk about augmentations now.
Augmentation
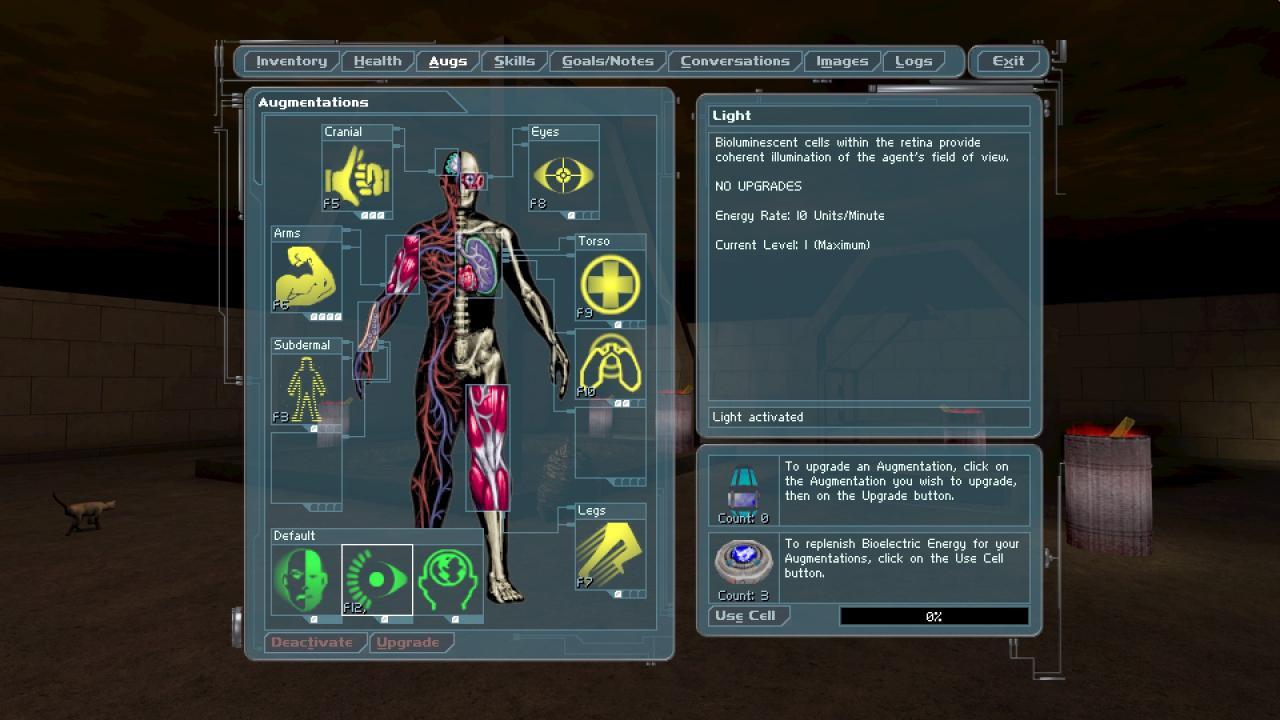
When you find an aug canister there’s two aug in it and you can choose one to install, on some body parts you have more than one slot so if you don’t like any of the augs in the canister you can throw it away to find the one you actually like since installing an augmentation is permanent, so choose very wisely. you can also find aug upgrade canisters which can be used on any aug to improve it up to lvl 4
After we leave the doctor we can visit our hacker right across the room and have a chat with him, there’s a room you can open near him with a repair bot in there they are like medbots but restore your energy to use your augs, and yes the flashlight is an aug too and uses energy. you can also restore your energy with bio cells you find.
Menus
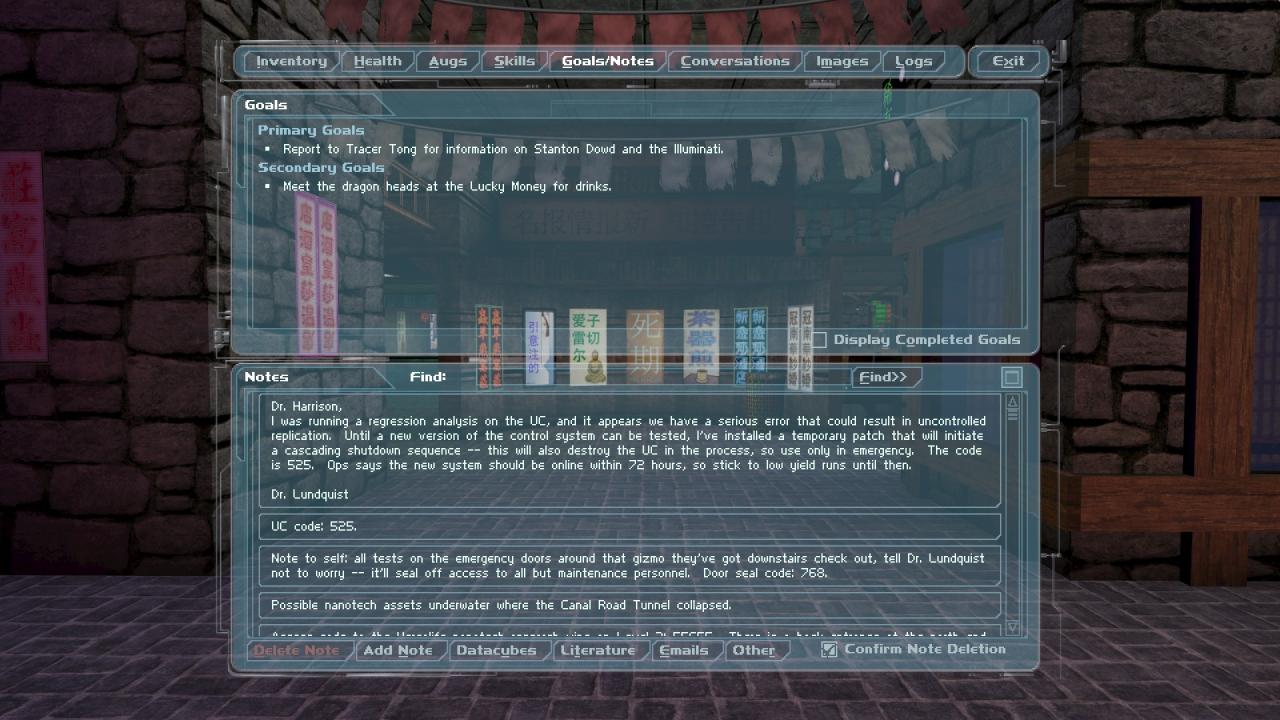
To open the door we need a code, there’s a notepad lying around with the code on it. you can open your menu and check the goals/notes, images, logs, and conversation tabs to see important information like codes, the pictures that are given to us and we find, and our conversation logs. look for notepads and look through people’s emails for valuable information. you can also hack ATM machines to get some cash and read some digital news papers on other devices.
Now that that’s out of the way we can go to the quartermaster and stock up some supplies.
Weapons and Inventory
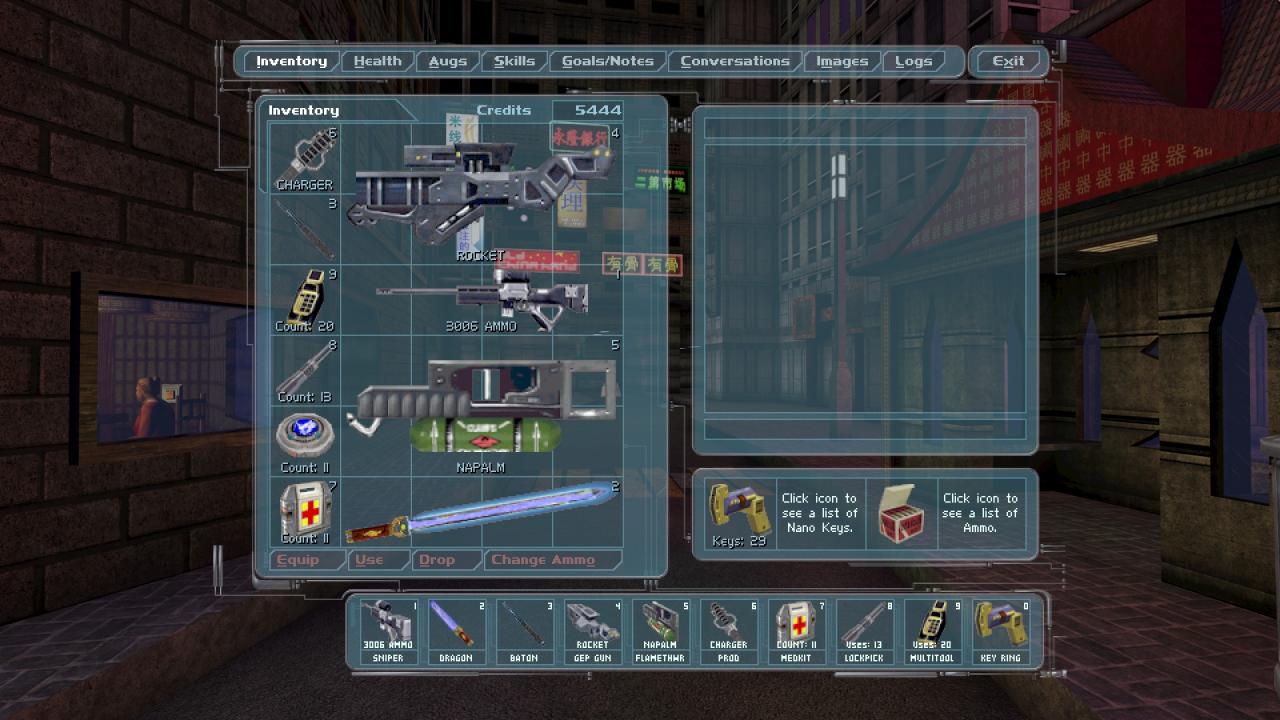
We have a limit amount inventory space so we can only carry a couple of weapons and items, ammo doesn’t take up space however. if you click on a weapon you can see it’s ammo type and change it. next the ammo icon is our key ring as well, any key you pick up gets added there, hold it out and you can open doors you have the key for.
You can find upgrades for your weapons like silencers, scopes, laser sights, faster reload upgrades, more accuracy upgrades, etc. as you can image the accuracy upgrade is very useful to help with this game’s very “unique” shooting mechanics.
Let’s talk about some guns now.
To counter this games awkward shooting mechanics you can use a sniper rifle with a few upgrades to make it very accurate, you can aim at people and instantly shoot at them with out having to wait half an hour for the accuracy to kick in. you can even put a silencer on it and make it the only gun you need for humans. sadly most of the other weapons don’t have this luxury so they are rather useless compared to the rifle. buy they still have their uses.
Of course the GEP gun and other power weapons are quite useful and pretty much the only guns that can take down robots and cameras, other than grenades.
The flamethrower is an amazing fodder killer but nothing else.
You can use the crossbow to be stealthy and knock out people or silently take them down.
Having a backup pistol is a nice choice, and a melee weapon.
You can use the pepper spray as utility as well.
Grenades are quite handy especially the LAM you can attach it to walls as traps or throw them as ‘nades (you can attach all the other ‘nades to walls too).
We can go back up now and visit our new colleagues in the break room, after your done chatting it up talk to Manderley for your next assignment. if your done exploring the HQ and gathering all the supplies you can and finished talking to everybody you can leave for your next mission.
You’ll find your self in battery park, nothing too complex to do here so I’ll mostly skip talking about this you should be able to handle it on your own, just be careful in the subway. try to find other ways to enter and mind the hostages.
Hell’s Kitchen the Hub – Closing Thoughts
Well with that being said you can go through the game with out too much trouble, you have around 40 hours before you see the end credits and the game has great replay value. There’s also multiplayer but I’ve never seen anyone else on the servers, and there is no co-op unless u mod the original.
Revision has a lot of achievements too. just run around and do some random stuff, shoot some hoops, run around with cold pizza, steal some orange soda, do some stupid stuff there’s probably an achievement for it. I’ve spent a lot of time hunting for some of them it’s quite fun and challenging however be warned that achievements do not count in NG+.
I hope this guide has helped you, I know how much I was lost when I first started the game. if I got anything too wrong or forgot to mention something important let me know in the comments I’ll update the guide.
Thank you for reading.