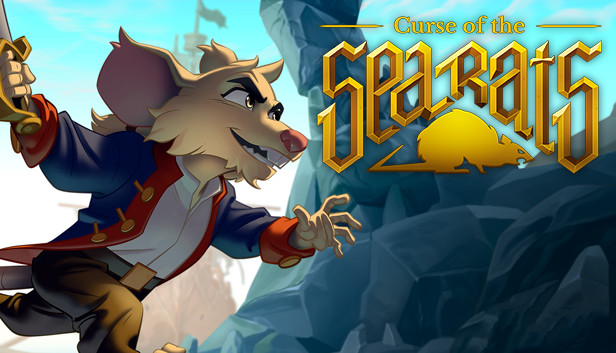
You want to defeat Flora Burn and get to the true ending? This guide will help you find all four different endings. It will also tell you some good gameplay hints and specials that might help you through the game.
Preamble
Two of which are bad endlings, one a more neural ending, and the last one being the perfect (true) ending. I will also provide valuable information on some game mechanics and special items that can be found for those interesed.
This guide was written for the game version 1.0.19 and will be updates if it is necessary.
Basics
The endings are connected to two main conditions:
1. freeing the Mysterious Pirates from the clutches of Short Fuse John
2. collect all golden tooths from Flora’s crew and obtain Sammy (the speaking skullhead)
Anything else is not important, like freeing the imprisoned pirates or missing out the optional bosses, like the Necromancer or the Lighthouse Keeper. This is because only the crew member bosses of Flora drop the golden tooths which are needed to get Sammy. As Flora Burn does drop one tooth herself you can get Sammy only afer riggering the endgame.
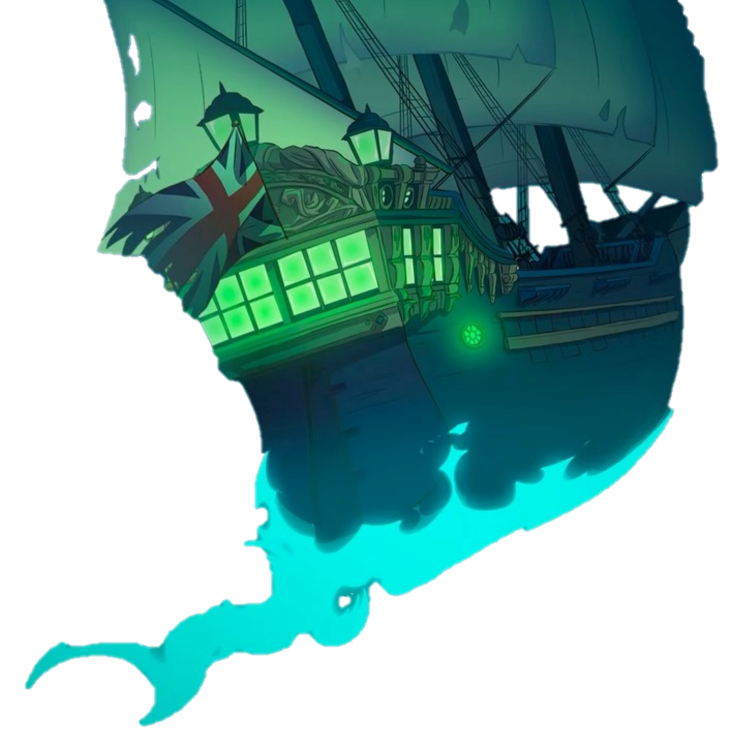
 Speaking of the endgame. One of the most criticized game mechanic is the endgame maze, which will be happening as soon as you freed the Mysterious Pirate and successfully beat Flora Burn in her first encounter at the peak of Sammhain Summit. If this happens and you saved afterwards, there is no point of return. The map won’t be easily accessibly anymore because a lot of barriers are place around the map, and the teleport portals cannot be used again. So if you have unfinished business left to do, don’t fight her yet.
Backup a perfect savefile
If you want a perfect savegame with which you can go for all 4 endings whenever you want to, don’t untie the Mysterious Pirate after fighting Short Fuse John (or don’t fight that boss at all yet) but collect any other golden tooths. Then save before the first Flora Burn encounter at Sammhain Summit peak.
Make a backup your savegame. For Steam Windows PC your savefile is located in the folder (just copy paste into file explorer)
%APPDATA%\..\LocalLow\Petoons Studio\Curse Of The Sea Rats\SaveData\
In the subfolder of your Steam-ID. They are named SaveData0.game to SaveData2.game depending which saveslot you used (0 being the first slot).
With this save you can replace or duplicate your progression to another slot anytime. It is best to do this directly in the main menu, without the load game overview openend.
Maps
Here is a 99,56% map with all crew member bosses marked for the golden tooths, the boss you should avoid at first, and where the endgame triggers.

This map shows the blocked areas during endgames (red markers) and possible routes to the ship. And also where to find the special boss Ratelli.
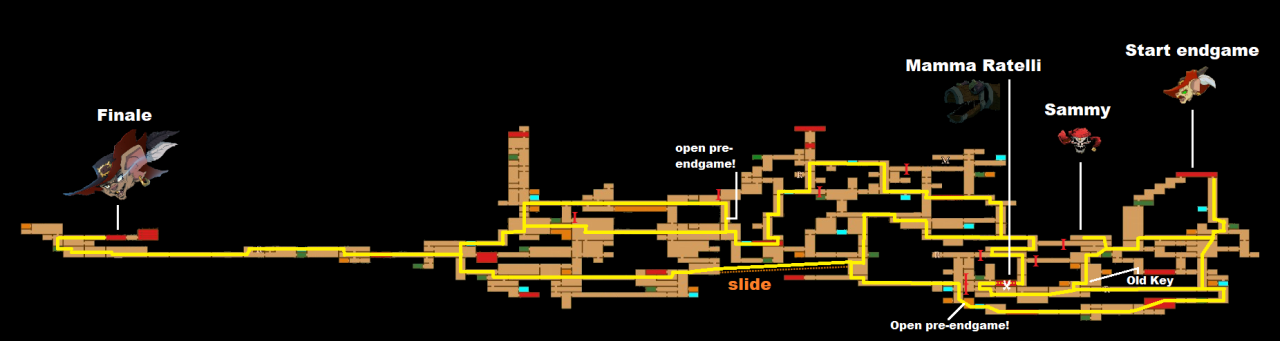
Hints: the route top bottom is the fastest, but only accessible of you opened the secret ppre-endgame. You will also miss Ratelli if you choose the fastest route. Using the waterfall slide is always the best option to go for to reach the ship fast.
If you want a more detailed one with all information, this map is one of the best I found so far (download link in the description of the video):
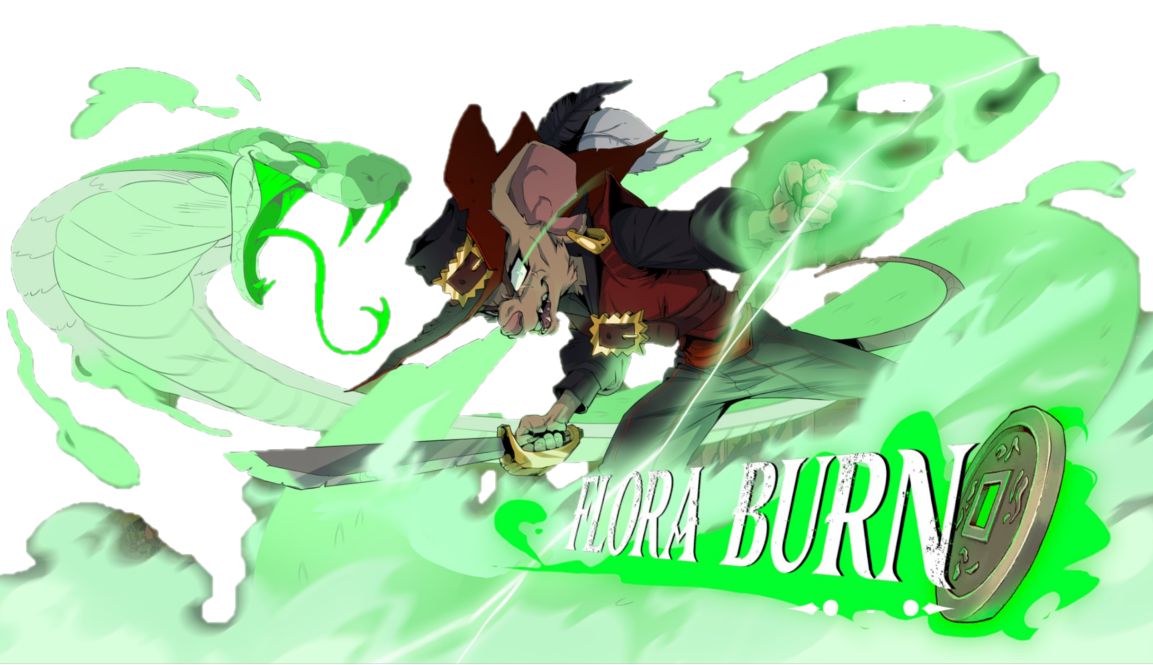
1 – Coward ending – Don’t accept the deal
 The first ending you can basically already trigger right after the game started. Just don’t accept the deal with Admiral Blacksmith to free Timothy to get your freedom in return.
To do so, just return to the ship and speak to the guard 6 times. He will get annoyed and says he only will let you through with the permission of the Admiral. Go speak to the Admiral to get it. He warns you abou the consequences. Just don’t care and board the ship again to go into jail. Leave Timothy to die in the evil witches hand.
You should unlock the achievement ‘Running away like a coward” with it and the game ends without rescuing Timothy, loosing your chance for amnesty and awaiting your harsh trial in Britain.
2 – Bad ending – Loose Timothy
 You will just battle Flora Burn in the first encounter, but without the help of the Mysterious Pirate.
In this case Flora will act like she was defeatet, but waits for the right moment to steal your amulet, Without it, and any further help, you neither be able to free Timothy out of the crystal, nor you will receive the serpent ring, your only chance to compete with Flora again. You have lost because Flora’s trap worked out, this was her plan all along. The game directly ends here giving you no chance to enter the endgame at all.
This will unlock the ‘Crystallized forever’ achievement.
3 – Mediocre ending – Loose to Flora Burn
 This will trigger the endgame in which you follow Flora back to the ship through a maze because a lot of ways are blocked by barriers. Teleport potals are now inaccessible as well because the serpent ring does not have suche powers and the heroes don’t accept selling their soul for dark magic. Find your way around the good all way and walk. There are multiple paths, the fasted one going over the Home of the Morrigan area and using the Spider Cave – waterfall slide to LaChusa’s Pit. But if you do so, you will miss the special boss fight Mamma Ratelli (a Kickstarter stretchgoal boss). If you play the game first, go over the Chu Chulainn Road, you automatically come to this boss then. Take a look on the endgame map in the map section to find a sutiable route for you (some are only accessible if you opened secret passage before or you obtained the necessary key for the door.
When you reached the ship, just fight your way through to Flora Burn. You will be able to beat her, but she will once again trick you and she will obtain amulet and the ring, making her almighty at last. She will set off laughing with the now cursed flying ship. You will remain being rodents.
This will unlock the ‘Sailing the skies’ achievement.
4 – True ending – Beat Flora Burn and Long Fuse John
Hint: it may happen that Sammy disappears during your endgame run. You can just save and reload to get him back, or you just don’t care about. The game will neithertheless take into account that he is with you and join your for the final fight against Flora.
Fight your way to the ship, and to Flora. This time, after you beat Flora, Sammy will prevent Flora from getting the amulet and the ring. Instead, Short Fuse John will pick them up and will mutate to Long Fuse John in the process. A 3 phased boss fight. After beating him, the ghost sensei will recover your human form and scatter ring and amulet into different directions. You will unlock the ‘No more fur’ achievement with it and ‘No one can beat me’ (beat all bosses).
Hints: The achievement ‘No more fur’ seems to be broken for many players at the moment and might not pop up. Also there is a tiny teaser at the end of credits, so watch it.
Gameplay hints
]If you have any troubles with the difficulty of this game it is best to focus on playing David. He does not only have the most funny dialogues, but he is a real gamebreaker for the time being. I am pretty much sure he will get nerfed anytime soon.
 The key is to unlock as fast as possible the perk Battle Cry which will gain you a 30% life heal for each sword hit dps you do. This will make using potions useless. In fact most bosses can be blindly fought by just hack’n slay them. Just tank the damage with leeching life out of the bosses.
You can even enhance this effect with the berserker mode named Honor because you will deal more overall damage during the 30 seconds.
The second valuable enhancement is the Blazing Tornado fire attack if you have enough spirit points collected. With the incendiary effect it deals more damage than those camparable magics of the others. It can further be maxed out with the Flaming Heart ability, whcih will give you 30% more magic damage if life is full – which is most of the time the case because of Battle Cry.
In a boss fight you basicall activate Honor and then Blazing Tornado with the first 3 energy orbs you have. Time your Blazing Tornado maybe with the first boss attack as it has an invu time frame. Afterwards have fun to go frenzy. Use Blazing Tornado again anytime regained enough orbs again or you see fit.
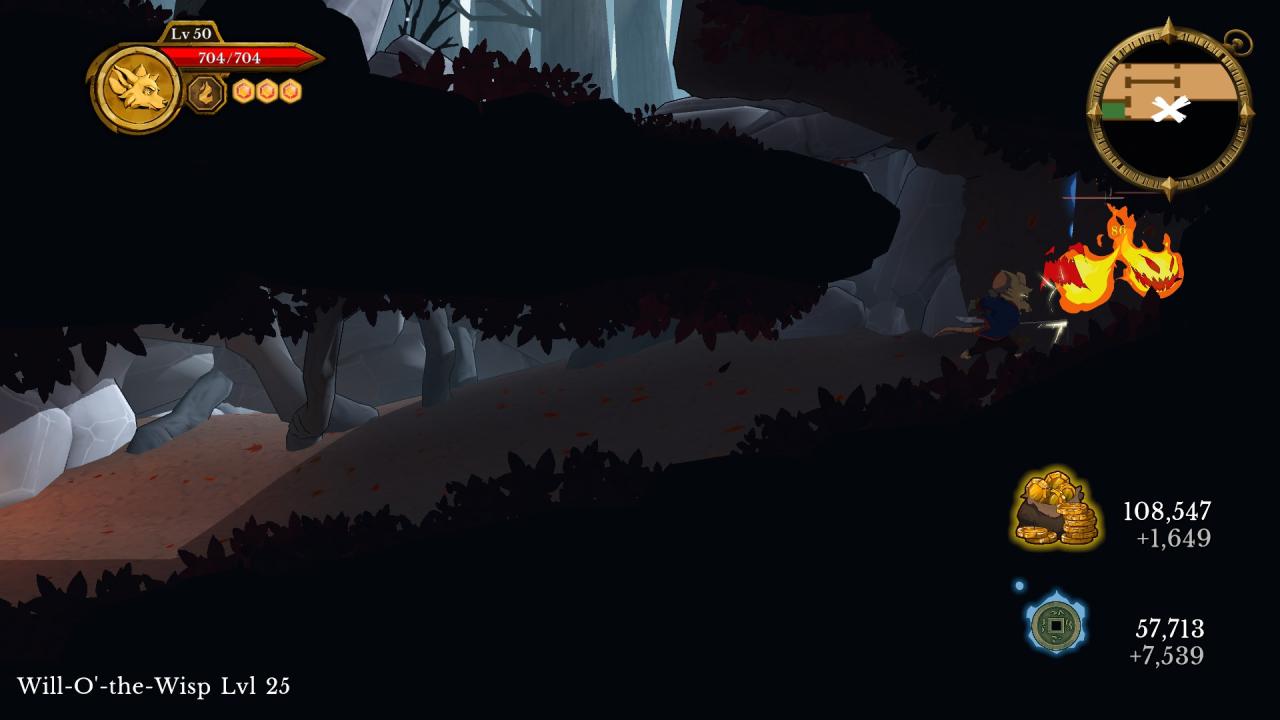
Later in the game in Sammhain Summit and the Home of the Morrigan are firy ghosts named Will’o’the’Wisp (a word play on the second Ori game). Just attack them relentlessly at their spawn point to farm quick spirit and gold. The Will’o’the’Wisp at Home of Morrigan are better as they are level 25 instead of 24.
Max level cap of your characters is 50. Due to that easy to farm XP possibility don’t bother to use your level up elixir early in the game which can be regularly found in secrets.


You can damage the Barrelosauros with the red explosive barrels by attacking them. This does also apply to multiple barrels at once (easier to perform with David or Akane due to bigger hitboxes) and hitting them midair.
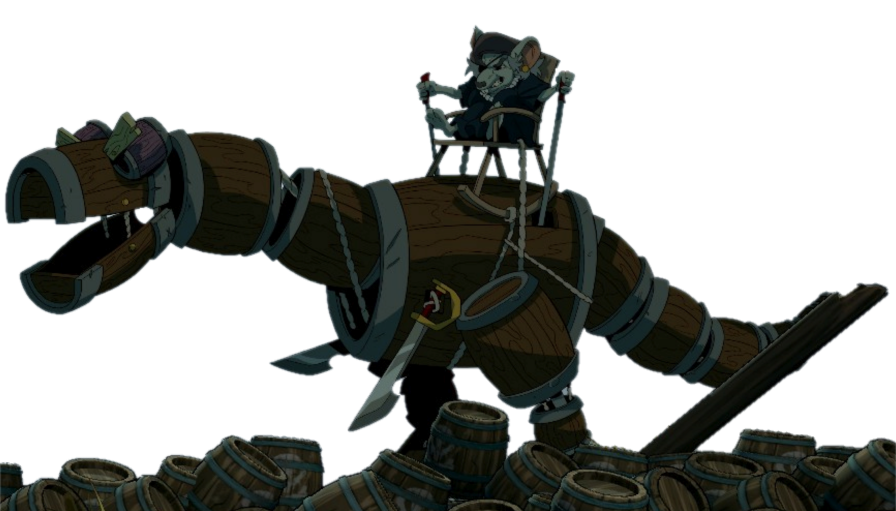 Also you can damage the boss with the most powerful magic attack. This makes Akane the most valuable character against Barrelosauros. Her auto-energy refill ability gives you regularly a free magic attack.
If you have the Transmutation Ring from Morrgian consider switching to David to do the Blazing Tornado fire magic attack – it is the strongest if you leveled him up. Then switch back to Akane. Be careful with the transmutation stall time. Don’t get knocked off of the screen by the flying barrels or you will die instantly.
If you play out your cards well the fight can be done in about 60 secs.
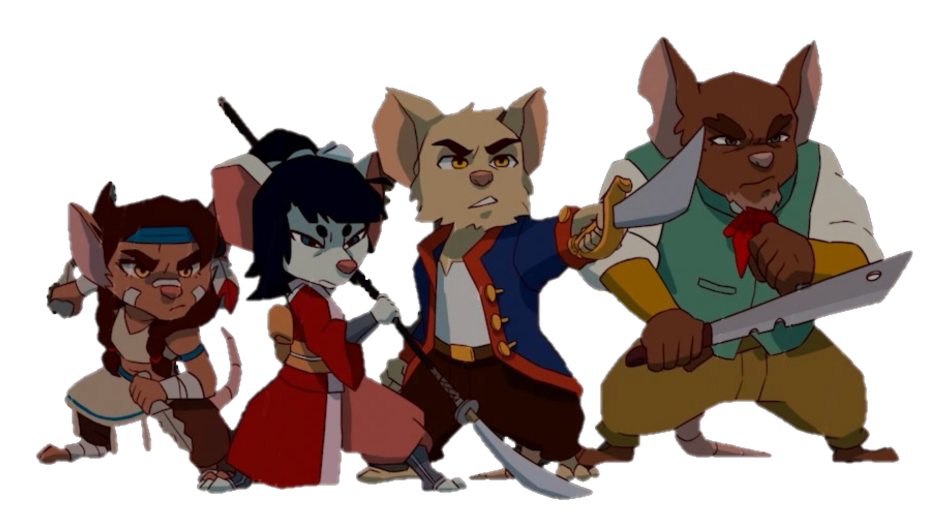
First off, you can change characters anytime on any savespot. Later on you will get the Transmutation Amulet if you beat Morrigan (an optional boss) which give you the power to switch on the fly. So don’t bother, you are not nailed to one character for the rest of the game. So test them out by yourself. The following judgement is my personal one. Pick the character who pleases your gamestyle most.

David Douglas
He is the best all-rounder and beginners character. His weapon has an easy hitbox, a very good dash, and his Blazing Tornado is the strongest wave magic attack of all characters. Also he can learn to heal himself just by attacking enemies. Which actually kills the game as you can outtank enemies and bosses easily – no consumables needed if you do it right. He also has the best or funniest dialogues.
Buffalo Calf
The long-range character which can even electrify enemies to stop them moving. She has no healing at all, so you must rely on consumables or other characters to do so. She has the fastest attack speed but a limited hitbox, but if you are dead on spot on a an enemy, she inflicts a hell of a damage on it. She can also sneak attack and deal more damage from behind later on. In my opinion, she is is a formidable coop character. One player takes the front, Buffalo will tackle and deal damage from behind. No need to risk anything with here. She is awesome in the Moonlight Lough area. The dash of her is a falling one and not as good as David’s.
Bussa
In my view the most worse character in the game (also the voice acting). He is basically a tank character wit hextra HP points. Bussa has a bad melee hitbox but has some area effect magic attacks. The best thing about him is that he has a basic healing magic, so you will need much less consumables. Has the same dash behaviour like Buffalo.
Akane Yamakawa
A versatile character. Basically she seems to be aimed to be a mage character. The only downside is that she has to rely on consumables for healing like Buffalo. But the hitbox is good, she has a basic ranged attack which needs no energy. Her dash is tricky though, because it is a backward dash to back away from enemies, but it does float. So if you turn around just before dashing, you can dash as far midair like with David, but needs some practice. But most awesomeness about her is the auto-refill energy ability she can learn. If you wait enough, you basically can use magic anytime you want. If you have the transmutation ring, switch to her, let the energy recharge, and heal with Bussa if you are stuck in an area to prevent dying.
Miscellaneous and other hints

 Defeating Morrigan in Home of the Morrigan will grant you the Transmutation Ring. A very awesome item. Like the Tasmanian Sword in the game ‘Wonderboy Dragons Trap’ you can change your character whenever you want. Use it directly in the inventory, or press the left analog stick on your controller. For keyboard players it is the TAB key. Careful, you will get stalled for 2 seconds.
Use this to your advantage. With full upgraded chars, you can always auto-refill your energy switching to Akane, go range attack with Buffalo, or heal yourself with Bussa whenever you see fit.
Hint: you need 3 stones to open the door to the Home of the Morrigan. See the map I provided. For one stone you have to visit Dan Black first to get to know that Charlie (a fun camo of Harold from Day of the Tentacle) has the stone to be able to obtain it from him.
 Fighting the boss Necromancer you will get the Resurrection Ring which will automatically heal you when you die. But is is a one use item. After this, it transforms into the Dull Resurrection Ring.
Hint: the Necromancer has 3 phases. The first one is easy, but the other two are working on platforms. if you fall off, you will die instantly. I suggest you stay on the big shield platforms because tthe small one will vanish – and if you are using them, use the bigger ones as a double net. Don’t rush it. He doesn’t deal a lot of damage. use long ranged attacks (Buffalo) or magic attacks (Akane) if you want to play it safe.
The Necromancer is the only boss that can be fought unlimited times as he is immortal. This mechanics seems to be added to give you the ability to recharge the Dull Resurrection Ring.
At the moment this seems to be broken. The Dull Resurrection Ring will vanish out of your inventory but you won’t get the normal Resurrection Ring. Reviving also will not work out. So once used, it is gone for good.
Don’t miss to drink the Milk Bottle from the farm house. It will grant you +50 max HP permanently.
Also get a Shilling (2 can be found, but you only need 1) and visit the lighthouse with it (the key tothe lighthose is in LaChusa’s Pit. If you use the left telescope on the top of the lighthouse, you will unlock the blacksmith (not Admiral Blacksmith). He will upgrade your weapon and raise your basic attack by +10 permanently.
Aside of the bosses or minibosses themselves, there are scattered some unique pirate type enemies around the world which are easily overseen but necessary to defeat for the ‘No one can beat me’ achievement.
I will list the ones I found so far (let me know if you found more):
1. Miner Pirate in Flying Rat Cave (left entracne shaft)
2. Whaler Pirate in the Valley of Winds (lower let area behind the locked door)
3. Chief Pirate in La Chusa’s Pit (right below the boss room)
Also might help: to kill the Skull Crab just parry its attack to make it vulnerable.
Thanks to Kelrycor for his excellent guide, all credits belong to his effort. if this guide helps you, please support and rate it via Steam Community. enjoy the game.
Is there any point to freeing the pirates stuck in the pirates of the carabean reference with the dog holding onto the keys besides having them rob you?