Here is a guide on how to use infantry to their fullest potential.
Introduction
However, this logic becomes more complicated when infantry gets involved. Each cell can hold five infantry units, spaced out over the cell in the shape of the five dots on a die.
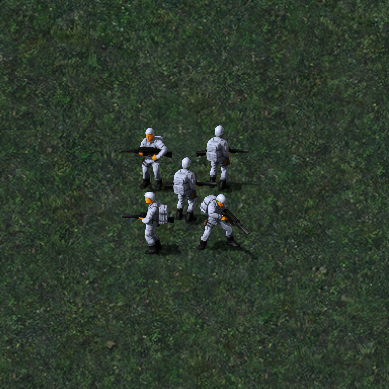
Yep. These five clowns.
The game’s distances also don’t work with whole cells. They are defined in a unit called a ‘lepton’, which is 1/256th of a cell. This means that some logics in the game, like weapon range, often lead to situations where these sub-cells really matter; where infantry on certain sub-cells are in range of enemy weapons, while those on the other side of the same cell aren’t.
This all means that sub-cell control can play a large role in the game. Do note that these tactics are less relevant versus human players, since they don’t have tanks that will automatically crush you when you attack them from too close, and they will much more easily send out troops to foil your plans if you try to position your Bazookas in those narrow sweet spots to take out a Guard tower, making such micromanagement rather useless.
In the missions against the AI, however, these tactics can be absolutely devastating, making them very much worth learning.
South Advantage
This quirk is probably caused by the fact a weapon’s range is calculated from the point from which it fires. Given the fact the game’s perspective is not 100% top-down, but somewhat angled, the point from which things fire is usually located somewhat more to the north than the actual center of the object; turrets are placed on top of tanks, and infantry fire from hip or shoulder height rather than from their feet. This generally doesn’t match the location which is targeted by enemies to attack them.
This has very real consequences for gameplay. The most obvious one is seen on structures like the Obelisk and Advanced Guard Tower, which fire specifically from their top cell. While the game does consider it a two-cell-high building when you attack it, meaning the approach distance from north and south are about the same despite the south cell being the only targetable one, approaching such a structure from the south will mean you stay out of the range of that top-cell weapons for longer while getting close to its vulnerable foundation cell. Conversely, when attacking from the north, you get in range a whole cell earlier before you can attack it.
But even on structures like a Guard Tower, you will see that it can attack infantry that’s slightly closer to itself on a north cell than on a south cell. Infantry, too, can attack a noticeably farther distance towards the north.
Specific Use Cases
So let’s take a look at these two situations. In the following images, the space between the infantry and the central target is the kill zone. Have anything standing there, and it all goes to hell. The red soldiers are the ones that are on the sweet spot from where they can shoot, but are not in danger. The grey soldiers on the outside are those that are out of range, and can’t contribute.
Contrary to popular belief, tanks will not “randomly decide” to start crushing your troops. There is a very specific logic attached to this: they will only go into “crush mode” when a soldier attacks it from a range that is less than one and a half cells away from the tank’s center. Do note that they can perfectly walk into these spots, as long as they don’t attack while standing there.
So, let’s see what the safe spots are, then:
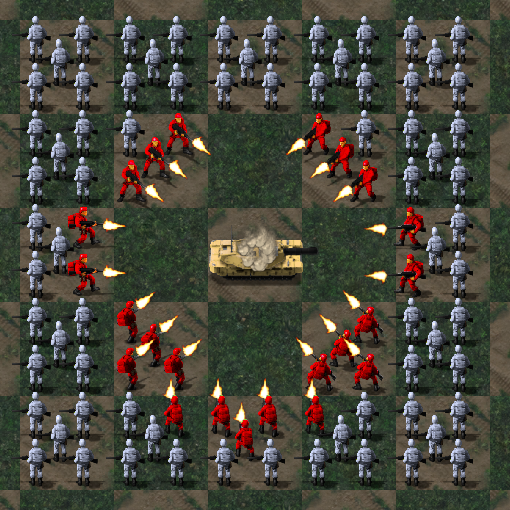
South advantage! At least in this case, it’s only in the infantry range, not in the tank’s crush range.
Using this knowledge to your advantage, you can take out $800 tanks with $500 worth of infantry, usually with barely any damage to said infantry.
Do note that there’s a very dangerous edge case, and that is Grenadier infantry. Grenades are slow projectiles, and AI units will actively try to evade them, which will very often cause tanks to unintentionally get closer to your troops, triggering the crush logic when one of these troops then lands a hit on it. For that reason, ironically, it is much easier to take out tanks with plain normal Minigunners than with the more damage-dealing Grenadiers.
In general, when you encounter a set of GDI Guard Towers in a situation where you only have infantry, you will most likely just throw in the towel and conclude it’s time to get something heavier in there. Guard Towers may seem a lot less scary in the Remaster than in the original, since their eardrum-assaulting machine gun sound got nerfed, but rest assured, if any building deserves to make you jump out of your chair when you have a soldier coming slightly too close to it, it’s this one. Its spread damage is so devastating that any shot directed at an infantry unit will severely damage, or plain wipe out, any other infantry close to it, even if it’s technically not even in the Guard Tower’s range.
However, as mentioned in the introduction, there is a sweet spot. Again, this is severely influenced by the South Advantage, so if your only avenue of approach is straight from the north, well, hasta lasagna, been nice knowing you, rest in tiny chunky pieces. But if you have access to its east, west or south side, well, things look a lot better for you:
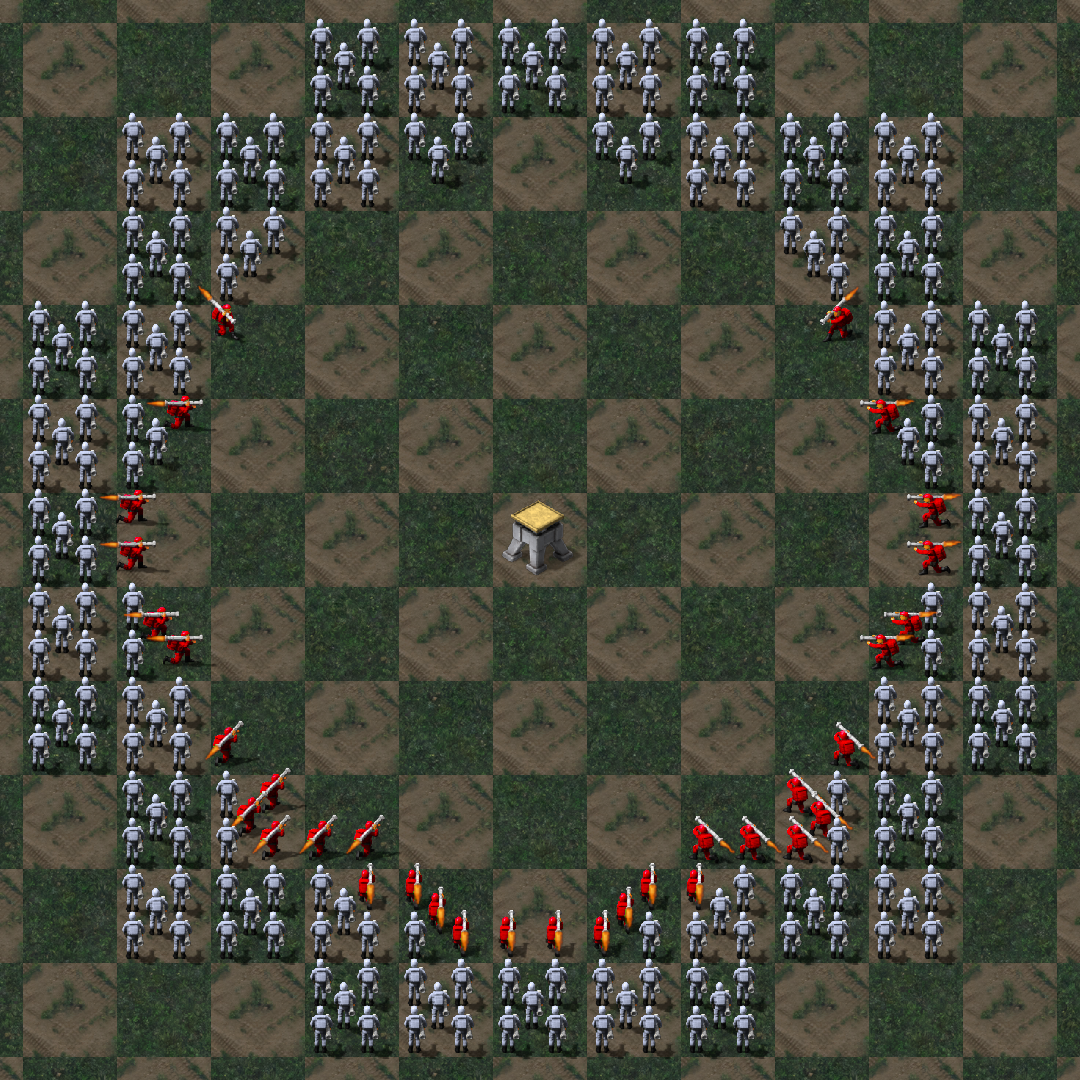 To test this setup, I had to initially replace the Bazookas by Commandos just so the splash damage wouldn’t wipe out the ones that weren’t actually in range.
There are several situations in Nod missions where the ability to take out Guard Towers with Bazookas is an absolute life and/or time saver. In the Nod campaign, it can make your life a lot easier, especially in missions where you start without a base. In the Covert Ops, there are specific situations designed in the missions where using this will allow you to cripple the enemy with a well-placed sneak attack.
Sub-Cell Movement
As a basic rule, your infantry is lazy. Order a soldier to go to a neighbouring cell, and it will travel the shortest distance possible, stopping on the closest sub-cell. This is good; it makes the behaviour predictable, and ensures they won’t accidentally move much closer to that infantry-devouring Guard Tower or to those fifty tons of threaded infantry-crushing steel.
Unfortunately, there are some strange quirks in the logic. When moving one soldier straight from one cell to another, this rule generally holds. When moving multiple soldiers, however, and when moving diagonally over multiple cells, they might go to different sub-cells than you might expect. So to micromanage that, don’t take too many risks, and if possible, move them one at the time.
Let’s move on to a specific example: armed with your new knowledge, you want to use a squad of five minigunners and show an enemy Medium Tank where it can stuff those tank shells. Well, at first, of course, you have a cell with five soldiers, approached as closely as possible without getting in the Crush Zone. But only the closest two of those can actually reach the tank. So, where do you go from there?
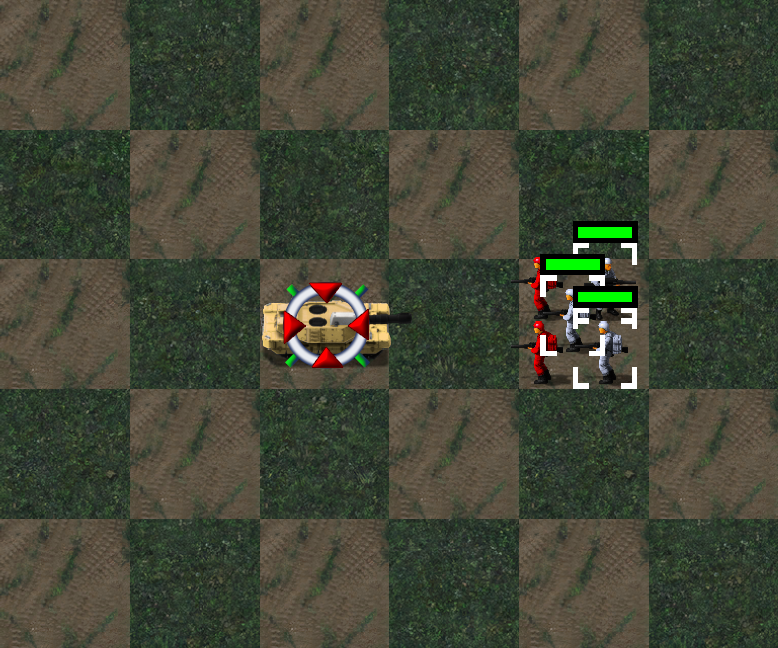
Well, you may think, surely if I move them to the cell just south-east of the tank, they can attack from there? So you move them diagonally. Except, this way, they end up like this:
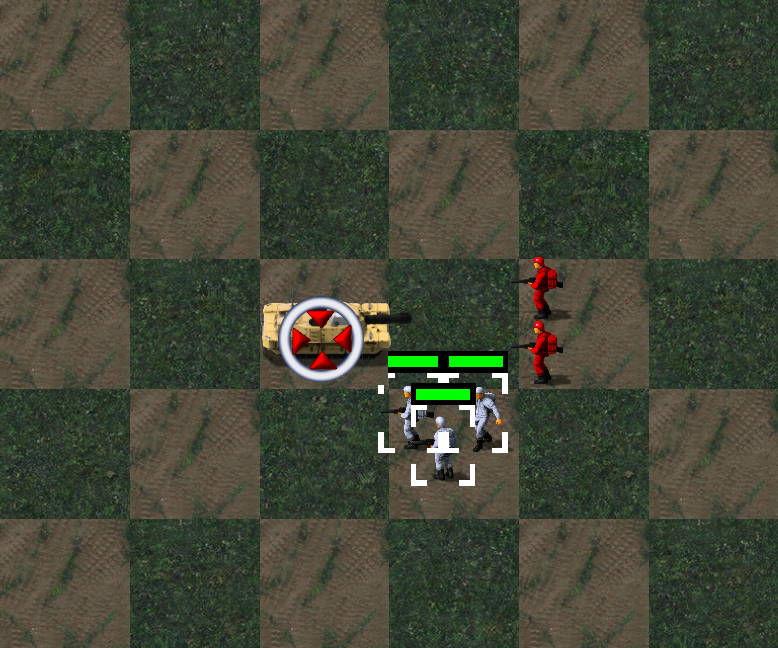
The top right sub-cell contains a soldier. Splat. Try again.
What if you move them one cell south first, and then to the west? Same effect; they still stick to the top of the cell where they were, and they still get crushed.
You could just move them all to the south cell, where they’re guaranteed to be safe… but that takes more time, and there might be other threats nearby which you’d prefer to avoid. So what’s the best course of action? Well, since you want them on the sub-cells far away from the tank, you could move them two cells down…
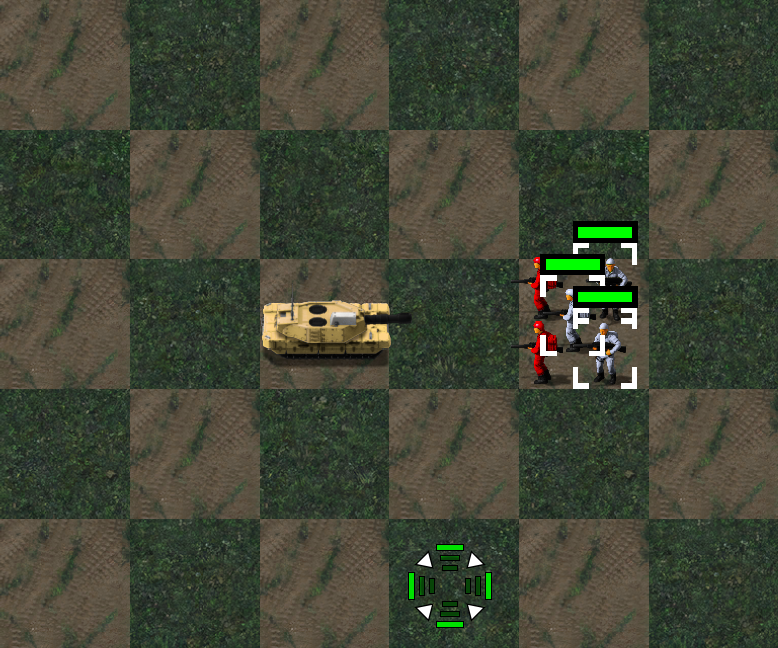
…and then back up…
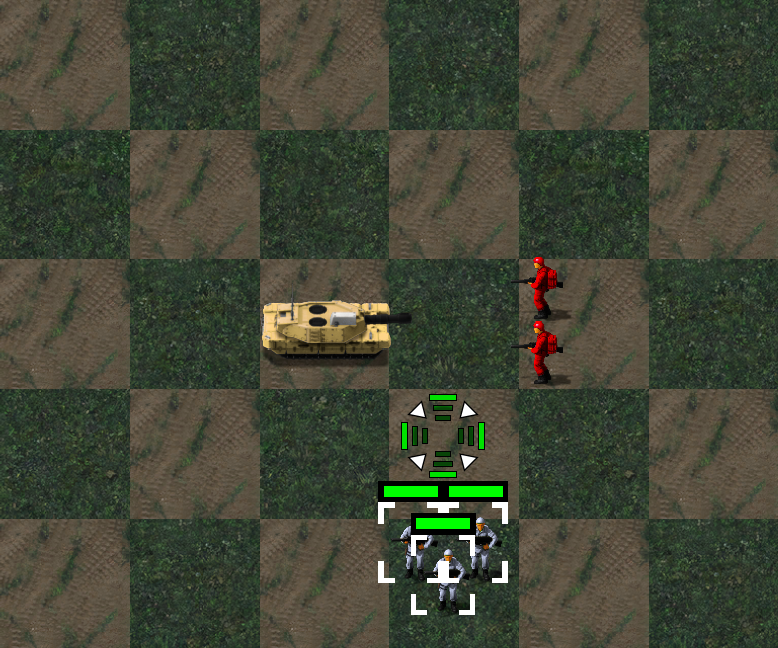
…to get to the perfect configuration:
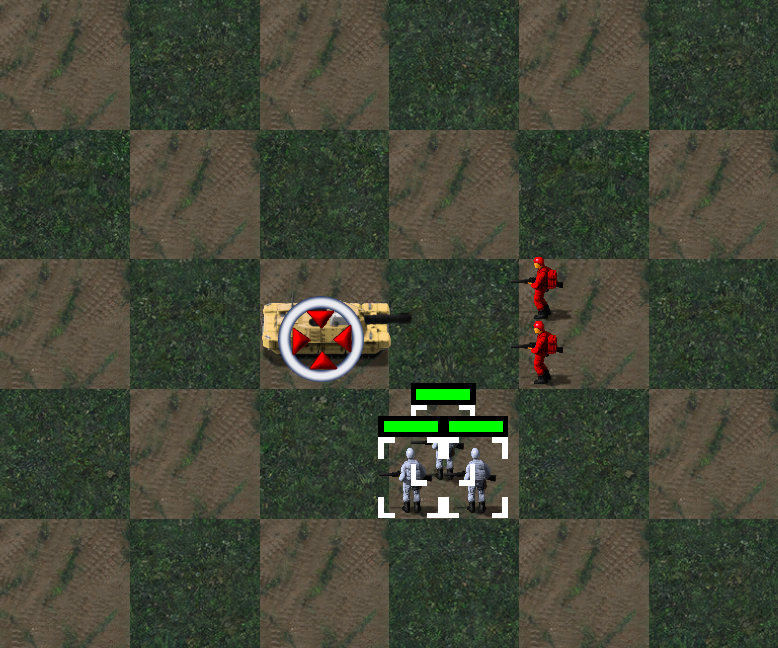
You can do this more efficiently, though. If you move only the two most southern soldiers of the initial group of five to the diagonal cell, they’ll stay perfectly out of crush range, and will both be able to attack. If you approach with your initial group diagonally, and leave one soldier out, your four remaining ones will all be able to attack. And there are loads of other variants.
For now, let’s just enjoy the result:
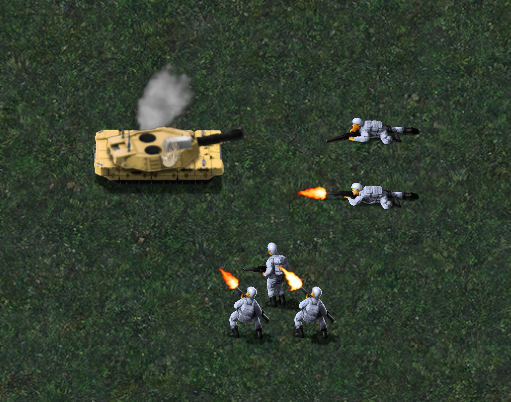 …
…
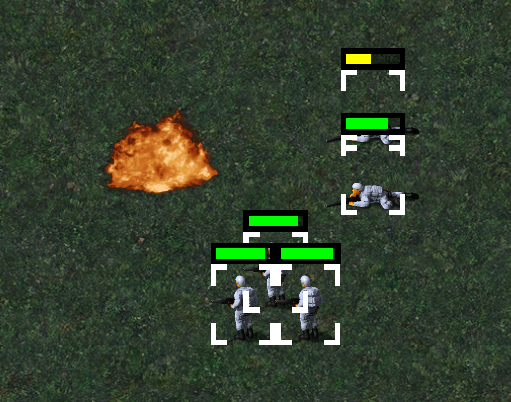 That’s right. One minigunner down to half health. Once you know what you’re doing, that’s the real cost of taking down a medium tank.
Force Move
For example, in the previous scenario, if the two minigunners to the east are both taking damage because the tank is shooting the top one, you can avoid more damage by moving the bottom one into the diagonal group. Since he’s already in the bottom left sub-cell, he’ll move to the available top-right sub-cell in the other one:
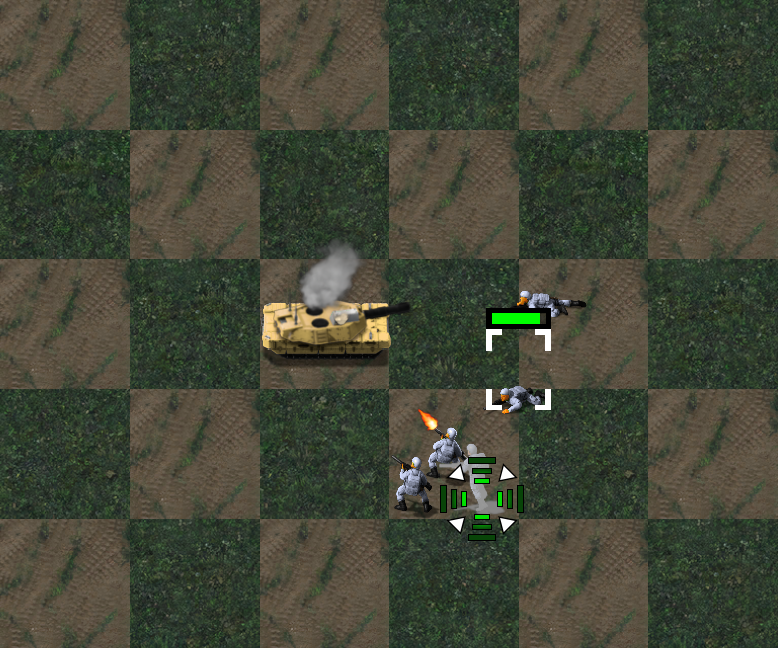
It does not matter which soldier in the target cell gets targeted. No matter which one you click on, the behaviour remains the same.
(Of course, if it’s the other one that gets targeted, this is useless; the soldier would still be in the splash damage area. But this was only an example; there are other ways to move them around)
One of the annoying things about infantry is that they often randomly switch sub-cells when you move them around, and this can mess things up when you need specific infantry in specific sub-cells.
Take for example a situation where you have to approach a Guard Tower from the east, and due to the terrain, you have to attack it from the exact diagonal spot. So, that’s this situation:
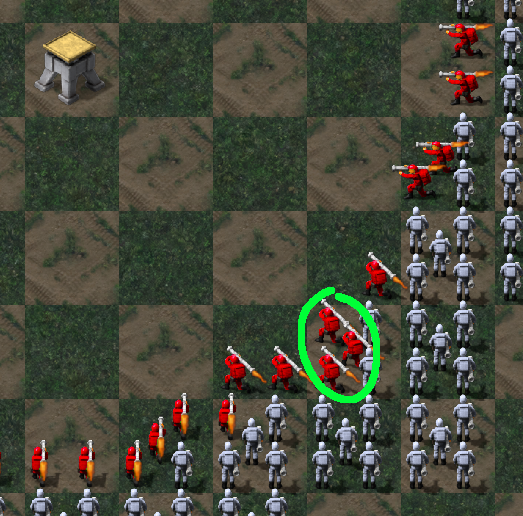
However, here’s the quirk: you only have two Bazookas.
If you only move the two in, from the east, they remain on the sub-cells the farthest away from the guard tower, and neither of them can shoot from there. So an obvious solution is to make a full group of five with some other infantry, and then move them in.
But then, it can easily happen that they randomly shuffle internally, and only one of the Bazookas ends up in a spot from where he can shoot. And given the fact you’re reading a guide on advanced micromanagement, you’re probably not playing this game on Cheat Casual difficulty, meaning, if it gets repaired, one Bazooka can’t destroy it on his own. So, what do you do?
The solution is to take a full group of other infantry, without the Bazookas, and move them in place. Then, select the ones on the spots you want to replace and move them out of the group, back to safety. Finally, Alt+Move the Bazookas into the cell, and they will seamlessly take up their intended spots, and do their job.
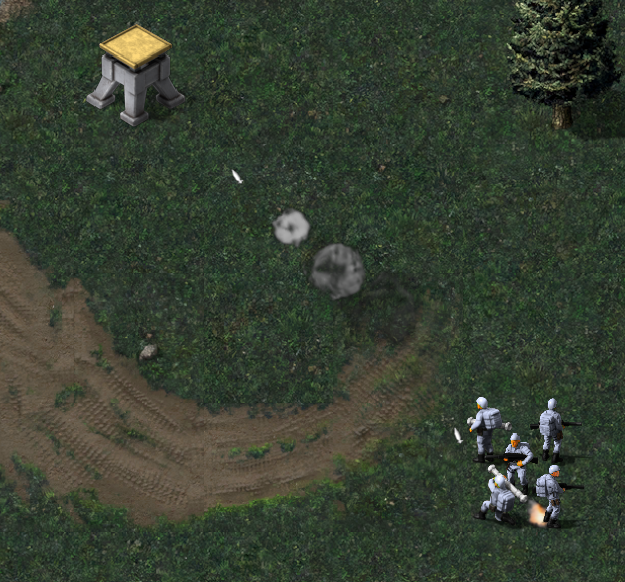
Of course, if you’re dealing with one of the positions where only four can be placed, on penalty of free entrailsplosions for the whole squad, this gets slightly trickier. Make sure to make your replacement soldiers approach from a direction that makes them the most likely to fill in the intended spot.
Afterword
So in case you have a tricky situation you’re not sure of, just experiment and see what works.
Thanks to Nyerguds for his great guide, all credit to his effort. you can also read the original guide from Steam Community. enjoy the game.
Related Posts:
- Command & Conquer™ Remastered Collection: Red Alert 1 Allied Campaign Hard Guide
- Command & Conquer™ Remastered Collection: Tips and Tricks for New Players
- Command & Conquer™ Remastered Collection: Red Alert 1 Soviet Campaign Hard Guide
- Command & Conquer™ Remastered Collection: How to Add a New Unit for Tiberian Dawn
- Command & Conquer™ Remastered Collection Save Game Location

