A step by step guide (for Windows) on how to remove black borders, black bars, change the FOV, resolution, and some other things.
Downloading Notepad++
Head off to the download page[notepad-plus-plus.org] and click on the lastest version. There are mainly two options that you can choose, if you have a 32-bit operating system, then the first option (32-bit / x86) is the adecuate option, click on • Installer down in the Download 32-bit x86 section. If you have a 64-bit operating system, then the second option (64-bit / x64) is what you should choose, click on • Installer down in the Download 64-bit x64 section.
Then install it, and now we can start editing the config file.
Locating the config file
If you don’t know what’s your Windows username then head to C:\Users.
The config file we’re gonna edit is Video.scr.
Right click the file and choose Edit with Notepad++.
Removing black borders and black bars
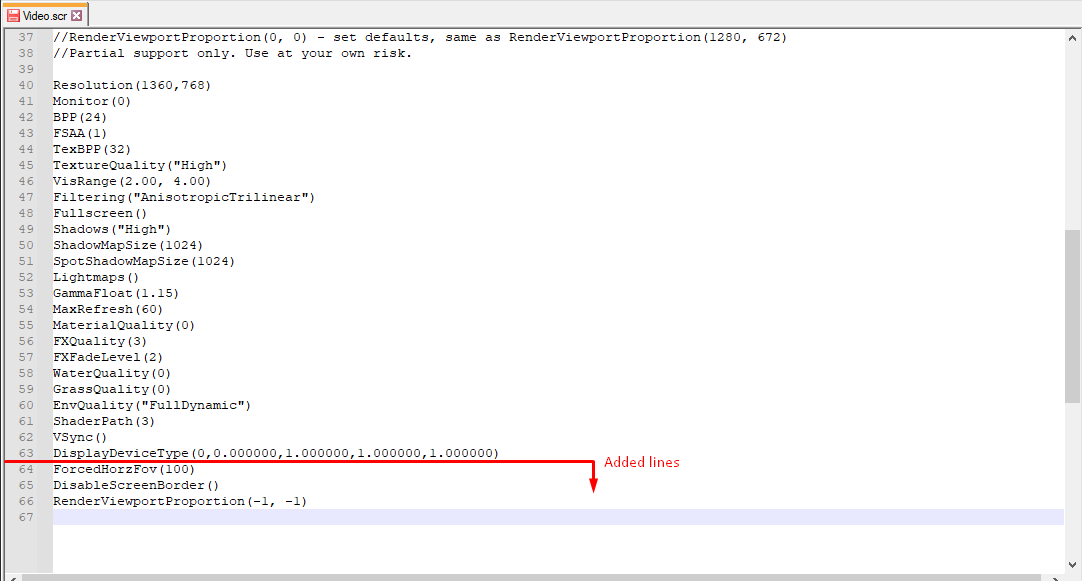
• To remove the black, painted borders you just need to add this line at the bottom and end of the file:
DisableScreenBorder()
Then you’ll be left with two, almost equally annoying black bars, commonly known as a letterbox.
• To remove the letterbox / make the game truly fullscreen, you just need to add this line at the bottom and end of the file:
RenderViewportProportion(-1, -1)
Changing the FOV
ForcedHorzFov(preferredFOV)
You can enter values between 80 and 110. Personally i recommend to use 100.
The default FOV is 82.72.
Enabling Anti-aliasing
Search the line FSAA(0) and change it to FSAA(1).
Changing the Anisotropic setting
Search the line Filtering(Anisotropic) and change the value (Anisotropic) by the one you desire: (From left to right increasingly GPU intensive) Bilinear, Trilinear, Anisotropic, AnisotropicTrilinear.
(The value you get by default on the file could be totally different, but the process is still the same)
Changing the resolution
Search the line Resolution(1360,768) and change the value (1360,768) to the one you desire.
(The value you get by default on the file could be totally different, but the process is still the same)
How the file looks (In my case)
Thanks to ZerØ! for his great guide, all credit to his effort. you can also read the original guide from Steam Community. enjoy the game.
Related Posts:
- Call of Juarez Gunslinger: Game Won’t Start FIX 2021
- Call of Juarez Gunslinger: Points and Bonus Points
- Top 5 Western Shooter Games You Should Try Before Red Dead Redemption 2 Comes Out