Tips, strategies and example decks for clearing the game.
Introduction
A Word about Weapons
My favorite weapons tend to be daggers and fist weapons (which are essentially upgraded daggers.) They tend to have slightly less attack than swords, but they make up for it by stacking bleed on opponents and synergize with builds that expect to attack multiple times in a turn. Since some cards and mechanics synergize with bleed, I find it’s usually better to stack bleed than to have higher flat damage. Lastly, because the dagger-archetype are one-handed weapons, they also allow for the use of shields in the offhand.
On the other side of the spectrum, handaxes are a single-handed weapon with the heaviest initial damage bonus of any archetype. They add fatigue after every strike, making them best for fatigue decks or decks where you expect to only occasionally strike enemies for heavy damage.
In the middle are standard swords, which have no special advantages or disadvantages. They are usually stronger than daggers in the early game, when you may not be able to attack multiple times in a turn and have to settle for big, single hits. Again, being one-handed weapons, they allow for the use of shields in the offhand.
Broadswords are great for crowd control and are second in damage only to handaxes, but their shortcomings are that you can’t wear a shield and you still have to stay at melee range, The fact that they add fatigue with every attack will kill a lot of early decks. I usually avoid them in preference of more defensive options, but they’re fantastic in conjunction with a spear if you’re building a fatigue deck. Otherwise, they tend to have the most potential in builds that can make strategic use of power moves, secondary movement effects, and knockback.
Spears are very powerful in the right builds, and their two-tile attack range facilitates a style of play based around kiting. Their main drawbacks are that you can’t wear a shield, they add fatigue after every strike, and tend to have roughly the same damage buffs as daggers. Spears are best when building fatigue decks or kiting decks that can afford their heavy energy cost.
And finally, crossbows are similar to spears in that they have a two-tile attack range, but are somewhat clunkier in that they must be reloaded with a damage-dealing card of the same color after every shot. They can help to apply damage or statuses at range, but they tend not to be your main weapon unless you have cards and a build tailored for them.
Deck Cycling and Control
Card cycling (draw and discard) will allow you to shuffle difficult statuses back into your deck, redraw your hand to fit the present situation, and can provide additional chances to get that one card you specifically need to kill your opponents or avoid taking damage this turn. Lastly, if your deck includes any kind of scaling element such as Beef Up, Jab or Tough Nut, faster cycling allows you to scale more quickly since you return to the necessary cards faster. Even if my my build doesn’t use shields, I will always take at least one Refocus to give myself faster deck cycling and a mulligan if my hand doesn’t work for this turn, as well as a Breathing Technique to let me re-add my most necessary cards back into the deck.
Similarly, this is why you remove cards that are weak to your build. The fewer draws you have to spend pulling cards you don’t want, the more of them can be cards you do want and the faster your deck cycles. This is why when you Meditate, you almost always want to remove cards unless you have a build-centric card that is mismatched with your equipment.
Shops
To be frank, upgrading equipment needs an overhaul. It is seldom a good idea to spend money upgrading your equipment in the first or even second arenas because crowds continue to drop (increasingly powerful) equipment during combat, meaning you could save two or four hundred gold just by continuing to play and wait for a while. But more important than that is the fact that equipment gives your build a BASE BONUS that you start combat with, and cards give you a SCALING BONUS that makes you more powerful as combat continues. Base bonuses are good to keep you alive while you scale upward, but will themselves usually provide just a small percentage of your actual defense or offense values during combat. For this reason (and the fact that I tend to use defensive playstyles), I would only ever recommend upgrading shields unless you have lots of excess gold to spend.
Bosses and Elites
The first boss, for example, is something of a DPS check. You may be able to kite it with enough patience, but low-damage decks will run into the problem of him gaining more block and strength every time stun wears off, making it harder to avoid hits without multiple movement abilities and making each hit harder to endure. You are supposed to counter this by having enough damage to consistently break his block, damage his health, and kill him with few repeats. You can prevent him from gaining attack range and power entirely by using piercing attacks or attacks that otherwise ignore block, but if your damage is too low then you still won’t survive the next arena.
The second boss gets increased damage if you don’t move out of cursed tiles, has high health and can attack with AoEs from multiple angles, and it essentially tests your ability to scale. If you have a build with good offensive scaling, it’s possible to avoid the attacks until you’re strong enough to tear through the minion and then the leader in quick succession. If you have good defensive scaling, you’ll more often go for the leader first and then make quick work of the minion once it goes into curse overload. But if your deck doesn’t scale well, you’ll have to rely on high burst damage to quickly kill the leader and pour everything you have into the minion afterward. It is absolutely possible to defeat this boss without scaling cards, but it requires that your moveset be strong enough from the outset to survive heavy hits or tear through health quickly.
The third boss combines heavy-damage AoEs and attacks from long distance to provide a fairly balanced challenge for most decks, but will punish kiting playstyles and low-damage decks. Its Judgement attack covers the entire arena and can do massive damage, but the damage of this attack is dependent on his block and you can wear it down with heavy DPS. Once again, it’s possible to clear this boss without either heavily-scaling block or traditional damage, but its very difficult.
In terms of general strategies, most of the bosses and certain elites heavily punish kiting playstyles. Some attacks can be avoided but others can only be tanked, and at their core they ask you to outscale them in terms of defense and raw DPS. A few movement cards, particularly Slam and Grappling Hook, can keep you alive while you get your powers and scaling set up – but they’ll run out of utility for most fights if you don’t have good scaling abilities.
General Strategy – Early Game
“Duh,” you say. But it is here at the Mystery Shop that you’ll usually find the big cards or items that can help you initially define a build. Find a bracer that makes Fatigue cost 0? Looks like the start of a Fatigue deck. Find a Shield Slam? Looks like a block deck.
It’s better to take equipment that enables specific playstyles at the Mystery Shop and after the early battles, just so that you have a central theme to build around. Don’t take good-but-general-purpose cards if you have a build-enabler present.
Your early game equipment should almost always consist of a sword and shield, with a ranged weapon in your “backpack” as a backup (this obviously changes as you get cards, equipment or accessories that start to form a deck archetype.)
The best cards to pick if you only have general-purpose choices are those that give you better deck control (draw, redraw, etc) or movement, but try not to take too many before you have a build figured out – it’s better to skip cards and stay underpowered for a little while than to end up with too many shield cards in a fatigue/skirmisher deck, to use a specific example.
The late game is punishing on kiting decks. Unless you have a plan to deal with the second and especially the third boss, movement tends to play the role of limiting your incoming damage to something your block cards can handle, not negating it entirely.
Throughout the entire game, stun is overpowered. You can faceroll bosses by knocking them into a corner and keeping them stunned for the entire battle. Any abilities you take that knock enemies around are as valuable as movement abilities, if not more so, for a kiting playstyle or a playstyle that needs time to get going.
The first cards you’ll want to get rid of will generally be a couple of basic Strike cards, While there are more good general-purpose defensive cards than good general-purpose offensive cards, you don’t want to scrimp on defense early-game. If you do take block cards, start deleting Defends instead, as you want to maintain a good balance until you have your build figured out. It’s better to have a build in mind as early as possible, but sometimes that doesn’t happen until after the first boss.
Always fight Elites. Always. If you find yourself struggling and low on health, chances are good that your run isn’t going to end well – so it’s better to take the purple coin and restart the run than to try for the boss and die to it anyway, or die in the next arena. Turnarounds do happen, but if you’re struggling with the Elites in Arena 1, you probably need to keep learning the basic game mechanics and restart your build from scratch.
You should rarely, if ever heal on heal/training options. Crowds will give you healing potions and events often contain options to heal, plus you’ll heal after every boss battle. Opportunities for upgrades are much rarer and will also save you health in the future as you become stronger.
Focus your upgrades on cards that give you scaling, because the faster you scale, the quicker you’ll finish fights and less damage you’ll take. If you have no scaling cards to upgrade, go for deck control and energy conservation.
After defeating the first boss, you’ll be presented with a choice of accessory equipment. The energy option is almost always worth its downsides, but if it destroys the build you have going, know that energy relics are absolutely not necessary for winning runs and it’s often better to take something else than to destroy a good build.
General Strategy – Mid and Late Game
Occasionally, you’ll find that you have only one or two of the “engine” components of the build you were planning for, but you’ll see another “engine” card that works in an archetype you’ve been wanting to play. Just take it and see if you can get your other build running, or plan for a hybrid build. Hybrid builds tend not to be as strong as focused builds, but they can still work and the game is at its most fun when you engage with experimentation.
* If it wasn’t obvious, “engine” components are cards that are major factors in making a build work, EG Shield Slam or Tough Nut for defense-focused decks.
Lots of enemies in the second area have AoE attacks. You won’t be able to kite them consistently without a build centered around it, so if your defenses aren’t up to par yet, it’s far more important to focus on staying alive than killing enemies quickly.
If you’ve built a strong deck, you’ll hit a point in the second arena (or early third) where you stop taking damage during most fights. At this point, you can stop going to the Card option in the Shops and start looking into improving your equipment. Keep trimming down your deck at meditation points, but don’t remove too many of your offense and defense cards. In general, you want no more than a third of your deck to be non-damage and non-defense cards, including your powers.
At some point you’ll probably have enough excess money that you can start thinking about upgrading your equipment. But if you are already destroying mobs and you feel confident about tackling the boss, consider saving that money for purple coins – your next run might not be so lucky.
Example Deck – Sword and Board
The Sword-and-Board is so named because of it’s very basic, beginner-friendly nature – using an offensive and defensive tool (AKA your sword and your board) to build an all-around balanced character.
The main scaling elements here are Jab and the two copies of Tough Nut. Beef Up helps keep the rest of the damage scaling, but I was still learning the mechanics at this point and the deck is hardly optimized.
Jab is powerful in that it scales exponentially – every time you cycle your deck, provided you can play every jab, it will gain double the amount of damage that it gained on the previous cycle. Two damage becomes four damage, becomes eight, becomes sixteen – and the number of jabs doubles on every cycle as well.
Two Tough Nuts were used to keep shield values high while scaling with Jab. This deck destroyed every boss without difficulty, and is overall a beginner-friendly deck.
One note here – I tend to keep my copies of Wind Up and Battle Stance, because they are useful to provide a little additional setup on turns where you have to spend more energy or space on defense than offense.
Feint and Breathing Technique were useful to play my scaling cards additional times per cycle, but there are no other special mentions.
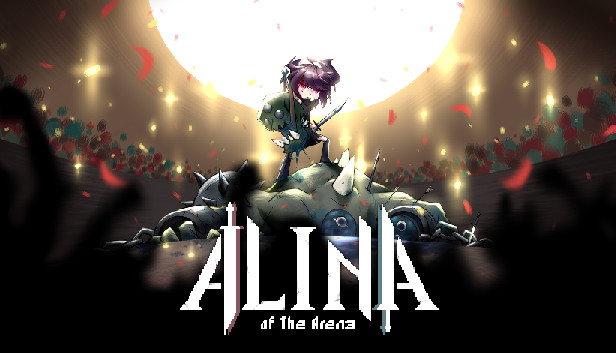
Example Deck – Turtle Charge
Because I felt Jab carried me through my previous wins, Turtle Charge was an attempt to use a defensively-scaling deck. It was overpowered enough that I swore off traditional defense for the next few runs, but that’s mostly because of how powerful Shield Charge is and that I was lucky enough to find it three times.
Shield Charge is powerful because not only does it allow you to carry block over, it can push opponents into walls and set them up for major damage. I took very little damage with this build past the first arena, and killed both the final arena elites and boss before they could even get an attack in.
Breathing Technique meant that I could play Shield Charge four times per cycle, which meant my block essentially never reset.
Repel was obviously lethal to most enemies, but it rarely had the chance to deal damage because Shield Charge killed everything first.
Rope Hook was useful in reaching the few enemies who like to kite before I lost my block, but I wouldn’t call it a major component.
One thing to note is that I almost made the mistake of taking out all of my regular offensive options, and only realized my error when trying to fight an elite that gained precognition once per turn. A basic attack or thrown rock is necessary to pull down preocognition so that Shield Charge can actually connect, or you’ll find yourself in a stalemate where you can’t deal damage to the enemy.
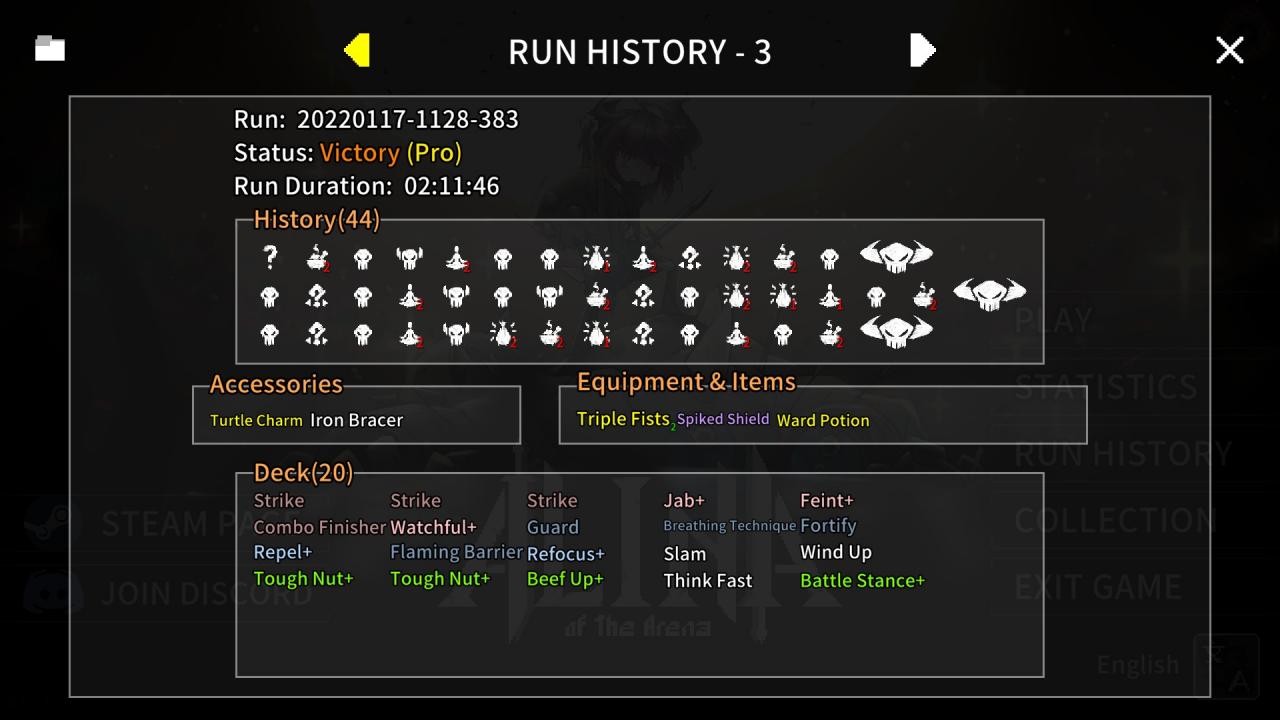
Example Deck – Skirmisher/Fatigue Hybrid

After the turtle build slaughtered Sir Knight, I wanted to try the opposite approach and make a build that didn’t use normal block cards, instead focusing on a kiting playstyle. I happened to get the Lightning Bracer in the mystery shop, which makes all Fatigue cards cost 0 energy. As a result, this ended up becoming a hybrid skirmisher and Fatigue deck, where most of my defensive ability was focused around staying out of range and most of my block came from attacking directly.
Trooper causes all Fatigue cards to give block when played, and Reflex provides block when playing attack cards. Add to that weapons that provide Fatigue on every attack, and every offense card now works as a non-scaling defense card that helps mitigate damage when you can’t avoid it.
Power Through ended up providing as much strength scaling as Beef Up, though in general Beef Up was easier to set up and use.
Multi-attack cards like Flurry are very powerful because their damage increase to Strength is multiplied by their number of attacks and they provide a copy of fatigue for every instance of damage.
The Trap, Hook, and Dirt were there to facilitate the kiting style of play, and all ended up being invaluable components to avoid taking damage. This doesn’t mean a skirmisher deck can’t work without them, merely that they are useful priority cards.
Echo was primarily used to play multiple copies of Trooper, but found utility with Slam and Throw Dirt as well.
This deck had difficulty with scaling – it was sometimes difficult to get my powers active while also kiting attacks, and even if I could manage that, it put me behind in scaling my offense. I ended up taking a lot of damage during this run, but since I was avoiding defense scaling, that is to be expected. It does show that it is possible to build viable skirmisher decks, but given that enemies start to gain AoEs and unavoidable attacks by the end game, it will always be a more risky style of play than stacking block.
One important note is that I carried a spear and broadsword. The Spear was used in most of my fights with the broadsword serving as opportunistic AoE, but the broadsword was a necessary component because of the final boss. Sir Knight can very easily kill you if your only weapon deals pierce damage. If I were to play this build again, I would take a more typical spear instead of the stinger.
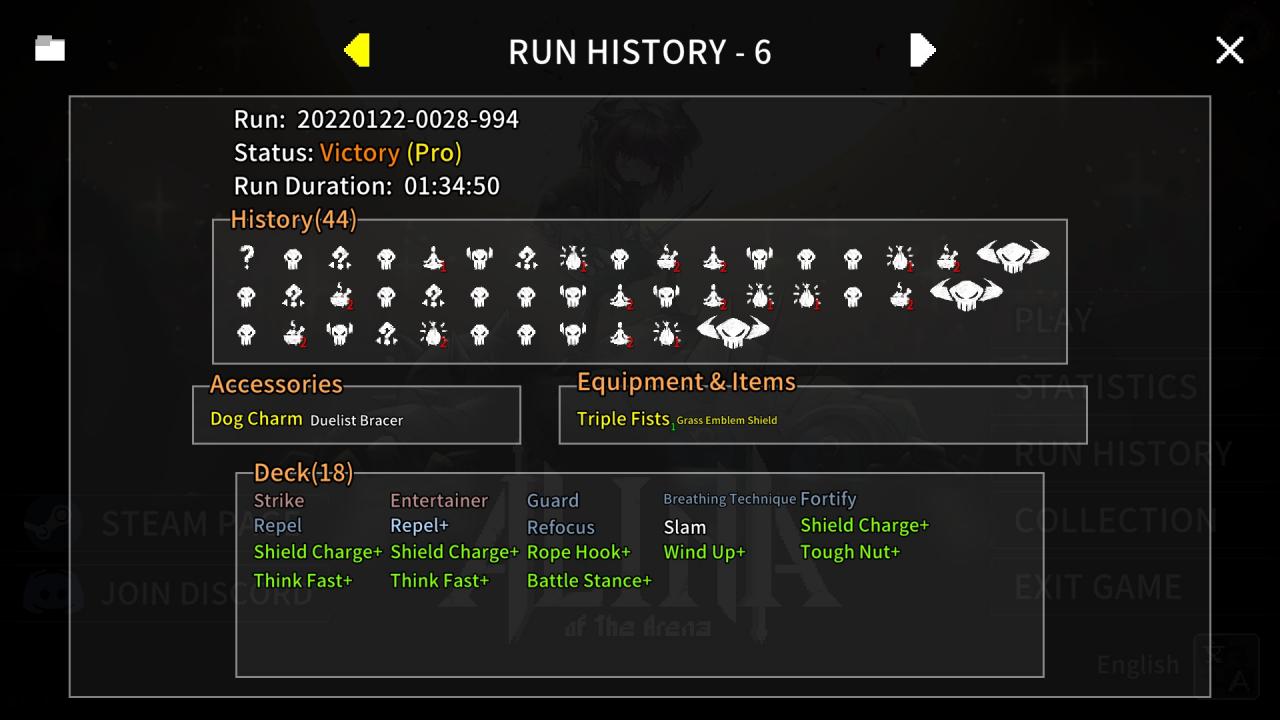
Example Deck – Monk
Similar enough to the Sword-and-Board that I debated leaving it out, but it shows a key synergy that I found important enough to include it.
The Monk is all about offense and deck cycling through Killer Instinct. The name fits very well, but in a humorous twist, the Monk archetype would actually make a fantastic crossbow skirmisher. I should have removed Tough Nut to help demonstrate this build’s actual power, but old habits die hard and I tend to be a defensive player.
Jab is used for power scaling, just like in the Sword-and-Board build, but it scales much faster now due to the draws provided by Killer Instinct. Because Jab costs 0 if it connects, and because you can draw two cards with every attack, it’s common to cycle your entire deck in a single turn and quickly reach the point where you deal hundreds of damage. Any draw cards you take would allow you to start cycling your deck a second time on the same turn, but to be frank, that’s usually unnecessary.
Reflex is used to provide block. Because the number of Jabs in your deck keeps increasing, so will the block you gain from dealing damage, and that’s if there’s anything left to attack you in the first place. The other block cards I had were just there to provide the setup time needed for Killer Instinct and Jab to get going.
If I were to play this build again, I’d tone down on the non-combat cards (removing either Echo or Unlocked Mind for certain), and remove more of the basic Strikes and Guards. I would also take an additional movement option or a crossbow for range.
Example Deck – Firestarter
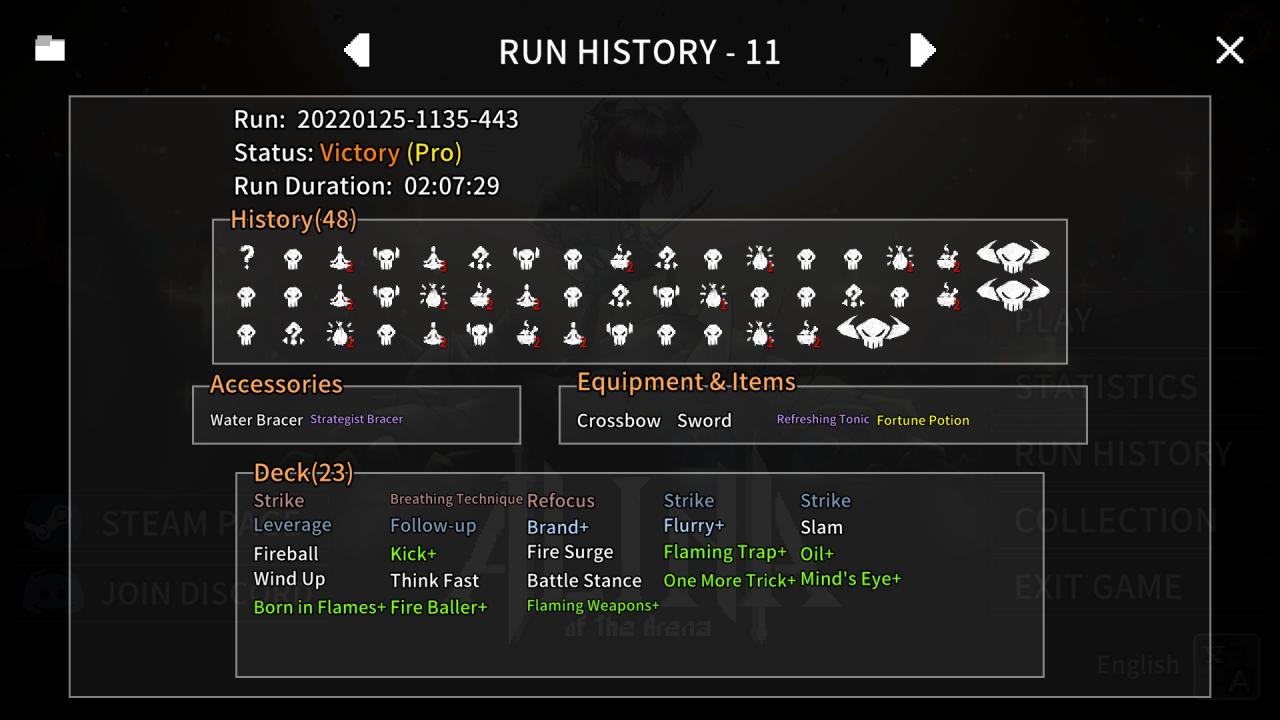
The Firestarter actually started as a pure skirmisher deck, but I switched focus in Arena 2 because fire-based cards kept showing up and I’d wanted to try a fire build for a while.
The trouble with fire builds is that they are inherently reliant on specific cards. A good card might only stack an additional three burn on an enemy, which is like providing six damage over a period of three turns if you don’t double-down on stacking it.
This isn’t as bad as it sounds because fire damage doesn’t scale linearly due to the way that it stacks. A 3-burn card will deal 6 damage if left alone, but when you immediately add another 3 burn, it instead deals 21 damage over six turns. Add another one on the same turn, and suddenly it deals 45 damage over 9 turns.
As a result, fire builds are very reliant on Brand to give them faster scaling. A single Brand will turn a low-power flame attack into a deadly weapon with very short turnaround time. Oil is also helpful, as it can quickly turn an enemy into a conflagration of melted flesh – but if you have the choice between the two of them, Brand is the engine that makes this build work.
I did not take Combust primarily because I was more worried about the arena bosses than the basic enemies, who were easily getting knocked around by Kick and Fireball to prevent damage.
You’ll notice that I only took Refocus and Breathing Technique as block options here, and in truth I took them only for their deck control potential. (Born in Flames was taken because by the endgame I was setting most of the arena on fire.) Given that my previous skirmisher builds still provided fair to large amounts of block, I thought it might be nice to try a build that was undeniably not dependent on block to survive. But that did necessitate taking Mind’s Eye to avoid the final boss’s judgement attack, as flame damage does not decrease block.
Two things to note:
1. If you try to play a firestarter deck, it also helps to have a way to force enemies to stay on flaming tiles. They will increase your burn stacks and increase your damage accordingly.
2. Please don’t try a firestarter deck as a newcomer, as it’s very finicky to get going compared to other, more traditional decks. I took the most damage by using this deck than any other. Fire builds can be a lot of fun and very rewarding, but at least get a win in using a more beginner-friendly method first.
With that said, just for fun and in no way to diminish what I just said about how finicky fire builds can be, have a picture of the final boss about to take 500 damage and perish from Burn.
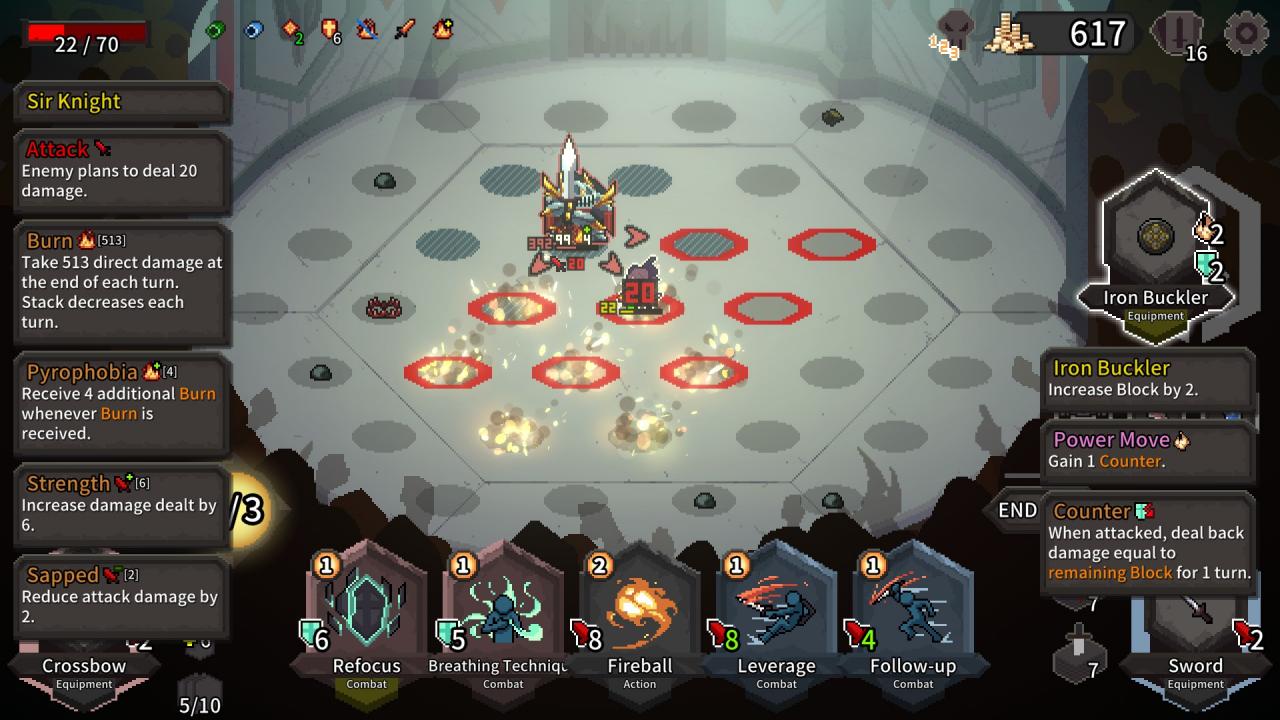
Thanks to Sir Slush for his great guide, all credit to his effort. you can also read the original guide from Steam Community. enjoy the game.