Introduction
I have gone through the Winter campaign twice with each deck, and probably close to ten times on War of the Branches with each as well, with a win rate of around 90%. While no deck is perfect and small tweaks have been made over time, I am quite happy with the state each one is now in. Feel free to make adjustments as you see fit, or use them as inspiration for coming up with new decks! I’d be interested to hear any changes or different designs people come up with that are successful.
Finally, if you don’t want to read all the notes on the decks, the images for the deck lists should be all that you need to get started crushing Winter difficulty!
Overview of Deck Setups & Key Points
- This guide assumes you have the relevant class at level 30 and the required cards to assemble the deck. Winter difficulty is quite punishing, and having your class at level 30 is a very large boost to your ability to win. You can attempt a run under level 30, but it may be much harder and the deck may not function well or at all (if the required traits are not unlocked).
Similarly, if you are missing some of the cards the deck may not function well. Feel free to substitute any missing cards with those that are similar, but keep in mind that some cards (usually buffs) may be vital to the deck. - While not required for all of the decks listed below, it is highly recommended you rebirth the relevant class(es) and level back to 30 to unlock the option for unrestricted traits. The unrestricted traits option allows you pick any of the 9 class traits on level up, and you can pick duplicates. Some of the decks listed will need this option to work, while for the rest it will be a nice option, in case under certain circumstances they want to adjust the order their traits are picked up.
- While all the decks below can clear all Winter content and get S+ ranks each time, some are faster, tougher, or more technical to work with than others. In each deck overview I’ll note its Speed, Survivability, Ease of Play, and if Unrestricted Traits are required or not. I’ll also note the order of traits to select, and what nodes/paths you should be prioritizing in the War of the Branches mode.
Decks that are fast can typically clear encounters in a single turn, while slow decks may require several turns of setup or reacting to enemy attacks.
A deck’s Survivability is based on how easy it is for it to recover life & block or negate damage. If a deck can heal easily and often has an answer to dangerous First Strike encounters, its survivability will be high.
Ease of Play is determined by how much thinking is required on a turn-by-turn basis, and how much thought needs to go into set-up for future turns. If a deck can spam cards in rapid succession and win without worrying about almost any encounter or optimizing their card hands, the Ease of Play will be simple.
Magnor: The Warrior
Overview: An extremely tough deck that focuses on big shield bashes and defensive retaliation. Uses shields and health as resources to both deal and mitigate damage.
- Speed: Slow
- Survivability: High
- Ease of Play: Challenging
- Unrestricted Traits Required: No
- Traits: Shield Bearer > Underdog > Shrug Off
- WotB Pathing: Levels > Events > Card Shrines
(Click image to Zoom)
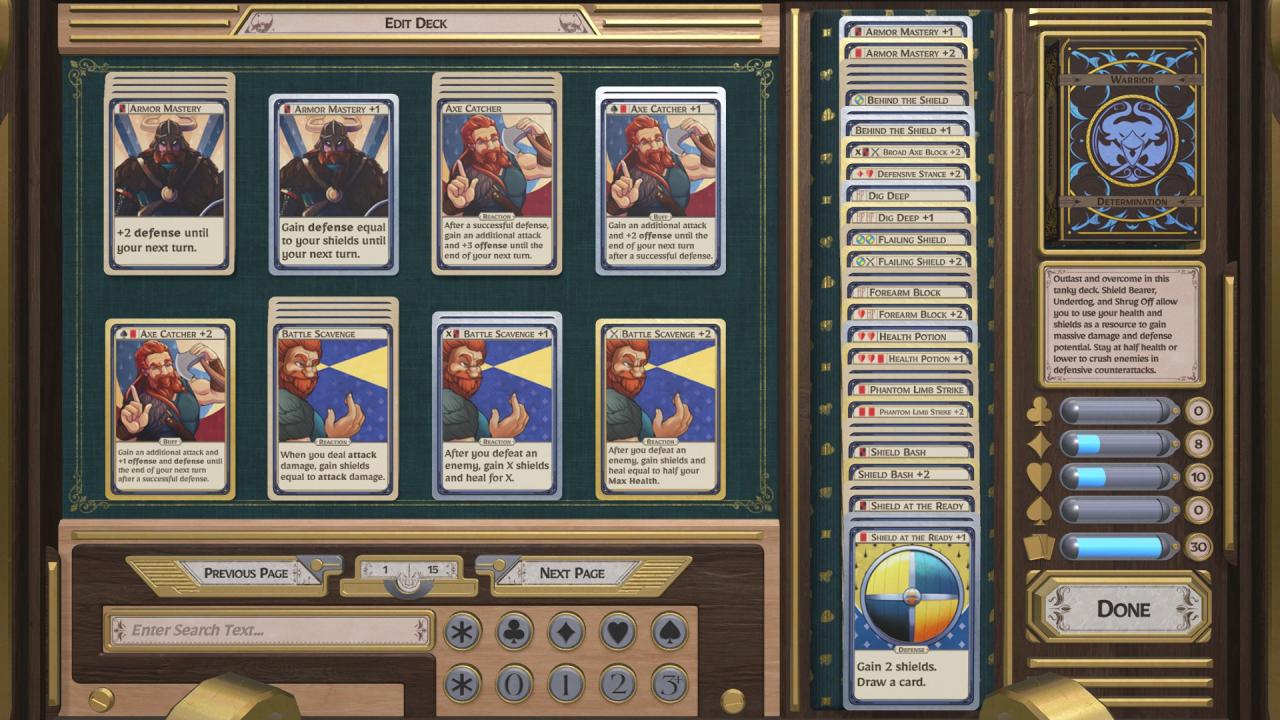
This deck utilizing the large number of shield-generating abilities Magnor has to reduce incoming damage and kill enemies in a single hit using shield bash, while also hitting back extra hard when successfully defending. Early on you’ll need to be careful not to overspend your ability cards or health before you have all your traits online. Once at max level, careful balancing with your health can lead to a rewarding experience as you deal massive damage and can survive even the toughest encounters.
Trait Selection
- Your first trait should be Shield Bearer to passively gain a shield each turn and potentially have up to two shields at each turn start. Use your shields to draw more cards using Behind the Shield and set your defenses up while steadily destroying enemies with Shield Bashes and Phantom Limb Strikes.
Your health is a resource, so don’t be afraid to use Dig Deep and Forearm Block to draw and defend. You can replenish mid-fight using Health Potion, and the +1 version also permanently boosts your max HP, so use it as often as possible, especially in War of the Branches. - Once you get your second level, pick Underdog. If you are on death’s door and have Unrestricted Traits available, you can pick Shrug Off instead for increased survivability, but you should almost never be in such a position. With Underdog, try to stay around half health or lower to take advantage of the double damage. This is a massive boost, and lets you deal heavy damage with everything from shield bashes to defensive counterattacks.
The game rounds health in your favor, so for example being at 7 HP out of 13 Max HP will enable the double damage. It can be beneficial to let some attacks through to dip your HP halfway and set up your damage boost. - At level three, pick Shrug Off (unless you picked it earlier to survive, in which case pick Underdog). This drastically boosts your toughness and can let you outright ignore some attacks, allowing you to cycle low-value cards rather than trying to match them to negate an incoming attack. You really should try hard to keep yourself at half health or below now, as the benefits far outweigh any risks. So long as you are below half HP and haven’t wasted your defensive abilities, you’ll be practically invincible against any encounter, even Invernus.
Some extra tips for the deck:
- Defensive Stance +2 is a major buff that lets you defend more easily and deal high defensive damage. Dig for it and try to apply it asap.
- Armor Mastery +1 and Armor Mastery +2 compliment each other very well, especially with Defensive Stance on. These two cards alone can let you set up turns with 5+ shield and 8+ defense, trivializing the following enemies’ turn.
- Flailing Shield and Flailing Shield +2 will deal 6 & 8 damage respectively to all enemies once you have Underdog active, allowing you to breeze past most multi-enemy encounters.
- Between the Behind the Shield & Dig Deep cards, you’ll often be at the max ability hand size of 6 cards. Don’t be afraid to throw out a card or two to deal chip damage or add extra shields and free up your hand. You’ll cycle back to your cards often, so use those bashes and limb strikes!
- The Hero Ability Prepare should be used almost every turn to throw out low-value cards and draw into your Kings, Aces, and Jokers. You can also use it to dig for Hearts to use your Health Potions.
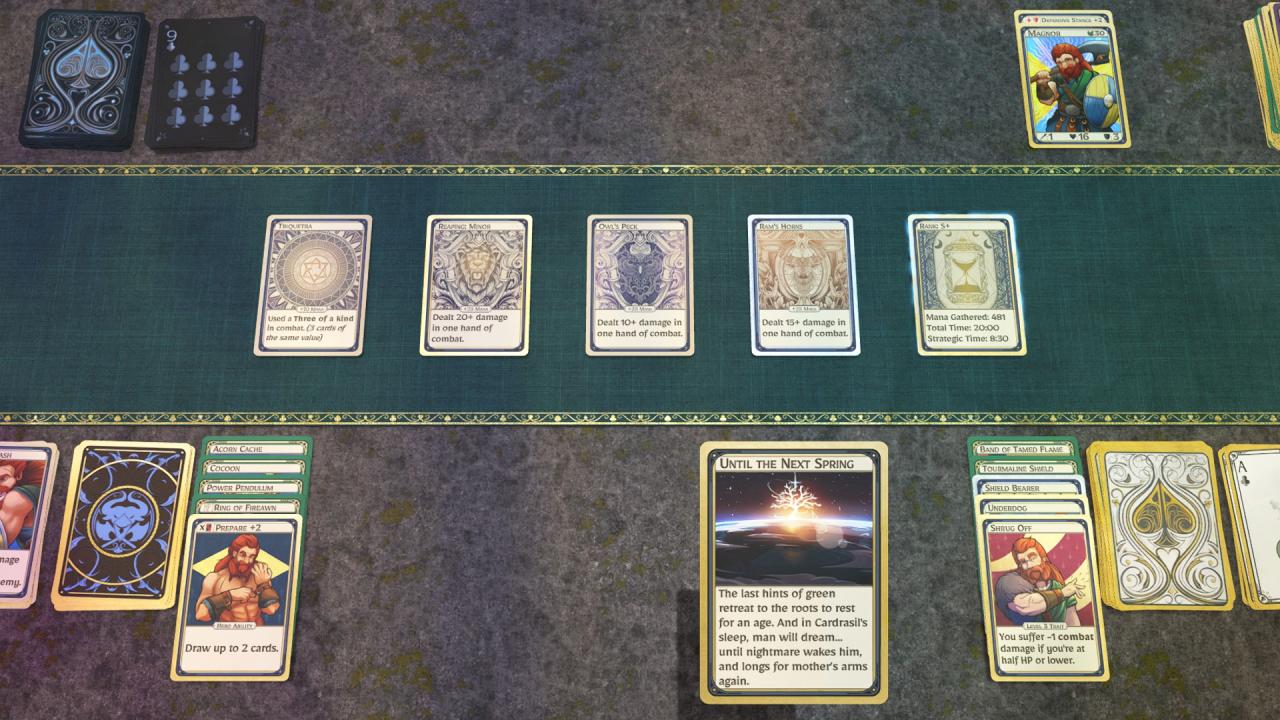
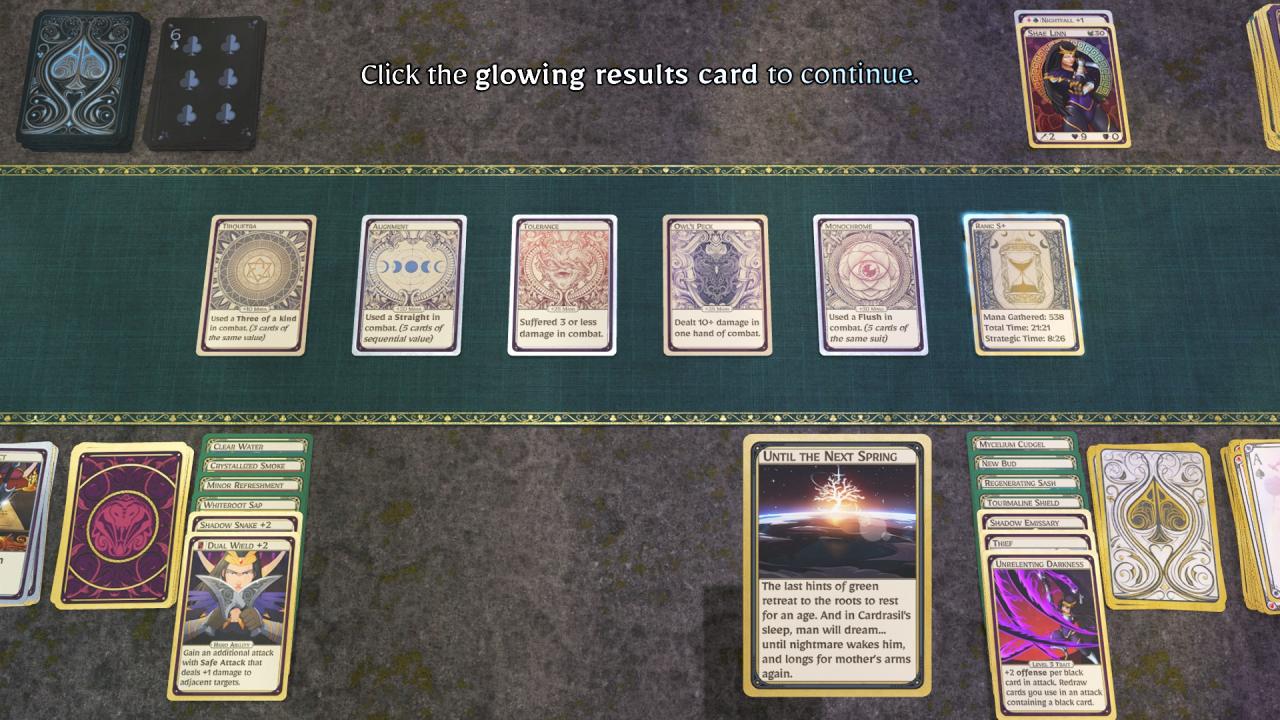
Example win with this deck in Winter War of the Branches (Click to Zoom)
Shae Linn: The Assassin
Overview: A powerful control deck that continually keeps enemies tapped out while dealing heavy damage with double attacks and constant flushes.
- Speed: Medium
- Survivability: High
- Ease of Play: Challenging
- Unrestricted Traits Required: No
- Traits: Shadow Emissary > Thief > Unrelenting Darkness
- WotB Pathing: Levels > Events > Ability Shrines > Merchants > Card Shrines
(Click image to Zoom)
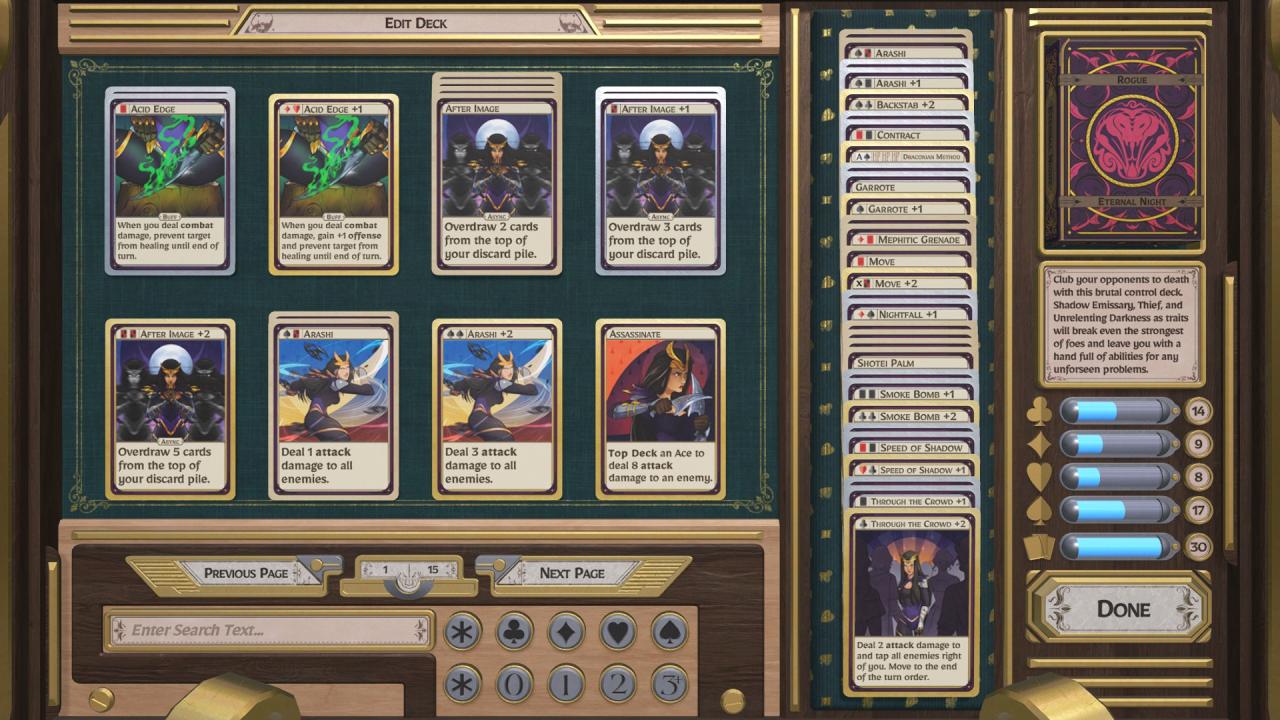
A particular favorite of mine, this Shae Linn deck is all about control and steady damage. Whether against one enemy or a group, your opponents will be tapped almost all the time from your abilities and attacks, and you’ll have the tools to recover from turns when they are not. Nightfall +1 is the key card(s) of this deck; this buff lets you turn your red cards into clubs or spades, letting you attack with constant flushes, easily cast abilities, and tap enemies with your red-turned-club card combos.
Contract lets you recover health, and Smoke Bomb lets you avoid damage altogether.
Against particularly challenging enemies, Garrote can negate their troublesome traits, while Draconian Method lets you end them instantly (or at least one of their phases). Use Through the Crowd as another method of tapping and damaging groups, and Move to set yourself back to the start to do it all again.
Trait Selection
- Your first trait should always be Shadow Emissary. This allows you to deal one extra attack damage with clubs, and more importantly lets attack damage with clubs tap enemies. This is a massive survivability boost, and allows your Arashi cards to tap all enemies (and do one extra damage) when you use a club to cast them.
During your first few encounters, the deck is in its most vulnerable state without your Nightfall buff and other traits, and you should do whatever you can to mitigate damage and dig for Nightfall. Do not be afraid to use your Trump card to negate several incoming attacks you would take damage from in the early game; once you have Nightfall and another level, the deck will lock down most encounters and leave you constantly in control. - Once you reach your second level, you should probably pick Thief. However, if you have Unrestricted Traits enabled and have Nightfall in your hand or on Shae Linn, go for Unrelenting Darkness first instead. Nightfall is a critical card in the deck, and Thief lets you draw to it faster. If you already have Nightfall, Unrelenting Darkness lets you overwhelm enemies with your high offense and constant card draws to replenish your attacks and as fuel for your abilities.
Otherwise, Thief will let you keep a constant hand full of options by letting you draw up to two extra abilities each turn. This gives you the freedom to cycle ability cards more aggressively and end encounters with a full hand for merchants and any dangerous encounters you go into next. - For your third level trait, select Unrelenting Darkness unless you did so at level two, in which case you’ll pick Thief. Unrelenting Darkness lets your flushes and even singles or doubles reduce enemy defense stats to almost nothing, and lets you draw back all cards used in the attack, so long as one of them was black. It also lets you draw cards when using attack abilities that cost black cards, letting you cycle low-value cards easily. Combined with Nightfall, your attacks will often be a flush of clubs, followed by your hero ability Dual Wield to attack with a single high-value club or pair of clubs to deal even more damage and tap out attackers.
The Thief trait pairs well with your powerful offensive attacks, allowing you to draw multiple abilities each turn to have a hand full of cards to handle whatever issues come up. At this point, only First Strike or the Indomitable encounter ability can keep you from cruising to the end of any encounter without worry, but Smoke Bombs will handle the odd situation that comes up from that, so keep one or two of them in hand!
Some extra tips for the deck:
- In War of the Branches, many Events have positive outcomes for this deck, so seek them out.
- Draconian Method has a difficult casting cost, but between Jokers and Nightfall making your Red Aces count as Spades, you’ll have several ways to use it. It should be one of your Ability Shrine targets to reduce its cost.
- Draconian Method can instantly end an encounter with Invernus, so try to keep it in hand before you face it. If Invernus resists, you do not pay the 3 HP life cost!
- If you are starting your turn at the end of the turn order (typically from using Through the Crowd), you can use Move to return to the start of the turn order and take back-to-back turns! This won’t work if you just moved to the end of the turn order (ex: casting Through the Crowd and Move back to where you were in one turn doesn’t give you an extra turn).
- As annoying as cancelling a reaction can be every time you attack with Garrote in hand, it is an incredibly useful tool to nullify dangerous or annoying enemies and should be kept for those encounters. That said, there are three of them in the deck, so spend them whenever they seem helpful, but try to keep one before boss encounters.
- Ability Shrines should be pathed toward to help make your critical cards cheaper or free, such as Smoke Bomb, Draconian Method, Speed of Shadow, or Mephitic Grenade.
Example win with this deck in Winter War of the Branches (Click to Zoom)
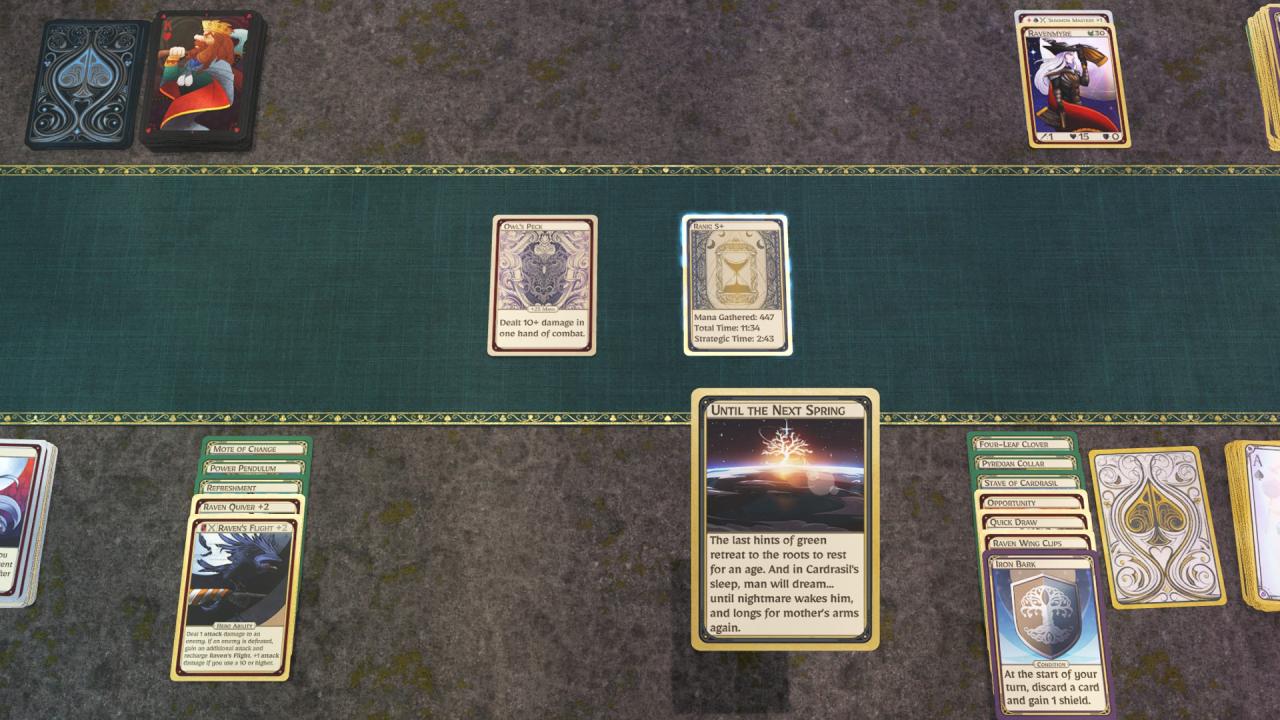
Nazim: The Mage
Overview: An explosive ability deck that can keep enemies tapped while dealing massive damage through Nazim’s high-powered spells.
- Speed: Fast
- Survivability: Low
- Ease of Play: Medium
- Unrestricted Traits Required: Yes
- Traits: Shamal > Evocation > Evocation
- WotB Pathing: Ability Shrines > Levels > Merchants
(Click image to Zoom)

This mage deck uses the Unrestricted Traits option to grab Shamal as its first trait, turning many difficult to cast spells into cheap or free ones! The deck has multiple ways of tapping all enemies to stall for turns, letting you use the Hero Ability Unearth and the Flash of Insight cards to replenish your abilities quickly. Encounters will often last only a turn or two as the deck has many hard-hitting spells for both single and multiple threats.
Use Armor of Frost to survive chip damage, and defensive spells such as Polar Wall and Wild Mana to block in the rare event you are attacked. As you level up and gain Evocation, your spells become even stronger, letting you end encounters rapidly. Arcane Volley +2 is our ultimate spell, and should be made free and copied in War of Branches to get as many as possible into the deck. With two Evocations, a single Arcane Volley will deal 18 damage across an encounter!
Trait Selection
- Your first trait must be Shamal to take advantage of all the otherwise expensive spells in this deck, such as Ice Javelin. This trait essentially makes the deck work, and lets you cycle through your abilities at an excellent pace.
- Your second & third traits should be Evocation. This is a great damage boost to nearly the entire deck, and allows your spells to rip through any enemy encounter. Evocation scales especially well with mass damage spells such as Fireball, and Arcane Volley +2. Despite their usefulness, your second and third traits are not vital to getting the deck to work well, and you should instead first focus on pathing to Ability Shrines to reduce the cost or copy powerful cards (such as Arcane Volley).
Some extra tips for the deck:
- Wild Mana is a fantastic card for defensive purposes, allowing you to turn any two cards in your hand into Aces (for free with Shamal). It should be saved along with Polar Wall for dealing with First Strike encounters as the deck has little else to handle them.
- Armor of Frost can help prevent damage, and casting your second one while you have it equipped lets you tap all targets, acting as an extra Frostwave +1. This effect will also work against enemies that normally nullify spade or black cards!
- This deck will draw two abilities each turn with the Hero Ability Unearth and can replenish quickly with multiple Flash of Insight cards. While it is good to stay close to max hand size for merchants and keeping your options open, you’ll redraw soon enough, so don’t hoard your abilities!
- This deck can keep enemies locked down for multiple turns in a row using the many cards that tap targets. You can use this to stall and redraw back to full over several turns as needed, or to help dig for Arcane Volley +2 so you can start reducing its cost/copying it at Ability shrines.
- In War of the Branches, once you have an Arcane Volley +2 in hand, keep it and reduce its cost to free at the first Ability Shrine, and then keep it in hand for the next Ability Shrine to copy it. Always try to keep one Volley in hand if you are approaching an Ability Shrine to duplicate it. Having several free copies in your deck at the end game can trivialize even the toughest encounters!
- Seal of Set can negate dangerous or annoying traits and trivialize many fights. Try to keep one in hand before boss encounters.
- Card Trick +1 & +2 can help you cast abilities if your suits aren’t cooperating, and they can also let you attack easily with a Flush!
- Use Time Warp after casting a powerful spell to get it back, or to regain high-value cards or specific suits as needed.
- Merchants can sell you some powerful equipment, and any that take cards to activate are reduced in cost thanks to Shamal!
- This deck doesn’t have a way to regain HP mid-fight, so don’t forget to take rests when you are down a few health.
Example win with this deck in Winter War of the Branches (Click to Zoom)

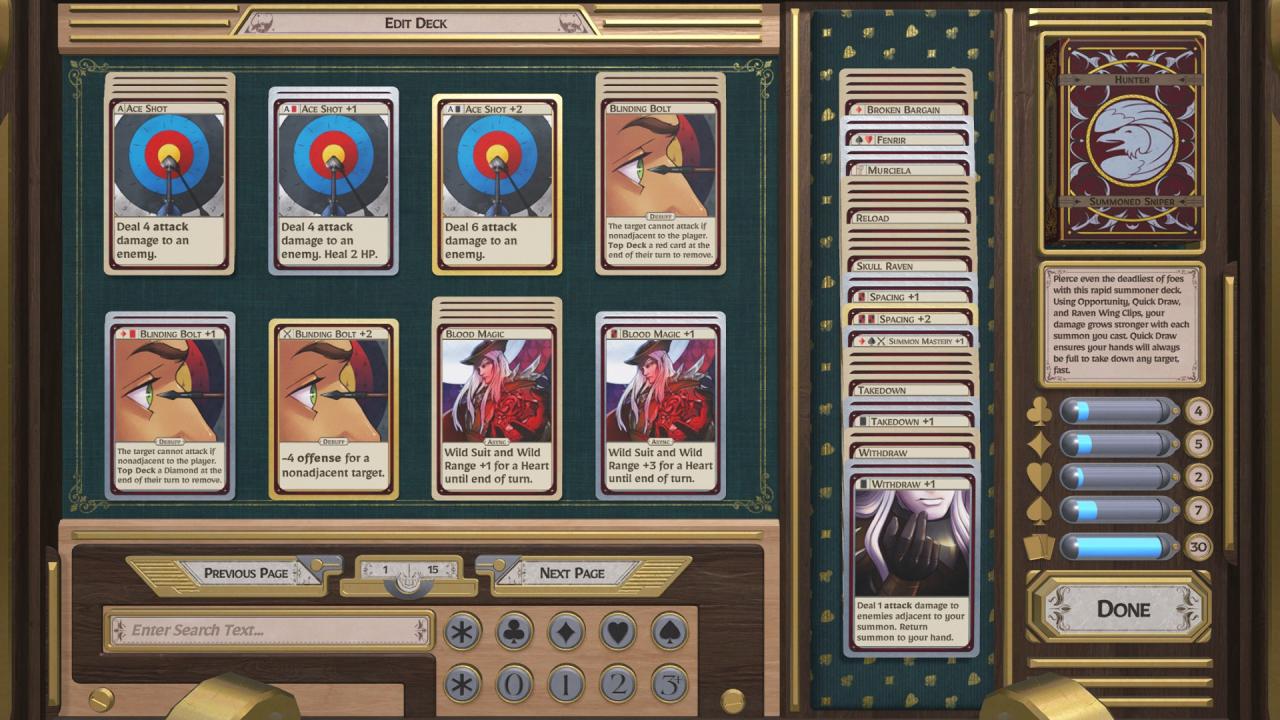
Ravenmyre: The Hunter
Overview: An incredibly fast blitz deck that throws out summons, Raven’s Flight attacks, and damage abilities to swiftly take out any enemy encounter in a single turn.
- Speed: Fast
- Survivability: Medium
- Ease of Play: Simple
- Unrestricted Traits Required: No
- Traits: Opportunity > Quick Draw > Raven Wing Clips
- WotB Pathing: Levels > Ability Shrines > Merchants
(Click image to Zoom)
This hunter deck utilizes the synergies between the traits Opportunity, Quick Draw, and Raven Wing Clips to continuously damage and increase the damage of all your attacks. Playing summons deals damage, which increases your subsequent damage, and allows you to draw card after card to refill both your regular and ability hands to full.
The deck starts out a bit slower and more fragile, but quickly gains a lot of speed at its second trait. Once the deck has all three traits, nearly every encounter will be finished in a single turn in record time, no matter how many targets or how dangerous they are. Multiple enemies actually make the deck ramp up faster thanks to Opportunity hitting two targets at once!
Trait Selection
- Your first trait should usually be Opportunity, however, if you have no summons in your opening hand and Unrestricted Traits is enabled, pick Quick Draw instead to let you cycle to them faster. Summons are a major part of the deck’s damage potential even without Opportunity, so you need them available.
Otherwise, use Opportunity to whittle down enemy encounters while utilizing your Hero Ability Raven’s Flight to snipe low HP targets. Don’t forget that using a 10 or higher card this way does 2 damage, and a kill with the ability refreshes it. You can take out multiple enemies and save yourself cards and health with good use of the Hero Ability.
The deck has almost no defensive cards and is most vulnerable at this stage, so path to your next level asap. Take out targets before they can attack and use Spacing to prevent damage and Murciela to recover HP.
Despite the lack of defense, your offensive strength and high starting health will almost always be enough to see you through to the next level without much concern. - Your second trait should be Quick Draw, unless you picked it for your first trait (in which case you’ll select Opportunity). Quick Draw lets your Raven’s Flight and standard attacks draw abilities, and also lets your Takedown and Reload cards cycle themselves. The deck will almost play itself at this point, cycling hands and quickly dealing steady damage while giving most encounters no chance to respond. Get your final level as soon as you can to transform the deck into a damage-dealing monster.
- Your final trait will be Raven Wing Clips. This allows your attack damage to boost your offense stat, and more importantly your subsequent attack damage each time. This will quickly reach ridiculous numbers, especially in multi-enemy encounters as your Summons (thanks to Opportunity), Raven’s Flight Hero Ability, and attack damage abilities all scale higher and higher with each card you play. Due to Quick Draw, your hand will almost always be topped off and you can spam as many cards as you want. If you want to see Invernus fall in a single turn incredibly fast and without any chance to Resist, this deck with all three traits active will deliver.
Some extra tips for the deck:
- Early on, use Skull Raven to replenish your abilities. A Skull Raven can draw multiple cards in the right combat encounter.
- Broken Bargain is incredible at wiping out encounters with multiple enemies before you have Raven Wing Clips online. If possible, try to combo it with Withdraw to both deal the exit damage, and save it for the next encounter.
- Summon Mastery +1 is not a vital buff, but it can help over time ensure that you can play your Broken Bargains and Fenrir cards when you want them, so try to get it active sooner than later.
- When you have the chance, take encounters with multiple enemies over a single one. Your traits all excel at hitting multiple targets and can finish encounters with them usually faster and safer.
- There isn’t much that this deck needs to path toward in War of the Branches aside from Level Ups. Ability Shrines and Merchants can help you out, but otherwise nothing is really needed to sprint to the finish.
- While it will rarely be needed, don’t forget to use your Raven Quiver Trump Card! It can be used defensively in the early game if you find yourself in a dangerous encounter to easily survive a round of enemy attacks and damage them instead.
Example win with this deck in Winter War of the Branches (Click to Zoom)
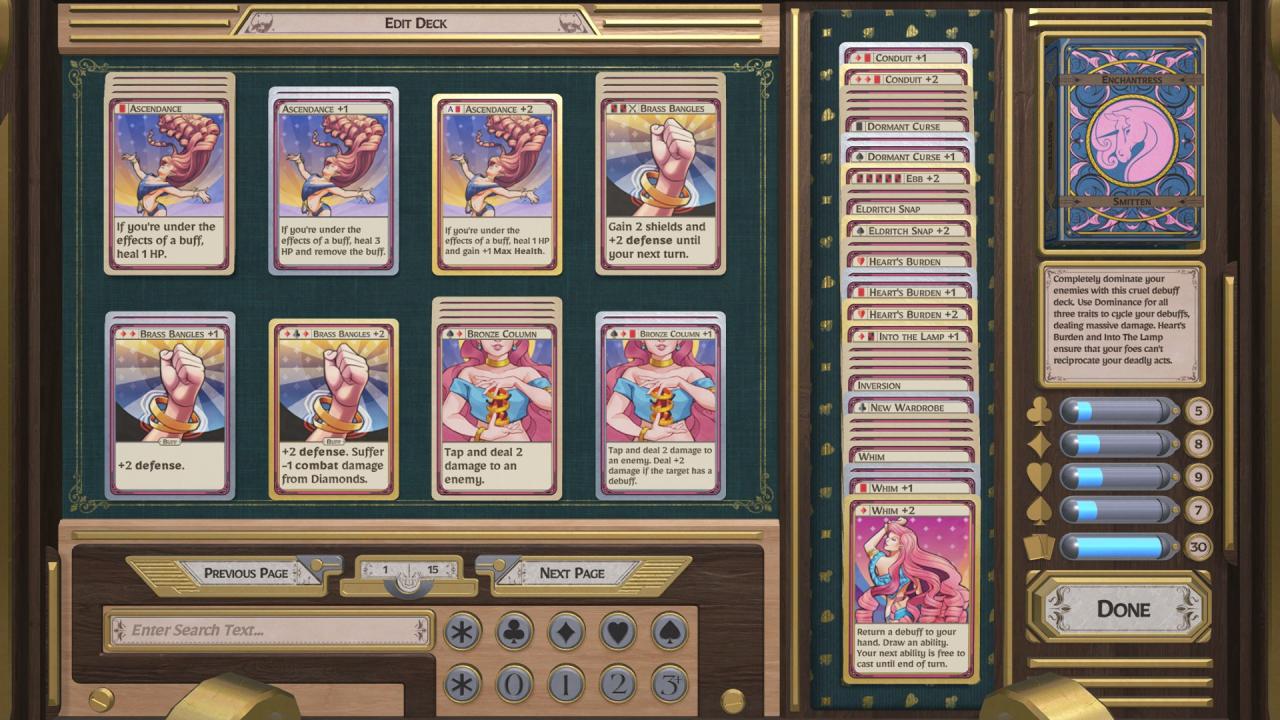
Leilah: The Enchantress
Overview: A deceptively fast and brutal debuff deck that cycles through abilities to deal huge damage all while being extremely well protected.
- Speed: Fast
- Survivability: High
- Ease of Play: Simple
- Unrestricted Traits Required: Yes
- Traits: Dominance > Dominance > Dominance
- WotB Pathing: Ability Shrines > Levels > Events > Merchants
(Click image to Zoom)
Another favorite of mine, this Leilah deck takes full advantage of the Unrestricted Traits option to select Dominance as our trait of choice for all three level-ups. In doing so, every time a debuff is applied to an enemy without one, they take 3 damage and the deck draws 3 new abilities. Removing a debuff also deals 3 damage, which can lead to a very swift victory when debuffs are applied and re-applied. Most debuffs have a cheap cost to cycle easily, and the deck has several ways to deal extra damage through Dormant Curse, Eldritch Snap, and Conduit +2.
Heart’s Burden cards let you easily recover missing HP, and Into the Lamp +1 is an incredible defensive buff that lets you ignore any amount of damage for a single ability card. Even at level 1, most encounters won’t last more than a single turn, but the deck’s defenses can easily deal with anything that lasts longer.
Ebb and New Wardrobe both let you replenish your ability hand if it begins to run low or you are out of debuffs to play, both of which should rarely happen. Only enemies with Resist like Invernus can cause trouble if they get lucky resist streaks, and even then the deck just needs a single debuff to land to redraw your hand.
Trait Selection
- For all three levels, select Dominance as the trait. As previously mentioned, this causes an almost deceptively huge pileup of damage very quickly, and the redraw from the trait is a massive boon. Even with just one level in Dominance, the deck still functions quite well, so in War of the Branches focus on hitting as many Ability Shrines as possible to reduce the cost of all the Debuff cards you can. Doing so will let you cycle through them even easier and end encounters faster.
The deck starts to really run wild once you get a second copy of Dominance, and your third copy will let you end encounters with lightning speed. There are plenty of good Events and Merchant equipment to get, so go to them when convenient, though neither are at all necessary to crush Winter difficulty.
Some extra tips for the deck:
- Aside from Ebb and New Wardrobe, nothing in the deck needs to be saved for the right moment. Play as many abilities as you can!
- Conduit +2 is excellent for wiping out packs of enemies in the early game before you can shift into high gear with multiple copies of your Dominance Trait. Try to reduce its cost in WotB and Whim it back to end those encounters quickly.
- Dormant Curse is the deck’s best debuff to apply, so focus on using Whim to recall them back to apply them over and over to take advantage of the extra damage they cause.
- Into the Lamp +1 can also help cycle your ability hand if you get very unlucky and have no debuffs and a full hand.
- Try to keep an Ebb and/or New Wardrobe in hand for the Invernus boss fights, as a string of unlucky Resists can lead to you having no debuffs to apply and no abilities to block using Into the Lamp +1. Both Ebb and New Wardrobe cards can be used as an emergency refill in such an event.
- Since this deck doesn’t typically use its cards to attack and can block or recover HP easily regardless of your hand, don’t forget your Fate Weaving Hero Ability can be used to Wild Suit a card to let you pay for an ability when you otherwise couldn’t!
Example win with this deck in Winter War of the Branches (Click to Zoom)

Thanks to Morthgarrow for his excellent guide, all credits belong to his effort. if this guide helps you, please support and rate it via Steam Community. enjoy the game.