This guide is a work in progress and will be updated frequently, as soon as possible, with tips, screenshots and more! Spoiler Alert!!!
Story Related Achievements (Hidden)
You will get an achievement for completing each of the 16 chapters of the game plus an additional one for completing all chapters of the game.
All story related achievements are unmissable!
 Under a New Sun
Complete chapter 1
 Newcomers
Complete chapter 2
 A Burden of Blood
Complete chapter 3
 Protector’s Duty
Complete chapter 4
 In our Wake
Complete chapter 5
 Leaving all Behind
Complete chapter 6
 Felons
Complete chapter 7

Complete chapter 8
 Tales and Revelations
Complete chapter 9
 Bloodline
Complete chapter 10
 The Cradle of Centuries
Complete chapter 11
 The Life We Deserve
Complete chapter 12
 Nothing Left
Complete chapter 13
 Healing our Wounds
Complete chapter 14
 Dying Sun
Complete chapter 15
 King Hugo
Complete chapter 16
 Knights!
Complete all chapters
Gameplay Achievements
There are 6 achievements that can be obtained during various chapters of the game, either by performing specific actions at given moments in the story or by continuously making certain actions throughout the entire game.
Some of them can be missed entirely and some can be achieved while progressing through the story, as they will detailed below.
Perfect shot (Hidden)
 Perfect shot
Shoot all the pine conesThis is the first achievement that can be unlocked during Chapter 1 – “Under a New Sun”, during objective “Defend King Hugo’s kingdom” when you have to shoot with your slingshot the pine cones thrown by Hugo into the river.You have to shoot all of them when Alicia can use her slingshot (the first one is not counted) as fast as possible, before the cinematic where the boy has to leave starts. If a pine cone is still in the water when the cinematic starts, the achievement will not unlock.
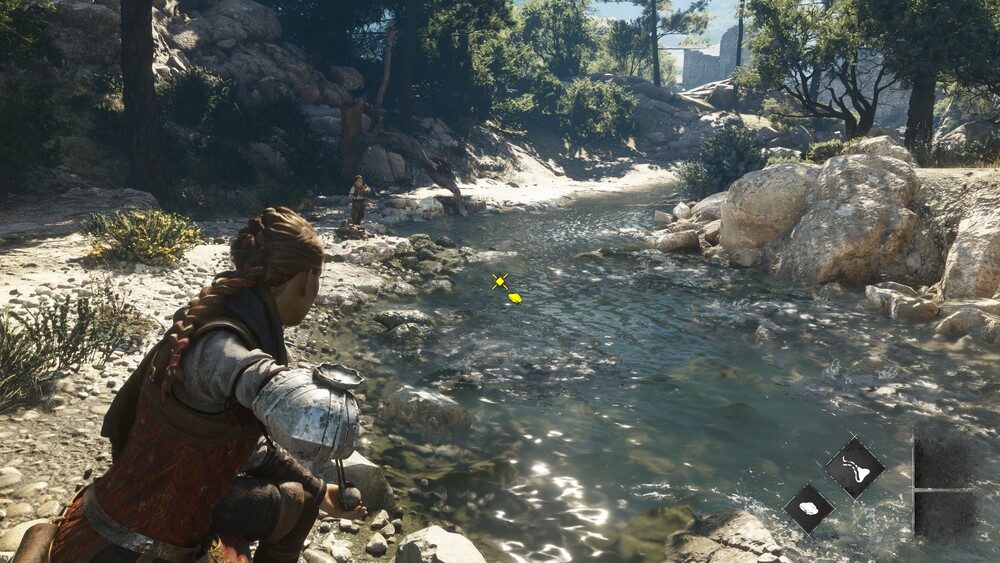
The achievement will unlock after the cinematic ends if you got all the pine cones.Note: If you miss any pine cone, quickly pause the game and quit to main menu BEFORE the cinematic ends. After reloading the save, you will be placed at the beginning of the objective and you can retry it until you destroy all of the pine cones.This achievement DOES NOT UNLOCK when attempting it on NG+.
Alchemist (Hidden)
 Alchemist
Craft 100 ammunitionsDuring chapter 2 you will learn to craft your first ammunition called “Ignifer”. From now on you can collect different materials and start crafting ammunition.
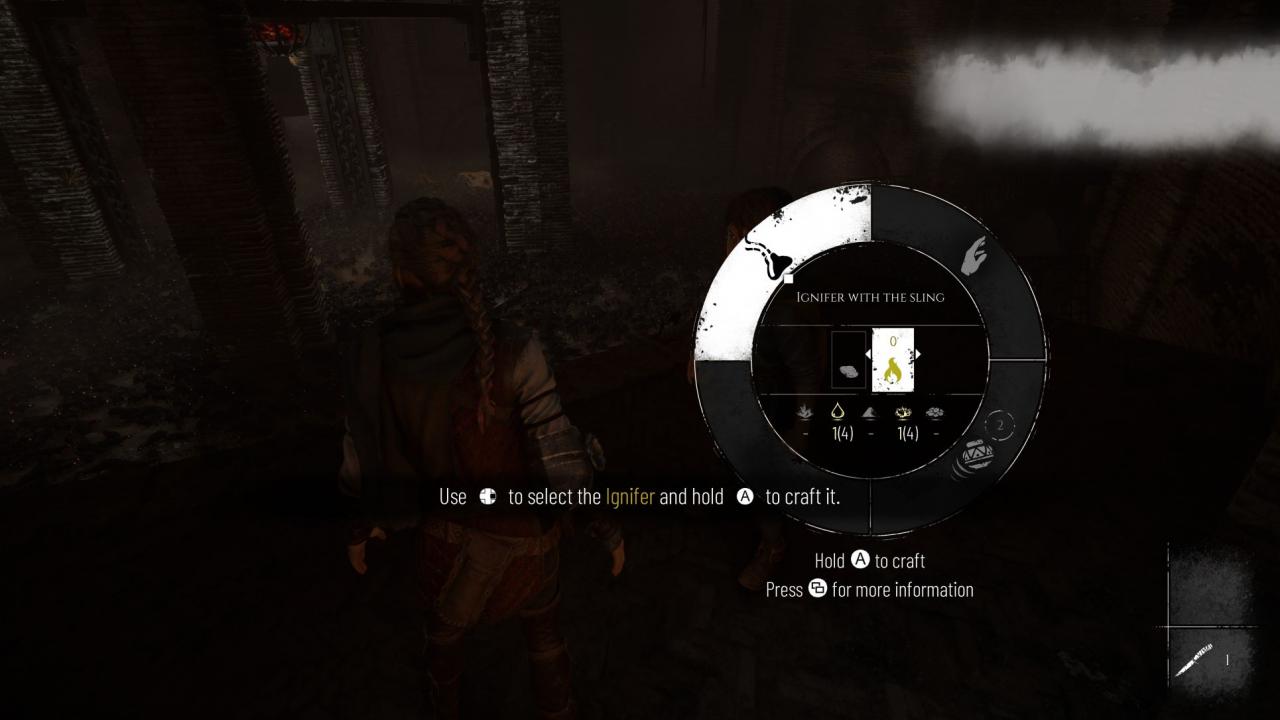 The achievement itself is pretty self explanatory, as you need to simply craft 100 pieces of ammunition (no matter the type) and you will most likely unlock it naturally, as you progress through the story. Throughout the game you will learn different recipes for different type of ammunition, such as Tar, Extinguis and Odoris.You should unlock this achievement during Chapter 4 if you collected all the crafting materials along the way and continued to craft ammunition as you used it.
Perfect throw (Hidden)
 Perfect throw
Successfully complete all throws in the Crowns game
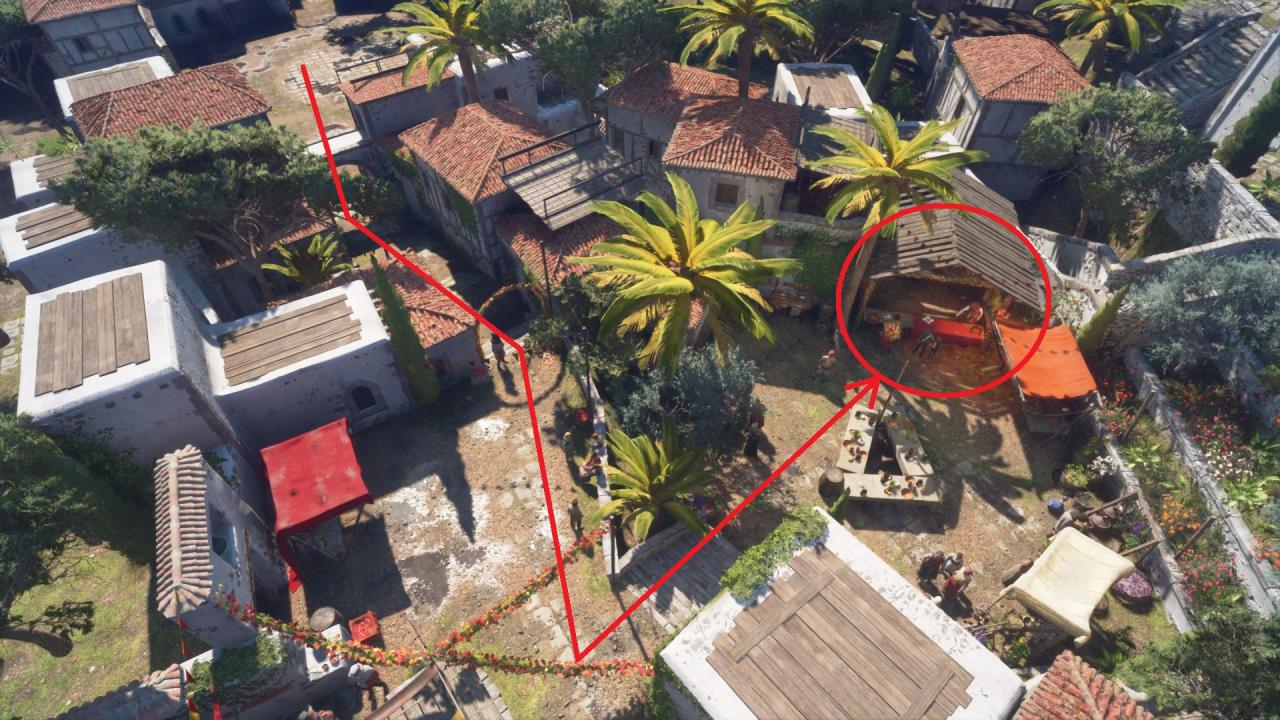 Interact with the stand in order to begin the mini-game and pick up the 4 pots from the table.To unlock the achievement you need to throw 4 pots through each of the 4 crowns and hit the coloured tarps behind them. Try to aim at the lower part of the crown until the trajectory looks like a dotted line at its end, as it’s going behind the crown. This way, you know for sure that the pot goes through the crown and hits the tarp.
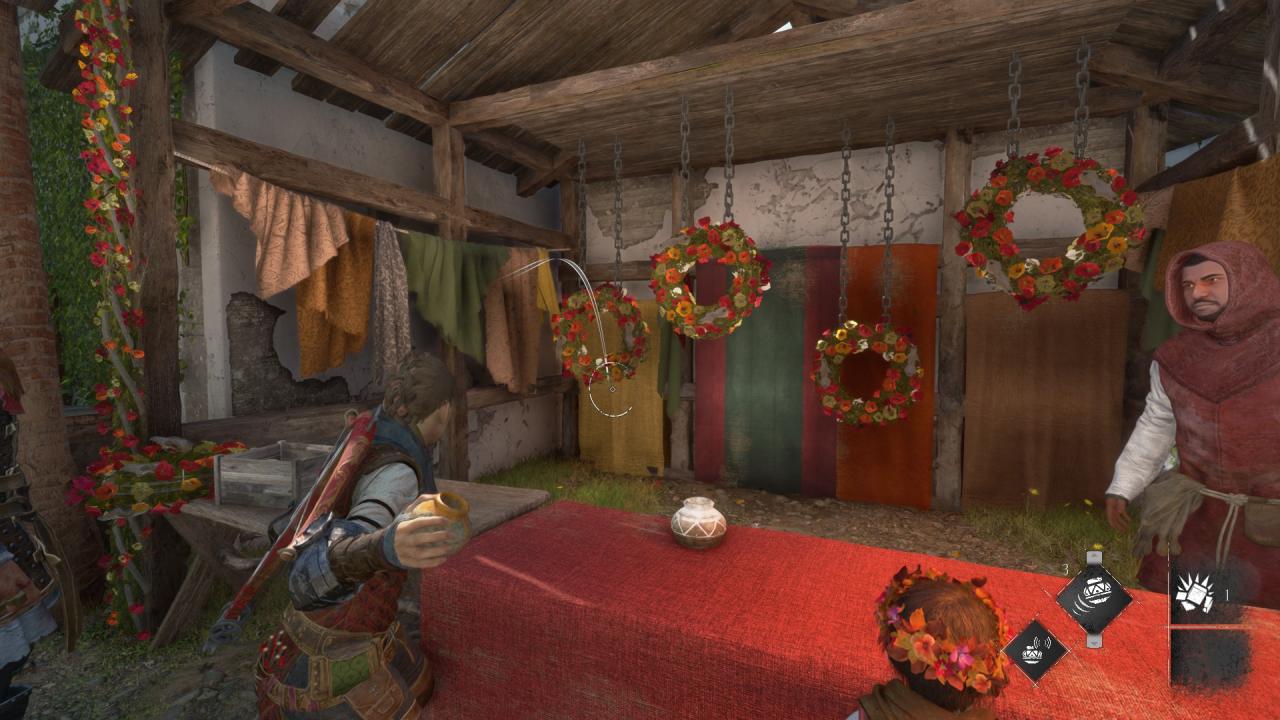
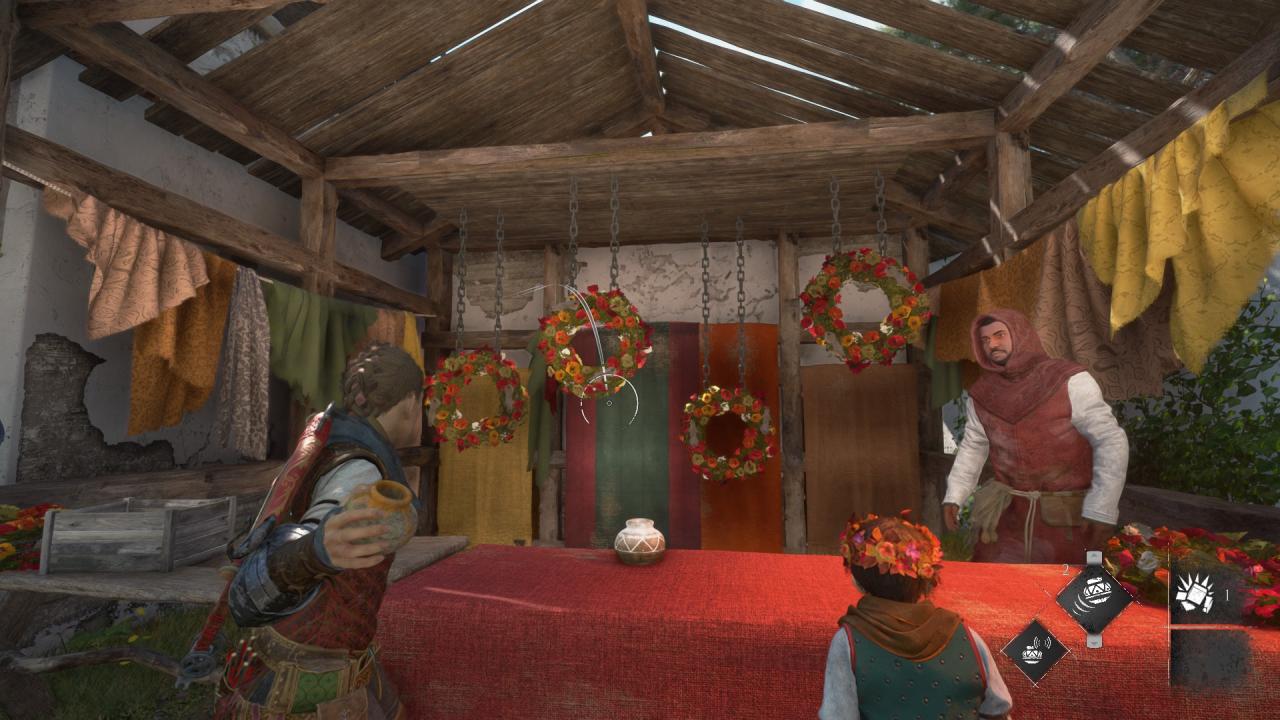
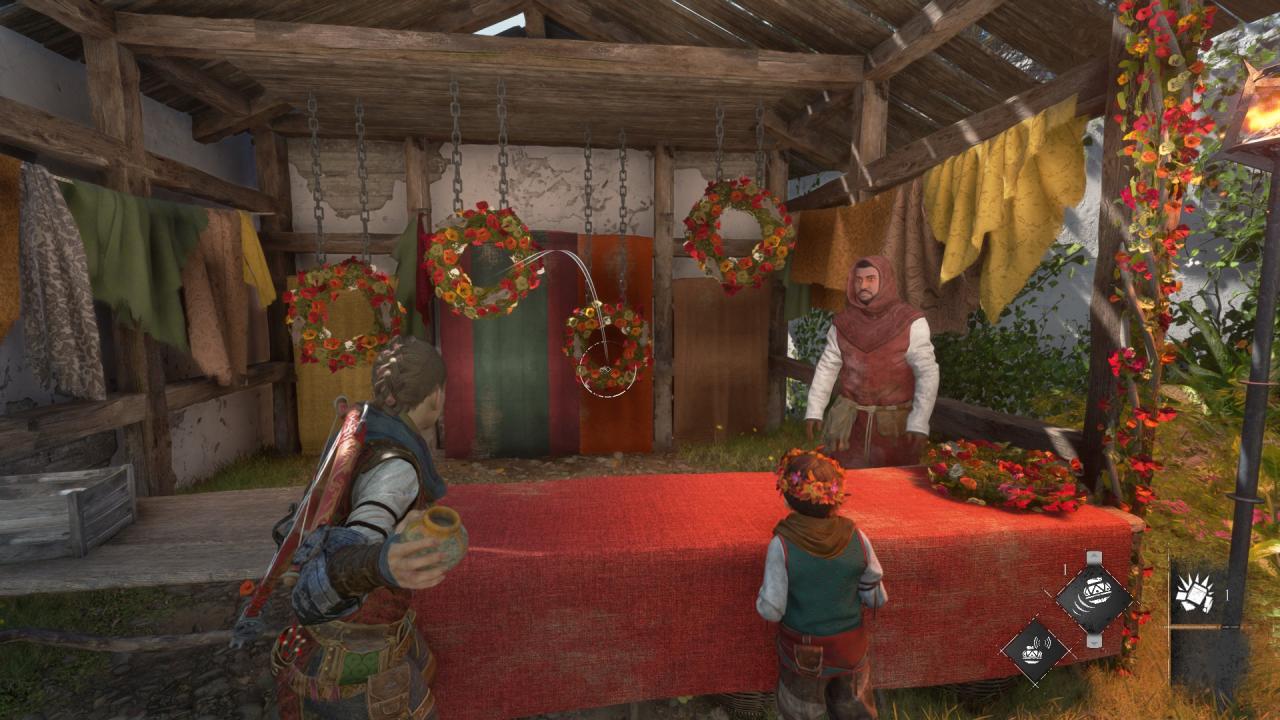
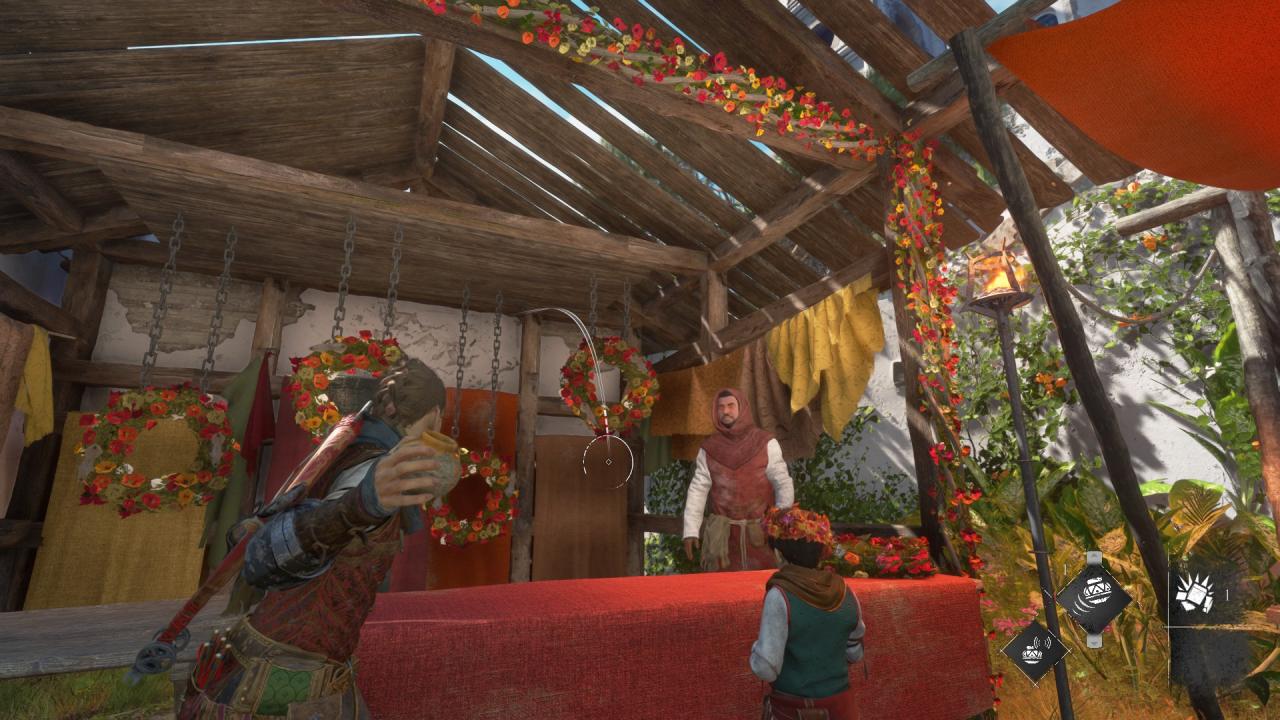 You need to perfectly throw the pots through each of the 4 crowns, from left to right, as to be sure to not throw through the same crown twice.When you successfully thrown the last pot, the Islander will congratulate you on your astonishing work and the achievement will unlock.Note: Playing this mini-game will also unlock the Souvenir #14 – Flower Crown.
Old protector (Hidden)
 Old protector
Interact with all the old protector’s items in the sanctuary
This achievement can be unlocked during Chapter 9 – “Tales and Revelations”, sub-chapter – “Phoenix”, during objective “Explore the sacred quarters”. For this achievement you need to interact with 16 items placed in various rooms around the sacred quarters.
After the cinematic ends, in which you enter the interior courtyard where the little child throne is located, follow Sophia and open the door towards the first room, where you will find the first objects that you need to interact with.
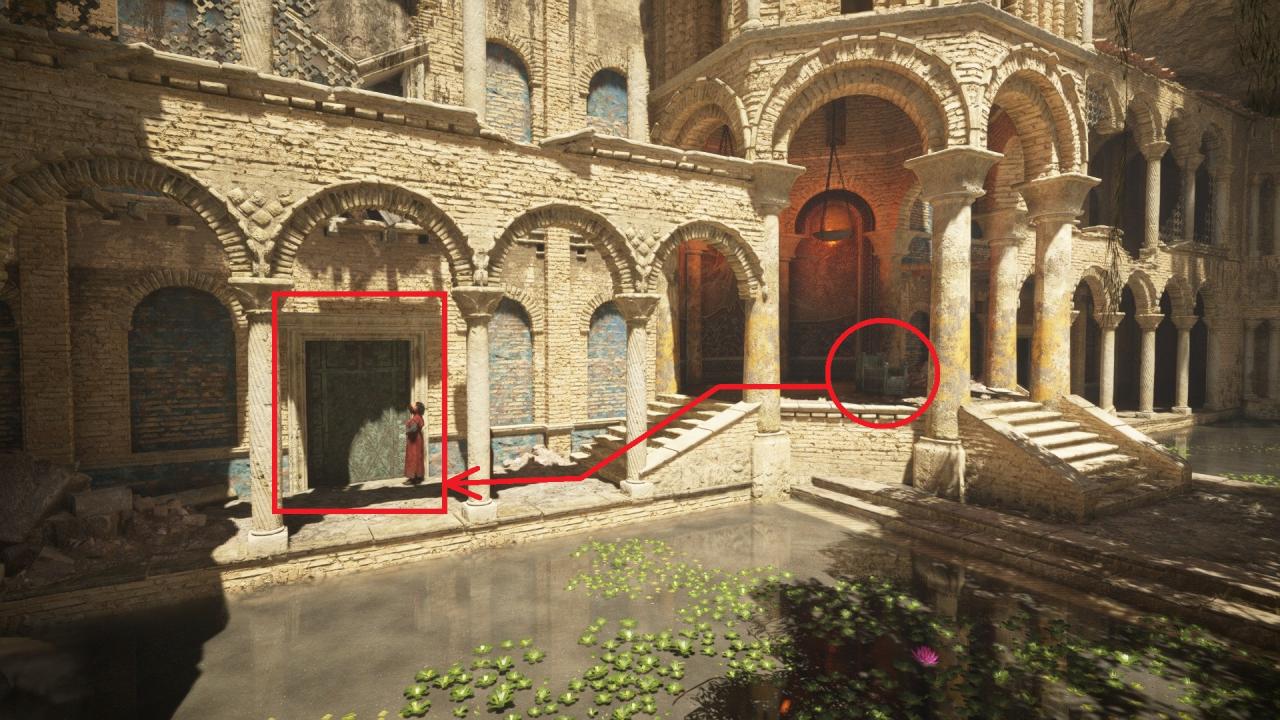
First room – 4 items to inspect:
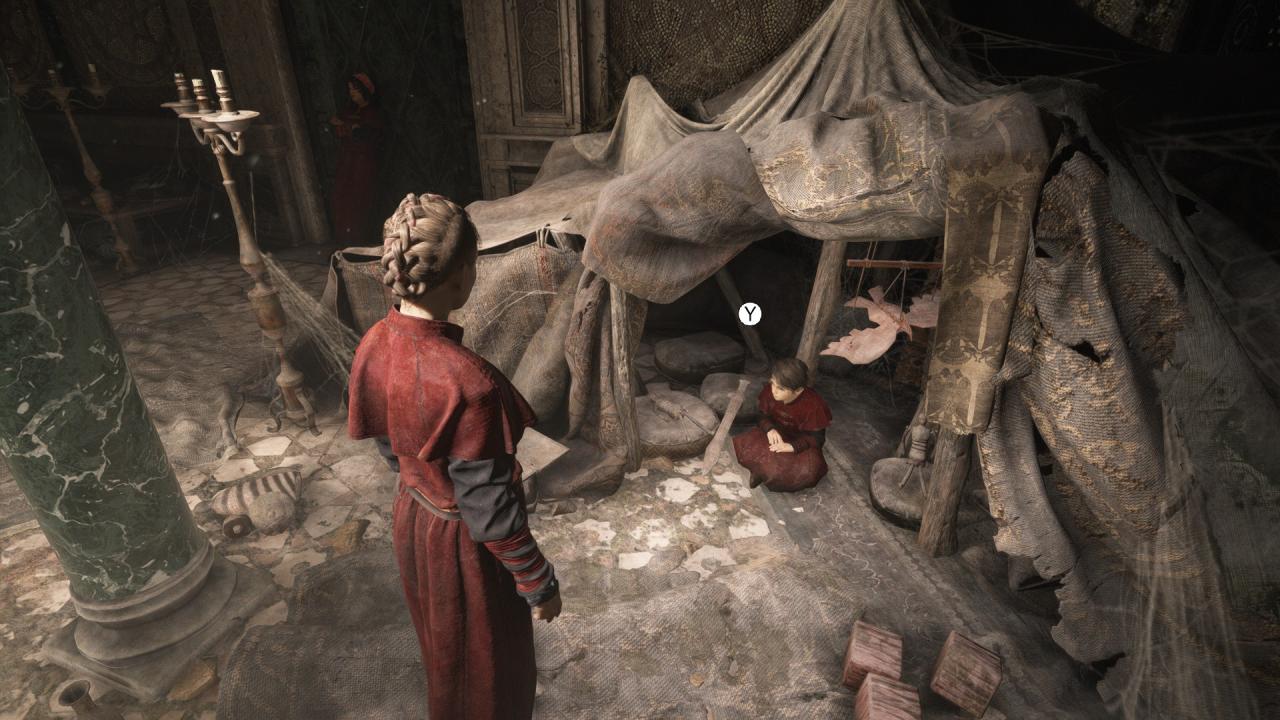
1. Child tent – Hugo will automatically go inside it and after that you can interact with it
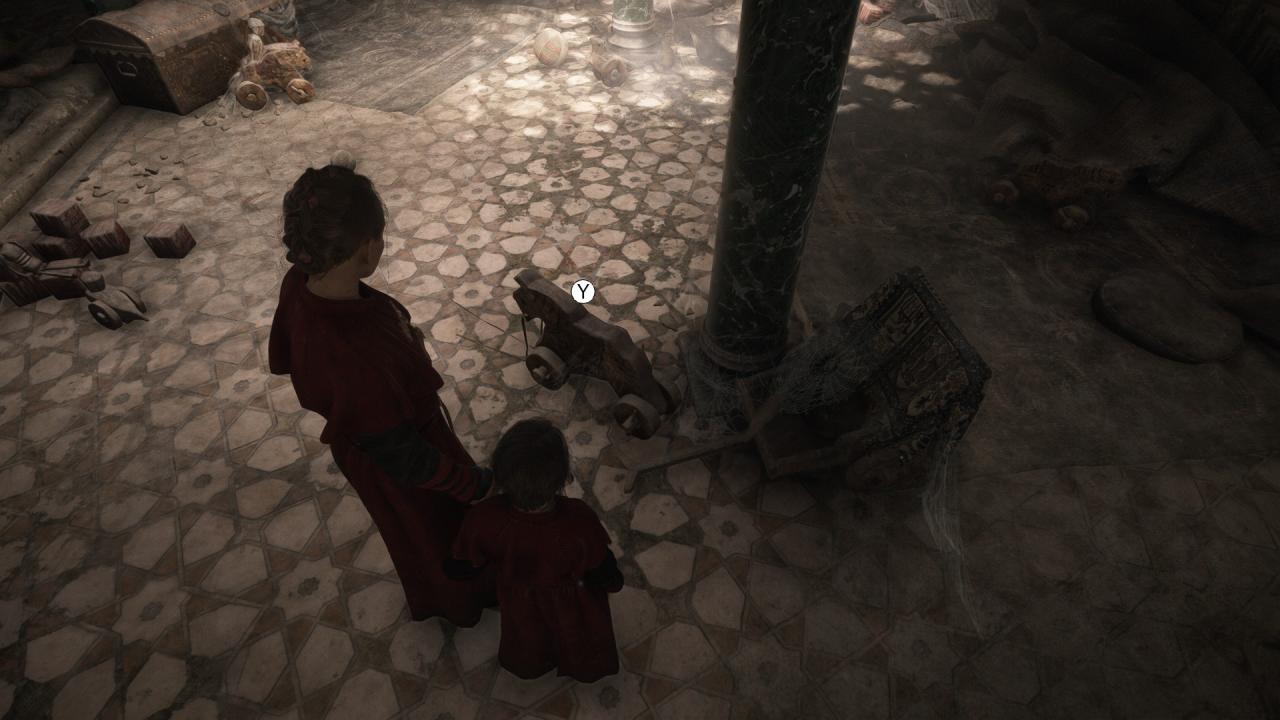
2. Wooden rocking horse
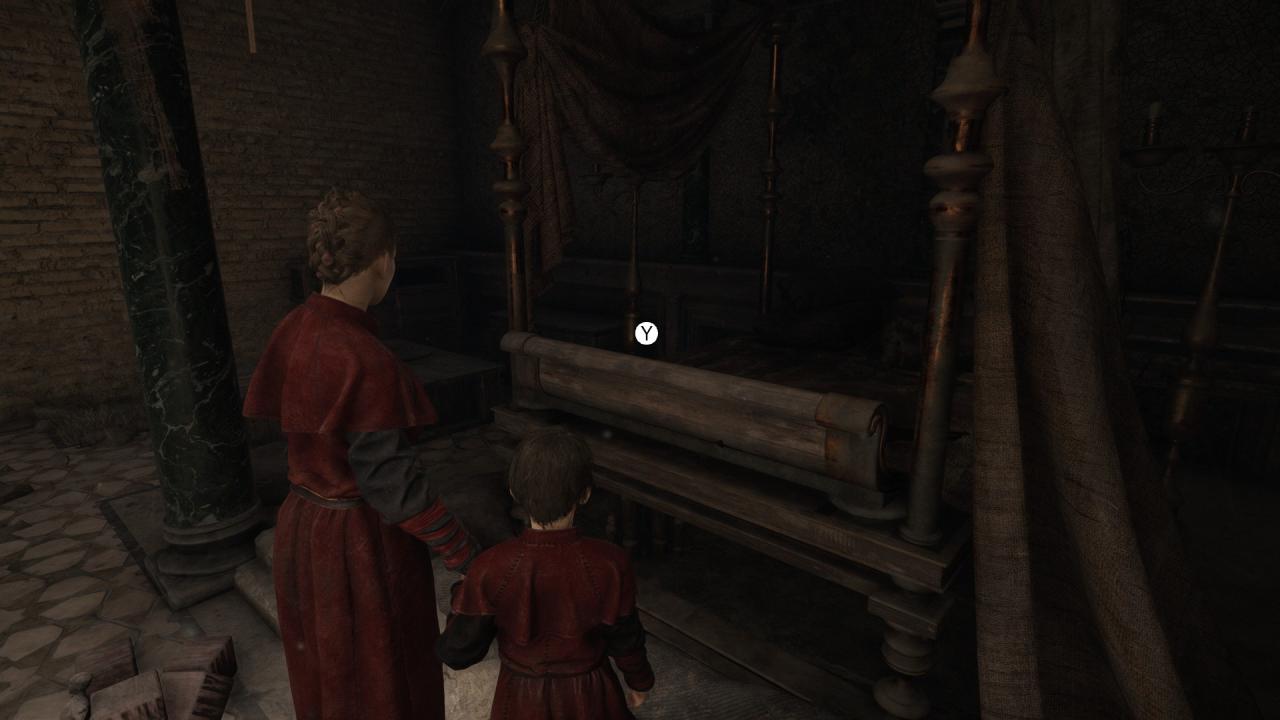
3. Child’s bed
4. Small wooden people dolls (prophets)
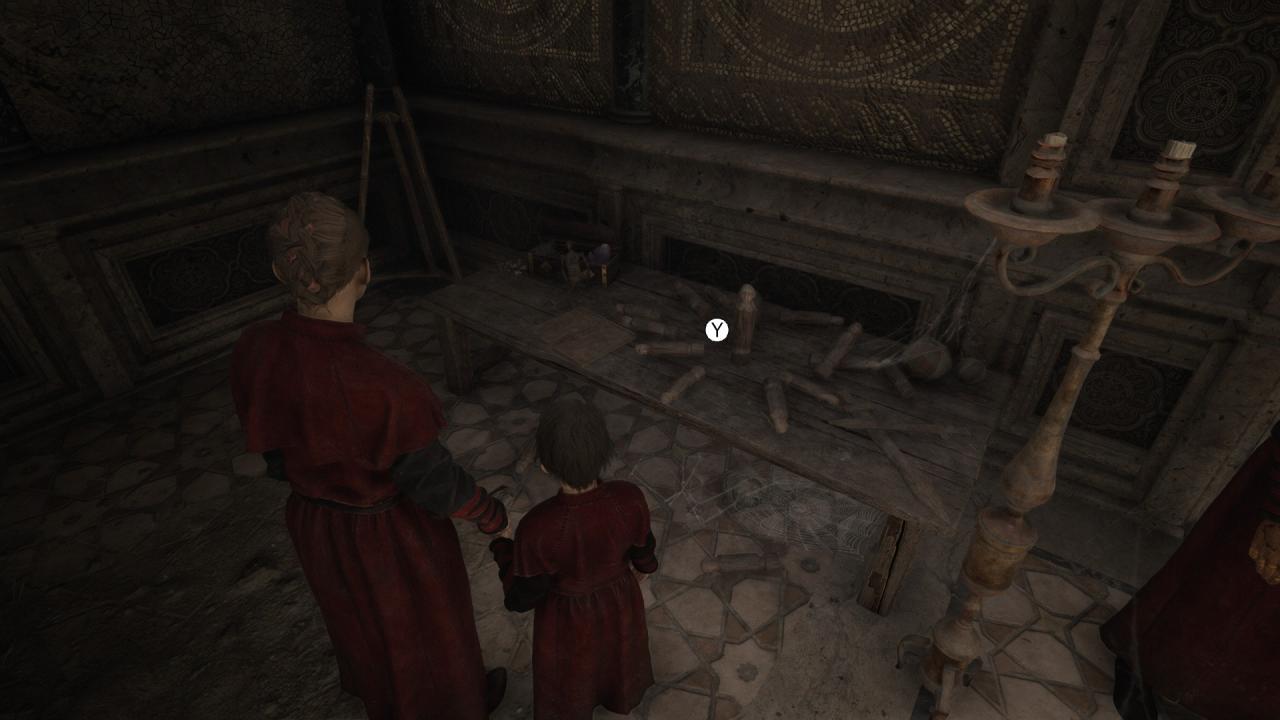
After inspecting all of the 4 items in the first room, exit the door to the second room.
Second room – 4 items to inspect:
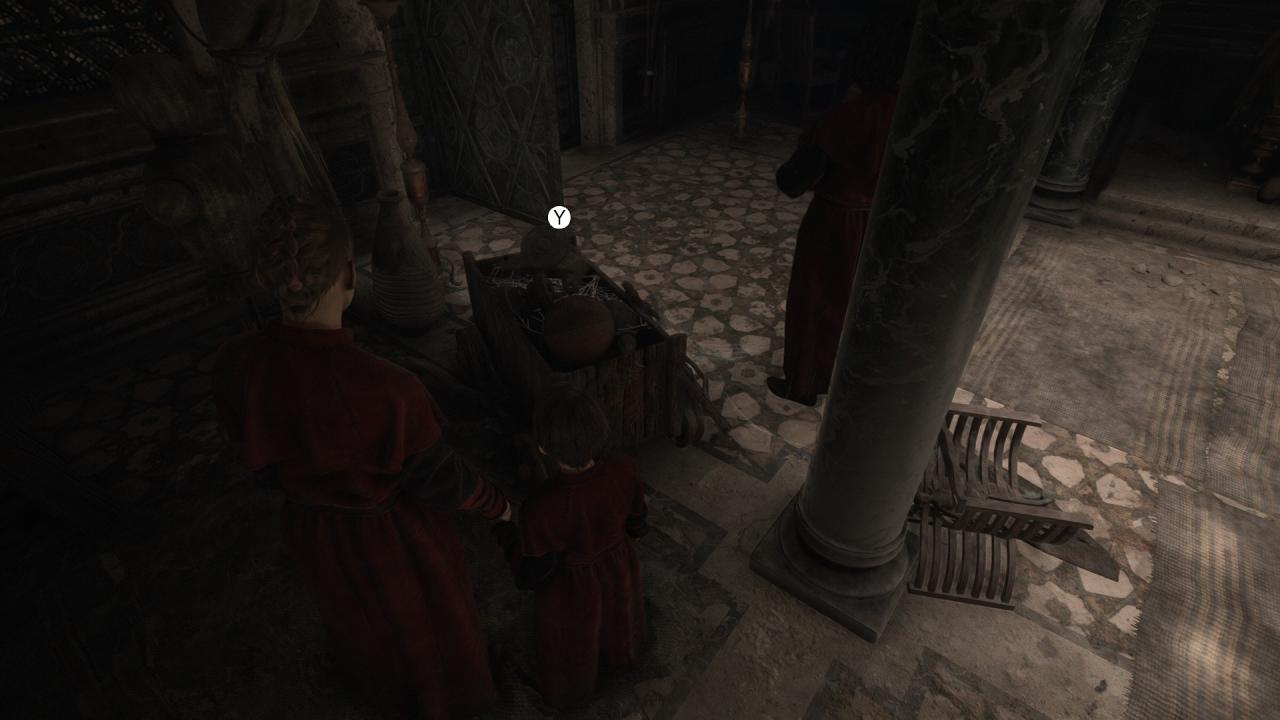
5. Toy chest
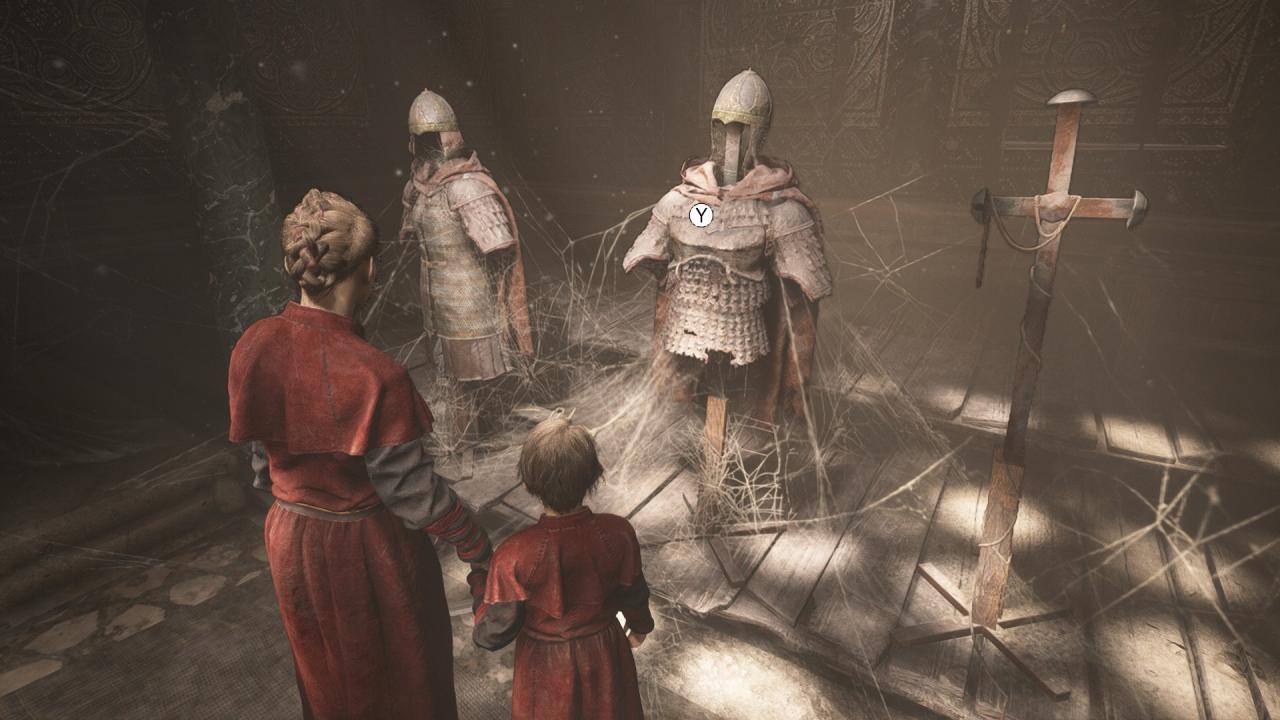
6. Woman’s armour
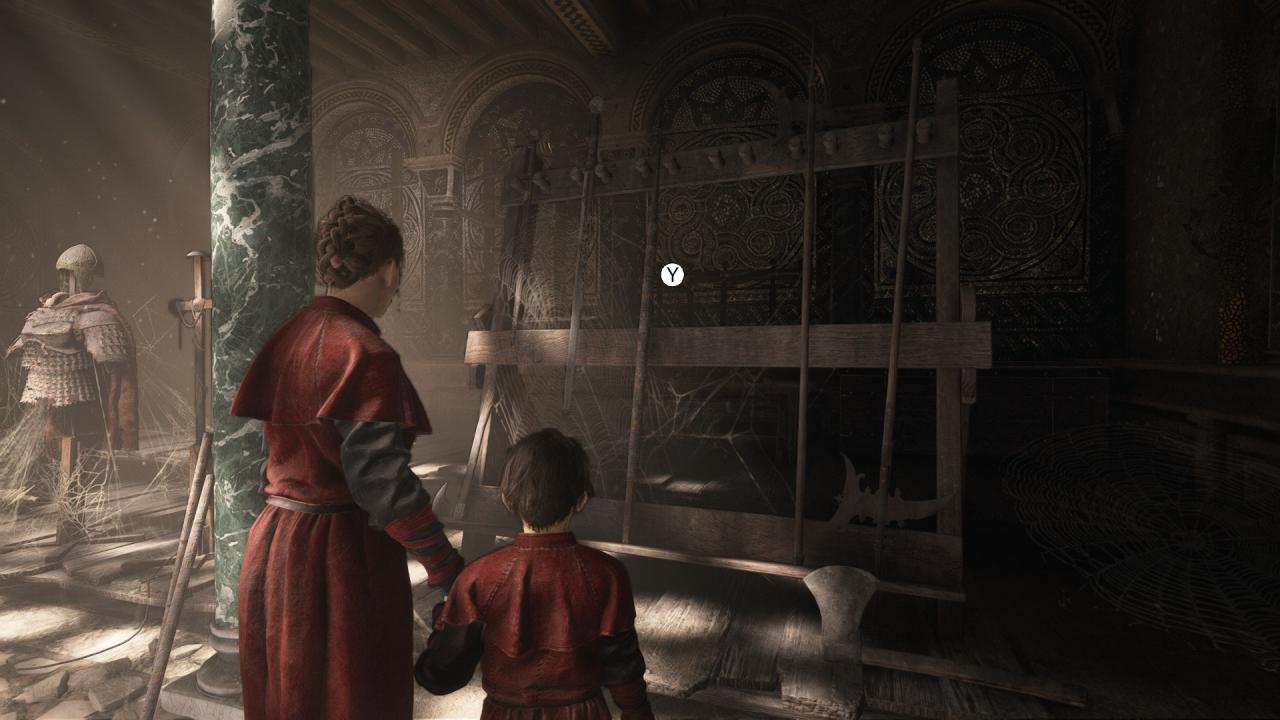
7. Weapon rack
8. Wax tablets
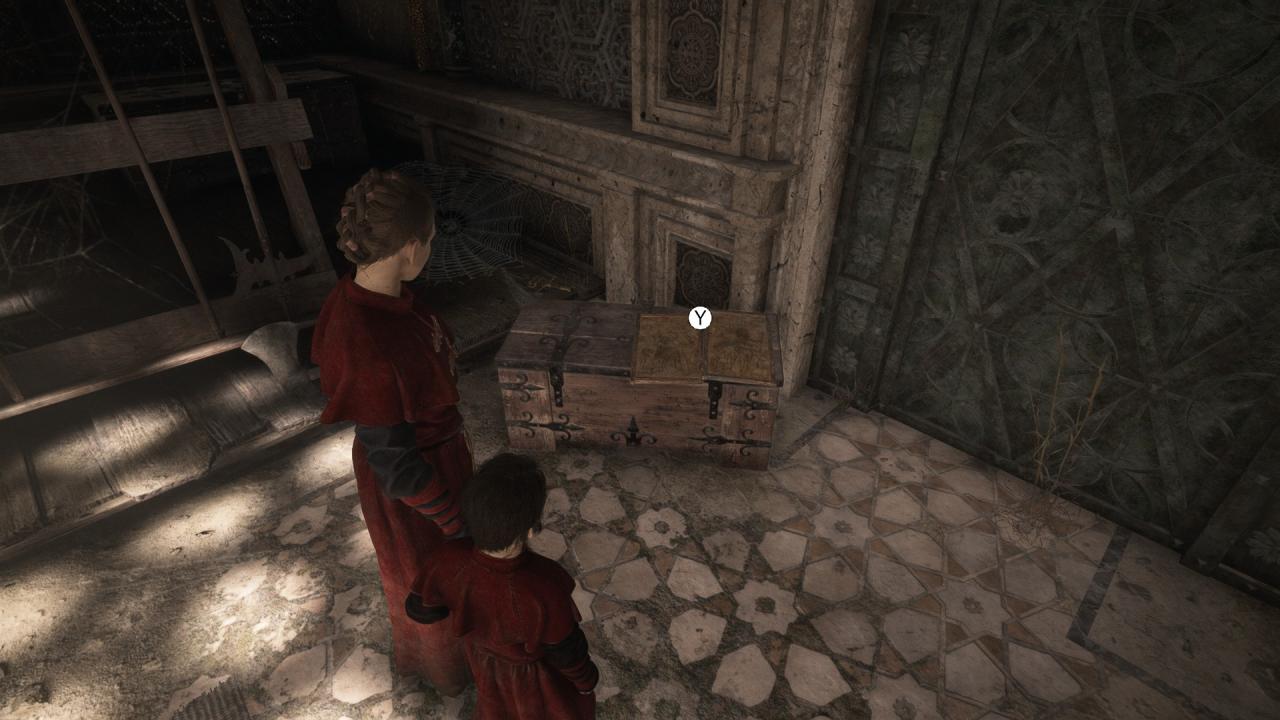
After inspecting all of the 4 items in the first second, exit the door to the courtyard with a Phoenix mural. Enter through the door to the third room.
Third room (alchemy laboratory) – 6 items to inspect:
9. Black powder at alchemical machine
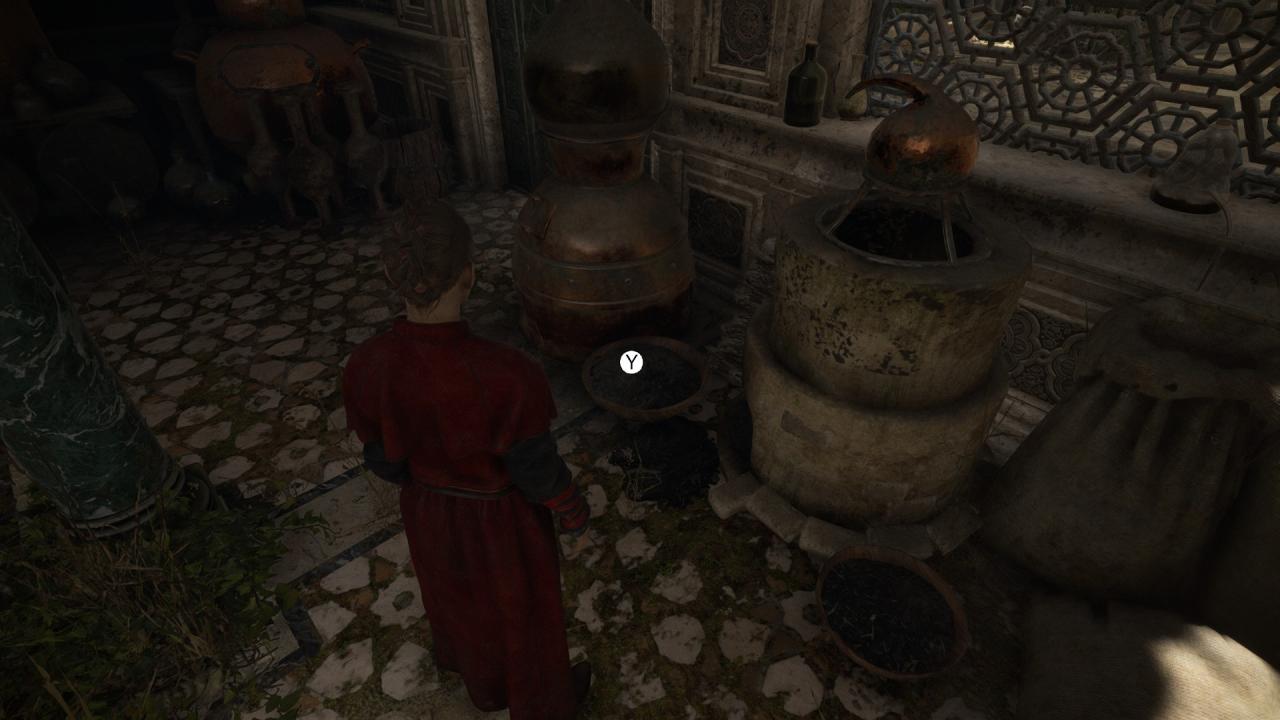
10. Small flask on the brewery machine
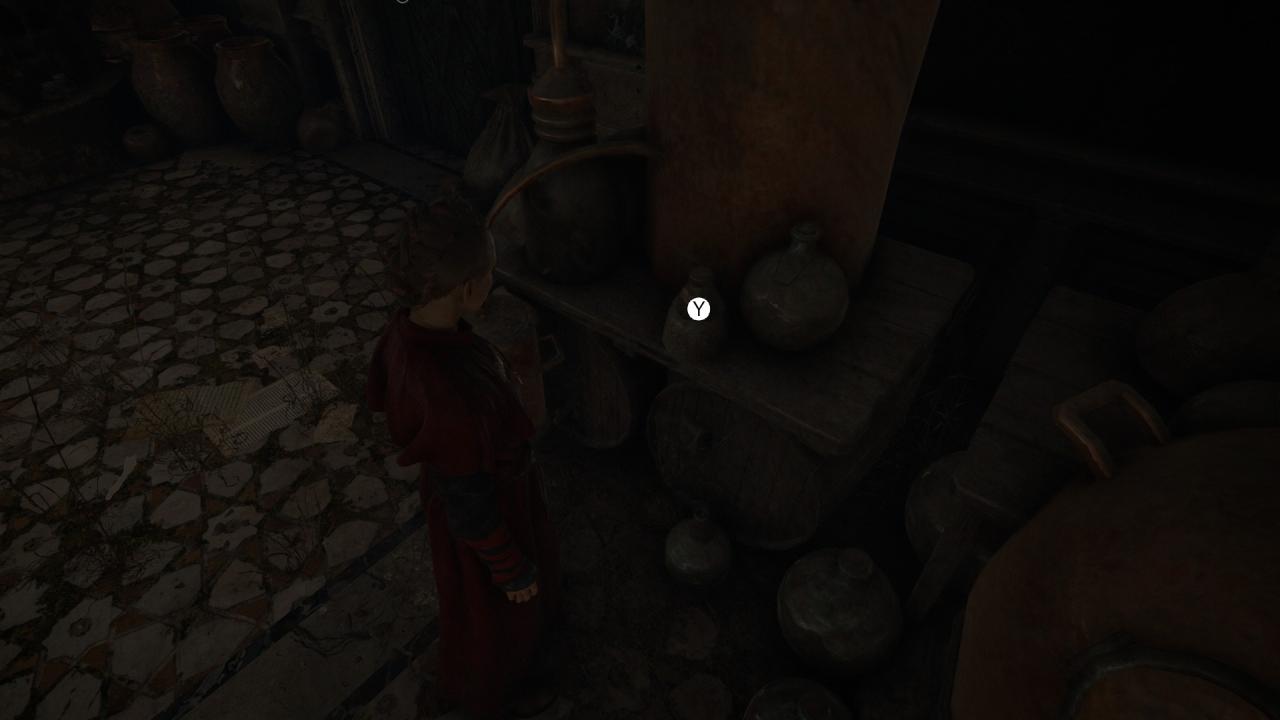
11. Multiple empty flasks and vials on a stone structure
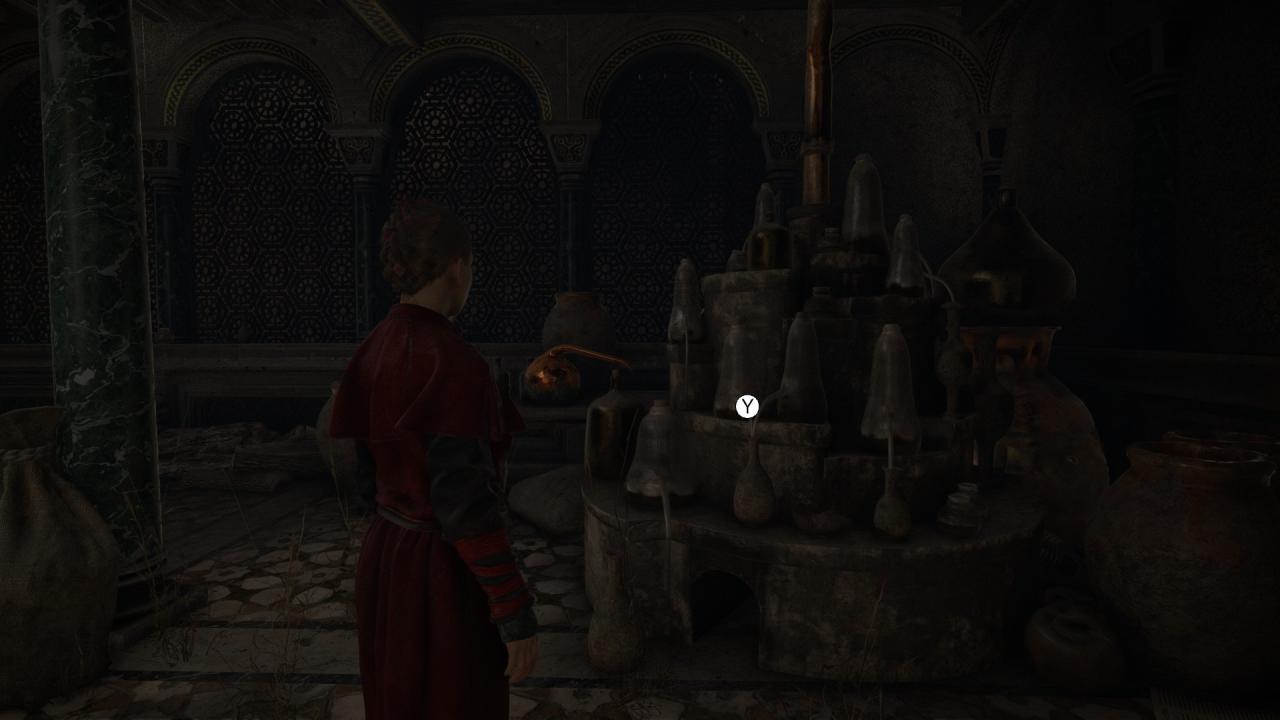
12. Small black flask on a book
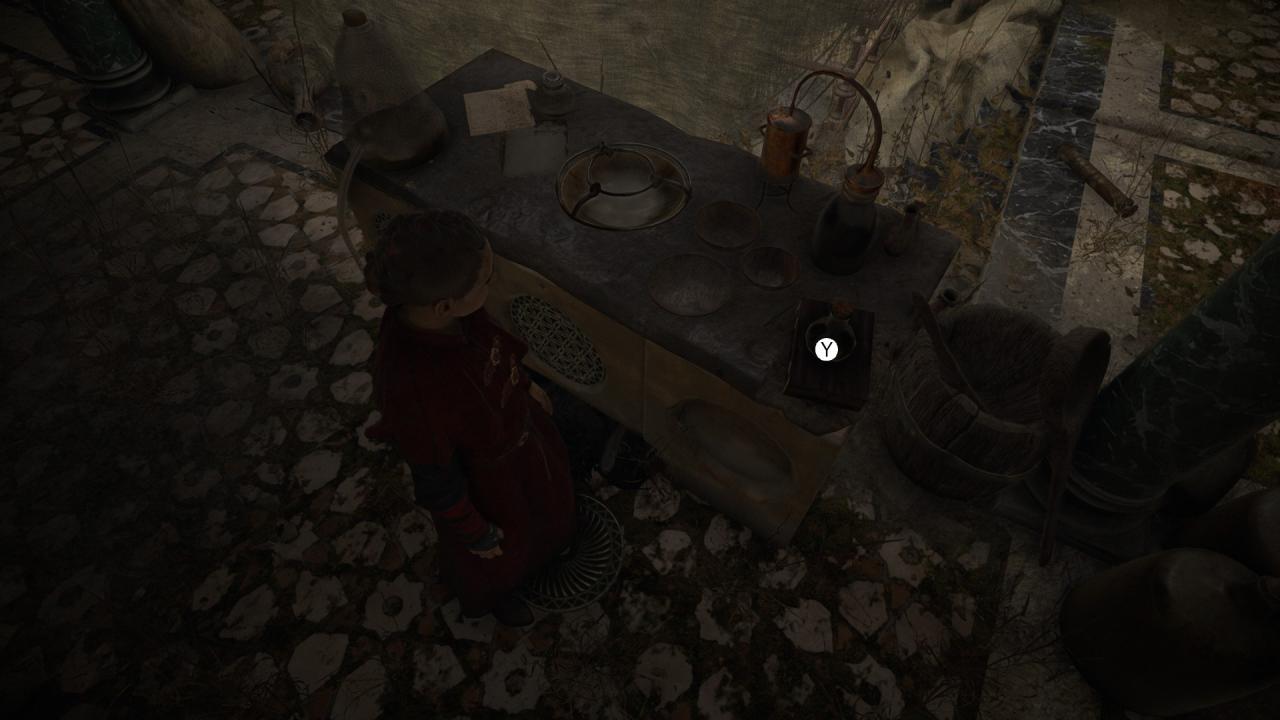
13. Athanor (furnace/cooking station)
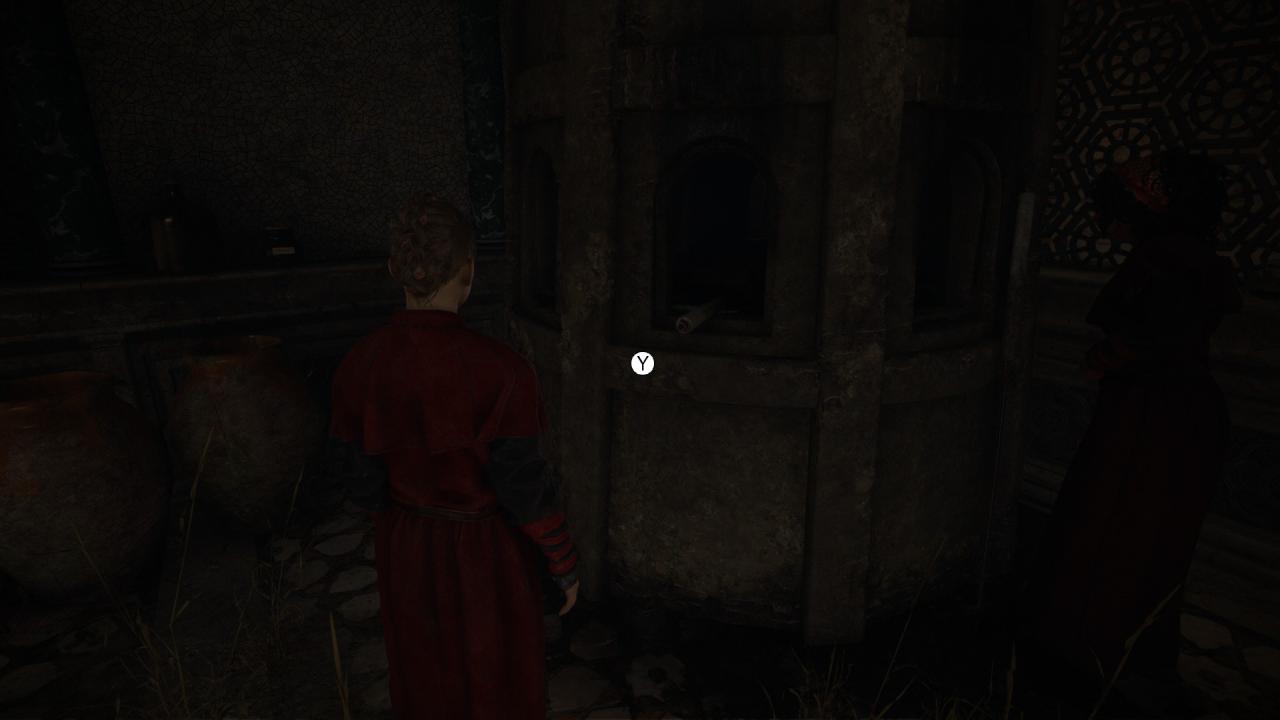
14. Lab table in the middle of the room – only available after Hugo walks to it
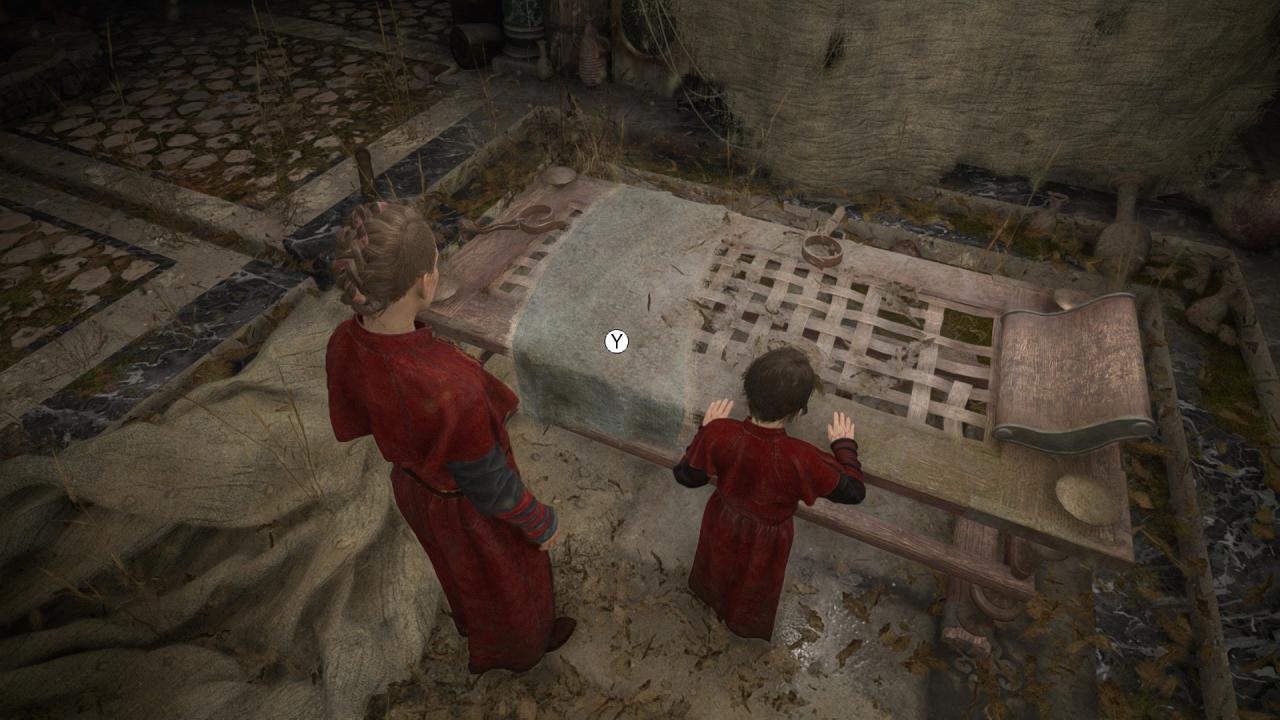
Sophia will no longer be with you in the room and she will call out to you. Exit through the window with the cloth, but only after inspecting all of the items mentioned above, otherwise you will no longer be able to interact with them.
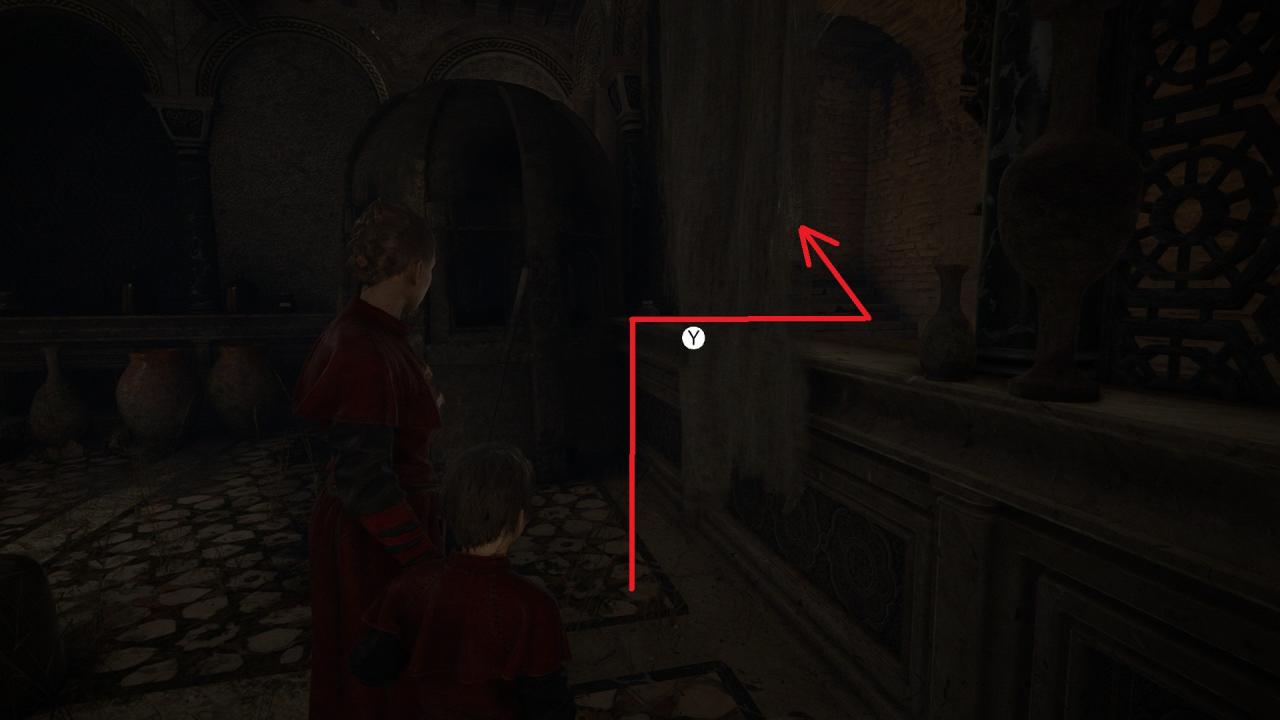 Head upstairs, reaching the fourth room.
Fourth room (the alchemist library) – 2 items to inspect:
15. Grate in the floor in the middle of room (between 4 green marble pillars)
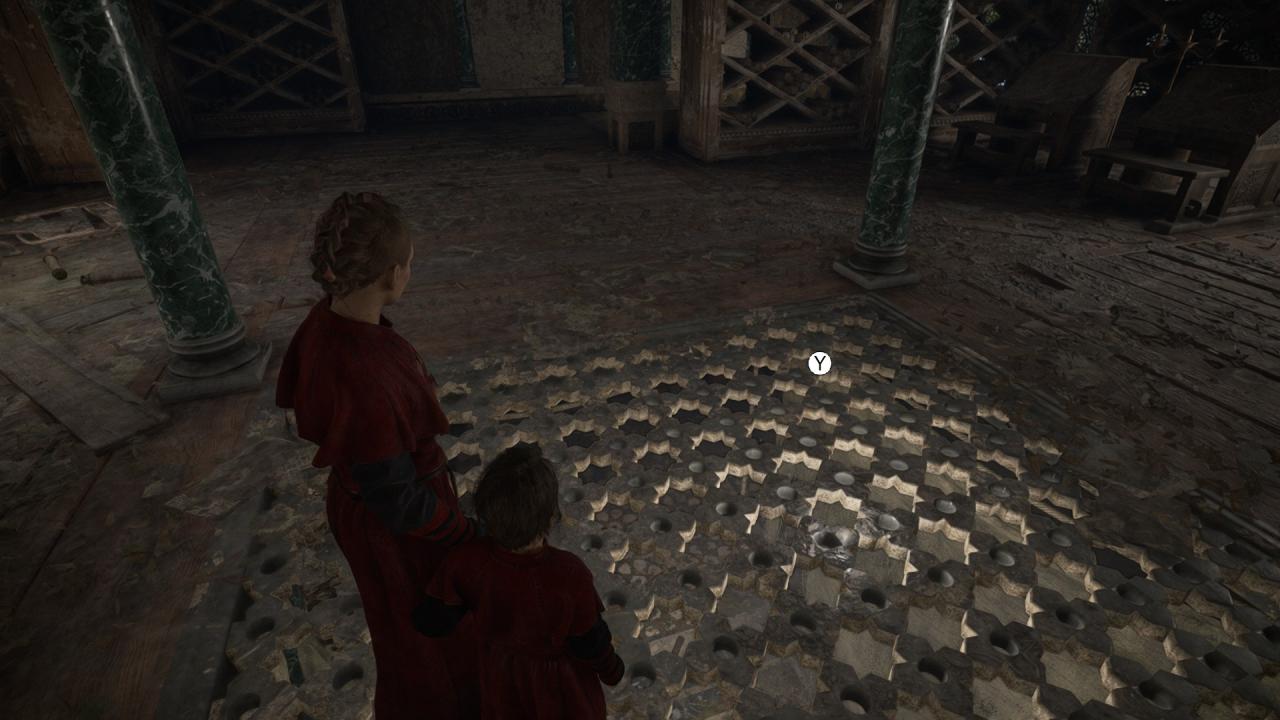
16. Scrolls in the shelves
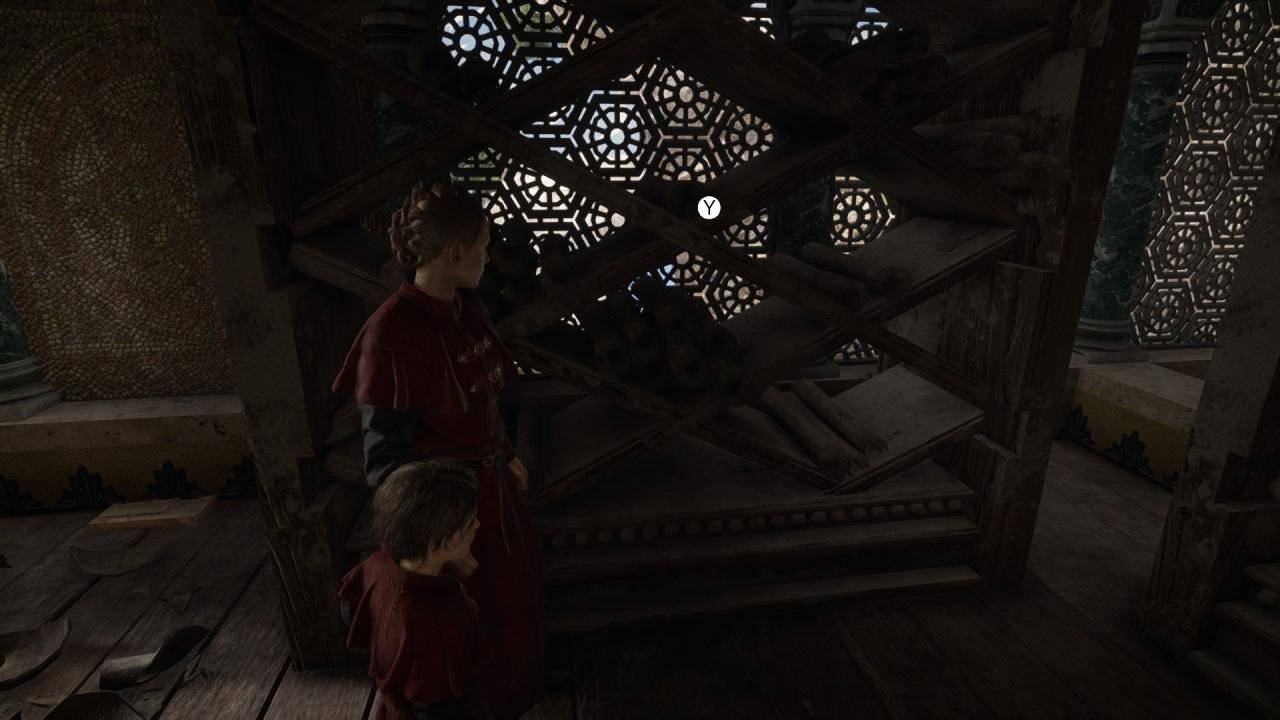
As soon as you interact with the last item, the achievement will unlock.
Mercy (Hidden)
 Mercy
MercyDon’t kill the guard on the docks
This achievement can be unlocked during Chapter 4 – “Protector’s Duty”, during objective “Cooperate with the soldier to cross the dock”, after completing the main puzzle of the area.
The soldier will recognize you and Lucas and will come to attack you. For this achievement, you need to leave the area without killing the soldier and deal at the same time with the swarm of rats that’s blocking your path.
You can do so in different ways:
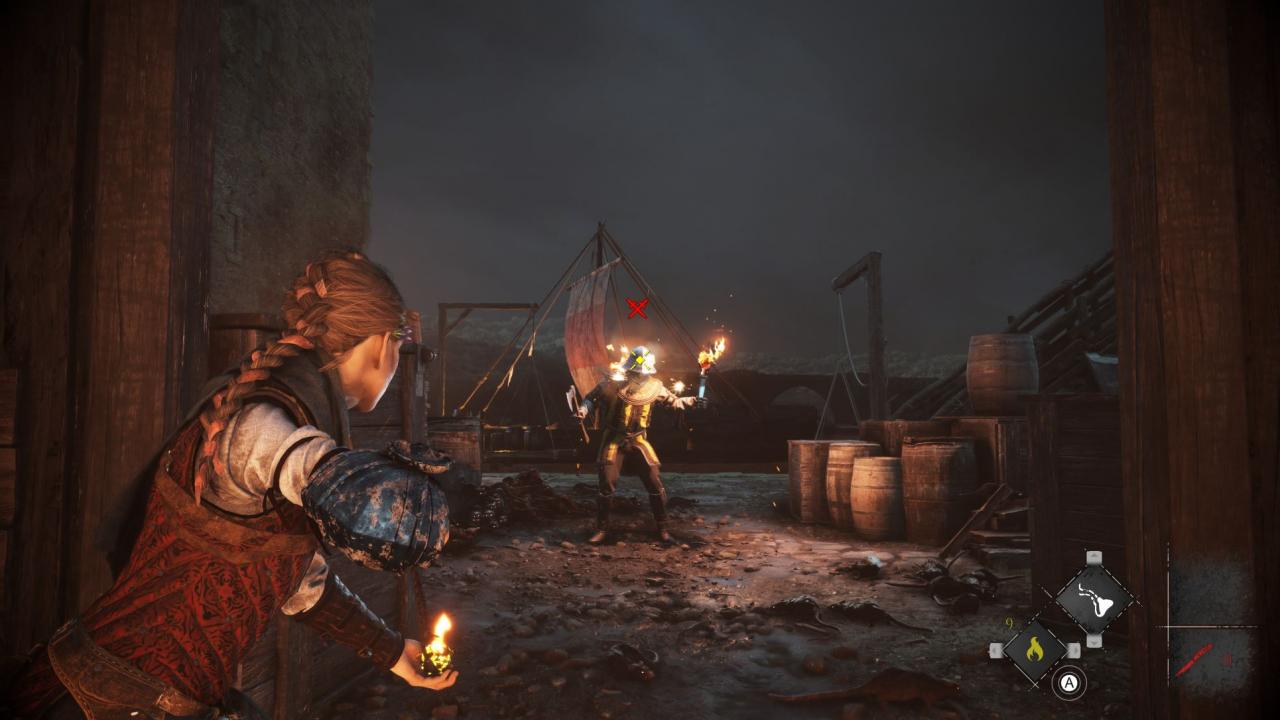
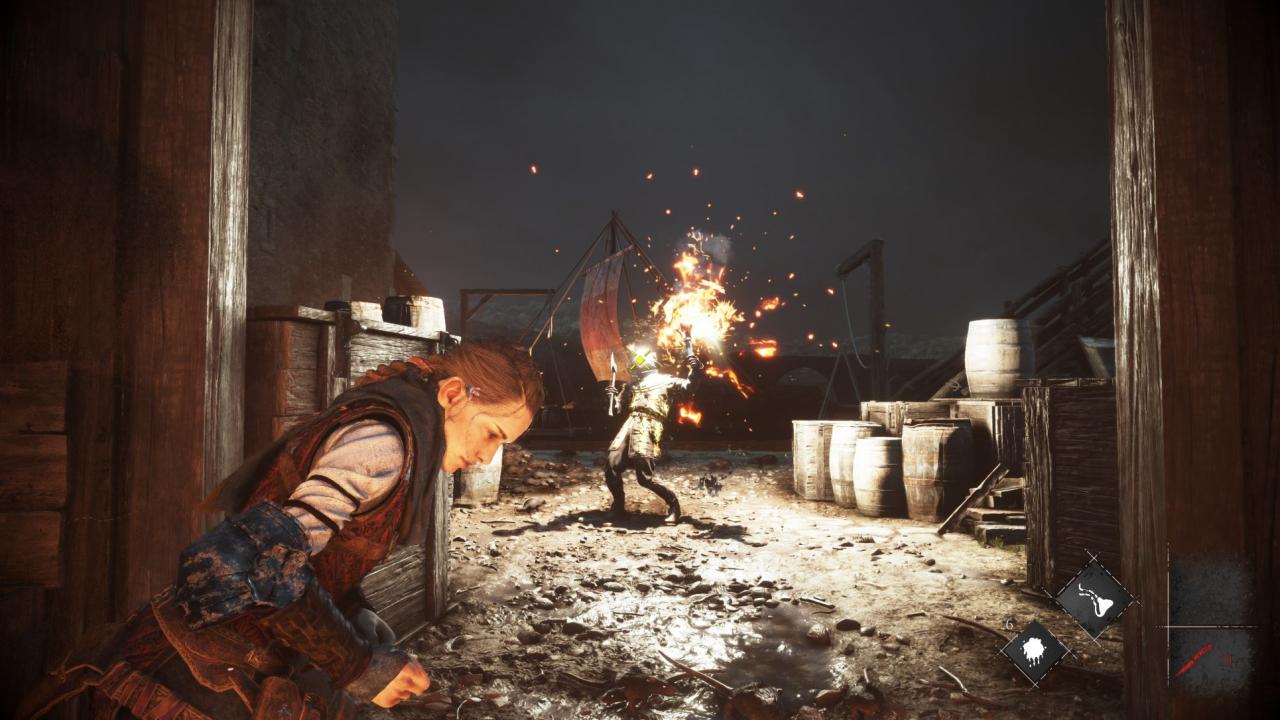
1. Use the slingshot with the Ignifer ammo on the guard to stun him and then use the slingshot with the Tar ammo on him to light up the area and make the rats go away so that you can safely run past the soldier and exit to the next area.
 OR
OR
2. Use the slingshot directly with the Tar ammo on the torch that the soldier holds to light up the area and make the rats go away so that you can safely run past the soldier and exit to the next area.
The achievement will unlock when you interact with the door towards the next area.
Night guard (Hidden)
 Night guard
Extinguish 40 fires
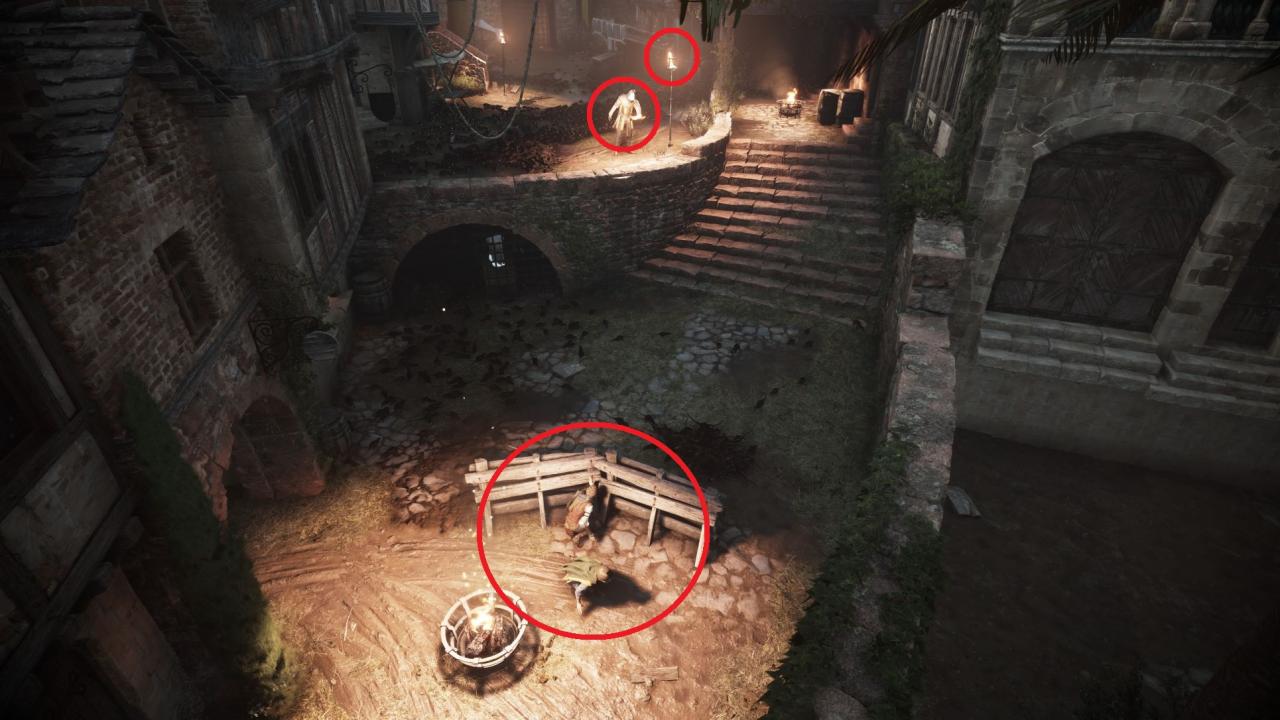
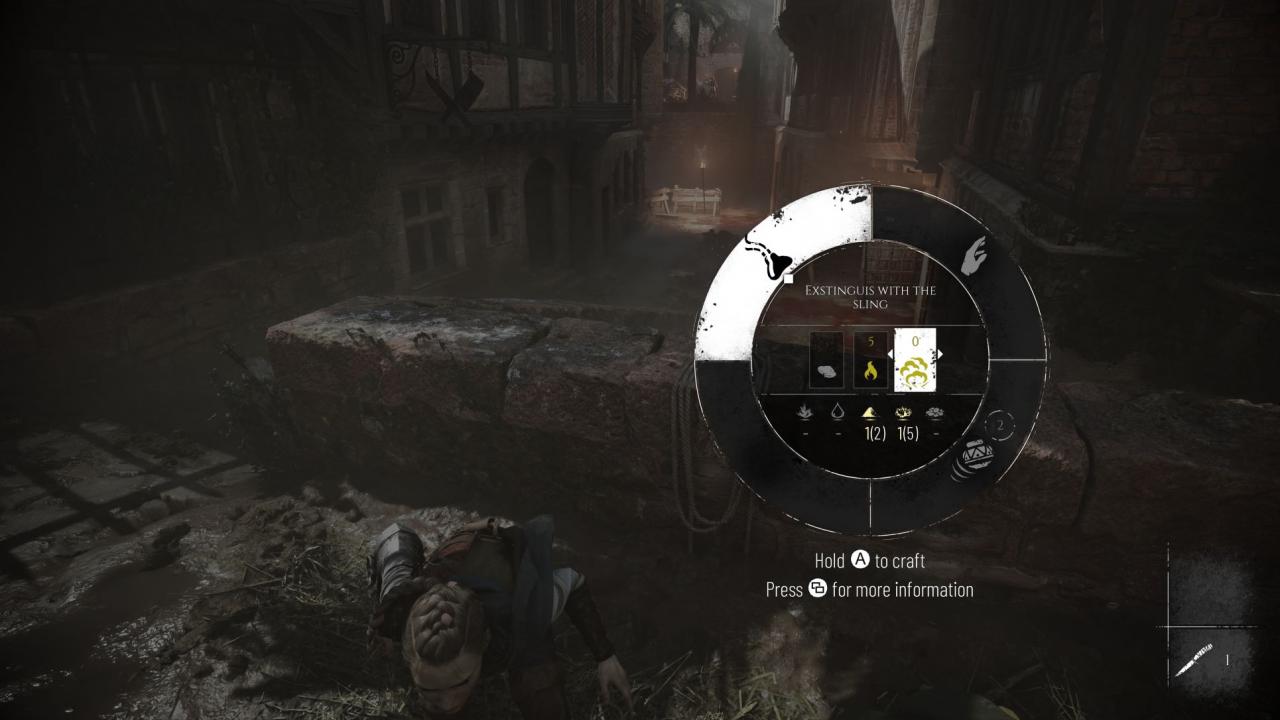 The achievement is rather self explanatory and you will most likely unlock it while playing the story naturally after putting out 40 fires.Note: If you want to get this achievement earlier, you can farm it right after learning the recipe. Extinguish the first two flames in order to kill the two soldiers and advance further, reaching the brazier behind the wooden barricade, where a checkpoint will be made. In front of you there will be a guard holding a torch and a second fire torch next to him. Proceed to extinguish both fires, open the pause menu and restart the section. Upon spawning extinguish both fires once again and repeat the process until the achievement unlocks.
Equipment Upgrade Achievements
There are 5 separate achievements for upgrading each equipment that you will use throughout the game: Sling, Gear, Instruments, Alchemy and Crossbow (unlocked in chapter 5). These equipments can be upgraded by using Tools and Pieces and you will need a total of 30 Tools and 875 Pieces to fully upgrade all of them.
– Tools can be found in specific locations and within Secret Chests throughout the game, starting from Chapter 3. Their location will be detailed in the next section of this guide.
– Pieces are crafting materials found scattered in the world, but they also can be obtained by scraping extra materials/ammunition (if you run out of space in your pocket) if you have the “Instruments” upgraded at level 1.
To upgrade each skill you must find and access workbenches or at any point and place in the game if you upgraded “Instruments” at level 2.
Recommendation: Focus on fully upgrading the “Instruments” equipment first, as the 3rd level “Unbreakable tools” will allow you to upgrade the rest of your equipment without needing to collect and consume the “Tool” material. Doing so and fully upgrading the Instruments equipement first will also allow you to unlock all upgrades achievements during NG.
 Not a toy anymore
Fully upgrade the sling
Level 1 – Softened Cords
Description: By softening the cords, Amicia makes less noise when she uses the sling.
Materials needed to upgrade: 1 Tool and 20 Pieces
Level 2 – Double cradle
Description: By adding a second cradle to the sling, Amicia can shoot a second time before reloading.
Materials needed to upgrade: 2 Tools and 65 Pieces
Level 3 – Elongated cords
Description: By extending the cords, rocks shot with the sling are more powerful and stun enemies for longer.
Materials needed to upgrade: 3 Tools and 90 Pieces
 Pocket laboratory
Fully upgrade the alchemy
Level 1 – Hidden pockets
Description: Sewing new pockets on her gear will help Amicia carry additional alchemical ammo.
Materials needed to upgrade: 1 Tool and 30 Pieces
Level 2 – Strong fire
Description: Amicia improves the alchemical ammo which enables her to kill enemies by throwing a jar combined with an Ignifer.
Materials needed to upgrade: 2 Tools and 65 Pieces
Level 3 – Unstable reaction
Description: Amicia improves the alchemical ammo to make Odoris explode on contact with fire, killing unarmored enemies.
Materials needed to upgrade: 3 Tools and 80 Pieces
 Handful of pockets
Fully upgrade the gear
Level 1 – Ringed belt
Description: A new ring on her belt will help Amicia carry an additional jar.
Materials needed to upgrade: 1 Tool and 30 Pieces
Level 2 – Bottomless bag
Description: Amicia can carry additional alchemical resources thanks to a new pocket on her back.
Materials needed to upgrade: 2 Tools and 60 Pieces
Level 3 – Belt cases
Description: Adding cases to her belt will help Amicia carry additional knifes and additional Pyrites.
Materials needed to upgrade: 3 Tools and 85 Pieces
 Effective instruments
Fully upgrade the instruments
Level 1 – Recycling tool
Description: A recycling tool is helpful for breaking jar, knife, Pyrites and bolts into pieces if Amicia has no more room.
Materials needed to upgrade: 1 Tool and 30 Pieces
Level 2 – Traveller tools
Description: With travellers tools, Amicia can upgrade her equipment anywhere without using a workbench.
Materials needed to upgrade: 2 Tools and 55 Pieces
Level 3 – Unbreakable tools
Description: Amicia can use an unbreakable tool to upgrade her equipment without tool cost.
Materials needed to upgrade: 3 Tools and 90 Pieces
 Improved crossbow
Fully upgrade the crossbow
Level 1 – Flexible limb
Description: Choosing a softer metal for the limb of the crossbow will enable Amicia to reload it much faster.
Materials needed to upgrade: 1 Tool and 40 Pieces
Level 2 – Bigger quiver
Description: With a larger quiver, Amicia can carry additional bolts.
Materials needed to upgrade: 2 Tools and 55 Pieces
Level 3 – Reinforced bolts
Description: By reinforcing the crossbow bolts, Amicia can recover them from enemies’ corpses.
Materials needed to upgrade: 3 Tools and 80 Pieces
Tool Locations
There are a total of 36 Tool items in the game (26 Tool chests and 10 Secret chests that each contain 1 Tool). Here are the locations for each of them during each chapter:
Chapter 1-2: 0 Tools
Chapter 3: 3 Tools
– Tool #1: Can be collected during objective “Exit the city”, shortly after learning the recipe to craft Extinguis. When reaching the brazier behind the wooden barricade, kill the guard and make your way up the stairs, where he stood previously. Head up the second pair of stairs on your left and enter the small room with a big chest in it.
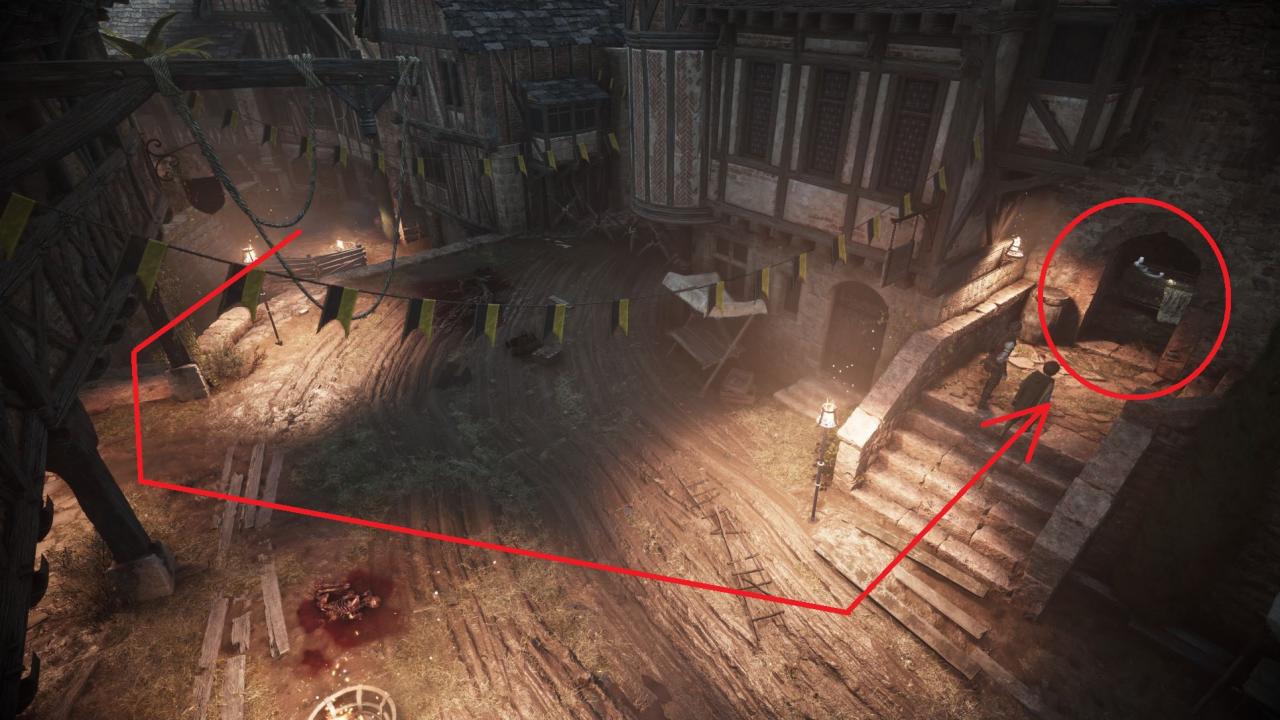
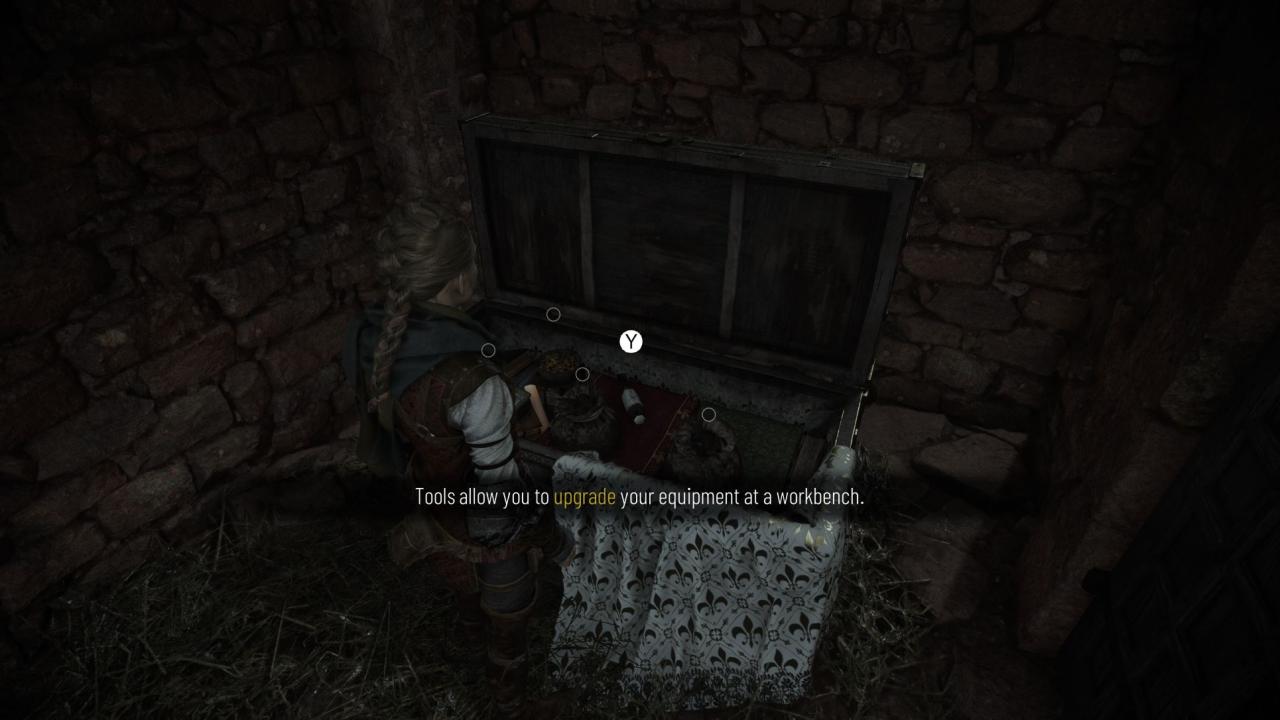 Open the chest and pick up the Tool.
– Tool #2: Can be collected during objective “Reach the herbalist’s forest”, in the rat infested village with a church and multiple enemies. The big chest in which you’ll find the tool is located in the last building on the left (where you’ll the herbalist being brought into the village).
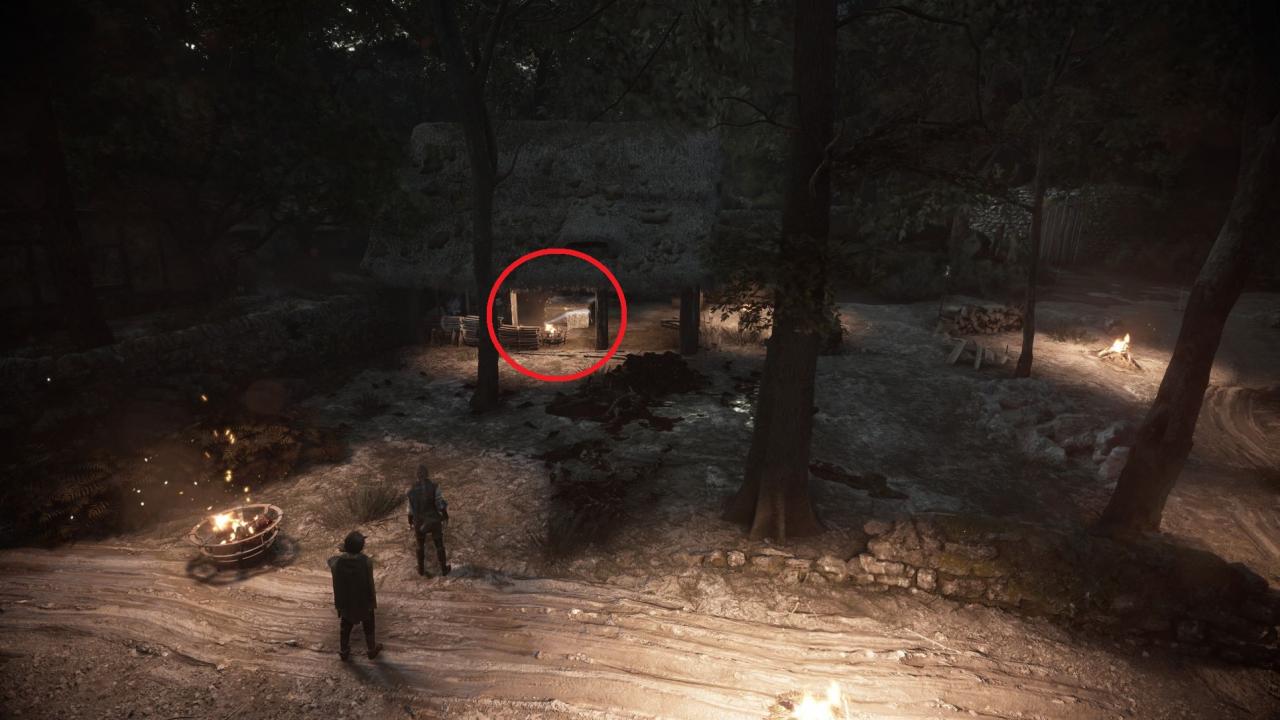
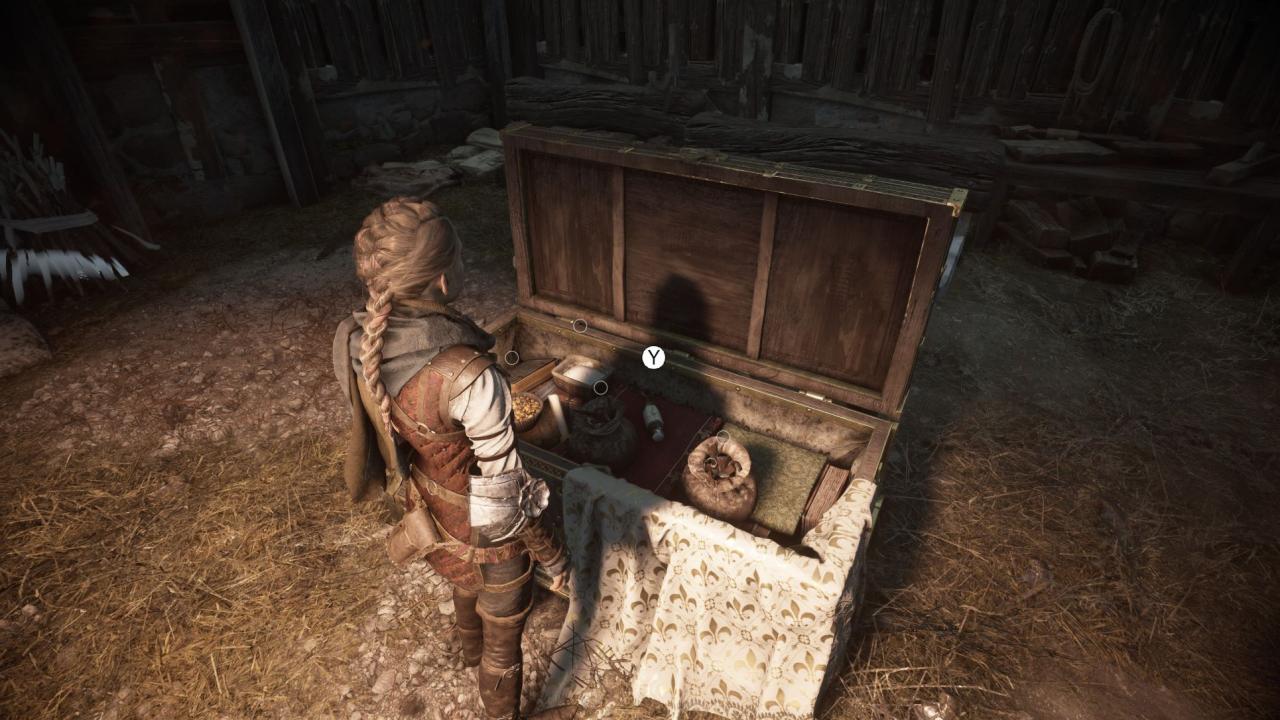 Open the chest and pick up the Tool.
– Tool #3: Inside the Secret Chest #1 (please see the Explorer achievement).
Chapter 4: 3 Tools
– Tool #4: Inside the Secret Chest #2 (please see the Explorer achievement).
– Tool #5: Can be collected during objective “Get back to Lucas”, after learning the Tar recipe. After clearing the path and reuniting with Lucas inside the Tar Workshop, climb the ladder where Lucas came from previously, to the platform with the giant tar keg and cross it to the other side in order to reach the big chest.
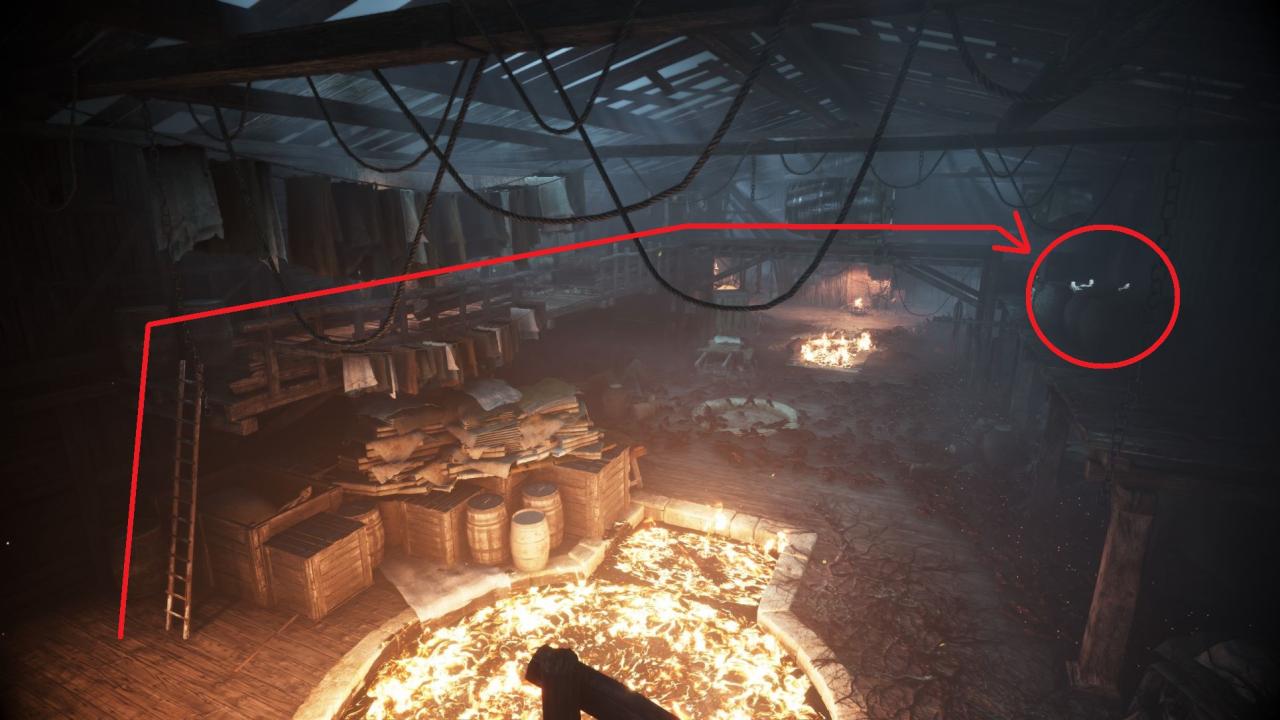
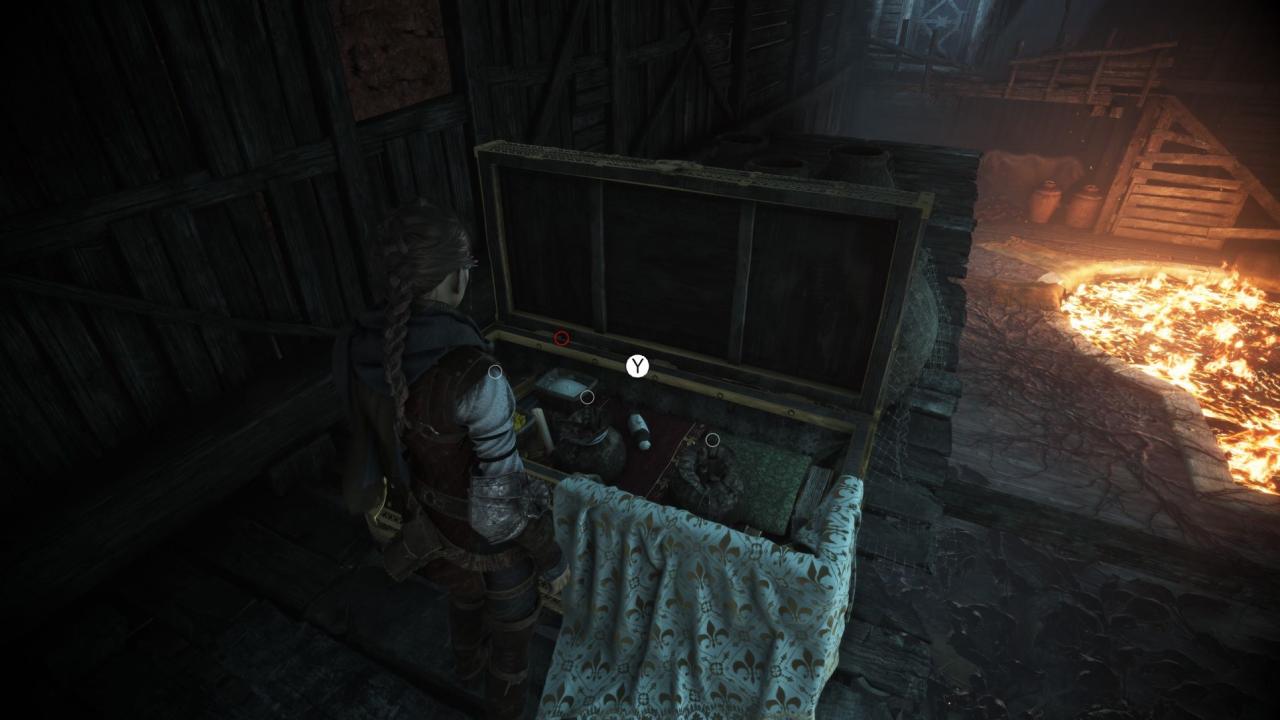 Open the chest and pick up the Tool.
– Tool #6: Can be collected during objective “Get to Joseph at the pontoon”, in the area where the soldiers have their camp. After reaching the big human-bodies bonfire, head towards the building to the left, where many rats are prowling. Inside this building will be a chest containing the 6th Tool.
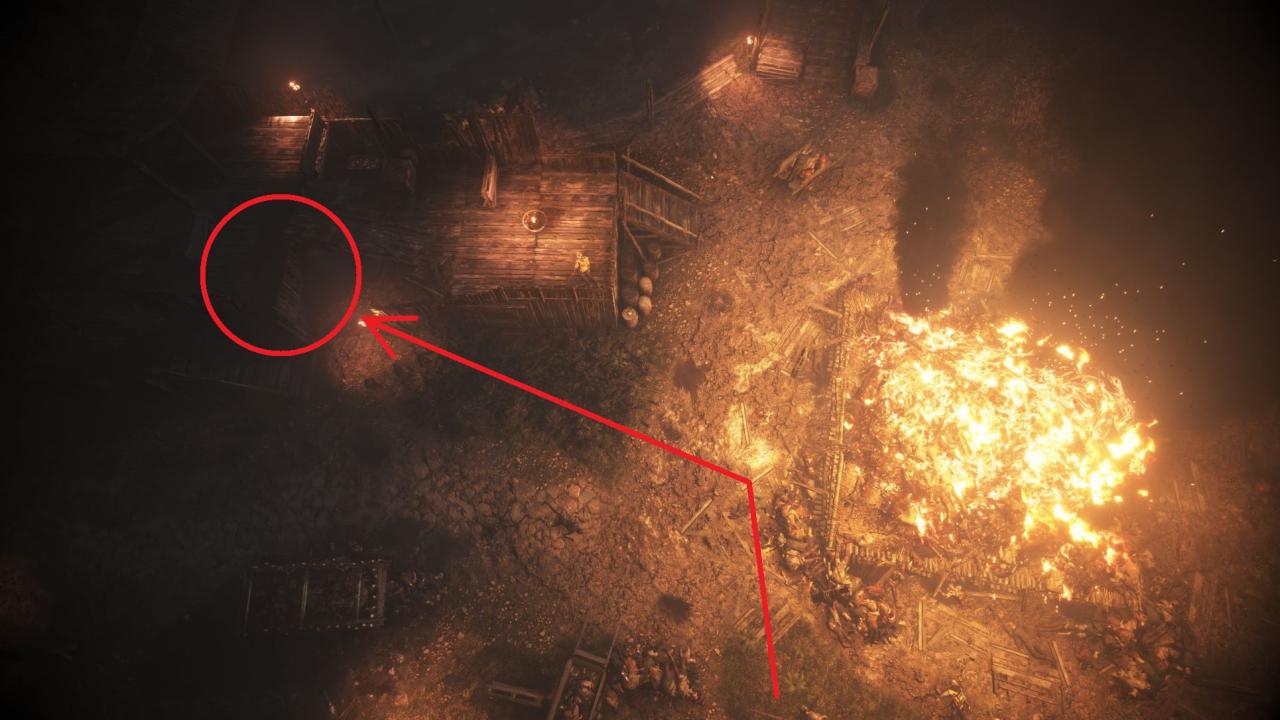 Use a Pot with Tar on the ground, light up the tar using the slingshot with Ignifer and then quickly enhance the flames by throwing another Tar with your slingshot in the fire.
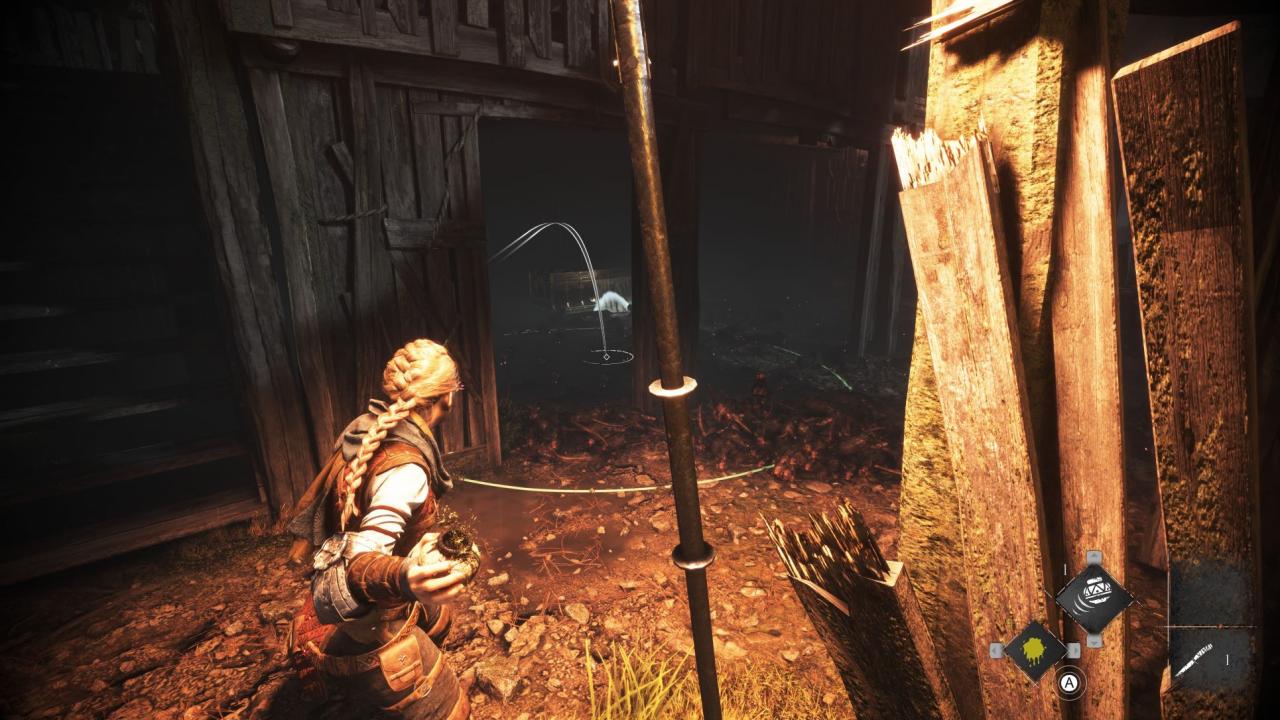
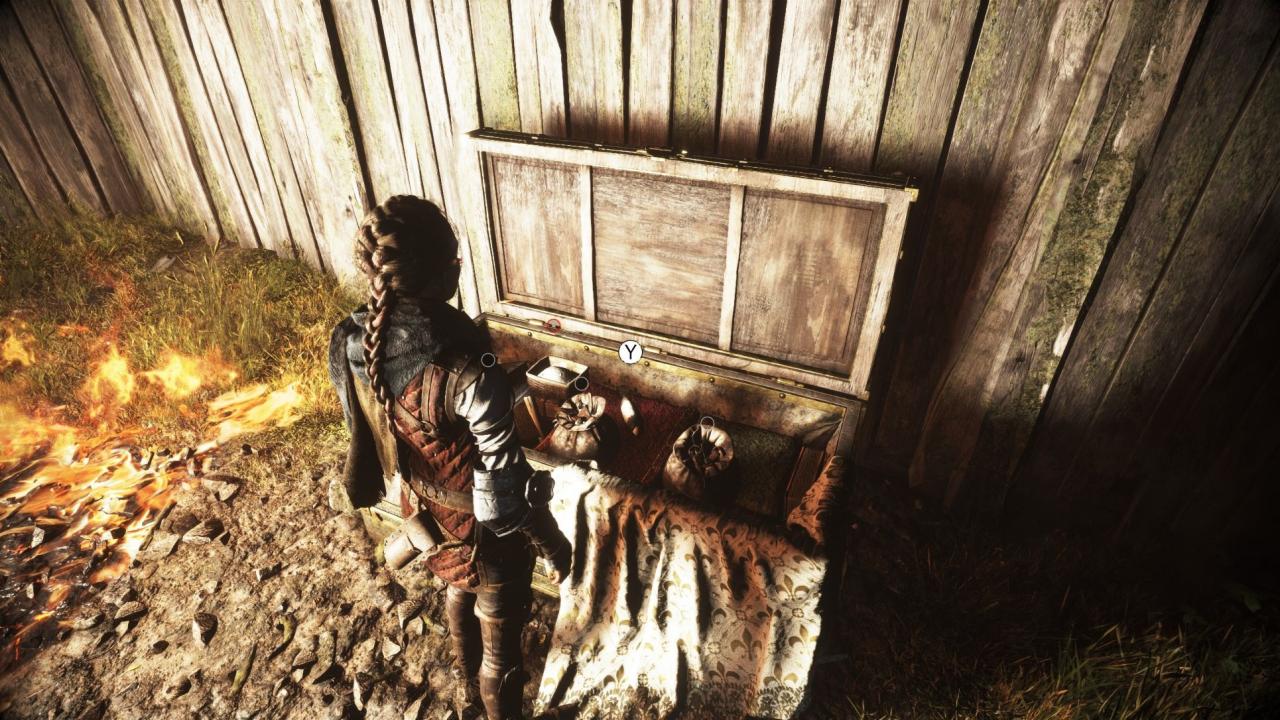 Run to the chest, open it and pick up the Tool as quick as possible, as the flames will not last very longer and the rats will instantly kill Amicia when the flames die.
Chapter 5: 3 Tools
– Tool #7: Can be collected during objective “Cross the construction site”, when you have to light up the final haystack and reunite with Lucas. Use the slingshot with Ignifer in order to light up the hay, drop down and facing the hay, go to the left where you will find a chest under the wooden platform.
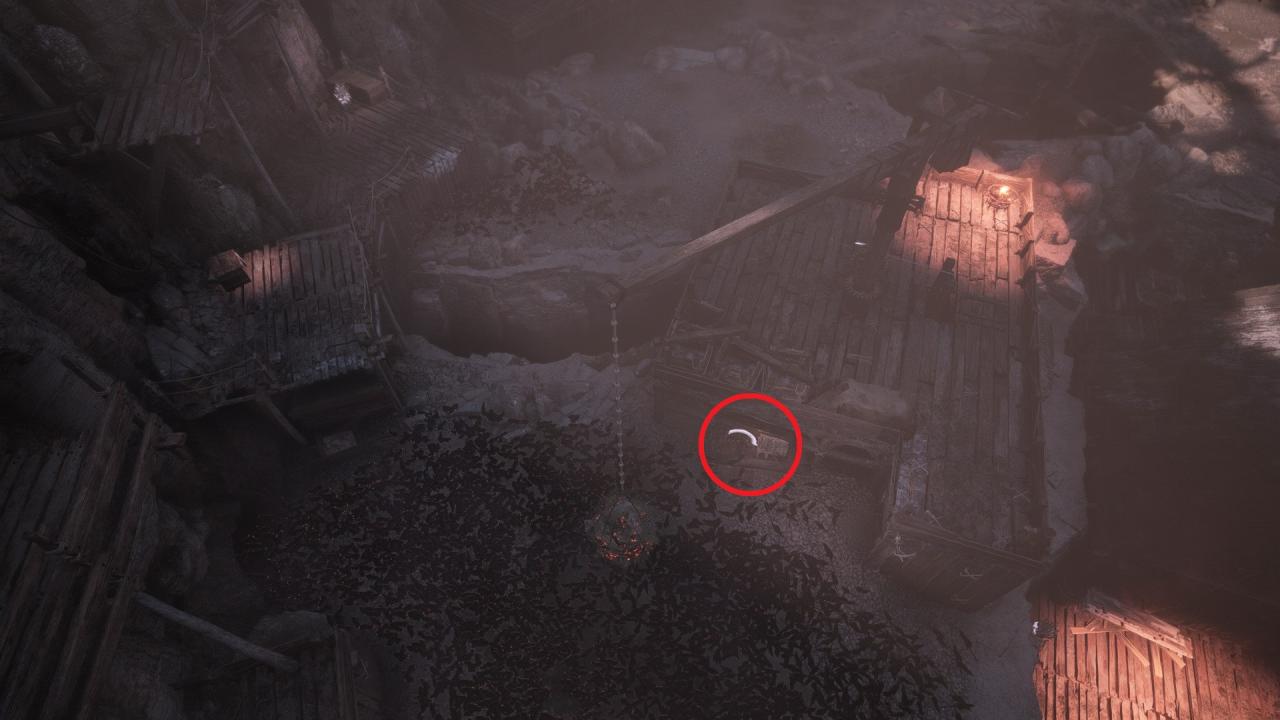
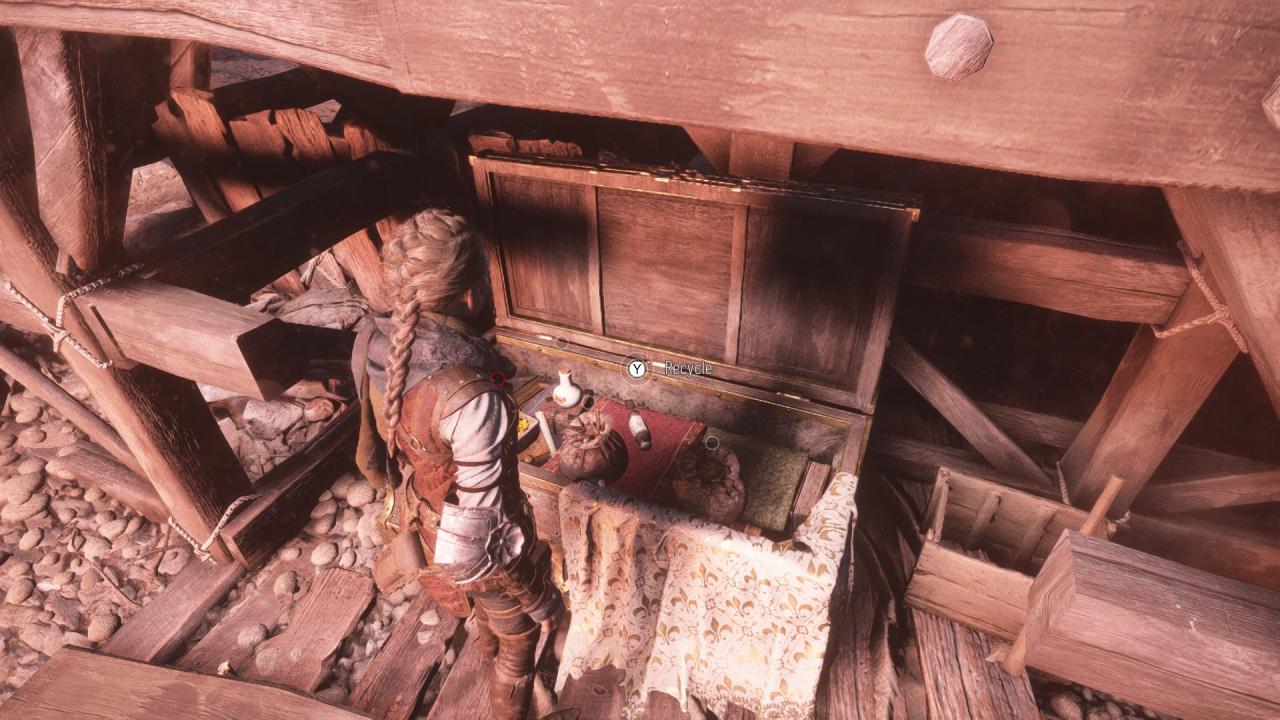 Open the chest and pick up the Tool.
– Tool #8: Inside the Secret Chest #3 (please see the Explorer achievement).
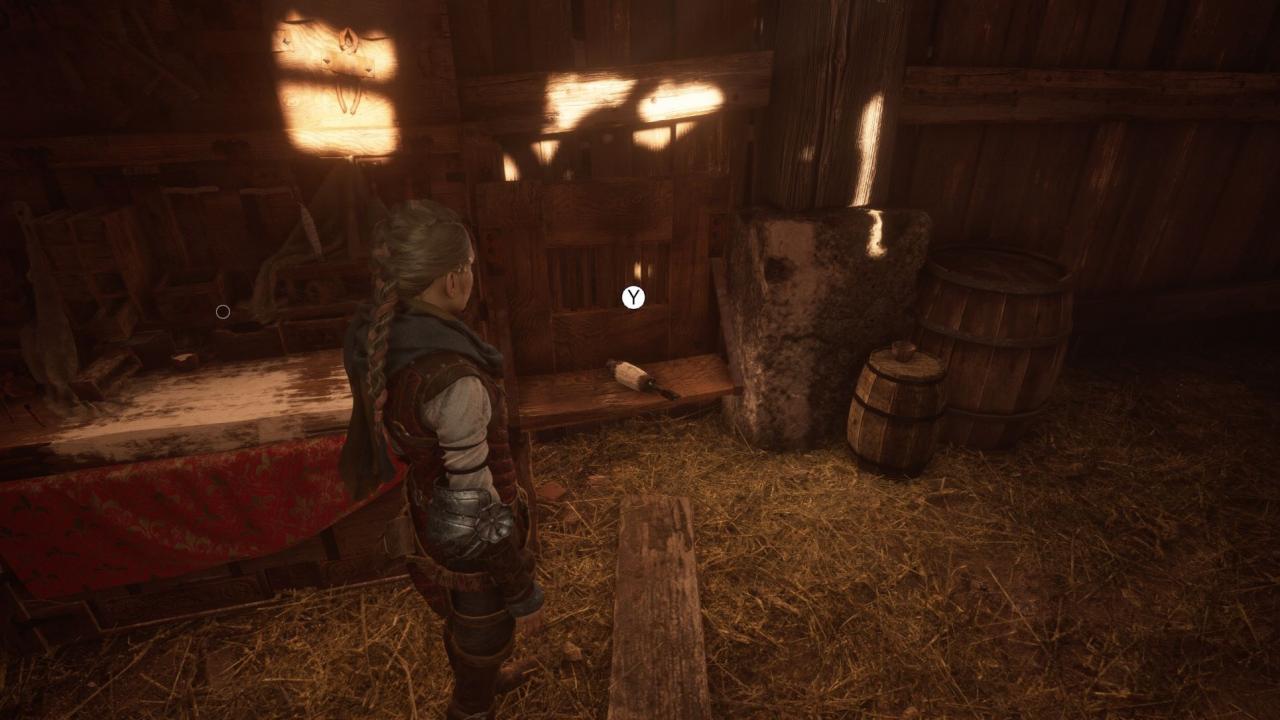
– Tool #9: Can be collected during the second objective “Find a way to reach the boat” after crossing the river and destroying the counterweight of the wooden pontoon. Head outside the barn and underneath it there will be an opening through which can crouch and reach the other side of the barn, where the big chest is.
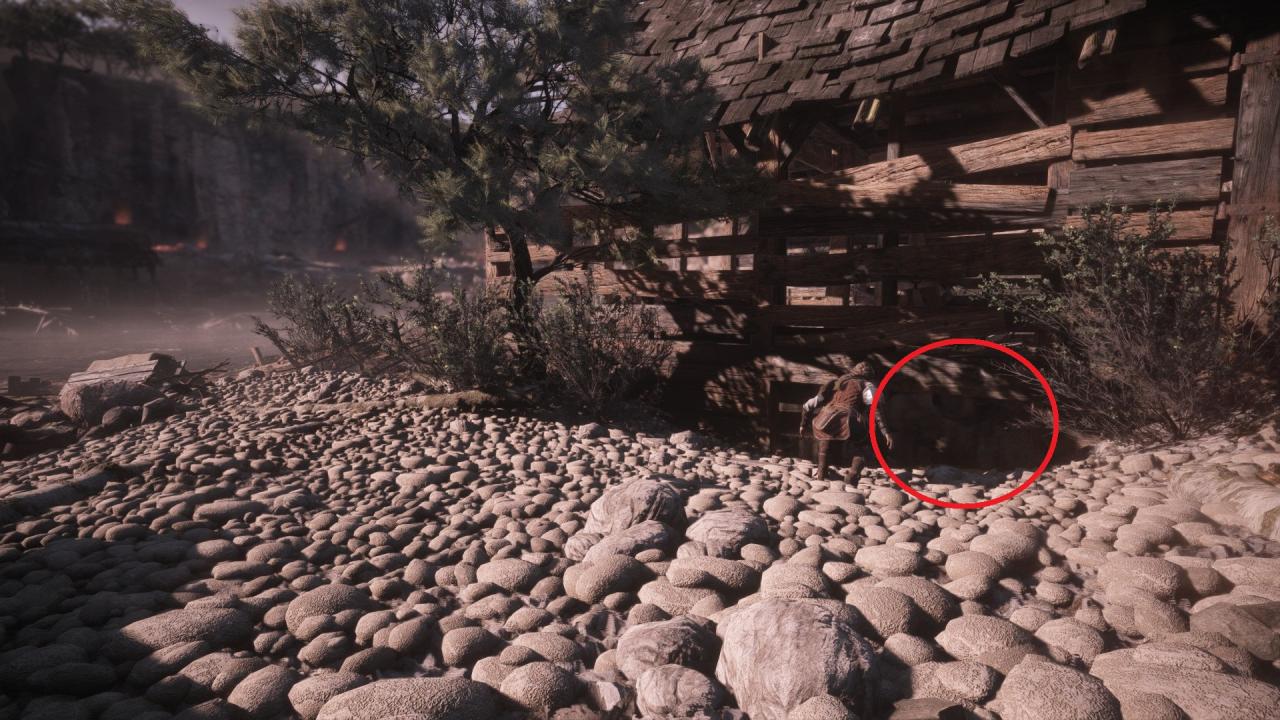
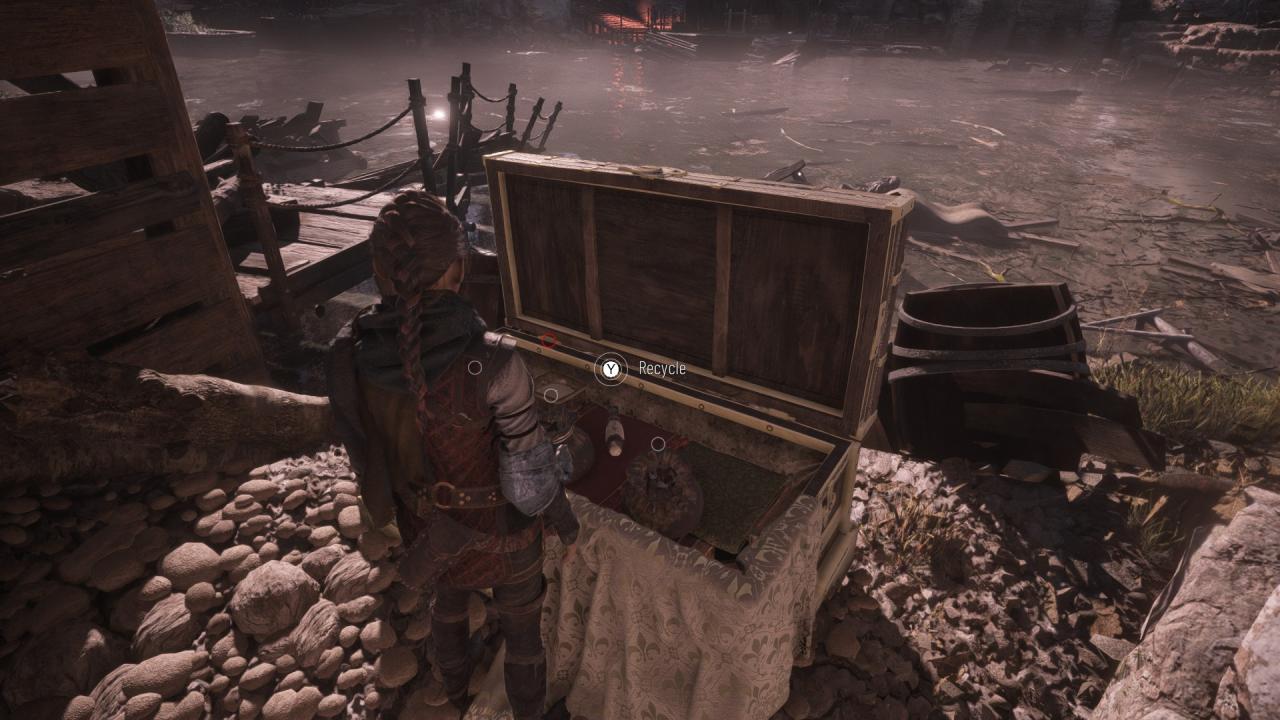 Open the chest and pick up the Tool.
Chapter 6: 4 Tools
– Tool #10: Can be collected during objective “Find a way out”, after reaching into the quarry area. Follow the corridor into the stone and at the end make a right. You can see a small hole in the wooden wall.
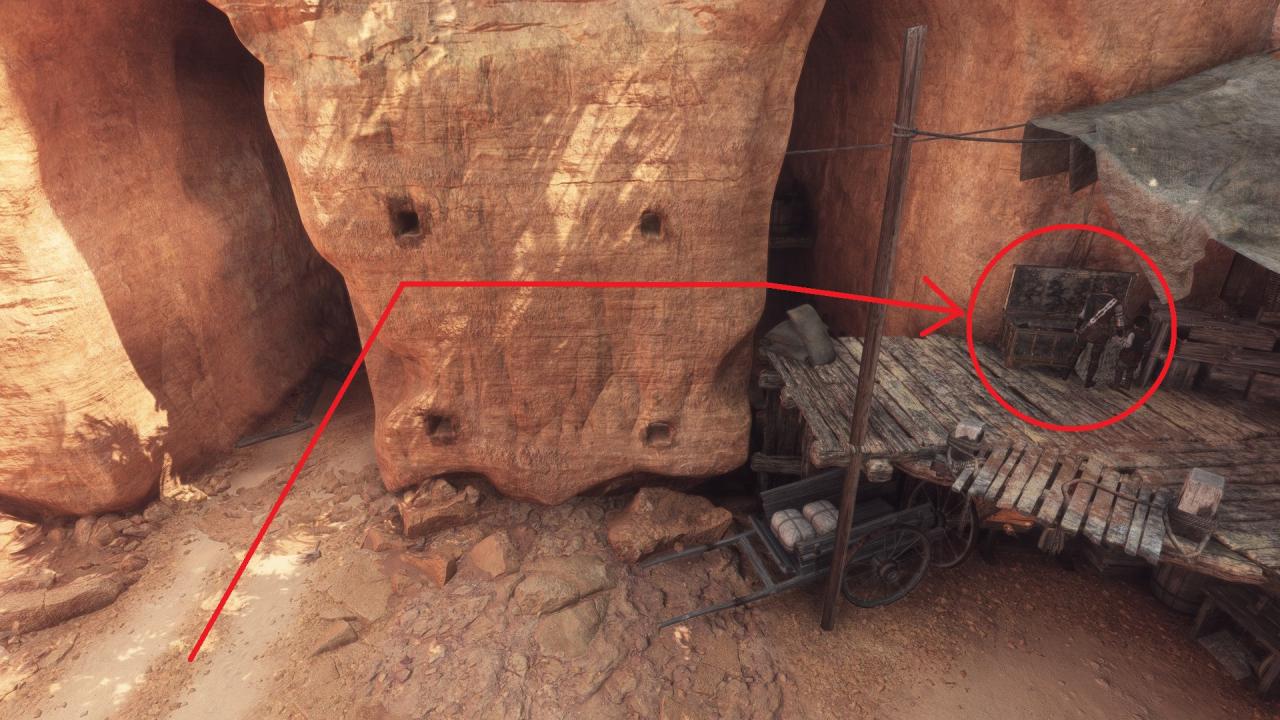
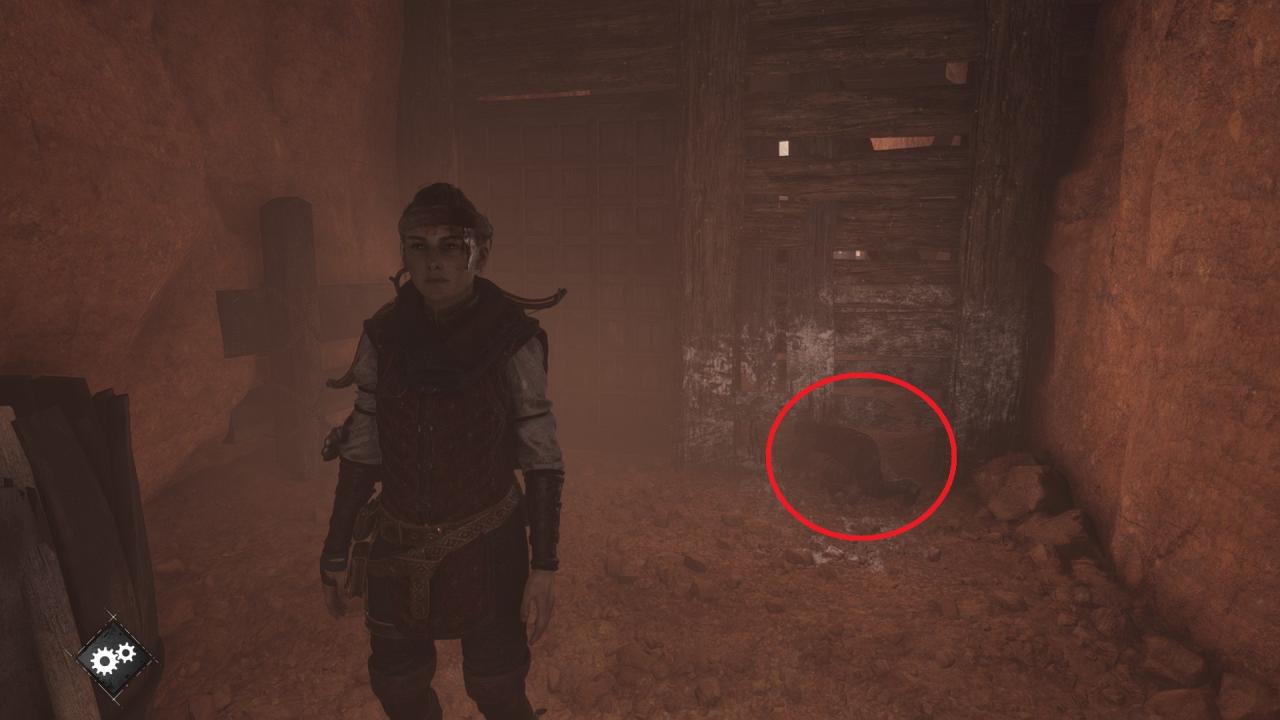 Interact with it in order to send Hugo through it to open the door for Amicia. Pass through the door, climb the stairs and to the left you’ll find a big chest.
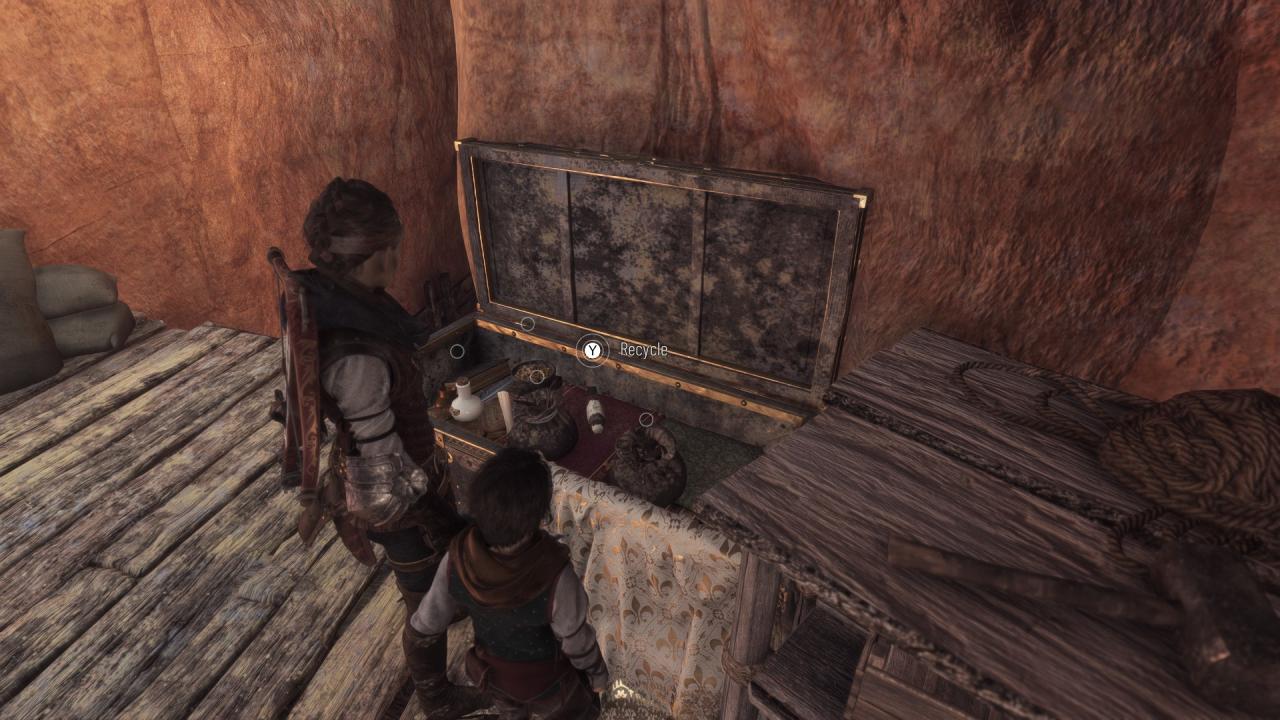 Open the chest and pick up the Tool.
– Tool #11: Can be collected during objective “Reach the building”, on top of the rock in the middle off the area, under a tent in a big chest. You can reach it by climbing a ledge.
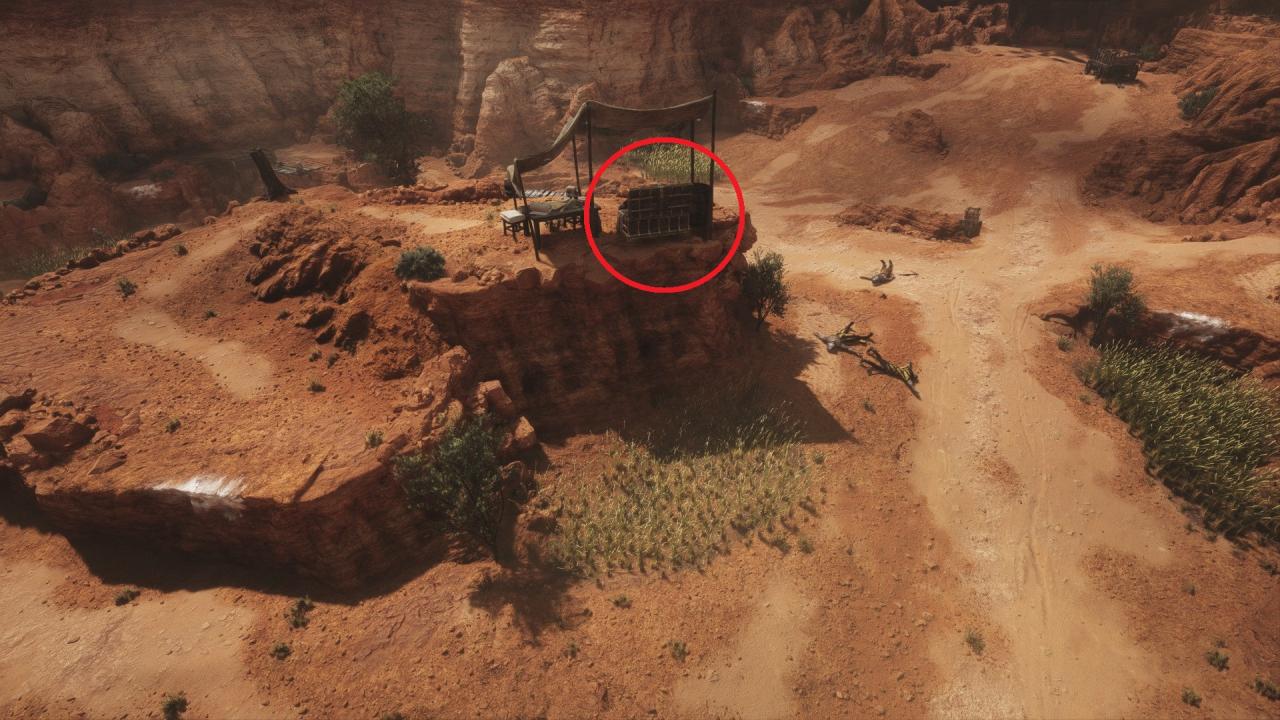
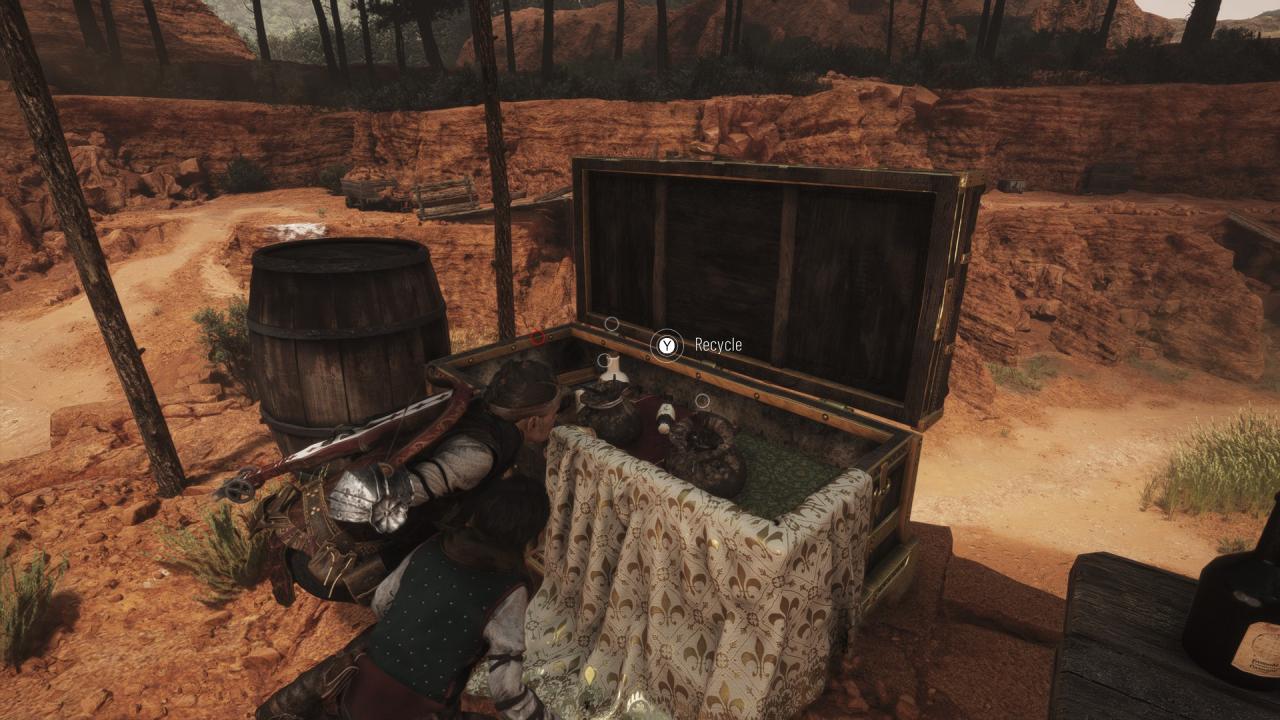 Open the chest and pick up the Tool.
– Tool #12: Inside the Secret Chest #4 (please see the Explorer achievement).
– Tool #13: Can be collected during objective “Exit the dye works”. On the right side of the area there is a hut, with a locked door to a cell inside.
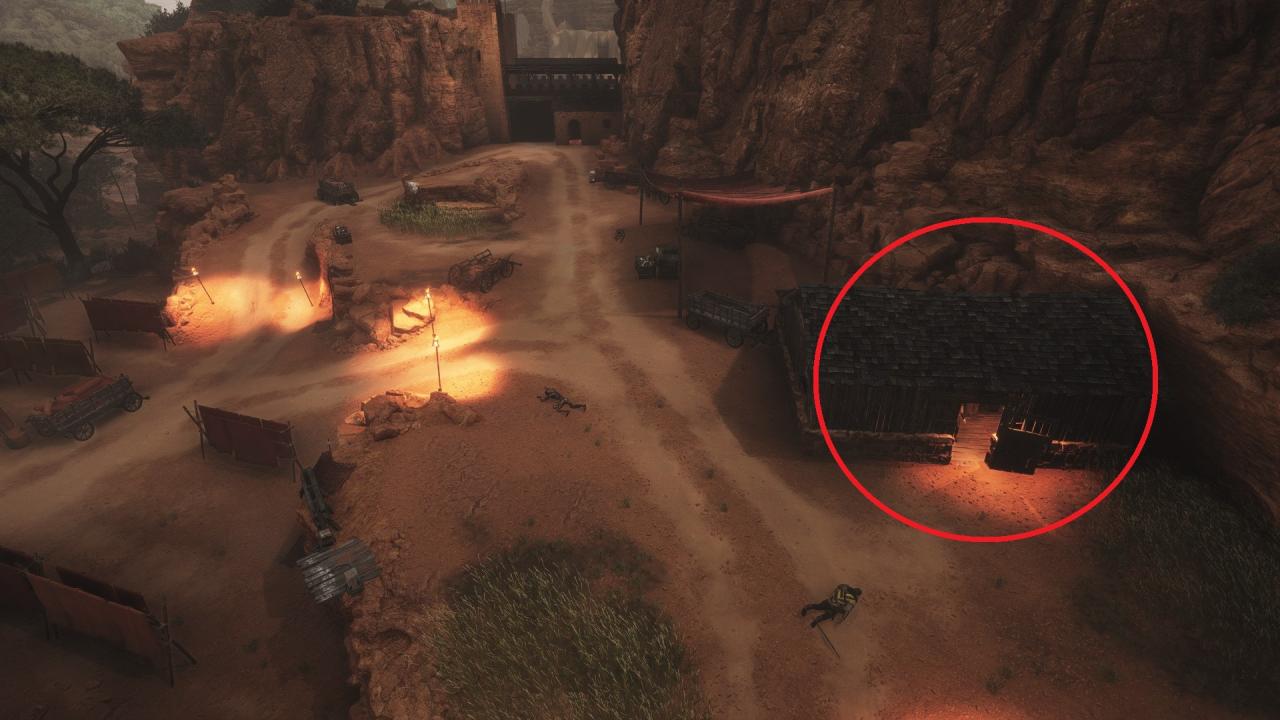 Go behind the hut and shoot the hinge to open the door.
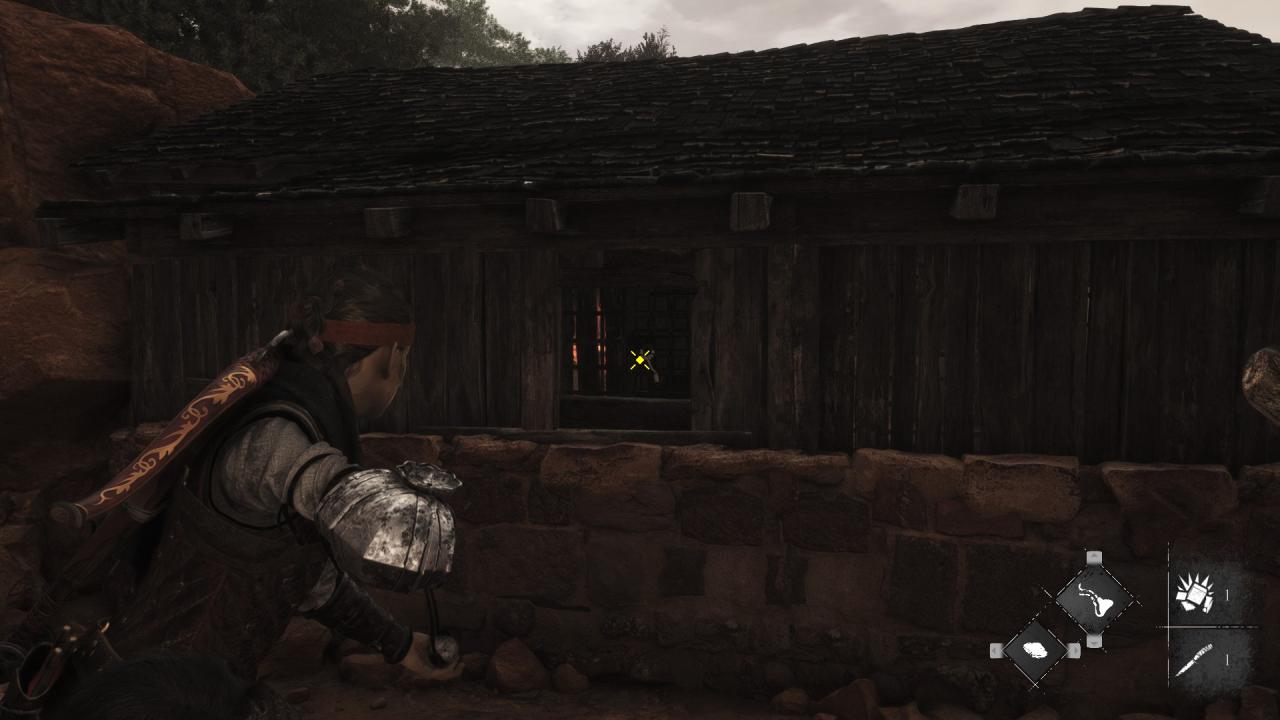
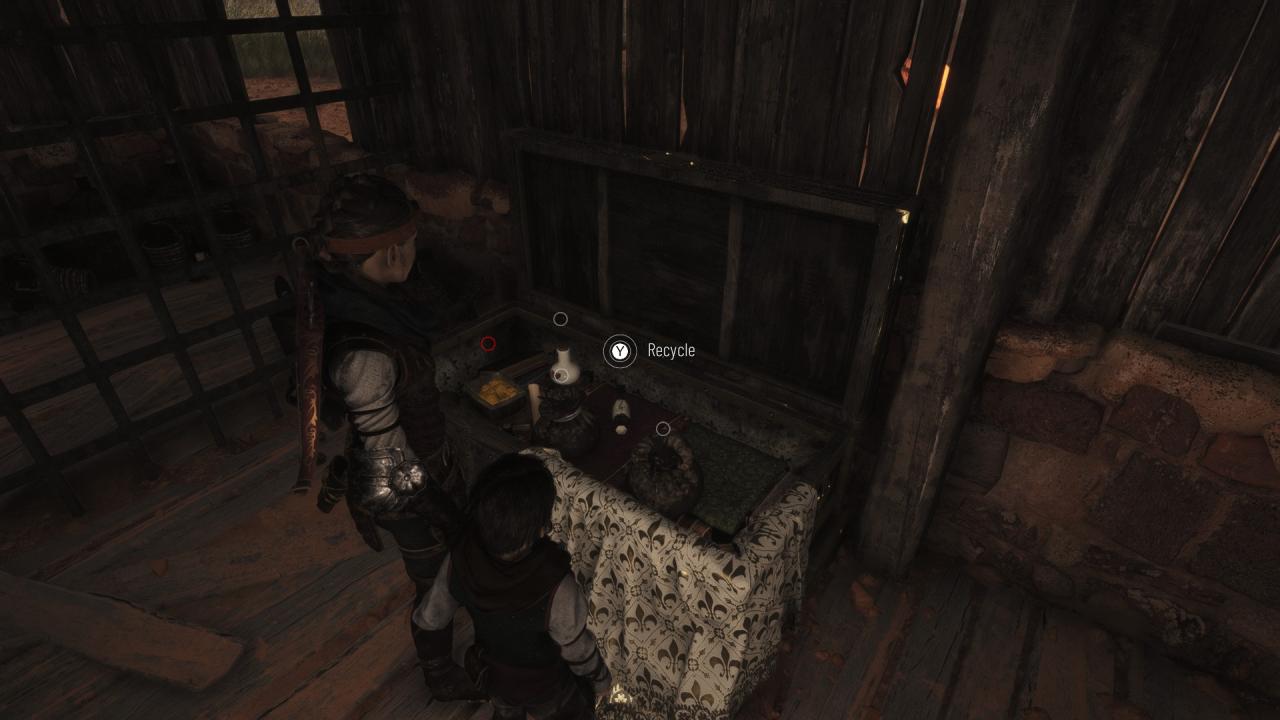 Go back inside, enter the cell, open the chest and pick up the Tool.
Chapter 7: 4 Tools
– Tool #14: Can be collected during objective “Reach the shipwreck”, in a section where you will be pushing a burning brazier cart inside the rats’ nest. Push the cart a little further until you see a crossroad. To the left there will be a small cavern with a big chest inside of it and a brazier near it. Light up the brazier by using Ignifer to clear the path of rats.
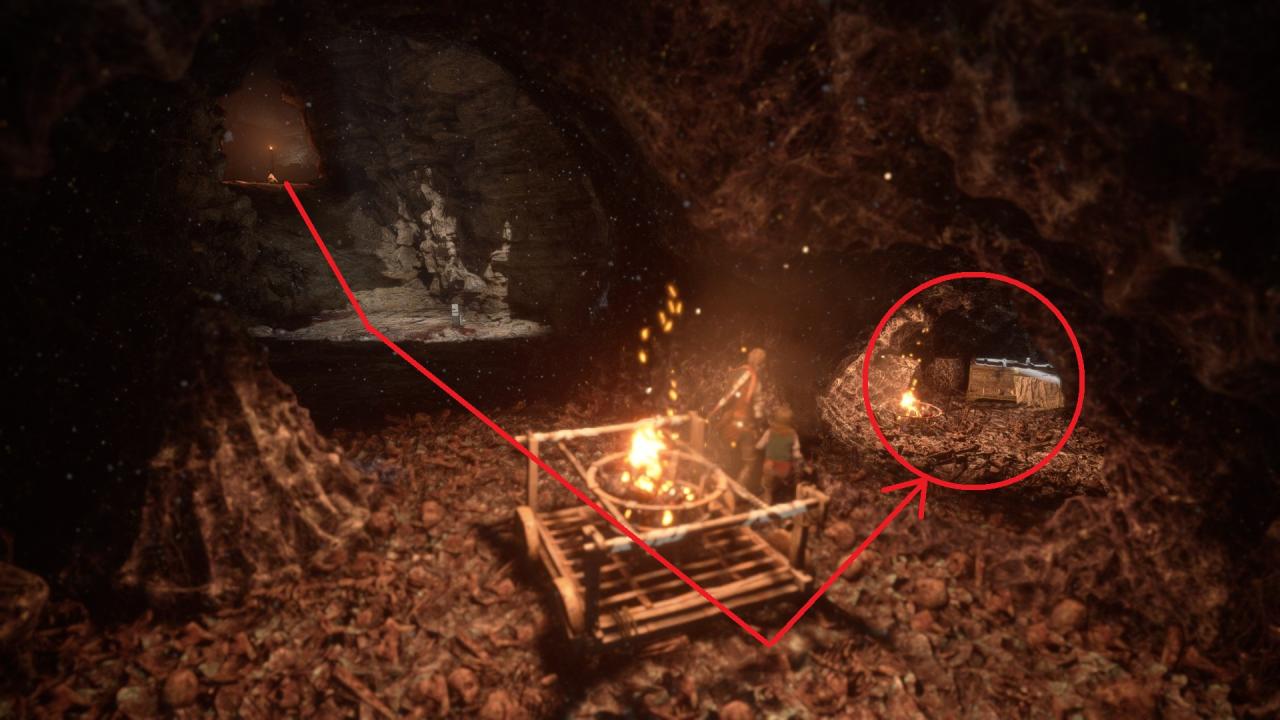
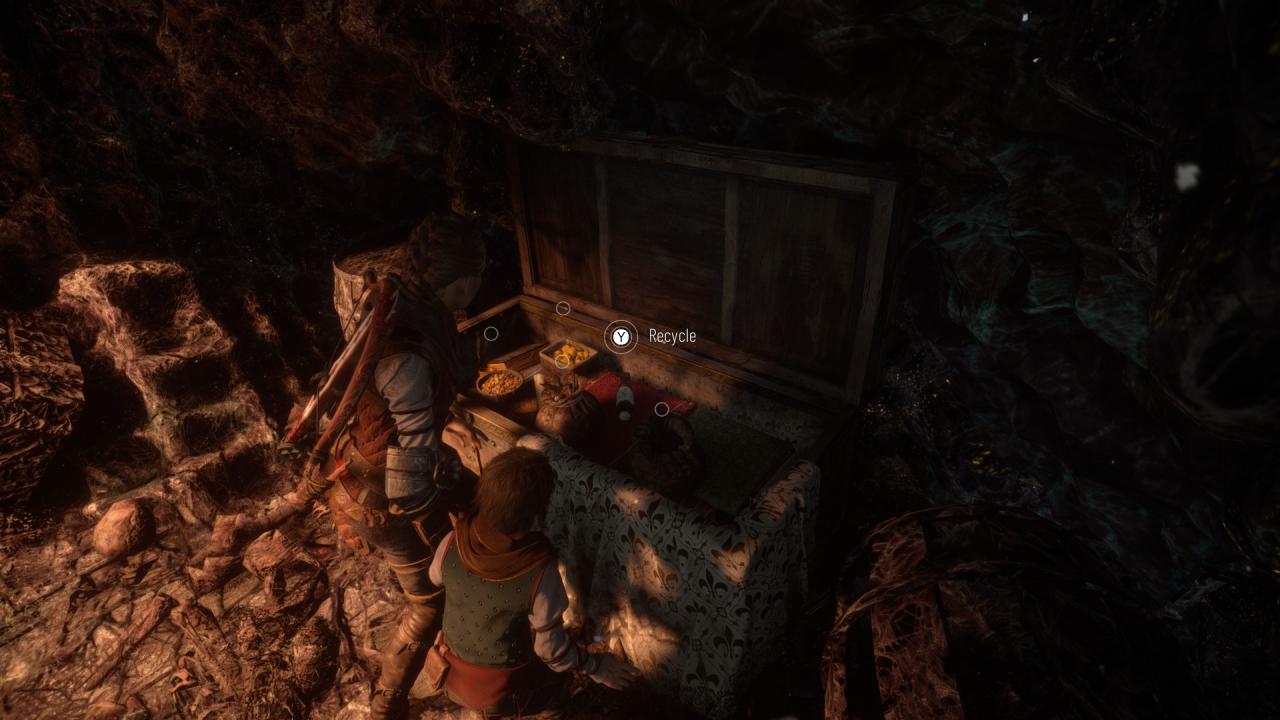 Go inside, open the chest and pick up the Tool.
– Tool #15: Inside the Secret Chest #5 (please see the Explorer achievement).
– Tool #16: Can be collected during objective “Reach Sophia’s boat”, on a small heart-shaped island. In the middle of the island there is a wooden pole that keeps a boat anchored. Interact with the rope on the pole and pull the boat towards the island.
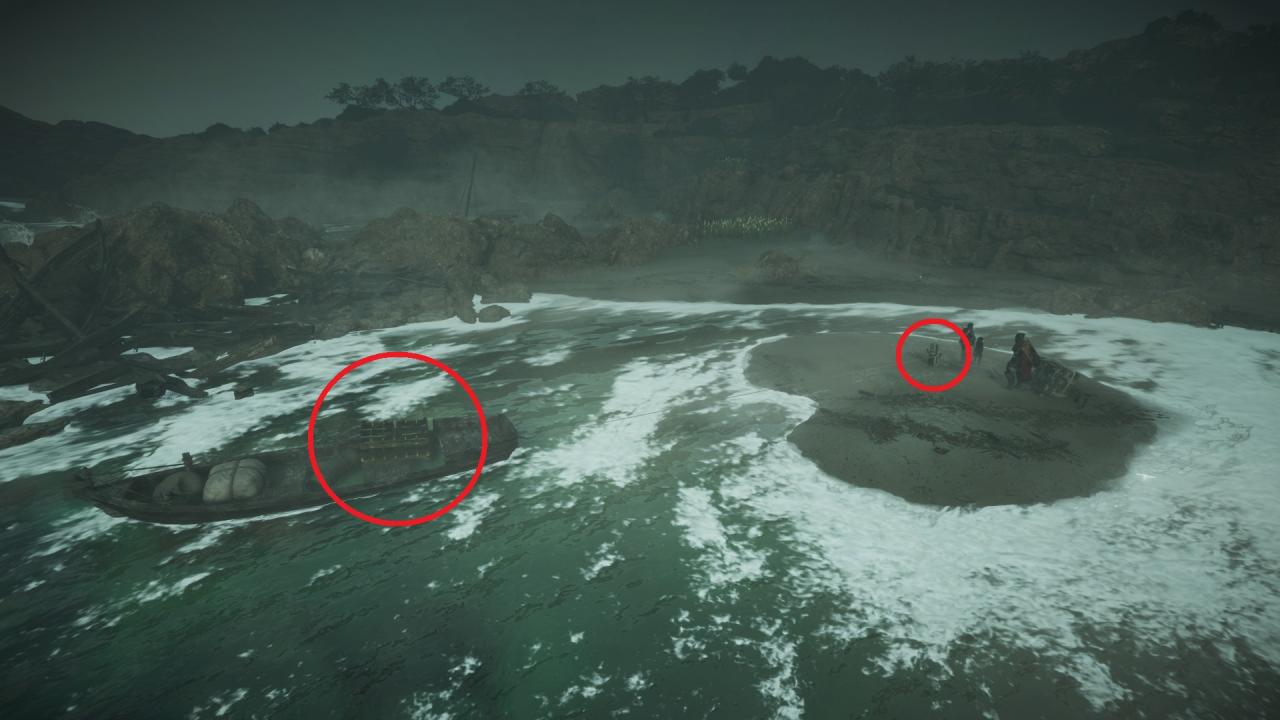 After the interaction is completed, go to the boat and in it you fill find a big chest.
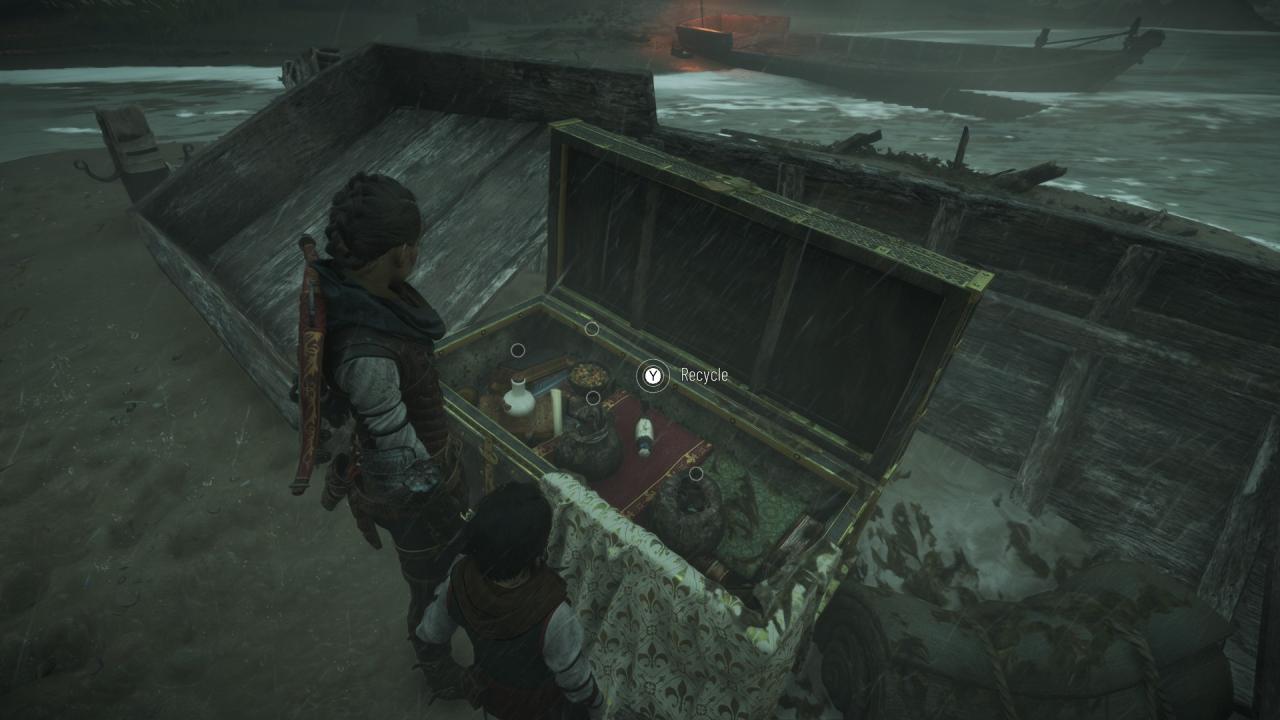 Open the chest and pick up the Tool.
– Tool #17: Can be collected during objective “Reach Sophia’s boat”, in the section where you reach the fish village. Reach the pontoon almost at the end of the beach, on which you can find another pole with an interactable rope. Use it in order to collapse the broken pier on which a big chest stands.
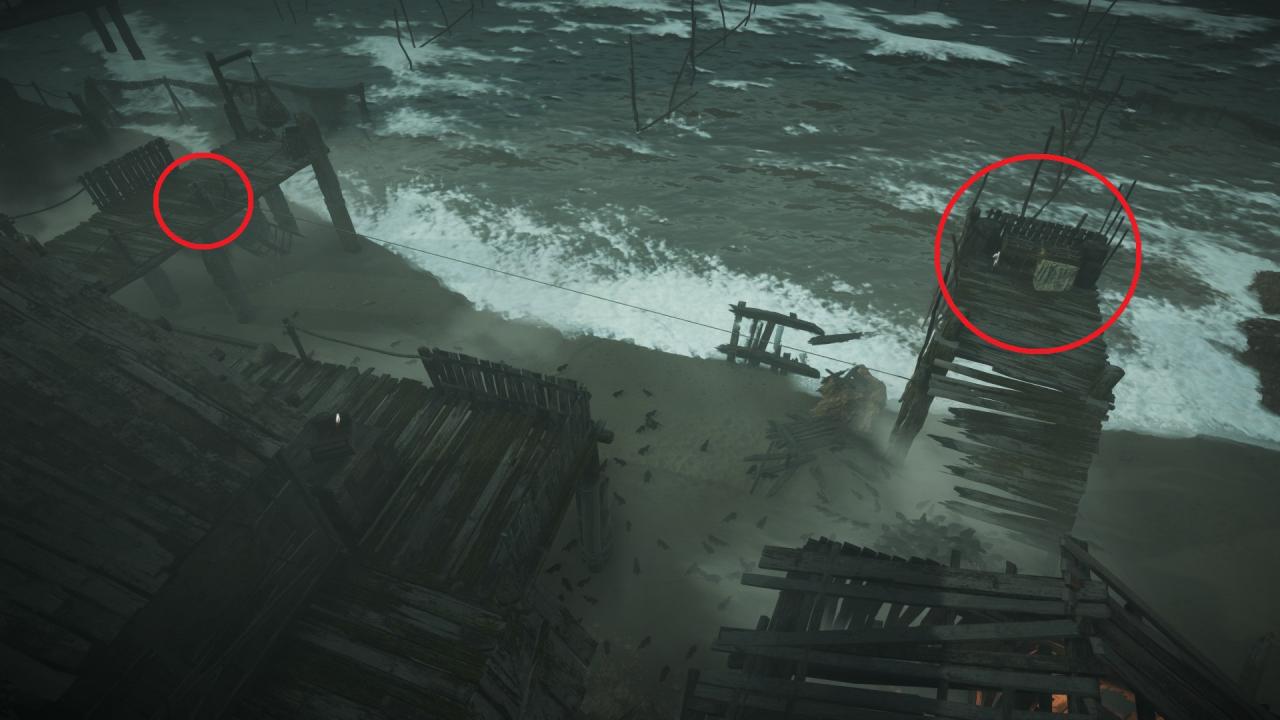
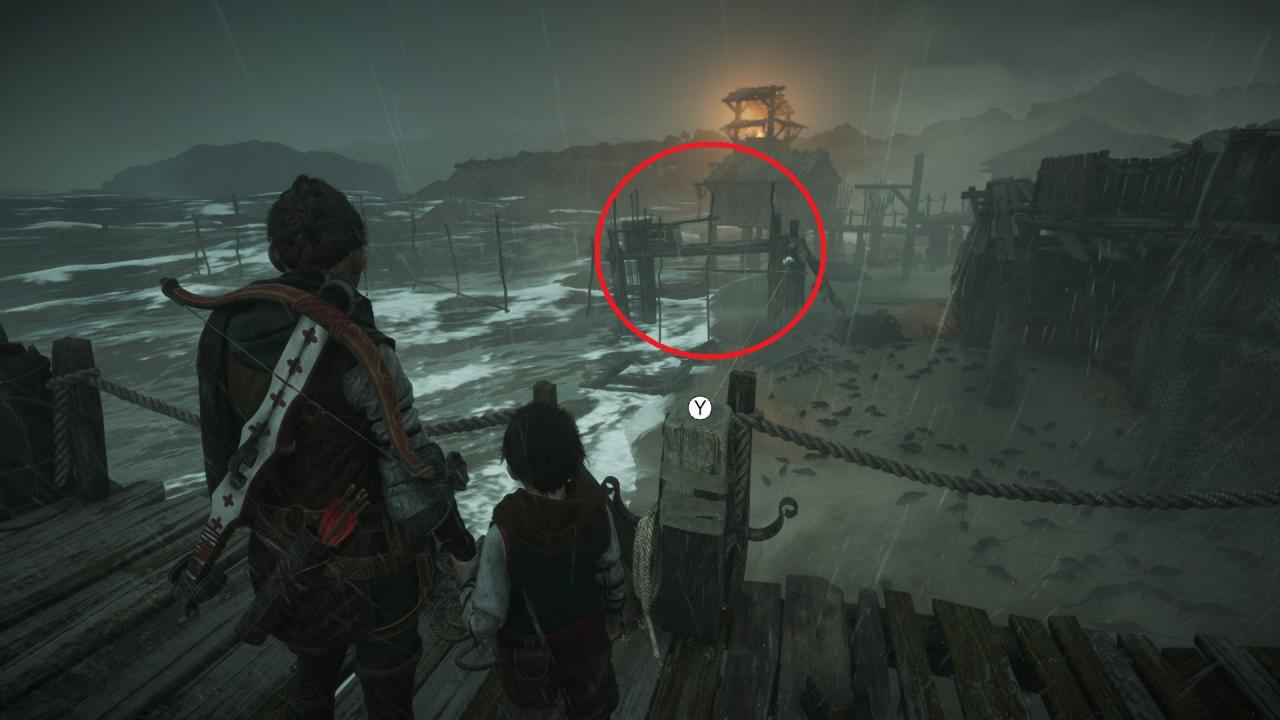 In order to reach the chest you must get rid of the rats on the beach. One way to do it is by using Hugo’s ability to control them and steer away the rats from the beach.
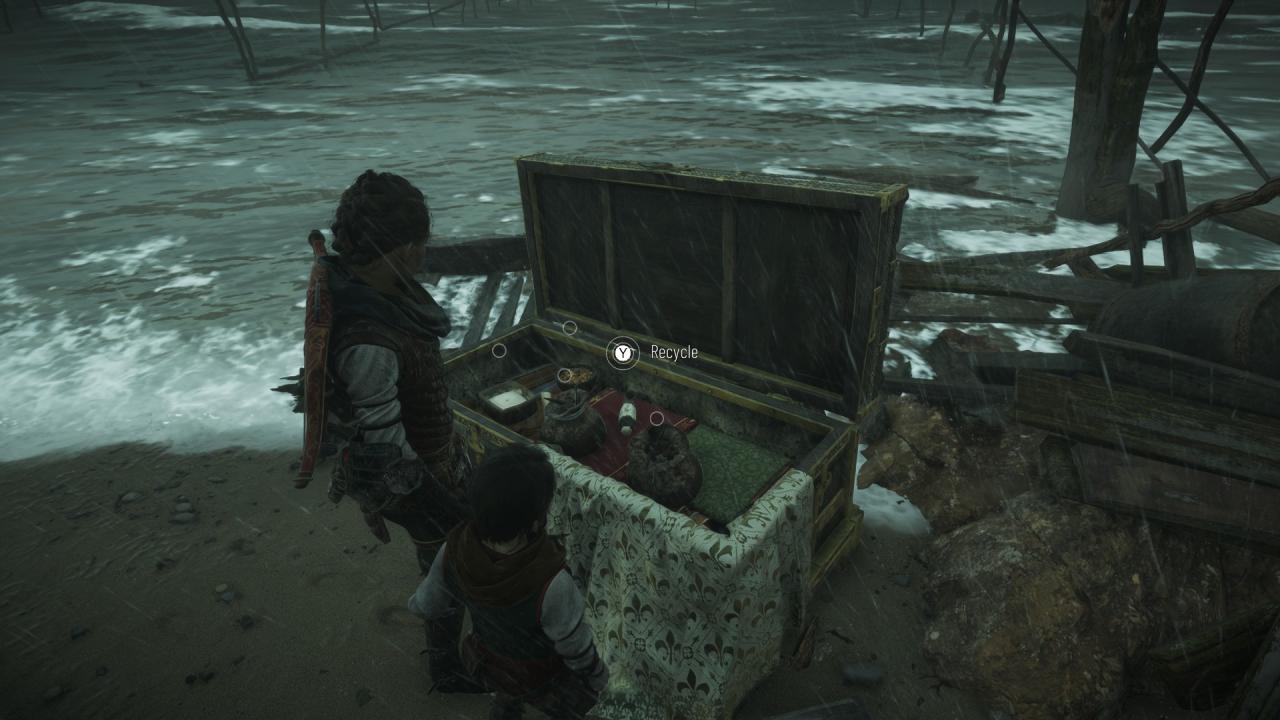 Open the chest and pick up the Tool.
Tool Locations (Chapters 8-16)
Chapter 8: 1 Tool
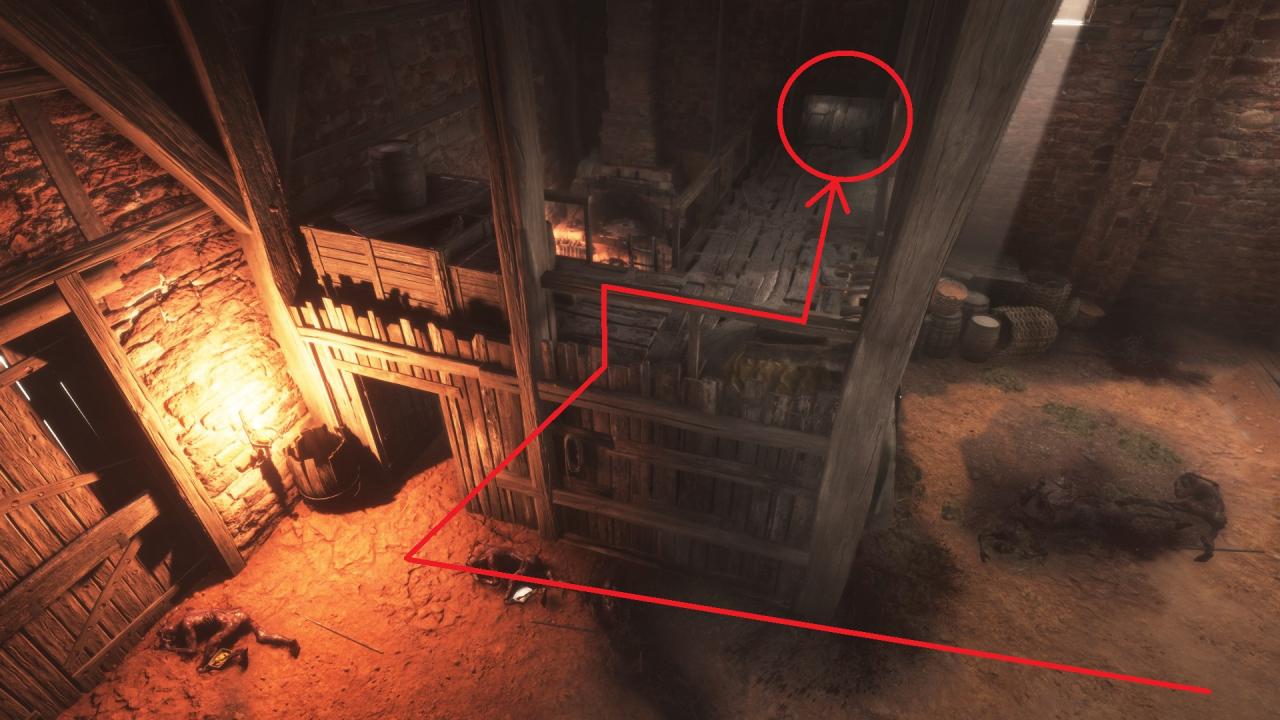
– Tool #18: Can be collected during objective “Escape from the Count’s soldiers”, when you have to move a cart to climb in the upper part of the barn and instead of going to the left as normal progression, go forward passing the hay and to the right you will find a big chest.
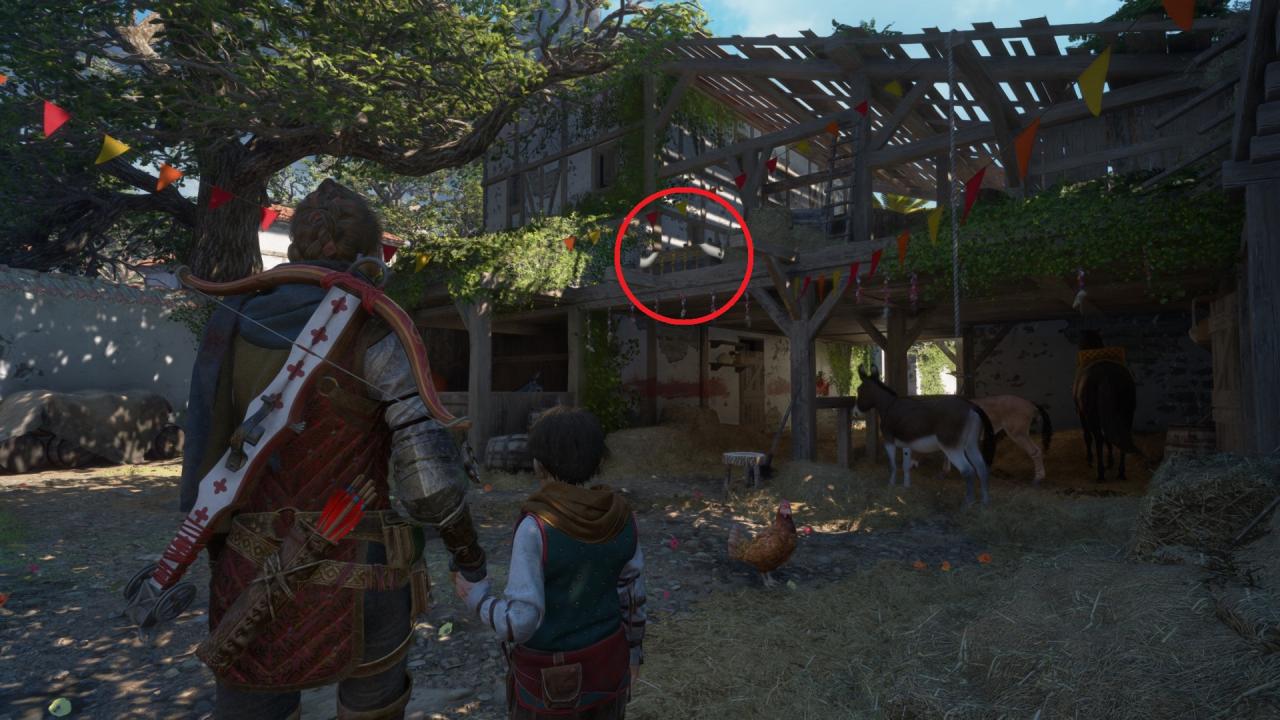
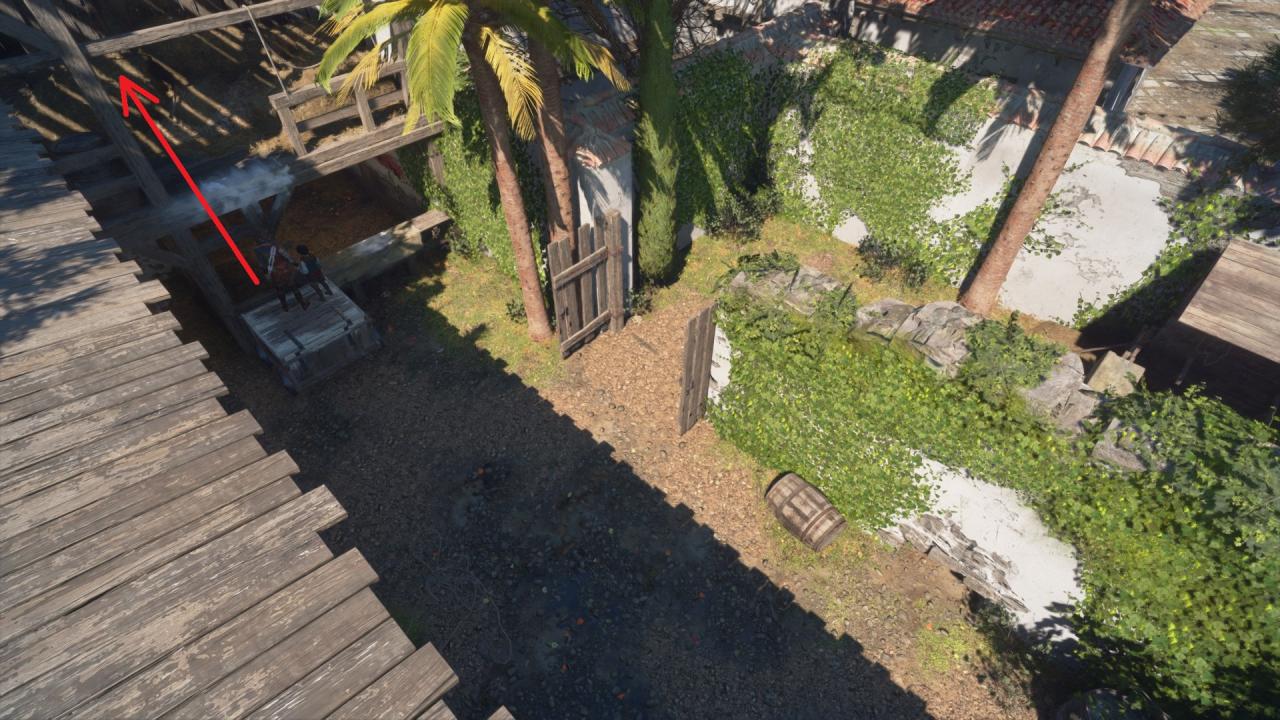
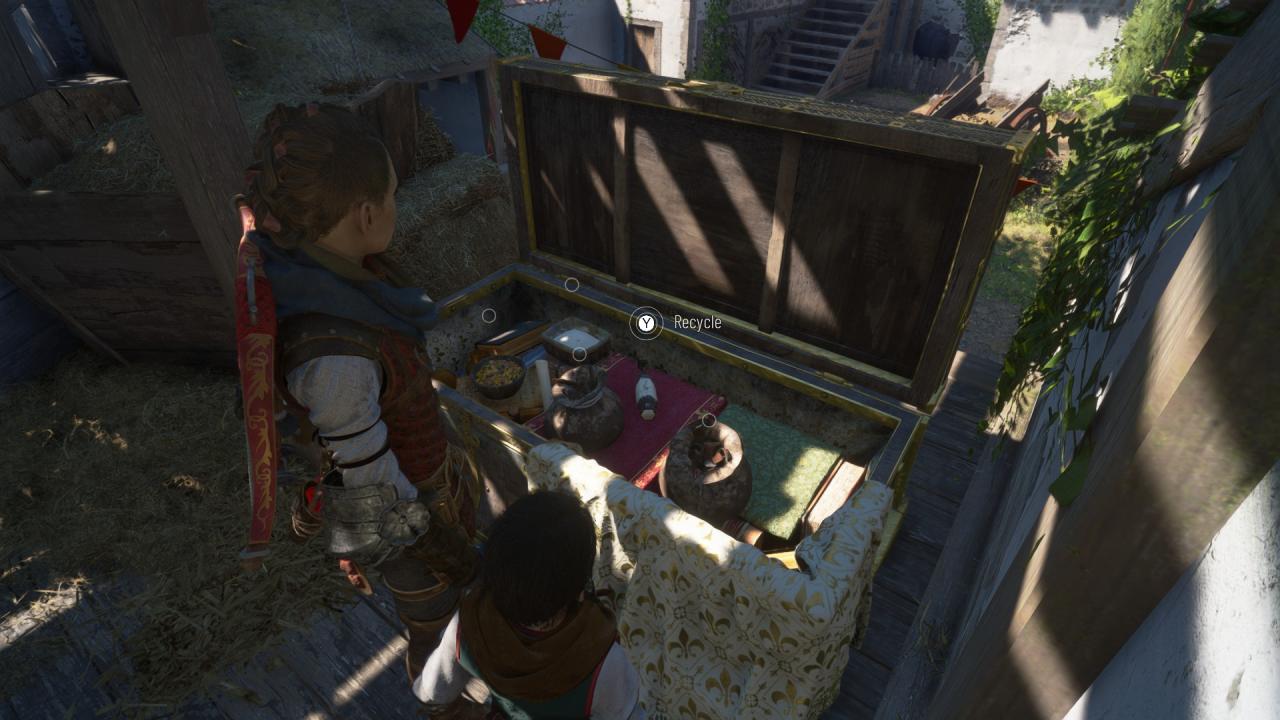 Open the chest and pick up the Tool.
Chapter 9: 7 Tools
– Tool #19: Inside the Secret Chest #6 (please see the Explorer achievement).
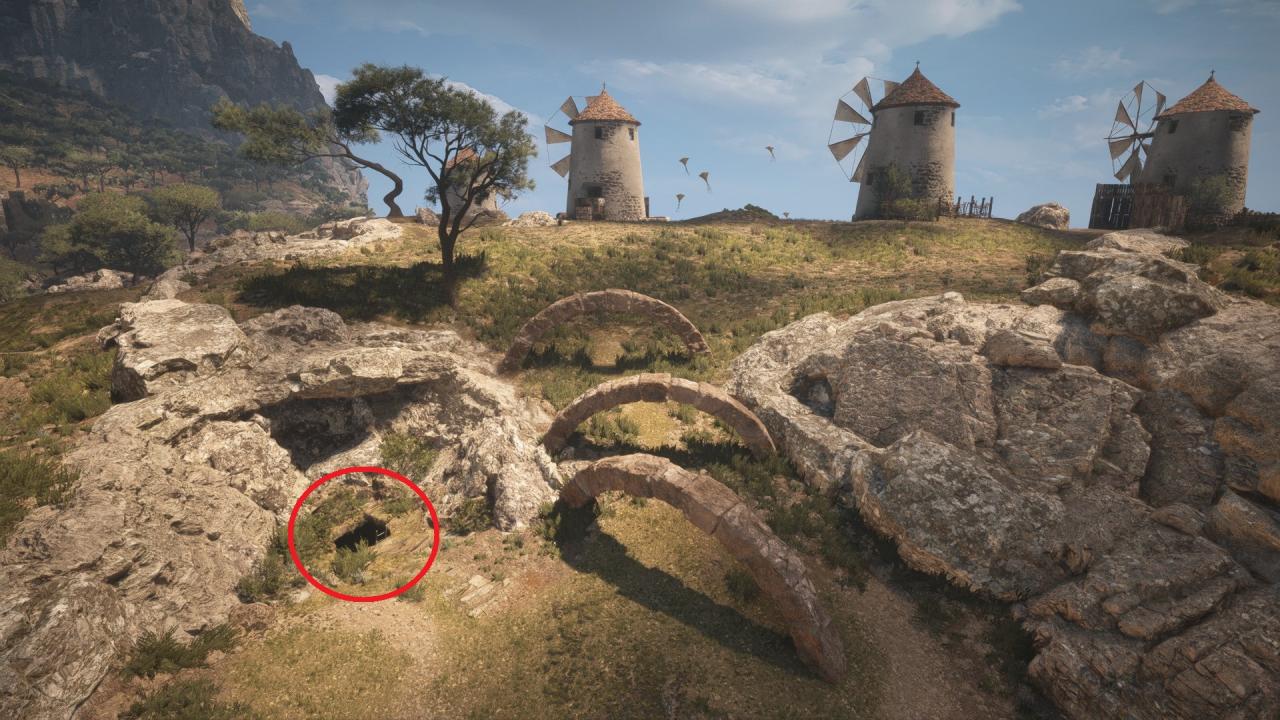
– Tool #20 and #21: Can be collected during objective “Follow the bird statues”, after leaving the castle and finding the first bird statue. From now on, you are free to explore the entire island. Head towards the windmills and solve the puzzle (windmills no.1 and 2 have to be closed, and no.3 and 4 have the be on), follow the 3 arches until you find the secret entrance underground. Climb down the ladder and go through the now opened path.
 Descend into the cave until reaching the smuggler’s layer. Continue exploring the cave until you reach a room with two big chests and a secret armour.
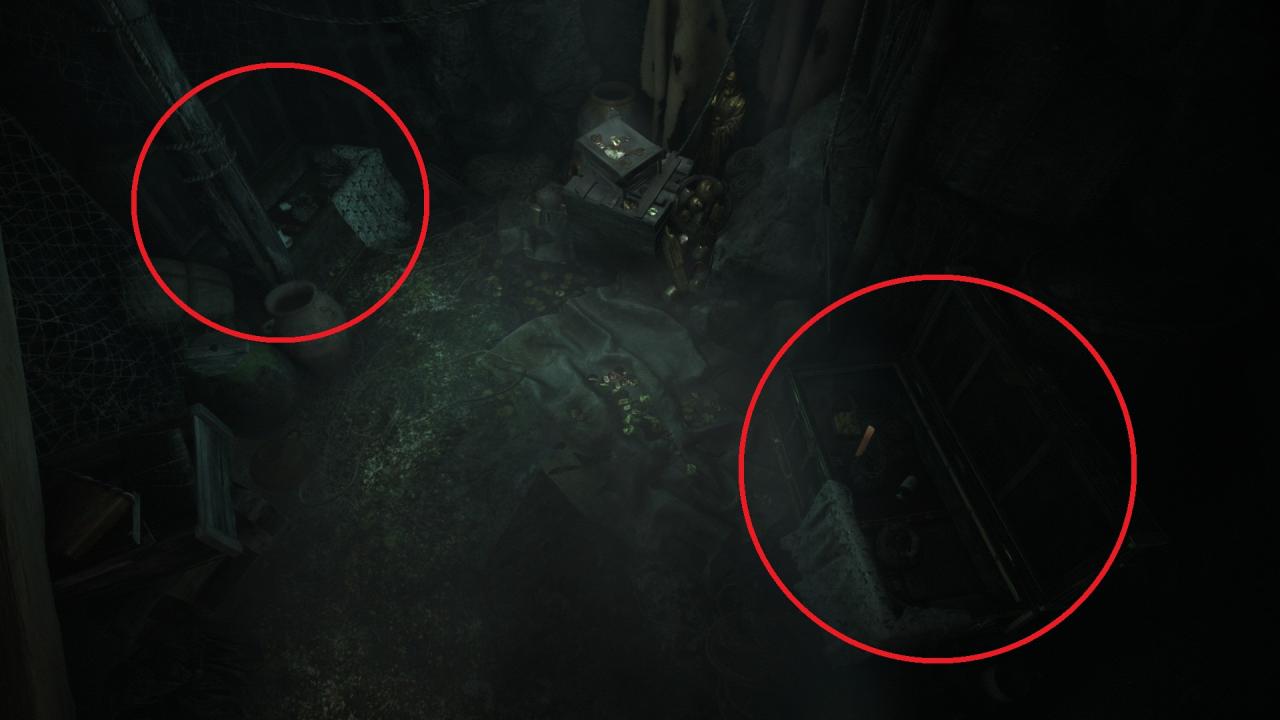 Open the two chests and pick up the Tools.
– Tool #22: Head towards the barn where the flying kites are and climb up on the roof of the barn. From a hole in the roof shoot down the hinge holding a suspended crate. Get down on the balcony and through the windows shoot the two hinges holding the barn door locked.
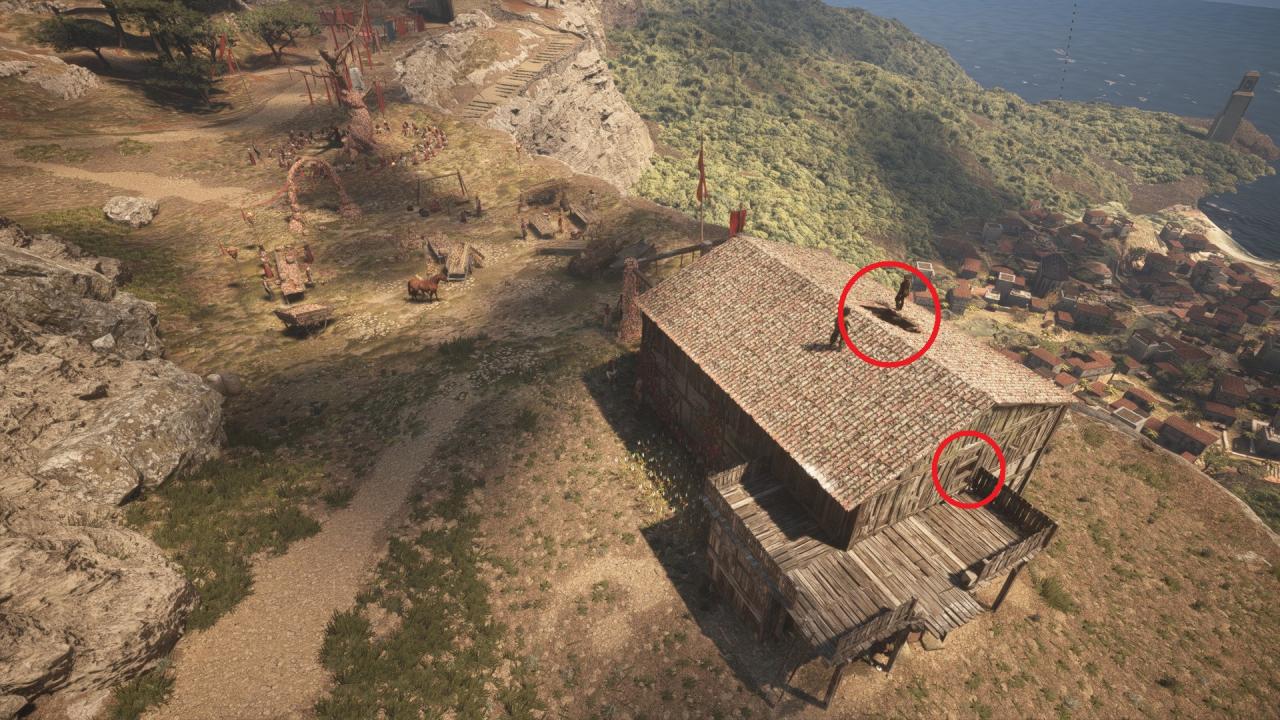 Head inside the barn and in the back of it there you’ll see a big chest.
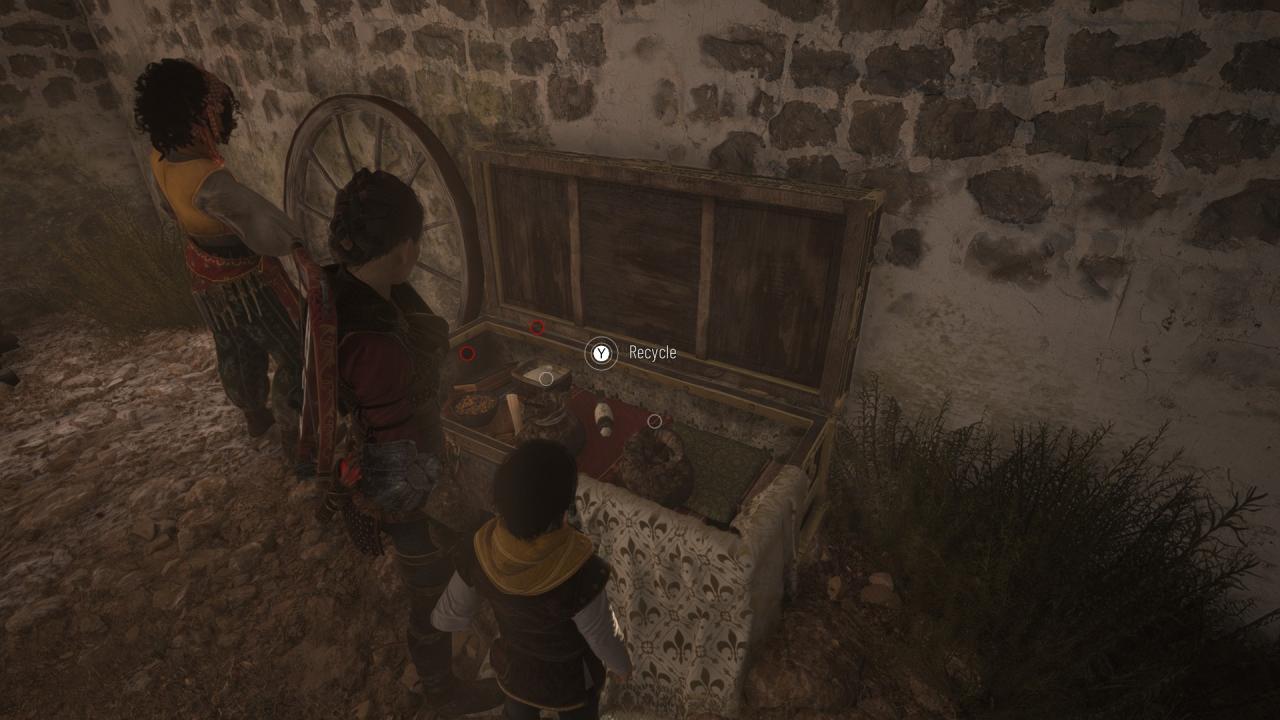 Open the chest and pick up the Tool.
– Tool #23: Head towards the watchtower climb the first ledge then go down the second ledge. Enter the watchtower through the window. Once inside the tower, climb the ladder and you’ll see a big chest.
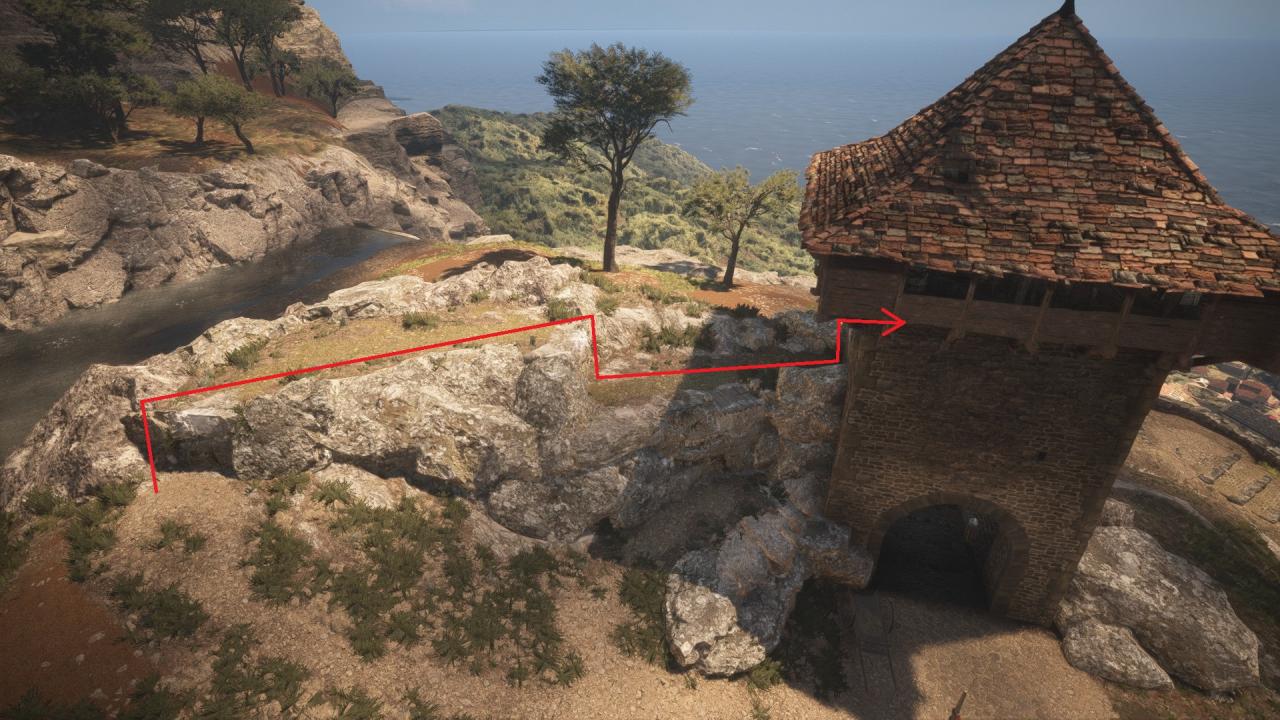
 Open the chest and pick up the Tool.
– Tool #24: Can be collected during objective “Find a way around the checkpoint”, after meeting the goat herder. Facing the gate, turn left then climb the ledge and continue walking on the path until you reach a ruined round building. The chest with the tool will be inside it (as well as the goat for the 17th souvenir).
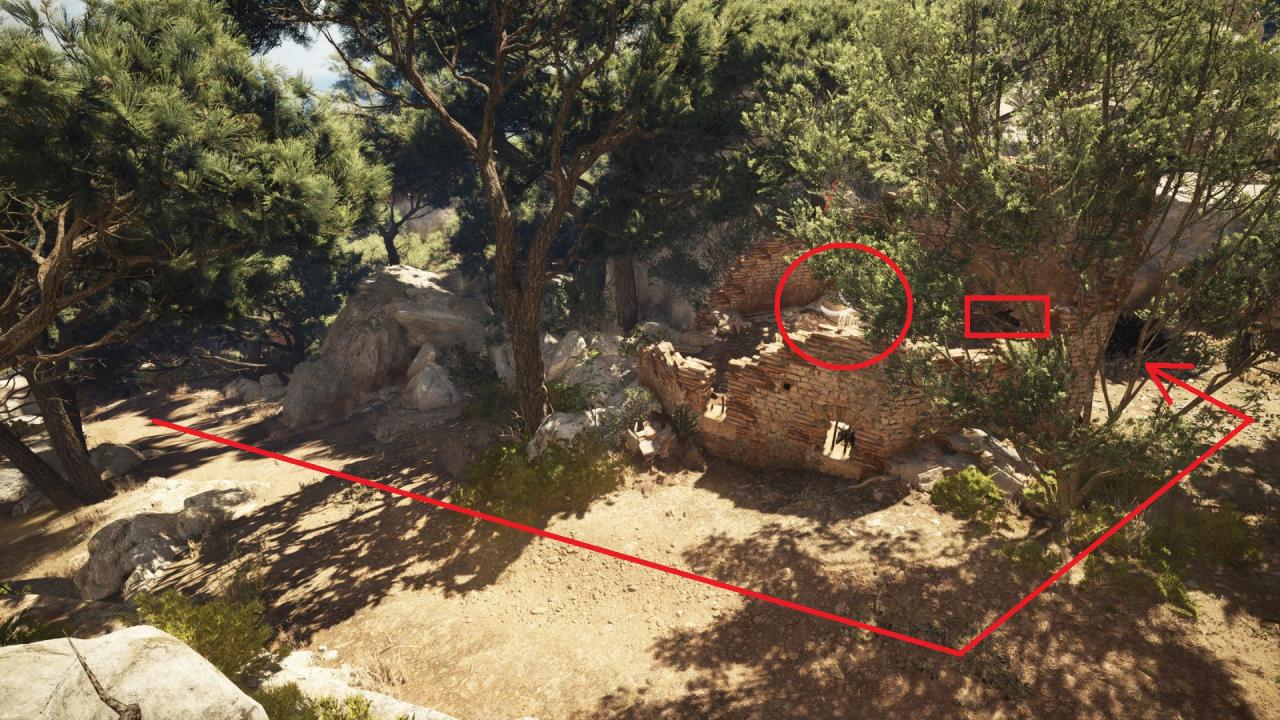 The door to the building will be locked, so in order to get inside you will need to burn down the grass to the right of the building that blocks a small hole in the wall. After the fire dies, send Hugo through the gap to open the door.
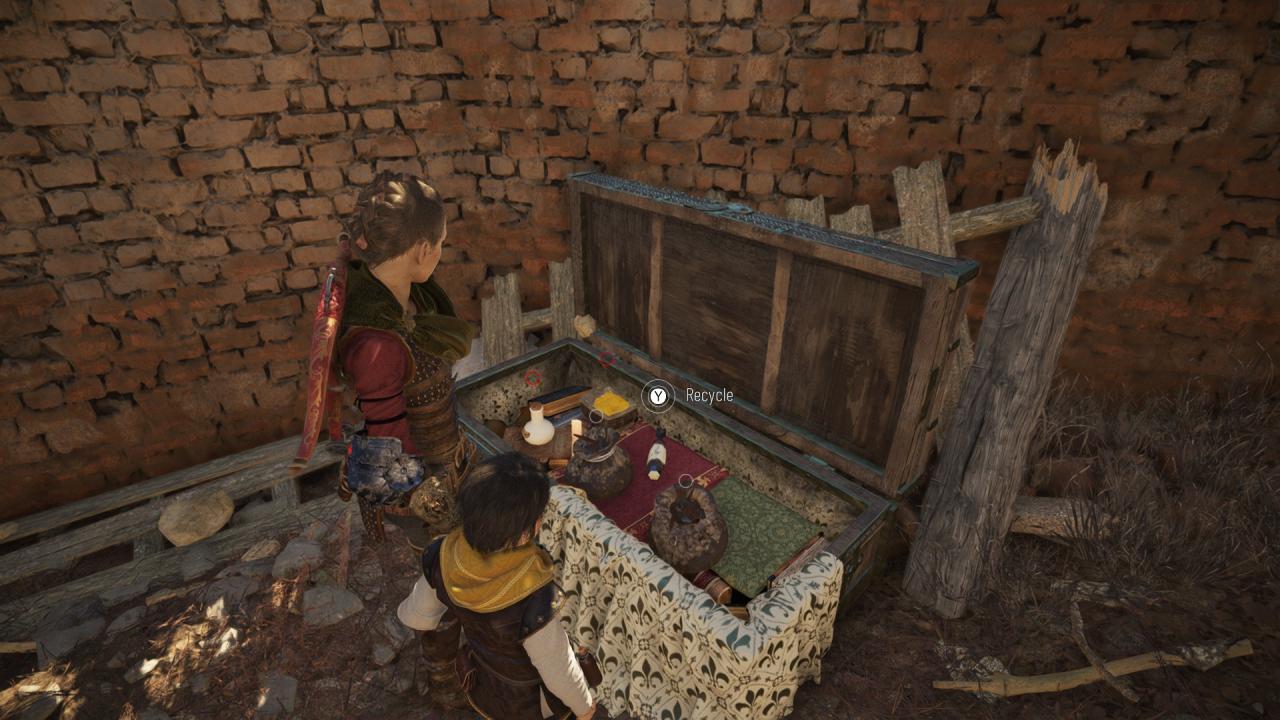 Enter the tower and to the right will be the big chest. Open the chest and pick up the Tool.
– Tool #25: Inside the Secret Chest #7 (please see the Explorer achievement).
Chapter 10: 4 Tools
– Tool #26: Can be collected during objective “Reach the fort”, when you have to unblock the door to the roman building. Reach the anchor point on the rooftop of the building in the middle.
Next to the anchor point there will be a big chest.
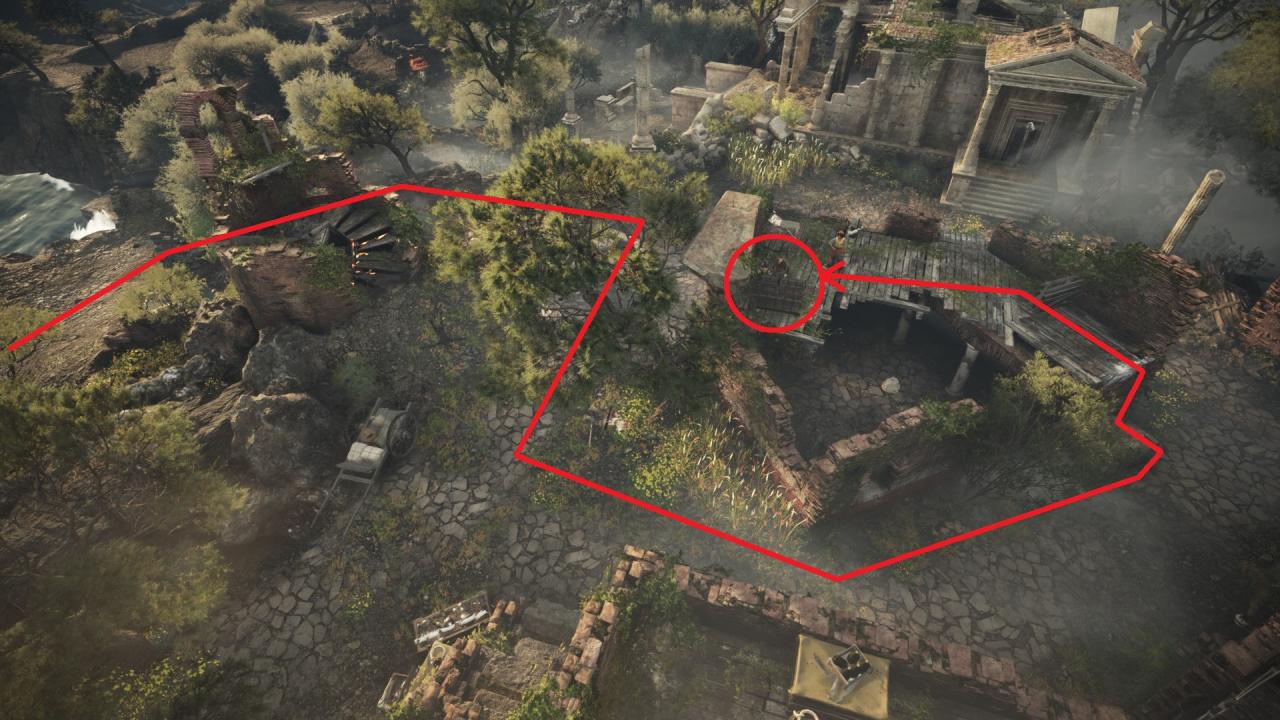
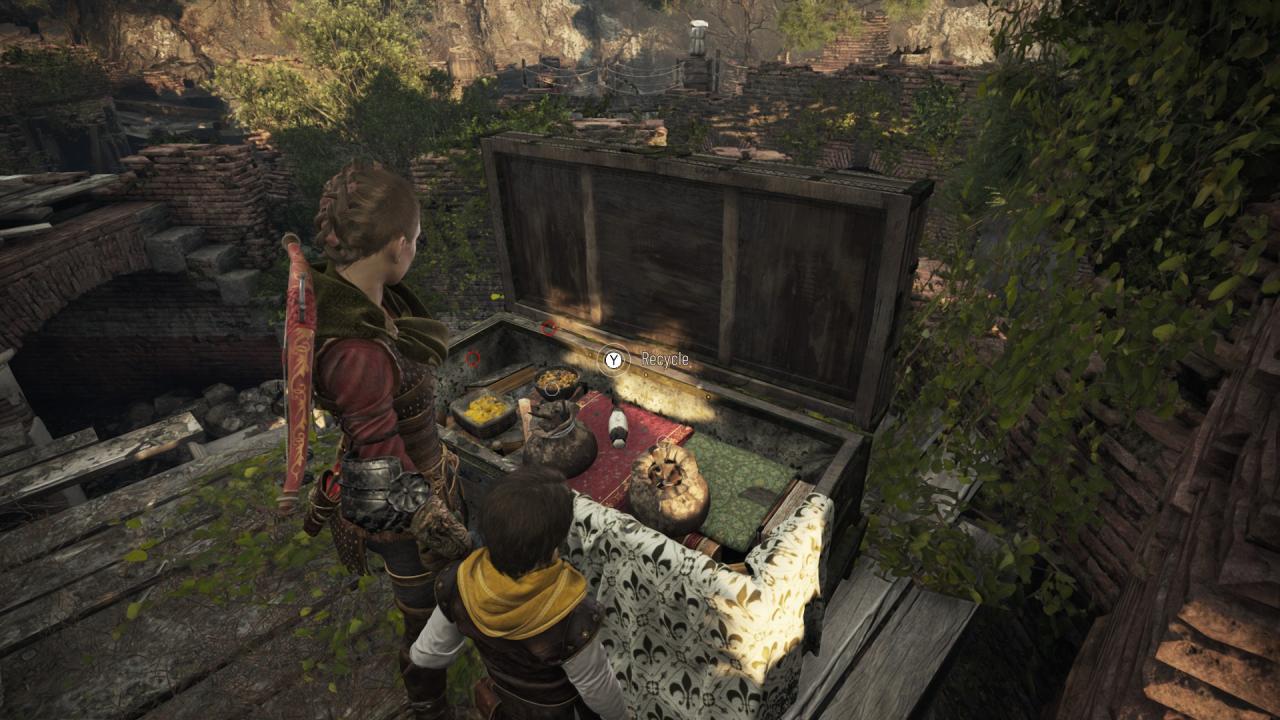 Open the chest and pick up the Tool.
– Tool #27: Can be collected during objective “Reach the fort”, when you reach the soldiers’ camp with many bodies and hanged people. Go forward on the path paved with rocks until you reach the last building on the right, with two prisoners in a wooden cage right to the entrance. Enter the building, go up the stairs, crouch through the hole in the wall in front of the stairs and on the balcony you will find a big chest.
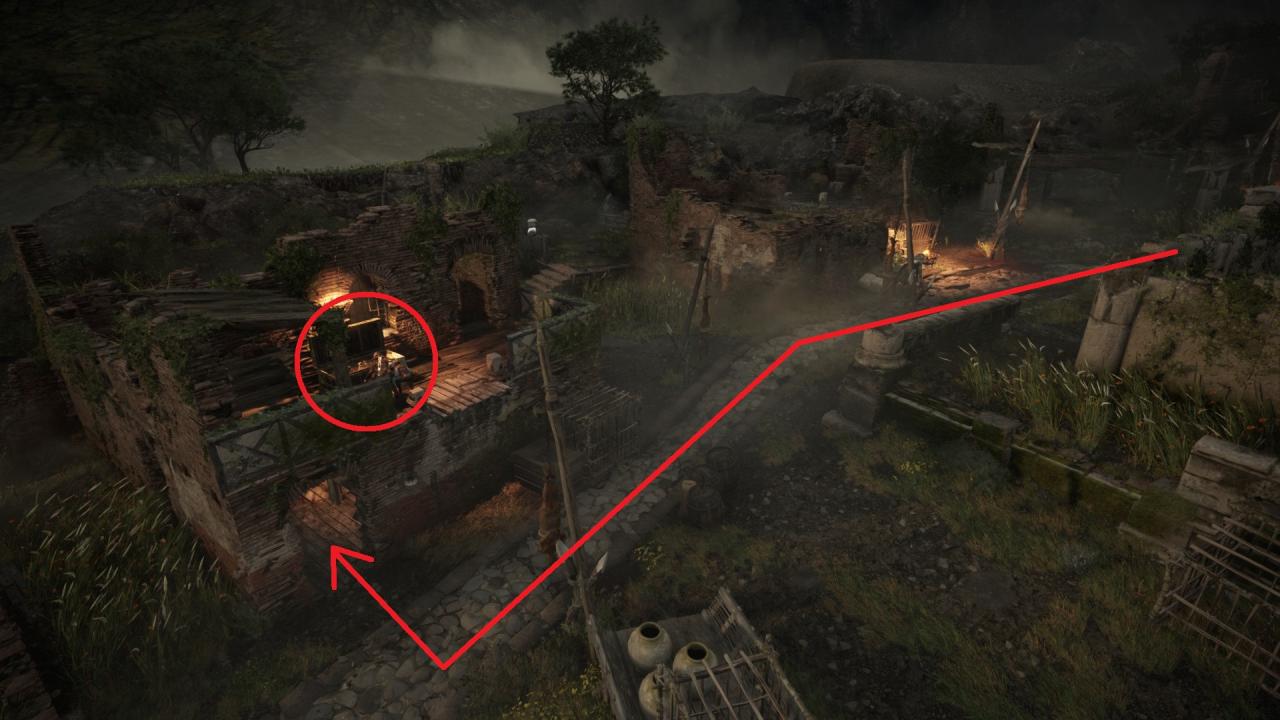
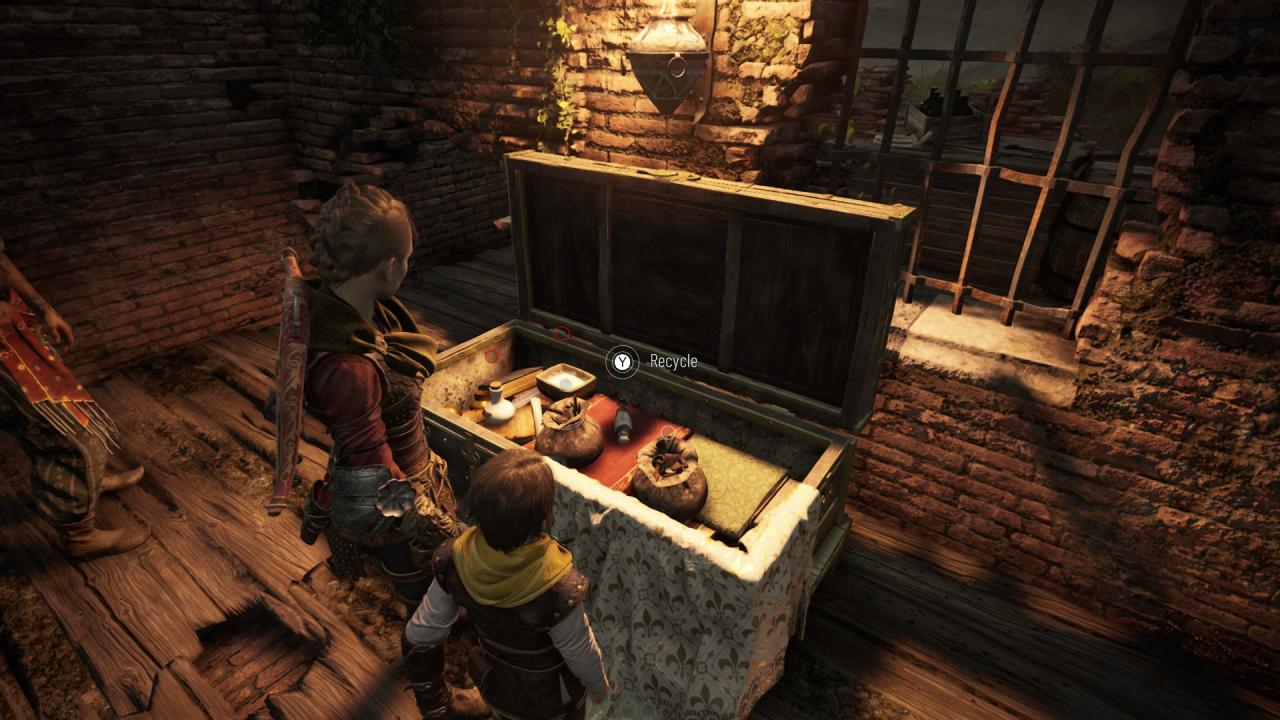 Open the chest and pick up the Tool.
– Tool #28: Inside the Secret Chest #8 (please see the Explorer achievement).
– Tool #29: Can be collected during objective “Reach the inner courtyard”, after you pass through the fire barricade. Get on the roof of the building using the stairs, head to the left side of the building and go down the stairs.
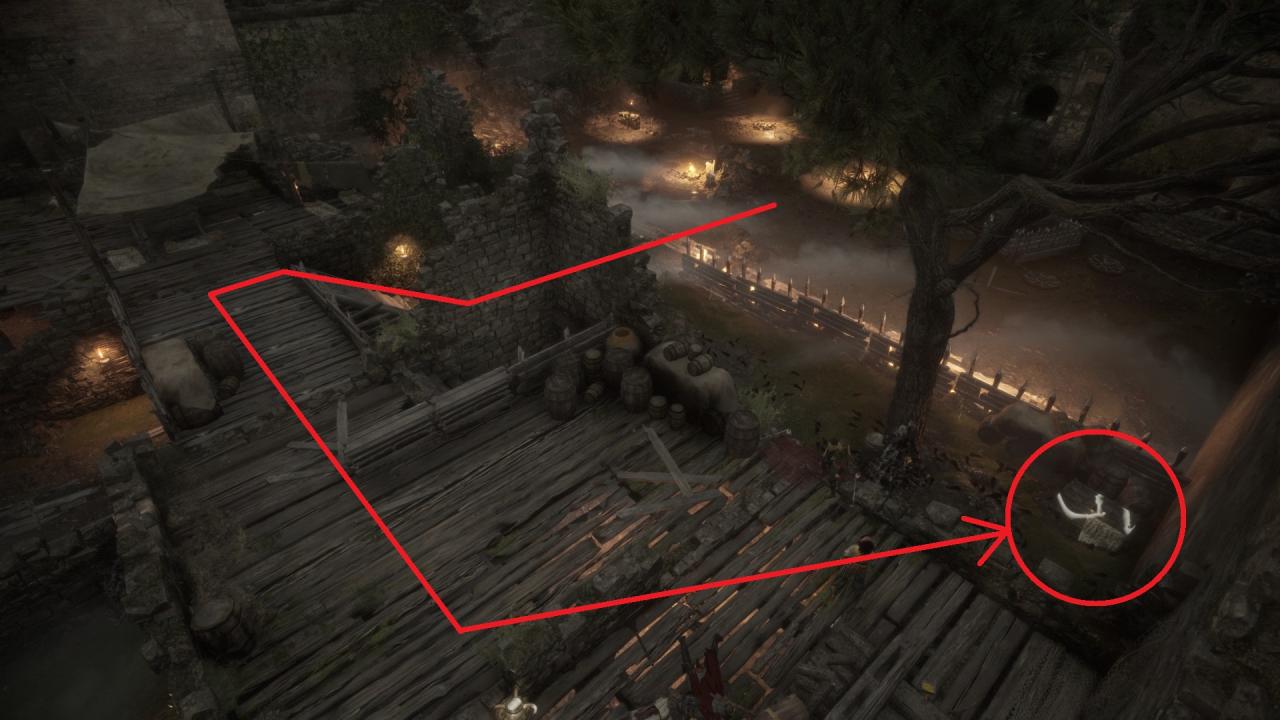 From here, use Odoris to lure the rats away and/or use a stick, light it on fire and go outside to the big chest.
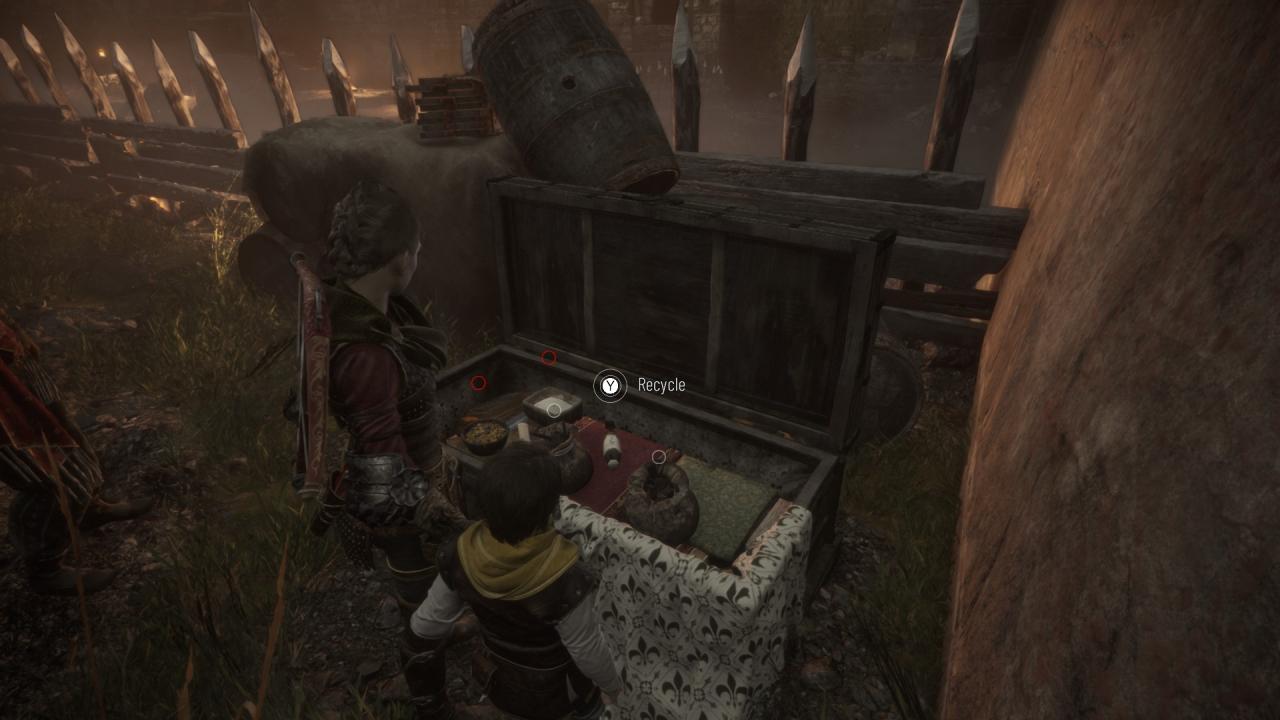 Open the chest and pick up the Tool.
Chapter 11: 2 Tools
– Tool #30: Inside the Secret Chest #9 (please see the Explorer achievement).
– Tool #31: Can be collected during objective “Explore the rest of the underground area”, in the section where you have to push the cart with the brazier in order to reach the other side. Before reaching the ladder on the left side there is a big chest.
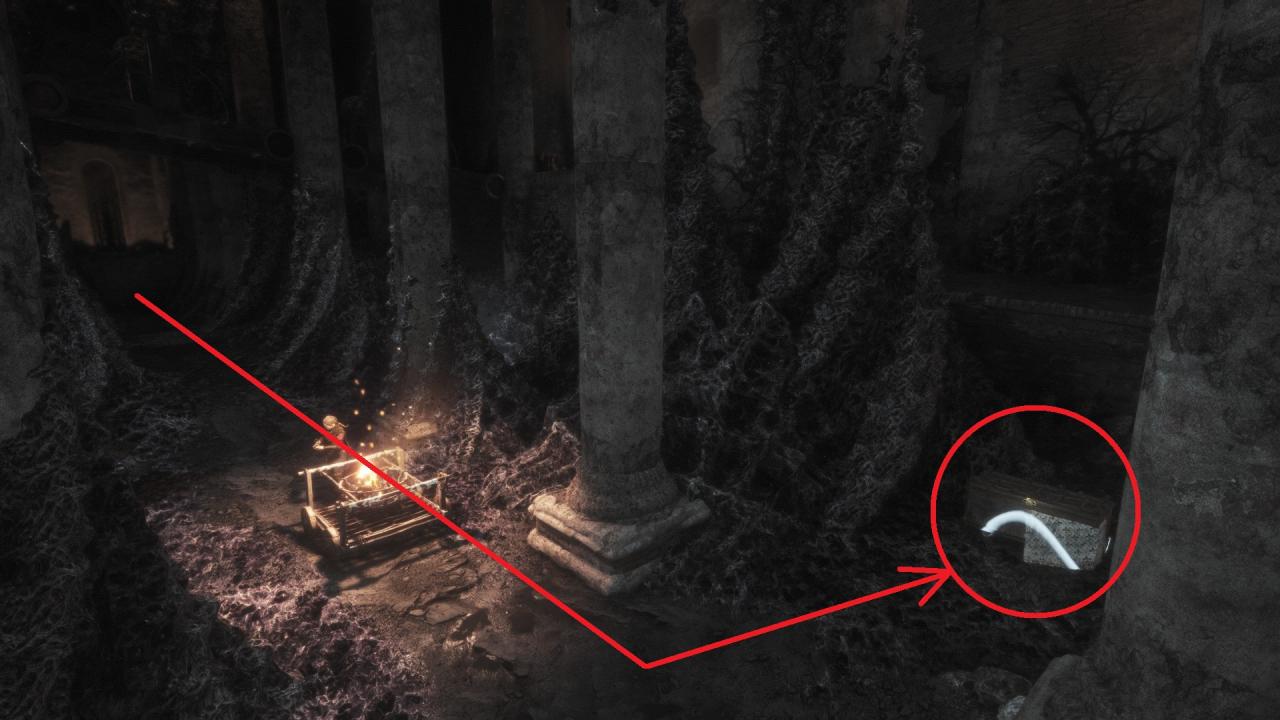 Stop and use a Tar with your slingshot with the brazier to enhance the flames. Quickly turn to your left and go to the chest.
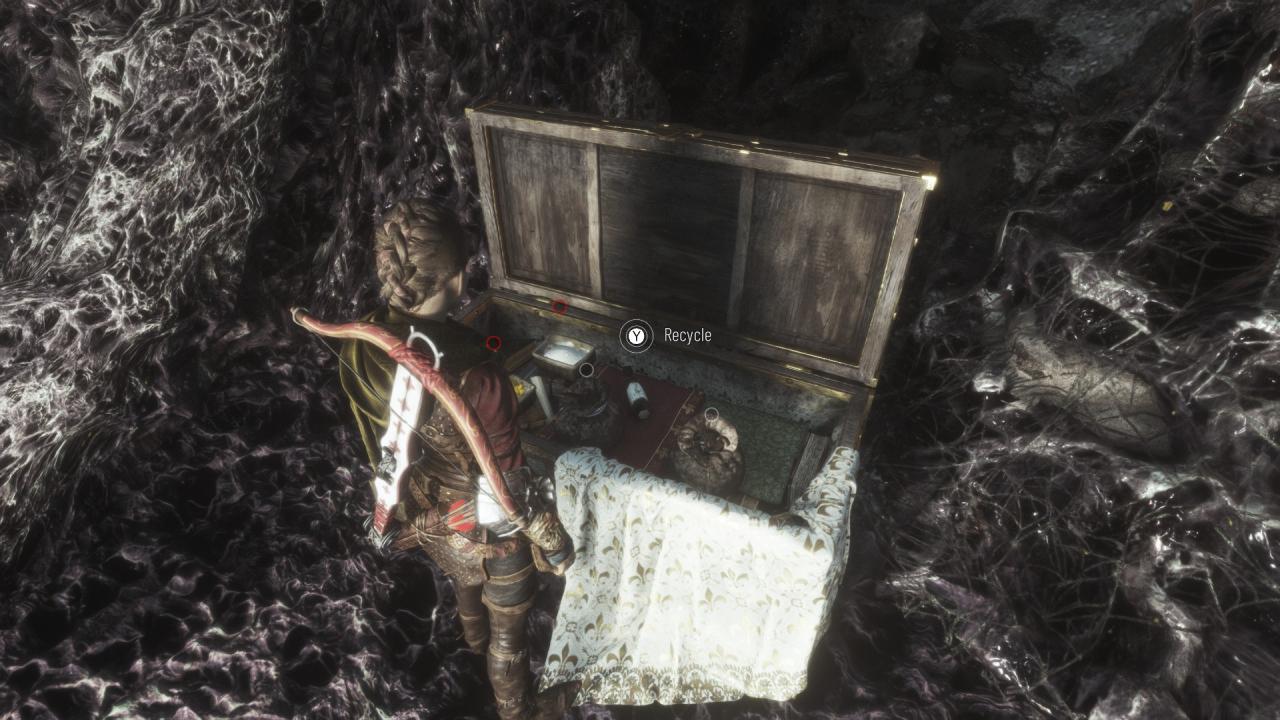 Open the chest and pick up the Tool.
Chapter 12: 0 Tools
Chapter 13: 4 Tools
– Tool #32: Can be collected during objective “Find a way to the surface”, after the cinematic where Lucas fixes Amicia’s shoulder. Enter the cellar and walk to the right, then turn left and enter the room.
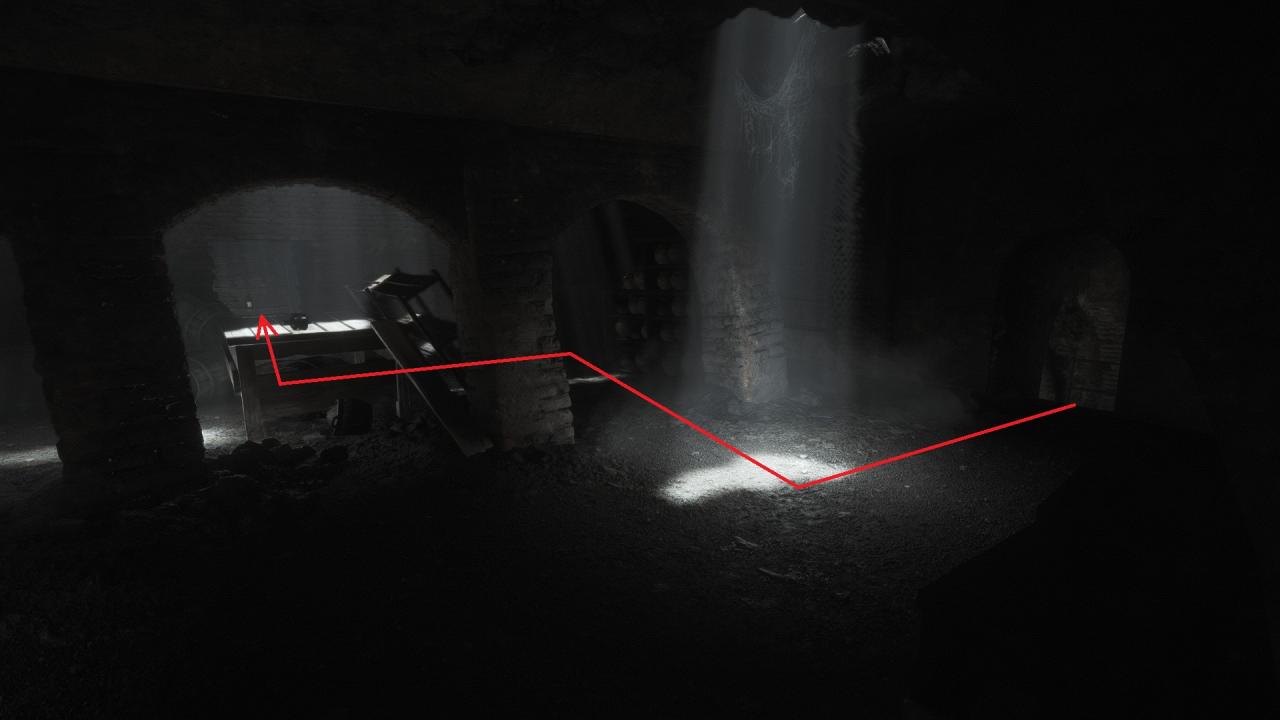 At the back of the room there will be a big chest.
 Open the chest and pick up the Tool.
– Tool #33: Can be collected during objective “Reach the port”, when exit to the surface and reach an open field with your first enemies. The big chest containing the tool will be at the foot of a hill, in the middle of the area, next to a soldier with shield.

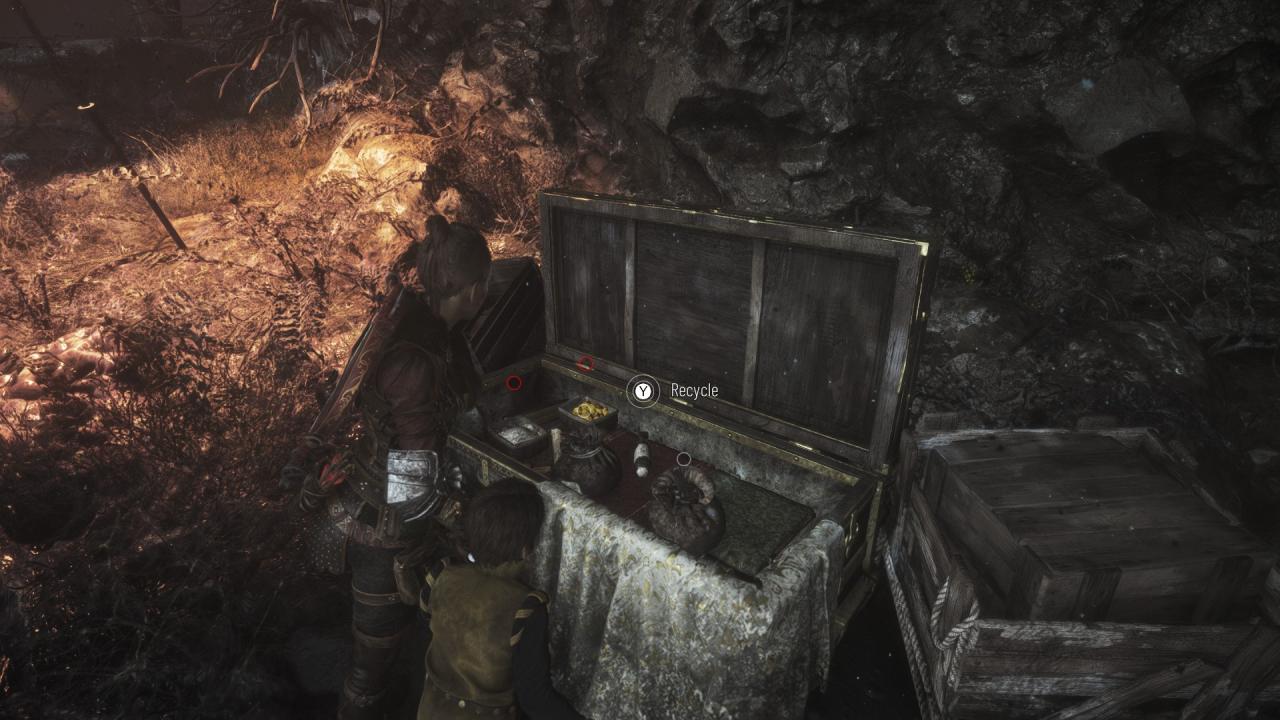 Open the chest and pick up the Tool.
– Tool #34: Can be collected during objective “Reach the port”, when reaching the ruined village, right exiting to the next area. To the left there will be a destroyed church with a big chest inside it.
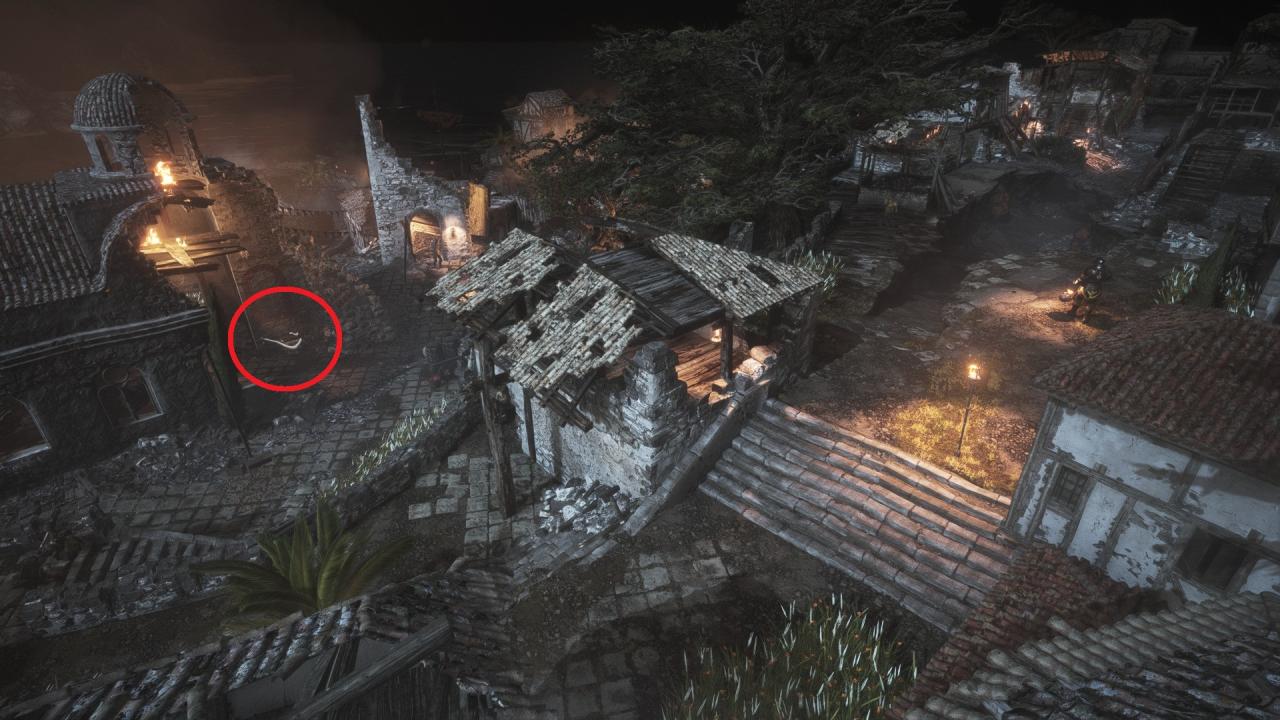
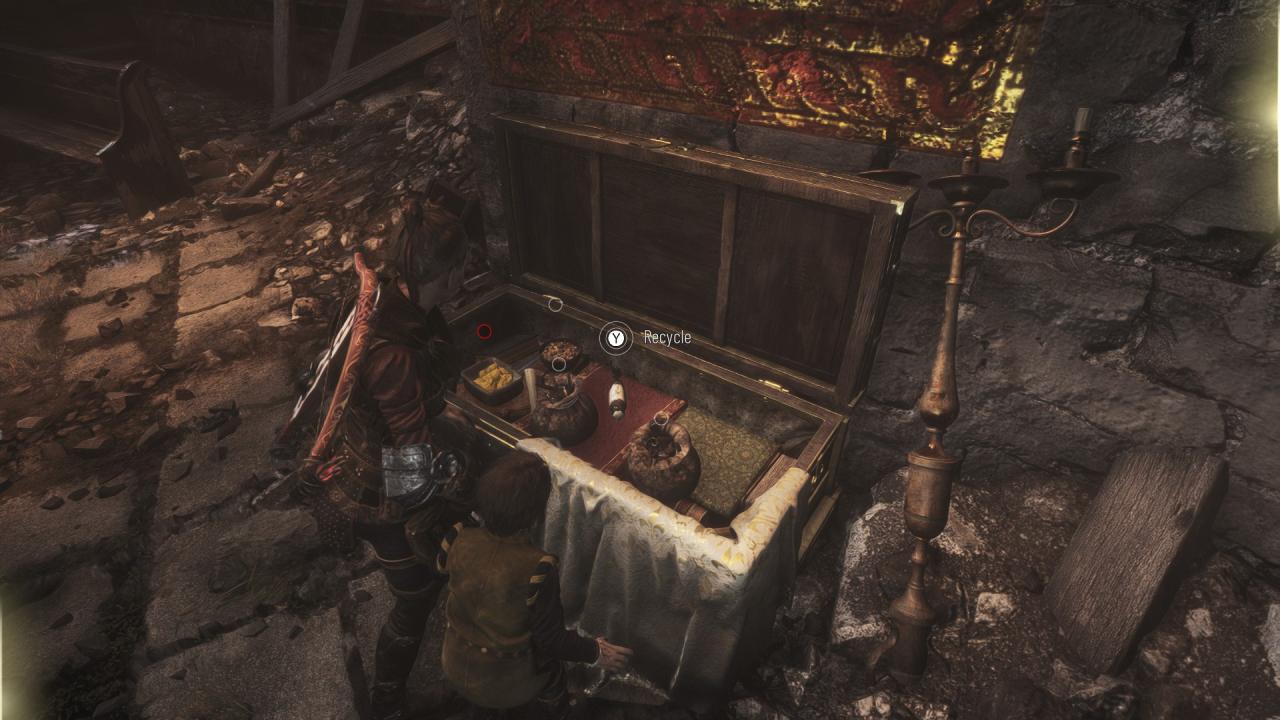 Open the chest and pick up the Tool.
– Tool #35: Inside the Secret Chest #10 (please see the Explorer achievement).
Chapter 14-15: 0 Tools
Chapter 16: 1 Tool
– Tool #36: Can be collected during sub-chapter “Marseille”, objective “Find Hugo”. Head towards the workbench in the destroyed house and look to the right. You will find a big chest.
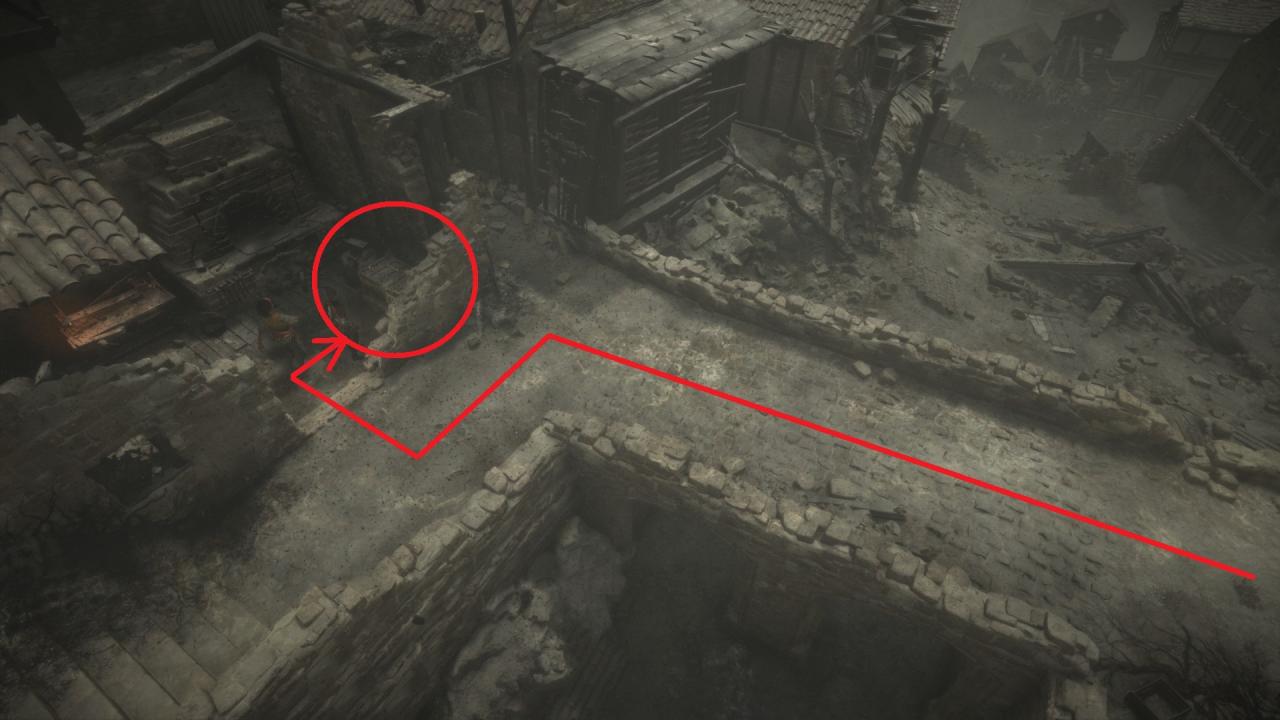
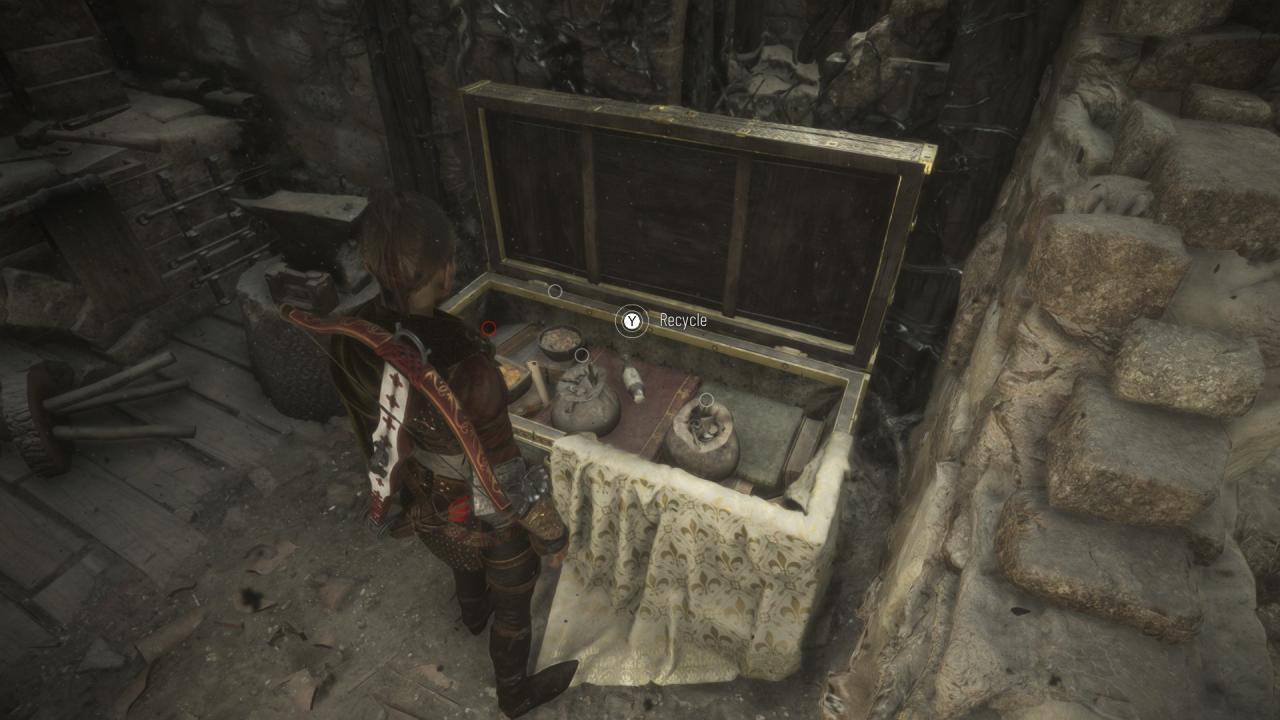 Open the chest and pick up the Tool.
In Chapter 2, during objective “Follow the Order’s Symbols”, after escaping your first enemy encounter of the chapter, a Skills tutorial will be displayed, making available to upgrade and check their progress in the Skills Menu.
There are 3 passive Skills in the game: Prudence, Aggressive and Opportunism.
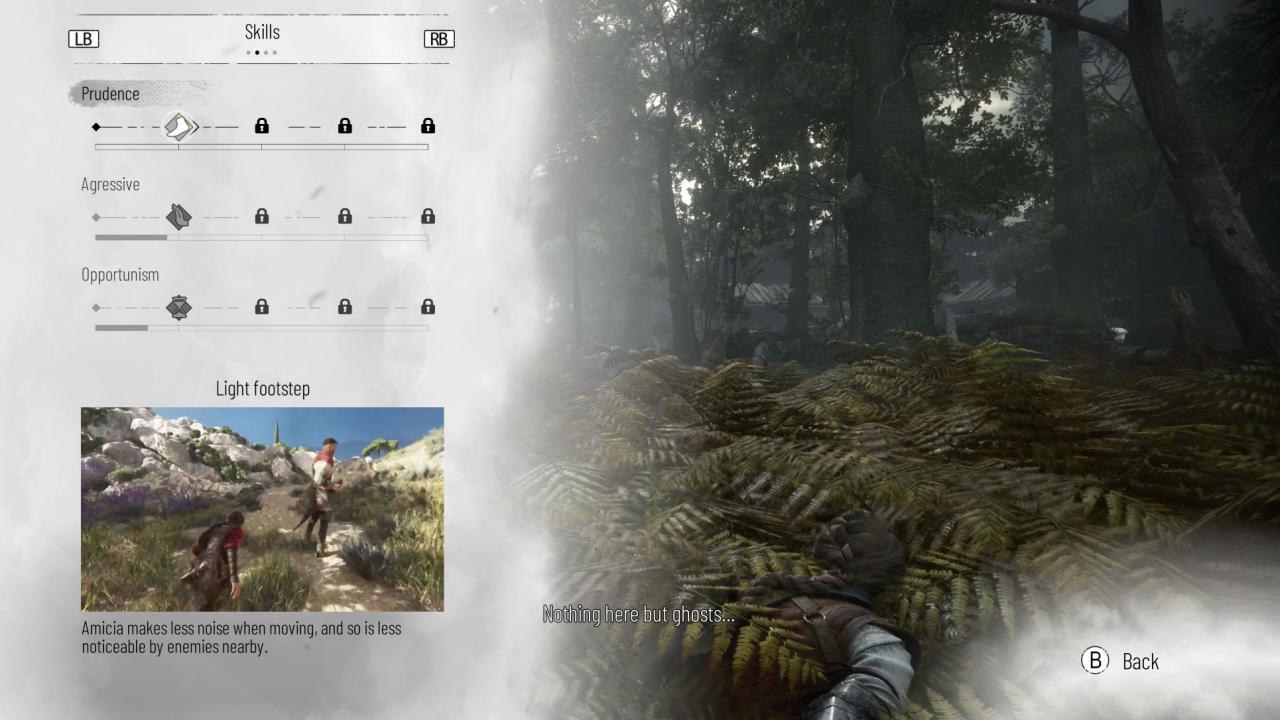 In order to progress each skill, you will need to deal with enemy encounters in certain ways. After every enemy encounter, depending on your playstyle, one or two of the passive skill will progress.
Each passive skill has an achievement tied to it that will unlock once you fully upgrade them.
 Sneaky
Fully improve the Prudence skills
The Prudence passive skill is progressed by finishing each enemy encounter by being completely stealth, without harming/killing enemies or being seen by them. This means that the enemies should not be fully alerted or start to chase you.
 Fighter
Fully improve the Aggressive skills
The Aggressive passive skill is progressed by finishing each enemy encounter by killing the enemies in open combat, while getting spotted intentionally. This means that you should do melee kills with knives or ranged kills with the crossbow.
 Malignant
Fully improve the Opportunism skills
The Opportunism passive skill is progressed by finishing each enemy encounter by using the environment and your equipment for your advantage and indirect kills. This means that you should focus on proceeding through the encounters by making diversions, attracting enemies in certain spots so that you can pass freely (or kill them), by extinguishing fire (so that the rats kill the enemies for you), etc.
Collectible Related Achievements
Herbalist [WIP]
 Herbalist
Find all flowers
There are 5 Flowers throughout the entire game that you will need to collect.
Chapter 1: 0 Flowers
Chapter 2: 1 Flower
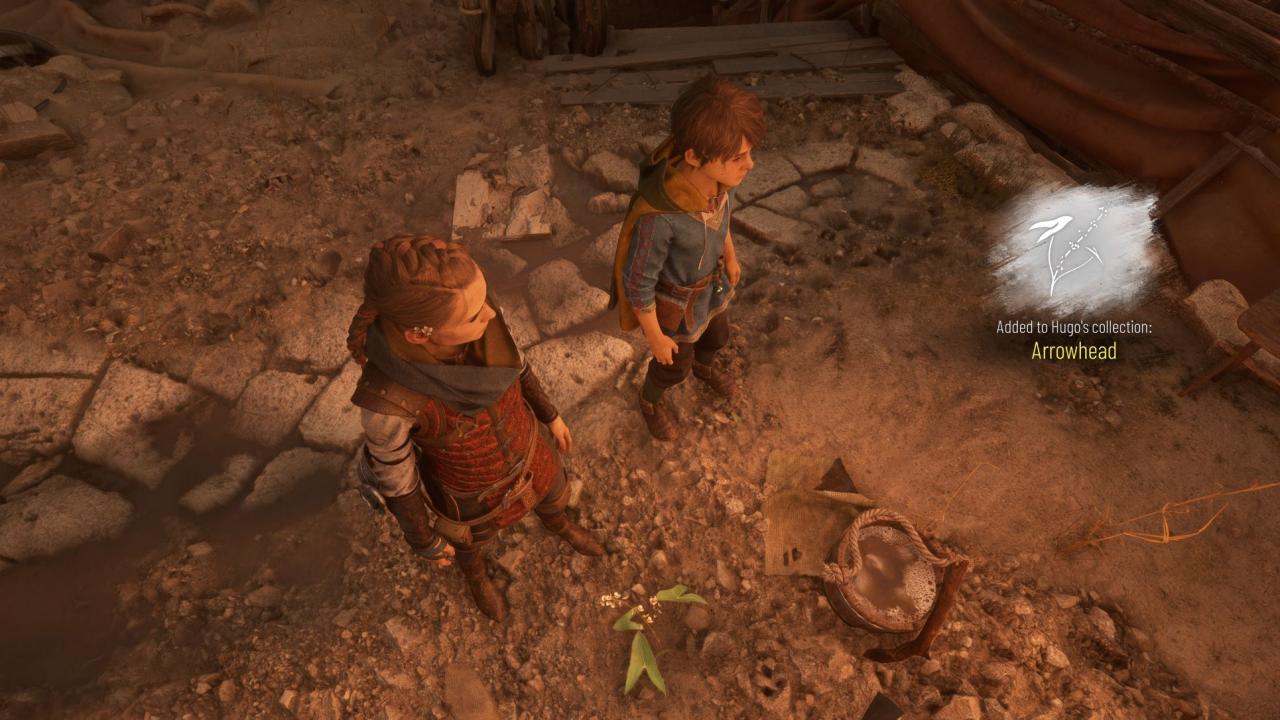
– Flower 1: Arrowhead
Can be collected during the second objective “Reach the South Tower”, after escaping the rats in the underground and reaching the surface. As you get outside, walk until you reach a vegetable garden.
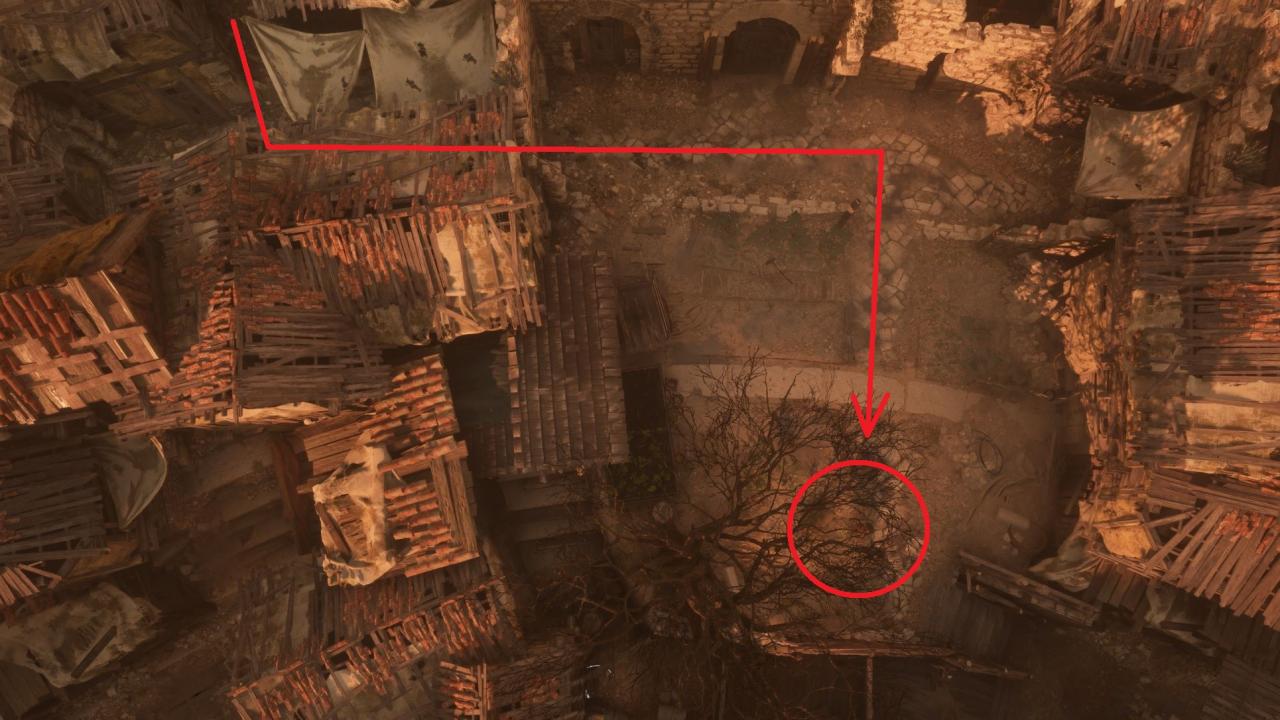
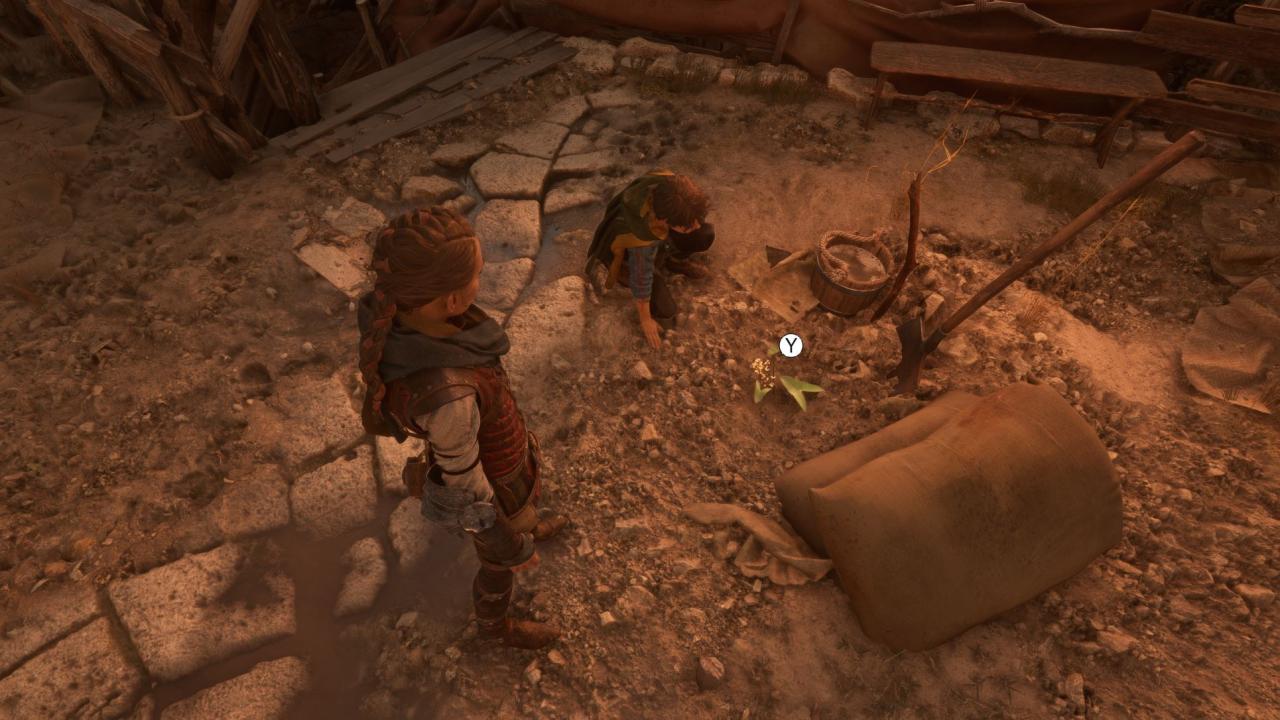 As soon as Lucas sees the garden, he will automatically kneel near a Arrowhead flower. Go to him and interact with the flower in order to collect it.
Chapter 3: 1 Flower
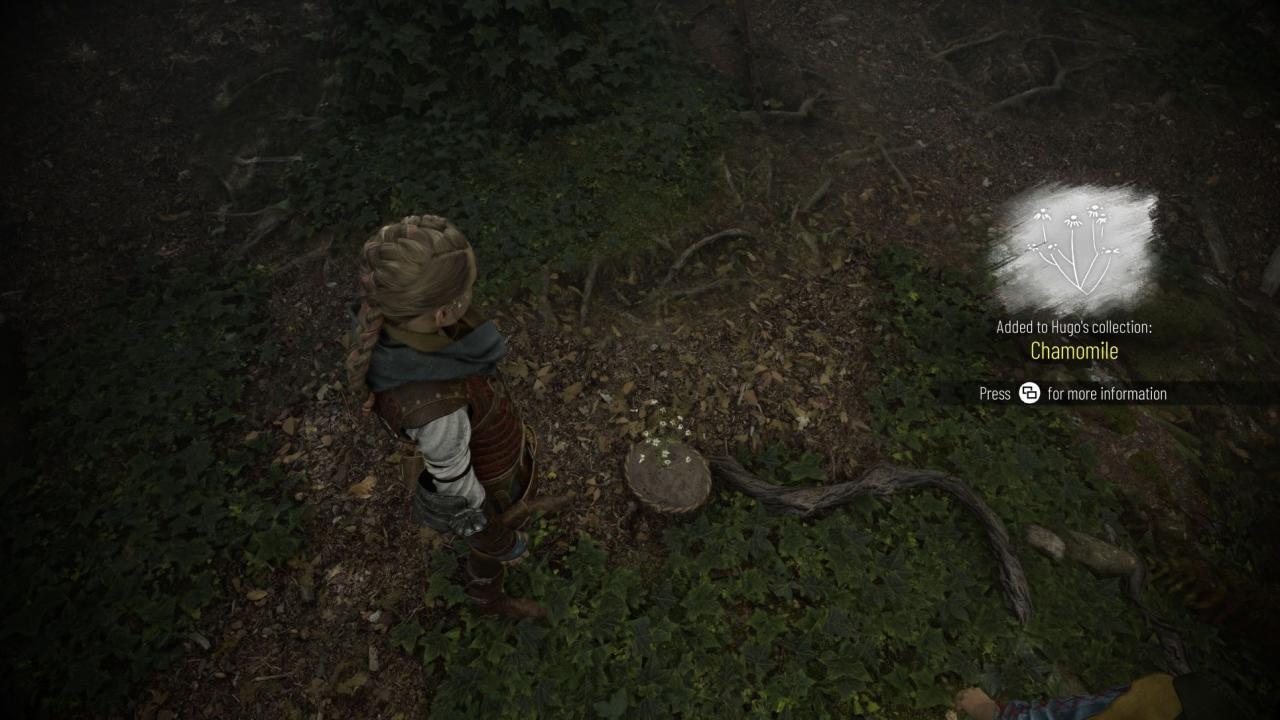
– Flower 2: Chamomile
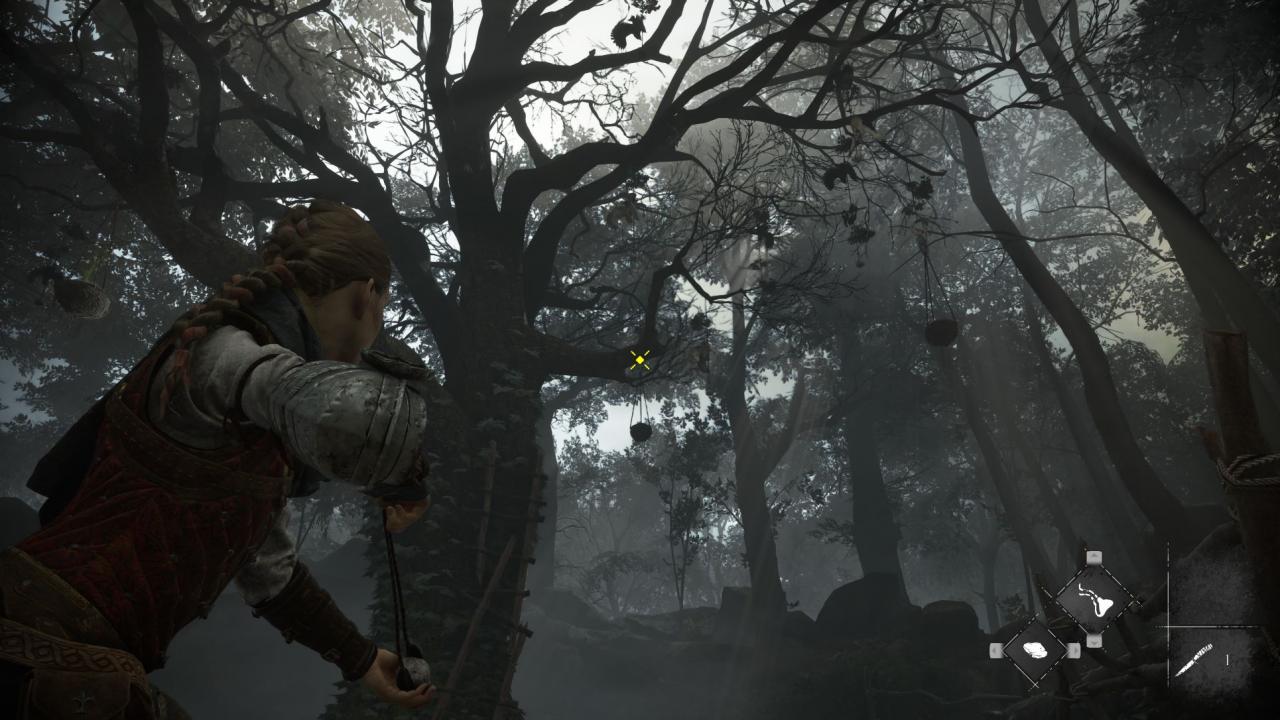
Can be collected during objective “Reach the herbalist’s forest”, after passing through the opening in the wall towards the herbalist’s hut. The Flower will be hanging in a pot from a tree branch to the left of the hut.
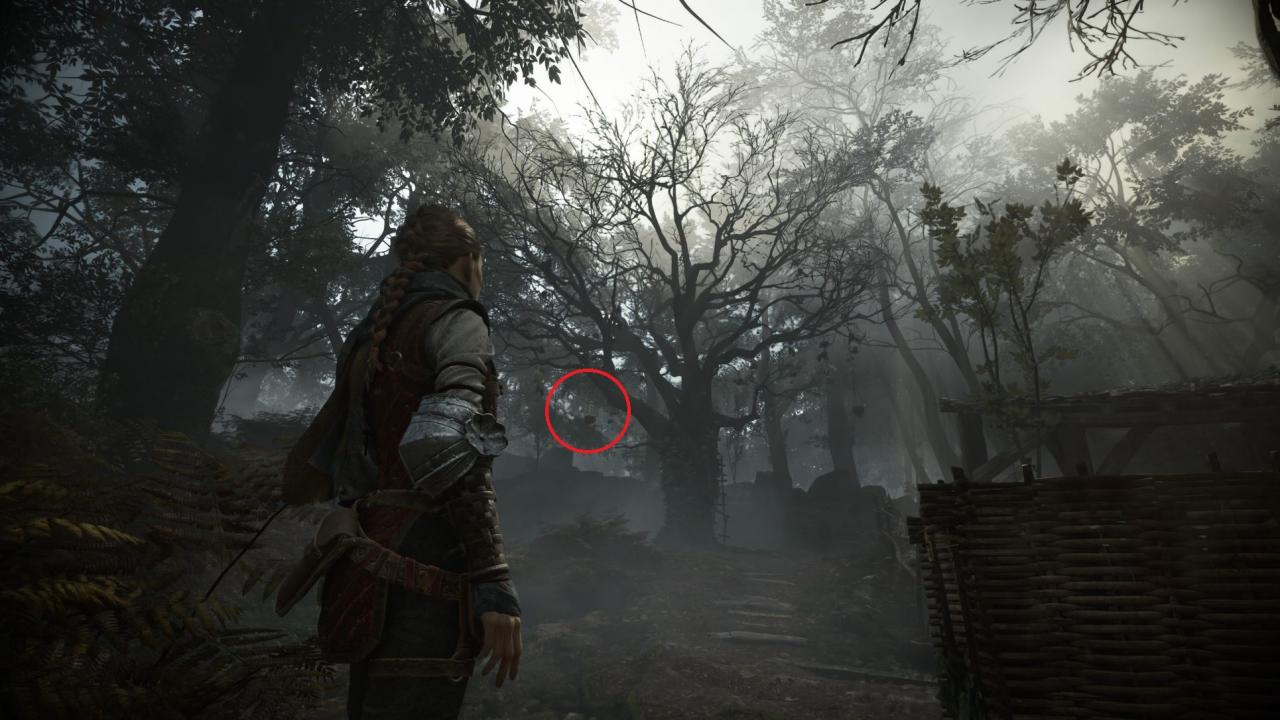 Shoot down the flower pot and interact with the flower in order to collect it.
Chapter 4: 1 Flower
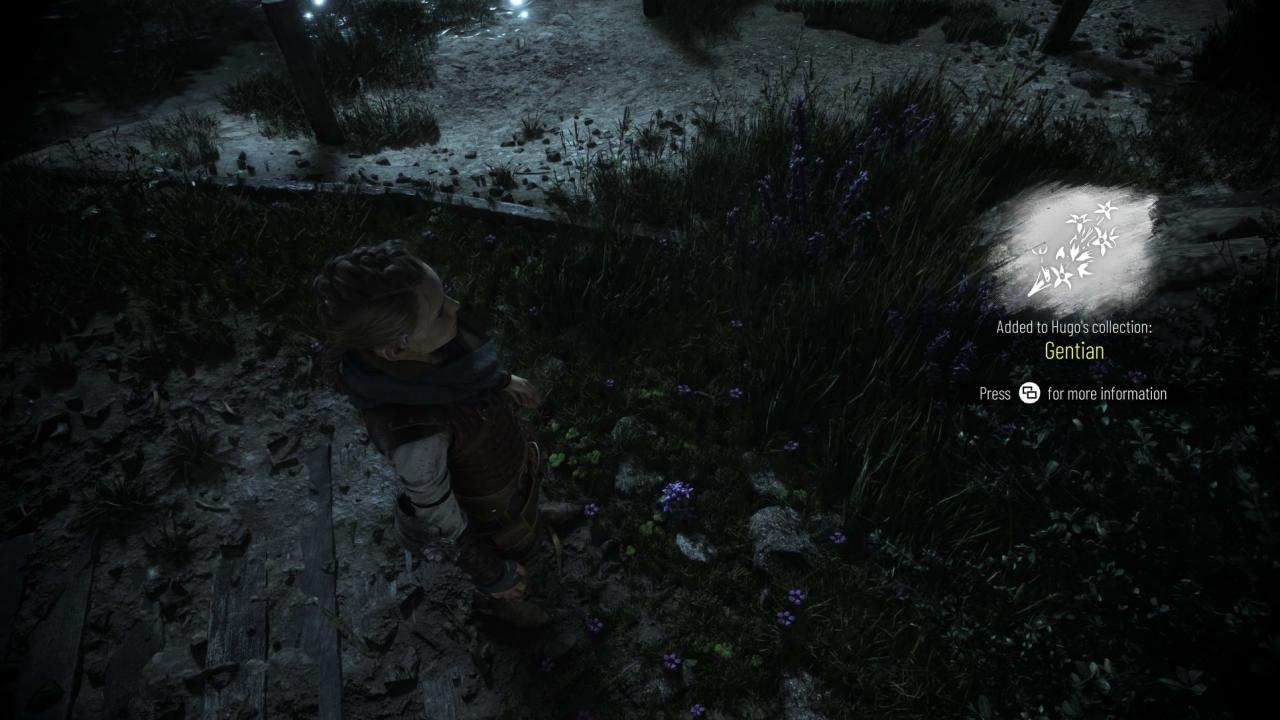
– Flower #3: Gentian
Can be collected during objective “Reach the Order’s Boat”, when reaching the beach section. Head towards the water, then turn right along the shoreline and continue walking until you reach the bushes with purple flowers.
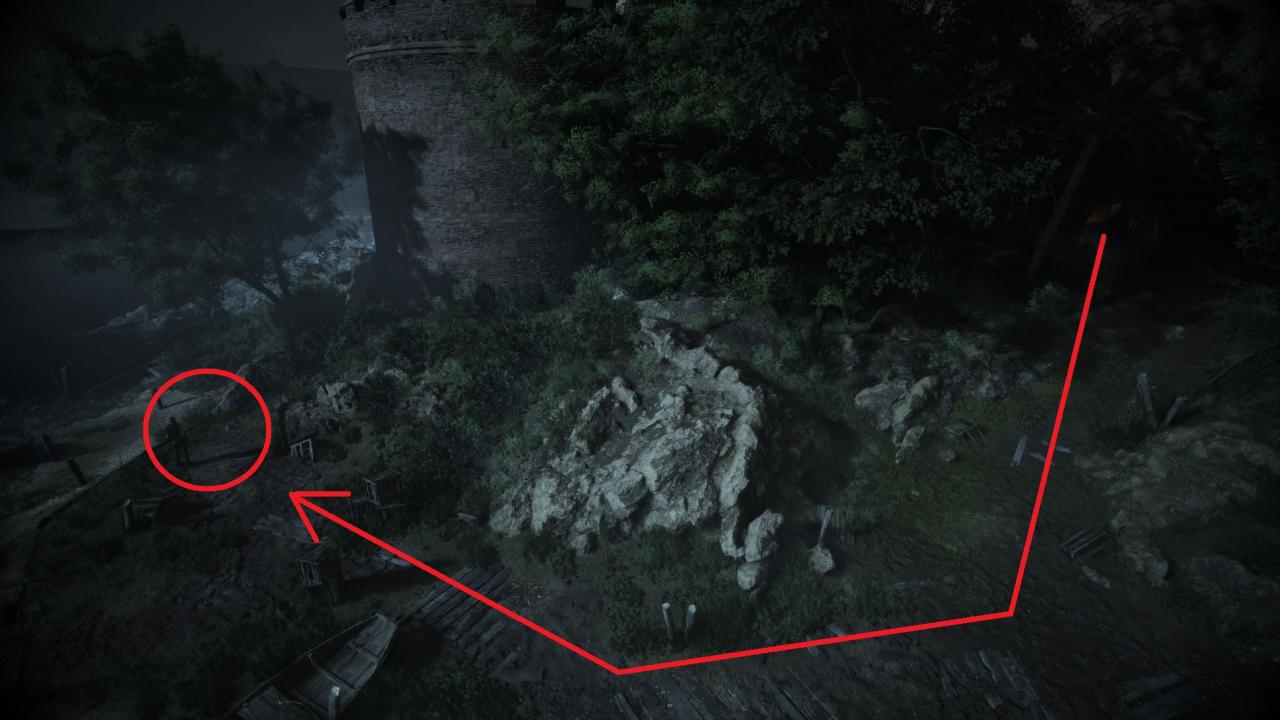 Interact with the flower in order to collect it.
Chapter 4: 1 Flower
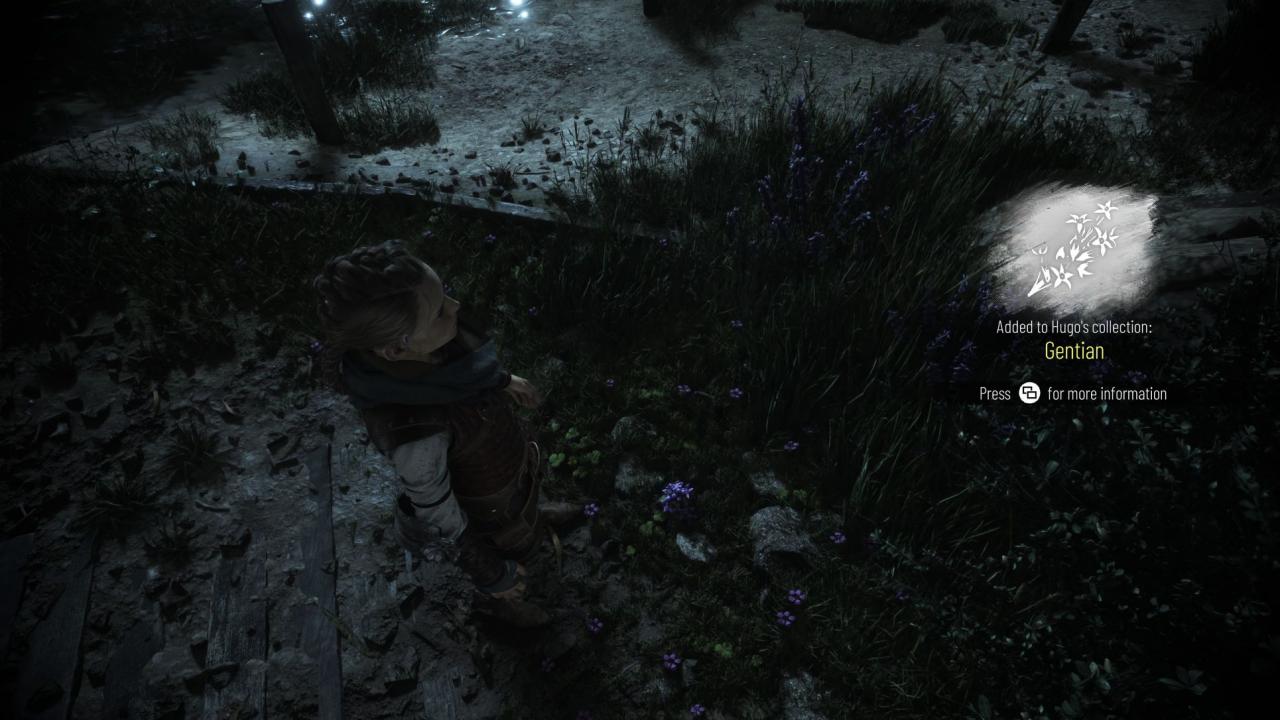
– Flower #3: Gentian
Can be collected during sub-chapter “Night Work”, objective “Reach the Order’s Boat”, when reaching the beach section. Head towards the water, then turn right along the shoreline and continue walking until you reach the bushes with purple flowers.
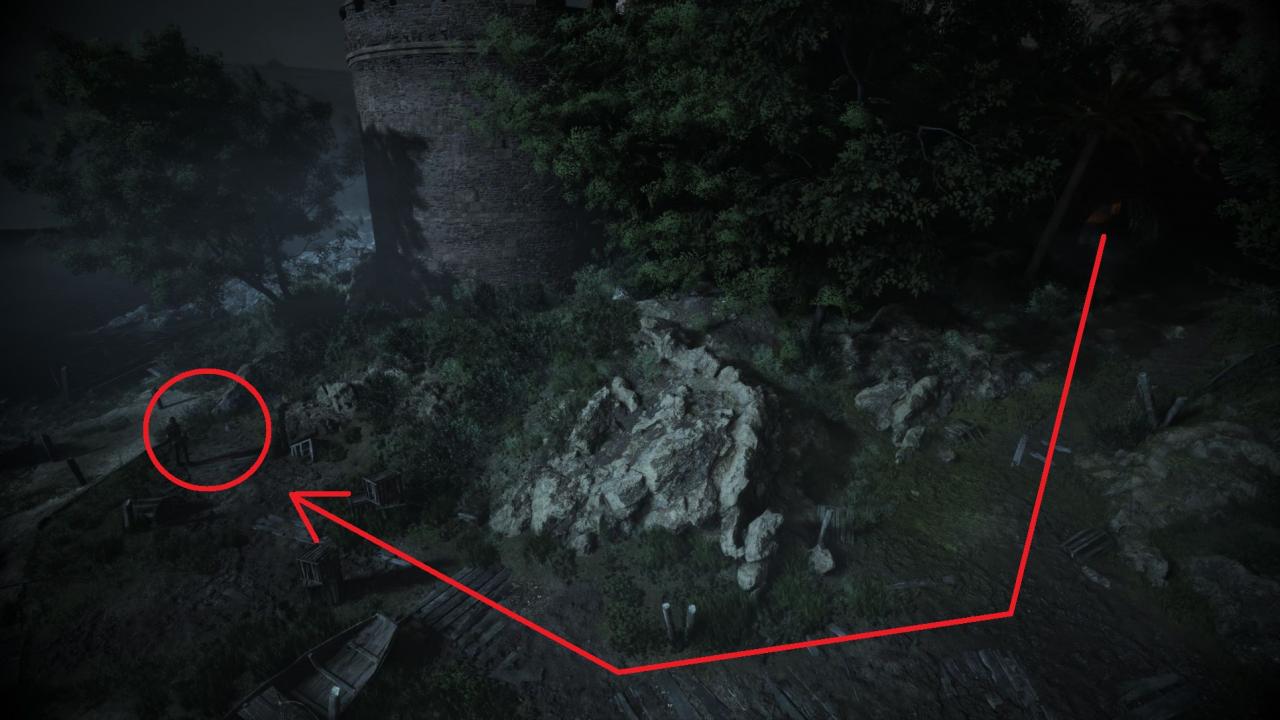 Interact with the flower in order to collect it.
Chapter 5: 1 Flower
– Flower #4: Anemone
Can be collected during sub-chapter “Bridge under construction”, the second objective “Find a way to reach the boat”, after crossing the river and destroying the counterweight of the wooden pontoon. Exit the barn, head towards the left underneath the bridge. Interact with the cart and bring it to the first pylon of the bridge where you can also see wooden scaffolding. Shoot down the hinge to release the platform.
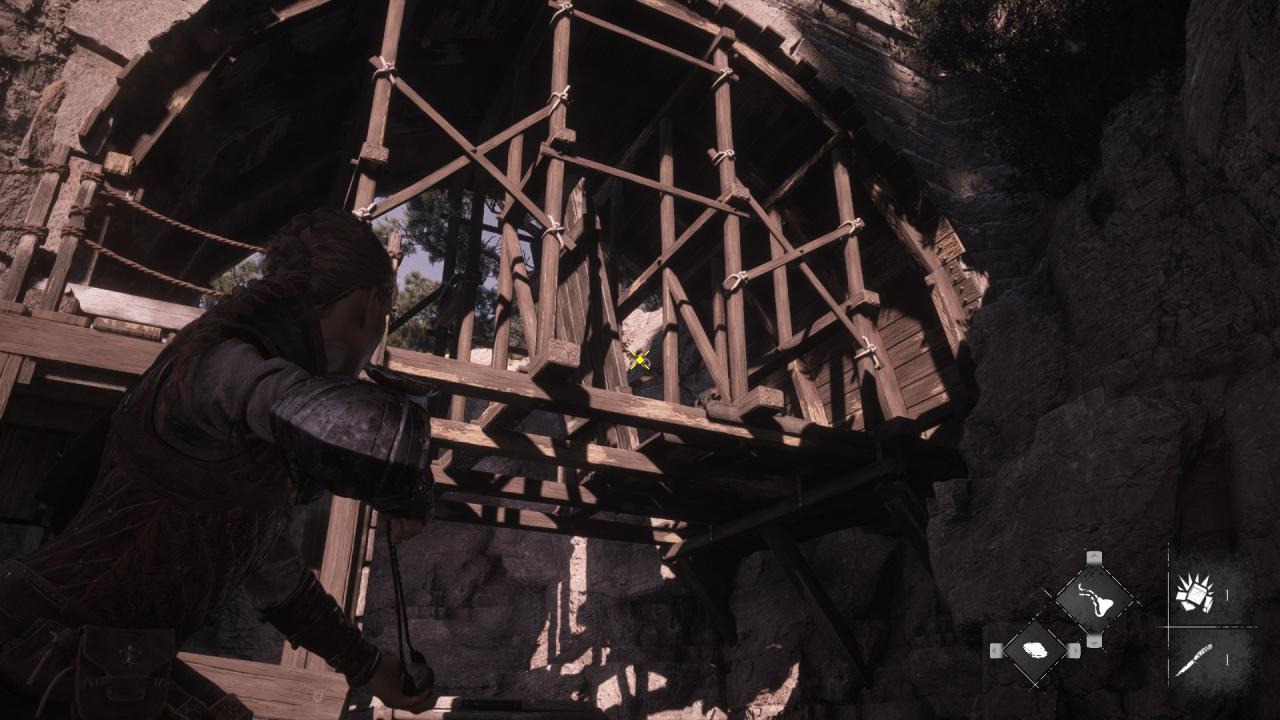
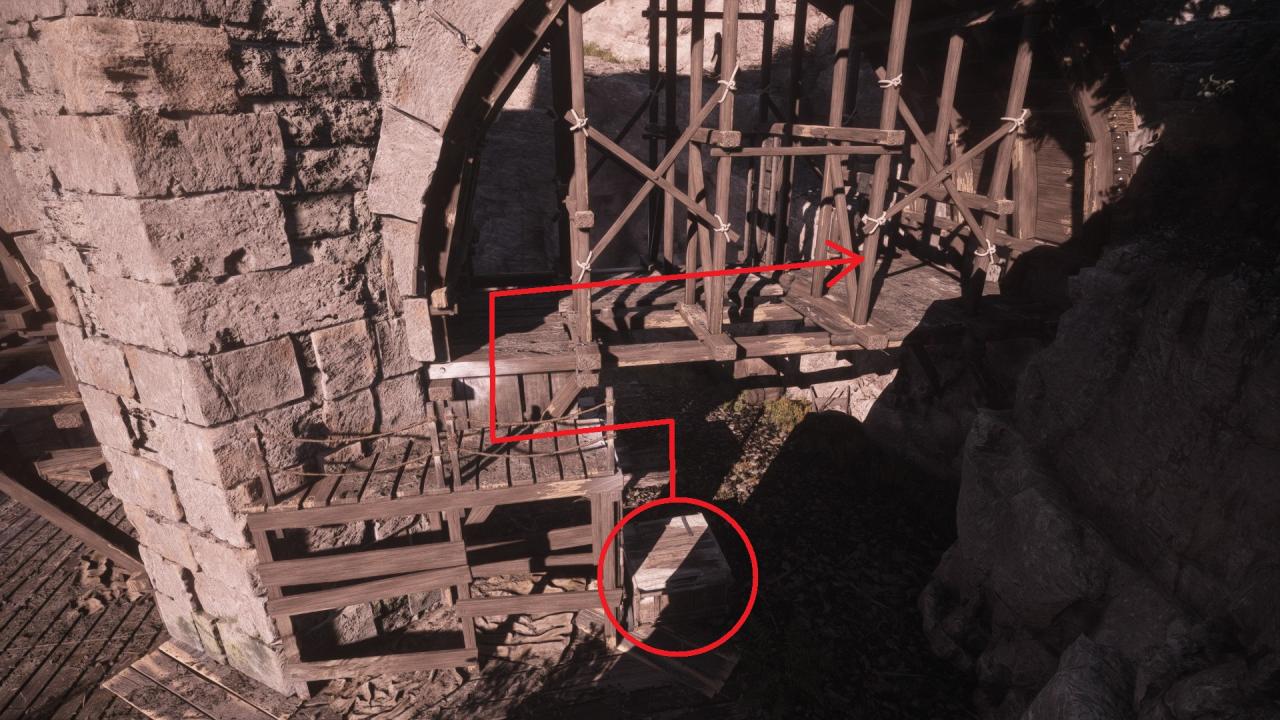 Climb on the cart, then on the scaffolding, to towards the cliff and continue climbing it until you reach the top, where you will find a large bush with pink flowers.
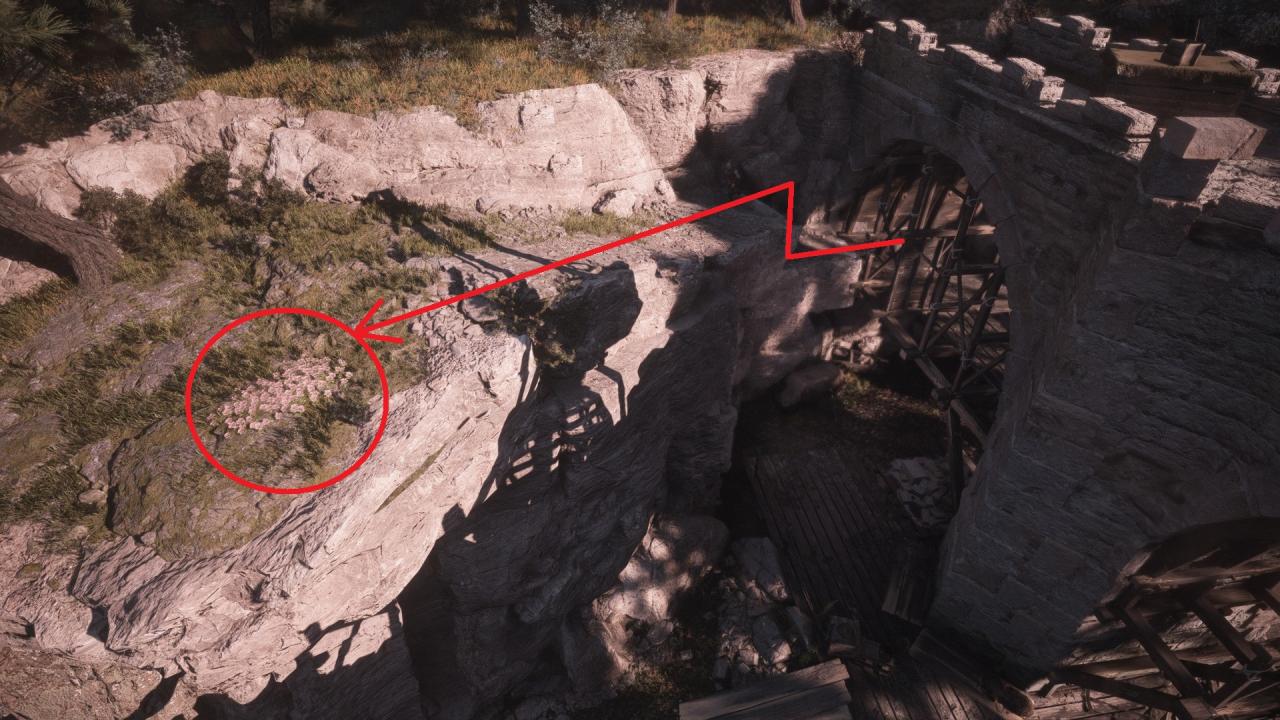 Interact with the flower in order to collect it.
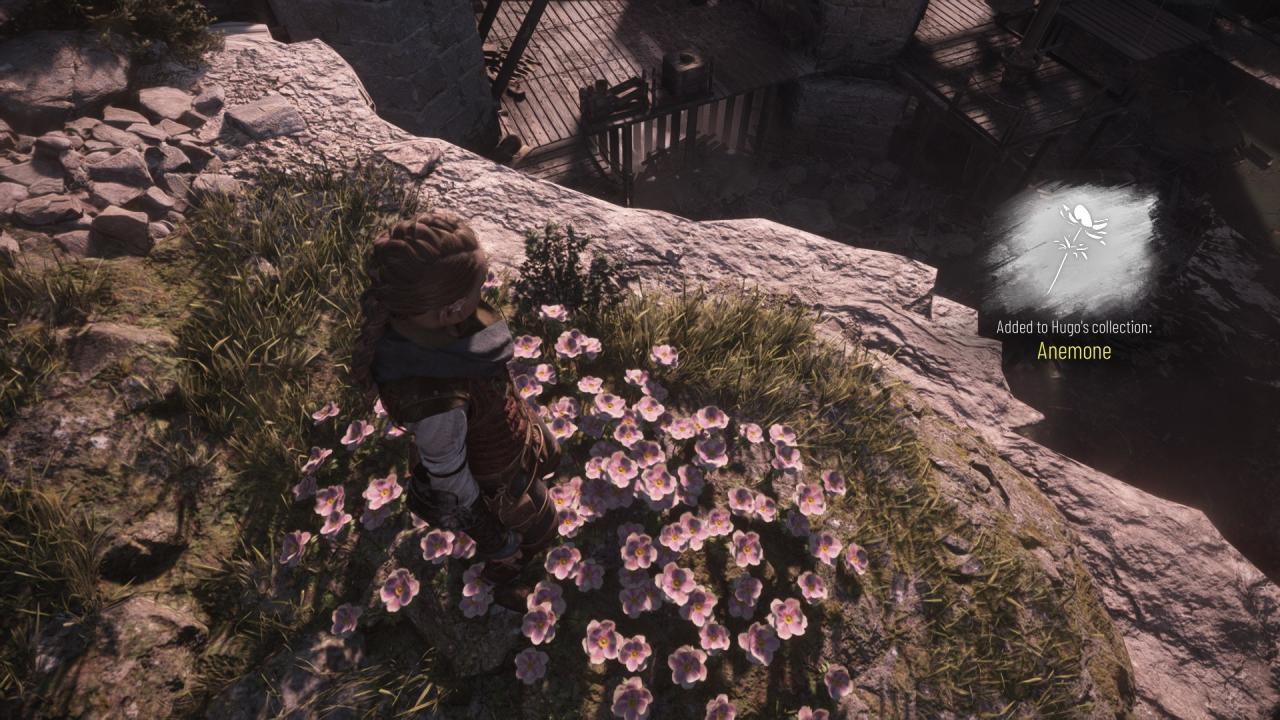
Chapter 6-15: 0 Flowers
Chapter 16: 1 Flower
– Flower #5: Carnation
Can be collected during sub-chapter “Marseille”, objective “Find Hugo”. Head towards the workbench and the take a left. Lucas will automatically kneel before the last flower when you get near it.
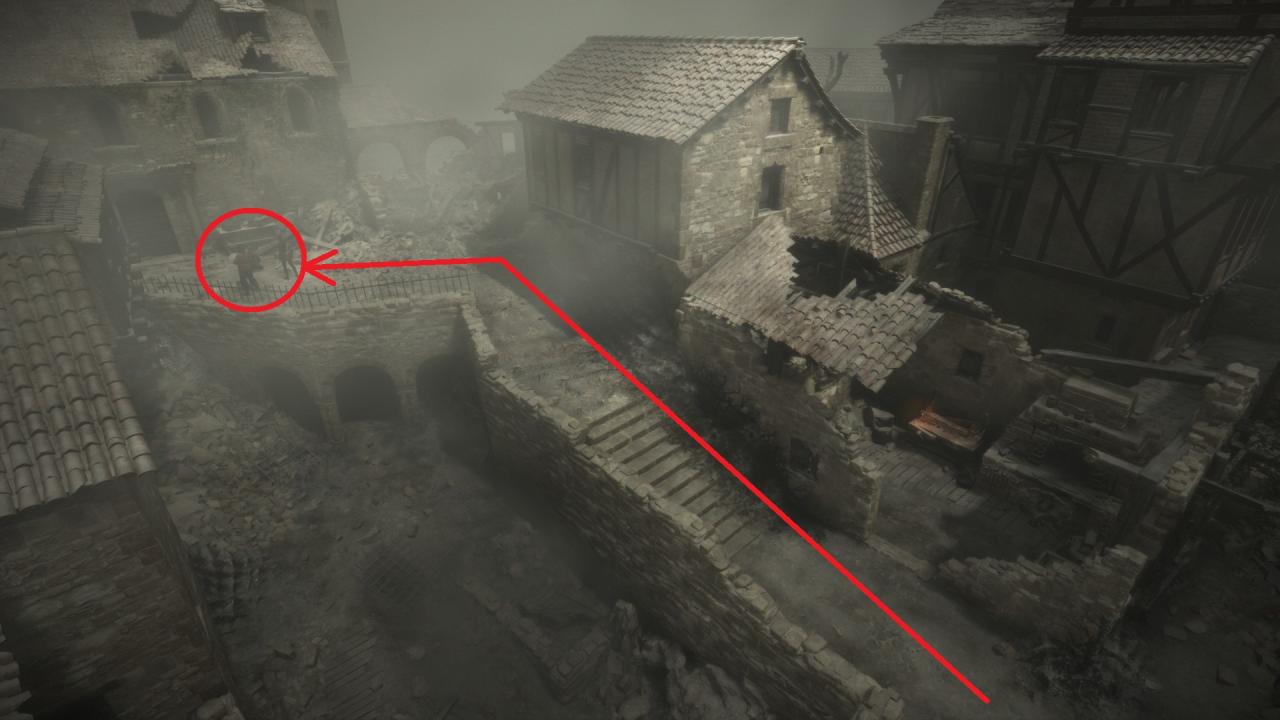
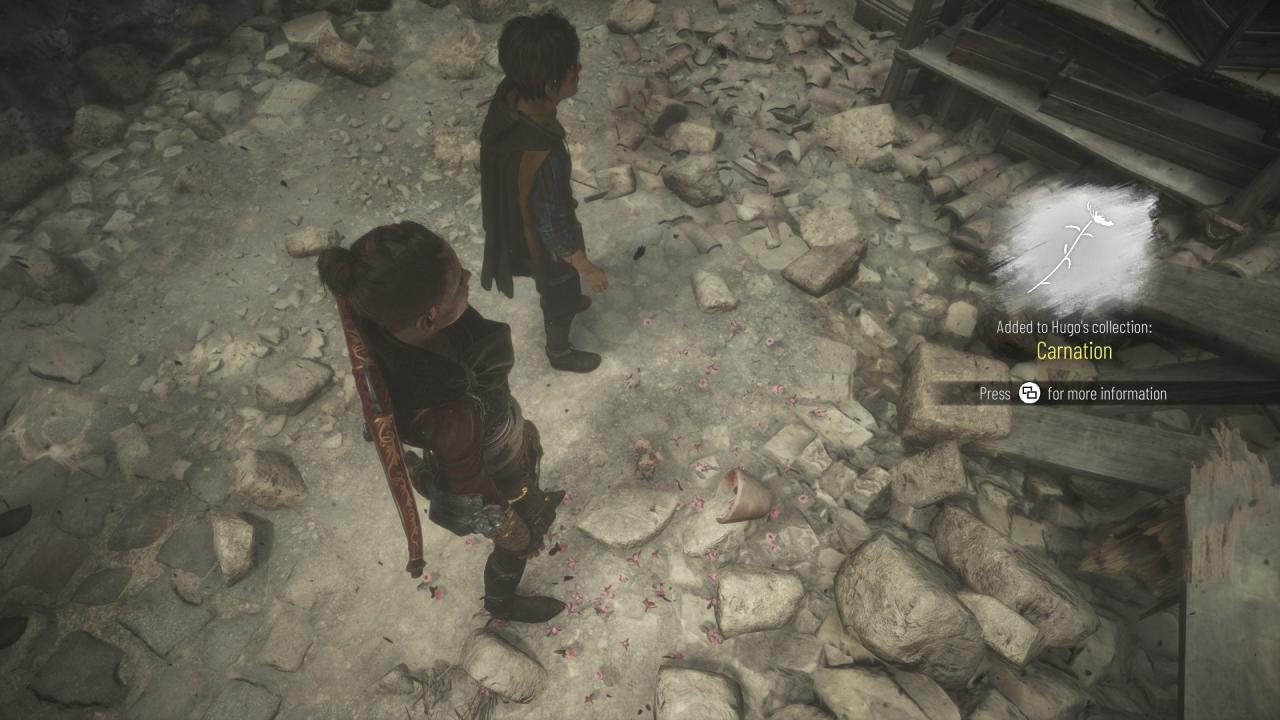 Interact with the flower in order to collect it.
After collecting all of the 5 flowers, as soon as you interact with the last one, the achievement will unlock.
Ornithologist
 Ornithologist
Find all feathers
MISSABLE
There are 7 Feathers throughout the entire game that you will need to collect.
Chapter 1-5: 0 Feathers
Chapter 6: 1 Feather
– Feather #1: Jay
Can be collected at the beginning of the chapter, during sub-chapter “Towards the sea”, objective “Find a way towards the coast”, after reaching a wide field full of wild flowers. After the short race, Hugo will stumble and fall in front of blue coloured feathers.
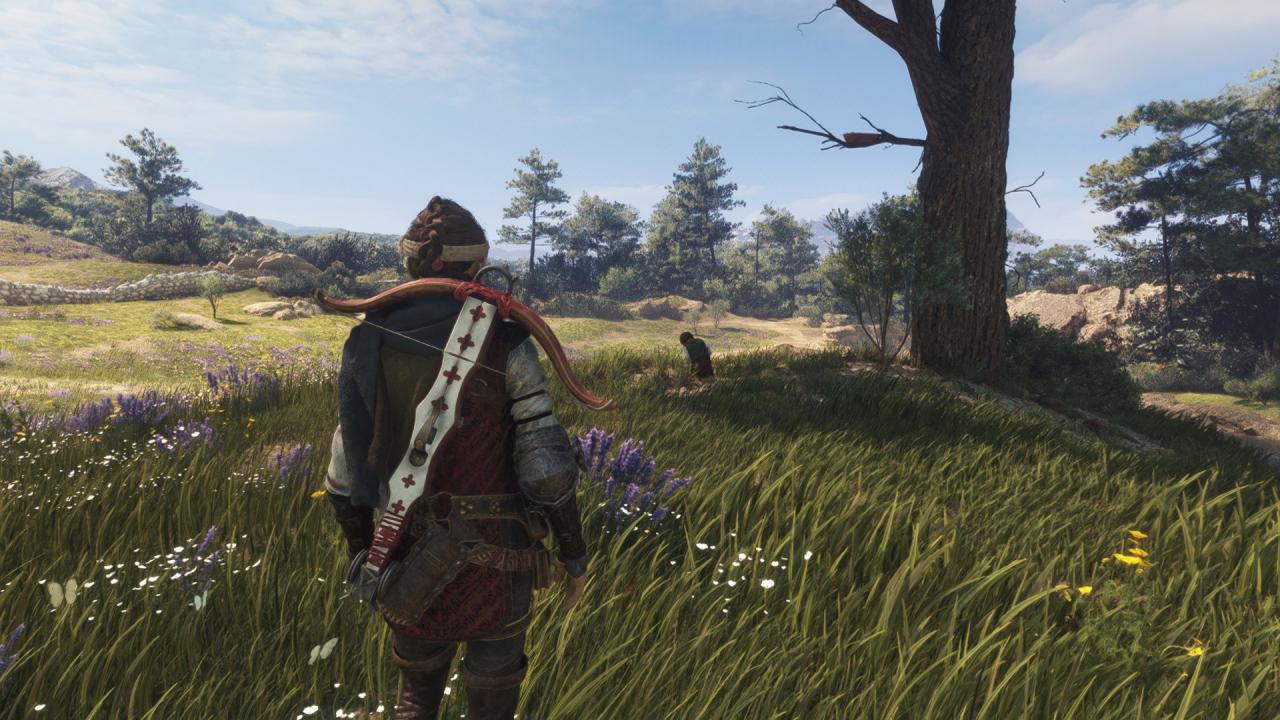
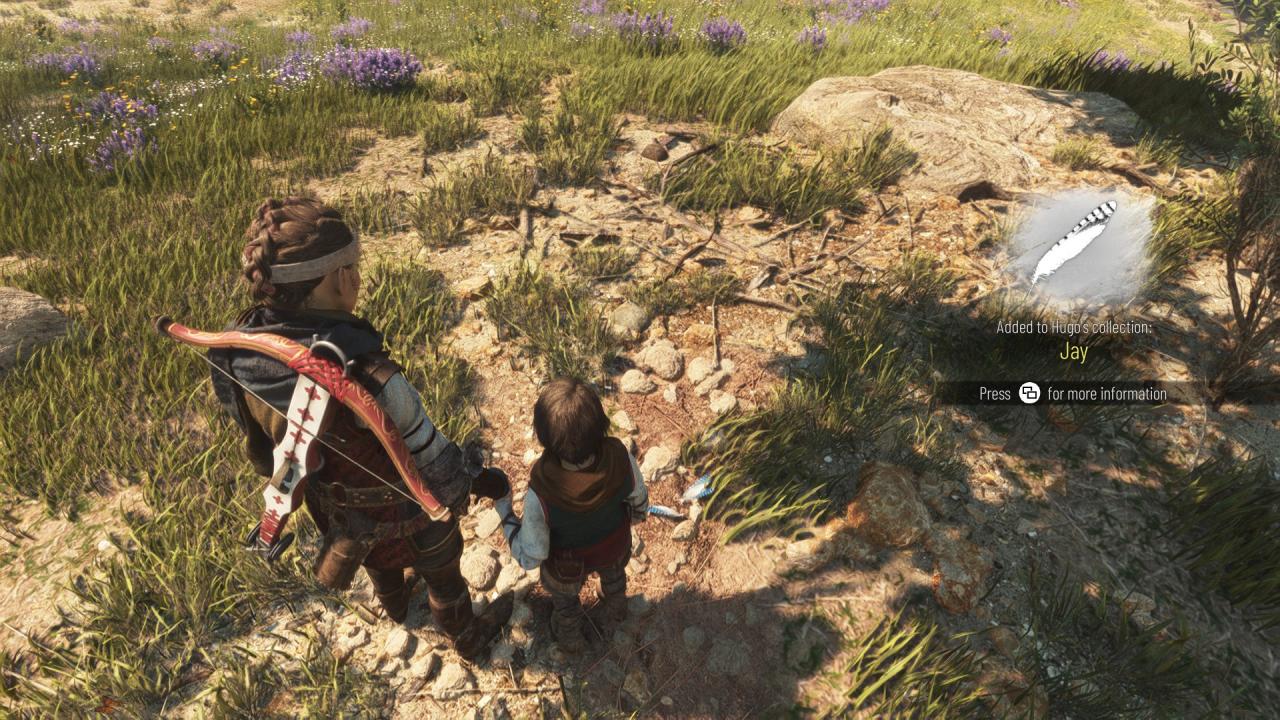 Approach him and interact with Hugo in order to collect the first feather.
Chapter 7: 1 Feather
– Feather #2: Black headed gull
Can be collected at the beginning of the chapter, during sub-chapter “Arrival at the beach”, objective “Cross the beach”, after reaching the beach. Continue forward until after Hugo charges into flock of seagulls where you will see a wooden shack on the left side of the beach at the bottom of the cliff. Enter the shack, exit through the window and continue along the path until reaching a dead end, where you will find some white feathers on the ground.
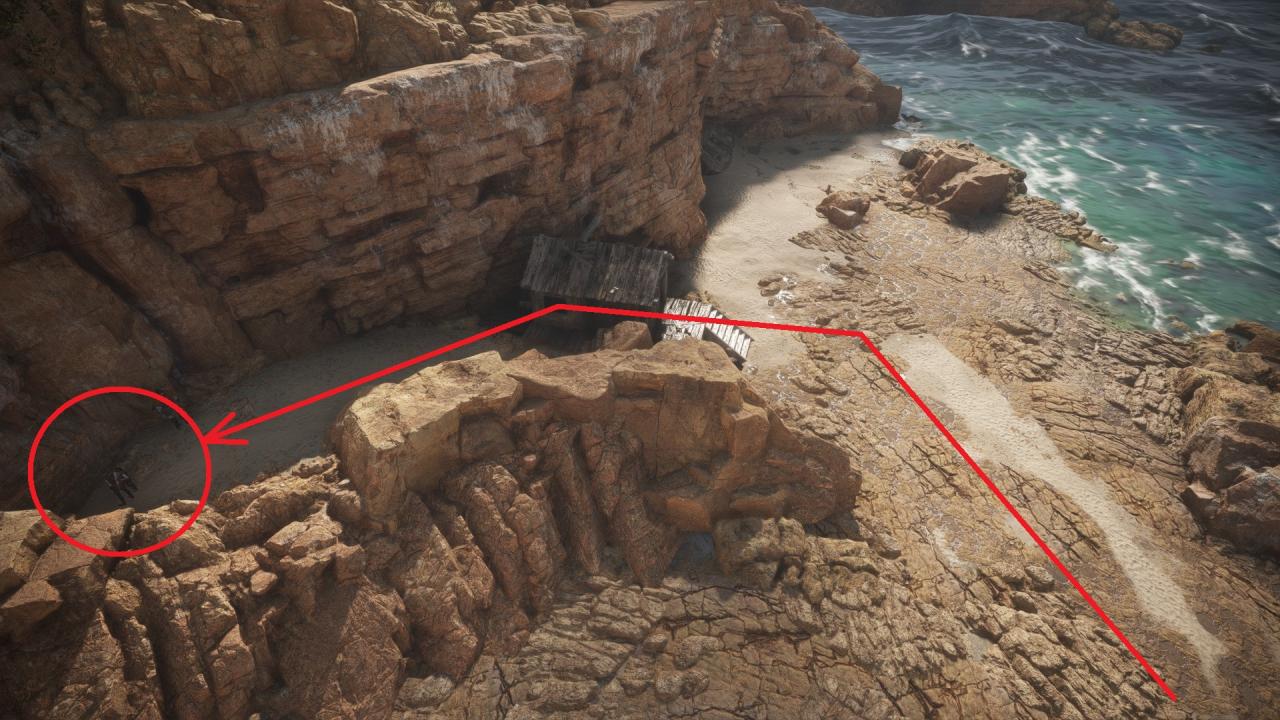
 Interact with them in order to collect the second feather.
Chapter 8: 1 Feather
– Feather #3: Black kite
Can be collected at the beginning of the chapter, during sub-chapter “Celebration of the brighter days”, objective “Look around for information about the island”, after reaching the market. From the entrance to the market, keep left until you reach small garden. Go forward until you reach the stone steps, go around them to the left on the grass and reach the olive tree in the middle of the grass.
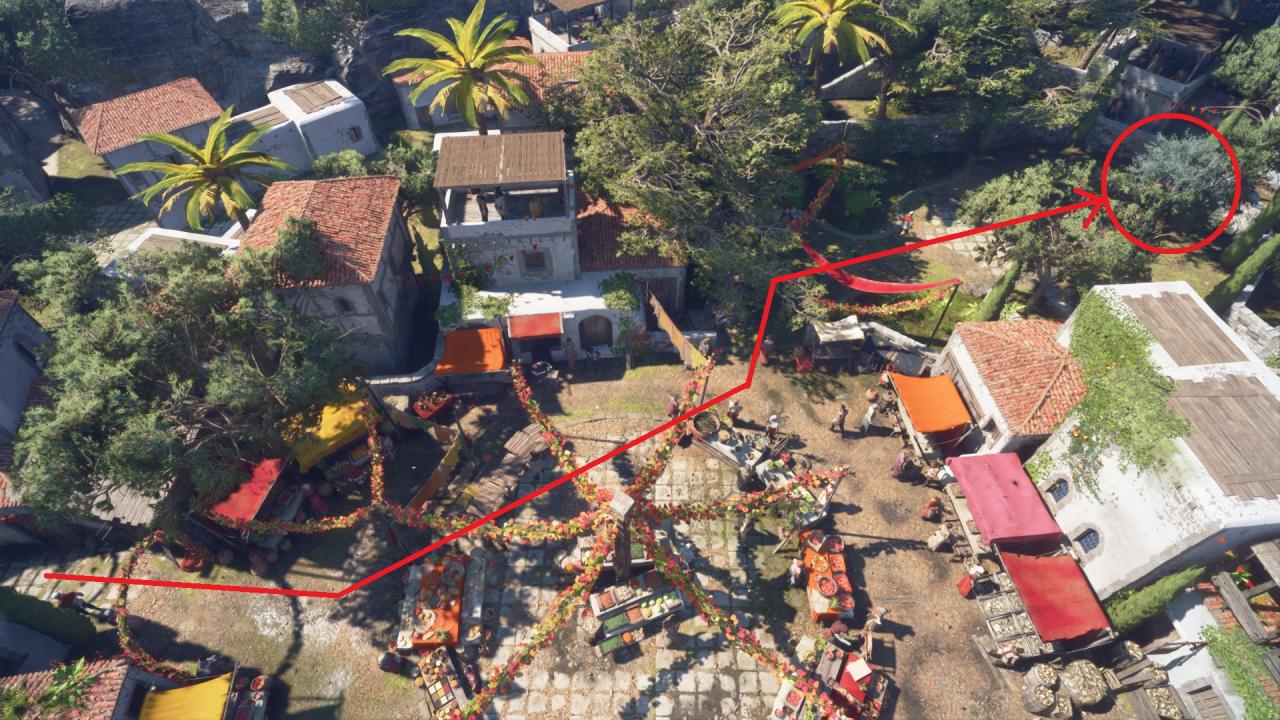 Underneath the tree you will find some black feathers on the ground.
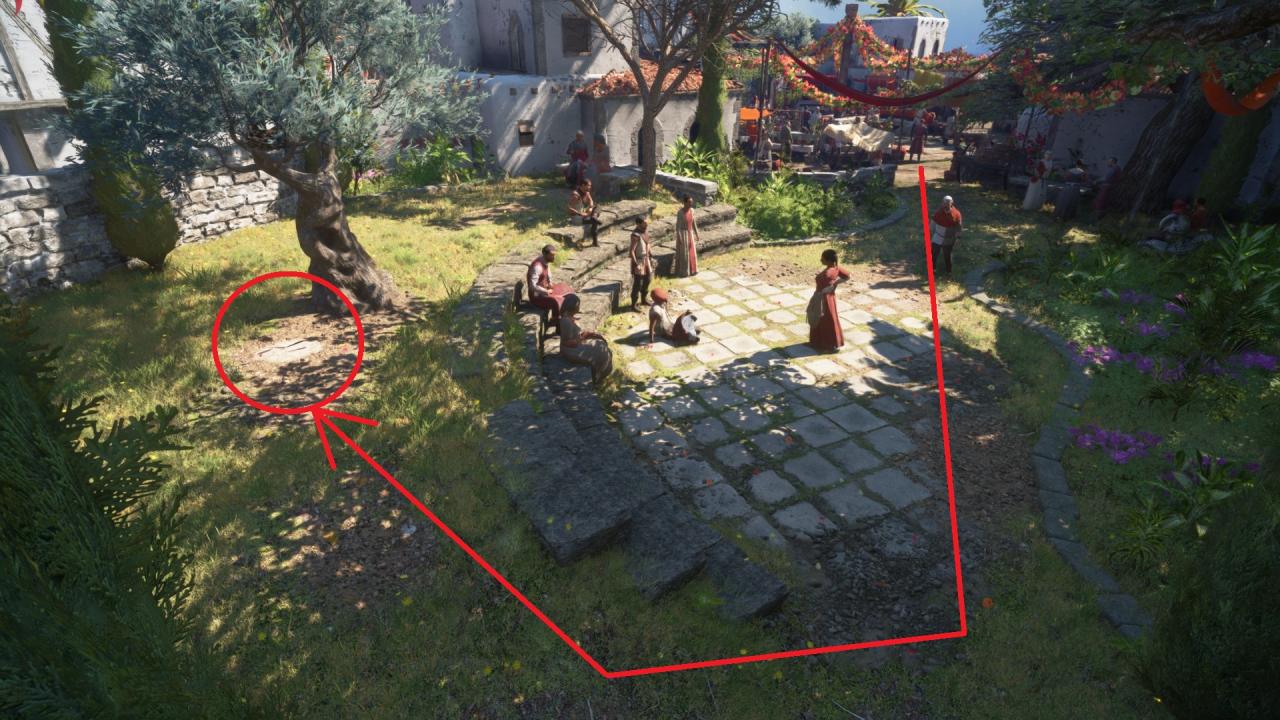
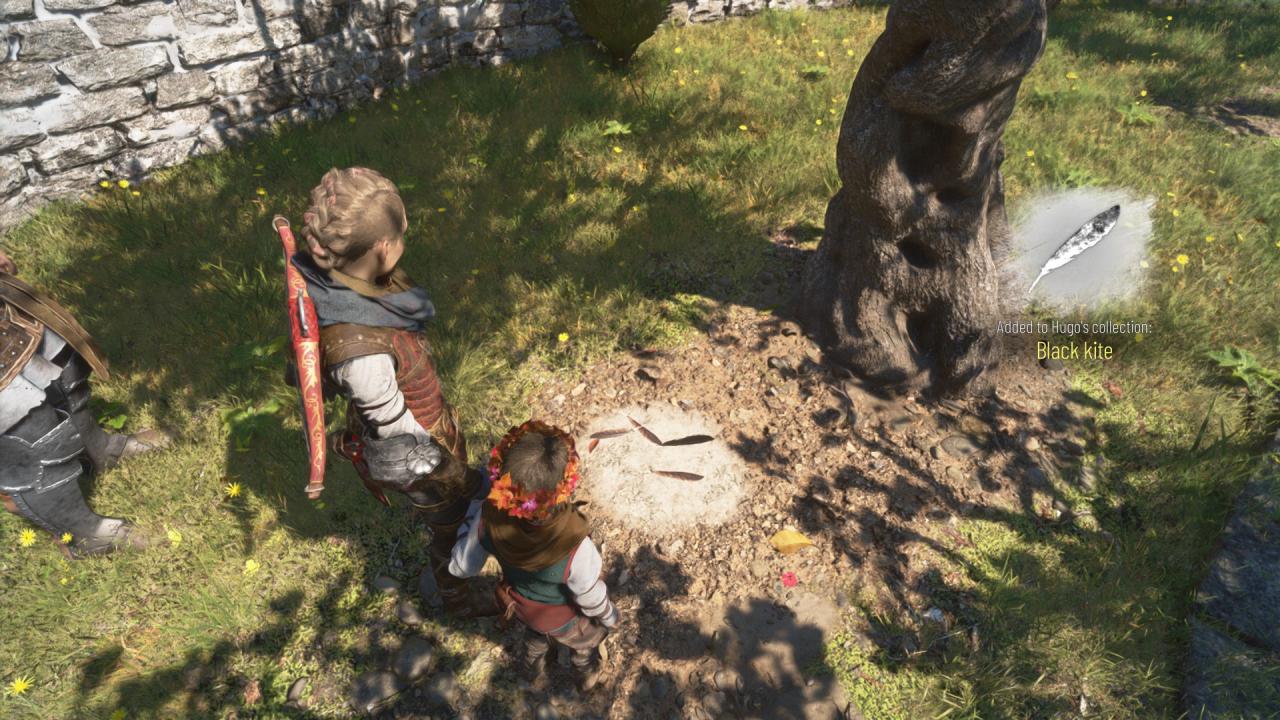 Interact with them in order to collect the third feather.
Chapter 9: 1 Feather
– Feather #4: Barn owl
Can be collected during sub-chapter “Entering the sanctuary”, objective “Find another way inside the sanctuary”, immediately after entering the tower after completing the stealth section. Continue climbing the stair to the top level of the tower (do no exit it through the middle level) and climb the ledge. From there go up the stairs and continue on the path until you reach to its end.
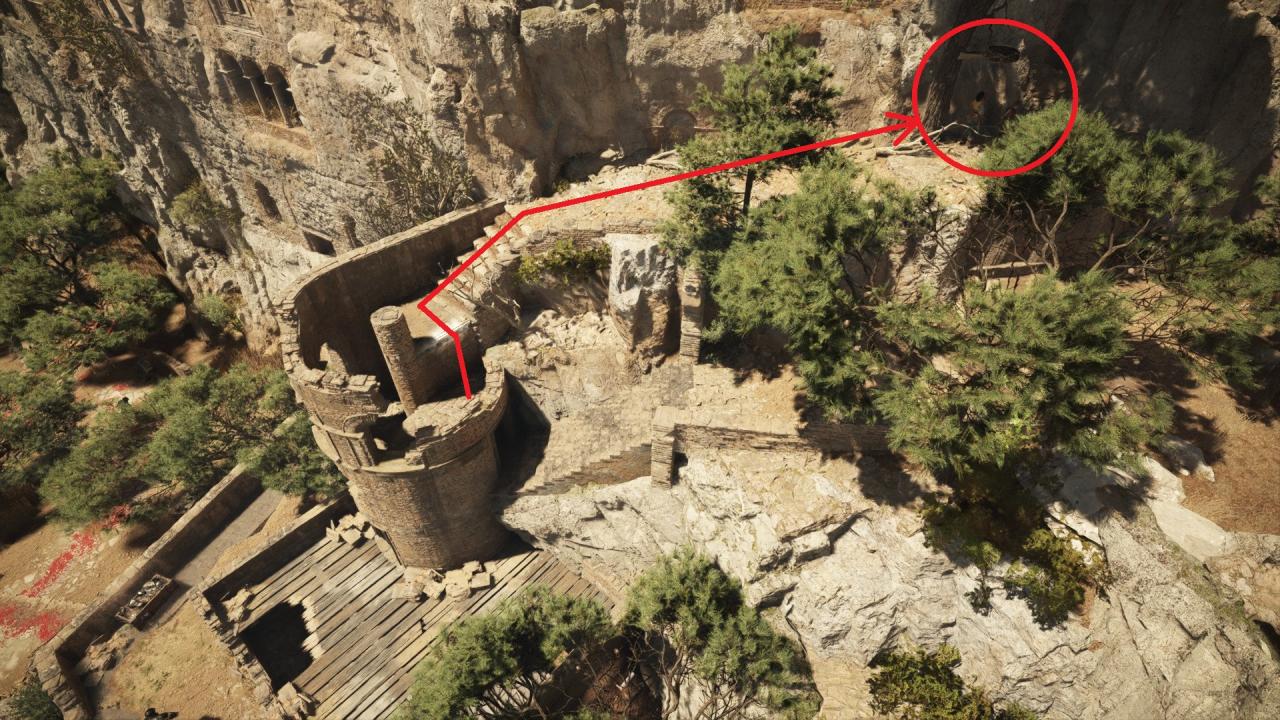 Underneath a tree you will find some yellow feathers on the ground.
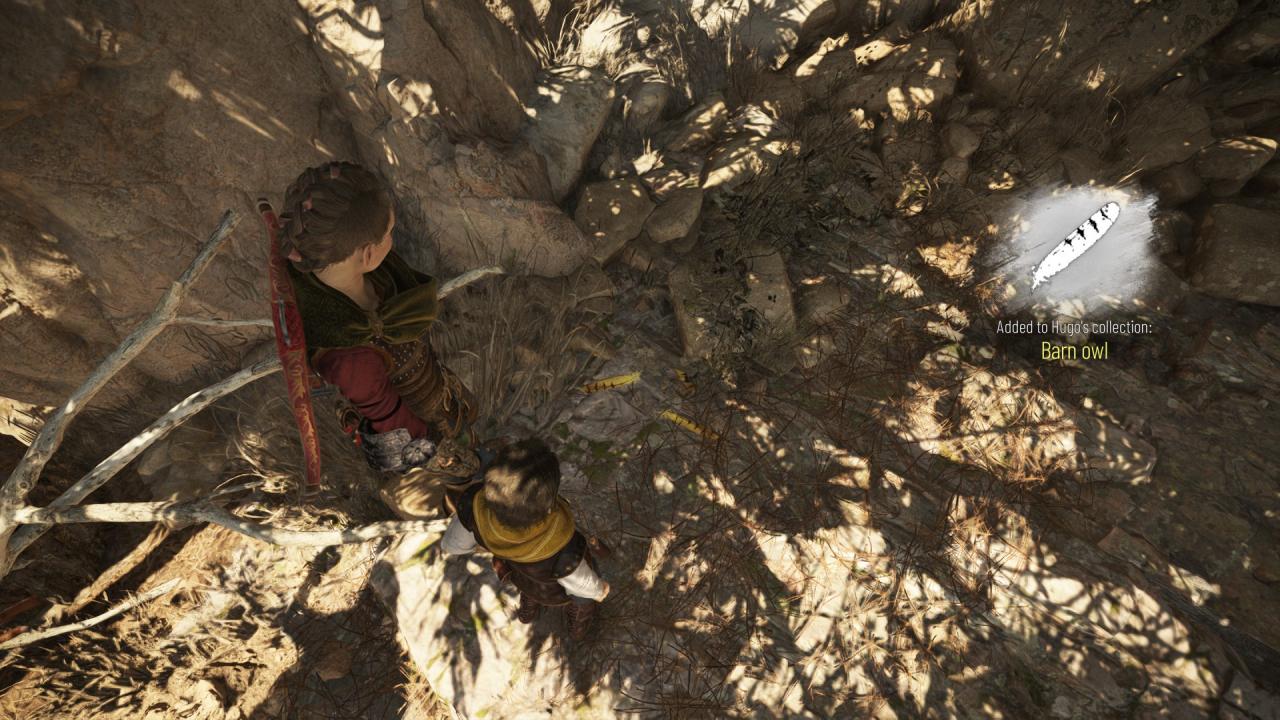 Interact with them in order to collect the fourth feather.
Chapter 10: 1 Feather
– Feather #5: Raven
Can be collected during sub-chapter “The old temple”, objective “Reach the fort”, after completing the puzzle to exit the roman building. Right after you get though the door, keep to the left on the grass path until you reach a ledge leading underneath the broken bridge. Climb down and follow the path on the narrow cliff until the end, where you will find some black feathers on the ground.
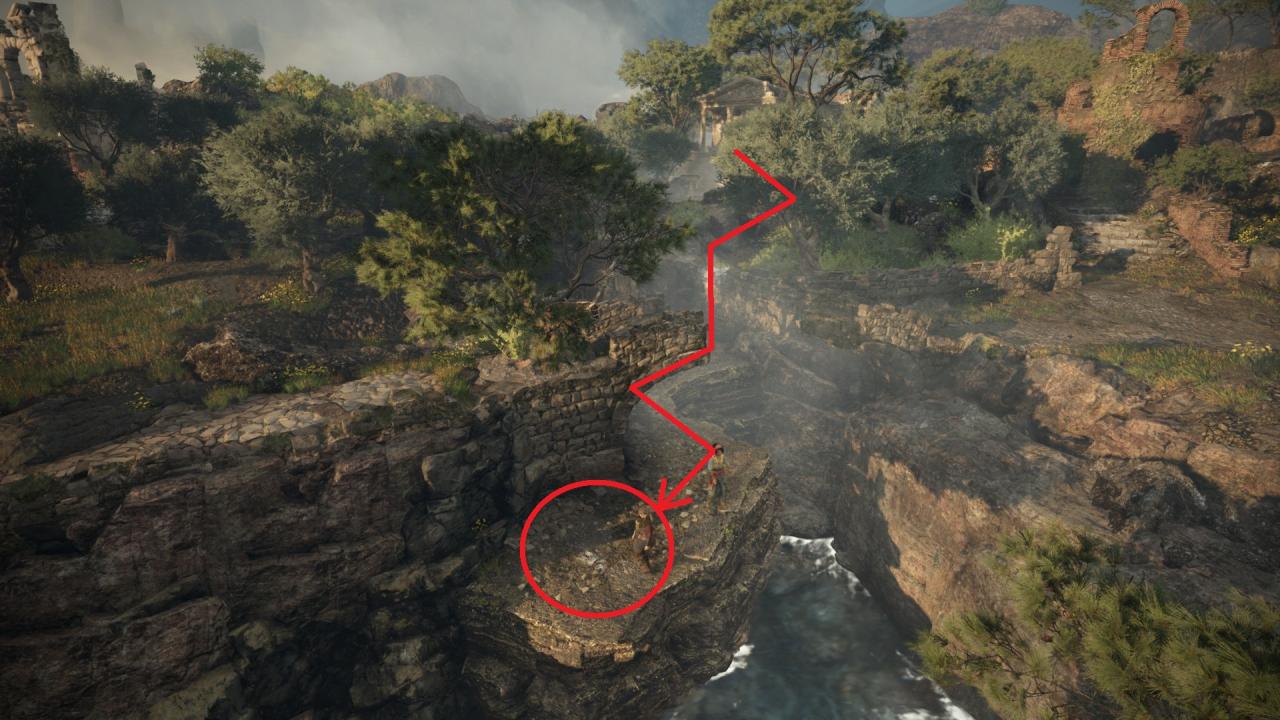
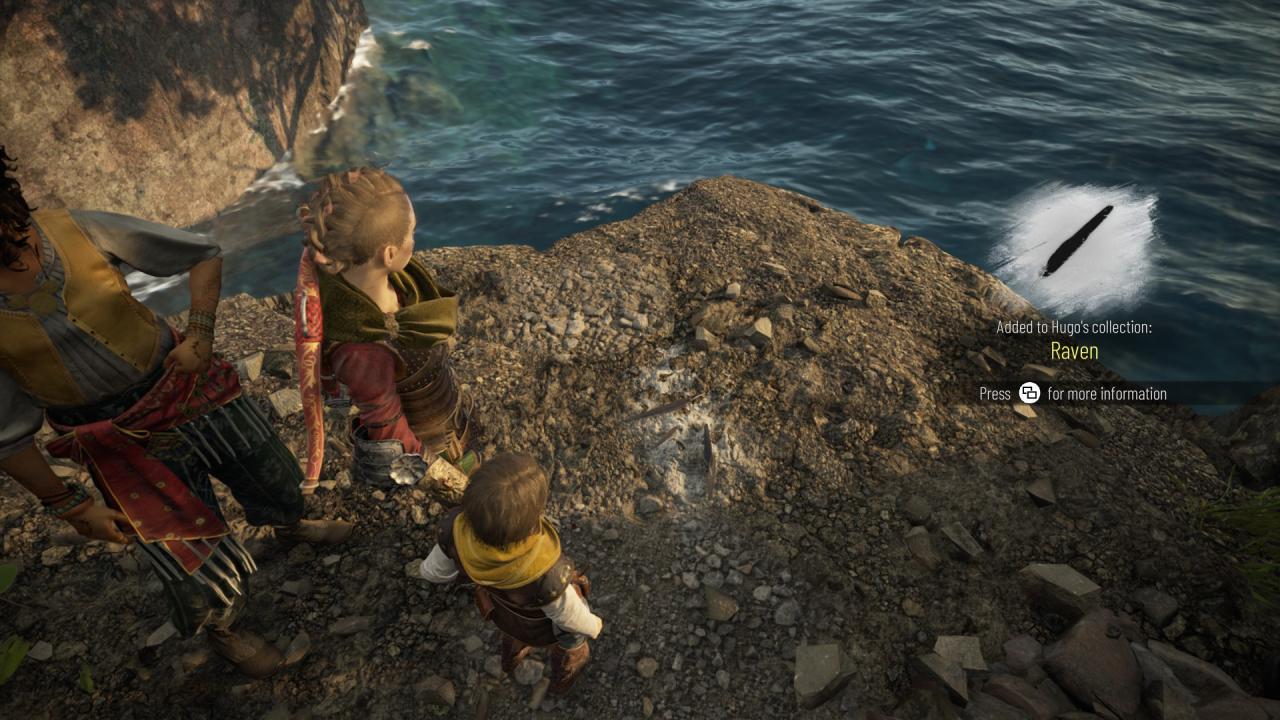 Interact with them in order to collect the fifth feather.
Chapter 11: 1 Feather
– Feather #6: European Goldfinch
Can be collected during sub-chapter “Byzantine technology”, objective “Explore the underground area”, after blowing up the first obstacle using the explosive greek barrel. Enter the room and on the right side there will be another explosive barrel behind a some wooden planks. Shoot it with Ignifer in order to blow up the wall and crouch through the newly created hole.
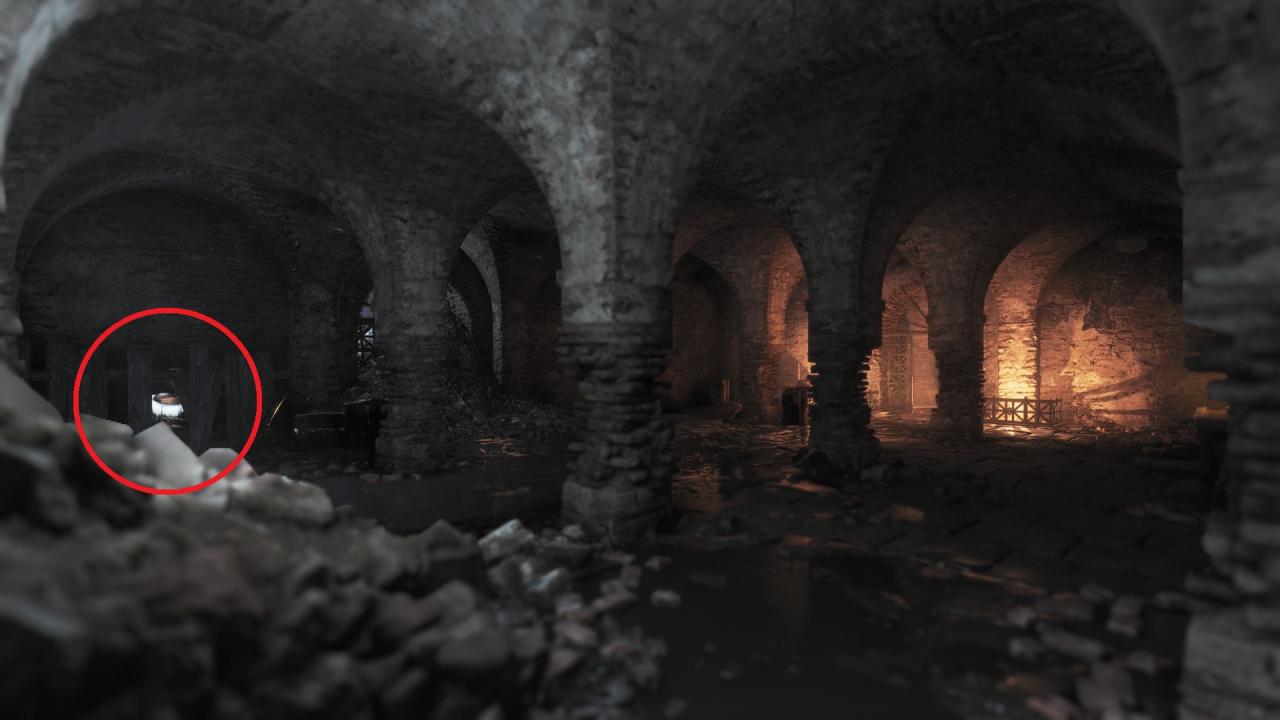 After you enter the room, walk forward and on the ground you will find some black and yellow feathers.
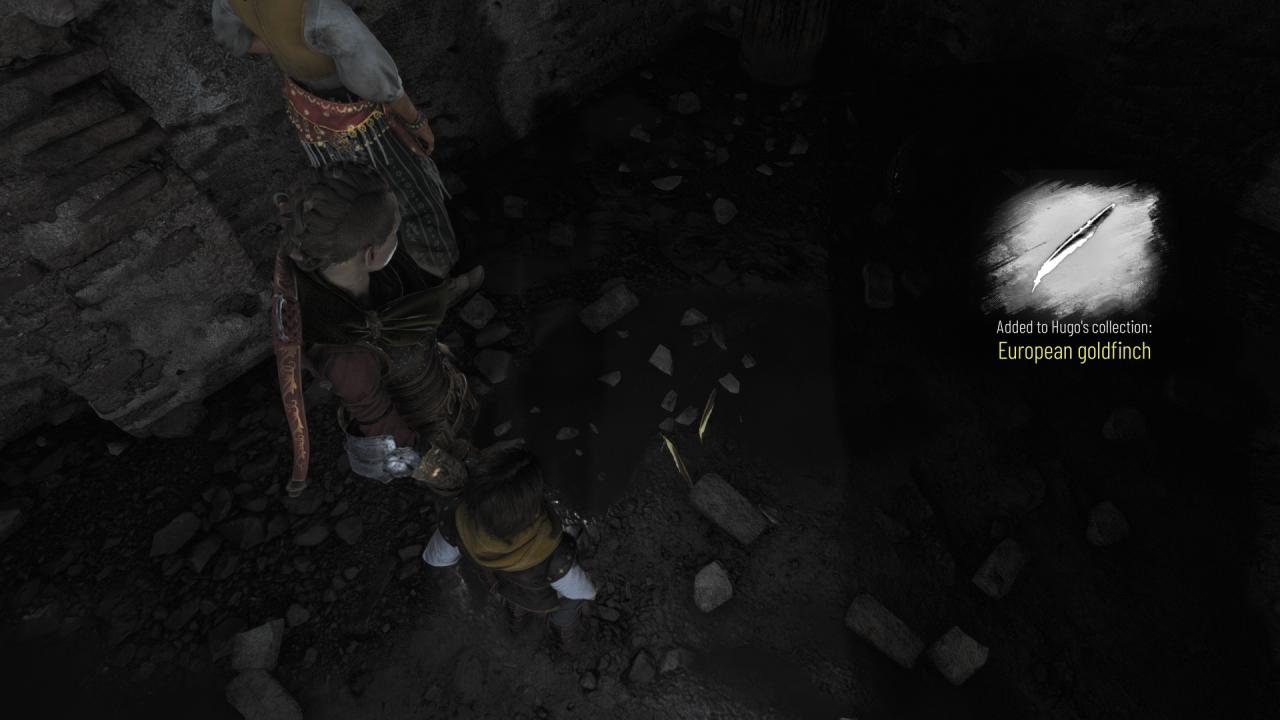 Interact with them in order to collect the sixth feather.
Chapter 12: 0 Feathers
Chapter 13: 1 Feather
– Feather #7: Greylag Goose
Can be collected during sub-chapter “Ruined village”, objective “Reach the port”, when you enter the next area of the city after the church. Reach the house with the workbench in it and climb the ledge inside it, go to the left on the balcony and jump down. Go forward through the flower archway and then immediately left through the door.
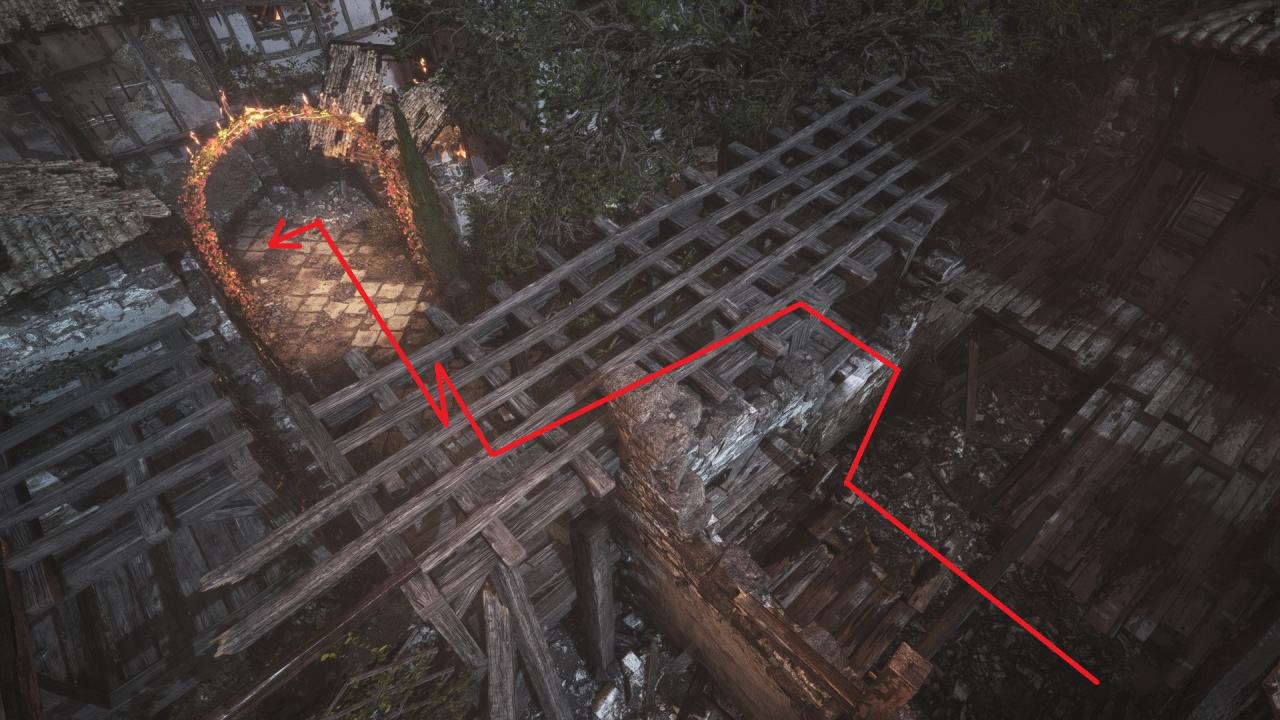 To the right, you will find a cart. Push it to the left, next to door of the the building from which you came from. Climb on the cart then on the ledge, and in front you will find some grey feathers on the floor.
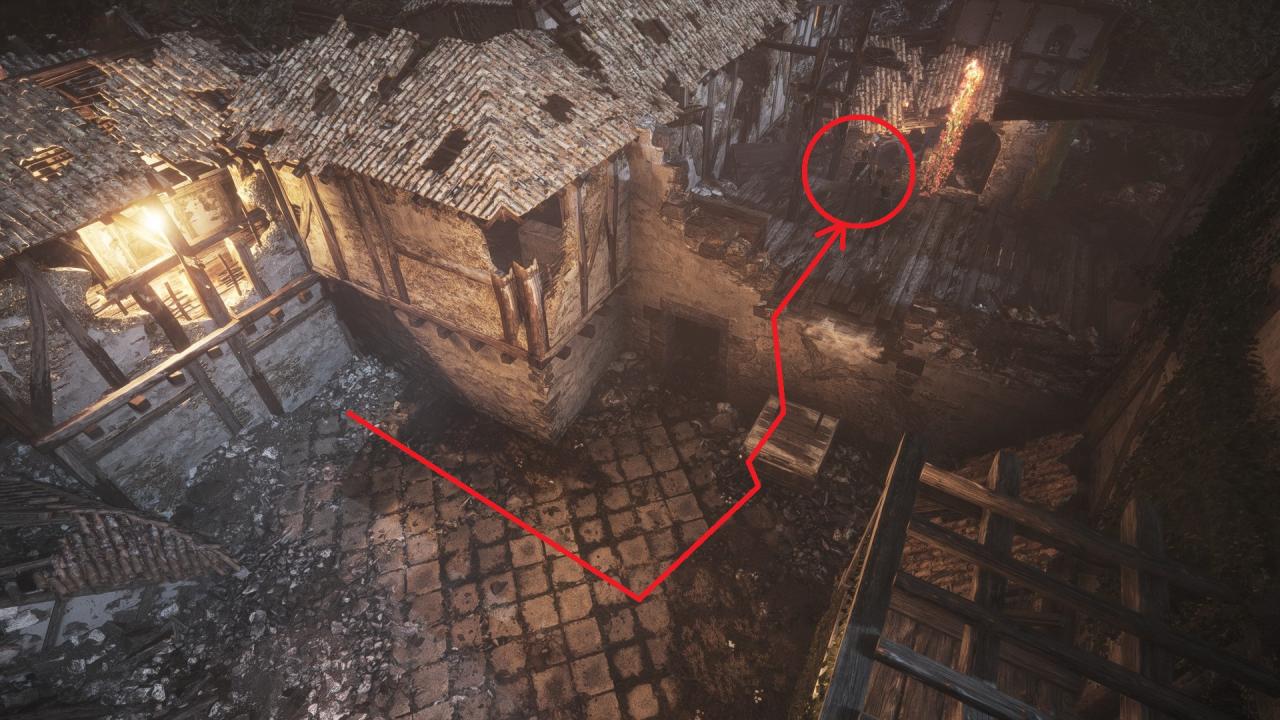
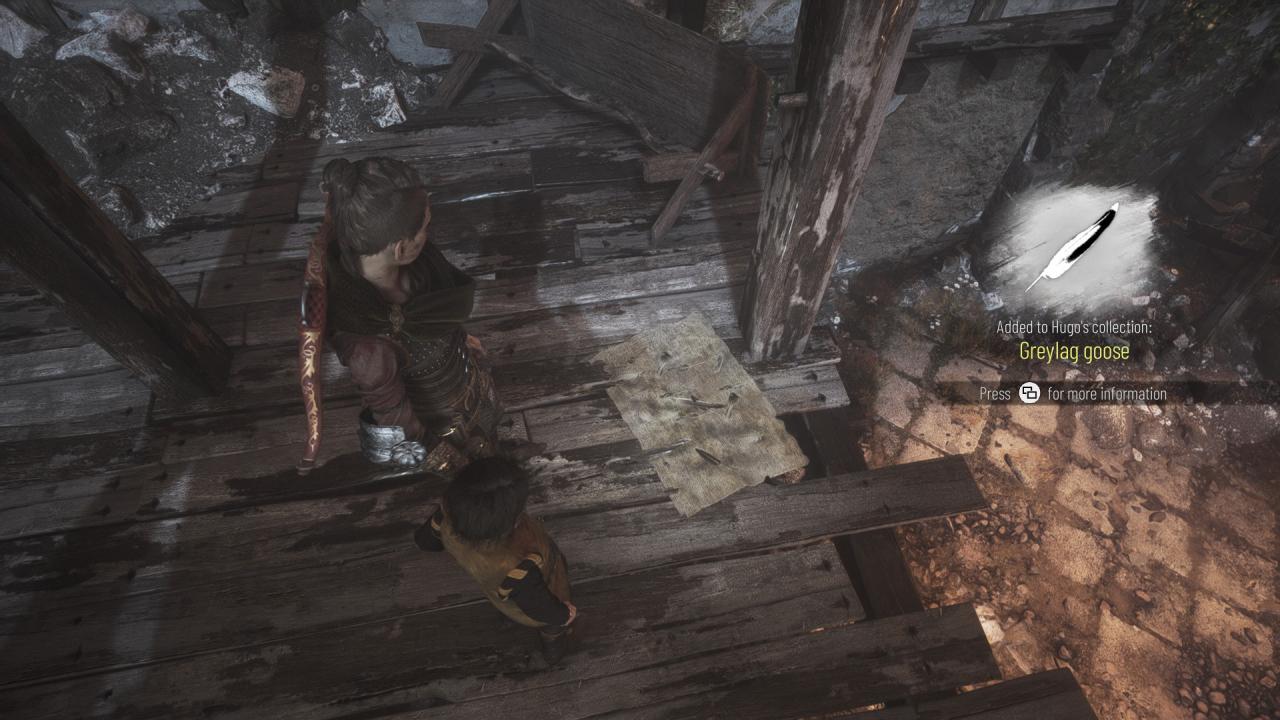 Interact with them in order to collect the seventh feather.
After collecting all of the 7 feathers, as soon as you interact with the last one, the achievement will unlock.
Explorer (Chapters 1-9)
 Explorer
Open all the secret chests
MISSABLE
There are 10 Secret Chests throughout the entire game that you will need to unlock using Knives. Inside them you will discover a workbench, multiple crafting materials and 1 Tool.
Keep in mind that the secret chests are not tracked in-game, unlike the Souvenirs and Hugo’s Collection.
Note: Before upgrading the Gear equipment at level 3, Amicia can only hold 1 knife at a time. Knives are consumables that are lost or broken after usage. Keep this in mind if you want to use the knives to either kill enemies in order to increase the passive skill “Aggression” or to unlock the secret chests. I recommend playing on the lowest difficulty “Narrative” on your first playthrough, as you will find more knives, rather than playing on the hardest where knives are relatively scarce.
Chapter 3: 1 Secret Chest
– Secret Chest #1 can be found and unlocked during the second objective “Escape the fort”, after finding Amicia’s belongings inside the warehouse (you will also get your knife back, if you had one).
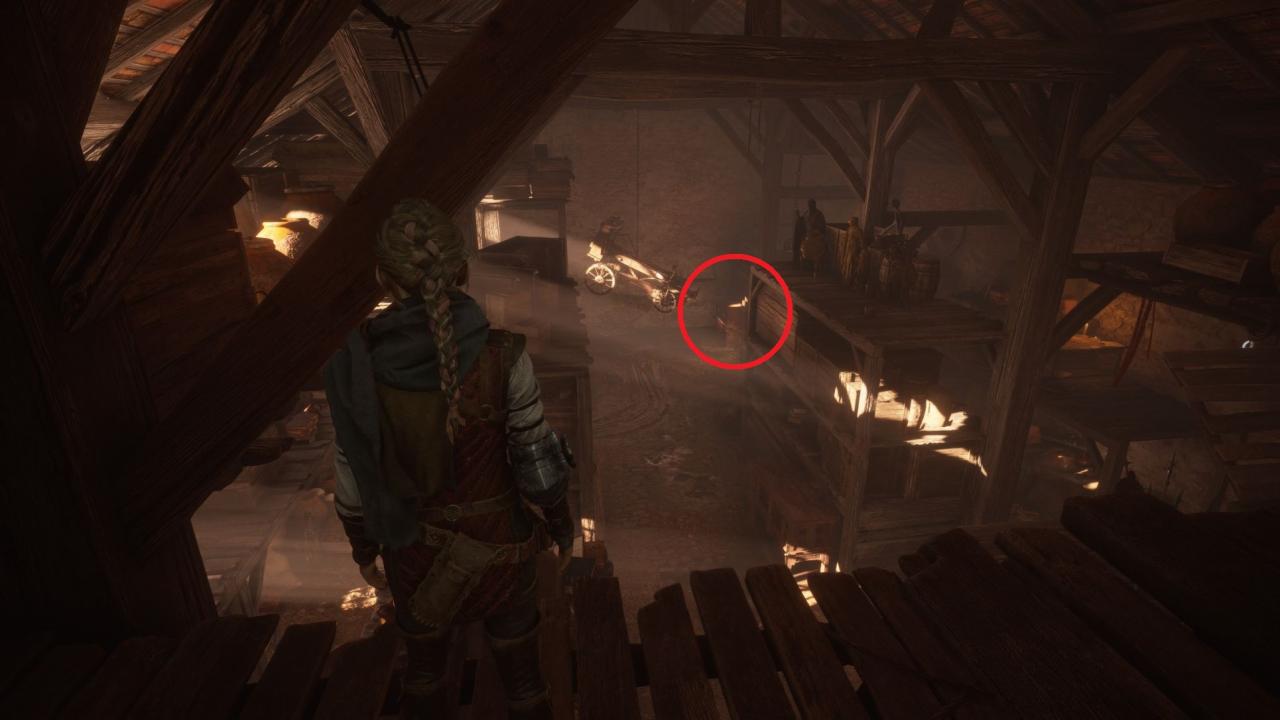 From where you found your belongings, turn around facing the hanging ballista and you will see the chest in front of you.
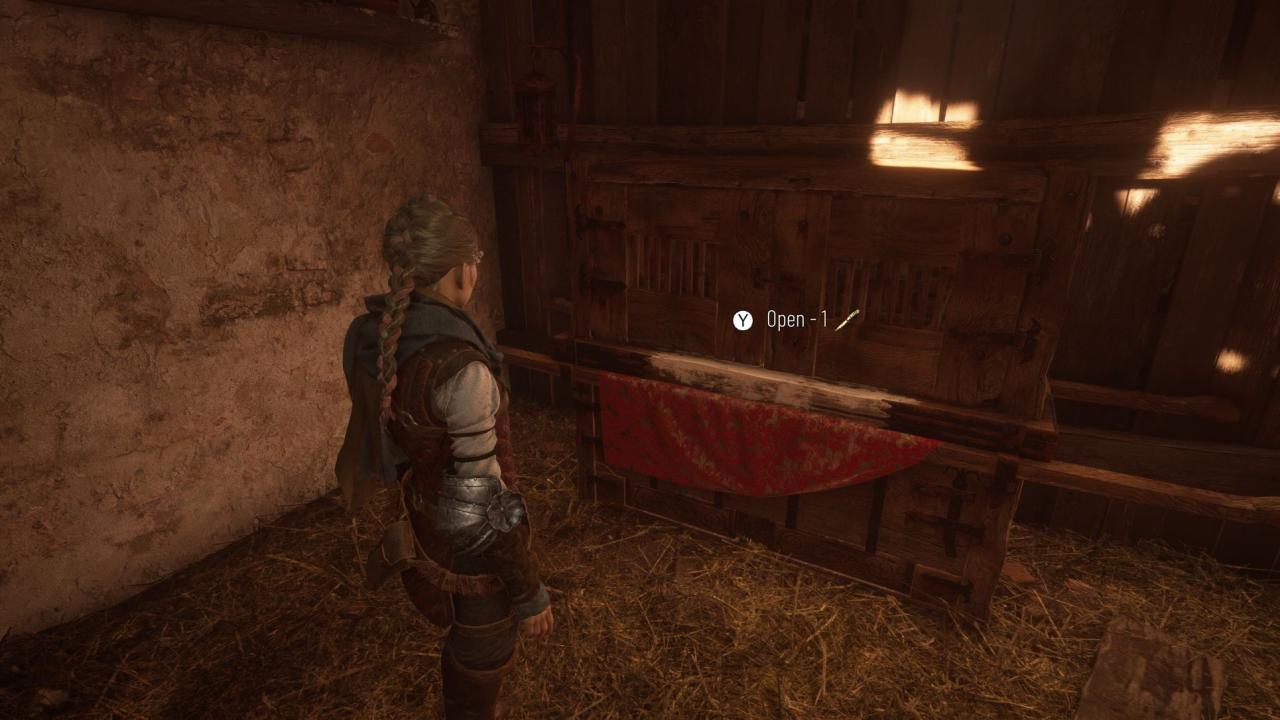 Interact with the secret chest consuming a knife.
Chapter 4: 1 Secret Chest
– Secret Chest #2 can be found and unlocked during objective “Reach the Order’s Boat”, after sneaking past the first enemy encounter, you will reach a wide area that will become infested with rats. Light up the tar, walk past it and then also light up the brazier on the cart. Walk towards the cart and push it to the left side, where you can see a ladder.
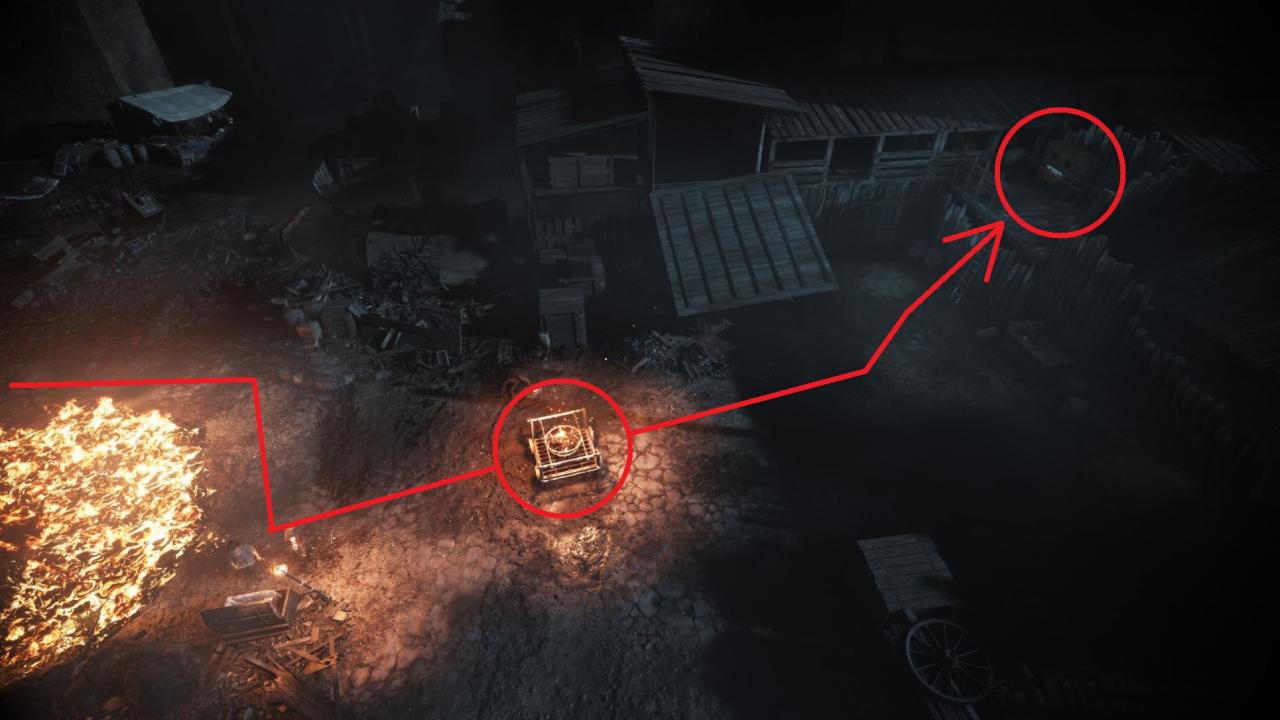 Bring the cart next to the ladder, climb it and there you will find the secret chest.
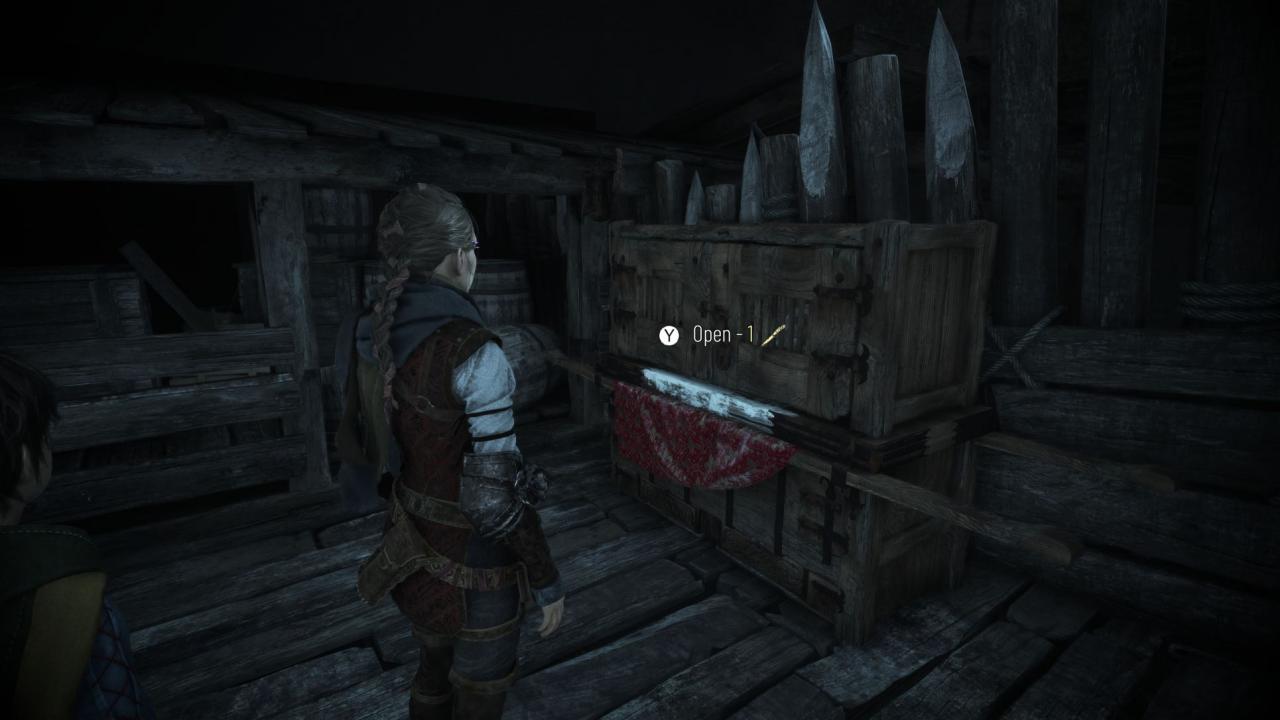 Interact with the secret chest consuming a knife.
Chapter 5: 1 Secret Chest
– Secret Chest #3 can be found and unlocked during sub-chapter “Reaction ferry”, the second objective “Find a way to reach the boat”, after crossing the river and destroying the counterweight of the wooden pontoon. Head outside the barn, continue to the left until you reach the fence behind the barn, squeeze through the opening in the fence and climb up the ladder leading to the attic of the barn.
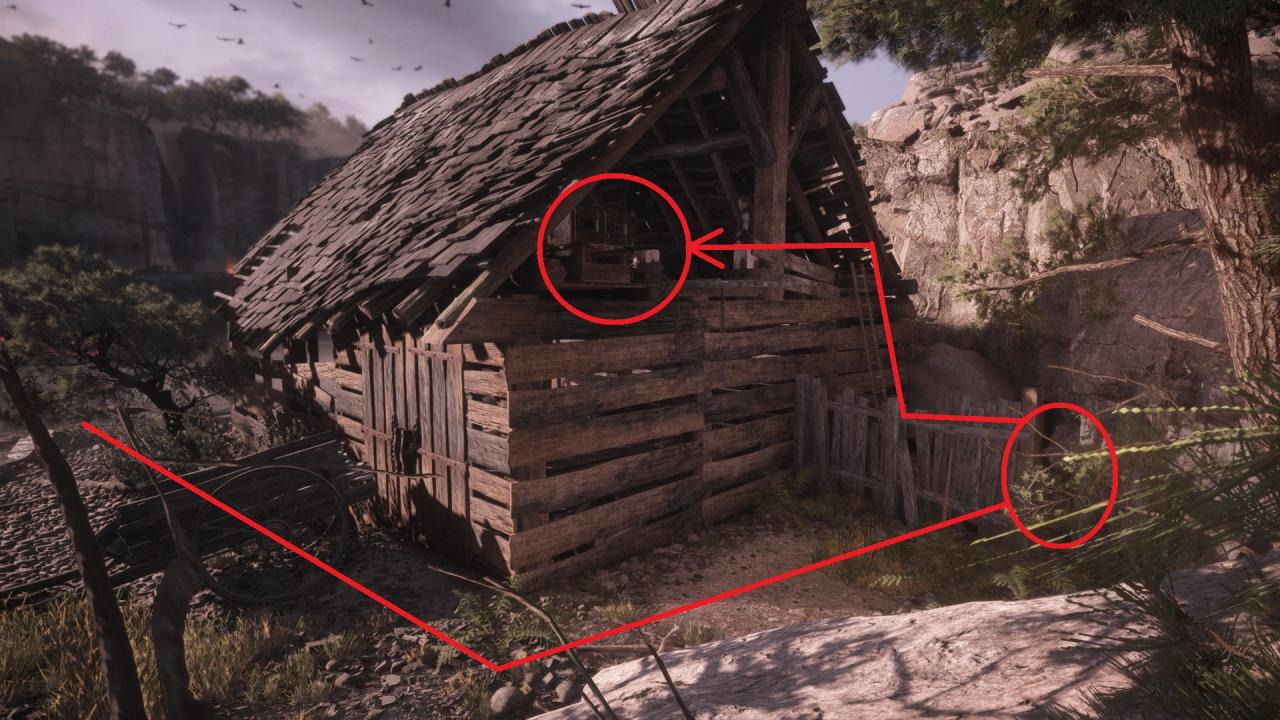 In the attic you fill find the 3rd secret chest.
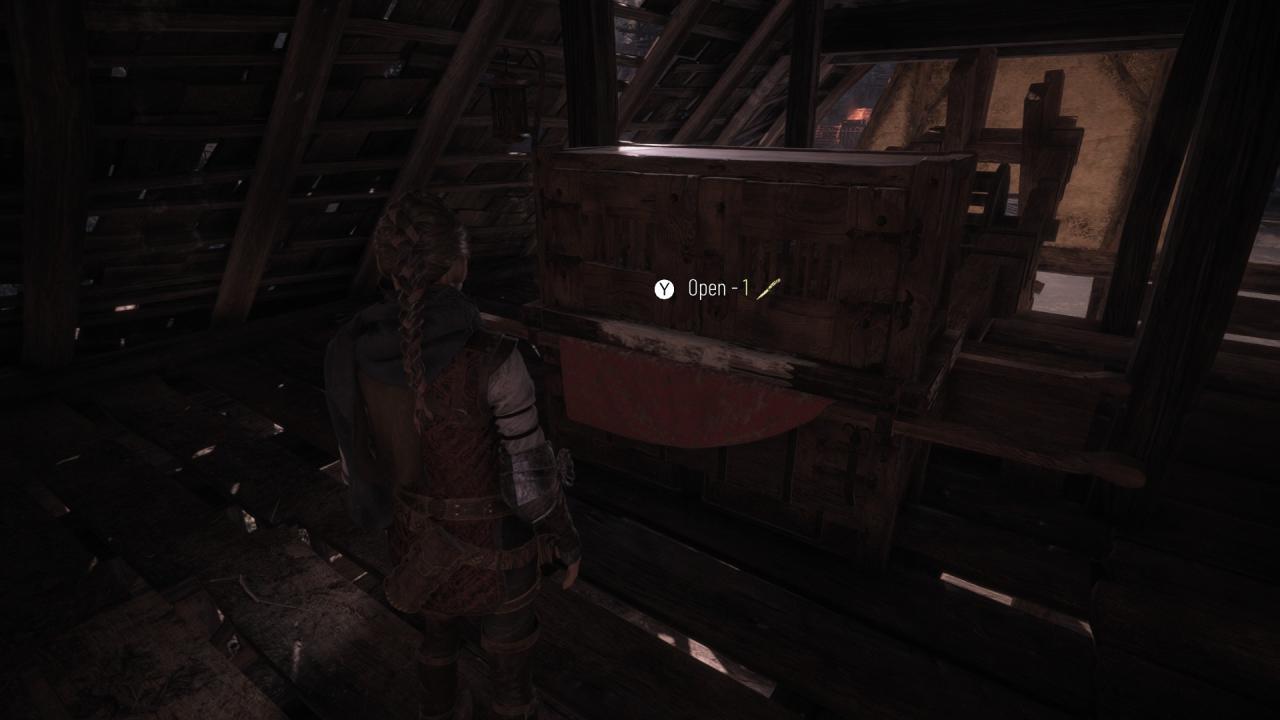 Interact with the secret chest consuming a knife.
Chapter 6: 1 Secret Chest
– Secret Chest #4 can be found and unlocked during sub-chapter “Call of the rats”, the objective “Find a way out of the building”, shortly after you enter the building. There is a hidden path, behind the wooden shelves to the left.
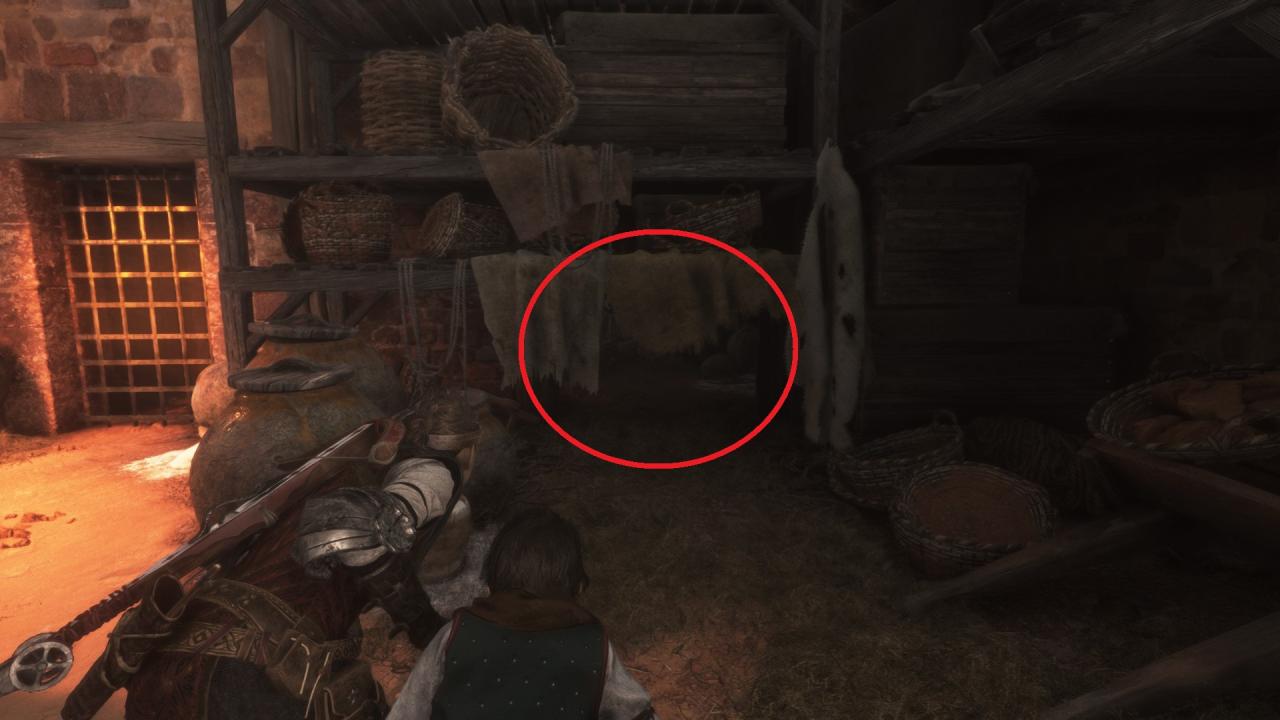 Crouch through the opening in the wall and inside the small room you will find the 4th secret chest.
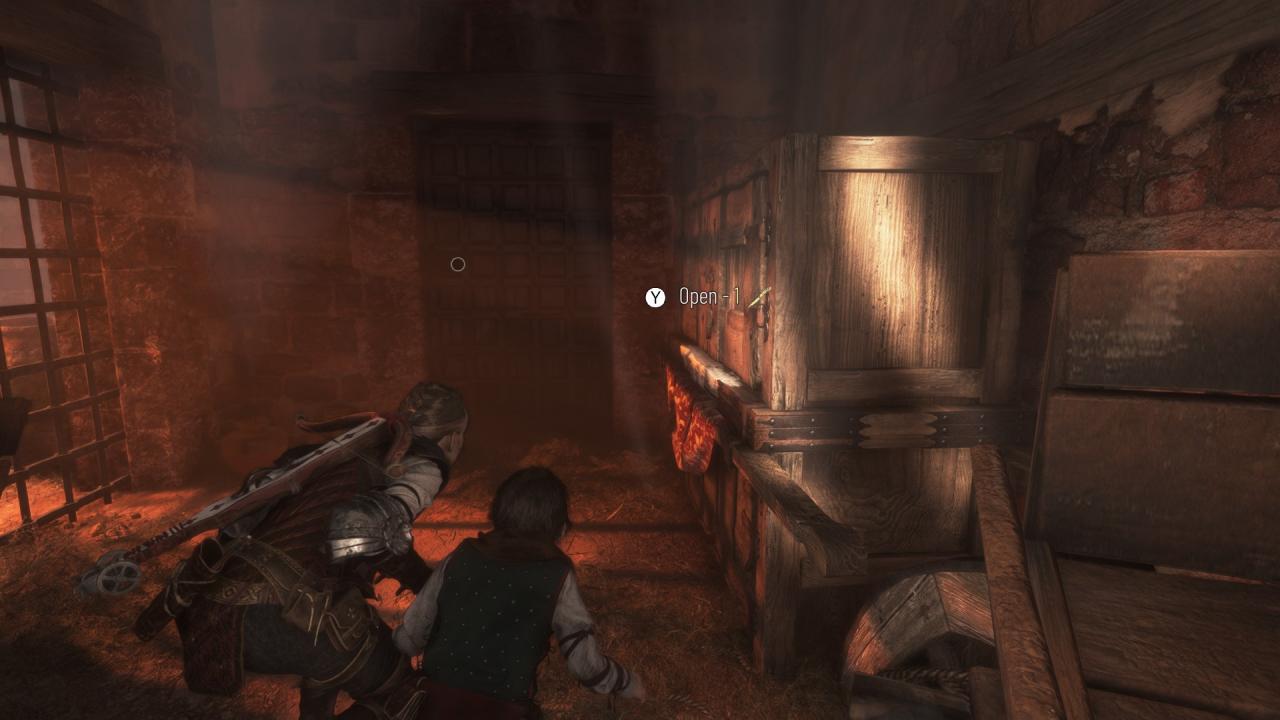 Interact with the secret chest consuming a knife.
Chapter 7: 1 Secret Chest
– Secret Chest #5 can be found and unlocked during sub-chapter “More Rats”, objective “Find the smuggler’s hideout”, when you reach the pontoon where a big shipwreck is in the water to the right. Crouch and enter through the hole in the hull and on the wrecked deck you will find the 5th secret chest.
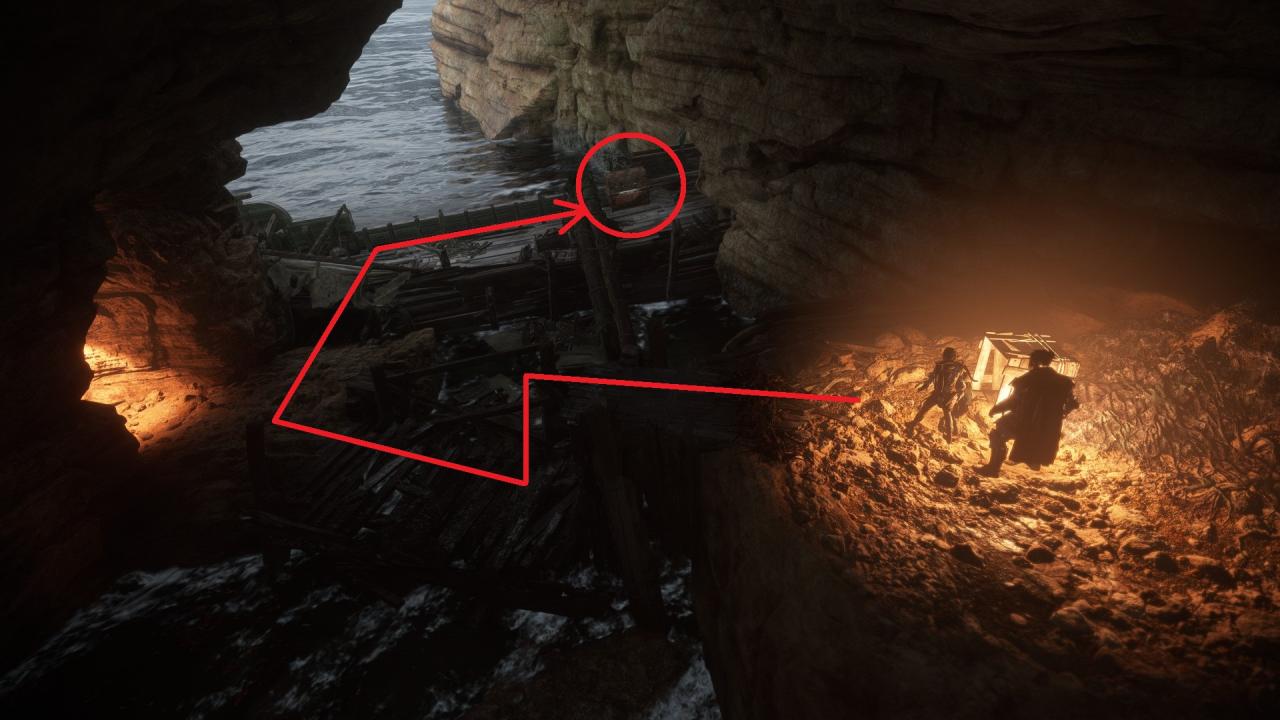
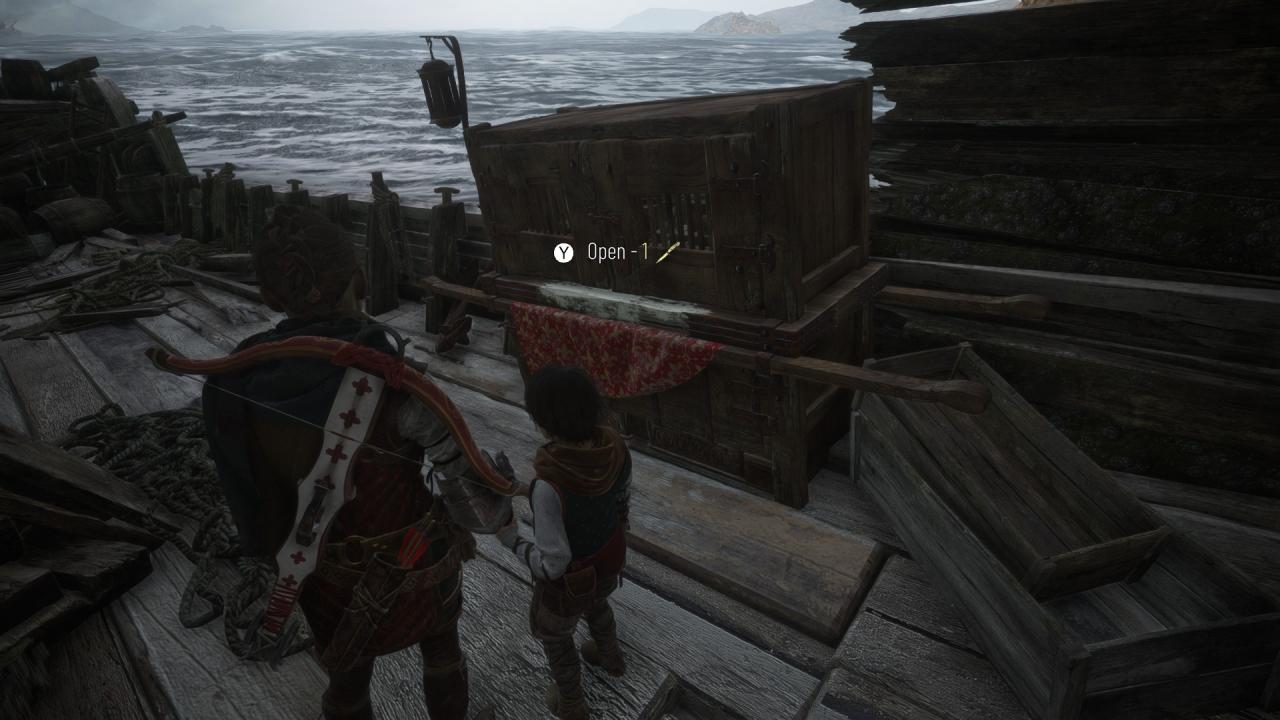 Interact with the secret chest consuming a knife.
Chapter 8: 0 Secret Chests
Chapter 9: 2 Secret Chests
– Secret Chest #6 can be found and unlocked during sub-chapter “Exploration”, objective “Follow the bird statues”, after leaving the castle and finding the first bird statue. From now on, you are free to explore the entire island. Head to the ruined tower near the river and go around it to the left.
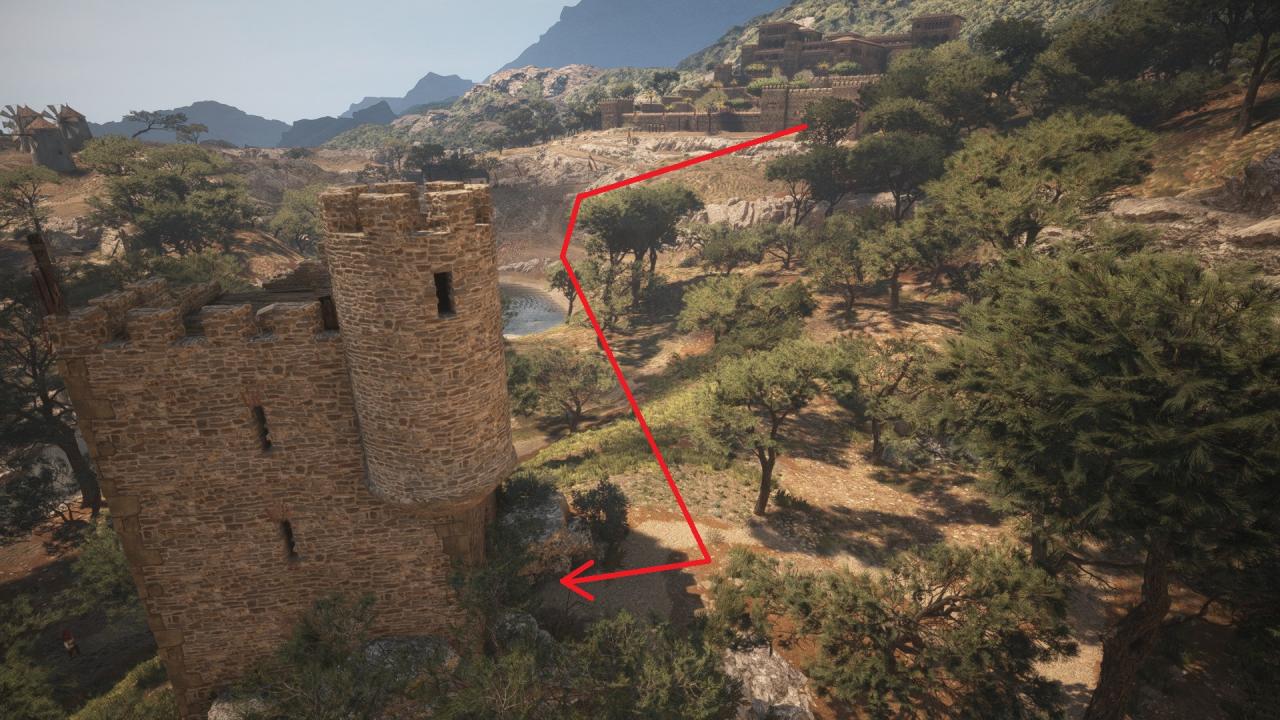 Shoot the hinge through the window in order to unlock the door blocking the path to the upper levels of the tower.
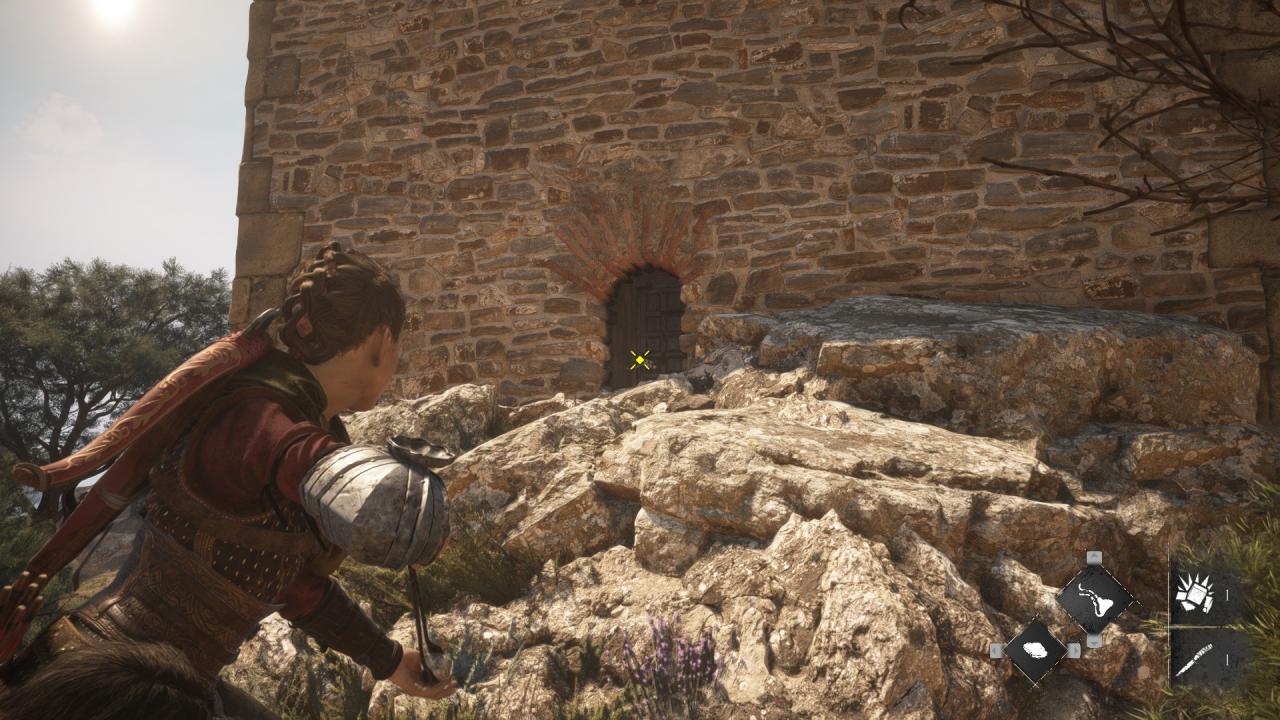 Head inside the tower and climb up to the second floor. You will see the secret chest in front of you.
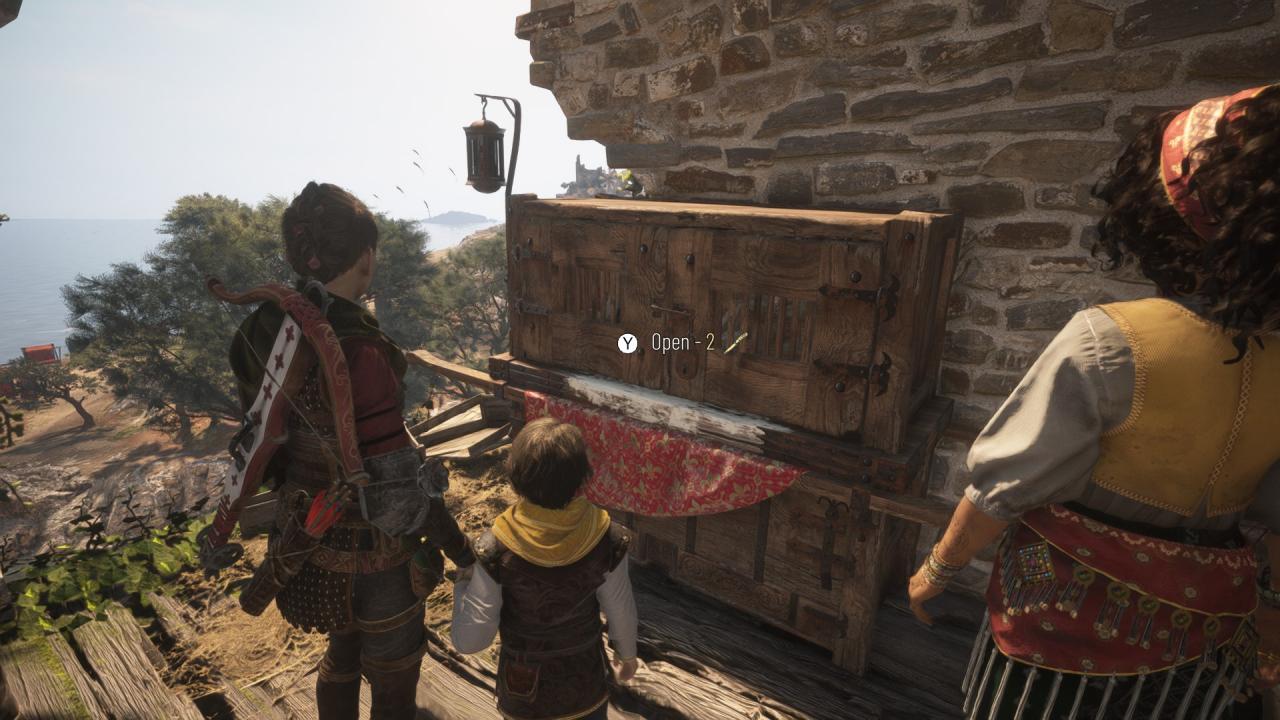 Interact with the secret chest consuming a knife.
– Secret Chest #7 can be found and unlocked during sub-chapter “On the mountain”, objective “Find a way around the checkpoint”. Continue on the path past the ruined round building, until reaching a narrow path surround by rocks that continues to the left. On this corner there is a ledge. Climb up and in front of you you will see a secret chest.
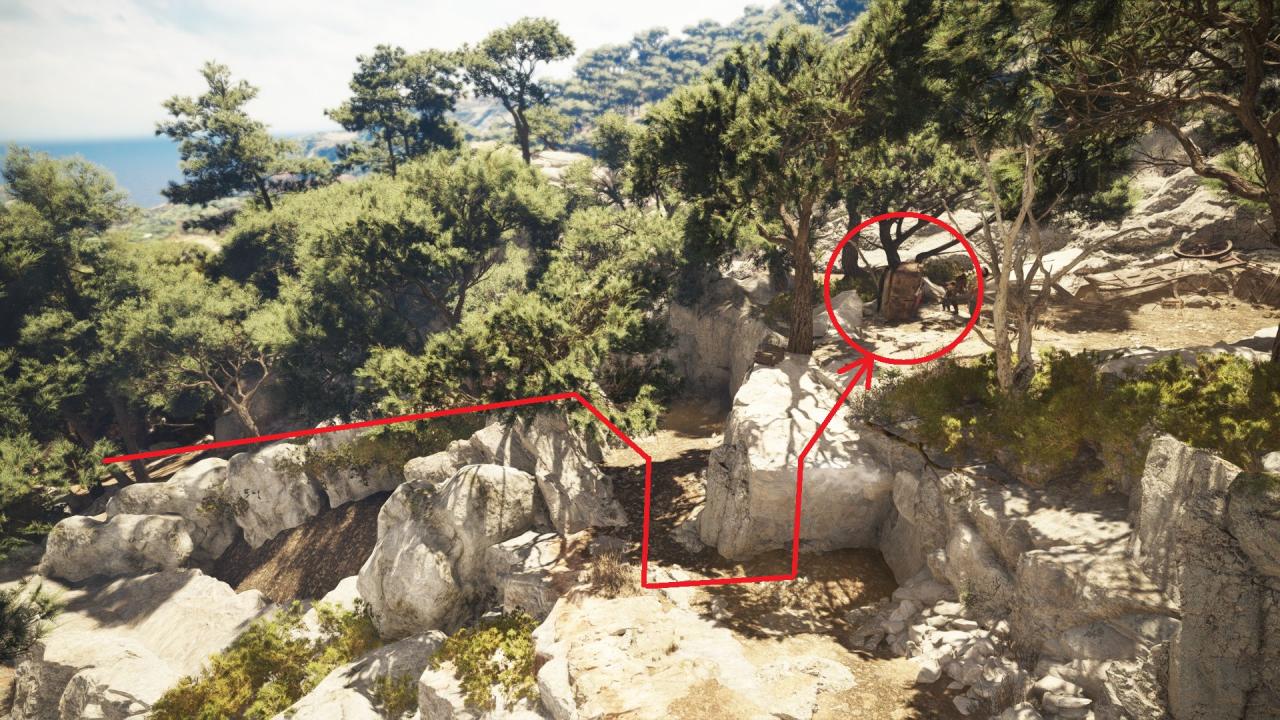
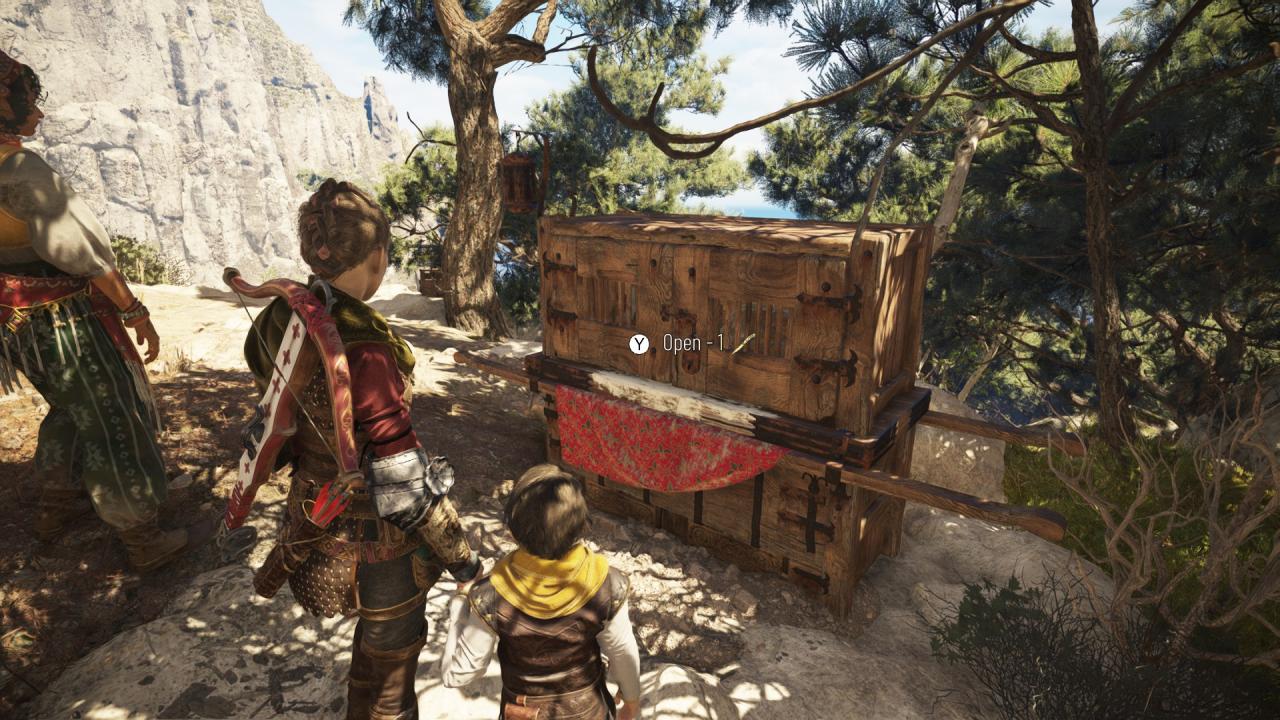 Interact with the secret chest consuming a knife.
Explorer (Chapters 10-13)
Chapter 10: 1 Secret Chest
– Secret Chest #8 can be found and unlocked during sub-chapter “In the courtyard”,the objective “Use Sophia’s prism”, when you have to cross the yard filled with rats by using Sophia’s prism to light up the way (after lighting up the first brazier). Light the second the second brazier, go to it and from here head inside the tower next to it.
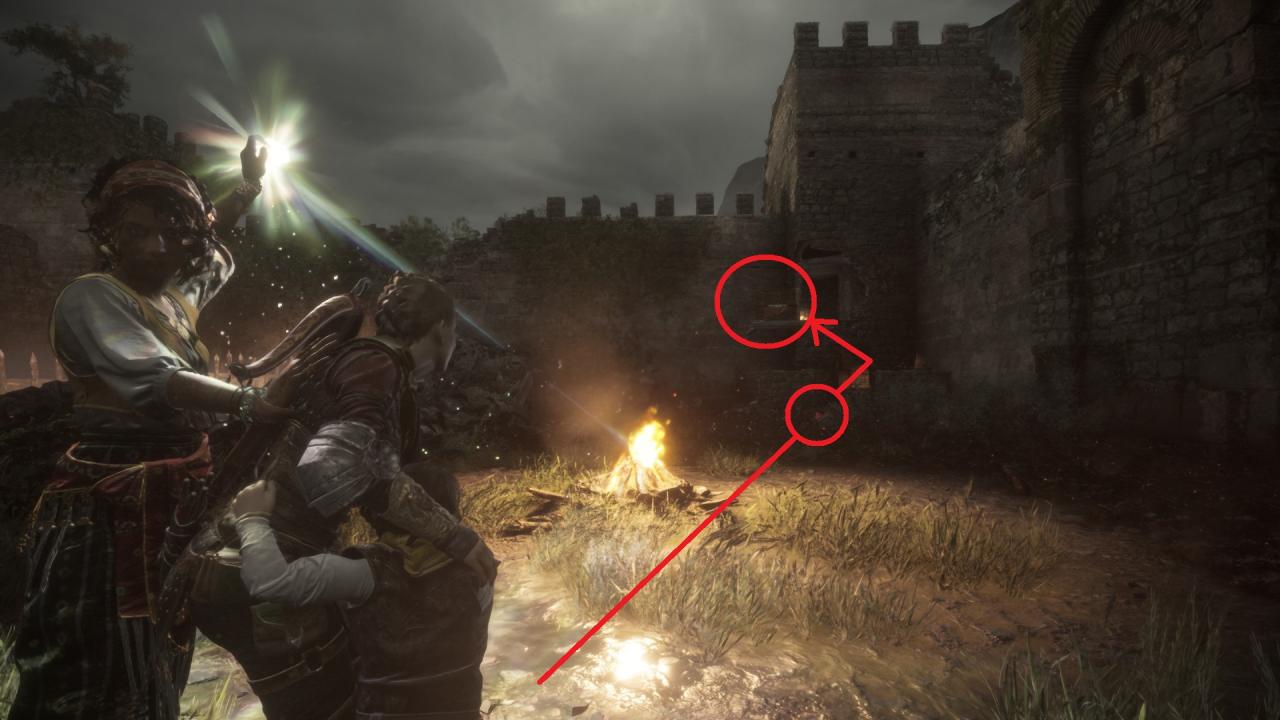 Climb up the stairs and exit on the balcony, where you will find the secret chest.
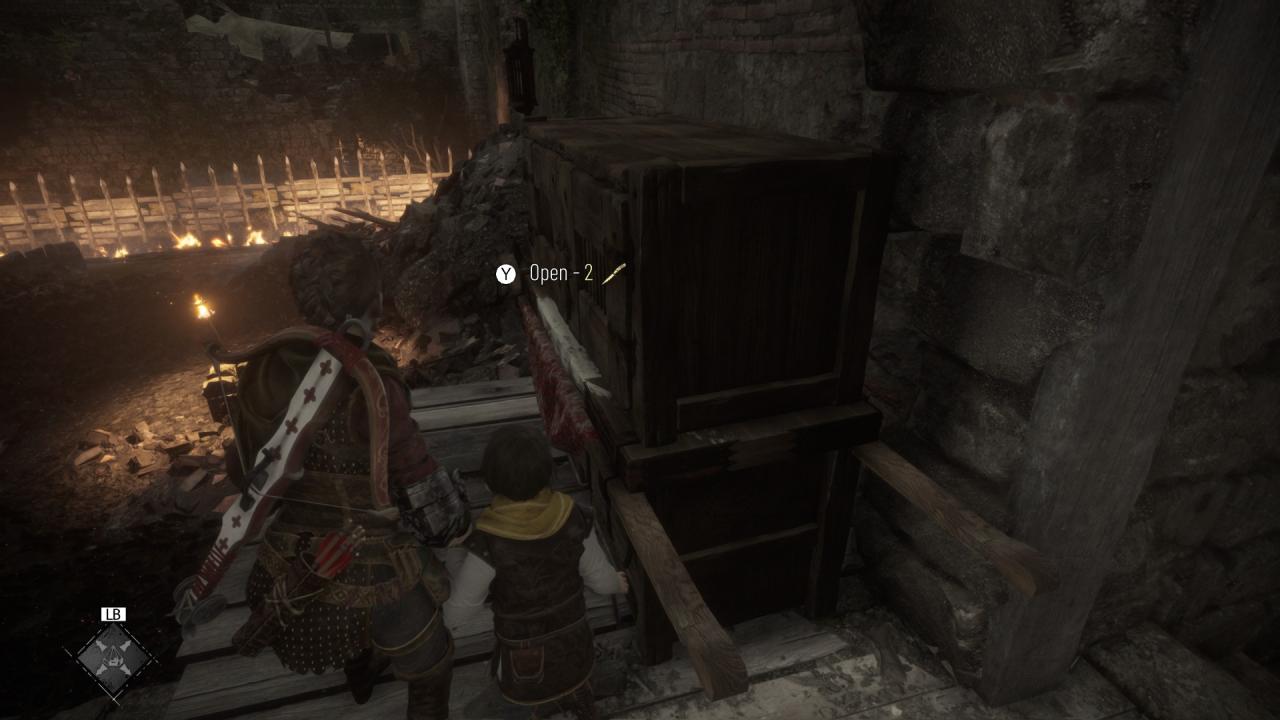 Interact with the secret chest consuming a knife.
Chapter 11: 1 Secret Chest
– Secret Chest #9 can be found and unlocked during sub-chapter “Rat tank”, objective “Explore the rest of the underground area”, after you reach the bridge section and Amicia finds herself surrounded by the rats at the lowest level of the room. After you fix two of the bridge segments, and you exit through the chains, you will see a brazier down on floor.
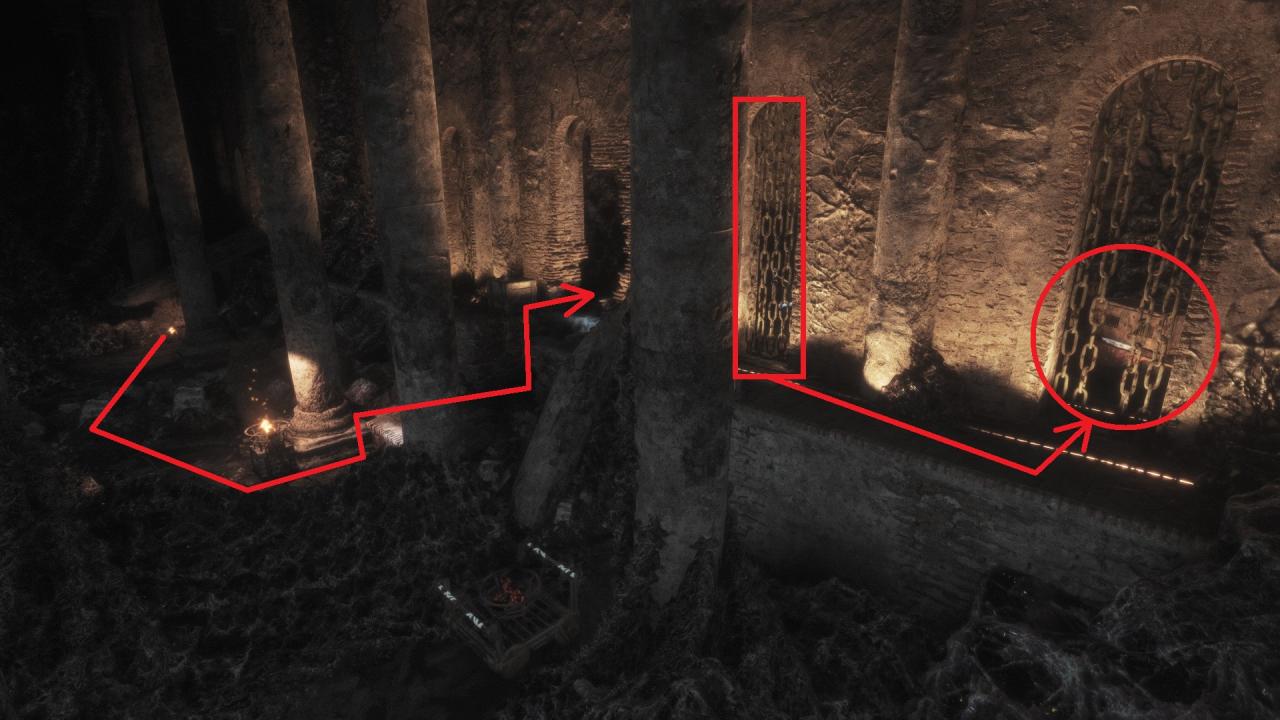 DO NOT jump down, but instead go to the left, through another pair of chains. In here you will find a secret chest.
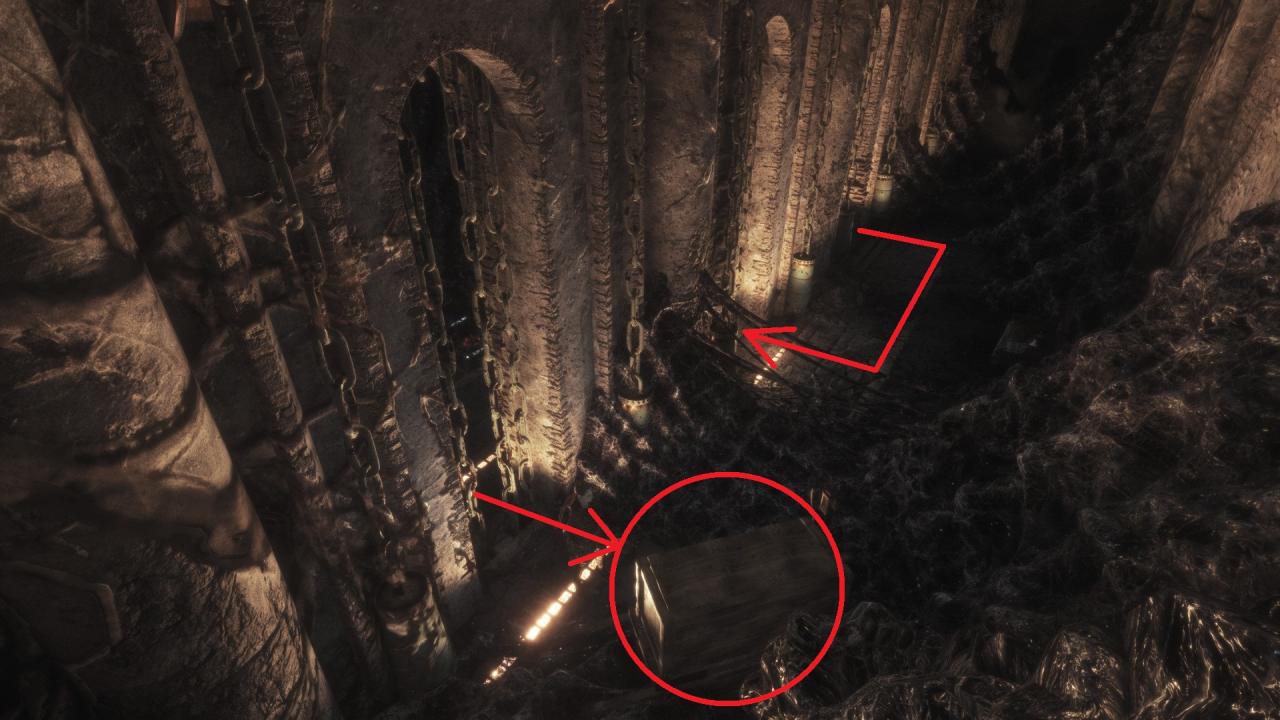
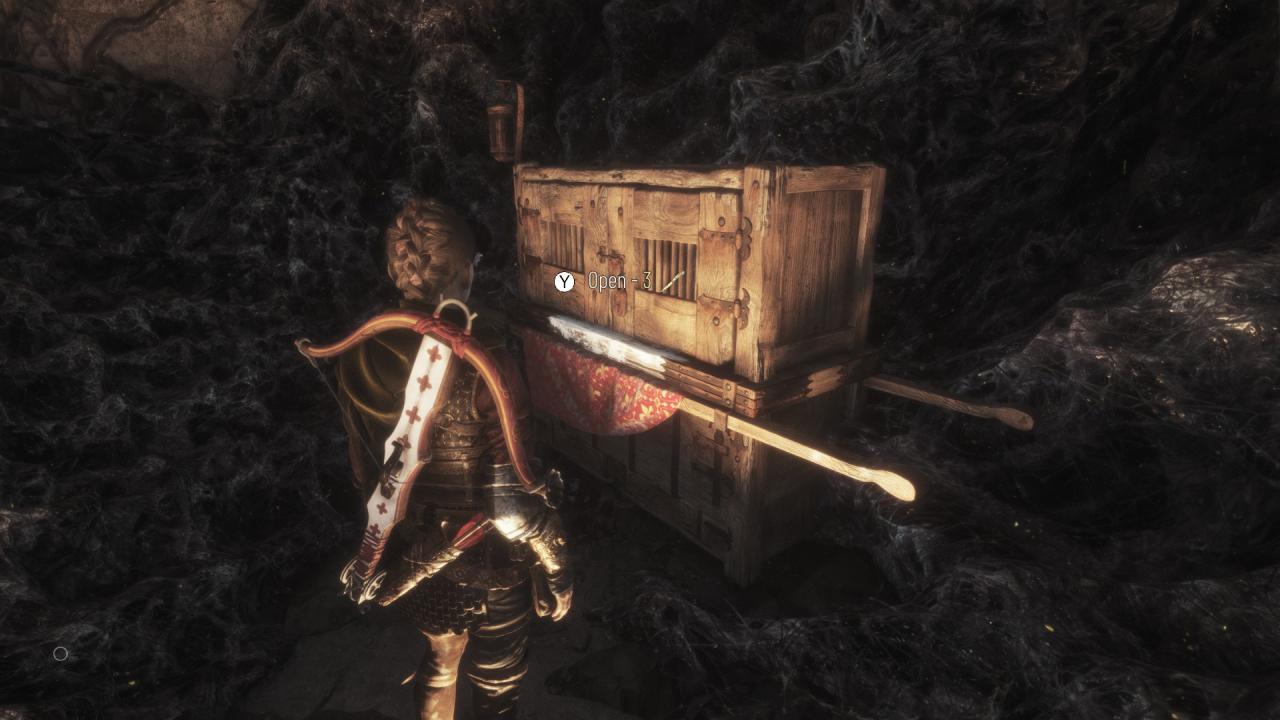 Interact with the secret chest consuming a knife.
Chapter 12: 0 Secret Chests
Chapter 13: 1 Secret Chest
– Secret Chest #10 can be found and unlocked during sub-chapter “Ruined village”, objective “Reach the port”, when you enter the next area of the city after the church. Reach the house with the workbench in it and climb the ledge inside it, go to the left on the balcony and jump down. Go forward through the flower archway and then immediately left through the door.
 To the right, you will find a cart. Push it to the left, next to door of the the building from which you came from. Climb on the cart then on the ledge and turn right.
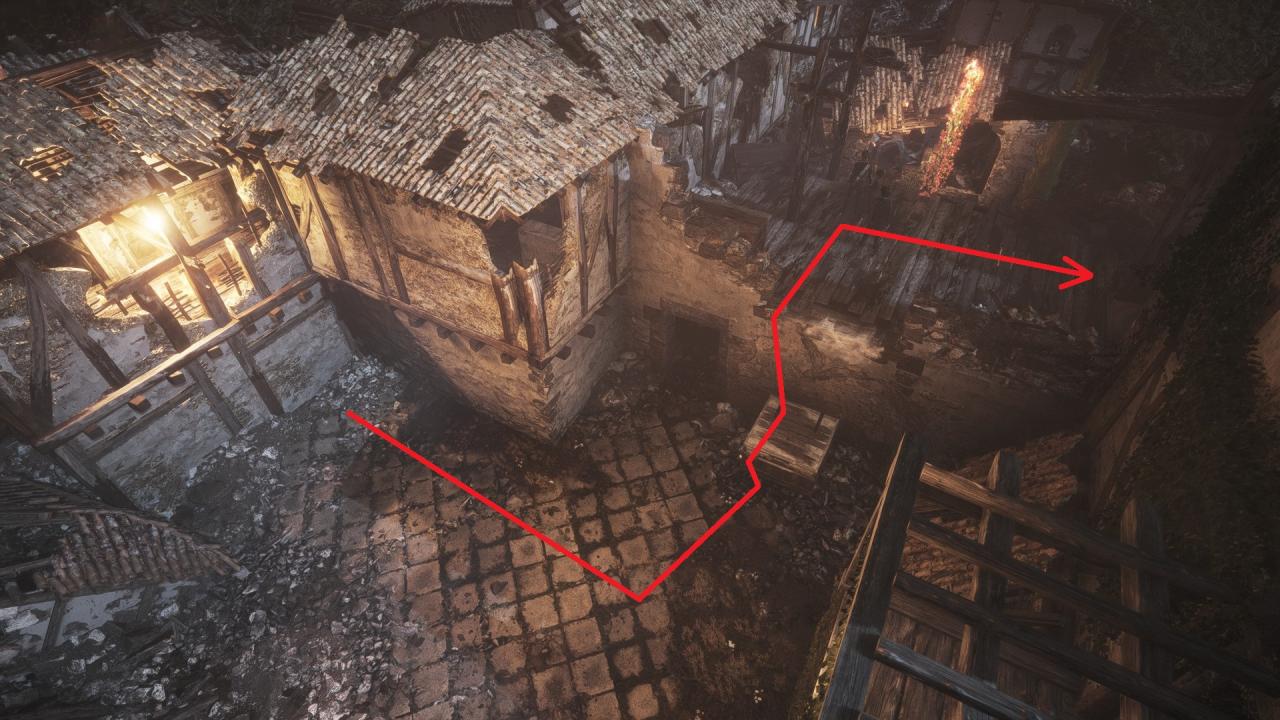 Walk towards the door and open it. To the right there will be the last secret chest.
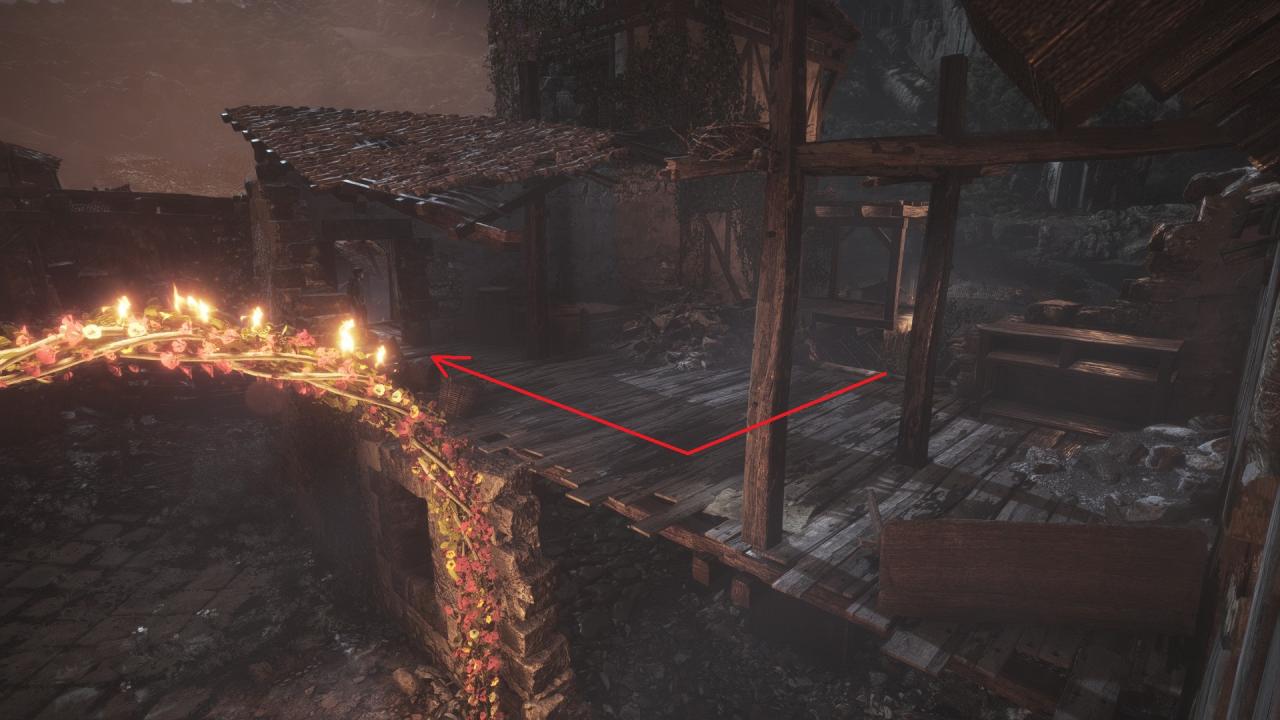
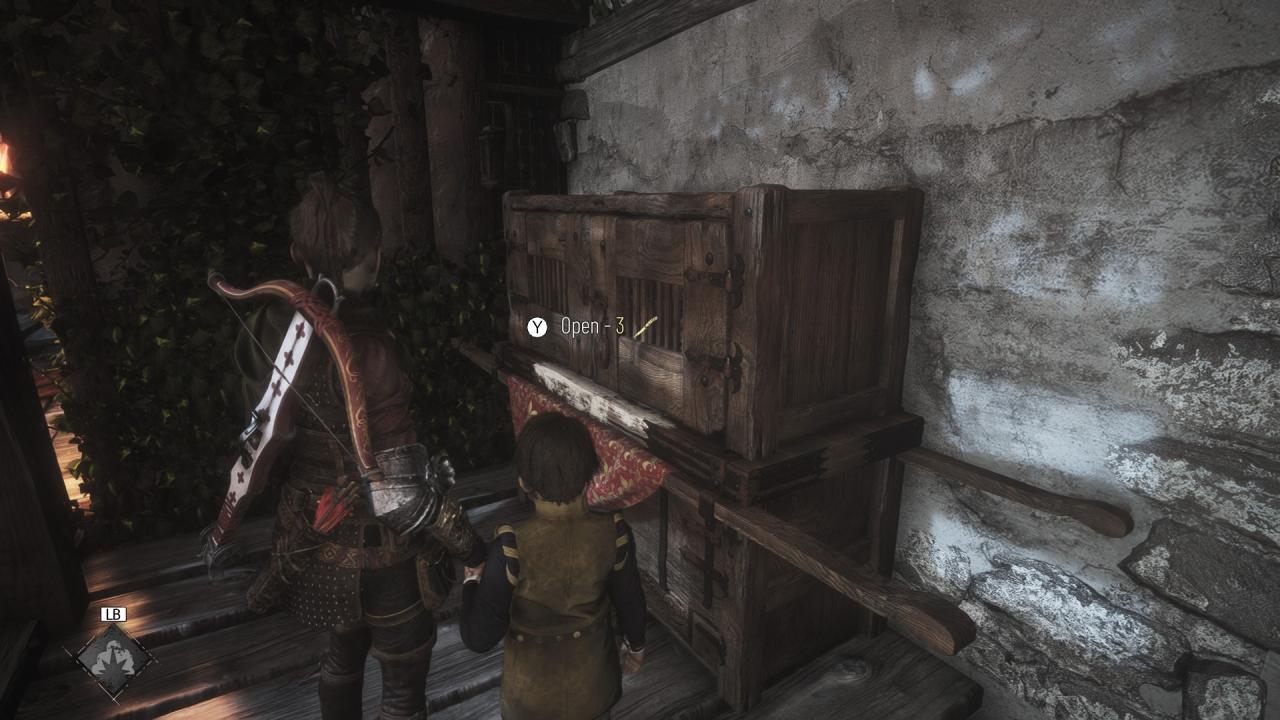 Interact with the secret chest consuming a knife.
After finding and unlocking all of the 10 secret chests, as soon as you open with the last one, the achievement will unlock.
Immortal Memories (Chapters 1-5)
 Immortal Memories
Recall all souvenirs
There are 21 Souvenirs throughout the entire game that you will need to collect. They are usually memories that can be triggered with, or without Hugo.
Chapter 1: 0 Souvenirs
Chapter 2: 2 Souvenirs
– Souvenir 1: Best player
Can be collected during objective “Walk to the House” at the beginning of the chapter. When reaching the market square, enter the tent in the middle of the market, pass the lady that offers Amicia a new hairstyle and take a right towards the lady that sells flower. From there head to the left towards the fish stand (with the big fish in the middle). To the right there will be a dead end alley with a funfair mini-game (pot-throwing).
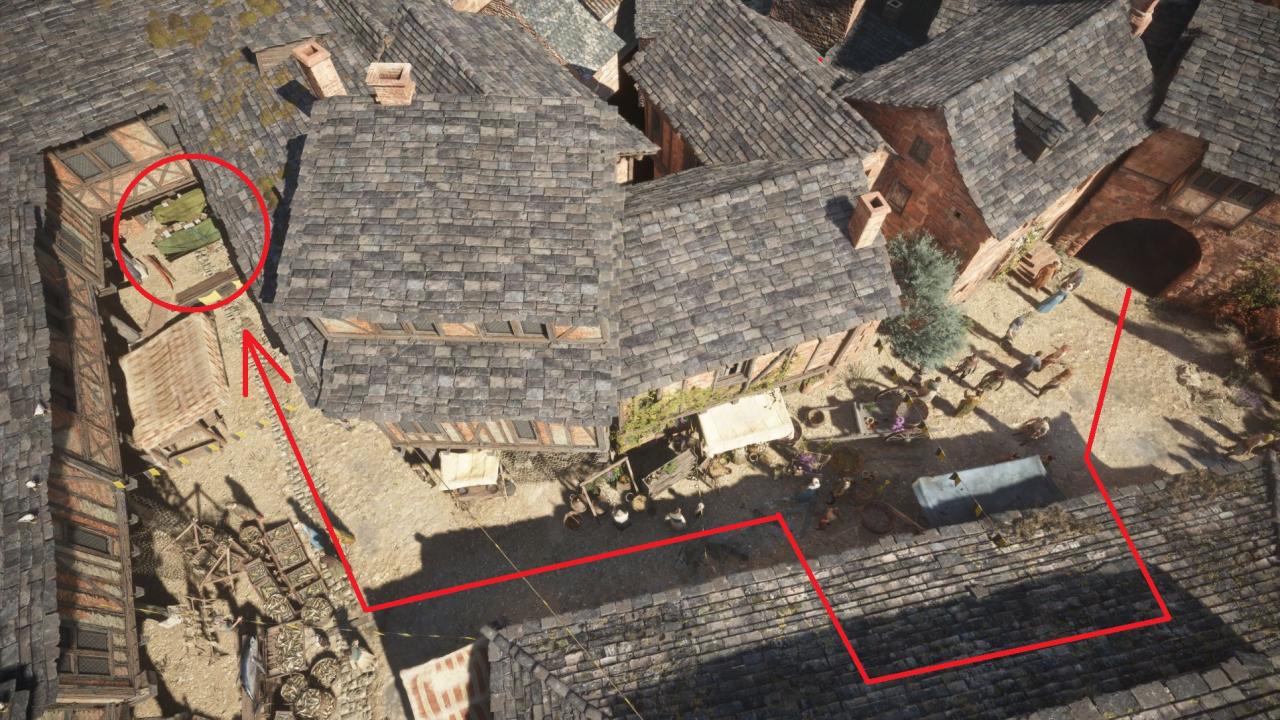
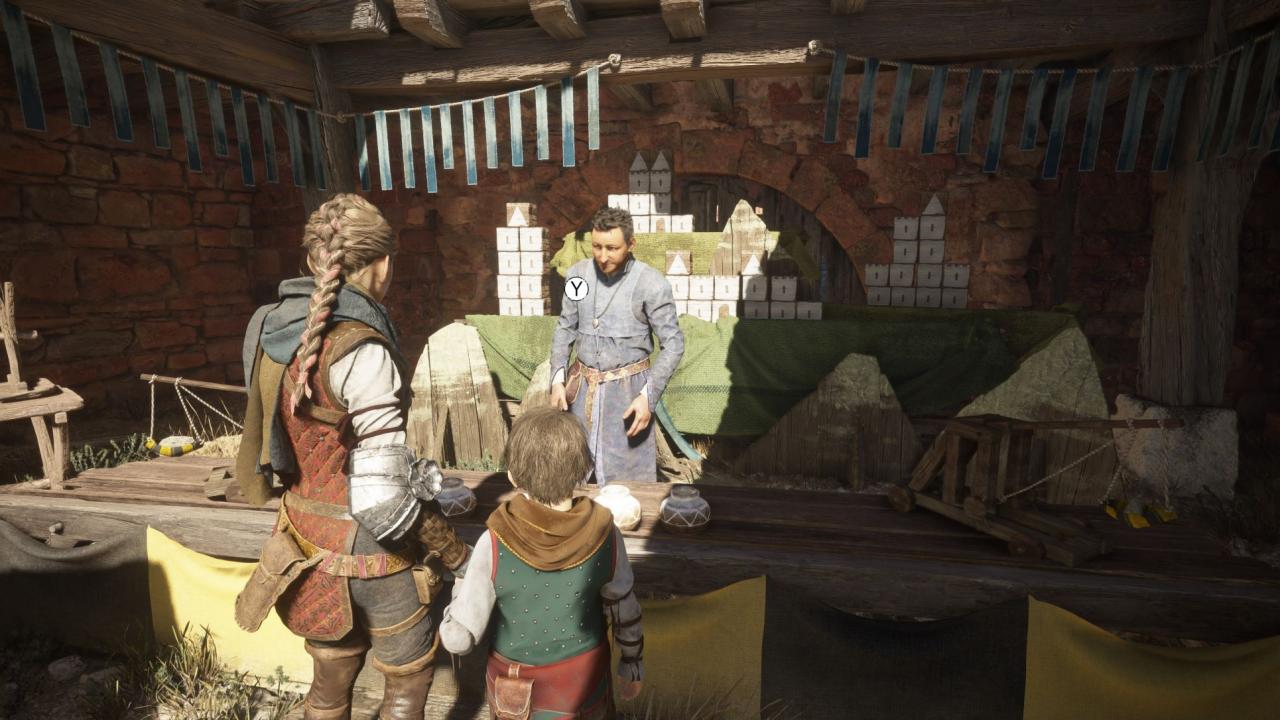 Go to the game stand and interact with it in order to begin the mini-game. Throw the 4 pots in the 4 towers of cubes and knock down all of them. The souvenir will be collected once Amicia wins and is declared the best player of the day.
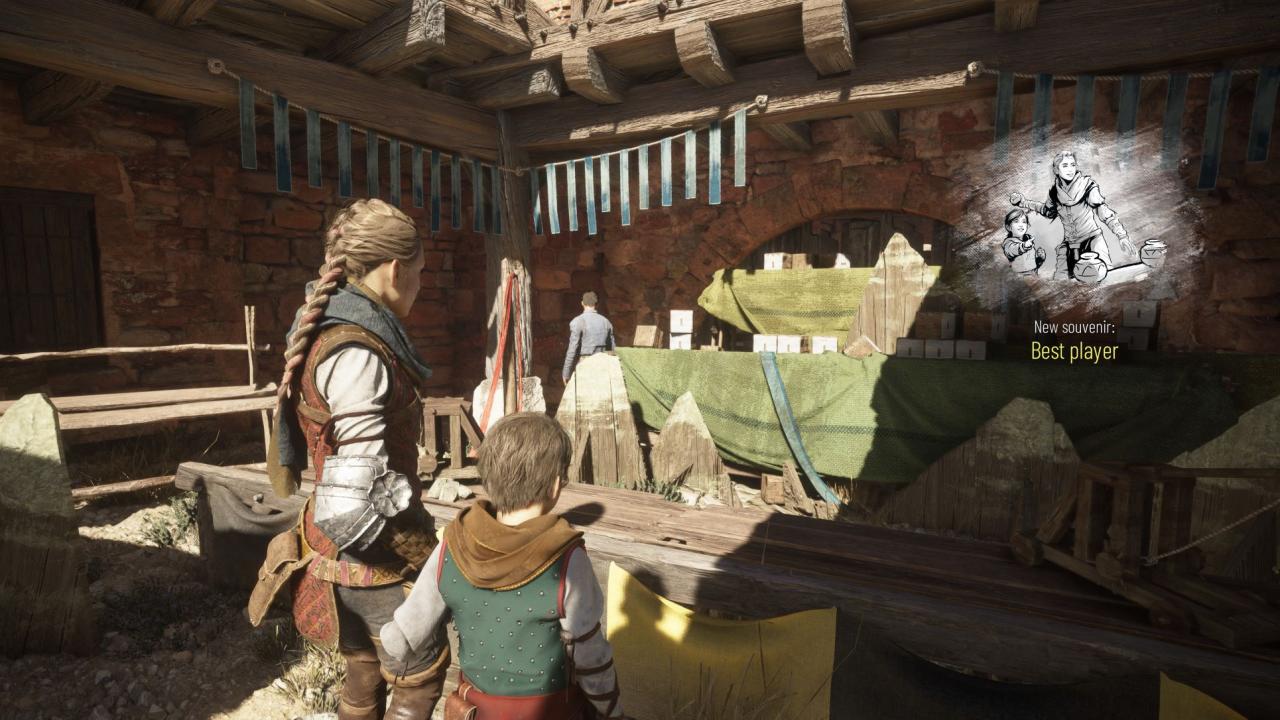 Note: This souvenir can only be obtained when Amicia is together with Hugo and cannot be acquired anymore if they reach the house.
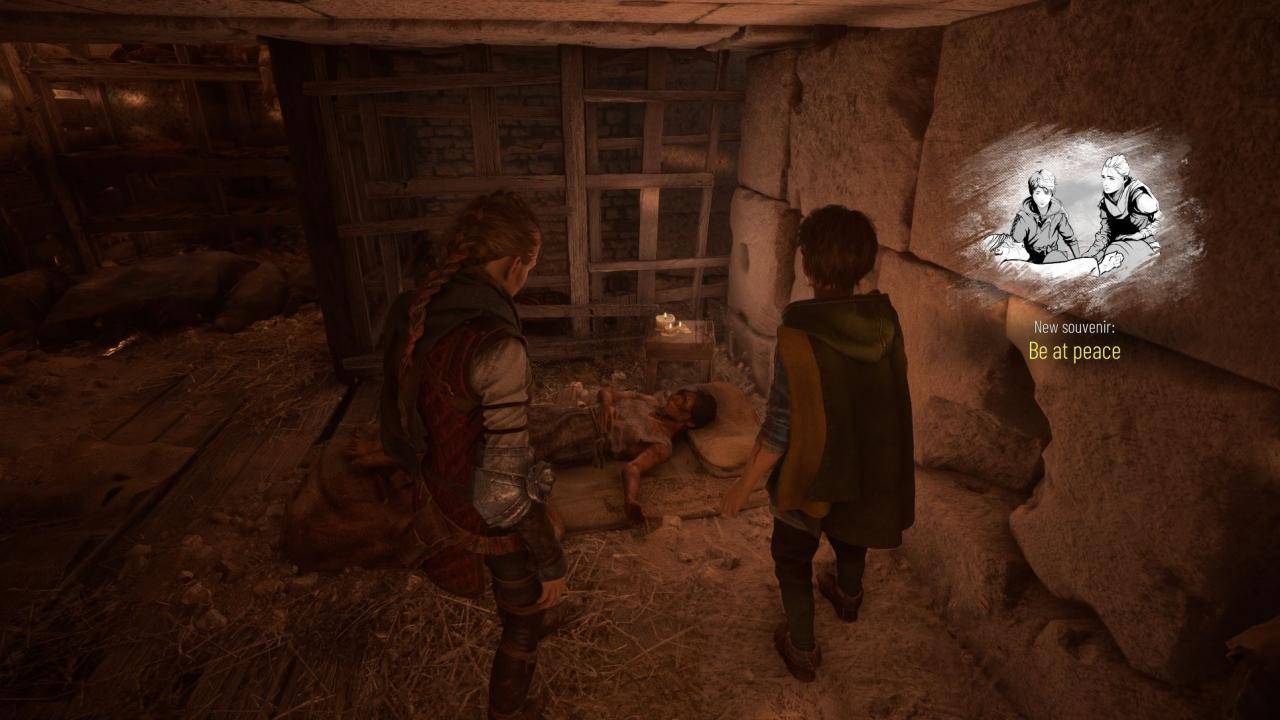
– Souvenir 2: Be at peace
Can be collected during objective “Follow the Order’s Symbols”. Progress through the chapter until reaching the point where the tutorial for the skill tree will be displayed. Go forward into the cellar with the dead bodies until reaching a staircase, go up the staircase to the right and walk until you see a woman on the floor, barely alive.
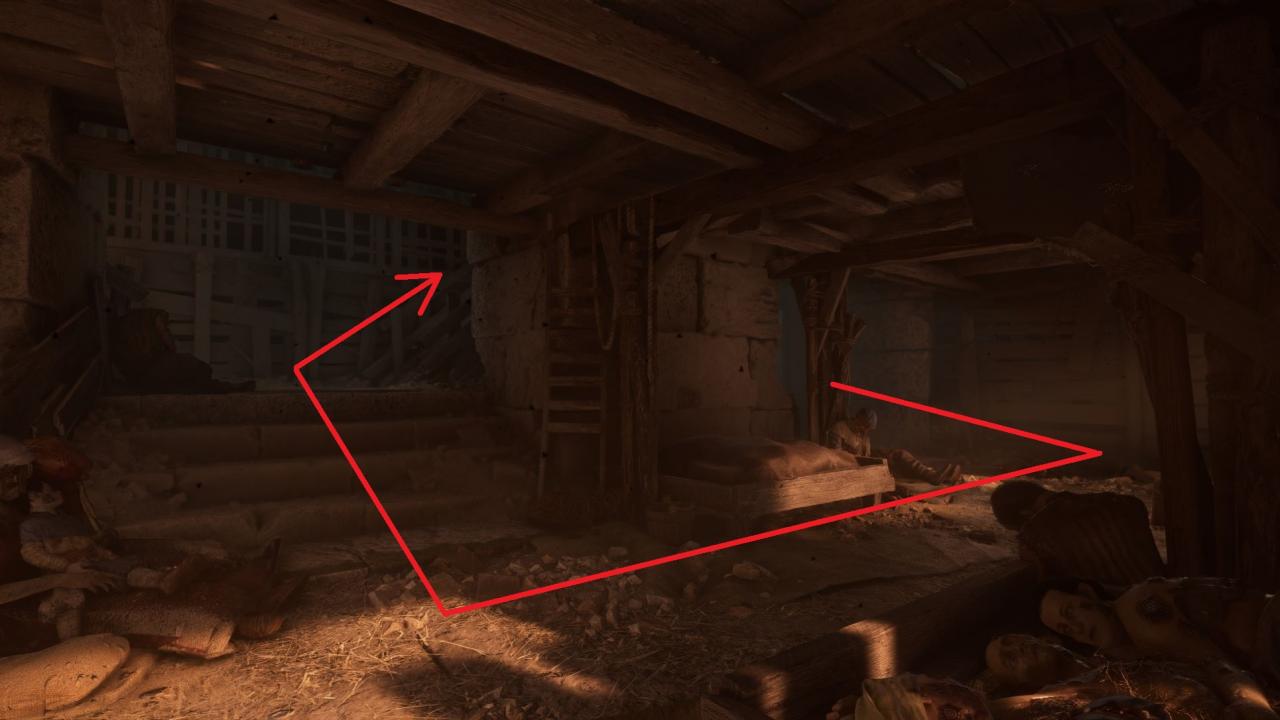
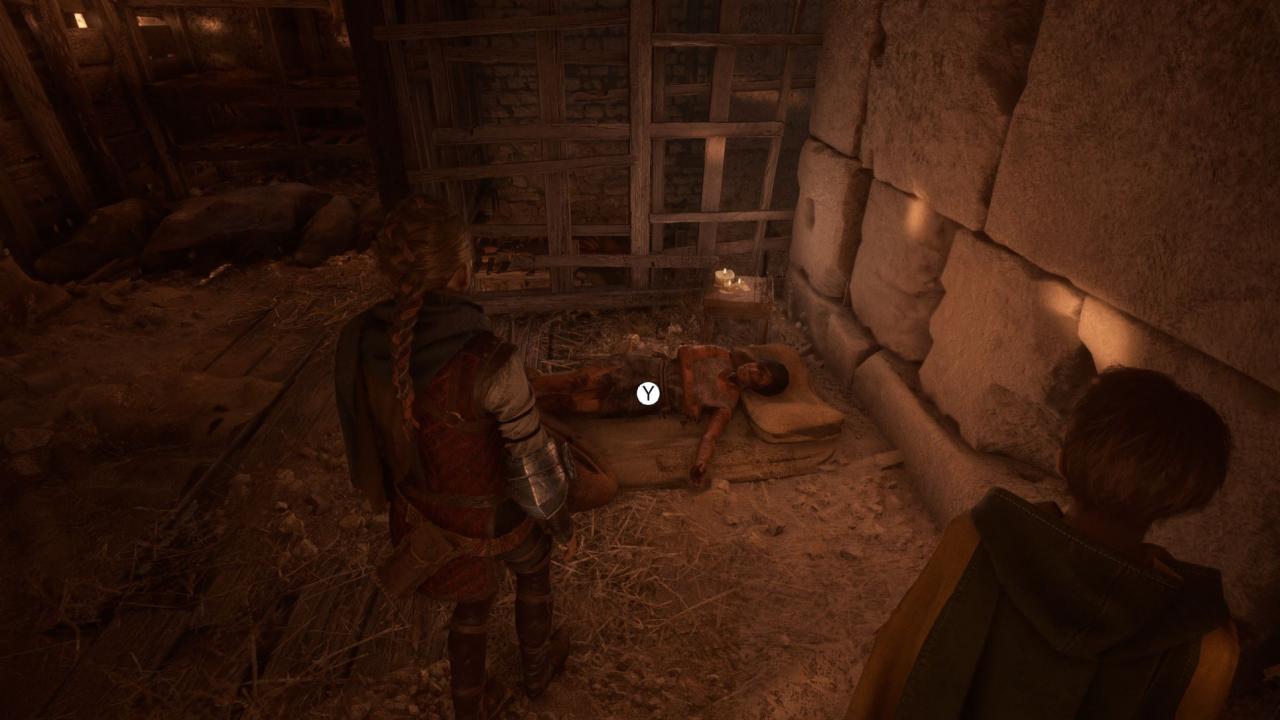 Interact with her and after the short dialogue the souvenir will be unlocked.
Chapter 3: 2 Souvenirs
– Souvenir 3: A grave
Can be collected during objective “Reach the herbalist’s forest”, right after exiting the town through the gate. Walk down the path to the first house (where the first workbench can be found) and head towards the second house to the right, with a locked gate. Go around the fence and unlock the gate by using your slingshot to break the lock.
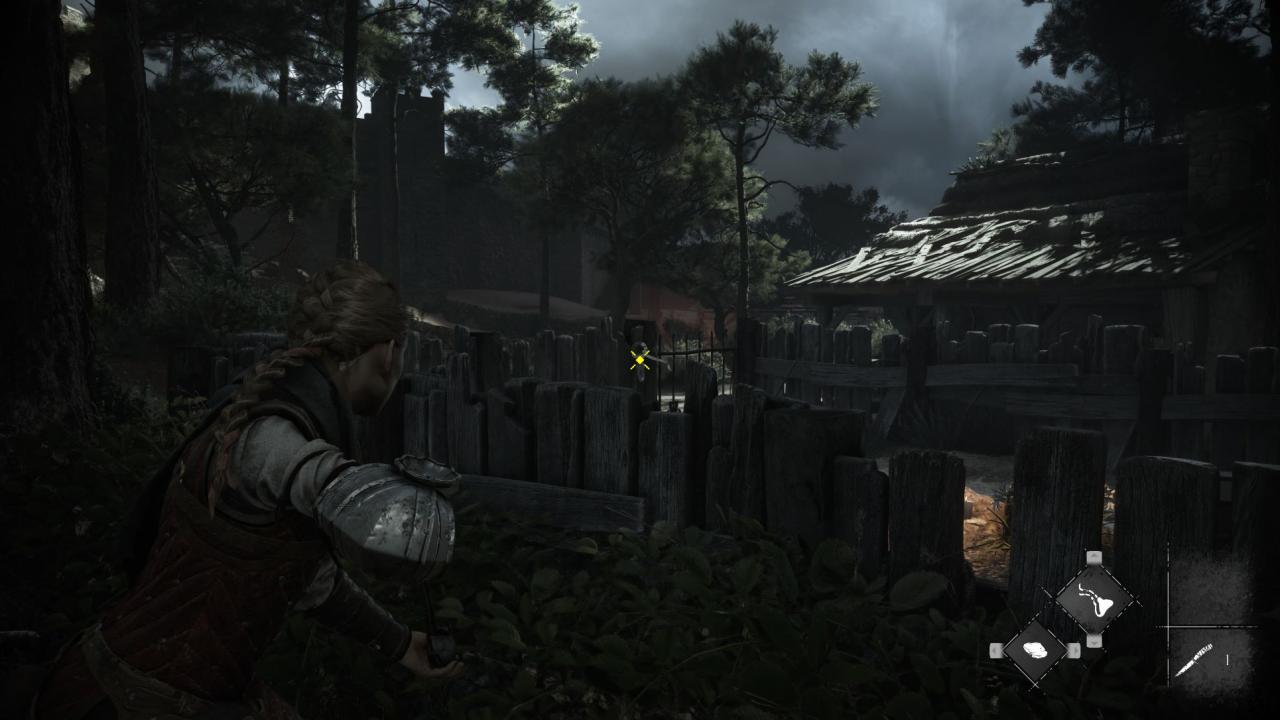
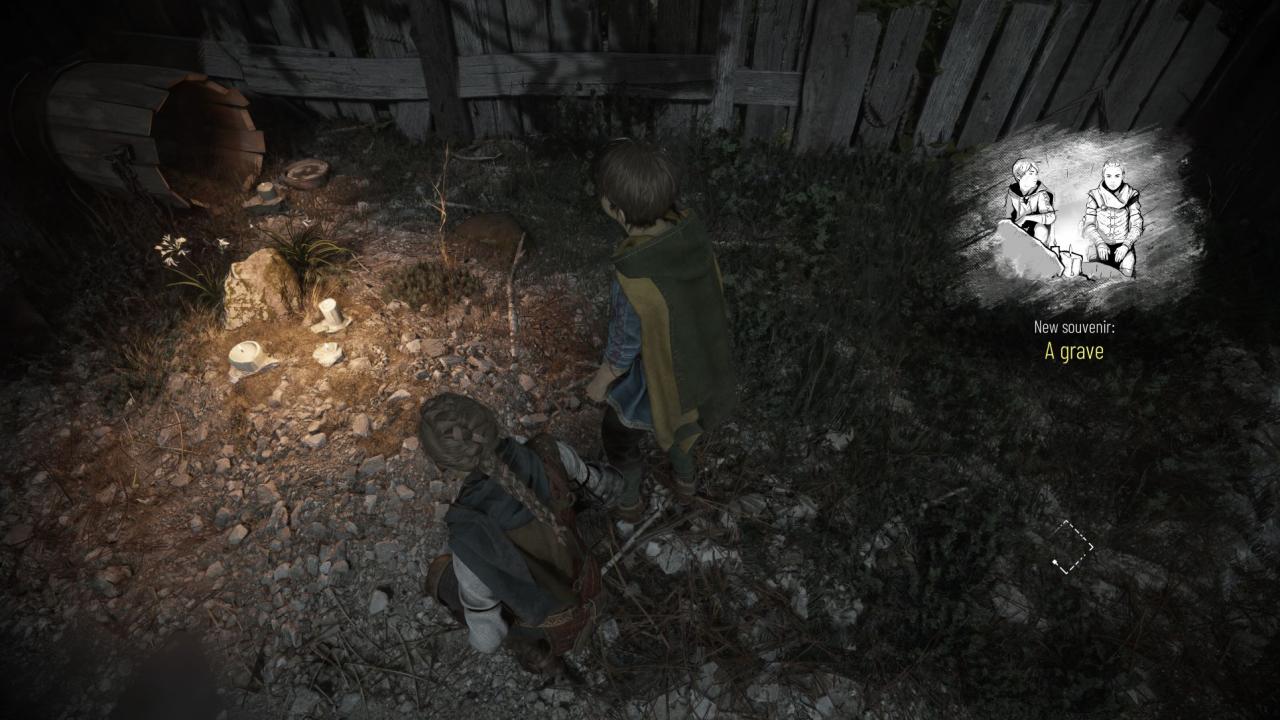
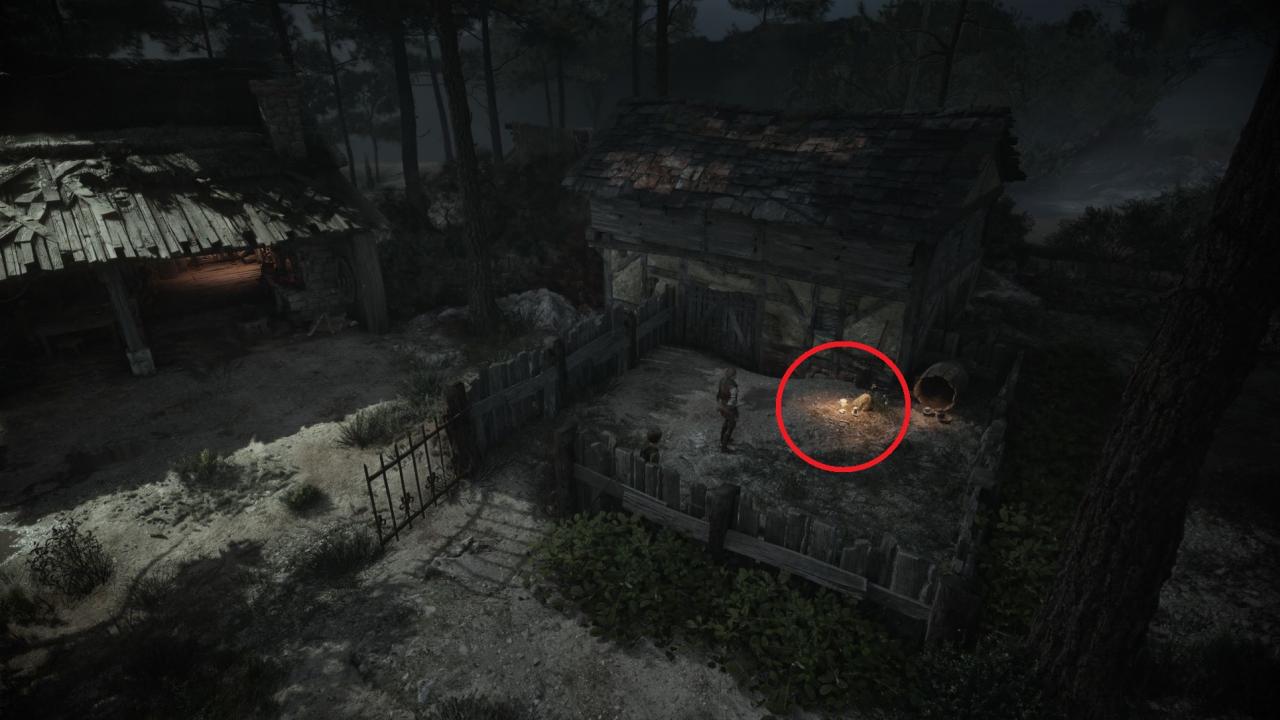 Enter the yard and there will be a grave with lit candles. Interact with the grave and the souvenir will unlock after the short dialogue.
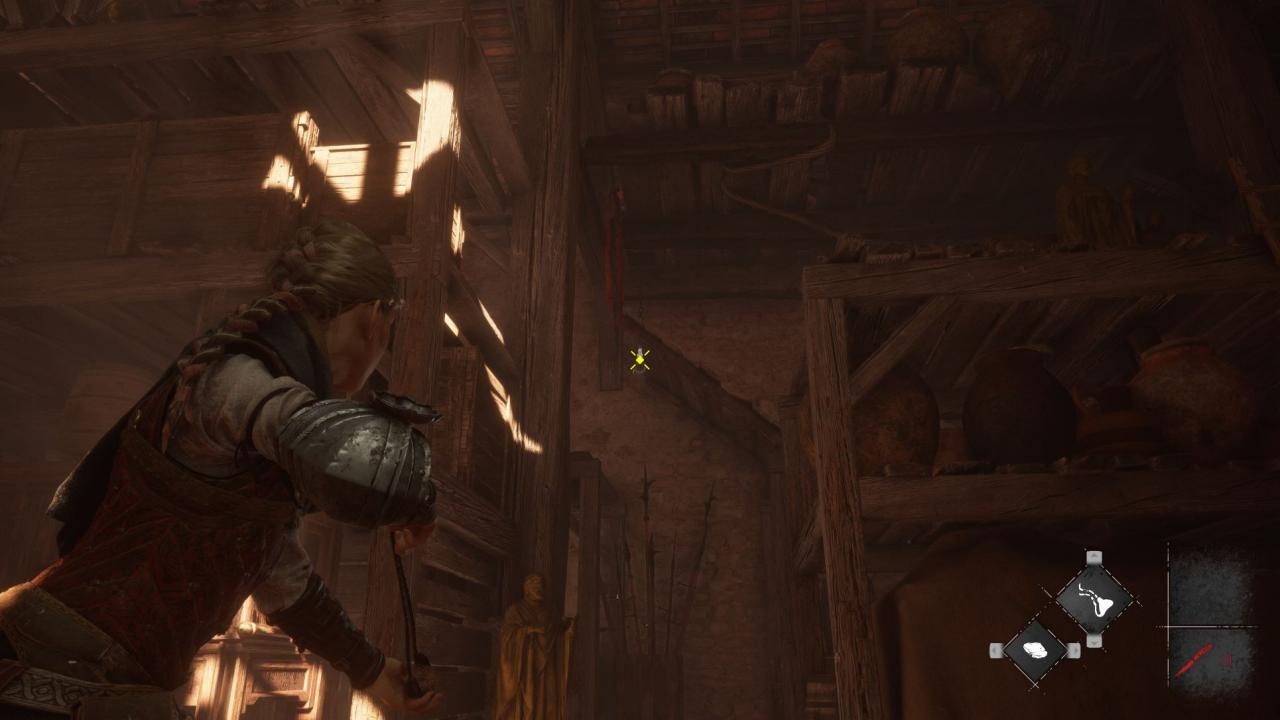
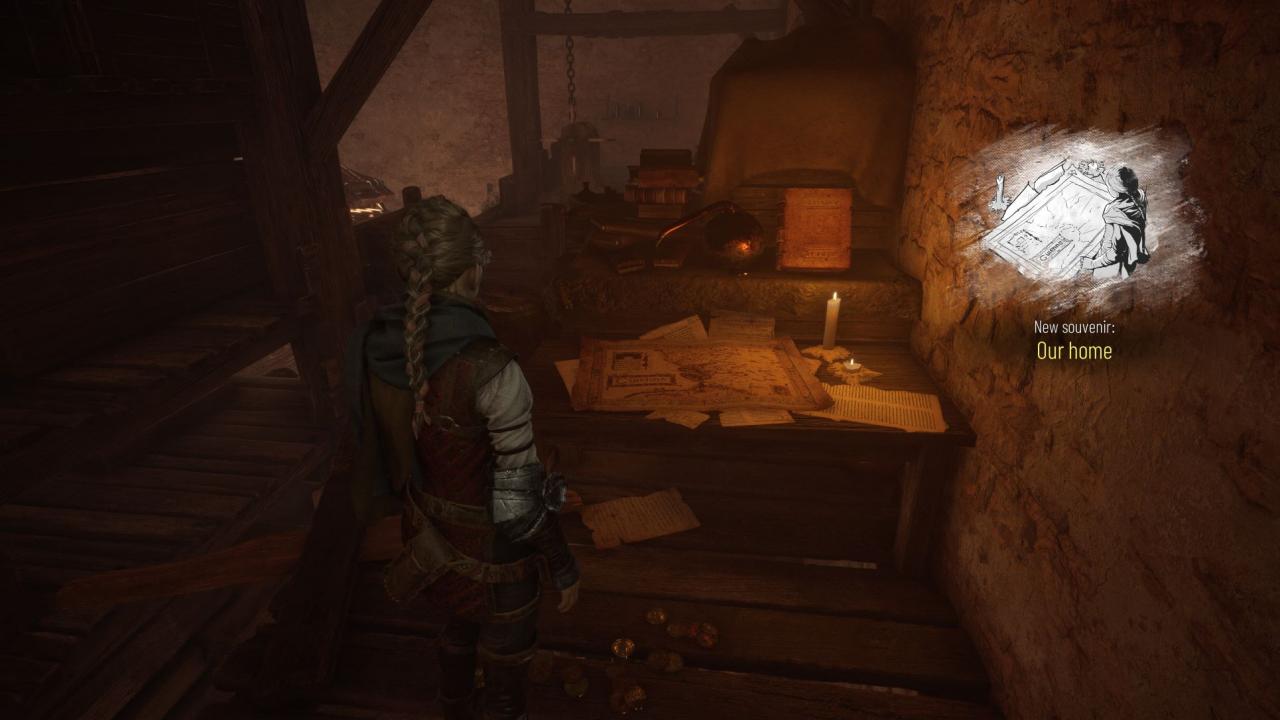
Can be collected during the second objective “Escape the fort”, after finding Amicia’s belongings inside the warehouse. Go back up the first ladder (from where you initially came from), turn left and and shoot the hinge holding the wooden platform. Cross the platform and reach the table where a map is located.
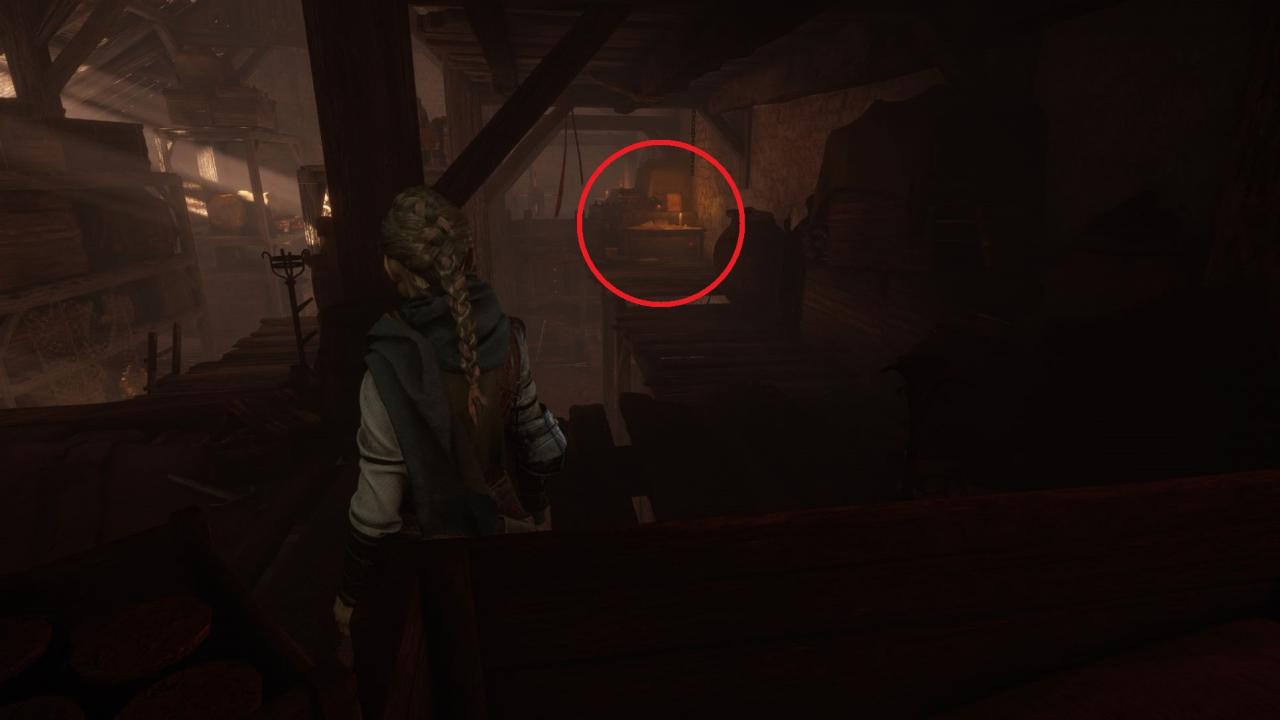 Interact with the map on the table and the souvenir will unlock after the short dialogue.
 Chapter 4: 2 Souvenirs– Souvenir #5: Silk treasure
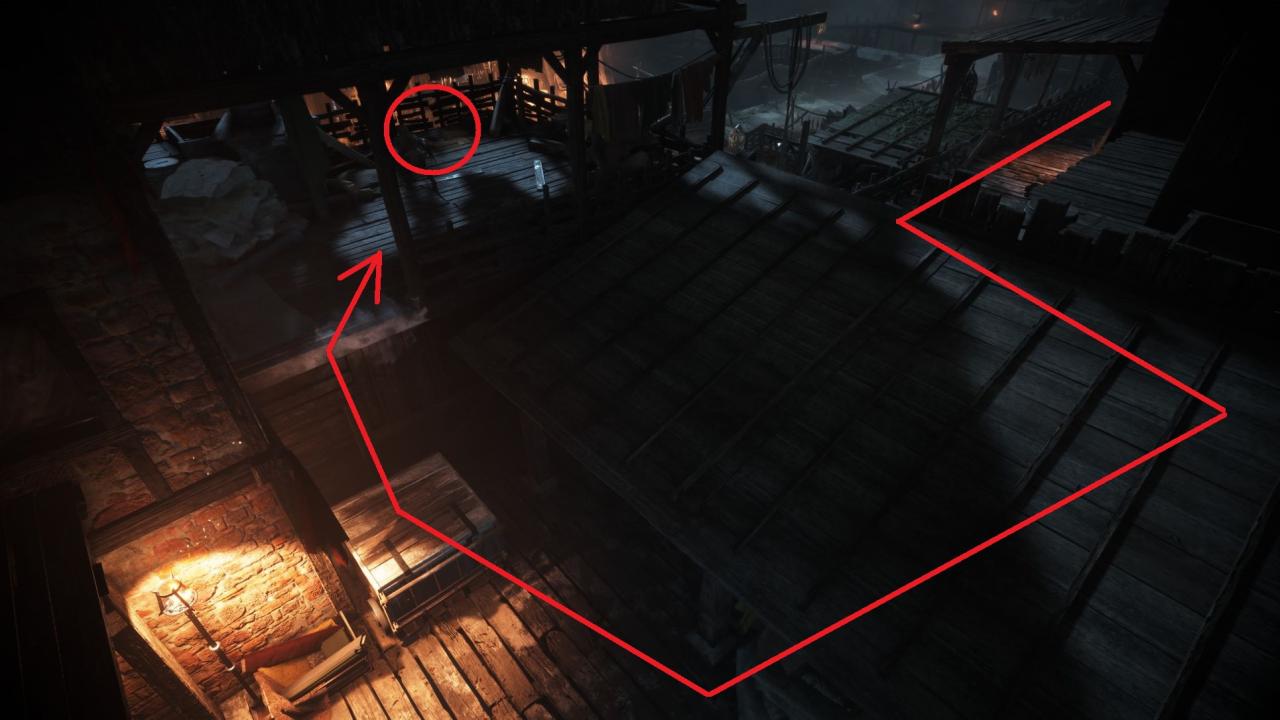
Can be collected during objective “Reach the Order’s Boat”. After reaching the beach, turn left and follow the main path until finding the interactable wooden hatch. DO NOT INTERACT with it, but continue the path until reaching a hole in a wooden wall. Crouch through it, bring the cart to the other side in order to climb on the balcony where you can find many silk fabrics.
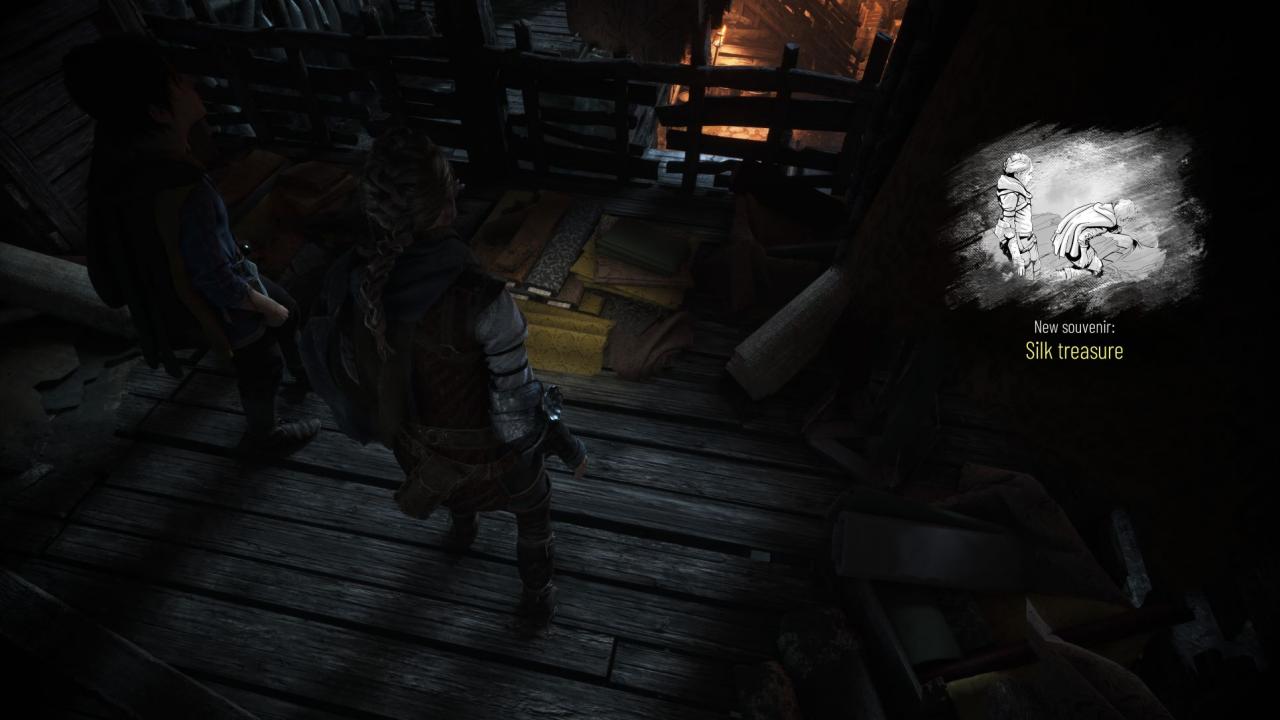
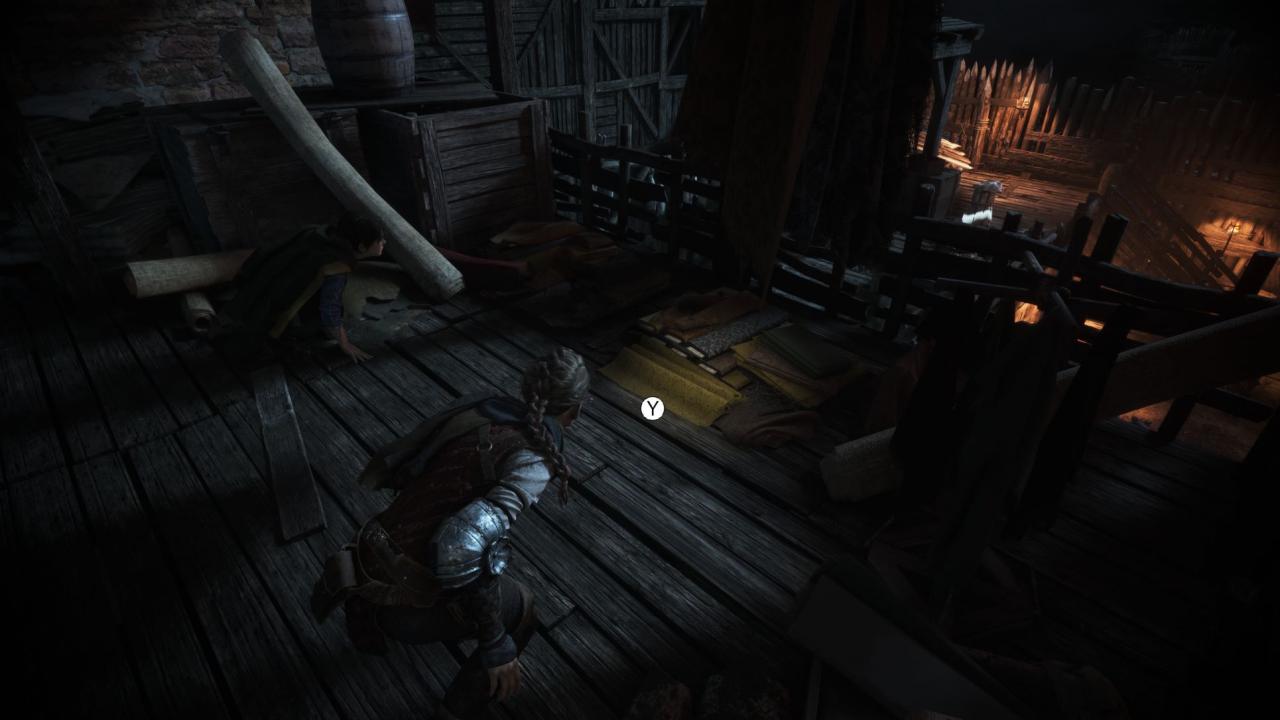 Interact with the pile of silk fabrics near the rail and the souvenir will unlock after the short dialogue.
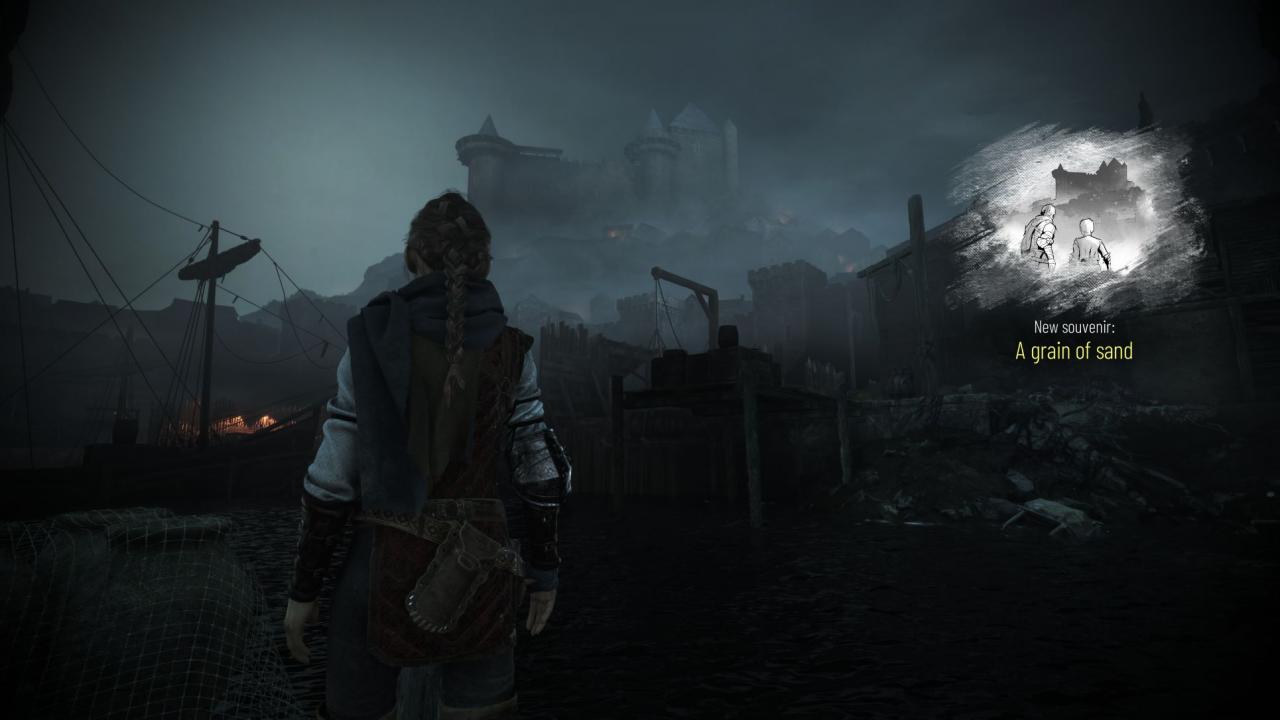
 – Souvenir #6: A grain of sand
Can be collected during objective “Reach the Order’s Boat”, after exiting the Tar Workshop. Progress until you reach an area with docks for small boats. To the left there is the door that leads to the next area, but DO NOT INTERACT with it. Turn to the right and shoot down a hinge with your slingshot, to open up a path to a small pier that has a little boat docked to the left. Walk until the end of the pier and there you will have an interact prompt.
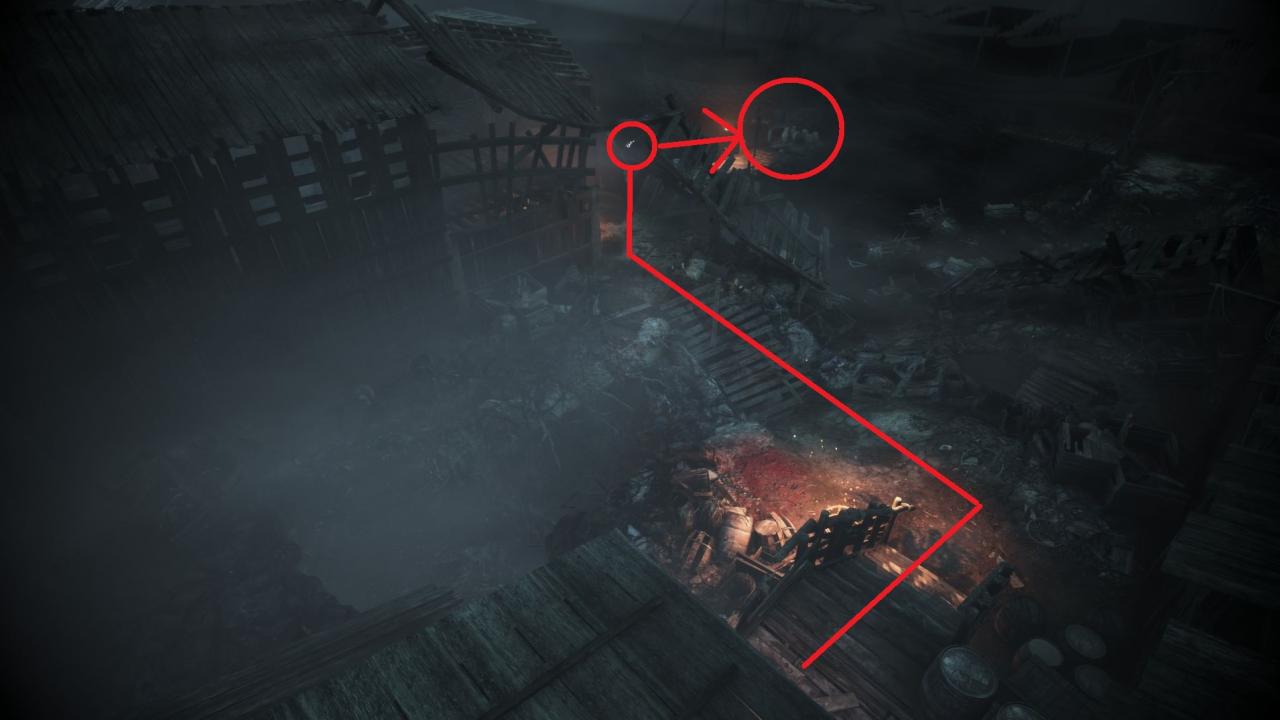
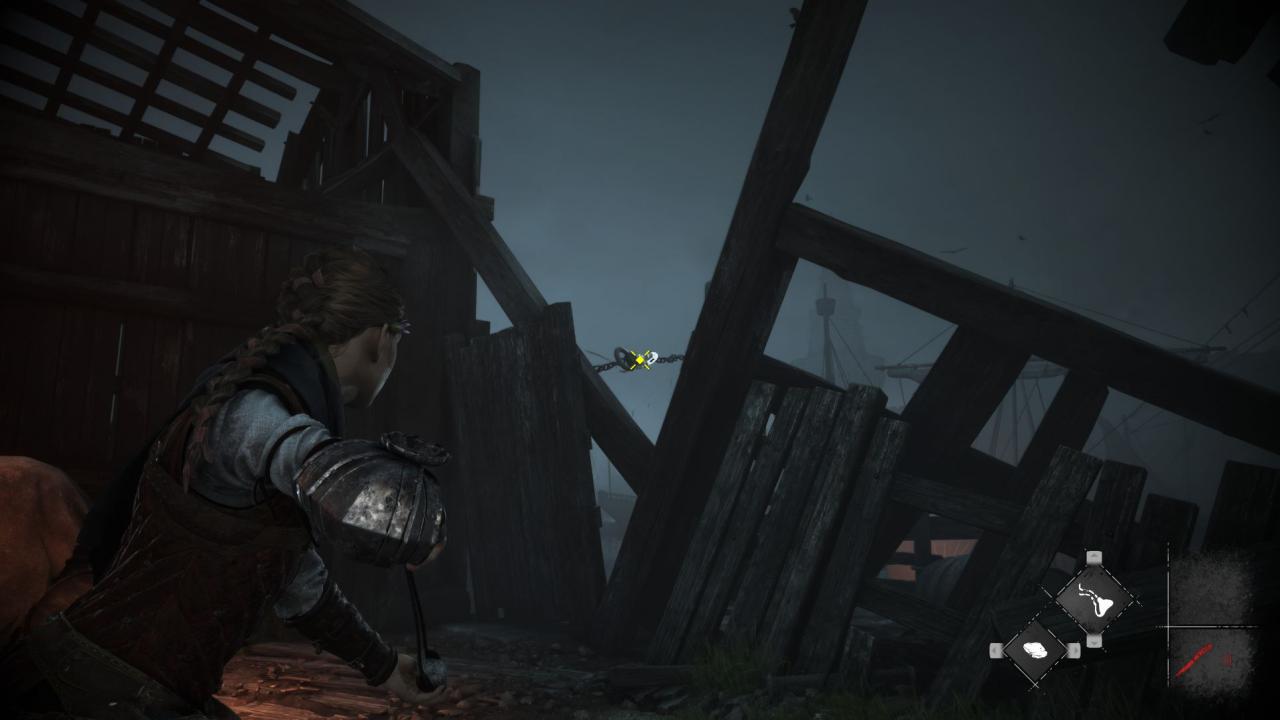 Use the interact and the souvenir will unlock after the short dialogue.
Can be collected during sub-chapter “On the River”, objective “Cross the construction site”, after getting on the final wodden platform after reuniting with Lucas. Above this platform there will be a ladder that you will need to shoot down the chain that is holding it, climb this ladder then go up to the other platform and climb a second ladder.
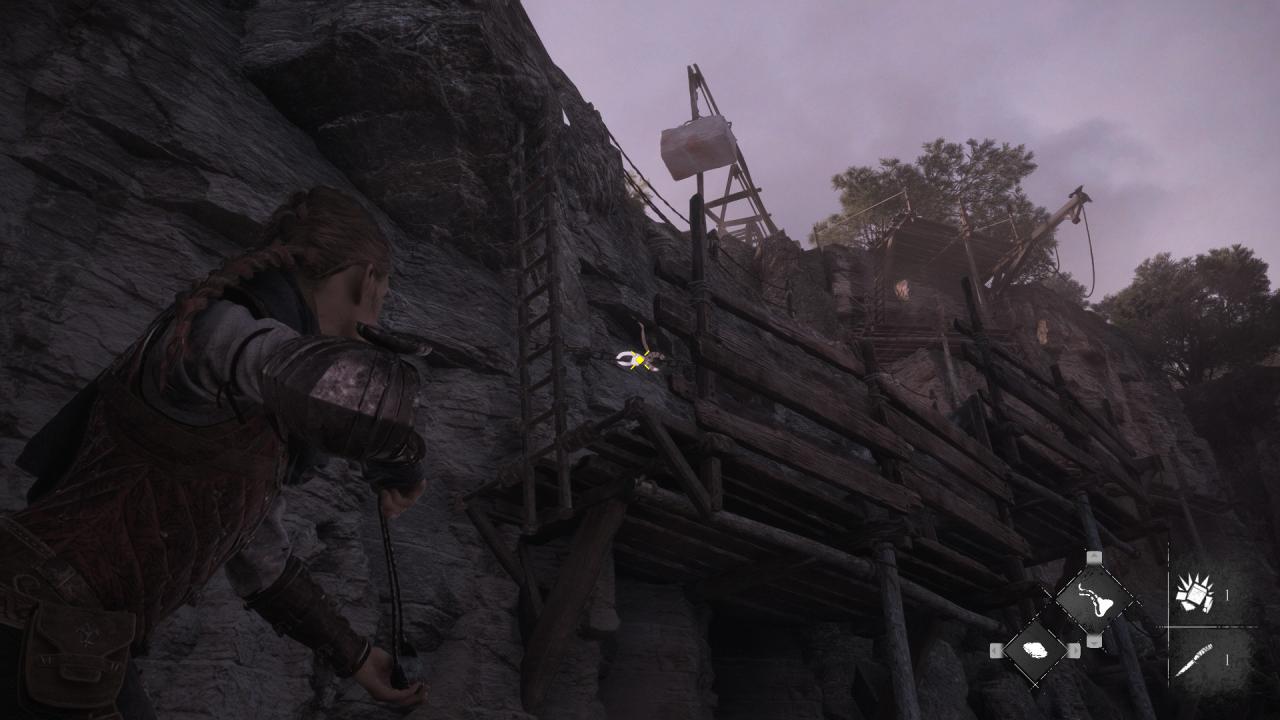
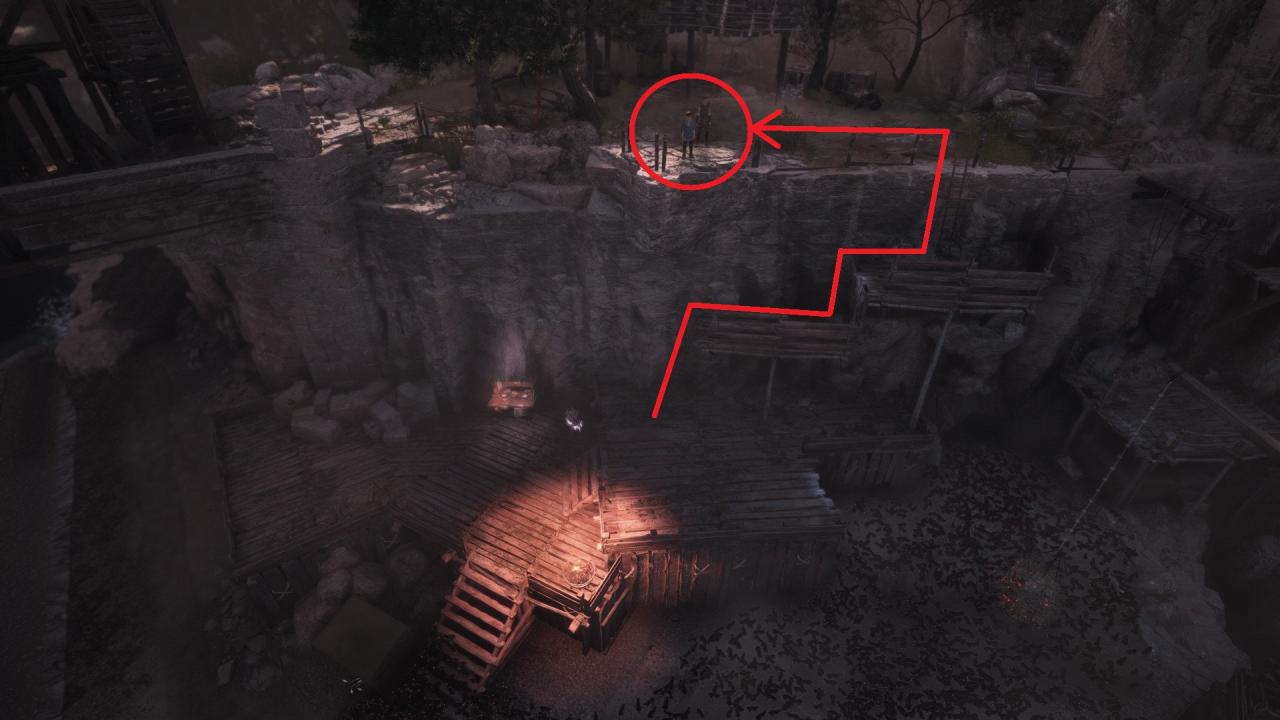 Lucas will go automatically to the corner edge of this cliff and an interact will be available.
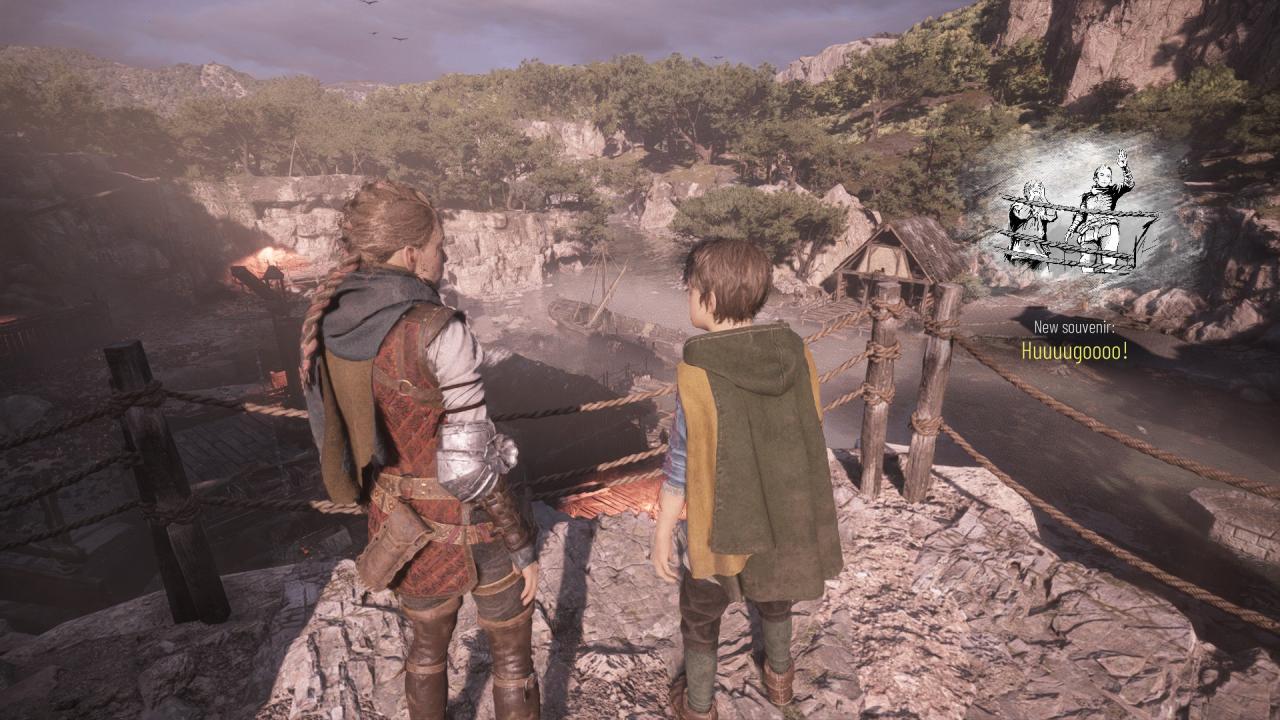 Interact with Lucas and the souvenir will unlock after the short dialogue.
Immortal Memories (Chapters 6-10)
Chapter 6: 2 Souvenirs
– Souvenir #9: Imagine you’re flying!
Can be collected during sub-chapter “A pilgrim road”, objective “Ask for the way to the coast”, after reaching the pilgrimage camp. Enter the camp walk towards the big tree at the centre. When you reach the tree, turn to your left, towards a small path between two tents, where a man is leaning on a tree (when passing near him, he will say “hello” to you). Follow this path until its end, where you can see a swing.
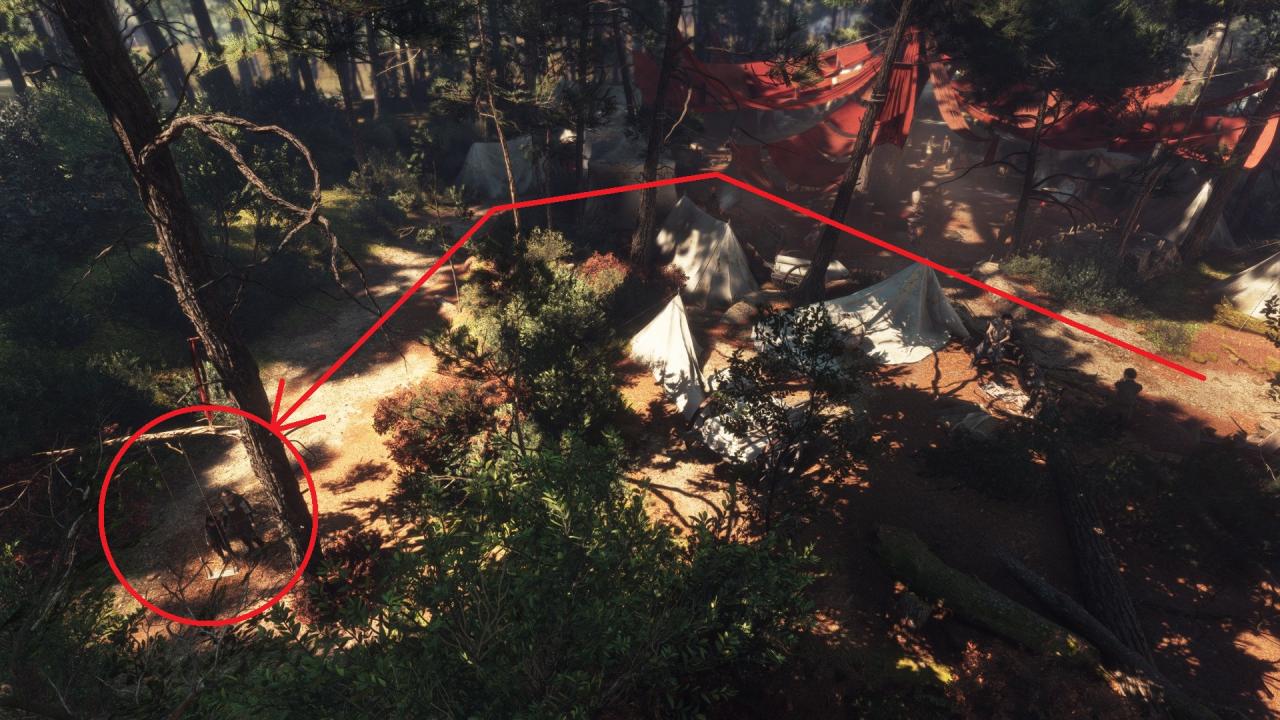 Hugo will go automatically to it and wait for you. Interact with the swing and the souvenir will unlock after the short dialogue.
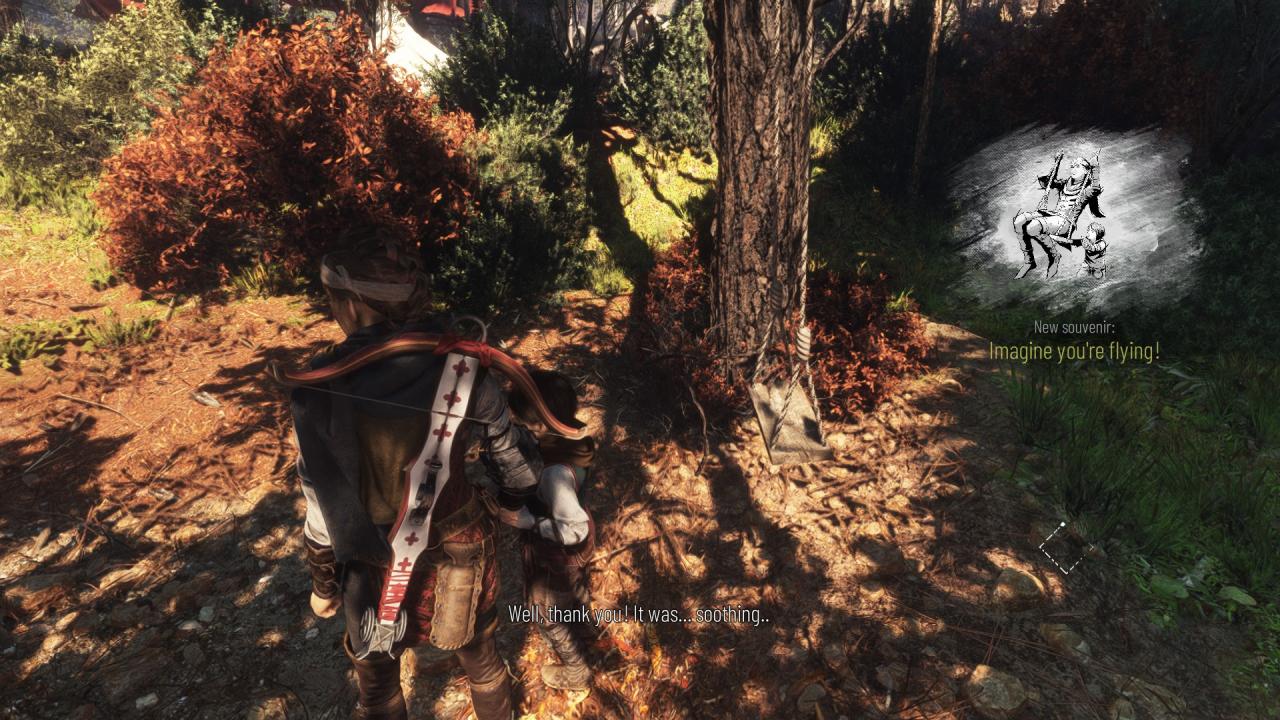
– Souvenir #10: Which colour do you want?
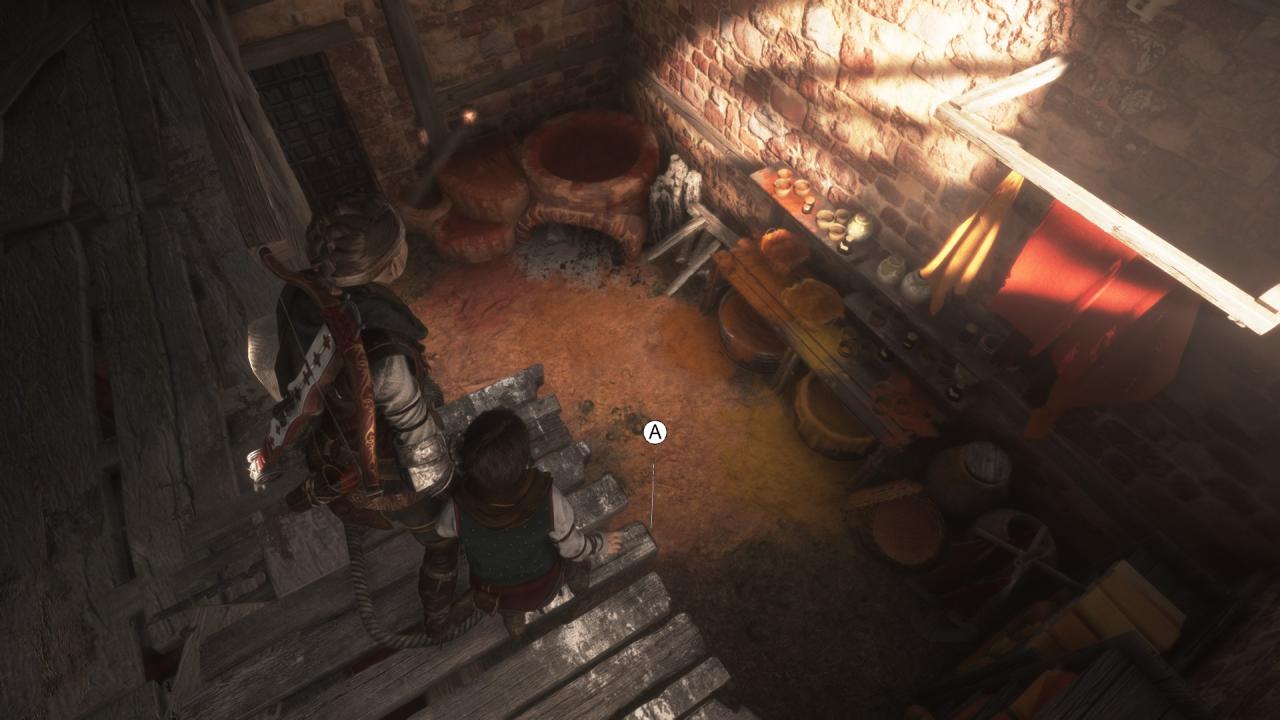
Can be collected during sub-chapter “Call of the rats”, objective “Find a way out of the building”, after regaining control of Amicia and crossing to the other side. Place the torch in the sconce and enter through the door to the right. Climb the ladder and crouch to the opening in the wall and drop down into the room.
 Hugo will automatically go to a table with strips of silk, asking to change Amicia’s bandage.
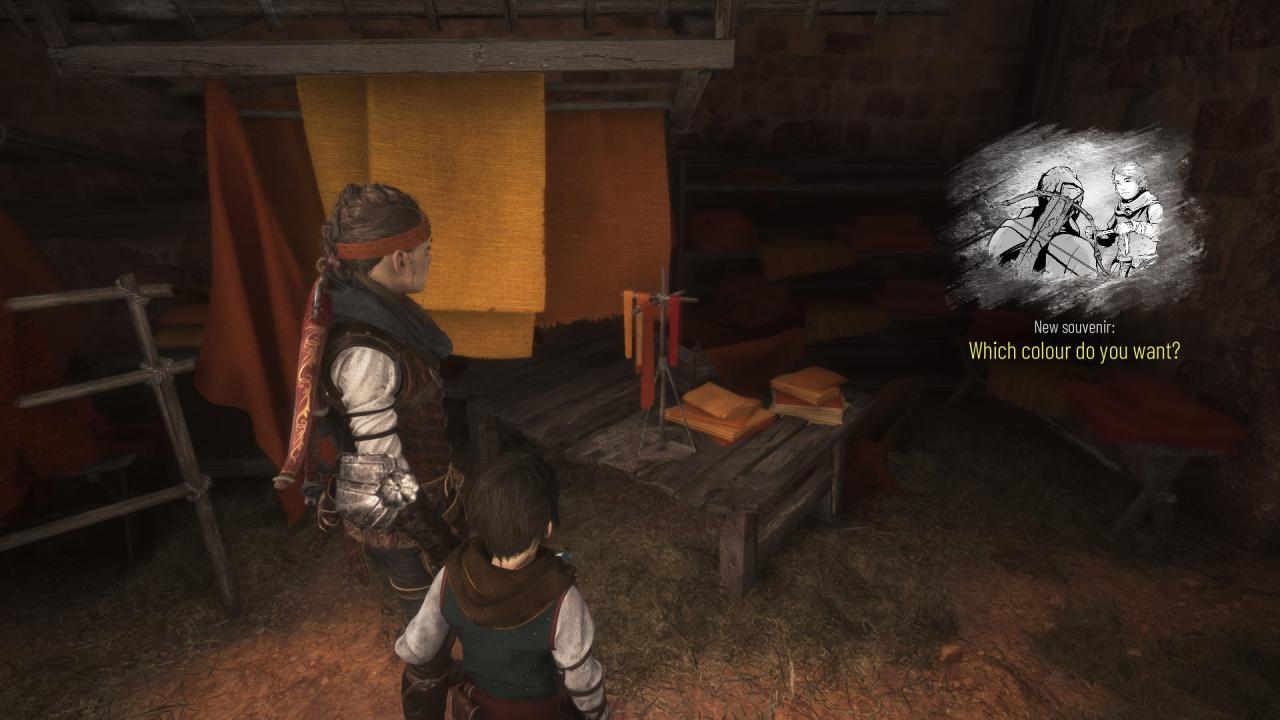 Interact with Hugo and the souvenir will unlock after the short scripted event.
Chapter 7: 2 Souvenirs
– Souvenir #11: The Survivor
Can be collected during sub-chapter “Passage in the caves”, objective “Find the smuggler’s hideout”, after escaping from the rats’ nest and reaching the beach. To the left you will see a shipwreck with a workbench inside it. Continue forward hugging the left wall (after passing the shipwreck) until you find a cliff that can be climbed on. Go up and head back towards the shipwreck. Here you will see an interact facing the ship.
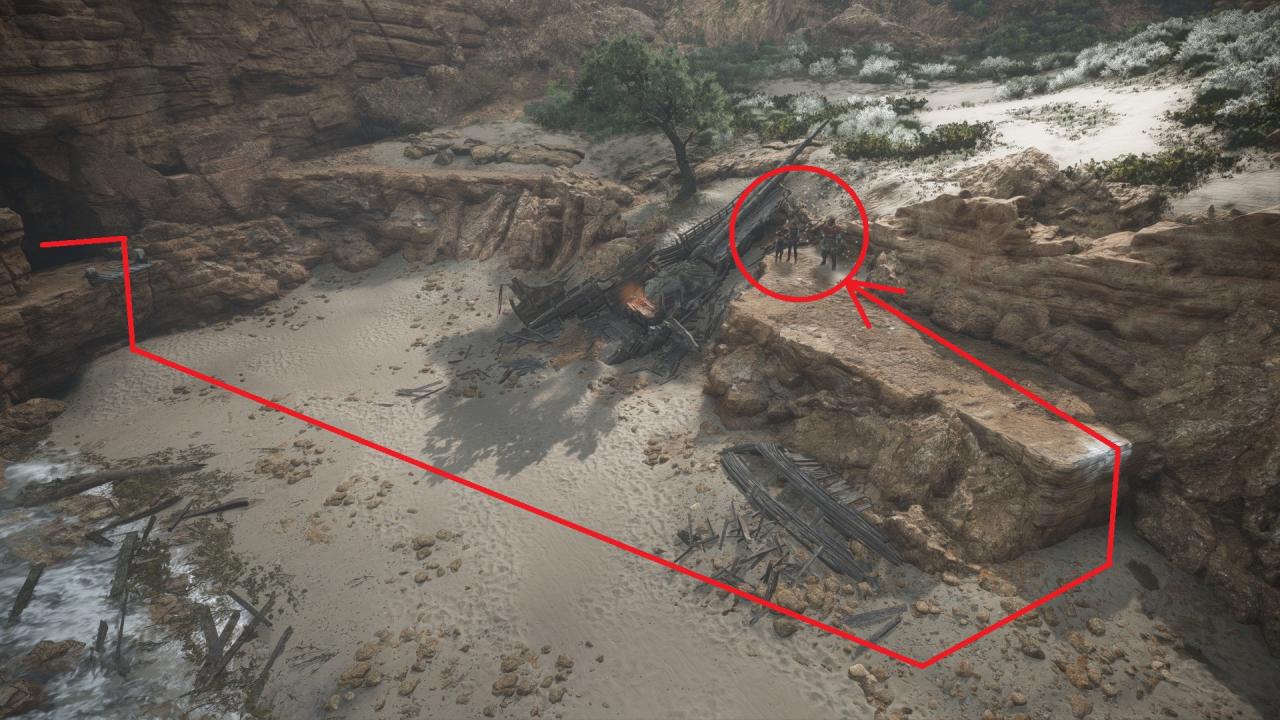
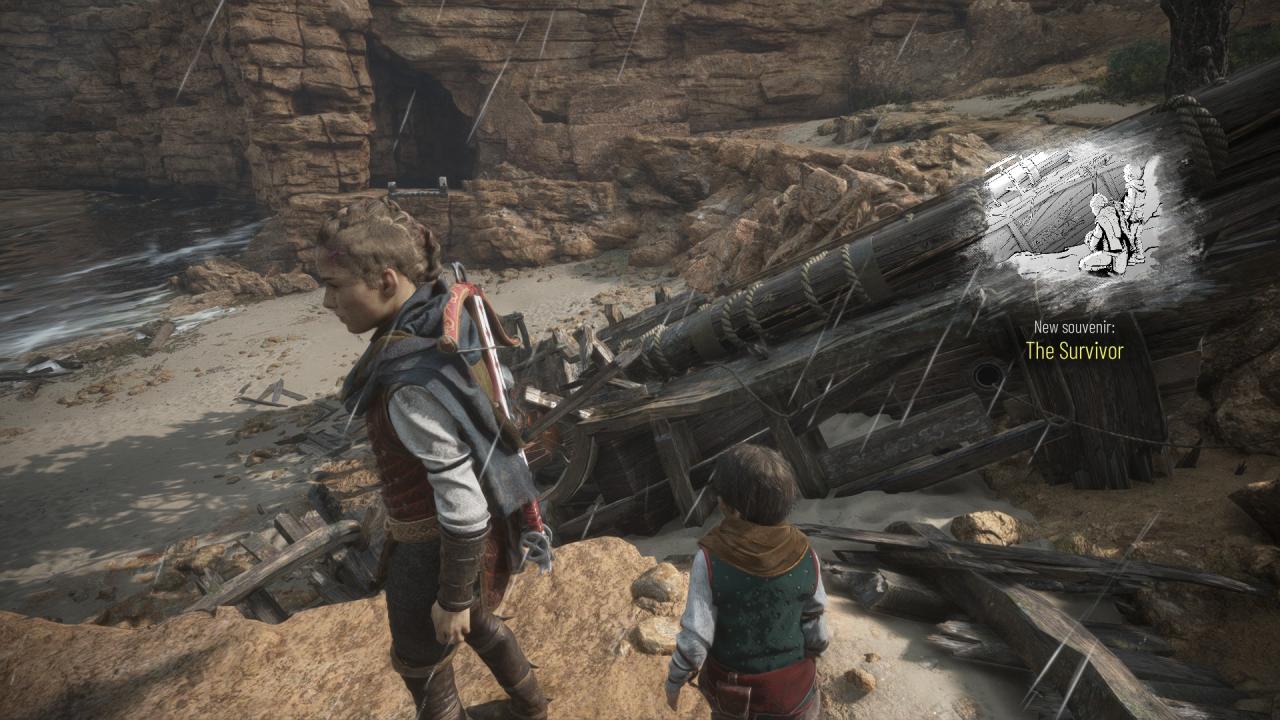 Interact with it and the souvenir will unlock after the short dialogue.
– Souvenir #12: The first men
Can be collected during sub-chapter “The fishing village”, objective “Reach Sophia’s boat”, right after you enter the next area from the beach towards the fish village, through the crevasse. Immediately hug the wall and turn left, climb the ledge and crouch inside the cave.
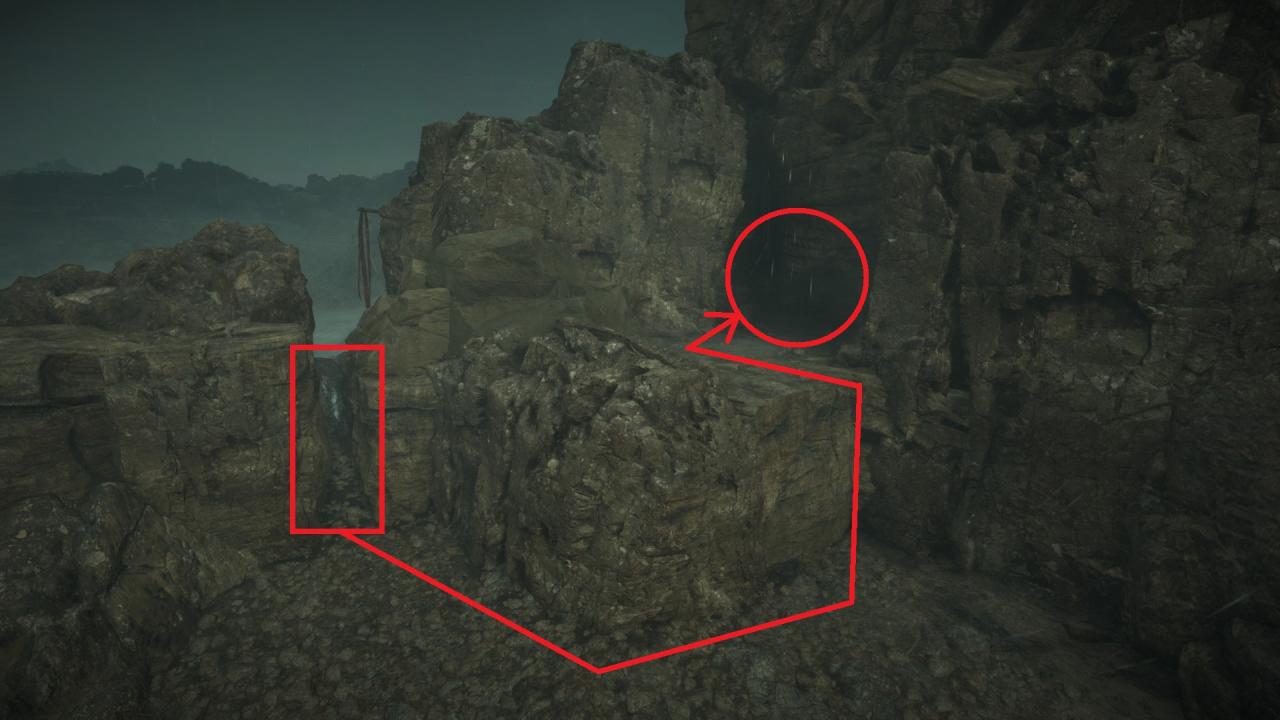 Grab the torch hanging on sconce and walk until to find the end of the cave. There you will find hands painted on the walls with an interact on them.
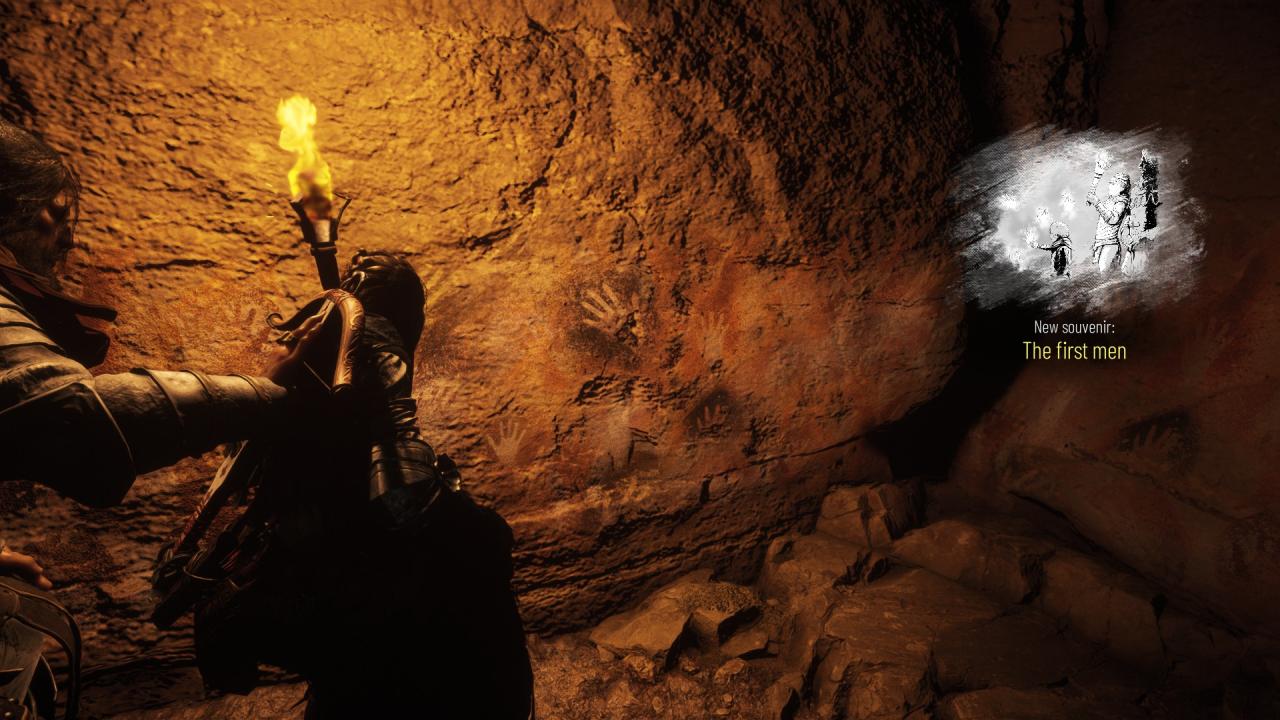 Interact with the wall painting and the souvenir will unlock after the short dialogue.
Chapter 8: 2 Souvenirs
– Souvenir #13: Silent Lucinda
Can be collected at the beginning of the chapter, during sub-chapter “Celebration of the brighter days”, objective “Look around for information about the island”, after reaching the market. From the entrance to the market, keep right until you reach an archway, then continue to the end of the alley, where you will see animal pens.
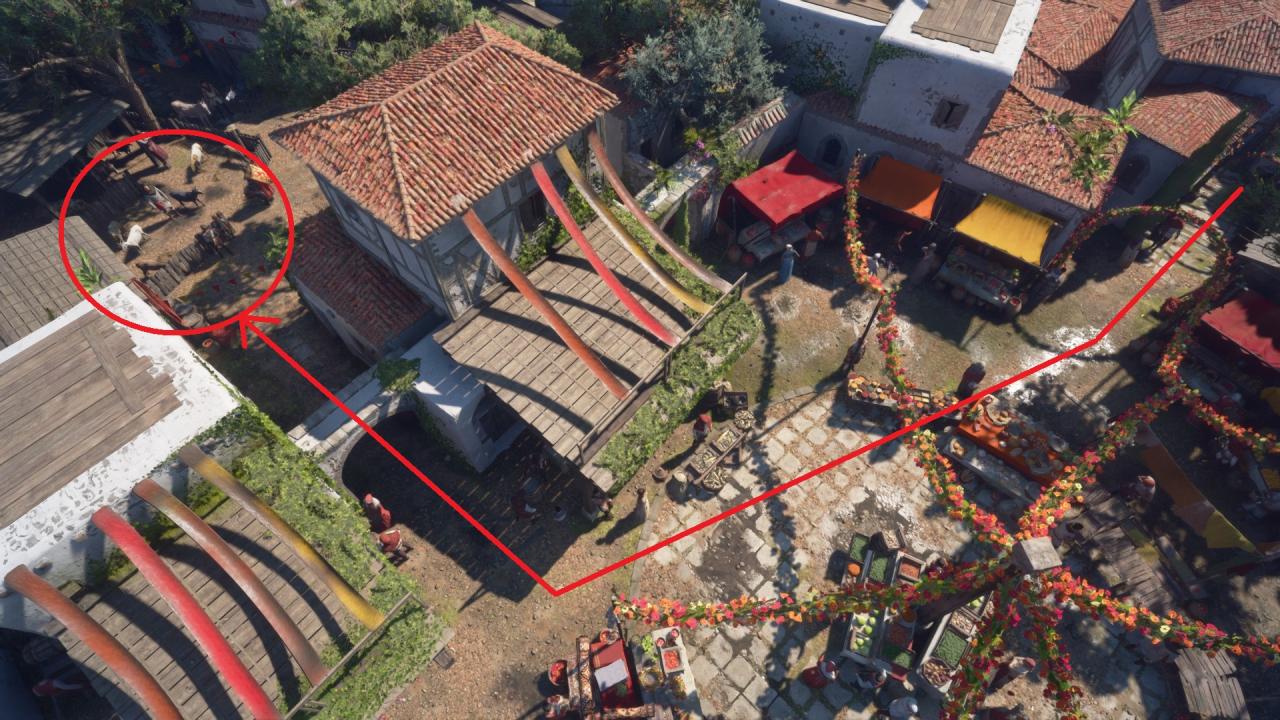 Hugo will go automatically to the fence, asking if he can pet the goats.
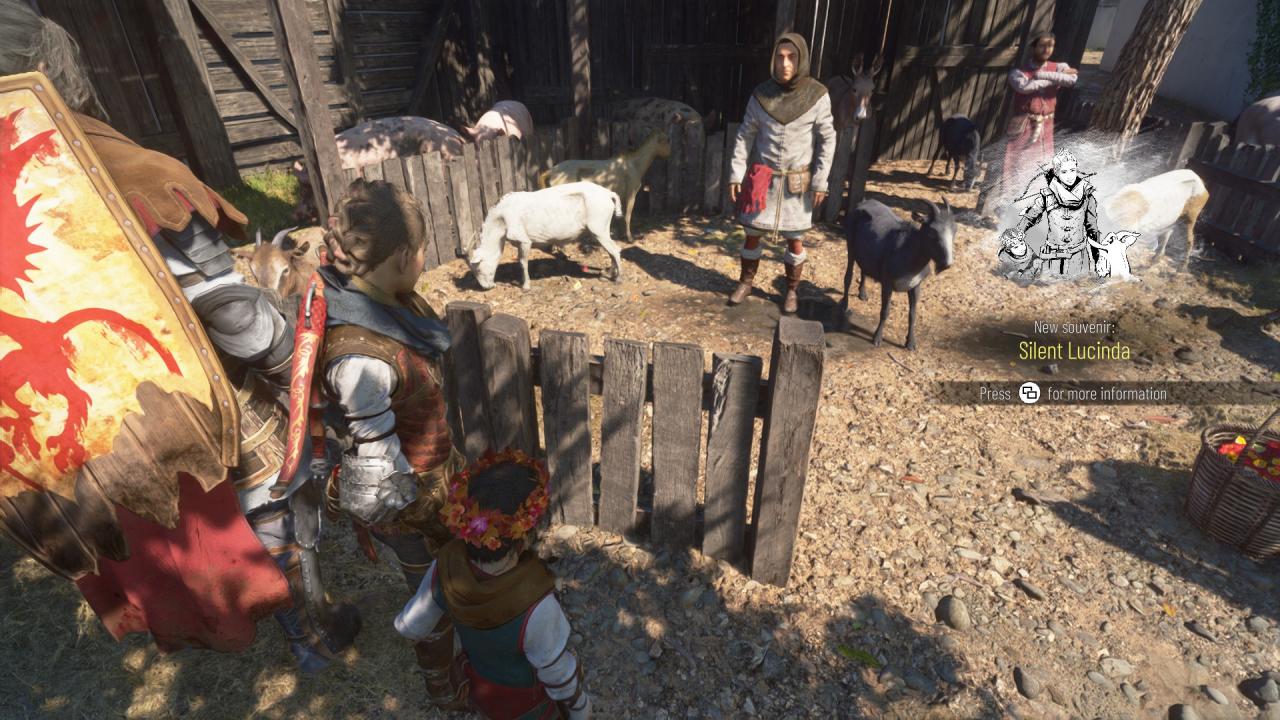 Interact with Hugo and the souvenir will unlock after the short scripted event.
– Souvenir #14: Flower crown
Can be collected during sub-chapter “Celebration of the brighter days”, objective “Look around for information about the island”. After exiting the market, follow the alley until you get to a pair of stairs to the left. Go down into the small plaza and head to the colourful stand with hanging flower crowns. Interact with the stand in order to begin the mini-game and pick up the 4 pots from the table.
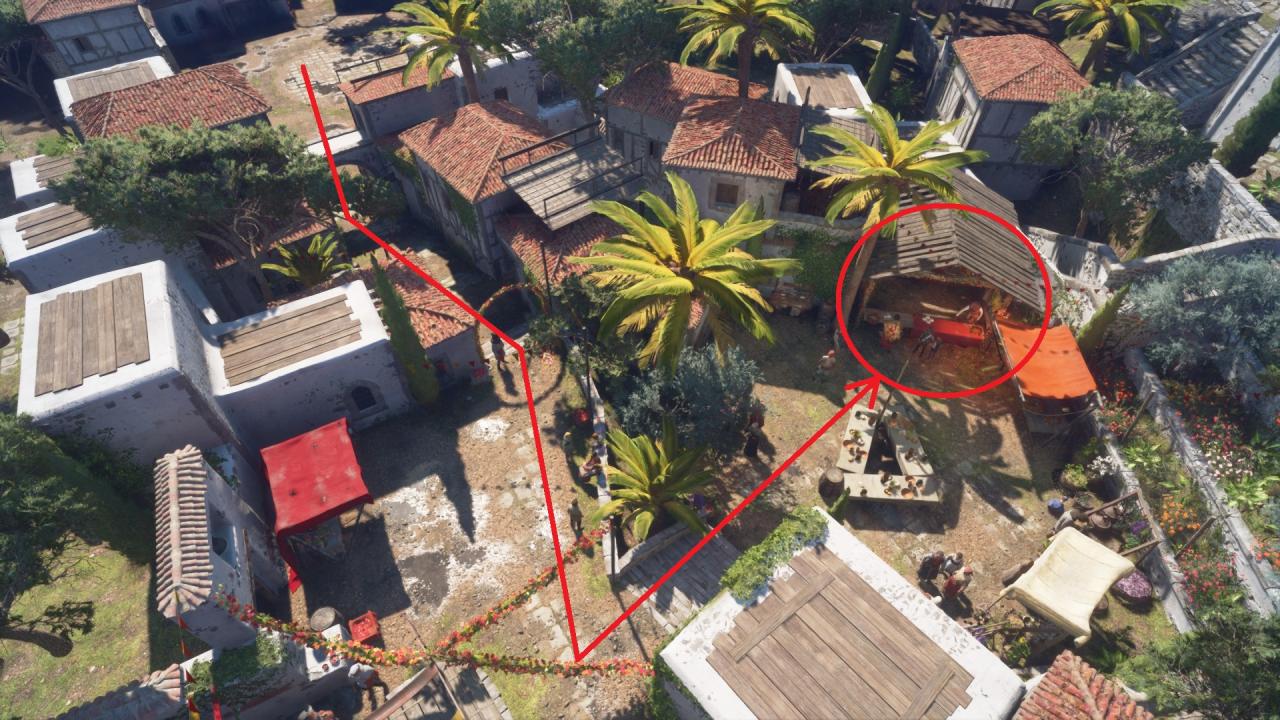 Complete the mini-game in any way, either by winning or losing, and the souvenir will unlock at the end of the game.
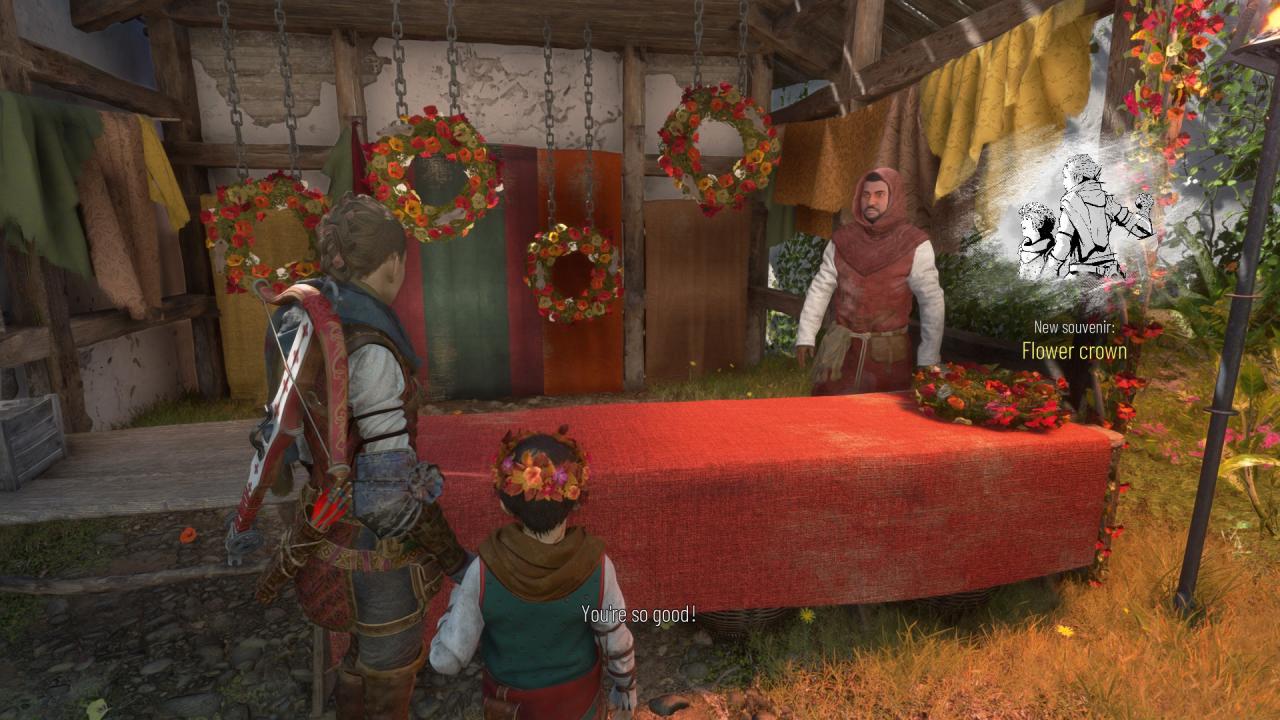 Note: If you perfectly throw the 4 pots through the 4 flower crowns, the achievement “Perfect throw” will also be unlocked at the end of the mini-game.
Chapter 9: 3 Souvenirs
– Souvenir #15: A thousand more years
Can be collected during sub-chapter “Exploration”, objective “Follow the bird statues”, after leaving the castle and finding the first bird statue. From now on, you are free to explore the entire island. Continue forward on the path until passing the second bird and reaching a crossroad. From here continue forward (keep the house to your left and the castle to the right) until you come close to a river. Turn on right on the path and walk towards the old olive tree at the end of the path.
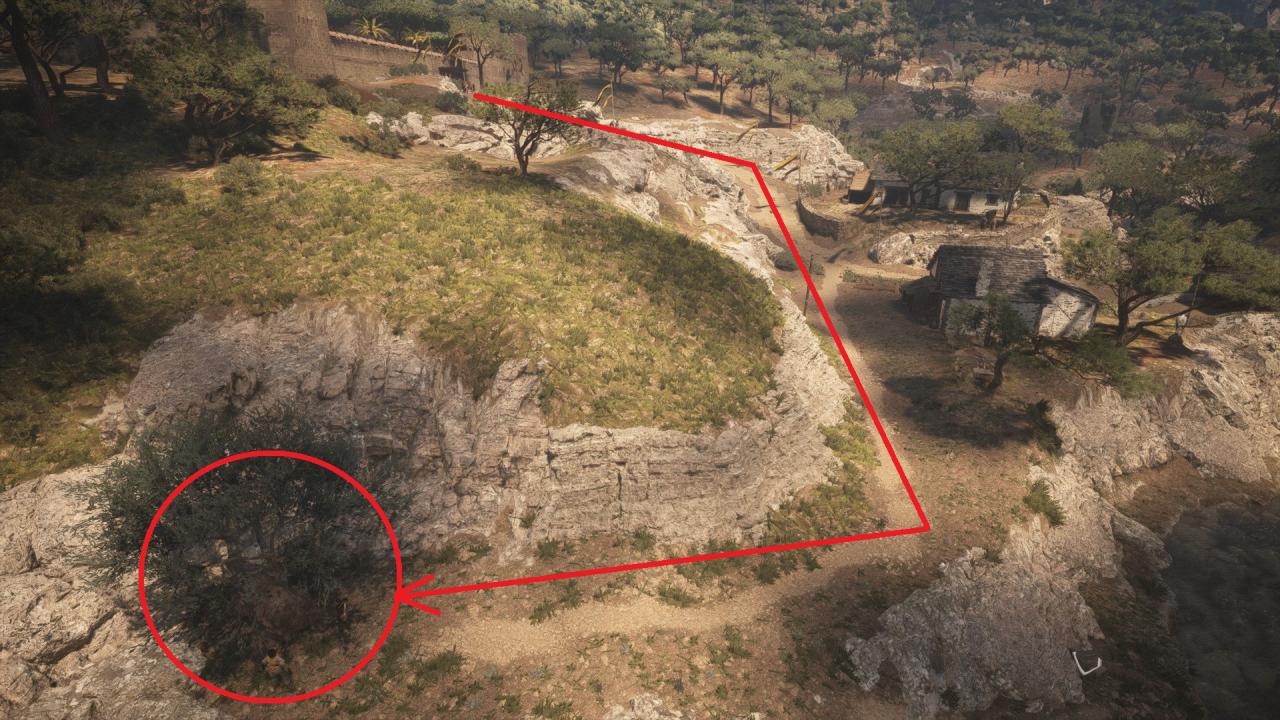
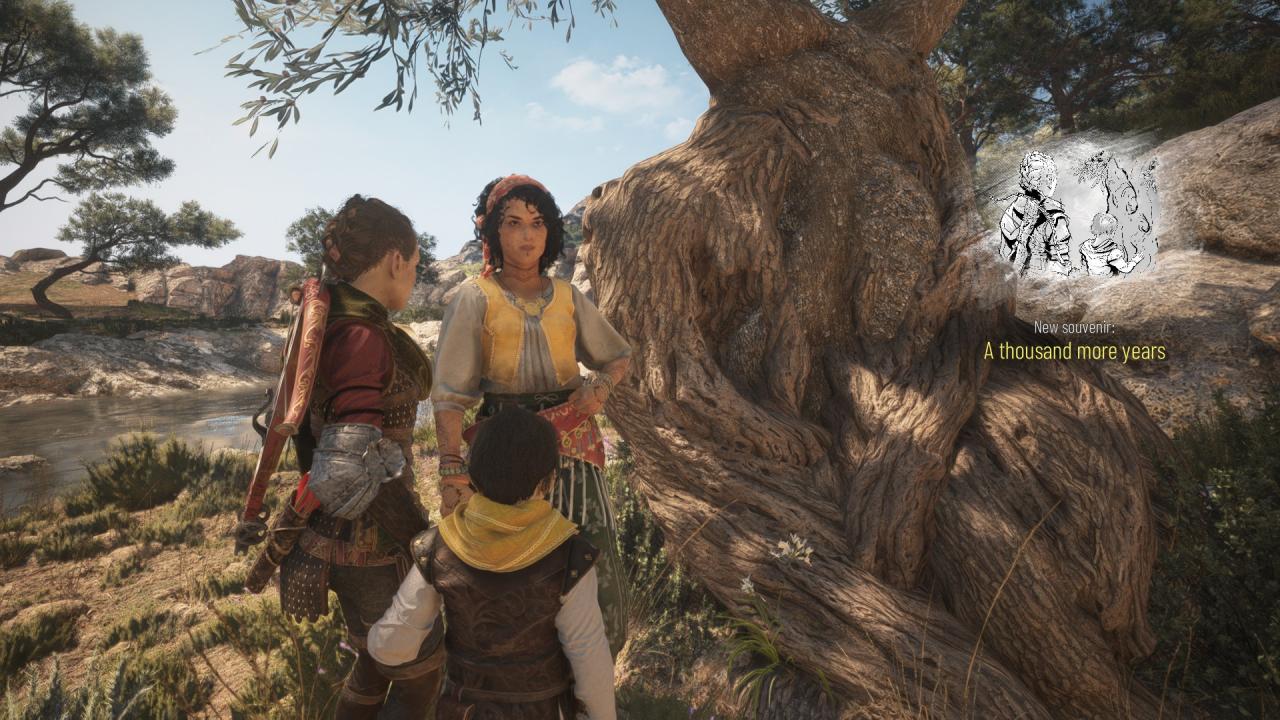 Interact with the olive tree and the souvenir will unlock after the short scripted event.
– Souvenir #16: Nice screeching
Can be collected during sub-chapter “Exploration”, objective “Follow the bird statues”, after leaving the castle and finding the first bird statue. From now on, you are free to explore the entire island. Head to the ruined tower near the river and go around it to the left.
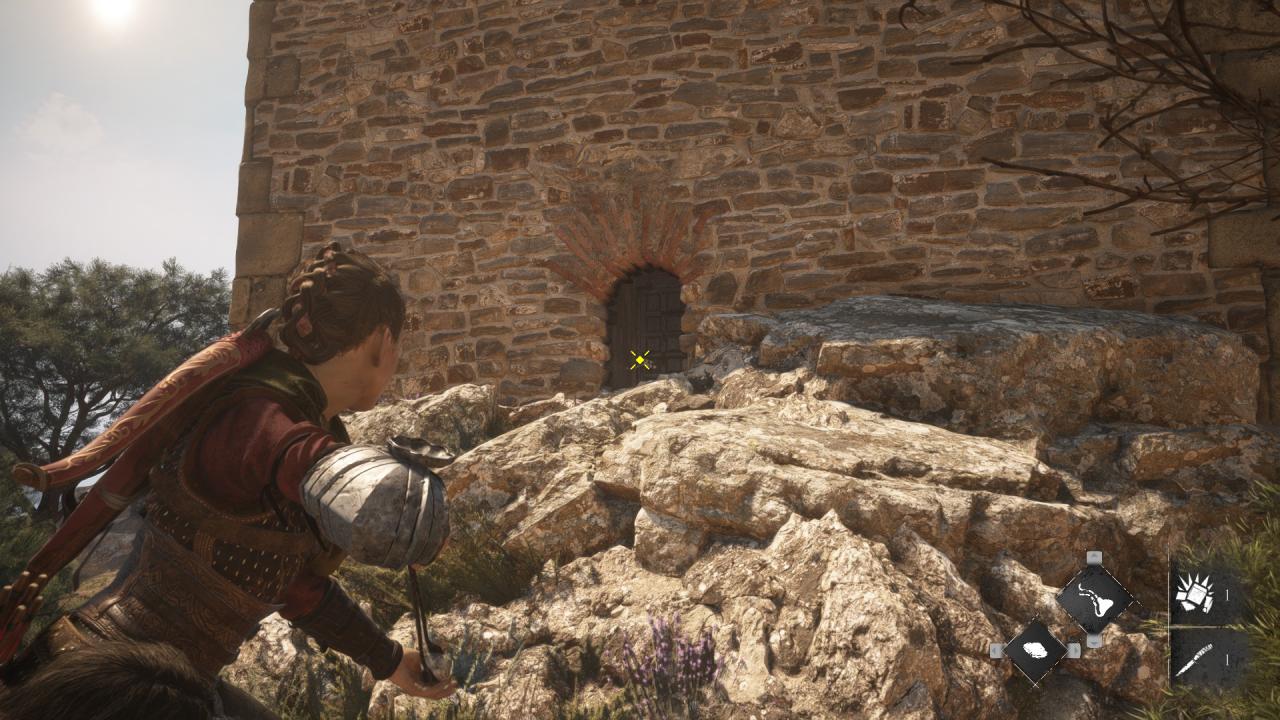
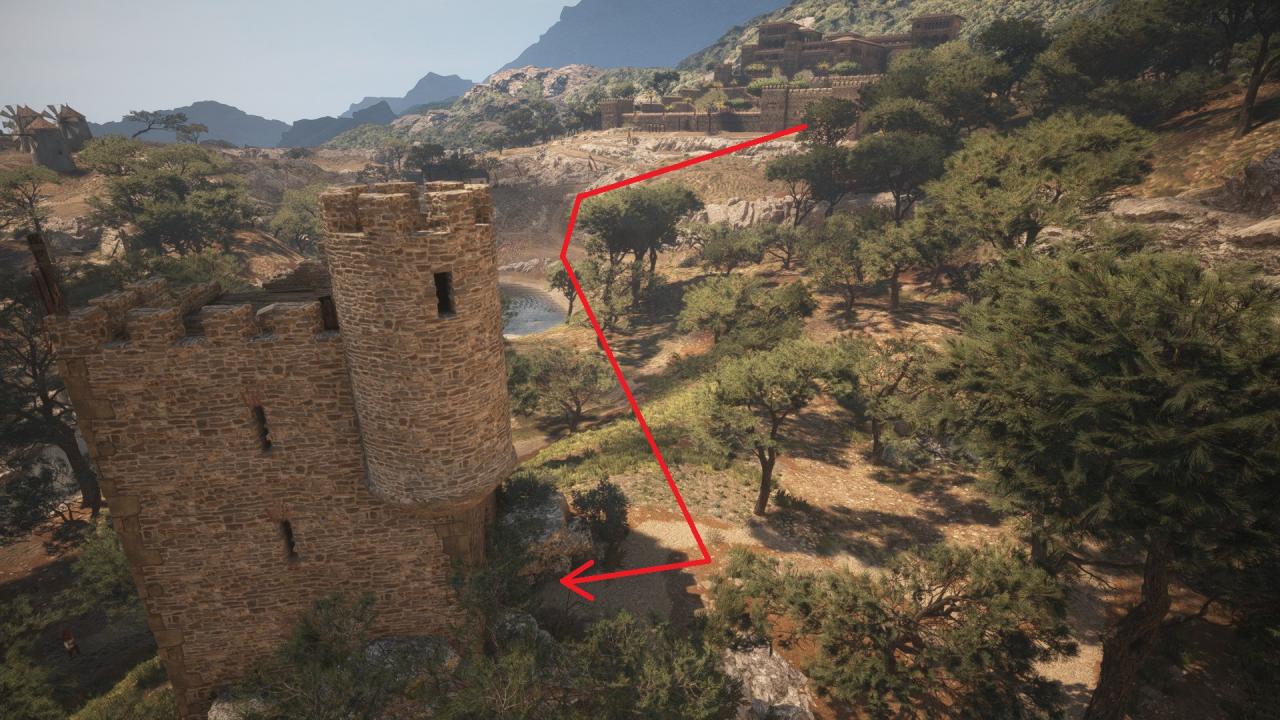 Shoot the hinge through the window in order to unlock the door blocking the path to the upper levels of the tower.
 Head inside the tower and climb up to the top level. An interact will be available on the ledge facing the sea.
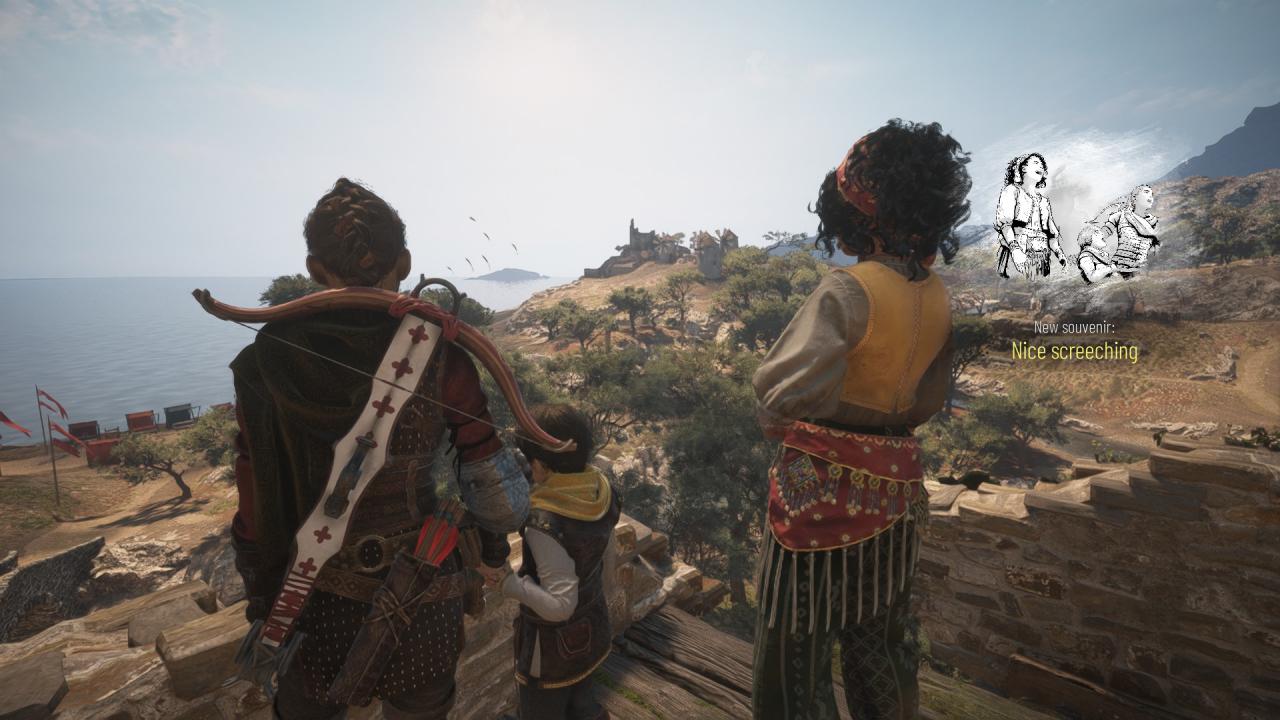 Interact with the ledge and the souvenir will unlock after the short scripted event.
– Souvenir #17: Tramontane
Can be collected during sub-chapter “On the mountain”, objective “Find a way around the checkpoint”, after meeting the goat herder. Facing the gate, turn left then climb the ledge and continue walking on the path until you reach a ruined round building. The goat will be inside it (as well as the 24th tool).
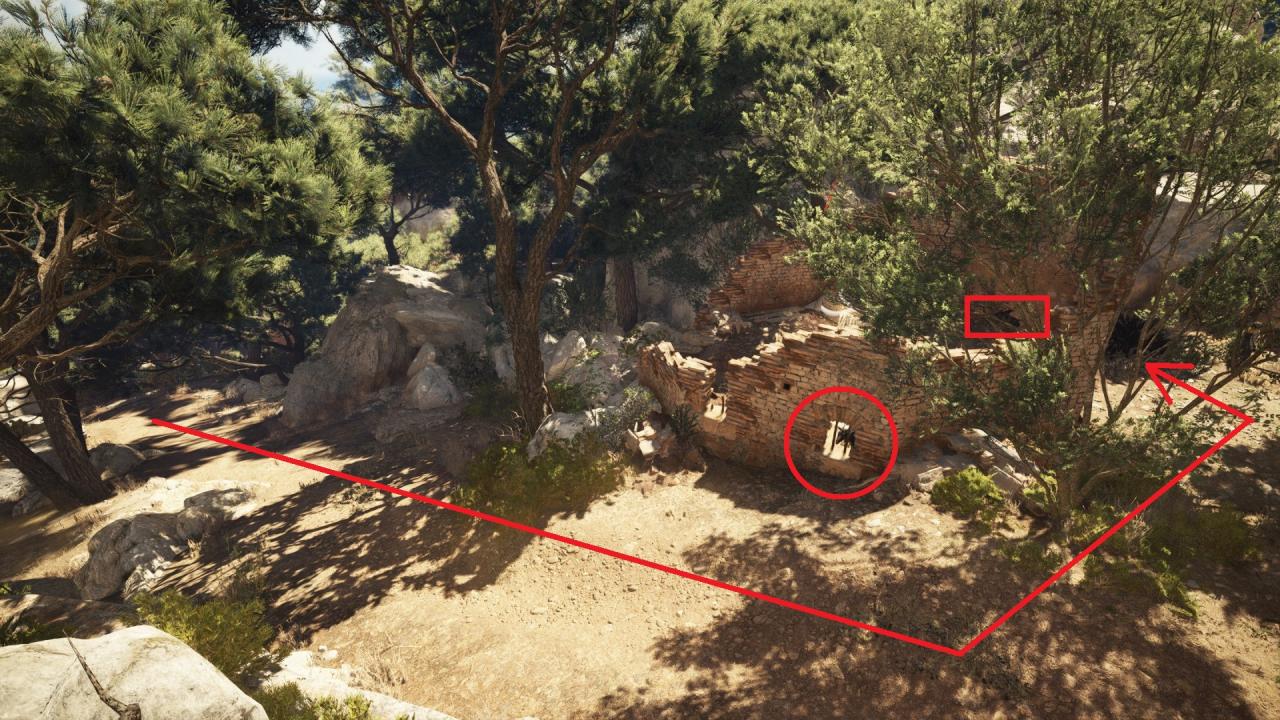 The door to the building will be locked, so in order to get inside you will need to burn down the grass to the right of the building that blocks a small hole in the wall. After the fire dies, send Hugo through the gap to open the door.
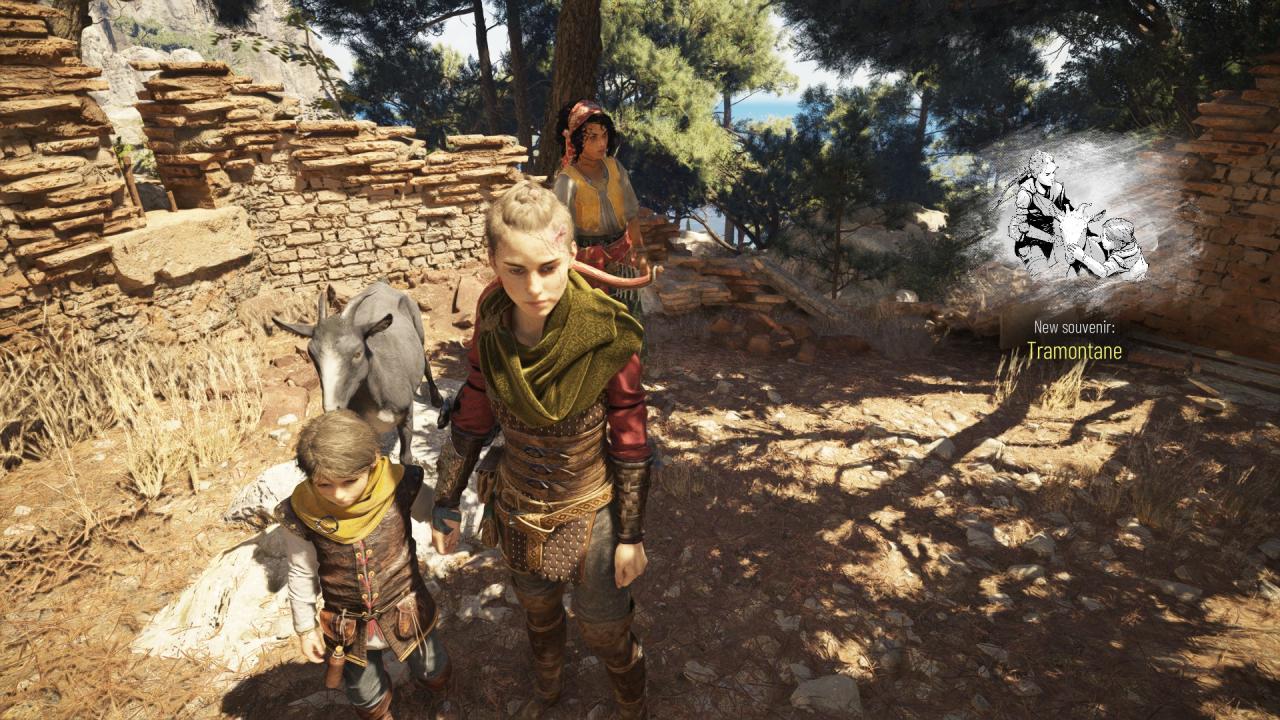 Enter the building and interact with the goat and the souvenir will unlock after the short scripted event.
Chapter 10: 1 Souvenir
– Souvenir #18: A rag doll
Can be collected during sub-chapter “Approaching the fort”, objective “Reach the fort”, after the cinematic ends, in which Hugo kills the soldiers with the rats. Go to Hugo and interact with him, the enter the building. Immediately go to the left through the archway and interact with the anchor point in order to break the wooden wall.
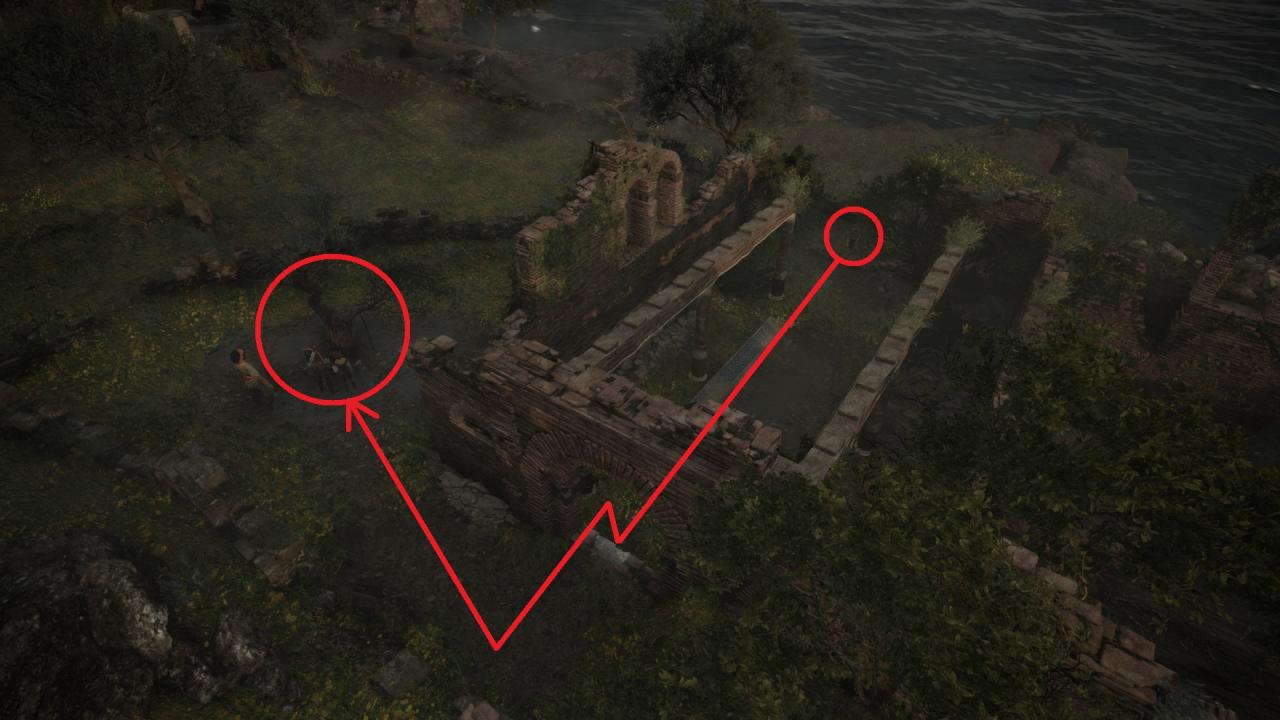 Go towards the now opened window and climb the ledge. Head to the right where you will see a bloodied tree with chains and a doll on the ground.
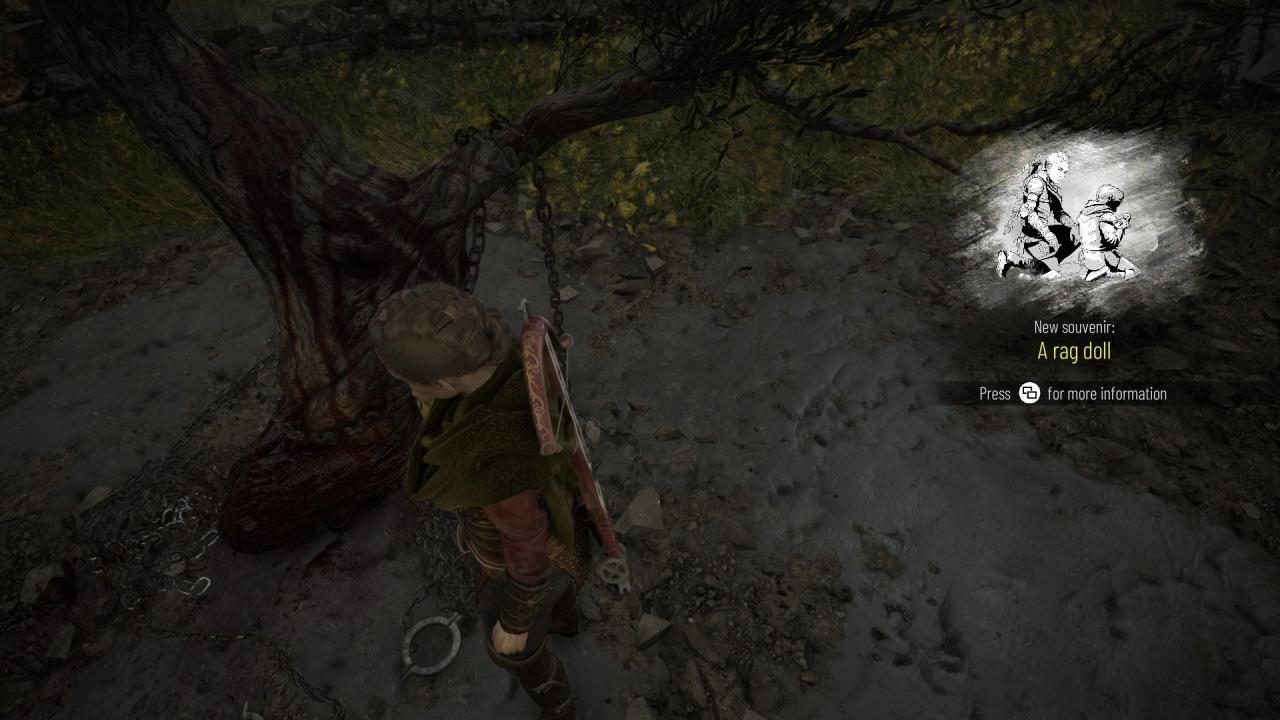 Interact with the tree and the souvenir will unlock after the short scripted event.
Immortal Memories (Chapters 11-13)
Chapter 11: 2 Souvenirs
– Souvenir #19: The Chateau d’Ombrage
Can be collected during sub-chapter “Explore the underground area”, objective “Explore the underground area”, after reaching the big open chamber with carts with braziers on them, that can be pushed around. Pull the first cart on the right towards you by using the anchor point, then push it back until the end of the track, then grab it and push it to the left until reaching the big rock, then grab it again and move it to the right towards the ledge until you can no longer push it.
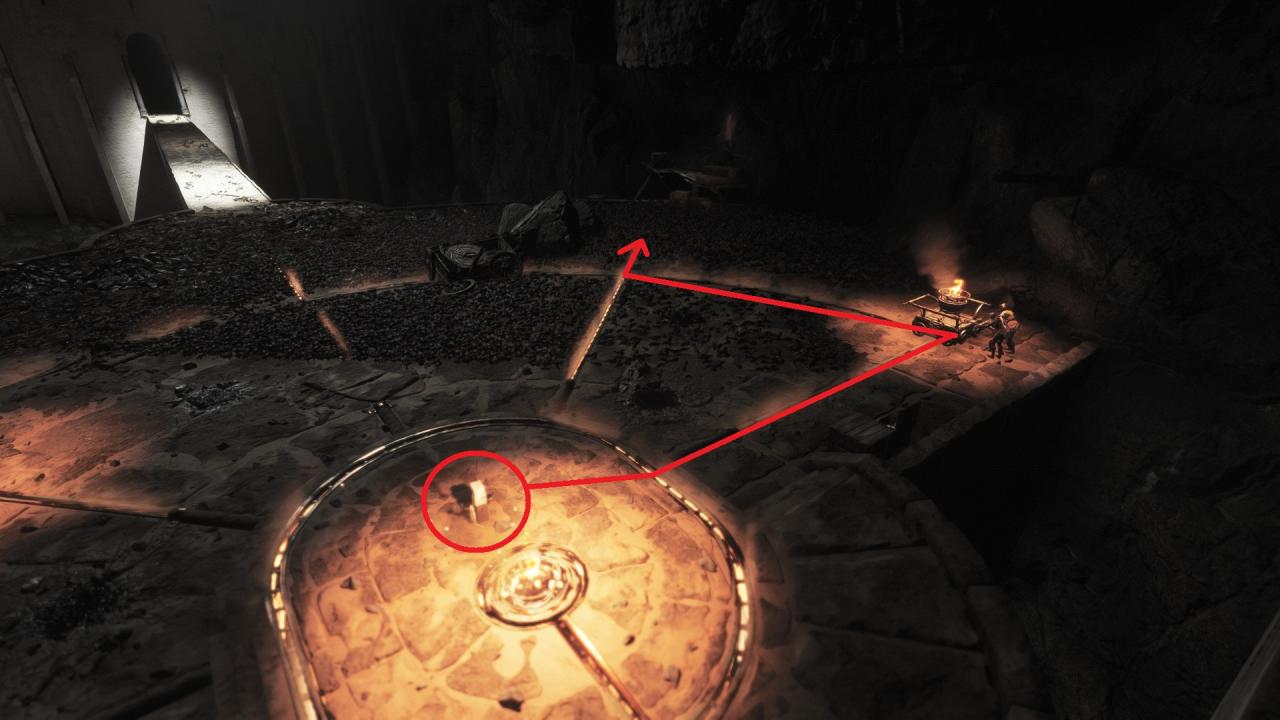 Use Sophia’s prism to get past the remaining section to ledge, get down and to your right you will see a lot of maps on a table.
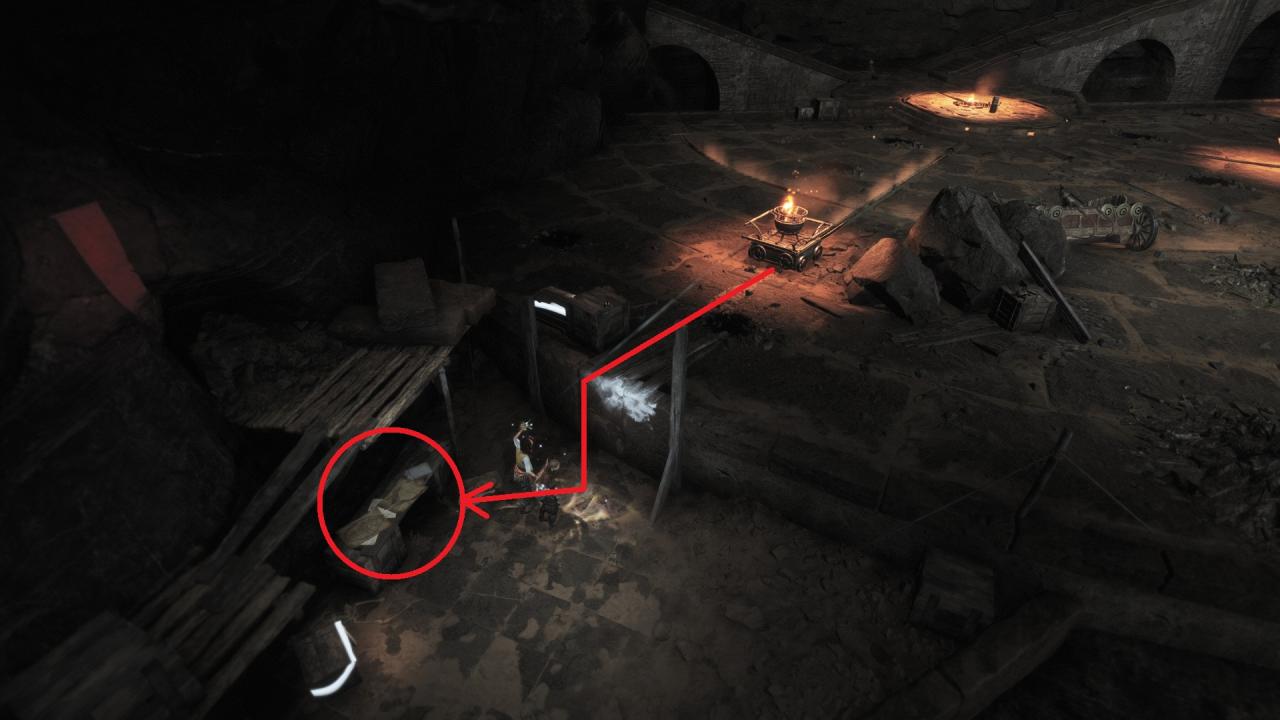
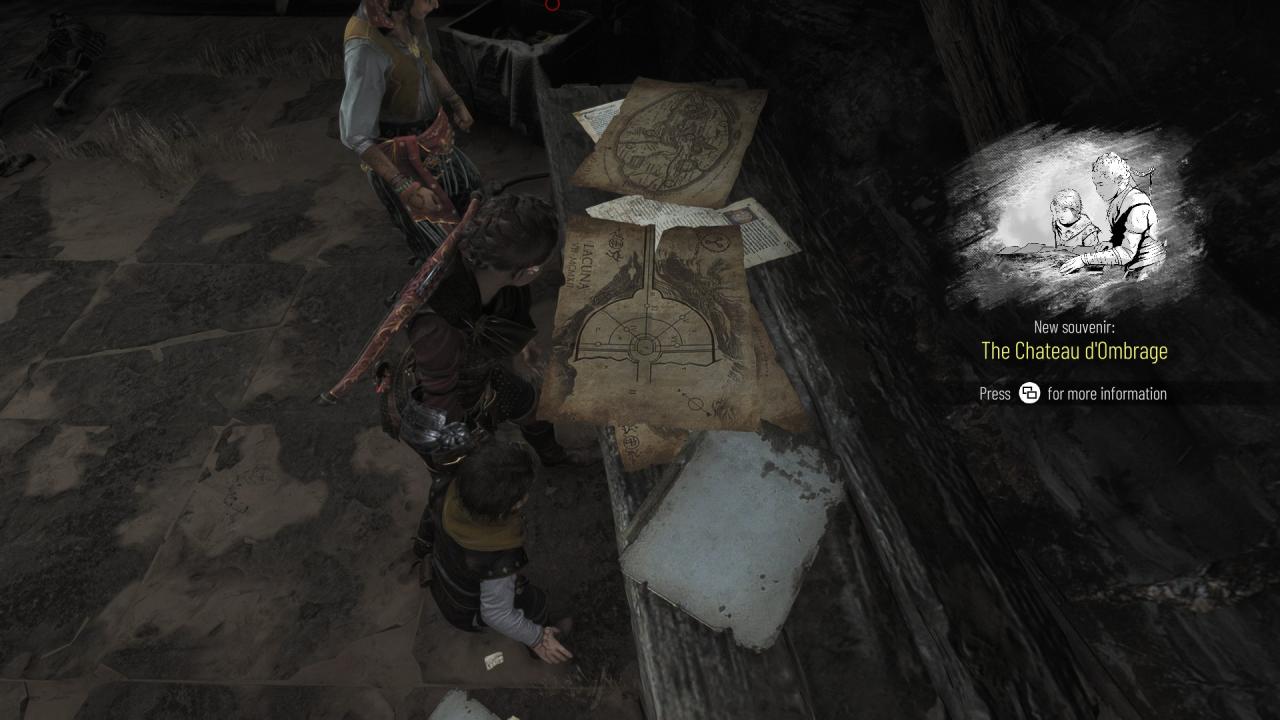 Interact with the maps and the souvenir will unlock after the short dialogue.
– Souvenir #20: His toys…
Can be collected during sub-chapter “Aelia”, objective “Open the gate”, after you cross the bridge, you’ll find yourself in a large room, in front of a big barred door. Turn to the right side of the room and you will see a locked door with a red piece cloth hanging on its right side and a small hole in the wall on its left side.
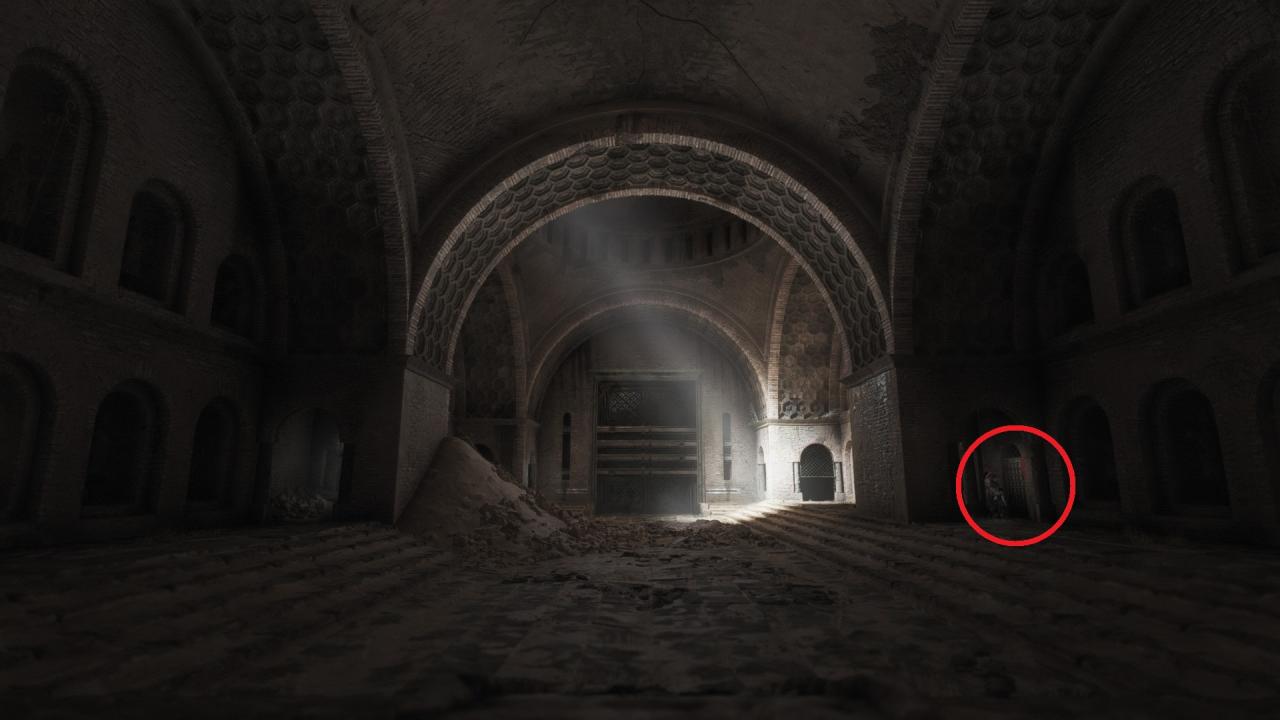 Send Hugo through the hole in order to open the door and enter the small room. In front of you, on the table there are some children toys and clothes.
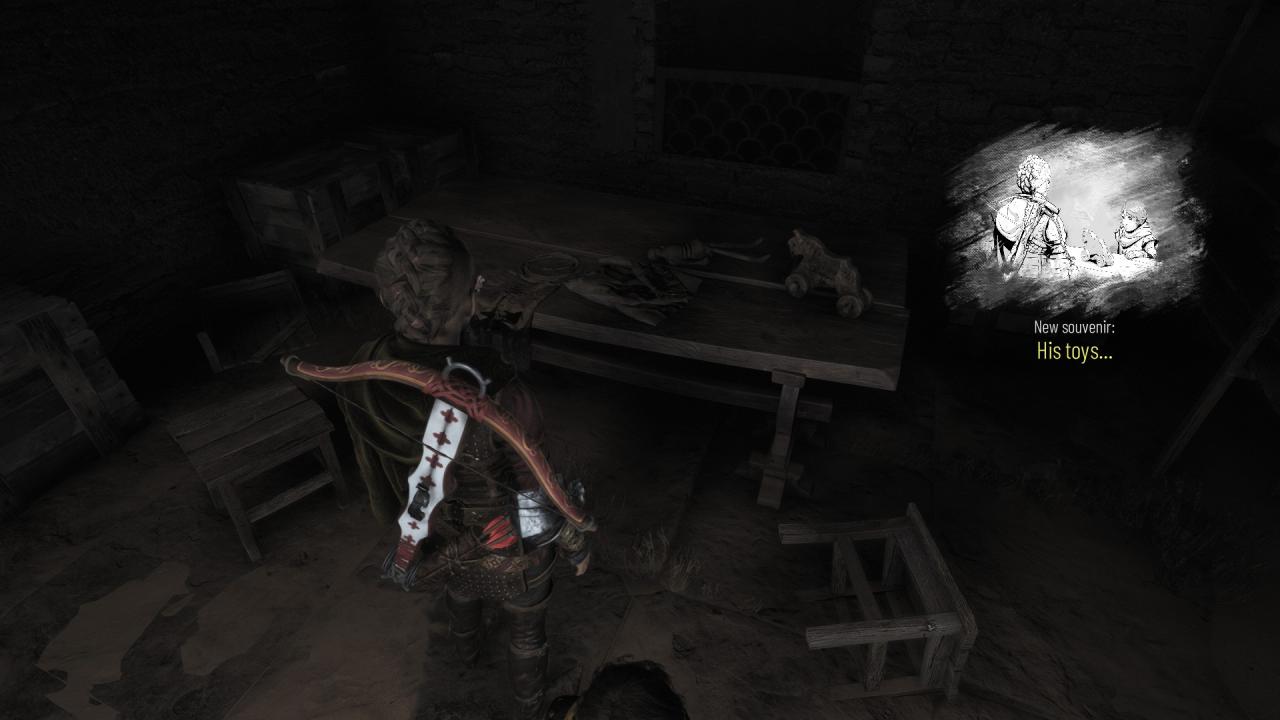 Interact with them and the souvenir will unlock after the short dialogue.
Chapter 12: 0 Souvenirs
Chapter 13: 1 Souvenir
– Souvenir #21: A mess
Can be collected during sub-chapter “Grief”, objective “Find a way to the surface”, when you reach underneath the destroyed library. Look to the right, where is a gap in the metal grill. Shoot the hinge that’s holding the door locked and enter that room, then go inside the corridor. Grab the shelf on wheels and pull it towards you, clearing the doorway to the next room.
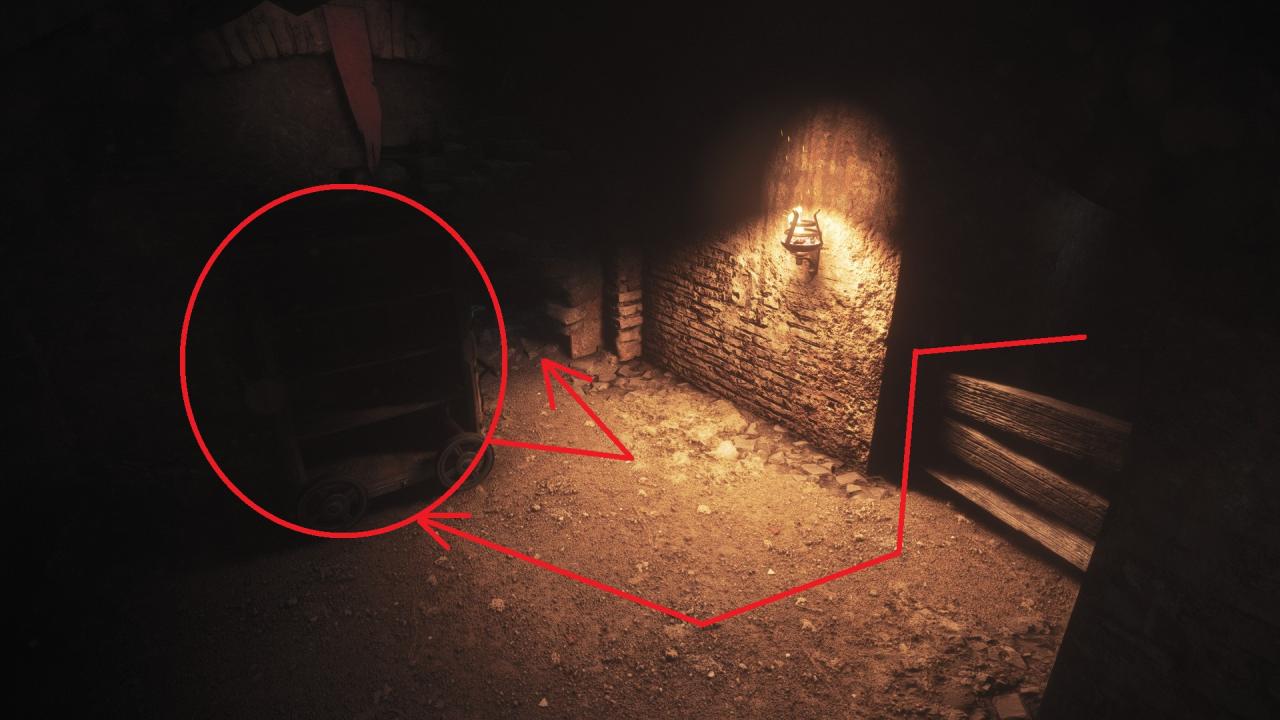
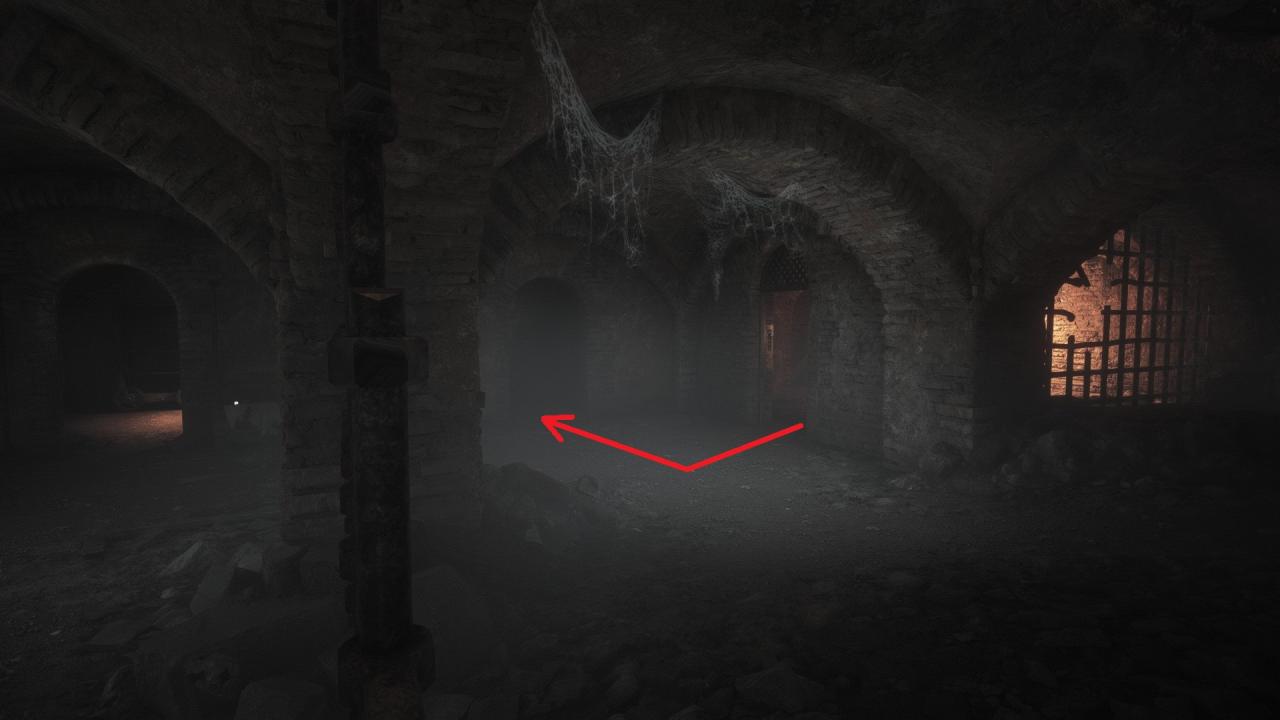 Go back and enter through the now unblocked corridor, jump over the wooden fence. To the right there is another shelf on wheels, blocking a hole in the wall. Pull that shelf away and enter the room.
 To the left, there is a messy table.
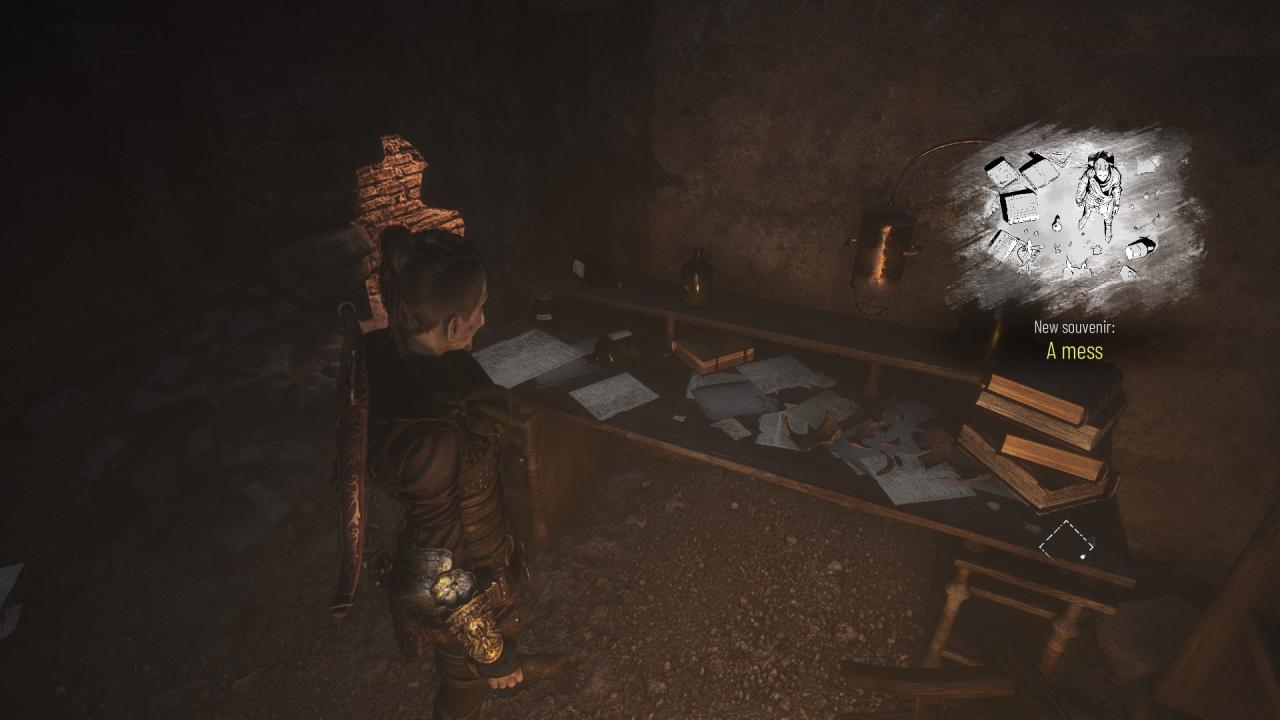 Interact with the tree and the souvenir will unlock after the short scripted event.
After collecting all of the 21 Souvenirs, as soon as you interact with the last one, the achievement will unlock.
Thanks to CrissSpirit and MrDEADX for their excellent guide, all credit to his effort. if this guide helps you, please support and rate it via Steam Community. enjoy the game.

