Don’t know what to do with your money after making your first bars ? This is a relatively easy setup you can try out to make your shoveling a little more convenient and profitable.
Introduction
You’re going to need make some cash before the operation can work.
I did not calculate the exact cash requirements for such expansion and so you should have a working setup to make money before starting it. Not a whole lot, but you can first start with a basic water dispenser setup first and furnace, which you can refit later once you’ve dug yourself your mine.
If you don’t know where to start still :
Fill bucket with dirt, advanced shovel carries twice the dirt and is highly recommended
Dump a pan in the water to fill it up and drop it back on the ground
Dump dirt from the bucket in the pan
Use the brush on the pan twice to clear the dirt and spawn minerals ( or not )
Sell minerals, or smelt them in the crucible and furnace for bars.
Sell the bars, or turn them into swords and jewelry.
First expansion
Setup a workspace with foundations at ground level.
To build foundations and use equipment. Grab them with E first, and then click to go into placement mode, you will see the block show up as blue or red a few feet away from you. The Entire dig site is an invisible grid, when placing pipes and foundations, they will all always be aligned on the same grid which is good as you do not need to worry about mismatching structures and misaligned pipes.
As you build in general, you want to secure your blocks with the building hammer.
The building hammer is used to lock a block in place, preventing you from picking it up when pressing E. It is essential you lock all blocks once they are in place to avoid removing furnaces and foundattions by mistake when working around them. Including pipes, tool racks, lights and your bed.
Get a water intake, straight pipes, angles and T junctions and a valve.
You should have 5 or 6 pans lined up on foundations, with pipes running over the pans to dump water in each of them.
Use the T junctions over the pans and an angle pipe for the last pan. I recommend laying the pipes three blocks high, if you lay the pipes just one block over the pans, they tend to make it awkward picking up and dropping things under the pipes.
Somewhere close to the workspace should be a valve, so that you can turn it on and off easily.
The water intake is placed in the river next to you and connected to the workspace.
Fill the pans with dirt, and hit the valve on and off to dump water into all of them at once.
You can brush the pans and collect.
All of these foundations and pipes can be refitted underground once you secure more money to expand.
You can use the buckets still to put the maximum amount of dirt in each pan. On the surface it is advisable to use the buckets as the nuggets spawned are small with each pan.
When heading down below the surface, the nuggets with become much bigger, and i find it much more convenient to use the advanced shovel and shovel straight to the pans without buckets.
As far as i understand, not using buckets yields less nuggets with each pan, but the time spent filling up the buckets and dumping them in the pan is too much, once you go below surface and obtain larger minerals with each batch.
The advanced shovel also has significant range, from which you can dig and dump by clicking from far away, making it far less tedious.
Going Under
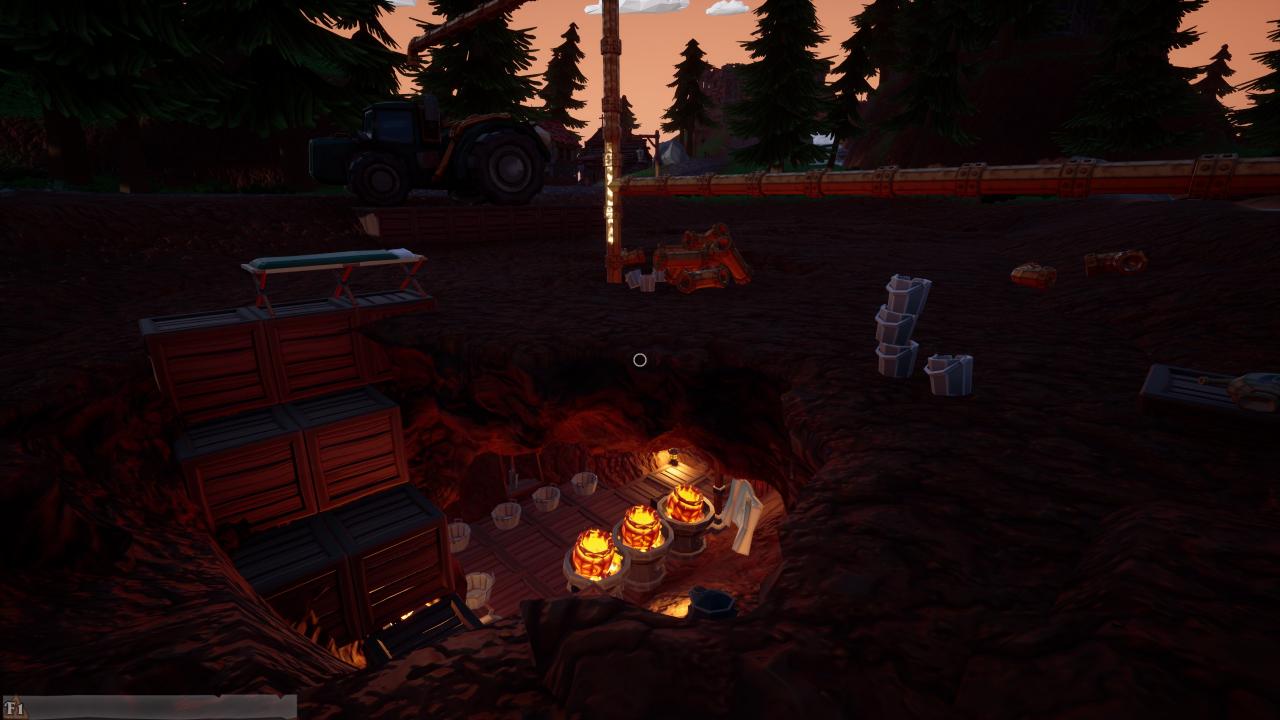
It does require to buy a whole more pipes and blocks, so you can use your income to buy new parts. Once you are confident you have the required amount of things purchased as you build it you can eventually retrofit your old blocks and parts to your new cave. Or keep it it’s up to you.
Wood and pipes are not particularly expensive and do not require some sort of energy source, or any maintenance as you do not need filters and high pressure at this point.

Digging down is pretty straight forward.
I picked the far end of the dig site to start a stairway down, maybe not the best decision as i was surrounded by bedrock that cannot be mined or built over. But eventually as i mine, can move around the cave in another spot later.
You can also be smarter than me, and aim for a more open section of dirt to go in.
Remember, dirt is literally money. digging yourself a cave is digging potential profit, don’t overdo it !
Place down two foundations in the ground where you want your stair to go down, and start digging using the Pickaxe.
The pickaxe deletes dirt, but is much faster at making tunnels than shovels.
Dig down until you can place blocks below, repeat until you find bedrock a couple blocks down.
Lay down a floor of foundations on the bedrock and make some space.
You can have as much space as you want but there’s things to consider.
As you are going to be brushing pans and smelting ore by hand still, going for a 15 pan long setup with 10 furnaces would quickly become a waste of money.
There’s a limited amount of ore one person can process at once.
Time spent smelting ore, sorting out ingots, is time not spent filling up pans, or crafting jewelry.
I found that 6 or 7 pans, can quickly yield enough mineral to keep you occupied at the smelter and anvil for a while. Spending cash on too many pans and pipes and furnaces decreases in gain the more you buy because you will overwork yourself eventually.
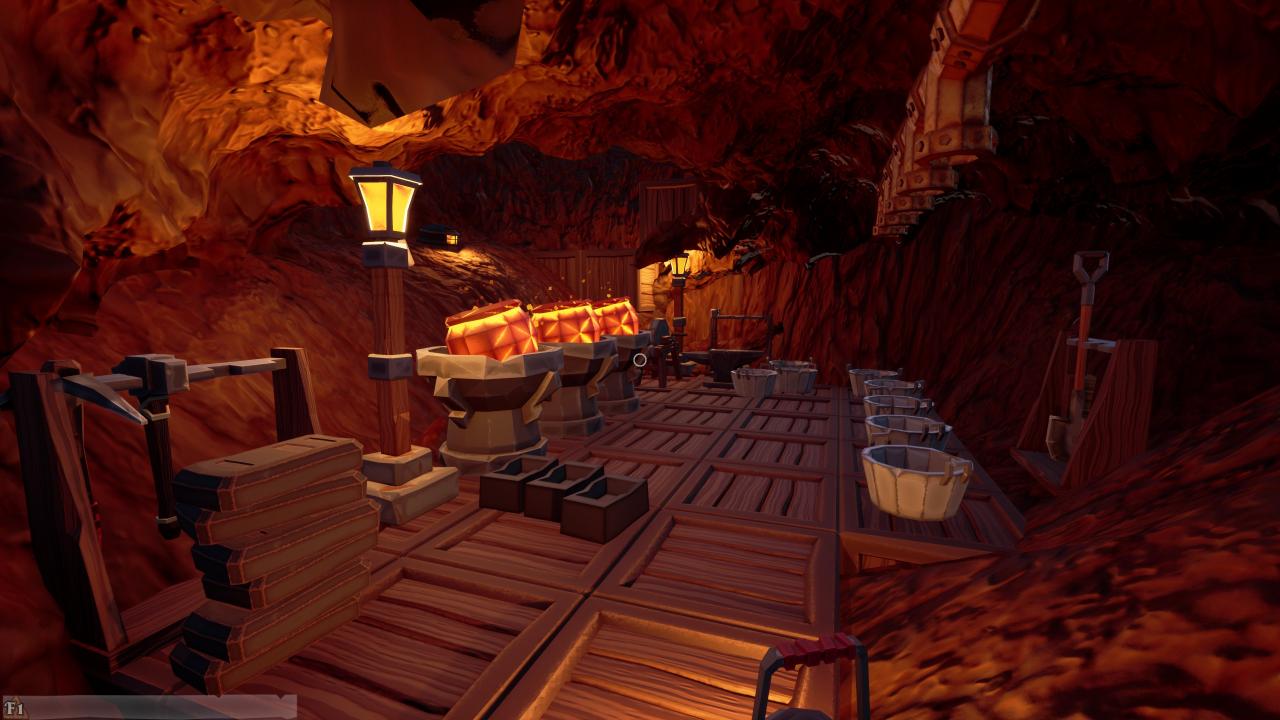
As you can see in the picture :
I have 5 pans lined up with pipes two blocks over each.
Above the camera is the valve that goes up to the surface so i can turn it on and off from the workspace.
A few furnaces with a mold for each.
Lanterns are a must for seeing anything obviously.
Only one anvil, and one grinder are required.
I like to have a pan for iron and a pan for gold nuggets that i fill up with 4 or 5 batches of dirt.
After smelting them all in bars, you can use pans to carry all of them to the stocks or for storage.
The trick to using pans for carrying ingots is simple, if they are too big to fit, aim a little higher, so the ingot hits the side of the pan and tucks inside. Once inside the pan, objects have no collision, so you can fit large amounts of bars in one single pan easily. If the ingot is big and sitting on top of the pan, it won’t be carried inside.
This goes the same for daggers.
Crafting is another step to making more cash with your minerals once refine.
At this time i am not certain the price calculations are entirely balanced so i cannot tell if crafting weapons and jewelry is consistently profitable over selling bars. But one would expect the extra work is worth it especially with heavier ingots.
To craft, you put your bars straight in the furnace ( not in a crucible ) and let them cook for a few seconds and put them on top of the anvil, and then hit the anvil with the Blacksmith Hammer.
Larger ingots mean larger items. You get large ingots by smelting large chunks of ore, or smelting several chunks at once.
There are 5 craftable items currently :
Dagger – 1 Iron bar
Axe – 2 Iron bars
Sword – 3 Iron bars
Ring – 1 Gold and 1 Gem
Necklace – 2 Gold and 1 Gem
As to how the pricing works and how the mass of an item is calculated i cannot tell. I assume it is an addition of all ingots you used for one item, or an average, or defined by the smallest ingot used. Rule of thumb is, go big.
As an extra feature, i like to have Tool racks to stop stepping on them and losing them when i need them.
A tool rack in front of the pans with the brush and shovel. Another rack in front of the anvil with the blacksmith hammer and the third one for the other tools like the pickaxe, build hammer.
Servicing your truck
To refill the tank, you want to have a pipe over the open top of the truck where the water is.
Setup a T junction to take water from your pipes, and a valve on top, and put down pipes high enough to clear the truck. The Truck is about 5 pipes high.
That in itself is fairly simple. Though i have found once or twice that the truck likes to get beached on the edge of the dig site. And it has very poor torque it seems as it hardly manages to drive over it.
This is why i laid some foundations under the water dispenser, to give the truck some room to fit itself nice and flat, without getting stuck.

Related Posts:
- Hydroneer: Easy Beginner Machine to Farm Money (Update 2.0)
- Hydroneer Starting Guide For Beginners (How to Play & Placing Items)
- Hydroneer: Easy Starting Money
- Hydroneer: How to Use the Icehelm Forge (Update 2.0)
- Hydroneer: How to Reactivate Achievements After Using Mods

