
I have run this “no-skill, all-auto” build through multiple full clears, and after a lot of trial and error I landed on a routing philosophy that trades flashy active skills for pure automated damage. Everything below reflects what I personally verified in my own playthroughs, including the mistakes that cost me runs.
The Core Philosophy: Let Auto-Attacks Do the Work
The whole idea behind this guide is minimizing manual effort while maximizing survivability. If you can kill something by kiting it from a safe distance without taking a single hit, never stand still and trade blows.
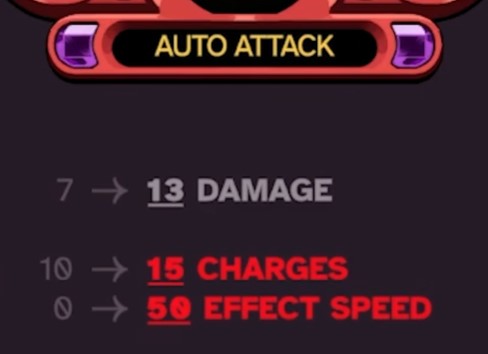
- Let auto-attacks handle combat — avoid active skills whenever possible.
- Kite to a zero-damage kill rather than fighting head-on. If a target can be worn down at range, that is always the correct play.
- Upgrade priority order: auto-attack damage > cooldown reduction >> active skills. Skills come last, always.
Run Setup Choices
Your opening selections define how smooth the whole run feels. I tested each of these and the differences are real, so pick deliberately rather than grabbing whatever looks cool.
| Category | Recommended Pick | Reasoning |
|---|---|---|
| Commander | Huntress | Grants +50% auto-attack; the tradeoff is longer skill cooldowns — irrelevant since skills are low priority anyway. |
| Castle | Spider Castle or standard Castle | Skip the Tank — without rear modules it cannot kite properly. |
| Squad | Mage or Flame Squad | The Mage‘s slow is extremely practical; the Flame Squad is a solid alternative. |
| Castle priority | Spider > Standard > Tank | Ranked by overall kiting potential. |
Editor Warning: When upgrading your castle, I strongly recommend taking speed and HP upgrades twice each. Going too heavily into a single stat got me killed more than once — a glass-cannon castle cannot survive the fights you cannot outrun.
A quick note on farming: grinding silver coins in this game is essentially dead time. If you do not want to sit through it, turning on unlimited coins is a perfectly reasonable shortcut.
Artifact Selection
- Starting artifact: Take the Shovel or the Souvenir. Both accelerate your buff stacking, and that scaling pays off the most in the late game.
- In-run priority: Grab any artifact that reduces auto-attack cooldown once skills come off cooldown.
- Sustain: Get the life-on-kill artifact as early as you possibly can.
- Magic builds: If you are running heavy magic, artifacts that boost magic damage are well worth the slot.
- Movement speed comes first when offered: Movement speed directly determines how comfortably you can kite, so never pass it up.
Rear Modules: Your Kiting Damage Backbone
Rear modules are the primary damage source for a kiting playstyle. I found these two to be the clear standouts.
- Companions — The most foolproof option. They deal the highest damage and can strike enemies from very far away from your castle, which means you can fight bosses from an absolutely safe distance.
- Dash — Wide area coverage, perfect for clearing trash mobs, and it hits hard when it lands fully on a boss. It also doubles as an escape when you cannot run away. I recommend attaching the upgrade that extends auto-attack range.
Editor Warning: I would avoid Mines and placeable Turrets entirely. Their damage ramps too slowly, and in real fights it is very hard to get them to lock onto a boss.
Top Modules: Omnidirectional Coverage and Survival
Top modules give you all-angle fire, which lets you quickly delete bombs and small enemies — and that translates directly into staying alive.
- Lightning Mage — Fast to deal damage, always hits, high DPS, and it stuns. Excellent against both groups and large enemies.
- Fire Mage — Its burn effect supports your kiting game by chipping enemies as you run.
- Turret — Auto-locks the highest-HP enemy, which in theory makes it a boss-killer, but range, projectile speed, and attack speed can all be problematic. It only becomes strong after heavy resource investment in the mid-to-late game.
- Arrow Tower — Respectable DPS, but it has no clear edge over the Lightning Mage or Fire Mage.
Editor Warning: Do not take the Mortar. Its damage comes out too slowly and its targeting is uncontrollable.
Front Modules: Path-Clearing, Not Main Damage
As a kiting build, your front modules are mainly there to open routes — they are not your primary damage dealers. Keep that role in mind when choosing.
| Module | Role | Verdict |
|---|---|---|
| Force Mage | Tornado has long field presence, long range, penetration, and crowd control, with solid DPS | Top pick |
| Teleporter | Far weaker damage and clearing than Force Mage, but the blink can save your life when needed | Requires skill to use well |
| Ram | Extremely high damage — great for instantly killing bosses | Only if you trust your driving; ramming trash mobs will get you killed |
Editor Warning: Skip the Front Cannon — it is comprehensively inferior to the Force Mage in every way that matters.
Flank Modules and Barracks
Flank modules matter a bit less overall. They come into play mainly during one-on-one boss fights, since most of the time your top modules are already handling the work. The available choices are all roughly similar — personally, I like the Flank Crossbow for its fast fire rate and consistent damage output.
As for the Flank Barracks and Front Barracks: unless you are specifically building around that archetype (which requires stacking a large number of dedicated buffs), I do not recommend them.
