This is an opinionated guide explaining how to place signals on rails in Voxel Tycoon. It focuses on making sure jams don’t happen, then allowing as much traffic as possible. Since it’s opinionated, it uses extra strict rules for rail and signal placement in order to simplify the process of deciding where to place signals. This is not the only way to place signals, but should produce quite efficient and jam-free systems.
Intro
This is how I place rail signals in my games of Voxel Tycoon. It is assumed that you already understand what the signal types are and how they work.
Checklist
After reading the guide, refer back to this section while playing the game to quickly verify your signals are correct.
- Two-way rails will only have pre-signals, and only at junctions.
- When a pair of one-way rails connects to a two-way rail, place a pre-signal going into the one-way track and a normal signal coming out.
- On one-way straights, place signals periodically.
- On one-way merges and splits, place signals to divide each branch.
- Intersections:
- Identify the actual intersection(s).
- Place pre-signals on the entrances and in between intersections.
- Place normal signals on the exits.
- Ensure there is enough space after each exit to fit a whole train.
- Add normal signals on any branches that are still connected.
- For non-blocking intersections, use rules 3 and 4.
- For station entrances, place a pre-signal before the split and normal signals in front of each platform.
- For station exits, place normal signals after each platform and after the merge.
Two-way rails
All signals on two-way rails should be pre-signals, and the only useful place to put signals on two-way rails is at intersections.
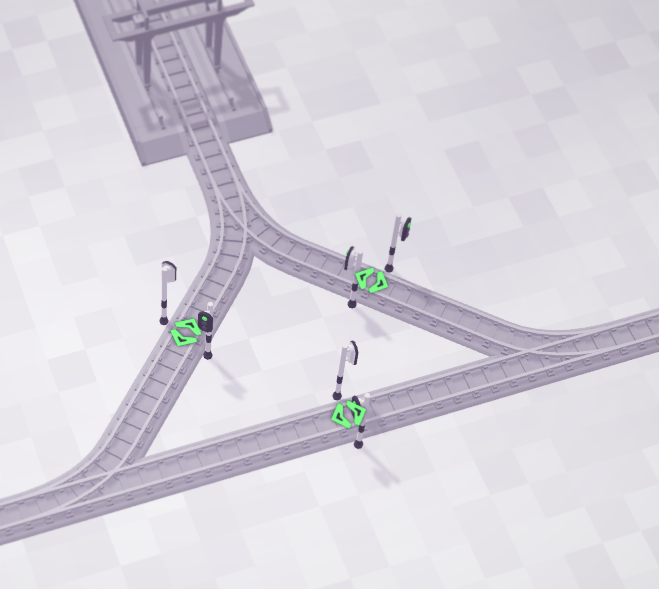
If you do not have room for signals in between, you can have them on the ends.
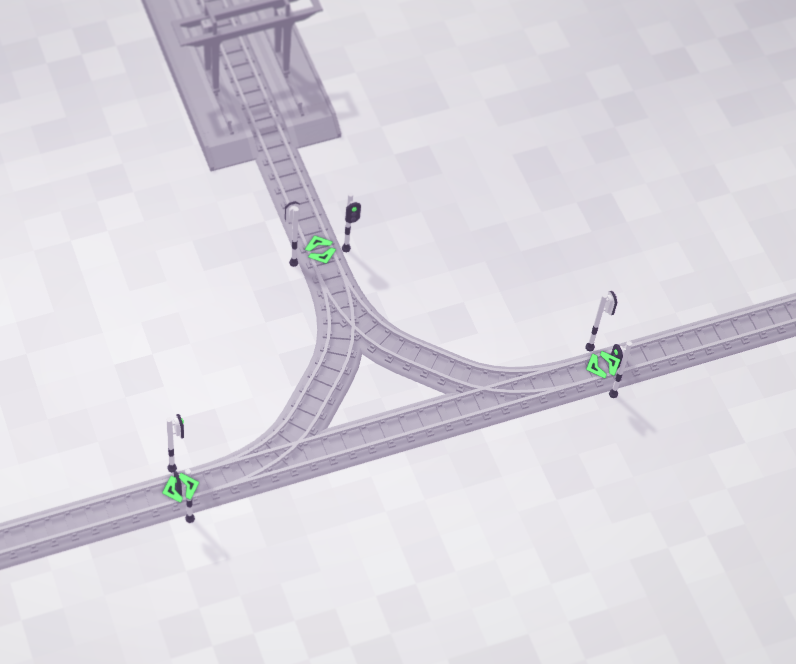
This is slightly worse since a train has to pass two signals before another train can pass, but will still function perfectly fine. The important part here is that each branch is a different block.
This allows multipe trains to serve different stations on the two-way track system. There is no need to have any other signals. Any normal signals on the two-way track will allow trains to come head-to-head and get stuck. The one exception is the last signal before a dead-end (such as a station). A pre-signal and normal signal will function the same in this case, but if you later expand the rail system, it will need to be a pre-signal.
Because of the limitations of VT signals, there is no general way to have more than one train on a two-way branch at a time without risking head-to-head jams.
Two-way to one-way interface
At a joining of two-way and one-way rails, you should have a pre-signal going into the one-way track and a normal signal coming out. These are on the one-way rails, not on the two-way, in order to follow the rules from the last section.
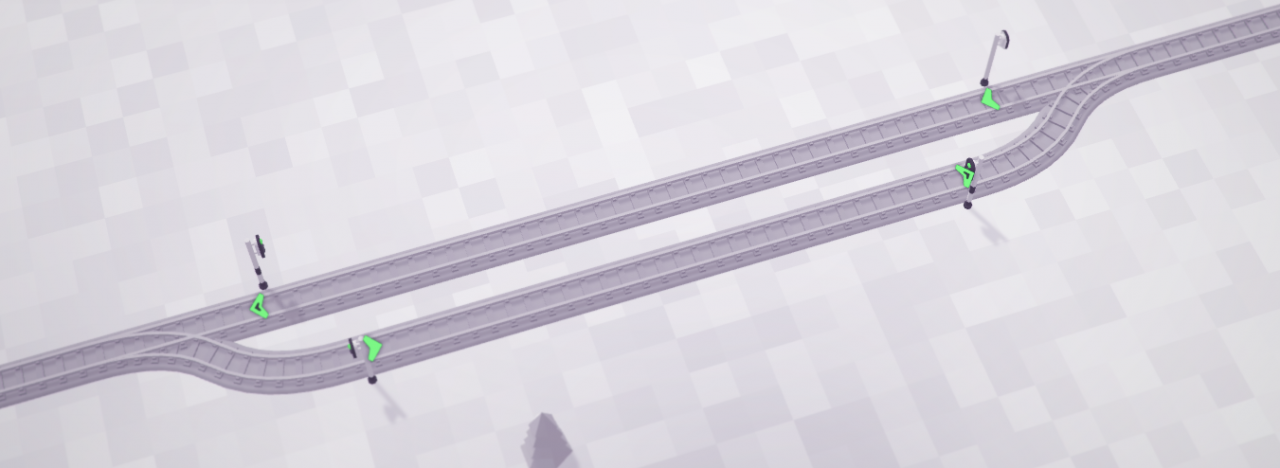
After the normal signal, there should be enough room to fit your longest train. This will be explained more in the Intersections section.
One-way rails
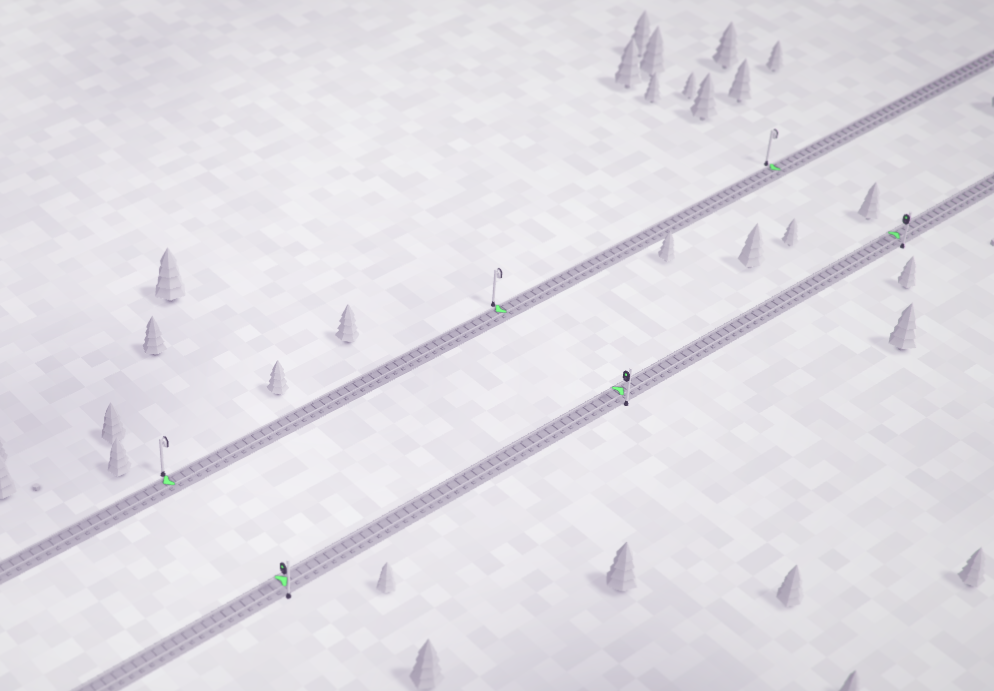
On one-way rails, you should place normal signals periodically. The spacing here is merely a tradeoff between how close trains can be to each other and cost. It does not directly affect the chance of jamming. A sensible spacing is the length of your trains, but any length will do.
One-way merges and splits
One-way merges and splits also aren’t very important. If two trains want to use the merge at around the same time, they must be sharing a branch, so it does not matter if either stops in the intersection since one will always block the other.
The only important rule is to make sure each branch is its own block so that trains can use them efficiently.
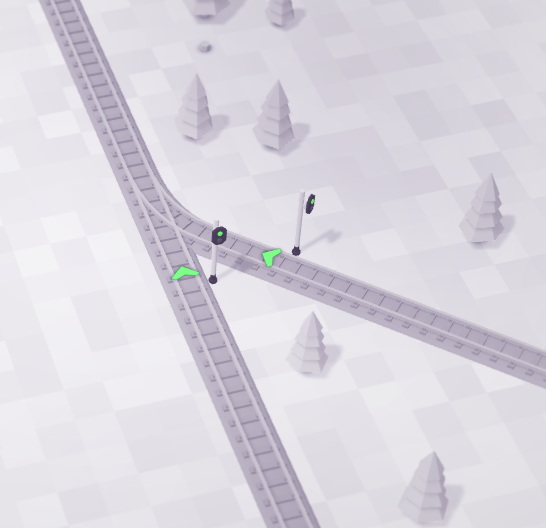
At the moment, there is no known way to create a priority merge.
Simple Intersections
This is the most important part of signalling since incorrect signals in intersections can easily cause jams, and since intersections are the most complex part of your rail system.
First, you should start out with an intersection.
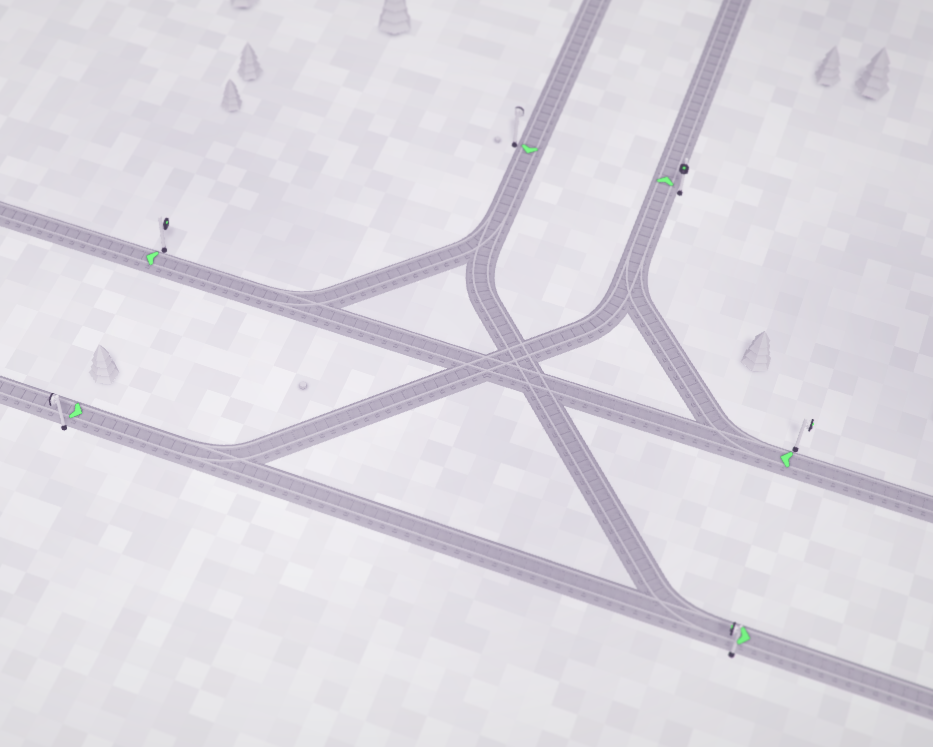
Right now it is inefficient and prone to jamming. We can fix that.
First, identify which parts are only merges or splits, which is any part that has three branches. These can be ignored for now.
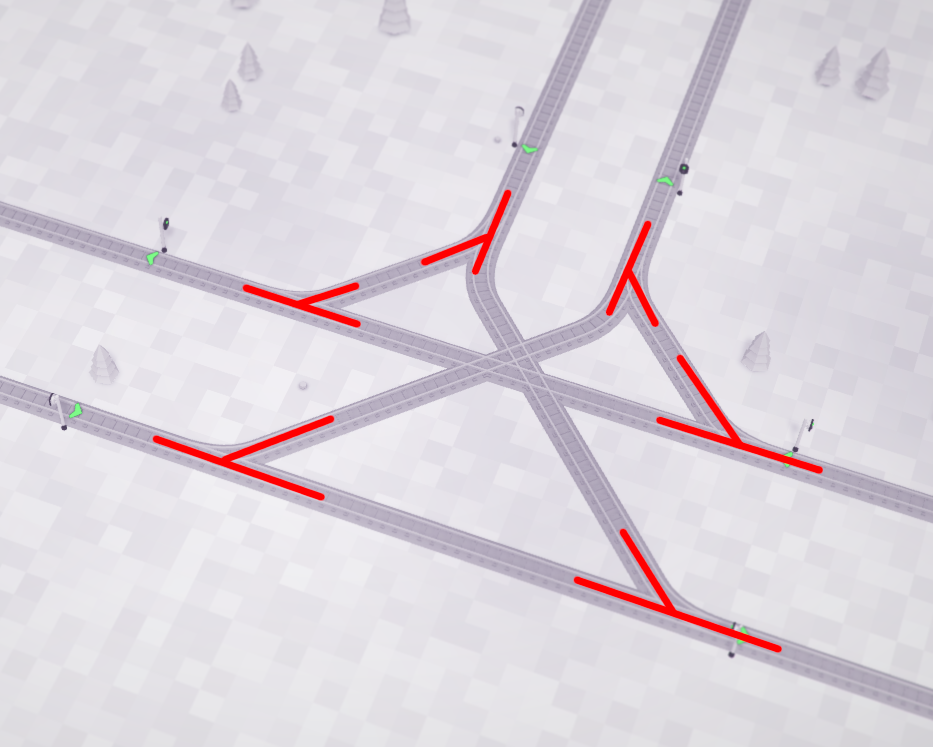
Now it is clear we have one *actual* intersection in the middle. All of the next signals will serve this part.
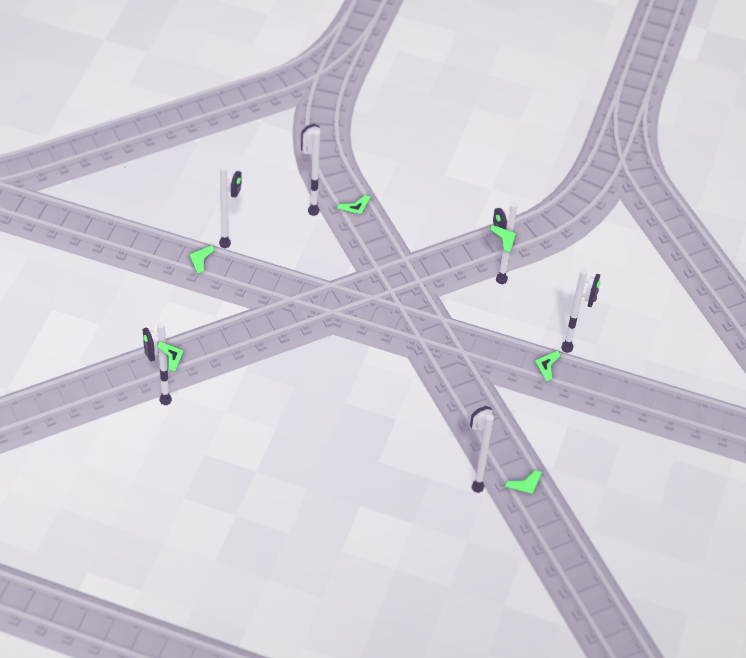
All rails going into it should have a pre-signal on them.
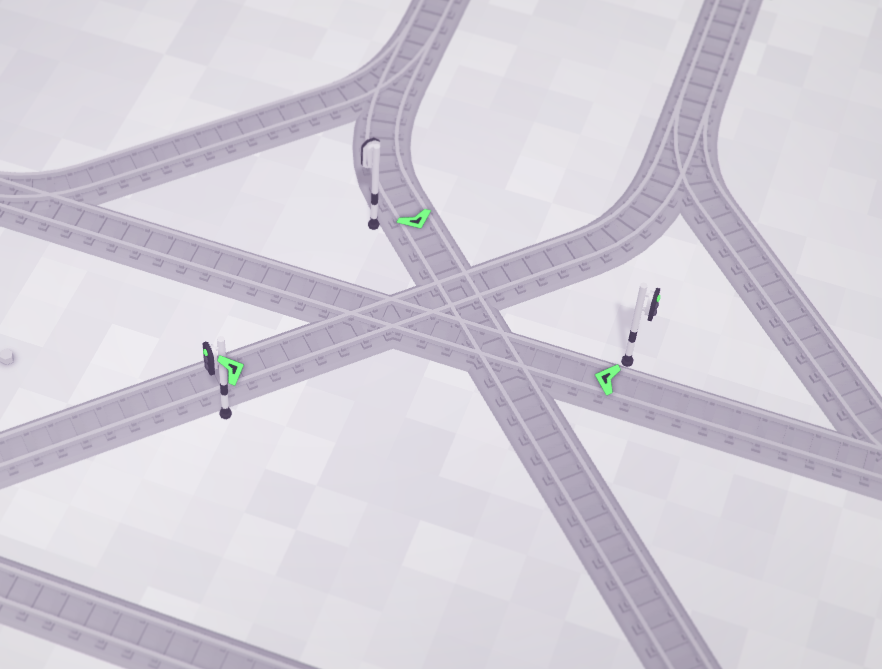
All rails coming out should have a normal signal.
Now we must make sure that after this block in all directions, there is enough space to fit an entire train before the next signal. The arrows denote these exits.
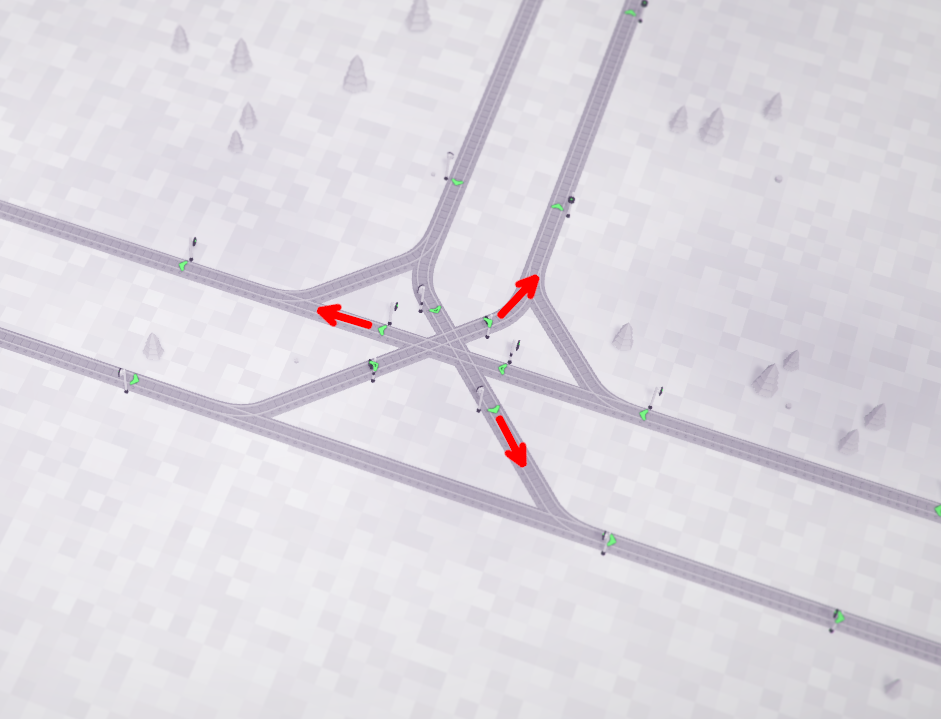
How much space you need depends on how long your trains are, so this one may be fine as-is if the trains using it are all short. But usually, you’ll need to delete and/or move the signals so there is more room. This ensures trains that enter the intersection will always be able to leave the intersection.
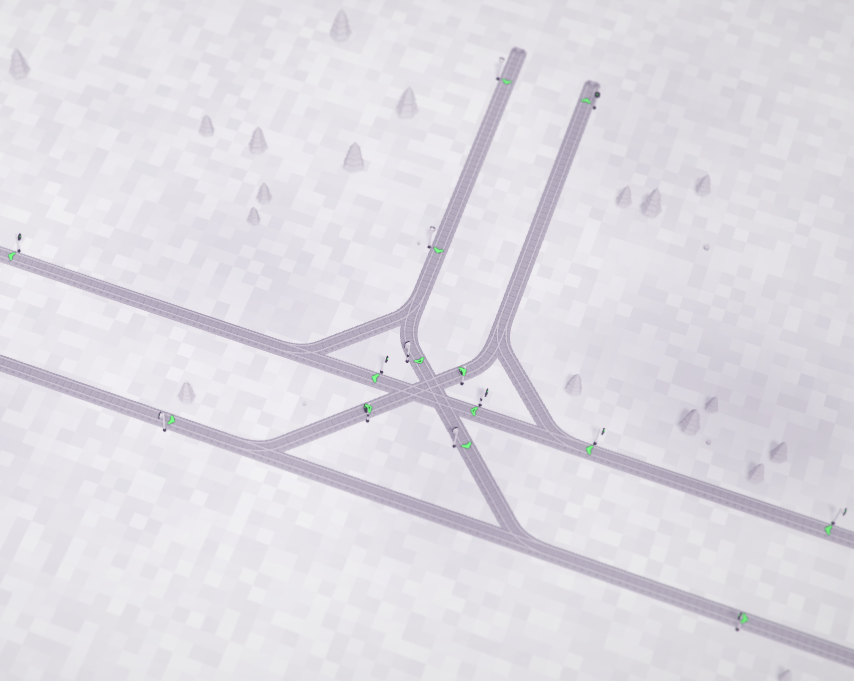
The signals leading into the intersection can be as close as they like. **At this point, the intersection is jam-free.** As long as trains aren’t getting backed up from down the line, no trains will be stuck blocking other trains.
The last step is to make sure all branches have been divided, in order to improve efficiency. Most of them were dealt with when we added signals to the middle intersection, but some are still left out. This is the same principe as for basic one-way merges and splits.
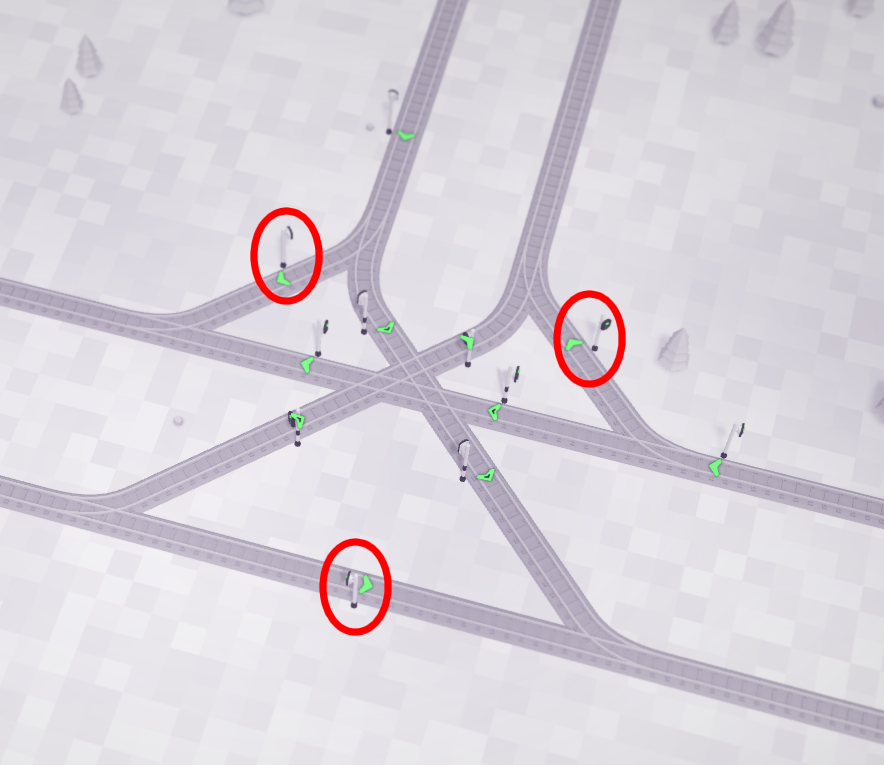
The goal here is to ensure trains do not block more than what they need to. If these signals are on a particularly long piece of track, you can place one next to each merge/split, or even have more than two.
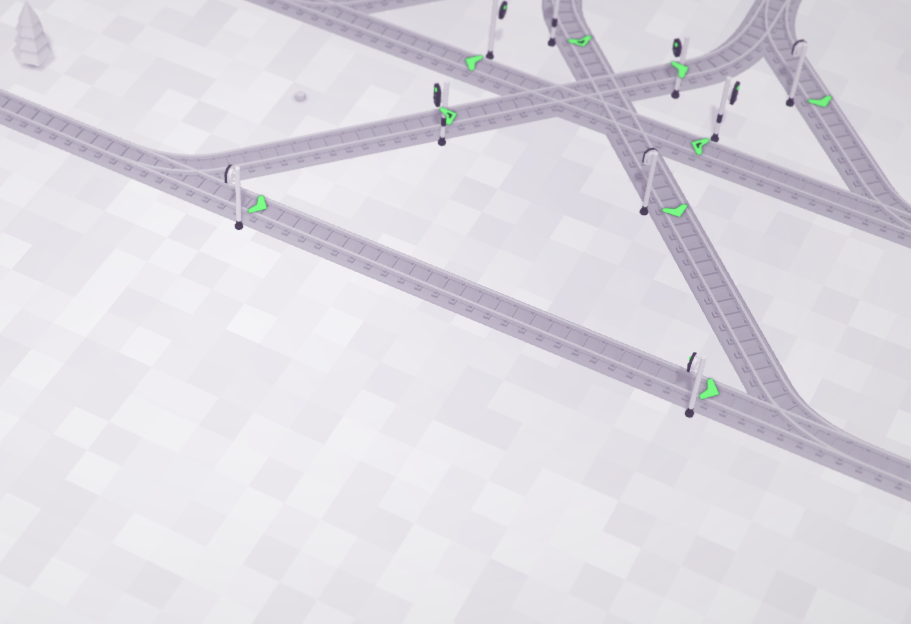
Complex intersections
Complex intersections are multiple simple intersections that are too close together to fit an entire train between them.
Lets say we add a rail to the last intersection going out this way.
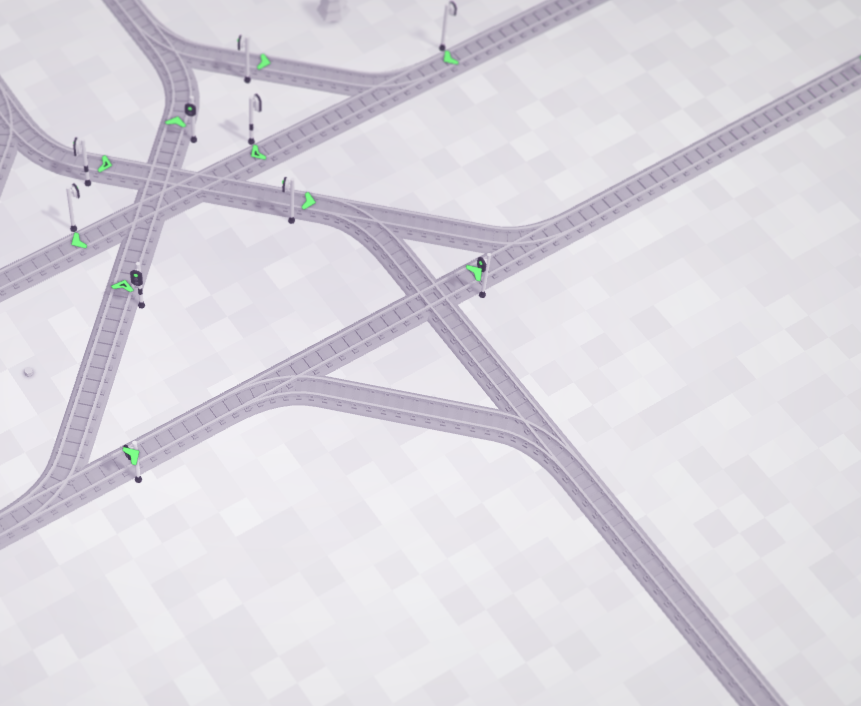
Using the same rules as before, you might end up with something like this:
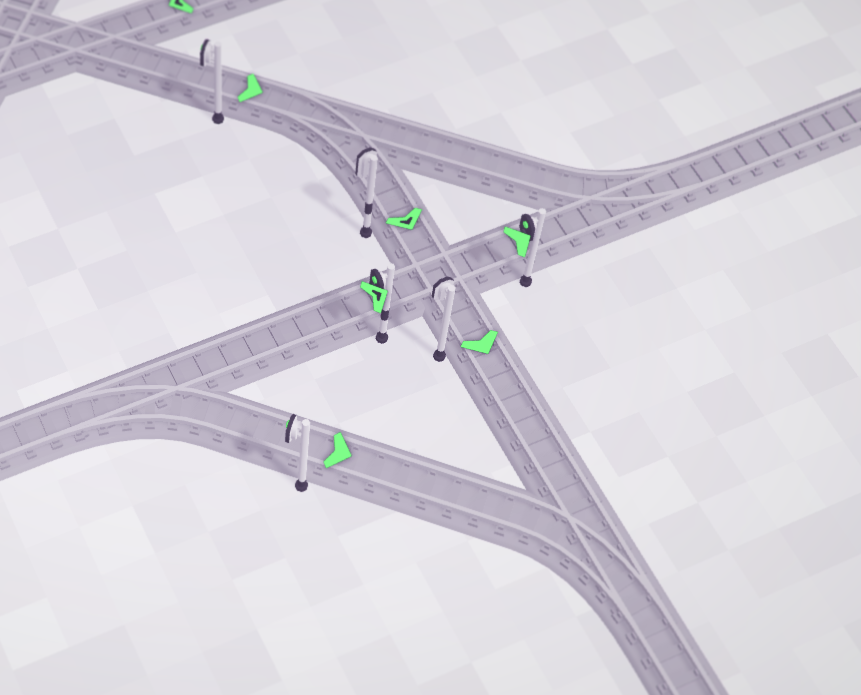
But now we’ve broken another rule: exits must have enough space to fit a whole train. So instead, we need to chain pre-signals.
Lets replace the signal directly between the intersections with a pre-signal.
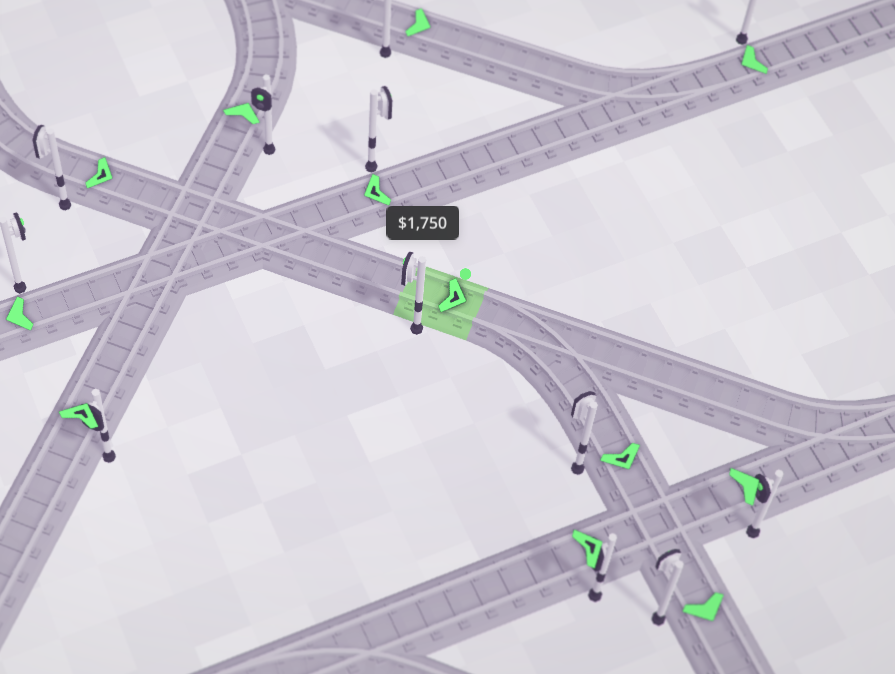
There is a problem still. A train waiting at the circled signal that wants to turn left has to wait for the entire red part to be free.
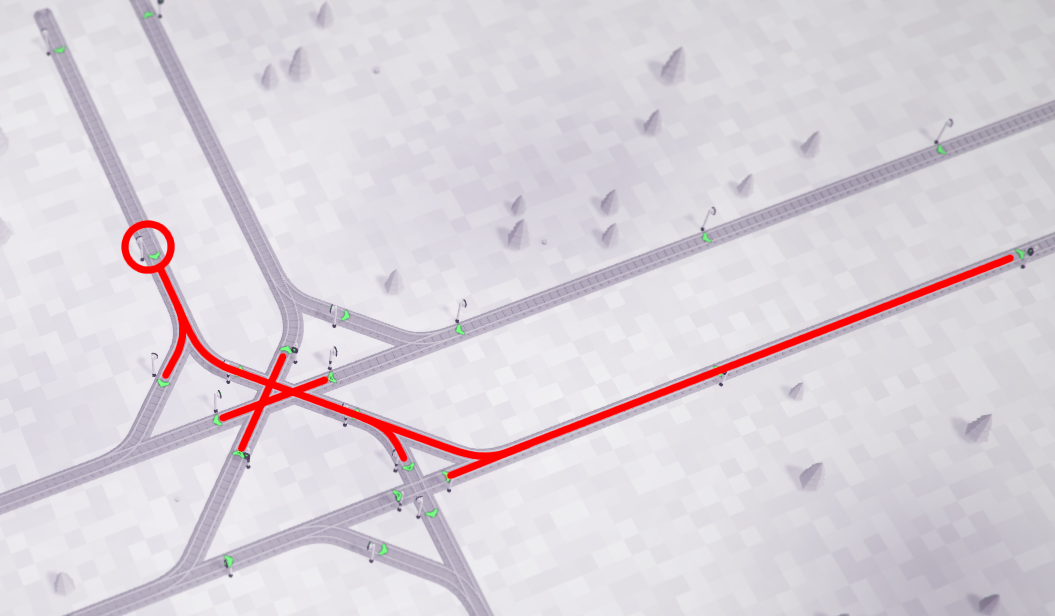
That’s one block too many. Usually we’d want to place a normal signal on the small piece next to the second intersection, but there isn’t enough room. We need a normal signal to end the chained pre-signals, so we’ll put it after the merge…
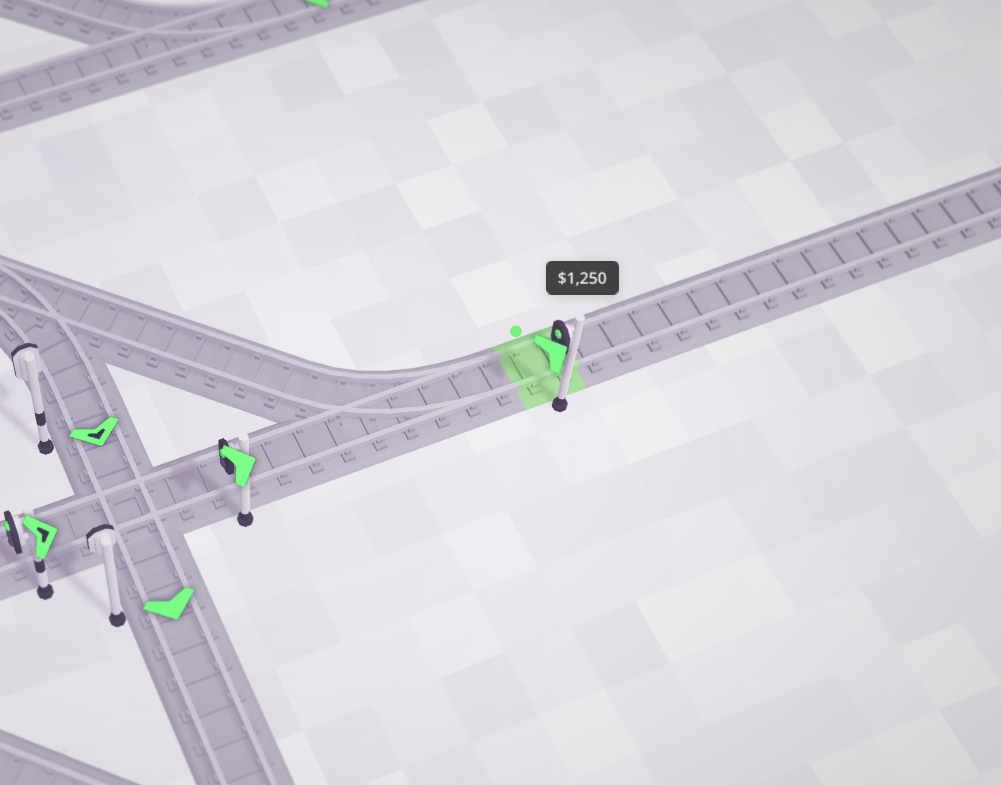
… and change what used to be an exit to a pre-signal.
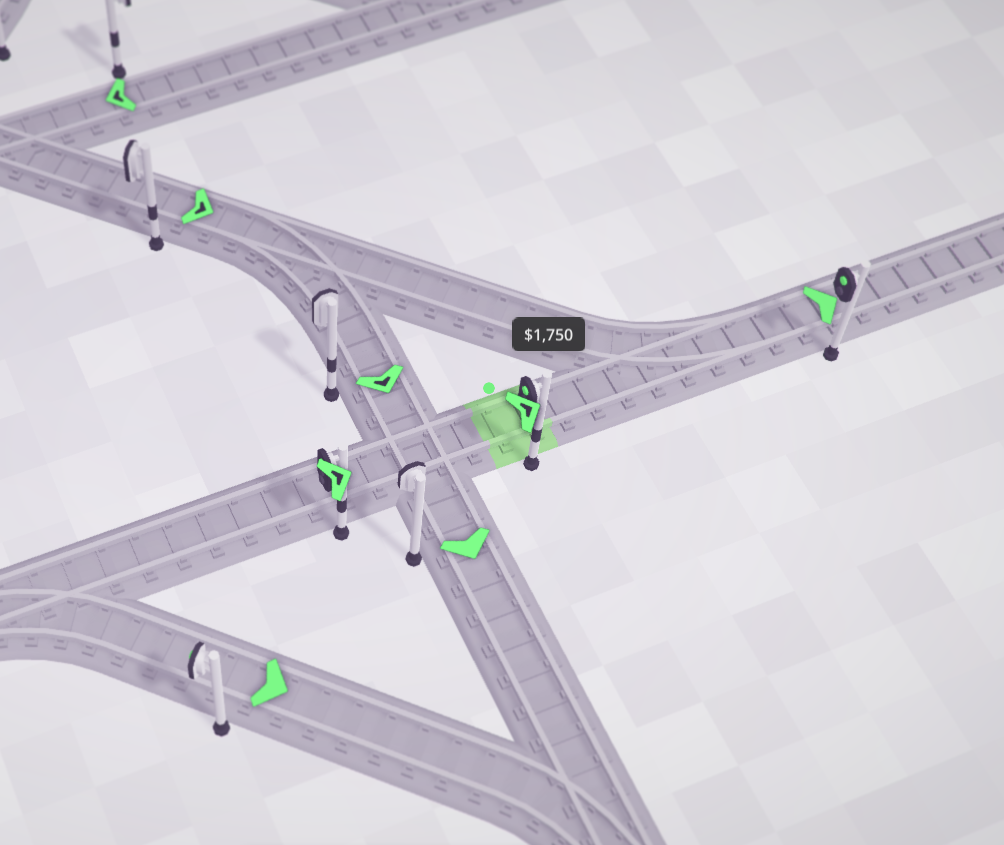
Again, make sure there is enough space after this new exit to fit an entire train.
Roundabouts
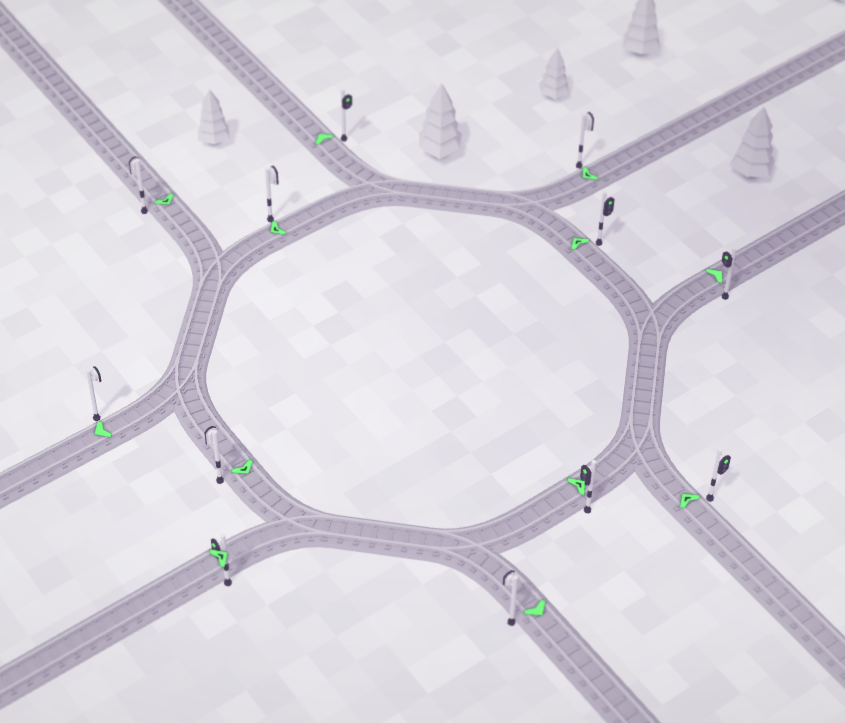
Roundabouts are the least efficient intersections in everything but price. You can follow mostly the same rules, except that since there is a circle, you cannot treat it as a sequence of merges and splits.
Any signals inside the circle should be pre-signals. Any signals leading into the circle should be pre-signals, and any exiting the circle should be normal signals. It is still important to have enough space after the exits to fit an entire train.
Non-blocking intersections
In VT we have three dimensions, so it’s possible to build intersections that are non-blocking. This means we need no pre-signals at all. These are more efficient than level intersections.
Here is one called the trumpet interchange:
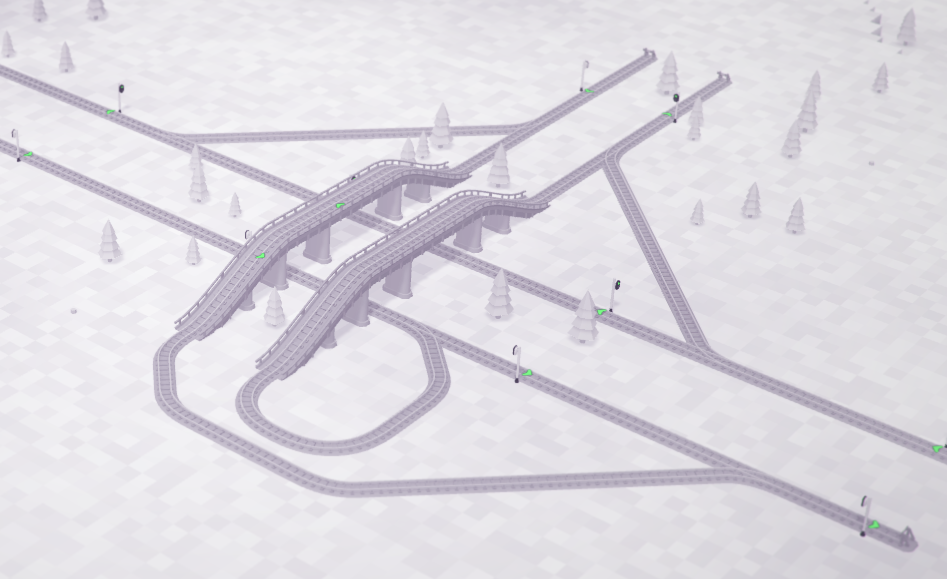
No sane application of signals will cause this junction to jam. After following the merge/split rules:
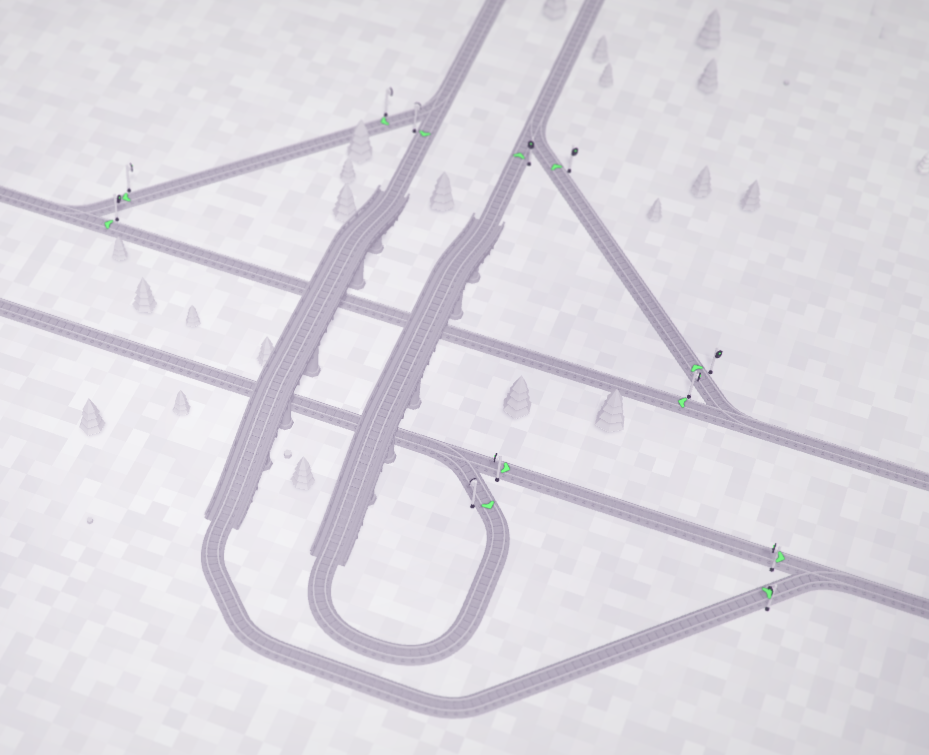
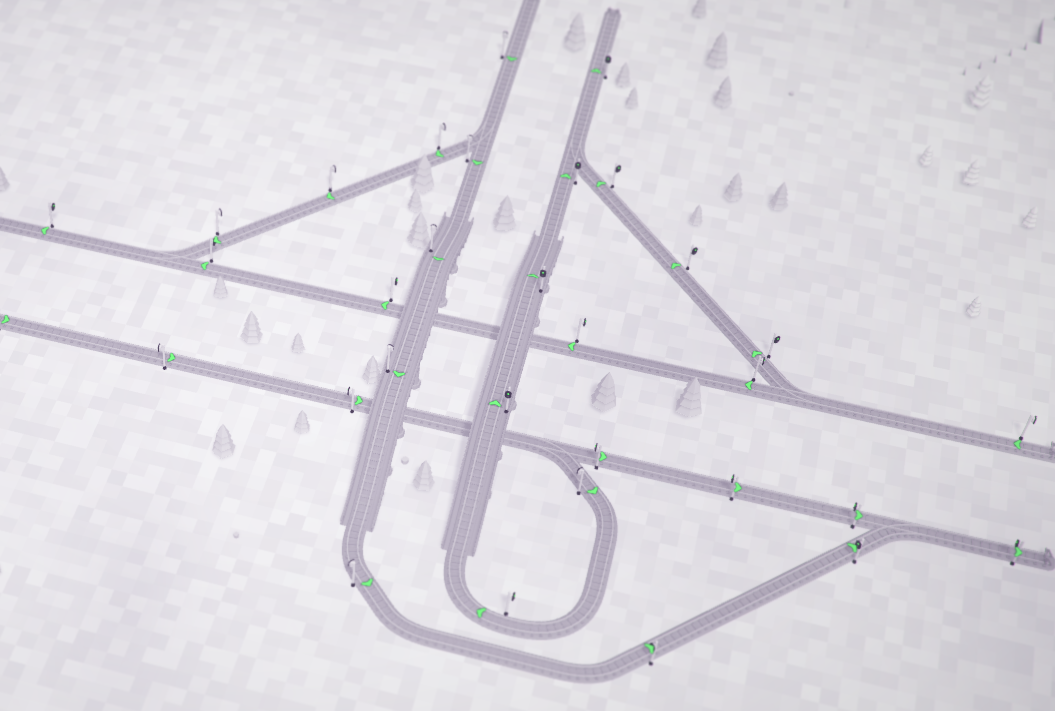
We have sufficiently divided all branches. Now all that’s left are normal one-way parts. These can be signalled as outlined above, but remember that trains will be going more slowly around curves, up hills, and when waiting for other trains, so you may want to put signals closer together.
One-way stations
The entrance to a one-way station will have a pre-signal, followed by a split, followed by normal signals at the edge of the station. The pre-signal holds waiting trains before the split so that it can decide after a train leaves, instead of on arrival, which platform to go to.
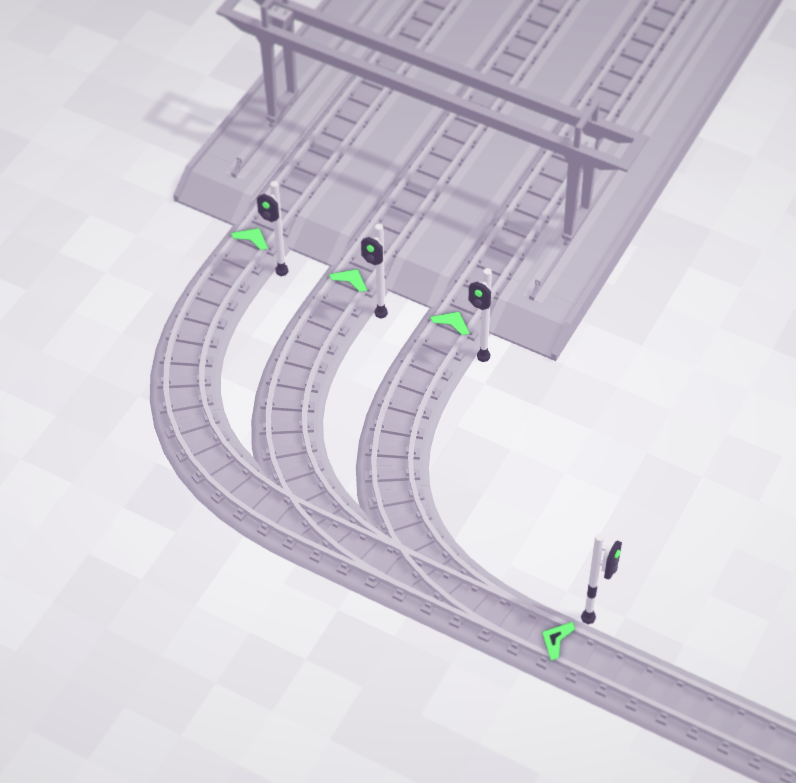
The exit is similar, but without the pre-signal.
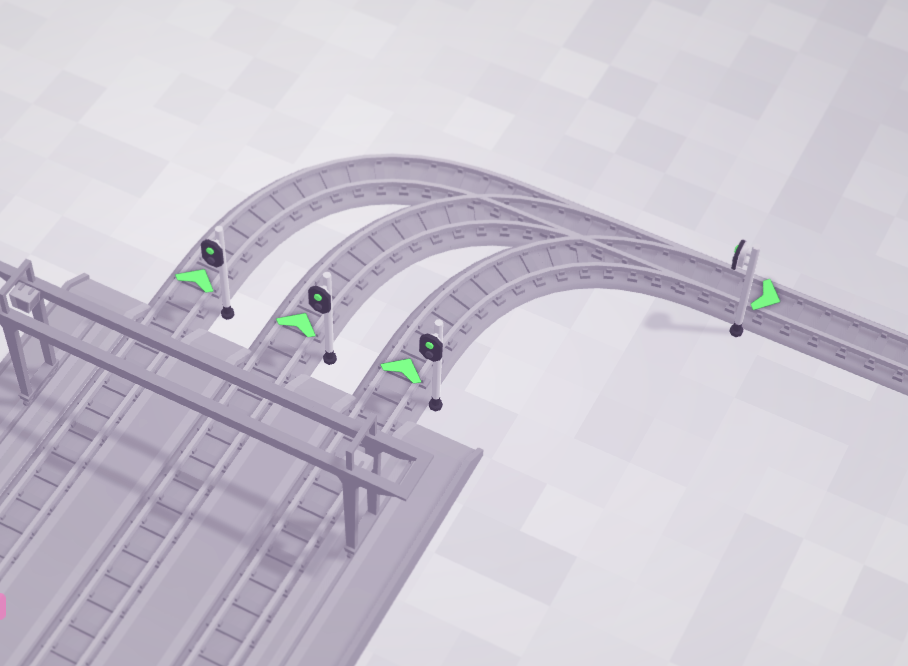
Remember that this is where trains will be traveling the slowest and most likely to be waiting, so you will want your normal signals close together. You also want the beginning split and end merge of your station to be as small as possible so that trains don’t spend much time in them.
Terminus stations
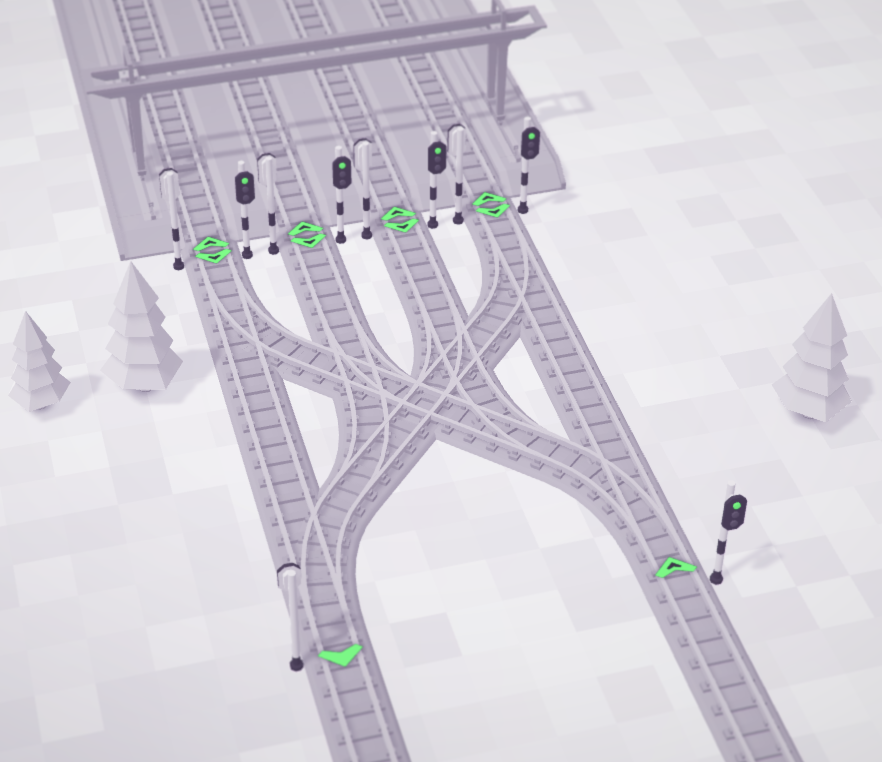
A terminus station is entered and exited from the same side. While less efficient than one-way stations, these are cheaper and take less space.
They are essentially a normal one-way station combined with an intersection. Therefore, there is a pre-signal at all the entrances (the one connecting to the main line and in this case, 4 coming from the station) and a normal signal at the exit. The signals leading into the station can either be pre-signals or normal signals without any functional difference since, as with two-way rails, it is the last signal before a dead end.
Avoiding other jams
There is one more thing to watch out for. If you look closely at the trumpet, you will notice that on every rail, there is a split before a merge. If you have a merge before a split, like below, you can end up lowering throughput.
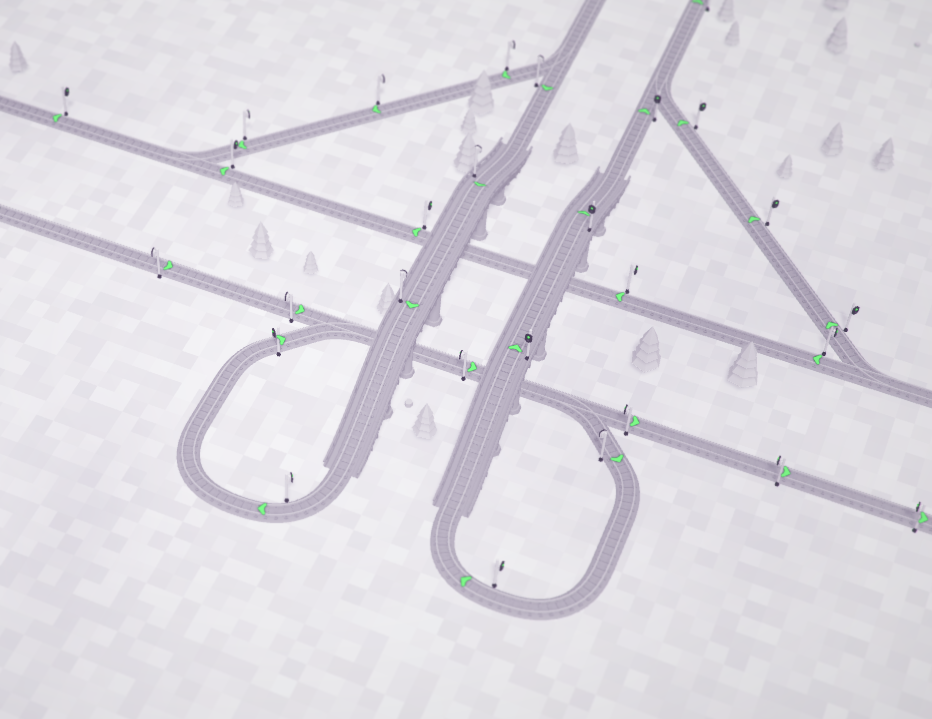
However, if you do this with a station, where trains are turning around, you can cause a jam.
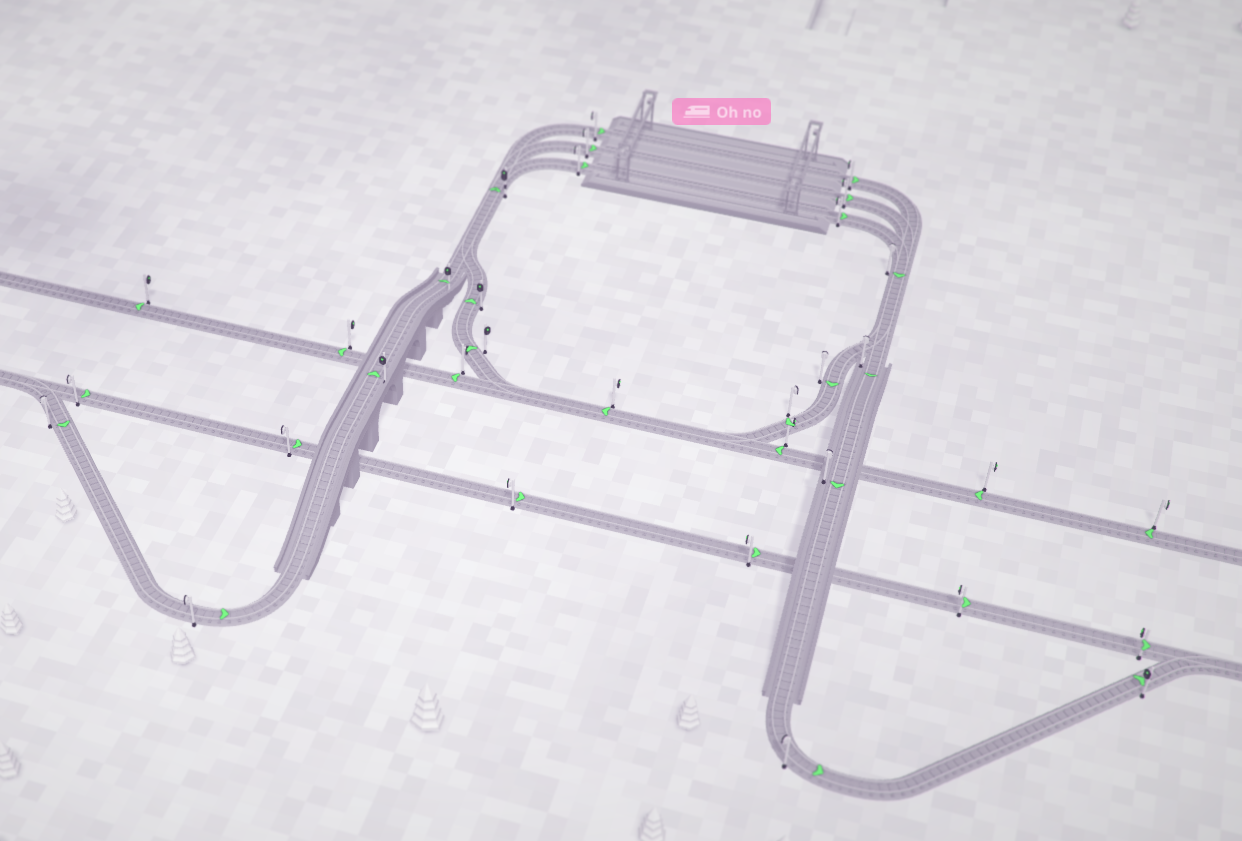
Here is the system with a jam:
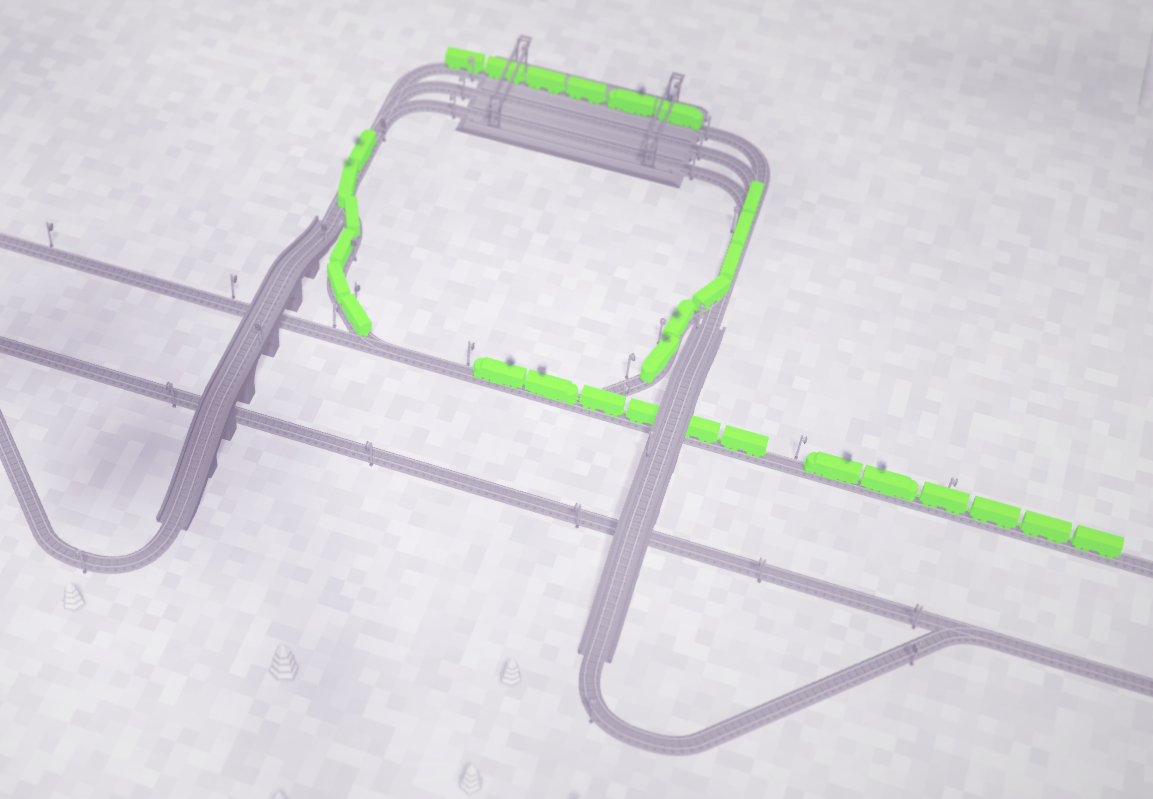
The train leaving can’t enter the rail because the train arriving is blocking it. Here is the station modified so that it merges after it splits. Note that there is a signal in between the split and the merge.
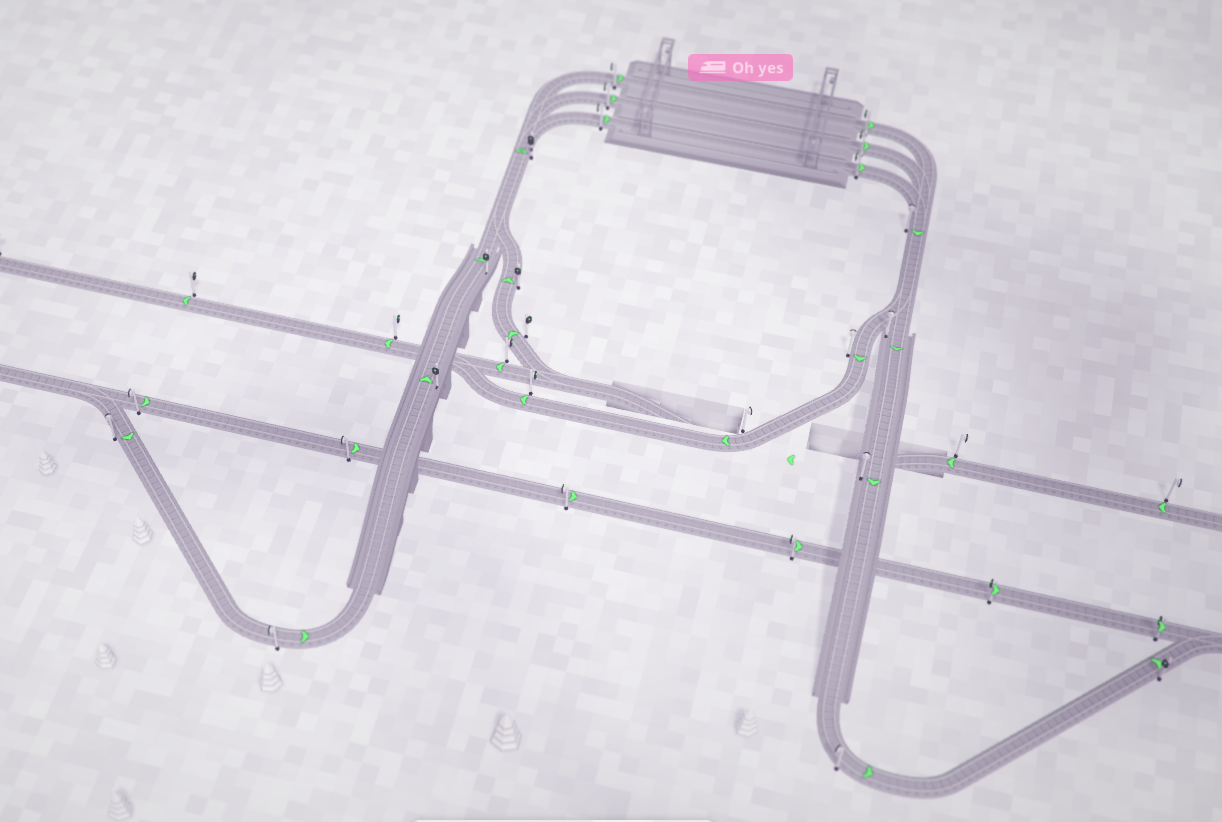
Conclusion
That’s pretty much it! This is not the only way to place signals, but it should help if your trains are often jammed.
While the level intersections and two-way tracks are useful for saving money, after a certain point I will make all my rails with non-blocking intersections and one-way max-length stations. The endgame requires lots of resources that demand an efficient and large rail system. I also try to keep either long straight sections or empty branches available so I can always expand the system when I open a new region. It’s often a good idea to lay down a 4-way intersection even when you only need 3 or even 2 of the directions right away.

