If you’d rather have hints than “go exactly here” directions, so you still get that “ah-ha!” moment satisfaction, this guide is for you.
Introduction
If you’d rather have hints than “go exactly here” directions, so you still get that “ah-ha!” moment satisfaction, this guide is for you.
Some people enjoy the fun of finding the secret, but they’re stuck on where to find some of them, so they’d like some hints and clues on where to look, without telling them exactly where to look. That spoils all the fun.
I recommend that before you use this guide, you search the levels for nooks and crannies on your own once, maybe twice. You’ll find a good percentage of them on your own. Feel free to come back here for the ones you can’t seem to find on your own.
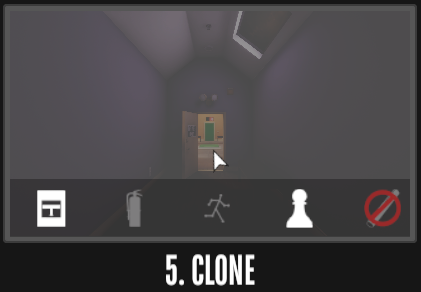
In order, the symbols are: fire alarms, extinguishers, constellations, hidden chess pieces, and blueprints. Other easter eggs do not show up here, making them hard to track.
If the symbol is white, you’ve 100%ed this level for that category. If the symbol is greyed out (like this extinguisher and constellation are), then you have at least one you still need to find. If the symbol is crossed out, then that level doesn’t have any to find. If the symbol isn’t there at all, that means you’ve never found a secret of that type in the entire game yet.
Fire alarms & extinguishers
Once you’ve clicked on a fire alarm, the handle will go down and stay down. Even if you reset from your checkpoint or come back to the level another day, it’ll stay down. This is handy to keep track of which ones you’ve already pulled. These alarms don’t set anything off, they appear to be broken in-universe… but if you pull every alarm in the game, you’ll get an achievement!
Fire extinguishers are mounted on the walls throughout the game, also at roughly light switch-level. Clicking on them once makes them shoot a puff of white chemicals. Clicking on them four times will empty the extinguisher completely, signaled with a wheezing sound on the final click. If you completely empty every fire extinguisher in the game, you’ll get an achievement. Make sure to click on them four times in a row.
Unlike fire alarms, there’s no visual indicator of if you’ve emptied an extinguisher already, which makes replaying levels a little trickier. Clicking on an extinguisher that you’ve already emptied recently in that play session will do nothing. Clicking on an extinguisher that you’ve already emptied during a previous game-load will result in that same wheezing sound you hear when you completely emptied it earlier.
Both of these objects are not exactly hidden, they’re typically mounted on walls in plain sight, though they can be easily missed if you don’t look at all walls over every room. For example, you’ll often find one if you go through a door and look toward the doorway you just came through.
I recommend that before you use this portion of the guide, you search the levels for secrets on your own once, maybe twice. While you’re searching for the harder secrets, you’re likely to run into a lot of the fire alarms and extinguishers. Feel free to come back here for the ones you can’t seem to find on your own.
For my fire alarms & extinguishers hints, I’ll be telling you how many of each you can find in each section. This will help you make sure you’re not missing any, and you’ll know when you can move on to the next section.
Level 1’s fire stuff
Level 2’s fire stuff
After Reception, there’s a series of pink hallways. There are 5 alarms and 3 extinguishers in that section. If you reach the circle looparound room, you’ve gone outside what I’m deeming that section.
After the hallways section, there’s a room that loops around and around in a square with several green exit signs. There are 1 alarm and 1 extinguisher in that loop. There’s also 1 extinguisher immediately outside the loop.
The section of the level after you climb the cardboard boxes is what I’ll call the checkerboard cube rooms. There are 4 alarms and 3 extinguishers in the checkerboard cube rooms.
After the checkerboard cube rooms, there’s a large room with a skewed door. It has 1 alarm and 1 extinguisher.
In the warehouse with the giant king, there’s 1 alarm and 1 extinguisher.
You’re close to the end. After the scaffolding (but before the elevator that ends the level), there’s 4 alarms and 3 extinguishers.
Level 3’s fire stuff
After Reception go past the green pipe room. Here there’s a red room, and a red-and-white room. These rooms have 2 alarms and 1 extinguisher.
The blue hallway has 1 alarm and 1 extinguisher. Do those before you fall in the hole.
Between the hole you fall into and tower of pallets, you’ll find 2 alarms and 3 extinguishers in that whole section.
There are none in the room with the tower of pallets, which is good because it’s quite dark.
You’re almost done now. Between the tower of pallets and the ending elevator, find 3 alarms and 5 extinguishers.
If you can’t find that last fire extinguisher in the final section there, have a look at my section for Level 3’s blueprints.
Level 4’s fire stuff
After Reception, you’ll find a giant hallway with 8 extinguishers.
Just before the room with the red pit you can fall in, there’s 1 extinguisher.
After you walk on the scaffolding with tiny white lights, you’ll find 1 extinguisher.
Not long after the room with the knife shadow, you’ll find 1 extinguisher.
In the final elevator hallway, there’s 1 alarm and 1 extinguisher.
Level 5’s fire stuff
Pulling fire alarm handles in this level will duplicate the handle over and over. You only have to do it once for it to count, don’t worry about maxing them out or anything, haha.
Between Reception and the cloning-clock room, you make giant, there are 5 alarms and 5 extinguishers.
Inside the cloning-clock room itself, there are 2 alarms and 2 extinguishers.
Between the cloning-clock room and the big fan room, there are 2 alarms and 1 extinguisher.
In the big fan room, there are 3 alarms and 1 extinguisher.
Between the big fan room and the cloudy wall, there are 1 alarm and 3 extinguishers. (I’m counting the extinguisher that’s right next to the cloudy wall.)
You’re almost done now. After the cloudy wall there 3 alarms and 3 extinguishers.
Level 6’s fire stuff
Reception has 1 alarm and 1 extinguisher.
After you enter the first dollhouse, but before you reach the TV, find 3 alarms and 3 extinguishers.
After the TV but before you enter the bouncy castle, find 1 alarm and 1 extinguisher.
After you enter the bouncy castle, there are 2 alarms and 3 extinguishers. Get those before you enter the elevator.
Level 7’s fire stuff
Reception has 1 alarm and 1 extinguisher.
In the very large room with a ringing alarm clock, there’s 1 extinguisher.
After you jump into the painting but before you reach the sideways rooms, find 5 alarms and 3 extinguishers.
While you’re exploring sideways rooms, but before you break the floor and fall, find 2 alarms and 4 extinguishers. One of the extinguishers is in a side-hallway that is hard to climb to. (If that isn’t enough hint, I reference it in my section on level 7’s chess pieces.)
Before you grab the die, find 2 alarms and 4 extinguishers.
After the white bedroom, the final stretch has 3 alarms and 2 extinguishers.
Level 8’s fire stuff
Constellations
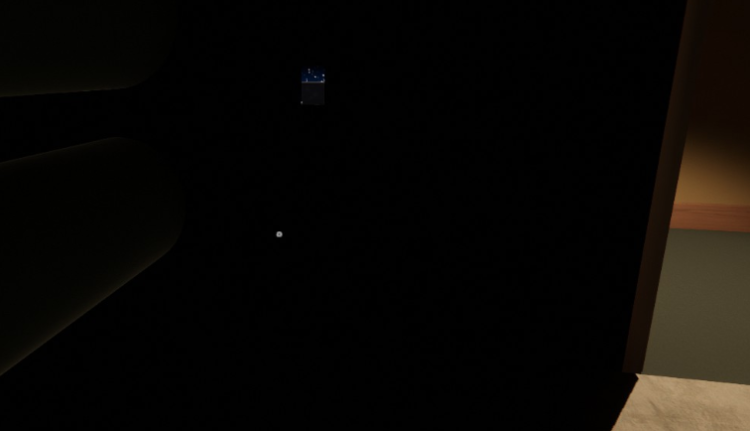 The hard part is always finding the entrance to the star room itself.
To find a star room, explore dark areas of the level, trying to find a doorway peeking through the darkness, in the far distance. You will probably have to look at it from just the right angle to see it, because the star rooms are separated from the main map by a long black tunnel.
 Once inside the star room, look up at the stars and try to find patterns in the stars. If you move around and look in the right place, you should be able to find areas where many stars cluster together in thick groups. Keep adjusting the place you are standing until those stars form solid lines. Once you start to get some lines forming, keep adjusting where you’re standing. Remember, Superliminal is all about what perspective you’re looking at things from.
Level 2’s star room
Shortly after you use a large exit sign, you’ll find a very tall, narrow wall. Search this room.
Level 3’s star room
After you leave Reception, but before you enter the museum. No objects are necessary.
Level 4’s star room
If you leave the Reception room, you’ve already gone too far.
Level 5’s star room
There’s a goofy vending machine here that spits out other vending machines. Perfect for a level about cloning! But don’t let it distract you from a secret hiding nearby.
Level 6’s star room
Search the relaxation room.
Level 7’s star room
In level 7 you’re not looking for a dark hallway at all, but a passage hidden among all the white.
Too vague a hint? It’s in the same room as one of the beds in level 7.
Level 8’s star room
In level 8 you’re not looking for a dark hallway at all, but a passage hidden among all the white.
Too vague a hint? After you exit a giant water cooler, search this area.
Still too vague? That’s understandable; it’s a really big area. I’ll narrow it down: After leaving the water cooler and walking between the traffic cones, turn right and start searching that region.
Chess pieces
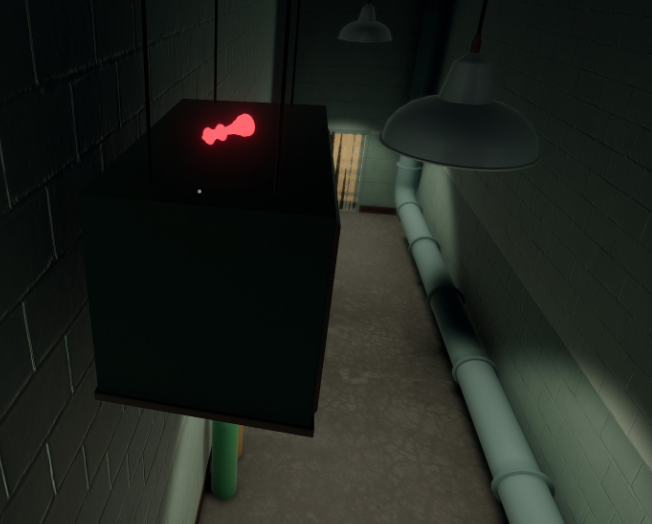 These chess pieces are always small, bright red or bright blue, and hidden in a high location. Their colour helps you spot them in the dark, but only if you’re up high enough and nothing is blocking your view.
When you click on one, it will glow brightly and vanish. That means you collected it!
To find these little guys, the trick is to keep an eye out for high-up parts of the level that something small could feasibly be resting on top of. The trick then is to find a way to climb up there. You’ll probably need an object or two that you can grow big and climb on top of.
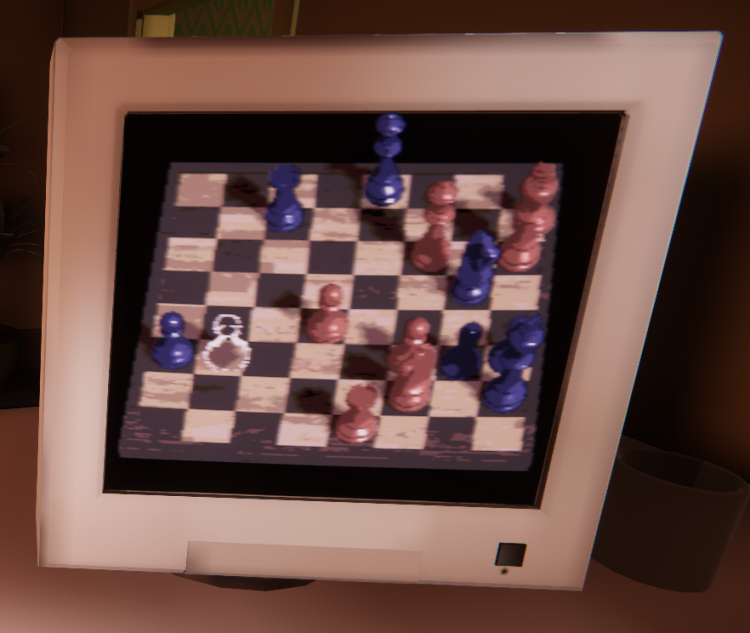 If you want to track your progress, go to the Reception room in most of the levels of Superliminal. The computer will show this chess board screen.
The white outlines are chess pieces you still have left to find. For example, in this screenshot I have just one left to find.
This means there’s 15 to find in total. Every level has one to three chess pieces, except for level 9.
Level 1’s chess piece
You’ll need to make a wooden board into a big ramp.
Level 2’s chess pieces
Chess piece 1:
Shortly after you use a large exit sign, you’ll find a very tall, narrow wall.
Chess piece 2:
In the room with a giant king, climb up on top of furniture with the help of the checkered cube.
Level 3’s chess pieces
Chess piece 1:
In the room with the die that splits in half. However, I tried climbing over that wall, I can tell you that wasn’t it.
Chess piece 2:
Take that vent grill with you, you might need it. Keep it with you until you find a room with a vending machine.
Level 4’s chess pieces
Chess piece 1:
While carrying a red light, climb the tower of cardboard.
Chess piece 2:
After collecting the one and only blueprint in this level, see if you can take your exploring in that area even further.
Level 5’s chess pieces
Chess piece 1:
Once you have the alarm clock in hand, try backtracking. Cloned objects can be stacked.
Chess piece 2:
After the fan room, you’ll need to do some climbing. There’s no objects to help you climb this time, so you’ll need to find a different way to parkour.
Level 6’s chess piece
Remember that window you have to walk through? Make sure the window is as small as possible (but still big enough to walk through of course). I say that because being big in the next room will help you spot the secret you need.
Level 7’s chess pieces
Chess piece 1:
Once the exit door falls from its hinges, try looking for alternate exits.
(You will actually need to find this hidden room if you want all the fire extinguishers in level 7.)
Chess piece 2:
After you use the knight to pass through a door, make sure to bring the knight with you. You can use the knight to help you in the next room too.
Level 8’s chess pieces
Chess piece 1:
After you’ve gone through the door once to test it out, put the miniature SomnaSculpt clinic back where you found it. Now go through that door again, and explore the miniature world.
Still can’t find it? Find a way to enter the bistro.
Is the door closed for you? Yeah, I had that problem at first too. Come back here after you’re seen the game’s ending.
Are you inside the bistro and can’t find the chess piece? Well, it’s a blue chess piece hiding among lots of its blue friends.
Chess piece 2:
After you’ve gone through the door once to test it out, put the miniature SomnaSculpt clinic down near the vending machine. Now go through that door again, and explore the miniature world.
Chess piece 3:
When you find a giant chess board, take the king with you and go back through the door you came from. Using this king, you can manage to climb up on top of the big white chunky walls.
Walk along the top of these chunky white walls, using your king to help you climb around. Explore until you find one of two red marks that look out of place among all the white. What you need to do is find both red marks, and stand in a position that aligns them. Much like you did for the checkered cubes or the giant green king in the early levels. The two red marks are far apart. If you find one on a water cooler and can’t find the second one, try to think about which way the red mark on the cooler is facing.
Blueprints
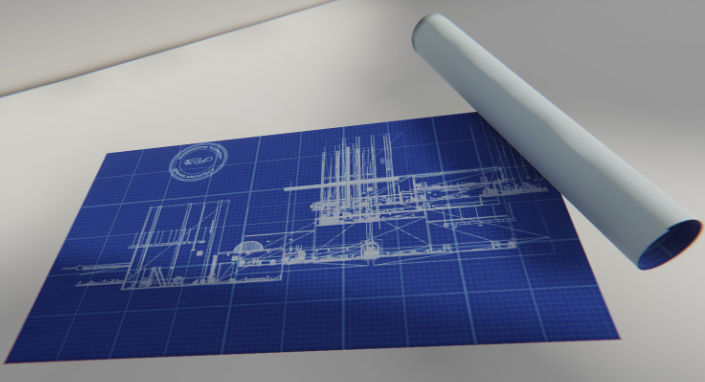 Levels in Superliminal have between one to three blueprints for you to find, except for levels 5 and 9 which have zero. When you find one, click on it to draw on it.
They can be found on:
floors,
walls,
backs of walls,
rooftops of structures you can climb atop.
Level 1’s blueprint
You know that part at the end of level 1 where you fall into a pit? That pit is avoidable if you have a big enough object with you.
Level 2’s blueprints
Blueprint 1:
Found shortly after you use a large exit sign.
Blueprint 2:
You’ve already figured out how to reach up and touch the moon, but maybe you can do even more?
Level 3’s blueprints
Blueprint 1:
How high can you climb in that amazing extending dice room?
Blueprint 2:
Before you do through the die with a door inside it, make sure to take an object with you, because you’ll need to do some climbing near the end of level 3.
You’ll need to get to this hidden area if you want all the fire extinguishers, too.
Level 4’s blueprint
After you turn on the generator, have a peek into the kitchen for some food you can grab. Once you have that, go back one room and explore.
Level 6’s blueprints
Blueprint 1:
Remember that window you have to walk through? Make sure the window is as small as possible (but still big enough to walk through of course). I say that because being big in the next room will help you spot the secret you need.
Blueprint 2:
When you reach the bouncy castle, backtrack with it. It’s useful not just as a portal, but for climbing on top of other things.
Blueprint 3:
When climbing out of the keyhole, bring both doorways with you. Remember that clever use of different-sized doors can increase your body’s size. I say that because being big in the next room will help you spot the secret you need.
Level 7’s blueprints
Blueprint 1:
Instead of jumping in the pool, jump the opposite direction instead.
Blueprint 2:
(After the section with the knight) Resist the urge to click on the big die. Explore first.
Blueprint 3:
They paved paradise and put up a parking lot. Can you find a secret in this room, or more aptly, outside it?
Level 8’s blueprints
Blueprint 1:
Your first discovery of whitespace. Can you find a secret in this room, or more aptly, outside it?
Blueprint 2:
In a hallway of white, take a peek behind things.
Blueprint 3:
After you exit a giant water cooler, take a peek behind it.
Eggs
Also, you can pick them up, carry them, resize them, and even stand on them. So in some parts of the game (namely levels 7 and 8), an easter egg might be the only object in that area that you can use to climb up and find other secret things in the level.
At the moment no one is sure how many eggs there are total. There’s at least eight. There might be ten, or maybe even more. I’ve given clues for the eight that are currently discovered.
Level 2’s eggs
Egg 1:
When you reach the first grey exit door that you can pick up, back up just a bit and look straight up. See that gap up above, wider in this T-section than the rest of the ceiling gaps?
Egg 2:
When in the room with the grabbable exit signs, you’re going to need to use a very large exit sign to climb very, very high.
Level 3’s egg
After you exit Reception, explore this dark room thoroughly.
Level 5’s egg
There’s a goofy vending machine here that spits out other vending machines. Perfect for a level about cloning! But don’t let it distract you from a secret hiding nearby. Take two mini-vending machines with you and continue forward to the next green hallway. It’s time to climb.
Level 7’s eggs
Egg 1:
A hard-to-reach doorway is located in the big room with the curved staircase. While you’re falling from above into this room, there is a split-second opportunity to grab something in that doorway, IF you’re looking at it from straight-on. This is exceedingly difficult to line up and to time: videos I’ve watched make it look like a one-frame trick.
Egg 2:
Reach the room with the pool, then pause and click Reset to Checkpoint. Pick up the die and backtrack.
Egg 3:
After you use the knight, you need to fall through a doorway in the floor. While falling, try to land on one of the pipes.
Level 8’s egg
When you reach the white apartment buildings, look for a gap you can squeeze through. Keep exploring after that.
Other secrets
Writing on the wall:
When you reach the room with a distorted door in level 2, you can find two hidden messages on the walls.
Gold chess piece:
In a dark and cramped area in level 3, you can find a golden bishop. Taking this into the next room reveals that it has low gravity turned on; how odd!
Dogs (new to update patch?):
After the nightmare turns more cheerful, try backtracking.
Happy:
In level 5, after the alarm-clock cloning room, go through the hallway as normal. Something funny happens to your reticle for a little bit…
Banana:
In level 5, in the room with the wide Somnasculpt Gallery sign you can clone, climb up as far as you can to find a hidden banana.
Radio recordings in the suites:
Here’s a couple secret recordings from Dr. Glenn Pierce you can find: After you exit your bedroom in Level 6, explore suites C and E. Suite C won’t be unlocked until you get all constellations, chess pieces, and blueprints.
Also, right beside Suite C you can see every blueprint in the game you’ve drawn so far.
TV nook:
In level 7 when you fall down into a room with a big red pawn, search this room to find a hidden TV.
Pointless egg boost:
After you get the last egg in level 7, bring it down with you into the room with the wide Somnasculpt Gallery sign. The egg can help you climb up this room and get where you couldn’t get before.
Music from the neighbours:
At the start of level 8, if you get really close to the wall with soundproofing on it, specifically the part of the wall that’s missing soundproofing… Listen! (I don’t know if you can do anything with this or if it’s an audio-only easter egg.)
Chess in the white apartment:
After you find the egg in level 8, you may be able to use it to climb the white apartment buildings. You can discover one of the apartment windows is transparent, and you can peek inside to see a full apartment, including a chess set on the table. The only way inside that apartment is this:
First you need all secret chess pieces. Go to Reception room, which you can find in the beginning of many of the levels. Go to the computer. You’re now within the same apartment building that you passed by during level 8.
Tiny letters on the white apartments:
After you get inside the white apartment (see above), bring the chess pieces outside and use them (and/or the egg if you want) to search every inch of those white apartment buildings that you can. You can use the egg to help you climb. Search the walls, the rooftops, the air conditioners. You can find a series of tiny letters printed on them. So far I’ve found 6 letters, but I’m told there’s 8. I’m deadly curious what they spell!
Glowing king:
Before you cross the giant chess board in level 8, take the king back through the previous door with you. Bring it into level 8’s star room for a surprise.
Scout’s birthdate:
In the water cooler area of level 8, on one of the outside walls, you can find a large scrawled note.
Inception reference:
When you get to the giant light switch in level 8, search this area for a while. You can find a toy to play with.
Soda achievements
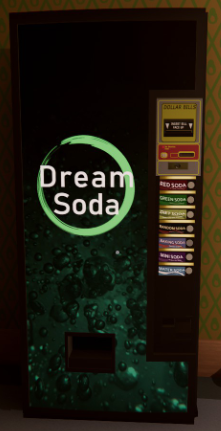
Sugar crash:
That “crash” might refer to it crashing into the floor.
Soda Connaisseur:
Make sure you try getting every flavour. You don’t have to do anything special with them — you can’t drink in this game, after all.
Environment Saved!:
Make sure to recycle.
Please Recycle:
That’s not the recycling bin…
Other achievements
Vaguely Activated Achievement:
Pick up any object, and freeze.
Please Use the Other Door:
In level 2, when you’re hanging out with the giant king, try to find a secret room.
(Note: this is necessary if you want to get all the fire alarms and extinguishers for level 2.)
When you do find it, you’ll find a special red die. Just for fun, I’ll tell you this die is unique. Try to roll it and get anything other than a 1. This doesn’t achieve anything, it’s just for fun. Talk about your weighted die!
Take Your Trash Elsewhere:
My hint for this one is that you have to make sure you’re using the correct shape of trash can. Yeah, there’s more than one kind of garbage recepticle in this game.
Why Are You Like This?:
Clone until you can’t clone no more.
Son of Man:
Drop an apple on your head. Found in level 5.
Polite Recognition:
First you need all constellations. Go to the main menu and click the fire exit symbol. It doesn’t take much exploration from there.
Kasparov:
Use the method I described in Other Secrets section to get to the white apartment’s chess board. You need to checkmate the red king, but only the red pawn and the blue rook are movable.
Speed Runner:
Beat the game in under an hour.
Superluminal:
Beat the game in under 30 minutes.
Thanks to Afterglow for his great guide, all credit to his effort. you can also read the original guide from Steam Community. enjoy the game.
Related Posts:
- Superliminal: Full Walkthrough (All Collectibles Guide)
- Superliminal: How to get Secret Room in Dollhouse
- Superliminal: How to Use the Somnasculpt Workshop
- Superliminal: All Easter Egg Locations

