This guide shows how to build a simple vehicle with the wheel tool. It shows how to turn any object into a car by attaching wheels. The wheels are motorized, have suspension and have basic control.
Step 1: Create a Chassis

- Equip an object to use as the body for your car.
- Press [Tab] (default) to open the inventory.
- Brows the categories for a suitable base object. The Props category can often be a good choice.
- Find an item in the center grid that looks promising. A large shipping container seems to work well for your first car.
- Double-click the item to equip it to the hotbar. Ensure that your current hotbar has room (use [F1]-[F12] (default) to change hotbars).
- Press [Tab] (default) to close the inventory.
- Place the object somewhere in the level as a frozen object.
- Switch to the item you placed in the hotbar. By default, you can use the numeric keys.
- Press [F] (default) to toggle frozen mode ON. If enabled, the snowflake icon at the right side of the screen should be highlighted blue. Freezing the object makes it easier to work with. The object will be unfrozen when you’re done.
- Position the hologram somewhere in front of you.
- When positioned the way you like, press [Left Click] (default) to place the object.
Step 2: Attach Wheels to Your Chassis
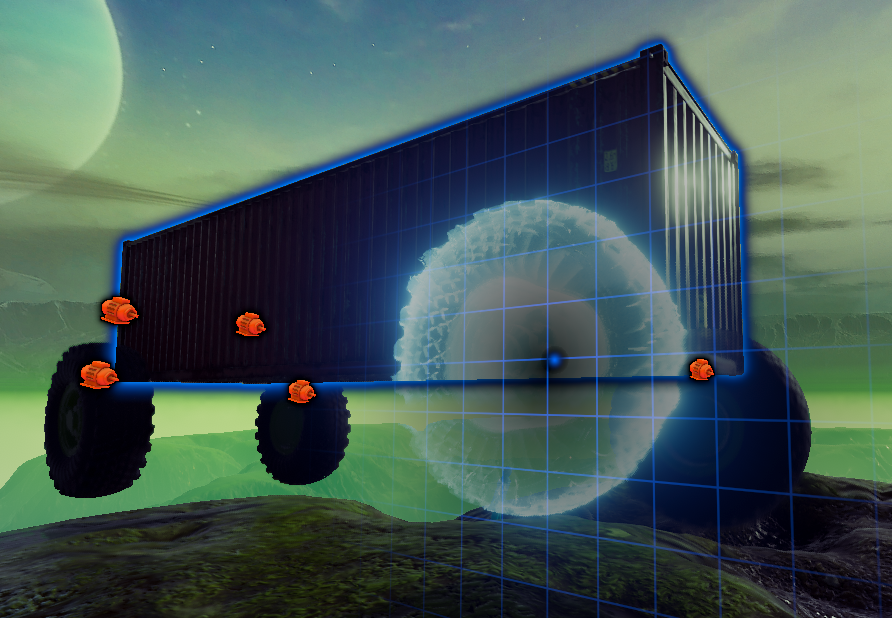
- Equip a wheel to attach to your car.
- Press [Tab] (default) to open the inventory.
- Open the Props category. This category contains most wheel-like objects.
- Find a wheel to use for your car. A good choice is an item called “Car Wheel”.
- Double-click the item to equip it to the hotbar. Ensure that your current hotbar has room (use [F1]-[F12] (default) to change hotbars).
- Press [Tab] (default) to close the inventory.
- Place the wheels on your car body.
- Switch to the item you placed in the hotbar. By default, you can use the numeric keys.
- Press [F] (default) to toggle frozen mode OFF. If disabled, the snowflake icon at the right side of the screen should be white.
- Hold [Left Shift] (default) to enable surface snapping mode. So long as the key is held, the object will snap its rotation and position to whatever it touches.
- Change the size of your wheels using [Keypad -] and [Keypad +] (default).
- Move the hologram and snap it to the surface of your car body. You can use the mouse scrollwheel to move the wheel further away from you until it touches.
- Don’t worry about perfection. We will be able to fine-tune the placement of the wheel later.
- Click to place the wheel.
- Repeat these steps if you want to attach more wheels.
Step 3: Tune Your Wheels
Now you can adjust the placement of your wheels, their speeds, axis of rotation and so on to your preferences.
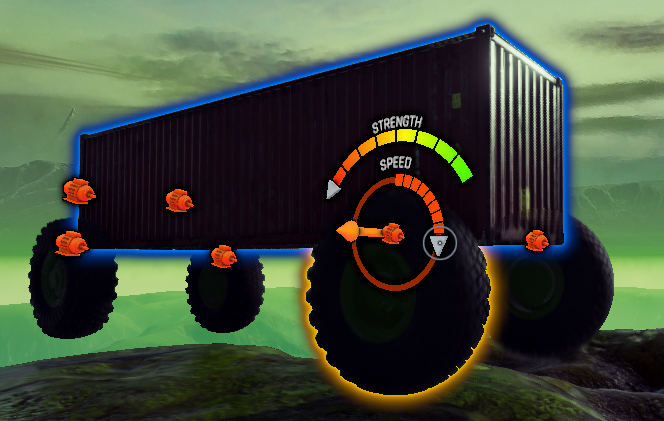
- Equip the Motor Tool.
- Press [Tab] (default) to open the library.
- Open the Tools category on the left side of the library dialog.
- Find the Motor Tool in the center tile grid.
- Double-click the item to equip it to the hotbar. Ensure that your current hotbar has room (use [F1]-[F12] (default) to change hotbars).
- Press [Tab] (default) to close the inventory.
- Select the car body with the Motor Tool for joint editing.
- Switch to the item you placed in the hotbar. By default, you can use the numeric keys.
- Aim your crosshair over the car body. A prompt labelled “Edit Joints” should appear with a highlight around your car body.
- [Left Click] (default) to select the car body. All of the joints you previously placed should be shown with orange motor icons.
- Fine-tune the motor joints of your car.
- Move your crosshair over a joint you want to edit. This will make editing gizmos appear around the joint.
- Fine tune the position of the joint. With your crosshair over the joint icon, click and drag the joint around. This changes where the wheel joins to the car relative to the car body.
- To snap the joint to a grid, hold [Left Alt] (default).
- To move the joint closer or further away, use the [Mouse Scrollwheel] (default).
- Fine tune the axis of rotation. Move your crosshair over an orange arrow pointing outward, then click and drag. This controls what direction the axle is pointing and defines how the wheel can turn.
- To snap the axis direction, hold [Left Alt] (default). This makes it easy to ensure all wheels point in the same direction.
- To bend the axis direction closer or further away, use the [Mouse Scrollwheel] (default).
- Fine tune the direction and speed of rotation. Move your crosshair over the rotation speed guage’s trianglular arrow, then click and drag. This controls what direction and speed the wheel will rotate.
- Remember which direction is the car’s forward, and make sure that all wheels rotate towards that direction.
- Hold [Left Alt] (default) to snap to different speeds. This is useful to ensure that all wheels rotate at the same speed.
Step 4: Ride Your Vehicle
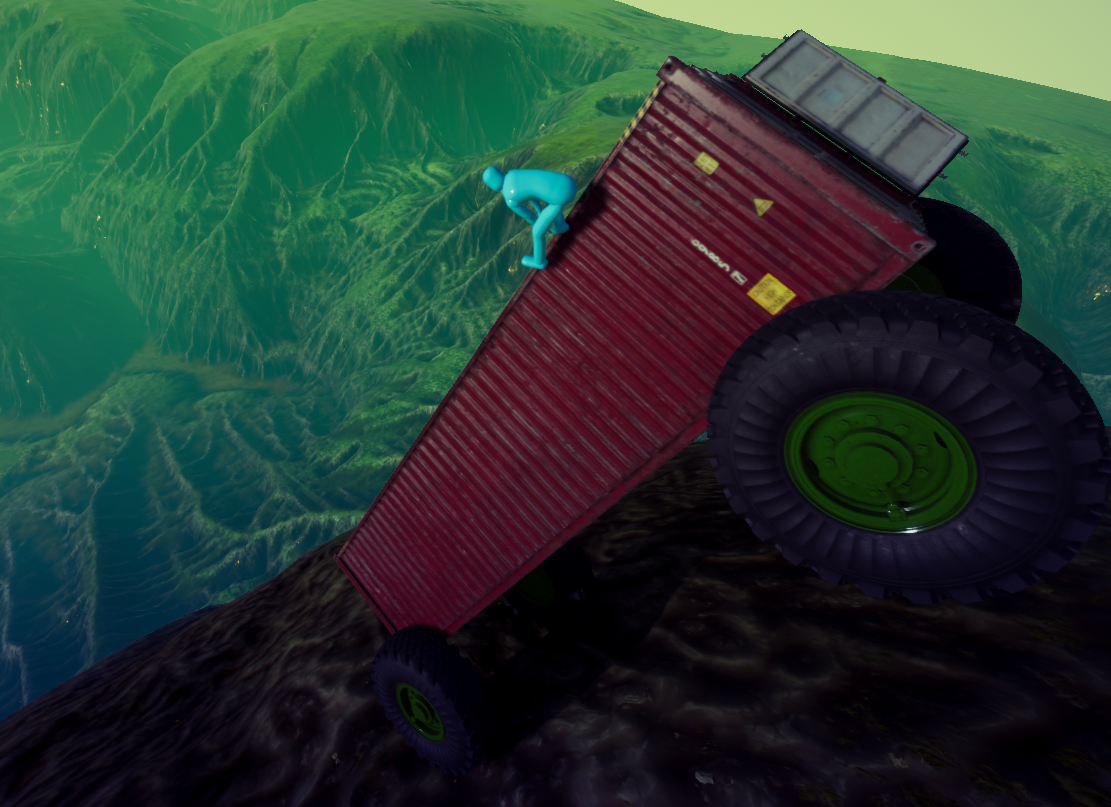
- Turn off your engines by pressing [Keypad 5] (default). All of the wheels you placed before will become unpowered.
- Unfreeze your car.
- Press [Tab] (default) to open the library.
- Open the Tools category on the left side of the library dialog.
- Find the Force Gun in the center tile grid.
- Double-click the item to equip it to the hotbar. Ensure that your current hotbar has room (use [F1]-[F12] (default) to change hotbars).
- Press [Tab] (default) to close the inventory.
- Switch to the item you placed in the hotbar. By default, you can use the numeric keys.
- Aim your crosshair over the car body.
- [Right Click] (default) to unfreeze the car body.
- If your car body is made of multiple moving parts, each part will need to be unfrozen individually. For example, if you used a shipping container, you’ll also need to unfreeze the two doors.
- Climb onto your vehicle.
- Grab onto your car by holding [Left Click] and [Right Click] (default). When your hands grab onto it, proceed to the next step. (Or not.)
- Start your car by pressing [Keypad 8] (default).
- Your car should start moving. Enjoy the ride!
Thanks to Hatchling for his excellent guide, all credit to his effort. if this guide helps you, please support and rate it via Steam Community. enjoy the game.

