A step-by-step tutorial on how to create mods like texture- and soundpacks.
No coding skills required.
Setup 0: Create your helpful shortcut folder
This is what my shortcut folder looks like:
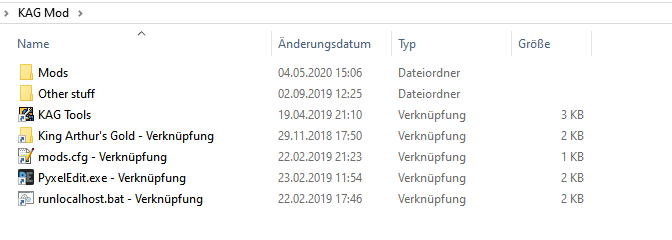
Going through this guide, you will learn about everything in this folder and fill your own folder.
Let’s not do a long introduction and get right into it!
Setup 1: Finding your game folder
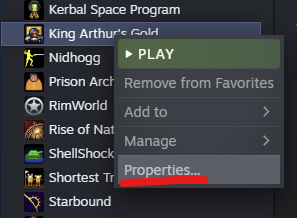 Rightklick the game in your steam library and hit “Properties”.
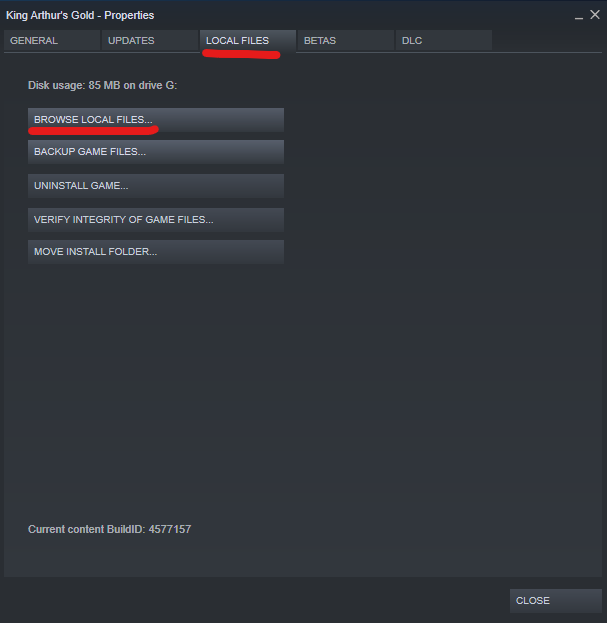 Chose “Browse local files” under the “Local files” tab.
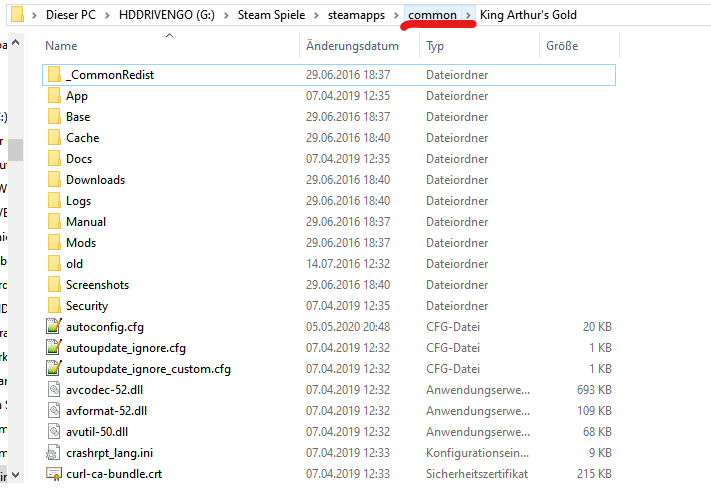 Voila, the game folder just opened up. Let’s create a link to our shortcut folder before we really start working with it.
For that, click on the previour folder in the folder’s adress bar to go one folder “up”.
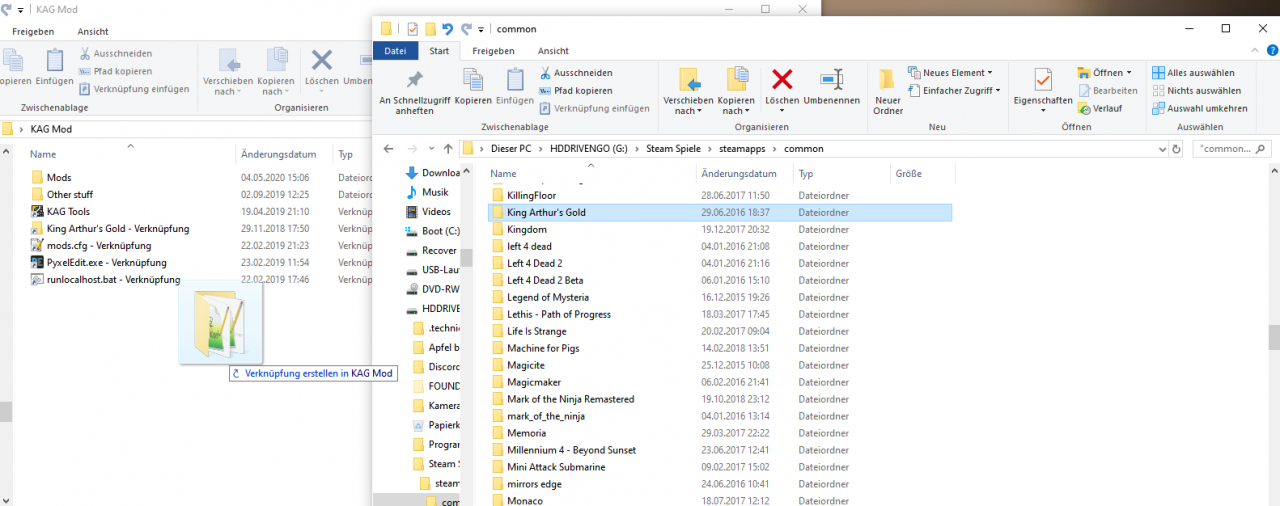 Open up your shortcut folder too. Now, pull the “King Arthur’s Gold” folder to your shortcut folder while holding down “Alt” on your keyboard.
Setup 2: Running the game in singleplayer
To do that, open up “runlocalhost.bat”, which is located in your game folder. I recommend to link it to your shortcut folder, so you can run the game quicker without searching for the file every time.
The game opens up on a “local server” now. Please notice, that only you can play on that “server” and that it won’t show up in public server list.
To configure the “server”, you can edit “autoconfig.cfg”, which is also located in your game folder:
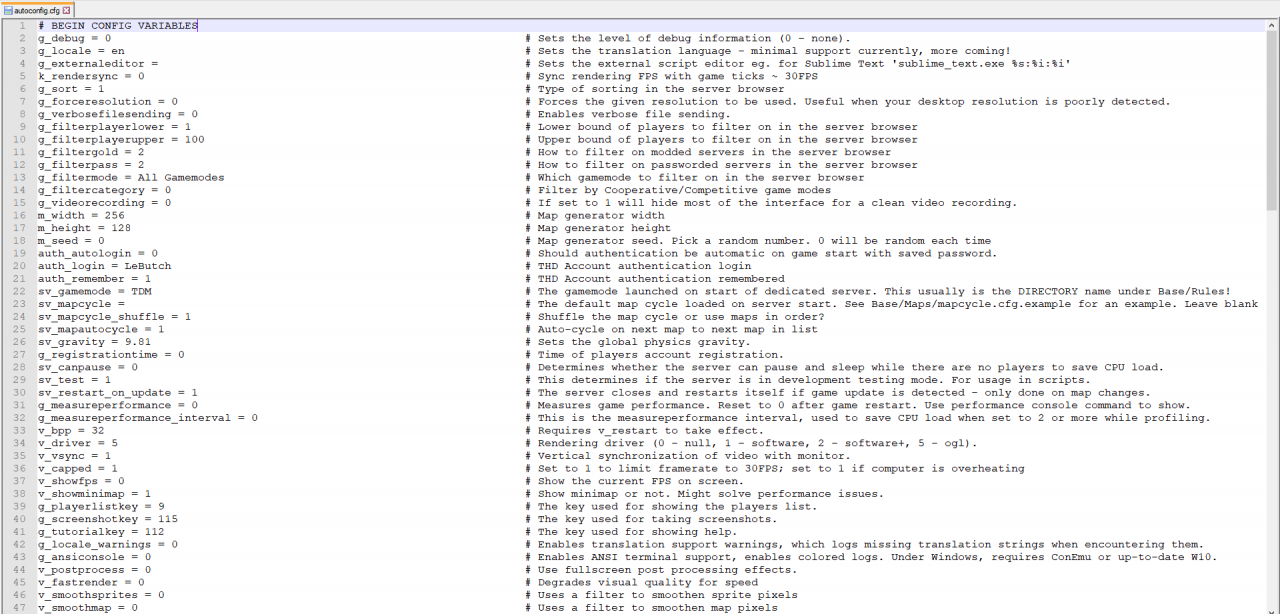
You should not change any values you don’t know the function of.
Here is a quick overview over the most important functions. You will most likely not need any of the others anyways:
- sv_gamemode (line 22) lets you set the gamemode your local server will run on. Most common gamemodes are CTF, TDM and TTH.
- sv_gravity (line 26) lets you set the gravity on your local server. Set it to 0 and everything will float. Set it below 0 and everything will fly to the top of the map. It is usually set to 9.81.
- sv_test (line 29): If set to 1, chat commands like !food are enabled, if set to 0 – disabled. Those chat commands let you spawn items – more on that later.
Setup 3: Creating your mod
For that, open up your game folder to open up the “Mods” folder inside it.
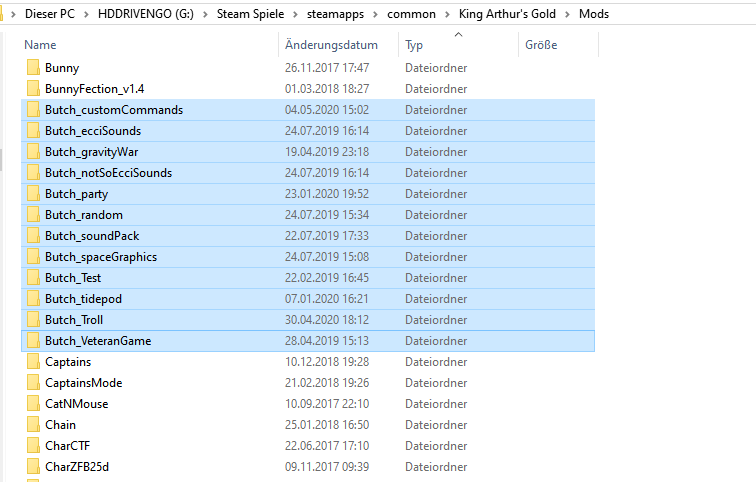
Every single mod you have ever played can be found in here. As soon as you join a modded server, the mods will be downloaded from the server to your “Mods” folder:
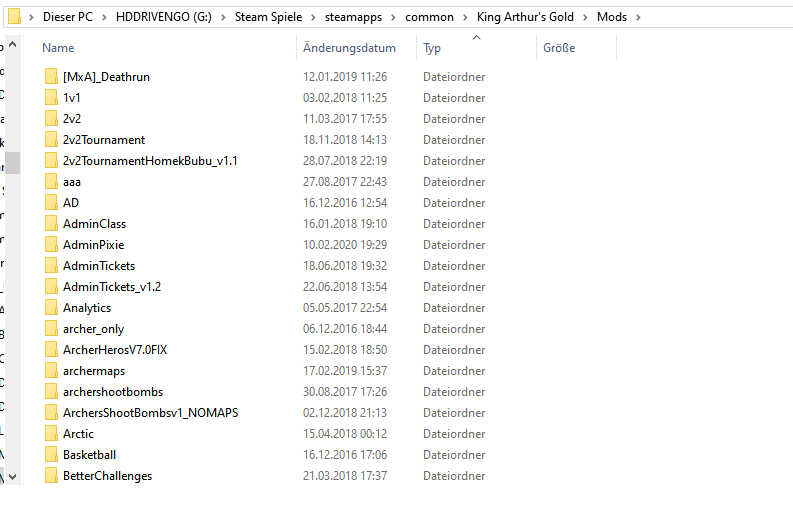 In my case, 447 mods are saved in the “Mods” folder.
To create your own mod, all you need to do is create a new folder in the “Mods” folder. The name of that folder will be the name of the mod. It’s simple as that.
To keep things ordered for you and other modders that might play your mod, I recommend including your name in the filename:
You should also never just copy someone else’s mod and claim it to be yours. There are no restrictions against that, but you will be hated for that.
Setup 4: Including your mod to the game
In your game folder, you will find a file named “mods.cfg”. I recommend linking it to your shortcut folder.
This file is a list of all mods that will be loaded on singleplayer. They will also be enabled when starting the game via Steam, but they will be disabled as soon as you join any multiplayer game.
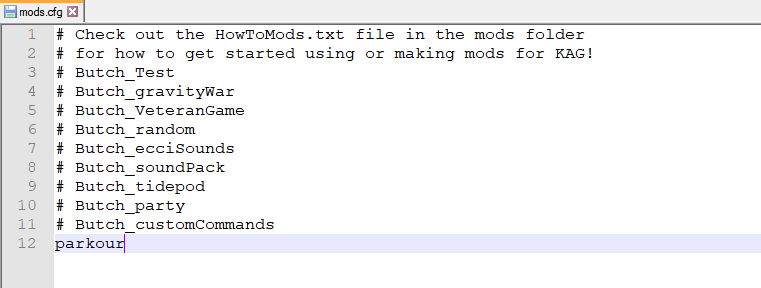
As you can see, most of the mods begin with a #. If you put a # in front of any line in this file, the line will be completely ignored. That means, only the mod called “parkour” is loaded in my case.
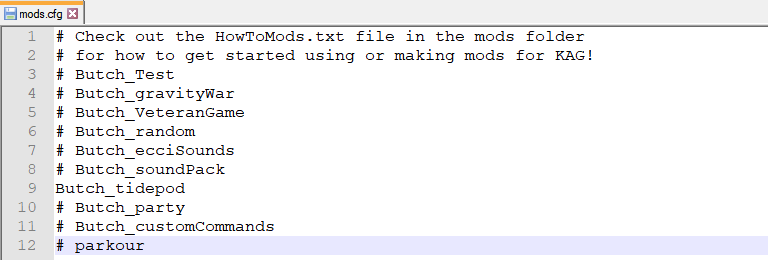
I am going to show you how to mod on my smalles mod: “Butch_tidepod”, so I will change the file accordingly:
Modding 1: How does it work?
The basic working principle is: Any file inside your mod-folder will override the game-file with the same name.
That means, you can copy any file from your game folder to your mod folder, to edit it there. That will be explained in detail later.
Please note that I am not going to show you how to script, because it is way too advanced for this guide. I might publish a guide completely about the basics of scripting in KAG in the future.
Modding 2: Where to find game files
All changeable game files are located inside the folder “Base” inside your game folder:
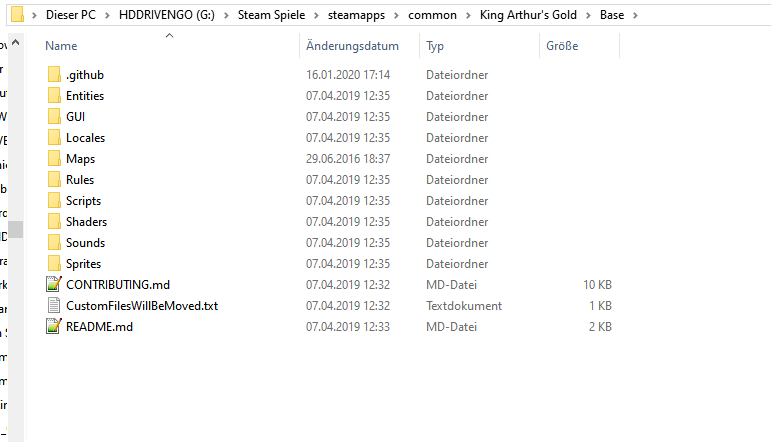
I recommend linking this folder to your shortcut folder, because you are gonna need it a lot. You should also take some time to browse through the Base folder just to get used to it’s structure. For an experienced player like me it was really interesting to see all of those textures. You will also still find many textures that were taken out of the game.
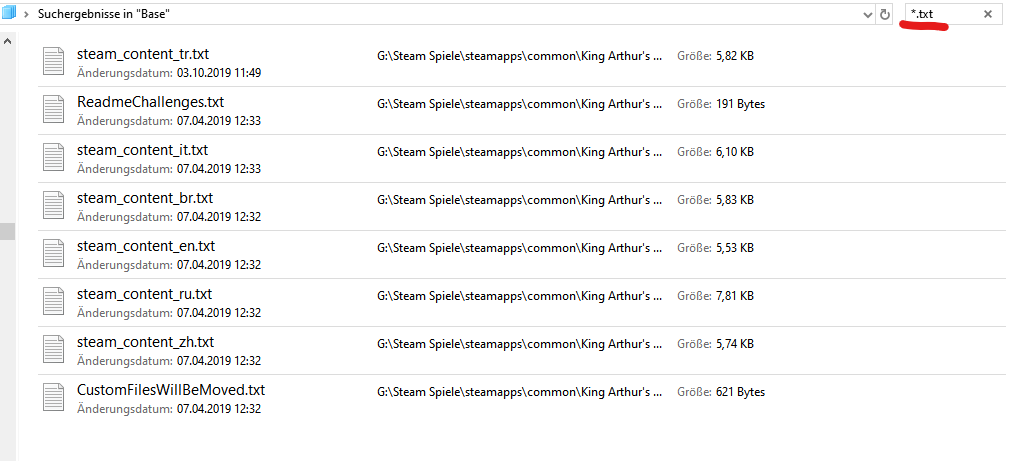
To speed things up a bit when searching for a specific file: You can filter for specific file extentions using the windows search function. For example: If you type in *.txt , it will list you all the .txt files:
Modding 3: Changing Textures
The editor is suitable, if all of the following criterias are met:
- It can edit single pixles
- It can handle PNG files with a transparent background
- You can not only choose the colour, but also the transparency of your “pen”
My favorite editor for that purpose is paint-net[www.chip.de]. It is free and perfect for editing KAG textures.
To create your own pixelart KAG textures, I recommend using PyxelEdit[de.freedownloadmanager.org]. It is a freeware too.
I am rather going to present you an example of a simple texture mod instead of explaining it step by step, because it is kinda self explainatory.
This is my tidepod mod. It replaces burgers with tidepods as a reference to this stupid internet trend where people ate tidepods:
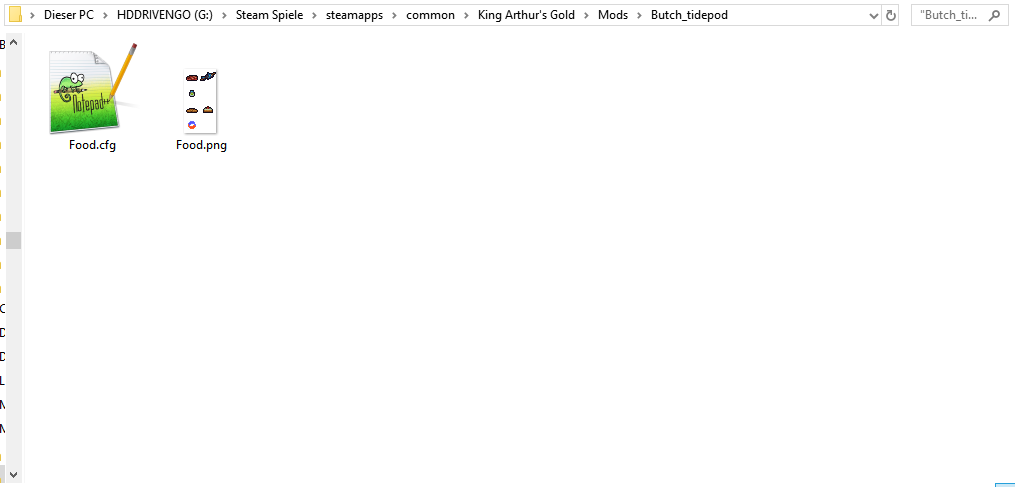
As you can see, it does only contain two files: An image and a configuration file. Let’s focus on the image for now.
The image itself was copied from the Base folder and edited. You can see the original on the left and the edit on the right:
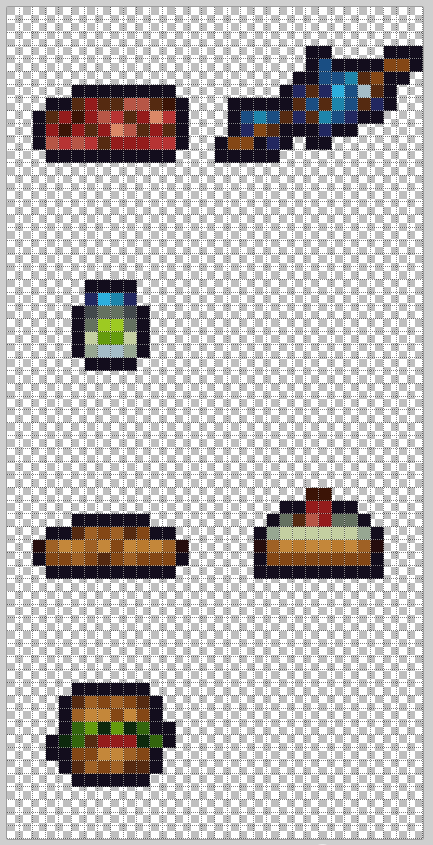
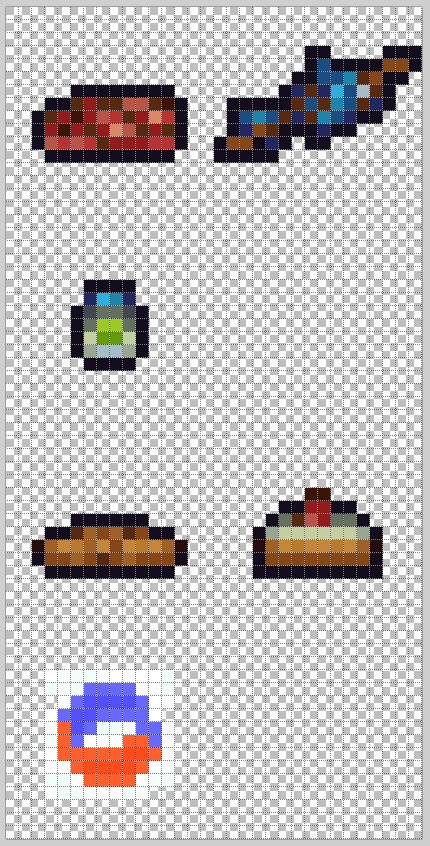
It is obvious that there are multiple textures in one file, which makes it important to stay within the boundaries of the texture you want to edit. The boundary is most likely a square which is 32 pixels wide, though it is possible to vary the size.
It is also fairly easy to see where those boundaries are. You can see two colums, which means that the boundary ends in the middle of the image. Everything outside the bounary will be eigher cut off, or attached to a different texture.
PyxelEdit comes in handy here. You can simply drag&drop the file in your PyxelEdit window to import it. Set the tile with and height to 16 and press “Import”:
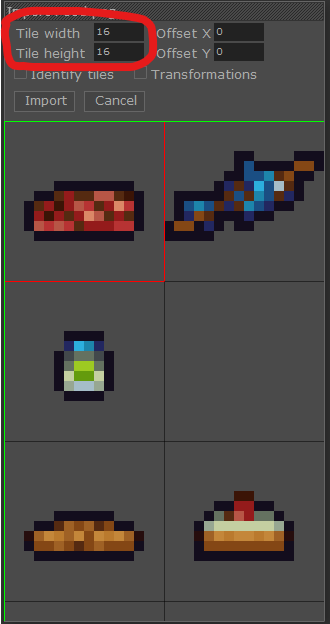
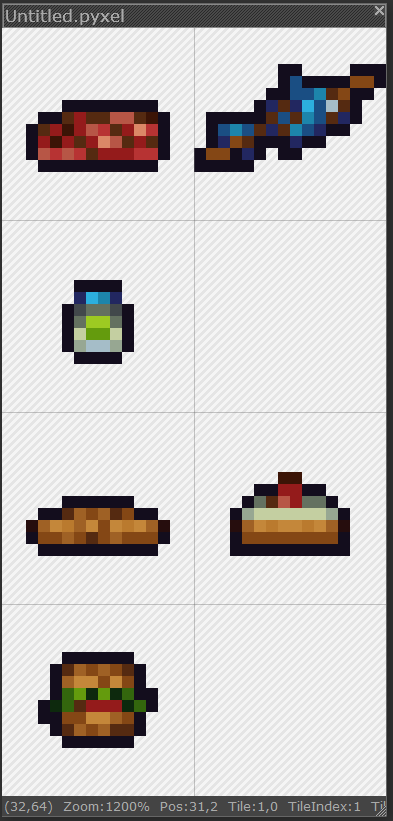
I am not going to give a full tutorial on PyxelEdit, but it is very simple to use. You will most likely get through it in 5 minutes fooling around. Using Paint-net is way fater though, so I rarely PyxelEdit.
One last thing about textures: Some objects have multiple textures. That is eigher due to the object being animated (like animals), or a random version of the object is generated every time to make the game look better (like logs and bolders):
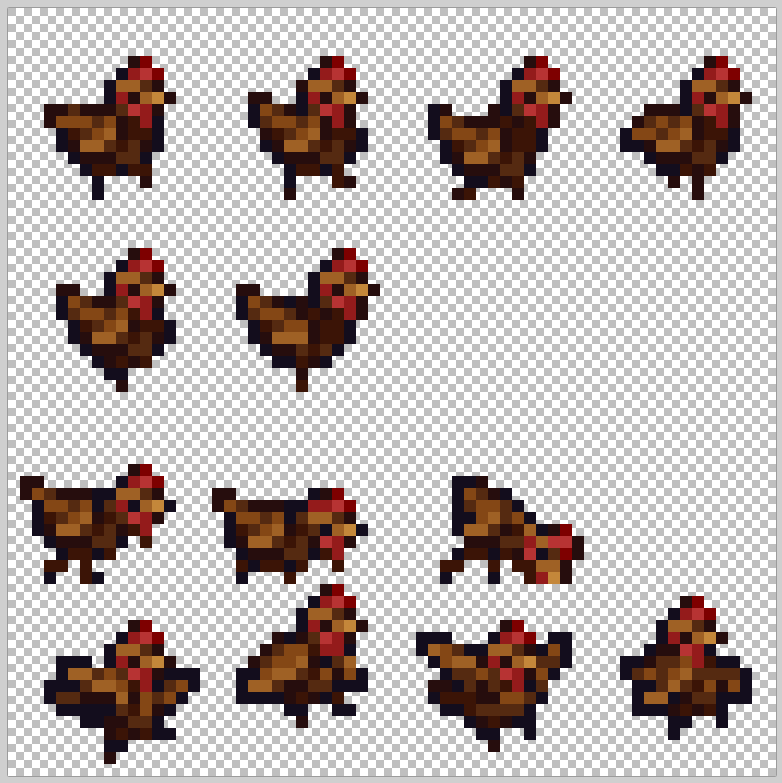
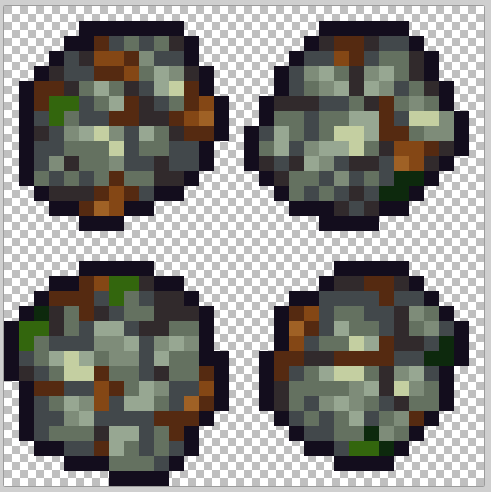
You have to edit every single texture of the object in case to really edit it. Otherwise, the object will have its original look at least sometimes.
The tidepod mod is shown again later.
To show you what you can do by editing textures, here is a screenshot of a texturepack I made some time ago:
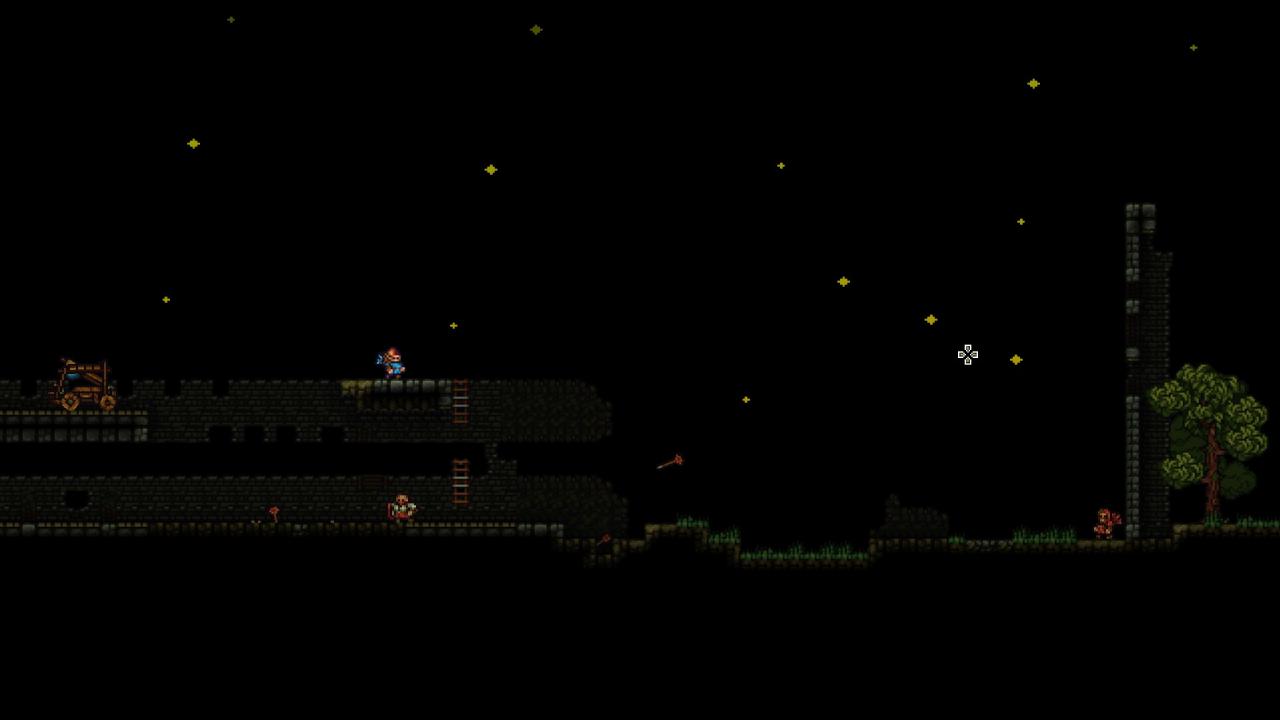
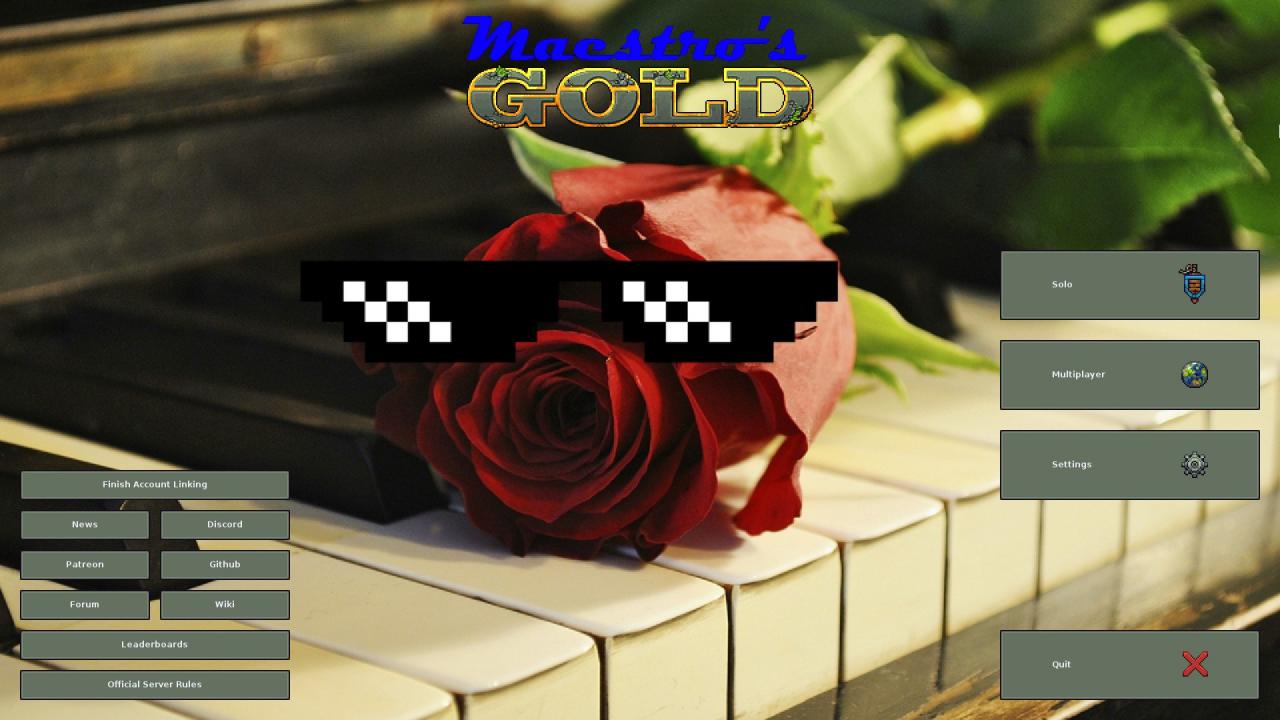
As you can see, you can not only change object textures, but also background and tiles. You can even go further by replacing menu textures:
Modding 4: Config files
This file is named like the texture, while being a .cfg file:
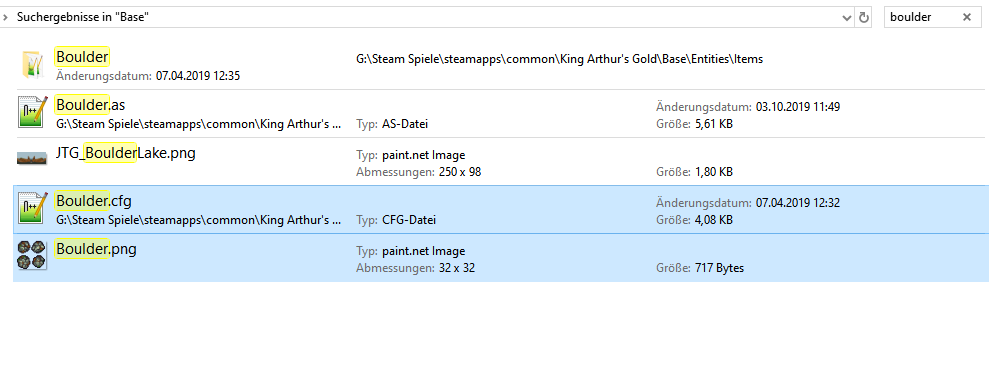
Opening the file, we find many different options. It is really important to not change anything you are not certain about what it does. Always backup your file before messing around with it, or you might loose your laboriously edited file.
Let’s go through the important parts of .cfg files:
 This part lets you define the texture. If you (really don’t know why you would do that) want to change the filename of the texture, you have to change it after “sprite_texture” too. Frame with and height set the boundaries of your texture, like explained in the previous chapter. Offset is not relevant and will make things unnecessarely complicated.
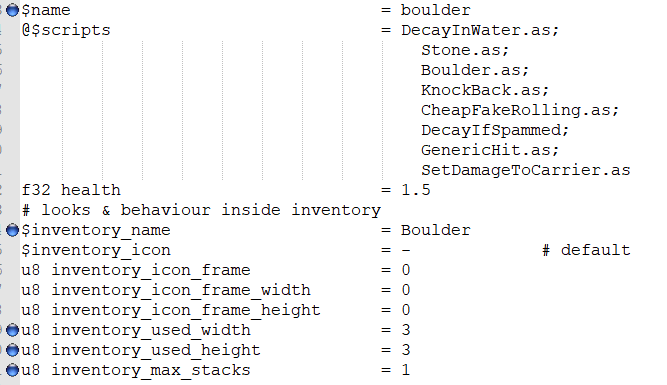 The marked lines define name and inventory properties of the object. As you can see, the object name is currently defined as “boulder”, while it will show up in inventory as “Boulder”. The object name is relevant for programmers, but not relevant for players. You should never change the name of an existing object! Changing the inventory name won’t do any harm though.
“inventory_used_width” and “inventory_used_height” define how much space the object shall use up in the player’s inventory. As you can see, it currently uses up 3×3 tiles, while the player’s inventory is only 2×2 tiles big. This is the reason why you are not able to put boulders in the inventory.
“inventory_max_stacks” defines how many items you can combine to a stack. In this case, it does not matter at all, because you can’t put boulders in the inventory anyways.
Here you can see that specific part of “Arrow.cfg”:
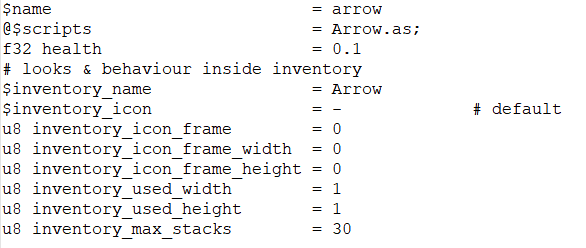 You can see that it uses up only a 1×1 tile and can be stacked up to 30 items.
Pro tipp: If the testmode is activated (see Setup 2), you can spawn objects using chat commands. Just type ![objectName] in the chat. The object name is defined in the config file behind “$name”. E.g. spawning a boulder goes like: !boulder
Spawning a burger goes like: !food
Modding 5: Changing sounds
To modify a sound, simply put a sound file in your mod folder with the exact same name like the sound you’d like to replace.
A quick example of how this could look like:
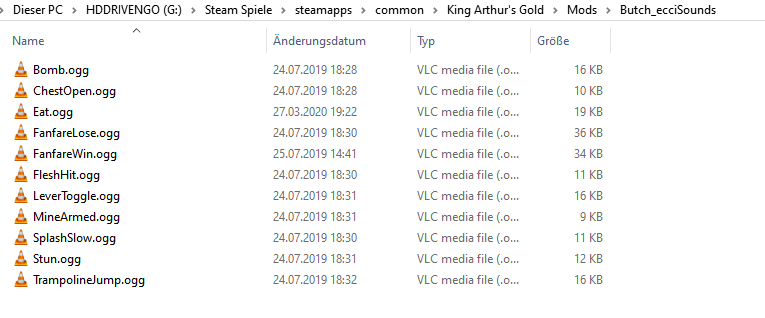
Keep in mind, that every sound file has to have the ending .ogg in order to function.
To replace a sound is fairly easy, but it is hard to create one. Unfortunately, I can not really help you much with that.
I use Audacity[www.audacityteam.org] to edit sound files, which works very well and 100% free. I am not gonna give a tutorial about this program here, but there are many really nice ones out there.
A problem you might encounter when replacing your first sound is that it will be really really quiet. In order to actually hear the sound ingame, you need to make it ridiculously loud:

Another problem you won’t get around is that some sounds are not implemented modding-friendly. You won’t be able to replace those without coding (like the keg explosion sound). Luckily, this is rarely the case.
Adding mods to your server (GShost.us)
My server is rent at GShost, a common platform for hosting private KAG servers. It should work the same on other hosting service platforms too though.
When connecting via FTP to your server, you should already see that it looks pretty simmilar to the local KAG game folder:
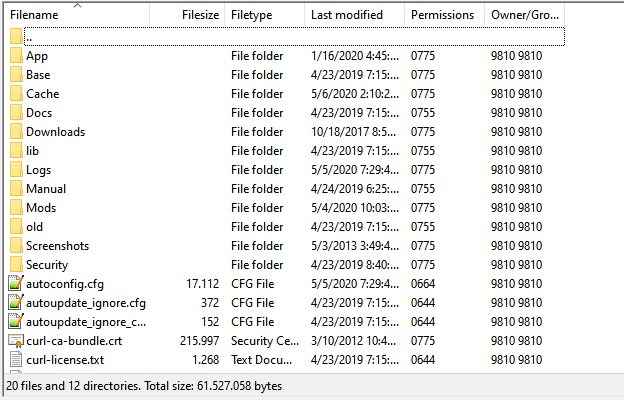
Installing the mods is basically the same like installing them locally:
1) Upload your mods to the Mods folder on your server
2) Edit or replace the mods.cfg file on your server like you’d do it locally
3) Restart the server

