This guide describes how to create custom servers for Dysterra. Please follow the guide step by step.
**Some of the settings required through out the guide may affect your PC security and functions.**
Note: Early Access version was updated on November 21th.
Setting up Port Forwarding for clients to access the server
Configure port forwarding on your personal Inter router or switch so that external clients can connect to the server PC.
- TCP Local Port 27015(Default): SRCDS Rcon Port
- UDP Local Port 27015(Default): GamePlay Traffic
Method 1: Installing & Running Custom Server from Steam
Search Dysterra Dedicated Server on Steam Library
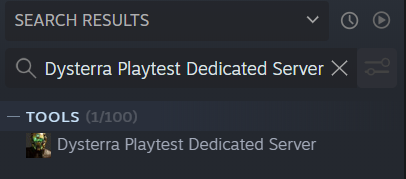
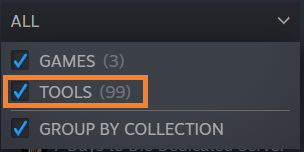
if it does not appear in the list


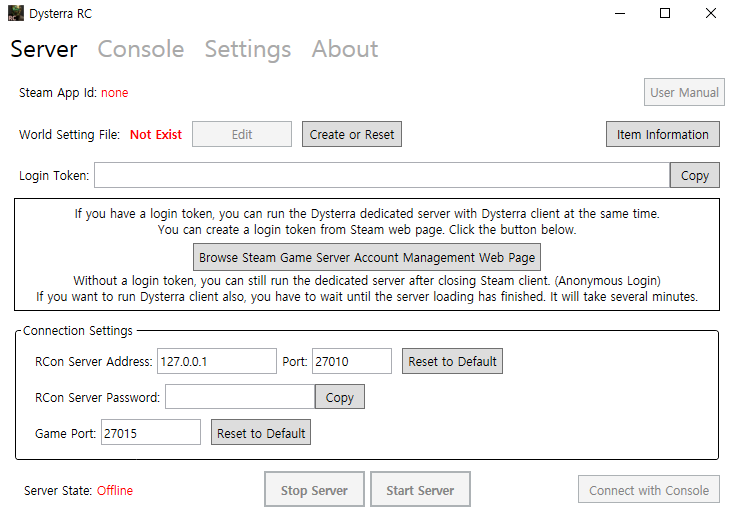 – When Dysterra RC is started for the first time, it will display as above.

※ Please note that the App ID for Dysterra is 1527890
– This is the Client’s App Id corresponding to the custom server. This is the value passed as an execution argument.

– This button opens the user manual document. It can also be a web page url. It is inactive because there is no official documentation yet.

The server can be started only when the world configuration file exists.
For more information about the world setting file, please refer to the [World Setting File] below.
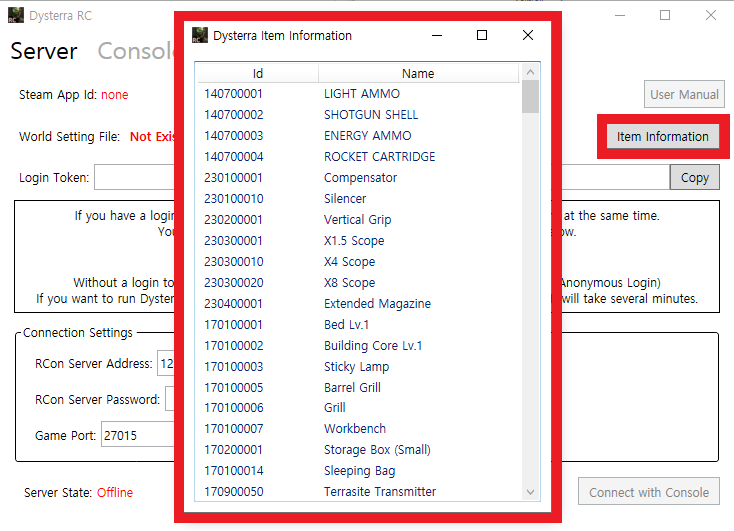 – Clicking the item information button brings up the item information window. You can check the required item ID in the world settings.
 – You can set the login token. If you have a token, you can run Client and a custom server at the same time without shutting down Steam. If you don’t have a token, it proceeds with an anonymous login after quitting Steam.
When the ‘Copy’ button is pressed, the currently set token value is copied to the clipboard.
You can create a token or manage existing tokens by clicking the ‘Browse Steam Game Server Account Management Web Page’ button.
For more information on token generation, please refer to the [How to run as anonymous login] down below.
 – This is the server-side setting for remote console access.
(If you want to connect using the remote console from outside, you must allow the above ports in the router’s port forwarding settings.)
 – This is the port used by the client to connect to the custom server.
(If you are using a router, you must allow the above ports in the port forwarding settings.)
 – Text indicating the server status and buttons to start and stop the server.
After running the server, it takes at least a few minutes before you can connect normally to the client.
The server stop button is activated when there is a running server process, and does not save the current state because it forcibly terminates the server process.
– Connects with the current server settings by running the remote console.
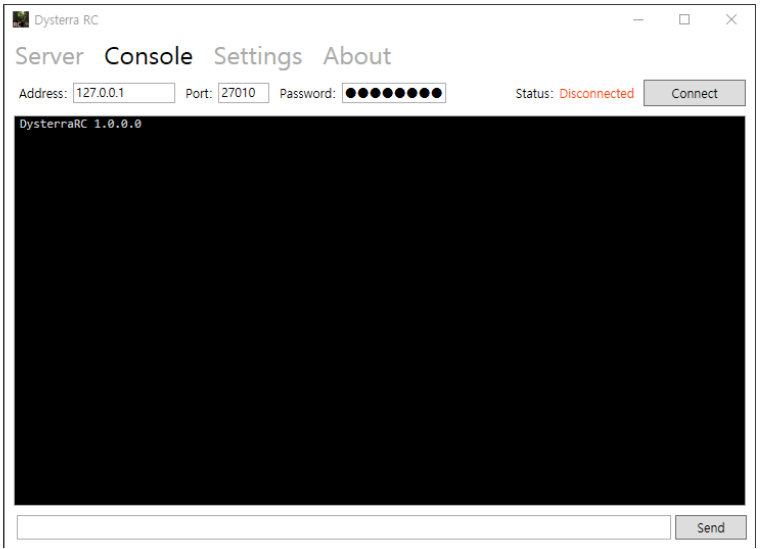 – This is a remote console function. (also called RC, RCon, etc.)
You can connect by entering the desired custom server address and port information.
– Alternatively, if you click the ‘Connect to Remote Console’ button in the ‘Server’ tab, you can connect immediately after automatically applying the current server settings (address, port, password).
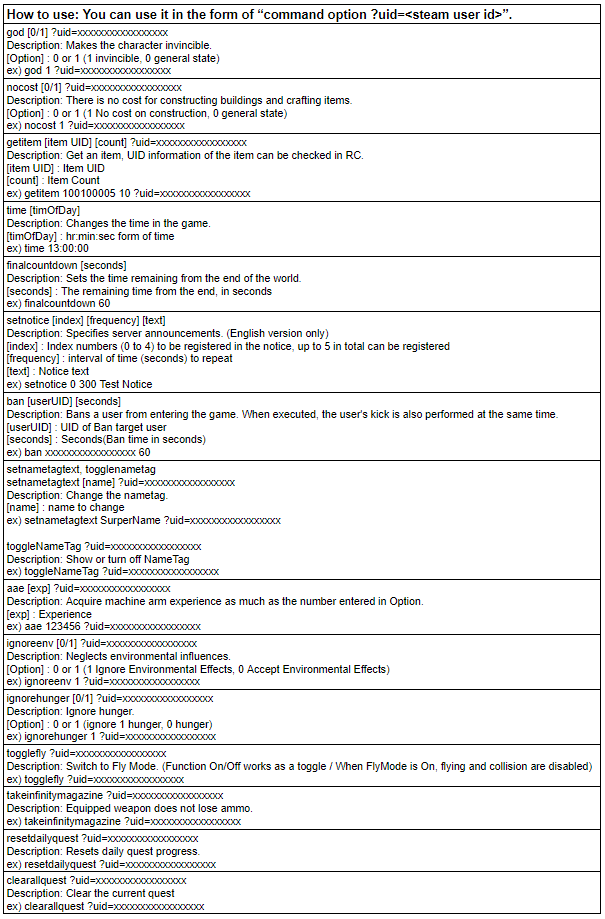
After connecting, you can send commands to the server using the input box at the bottom.
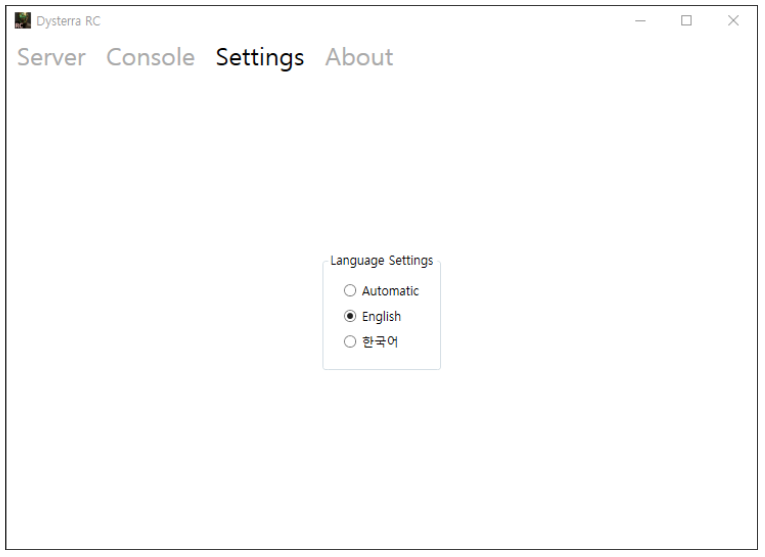 – You can change the language.
The default is ‘Auto’, and it detects the language set in Windows and automatically selects Korean or English.
You can also explicitly change the language by selecting ‘English’ or ‘Korean’.
However, when changing the language, Dysterra RC must be restarted.
Method 2: Installing & Running Custom Server with SteamCMD

1) Create a folder dedicated to steam cmd
Example) C:\SteamCMD
2) Download the file
https://developer.valvesoftware.com/wiki/SteamCMD
3) Unzip to a dedicated folder and run SteamCMD
installation path setting
![]()
Set the installation path with the force_install_dir command
Log in to SteamCMD with your personal account
 After entering the ID, enter the password. If Steam Guard is enabled, you will also need to go through the authentication process.
Dysterra Dedicated Server Installation
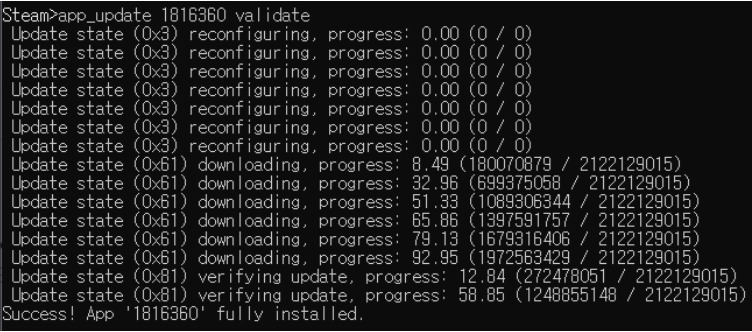 You can install it by entering the app_update [custom server app ID] validate command.
Go to Dysterra\WorldSettings\ under the folder where the custom server is installed.
Copy the Survival_Landscape_Template.json file and create a MyServer.json file.
For details on the world configuration file, refer to the [World Setting File] below.
Move to the folder where the custom server is installed and create a batch file with the following contents.
 For details on execution factors, refer to the [Custom server executor] below.
Close Steam first, and then run the above batch file.
First, go to the Steam website and create a login token for the server.
Create a batch file in the following format and run it. (No need to quit Steam)

In places where it is not easy to run the Steam app or SteamCMD, you can copy and run only the files of the custom server.
Go to the folder where the custom server is installed and copy the file. (Example: USB memory stick)
Copy the files to the PC that will run the server.
Create the same batch file as mentioned above in the appropriate folder and run it.
Connecting to the client
Even if the log outputs, the actual server loading completion takes about 3 to 5 minutes.

1) Steam login
2) Run Dysterra
3) Click “Custom server” in the lobby
4) You can check and connect to custom servers in the Custom server list on the right.
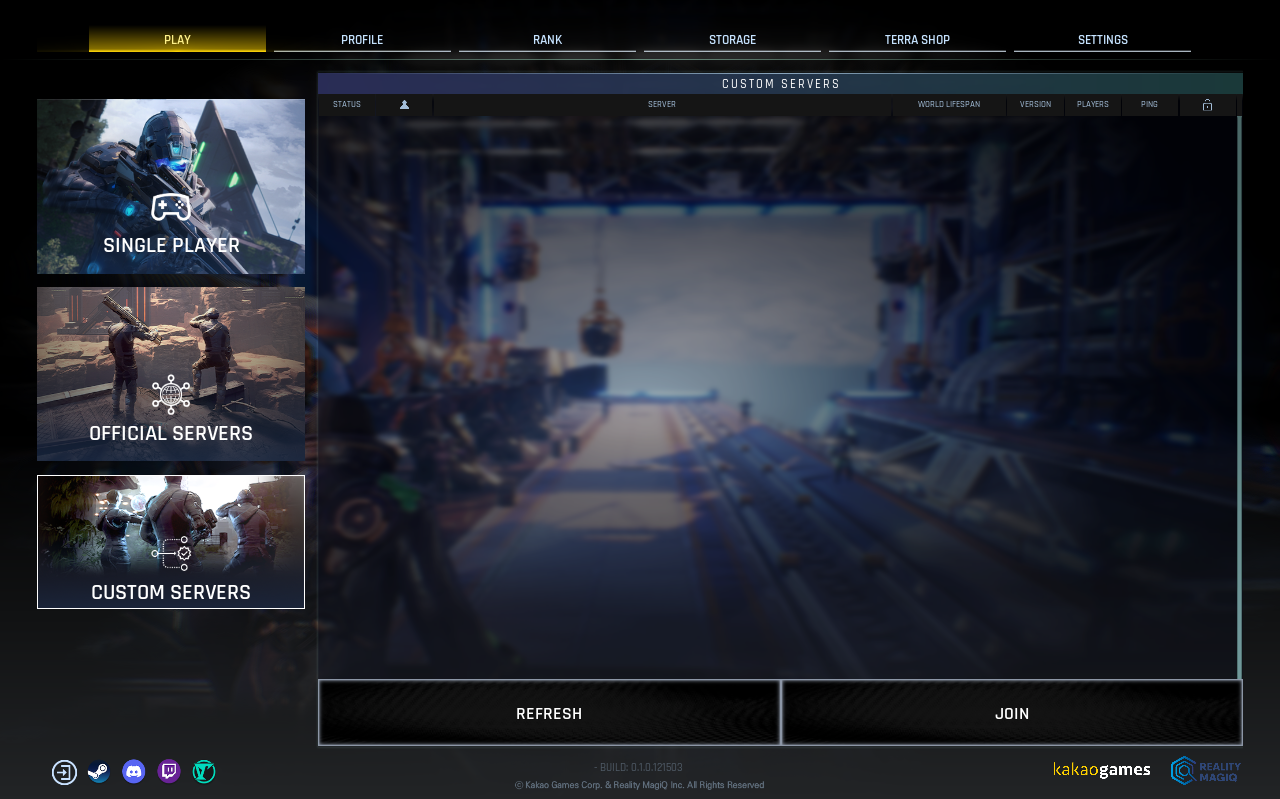
Others
Access the website. (https://steamcommunity.com/dev/managegameservers)
If you are not logged in, click the login button in the upper right corner to log in.
 Enter the Steam App ID of the Distera client in the first column.
(Caution: Do not enter the Server App ID!)
The 2nd column is a description of the token, so enter an approximate name. Example) Dysterra Custom
Click the Create button to create a token.
 Copy the generated token and use it as Dysterra RC or server execution factor.
Caution!) Login tokens are sensitive information and should never be disclosed to anyone.
The path of the World Setting File is as follows.
![]() If the file does not exist, you can create it by copying the Survival_Landscape_Template.json file in the same folder. (In Dysterra RC, it is possible with one click of a button)
If the file does not exist, you can create it by copying the Survival_Landscape_Template.json file in the same folder. (In Dysterra RC, it is possible with one click of a button)
The file is in JSON format and can be edited with Notepad, etc.
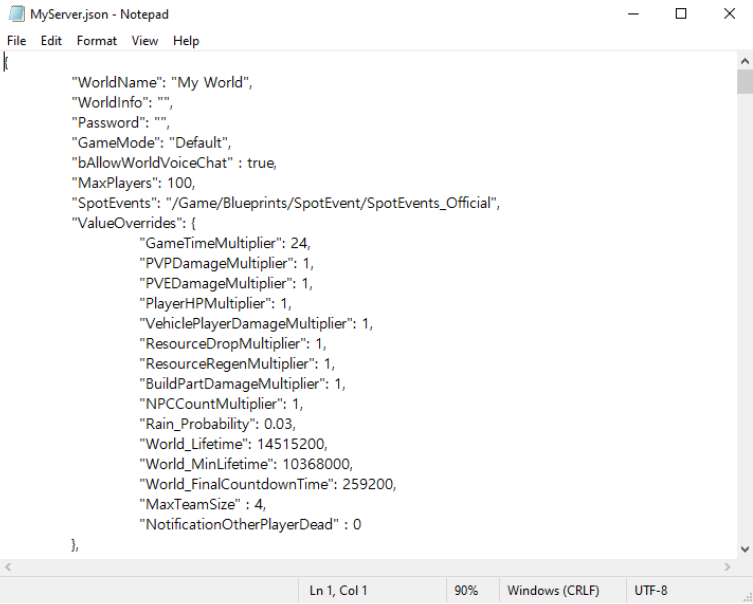
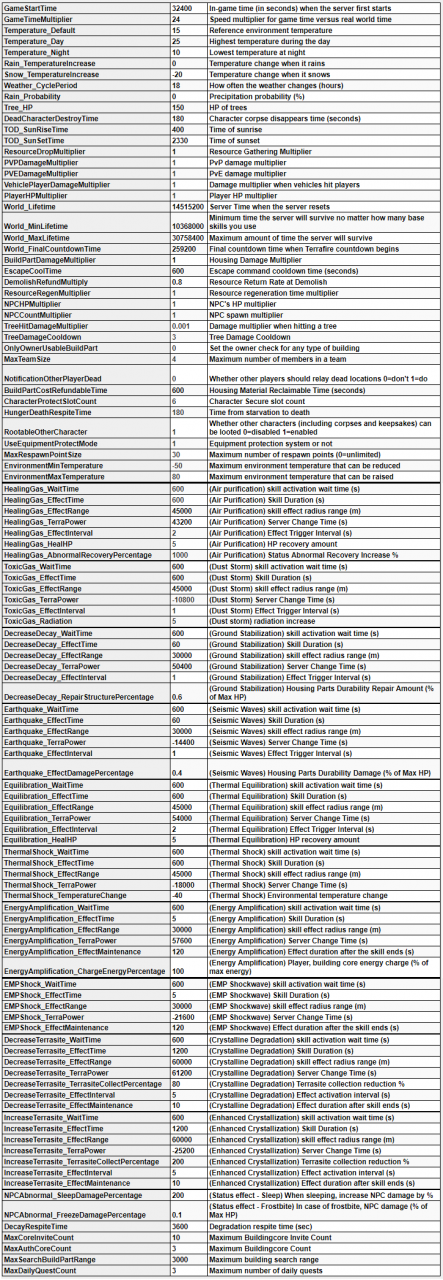
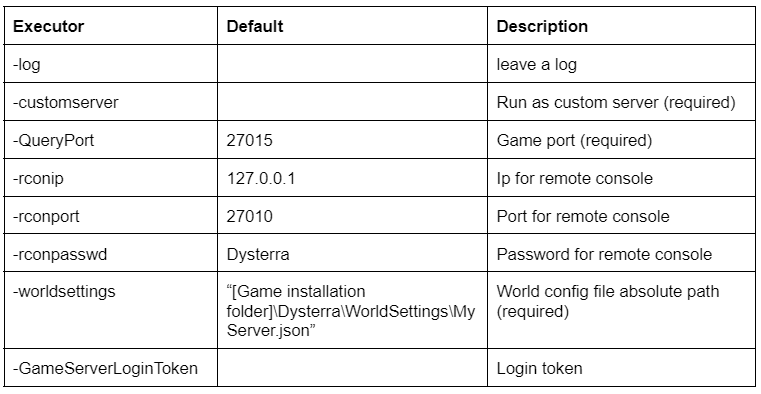
Example)

1) If other programs or other PCs are using port 27015, change the port.
Available ports: 27015 ~ 27030
2) Configure port forwarding on the Internet router or switch.
3) Apply the changed port number in Dysterra RC.
4) If Custom server does not appear in the game with the above method, check the firewall.
1) When running multiple servers, you can use ports from 27015 ~ 27030. You can open both TCP and UDP. You can open one server per port.

2) If you set the game port number in Dysterra RC and click Start Server to start the server, the server start button will temporarily be disabled. After a while, if the button becomes active again, change the port number and press the server start button again.
3) If you click the Stop Server button, multiple servers will all shut down. Currently, there is no way to shut down a specific server in Dysterra RC, you have to use the task manager.
Thanks to GM_Terrasite for his great guide, all credit to his effort. you can also read the original guide from Steam Community. enjoy the game.

