A Modding Guide that will explain every step of the way.
Mod Packaging (Nexus/Vortex)
Fantastic I don’t want that time I spent on that Extension to go to waste.
It shouldn’t be too hard for you.
- One and Done Mods
- Multi Choice Mods
What do I mean by these things, One and Done would be Just a Mod and You install it, simple enough.
Multi Choice Mods, Would encompass mods that need to give different files based on what you are doing, For example a mod with multiple options for Ranger Skins or CIA skins.
I will be showing you how to Setup Both.
Mod Packaging (One and Done)
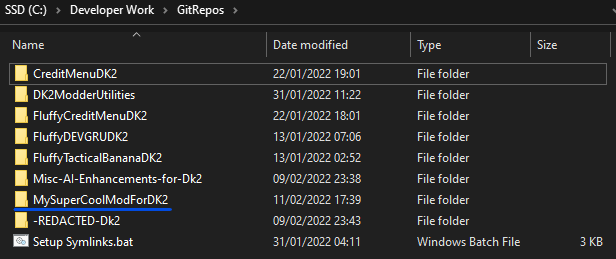
First you need a Mod Folder, Today I am using MySuperCoolModForDK2
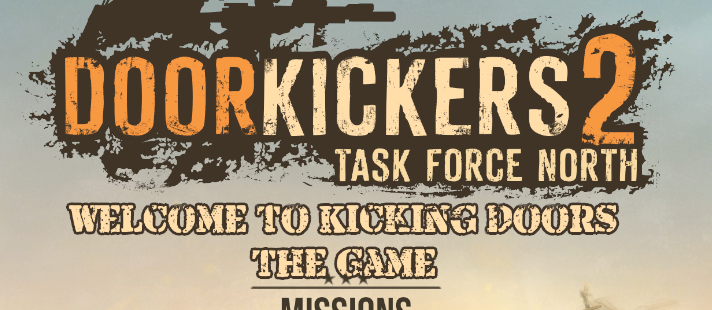
Second you need a mod, Today my Example mod will just be adding an Image to the Splash Screen.

It seems to have worked, Now lets get on to Packing it up for Nexus.
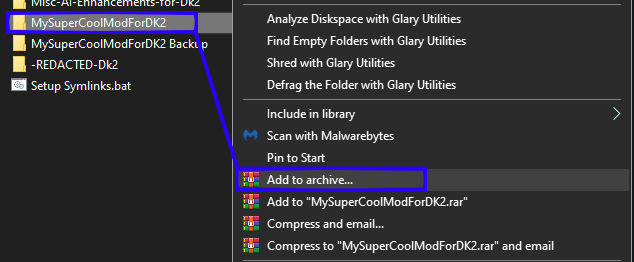
Now the Easiest way to explain is to literally just pack it up like that
You can choose anything you want for the Archive type, I used .zip, But to my knowledge 7zip & Rar and the rest should work, Don’t quote me.

Now the Archive has a Folder in it, that is the Mod, This is fine for One and Done mods.
So we packed it right, Hopefully, but how do we make sure it works as intended?
That’s Easy All you need to do is hit manual Install in Vortex in the Mods section and Pick your Zip file.
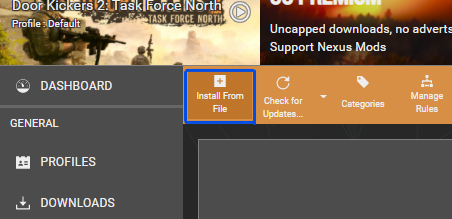
Don’t be discouraged that your Mod doesn’t have your Name and such on it, that will be filled out when you upload to Nexus. Here is an example of Mich’s White Phosper Mod next to my Example Mod.

Now press the Button that says Disabled, that will enable the mod.
Assuming You packed it following this Guide it should work as intended.
This Appeared in my Mods Folder after I enabled the Mod.

And After booting up the Game, I can see it worked.
Mod Packaging (Multi Choice Installer Method 1)
“Fluffy, When would I ever need to do this, It sounds pretty useless to me”
- Compatibility with another Mod.
- Compatibility with A Different Game Version.
- Multiple Versions of your Own mod to pick from e.g Different Uniforms.
- Perhaps even more advanced Tweaks for minor changes.
- Perhaps even all of the Above.
A Simple Multichoice Installer that will work fairly easy with the First 3 Answers.
Which I will be showing in a different section will be used for Answer 4 and 5,
and will require a little more specific engineering with file paths to sort out.
Much like the Single Choice mod I am going to work out of a Same location with a Different folder this time.
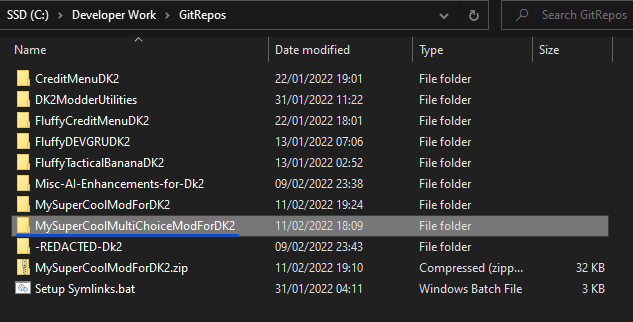
Yes I know my Naming Conventions are Awesome~ You don’t need to tell me.
Inside this are my Options for my Mod.

The Contents of these Options are in essence a copy of your Mod that has the Changes,
For my example I have changed nothing.
But in your Case it would likely be a Version of your Mod that has a Compatibility in mind or perhaps different models etc.

To Make the Installer you will need FOMOD, Which actually is a tool for Fallout but works perfectly find for any game and is suggested by Nexus themselves, You can find that Here[www.nexusmods.com]
Now to get Started you will need to select the Root of your Mod Folder.
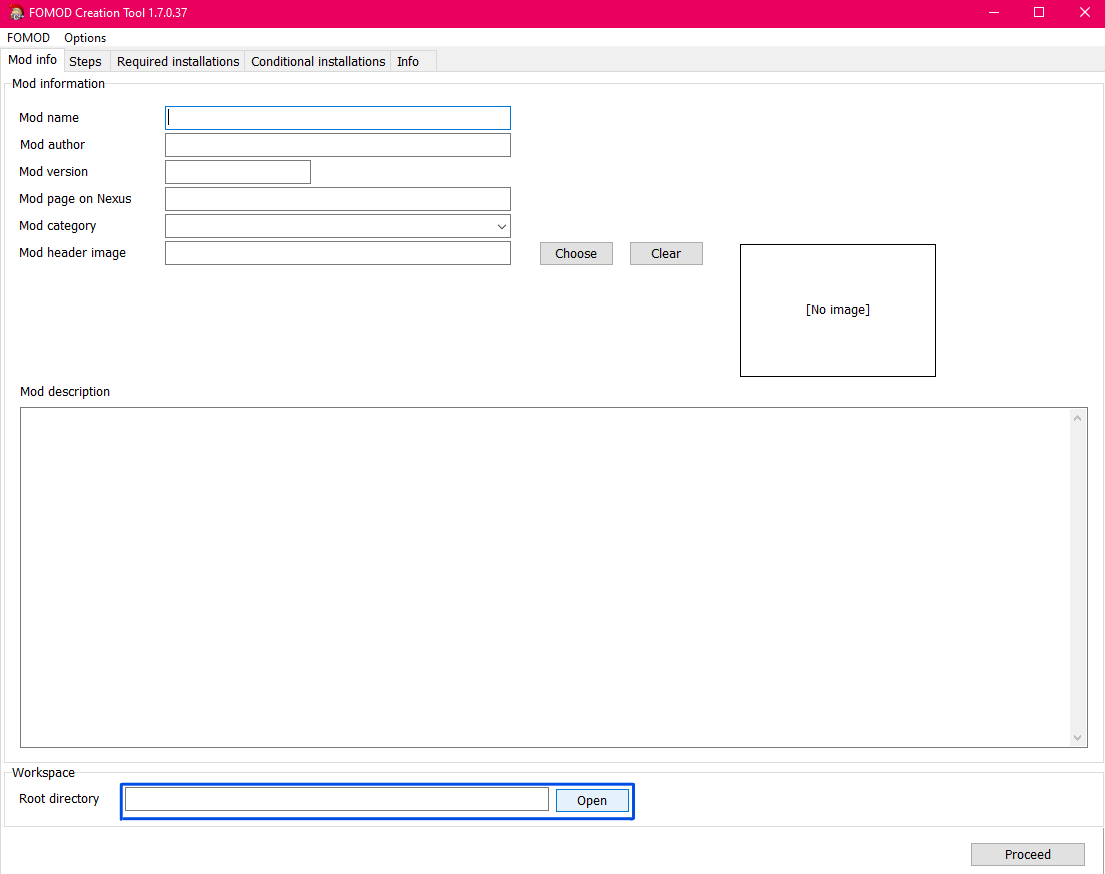
I am obviously going to choose the Folder I so gracefully Named.
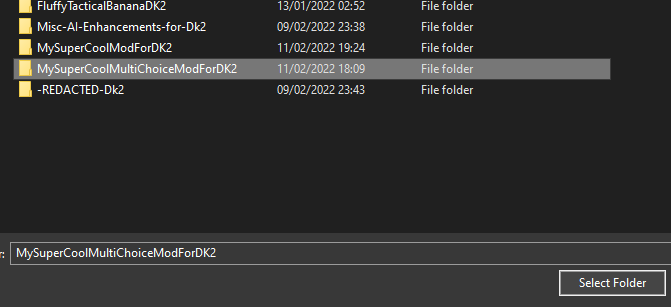
Once you have done that it will give you a Prompt just press Yes.
Now you will have to Fill in the required details, No sweat if can’t fill out the Mod Page section.
You can do that later or you can make a dummy mod page before you upload, both options work.
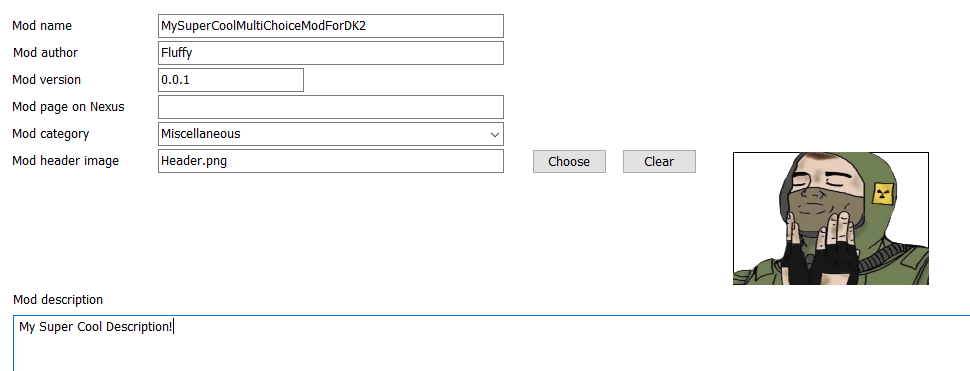
Now I know it looks a little scary much like hearing a Parent say your Full name.
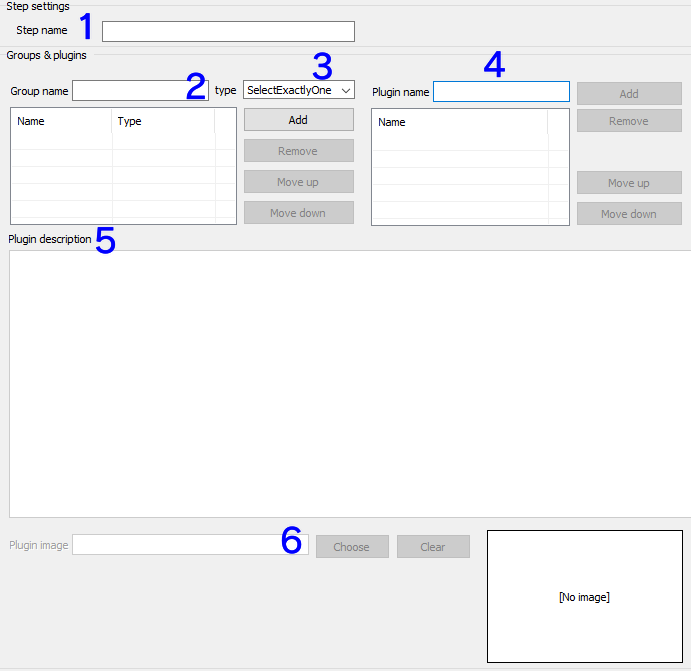
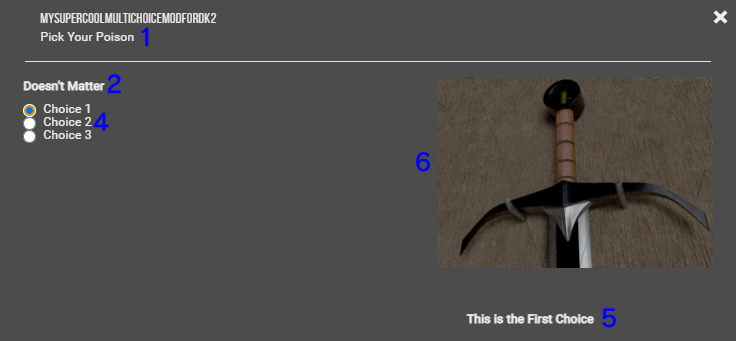
But don’t worry its not that complex, I will break it down Barney Style.
- is what the Step is called during the Actual Installation.
- Shows near the Top and should be a general Title for the Step
- is the sort of Install options you want for this step, for example SelectExactlyOne lets you only choose one option.
- is what the Option is actually Called when your Selecting things.
- is per Option and should be used to explain what that option does.
- is what shows on the right of the Installer, This is per Option.
Here is what It Looks like when Its filled out for 3 Options
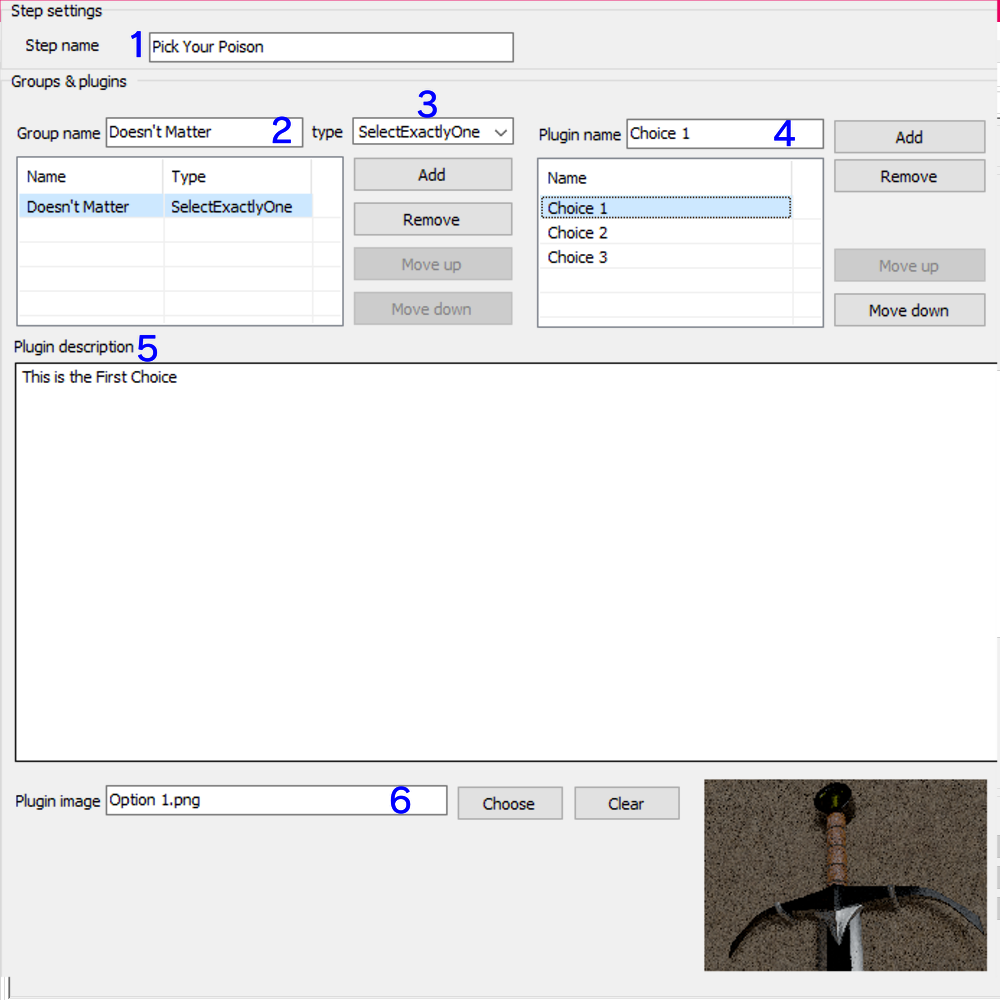
Here is a visual Guide to show off what Shows and Where
Now for the Important part, setting the Installer up the Right way.
I draw your Attention back to the bottom of the FMOD Program where it says Files.
Now the Basic Idea is you Take Folders/Files and put them in a Destination denoted by DATA\
Don’t Fret DATA is actually the Mods Folder for Doorkickers in this case.
In my image I selected Choice 1 at the top of the Program and added Option 1 as Folder and it gave it an automatic Destination, we actually don’t want that, You want to remove that Path Entirely, by right clicking and hitting Edit path.


If we left it Default it would do the following.
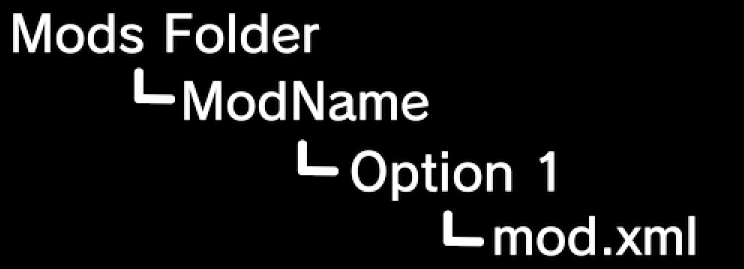
But when you leave the Destination Blank It removes the Option 1 Folder from the path,
placing the mod.xml correctly in the Mod folder.
Of course you can use the path to precisely place files also.
I plan on covering that in Method 2.
Now all that’s left is to save it either by pressing Control+S or the button called FMOD in the topleft and hitting Save.
Lastly we need to package the mod, You can simply Zip up the Root Folder, that we Started with and Upload to Nexus.
However if you want to check whether it works much like in the One and Done Mod Section you can install it manually.

Thanks to Fluffy for his great guide, all credit to his effort. you can also read the original guide from Steam Community. enjoy the game.
Related Posts:
- Door Kickers 2: How to Create Weapon Mods
- Door Kickers 2: How to Create Multi-floor Maps (New V0.33)
- Door Kickers 2: Controls & Keybinds Guide
- Door Kickers 2: Kamil Pasha Market Simple Guide

