Beginner’s Guide to becoming a pirate lord in X3: Farnham’s Legend.
Getting Started (What You’ll Need and Where to go)
First off, you’ll want to head for Hatikvah’s Faith. If, in the plot, you chose to side with the pirates with the gate alignment, it’ll be much easier to reach. Heading South from the Xenon Hub to Danna’s Chance, it’ll be 2 sectors east from there. 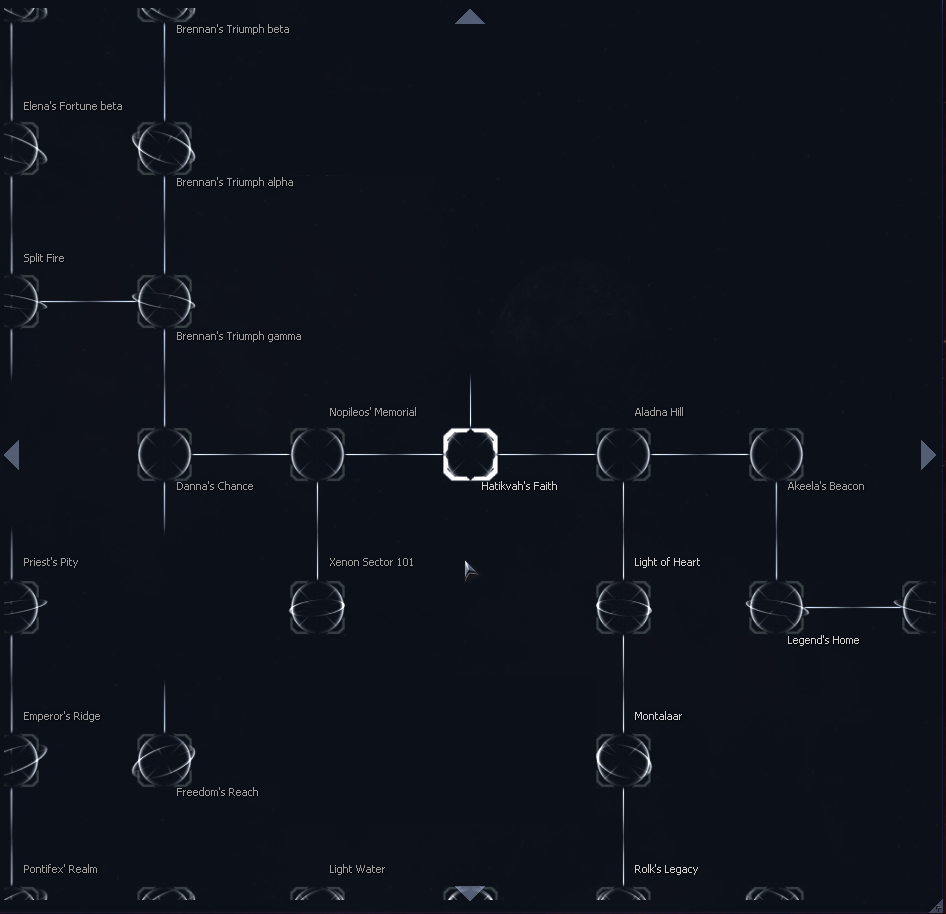
Locating this area of the map is pretty vital I would say, as Hatikvah’s Faith is one of a few high traffic border sectors that contains cross-traffic from all commonwealth races (Argon, Boron, Teladi, Split, and Paranid), including military and transports, while also having easy access to a pirate shipyard in the same sector.
Stealing Cargo (Cargo Hacking)
Start by looking around the sector for Friendly/Neutral Weapons Dealers or High Tech Traders. They must not be hostile to you or the cargo hacker will not work.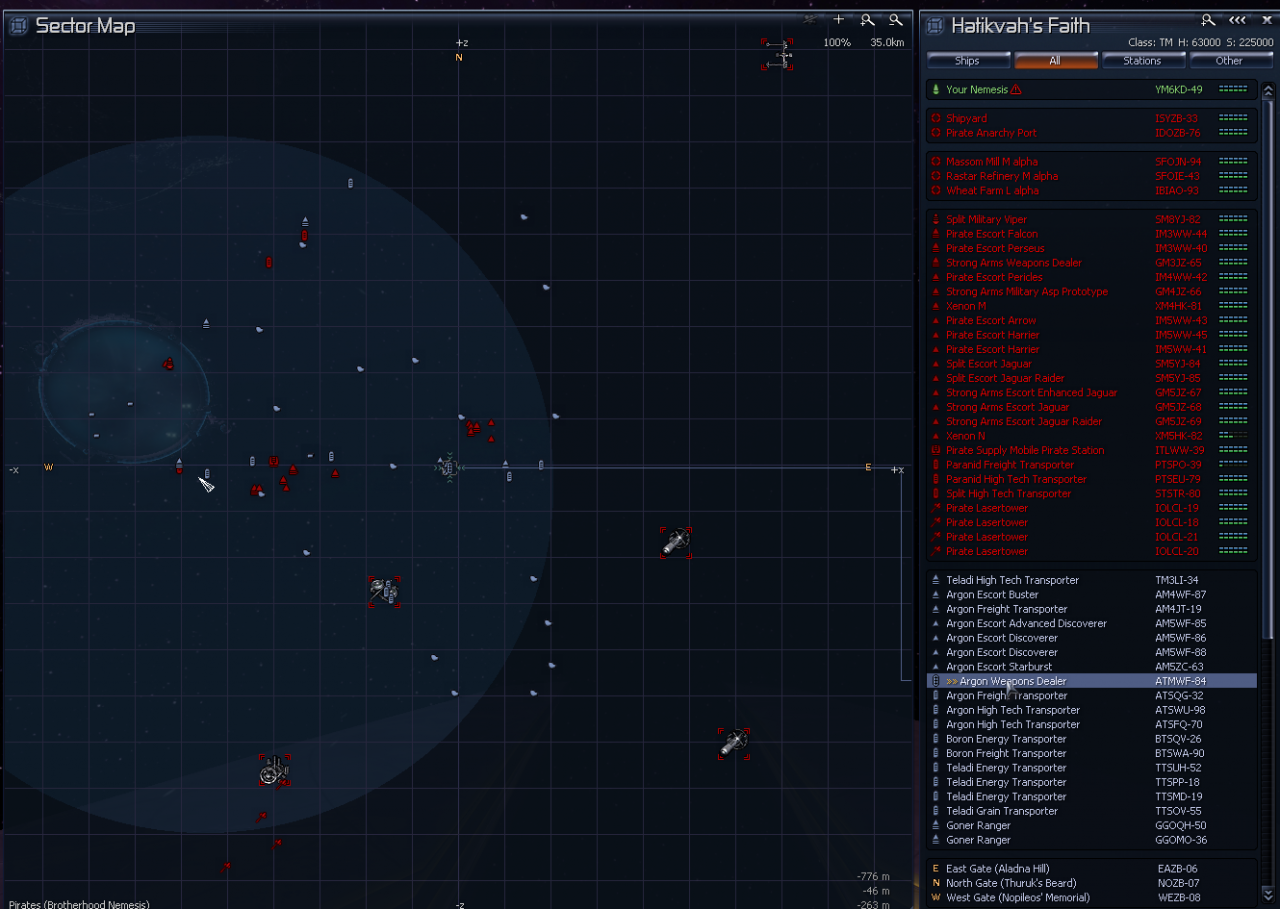
Once you have located a target, get in range and scan them to discover the contents of their cargo. Finding a target with a sufficient amount of loot, get in close and engage the cargo hacker using the hotkey you’ve assigned. You’ll want to prioritize grabbing weapons of highest value first, though exclude XL size weapons as you likely won’t be able to steal them without being detected.
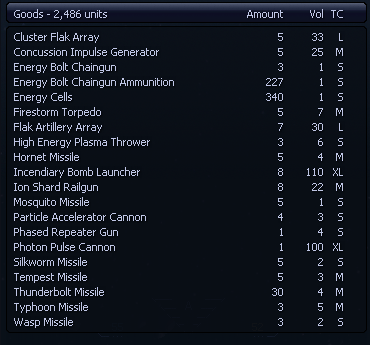 Grab any Fragmentation Bomb Launchers, Plasma Burst Generators, Concussion Impulse Generators, High Energy Plasma Throwers, Ion Shard Railguns, and any other Medium or Small guns.
IMPORTANT: If you’re detected while trying to steal from them, simply open the communication menu, and use the option for “Sorry, Weapons fire was in error.” 9 times out of 10, your crimes will be forgiven as long as you don’t continue trying to steal from the same target.
Once you’ve gathered a sufficient amount of loot, simply head to the anarchy port to sell it. (If you can’t dock here, another equipment dock or military outpost will work.)
Armoured Transports and Small Ship Capture
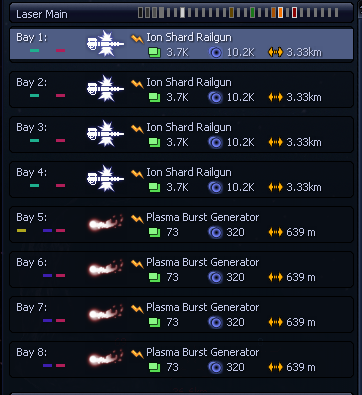
Set up your Railguns to be on group 2, Plasma Generators on Group 3, all weapons on group 4, and a single PBG on group 1. Note that there are other, more effective weapon setups than this, but this setup is highly specialized for the targets we will be going after: Armoured Transports.

Armoured Transports are a new addition in Farnham’s Legacy, and are intended as a stopgap between a TL and a TS. They are heavily shielded and have very tough hulls, and oftentimes will have several turrets equipped with light weaponry as well as fighter drones, and the occasional escort. They are easily identified by their new, unique icon on the map.

Find one, open the comm menu, and tell them to surrender. Yes, do it before you’ve even fired a shot, as there’s a small chance they’ll immediately give up anyway, or drop their cargo. Even if they don’t, however, this will turn them hostile to you, and focus their attention on you, allowing you to either lead them somewhere more safe away from other hostiles or prevent them from escaping to a more policed sector.
Start approaching them, and lay into them with your ion shard railguns until you’re within 1km range. Once there, use shift+f to adjust your speed to match the target, and begin laying into them with PBG’s. Once the shield is down, switch to weapon group 1, and begin slowly whitting away at the hull. (The PBG is an amazing tool for stripping away all but one shield from your target, ensuring they won’t have weapons to fire on you with while you pursuade them to give up their ship.)
Open the communications menu when your target is at 80% hull or lower, and demand their surrender. If they refuse, back off and let their shield recharge to 50%, and try again, taking away a few more hull % each time. Most of the time, I find that the pilot will bail between 30~80% hull, or not at all.
After they’ve left the ship, you’ll need to ensure there’s no other hostiles nearby. Clear out any remaining hostiles, then claim your new armoured transporter. Send it to the shipyard conveniently in the same sector, and sell it for a fresh 3-5 million credits. (If you sided with the Argon and you don’t have the pirate rep to dock there, send it to light of heart instead.)
Preparing for Boarding
You’ll also need a Transporter Device and Bioscanner on your personal ship, these can be puchased from the Terracorp HQ in Home of Light Alpha.
Jumpdrive kits will be very helpful, but not entirely necessary as long as you carry a spare jumpdrive on your personal ship, and are okay with re-buying it after every capture.
Load up your transporter with marines. If you’re struggling to find where marines are sold, check your encyclopedia for locations. A few to note are the Military Outpost in Aladna Hill, the Rehabilitation Facility in Danna’s Chance, and the Teladi Equipment Dock in Company Pride.
Get 21 Marines. Don’t get more, as if you do, they will not be usable in the next step. Focus on marines with the highest fighting skill, since it can only be trained through experience. (Optional: Train them in all skills with advanced training twice before proceeding. This isn’t necessary, as it won’t impact their combat performance, only their ability to cut into tougher hulls and hack tougher mainframes. Training won’t be needed for the target we are after.)
When you are ready, save your game and proceed back to Hatikvah’s Faith.
Boarding Ships
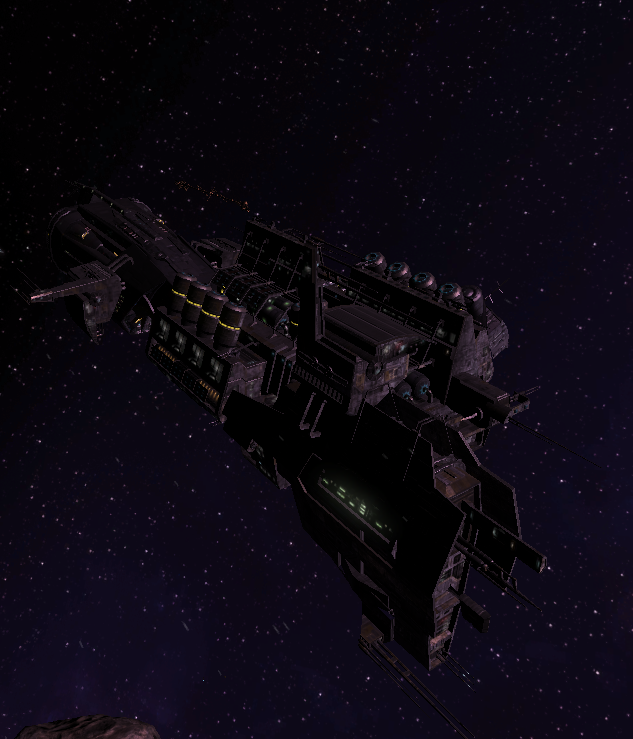
Scope out your target, ensure there are no hostiles nearby. If there are, either eliminate them, or wait for your target to be somewhere safer. Get close enough, and scan its’ cargo. You’ll want to ensure it doesn’t have Advanced Firewall Software, Internal Sentry Lasers, or a Hull Polarizing Device before boarding as they’ll seriously hurt your efforts, or even outright prevent you from capturing the ship.
When you are ready to board, jump your marine transport in and command it to follow you. Engage your target, and take the shields down. (You don’t need to do hull damage, but if the target has any of the previous 3 pieces of software, you’ll need to damage the hull using your PBG until the component is destroyed.) Once the shields are down, switch to your transport, and get in front of it, about ~1.5km away.
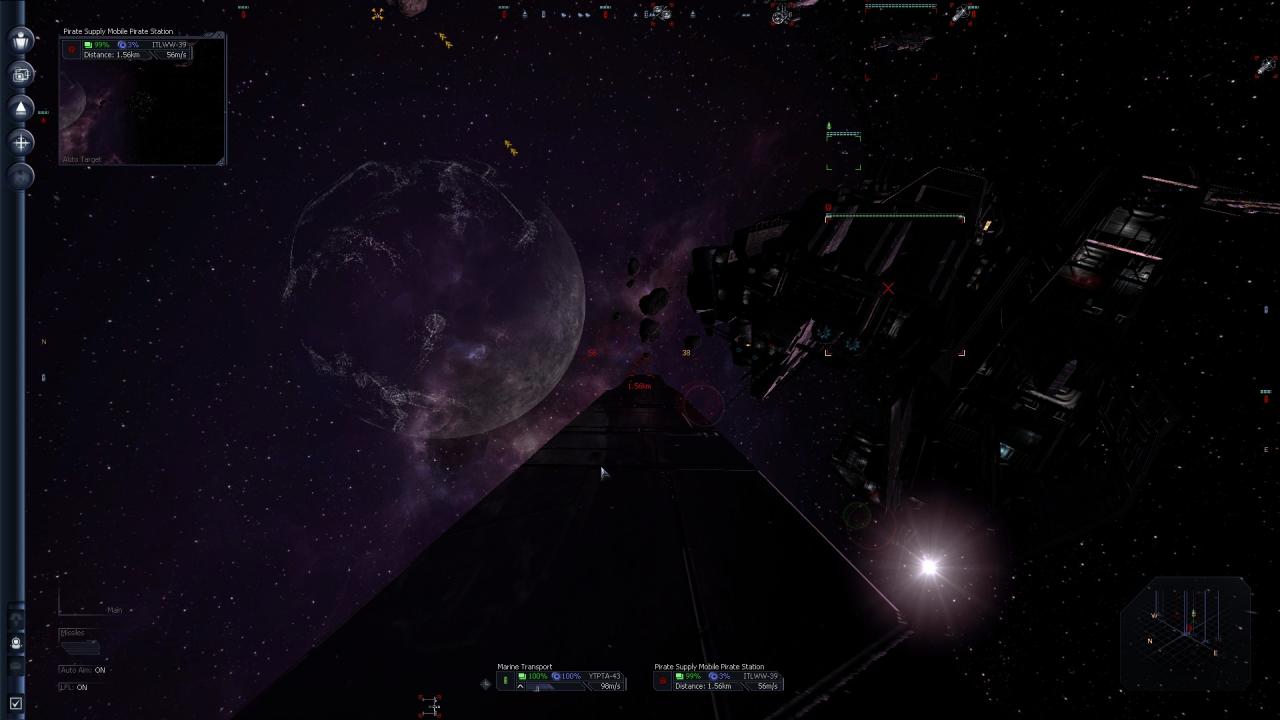
You’ll need to time this carefully, and you’ll have to switch back to your combat ship and attack if it’s shields start getting above 5% again. Press the hotkey to “Launch all Marines” (assignable in the controls menu under the weapons category), then get your transport out of the way.
If done successfully, your marines should begin spacewalking to the target, and, since they’re in it’s direct path, they should have no trouble making contact. Switch back to your combat ship, and continue keeping the shields below 8%. WARNING: IF THE SHIELDS GO ABOVE 8%, YOUR MARINES WILL BE INSTANTLY VAPORIZED BY THE ENERGY SHIELD.
Listen for when your marines have informed you that they are through the hull and have begun combat. At this point, it is safe to simply have your autopilot follow the ship, and open your personnel tab to monitor their progress.
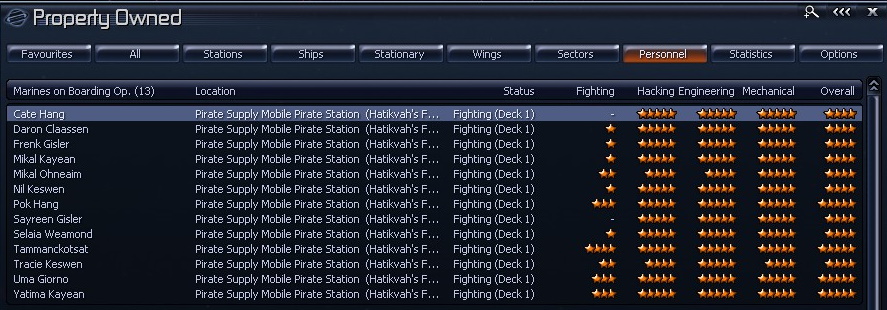
They’ll fight their way through 5 decks of the ship, then hack the core. As long as you brought 21 marines, they should have no trouble clearing their way through the ship with little, if any, casualties, and before long, the ship will come under your control. 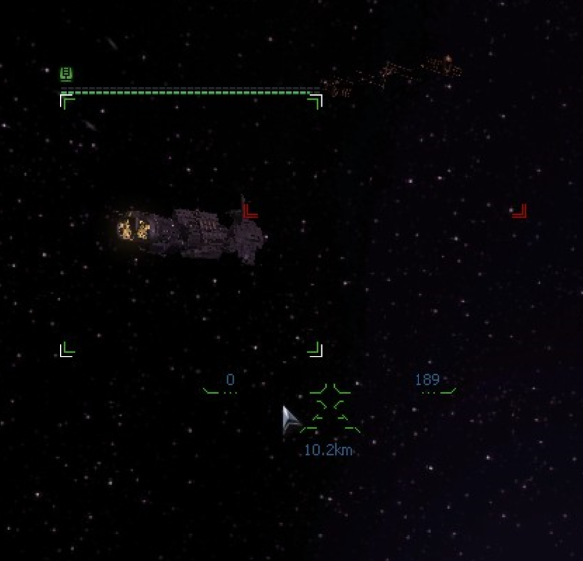
At this point, your faction reputation with the pirates will plummet, and you’ll no longer be able to send it to the shipyard in the same sector. You’ll need to send it to the shipyard in Light of Heart to sell it. To ensure it makes it there, either provide an escort or transfer it a jumpdrive and some energy cells. Make sure you clean up any marines floating in space before leaving the sector.

