
Each area ends in a boss, and each boss gates the next tier of settlement upgrades, spells, and units. Treat those fights as checkpoints, not detours — the unlocks behind them are what make later challenge modes survivable.
What You Need Before the Run
Nothing carries over from a previous save, so start clean and let the tutorial finish before you touch settlement menus. The tutorial introduces the NPCs you will return to for upgrades, and founding the settlement is the first real milestone.
- Expect a long run. The second and third areas take far more time than the opening, so plan sessions around a full area rather than a single boss attempt.
- Gold and ability upgrades are the two levers you control outside combat. Farm and upgrade before pushing a new area, not after you are already stuck.
- Challenge mode and Ascended mode sit after the main story. Do not chase them until the final boss is down.
Several areas in this run are covered as boss-focused segments rather than step-by-step routes. Where the source is thin, this guide flags it instead of inventing paths — use the boss tactics and upgrade priorities as your anchor and explore the rest yourself.
Blue Mushroom Puzzle
If you activate them in order, it turns the game time to night. The order of activation is as follows:
- Bottom Middle
- Top Right
- Middle Left
- Middle Right
- Bottom Right
New Game & Tutorial: From First Death to Your First Real Run
The opening stretch of Wielders of the Essence is a guided loss. You are meant to fall at the end of the tutorial run, and that death is what hands you the game’s real loop: feeding experience to the Dormant One and building a settlement around it. Treat the tutorial as a place to bank two specific upgrades rather than a fight to win.
Starting the Run and Picking Your First Upgrades
Choose New Game from the main menu to drop into the tutorial. When upgrade choices appear, take these two:
- Rejuvenation — passive health regeneration keeps you alive long enough to see the rest of the tutorial content.
- Greed — extra gold compounds into your settlement purchases almost immediately.
Do not fight the ending. The run concludes with your death by design, and the story continues from there.
The Dormant One and What It Wants
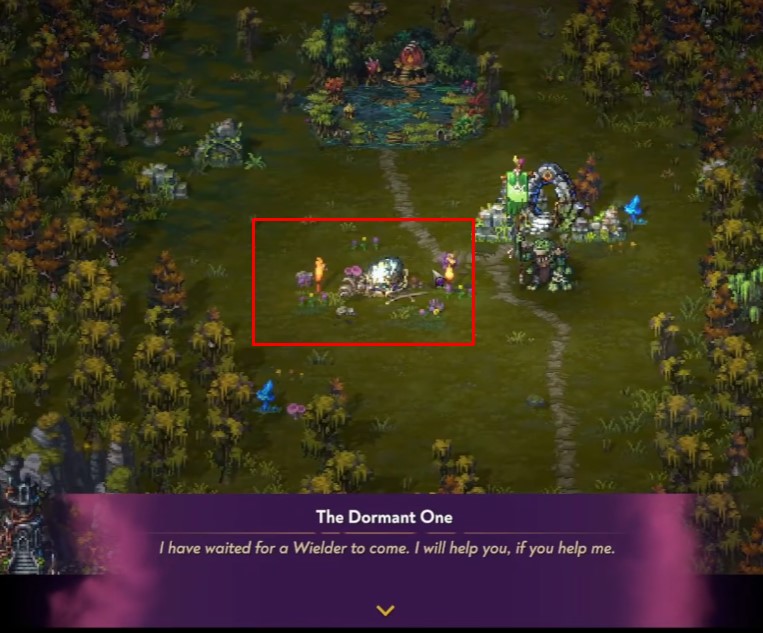
After you die, you are teleported to the egg — the Dormant One. It explains the exchange that drives the whole game: your accumulated experience feeds it, and in return it teaches you to wield essence. Your side of the bargain is to raise a settlement, construct buildings, and gather allies. Everything you do from this point feeds back into that cycle.
Founding the Settlement
Spend your crystals to push the settlement up to tier 1. This is the gate that opens new buildings and features, so make it your first purchase before anything else. Once the tier is unlocked, put the Hunter building up.
Hunters and the Portal
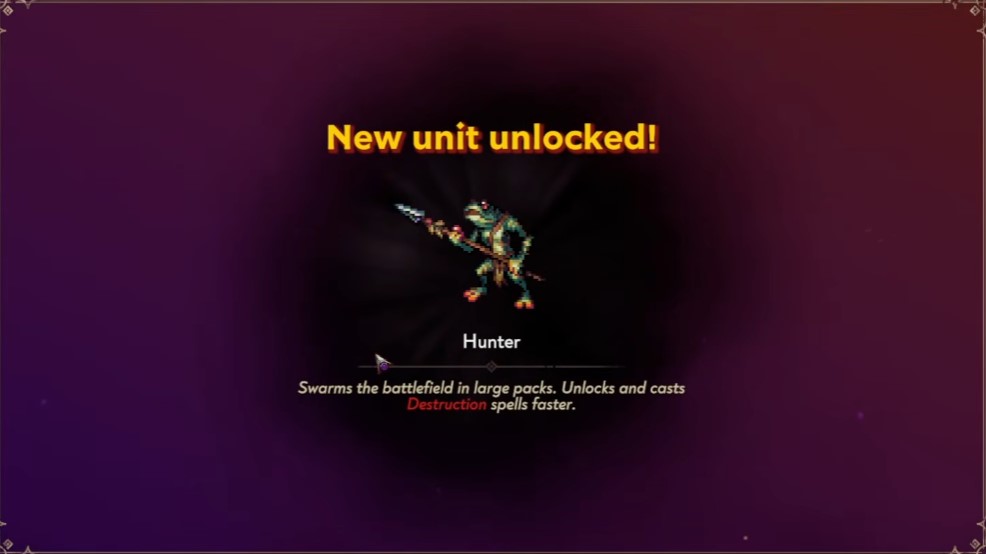
Hunters are your first ally and they earn their slot: they help you cut through swarms, handle large packs, and unlock and cast destruction spells faster. With a hunter at your side, head to the portal and start your first real run — you return to the marsh, this time with backup instead of an empty party.
Delay the portal until the Hunter building is finished. Entering the marsh without a hunter means facing the same swarms that killed you in the tutorial with none of the crowd-clearing help.
First Area: Chests, Allies, and the 75-Rat Timed Event
The opening zone hands you a steady drip of upgrades before it asks anything hard of you. Treat the early pickups as the foundation for your whole run — the chests and level-up choices here decide whether the rat event is even worth attempting.
Early Chests and What They Give You
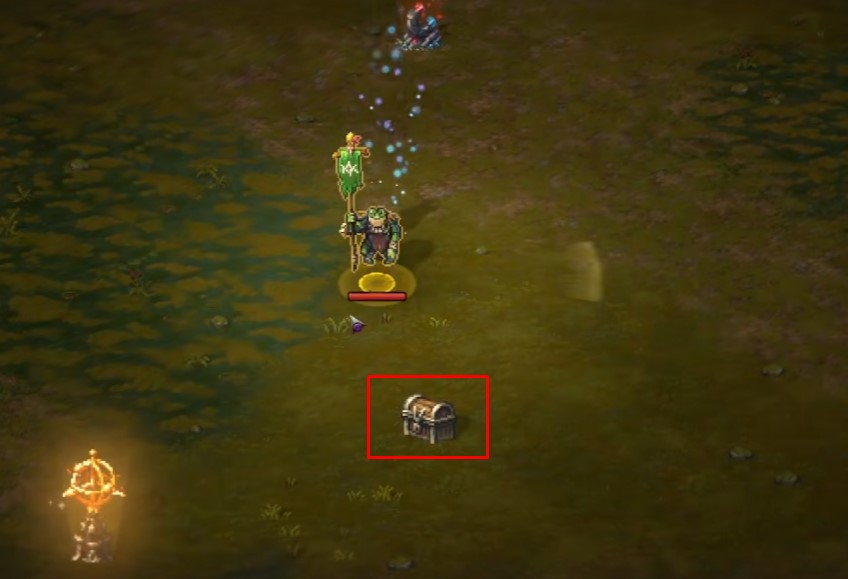
Two chests anchor this stretch. Grab the first one as soon as it appears for a flat 10% speed boost — small, but it makes dodging and repositioning noticeably easier while your damage is still low.
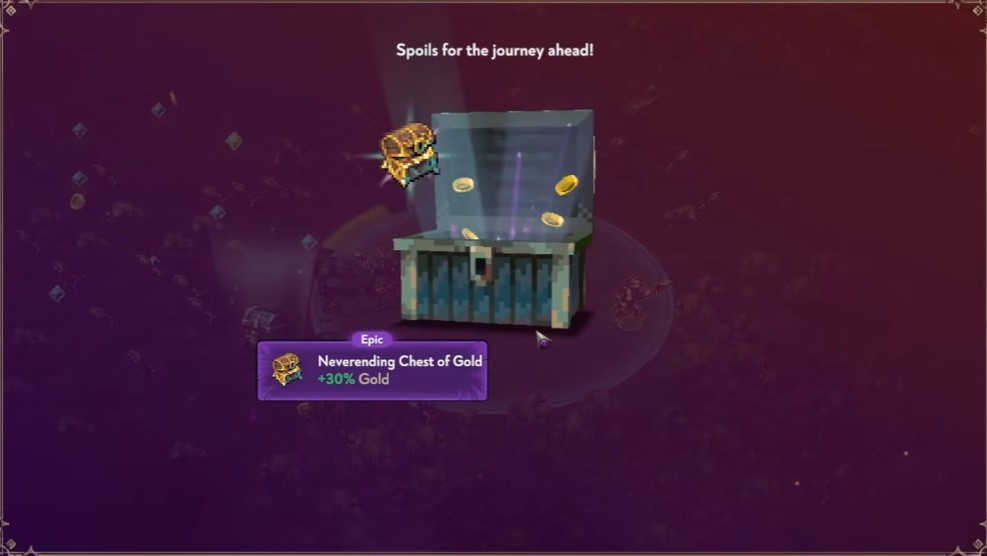
Later in the area, a second chest delivers 30% more gold plus the Bone Crown, which extends duration. The gold bump compounds with any gold upgrades you take, so if you’re planning to lean into economy, this chest is the payoff.
Level-Up Choices That Carry the Run
Your upgrade picks should skew toward offense first. Critical chance and attack speed are the highest-value early grabs — they multiply everything else you add later, and they make clearing rat packs far less painful.
- Regeneration — take it to recover health over time; it keeps you alive through the rat swarm without burning consumables.
- Critical chance — priority pick for raw damage scaling.
- Projectile speed and attack speed — pair these to land hits faster and more reliably.
- Brutality — more damage, stacks well with crit.
- Speed — mobility for kiting and dodging.
- More gold — economy pick; strongest when paired with the 30% gold chest.
Recruiting the Hunter
When the hunter ally option appears, take it. The hunter fights alongside you and can be upgraded further down the line, so it’s an investment rather than a one-off perk. An extra damage source matters most during the rat event, where you’re racing a clock.
Handling the 75-Rat Timed Event
The timed event asks you to kill 75 rats before the timer runs out. On a fresh run with thin upgrades, this is a real stretch — the source is upfront that the first attempt often falls short. Focus fire on rats and keep moving, but don’t panic if you miss it.
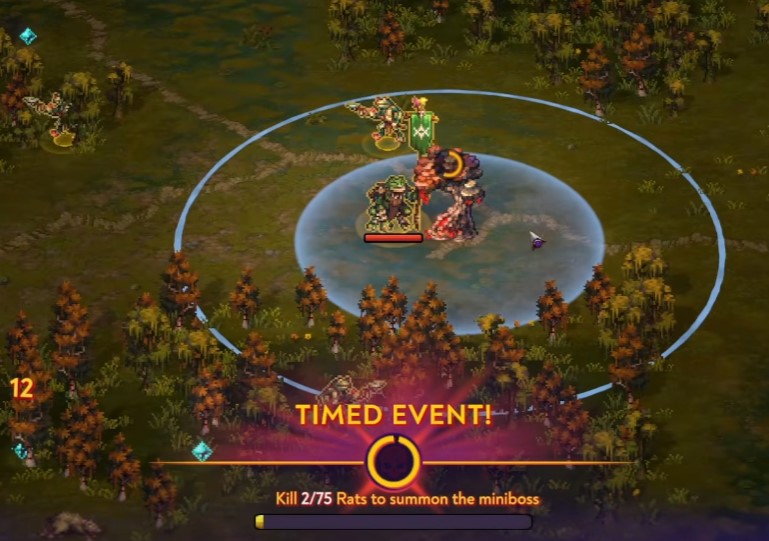
If you’re underpowered when the rat event triggers, it’s fine to let it fail and keep pushing the run. The upgrades you bank now make the next attempt far more realistic.
Power Pick: Sharp Blades
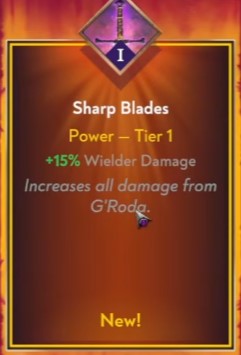
When the power selection comes up, Sharp Blades is the dependable choice — it’s the pick the run leans on consistently. Take it and keep building damage around your crit and attack speed.
Upgrading Your Settlement
The settlement is where every run pays off. The experience you bank during a run feeds the Dormant One, and what it builds with that experience shapes how strong your next attempt starts. The 1,500-crystal gate is the wall you hit first, so most of this phase is about pushing crystal income while quietly stacking the upgrades that make clearing faster.
What the Dormant One Builds First
Back at the settlement, the Dormant One puts up a destruction spell spot and hands you Cold Snap. It targets newly arriving enemies, freezes them, and makes them take amplified damage while frozen. More destruction essence means you cast it more often, so treat it as your opener rather than a panic button — freezing fresh spawns keeps the field manageable before your damage ramps.
The next settlement upgrade is locked behind 1,500 crystals. Until you have them, the loop is simple: head into unknown lands, gather resources, and come back with enough experience to keep the Dormant One working.
Spending Gold Before the Next Run
Gold is tight early — you are sitting on roughly 56, which is nowhere near the Dragon Monolith’s price. Put what you have into Greed to raise gold gain, then leave the expensive buildings alone until your income catches up. A small Greed bump now compounds across every enemy you kill later.
Run Upgrade Priorities
The upgrades you pick between fights decide whether a run snowballs or stalls. Lean on offense that scales with your Cold Snap freeze, and only take defense when you are actually taking hits.
- Attack speed and projectile speed — more shots landing on frozen targets, faster.
- Critical chance and critical bonus (10%) — frozen enemies take amplified damage, so crits hit harder on them.
- Hunters — boosts both damage and range, a strong pick when enemies start spreading out.
- Brutality — raw damage for the next run; take it when you need to break through a tanky wave.
- Rejuvenation — healing when your health is bleeding out and you cannot afford a death.
- Spell damage — makes Cold Snap and your other spells hit harder.
- Protection — damage reduction for runs where you expect sustained pressure.
When a run offers more gold, take it — the extra currency feeds Greed and the settlement buildings you are saving toward.
Events, Chests, and the Magnet
Not every distraction is worth your time. If you are short on crystals, skip an event and keep farming resources instead; the payout rarely beats steady kills. When you do commit to an event and fill it, the reward is worth it.
- Grab the magnet so pickups pull toward you — less walking, more collecting.
- Take Blood Frenzy after filling the event meter.
- Open chests as they appear; one drops the legendary Talisman of Destruction Essence, which grants +1 unit of destruction essence.
- Recruit the extra unit to grow your army alongside the talisman.
Leather Headband and Returning to the Dragon
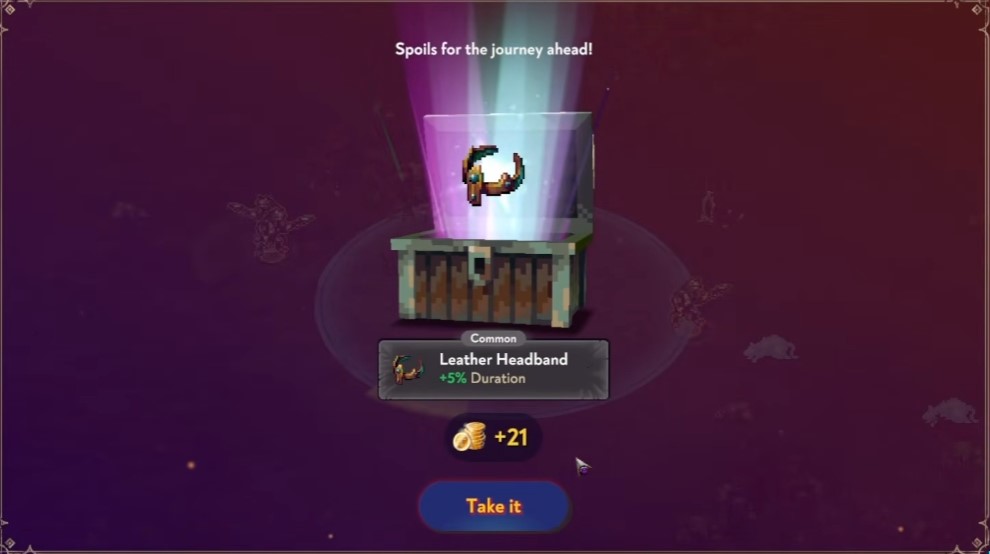
Among the smaller picks, Leather Headband duration extends that buff’s uptime — useful if you rely on it during longer fights. When the area is cleared, head back toward the Dragon to reset the loop, then spend your accumulated resources on the next round of upgrades. Keep defeating enemies along the way; each kill is both experience for the Dormant One and gold for Greed.
Do not sink gold into the Dragon Monolith or other big buildings until you clear the 1,500-crystal settlement upgrade. Greed first, then the expensive unlocks.
Spending the 1,500-Resource Settlement Upgrade
Once you’ve banked enough crystals, push the settlement to its next level for 1,500 resources. That single purchase is the gate for everything else in this stretch, so don’t dribble the currency into small rolls before you can afford it. When the upgrade lands, immediately redirect your spend into the combat stats that keep you alive on the way to the boss.
- Attack speed first — faster hits mean more chances to proc everything else.
- Brutality and critical hits next, so your damage scales with the speed you just bought.
- Precision to tighten your hit consistency before the boss gate.
On the level-up screens, grab the flat damage bump (the 2.5 damage pick) and pair it with another attack speed roll. Rejuvenation is worth taking whenever it appears — healing is your buffer against the harder encounters ahead, and you’ll want it topped up before the boss.
Cold Snap, Greed, and the Damage Stack
Cold Snap is a strong early pick here; take it when offered and let it do crowd work while you focus on positioning. From there, keep stacking the same core: more damage, more brutality, Sharp Blades, and Fury. Greed and speed rolls are fine fillers, but they shouldn’t crowd out raw damage or attack speed.
Finish off the Sharp Blades upgrade line so the ability is fully online — a completed ability outperforms a pile of half-finished ones. If a projectile speed option shows up before the boss, take it; slower projectiles are a real liability in that fight.
Treat the boss as a survival check, not a damage race. If you can barely scrape through, prioritize defensive and healing picks over greedier offensive rolls.
Legendary Drops and Gear to Equip
This stretch hands you several legendaries — collect every one you walk past, since they’re free permanent value.
- Tadpole — max health boost; take it for the survivability.
- Ancient Ember — 30% experience, which accelerates your whole upgrade curve.
- Circlet of Swift Winds — 30% attack speed; equip it immediately.
- Mirror of the Moon — range, useful for hitting enemies before they close in.
- Scroll of Power — 10% experience.
- Vial of the Heart — +20 health.
- Endless Scroll — 5% XP; small but free.
Grab a magnet when it’s available so crystals and drops get vacuumed up from range — less time walking into danger to collect loot. Sweep the environment for loose crystals between fights and bank them toward the next settlement tier.
Heartlands: The New Map Area
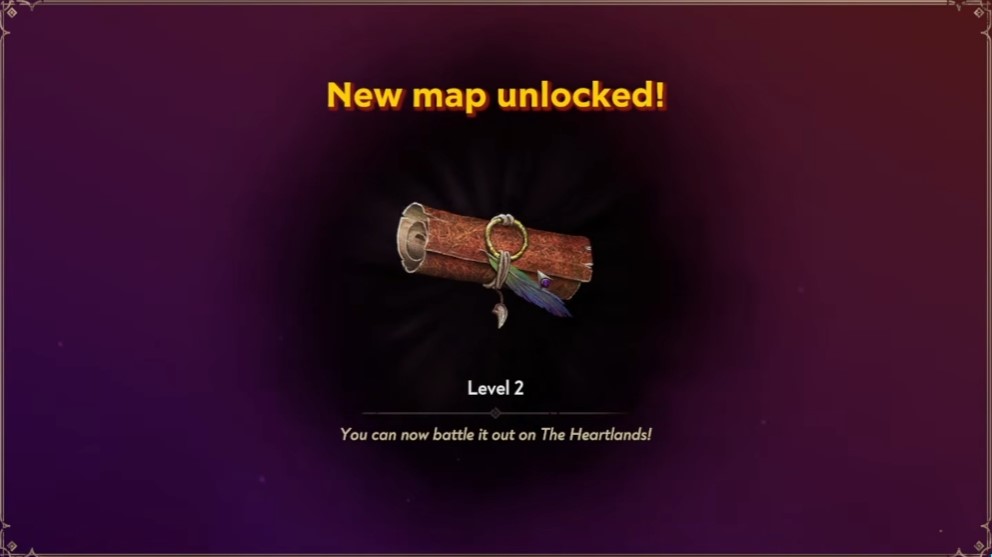
The Heartlands unlock during this chapter, but the unlock isn’t an invitation. It’s a noticeably harsher zone, and stepping in under-geared will end your run fast. Finish your current upgrades, equip the legendaries above, and only then push into the new area.
- Confirm your attack speed, damage, and healing are all upgraded before you enter.
- Keep a rejuvenation source ready — the Heartlands punish sloppy health management.
- Use the range from Mirror of the Moon to soften enemies before they reach you.
If you’re unsure whether you’re ready, run one more upgrade cycle first. The Heartlands aren’t going anywhere, and a failed attempt costs more than a few minutes of extra farming.
Boss Fight: The First Wielder Showdown
The first boss is a projectile-heavy caster, and she sets the tone for the rest of the run: keep moving, keep your Sharp Blades swinging, and treat the blacksmith as part of your combat loop rather than a between-run pit stop. Everything below covers the fight itself, the settlement spending that follows, and the longer farming stretch where the boss becomes an optional target you can deliberately leave alive.
Winning the First Encounter
She leans hard on projectiles, so standing still to trade hits is how runs end early. Stay mobile, circle her, and let Sharp Blades do the work while you keep upgrading it whenever an upgrade prompt appears. When you get a choice, take more max health — surviving her volleys matters more than squeezing out extra damage this early.
Before or between attempts, visit the blacksmith and buy the max health upgrade. Once her health bar is gone, the encounter is complete and you can move on to spending what you earned.
Do not try to facetank her projectile patterns. Constant movement is the whole strategy here — the damage comes from Sharp Blades, not from you standing your ground.
Spending 2,200 Crystals on the Settlement
Your first big settlement upgrade costs 2,200 crystals. The Dragon Monolith is the standout pick — it grants more skills and lets you hit more enemies at once, which compounds across every later fight. Round out the purchase with damage for your wielder, troops, and spells, plus health, thorns, fury, rejuvenation, and greed.
- Dragon Monolith — extra skills and multi-target hits; take this first.
- Damage nodes — wielder, troops, and spells all scale separately, so spread across them.
- Survivability — health, thorns, and rejuvenation keep you alive during farming stretches.
- Greed — more crystals per run, which accelerates every upgrade after this one.
Chasing Her Down and Finishing the Run
After the settlement upgrade, chase the boss to re-engage. Attack speed is the answer here: stack it and she folds quickly. Killing her drops 2,000 crystals and closes out the run. On the upgrade screens that follow, favor range, XP gain, and max health so your next attempt starts stronger.
Building Out Your Toolkit
Between boss attempts, invest in essence spires — each one channels more energy into upgrades. That unlocks rerolls and new units, including Ethra, whose piercing projectiles punch through lined-up enemies.
Spells and Gear to Pick Up
- Vortex — a shrinking ring of arcane energy that renews on every cast; strong area control.
- Cold Snap — adds crowd control, which buys you breathing room against projectile spam.
- Gauntlets — grab these and pour upgrades into vortex damage.
- Blacksmith helmet — a straight damage increase; buy it when you can afford it.
Use the compass to find objectives and clear the guards blocking your path, and open every chest you pass for extra rewards.
Farming Runs and the Boss You Leave Alive
Later runs work differently: survive until the timer ends and the boss appears, but you are not obligated to kill her right away. She will start chasing you, and that is fine — keep exploring, opening chests, and collecting gear while she trails behind. Avoid finishing her off until you are ready to end the run.
When you do fight, attack speed remains your best stat. For upgrades during the farming phase, take health regeneration to stay topped up, the magnet upgrade to widen pickup range, and attack speed for output. Arcana magic (5% experience) and the compass upgrade for 15% experience both pay off over a long session. Chain lightning is a solid new ability, though vortex is equally worth taking if it appears.
Synergies Worth Locking In
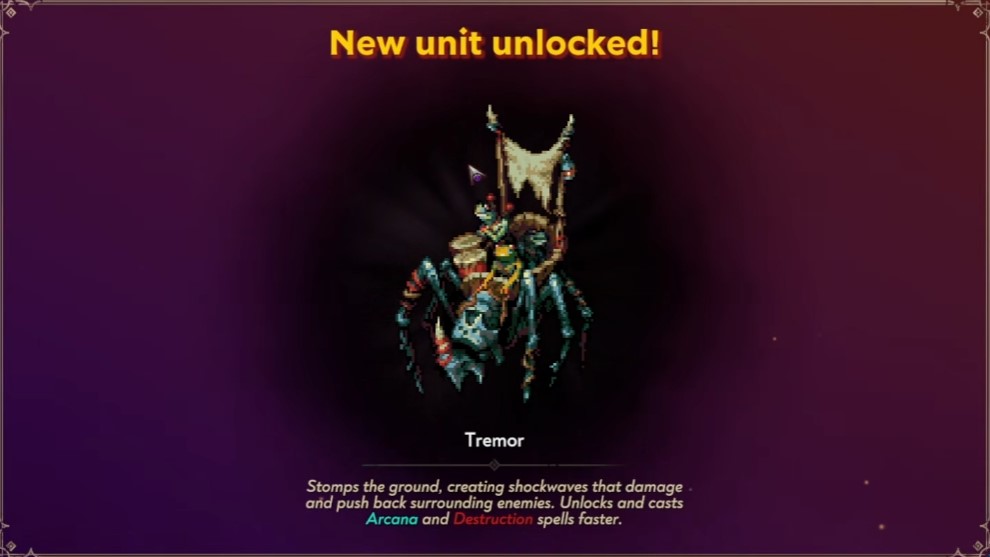
- Driving Herd — pick Tremor at the kennel; he steers the herd into the hunter’s line, boosting damage for you and your troops.
- Corrosive Bile — reroll if needed to grab Crawler; his tanks leave damaging puddles, so fight around them.
Spend spare wood recruiting extra units, and once you have the resources, upgrade the settlement to bring three troops and three spells into battle. New units like Tremor (ground-stomping shockwaves that push enemies back) and buildings like the arcane spire (bouncing projectiles) and crawler (corrosive acid) widen your options considerably.
After the Kill: Tavern and New Characters
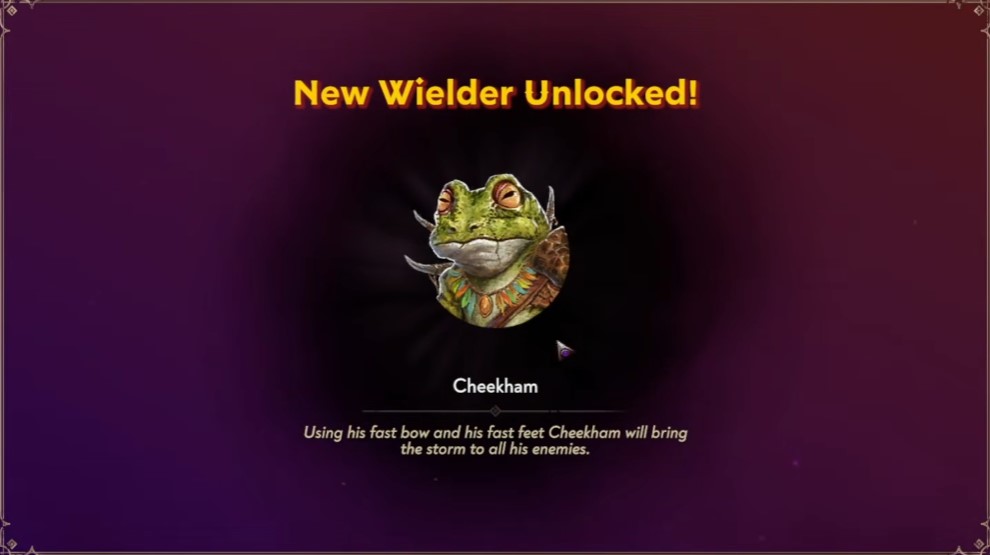
Defeating the boss unlocks the tavern, where you can recruit and switch characters. Prioritize the fast mover — they collect XP from killed enemies and unlock destruction and creation spells faster than anyone else. Picking up the creation spells skill opens a whole new spell pool, so make that your next unlock target.
Second Area & the Cannon Boss
The arch past the first map drops you into a resource-rich zone, but the real gate is the boss waiting at the end of it. Everything below is about building a ranger that can actually finish that fight instead of letting the boss slip away.
Starting the Run as a Ranger
Pick the ranger before you commit to the second map. Your opening upgrade should be piercing volley — arrows punch through enemies, and the chicken adds more arrows per cast as the skill levels up. That scaling is what carries your damage through the early waves.
Follow it with the combined 20% speed and health pick for a safe stat base. If the offered options are weak, spend a reroll rather than settling — a bad upgrade now costs you time later.
Upgrade Priority Before the Boss
Small movement gains compound. Take movement speed even when the number looks minor, then layer on pickup range so resources and orbs come to you instead of forcing detours.
- Damage — take it whenever it appears; it shortens every fight.
- Ability damage — grab this after you clear the boss and step into the new area.
- Attack speed — prioritize it whenever it is offered; more casts means more piercing volleys landing.
- Max health — a survivability buffer for the cannon phase.
- Precision — improves accuracy so your arrows stop wasting themselves.
Keep farming between upgrade picks. The boss is not a single burst check — you grind resources, stack stats, and then commit to the kill.
Fighting the Boss
Once you engage, stay on it. Do not let the boss run away — a disengaged boss means re-farming and lost time. It leans on cannon attacks alongside its other abilities, so keep moving through the volleys while your piercing arrows and attack speed do the work.
Treat the cannon fire as the real threat, not the boss’s health bar. Dodging cleanly matters more than squeezing in one extra shot.
Clear the kill five guards quest when it appears, and watch for additional quests popping up alongside it. Finishing the boss completes the area and opens the path forward.
Second-Area Loot & Essence Upgrades
This zone out-produces the first map, so sweep it properly. Gather wood and other materials, and hunt down celestial orbs — they are an upgrade currency, and a cluster of them spawns in a specific small slice of the map, so cover that pocket rather than wandering.
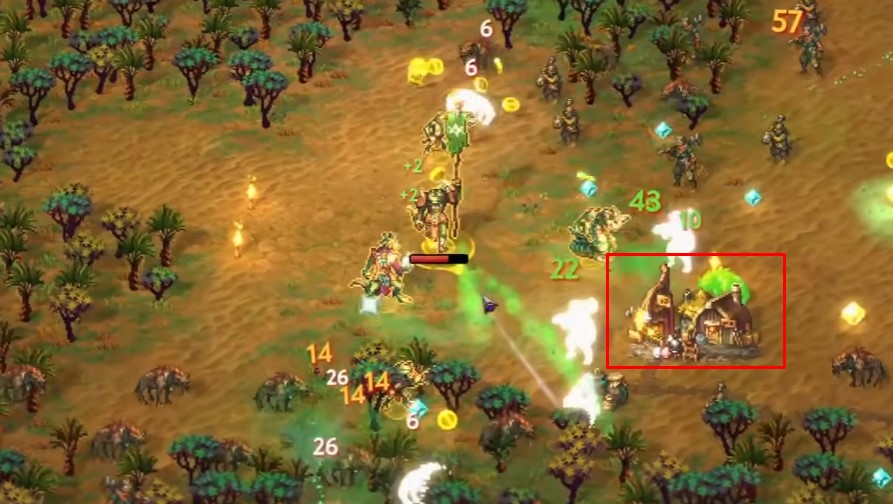
- Creation magic — unlocks more creation spells and speeds up casting as your essence climbs. High value if you lean on spells.
- Legendary projectile upgrade — a straight boost to your arrow output.
- Legendary upgrade — appears after you survive the area event; take it before the boss.
- Bow damage or speed — either works; pick whichever stat your build is short on.
Post-Boss Cleanup and Ravagers
With the area cleared, tighten the build before the next zone. Upgrade Ravagers for more damage, and take the damage-output upgrade that rewards standing still — it pairs well with a boss you are holding position against. Fill remaining slots with max health, precision, or attack speed depending on what the run is missing.
Dance of the Vanir: Boss Fight and Blessing Drops
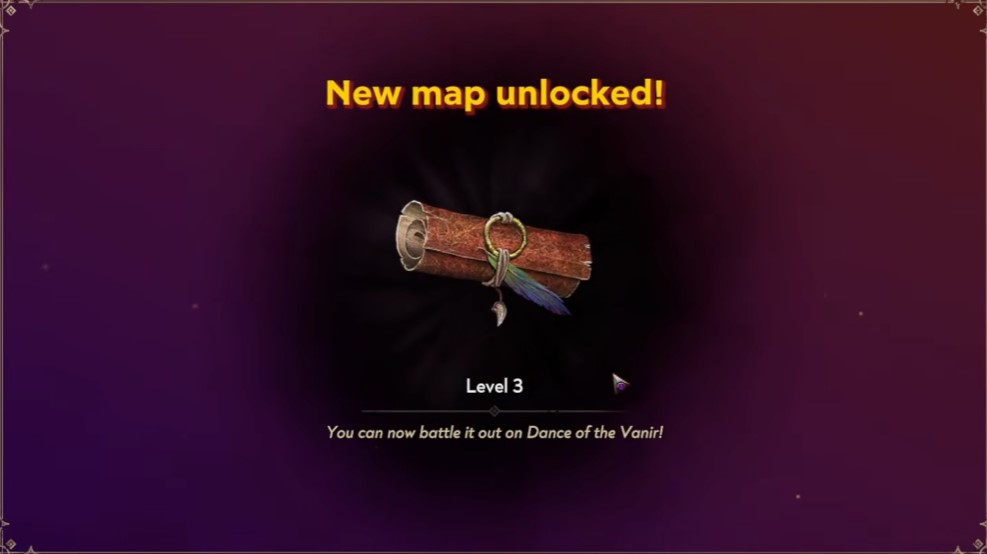
The Dance of the Vanir boss is the wall between you and the rest of the area. Treat it as a survival check first: keep moving, let your spells tick, and avoid standing in the boss’s damage windows. Healing is scarce in this run, so a single greedy trade can end the attempt.
- Take the Arcana upgrade that grants 5% damage and 25% pickup range before the fight — the pickup range keeps dropped resources flowing in while you dodge.
- Defeat the boss to clear the area and open the path forward.
- Collect the blessings that drop from the boss, including Furious Brutality and Ether Vortex. Grab them before moving on; they are free power for the next stretch.
Level-Up Picks After the Boss
The level-ups that follow the boss decide how smooth the next area feels. Favor consistency over flashy one-offs.
Core stat upgrades
- Critical hit chance for steady damage scaling.
- Area effect to widen your damage footprint.
- More projectiles to multiply every hit you land.
- The 30% experience bonus when it appears — faster levels mean more upgrades sooner.
Legendary and spell picks
- Take legendary upgrades when offered, prioritizing area effects and spells that fit your current build: Magnet, Cold Snap, Exhale, and Arcane Spear.
- Upgrade Exhale and stack additional projectiles on it for a reliable damage spike.
Legendary upgrades are generally strong, but the right one depends on your existing spells. If a legendary doesn’t synergize with what you already run, a solid area or projectile pick often does more work.
Clear the Map Before You Leave
Fully explore the second area before committing to the boss or moving on. Resources and upgrades left behind are gone for good, and the map is small enough that a full sweep costs little time.
Gold Farming Loop and Settlement Upgrades
When you need gold, go back to the first area. It farms faster than replaying the second area, and the enemies are far less punishing. Aim for 2,000 gold as your first milestone.
What to buy first
- Upgrade hunters for 2,000 gold — their damage jumps from 10 to 18, a big early return.
- Upgrade your settlement for 2,000 gold to unlock extra troop and spell slots. More slots mean more build variety and raw power.
- Invest in tech speed. It scales damage hard and is one of the strongest stat sinks available.
- Grab gold gain and spell damage upgrades to speed up the next farming loop.
- Upgrade the compass so your position shows on the map — navigation gets much easier.
- Pick up the speed upgrade for mobility and the max health upgrade for survivability.
- Upgrade Rapture and the vortex spell with celestial orbs for better area control.
Keep farming toward 4,000 gold for the next hunter upgrade. When the destruction upgrade appears, take it — it boosts your vortex spell’s damage directly.
Healing is limited, so play cautiously when health is low. Use movement and spells to stay alive rather than trading hits you can’t afford.
Late Upgrades and the Final Area Boss
With hunters, settlement slots, and tech speed online, the area boss becomes a damage race you can win. The vortex spell earns its keep here — it started as the least favorite pick and turned into a favorite once its area control and destruction upgrade came together.
- Bring four troops and four spells into battle once the extra-slot upgrade is purchased.
- Unlock Far Walk for better traversal; the next tier of that upgrade costs 15,000 gold.
- Engage and defeat the area boss with your upgraded spells and troops, then move on.
Third Area & Boss Fight
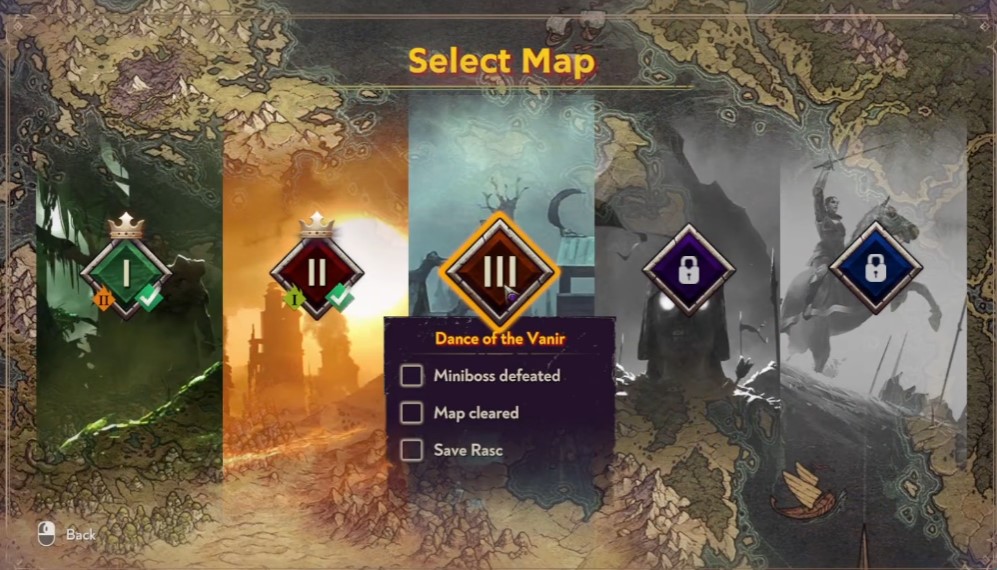
The third area is where your build starts to matter more than your reflexes. You are juggling a new character unlock, a god blessing, and a spell loadout that needs to carry you through the boss at the end. The order you take upgrades here decides whether the run feels smooth or turns into a slog against boars and thorns.
Opening the Area and Locking In Your Blessing
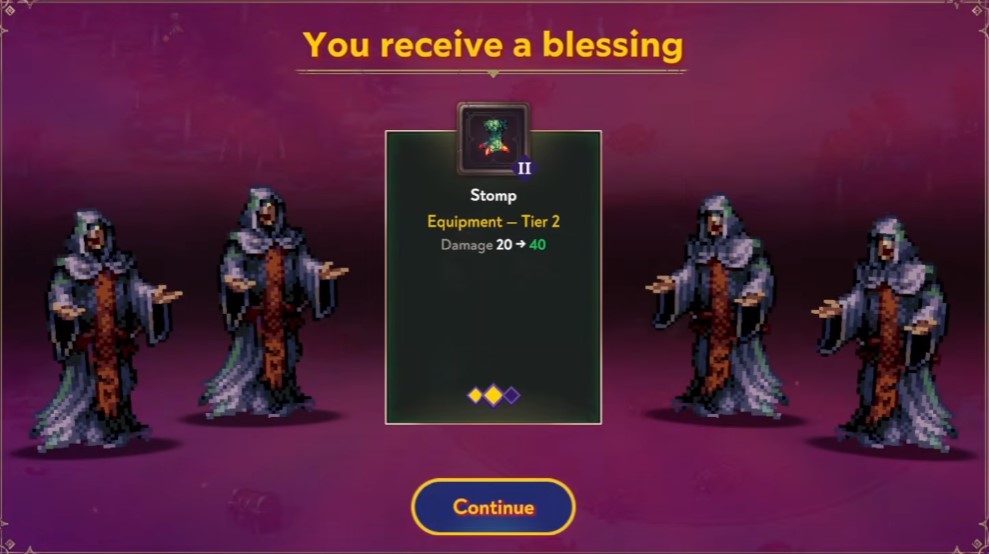
Step into the third area and grab the new character it unlocks before you commit to anything else. Your first real decision is the Stomp god blessing — take it for the area damage, since the rest of this region rewards clearing packs rather than single targets. Follow it with the Might upgrade to push your damage numbers up early, then add the Shaman troop for its support abilities.
Once those are in place, start rerolling. You are hunting two things specifically: celestial orbs for area control and the Rejuvenation upgrade for healing.
Rejuvenation is worth burning rerolls on. Without sustain, the boars in this area will chip you down faster than you can recover.
Also take the upgrade that grants experience for the scroll — it keeps your leveling pace up so the later picks arrive sooner.
Building the Spell Core
Your damage plan for this area centers on two spells that work well together: Arcane Sphere and Celestial Orbs. Add Ether as well for extra damage and utility. From here, filter every upgrade choice through that core — if a pick doesn’t feed the Arcane Sphere and Celestial Orbs synergy, it’s usually the wrong pick.
- Fury — raises your attack speed and damage output.
- Destruction area legendary — boosts area damage, which is exactly what this build wants.
- Movement speed — better mobility to dodge thorns and reposition around packs.
- Gloves with attack speed — more hits per second on your main damage.
- Precision — tighter accuracy so your spells land where you aim.
Surviving the Boars
Boars are the main threat in this stretch, and they leave thorns on the ground. Watch your footing — standing in a thorn patch during a fight drains health you’ll want for the boss. Stack survivability to compensate: take Regeneration for health recovery over time and raise your max health so a bad thorn patch or a boar charge doesn’t end the run.
New Map, New Character, New Loadout
Move on to the new map and pick up the attack speed talisman on arrival. This is also where you unlock the Hunter character. Take Might again to keep damage scaling, then rebuild your spell set around Rupture, Darkin Spear, and Celestial Orbs. Upgrade Rupture once it’s in your kit, then layer on a shield upgrade for protection and a damage area upgrade to keep your AoE relevant.
Collect gold as you go — you’ll need it for the purchases ahead.
Switching to Hask
Select the Hunter to unlock Hask, a character with no spells of his own. Instead, he leads more troops and empowers them, so your damage comes from the army rather than your spell bar. If you’re running Hask, prioritize attack speed (the strongest general upgrade for this style) and Arcana, since every spell in play is Arcana-based.
Final Stretch Before the Boss
Follow the compass marker downward and unlock the Crawler unit to add more troops to your roster, then upgrade your attackers. Pick up the 3000 gold drop and spend it on an equipment upgrade. Take one more Arcana upgrade before the fight — with an all-Arcana spell loadout, it’s the cleanest damage boost available to you.
With your troops upgraded, your spells synergized, and sustain in place, you’re ready for the area’s final boss.
Favorite Spell: Vortex
Vortex earns its slot as the go-to spell because it does two jobs at once: it pulls scattered enemies into a tight cluster and holds them there. That cluster is exactly what your area damage wants. Everything below is about setting up that combo, then cashing it in on a boss.
Why Vortex Carries the Build
Crowd control is the real damage multiplier here. A pack spread across the arena wastes your area hits; a pack stacked in one spot takes all of them. Vortex converts messy rooms into single-target fights, so you spend less time chasing stragglers and more time deleting health bars. Pair it with your orb damage and the clear speed jumps noticeably.
Cast Vortex before your burst, not after. Grouping enemies first means every follow-up hit lands on the whole pack instead of one target.
Upgrade Order After Taking Vortex
Once Vortex is locked in, the upgrade picks matter more than the spell itself. Work through them in this order so the build comes online before you summon anything dangerous:
- Units first. Upgrading your units raises your baseline output, which every other upgrade then scales off.
- Rupture next. Take the rupture upgrade to add punch to your damage rotation.
- Regeneration after. Grab regeneration so you can survive the longer boss fight without babysitting your health.
- Then the 150% damage boost. This is the big swing — take it once your survivability is covered, so the extra damage actually gets used instead of dying on the floor.
If you grab the damage boost too early, you hit hard but fold fast. Regeneration before raw damage keeps the run stable.
Summoning and Beating the Boss
With Vortex selected and the upgrade chain in place, trigger the boss summon. The fight plays to the build’s strengths: let the boss and any adds clump up, drop Vortex to pin them, and unload your area damage into the stack. Celestial orbs plus Vortex proved reliable here — the orbs handle sustained damage while Vortex keeps everything in range.
- Open with Vortex to control the arena from the first second.
- Keep the boss grouped with adds rather than letting it drift to a corner.
- Lean on regeneration to outlast rather than out-burst the boss.
Don’t summon until the 150% damage upgrade and regeneration are both in place — the fight is far more forgiving with that combination than with a half-finished build.
A Dragon Unit?
The dormant egg is the gate to this whole chapter. Everything else — the new ability, the forest ruin, the tower requirement — flows from cracking it open, so treat the egg as your first stop before you sink resources into anything else.
Freeing the Dragon and What It Gives You
Interact with the dormant egg to hatch it. The dragon doesn’t just sit in your roster as flavor — it hands over the Breath of the Dragon ability the moment it’s free, so check your ability list right after hatching to confirm it registered.
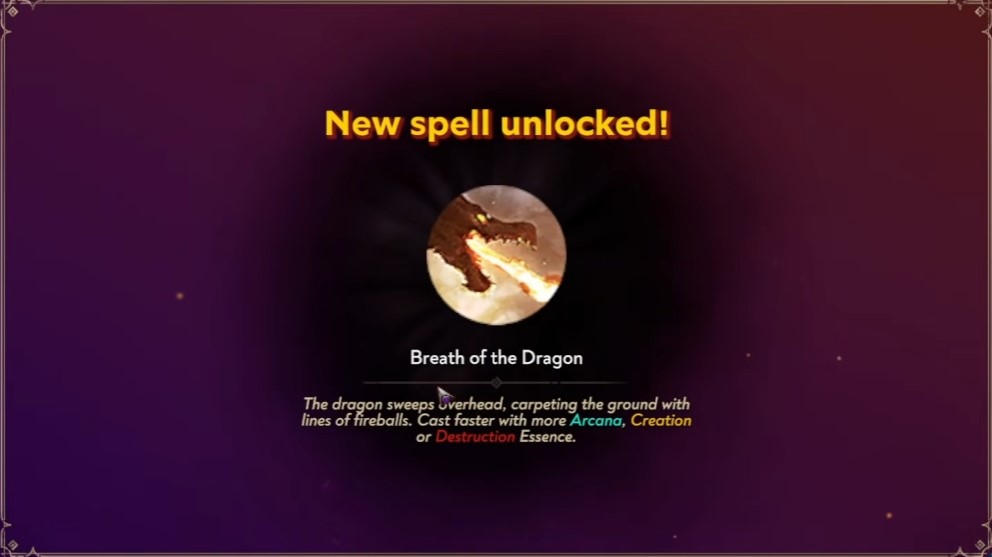
In combat, the dragon sweeps overhead and carpets the ground below with fireballs. That area coverage is the point: it clears ground-level threats you’d otherwise have to pick off one at a time.
Making Breath of the Dragon Cast Faster
The fireball carpet is strong but slow to come out. Stack Arcane Acriation and Destruction Essence to shorten the cast — the two together are what turn the ability from a periodic sweep into something you can lean on during a real fight.
- Equip Arcane Acriation to cut cast time.
- Add Destruction Essence alongside it rather than replacing it.
- Test the new cast speed in a low-stakes land before pushing difficulty.
The Forest Ruin and the Tower Requirement
The dragon points you toward a ruin in the forest. Repairing it opens a path to another world — that’s your next progression gate, so don’t wander off before the repair is done.
Separately, the tower only lights when you’ve completed every land at the greatest difficulty. That’s a completion check, not a quick task: plan to clear each land at max difficulty rather than cherry-picking the easy ones, or the tower stays dark no matter how much else you’ve finished.
If the tower won’t light, it’s almost always a land you cleared at a lower difficulty. Re-run the ones you skipped at the highest setting before assuming something is bugged.
Buying Wood
Wood is purchasable, but the price climbs with every trade you make. Buy in the quantities you actually need for the ruin repair and near-term upgrades instead of stockpiling early — repeated small purchases will cost you far more than one deliberate buy once you know your target.
Hardest Difficulty Challenge on the Heartlands
This is the run where the Heartlands stops forgiving you. Push the difficulty slider to its ceiling, prove you can clear it, and the game opens a door it keeps locked otherwise. Treat it as a build test, not a victory lap.
Setting Up the Run
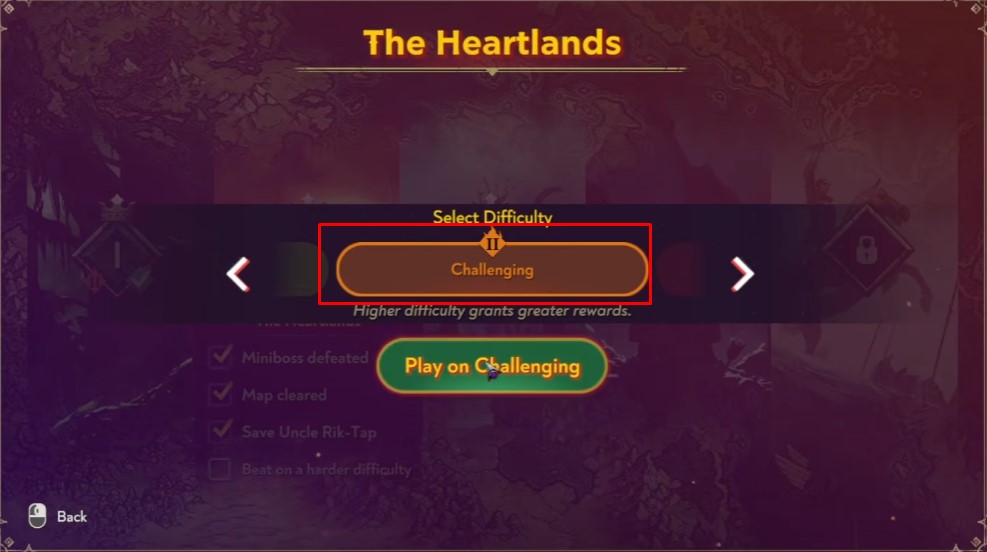
Pick the Heartlands map and choose the highest difficulty available to you, then start on challenging. The point isn’t to limp through — it’s to confirm your build and upgrades can actually carry a clear at this level, because the unlock at the end of this chapter depends on it.
- Highest difficulty on the Heartlands map is the target; challenging is the floor you need to clear.
- Go in expecting to be tested — if the run collapses early, the build is the problem, not the difficulty setting.
Upgrade Priorities During the Run
Your choices during the run decide whether the clear happens. Front-load movement and offense so you can stay alive and keep damage flowing, then layer in the abilities that scale your output.
- Finish the event movement speed upgrade first — mobility keeps you out of trouble on a harder map.
- Take the vortex ability when it’s offered; it’s a core pick for this run.
- Favor attack speed upgrades whenever they appear, since faster attacks compound with everything else you take.
- Grab the dragon upgrade when the option shows up.
Attack speed and the vortex ability are the two picks that matter most here. If you’re offered a choice between a generic stat and attack speed, take the attack speed.
Clearing for Gold and the Unlock
Finish the run to bank 4000 gold — a meaningful payout that makes the difficulty spike worth the risk. More importantly, clearing every level on challenge or hard difficulty is what unlocks Overwhelming difficulty (ascendancy).
- Complete the full run to collect the 4000 gold reward.
- Clear all levels on challenge or hard difficulty to trigger the Overwhelming unlock.
- If the unlock doesn’t appear, check that every level was actually cleared at the required difficulty — a single missed clear blocks it.
Once Overwhelming is available, you’ve got the next tier of rewards waiting on the other side of an even steeper curve.
Gold Farm & Upgrades
This stretch is about turning a boss fight into a repeatable income source, then converting that gold into survivability and hunter power before the next wall. The order you spend in matters more than the raw amount you bank.
Prep the Boss Run
Don’t rush the boss the moment it’s available. Push a few more levels first — the extra stats make the challenge-difficulty clear consistent instead of a coin flip. A clean kill is what makes farming worthwhile; a failed attempt just burns time.
Farm Gold on Challenge Difficulty
Once you’re comfortable, fight the boss on challenge difficulty specifically to farm gold. The higher difficulty is the point — it pays out more per kill, so treat it as your income loop rather than a one-off milestone. Repeat it until you’ve built a meaningful reserve before heading back.
Bank enough for several upgrades in one trip. Returning to town after every single kill wastes the momentum you just built.
Spend the Gold in Town
Head back to town and put the gold to work. Prioritize in this order:
- Hunter to max level — the biggest single power jump, so finish it first.
- Durations upgrade — extends your buffs and effects so each run stretches further.
- Finish the shield upgrade — complete whatever remains on it for a sturdier buffer against boss hits.
- Health upgrade — round out your survivability so the next boss attempt isn’t a glass-cannon gamble.
Maxing the hunter before the defensive upgrades means your farm kills get faster, which in turn funds the shield and health purchases sooner.
Loop Back Into the Fight
With the hunter maxed and the defensive upgrades in place, return to the boss on challenge difficulty. The stronger hunter clears faster and the added shield and health make the fight safer, so each loop nets more gold in less time — the cycle that carries you toward the next progression gate.
Melting Bosses Farm in Challenge Mode
Challenge mode turns the boss loop into a resource faucet, but only if your build can delete a boss before its mechanics matter. The vortex and spheres setup does exactly that: overlapping damage zones stack so heavily that the boss dies while you stay effectively untouchable. Treat this chapter as the order to buy upgrades in while you’re inside the run, not a separate loadout screen.
Start With Destruction
Open the upgrade picks with destruction. It is the first multiplier you want online because every later pick — precision, reach, creation — feeds into the same damage output. Buying damage first means the vortex and spheres are already hitting hard by the time you reach the boss, so the kill window stays short.
Kill the Boss Behind Your Shield
Once destruction is up, take the boss fight with your shield active and commit to a fast kill. Do not kite or play safe — the whole point of this farm is that the vortex and spheres clear the boss before you take meaningful damage. Standing your ground with the shield up keeps the damage zones centered on the boss instead of dragging them around the arena.
If a boss is surviving long enough to threaten you, your damage picks are lagging. Grab the next offensive upgrade before re-entering rather than trying to out-sustain it.
Stack the Damage Multipliers
After the first kill, keep layering the offensive upgrades in this order so each one compounds the last:
- Precision — sharpens your hit output, feeding the same vortex and spheres damage.
- Reach — extends your effective range so the spheres cover more of the boss.
- Creation — adds to the build’s core scaling.
- Meteor Strike — a heavy hit that speeds up the kill further.
Each of these exists to shorten the time-to-kill. The faster the boss drops, the more runs you fit into the same session, which is the real currency of a boss farm.
Close Out With Gold Find
Finish the rotation by raising gold find. Damage upgrades get you the kill; gold find converts those kills into spendable resources. Slot it in once the offensive core is set so your repeated boss clears actually pay out instead of just proving you can win.
Repeat the loop — destruction first, then precision, reach, creation, meteor strike, and gold find — for each farm pass. The order matters more than any single pick: front-loading damage keeps the shield-and-delete strategy reliable, and back-loading gold find keeps the rewards scaling with your clear speed.
Fourth Area & Boss Fight
The fourth level is where your build stops being a pile of small percentages and starts firing on all cylinders. The upgrade offers here lean hard into Fury, Vortex, and Meteor Strike, and the area hands you two Essence drops worth chasing: Gold Destruction Essence and Range Creation Essence. The boss at the end is the payoff — if your damage is online, it folds fast.
Opening Upgrades and the Rescue Objective
Start the level by locking in Hunter, then push projectile speed for Fury — faster projectiles mean more Fury uptime, which compounds everything else you take later. Grab the magnet when it appears so pickups stop pulling you off your route, then layer in Vortex, Precision, Crawler, and Meteor Strike as they show up.
The mid-level objective is rescuing the guards. Clear the surrounding enemies before you commit to the rescue so you are not caught mid-interaction. Once the guards are safe, the upgrade pool opens up with Rejuvenation and HP regen — take both to keep your health topped between waves.
- XP Area and Range widen your pickup and damage footprint — good value on a level with lots of ground to cover.
- Destruction for Vortex makes your swirls actually kill rather than just chip.
- Follow up with another Hunter pick and a Shaman pick to round out the early build.
Essence Pickups and the Ball Objective
When the Gold Destruction Essence drops, break off and collect it — it is a permanent-feeling boost you do not want to leave on the floor. After that, head for the ball objective to keep the level moving.
The upgrade offers around this stretch are generous: Arcane Speed, Meteor Strike, Vortex, and the jump to four projectiles. Take the four-projectile upgrade the moment it is offered — it is the single biggest damage spike in the run so far. Follow it with Fury and Range, then grab the Range Creation Essence when it appears.
Do not skip either Essence drop to chase kills. The area keeps spawning enemies, but the Essence is a one-time grab.
New Enemies and Gear
Fresh enemy types show up in this stretch. Keep moving and let your projectiles and Vortex do the work rather than standing still to trade hits. Take Rejuvenation when it is offered to stay healthy through the new pressure.
Equip the Leather Gloves as soon as you get them — free stats for a gear slot. From there, stack the multipliers that scale your whole kit:
- Attack Speed and Duration to keep your effects firing and lasting longer.
- Plus One Units to add another body to your damage output.
- Range Regeneration and Might for sustained damage and raw power.
Surviving the Wave to Summon the Boss
The level gates the boss behind a survival wave. This is the stretch to spend your upgrades on scaling rather than survival — you want damage rolling before the boss spawns. Take Duration Speed and Spell Damage, then apply Attack Speed to your gauntlets.
The standout pick here is the upgrade that makes all durations last 50% longer. Combined with your earlier Duration and Duration Speed picks, it stretches every effect — Vortex, Meteor Strike, Fury — into a near-constant uptime. Take Destruction twice around it, plus another Duration Speed and Range, to keep the damage climbing.
Round out the wave with a Gold upgrade so your economy keeps pace, then prepare for the boss.
The Boss Fight
Take Meteor Strike as your final pre-boss upgrade, then commit. With four projectiles, stacked Fury, long-duration Vortex, and repeated Meteor Strikes, the boss goes down almost instantly — the build carries the fight, so stay aggressive and keep your effects on the boss rather than kiting.
- Keep your damage uptime on the boss; do not retreat out of Vortex range.
- Let Meteor Strike and Vortex tick while your projectiles handle direct damage.
- If the boss survives longer than expected, your Duration and Destruction stacks are the levers to lean on next run.
Deleting Bosses: Bow is OP
Boss health bars in Wielders of the Essence melt when the bow is doing the work. This stretch is about stacking single-target power and the meta upgrades that feed it, while also picking up the Claws so your weapon pool isn’t one-dimensional.
Why the Bow Carries Boss Fights
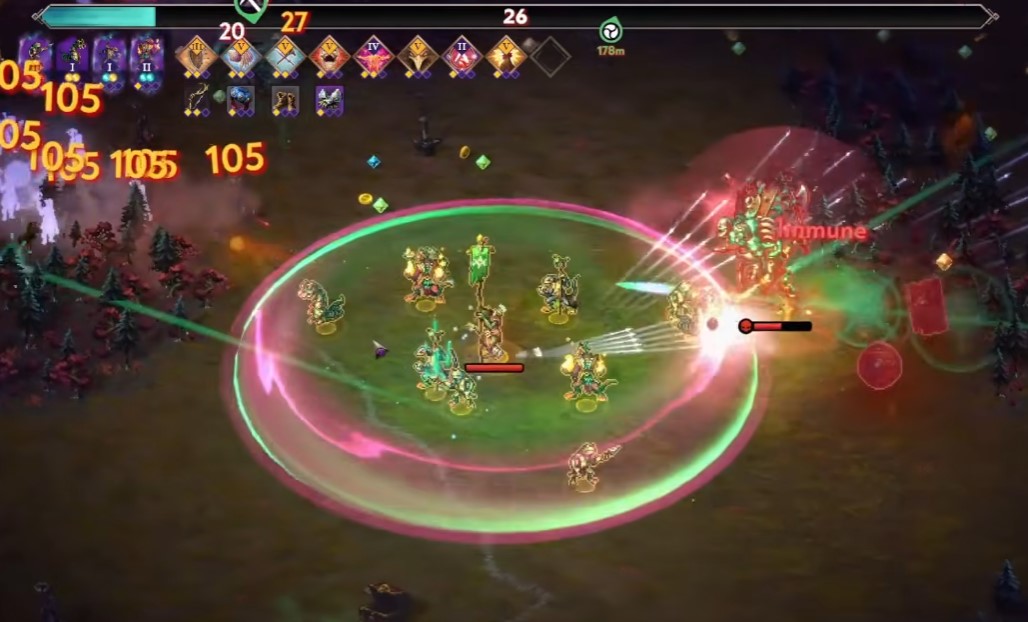
Treat the bow as your dedicated boss-deleter and pour resources into it before anything else. Its single-target damage scales hard enough that most boss encounters stop being endurance tests and turn into short bursts of focused fire.
- Prioritize bow upgrades over spreading damage across other weapons — concentrated investment pays off far more against bosses.
- Keep the bow equipped for boss rooms even if you favor other weapons for clearing trash.
- Once the bow is upgraded, expect boss fights to end noticeably faster, freeing up time and resources for everything else.
Expanding the Arsenal: Claws and XP
Unlock the Claws to widen your weapon options — useful for variety and for runs where the bow isn’t the answer. Pair that unlock with the XP Gained upgrade so every kill pushes your progression faster.
- Unlock the Claws weapon when it becomes available.
- Take the XP Gained upgrade to compound your farming speed.
- Use the extra XP to fuel the upgrade spree below.
Meta Upgrades That Feed the Bow
Raw bow damage only goes so far without the supporting upgrades behind it. Push these to their caps so your boss-killing power compounds.
- Creation Magic: upgrade it to max level.
- Dragon: max out the Dragon upgrade.
- Tremor: upgrade the Tremor ability.
- Rerolls: grab more rerolls so you can fish for the upgrades you actually want during runs.
Farming Toward the Hardest Difficulty
Before you take on the hardest difficulty, farm additional resources. The upgrades above are your checklist — max them out first, then spend the surplus on anything that sharpens the bow further.
Don’t rush the hardest difficulty with a half-built bow. Bank the resources, finish the Creation Magic, Dragon, and Tremor upgrades, and go in with rerolls in hand — the difference in boss kill speed is the whole point of this chapter.
Fourth Area & Boss Fight (Challenge Mode)
Challenge mode turns the fourth area into a damage check: regular enemies hit hard enough that a single careless moment ends the run. The answer is to build a wide, fast-clearing loadout early, then let that momentum carry you through the boss.
Opening Upgrade Picks
Lock in your core multipliers before the first chest. Take Damage first, then Area, Duration, Ethereal, and Dark in that order. Follow with the Shaman upgrade — it rounds out the early build and keeps your clear speed high through the opening waves.
- Damage — your primary scaling stat for the whole run.
- Area and Duration — widen and extend your effects so waves die faster.
- Ethereal and Dark — stack on top of the base damage picks.
- Shaman — the last piece before you open the chest.
After the First Chest
Open the chest for its rewards, then keep stacking Duration and Range. Add Death damage next — it gives your kit a second damage source to lean on. From here the priority is Arcane Spear, the 15% damage increase, and another Range pick, followed by Pierce Volley to punch through grouped enemies.
Enemies in challenge mode can nearly one-shot you. Treat every hit as fatal and keep moving rather than trading damage.
Mid-Run Scaling
Sweep up resources as they drop, then spend them on Attack Speed and Arcana. Take the blessing when it appears — it adds another layer to an already stacked build. Keep clearing until the wave is done; surviving it is what summons the boss.
- Attack Speed — more uptime on everything you’ve already invested in.
- Arcana — deepens your spell damage.
- Blessing — a free boost before the boss spawns.
Boss and Cleanup
Grab the Vortex upgrade before the boss engages, then commit to the fight. With Damage, Area, Duration, and the 15% boost already online, the fourth area boss should fall fast — the danger is the approach, not the boss itself. Finish the area on the hardest difficulty setting to bank the clear.
Once the run is done, put remaining resources into the claws character and max out whatever upgrades are still short. That closes out the challenge mode loop for this area.
P’Cha, the Last Map, and the Final Boss
Everything you’ve built across the run comes down to one loadout choice and one survival plan. P’Cha handles the closing map more cleanly than any other wielder, and the upgrade priorities below are what keep the run alive long enough to reach the boss.
Why P’Cha for the Closing Run
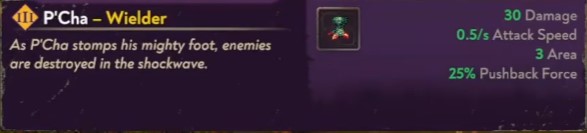
P’Cha controls more smoothly than the alternatives, and on the final map that responsiveness matters more than raw stats — you’ll be dodging and repositioning constantly while your damage ticks up in the background. Switch to P’Cha before you load into the last area, not after; the wielder choice locks in with the run.
Opening the Final Area
Two things decide whether the early minutes go well: getting a vortex online fast, and stacking HP regeneration from the first upgrade screen onward.
- Vortex first. Secure one early so your damage output runs while you focus on staying alive.
- HP regeneration is non-negotiable. Take it every single time it appears in the pool — treat it as a mandatory pick, not a preference.
- Fill the rest of your slots with tempo and offense: iteration speed, attack speed, precision, and fury all compound into faster clears and safer fights.
Legendary Picks and Survival Focus
When a legendary upgrade appears, resist the urge to chase pure damage. The final area punishes glass-cannon builds, so lean into anything that keeps you standing: range, health destruction, and nexus are all solid choices. The guiding rule for this whole stretch is simple — prioritize survival over greed, because a dead run gets no ending.
If you’re torn between a flashy damage legendary and a defensive one, take the defensive one. You can always earn more damage later; you can’t earn back a lost run.
Rescue, Dragon, and the Builder Unlock
Partway through the map you’ll get the chance to rescue your guy. Do it — the rescue unlocks a new builder, Maxuna, who can control additional spells and gives you more flexibility going forward. Later, call on the dragon ability and pick the tremor upgrade when it’s offered; it fits the survival-first plan by giving you breathing room during crowded moments.
The Final Boss and the Ending
With regeneration stacked and a vortex carrying your damage, engage the final boss and play patiently rather than trading hits. Once it falls, the ending sequence plays out and challenge difficulty unlocks — the reward for finishing the run, and your gateway into harder attempts. If you’re going for full completion, this is the fight that closes out the campaign, so make the survival picks count.
Fifth Area & Boss Fight (Final Challenge Mode)
Challenge difficulty is the last gate before the endgame modes open up. Every troop is already maxed here, so your run lives or dies on upgrade picks and how you spend your wielder levels — not on grinding stats.
Opening the Challenge Run
Start a fresh run on challenge difficulty and treat the first upgrade screens as the run’s foundation. Grab the magnet and damage resistance early so you can vacuum up pickups and survive the denser enemy waves, then steer your picks toward the arcane spear.
When it’s time to level a wielder, you can try Maxuna, but hold off on committing to it early — ball level three is the safer investment while your build is still forming. If the run stalls, restart and take the quick bonus alongside arcana upgrades to get your damage online faster.
Eth’dra Build Order
On the retry, pick Eth’dra as your wielder and take the range upgrade first. Follow it with a blessing, then the magnet, and from there stack the offensive and defensive picks in this order:
- Attack speed — raises your raw damage output.
- Critical chance — pushes your damage ceiling higher.
- Rejuvenation — keeps you alive through the longer fights.
- Chain lightning — adds area damage across packs.
- Vortex — crowd control to keep enemies off you.
- Chain lightning again — stack the effect for heavier multi-target hits.
Boss and Tower Progression
Save pierce volley for the boss and fire it only once the boss is inside your range — wasting it on approach costs you a big chunk of the fight. Finish the boss to clear the area, then head into the tower to move the game forward.
Clearing this run unlocks Overwhelm difficulty. Don’t jump in immediately — bank your gold first.
Spend 15,000 gold to level up several characters before you push the new difficulty. From there, max out your upgrades to unlock Ascended mode, the next tier of the endgame.
