
The game is a loop of capture, grind, sell, and upgrade, and most slowdowns come from a bottleneck somewhere in that chain rather than from bad aim. Treat the factory as the thing you are really upgrading: weapons clear waves, but conveyors, grinders, and machines decide how fast money comes in.
How This Run Is Structured
The early hours are about learning the loop and surviving events like meltdowns and nightfall. The middle stretch is where weapons and abilities take over — the shockwave and the slot machine change how fast you can clear and bank money. The late game is prestige, rebuilding stronger, and pushing machines and weapons toward the final creature and the billion-dollar goal.
- Expect the single long run to be broken into region-style chapters here, so you can read only the section matching your current save.
- Money decisions matter more than kill speed. When a purchase feels optional, check whether it removes a processing bottleneck first.
- Prestige is a reset, not a loss — the permanent boosts are the point. Do not treat it as an endgame-only choice.
What You Need Before Starting
Nothing external — no mods or prior saves required. The only real prerequisite is patience with the grind: several milestones in this run sit hours apart, and the gap between the $100,000 mark and the billion-dollar finish is the longest stretch. Plan to play in sessions and use the chapter markers to reorient when you come back.
First Shift: Capture, Grind, and Sell
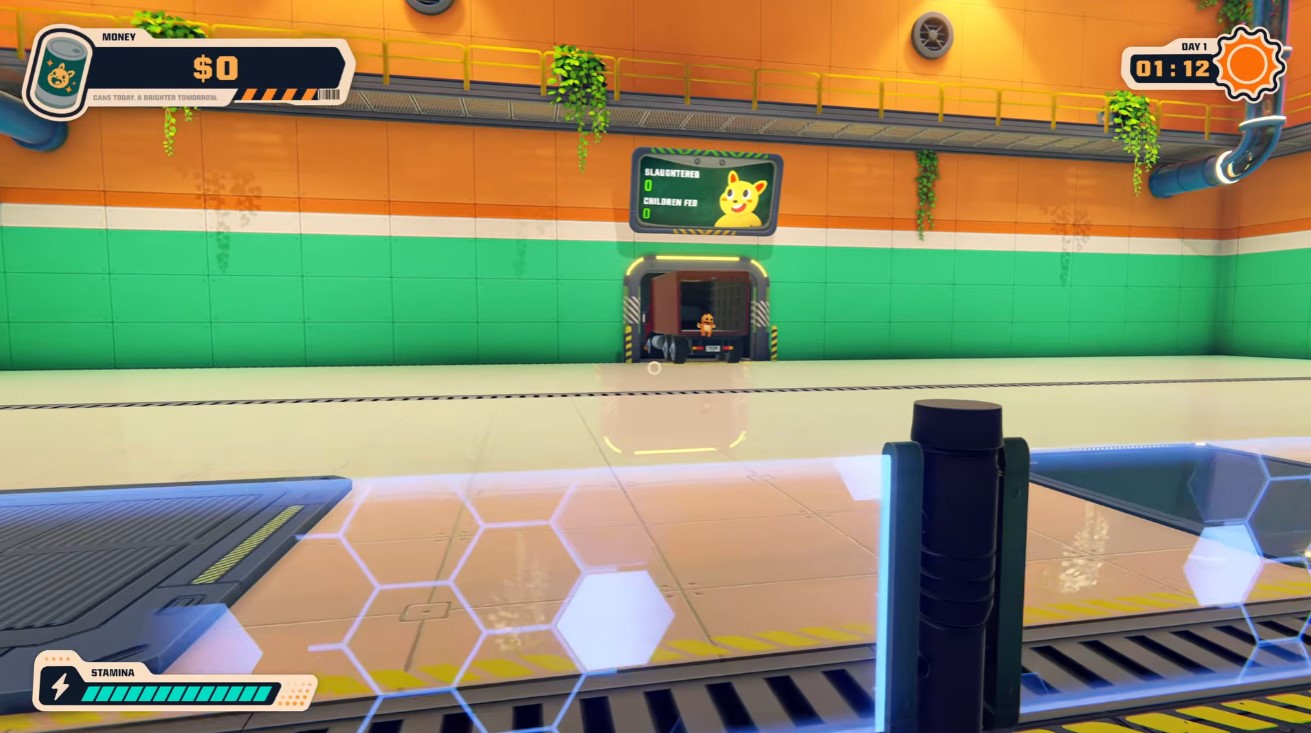
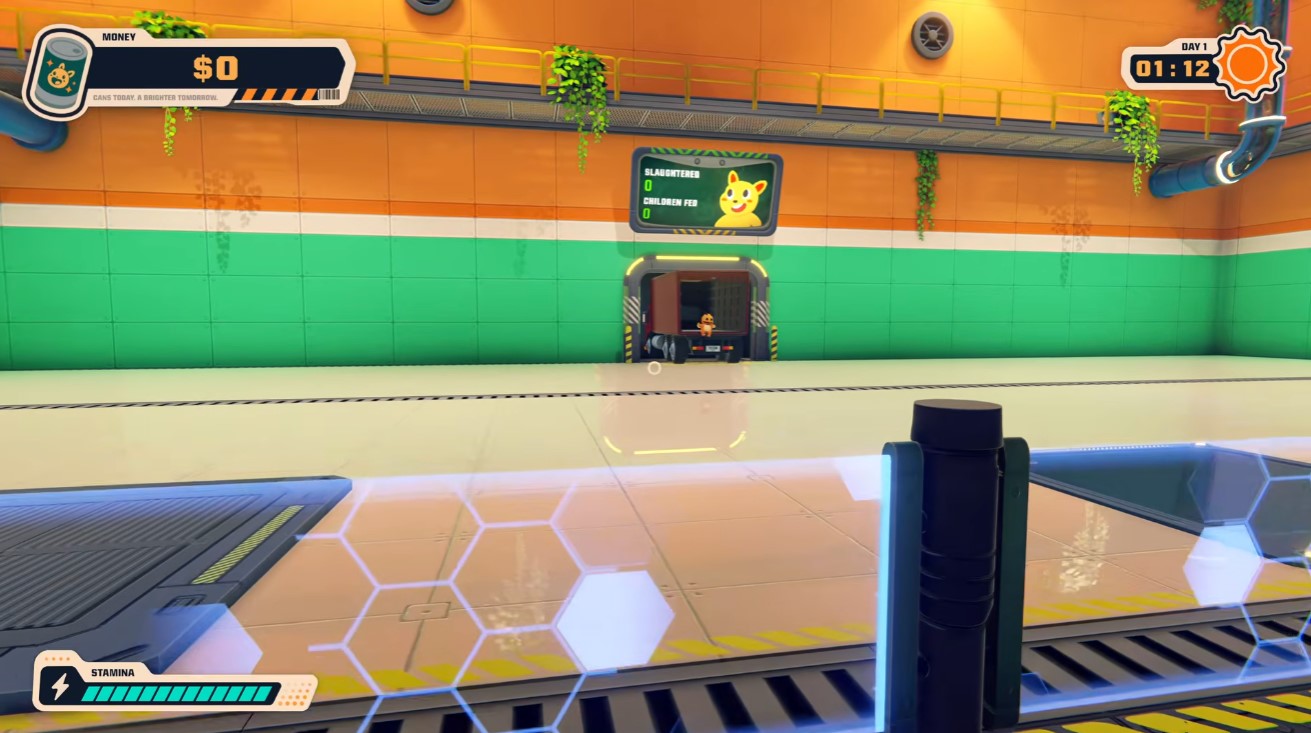
You start with nothing but your fists and an empty wallet. Everything in Can ‘Em All flows from one loop: beat a creature down, feed it to the grinder, and turn the output into cash. Get that loop clean once and the rest of the game is just scaling it up.
Breaking Down Your First Creature
Walk up to the nearest creature and start swinging. A single punch only chips away at its health, so keep hitting until it drops into a stunned state — that’s your window to act. Don’t back off early; if it recovers, you lose the progress you made on it.
- Punch repeatedly rather than once and waiting. Damage stacks toward the stun.
- Watch for the stun cue before you try to grab. Lifting an upright creature won’t work.
- Once stunned, pick it up and carry it to the grinder.
Feeding the Grinder
With the creature in hand, throw it into the grinder. The machine does the rest and spits out a finished can. Grab that can off the ground — it’s your product, and it’s worthless sitting there.
If the throw misses, the creature may not go in cleanly. Line up your toss so it lands inside the grinder opening rather than bouncing off the rim.
Cashing In at the Container
Carry or throw the can into the marked container to sell it. Each can nets you $1, so your first sale is small — but it’s the proof that the loop works. Repeat capture, grind, and sell until you’ve banked enough for your opening purchase.
Buying the Steel Fist Upgrade
Night is when you spend. Take your earnings and buy the Steel Fist upgrade for $1. It doubles your punch damage from 1 to 2, which means fewer swings to stun each creature and a faster capture cycle from here on.
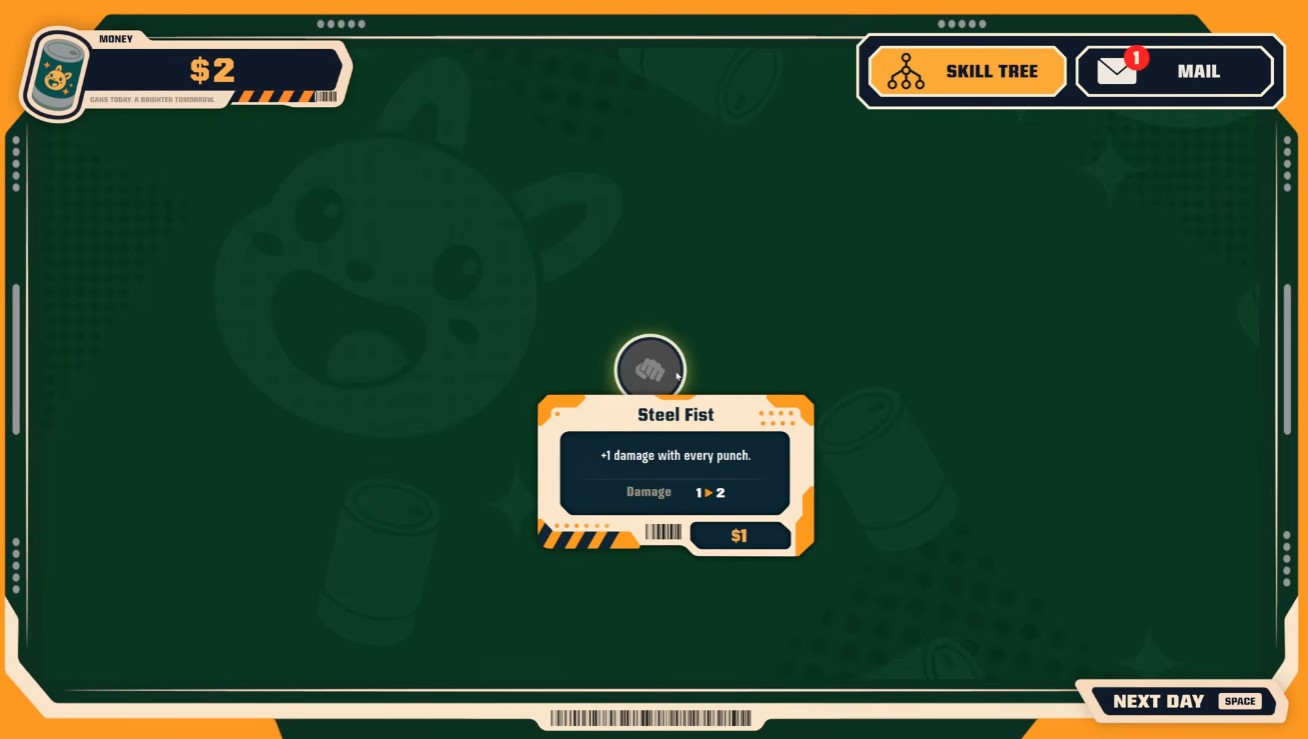
- Prioritize Steel Fist before anything else — it speeds up every future capture.
- Keep the loop running after the purchase; the extra damage pays for itself quickly.
Day 2: Meltdowns, Crates, and Factory Expansion
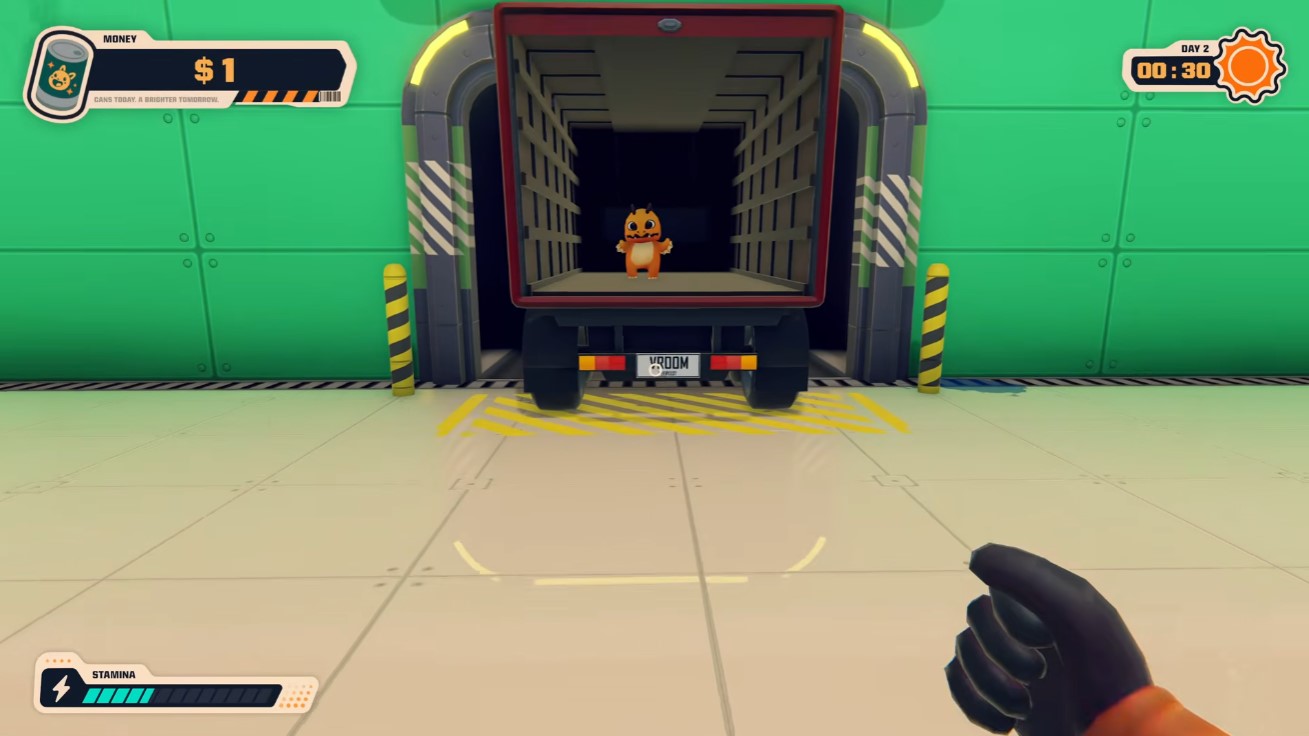
Day 2 is where the loop starts paying you back. The truck runs heavier, the grinder wants more, and the first meltdown forces you to move faster than you did on Day 1. Treat today as a lesson in throughput: every upgrade you buy should shorten the distance between a creature arriving and a can rolling out.
Throwing Creatures Straight Into the Grinder
Stop walking creatures to the grinder by hand. Line up your throws so the creature lands directly in the intake, then chain the next grab while the previous one is still falling. A clean throw saves the entire walk, and on a busy day that walk is the difference between clearing the floor and losing cans to the meltdown timer.
- Practice the arc on a quiet moment before the truck unloads — a missed throw costs more time than a careful one.
- Keep your back to the crate stack so you can grab, turn, and throw without repositioning.
Surviving the Meltdown Event
When the meltdown hits, the clock is the enemy, not the creatures. Abandon any tidy sorting and grab whatever is closest to the grinder first — processing volume beats processing order. If a creature is already in your hands when the event starts, throw it before reaching for a new one.
Don’t chase stragglers across the factory during a meltdown. Grab what’s within a couple of steps of the grinder and let the rest go; the timer punishes travel, not missed pickups.
The Crate Shortcut and Factory Layout
There’s a crate positioned to shuttle creatures toward the grinder far faster than carrying them one at a time. Find it early and fold it into your route — it turns a long haul into a short one and keeps the conveyor fed while you work the other side of the floor.
Take a few minutes to walk the factory itself. Check the exit and the bathroom so you know where everything sits, and note that falls cost you nothing here — you can drop off ledges to cut corners without worrying about damage. Learning the vertical layout now pays off on later, busier days.
Spending Your First Upgrades
Head to the upgrade menu once the day’s earnings are in. Two purchases matter most right now: More creatures arrive increases your supply, and Increase throwing force makes those direct grinder throws easier to land. Together they raise your ceiling on every future day.
After that, put money toward the shiny chance upgrades — they raise the odds of shiny creatures and shiny cans, which is where the real value sits — and unlock the additional conveyor section to spread the flow across more of the floor. While you’re working, move the conveyor belt itself to a position that shortens the trip from crate to grinder.
One last thing: the veteran employee has a tip worth hearing. Don’t get attached to the creatures. It’s a joke with teeth — you’ll process a lot of them, and sentiment slows your hands.
Baseball Bat and Early Grinder Strategy
This stretch is where your income starts compounding — but only if you stop wasting movement. The bat, the basket, and a few well-placed upgrades all compete for the same small pile of cash, so spend in the order that removes the most friction first.
What the Radio Tells You About Cutelings
A broadcast mid-run explains the economy you’re feeding: cuteling meat has overtaken chicken as the most-eaten protein, purely because the creatures breed so fast. That’s the game telling you the supply is endless and your bottleneck is processing speed, not creature availability. Treat every upgrade decision through that lens.
Spending Order for the First Purchases
You won’t afford everything at once. Bank toward the $40 baseball bat unlock, but don’t ignore the cheaper quality-of-life buys that make earning that $40 faster.
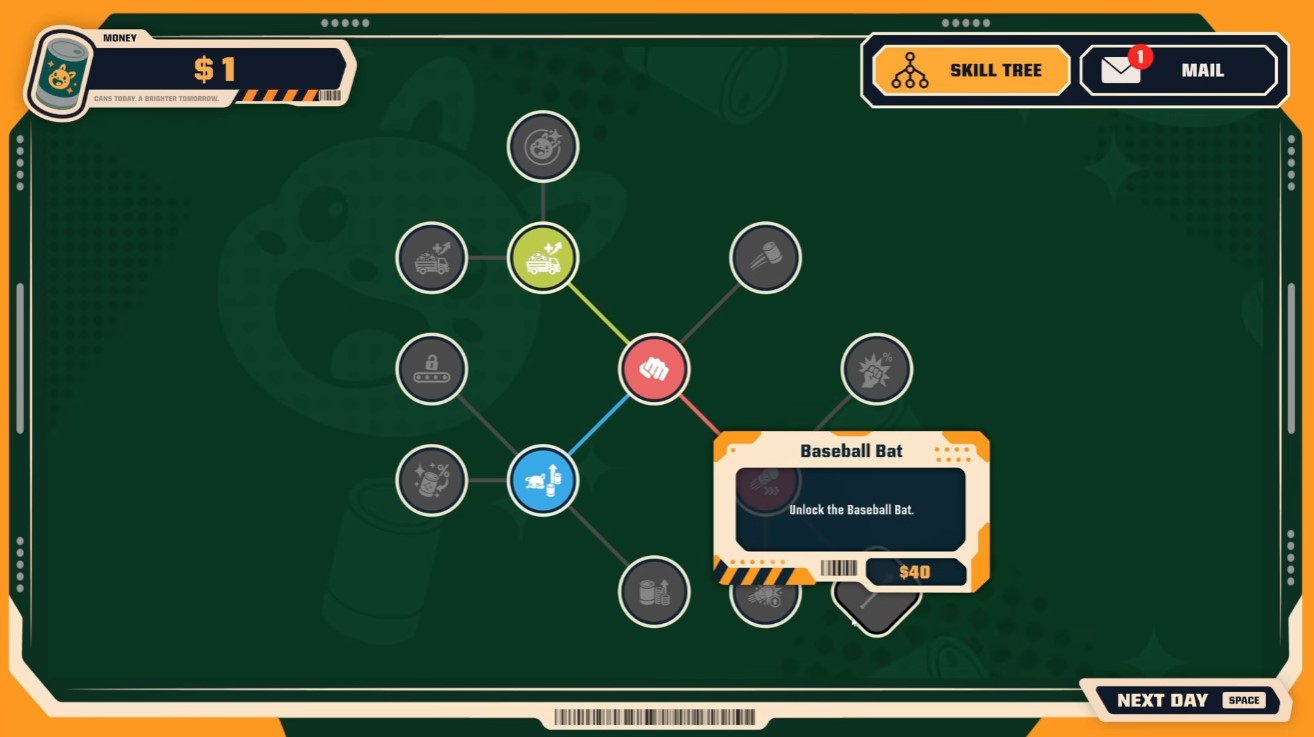
- Baseball bat ($40–$42): the headline unlock. It raises melee damage and opens the path to the knife. Worth the temporary dip in earnings because kills come faster.
- Damage per hit: pushing damage to three per swing shortens every fight — take this when you’re missing kills.
- Run speed: lets you chase down fleeing creatures instead of losing them across the floor.
- Increased can value: cans jump to roughly three times base value, which quietly multiplies everything else you do.
- Throw force or critical chance: solid alternatives at the $12 tier if you’d rather speed up the grinder feed than your swings.
Holding the bat blocks you from picking up cans. Keep it equipped for combat only and swap off when you’re collecting, or you’ll stand over a pile of cans unable to grab them.
Moving Cans and Creatures Efficiently
The basket in the factory corner is the single biggest time-saver in this section — grab it and you can haul several cans per trip instead of one. Pair that with tighter positioning and the loop tightens considerably.
- Herd creatures as close to the grinder as you can before engaging, so the toss is short and nothing escapes mid-carry.
- While holding a creature, use the throw button to launch it in — this is the fast path to feeding the grinder.
- Toss creatures in and expect a couple of seconds of grinding before the cans drop; don’t stand idle waiting, line up your next catch.
- If you keep whiffing cans on the move, that’s a signal to buy a movement or area upgrade rather than fight the controls.
Reading the Upgrade Menu
Upgrades here are permanent multipliers, not one-off conveniences, so pick the one that fixes your current worst problem. Missing cans? Go movement or area. Fights dragging? Go damage. Feeling poor despite constant grinding? Can value pays back across every future run. The bat is the exception — it’s a combat unlock that also gates the knife, so treat it as a milestone rather than a stat bump.
Vacuum, Nightfall, and Shiny Cans
This stretch of the factory run is where your income starts compounding — but only if you spend in the right order. The vacuum changes how you gather creatures, the bat upgrade changes how fast you clear them, and shiny variants change what a single can is worth.
Spending Order: Bat Damage Before Vacuum Range
The instinct is to dump everything into suction, but the double bat damage upgrade earns its money back faster. One-hit kills mean you stop chasing wounded creatures around the floor, which shortens every collection cycle. Buy that first, then put money into the vacuum itself.
- Double bat damage: turns most creatures into one-hit kills — the biggest time saver available at this point.
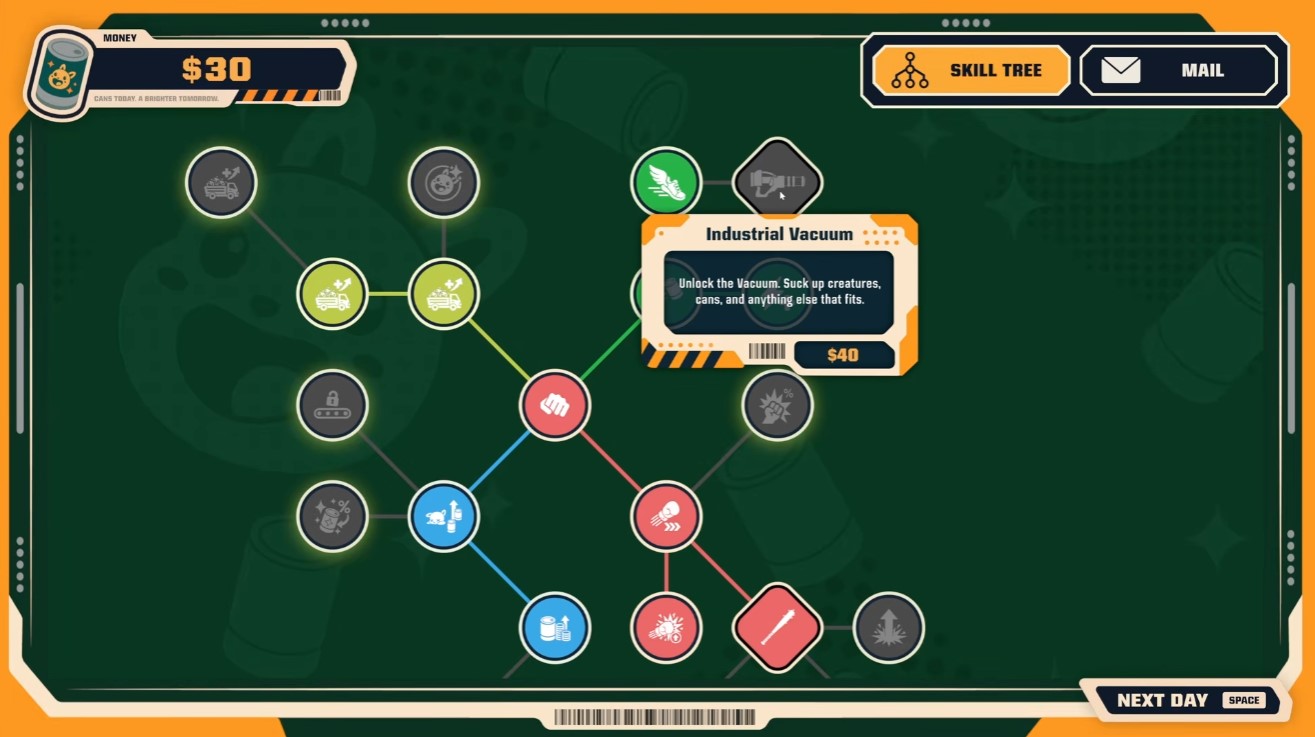
- Vacuum purchase: widens suction range, raises storage capacity, and opens up shiny can chances and duplication.
- Vacuum upgrades ($69): shoot objects further, extend suction range, add storage, boost running speed, and raise maximum stamina.
The $69 upgrade bundle is worth taking as a set — the movement and stamina gains matter as much as the suction range once your routes get longer.
Unlocking a Better Creature and Stretching the Day
Once the vacuum is online, spend on a new creature unlock. The newer creature produces more valuable cans, so every unit you process is worth more than the starter stock. Pair that with the day-extension purchase to keep the factory running longer — more uptime with a higher-value creature is the cleanest profit jump in this section.
The Night Shift
Nightfall doesn’t stop production, so keep working through it. The loop stays the same, just with less visibility:
- Press F to vacuum creatures into storage.
- Throw the captured creatures into the grinder to process them into cans.
- Repeat, watching for anything unusual in the batch.
Shiny creatures can slip through the grinder unnoticed if you’re rushing. Glance at what you’re processing before you dump it — a shiny variant is worth far more than a normal one.
Chasing Shiny Cans
Shiny cans are the most efficient money in the game right now, so build your session around them rather than around raw volume. Explosive ammo and conveyor belts both push can production higher, letting you feed the grinder faster while you hunt for shiny variants. If a run feels slow, check whether you’re actually prioritizing shiny output or just grinding normal cans.
Feeding Children and Shipment Management
By this point the factory floor is running hot and the money decisions start to compound. The two things that matter most here are how you spend your earnings and how you handle a full shipment without wasting the valuable cans inside it.
Milestones and the Flashlight
You have now fed 100 children, which clears the current feeding milestone. Keep an eye on that counter — it gates progress and is easy to forget while you are busy processing.
Pick up the flashlight next. Dark areas of the facility are unreadable without it, so grab it before you push into any poorly lit section rather than fumbling around blind.
Upgrades Worth Your Money
Four upgrades are on the table. Spend with intent, because the order changes how fast your income snowballs.
- Extend the day — more working time per cycle, which pays off on every subsequent run.
- Duplicate money from cans — doubles your payout at the source; take this early.
- Shiny cans worth more — boosts the premium drops, but only after you can reliably land them.
- Three cans per creature — raises raw output, best once your belt can keep up.
Prioritize extending the day and can duplication first. Those two compound fastest, while the shiny-value and triple-can upgrades are stronger once your throughput is already high.
When new employees become available, hire them — more hands mean faster processing. Skip the chainsaw upgrades; they are not needed for progress and just drain cash you could put into the upgrades above.
Handling a Full Shipment
Aim to capture the entire shipment, with shiny variants as your priority. Explosive ammo clears groups quickly, but the blast can destroy shiny cans in the process — so keep explosions away from anything sparkling and pick off those targets individually.
New creatures have entered the rotation. They are worth five times the normal rate but soak three hits before going down, so budget extra ammo and time for them.
A shiny can is worth $18 — roughly six times a standard can — which is why protecting them from stray explosions matters so much.
Fill your inventory with the highest-value creatures, especially the incredibly valuable ones, before you process anything. A packed inventory of premium creatures is the single biggest lever on your payout.
One more thing lands in your inbox: a message from the Cuteness Action Network urging employees to quit. Ignore it and keep working — there is no penalty for staying on the job.
Blue Cans and Weapon Progression
Blue cans change the math of a run. Once they start showing up, red creatures become obstacles rather than targets — you only swing at them when they body-block the vacuum. Everything in this stretch of the game is about turning that value gap into cash fast enough to buy the knife, then the pistol, and finally the big factory sale.
Why Blue Cans Are Worth Chasing
A blue can sells for $15, well above the red payout. That single number should drive every decision here: which creatures you vacuum, which upgrades you buy, and when you stop attacking and start hauling.
- Prioritize blue creatures in every wave; treat red ones as path blockers only.
- Process shiny cans whenever they appear — they are the fastest route to the multi-million dollar thresholds.
- Don’t hoard creatures in inventory between shifts; they don’t carry over, so anything left unprocessed is wasted value.
Feeding the Grinder Without Backups
The machine jams if you dump everything at once. Toss creatures in gradually and keep the belt moving. If the conveyor stalls, manually push the remaining creatures into the machine so the shift doesn’t end with a full queue.
Hold the vacuum button instead of tapping it — continuous suction clears a crowd far faster than repeated clicks. When your can storage maxes out, that’s your signal to stop collecting and start selling.
Weapons: Knife First, Pistol Next
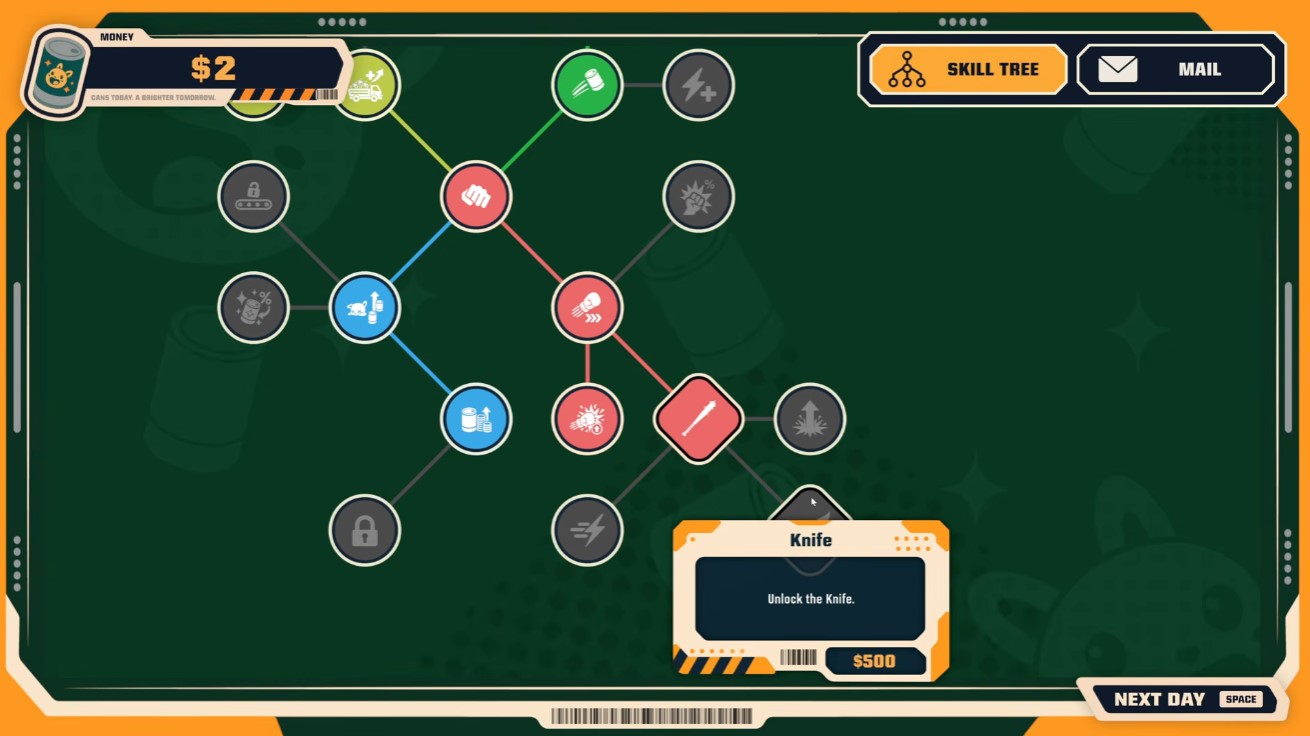
The knife costs $500 and hits for double the bat’s damage. It is the single biggest combat jump available at this point, so save for it before spending on anything cosmetic. The pistol is the follow-up purchase once the knife is in hand.
Bleeding looks tempting but underdelivers: it ticks for 4 damage against creatures with 12 total health, so it can’t finish a kill alone. Pair it with direct hits rather than relying on it as a primary source.
If a fight feels slow, the problem is usually crit chance, not raw damage. Push crit toward 100% and enemies get eviscerated on contact — combat stops being a chore.
Upgrade Order That Actually Pays Off
Spend in this rough priority so each purchase compounds on the last.
- Crit chance — chase 100%; it’s the strongest combat stat in this stretch.
- Conveyor belt sections — more belt means more processing capacity per shift.
- Explosive bullet damage and explosion chance — crowd control that clears waves without you swinging.
- Processing speed and belt speed — cuts machine time and raises throughput.
- Storage capacity, suction range, and creature arrival rate — keeps the pipeline full.
- Shift length — a longer shift beats faster attacks, since more time means more cans sold.
Later purchases in this block include machine 2, four cans per creature for $20,000, higher can value, paper cut, more shotgun pellets, shockwave damage, and lucky punch for shockwave procs. Melee attack speed and running speed are fine quality-of-life buys once the core throughput upgrades are done.
Cash Targets and Selling the Factory
Two money milestones gate your progress: 5 million dollars unlocks additional creatures, and 10 million in a single day is the efficiency benchmark — expect to need multiple belts and explosive ammo to hit it. A single can at $15 and a shift total around $896 show how far volume, not unit price, carries you.
When the milestones are met, sell the factory. The option appears at 110 gears first, then at 150 gears once you’ve earned enough to complete the stage — take the higher sale when it’s available rather than cashing out early.
Finish each shift before the 10-second timer runs out; the shift closes and your cans are sold automatically. New creature types like the electric guy get captured like any other, so don’t change your routine for them.
Night Shift and Shockwave Dominance
Night shifts change the rhythm of the run: creatures come thick and fast, and your seven inventory slots fill before you know it. This stretch is about turning that pressure into profit with the shockwave and a few well-timed upgrades.
Working the Night Shift
Switch to night duty and lean on suction to pull creatures in. Shiny creatures are worth grabbing on sight — they carry bonus value, so prioritize them over ordinary catches when a slot is about to fill.
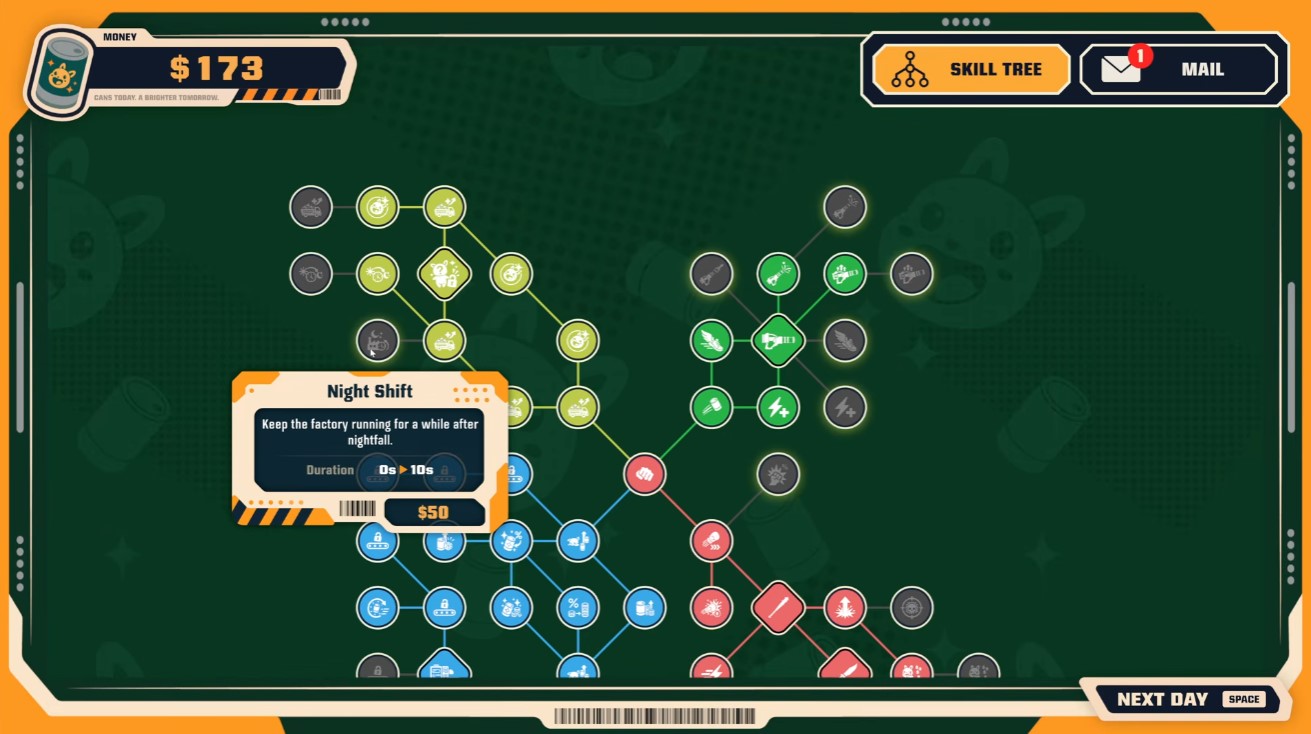
- With only seven inventory slots, deposit to the processing machine often instead of hoarding. A full bag means missed captures.
- Toss everything you collect into the processing machine to convert creatures into cans — that’s your only income stream during the shift.
- If creatures pile up faster than you can process them, that’s a machine bottleneck, not a skill problem. Keep processing and plan for more capacity as your earnings grow.
Day 17 Upgrade Choices
When the upgrade screen appears, take increased firing speed and movement speed (sprint) first. Faster sprint cuts the dead time between spawns and the processing machine, which matters more than raw damage at this point. Shockwave damage is a reasonable pick but optional — the base shockwave already does the heavy lifting.
Follow up with the can value upgrade as soon as it’s offered. Every can selling for more compounds across the whole shift and gets you to money goals noticeably faster.
Lucky Punch and the Shockwave
The lucky punch can trigger a shockwave that damages everything nearby. It’s the best crowd-control tool you have — one good proc can wipe a whole cluster of creatures and turn a messy night into a quick clear.
Shockwave is genuinely strong, but the trigger is inconsistent. Don’t build a whole strategy around waiting for it; treat each proc as a bonus clear and keep suction and shooting as your baseline.
- Throw punches into the densest groups so the shockwave catches as many creatures as possible.
- Keep using lucky punch throughout the shift — repeated procs are what make the ability feel overpowered.
Buying the SMG
Once you’ve banked $3,000, buy the SMG. It raises damage, shortens the delay between shots, and adds explosive bullets — a clear step up from the starting pistol for thinning crowds.
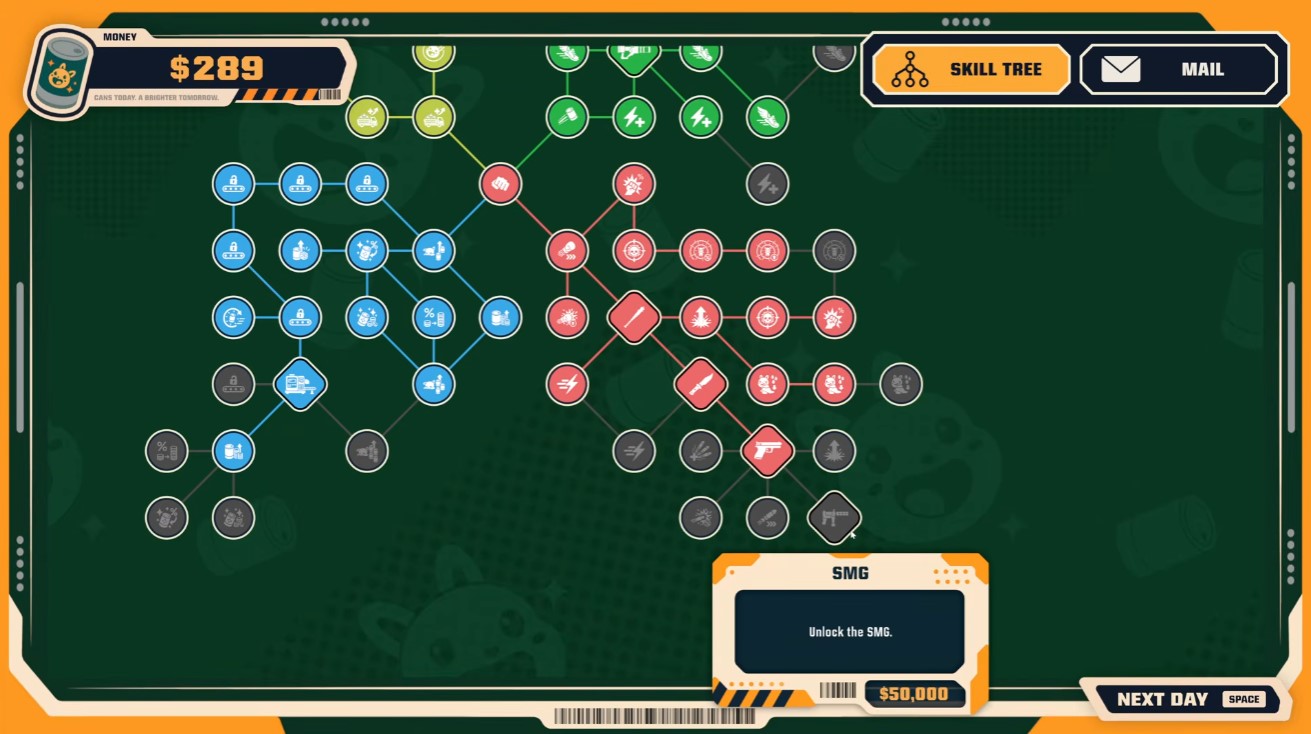
Until then, stick with the pistol and aim deliberately; every missed shot costs time you could spend processing. After the SMG is in hand, use it as your main weapon and let the shockwave handle the tightest clusters while you keep the processing machine fed.
Slot Machine, SMG, and Green Creatures
This stretch of the run is where the money loop and the combat loop start feeding each other. The slot machine gives you a shortcut to big upgrades, but the green creatures arriving at the same time make every bullet count — so the order you spend in matters.
Gambling With the Employee Entertainment Program
Check your email for the new entertainment program and open the slot machine. Start with a 300 bet and let it ride toward a jackpot. Any loss is gone for good, but the winnings go straight back into the company, so treat it as a funding tool rather than a side activity.
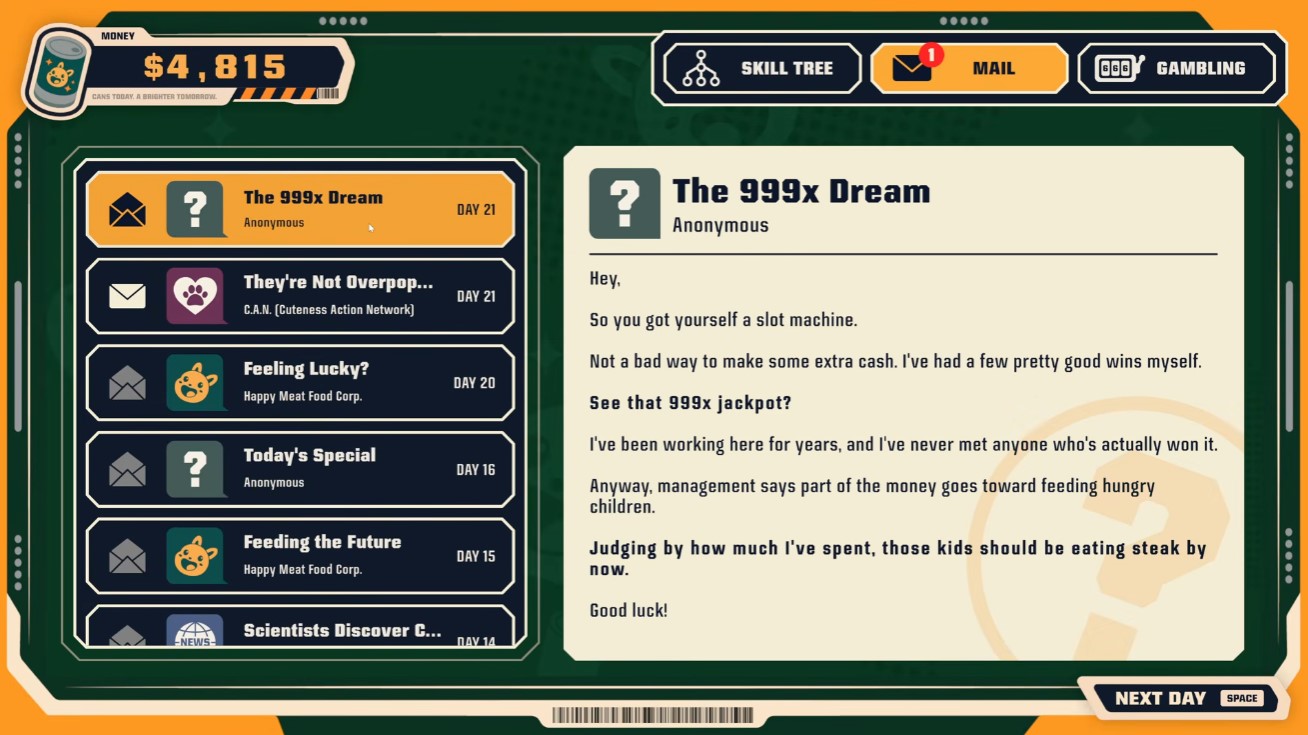
While you’re in the menus, read the fresh mail. “The 999 Dream” references the slot jackpot and management’s claim that the money feeds children, and another message rambles about overpopulation and controlled breeding. None of it changes your controls — it’s flavor that tells you what kind of company you’re grinding for.
What to Buy First
Once the money lands, the upgrade list is long and not everything is worth the price. Prioritize the ones that change how fast you clear a wave:
- Increase all damage — the single biggest quality-of-life buy at 10,000. It flips green creatures from two-shot to one-shot.
- More shiny cans — solid value early; lean into the shiny/duplicate can path when the shop pushes you there.
- Larger capacity and larger suction range — lets you vacuum more cans per pass instead of backtracking.
- Explosive bullet chance and explosive bullet damage — pays off in dense crowds.
- Chance to gain a bullet, reduced shot delay, faster melee, more movement speed — small but they stack into smoother combat.
- Higher shockwave chance — worth taking, but note the next tier costs a million, so don’t bank on pushing it further.
Skip critical hit chance. It doesn’t move the needle here, and the money is better spent on damage or capacity. A new creature costs 3,000 and is a reasonable pickup once your core upgrades are in.
Handling the Green Creatures
Green creatures survive a single bullet but not two, and they grind forever if you let them pile up. The reliable pattern is to stand your ground, wait out the shockwave, then pour fire into the survivors. Shockwave does real work on these guys — upgrading it is what keeps the waves from swallowing you.
Point-blank shooting is a trap when you’re out of bullets. Swap to the knife for close kills instead of wasting shots you don’t have.
Once “increase all damage” is active, you’ll be one-shotting greens and can chain shockwave plus sustained fire to clear whole groups at once. Aim deliberately — missed throws into the grinder mean missed cans, and missed cans mean missed money.
Feeding the Machines
Load cans into the machines in batches — roughly 25 into one, 25 into another — and expect the volume to cause some friction. Each can is worth $400, so the goal is throughput: throw defeated creatures into the grinder, collect the output, and keep the belt moving.
To unlock a third machine you need to improve the conveyor belt line first, so that upgrade is a prerequisite, not a luxury. If creatures are backing up faster than you can process them, drop the belt speed by about 20% and put the money into processing speed instead — a slower belt you can actually keep up with beats a fast one that jams.
Daily earnings targets climb as you go: hit at least 2,500 with your early upgrades, push toward 20,000 once damage and duplication are online, and treat 30,000 as the stretch goal. Spending everything on upgrades in one go can leave you short — keep enough buffer to actually reach the day’s target.
Saving for the SMG
The submachine gun is the payoff for all this grinding: $50,000, 104 bullets, 72 damage — the same per-shot as the pistol, but the fire rate is what makes it worth it against hardy crowds. The AK-47 is the next weapon after it.
Until you can afford it, use rapid fire on the crowd and switch to melee when the magazine runs dry. If you’re chasing the grind-a-creature-while-alive challenge, be careful near the grinder — it’s easy to fall in while lining up the throw. After the SMG, round out with more explosive bullet chance, more cans per fella, and the final impact upgrade for a higher shockwave chance.
Debt, Grinder Upgrades, and the $100K Goal
This stretch is where the money finally starts moving. You are still chained to the debt, but the upgrades you buy here turn the grinder from a bottleneck into an engine. The order you spend in matters more than the amount you spend.
Bet the Fortune and Clear the Debt
When the game offers the bet, push your whole fortune in. After that, get back to the canning facility and process cans until the debt is gone. The grinders you started with are full and inefficient, so the first real purchase is a new grinder to raise processing capacity. Do not sit on a full grinder waiting for it to drain — that is wasted time.
Your target before the day ends is at least $50,000. Once you clear that, unlock an additional machine so can processing runs without you standing over it.
Shockwave, Cleanup, and the Order of Work
The shockwave ability is your group-clear tool. One explosion that destroys 10 creatures at once also unlocks an achievement, so line up clusters before you fire rather than picking creatures off one by one. After the blast, pick up and process the leftover bodies to clear the area.
- Only run cans through processing when you are out of bodies. Bodies first, cans second.
- Keep throwing enemies into the grinder while you work — every body is money.
- Push processing up to $100,000, then keep going toward $110,000 and $120,000.
Where the Upgrade Money Goes
Explosive bullets come first. More chances for explosive rounds clears groups faster than any quality-of-life upgrade. Critical hit chance and the 10% instant-destroy chance are quietly excellent — that instant kill triggers more often than it looks on paper. Conveyor belt speed is the one to skip; it does not change your income enough to justify the cost.
Survival and collection
- Raise vacuum storage capacity so you are not running back and forth.
- Unlock the robot that pushes creatures toward the grinder, then raise its movement speed.
- Buy stamina to keep moving and acting without downtime.
- Add storage capacity — upgraded storage lets you carry 250 cans, so stop thinking in hundreds.
Processing throughput
Processing speed is worth the money. The gain is modest rather than dramatic, but it compounds across every batch you run. If the robot falls behind, manually toss cans into the grinder to keep it fed.
Happy Meat, Gambling, and the Next Day
Once you are back at $100,000, the Happy Meat employee message plays — food donations and animal cruelty. Take the money into upgrades: more exploding bullets, a longer day/night cycle, and more creatures per truck. Spend around 20,000 here and keep explosive bullets ahead of conveyor speed.
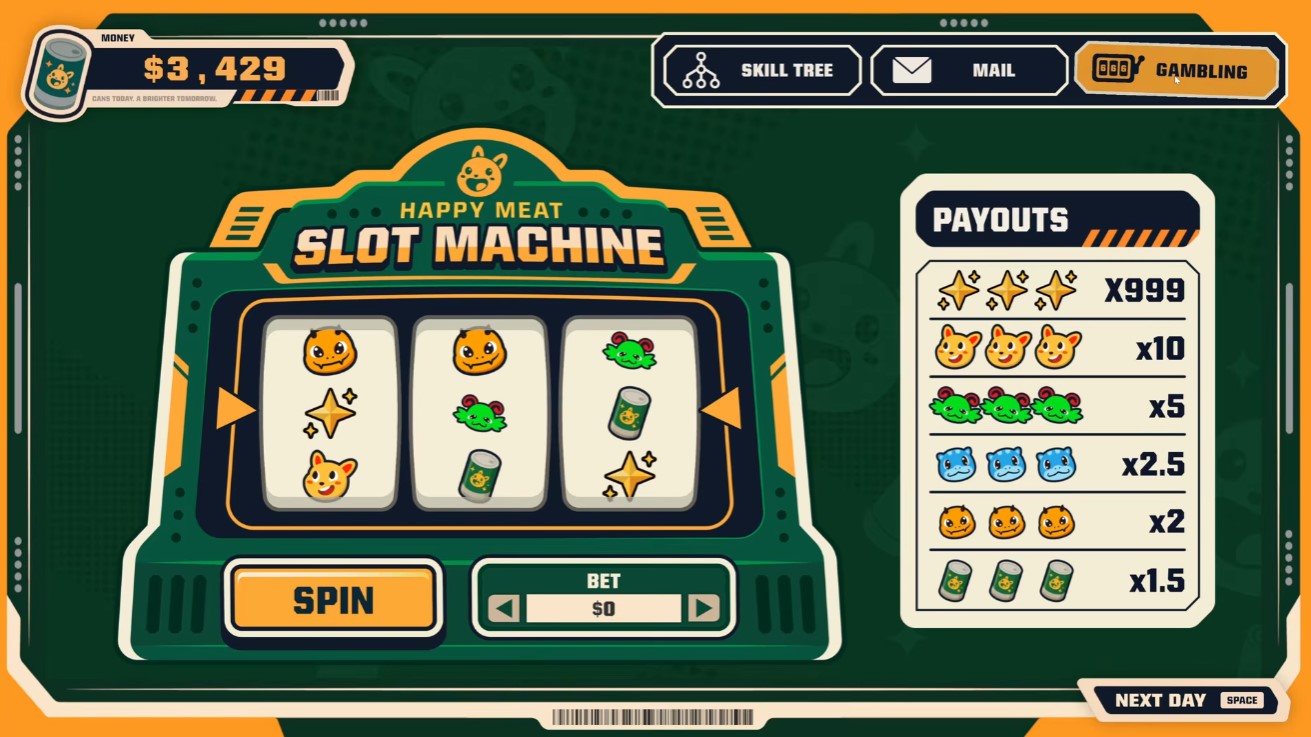
Then gamble 20,000. A 100,000 win goes straight back into more explosive bullets. When you are ready, start the next day — and note that staying in the elevator skips work entirely, so step out if you want the shift. The bathroom is locked, so do not waste a trip on it.
Feeding the Truck and Managing the Load
The truck only returns once you have killed enough creatures. Process roughly 90 bodies — about 30 per batch — to trigger the next one. Pink creatures carry the most health, so save your explosions for them and let the shockwave handle the rest.
- Buy another processing speed upgrade before the body count climbs.
- Use the clean-up ability when bodies pile up faster than you can process them.
- Upgrade the sucking ability to pull cans in faster.
- Buy one more explosive bullets upgrade, then bank toward 250 for the AK-47.
Watch the processing system closely. Overloading it stalls your income, so keep enough ability in reserve to handle whatever the truck drops next.
Shoot creatures as they emerge and let explosions break up the groups. Defending the line and keeping the grinder fed are the same job here — do both at once and the $100K mark stops feeling far away.
AK-47, Prestige, and Permanent Upgrades
This stretch is where the factory stops being a money grind and starts being a build. You are working toward a 250,000 cash milestone, and everything you buy before that point should either speed up your shooting loop or push you closer to the number.
Grinding to 250,000 for the AK-47
Your target is 250,000 in the bank. Keep the can-and-creature loop running and gamble when the gap feels too slow to close by shooting alone. Once you hit the threshold, the AK-47 unlocks along with several support purchases:
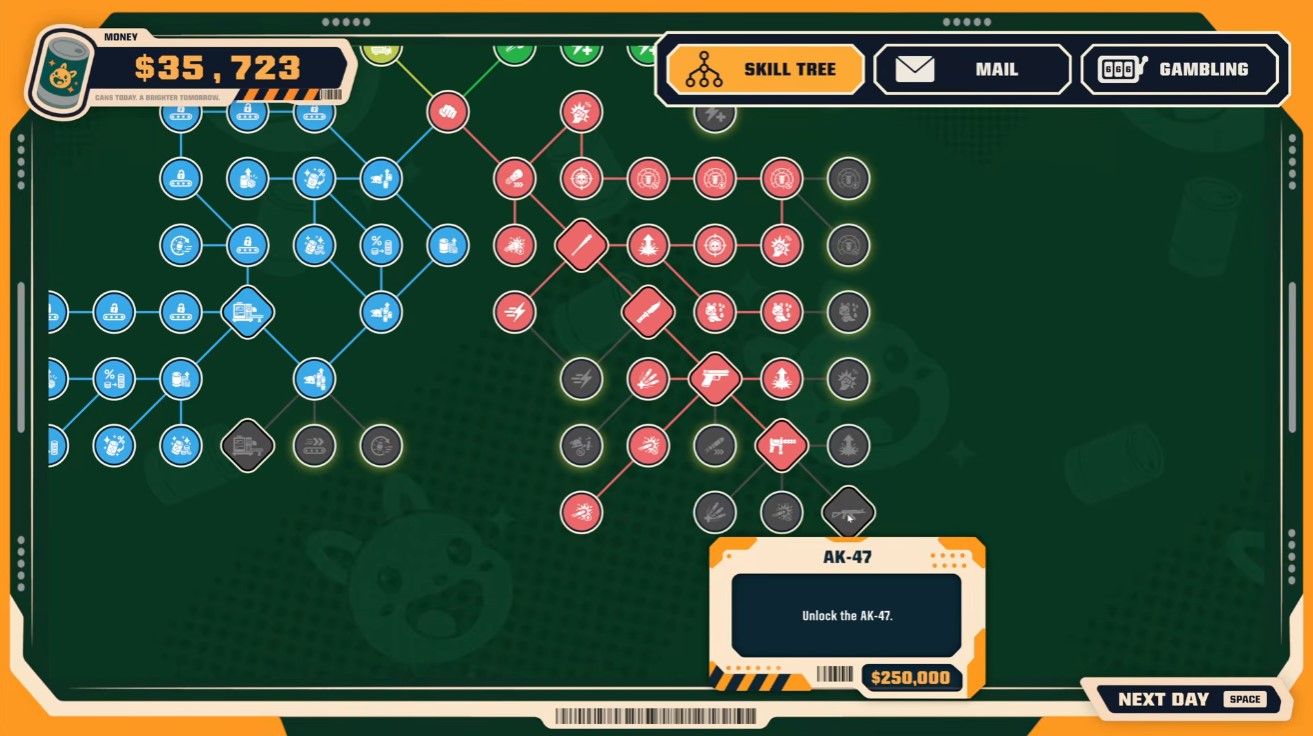
- Automated defense turret — takes pressure off you while you roam.
- Chainsaw — raises bullet gain per creature, so each kill feeds the loop harder.
- Hole-in-one — 10% more money when shooting cans, a flat boost to every can you hit.
The AK-47 kicks upward, so pull your aim down as you fire rather than fighting it shot by shot. Expect to re-learn your sight picture compared to earlier weapons.
Spending the first big payouts
Put 10,000 into more stamina, then gamble whatever is left over. Stamina matters because the loop rewards movement — running around to find more creatures keeps the grinder fed when cans run dry. Before you commit to the next upgrade tier, sweep the upper area of the map for secrets; it is easy to skip while you are focused on the cash counter.
When you start buying production upgrades, weight them toward anything that shortens the time you spend shooting cans and creatures into the grinder. Firing speed and can production are the two levers that compound.
Upgrade priorities and the 200,000 can-value buy
Take the upgrade picks in this order when they appear:
- Double firing speed.
- Exploding bullet damage.
- More ammo.
- Processing time.
- More ammo again.
After that, push toward the 200,000 purchase that raises the price of every can — it multiplies the value of the loop you have already built, so it pays for itself faster than another raw damage pick. Keep shooting cans and creatures in between, and watch your ammo count; the AK-47 chews through reserves quickly, and running dry mid-run stalls the whole cycle.
Selling the factory and banking permanent points
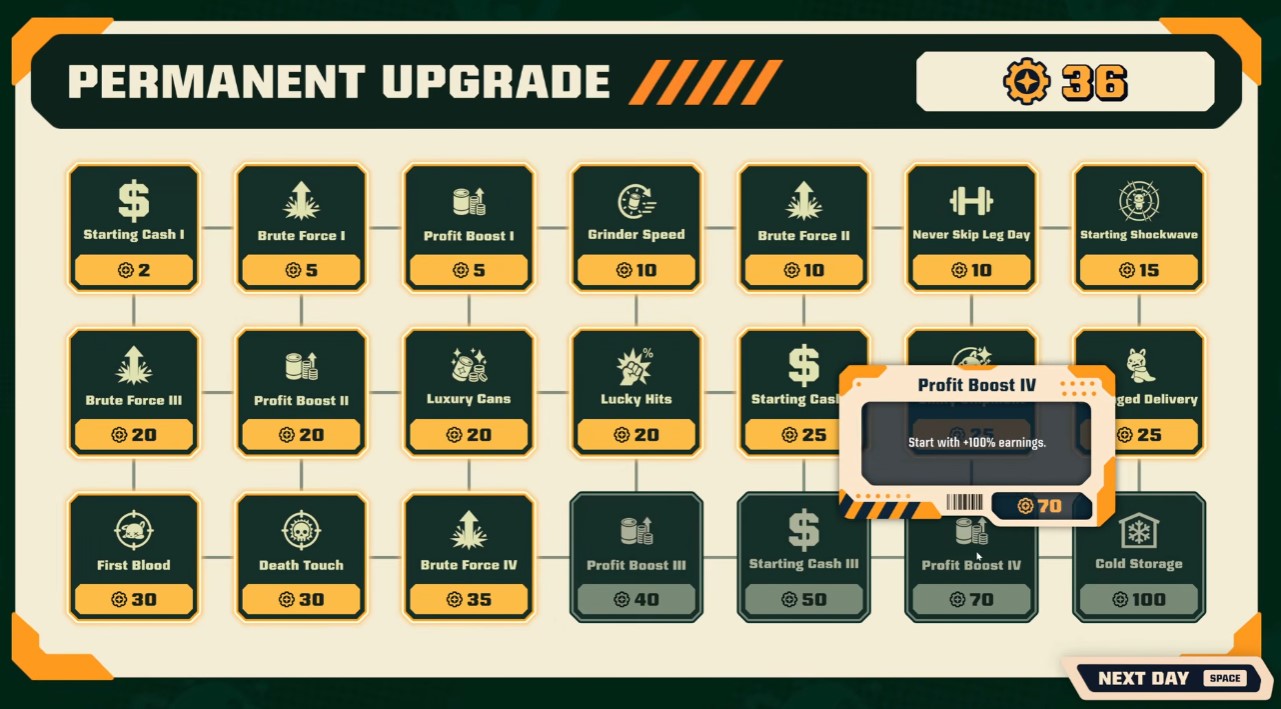
Once you are back at 250,000, accept the offer to sell the factory for 36 permanent upgrade points. This is the prestige trigger: it also unlocks the ability to sell your factory at any time afterward, so you can reset on your own schedule instead of waiting for the prompt.
Spend those points on the cheap perks first — starting with extra earnings, extra damage, and doubled critical hit chance are the ones worth grabbing early. Lower-cost upgrades give you immediate benefit on the next run, while saving for one expensive node leaves you weaker for longer.
Buy the cheaper permanent upgrades before the big ones. The early perks pay off from the first minute of the new run, and that head start is worth more than a single late-game node.
Post-Prestige Run: Overnight Processing and New Creatures
A fresh run with permanent upgrades banked plays very differently from your first climb. You already hit harder, so the early grind shrinks to a few minutes of punching and buying. The real goal this time is pushing the conveyor line far enough to unlock overnight processing and the new creature stock.
Opening the Run: Punch, Then Buy
Shoot the first creature to get the loop moving, then punch cutlings with your bare hands. Each hit deals 6 damage, so expect a short warm-up before the money flows. Spend your first cash on damage, movement speed, and extra creature spawns — movement speed matters most because it gets you to the vacuum faster.
- Grab the baseball bat as soon as you can afford it; the damage bump speeds up every early kill.
- Prioritize blue cutlings over other colors — they are worth more per pickup.
- Buy the vacuum early so cutlings collect themselves while you keep swinging.
- Round out the first shopping pass with shiny cans and increased can value.
Mid-Run Shopping: Knife and Storage
Save up $500 for the knife — it is the biggest single damage jump before the shockwave. Once you have it, shift spending toward the processing side of the factory instead of raw damage.
- Increased storage capacity and suction power keep the belt fed without constant babysitting.
- Shiny can value and can duplication compound over a long session; buy both before the cheap damage upgrades.
- More cans per creature stacks directly on top of your can value upgrades.
- Critical hit chance is worth picking up once the basics are covered.
Feeding the Line and Finding Better Creatures
Upgrade conveyor belt speed and processing speed together — a fast belt with slow processing just backs up. Then go hunting for higher quality creatures, since their cans sell for more and make every downstream upgrade cheaper to reach.
Blue cutlings arriving in shipments are the best value on the belt, so sweep those first. If you need a cash spike, the gambling machine is there, but treat it as a bonus rather than a plan.
Unlocking Overnight Processing
Overnight processing is the milestone that changes the pace of the run: cutlings get processed while you are away, so your next session starts with a payout instead of an empty belt. Push processing upgrades until it unlocks, then buy the conveyor belt extension to raise your capacity ceiling.
Shockwave only deals 1 damage per hit, but that is enough to clear packs of red enemies in one sweep. Buy it for crowd control, not for boss damage.
New Creatures and Late-Run Upgrades
With overnight income flowing, the $3,000 creature becomes reachable. Buy it, then keep the belt honest with the processing time upgrade so the new stock does not sit unprocessed.
- More capacity, increased suck range, and better shooting range make collecting blue cans less of a chase.
- Keep sweeping blue cans back to the belt by hand — the shiny blue can that shows up mid-run just needs sustained attacks to collect.
- When the factory is running itself, sell it for two upgrade points and carry that progress into the next reset.
That sell-off is the natural exit from this run: the two points are worth more than squeezing another hour out of a maxed line.
Rebuilding the Arsenal After Prestige
Prestige wipes your progress, so the first purchases are about restoring basic throughput. Buy the bag space upgrade before anything else — a bigger carry limit means fewer trips between the field and the machines. Then take firing speed twice so your shots keep pace with spawns, and put money into shockwave damage. A shockwave that can wipe every red enemy on screen is the single biggest quality-of-life jump you can buy this early.
Once those are in place, grind cans through the processor until you can afford the pistol at $25,000. The pistol is your answer to green enemies; aim assist does heavy lifting on shots, but it will not lock onto the greens for you, so target them deliberately.
Aim assist is generous for ranged weapons but absent for melee — don’t expect a swing to track a moving creature.
Processing Capacity and the Overpopulation Engine
Money only compounds if your machines can keep up. Buy a second processing machine as soon as you can afford it, then grab the Overpopulation upgrade — a 90% chance to duplicate cans is the strongest economy multiplier available at this stage. Shiny coin cans are worth more than standard ones, so duplication hits hardest when your shiny chance is also up.
When choosing between damage and capacity, take the extra ammo upgrade over a blanket damage increase. More bullets in flight means more cans collected per pass, and the next upgrade tier sits around 30,000 cans — plan your grind around that number.
Spending Priorities for the Mid-Game Push
- Creature variety to widen spawn types, plus distance to stretch the day longer. Storage is worth a look here too.
- Instant crit, the 10% chance to trigger a shock wave, and the speed boost. Bleed is optional but cheap value.
- Longer nights at 70,000 — a longer night means more enemies funneled into your grinders.
- Vacuum suck range and fire rate once affordable. These are easy to skip early and painful to lack later.
Shockwave Crowd Control and Grinder Play
Fire shockwave shots straight into dense crowds rather than picking enemies off one at a time. Shockwaves can trigger off other shockwaves, so a single well-placed shot into a pack — especially pinks — can chain into a full clear. After the dust settles, walk the field and manually collect survivors, including the shiny guy, and feed them to the processor.
Enemies worth 25 each add up fast when you sweep the whole map instead of camping one spot. Route your collection past the grinders and clear that area completely; grinders do the killing for you, but the current models struggle against large waves, so upgrading them pays off once your income stabilizes.
Keep pouring cans into shockwave damage even past the point of reason. Once creatures are feeding you steady income, absurd shockwave levels clear screens faster than any other stat.
Weapon Unlocks and Late-Run Upgrades
Stack damage upgrades as funds allow — 8,000 for raw damage, 8,000 for a chance at ammo back, and 5,000 for shockwave damage are all reasonable pickups. Beyond that, prioritize instant kill chance, reduced processing time, higher shiny can chance, duplicate cans, and faster attack speed. More bullets and a shorter delay between shots round out the firing line.
Be honest about diminishing returns: money-making upgrades often feel like they underperform for their price, so weigh them against combat upgrades that let you clear waves faster. Bank toward $10,000 before committing to a big purchase, and keep suction upgraded so collection never becomes the bottleneck. The AK-47 is the long-term goal — save for it once your economy and shockwave are carrying the run.
Chainsaw, Turrets, and Penguin Unlock
This stretch is where the factory stops being a hobby and turns into a logistics problem. Trucks keep dumping creatures, your grinders run dry the moment you look away, and the upgrade menu finally offers the toys worth saving for. The order you buy things here decides whether the next wave buries you or pays for itself.
Opening the Chainsaw and the First Helper
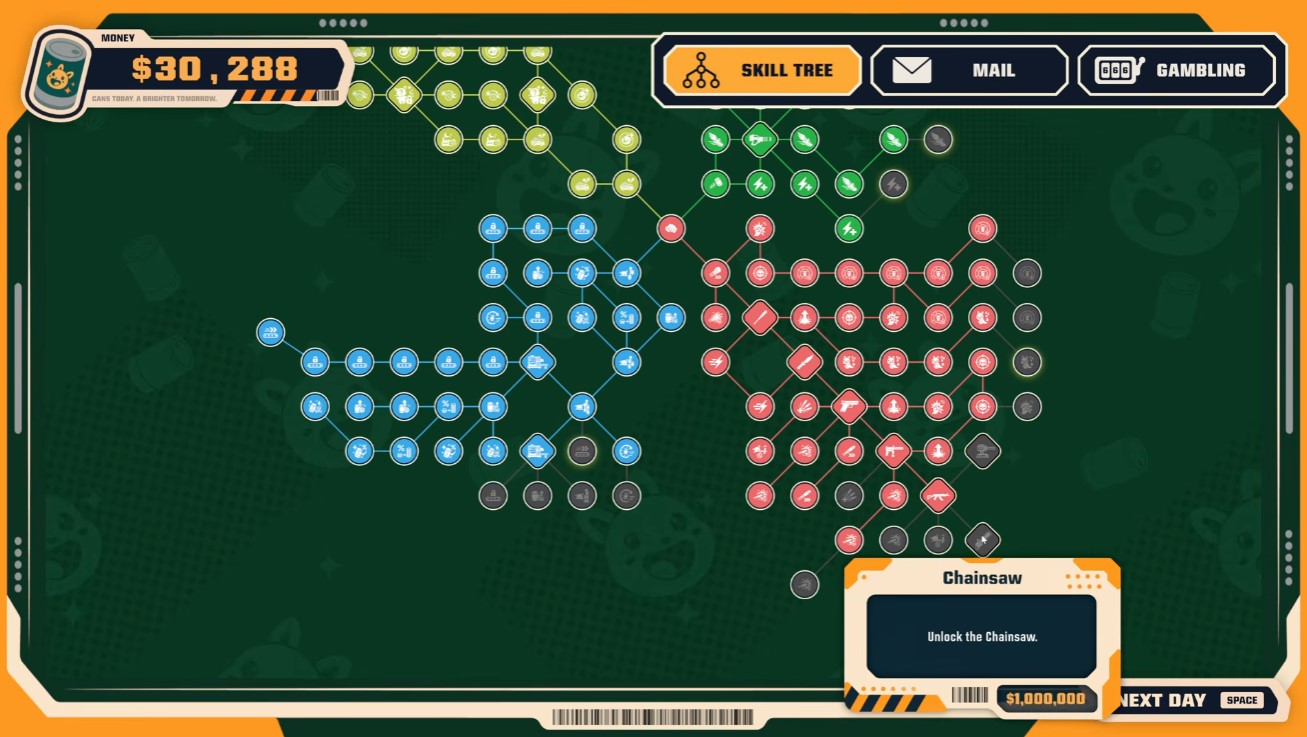
Grab the chainsaw unlock before anything else — it changes how fast you clear a wave, which in turn feeds every grinder on the floor. Pair it with a helper so collection doesn’t stall while you’re shooting. Once those two are in place, dump whatever cash is left into the jackpot machine chasing the 999 payout; it’s a lottery ticket, not a plan, so don’t expect it to fund the next upgrade.
- Buy extra storage capacity early — you’ll be hauling far more cans than the starting bin holds.
- Fire the pistol with a click to keep pressure on creatures between bigger purchases.
- Treat gambling money as already spent. If the jackpot hits, great; if not, you lost nothing you were counting on.
Processing Speed Beats Everything Else
The upgrade menu tempts you with more monsters, a bigger 500-can capacity, and better suction. Resist all of it for now. Processing time is the bottleneck: cans pile up faster than the grinders can chew them, so a faster line converts every creature you kill into money instead of a clogged floor.
When you’re choosing between a conveyor belt and raw processing speed, take the speed — especially if you intend to spawn more creatures later. A belt moves cans around; speed actually empties the queue.
If your grinders sit empty while cans overflow your pockets, you bought the wrong upgrade. Fix processing before adding anything that makes more cans.
Grinder Capacity and the 500-Can Carry
Push grinder capacity up to 20 cans each so a single deposit keeps production running while you fight. Then spend the 500,000 on the 20% bump to cans per creature — that multiplier compounds with every kill for the rest of the run. The carry upgrade takes you to 500 cans, but the next tier costs 100,000 cans (three green cans), so plan a long deposit session before you chase it.
Keeping the Line Fed
- Never let a grinder hit zero — top off all of them partially rather than filling one completely.
- Stop shooting periodically and sweep the processed cans out of the grinders; they don’t collect themselves.
- Test the chute by jumping in after a full deposit. It’s worth one attempt to see if it swallows everything at once, but don’t build a strategy around it.
The Transport Tube Detour
Throwing yourself into the transport tube triggers an unauthorized usage message and nothing more — no bonus money, no shortcut. Going back a second time produces no new message at all. It’s a curiosity, not a route, so don’t waste a run testing it twice.
Weapon and Combat Upgrades Worth the Money
With the economy stable, the combat tree opens up. Firing speed is the headline purchase at half a million, and a second fire rate upgrade doubles it again — that’s the investment that keeps waves from stacking up while you’re mid-deposit. Fill in the supporting pieces around it:
- Suction at 100,000 — it pulls in a circle around you, not just where you’re aiming, so it’s far stronger than it looks.
- More explosions at 60,000 and 70,000, then explosion damage at 80,000 and 100,000.
- Start each day with more ammo, and boost the chance to gain a bullet from weapons that destroy creatures.
- Faster conveyor belts and increased player speed for getting around the floor.
Aim backward into a crowd to trigger explosions where they’ll actually connect. On the shockwave: it appears to instantly kill enemies, but that’s an assumption rather than a confirmed mechanic — play as if it does and adjust if creatures survive it.
Surviving the Truck Shipments
Shipments arrive nonstop from the trucks, so treat the floor as a permanent combat zone rather than something you clear and tidy. Keep the chainsaw and doubled fire rate working on incoming creatures while your suction circle hoovers up the drops around you. Gamble small amounts like $5,000 between waves if you want to keep rolling at the jackpot without gutting your upgrade fund.
Robot and Staff Upgrades
Once the shooting side is handled, spend on the little robot: make it move faster and enlarge its shovel so it clears cans more efficiently on its own. Pick up a new guy as well — extra hands mean fewer trips where you abandon the fight to run deposits manually.
Gambling, Shinies, and the Million Mark
Keep the gacha loop running whenever you have spare cash. Gamble again, and if the pull gives you nothing you actually want, roll again — do not sit on a bad result. Between rolls, keep collecting shinies so you can fund the next batch of upgrades without stalling your damage curve.
Your first big currency target in this stretch is a million. Hitting that threshold is what opens the chainsaw, so treat shinies and can income as the gate in front of your next weapon tier rather than optional side cash.
Cleaning Up the Truck Waves
Enemies start arriving far too spread out to handle reactively. The fix is to catch them the moment they step out of the truck, before they scatter across the map. No new truck shows up during this stretch, so the pressure comes from the density of the current wave, not from a fresh spawn.
- Position yourself at the truck exit and shoot enemies as they emerge.
- Expect to run completely dry on ammo at least once — plan your reloads and pickups around that.
- When you can’t shoot, switch to the chainsaw for close-range cleanup instead of backing off.
If enemies feel unmanageable, it’s usually because they spread out before you engage. Kill them at the source, not mid-map.
Weapon and Upgrade Priority
Once the chainsaw is in hand, the next weapon tier is shotguns. Pair that with an ammo bonus so your ranged output doesn’t collapse mid-wave. The chainsaw earns its slot against clustered enemies up close, so keep it equipped for the moments when they pile onto you.
Conveyor Belt and Processing
Buy the conveyor belt and the processing-time reduction together — one moves cans, the other speeds them through the machine. Tune the belt speed to roughly 60–70. That range keeps enemies flowing off the truck without bottlenecking the line.
- Sunset can and conveyor belt are both worth grabbing here.
- Reduce machine processing time more than once if you can afford it; throughput compounds.
- Deposit all captured animals so they convert into cans instead of sitting idle.
Two Million and the First Turret
Push your total to two million to unlock the next tier of upgrades. The headline purchase is the first turret — it adds passive damage output so you’re not the only thing shooting during a wave.
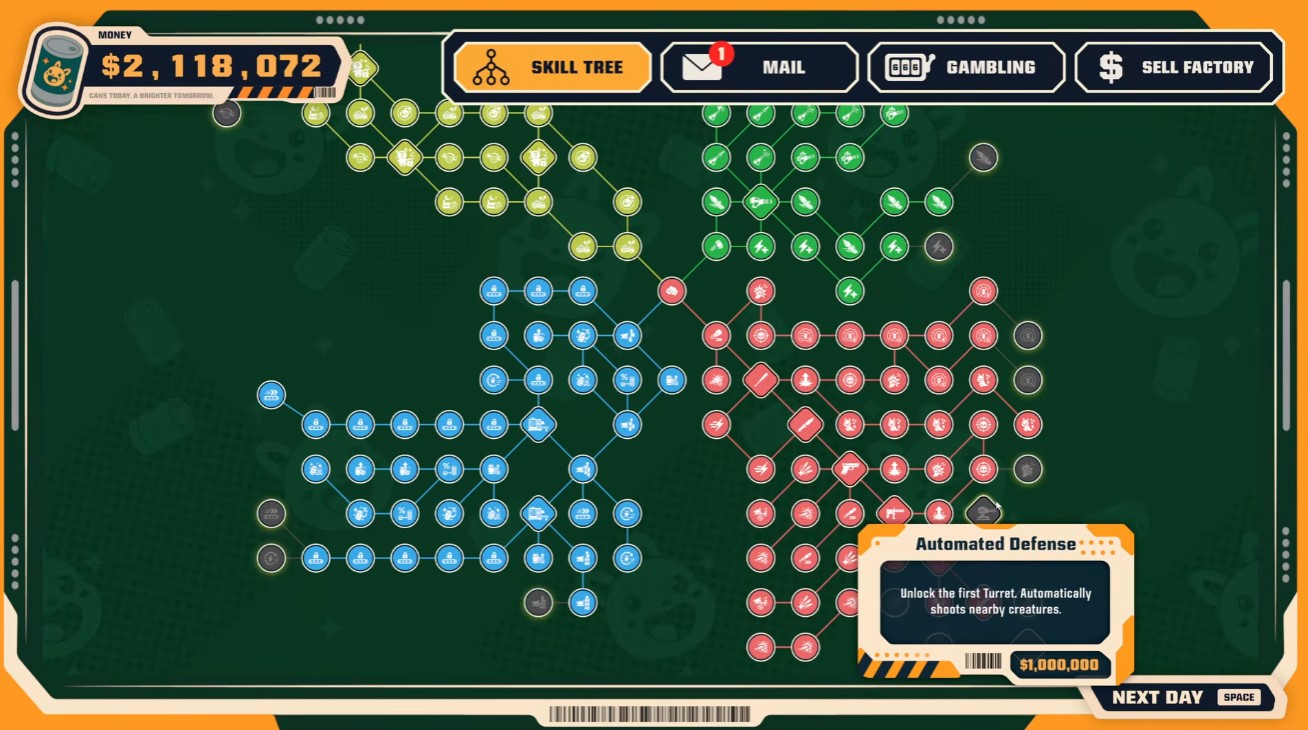
Spend the rest of that budget on the practical quality-of-life upgrades:
- Processing time, to keep cans moving.
- Firing speed, for more shots per second.
- Faster wheels and sprint speed, so you can reposition to the truck quickly.
- Increased shovel size, to scoop more cans per pass.
On the penguin: try to capture another one if the opportunity appears, but don’t count on it — the source is unclear on whether a second penguin is actually obtainable, so treat it as a bonus rather than a goal.
Handling the Next Truck
When another truck rolls in and starts spawning enemies, let the turret and your ranged weapons do the heavy lifting while you hold the exit. This is where the earlier upgrades pay off — a faster belt and shorter processing time mean the wave converts to cans faster than it can overwhelm you.
Late-Wave Damage Stack
With income flowing, dump the next round of purchases into raw damage so tougher enemies stop being a wall. Prioritize the shotgun and rocket launcher, then layer on the multipliers.
Bullet and Explosive Upgrades
- Fire twice as many pellets to raise shotgun output.
- Increase bullet chance and all damage together — they stack into the same shots.
- Grab explosive rounds, then use the explosions to wipe out whole groups at once.
- Extend the day so you have more time to farm before the wave resets.
Insta-kill chance is worth doubling here. A higher chance to instantly kill an enemy scales better than flat damage against the tougher spawns, and it pairs well with explosive rounds clearing the trash around them.
Explosions are your best crowd control in this stretch. Aim them at the densest cluster rather than single targets.
Rocket Launcher and Cell Factory
This stretch is where your money starts working for you — or gets wasted. The shop offers several tempting purchases at once, and a couple of them look better than they perform. Spend deliberately here and the grind speed jumps; buy blind and you’ll be selling upgrades back to recover.
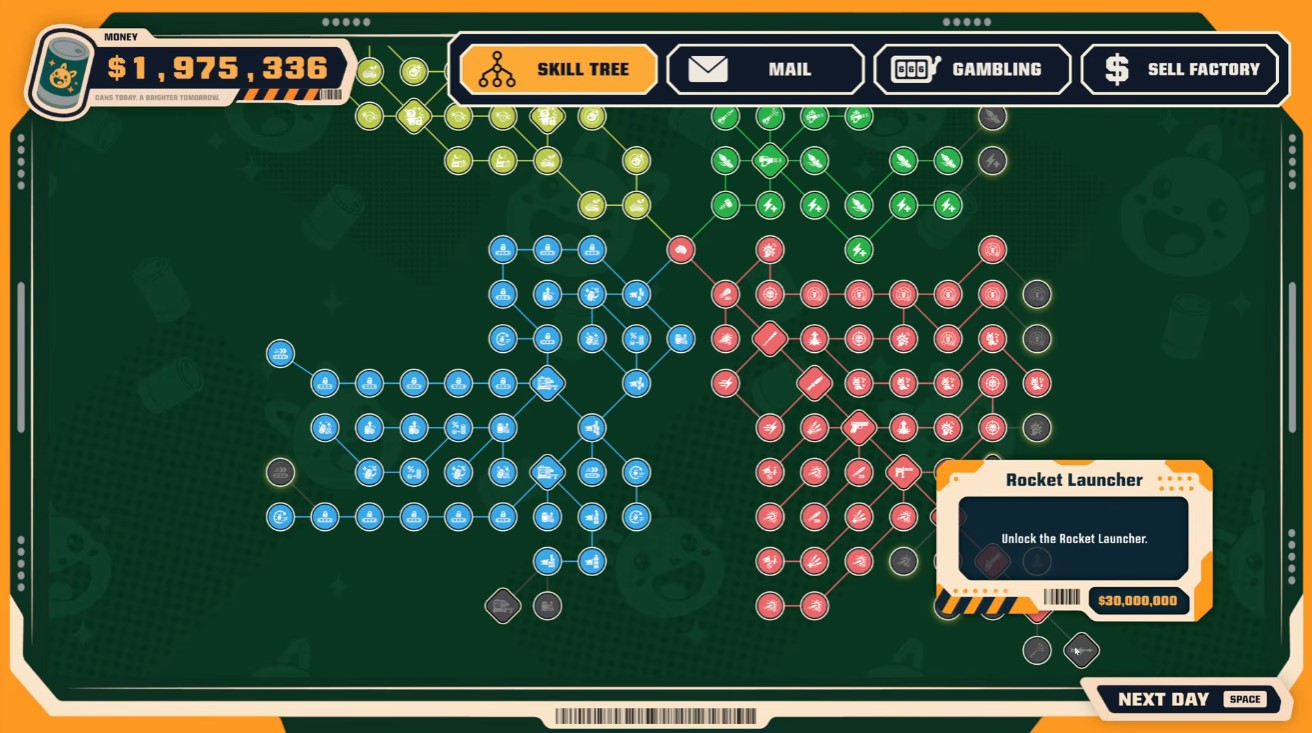
What to Buy First
The vacuum line is the single best investment on this screen. A basic vacuum collects cans automatically so you stop chasing crates by hand, and every upgrade stacked on top of it (firing speed, suction range, storage) pays for itself fast. Once firing speed is high, shooting cans into processors is quick enough that the 50% bonus becomes genuinely worth chasing.
- Grab the basic vacuum, then push firing speed, suction range, and storage as far as you can afford.
- Unlock running without stamina consumption so you can reposition without downtime.
- Pick up “Never Skip Leg Day” for the movement/damage benefit — just know these purchases are permanent, so don’t buy it while waiting on lucky hits.
- Add damage and crit chance, including the small chance to instantly kill a can, to speed up processing.
The Rocket Launcher and Cell Factory Question
Both headline purchases in this section underdeliver. The rocket launcher is meant to clear cutlings efficiently, but in practice it doesn’t outperform your existing tools — test it, then fall back on what already works. The cell factory is similarly weak for the price, and the vacuum upgrades are the better use of the same money.
Don’t sink currency into the cell factory expecting a big payoff — the vacuum upgrades give far more value for the same spend.
If you already bought the factory, sell it back for 300 and redirect that money into permanent upgrades. The extra shiny-can chance it offers is wasted anyway, since every can eventually turns shiny on its own.
Combat and Processing Loop
Park yourself in one spot and let the conveyor belt drag cutlings into the processing area while you shoot. The shotgun works well here: some cutlings survive the drag, but most get processed before they reach you. Punch anything that gets through.
- Hold position and fire with the shotgun as cutlings are pulled in.
- Keep grinding in place until you hit 1000, then shoot while they’re being dragged.
- Break off to grab shiny cans the moment one appears — they’re worth far more than standard cans.
- Defeat shiny creatures on sight to claim a shiny can drop.
Upgrade Synergies Worth Knowing
Bleed damage is the sleeper pick: if it counts toward “any damage” bonuses, it can multiply your output dramatically. Test it against a tough target to confirm the interaction before you lean on it. Shockwaves are the other standout — they’re especially strong for fast grinding, so stack them alongside your damage and crit purchases.
When you’re picking a batch of upgrades, brute force, death touch, grinder speed, more damage, and crit chance form a solid core. Note that some damage boosts are additive rather than multiplicative — “Punch faster” and “Give me a baseball bat” still help attack speed and damage, just don’t expect them to compound.
Cash Flow and Permanent Progress
Punch and shoot your way to a healthy balance, then convert it into lasting power. Selling the factory for 300 is often the move that lets you afford a full sweep of permanent upgrades, plus more free cans and machine 4. When a day-extension bonus is offered, take it — the extra time and large payout maximize productivity before you spend.
- Sell the factory to fund a complete permanent-upgrade pass.
- Unlock machine 4 and raise your free-can count.
- Choose luxury cans when the option appears.
- Take the extend-the-day bonus whenever it’s on the table.
Rocket Launcher and Cell Factory
The money loop here is the same one you already know, just scaled up: process cans in the grinder, and shiny cans pay out a lot. When the processor is idle, don’t wait on it — toss cutlings in yourself and shoot them so they finish faster. That manual push is the difference between a slow grind and a steady income.
If you’re short on cash, the pistol costs 3000. A whole new creature runs 30000, so if that’s out of reach, sink the money into vacuum stats and running speed instead. Both make every collection run more efficient, and efficiency compounds.
Where the Money Actually Comes From
Value upgrades matter more than raw firepower early on. Buy the “more value per can” upgrade and the can-stat boosts, then pick up insta and shockwave chances when they appear. Blue cans are worth more than red cans — even shiny red ones — so steer your vacuum toward blue whenever you have a choice.
One warning from experience: some upgrades quietly undercut the strategy you were running. After a round of purchases, check whether your old method still works. Sometimes it’s literally bad now, and you need to change your approach rather than keep forcing it.
When you’re picking targets, prioritize the pink guys. Shoot them specifically and let incidental hits handle the rest — the rewards are better and you spend less ammo chasing everything.
Upgrade order that pays off
- Conveyor belt first — faster processing means faster money.
- Shockwave next, so one shot damages a whole cluster of enemies.
- The 10% insta-kill chance on cans, which turns tough targets into free kills.
- Larger suck and further suck to widen vacuum range, then raise the suck ability itself.
If you’re still short on a key upgrade, selling the factory to afford lucky hits is worth it. Lucky hits outperform most other purchases at this stage, so treat them as a priority rather than a luxury.
Weapons and the Next Buying Round
Grab the baseball bat when it’s available, then collect the vacuum and Bella and get back to stocking cans. Push the conveyor belt up again for more processing speed.
On the next shopping pass, work through this in order:
- Pistol, a new fella, and a conveyor belt increase.
- More cans, then another machine, then more cans again.
- Boost everything tied to cans and processing.
- More duplicate money.
Follow with a combat round: another shiny guy or another fella, then all-damage, more crit, a chance to insta a fella, more crit, more insta, and shock waves. Finish by making the vacuum way better and raising movement speed.
Clearing Debris and Feeding the Grinder
Keep firing to process creatures, then vacuum up the debris and throw it into the grinder to clear the area. A clean floor keeps your routes short and your vacuum from clogging on leftovers.
Jump back into the hole and spend on processing speed and can value. Buy another machine if you can afford it — parallel processing is one of the biggest jumps in income you’ll get at this point. Then put money into vacuum upgrades for suction range and capacity.
Late-Chapter Damage and Defense
Vacuum up all the defeated bodies and buy processing speed upgrades to keep pace. Max out fire rate, widen suction range, and expand storage capacity so a single run collects more before you have to dump.
Weapon and turret priorities
- Shotgun: more pellets and reduced shot delay.
- Gamble option for random bonuses — cheap upside when you have spare cash.
- Automated defenses, then turret ammo capacity and damage.
- Unlock a second turret and improve the vacuum toss bonus.
Close out by raising movement speed and shovel size, then buy another character. Faster movement and a bigger shovel both shorten the loop between killing, collecting, and processing — which is what this whole chapter is really about.
Final Creature and Billion-Dollar Goal
You are deep in the endgame now: the debt clock is the only thing between you and the exit. This stretch is about converting a fully upgraded factory into raw cash fast, then buying the one upgrade that actually lets you walk out.
Keep the Grinder Fed
New creatures keep dropping in, including the last one, and every one of them is just raw material. Shove them into the grinder as fast as you can instead of letting them pile up — idle creatures are wasted cans.
- Use the auto turret alongside your own weapons; it processes creatures with the same effect as you do.
- The flamethrower is the standout tool here — it chews through creatures far quicker than anything else you have.
- Keep an eye on machine gun ammo. If it runs dry mid-push, top it up so you are never standing around waiting.
- Buy the damage and extra conveyor belts as they come up so the line never bottlenecks.
Spend 700 Gears on the Weapon Unlock
Sell the factory for 700 gears to open up the rocket launcher, flamethrower, and the smoked meat upgrade. Then push the machine gun toward its cap — you want it near maximum before the final grind.
The smoked meat upgrade is the money-maker in this batch: it turns out smoked cans worth double. Once it is running, suck up every can the line produces; leaving cans on the floor is leaving profit behind.
Chase the Shinies
Regular cans are background noise at this point. Shiny cans are what actually move the needle, and they still out-earn everything else even this late.
- Wait for shiny cans to drift closer, then sweep them up for a fast cash spike.
- When you gamble, pick the “cans are more valuable” and “cans can duplicate” outcomes — they compound with the shiny economy.
- Gambling is optional fun, not a requirement. Do not sink money you need for upgrades into it.
The 1 Billion Threshold
Hit 1 billion and drop into the hole to advance. From there the upgrade terminal opens its last tier, and this is where you spend everything you have banked:
- Can economy: shiny economics, more cans per creature, maximum cans per creature, and the can printer (50% chance to duplicate money and cans, 10% chance at a shiny can).
- Factory: 250 max occupancy, max conveyor belt speed, 40% chance to gain a bullet, 100% more ammo, 50% chance to gain a bullet, 100% less delay between shots, more damage from all turrets, and rocket launcher explosion radius up.
These purchases unlock the exit for 666,666. Gambling exactly 666,666 does not trigger the 999 achievement — that attempt fails, so do not burn a run chasing it.
Buy Freedom and Leave
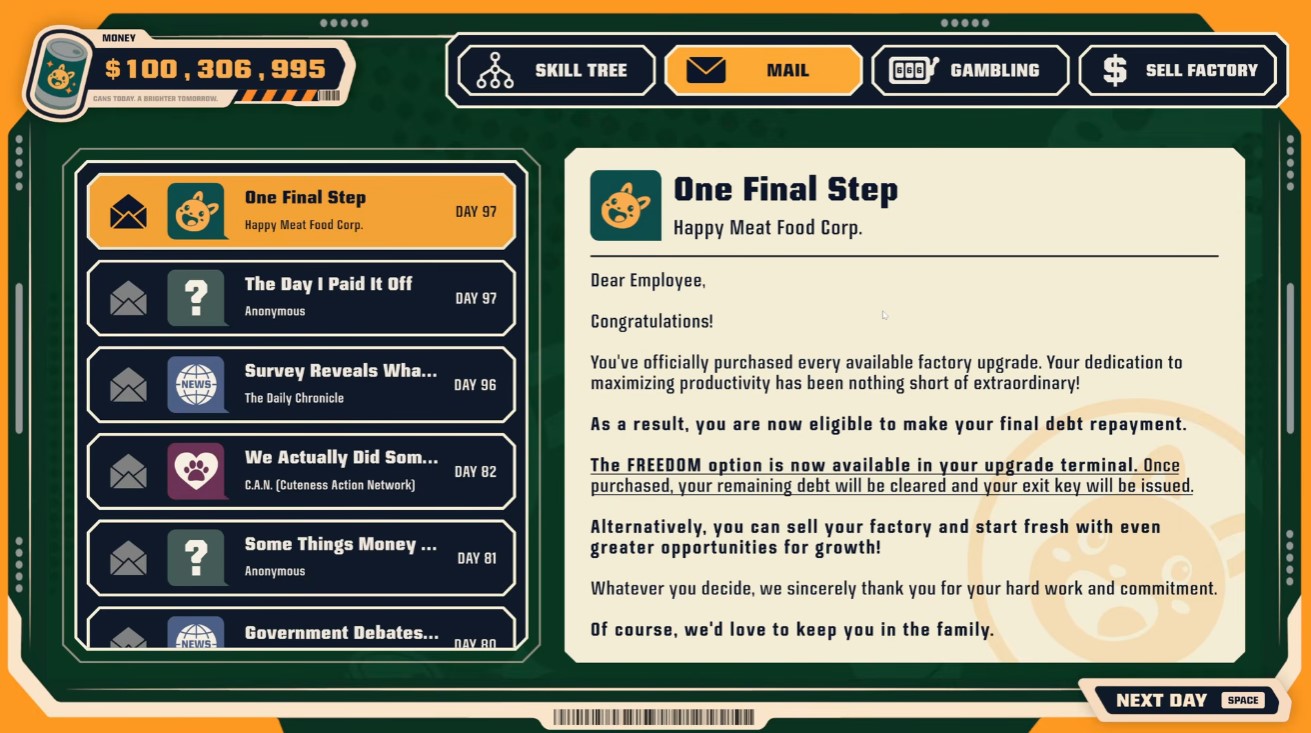
Once the exit is open, take the freedom option in the upgrade terminal. That clears the remaining debt and hands you the exit key.
Before you go, sweep the factory floor one last time — cans tucked against the walls and up in the upper areas are easy to miss, and the place looks better tidy. Then walk to the exit door and interact to roll the ending.
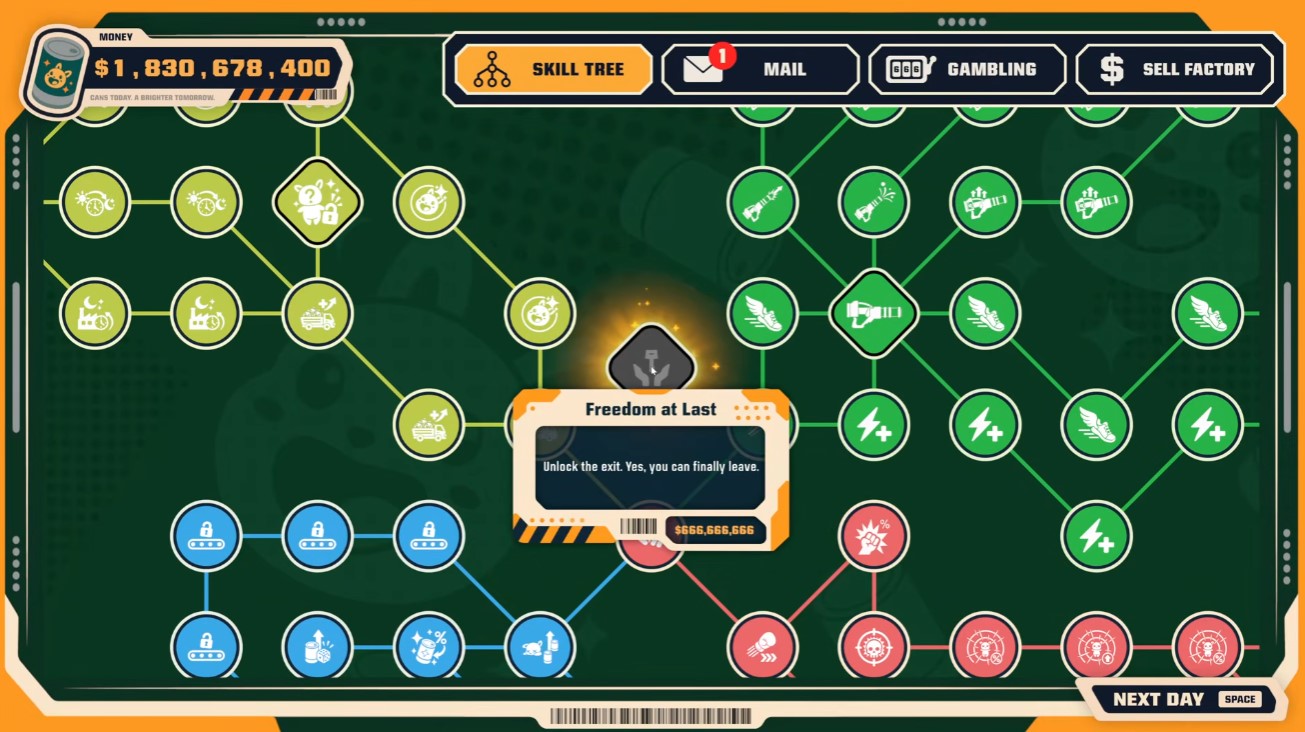
If the exit door will not respond, you have not bought freedom yet. The key comes from that terminal option, not from the 666,666 price tag alone.
Factory Floor Basics: What Actually Makes Money
Everything in Can ‘Em All feeds one loop: catch creatures, push them into the grinder, can the output, sell it, and spend the cash on the next bottleneck. The run only feels slow when one link in that chain is weaker than the others. Read the floor before you buy anything — a fast grinder feeding a slow conveyor is wasted money, and a fast conveyor with no creatures on it is worse.
These are the levers that matter across the whole run, whether you’re on your first shift or pushing toward the billion-dollar exit.
Processing and Conveyor Setup
- Upgrade belts and grinders in matched pairs. If cans pile up before the seller, the belt is fine and the grinder is lagging; if the grinder sits idle, the belt or your capture rate is the problem.
- Position creatures near the grinder mouth so they walk in on their own. Cutting the walk time is free throughput you don’t have to pay for.
- Overnight processing turns idle hours into stock. Unlock it as soon as it appears after prestige — it compounds with every other upgrade.
The Vacuum and Creature Collection
The vacuum is your collection tool, not a combat weapon. Suction range and speed decide how many creatures reach the belt per minute, so a vacuum upgrade often out-earns a weapon upgrade in the early and mid game. Sweep dense spawn areas rather than chasing single stragglers.
Shiny and Blue Cans
Shiny creatures and blue cans are the high-value outliers. Prioritize a shiny over a crowd of commons every time — the payout difference is large enough to justify the detour. Blue cans are a major income source once they start dropping, so keep a clear lane to the seller when a batch comes through instead of letting them queue behind normal stock.
Shockwave: Your Crowd Reset
Shockwave clears packed waves in a single press and becomes central to combat once night shifts and green creatures show up. Upgrade it before you need it, and treat it as a reset button when a crowd overwhelms the floor rather than a damage source you spam on singles.
Weapons, Gambling, and the Prestige Decision
Weapon Order and What to Max
Weapons arrive in a rough ladder — bat, knife, pistol, SMG, AK-47, chainsaw, rocket launcher — with turrets and a flamethrower filling out the late game. Don’t spread upgrades thin. Crit chance and explosive damage pay off across multiple weapons, so those are safe investments; max the machine gun and flamethrower specifically for the endgame push.
Slot Machine and Debt
The slot machine is a genuine risk. Betting your entire fortune can pay off big or leave you paying off debt — only gamble money you can lose without stalling your upgrade path. If you do take on debt, clear it before prestige so it doesn’t drag the next run.
When to Prestige
Prestige wipes your progress but grants permanent boosts that make every following run faster. Trigger it once your current run has plateaued and the permanent upgrades on offer would clearly outpace anything left to buy. The post-prestige rebuild is where overnight processing, new creatures, and new machines come online, so expect the second run to overtake the first quickly.
Endgame Prep and Run-Ending Mistakes
- Don’t enter the final creature fight with unspent damage upgrades — max the machine gun and flamethrower first, since the last stretch is a damage check, not a puzzle.
- Keep the belt-to-seller lane clear during big shipments and shiny batches; a clogged lane quietly bleeds income while you fight.
- Clear debt and finish major purchases before prestiging — carrying either into a reset wastes the permanent boost you just earned.
- Don’t over-invest in a single weapon early; crit and explosive upgrades carry you across the whole ladder until the dedicated endgame guns arrive.
