
I’ll be upfront with you: this monk route is a living document. It’s been shaped through direct gameplay testing, community reports, and plenty of reader feedback, and I keep refining it as the game patches roll in. What I love about it is that you never spend a single gold coin on respecs — the entire 60-point talent path is cumulative and continuous, so you can follow it start to finish without ever second-guessing your investment. If you find a smoother synergy for any bracket or zone, drop it in the comments and I’ll work it into the next revision.
The Two Rules That Shape Everything
Before we touch a single talent point, internalize the economy behind the monk. Resetting talents is punishing — at level 25 alone a full respec runs over 2,600 gold — so planning ahead isn’t optional, it’s survival. That’s exactly why the 60-point progression below never asks you to backtrack.
Active abilities are a completely different story. Swapping skills in your combat action bar is 100% free, which is the single most liberating thing about leveling this class. As you push into biomes full of elemental threats — poison pools, heavy crowd control, mob swarms — you can and should swap your action bar skills on the fly to answer each environment. Nothing is locked in except your talent tree.
Ability unlocks hit on fixed milestones, and I’ve verified these against the engine assets:
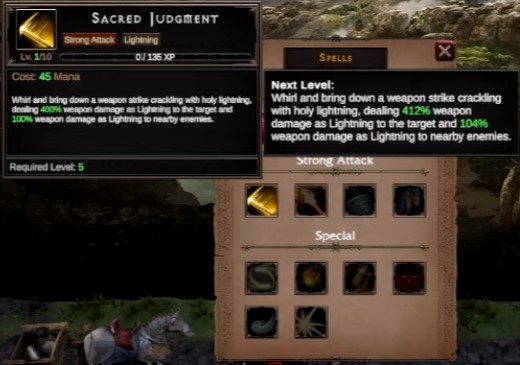
- Basic Attacks: Threefold Strike (Lv 1) → Furious Fist (Lv 15) → Seismic Strike (Lv 30) → Chi Bolt (Lv 45).
- Strong Attacks: Sacred Judgment (Lv 5) → Piercing Lunge (Lv 20) → Whirlwind Staff (Lv 35) → Golden Palms (Lv 50).
- Special Attacks: Sacred Orbs (Lv 10) → Spirit Stream (Lv 15) → Charge (Lv 25) → Spirit Twin (Lv 30) → Wind Steps (Lv 40) → Divine Thunder (Lv 45).
Bracket 1: Levels 1 to 14 (Early Plains & Catacombs)
The opening stretch is gentle by design. You’re in the Starter Plains and Early Catacombs (Waves 1 to 14), and everything coming at you is slow melee — zombies, skeletons, and a raptor miniboss. There’s no elemental damage yet, just direct physical attacks, so this is the window where you learn your rhythm painlessly.
- Levels 1 to 5: Dodge Chance (5/8) in Row 0 — this unlocks Row 5.
- Levels 6 to 9: Attack Speed (4/6) in Row 5.
- Level 10: Dodge Chance (+1 → 6/8) in Row 0, which unlocks Capstone I at 10 cumulative points.
- Level 11: Capstone I: Mirror Steps (1/1 – MAX) — this adds flat physical damage after every dodge.
- Levels 12 to 13: Dodge Chance (+2 → 8/8 – MAX) in Row 0.
- Level 14: Attack Speed (+1 → 5/6) in Row 5.
Action bar for this bracket is Threefold Strike (Basic), Sacred Judgment (Strong), and Sacred Orbs (Special 1). Pair it with the Grey Forest Wolf for Attack Speed or the Orc Fighter for flat Strength — both are comfortable starting companions, so pick whichever fits your mood.
Bracket 2: Levels 15 to 19 (Infinite Mana Engine)
Level 15 is the first real power spike. You pick up Furious Fist as your new Basic and Spirit Stream as a Special. The zone shifts to Deep Forest and the Ruin Thresholds (Waves 15 to 19), and this is where the mana engine starts humming.
- Level 15: Attack Speed (+1 → 6/6 – MAX) in Row 5 — this unlocks Row 15 at 15 cumulative points.
- Levels 16 to 19: Zephyr’s Flow (4/5) in Row 15, so dodge now generates continuous mana.
Swap your bar to Furious Fist, Sacred Judgment, Sacred Orbs, and Spirit Stream. A Grey Forest Wolf or a Boar both work fine here; the Boar’s passive will start mattering much more in a few levels.
Bracket 3: Levels 20 to 24 (The Toxic Swamp Wall & Venom Queen)
This is the first bracket that actually punishes sloppy play. The Poison Swamp and Muddy Coast (Waves 20 to 24) are laced with persistent green poison floor pools and environmental DoTs — and here’s the thing I learned the hard way: Dodge Chance does not mitigate ground poison ticks. Your evasion is worthless against the floor itself. Watch your footing, not just the enemies.
- Level 20: Zephyr’s Flow (+1 → 5/5 – MAX) in Row 15 — this locks in permanent infinite mana sustain.
- Levels 21 to 24: Fundamentals (4/10) in Row 20 to directly scale basic attack damage.
At 20 you also unlock Piercing Lunge as your Strong — a piercing cone strike at mid-range that feels great for clearing clumps. Run Furious Fist, Piercing Lunge, Spirit Stream (your active healing), and Sacred Orbs. Your companion here is non-negotiable: bring the Boar. Its Vitality passive raises your Max HP pool, which stops sudden deaths and amplifies the net health per second you get out of Spirit Stream. I wouldn’t touch the swamp without it.
Bracket 4: Levels 25 to 29 (Crowd Control via Charge)
The Deep Swamp and Desert Outskirts (Waves 25 to 35) teach you why crowd control matters. Level 25 hands you Charge as a Special, and it becomes your answer to poison spitters — a rush that lands an area stun and lets you shut down ranged threats before they punish you.
- Levels 25 to 29: Fundamentals (+5 → 9/10) in Row 20 for massive basic damage scaling.
Keep Furious Fist, Piercing Lunge, and Spirit Stream slotted, then add Charge as Special 2. The Boar or Grey Forest Wolf both carry you here, though I tend to favor the Boar if I’m chaining pulls.
Bracket 5: Levels 30 to 34 (Awakening the Spirit Twin)
Level 30 is a big one — you get Seismic Strike (Basic), Spirit Twin (Special), and Capstone II all at once. I’m exploring the Red Barrens Entrance and Shifting Dunes (Waves 36 to 40) around this point, and Spirit Twin completely changes how the monk feels because it duplicates all of your attacks.
- Level 30: Fundamentals (+1 → 10/10 – MAX) in Row 20, unlocking Capstone II at 30 cumulative points.
- Level 31: Capstone II: Gathered Force (1/1 – MAX) in Row 30.
- Levels 32 to 34: Vigor (3/8) in Row 15.
For the bar, Spirit Twin takes Special 2, while Special 1 flexes between Spirit Stream for sustain or Charge for the stun. Your companion options are the Grey Forest Wolf or the Skeleton Archer if you want Crit Chance.
Bracket 6: Levels 35 to 39 (Area Clearing with Whirlwind Staff)
If you’ve been craving better area clearing, this is your bracket. Level 35 unlocks Whirlwind Staff, and its two wandering tornadoes make the Red Desert and Bandit Camps (Waves 41 to 49) far less tedious. Honestly, the first time those tornadoes swept through a camp, I stopped missing single-target burst entirely.
- Levels 35 to 39: Vigor (+5 → 8/8 – MAX) in Row 15 — this maxes your physical crit chance.
Run Furious Fist, Whirlwind Staff, and then either Charge or Spirit Stream in Special 1, with Spirit Twin holding Special 2. The Boar gives you sustained survival against the desert mobs, or the Orc Fighter works if you’d rather push damage.
Bracket 7: Levels 40 to 44 (Evasion Spikes with Wind Steps)
By now I’m fighting through Snow Hill and Frost Keep (Waves 50 to 54), and level 40 brings Wind Steps — a massive active dodge spike that lets me survive moments I had no business surviving. It pairs beautifully with the evasion-heavy talent path.
- Level 40: Heavy Hands (1/5) in Row 20, unlocking Row 40 at 40 cumulative points.
- Levels 41 to 44: Enhance Spirit Twin: Duration (4/6) in Row 40.
Bar setup is Furious Fist, Whirlwind Staff, Wind Steps in Special 1, and Spirit Twin in Special 2. Take the Skeleton Archer or Orc Fighter depending on whether you want crit or raw Strength.
Bracket 8: Levels 45 to 49 (Chi Bolt & Heavy Hands Critical Scaling)
The Defiled Keep (Waves 55 to 59) is where your critical scaling really comes online. Level 45 hands you Chi Bolt (Basic) and Divine Thunder (Special), giving you a ranged option and a room-wide daze if you need breathing room.
- Levels 45 to 46: Enhance Spirit Twin: Duration (+2 → 6/6 – MAX) in Row 40 for permanent clone uptime.
- Levels 47 to 49: Heavy Hands (+3 → 4/5) in Row 20, scaling Critical Strike Damage for Strong Attacks.
Keep Furious Fist up front, or swap to Chi Bolt if you want ranged sustain. Whirlwind Staff stays as Strong, Wind Steps as Special 1, and Spirit Twin as Special 2 — or Divine Thunder when a room-wide daze would save you. The Skeleton Archer or Boar both fit here.
Bracket 9: Levels 50 to 59 (Golden Palms & Rune Assembly)
Now we’re in the endgame grind — the Volcano and Nightmare Threshold (Wave 60). Level 50 unlocks Golden Palms as your Strong attack, and this bracket is also where I finish assembling my gear.
- Level 50: Heavy Hands (+1 → 5/5 – MAX) in Row 20, unlocking Row 50 at 50 cumulative points.
- Levels 51 to 58: Enhance Golden Palms: Damage & Mana Cost (8/8 – MAX) in Row 50.
- Level 59: Exploit Weakness (1/10) in Row 50.
Run Furious Fist, Golden Palms, Wind Steps, and Spirit Twin. For runes, I socket the 6 pieces of the Hundred Hands set here. Your companion flexes between Skeleton Archer and Orc Fighter. If you want to see how this kit compares against alternate setups, my monk build guide breaks down the trade-offs.
Bracket 10: Level 60 and Paragon (Inferno & Definitive Best-in-Slot)
Endgame arrives with Capstone III: Formless (1/1 – MAX) in Row 60 plus the Paragon System. The payoff is exactly what you’ve been building toward: it converts your 70%–80% Dodge Chance directly into massive Critical Strike Damage. All those dodge points suddenly become a weapon.
- Immediate Paragon allocation: invest into Life on Hit (Utility) and Dodge Chance (Defense).
- BiS companion: Lord of the Cinder — its Ashen Wrath skyrockets Critical Strike Damage — or the Skeleton Archer.
Full Ability Progression Matrix
Whenever I lose track of which skill should be slotted at what level, I come back to this table. It maps every bracket to its Basic, Strong, Special 1, Special 2, and companion.
| Bracket | Basic Attack | Strong Attack | Special 1 | Special 2 | Companion (J) |
|---|---|---|---|---|---|
| Lv 1–14 | Threefold Strike (Lv 1) | Sacred Judgment (Lv 5) | Sacred Orbs (Lv 10) | (Locked) | Grey Forest Wolf / Orc Fighter |
| Lv 15–19 | Furious Fist (Lv 15) | Sacred Judgment (Lv 5) | Sacred Orbs (Lv 10) | Spirit Stream (Lv 15) | Grey Forest Wolf / Boar |
| Lv 20–24 | Furious Fist (Lv 15) | Piercing Lunge (Lv 20) | Spirit Stream (Lv 15) | Sacred Orbs (Lv 10) | Boar (Vitality) |
| Lv 25–29 | Furious Fist (Lv 15) | Piercing Lunge (Lv 20) | Spirit Stream (Lv 15) | Charge (Lv 25) | Boar / Grey Forest Wolf |
| Lv 30–34 | Furious Fist (Lv 15) | Piercing Lunge (Lv 20) | Spirit Stream / Charge | Spirit Twin (Lv 30) | Grey Forest Wolf / Skeleton Archer |
| Lv 35–39 | Furious Fist (Lv 15) | Whirlwind Staff (Lv 35) | Charge / Spirit Stream | Spirit Twin (Lv 30) | Boar / Orc Fighter |
| Lv 40–44 | Furious Fist (Lv 15) | Whirlwind Staff (Lv 35) | Wind Steps (Lv 40) | Spirit Twin (Lv 30) | Skeleton Archer / Orc Fighter |
| Lv 45–49 | Furious Fist / Chi Bolt (Lv 45) | Whirlwind Staff (Lv 35) | Wind Steps (Lv 40) | Spirit Twin (Lv 30) | Skeleton Archer / Boar |
| Lv 50–59 | Furious Fist (Lv 15) | Golden Palms (Lv 50) | Wind Steps (Lv 40) | Spirit Twin (Lv 30) | Skeleton Archer / Orc Fighter |
| Lv 60 BiS | Furious Fist | Golden Palms (Auto) | Wind Steps | Spirit Twin | Lord of the Cinder / Skeleton Archer |
Spotted an Error or Have Feedback?
This game keeps getting updates, so numbers shift and skills occasionally behave differently after a patch. If you notice any conflicting figures, a skill that suddenly plays out of step with what’s written here, or an even smoother ability rotation for a particular bracket, leave a comment below. Community contributions get credited in future revisions — that’s how this guide keeps getting better.
