A brief guide for some strategies to make the Anabasis campaign a bit less intimidating!
Introduction
The Anabasis campaign is probably the most difficult single-player aspect of the game and also the most true to the feeling of the show. A good Anabasis run can be challenging and rewarding, but the mode itself can be frustrating for new players.
Hopefully this guide will both encourage more people to run this mode and make it a bit less intimidating!
Fleet Composition
The first question that needs to be asked here is a basic strategic question: is my fleet fast or slow?
A faster fleet can scoot around the edges of the map running down the jump timer, avoiding more close-combat attrition, but can be caught badly by an awkward Cylon jump in (Cerates at close range being the normal candidate). Meanwhile, a slow fleet is much more durable, but will likely have far more Cylon ships in each jump catch up to and engage them, making it a more stand-and-fight oriented option.
For the beginner, I strongly recommend slow fleets, as you get more margin for error with them.
Every fleet needs flak, so the fast-or-slow question essentially becomes a question “Where is my flak coming from?” You are going to need flak because the later levels are going to absolutely bury you in torpedoes and guided missiles and you cannot PCM all of them.
A fast fleet relies on Artemis and Defenders (both 120m/s speed) or Valkyries (150m/s) for its flak coverage, while a slow fleet relies on Jupiters and Mercuries (90m/s) for its flak protection.
Your supporting ship choices, should you run any non-battlestars (an all-battlestar Anabasis fleet is perfectly viable, by the way) should conform:
Fast Fleets can run Berzerks, Adamants, Minotaurs.
Slow Fleets can run Heracles, Atlas.
Janus, Ranger, and Manticore all rely substantially on missiles for offense and you simply won’t have enough missiles to last ten missions. I don’t recommend any of these. Likewise, the Orion really doesn’t fit in here.
Note that you will get a Celestra (and a freighter) for free at the beginning, so you do not need to include a Celestra in your composition.
Munitions and Squadron Selection
Squadrons:
Fighter slots are best used for Viper IIs (or VIIs if you have them). You are going to need to face down a lot of missiles and a lot of raiders and nothing quite does the job like a pack of vipers.
A slow fleet is also going to have some ‘utility’ squadron slots. I find that the best option here are Assault Raptors. You need to be careful not to let them get too far out (do not go cherry-picking with them!), but in a cluster of 3 or 4 squadrons, their rocket attacks followed by strafing can rapidly remove key threats (like a Revenant moving into firing position, or an Arachne that has positioned to fire around your flak) that your capitals cannot, for whatever reason, respond to.
I do not generally find sweepers reliable enough for use in Anabasis, your mileage may vary.
Note that even if you keep them fairly close, you want to recall Vipers at least two turns before jumping (unless they are on a defend order in your fleet-ball) and Raptors at least three (and sometimes four) turns. There is nothing worse than taking damage you didn’t need to because you had to wait a turn to get that last raptor or viper in the bay (or worse yet, losing your squadrons because you had to jump early).
Munitions:
Remember: your job is to avoid damage and escape, not defeat the enemy. This means that almost every kind of ‘damage’ munition is pointless. You will run out of missiles long before the Cylons run out of ships.
The Key Munitions are:
PCM: You need some of these, ideally at least two different ships able to fire them. While you should take the vast majority of enemy munitions on your flak fields, the unpredictability of Cylon jump-in reinforcements means that you will often have enemy missiles approaching from in front or behind where your flak cannot reach. Save PCM for the moments, but bring a lot, because these moments will happen.
Debris Mines: These stretch a cylinder over a section of the battlefield, essentially a bale of barbed wire to damage enemy (and friendly!) squadrons; they absolutely shred raiders, dropping them to about half health in a single pass. You shouldn’t need more than one or two ships with these and you also should not fire them in the first 7 or so jumps (they come in small numbers, do not waste them). But in the last three jumps, Cylon raider cover becomes intense and these, properly used, can thin the horde so that your vipers can compete.
Basic Principles
In the Anabasis campaign, you are going to need to face ten consecutive battles. Ship damage, squadron damage and munitions use are preserved from one battle to the next, meaning that every bit of damage is meaningful and needs to be avoided. Yes, you can occasionally repair, but you cannot count on that to save you.
During each battle, you will count down until all of your ships are ready to jump. These countdowns get longer the more jumps in you get. At each jump, you will have two choices of the next jump target. The more turns you stick in the battle, the more you will learn about the two options, but beyond the first handful of jumps, it is almost never worth it to stick around in a fight in order to get more intel; you are going to have to jump partially blind frequently in the later jumps.
Each jump also gives you a certain amount of salvage. As far as I can tell, this is not changed by how many ships you shoot down but rather is a constant (which can be increased or decreased by the random effects of a jump destination). There is a random chance that each jump will have the effect of R&R (resupply and repair) either at standard cost or at +50% cost. That allows you to spend salvage to repair ships and restock munitions.
You can only repair if your Celestra is still alive! You can only restock if your Freighter is still alive! Consequently these ships must be protected and are far less expendable than other civilian ships.
In addition to each jump taking longer, the scale of Cylon forces will ramp up. The first two jumps will primarily see fleets of Talons and Nemeses. In the third and fourth jump, you’ll see Revenants and Arachne’s added in. Often an early Argos seems to appear around jump 4 or 5; be ready for the surprise nuke. By the sixth or seventh jump you are likely to face packs of Cerates (which are very dangerous) and larger groups of Arachnes, along with the first Basestars. By jump 8, reinforcement groups of triple-basestars are common, backed up by large groups of smaller ships.
Each jump begins with a fleet of Cylons directly in front of your starting deployment area, but the Cylons will receive regular reinforcements (the counter on the top right), which can jump in nearly anywhere, including directly into visual (and firing range) of your fleet. Consequently, you need to plan and prepare for engagements from unexpected angles: a fleet that can only fight in one direction will not cut it.
Consequently your goal in the early missions is to avoid damage and stock up on salvage to prepare for the intensity of the last few jumps.
Again: Remember: your job is to avoid damage and escape, not defeat the enemy.
Formations!
First: your fleet cannot tank incoming missile fire and the volume will eventually be too much for PCM and vipers. You will nee to use flak walls to stop most missiles.
Second: You will have a number of very vulnerable civilian craft which cannot defend themselves and die very fast. Two of these, a Freighter and a Celestra, must be protected for you to be able to repair and resupply when the option becomes available.
Also, letting Helena die on the Celestra makes you a bad person.
Third: Your formation also has to be flexible and able to respond to new threats from unexpected vectors, but keep in mind your goal is to avoid damage, not deal it.
This leads to a workable, reliable formation: the triple-wall. This formation deploys in a line as shown here:
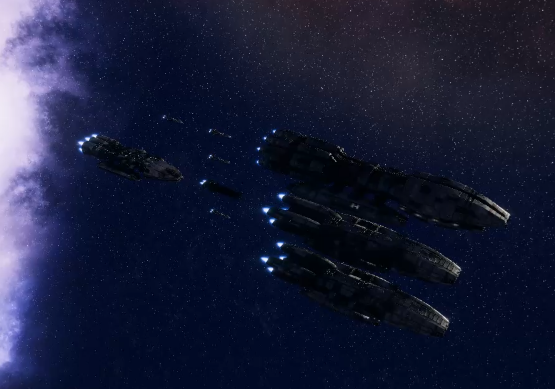
Note that you can vary the specific ships here. This is a ~9.5k fleet entering the final jump (I have lost the freighter here, but none of the combat ships, though one of those Jupiters is in rough shape).
Here is an 8k fleet (this was my first successful Anabasis comp, pulled out of retirement to illustrate the system): 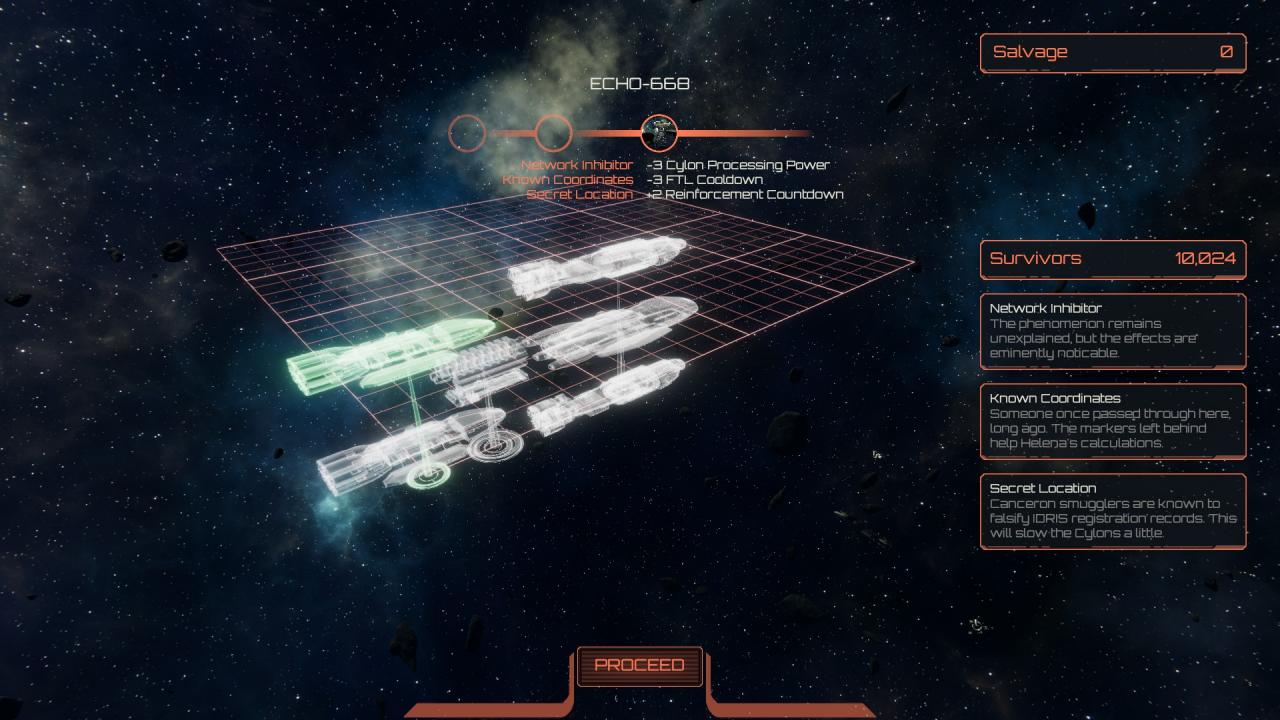
The ‘Main Wall’ of the wall deploys out front and should have full flak coverage. For a heavy fleet you can often get away with one Jupiter covering two other battlestars or other heavy ships with flak; for a light fleet, this probably means two Artemis or Valkyries, stacked on top of each other. The main wall should be your heaviest, tankiest ships.
The ‘Civilian Wall’ of the wall deploys directly behind the Main Line and consists of all of the Civilian ships. Set the Celestra and the Freighter directly behind your battlestars and at exactly the same height so that the big ships physically block projectile (not missile) fire from them. Set civilian transports above and below them in a tight box.
The ‘Back Wall’ is often just one flak capable ship (above its an Artemis or two) whose job is to both provide supplemental firepower through the gaps in the other two lines but also to provide a flak shield that you can throw in a new direction in an emergency. Artemis, Valkyries and Defenders are best for this, even in slow fleets – when you turn, the Back Wall is going to have to sweep more space to make the wider turn, so not having a slow Jupiter back here will let the fleet move faster.
Now, while the Triple-Wall deploys end to end like this, it does not fight this way. Instead, the Triple Wall, immediately on the first turn should swing to port or starboard like this: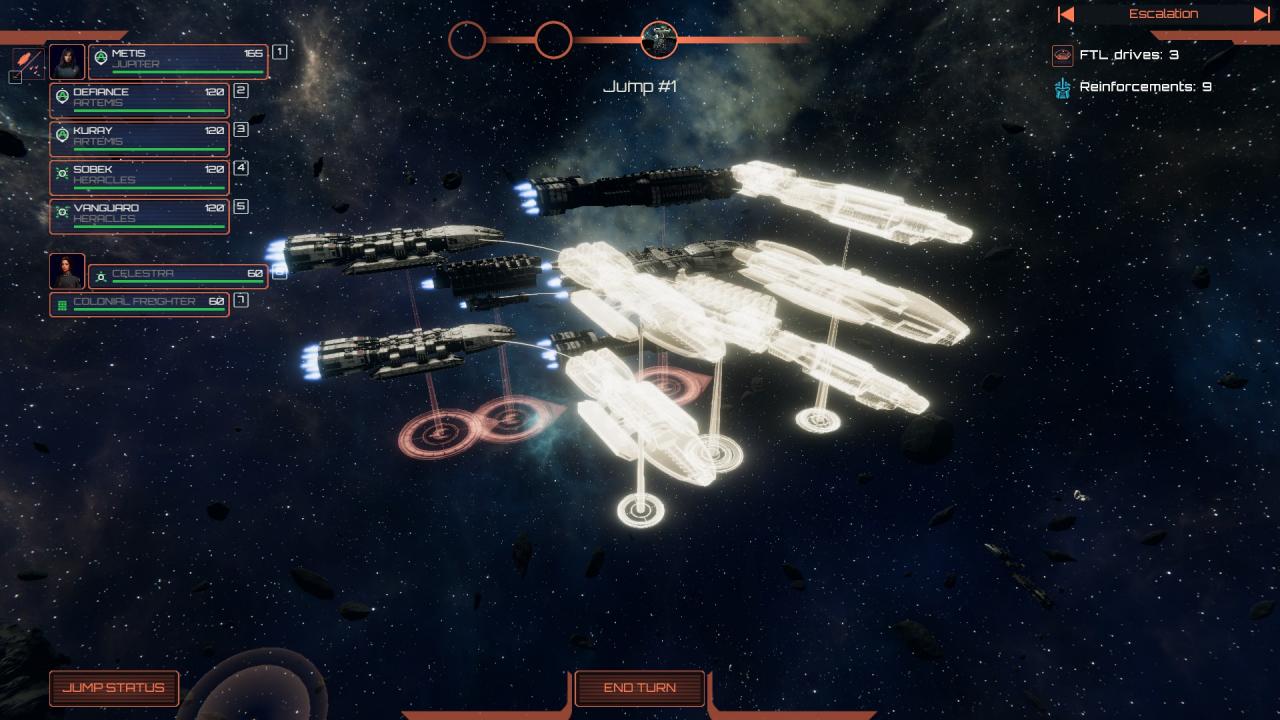
And then finish the swing on turn two like this: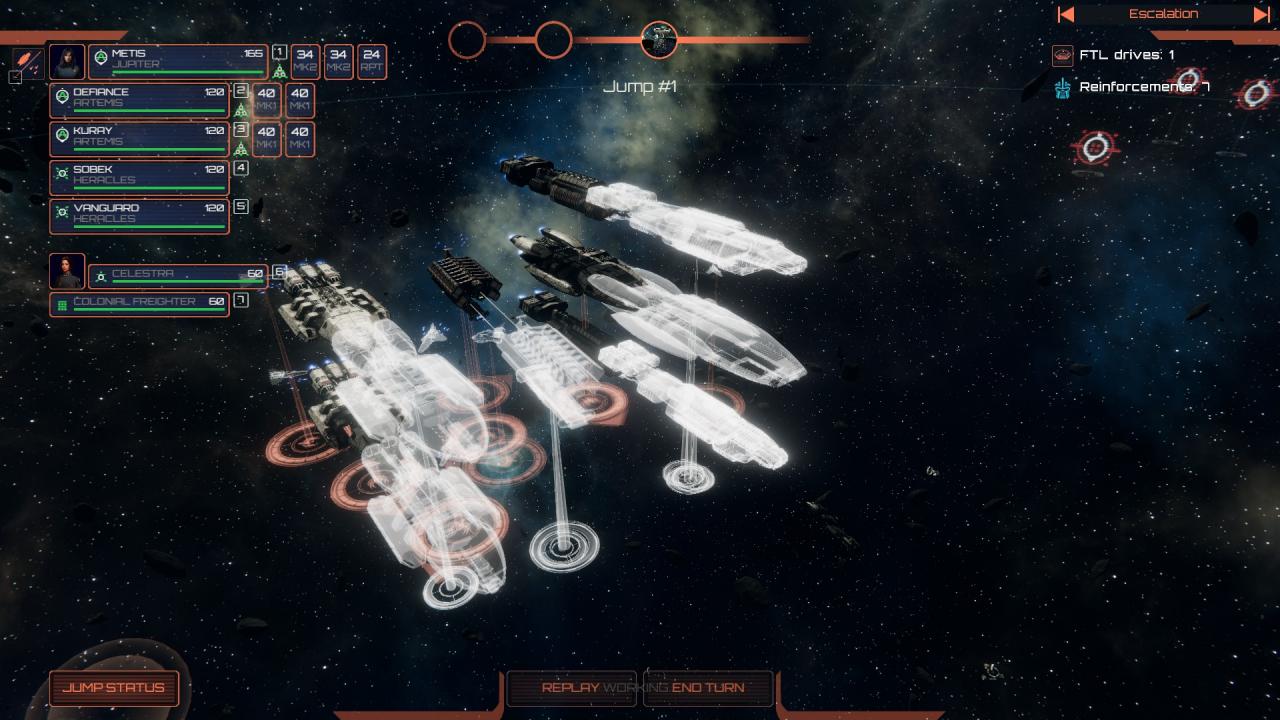
To create a box, where two sides (one facing the center of the map, one facing the edge of the map) have flak cover. It should then move, at the speed of the slowest ship, out to the map edge, turning as necessary to keep the majority of enemy ships facing the ‘Main Wall’s broadside.
Moving the Fleet
The trick here is that, since you are trying to run out the clock, not win a stand-up battle, you want to keep moving and keep moving away from the enemy so that, ideally, relatively few ships reach you and those that do have to charge through your deadly Battlestar broadsides to get into range (and die rapidly trying).
What that means in practice in almost every jump is that you are going to begin by choosing: Right or Left? By which I mean which edge of the arena are you going to move towards through the battle? Moving out of the center offers the best chance that enemies will either jump in too far away to have any impact or waste crucial turns slogging over the map to get to you. It also helps to ensure that the majority of enemies will be on a single facing, so that you can get your broadside flak and guns facing them.
You do not want to be surrounded, so get out of the center.
There are two main considerations for the right-or-left decision: your current armor and the terrain.
On the armor front, I like to alternate turns right and turns left, jump-to-jump, to spread damage out over the parts of my Main Wall ships. At the same time, you do not want to be running your fleet through asteroids or nebula. Fields that damage squadrons can substantially reduce your ability to leverage Vipers and Raptors and should also be avoided (remember, Cylon fighters can be replaced, yours cannot, do not dog-fight in dust-clouds).
If you are going to turn right, deploy your fleet on the back right corner of the deployment zone. If you are going to turn left, deploy your fleet on the back left corner of the deployment zone. That will maximize enemy ship and missile travel time from the center, the one place you can be sure that a major enemy force will be attacking from.
After that, it is all fairly simple: make best speed to the map edge, while keeping your broadside facing the nearest, most dangerous enemy cluster, holding formation as best you can.
Managing Squadrons
For the first few jumps, the Cylons are weak enough that it is a viable strategy to ‘rush’ your fighters and raptors out and simply destroy the Cylon ships. But by the fifth jump or so, the balance of fighter and gun-power is going to shift and thus ‘charging’ your squadrons will see them taking losses you cannot replace. This is a crucial mistake, because you are going to need your Viper-cover intact for the final few jumps when Cylon raiders come thick.
The solution to this problem is as follows:
On the first turn, launch all squadrons, every jump.
On the second turn, assign half of those squadrons to defend the Celestra and the other half to defend the Freighter (which are dead center in your Civilian Wall and thus exactly at the center of your tightly-grouped fleet).
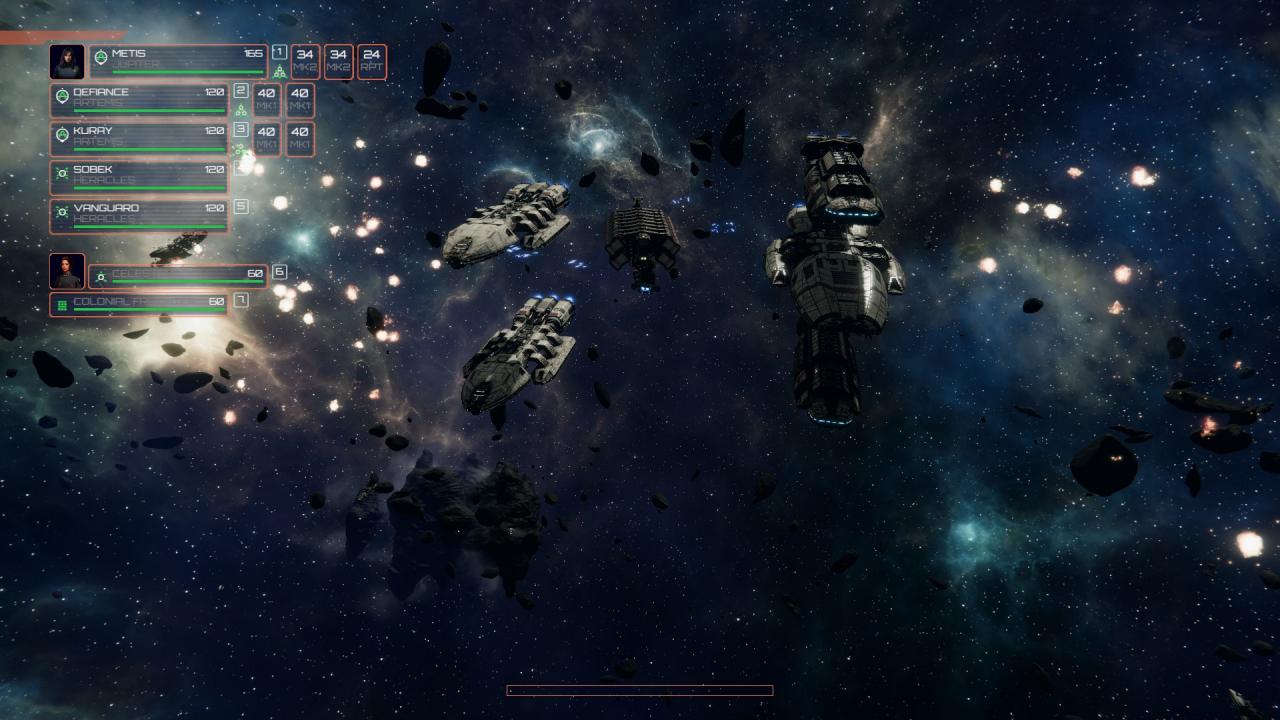
Pictured: A Happy Fleet, with Flak Walls on both sides and squadrons nice and cozy in the center, ready to make some toaster-mamas cry.
Boom, done.
That will keep your Vipers out of your flak fields, keeping them tight within your formation, but ready to dash out to engage enemy Raiders or missiles. The big advantage of this, over charging out into enemy raider swarms, is that now your Vipers will be dog-fighting with raiders that are also taking point-defense fire from your big ships. They may also have been forced through flak and debris-mine fields, further weakening them, which allows your vipers to defeat them with minimal damage.
Meanwhile, your Raptors are close to the fleet, ready to land quickly if you are ready to jump, or ready to dash out from the fleet to rocket-down enemy ships that get around your Main Wall.
Always watch the jump counter and recall squadrons when it gets low!
Handing the Unexpected
First thing is first: once targets begin closing with your fleet, you should probably switch to all-offense on your Main Line (because once Cylons are in gun range, it is absolutely imperative to get them dead as fast as possible; guns cannot be stopped like missiles).
Target priority is almost entirely focused on removing enemy gun power, because you should be stopping 100% of enemy missiles with flak and PCM. So your priority order (adjust for range and heading, etc):
1) Cerastes. Tons of firepower, fairly fragile. Light ’em up.
2) Revenant. If they get in close and turn to broadside, you will regret it. Kill them first.
3) Cerberus (sort of). These should never really be catching up to gun-range, but if they do, they’re next, since those six heavy guns can actually do decent damage if you ignore them. But again, you should only ever ID these things with Vipers or if you made a mistake.
4) Arachne. Five medium turrets can actually slowly sand-paper off armor, so these generally come right after Revenants. They’re fragile, which helps.
5) Phobos (pop this up a bit if they are hacking). Fragile, only 3x medium turrets. Relatively low priority target.
6) Basestar. Super-dangerous, why so low? Because they are very tanky and your goal is to get as much firepower away as fast as possible. Getting hot-dropped by Basestars does happen though, so be prepared to focus them down. Always focus fire all ships on one basestar and move one by one, do not split fire.
7) Everything Else, mostly Talons and Nemeses. Watch out though for a Nemesis that moves to get behind your fleet and fire around the flak (Raptor Rush can solve that problem right quick).
Note that you will not see Cratus, Guardian Basestars, or Modern Basestars in Anabasis so far as I know. Argos does show up, rarely, but sticks at distance so you are unlikely to ever actually engage one.
Other than that, the biggest ‘surprise’ is likely to be either danger-close reinforcement jump-ins, or else reinforcement jump-ins either directly in front or directly behind your Triple-Wall (that is, where you do not have flak) outside of visual range (so that you do not know what you are facing.
In the first case (danger-close jump-in), keep calm and follow the priority list to remove targets as rapidly as possible. Especially if the jump-counter is low (and very especially if the next Cylon wave comes after you will have jumped out) it can make sense to have your Back Wall turn to engage the new group while your civilian ships ‘squirt out’ of the formation and make a run away from all enemies. Otherwise, the AI likes to gun down the freighter and celestra especially and there’s not much else you can do to stop them.
Remember in a gun-duel that the Celestra’s armor-plating application can help you absorb damage.
As for out-of-visual jump-in either fore or aft of the fleet’s heading, my advice is to immediately drop a PCM in that direction, at very short range. The PCM bubble should essentially kiss the engines of every ship in your fleet. That will prevent catastrophic surprise-torpedo hits and give your Vipers (remember the vipers you kept the pocket?) more time to shoot down missile and give you more time to get flak on the enemy’s bearing. Then move your Back Wall flak ships (this is what they are for) so that the can cover the new danger-vector and get that flak up there.
Do not put a flak field over your civilian ships, it will kill them.
Epilogue: See You On Caprica
There is a considerable degree of randomness and surprise in the Anabasis campaign. Even a perfect run can be battered by bad luck (Cerastes danger-close jump-ins being the worst of this, generally, for losing the civilian ships). But by and large if you follow these basic guidelines, you should have a good shot of making it through with most of your ships in one piece.
I may expand this guide a little later (I plan to add a picture or two). But for now, that’s it, and hopefully I’ll see you soon on this screen, hanging out over Caprica:
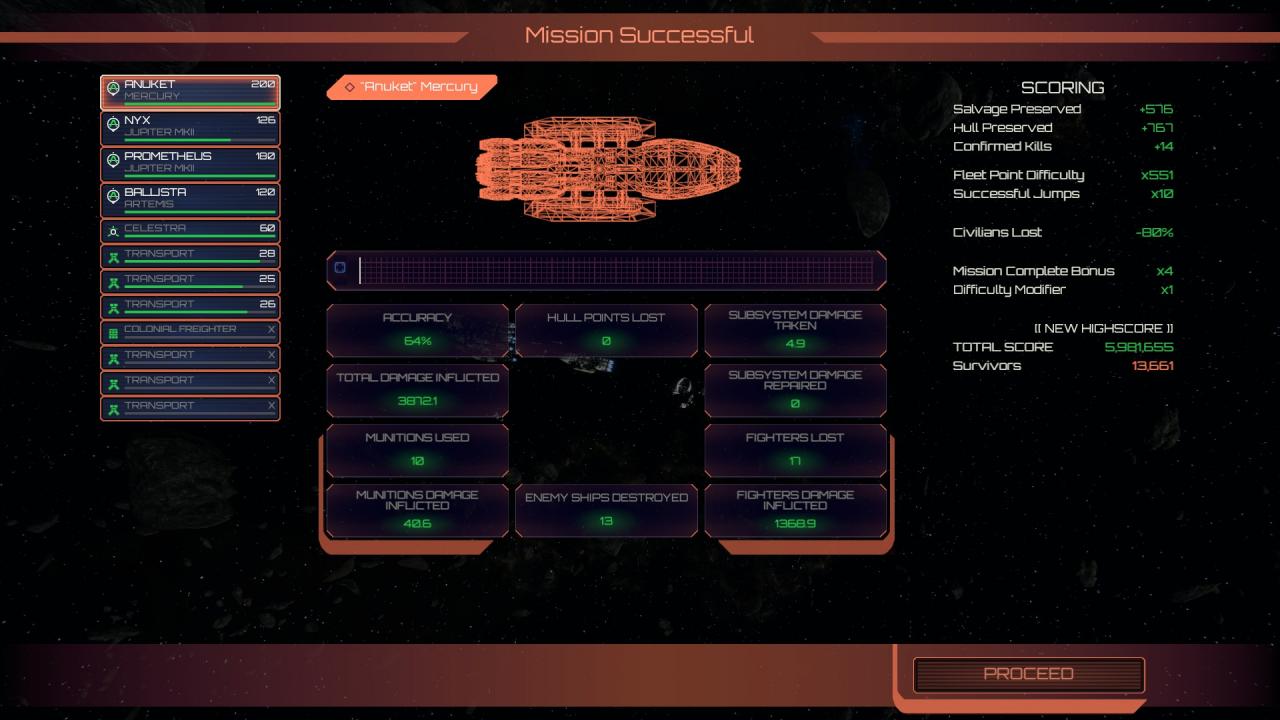

Great pointers! I made a run on Normal difficulty and quit on jump #8 after losing all civilians and decided to restart, this time on Easy and being more defense-minded. I read your guide after Jump #5 on my 2nd attempt, I’m about to make Jump #9, lost one Civ and one combat ship (Ranger). I may do a 3rd run on Normal again when I finish, implementing a diff fleet composition (I took two Rangers with me and find EMP Mine and Debris Mine rather pointless, one PCM slot and that one helped out a lot. ) I’ll have to try using multiple Assault Raptors!